
Royal Romances Season 2 Episode 4: The Lost Dragon – The game’s walkthrough begins with you finding a wounded and frightened dragon. Long ago, humans and dragons were one. Long before dragons left the lands they shared with humans after suffering from greed, an incredibly unique and rare species of dragon was thought to be lost forever. It is up to you to sort it all out and save the dragon race. If you can’t complete any of the puzzles or don’t know where the items are, on our website you can watch the walkthrough of Royal Romances Season 2 Episode 4 (16): The Lost Dragon, and save the dragons from the final destruction.
Royal Romances Season 2 Episode 4: The Lost Dragon – Walkthrough
Here you can see the full walkthrough of Royal Romances Season 2 Episode 4 [s2e4]: The Lost Dragon, especially the main story.
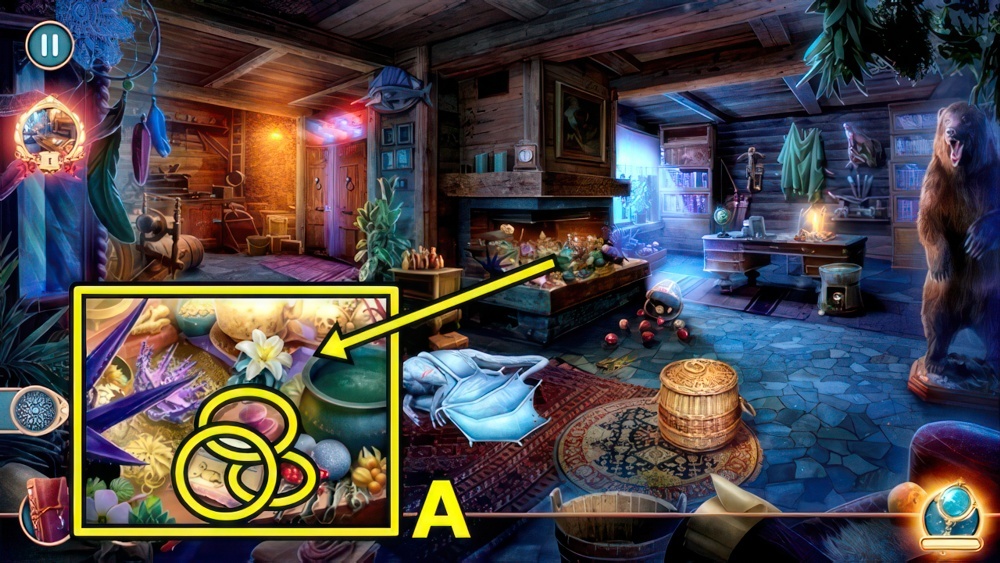
- Read (A), take MOSAIC PIECE 1/2 and STEEL BRUSH.
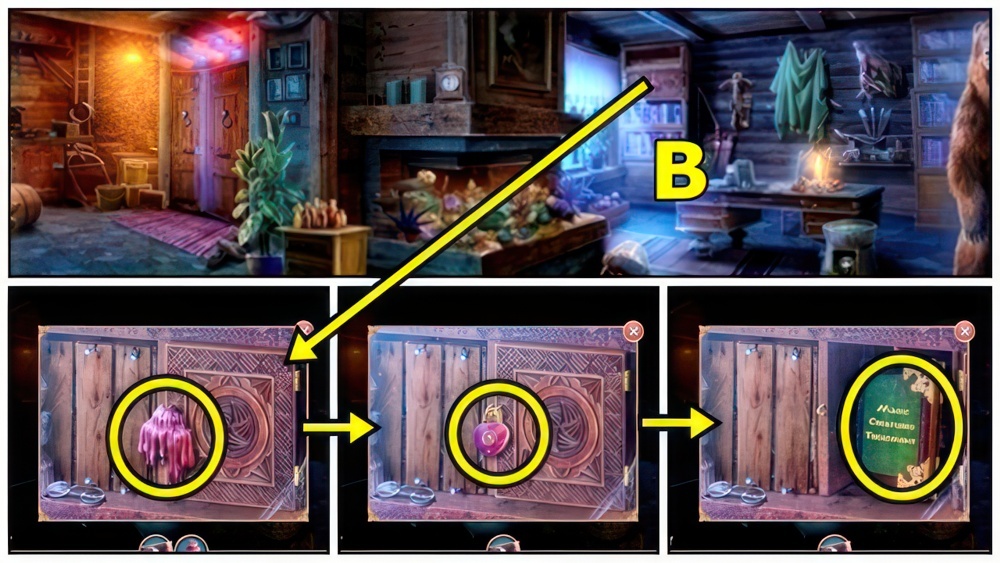
- Use STEEL BRUSH (B), remove, examine.

- Find items (C), take RECIPE BOOK, HAMMER, ALCOHOL and MAGNET.

- Use MAGNET (D), take NAILS.
- Go to Hunter’s Lodge Exterior.

- Take BOW (E).
- Examine, add NAILS and HAMMER.
- Take PUMPKIN.
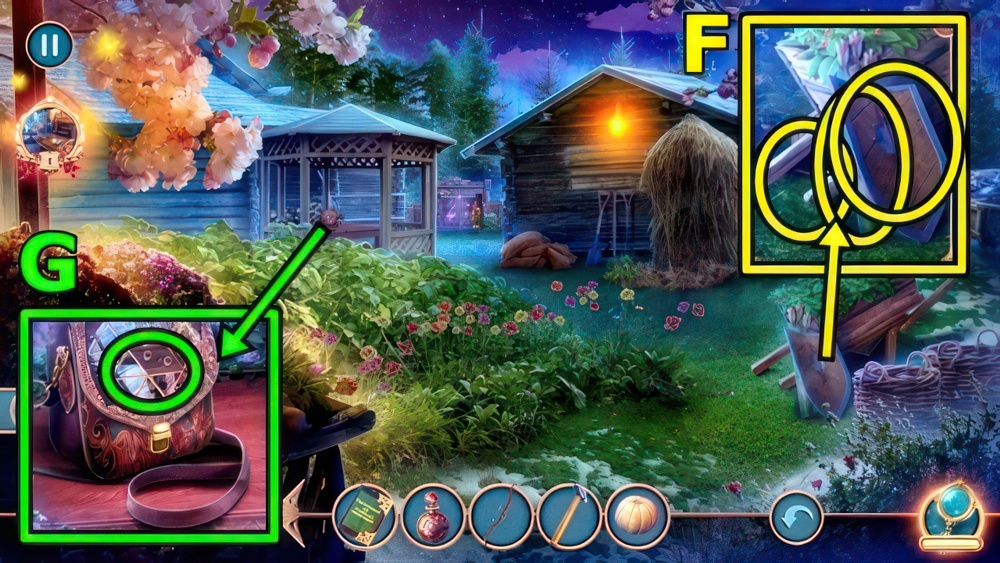
- Take SHIELD (F) and QUIVER OF ARROWS.
- Add PUMPKIN, take MOSAIC PIECE 2/2.
- Add MOSAIC PIECE (G).
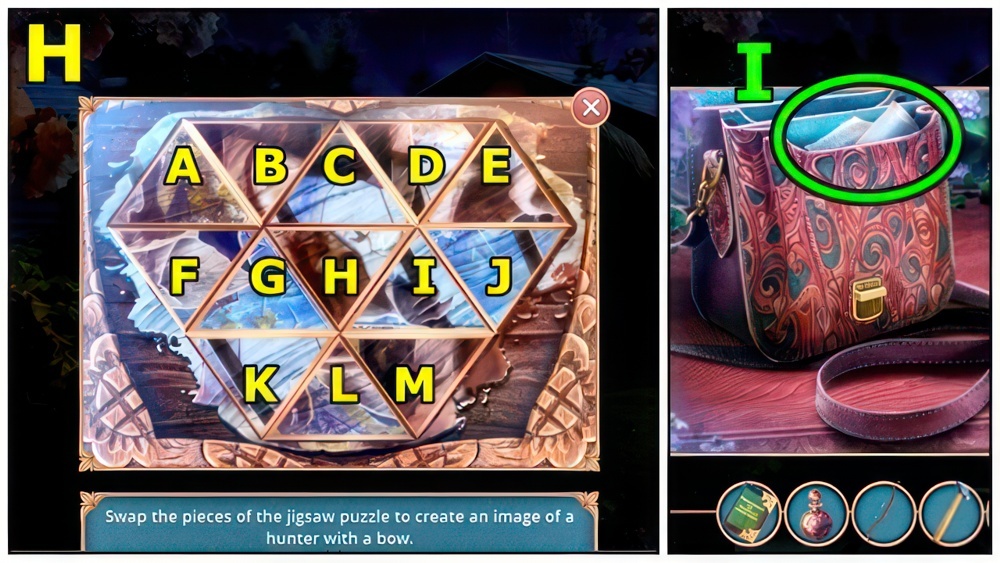
- Swap the pieces of the puzzle to create an image of a hunter with a bow.
- Walkthrough: (H) (J-A)-(I-F)-(C-G)-(D-L)-(J-E)-(I-C)-(I-B)-(H-J).
- Take BANDAGES (I).
- Move down.
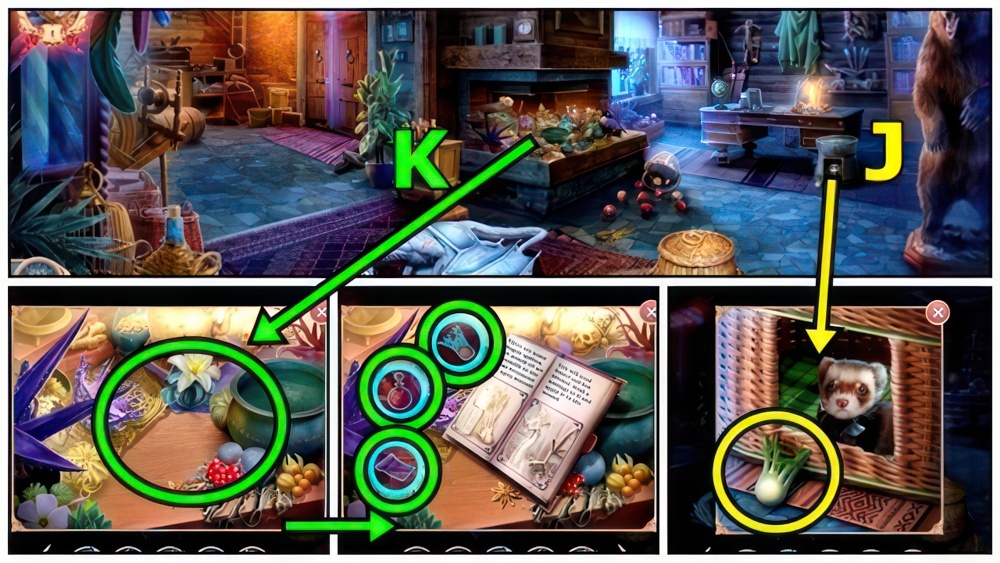
- Take FENNEL (J).
- Add RECIPE BOOK (K), then add FENNEL, ALCOHOL and BANDAGES.
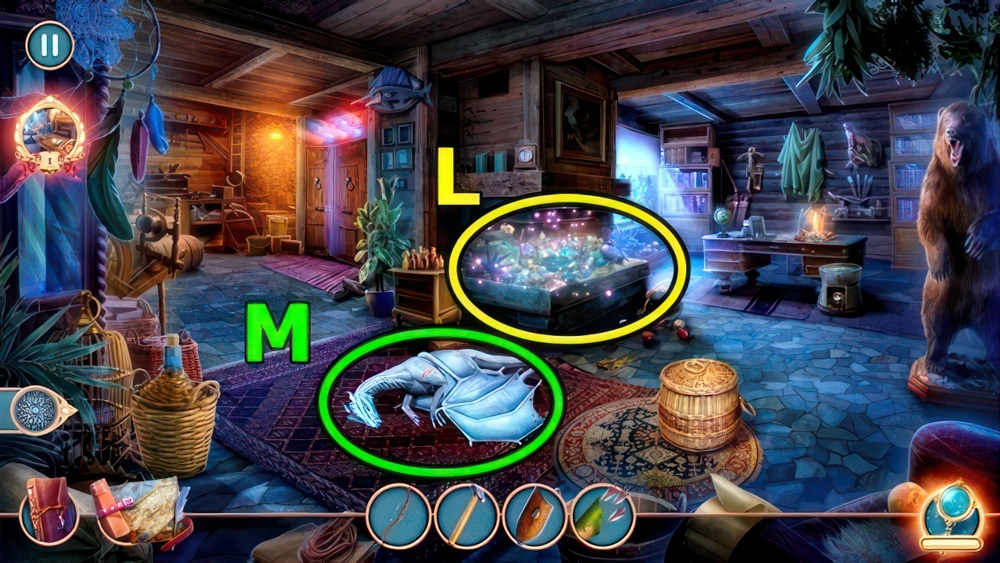
- Play puzzle (L), take MEDICINAL BANDAGES.
- Use MEDICINAL BANDAGES (M).

- Select (N).
- Receive GATE KEY.
- Go to Hunter’s Lodge Exterior.
- Insert GATE KEY (O).
- Go to Cherry Woods.
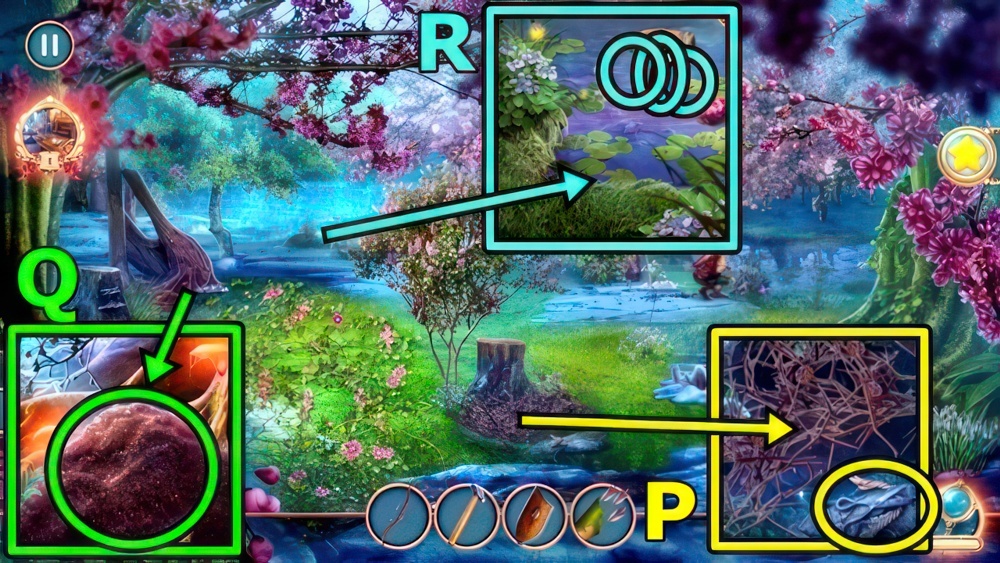
- Take SCISSORS (P).
- Use SHIELD (Q), then SCISSORS, receive ROPE.
- Add BOW (R), QUIVER OF ARROWS and ROPE, take WOODEN CLAW.
- Return to Evelyn’s Home.
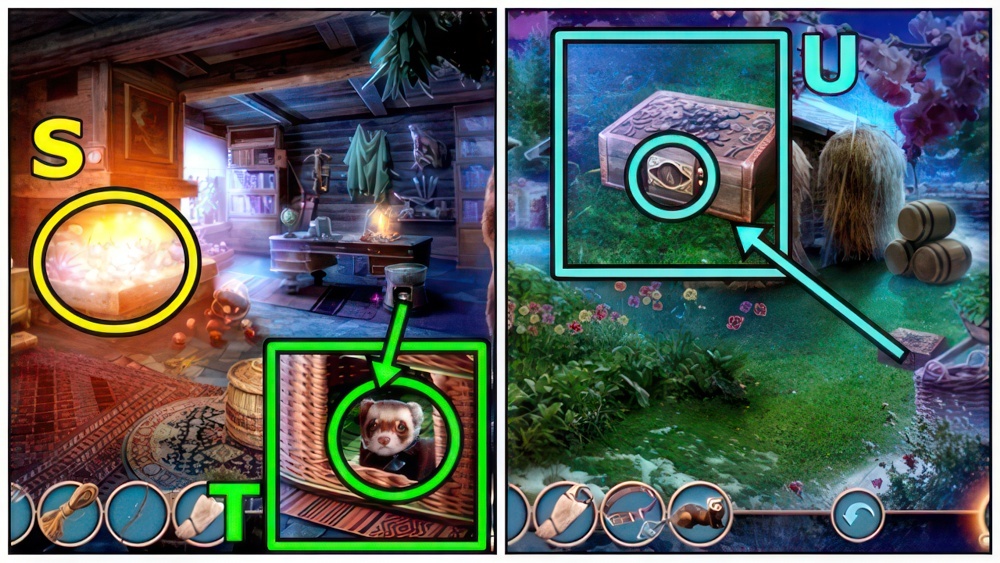
- Play puzzle (S), take FERRET FOOD.
- Give FERRET FOOD (T), take COLLAR and GLASSIE THE FERRET.
- Go to Hunter’s Lodge Exterior.
- Add COLLAR (U).
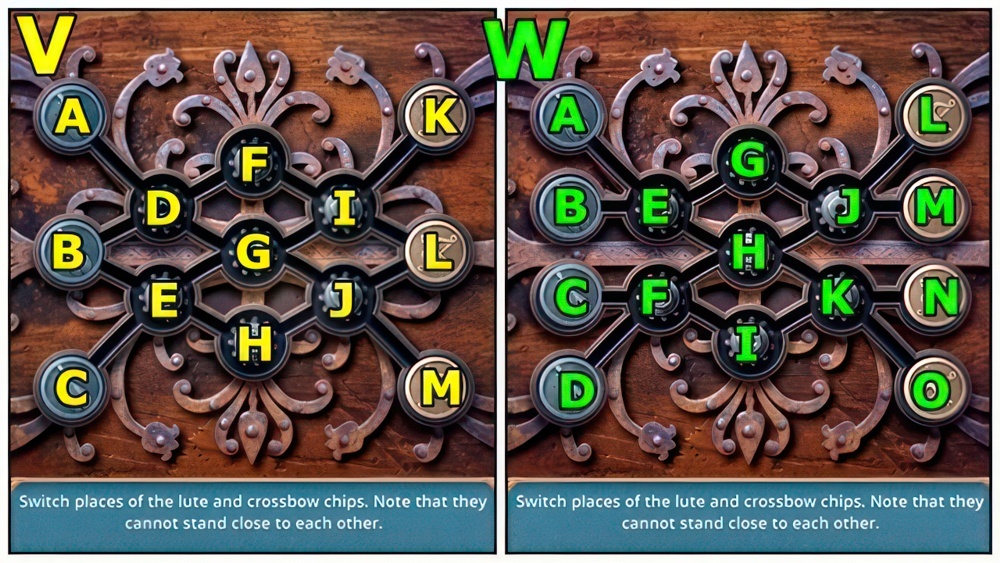
- Switch places of the lute and crossbow chips.
- Note that they cannot stand close to each other.
- Walkthrough: (V) Easy (B-E-H)-(A-D-B-E)-(K-I-F-D-A)-(E-B)-(H-E)-(L-I-K)-(M-J-L-I).
- (E-H-J-M)-(B-E-H)-(I-F-D)-(H-J)-(C-E-H)-(D-B)-(K-I-F-D)-(J-L-I-K)-(H-J-L)-(D-G-E-C).
- Walkthrough: (W) Hard (A-E-H-F-I)-(B-E-H-F)-(L-J-G-E-A)-(M-J-G-E-B)-(F-H-J-L).
- (I-F-H-J-M)-(O-K-H-E-G)-(N-K-H-E)-(C-F-I-K-O)-(D-F-I-K-N)-(E-H-F-D)-(G-E-H-F-C).
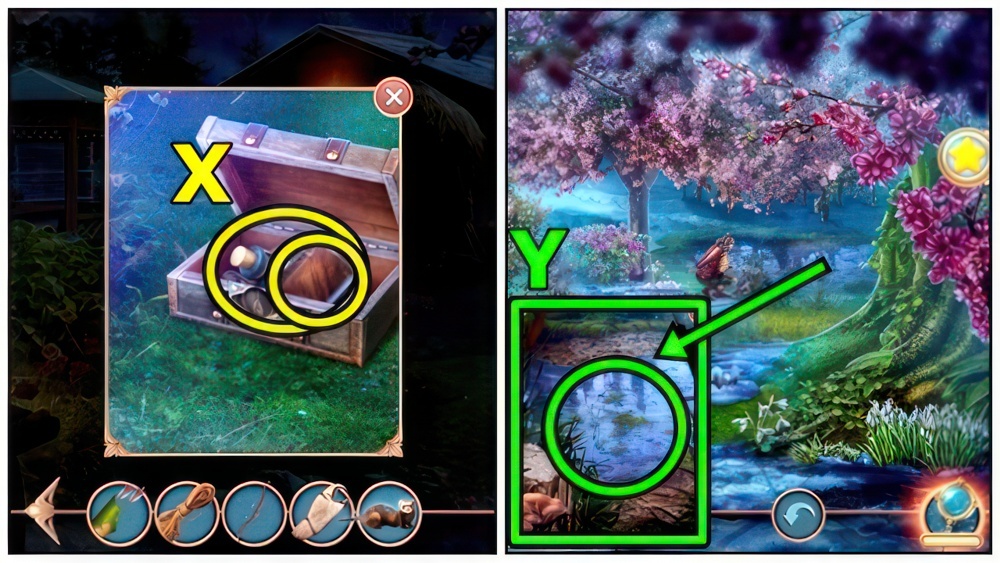
- Read (X), take POTION OF DESICCATION.
- Go to Cherry Woods.
- Use POTION OF DESSICATION (Y).
- Go to Banshees’ Valley.
- Play puzzle.
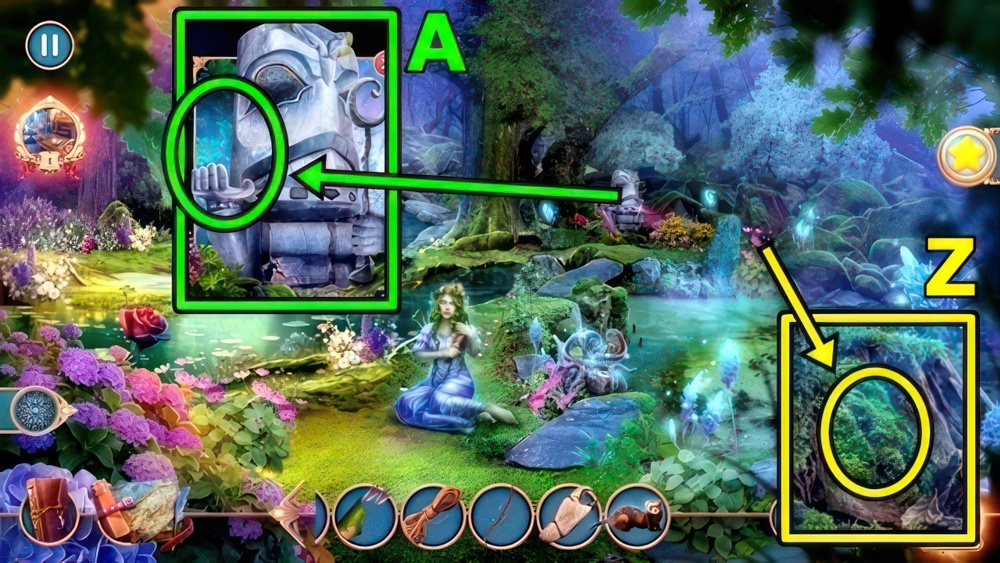
- Use WOODEN CLAW (Z), take OWL STATUETTE and RAKE.
- Add OWL STATUETTE (A), take BENT-END STAFF.
- Move down.

- Use RAKE (B), then SHIELD and ROPE.
- Take GLASS VASE and ROPE.
- Use BENT-END STAFF (C) and GLASS VASE, receive LILY IN A VASE.
- Go to Banshees’ Valley.

- Give LILY IN A VASE (D).
- Select (E).
- Receive PADDLES.
- Go to Underwater City.
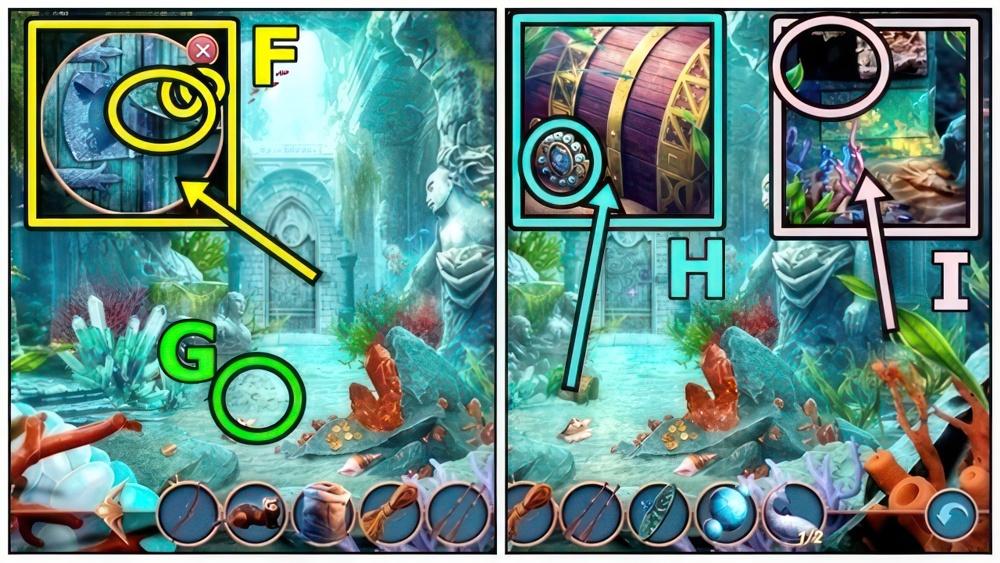
- Take CAP (F), PEARL and ORNATE STONE 1/2.
- Examine (G).
- Add PEARL (H), take MURAL PIECE.
- Add MURAL PIECE (I), take MILL SAILS.
- Move down.
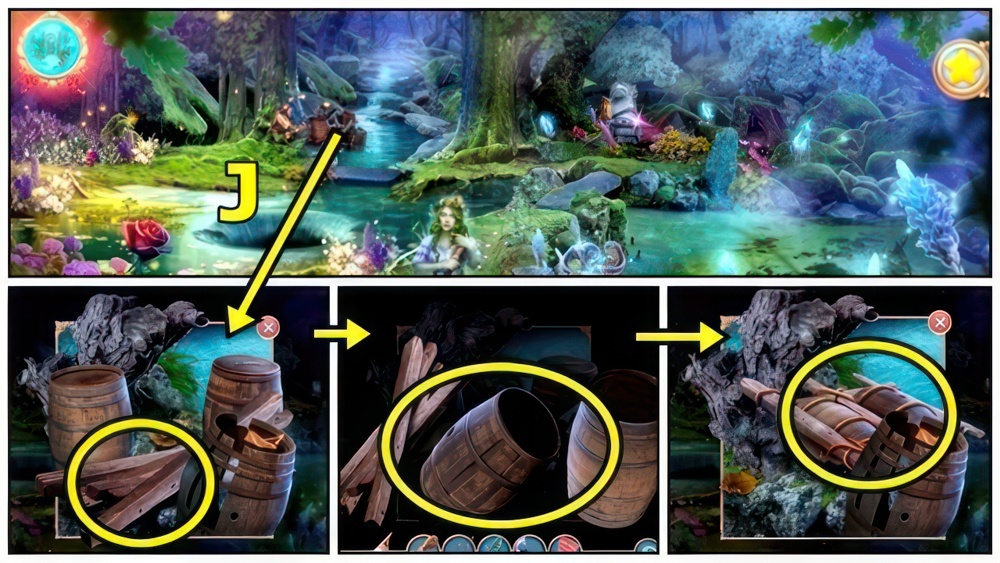
- Examine (J), add ROPE.
- Add PADDLES.
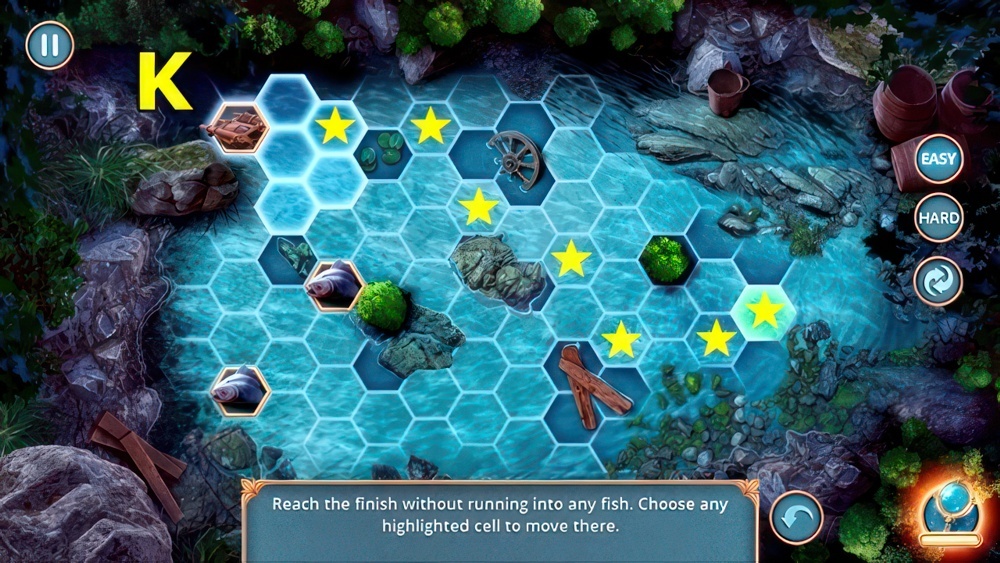
- Reach the finish without running into any fish.
- Choose any highlighted cell to move there.
- Walkthrough: (K) Easy.
- Fish move randomly.
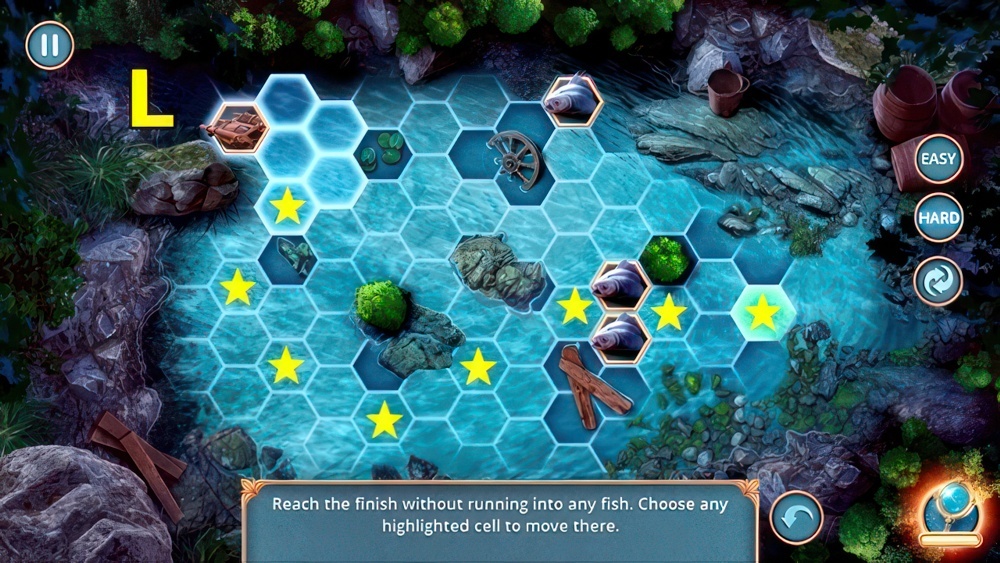
- Walkthrough: (L) Hard.
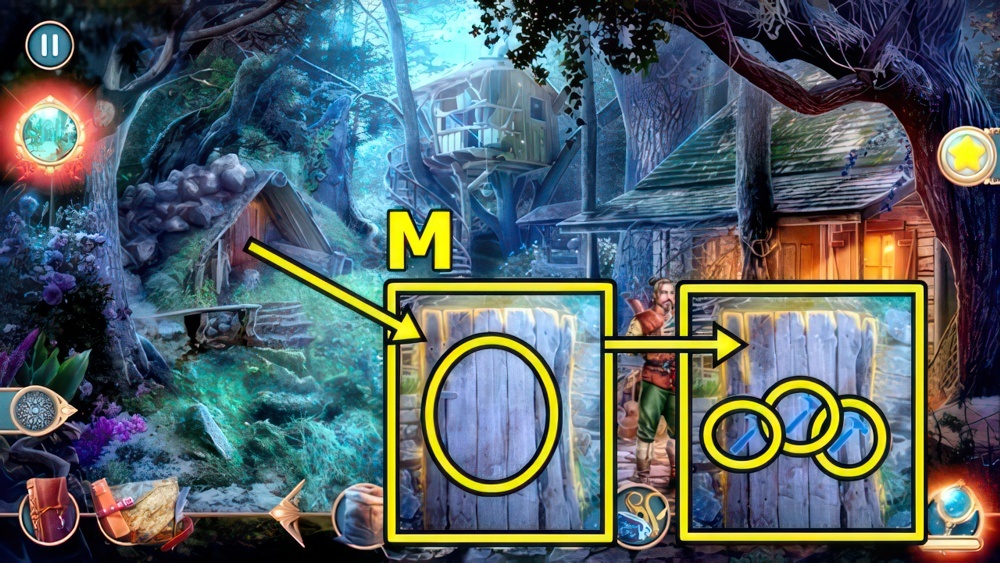
- Use HAMMER (M), press each hammer icon 5x.

- Play puzzle (N), take FANG ON A CORD.
- Examine (O).
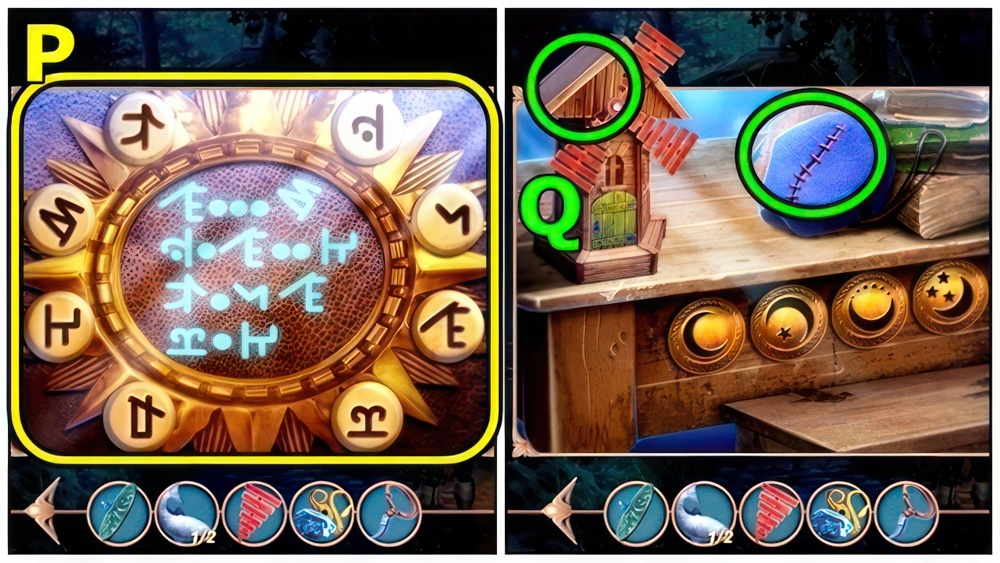
- Place the elements in the order shown in the center.
- Find the starting point first.
- Walkthrough: (P) Easy and Hard.
- Examine.
- Add MILL SAILS (Q), take FISH AMULET.
- Use FANG ON A CORD, take GEMS.
- Return to Underwater City.
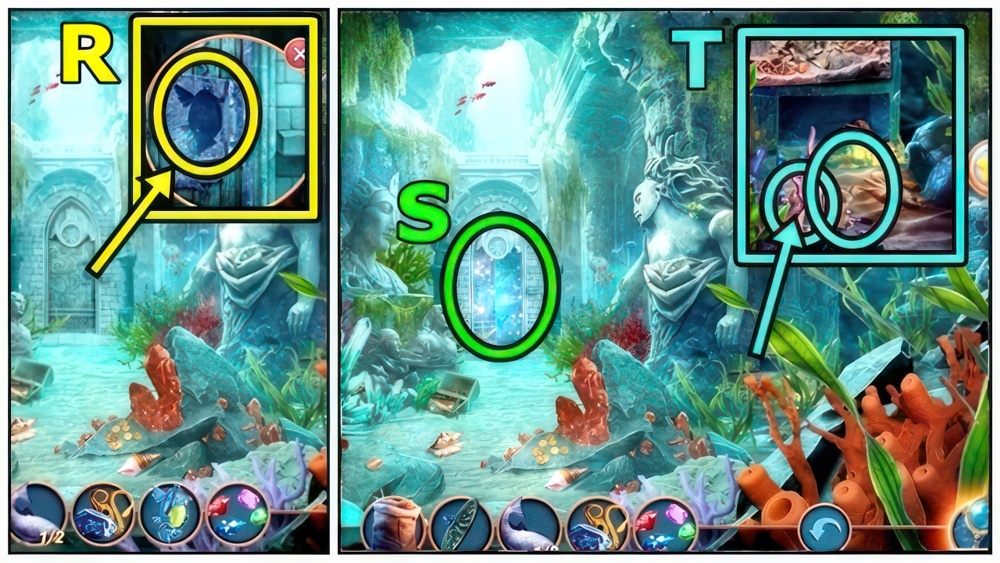
- Insert FISH AMULET (R).
- Play puzzle (S), take STONE VASE.
- Add STONE VASE (T) and CAP.
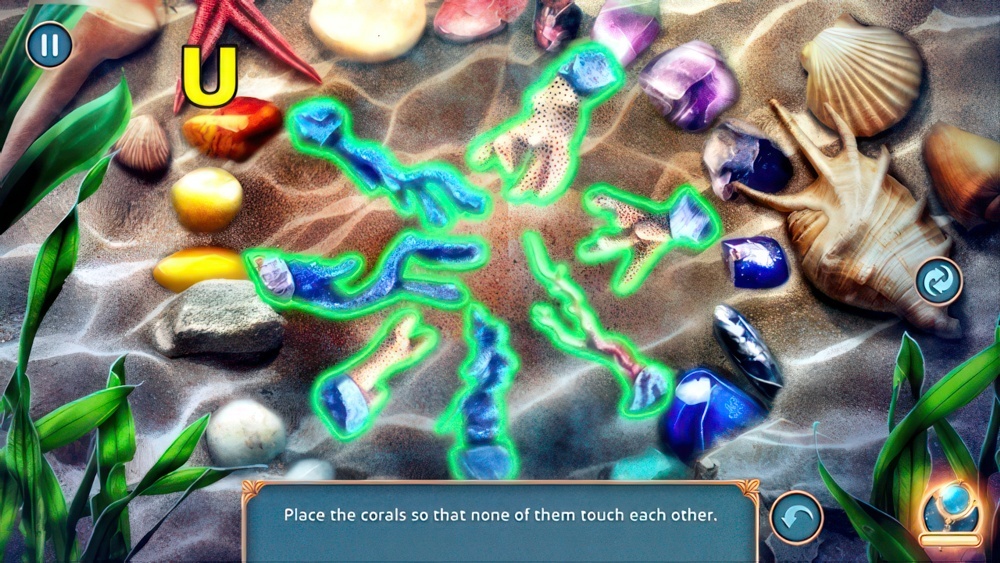
- Place the corals so that none of them touch each other.
- Walkthrough: (U).
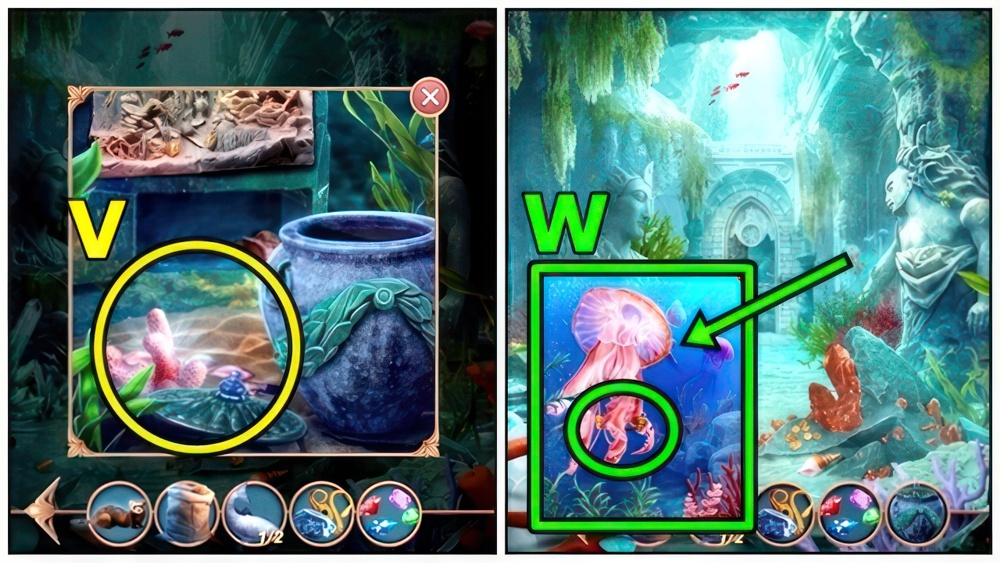
- Take VASE WITH CORALS (V).
- Add VASE WITH CORALS (W), receive HANDLE.
- Move down.
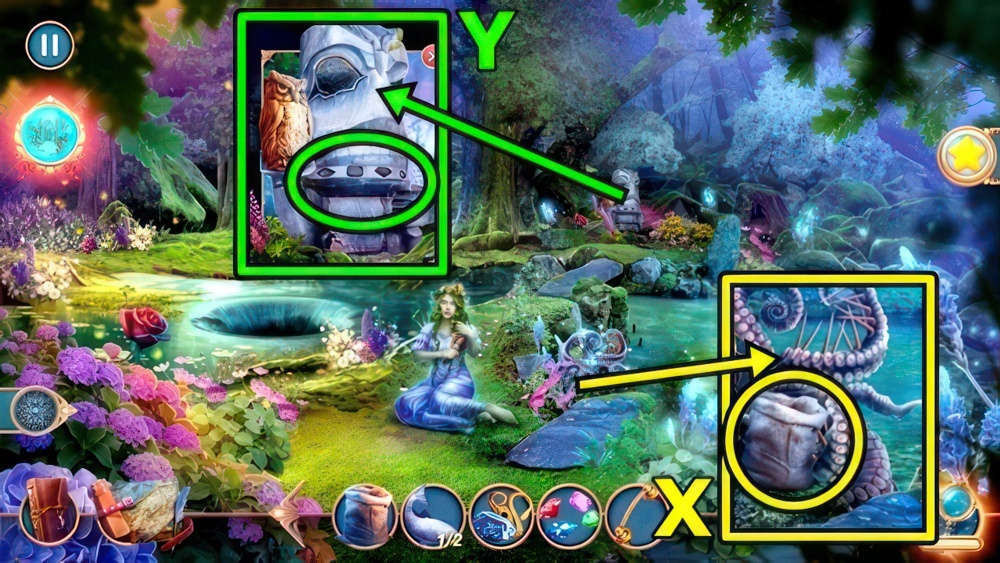
- Take SACK (X).
- Add GEMS (Y), take BLADE.
- Go to Poacher’s Lair Exterior.

- Add SACK (Z) and BLADE.
- Find 1 specified card 3 times.
- You have 3 tries, then the game will start over.
- Walkthrough: (A) Easy and Hard – solution is random.
- Enter Poacher’s Lair.
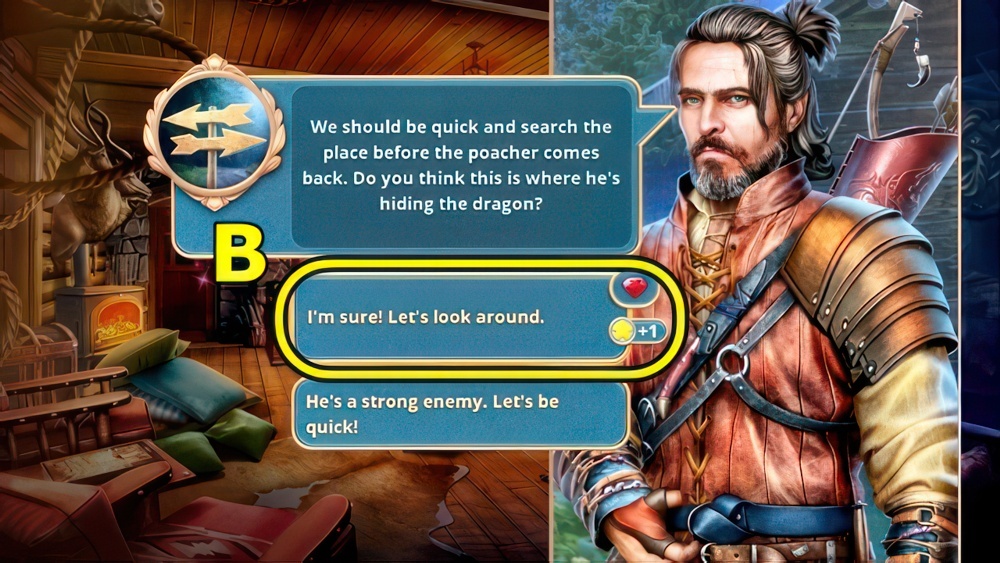
- Select (B).
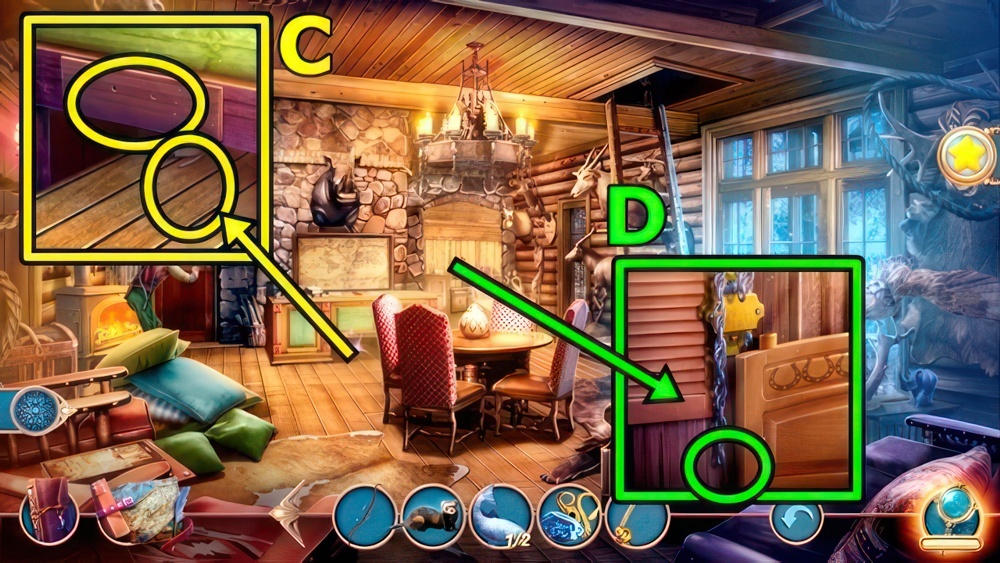
- Use GLASSIE THE FERRET (C), take THREADS and SPUR.
- Add HANDLE, take ORNATE STONE 2/2.
- Add SPUR (D).
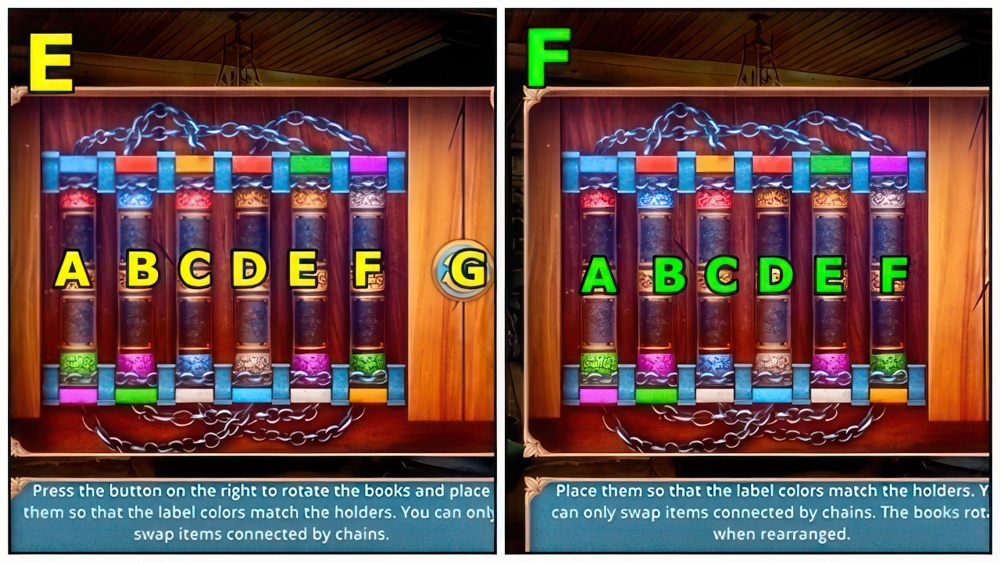
- Place them so that the label colors match the holders.
- You can only swap items connected by chains.
- The books rotate when rearranged.
- Walkthrough: (E) Easy (F-D)-(D-A)-(A-E)-(E-G)-(C-F)-(D-F)-(A-D)-(D-F)-(F-G)-(A-D)-(A-E)-(E-B)-(A-E).
- Walkthrough: (F) Hard (F-D)-(D-A)-(A-E)-(C-F)-(D-F)-(A-D)-(D-F)-(A-D)-(A-E)-(E-B)-(A-E).

- Examine (G), take PICKAXE.
- Return to Underwater City.
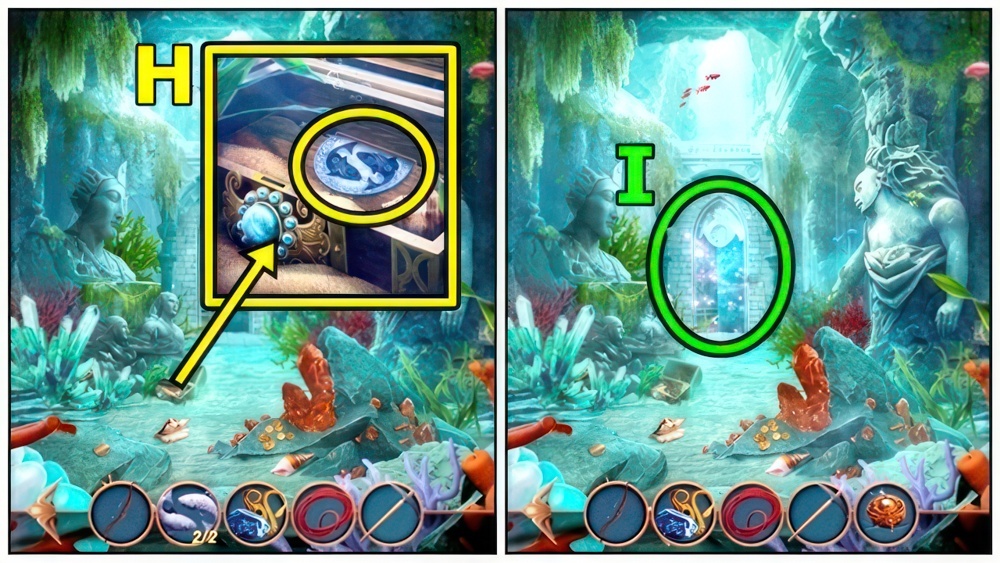
- Add ORNATE STONE (H), take MOON CRYSTAL AMULET.
- Play puzzle (I).
- Return to Poacher’s Lair Exterior.
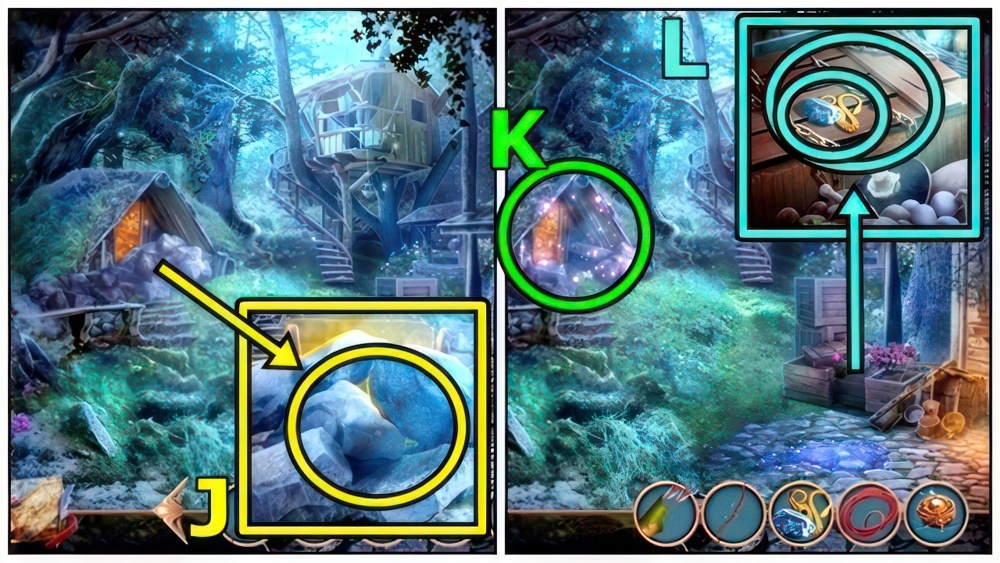
- Use PICKAXE (J).
- Play puzzle (K), take TRAP.
- Take FLINT AND STEEL (L).
- Use TRAP, take TWIG and WAX.
- Enter Poacher’s Lair.

- Read (M), take LEAVES.
- Add WAX, then FLINT AND STEEL.
- Take CANDLE.
- Use CANDLE (N).
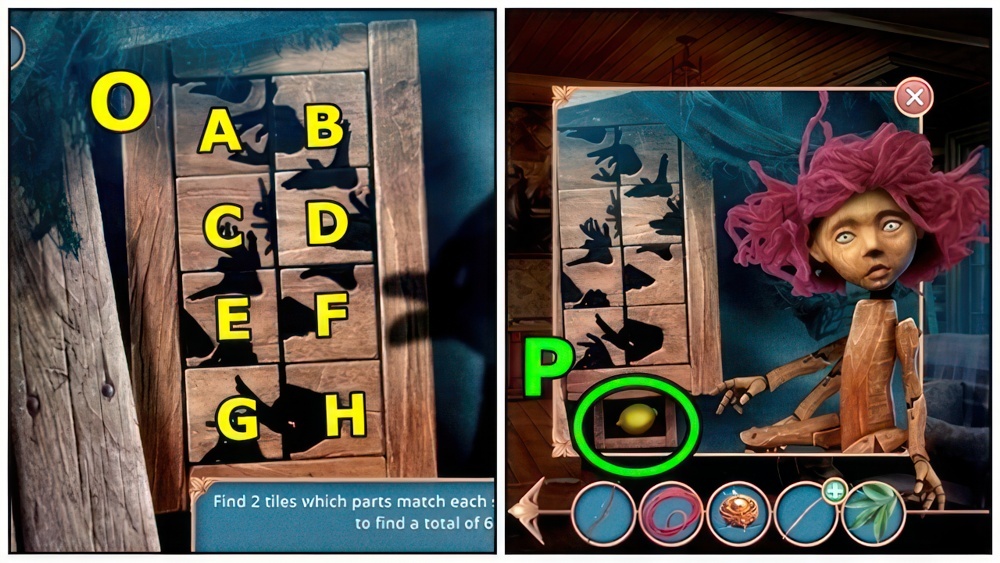
- Find 2 tiles whose parts match each shadow figure.
- You need to find a total of 6 pairs.
- Walkthrough: (O) Easy E-F, C-D, B-C, B-E, D-E, F-G.
- Walkthrough: (O) Hard E-F, C-D, B-C, B-E, D-E, F-G, A-G, A-H.
- Take LEMON (P).
- Return to Banshees’ Valley.
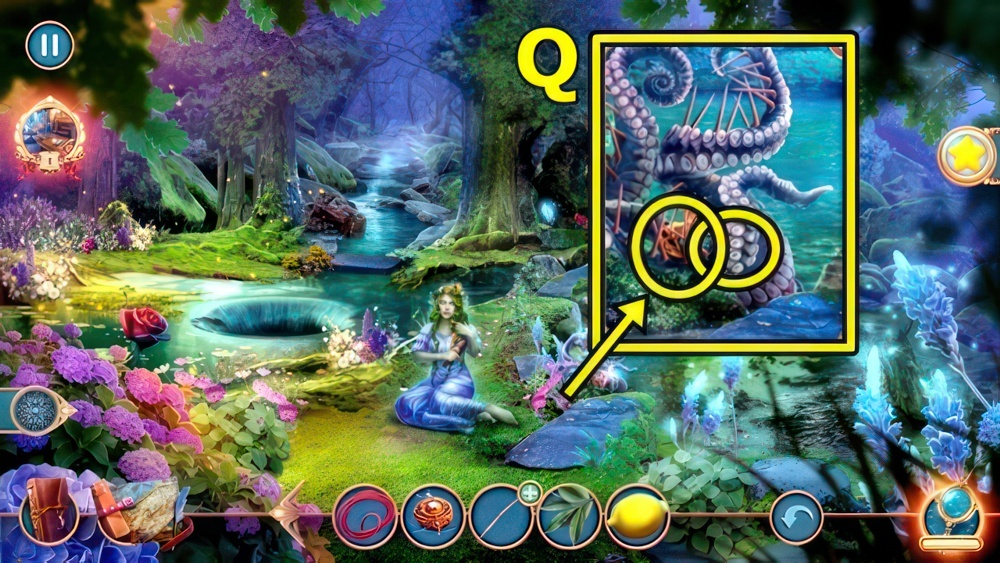
- Add LEMON (Q) and QUIVER OF ARROWS, take HORSE FIGURINE.
- Return to Poacher’s Lair.

- Add HORSE FIGURINE (R), take CACHE KEY and MAGIC INK.
- Insert CACHE KEY (S).
- Enter Dragon Hideout.
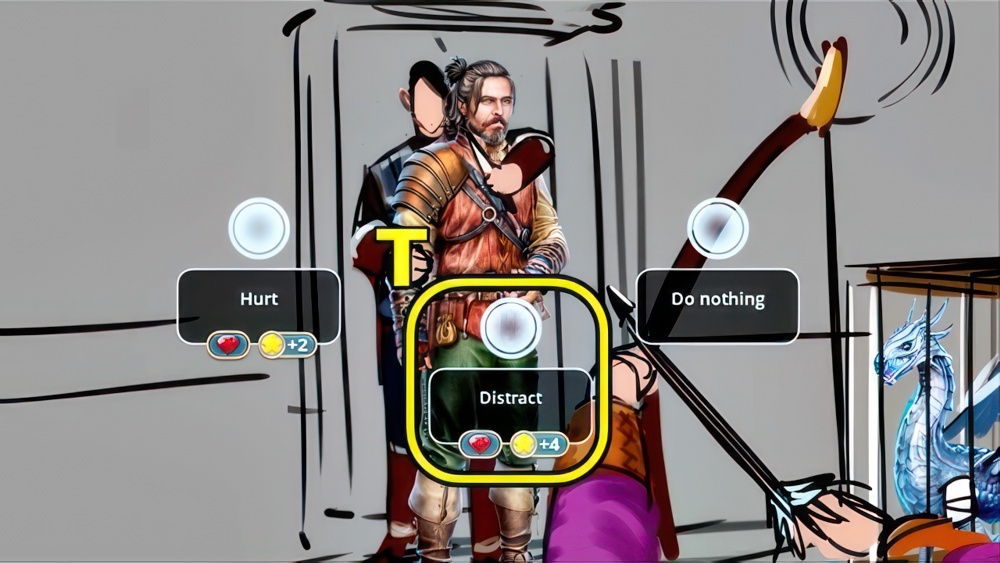
- Select (T).
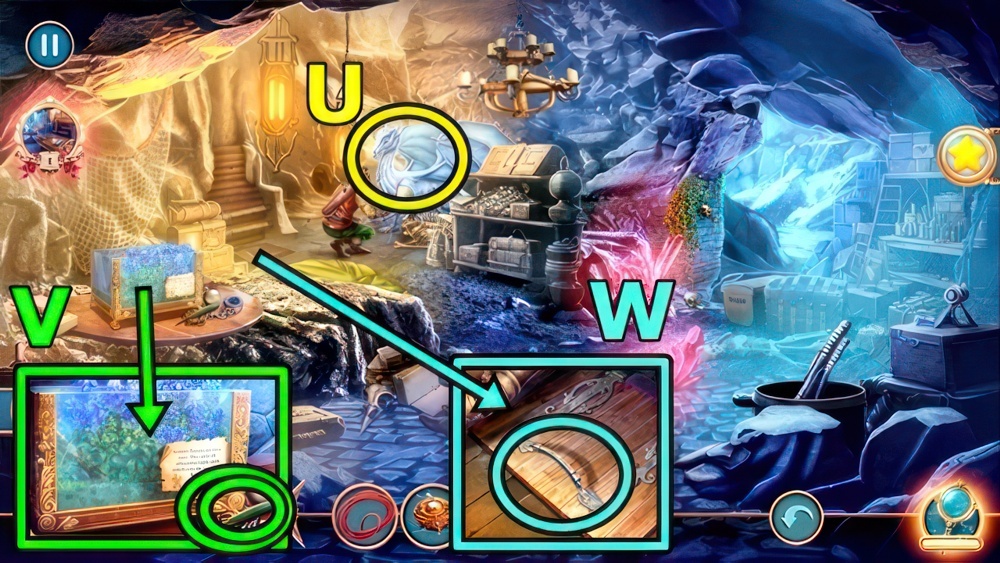
- Give MOON CRYSTAL AMULET (U).
- Take FEATHER (V) and SHACKLES.
- Use SHACKLES (W).
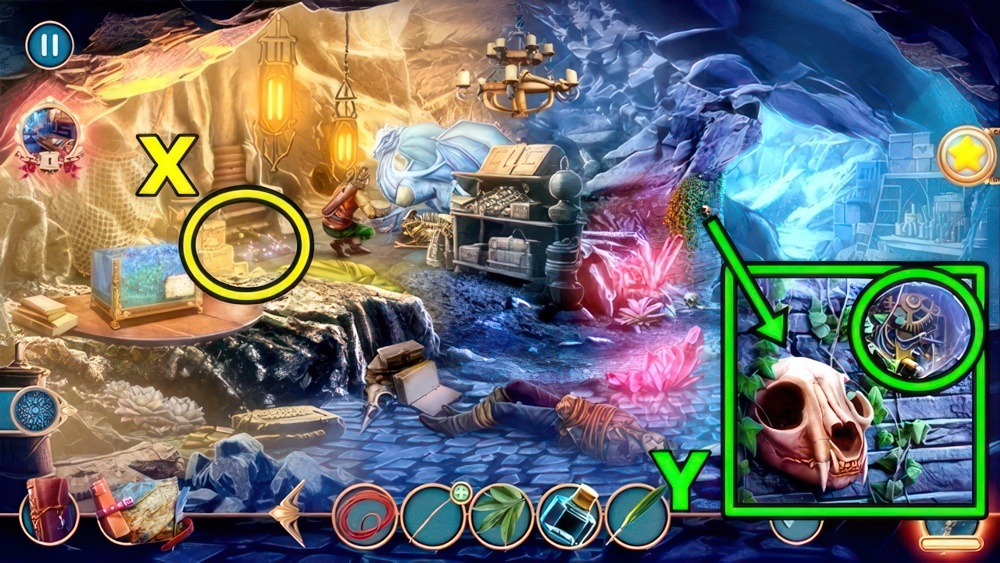
- Play puzzle (X), take SKULL.
- Add SKULL (Y), take CANE HANDLE.
- Return to Evelyn’s Home.
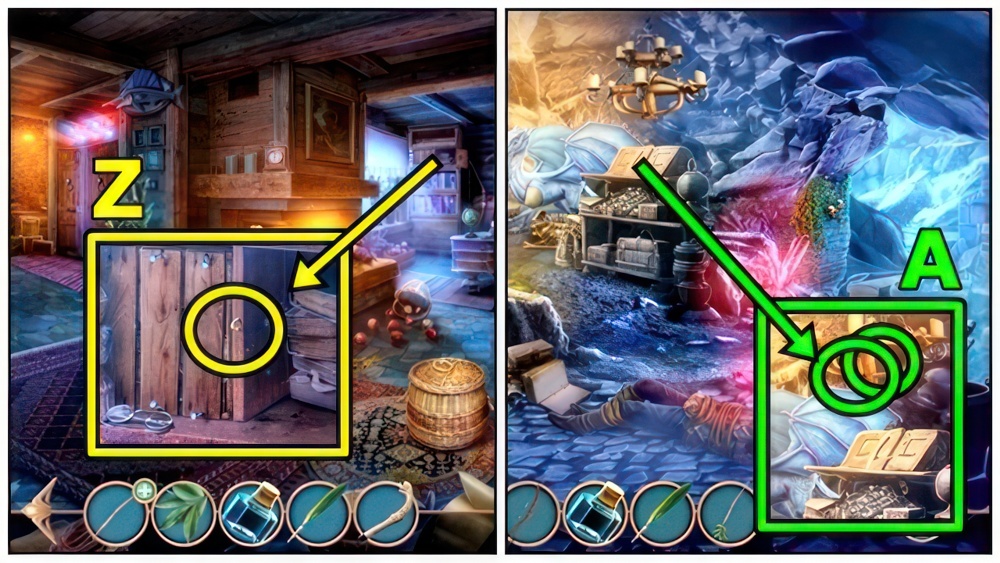
- Use CANE HANDLE (Z), take ARROWHEAD.
- Return to Dragon Hideout.
- THREADS, LEAVES and ARROWHEAD on TWIG, receive ARROW.
- Use BOW (A) and ARROW.

- Rotate the triangles to make 3 differently shaped sights shown on the left.
- Walkthrough: (B) Easy Ax2-Cx2, Ax2-B-Cx2, Ax2-B-Cx2.
- Walkthrough: (C) Hard Ax2-Cx2-D, Ax2-Bx2-Cx2-D, Ax2-Bx2-Cx2-D.
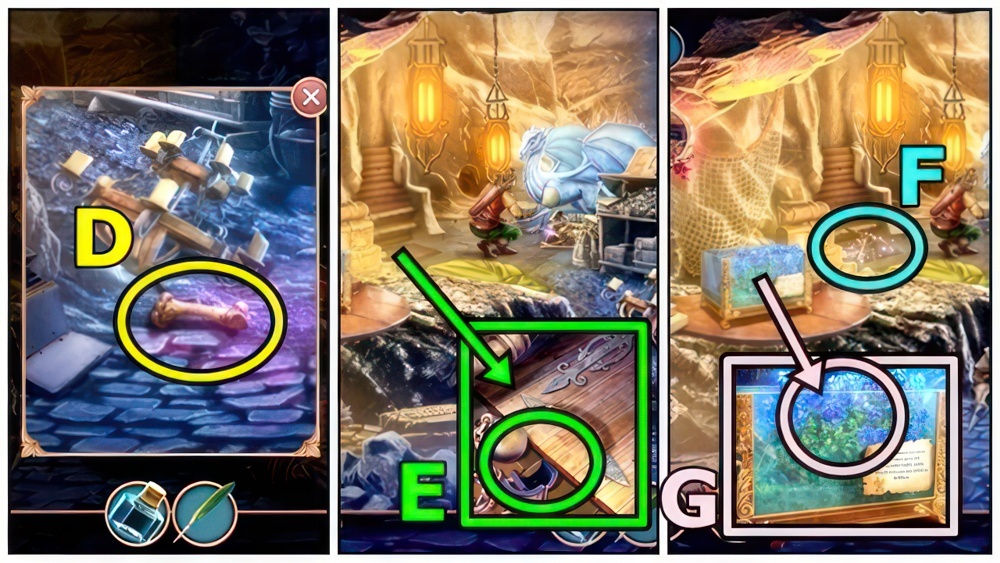
- Take BONE (D).
- Use BONE (E).
- Play puzzle (F), take CLAY DISH.
- Use CLAY DISH (G), receive UV FLOWERS.
- Return to Poacher’s Lair Exterior.

- Add UV FLOWERS (H), press symbols, take SPELL.
- Return to Dragon Hideout.
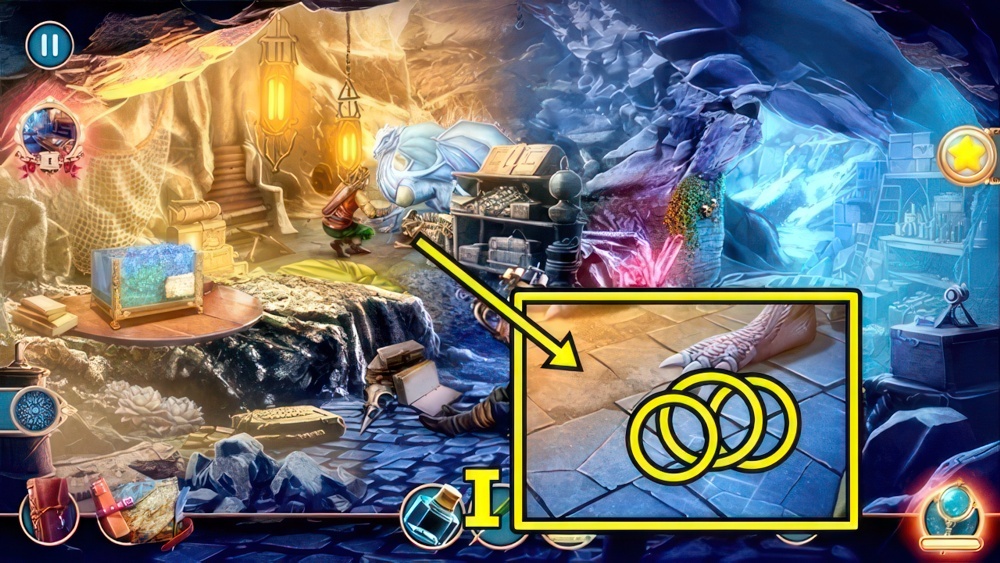
- Add MAGIC INK (I), FEATHER and SPELL.
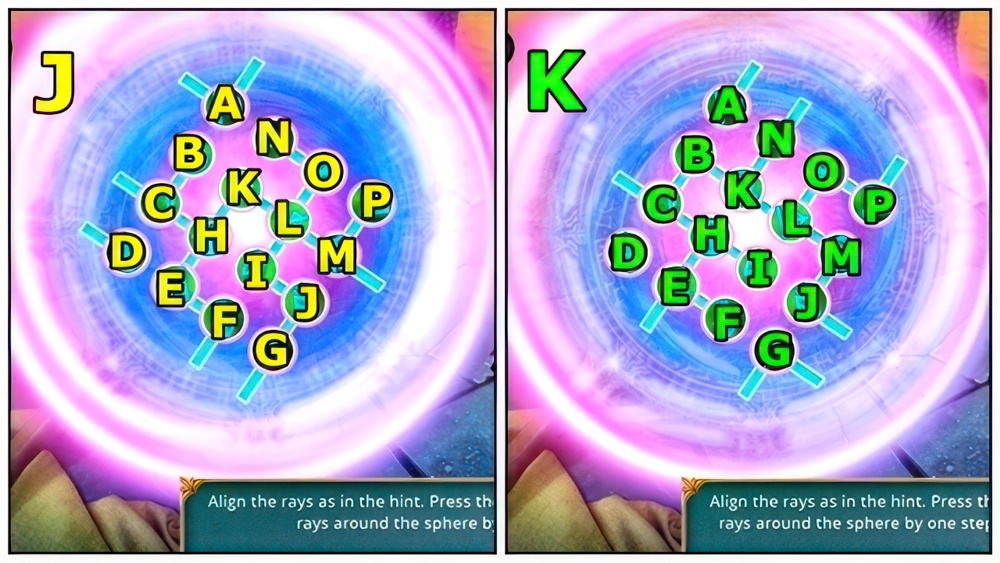
- Place the rays as in the hint.
- Press the symbol to rotate the rays around it.
- Walkthrough: (J) Easy Jx3-Px3-Mx3-Cx3-Dx3-Ix3-Fx3-Gx3-Ax2.
- Walkthrough: (K) Hard Cx3-Lx3-Kx3-P-N-Ax3-Ex2-Hx3-Gx2-Ex3-Jx2-Ix3.
Congratulations! You have completed the game Royal Romances Season 2 Episode 4: The Lost Dragon.


