Lost Lands 10 (Bonus Chapter) – This time you’ll travel through the eyes of Kiana, Susan’s granddaughter, to learn about her adventures in an uncharted part of the Lost Lands. After accidentally being separated from her grandmother, Kiana finds herself in a forest with giant trees with dwellings inside. The place is reminiscent of a centaur village she saw as a child. Kiana decides to explore the area in hopes of finding Susan. During her search, she discovers a house inside one of the trees. From a diary left by the previous owner, the gnome Uri, Kiana learns that this place was the beginning of her grandmother’s adventures in the Lost Lands. At the site, she meets Furi, Uri’s brother, who comes here to honor his brother’s memory. After telling Furi about her situation, Kiana gets an unexpected solution: the dwarf suggests that she use the flying turtle living in the misty lake to move around. However, in order to use its help, Kiana has to find a way to lure this unusual creature and make contact with it.
Bonus Chapter Walkthrough
Here you can view the walkthrough for the bonus chapter in Lost Lands 10.
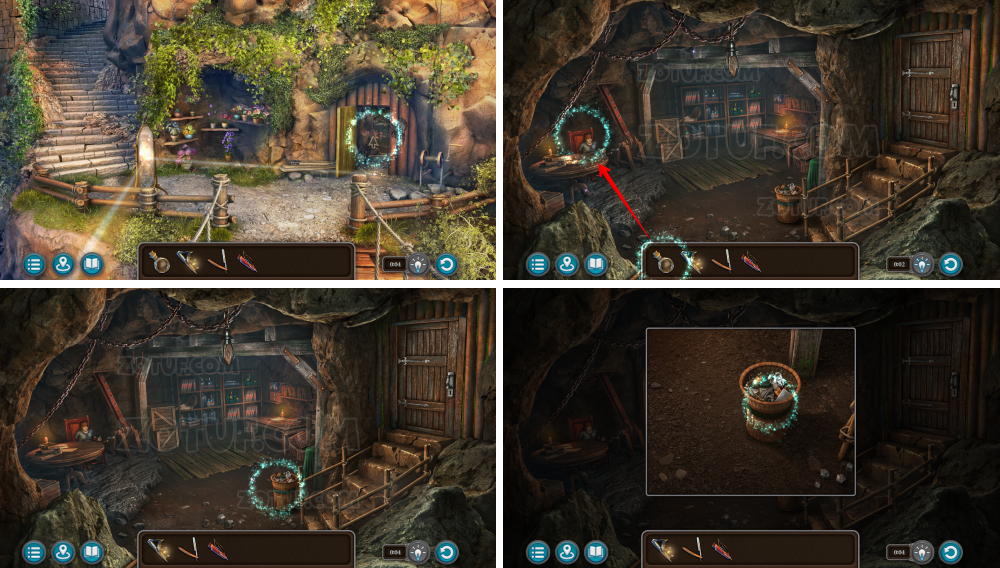
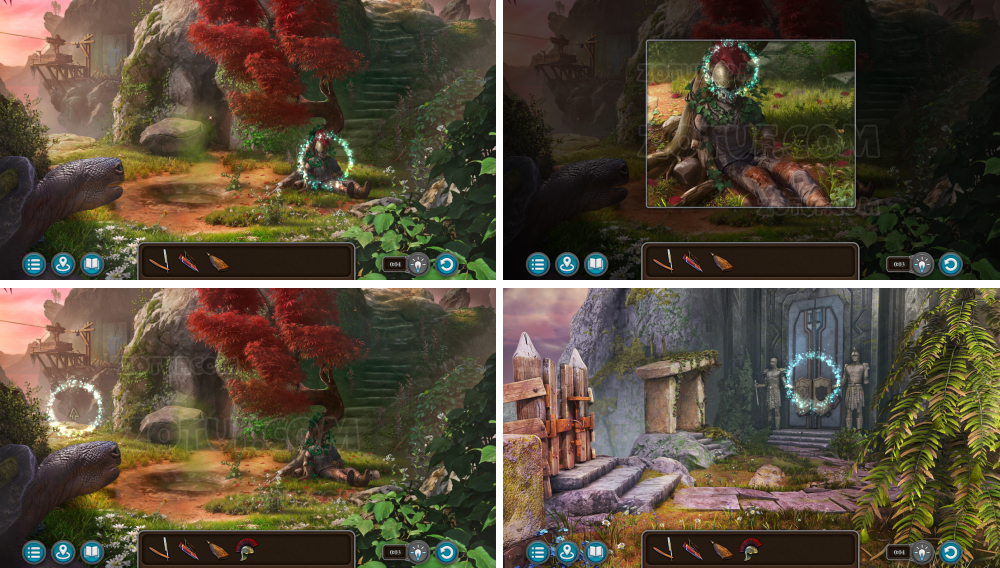
Away from grandma
My grandmother and I accidentally got separated. I need to find her.
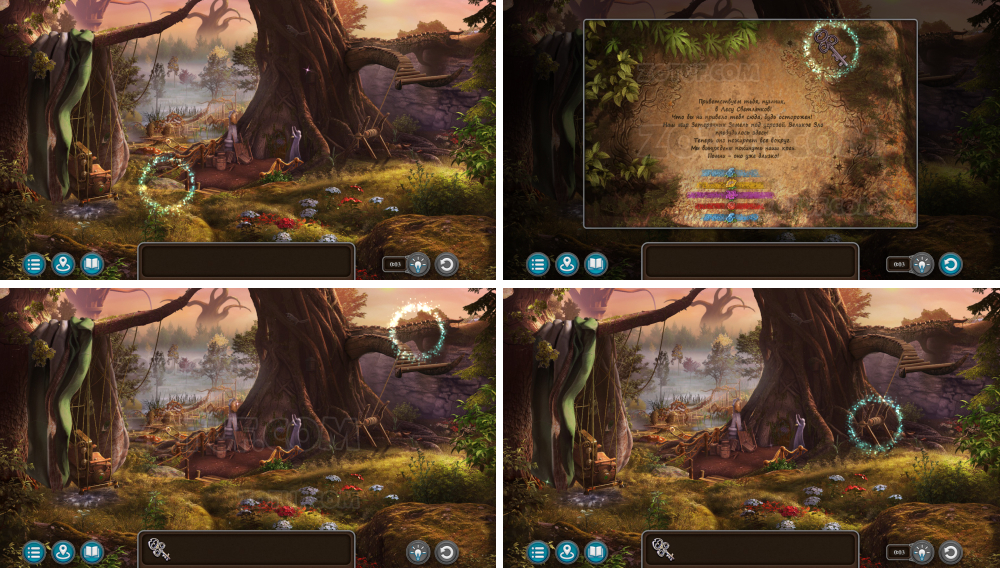
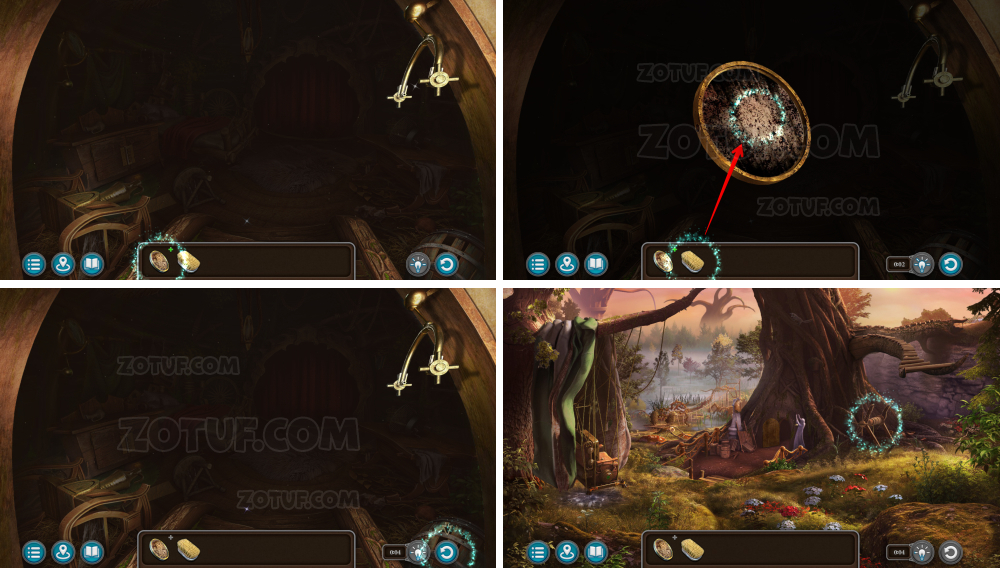
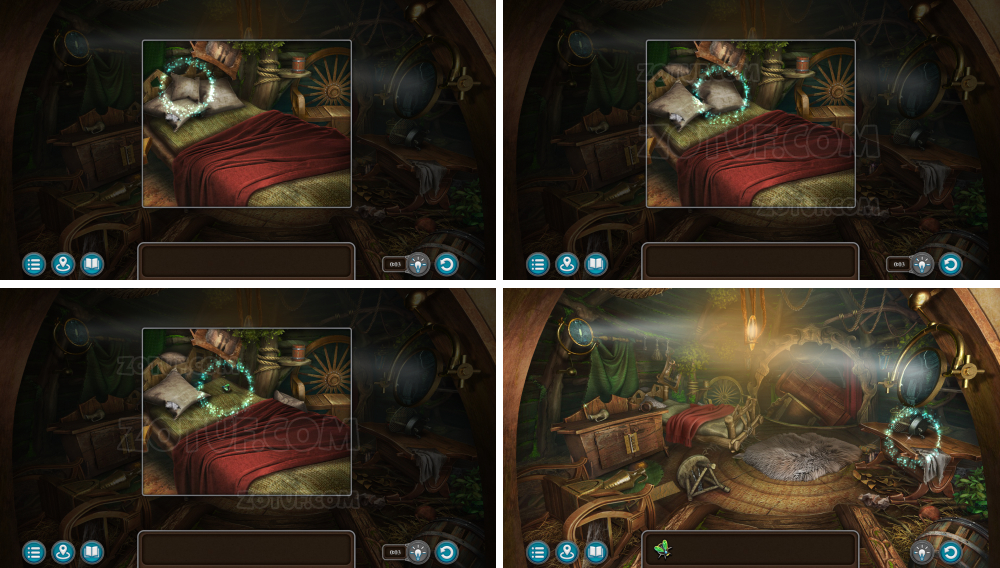
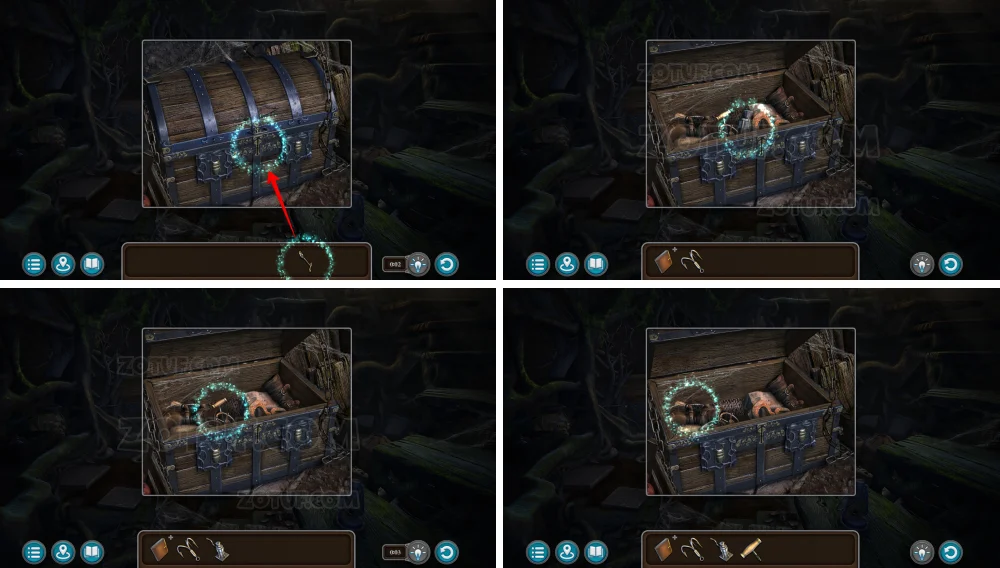
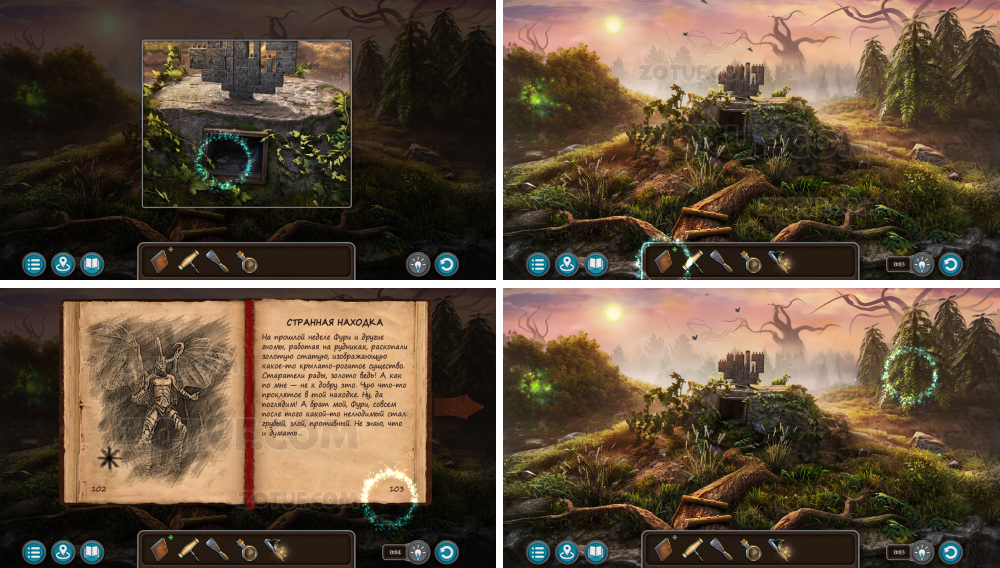
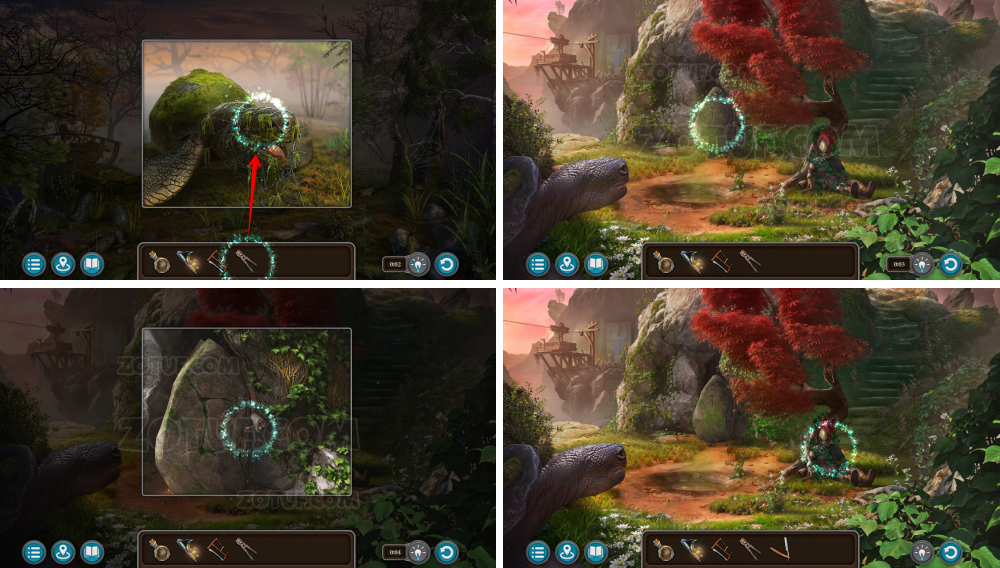
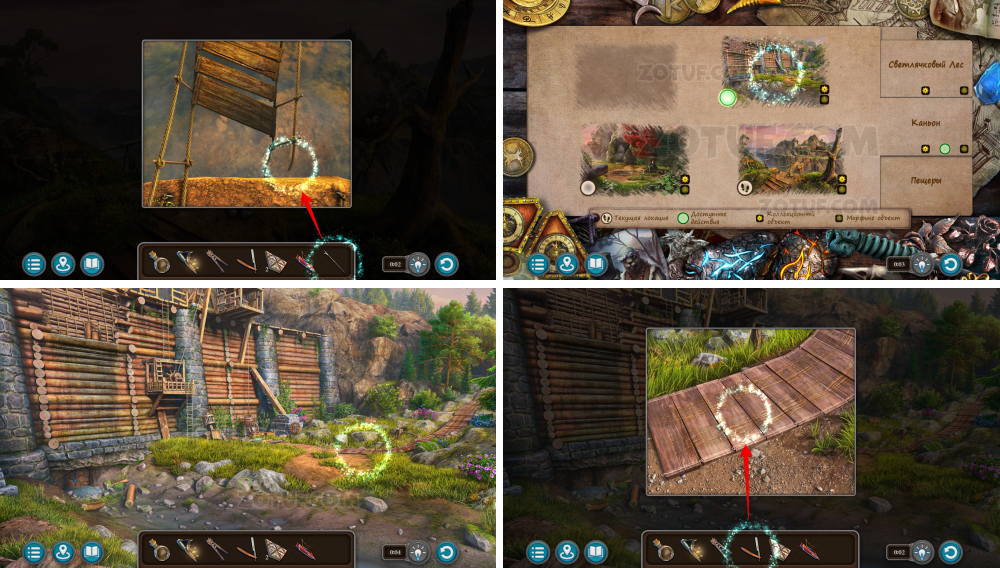
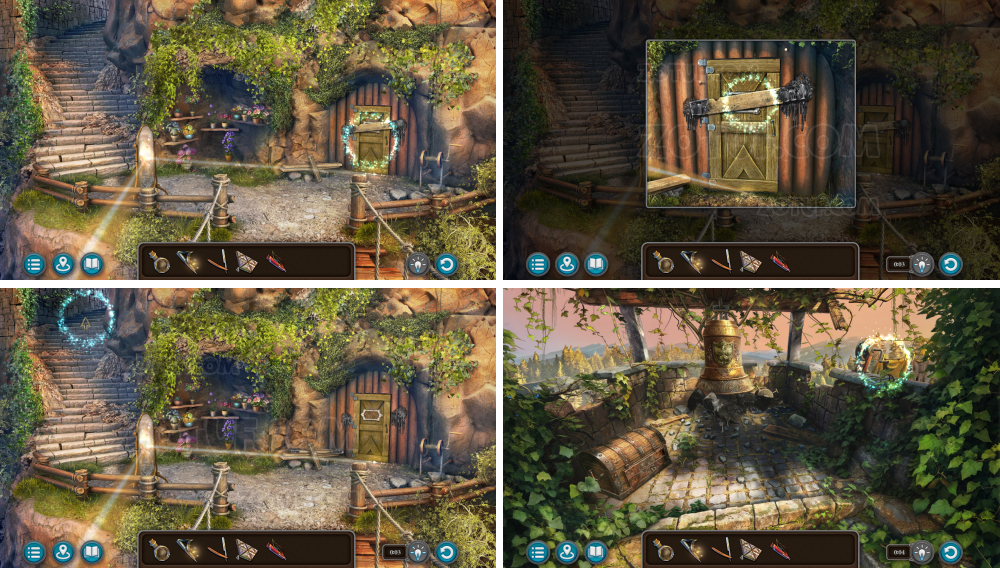
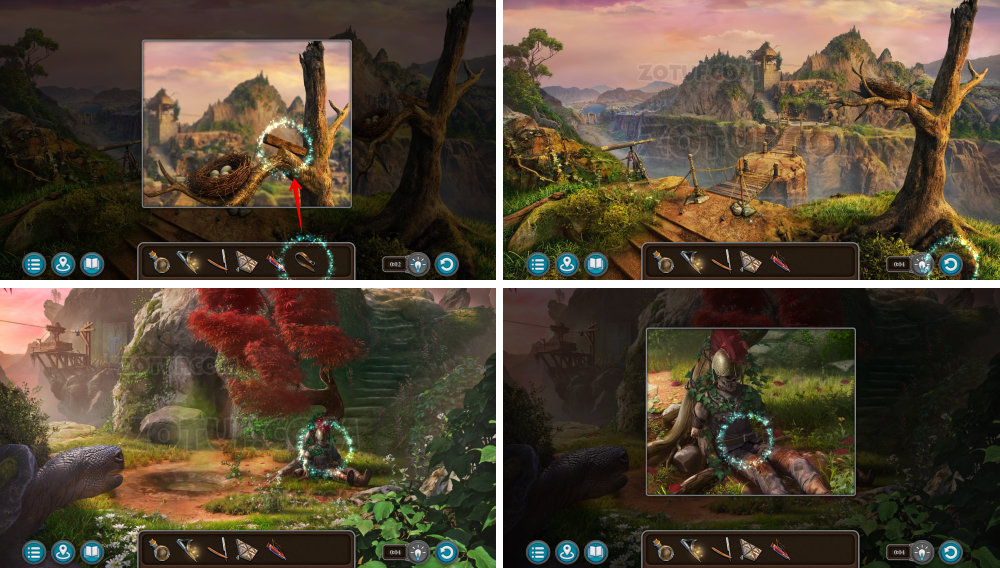
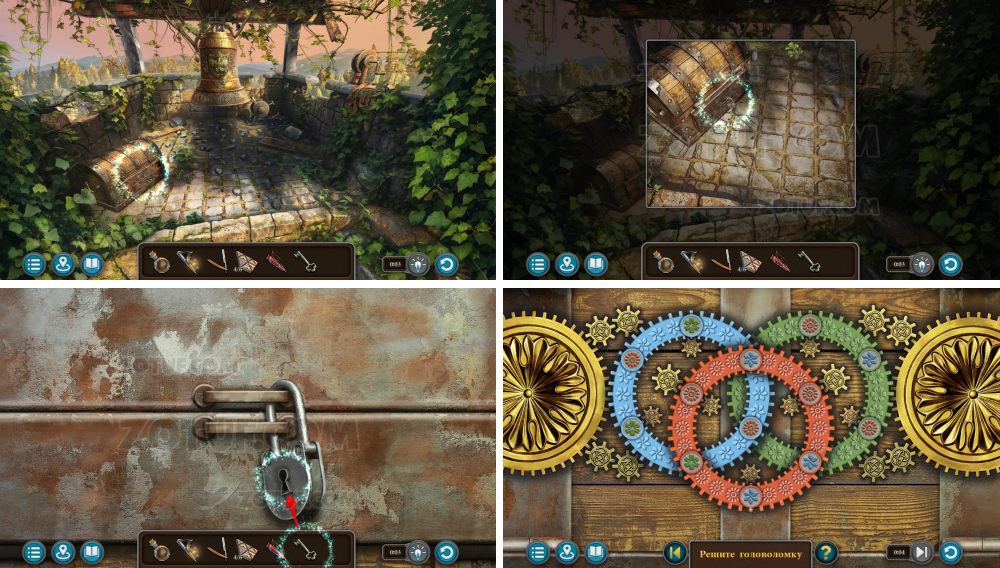
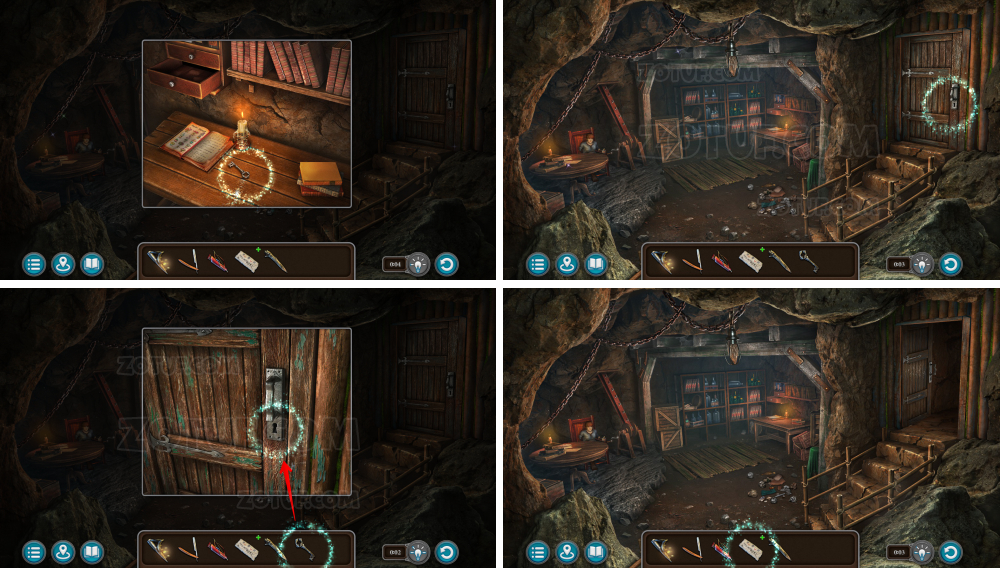
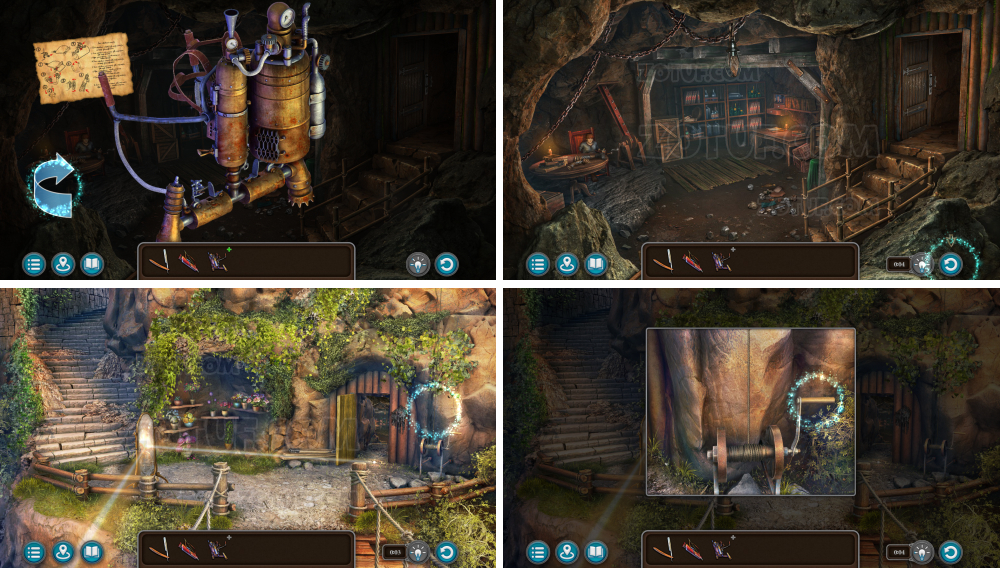
- Take the key.
- Examine the branch and winch.
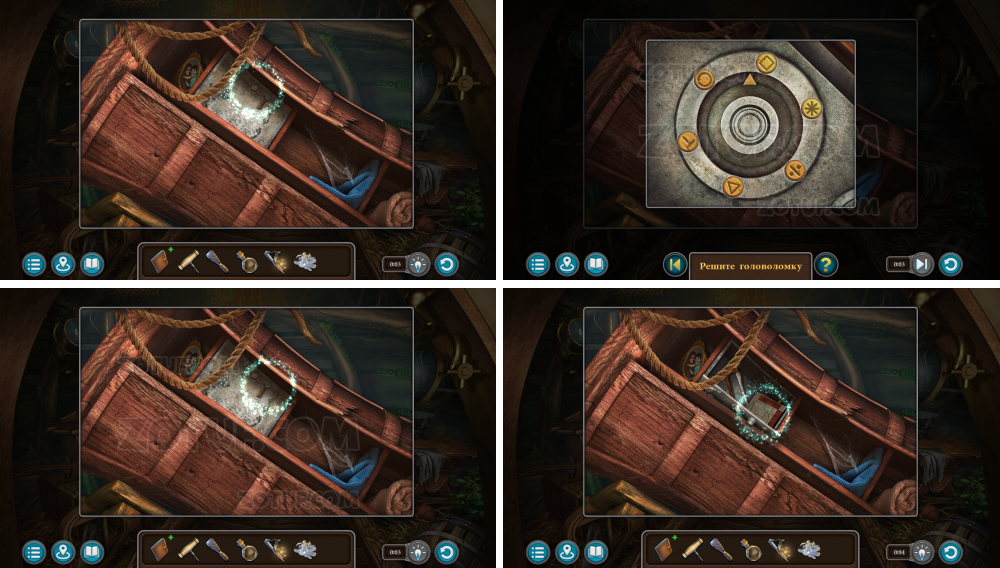
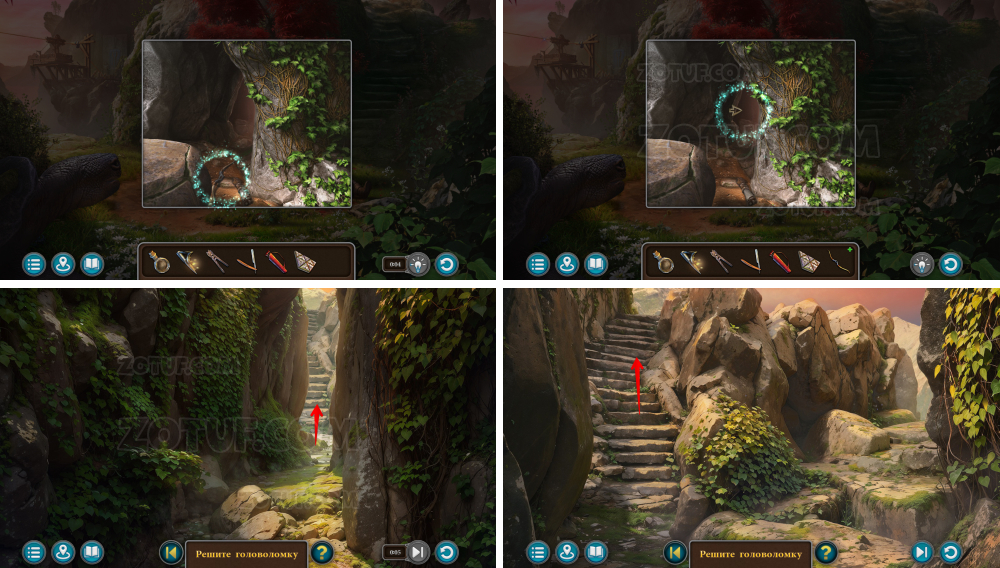
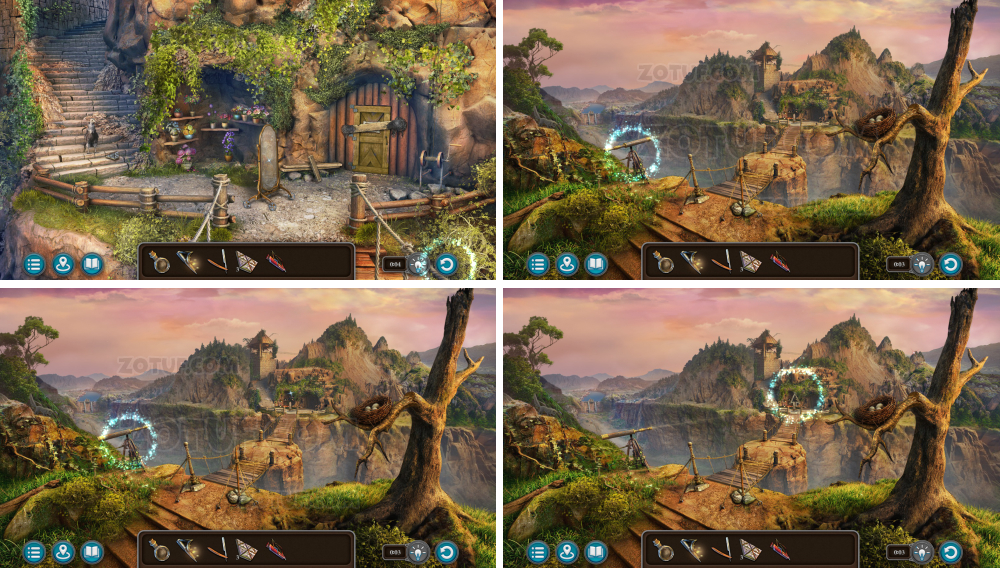
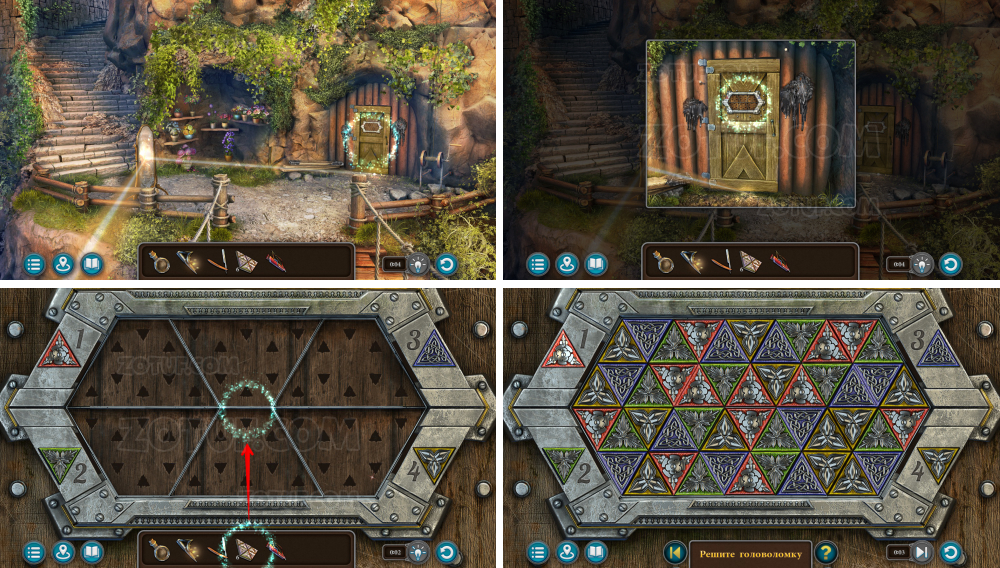
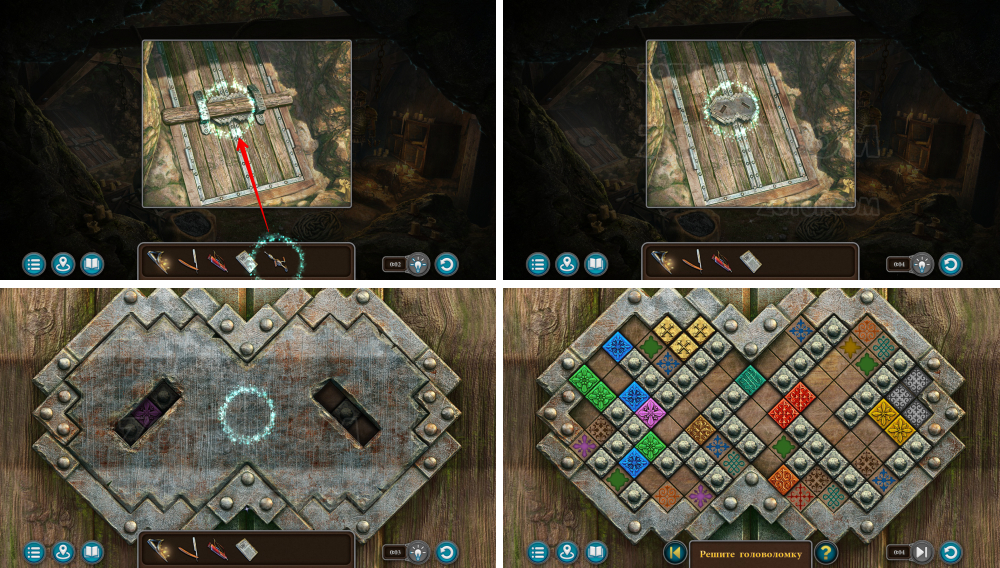
View from above
Climb the cliff to get a better view of the area.
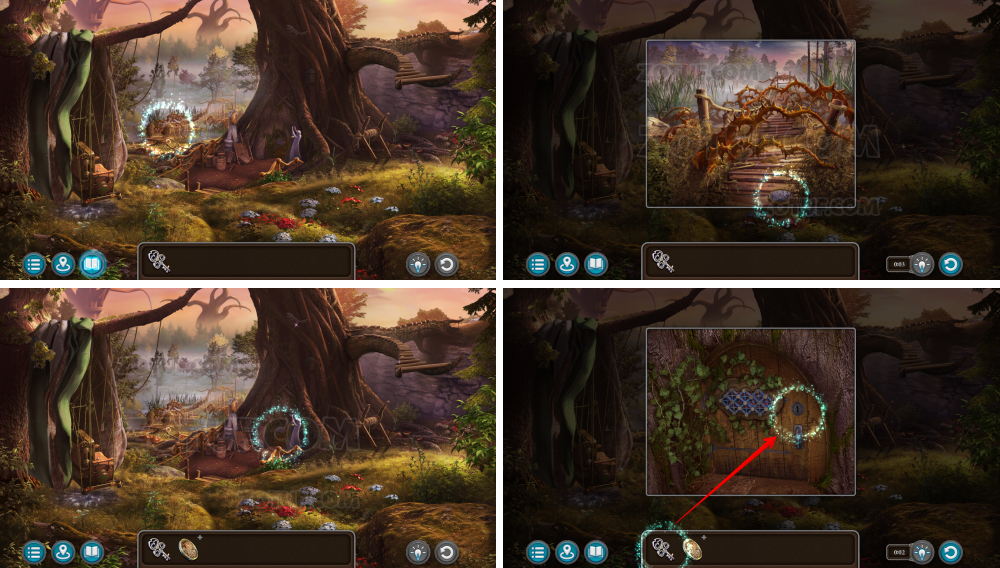
- Take the round mirror.
- Use the key.
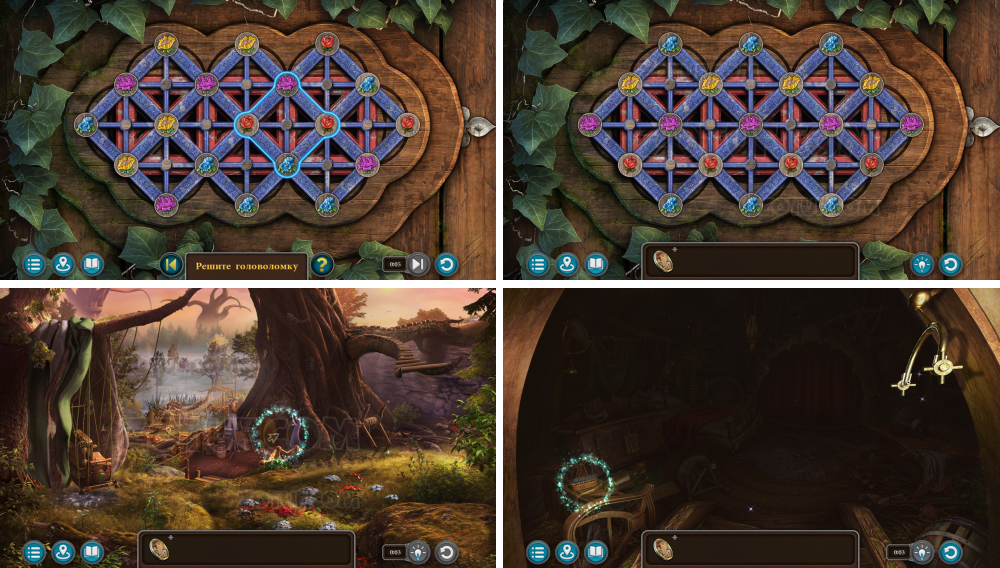
- Solve the puzzle: Rotate the colored squares and place them according to the hint – you’ve seen it earlier in the game.
- Solution in the picture.
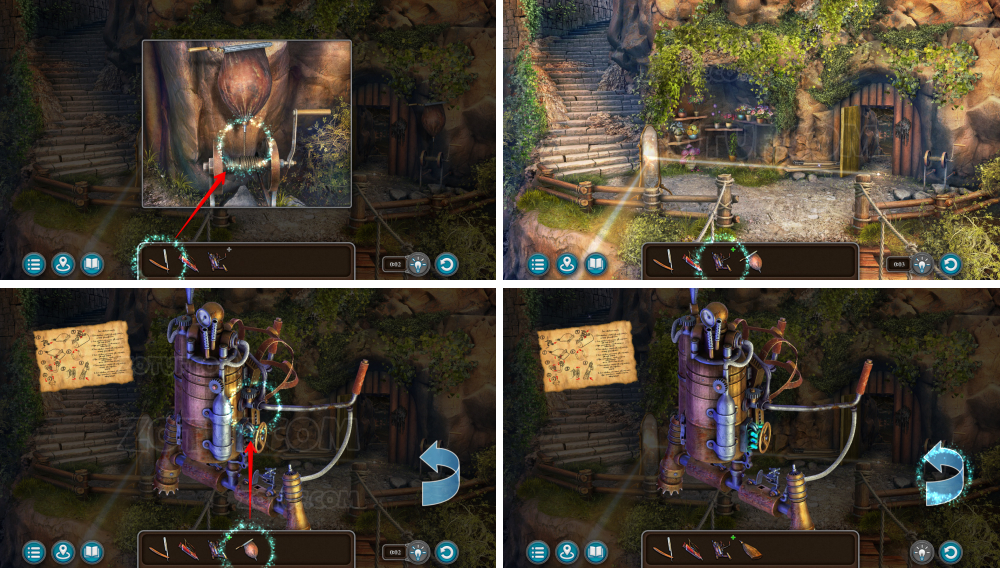
- Take the brush.
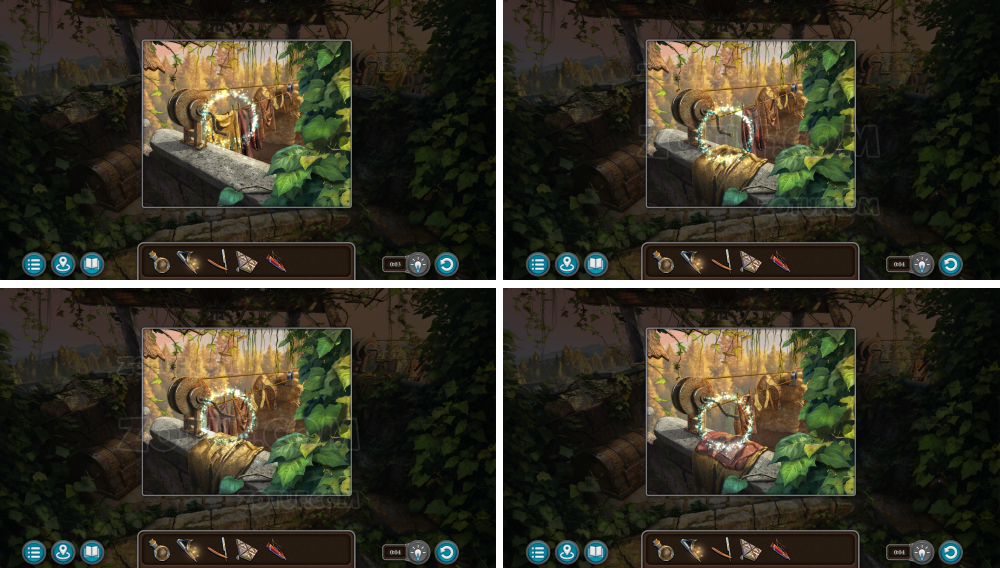
- Click on the round mirror.
- Use the brush.
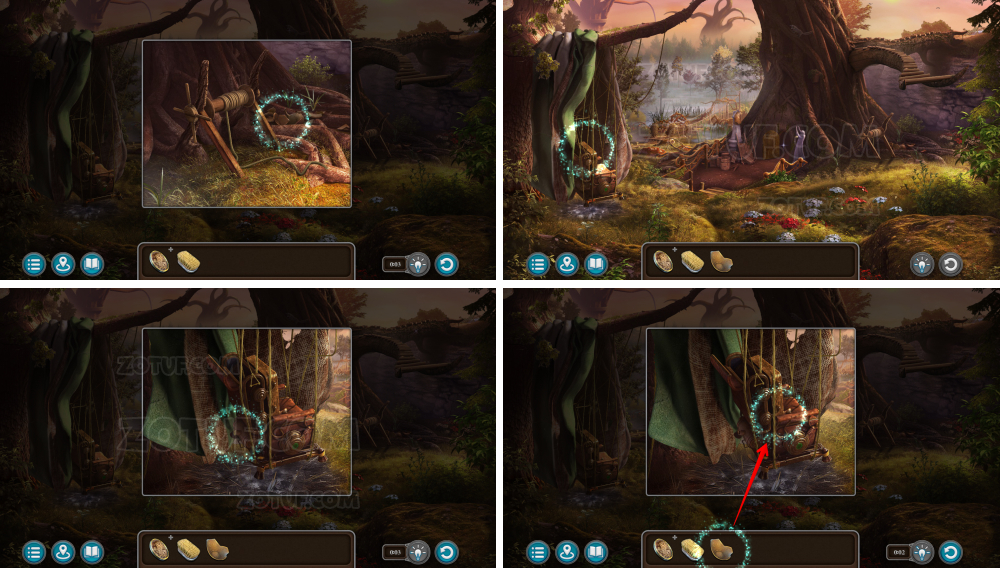
- Take the bottom of the pitcher.
- Remove the cork.
- Use the bottom of the pitcher to get the alcohol liquid.
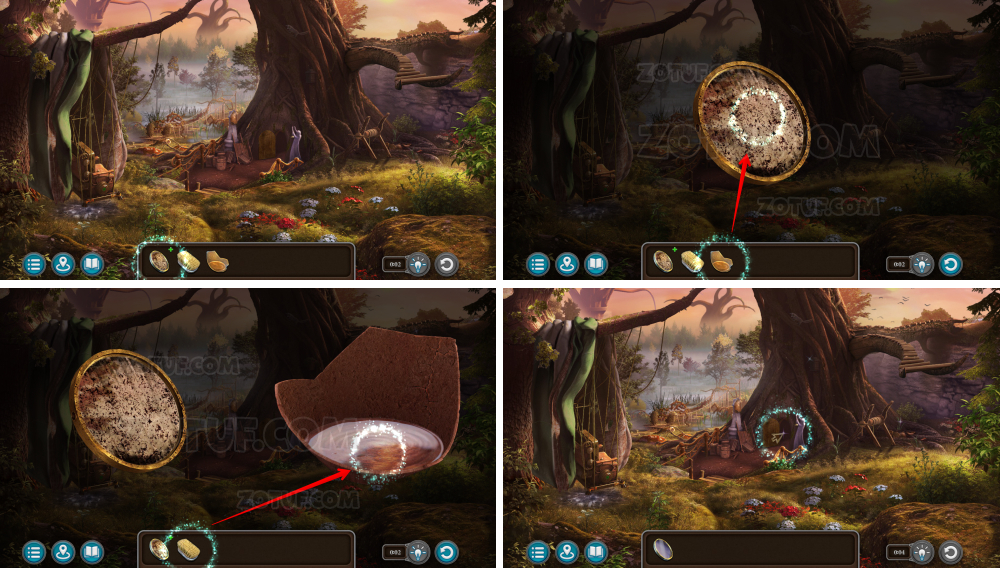
- Click on the round mirror.
- Use the alcohol liquid.
- Use the brush to get the mirror.
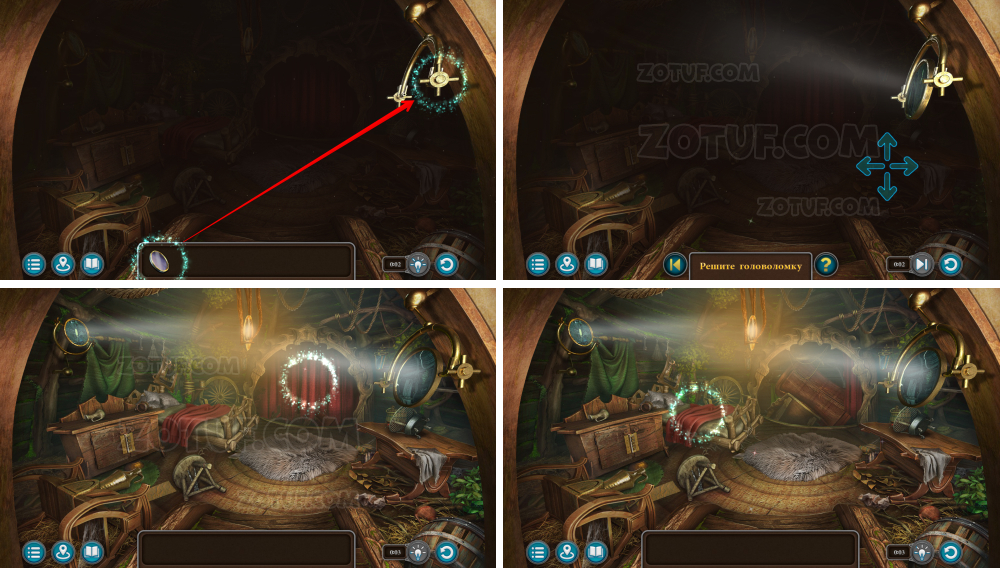
- Use the mirror.
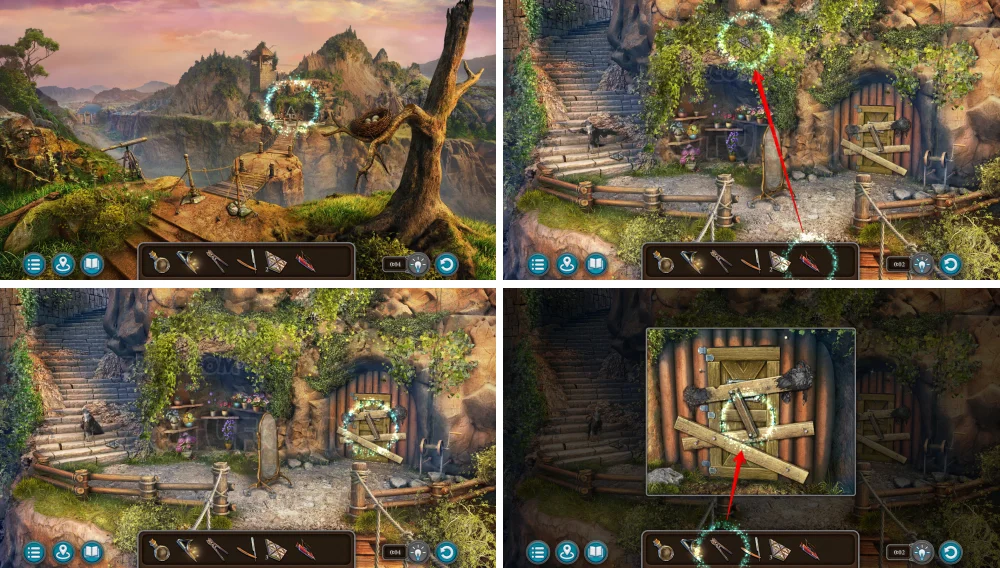
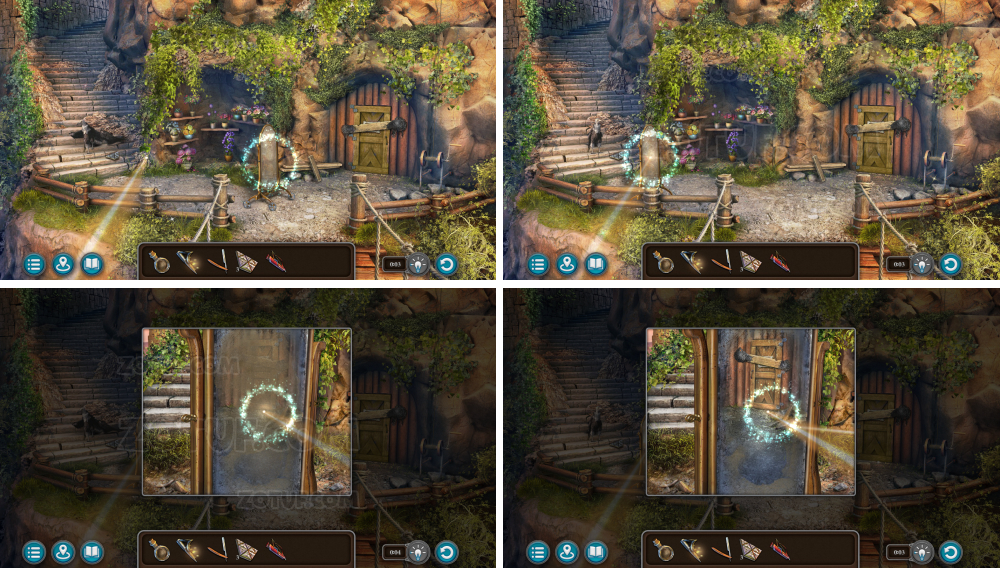
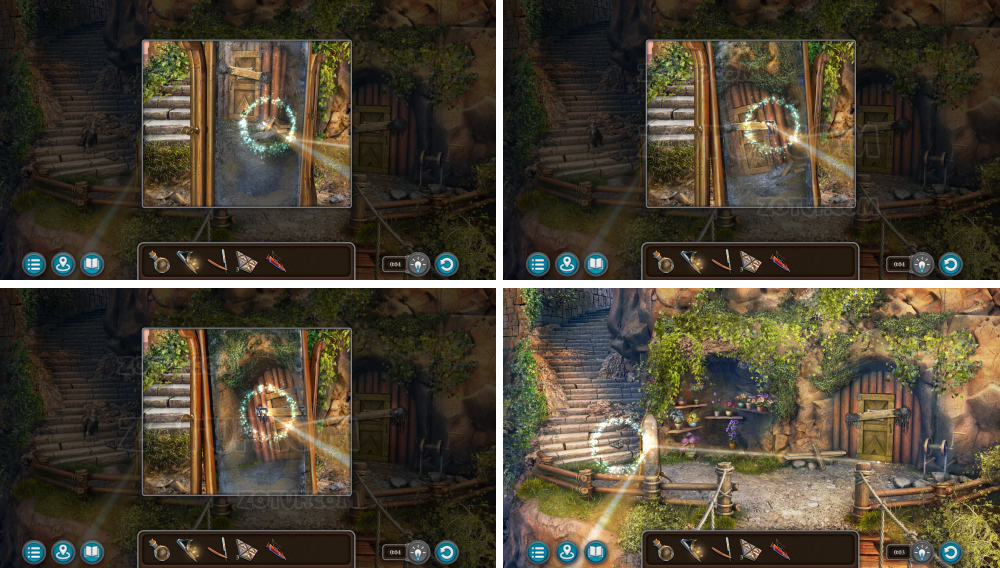
- Solve the puzzle: Use the arrows to guide the beam and find a way to illuminate the entire dwelling.
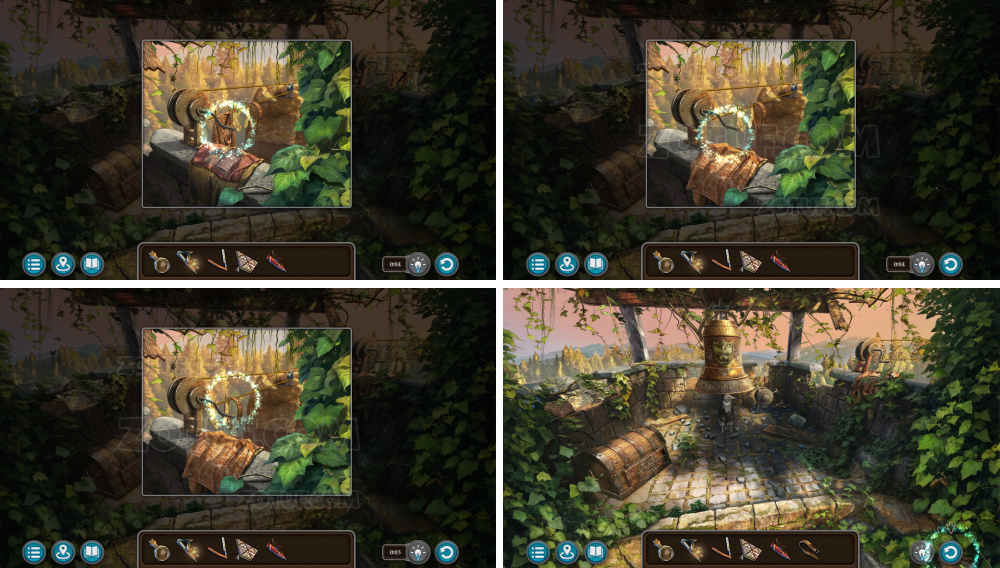
- Take the insect figurine.
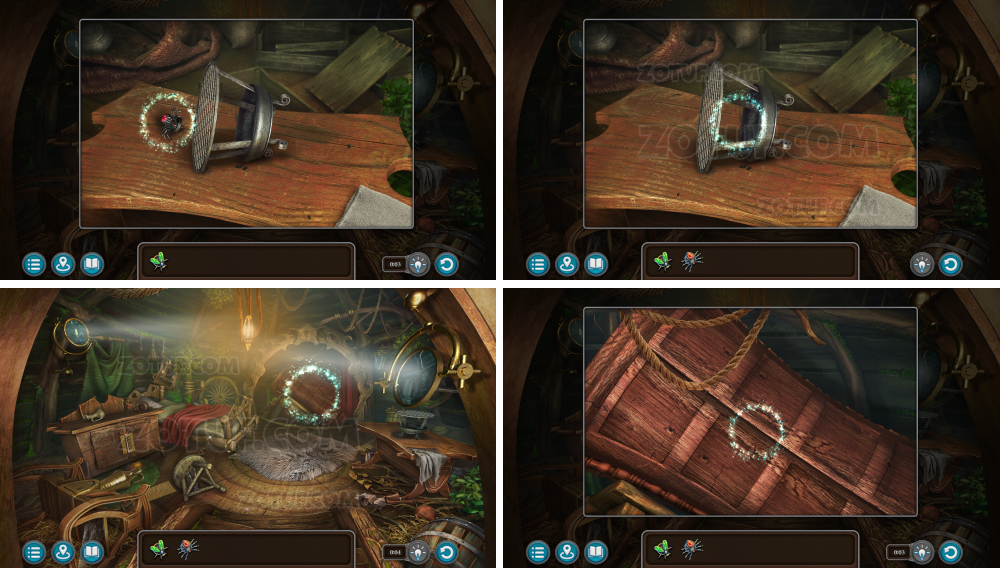
- Take the insect figurine.
- Take the insect figurine.

- Use the insect figurines.
- Use the insect figurine.
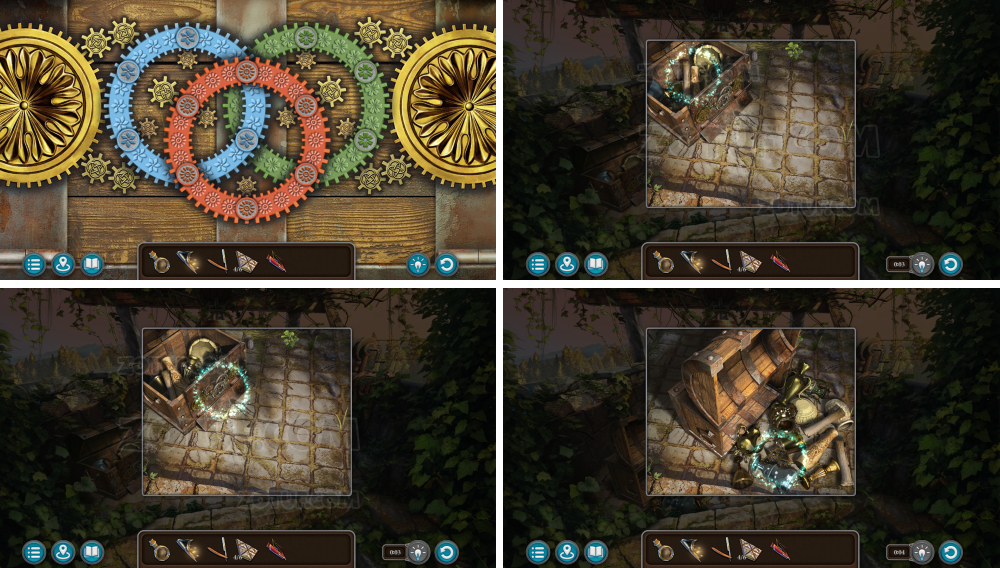
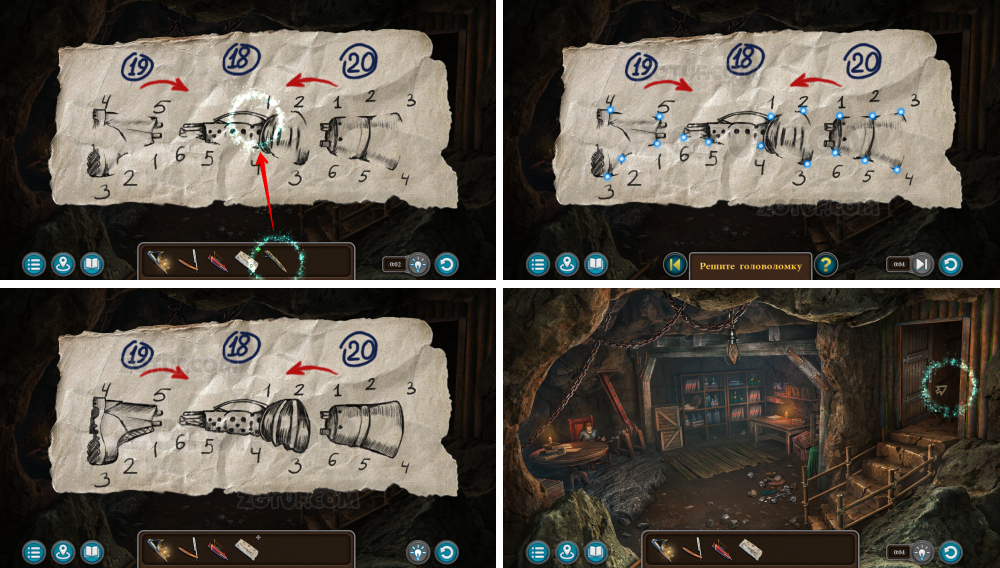
- Solve the puzzle: Move the beetles and place them in their correct positions.
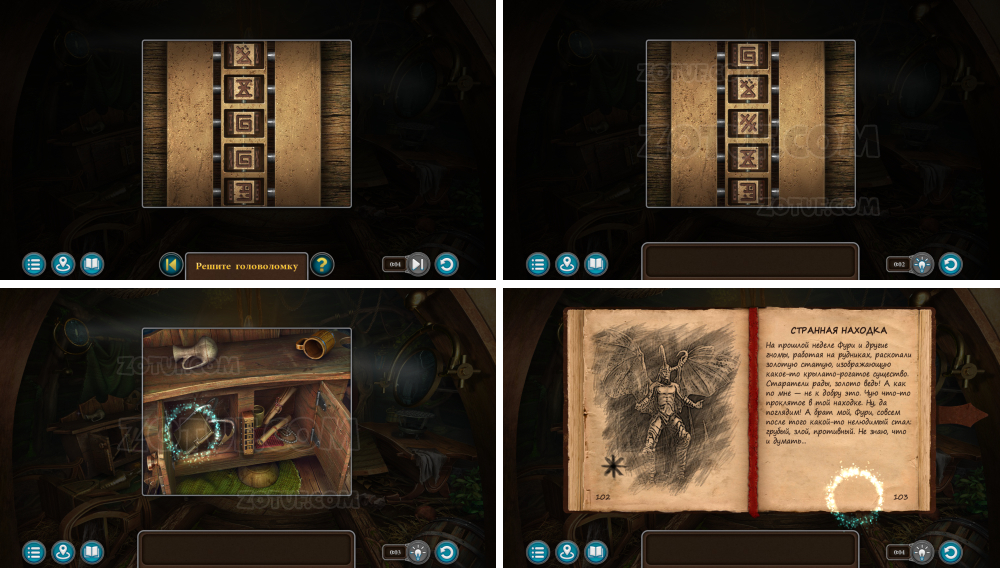
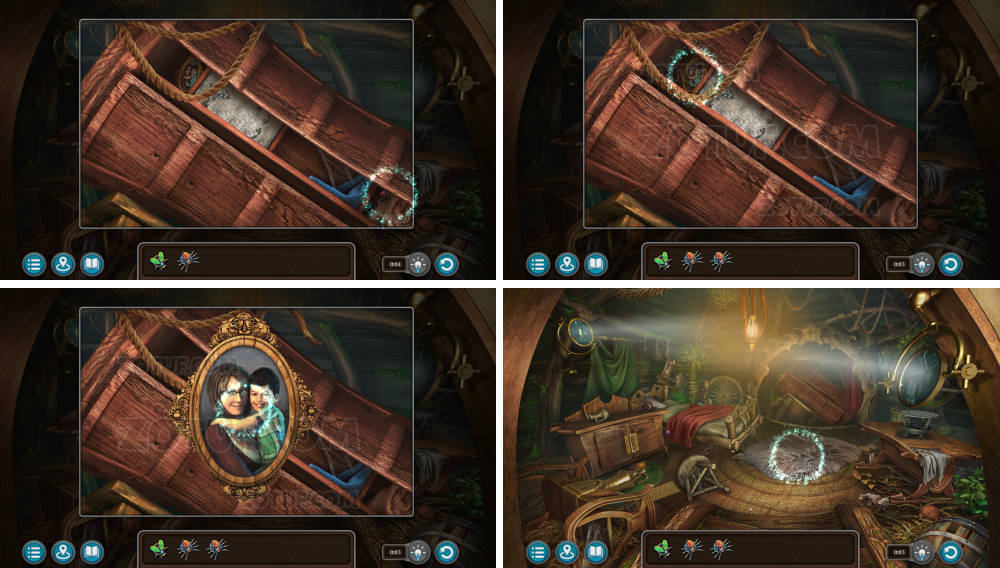
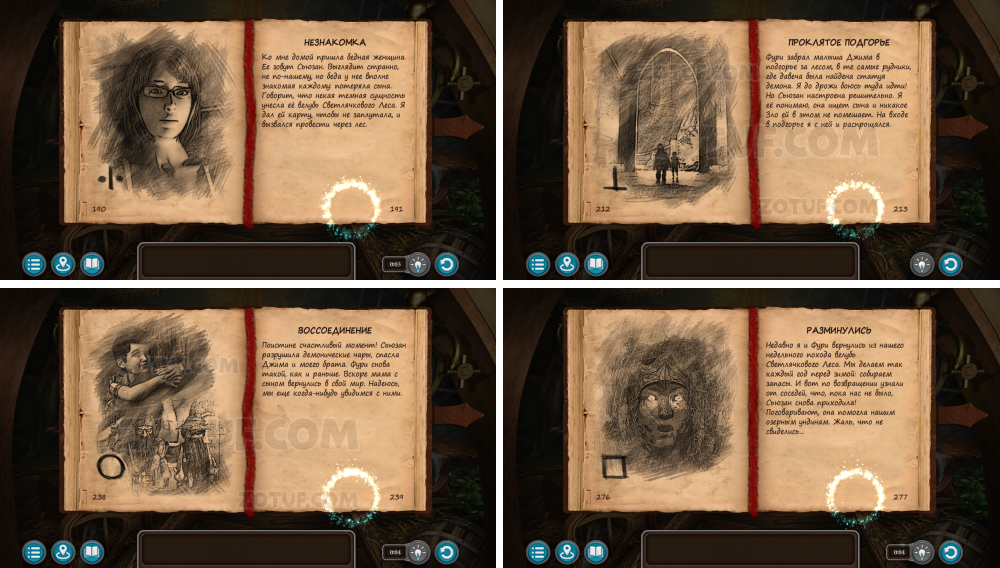
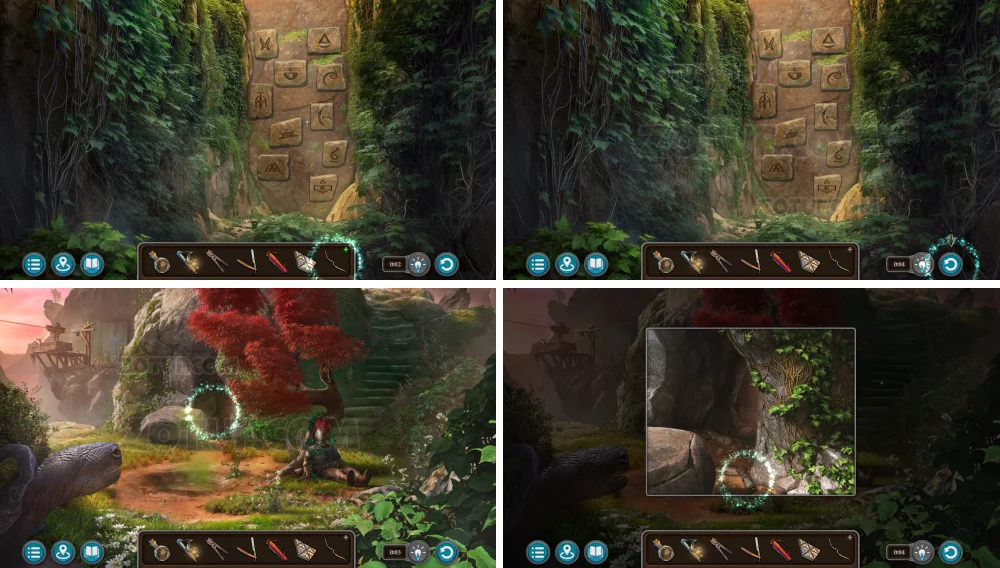
- Solve the puzzle: Rotate the sections to select the correct patterns – you’ve seen them earlier in the game.
- Solution in the picture.
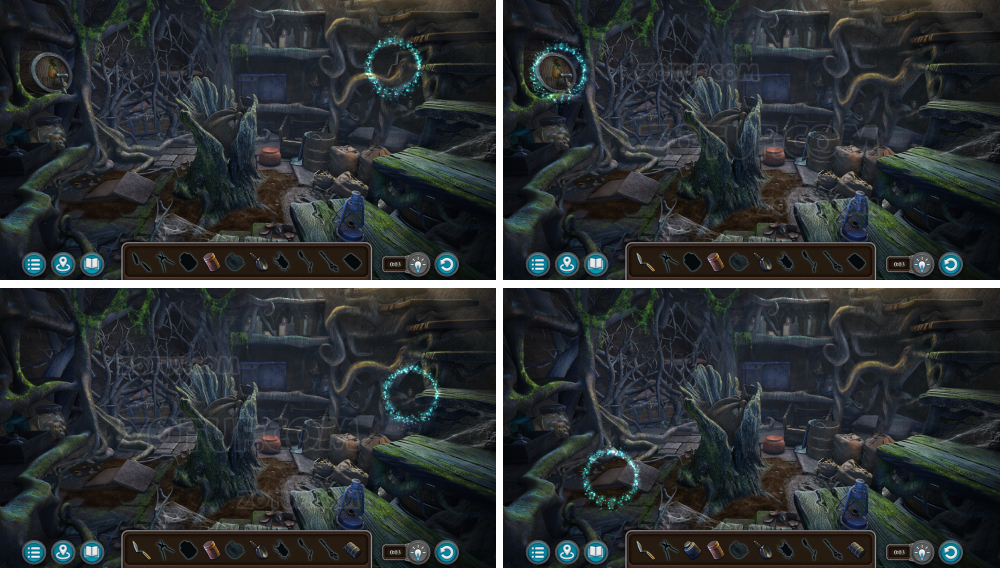
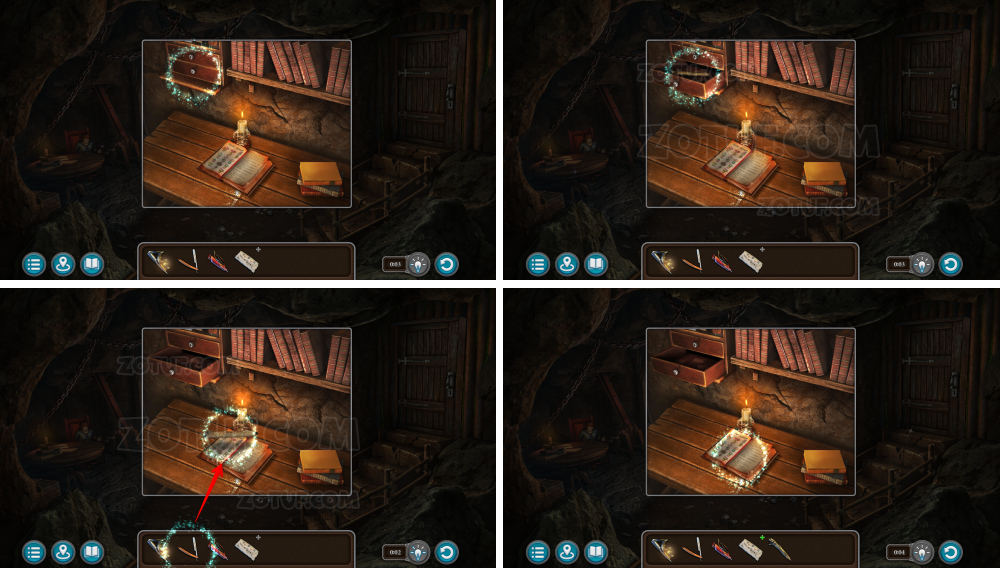
- Take Uri’s diary.
- Read the diary and memorize the hints.

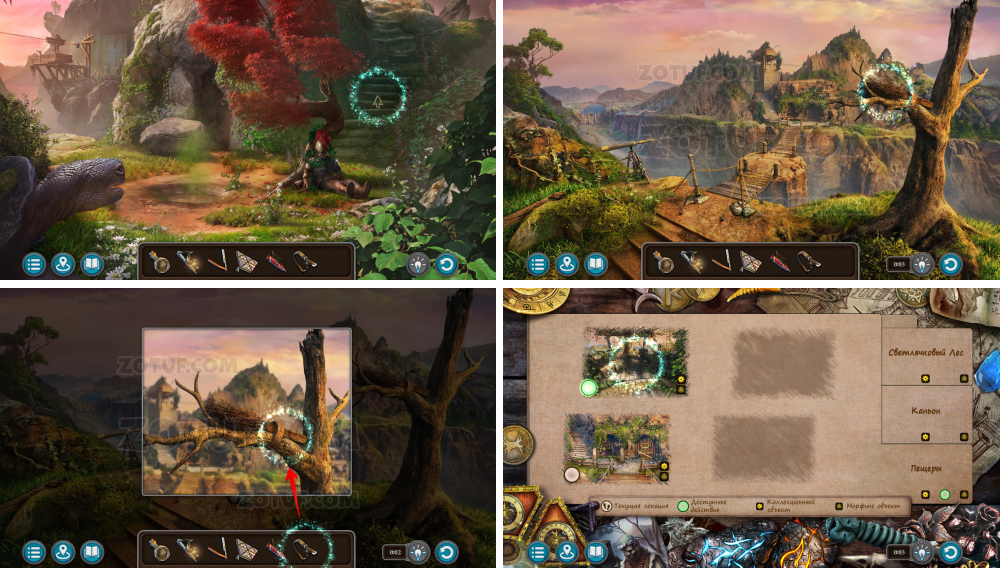
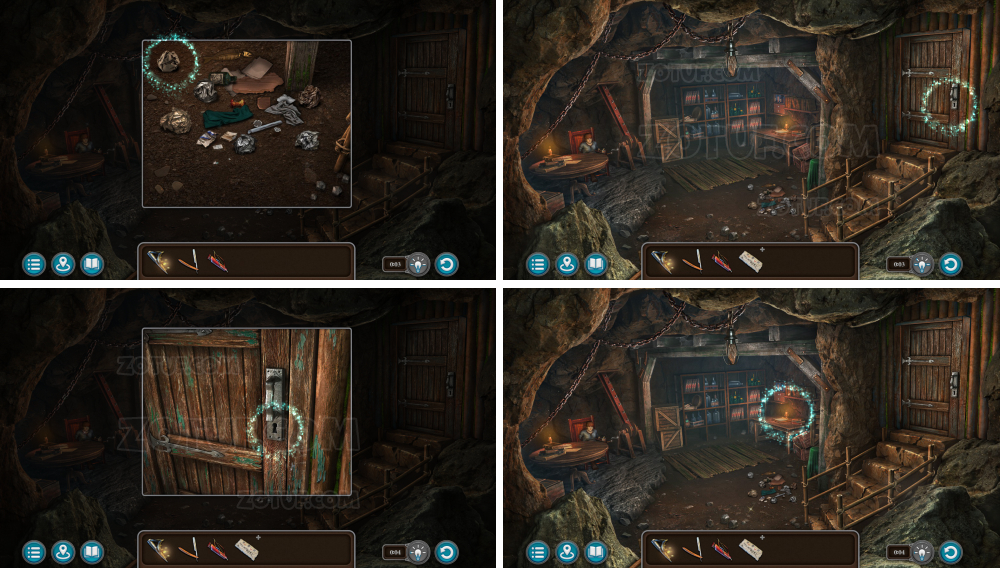
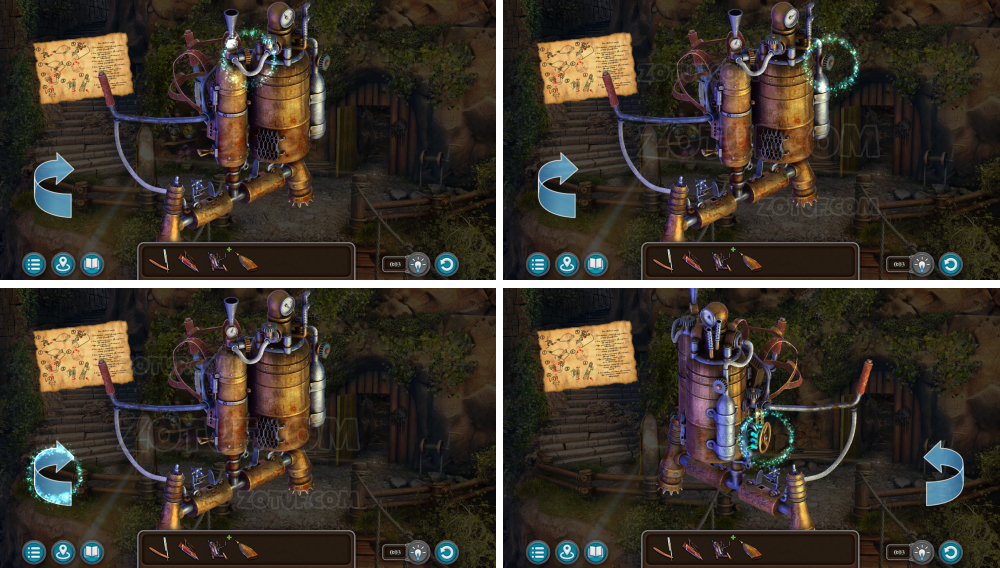
- Take the grappling hook.
- Find objects that can help you hook the tree branch.
- Solution 1.
- Solution 2.
- Solution 3.
- Solution 4.
- Solution 5.
- Solution 6.
- Solution 7.

- Solution 8.
- Solution 9.
- Take the jack, corkscrew, and spatula.
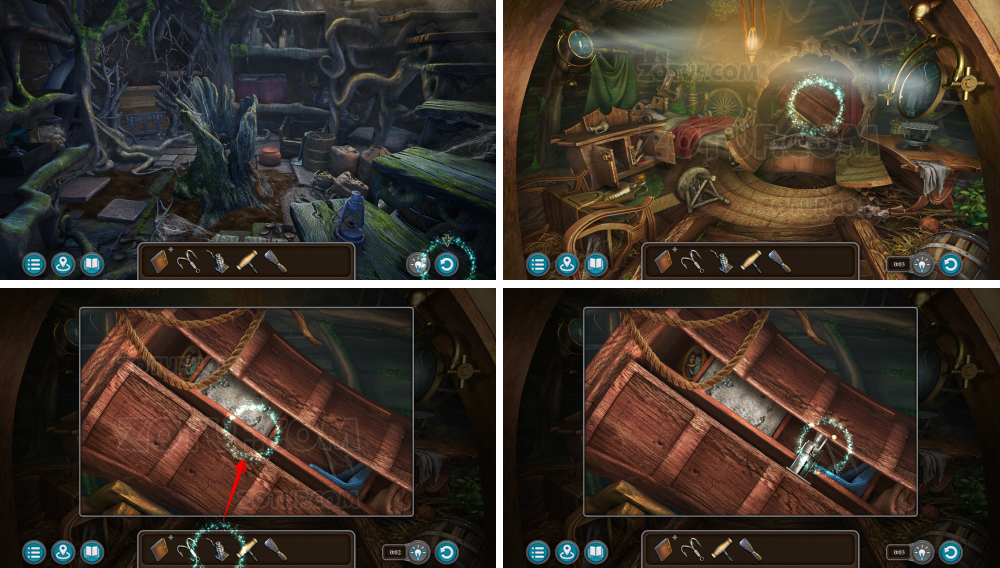
- Use the jack.
- Use the grappling hook.
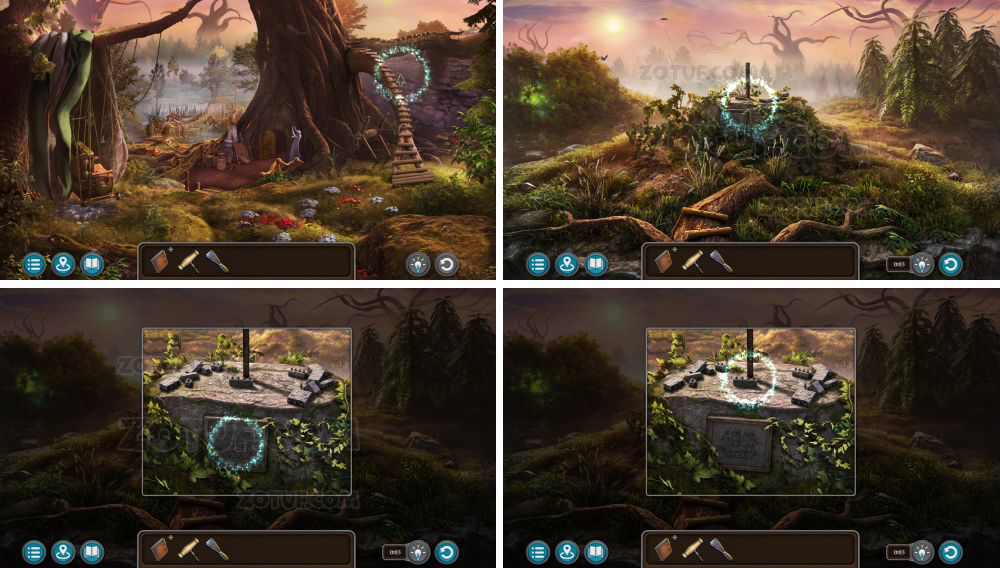
- Examine the memorial sign.
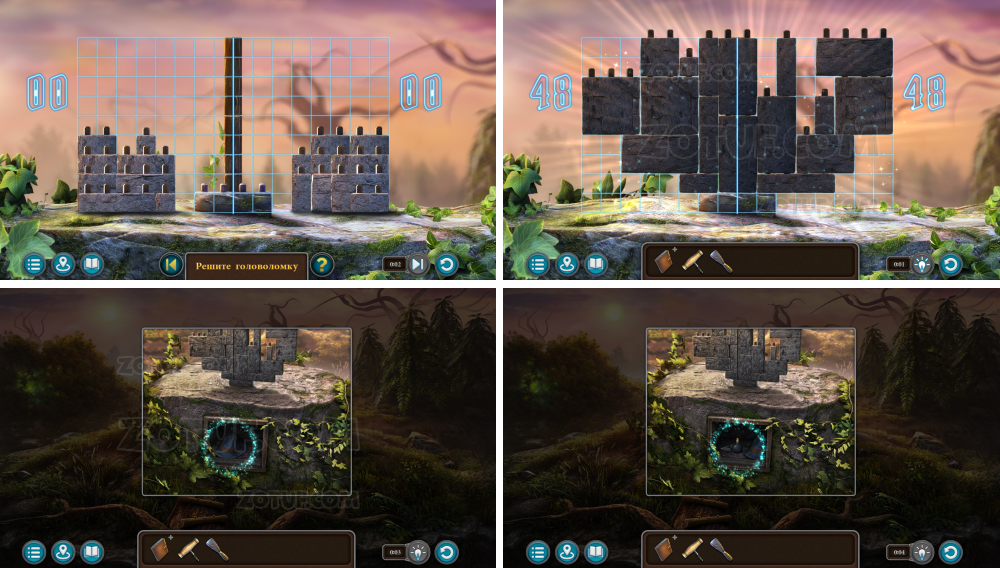
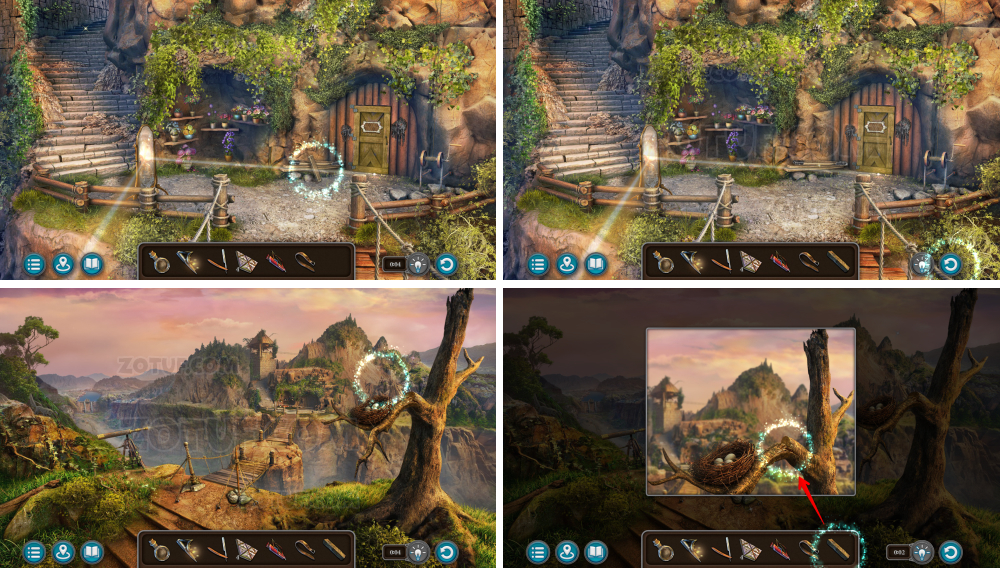
- Solve the puzzle: Balance the stones so that there is an equal number of cells on both sides.
- Solution in the picture.
- Take the bottle of water.
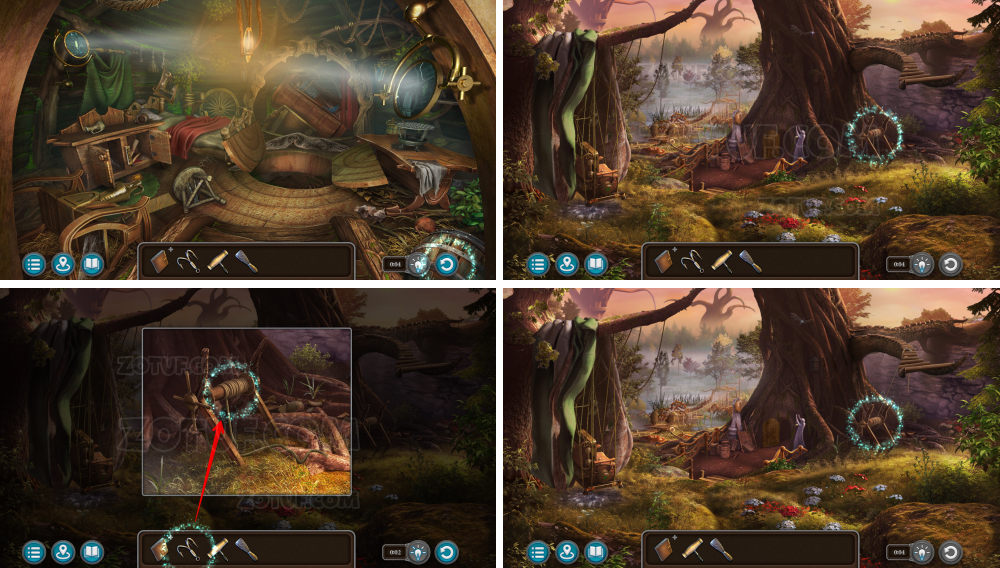
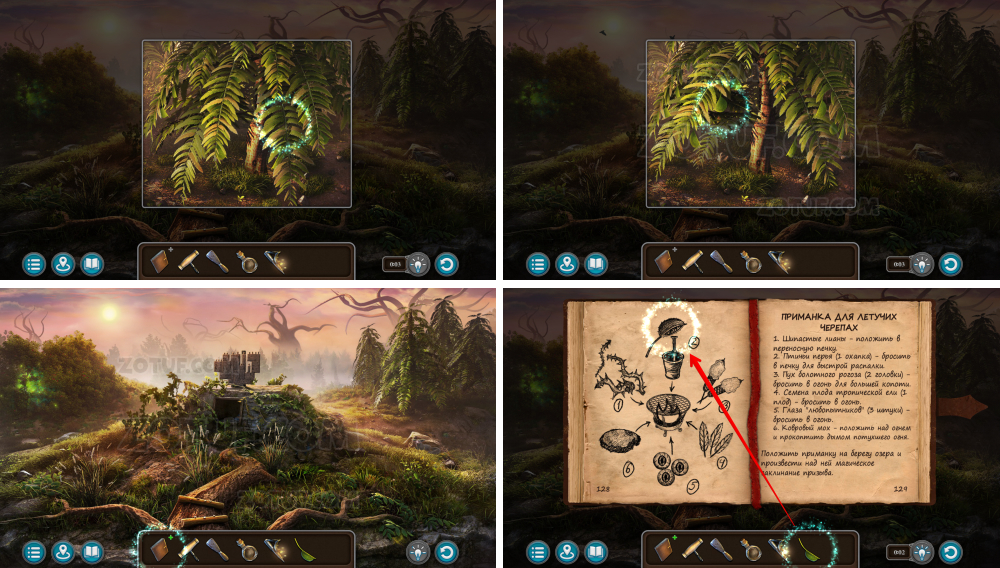
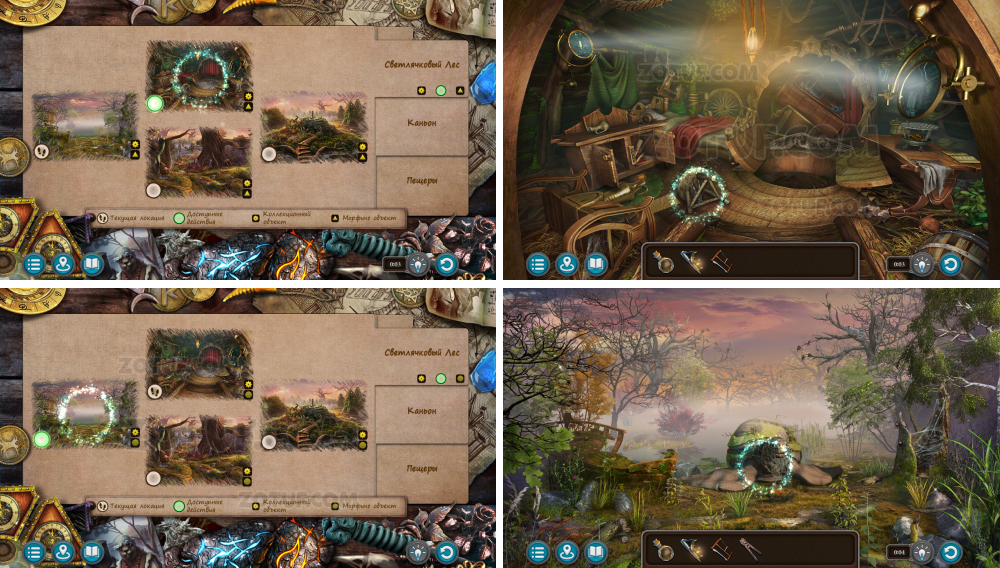
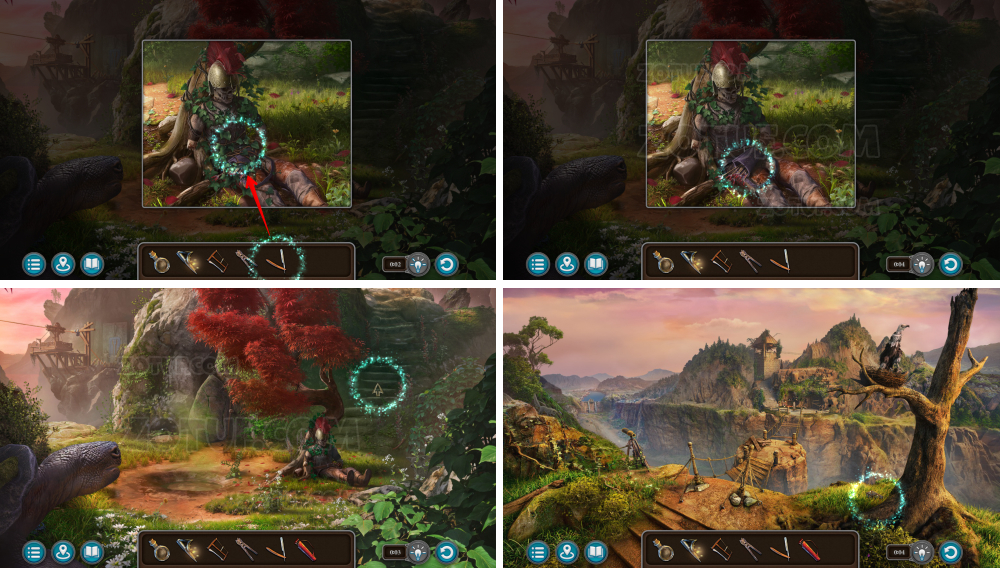
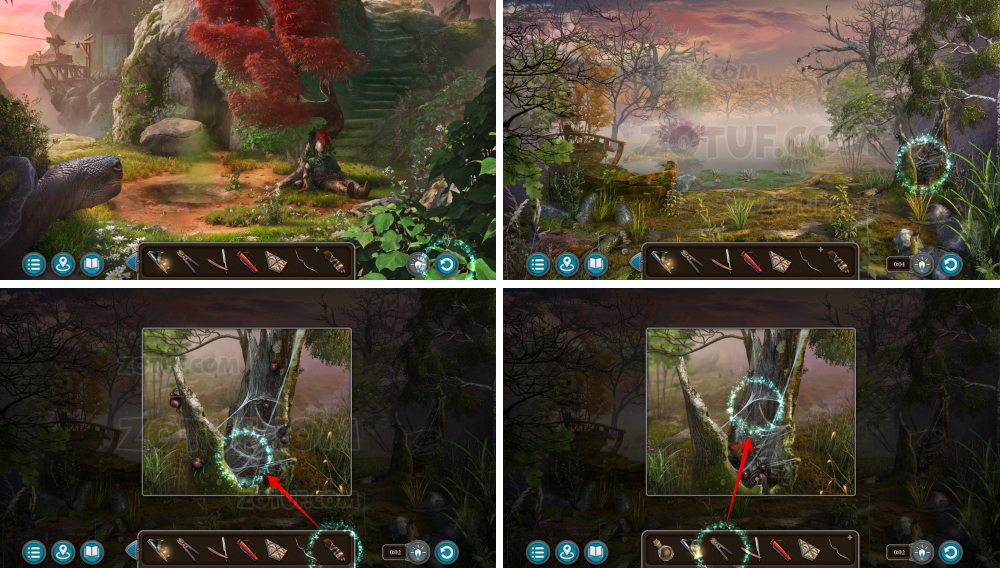
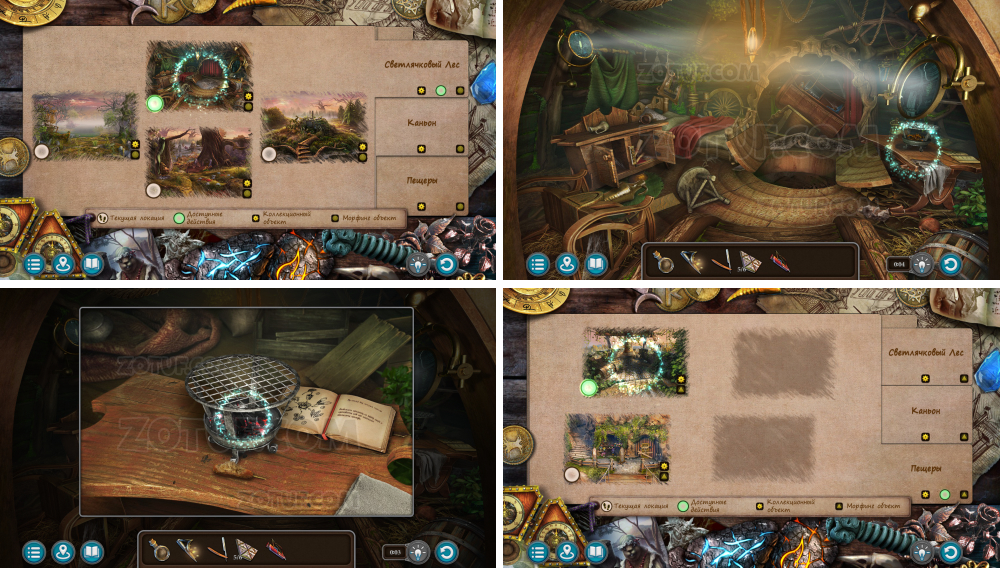
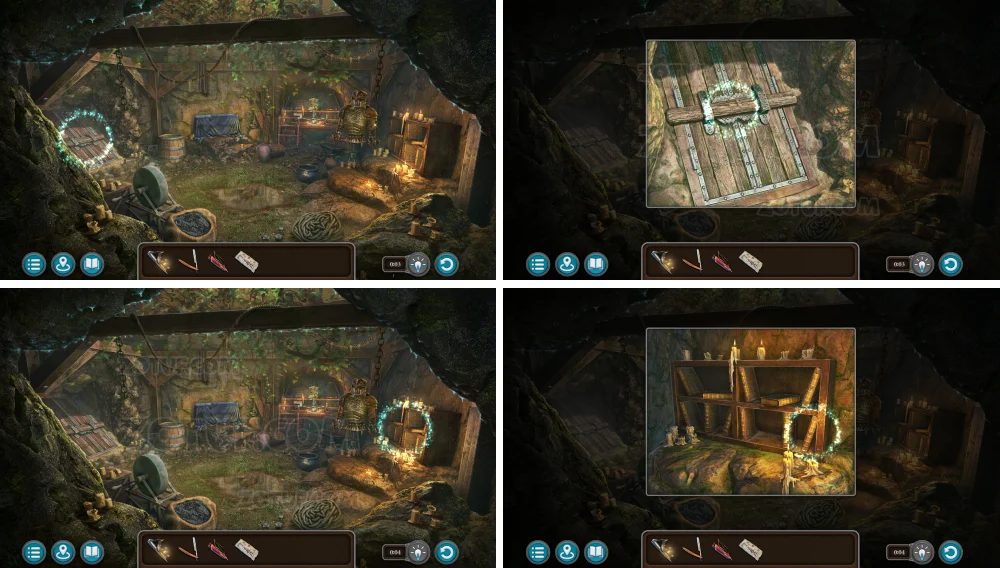
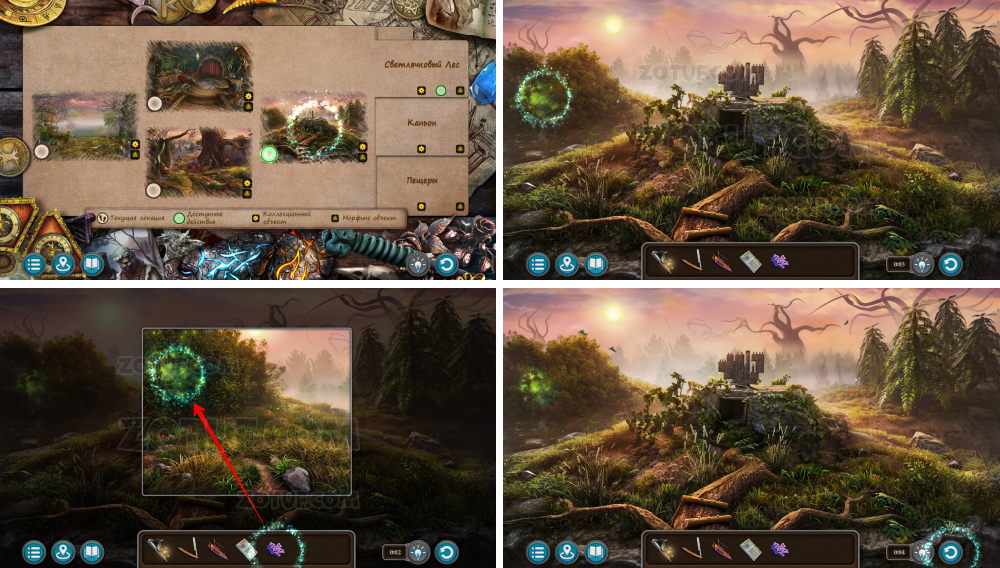
Even higher
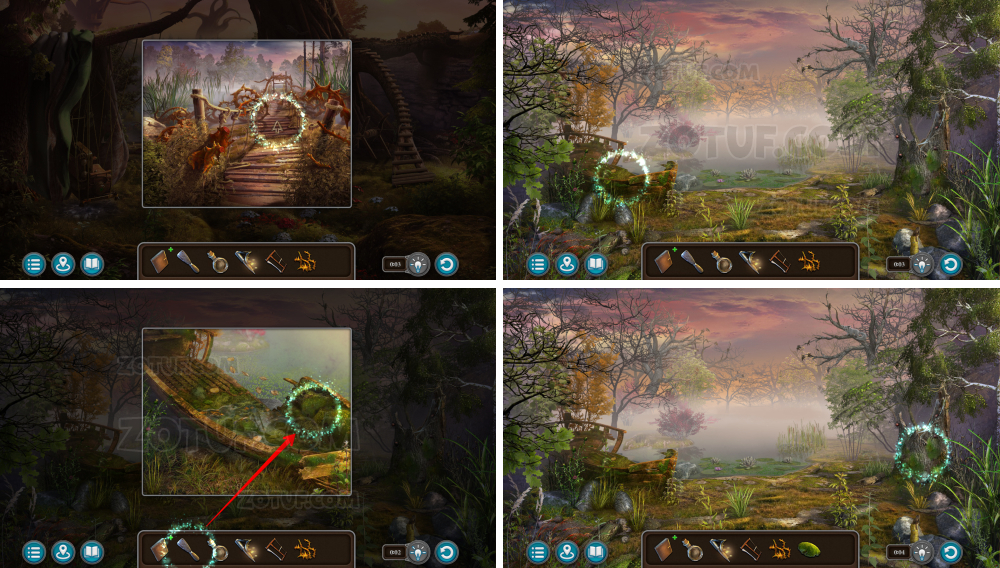
Lure and ride on the turtle from the foggy lake.
- Take the flint.
- Open Uri’s diary.
- Memorize the symbols for the safe.
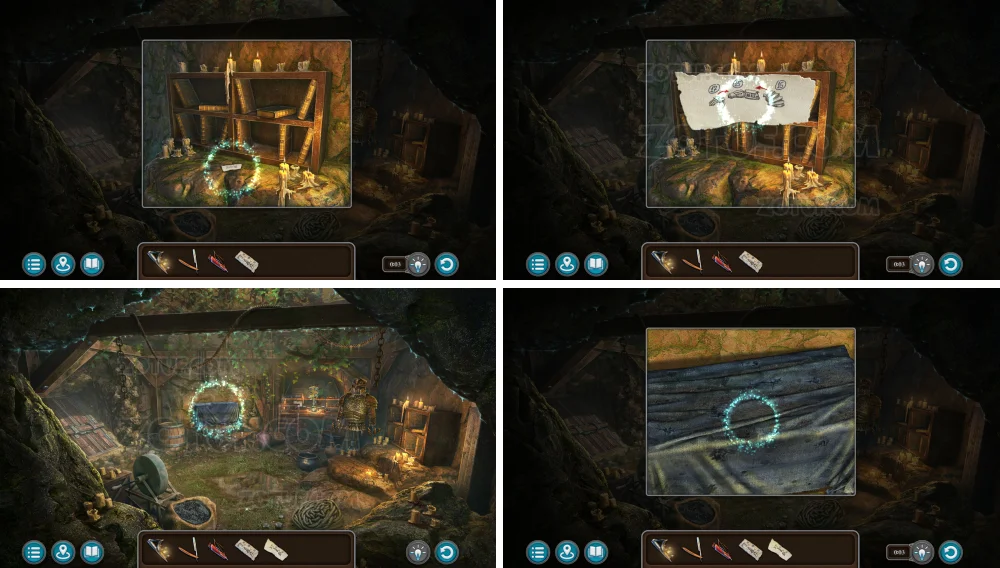
- Take the tropical pine fruit.
- Open Uri’s diary.
- Use the tropical pine fruit.
- Take the bundle of feathers.
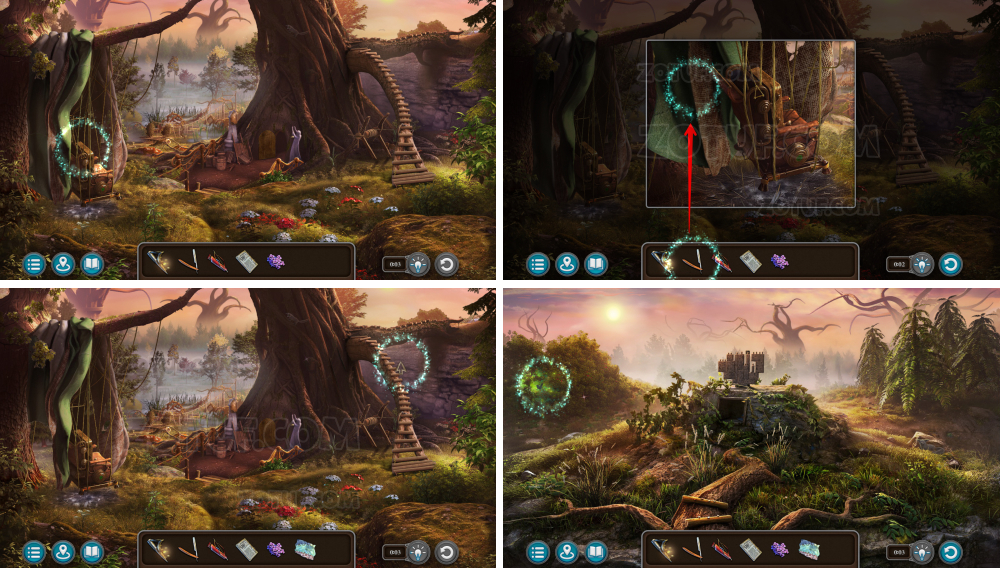
- Solve the puzzle: Activate the symbols in the correct sequence. You’ve already seen the hint.
- Solution: 1 (÷), 2 (△), 3 (*), 4 (T), 5 (○), 6 (◇).
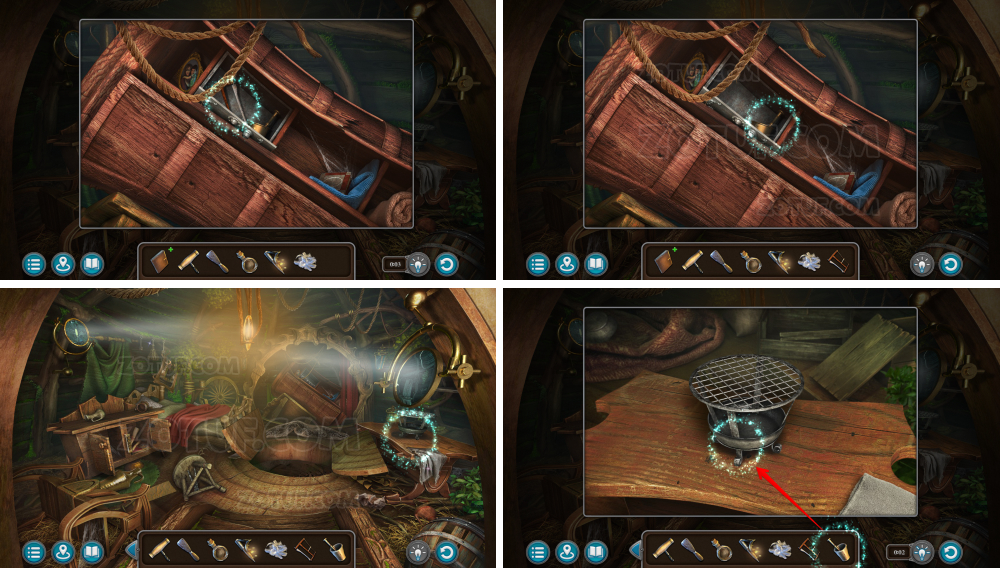
- Take the saw.
- Take the mortar and pestle.
- Use the mortar and pestle.
- Take the jar with eyes.
- Open Uri’s diary.
- Use the bundle of feathers.

- Click on the jar with eyes.
- Use the corkscrew.
- Take the curious eyes.
- Open Uri’s diary.
- Use the curious eyes.
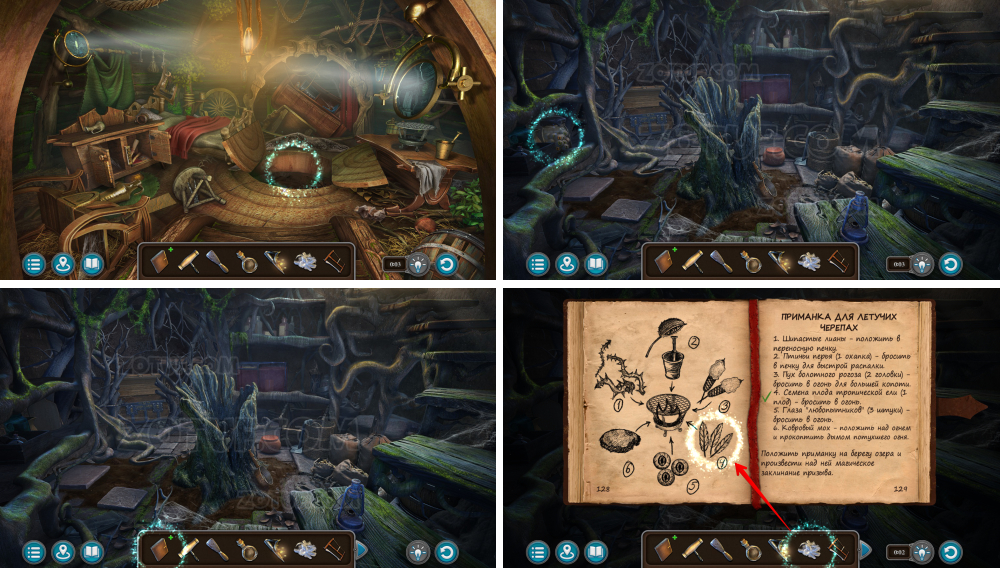
- Use the saw to get the thorny vines.
- Use the spatula to get the swamp moss.
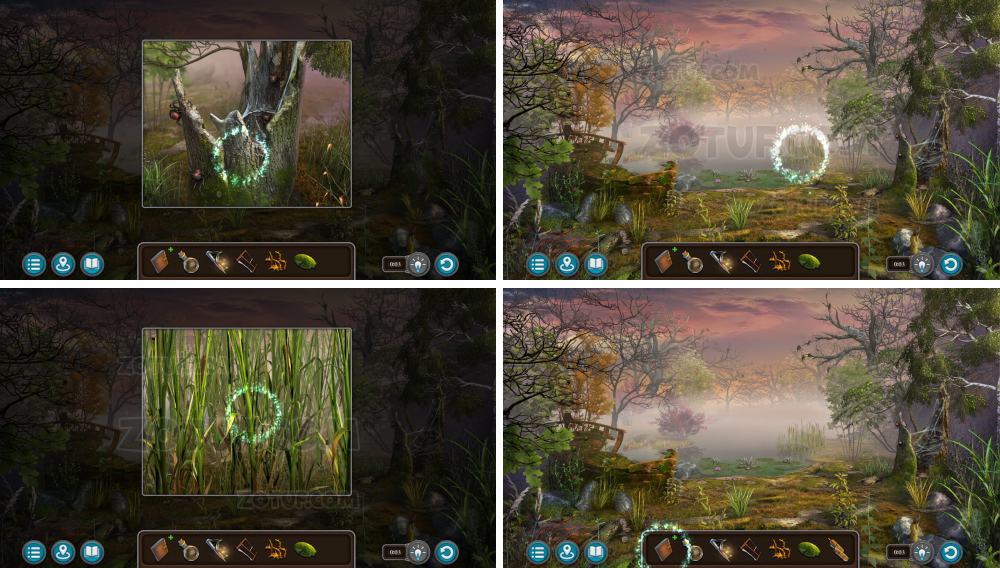
- Take the cattail.
- Open Uri’s diary.
- Use the cattail, thorny vines, and swamp moss.
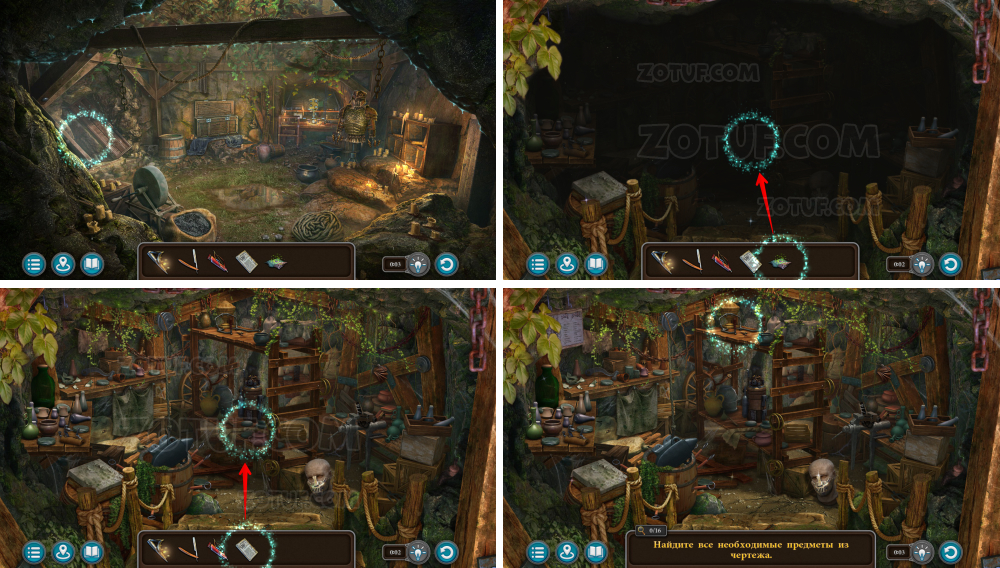
- Get the bait ingredients.

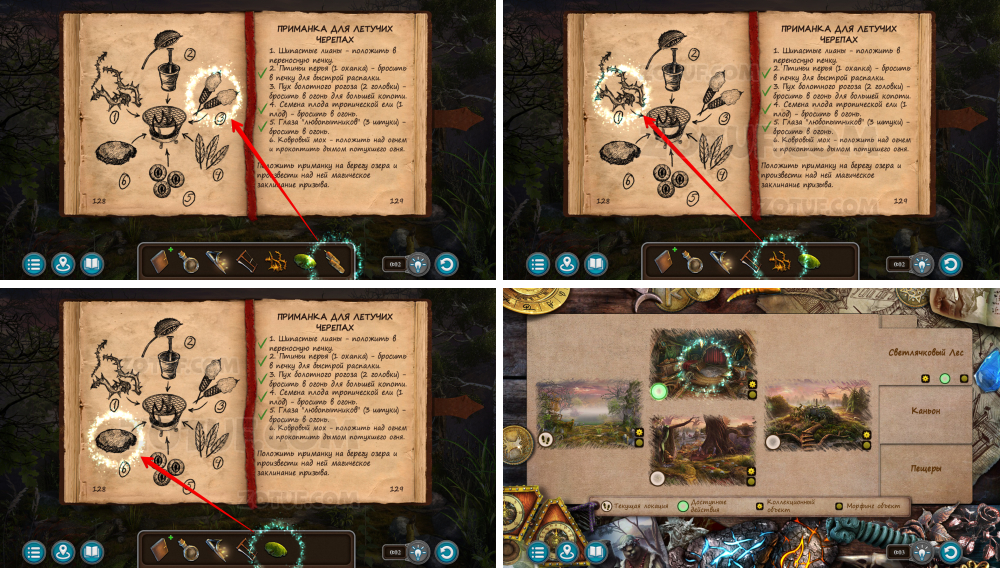
- Use the bait ingredients.
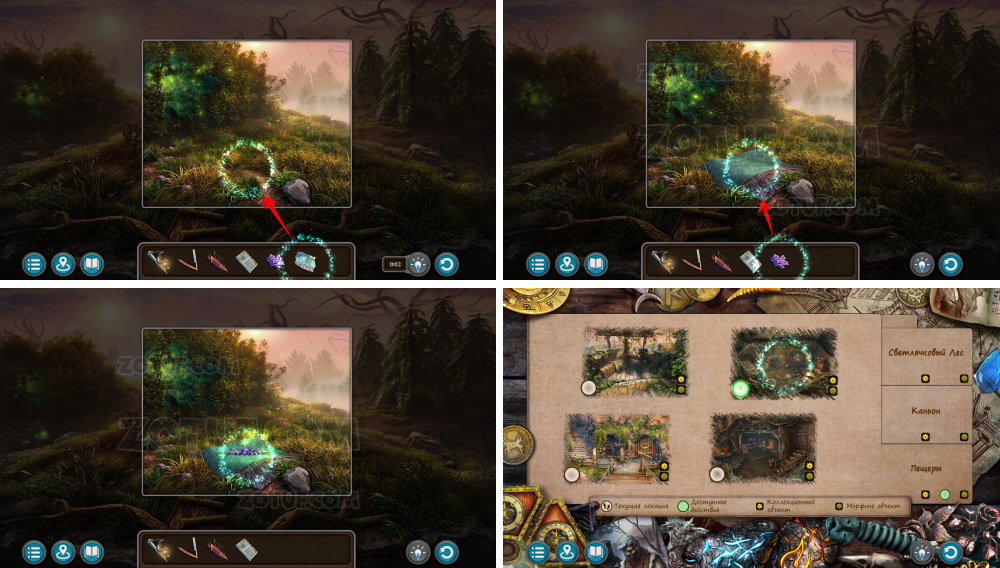
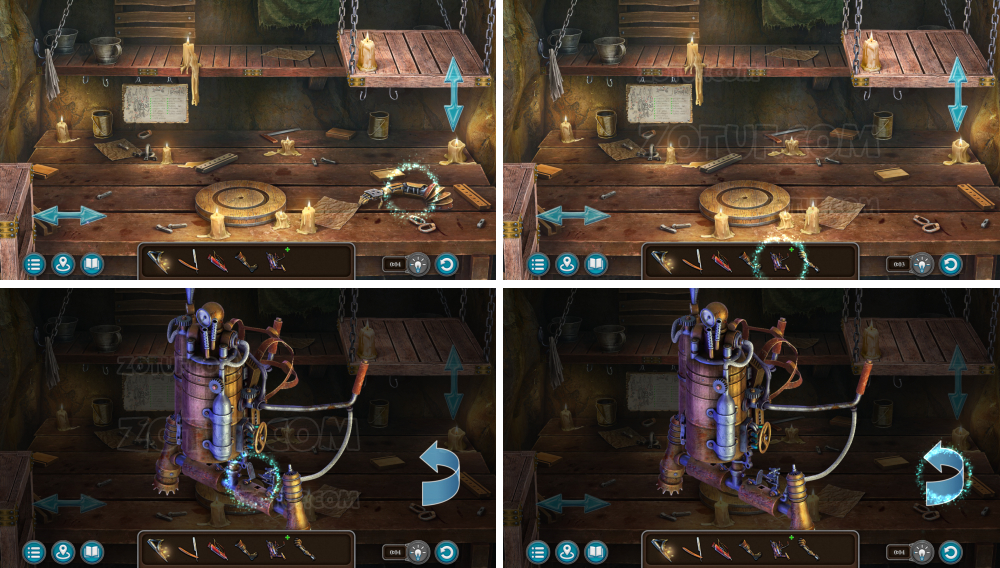
- Place the thorny vines in the burner.
- Use the flint.
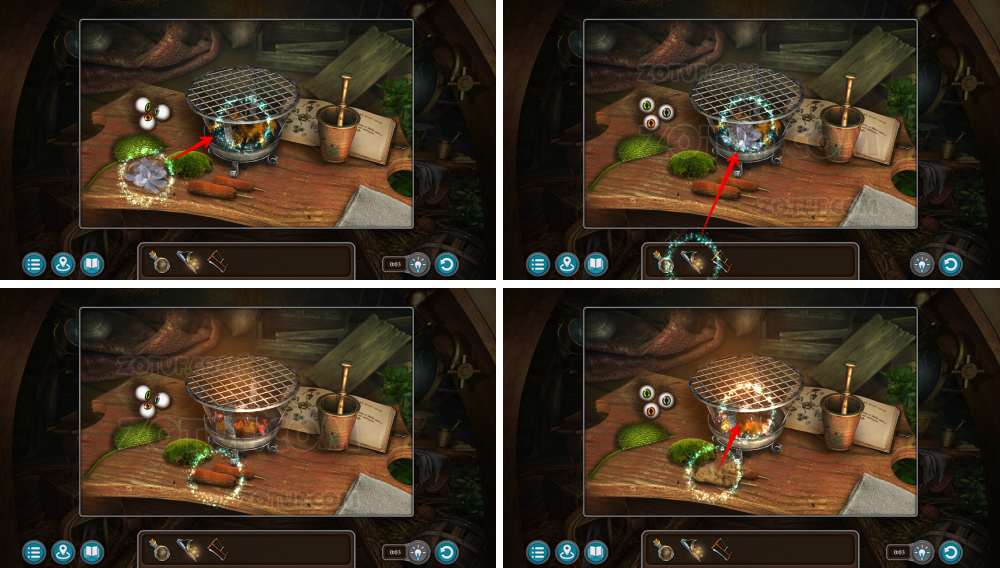
- Place the bundle of feathers in the burner.
- Use the flint.
- Place the cattail in the burner.
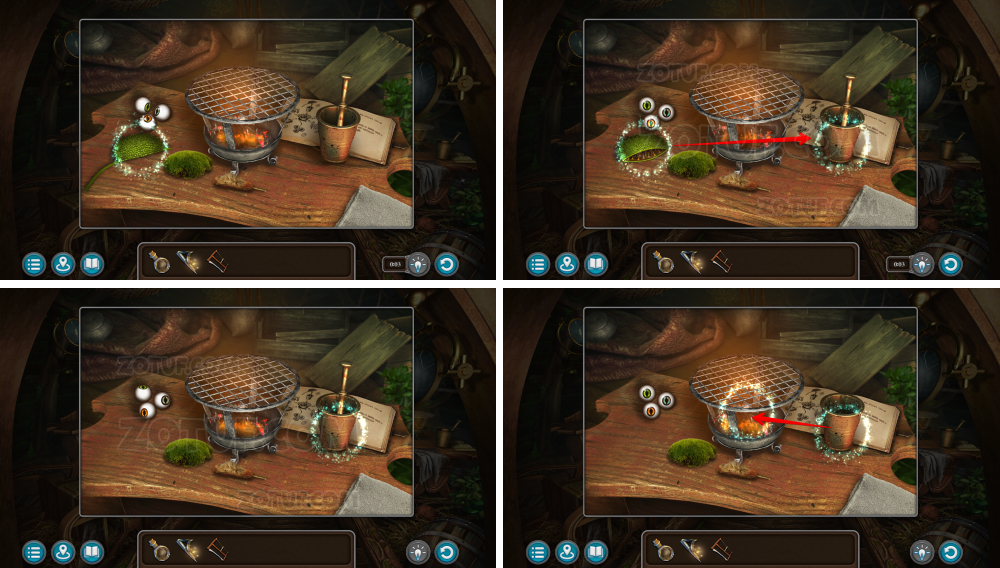
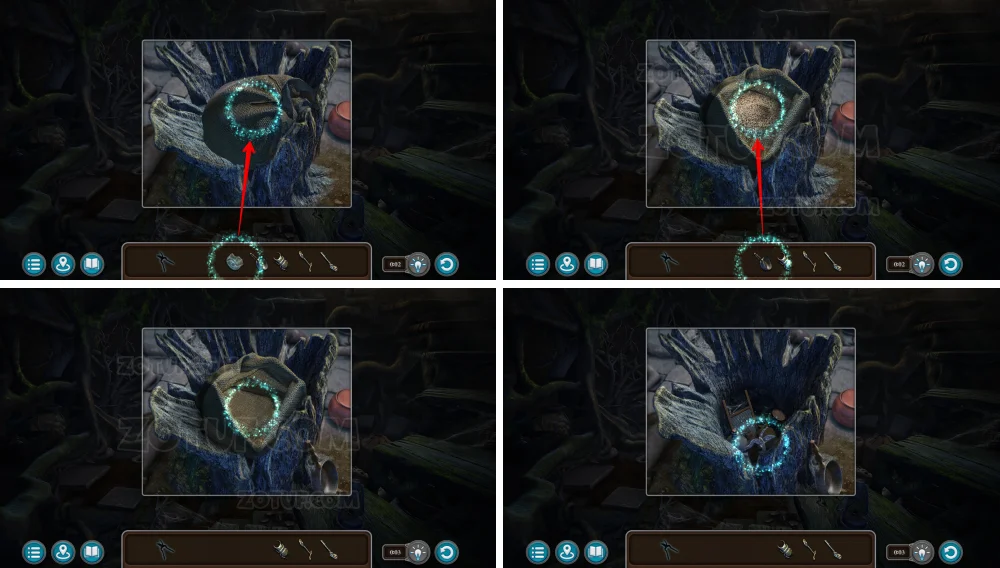
- Place the tropical pine fruit in the mortar.
- Pour the seeds from the tropical pine fruit.
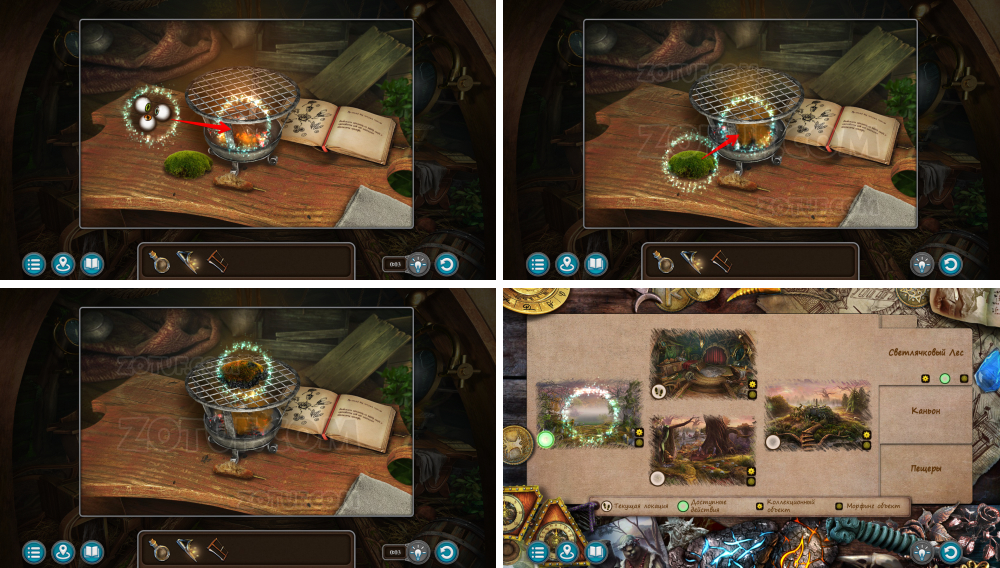
- Place the curious eyes and swamp moss.
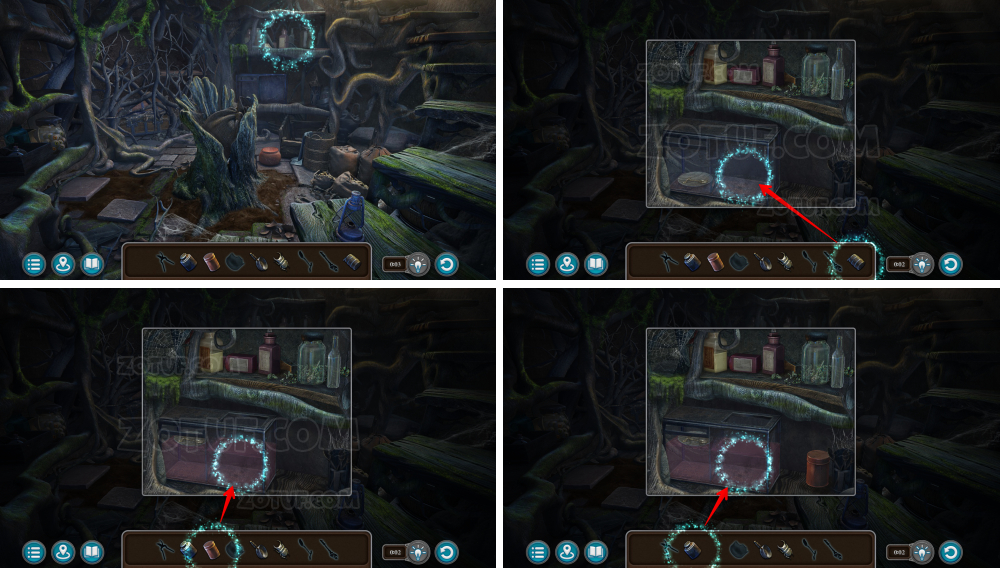
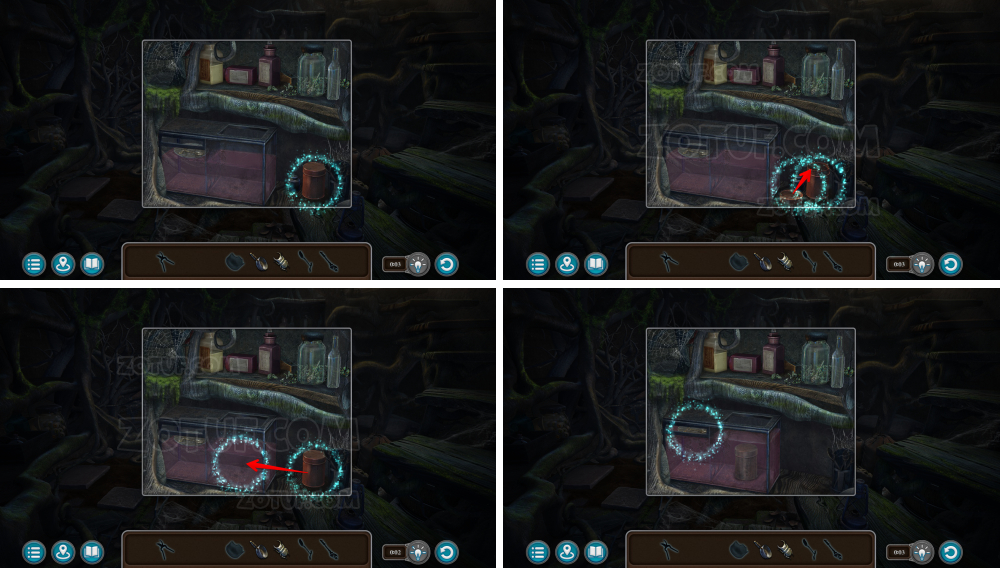
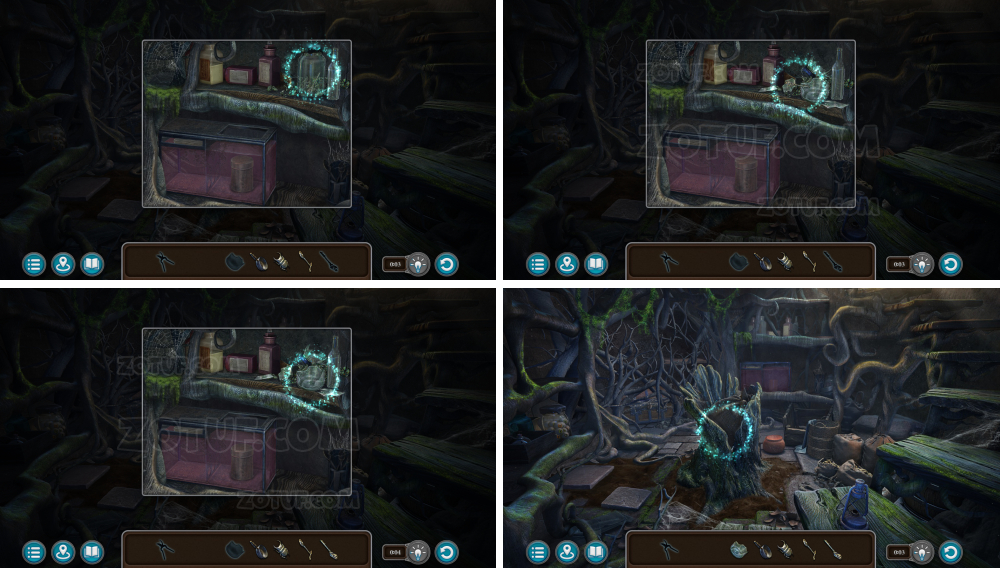
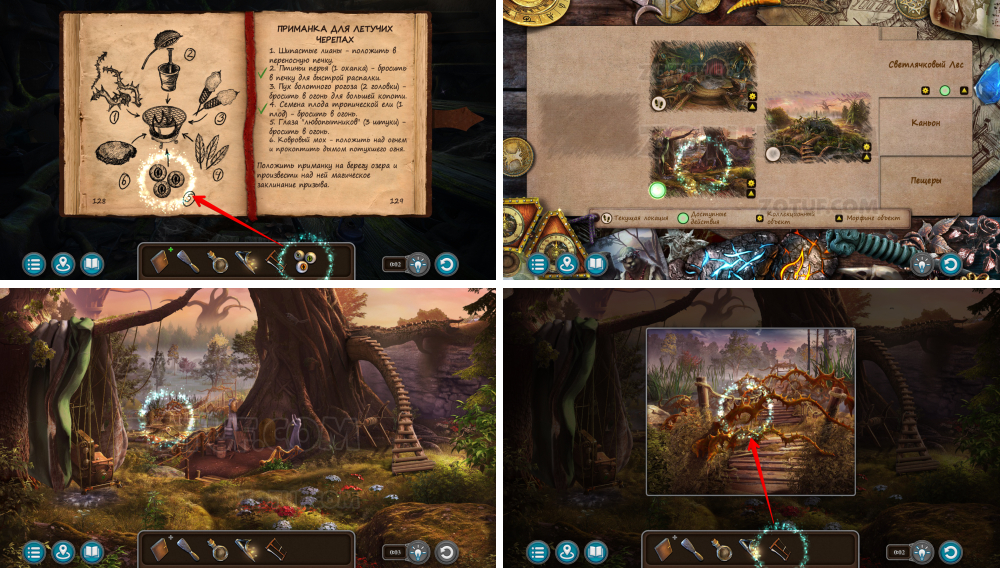
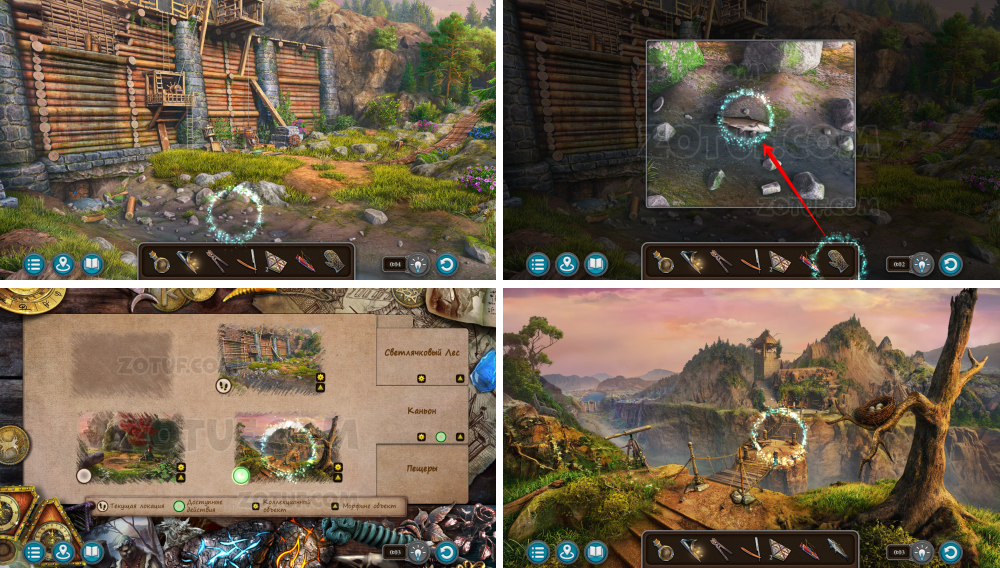
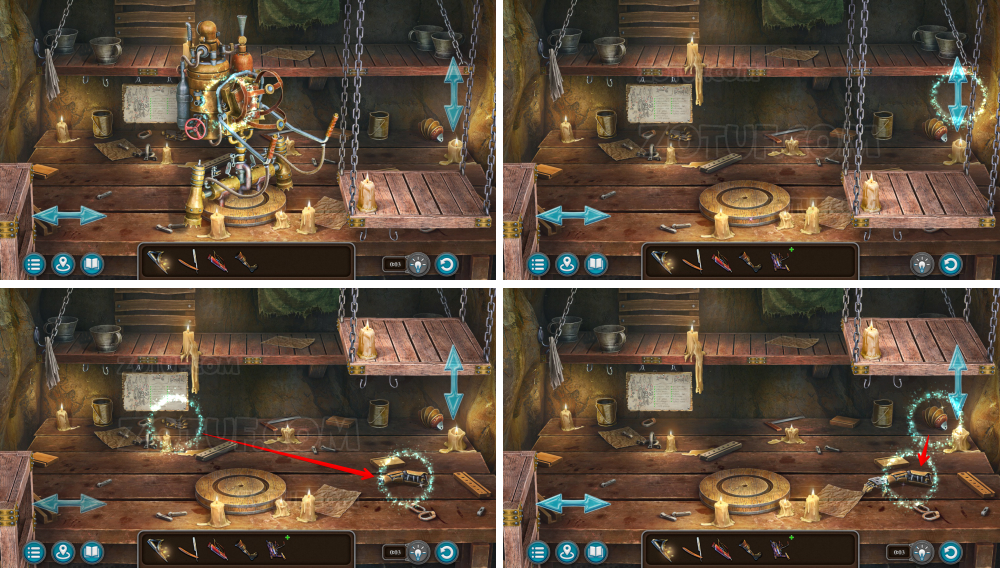
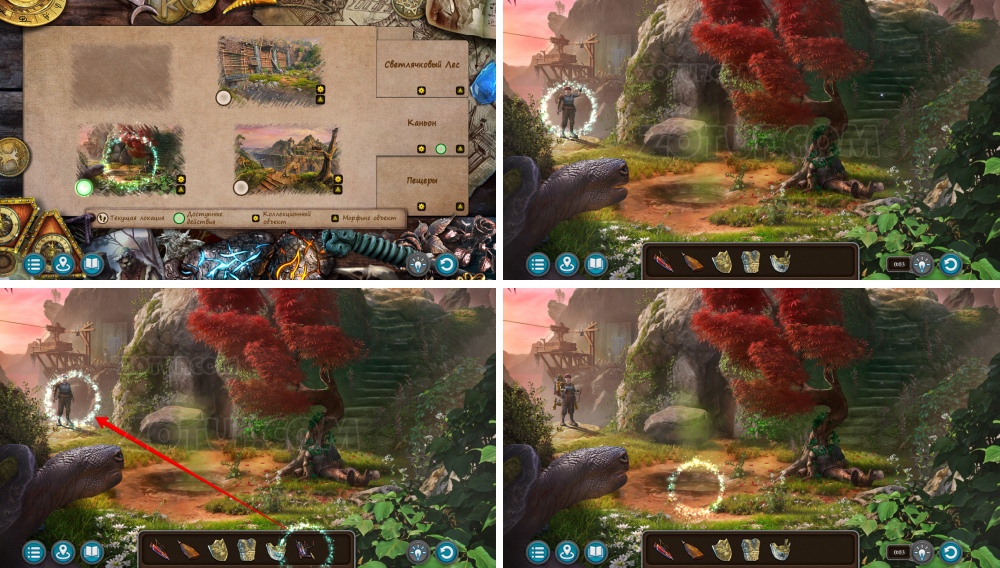
- Take the turtle bait.
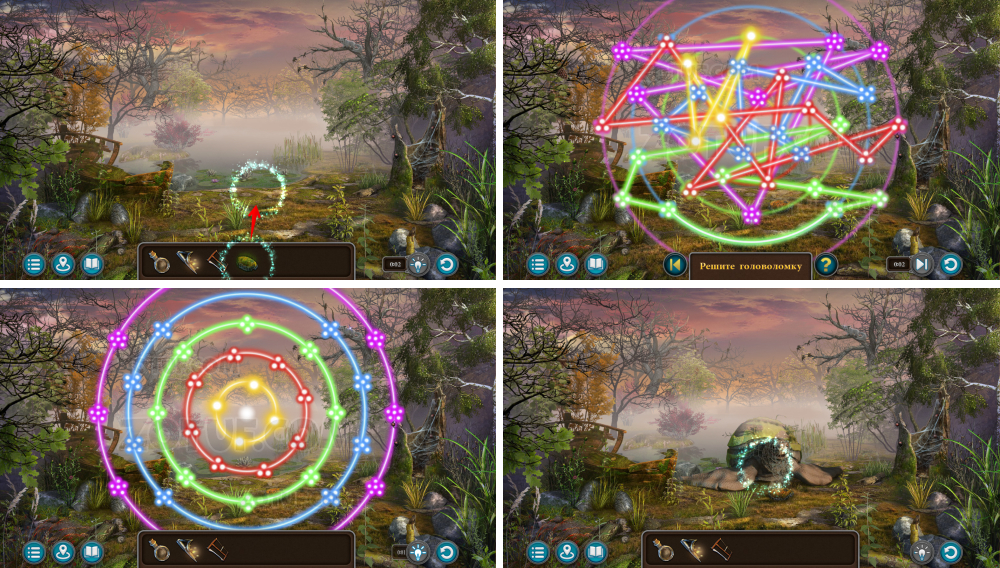
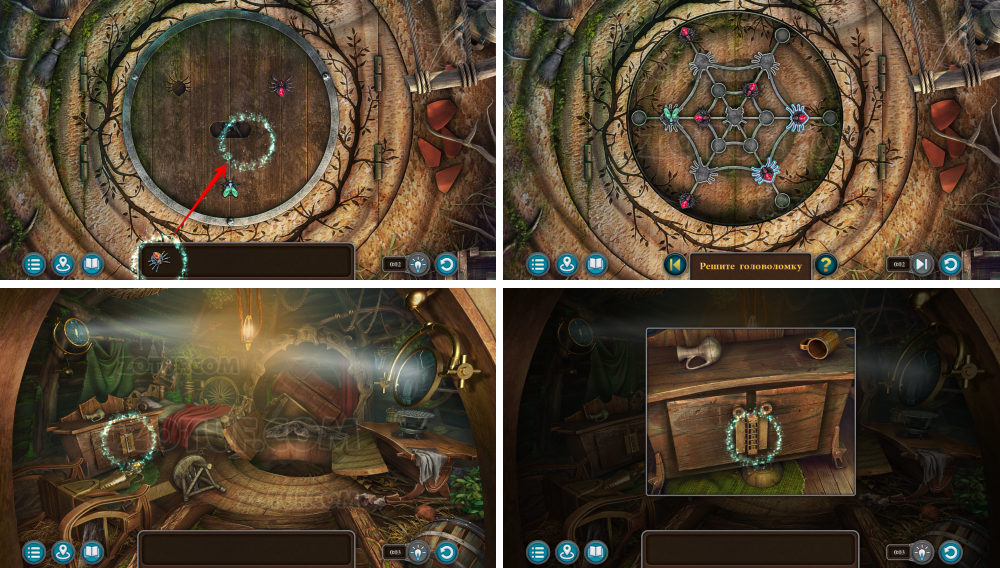
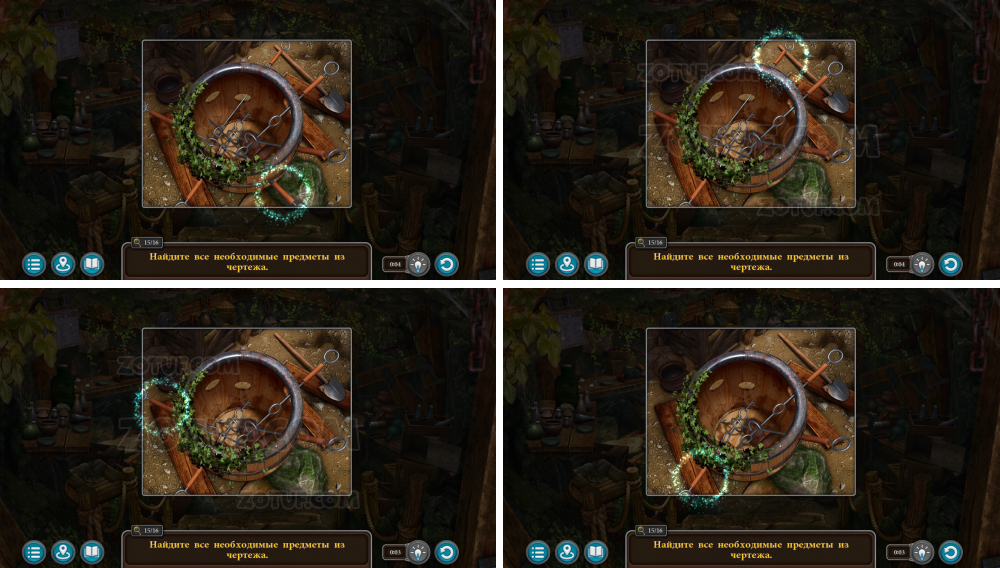
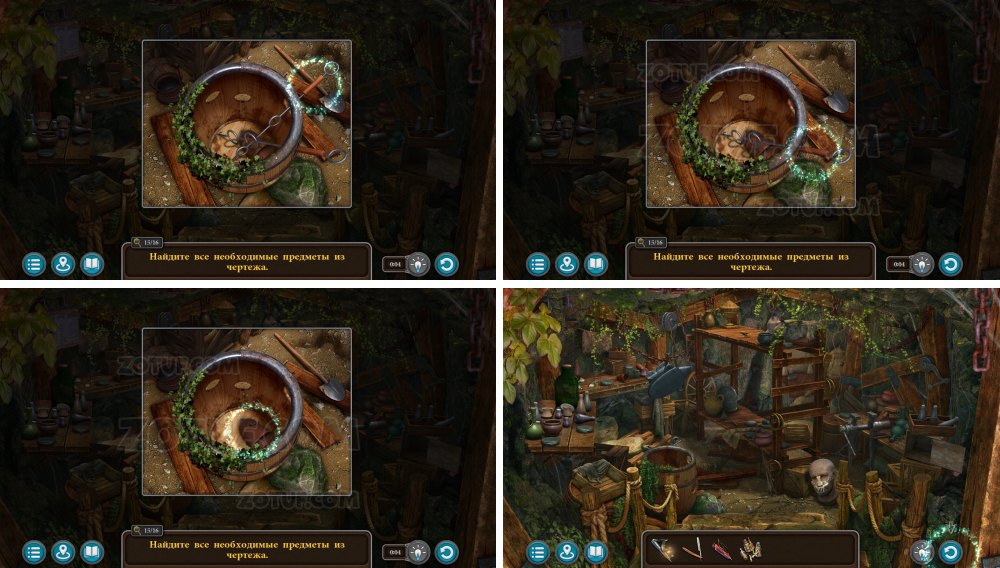
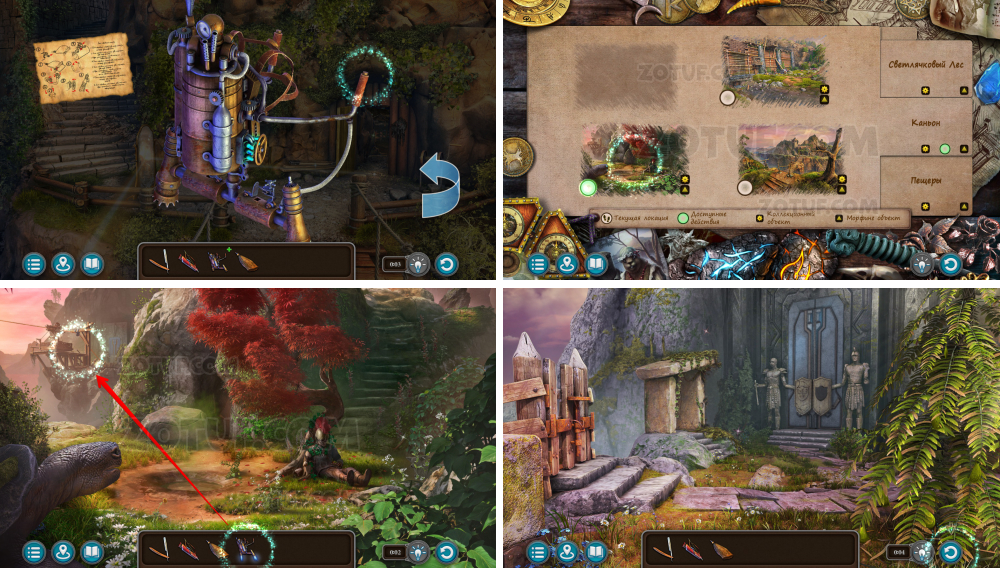
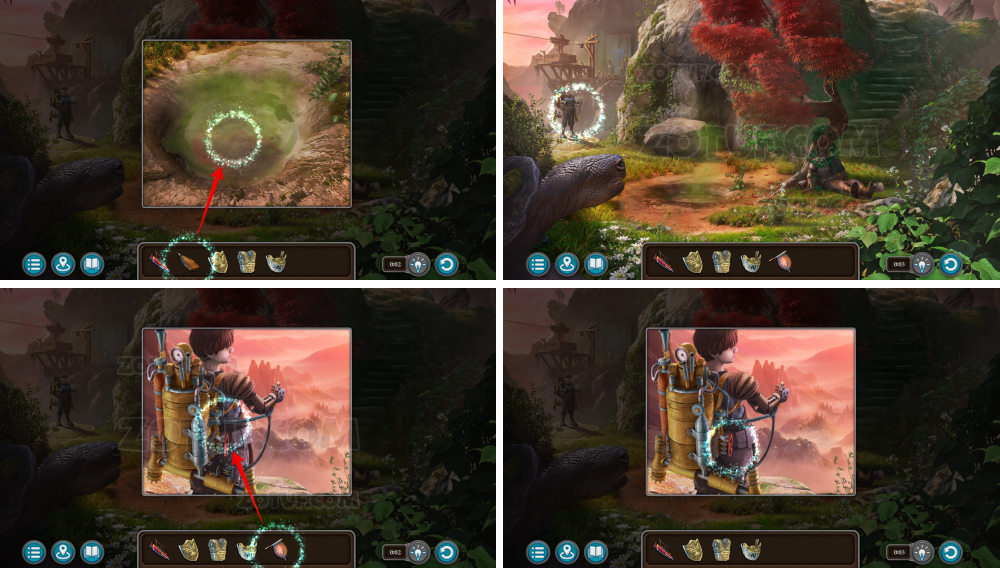
- Use the turtle bait.
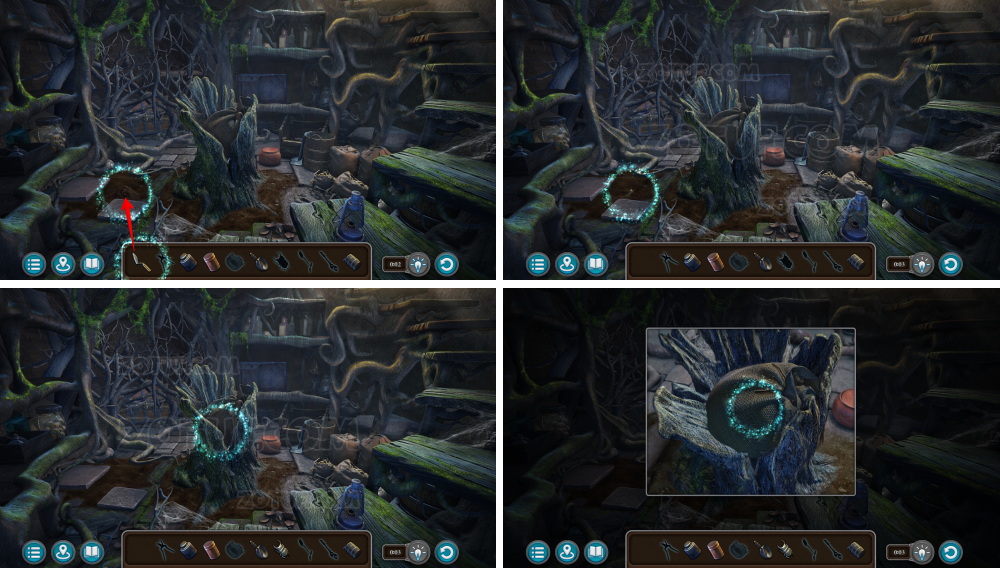
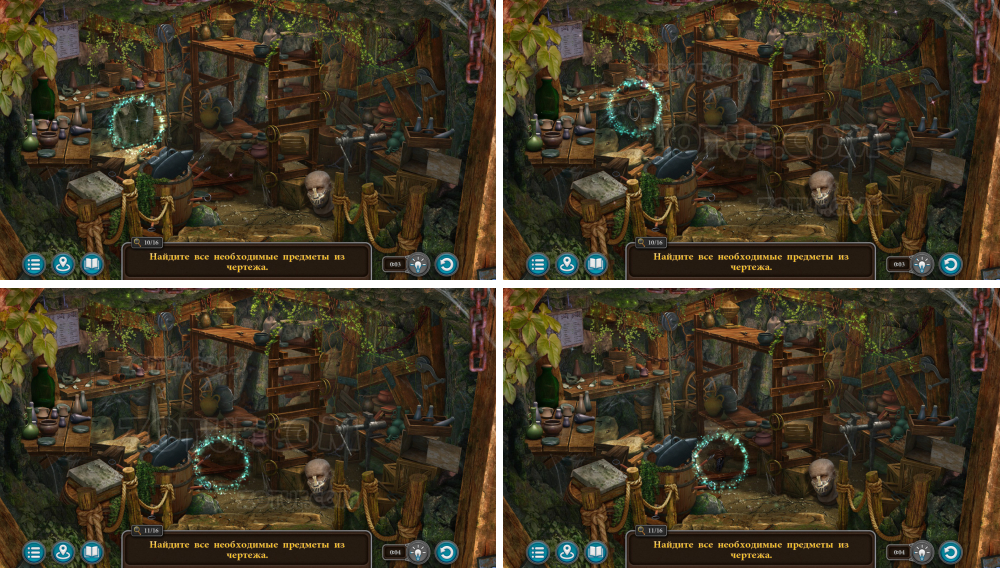
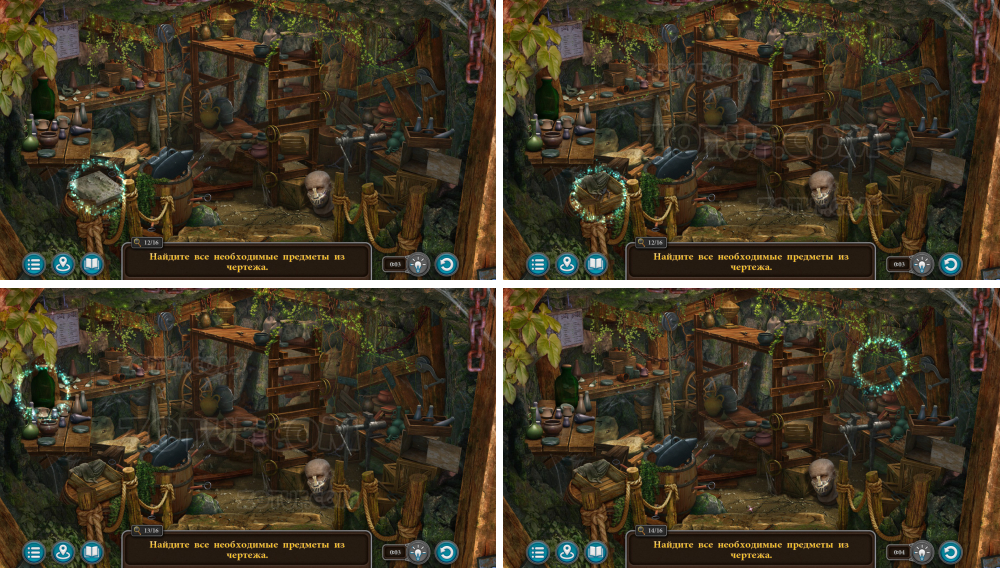
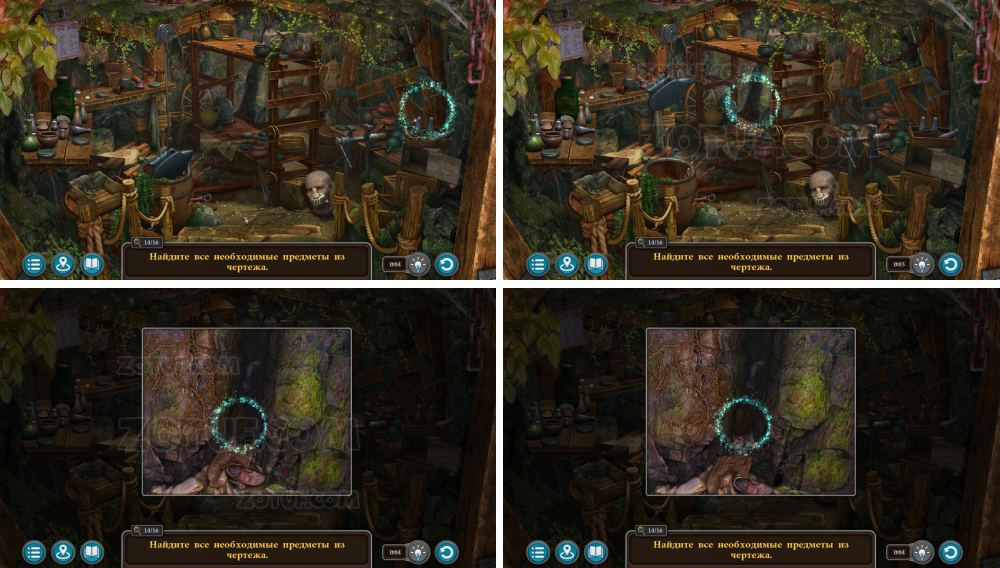
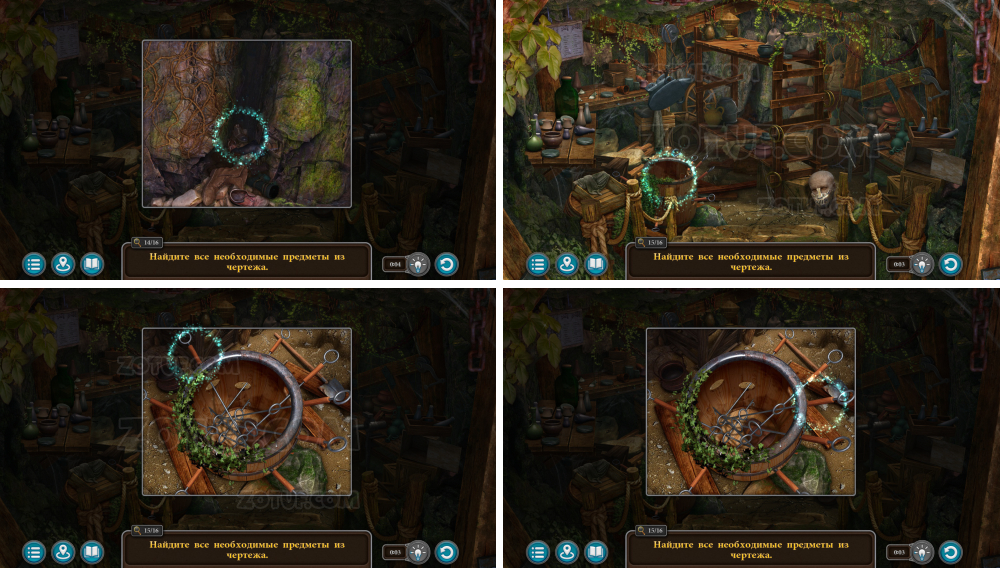
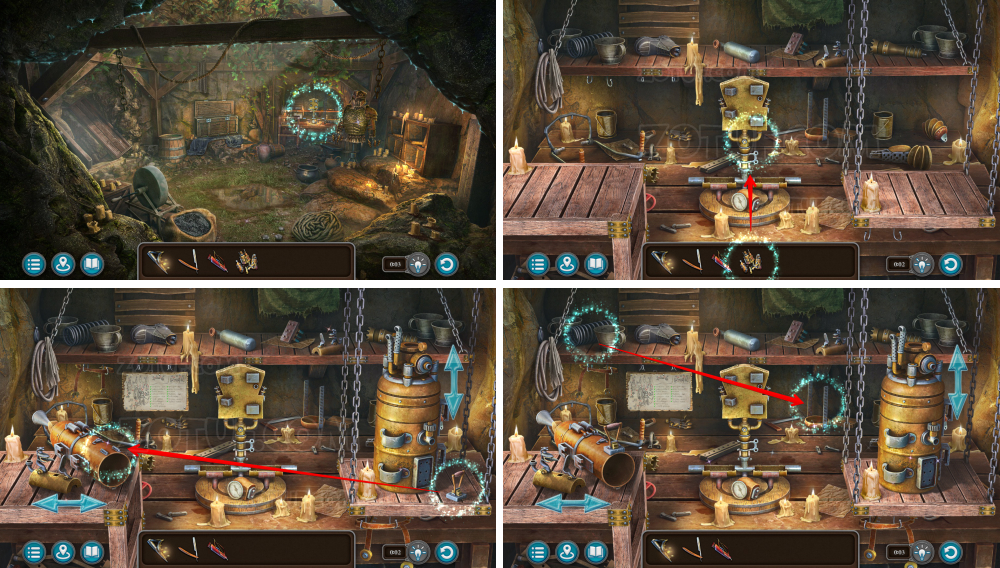
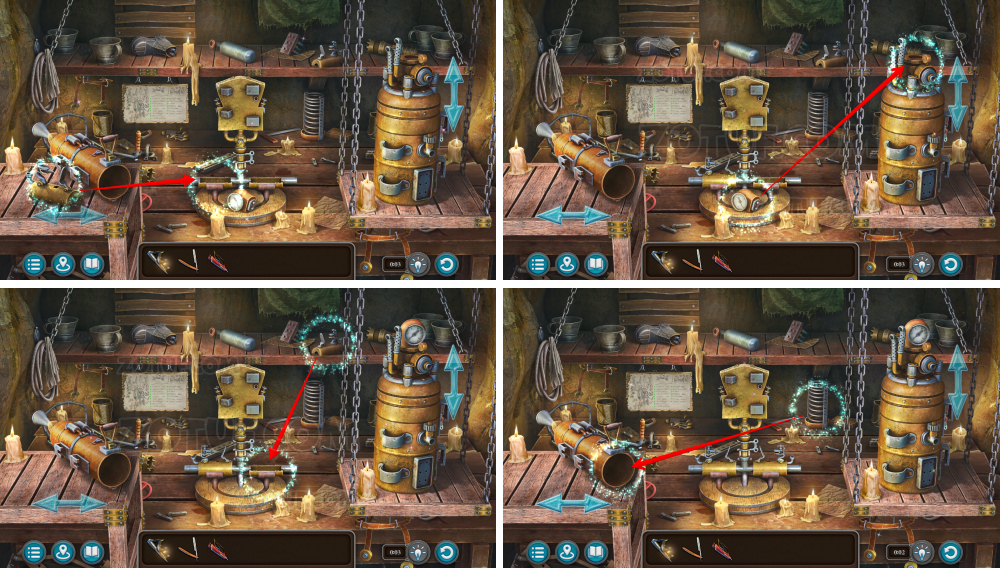
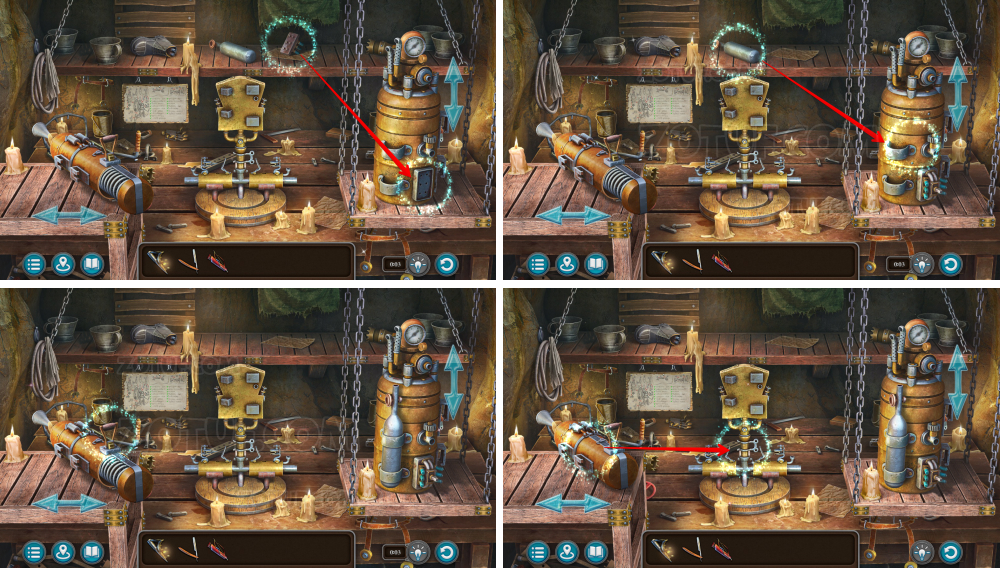
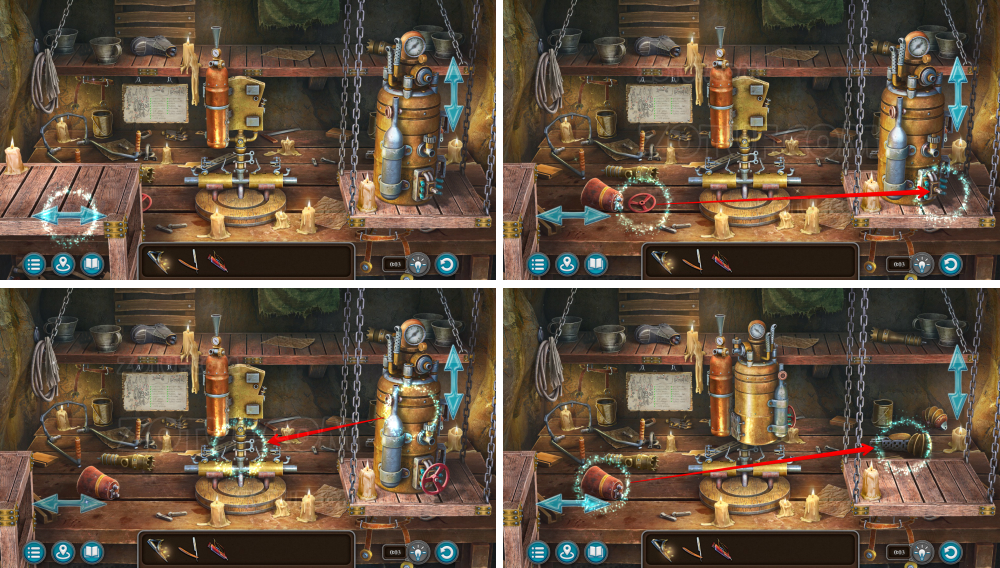
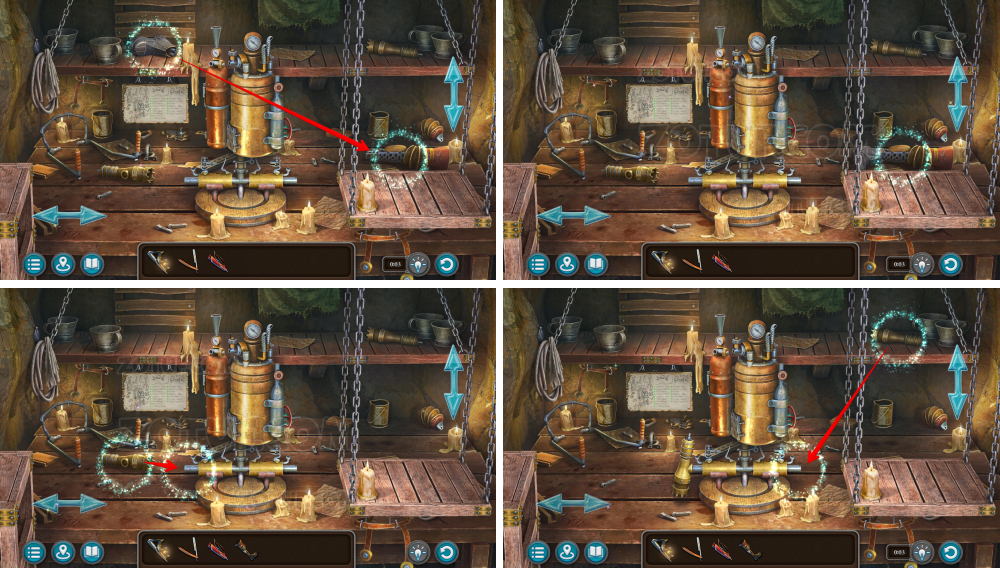
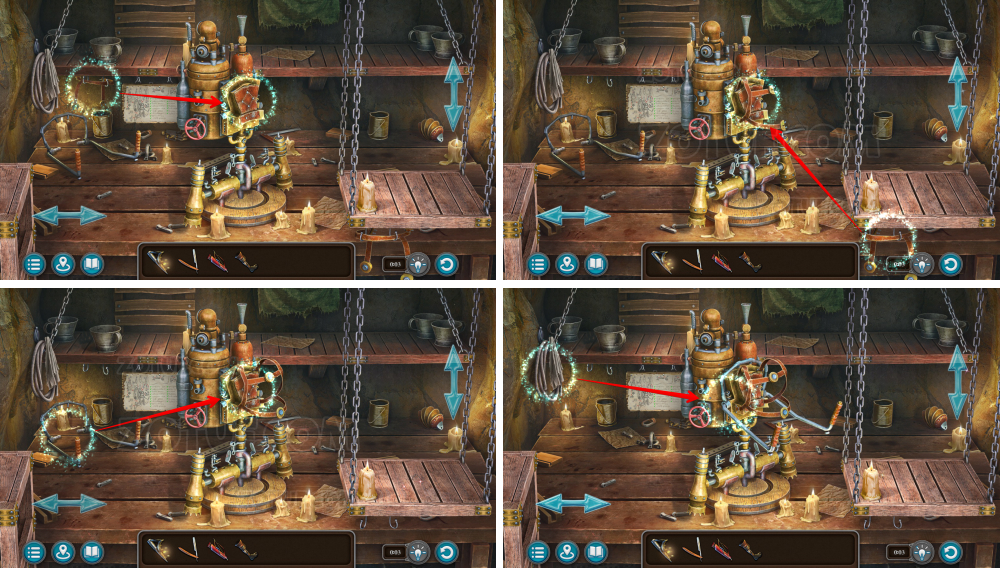
- Solve the puzzle: Move the dots to untangle the beams and draw circles with them.
- Take the wire cutters.
Dam
Talk to someone at the dam.
- Use the wire cutters.
- Take the dangerous razor.
- Use the dangerous razor.
- Take the quiver of arrows.
- Take the patterned trapezoids 1/6.
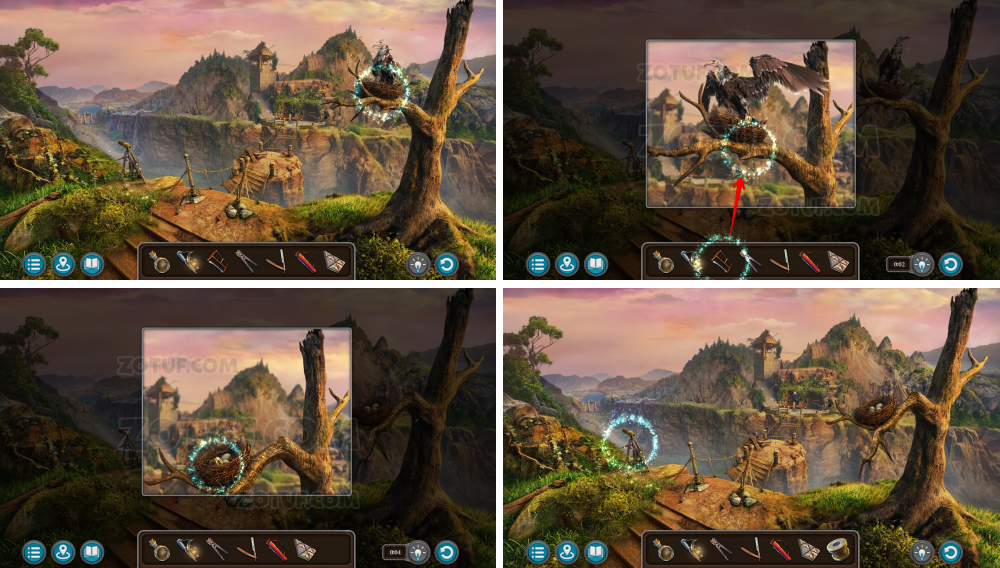
- Use the saw.
- Take the spyglass lens.
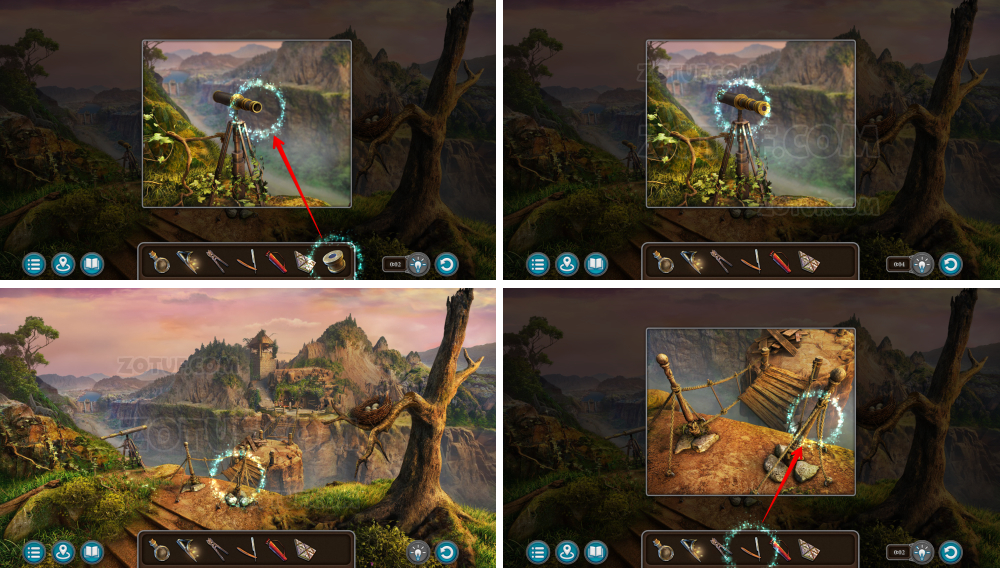
- Use the spyglass lens.
- Use the dangerous razor.

- Take the wooden pole.
- Use the wooden pole.
- Take the Elogan bow.
- Solve the puzzle: Navigate through the canyon and find the exit from the maze.
- Go forward twice.
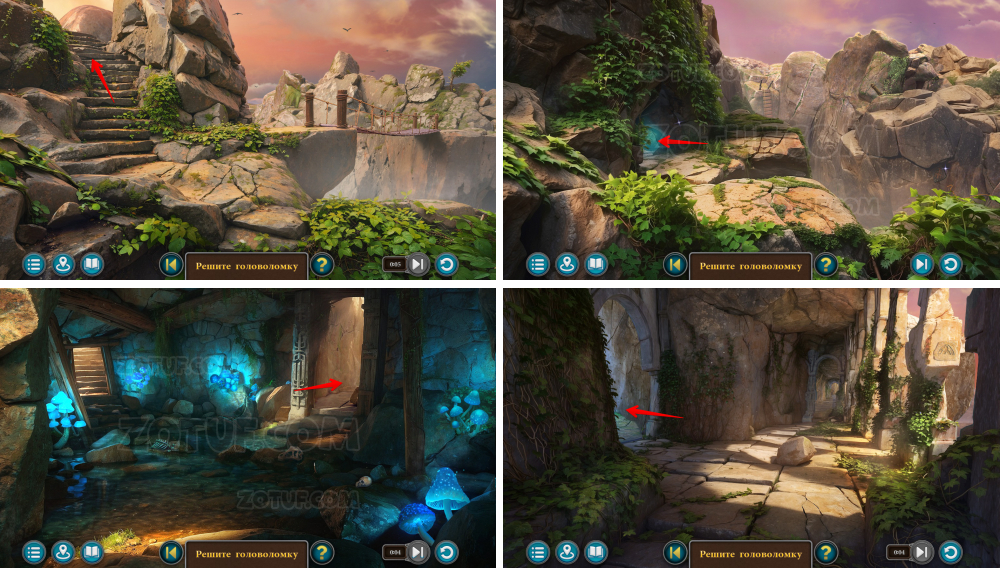
- Go left twice.
- Go right then left.
- Found a closed exit from the maze.
- Go back.
- Take the dried hand.
- Use the dried hand.
- Use the wire cutters to get the strong spider thread.
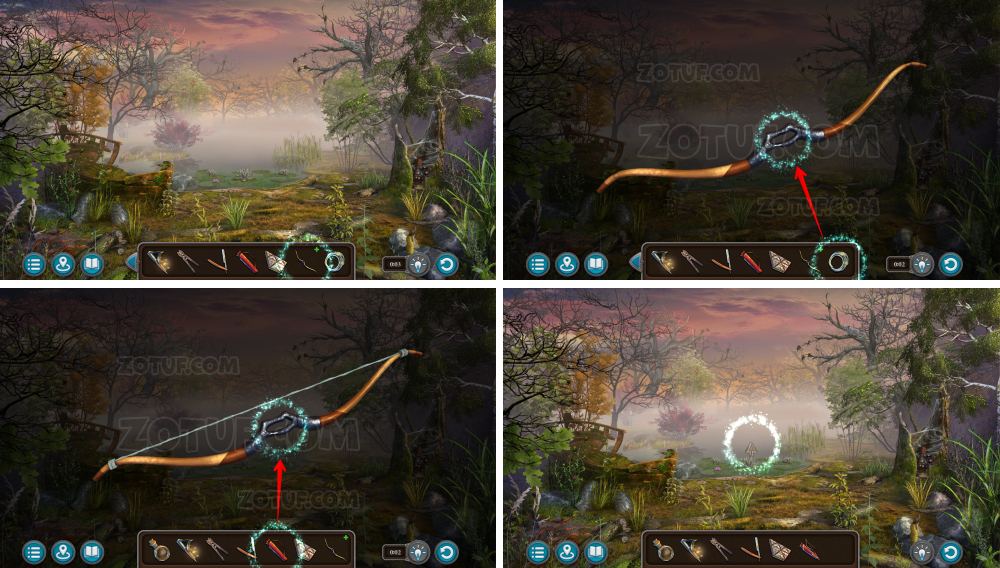
- Click on the Elogan bow.
- Use the strong spider thread.
- Use the quiver of arrows to get the bow and arrows.
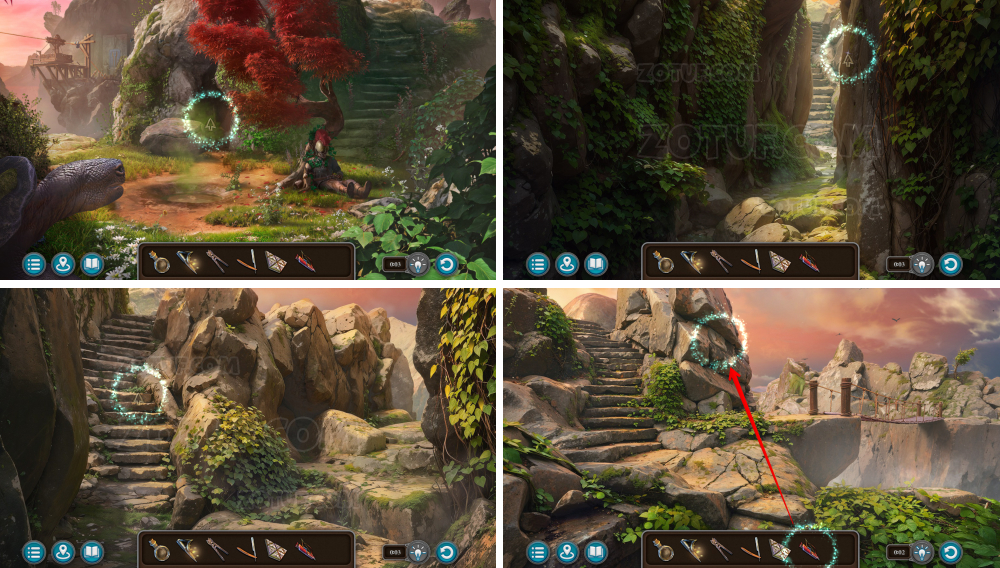
- Use the bow and arrows.
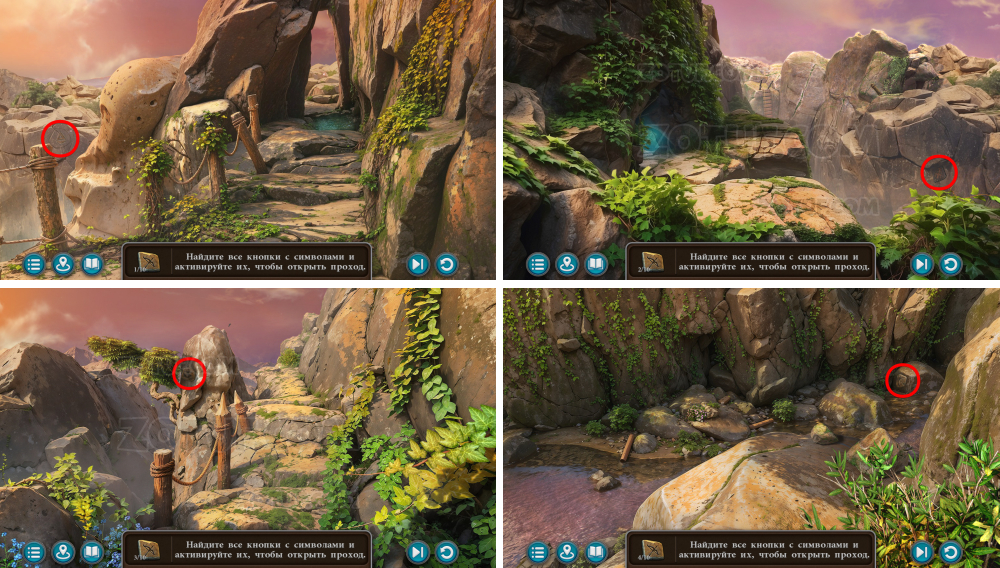
- Find all the buttons with symbols and activate them to open the passage.
- Solution 1.
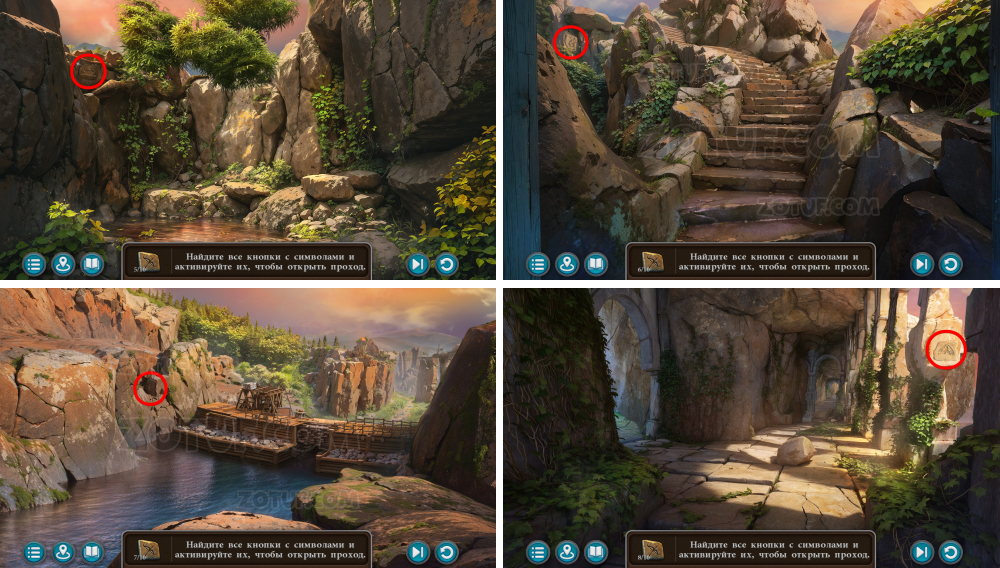
- Solution 2.
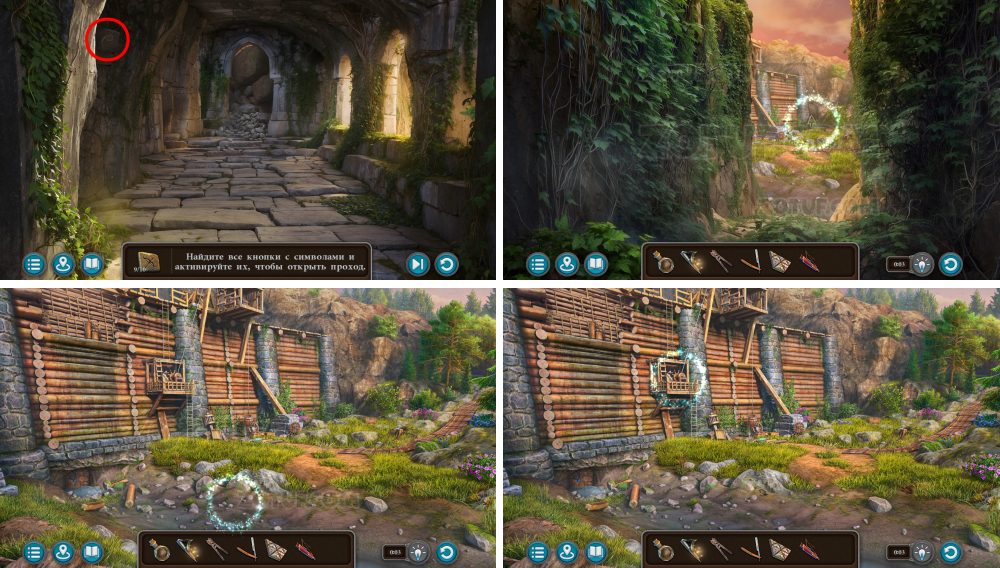
- Solution 3.
- Talk.
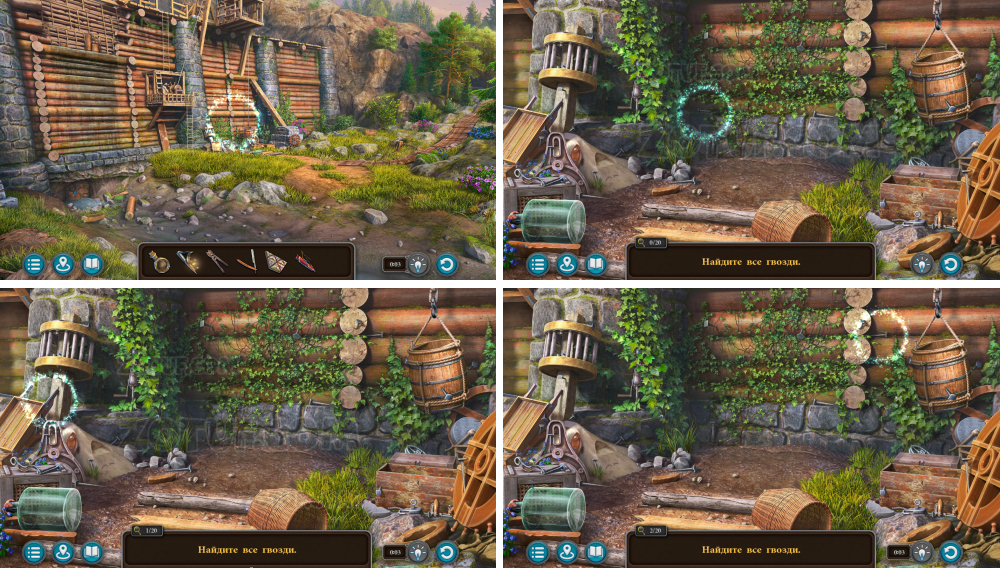
- Find the nails.
- Solution 1.
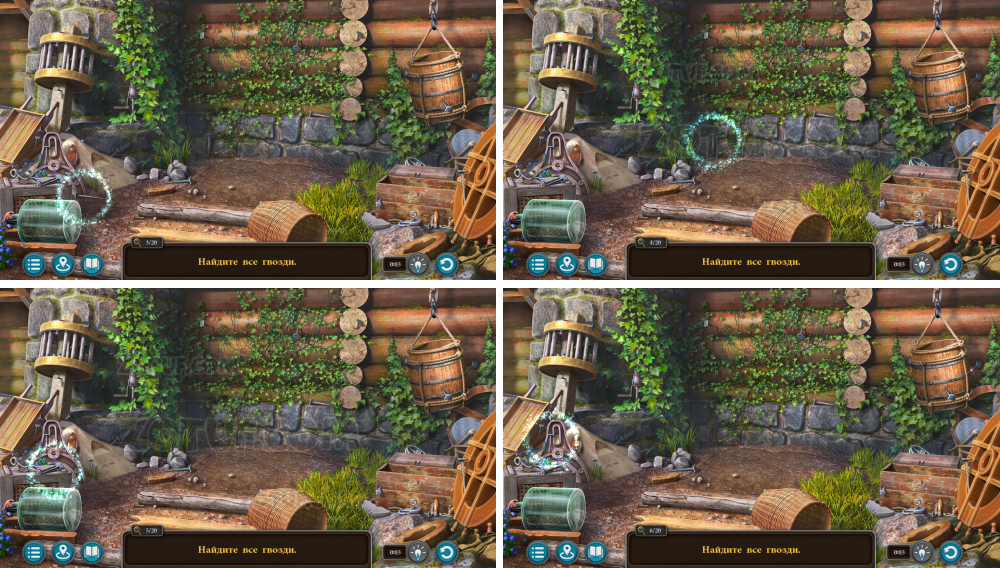
- Solution 2.
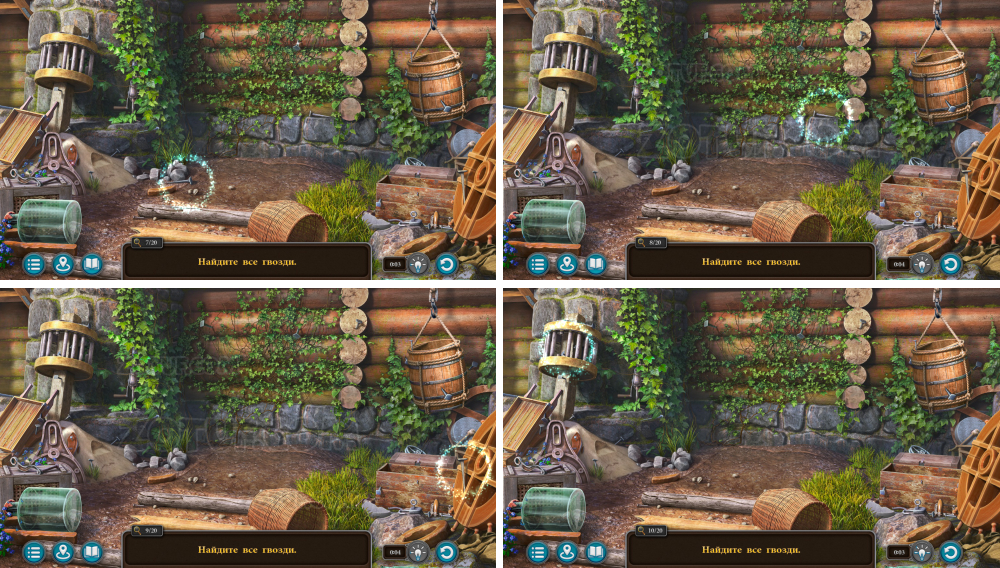
- Solution 3.
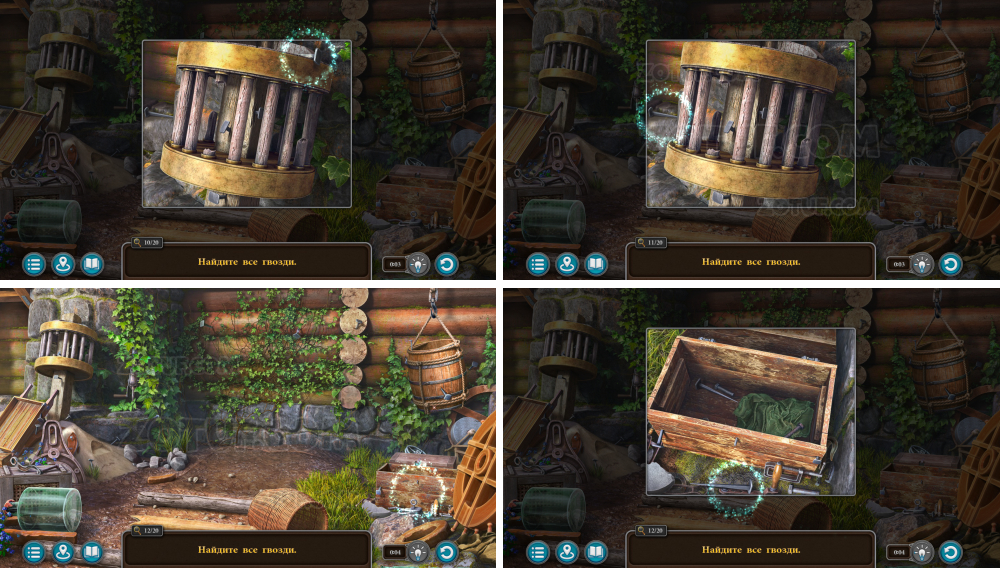
- Solution 4.
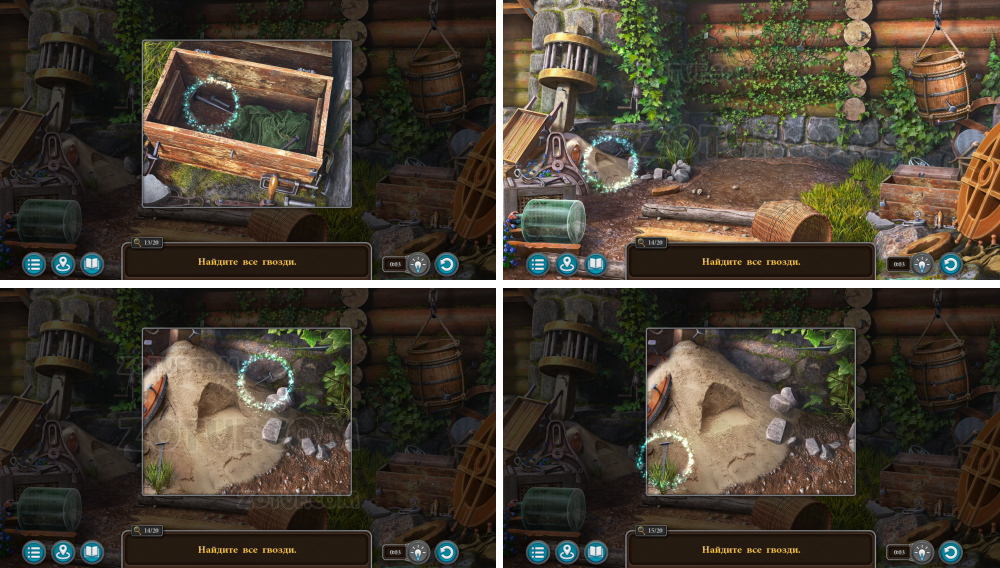
- Solution 5.
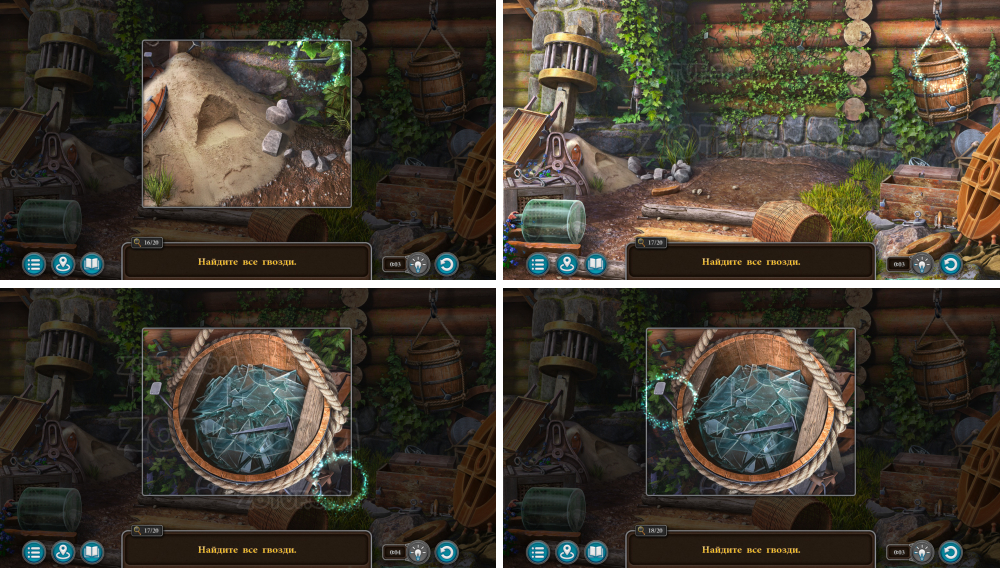
- Solution 6.

- Solution 7.
- Take the nails.
- Use the nails.
- Talk to get the bar.
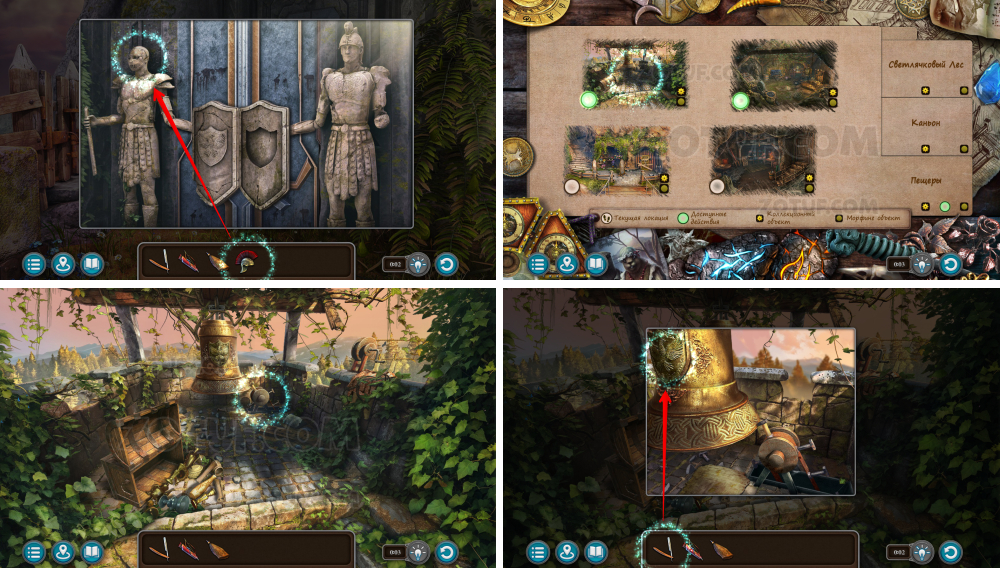
Dwelling in the mountain
Talk to the dwelling’s owner on the opposite cliff of the canyon.
- Take the patterned trapezoids 2/6.
- Use the bar.
- Use the dangerous razor.
- Take the trap part.
- Use the trap part.

- Take the spiked glove.
- Use the spiked glove to get the fish.
- Use the fish.
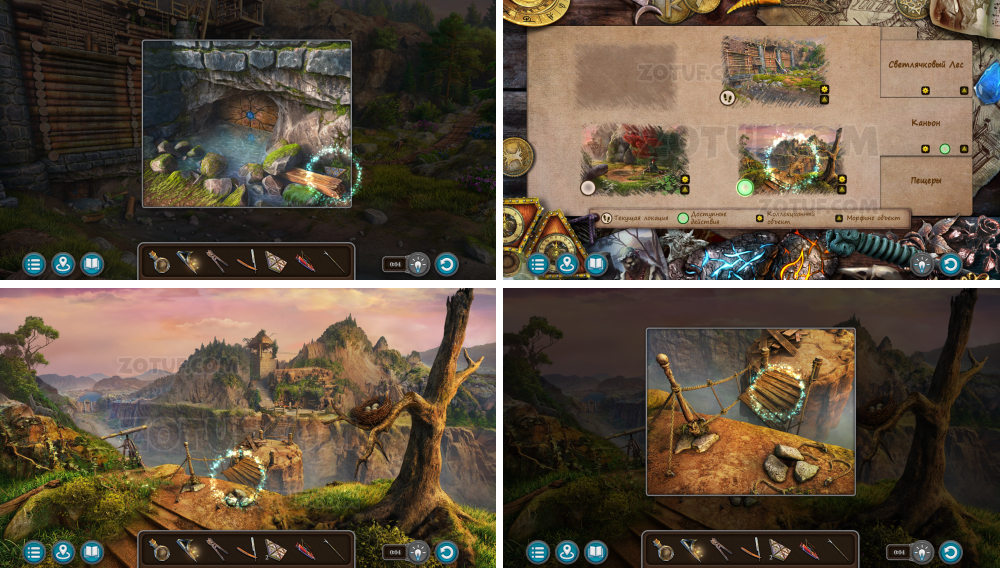
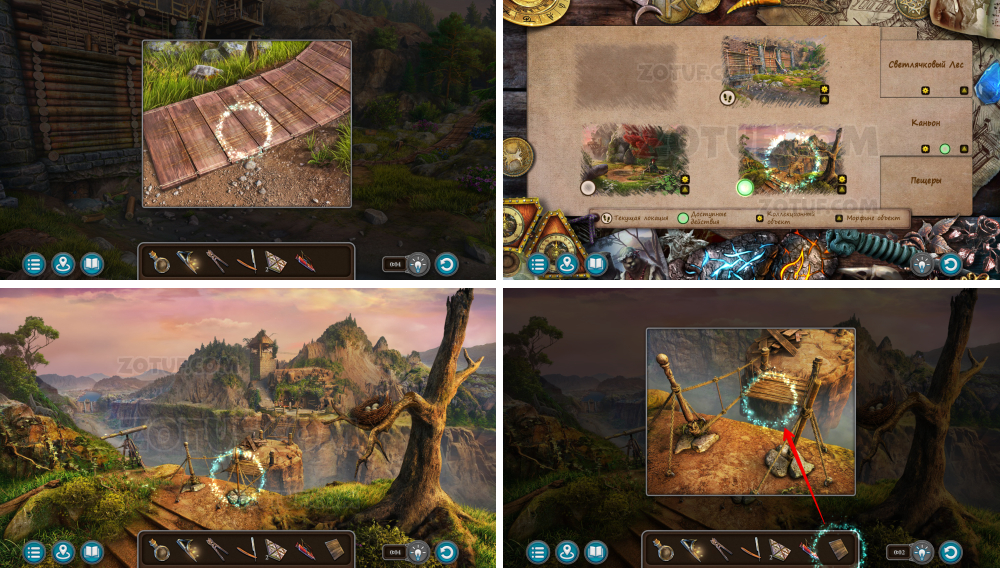
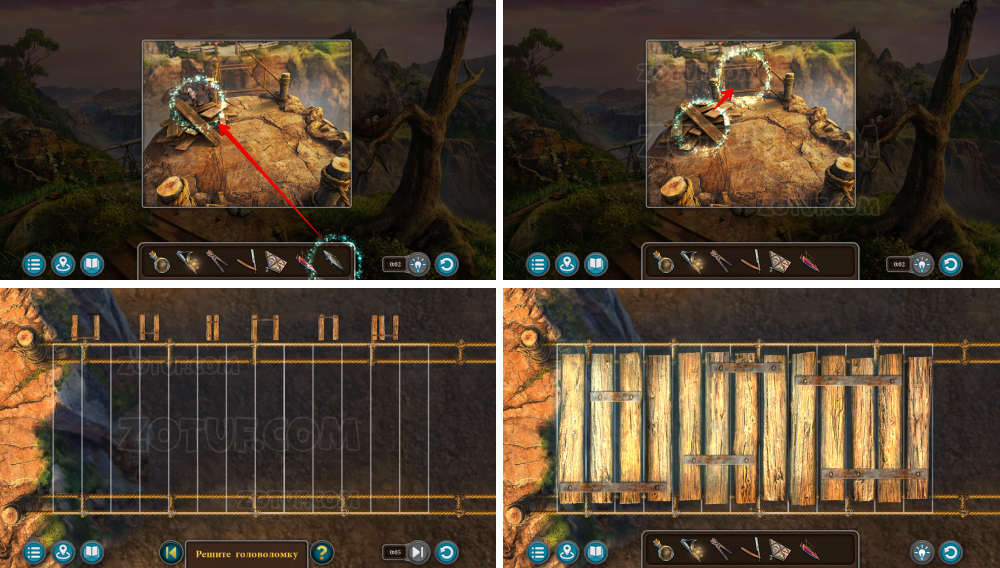
- Solve the puzzle: Place the planks on the bridge to form a path without gaps.
- Solution in the picture.
- Use the bow and arrows to get the patterned trapezoids 3/6.
- Use the wire cutters.
- Aim the telescope beam.
- Adjust the mirror.
- Melt the resin from both sides of the plank.
- Scare the bird.
- Take the patterned trapezoids 4/6.
- Remove the plank from the door.
- Turn the handle and remove the excess clothing.
- Take the fabric belt.
- Take the wooden block.
- Use the wooden block.
- Use the fabric belt.
- Take the leather belt.
- Use the leather belt.
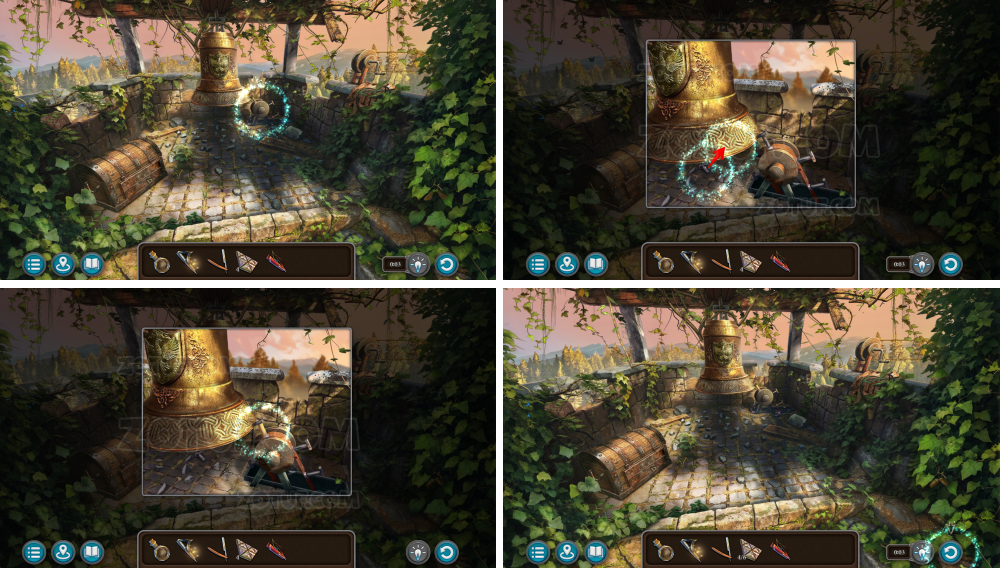
- Strike the bell with a hammer.
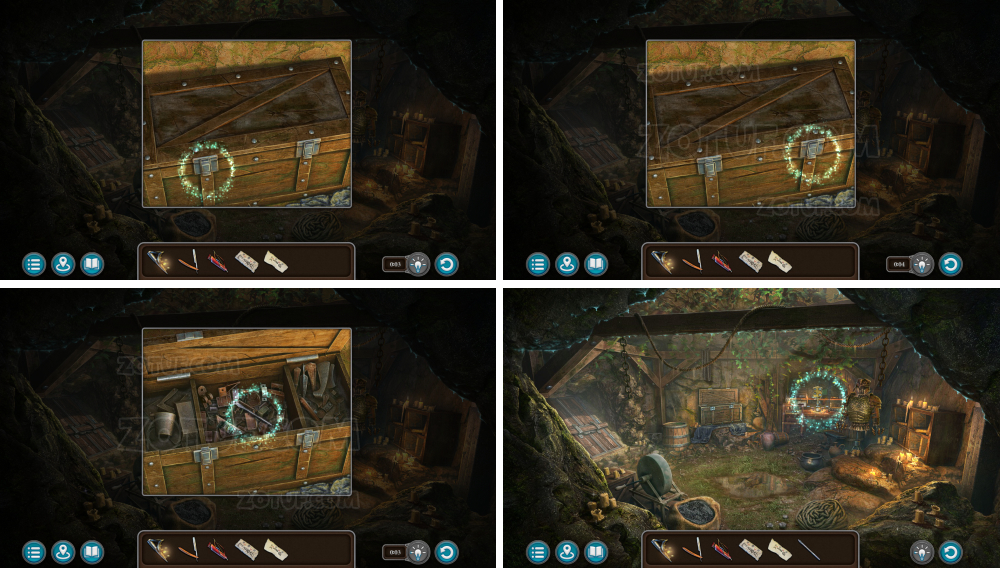
- Take the chest key.
- Use the chest key.
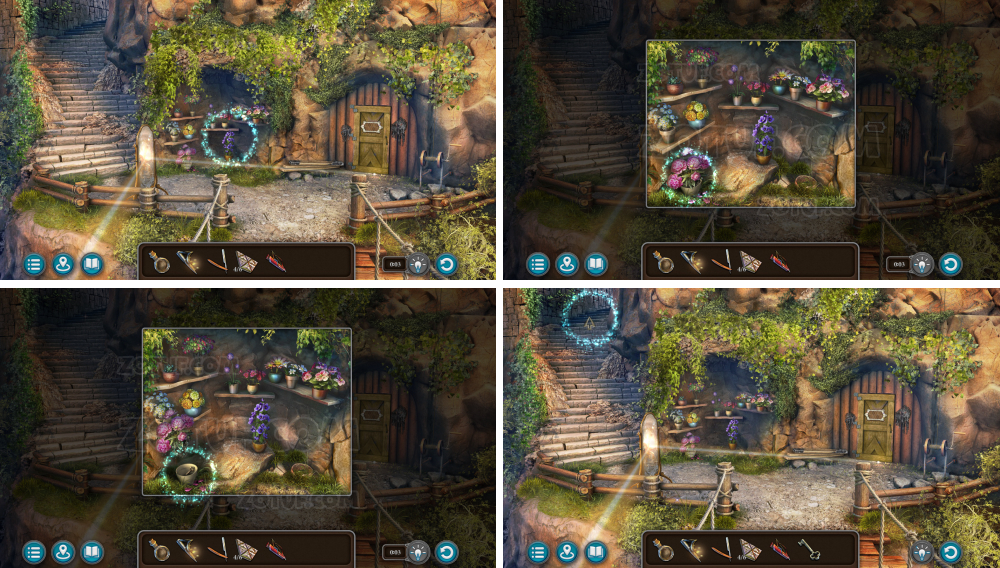
- Solve the puzzle: Place the flowers in the circles of the same color.
- Take the patterned trapezoids 5/6.
- Take the charcoal stick.

- Use the charcoal stick.
- Strike the bell with a hammer.
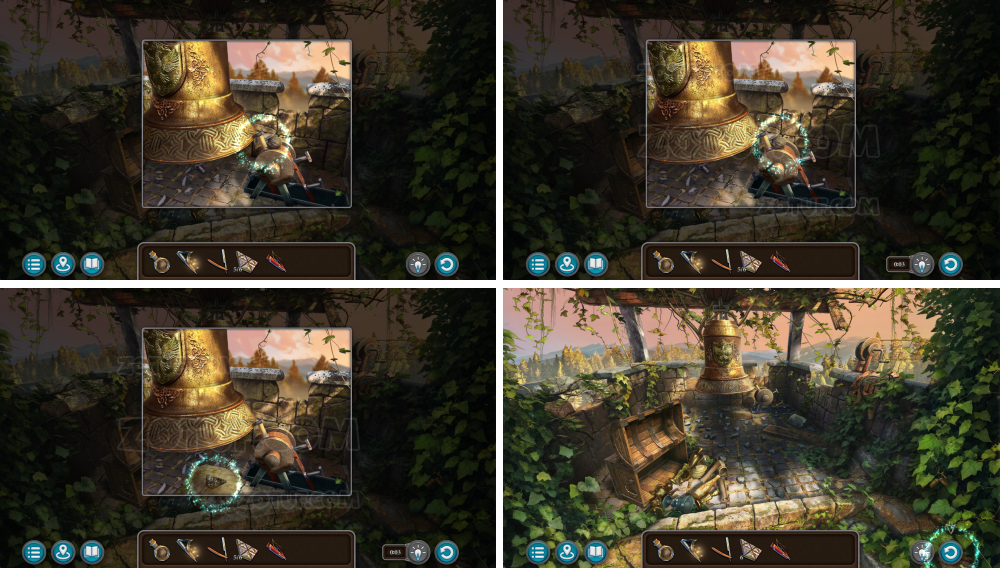
- Take the patterned trapezoids 6/6.
- Use the six patterned trapezoids.
- Solve the puzzle: By clicking on the pieces, deactivate all the chains: red – green – blue – yellow. You can only click on adjacent pieces.
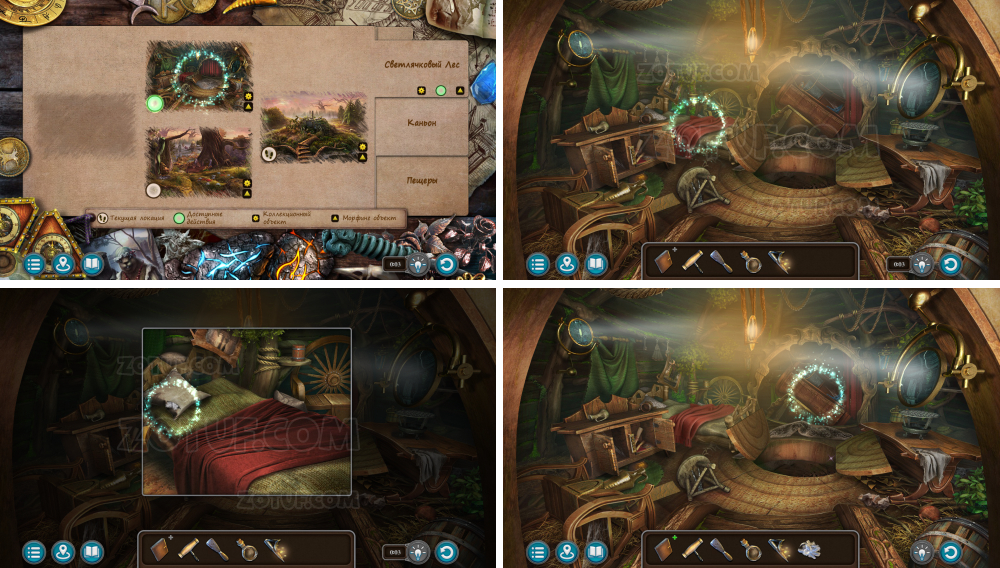
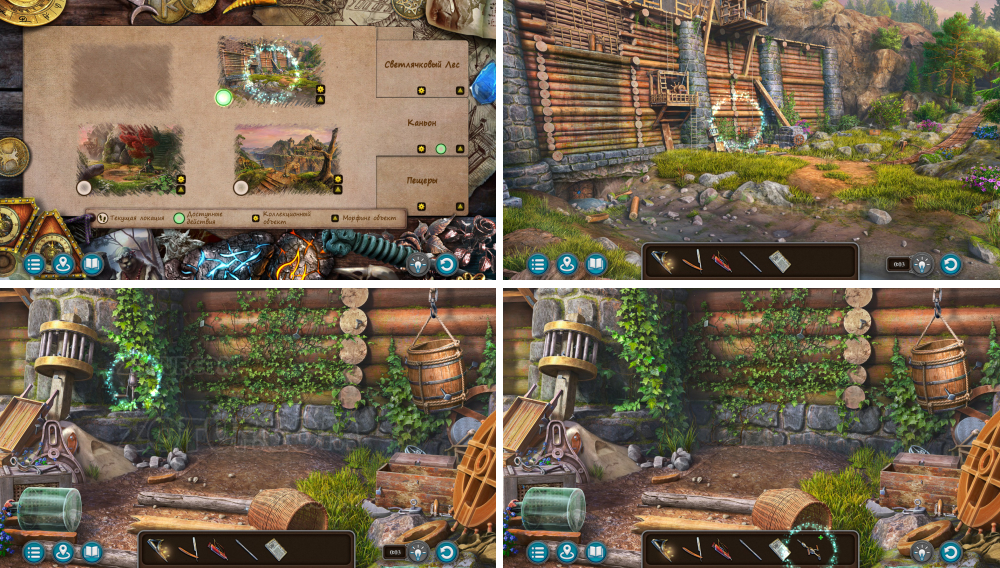
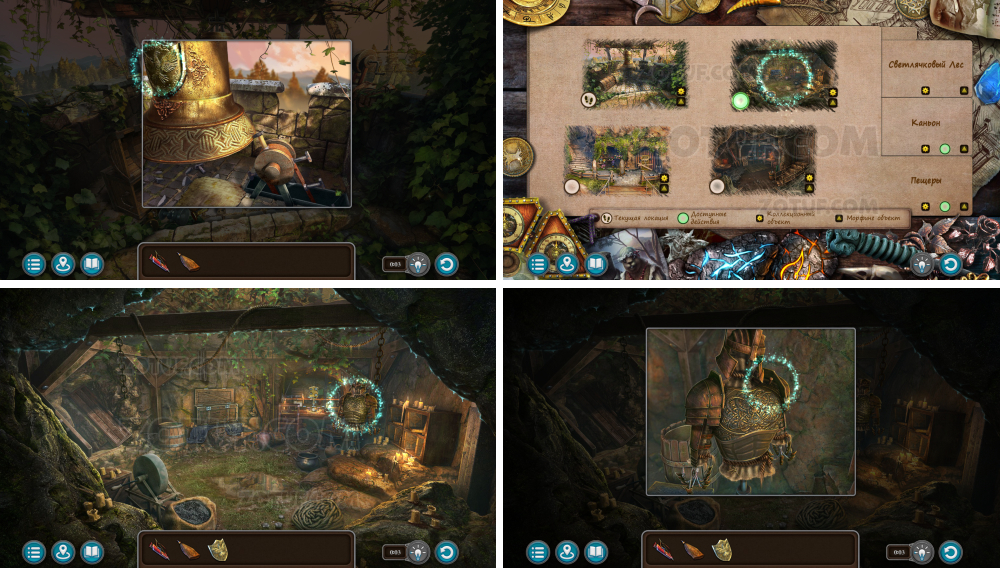
Mechanisms for Mora
Help Mora finish her mechanical development and fly to the temple doors.
- Use the bottle of water.
- Talk.
- Take the prosthetic leg blueprint.
- Take the dull pencil.
- Use the dangerous razor to get the pencil.
- Take the workshop key.
- Use the workshop key.
- Open the prosthetic leg blueprint.
- Use the pencil.
- Solve the puzzle: Connect the blueprint fragments by points.
- Get the prosthetic leg blueprint.
- Examine the workshop, click on the book.
- Take the prosthetic arm blueprint.
- Take the screwdriver shaft.
- Use the prosthetic leg blueprint.
- Use the prosthetic arm blueprint.
- Take the jet pack blueprint.
- Take the drill.
- Click on the drill.
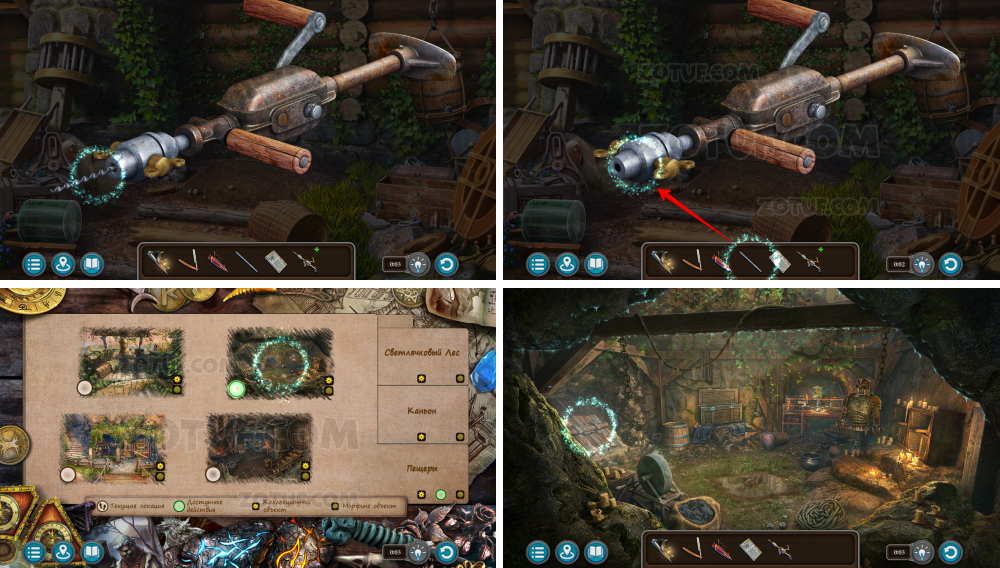
- Use the screwdriver shaft to get the drill with screwdriver.
- Use the drill with screwdriver.
- Solve the puzzle: Move one of the pieces with a cross to any lit square. Place other pieces on colored patterns to open the path.

- Take the glow-in-the-dark violets.
- Use the glow-in-the-dark violets.
- Use the dangerous razor to get the parachute fabric.
- Use the parachute fabric.
- Use the glow-in-the-dark violets to get the fireflies.
- Use the fireflies.
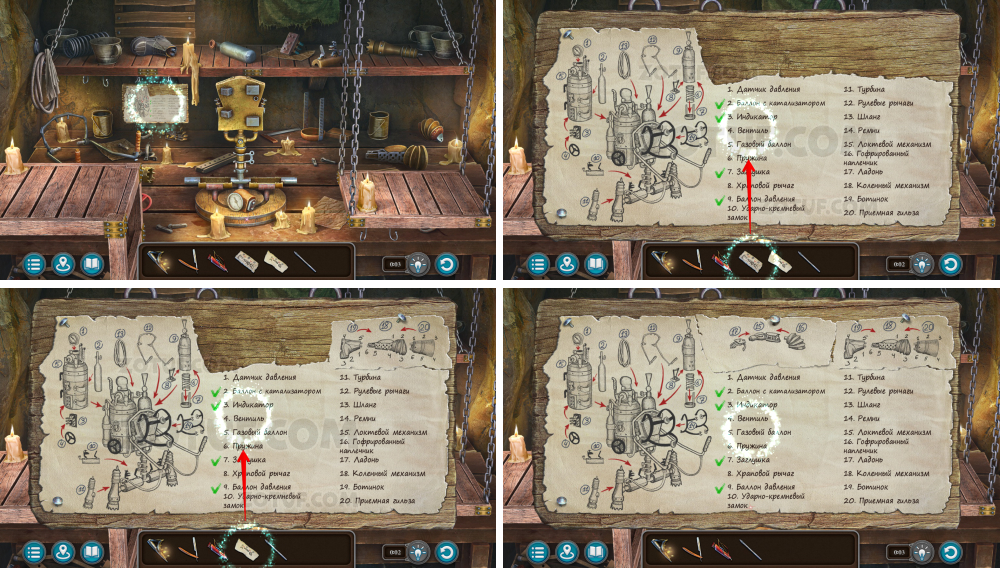
- Use the jet pack blueprint.
- Find all the necessary items from the blueprint.
- Solution 1.
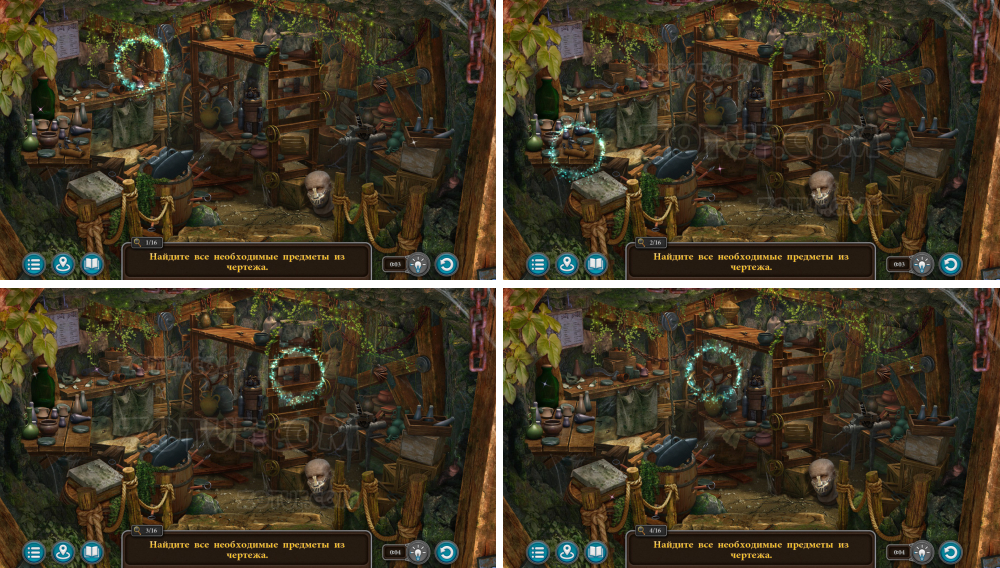
- Solution 2.
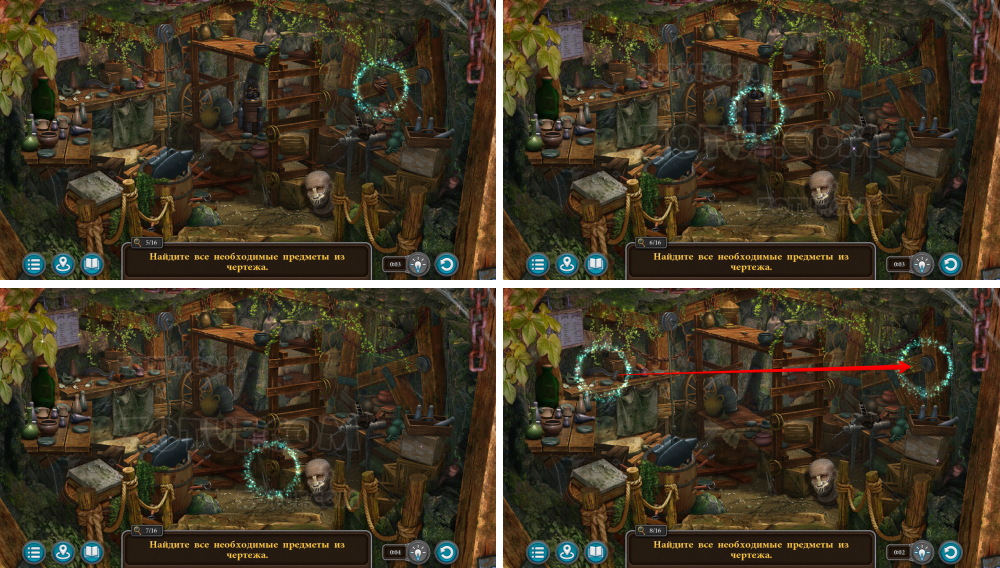
- Solution 3.
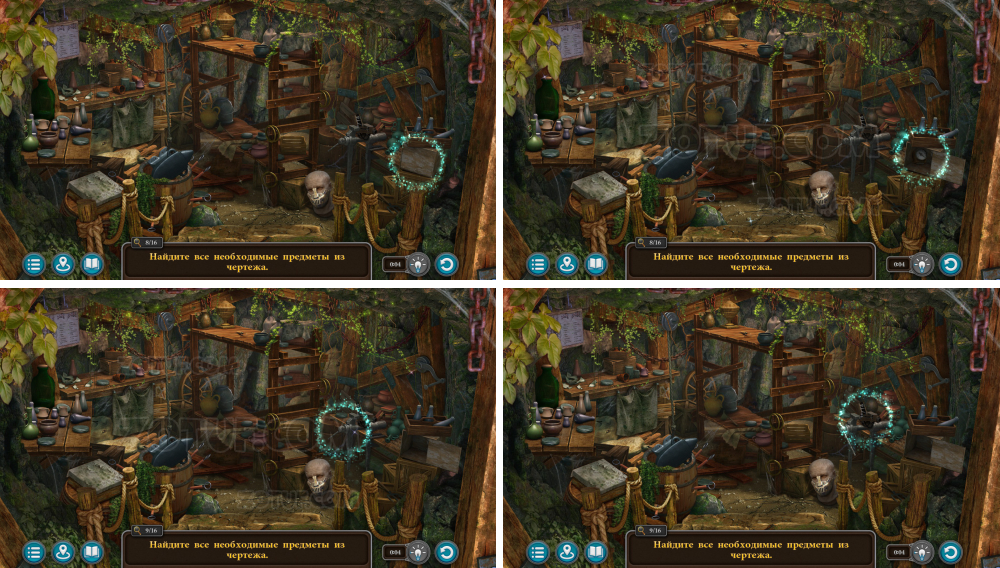
- Solution 4.
- Solution 5.
- Solution 6.
- Solution 7.
- Solution 8.
- Solution 9.
- Solution 10.
- Take the set of parts.
- Use the set of parts.
- Solution 1.
- Solution 2.
- Solution 3.
- Solution 4.
- Take the prosthetic leg.
- Solution 5.
- Solution 6.
- Solution 7.
- Take the flying machine.
- Solution 8.
- Take the prosthetic arm.
- Click on the flying machine.
- Click the small levers.
- Use the prosthetic leg.
- Use the prosthetic arm.
- Get the device setup guide.
Flight
Use the rocket launcher and fly to the temple doors.
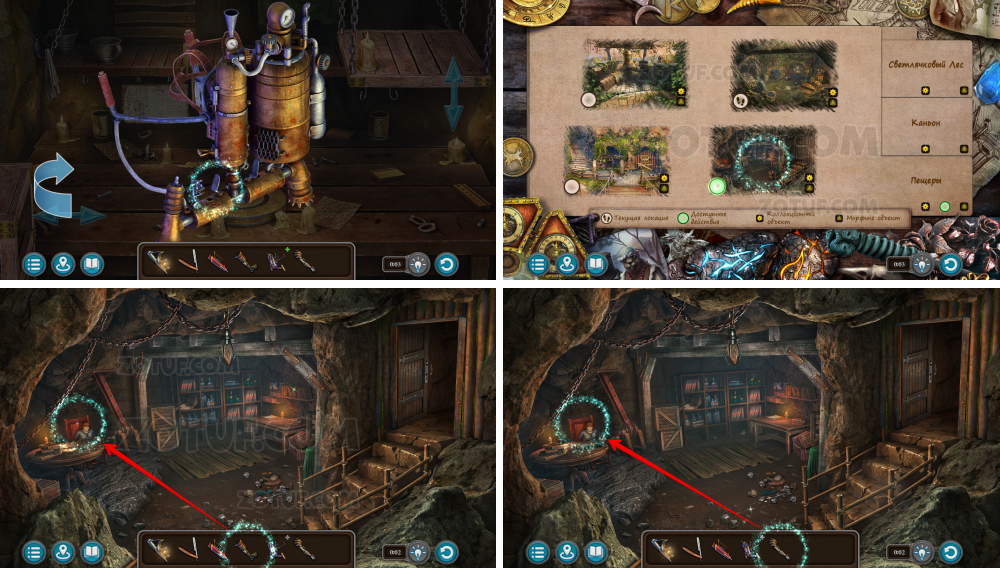
- Click on the flying machine.
- Use the device setup guide.
- Use the flint.
- Click on the winch near the door.
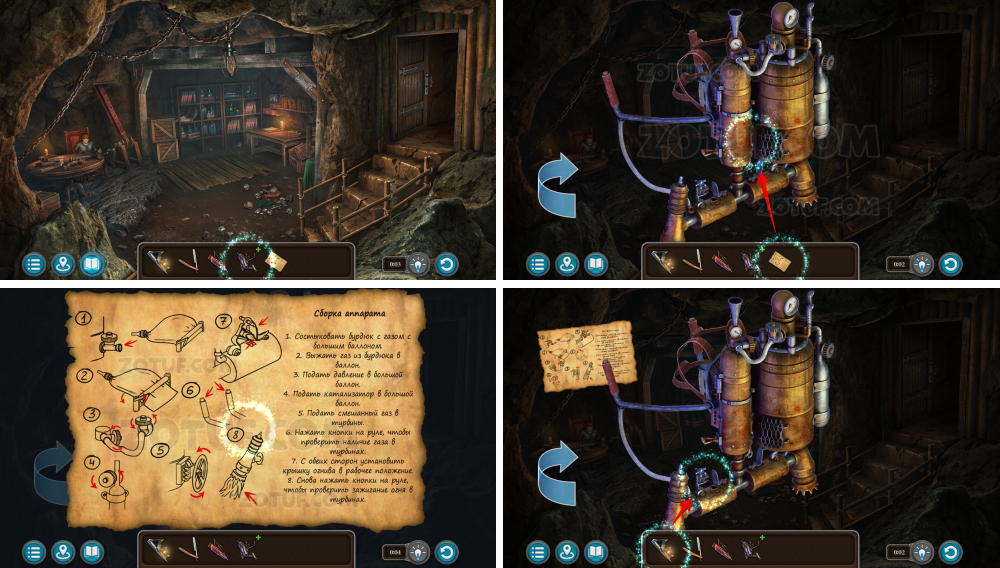
- Use the dangerous razor to get the gas bag.
- Click on the flying machine.
- Use the gas bag to get the empty gas bag.
- Open all the valves.
- Take the jet pack.
- Use the jet pack.
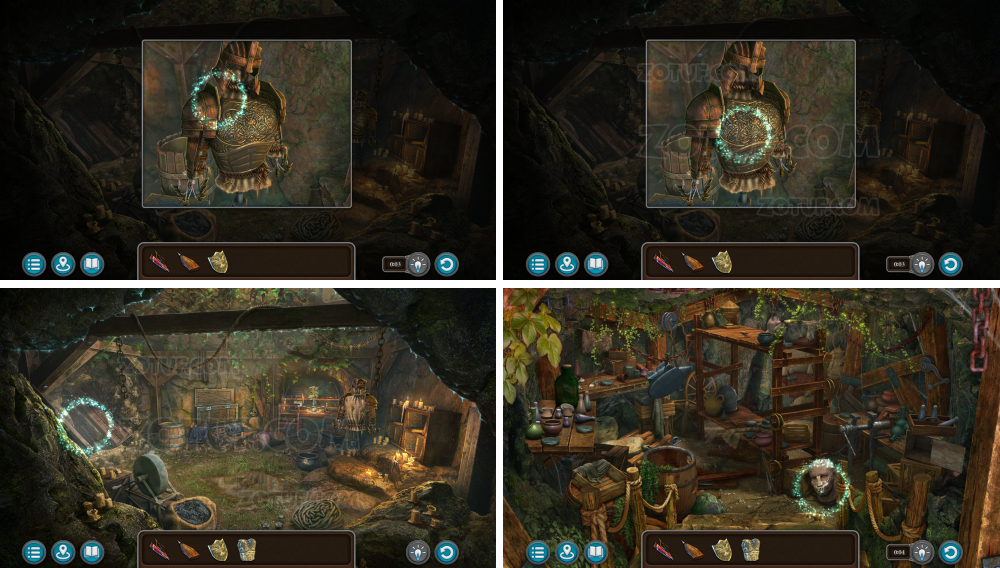
Temple entrance
Get inside the temple to meet Grandma.
- Take the helmet.
- Use the helmet.
- Use the dangerous razor.
- Take the heraldry.
- Take the first peg from the shoulder.
- Take the second peg from the shoulder.
- Take the cuirass.
- Take the visor.
- Talk to get the jet pack.
- Use the jet pack.
- Use the empty gas bag to get the gas bag.
- Use the gas bag.
- Open the valve.
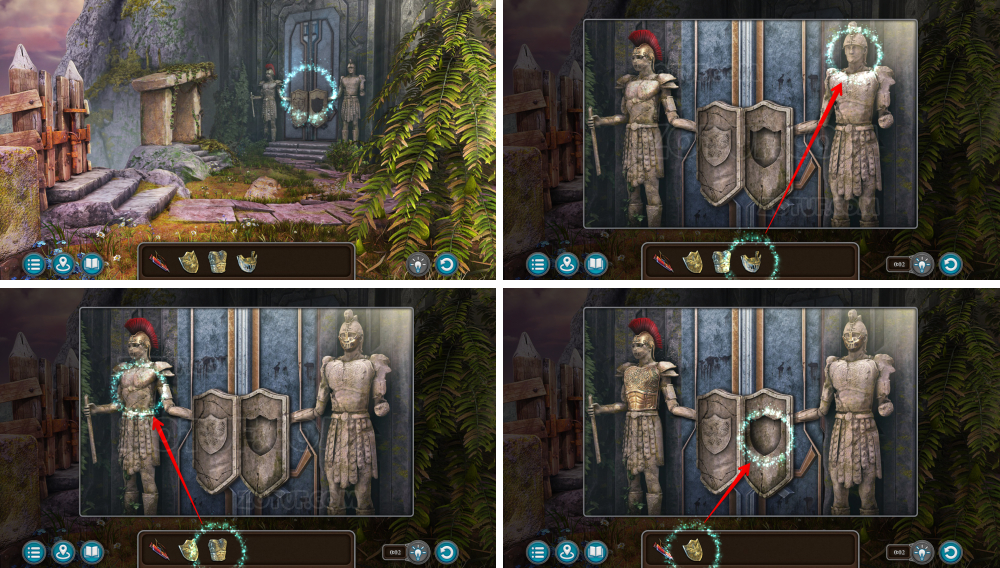
- Use the visor, cuirass, and heraldry.
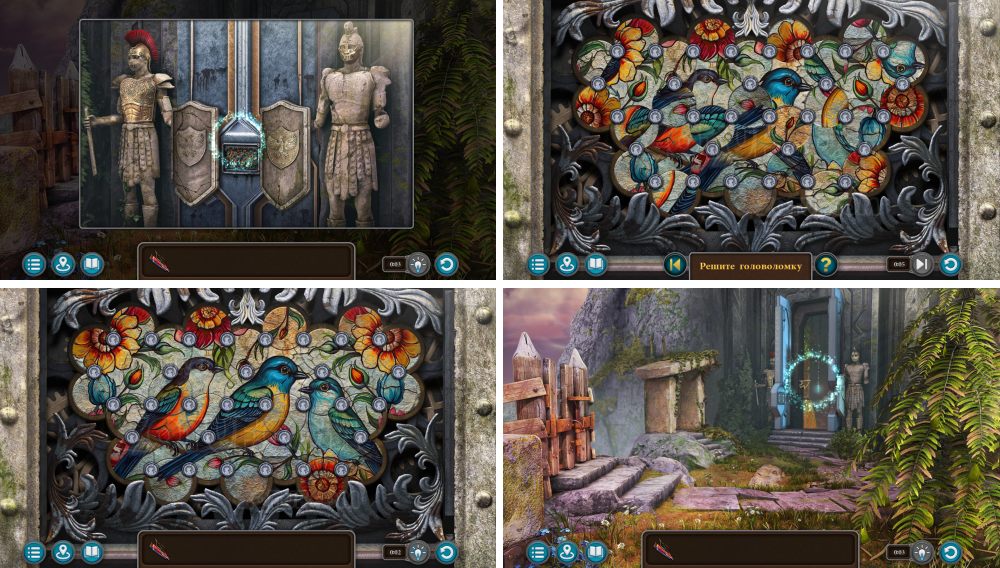
- Solve the puzzle: Restore the image by rotating the circles with the attached fragments.
- Solution in the picture.
- Enter inside.
Congratulations! You have completed the game Lost Lands 10.


Game threw a glitch, at the bell, wrote on the scroll, hit the bell, scroll disappeared then when I hit the bell again it reappeared exactly as before. No way to move on, charcoal stick no longer available so totally stuck.