
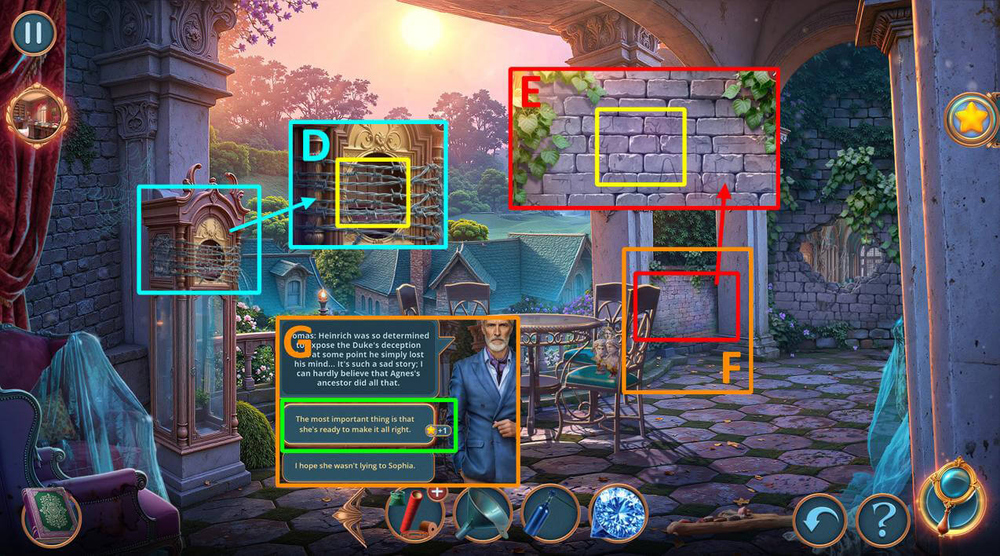
Hidden Legacy 2: Whispering Walls (Bonus Chapter) – This time, you must uncover the truth about Heinrich Braun, a talented architect whose name has become linked to a disappearance, the mansion’s secret rooms, and crimes that have been hidden for decades behind lies and fabricated stories. It gradually becomes clear that Heinrich’s fate was deliberately distorted, and his memory has been all but erased, as if someone tried to bury the truth forever along with the architect himself. During the investigation, you explore the old chapel, the library, hidden rooms, and forgotten parts of the estate, finding documents, paintings, and clues that reveal Braun’s past. Step by step, the heroes piece together the chain of events, connecting his work, secret passages, and mysterious incidents that occurred many years ago. At one point in the investigation, a raven appears with an important message, and attempts to reach new clues lead to dangerous and unusual situations, including working with a massive chandelier and uncovering the dark secrets of churches and cemeteries. As the story unfolds, it becomes clear that the duke was involved in Heinrich’s death, having concealed his crimes and the fates of his victims for many years fates that no one was ever meant to know. More and more evidence points to a massive deception involving the falsification of facts and the concealment of the truth about past events. You must uncover the truth about Heinrich Braun and restore the architect’s place in history by piecing together the full picture of a tragedy hidden for many years from the fragments of memories and old secrets.
Bonus Chapter Walkthrough

- Select this option (A).
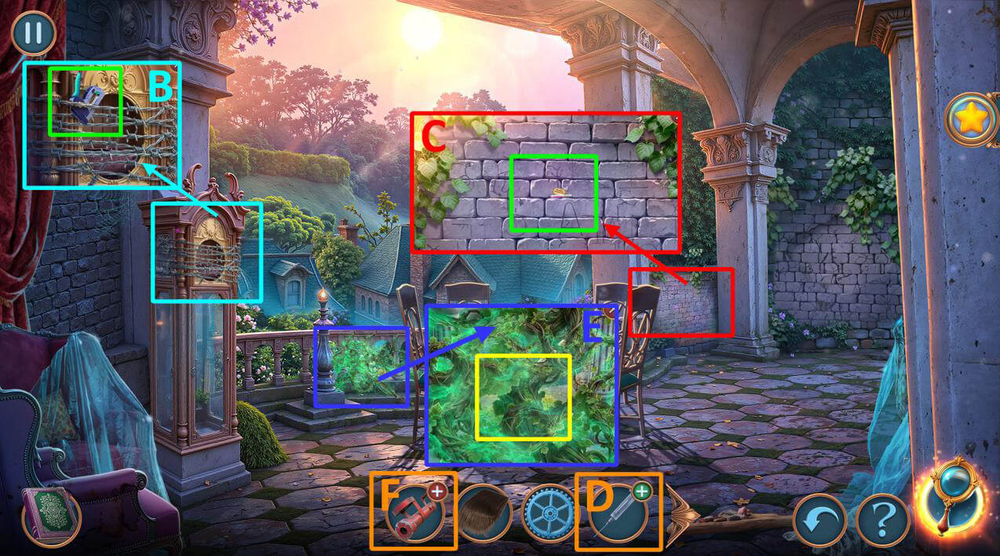
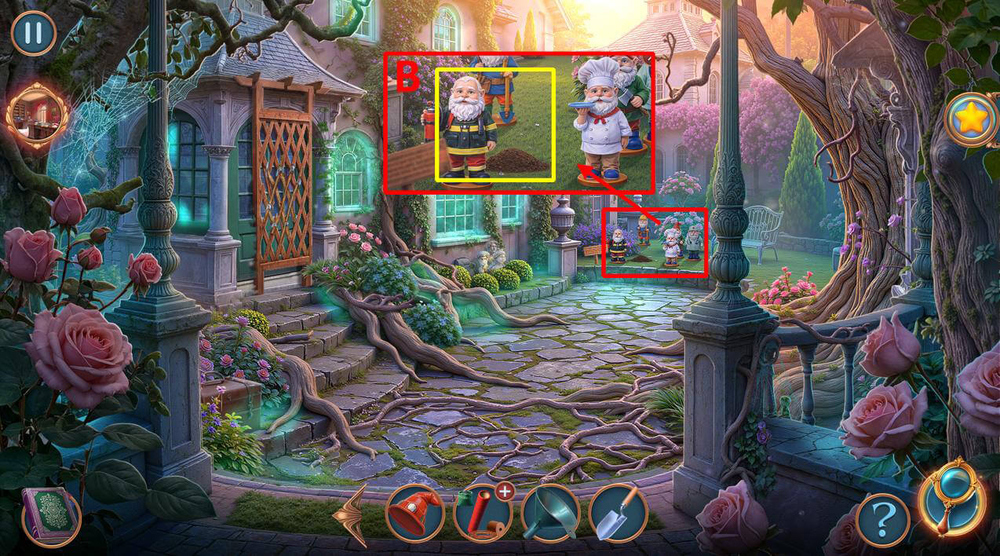
- Take BATTERING RAM (B).
- Take FURRY RAG and GNOME (C).
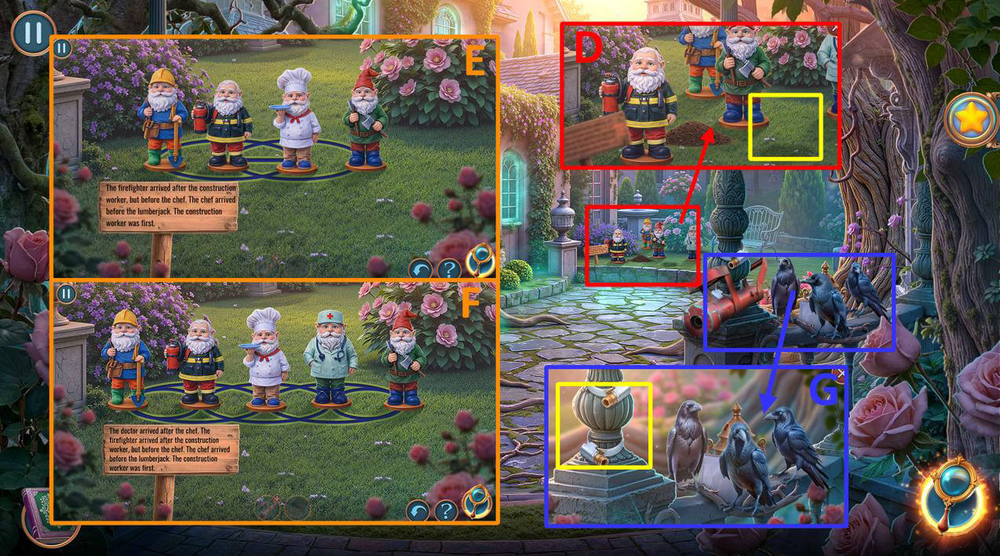
- Use GNOME on the gnomes (D).
- Easy solution: Place the gnomes as shown in the picture (E).
- Hard solution: Place the gnomes as shown in the picture (F).
- Take GILDED GEAR and HEX WRENCH.
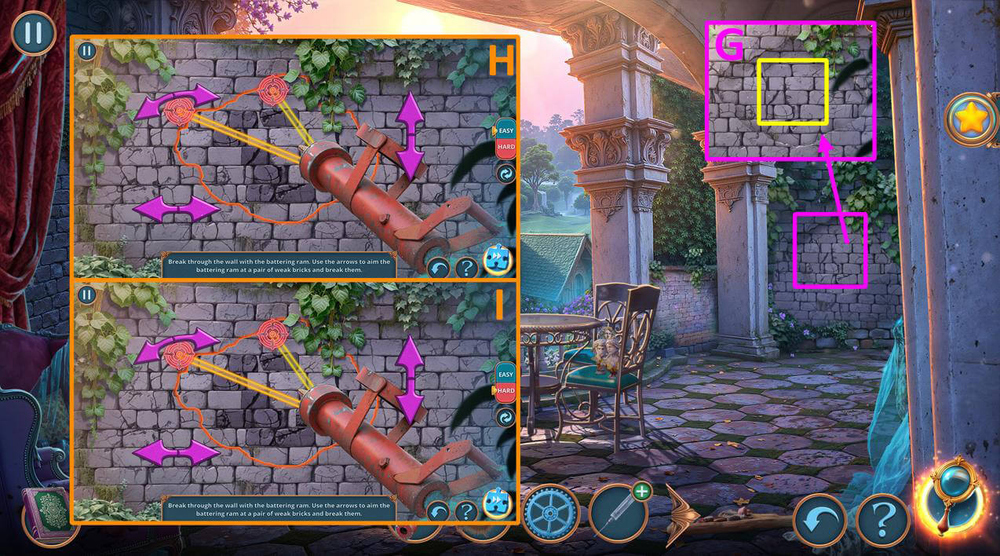
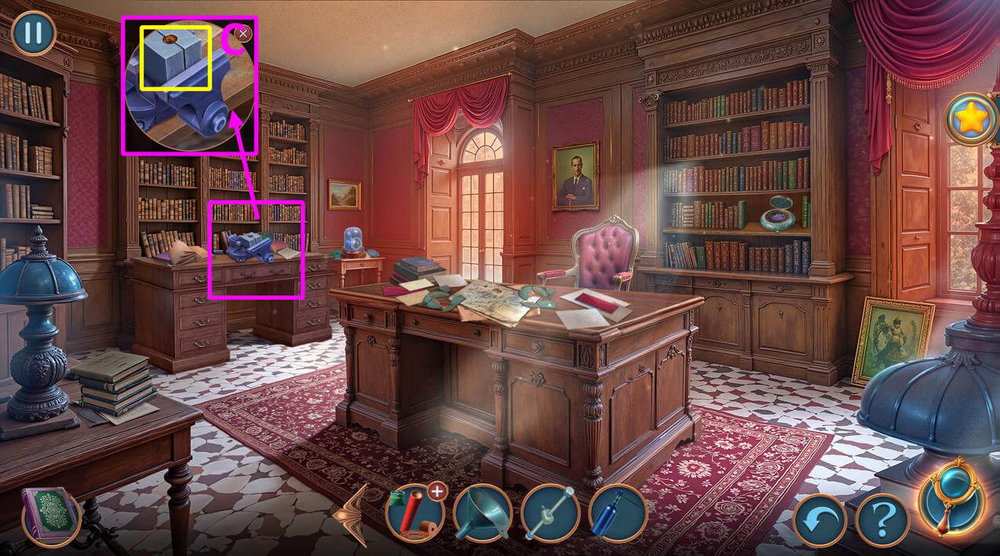
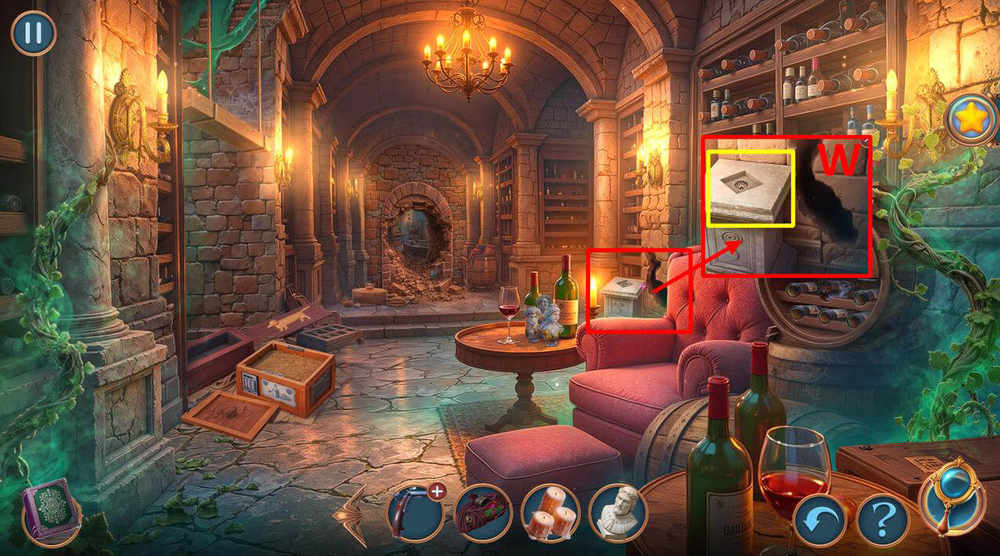
- Use HEX WRENCH on clamps, take CLAMPS (G).

- Use CLAMPS and BRANCHES on the fence (H).
- Easy solution: Place objects as shown in the picture (I).
- Hard solution: Place objects as shown in the picture (J).
- Go forward.
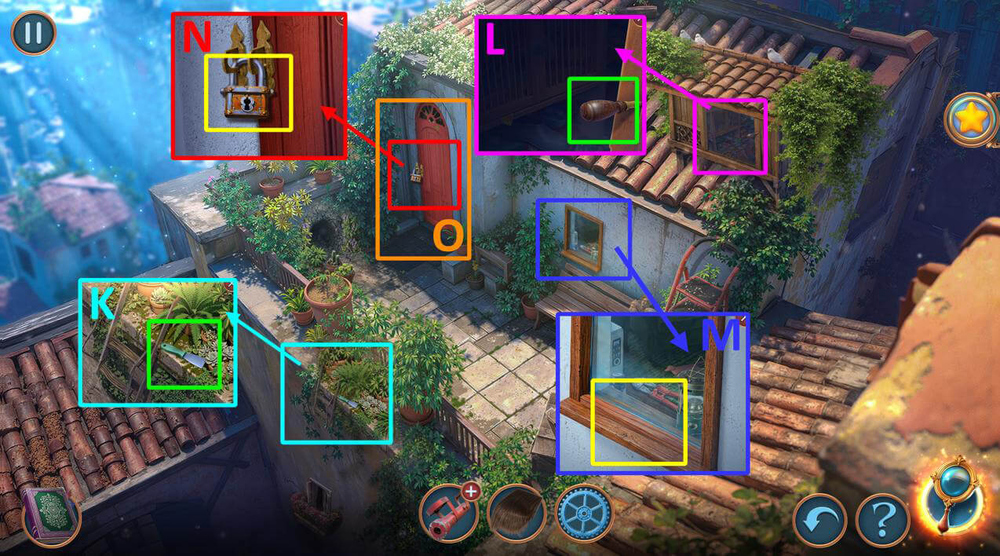
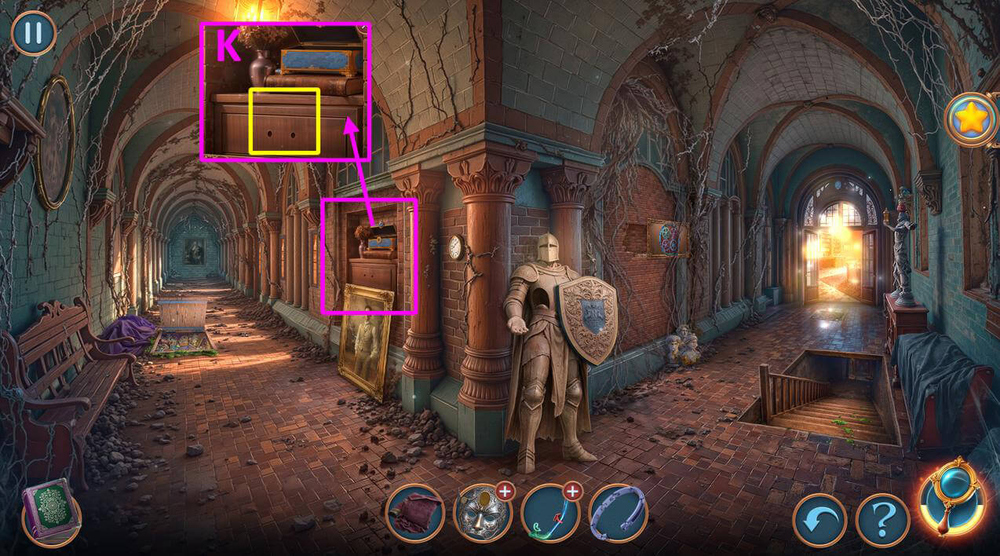
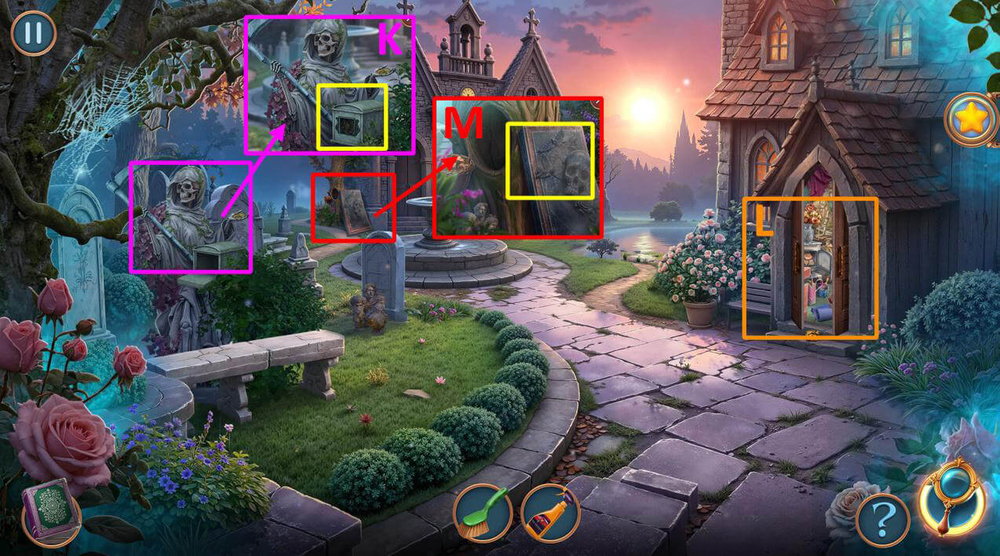
- Take SCRAPER (K).
- Take AWL (L).
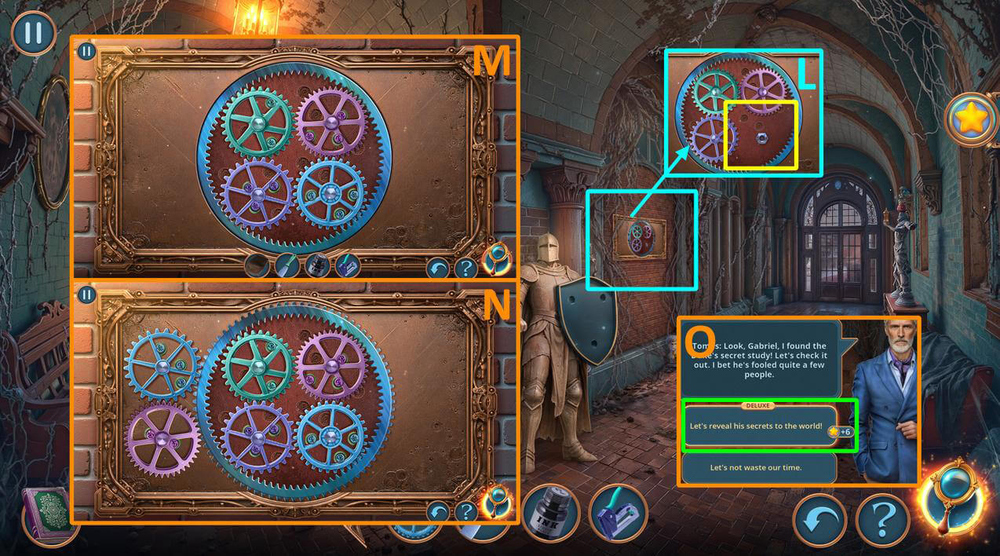
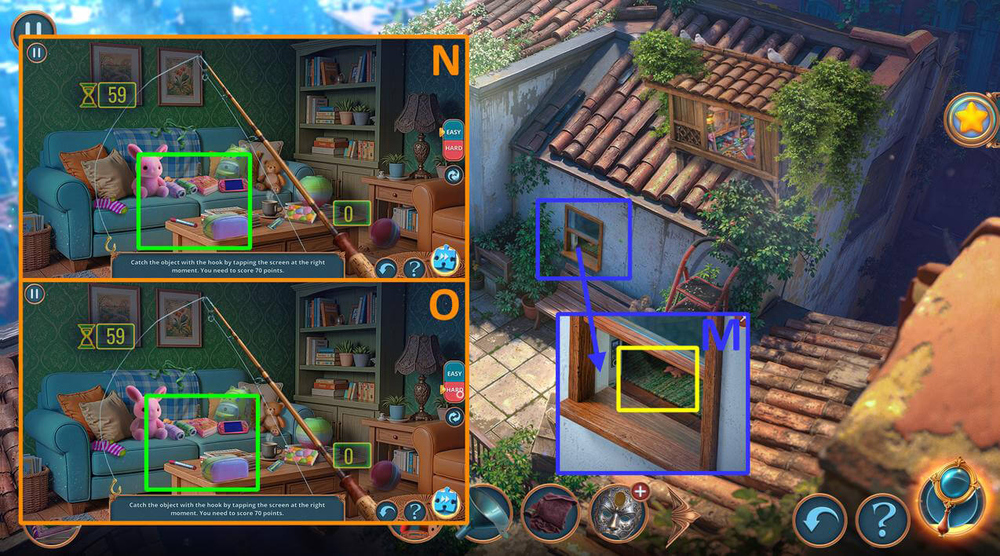
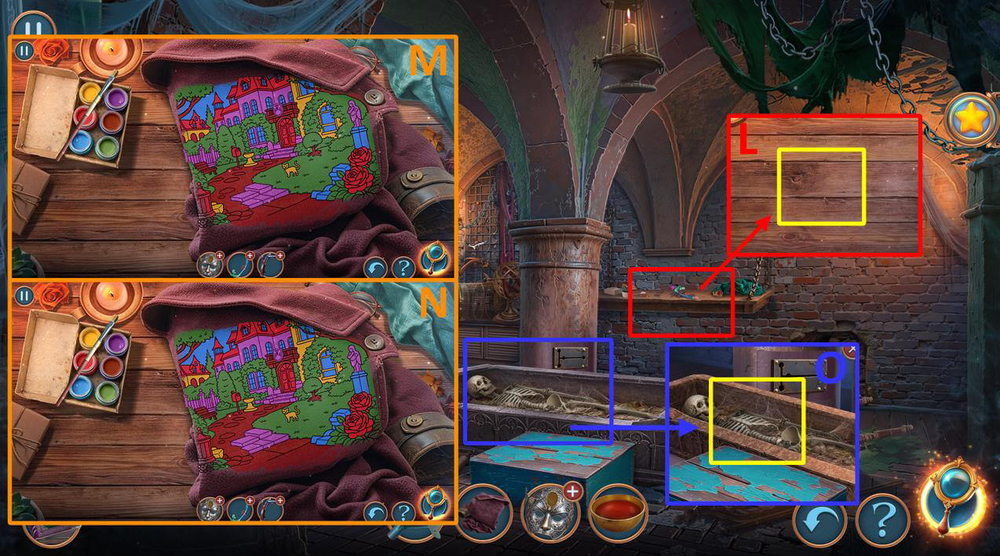
- Use AWL and THICK BOOK on the window, take INK and BOLT CUTTERS (M).
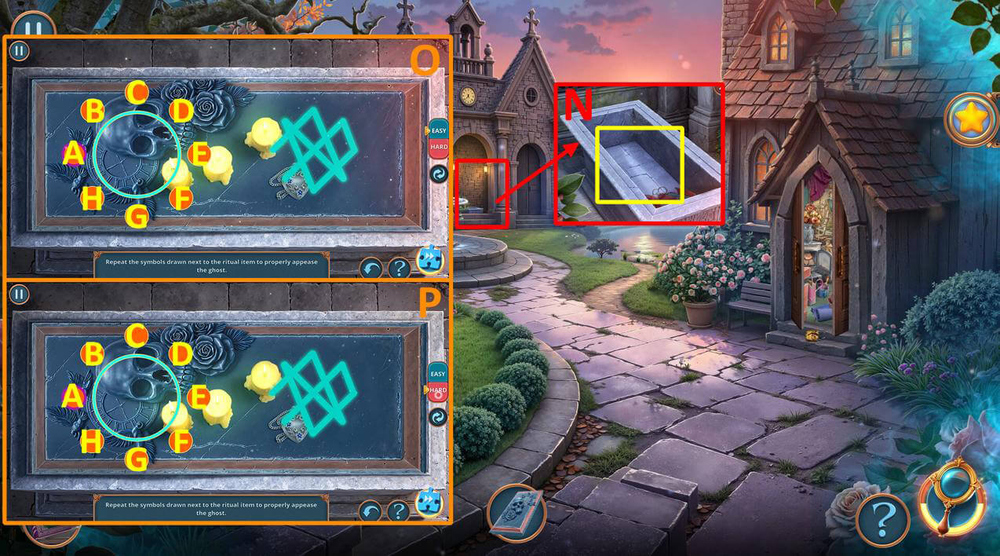
- Use BOLT CUTTERS on the lock (N).
- Play puzzle, earn SIGNAL FLARE (O).
- Go back.
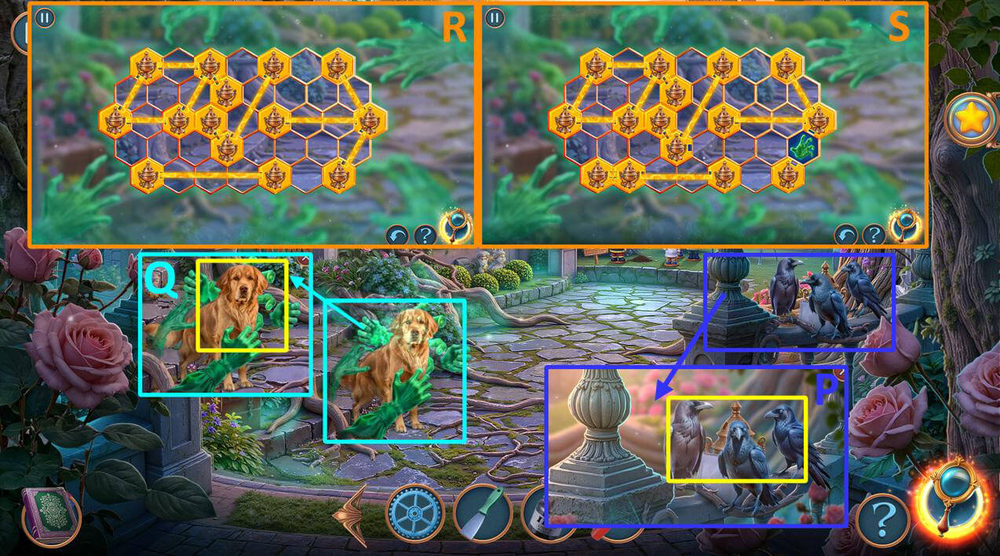
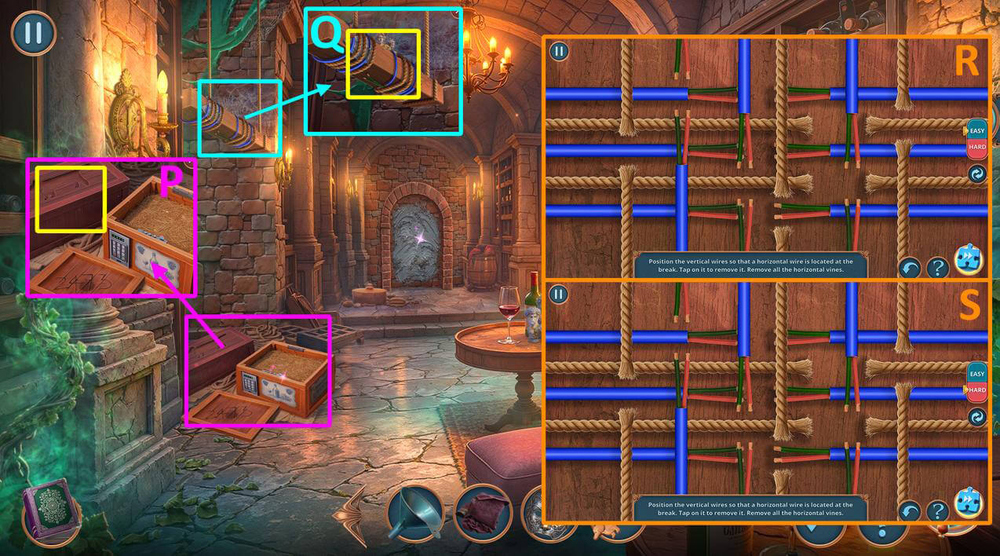
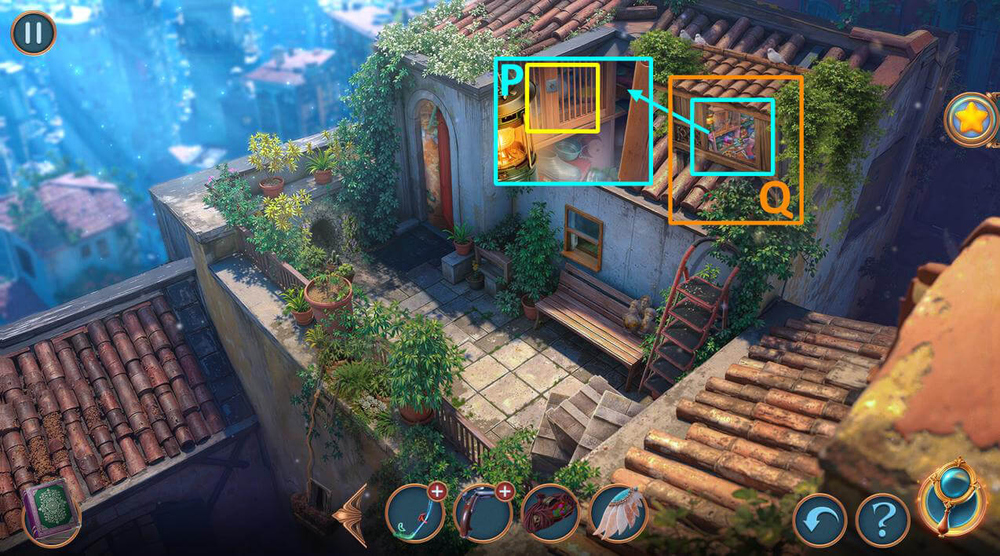
- Use SIGNAL FLARE on the crows, take and read the note, take CENSER (P).
- Use CENSER on the dog (Q).
- Easy solution: Place objects as shown in the picture (R).
- Hard solution: Place objects as shown in the picture (S).
- Take DOG and CABLE.
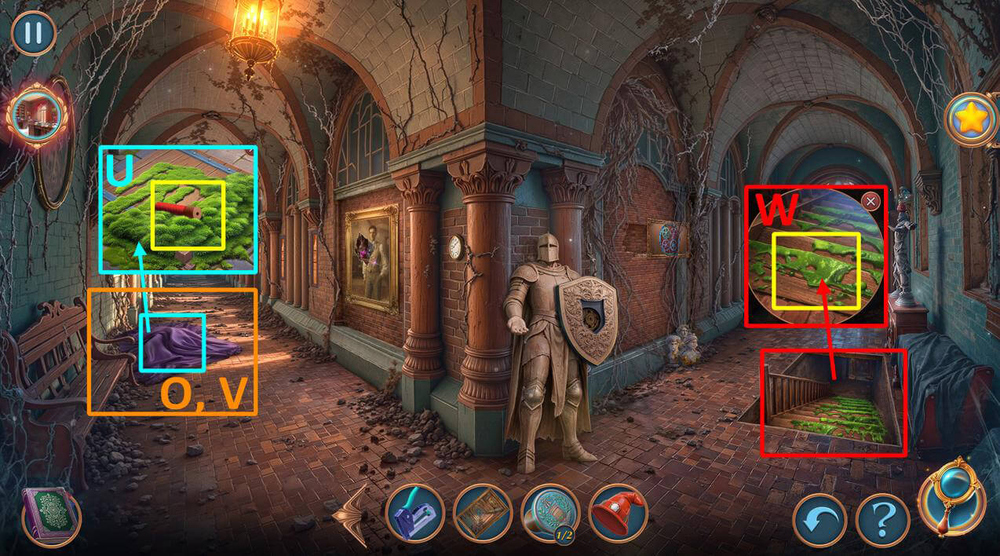
- Use CABLE on the charger, take CHARGED LANTERN (T).
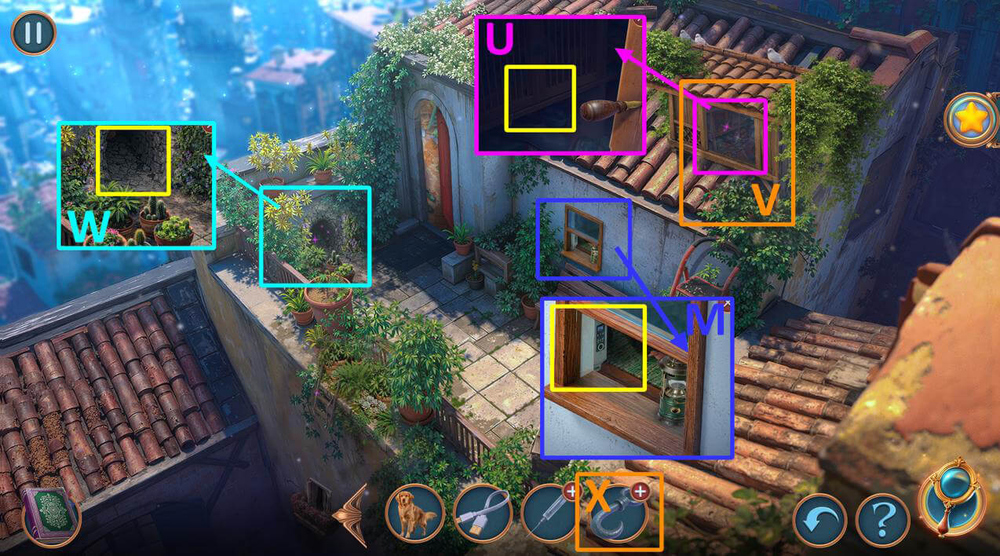
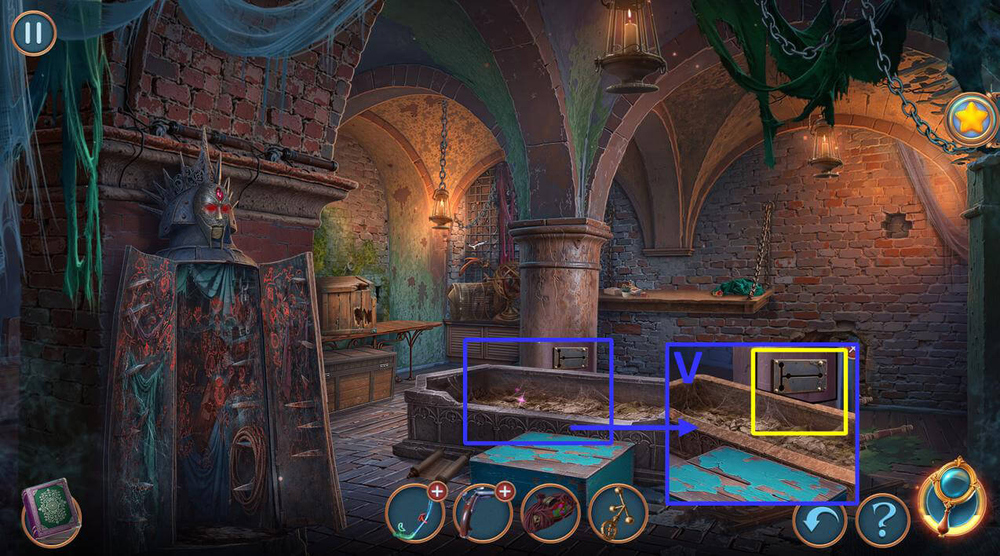
- Use CHARGED LANTERN on the darkness (U).
- Play puzzle, earn TATTERED CLOAK (V).
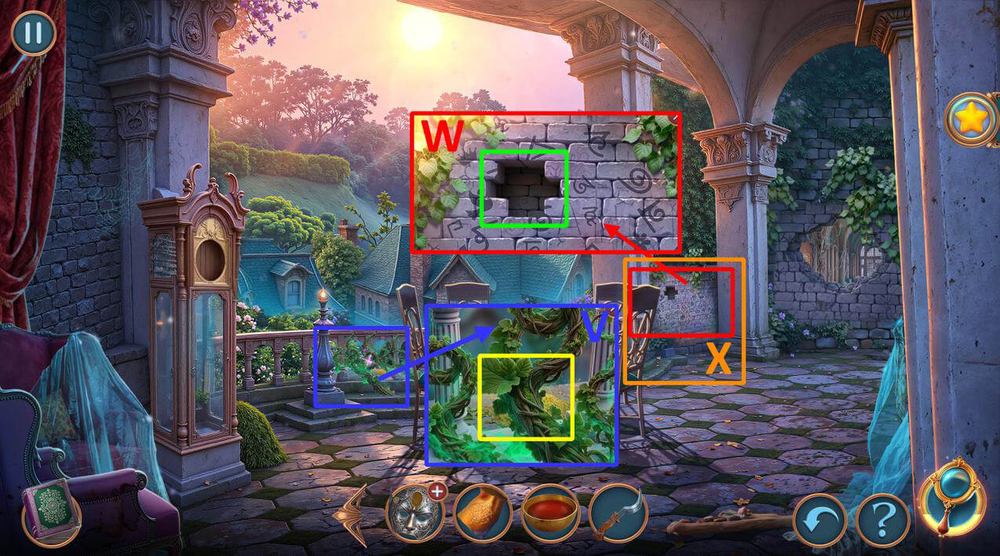
- Use TATTERED CLOAK and DOG on the cave, earn ROPE, take and read the note (W).
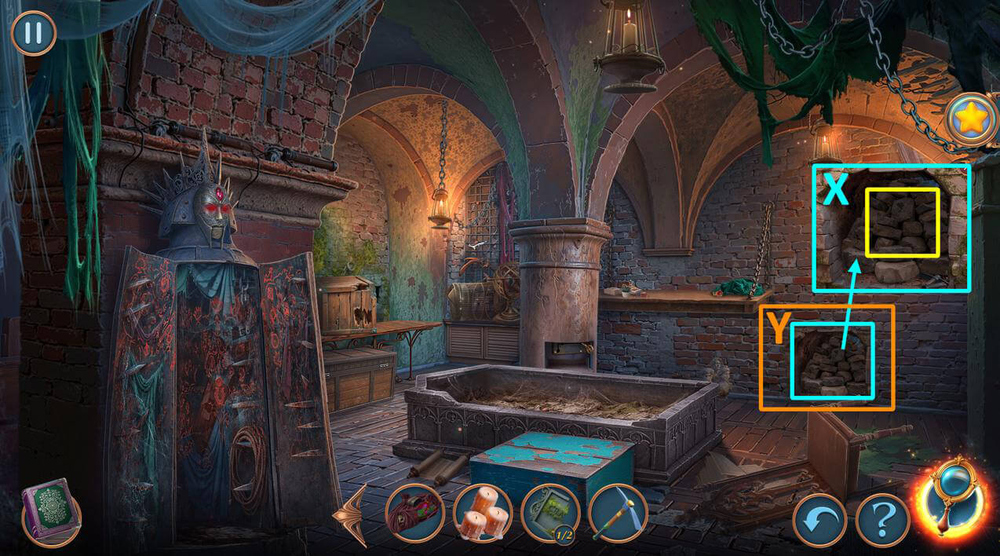
- Use ROPE on HOOK, earn GRAPPLING HOOK (X).
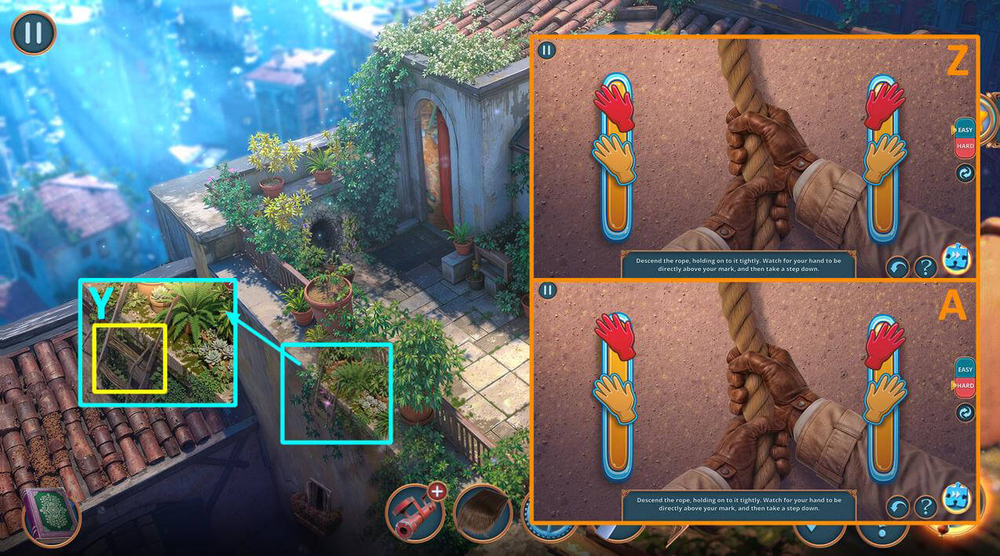
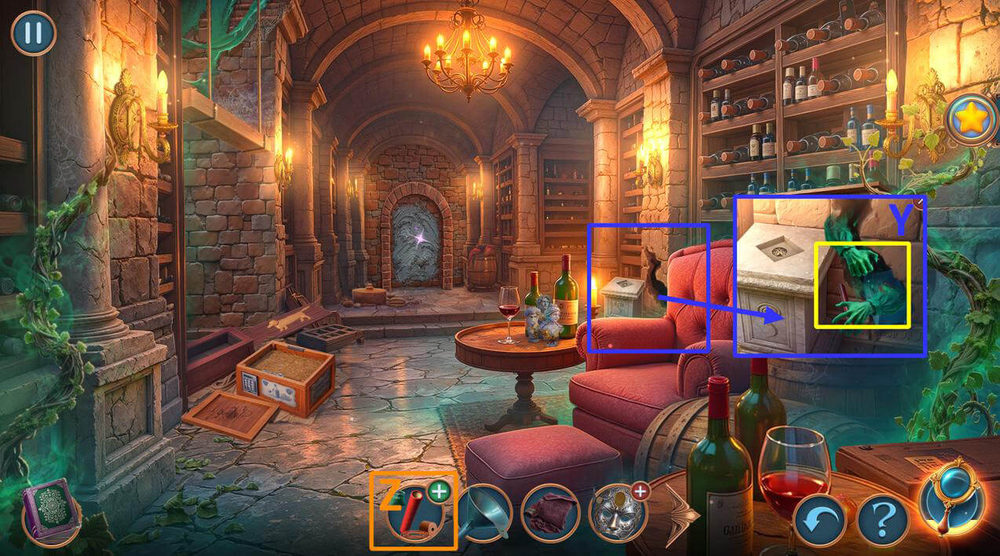
- Use GRAPPLING HOOK on the way up (Y).
- Easy solution: Click the screen when the moving hand turns green (Z).
- Hard solution: Click the screen when the moving hand turns green (A).
- Take STAPLER (B).
- Take ANTIDOTE (C).
- Use ANTIDOTE on SYRINGE, earn SYRINGE (D).
- Use SYRINGE on the poisonous plants, take BROKEN SPEAR (E).
- Use BROKEN SPEAR on BATTERING RAM, earn BATTERING RAM (F).
- Use BATTERING RAM on the wall (G).
- Easy solution: Aim the ram’s beams at weak spots (H).
- Hard solution: Aim the ram’s beams at weak spots (I).
- Go forward.
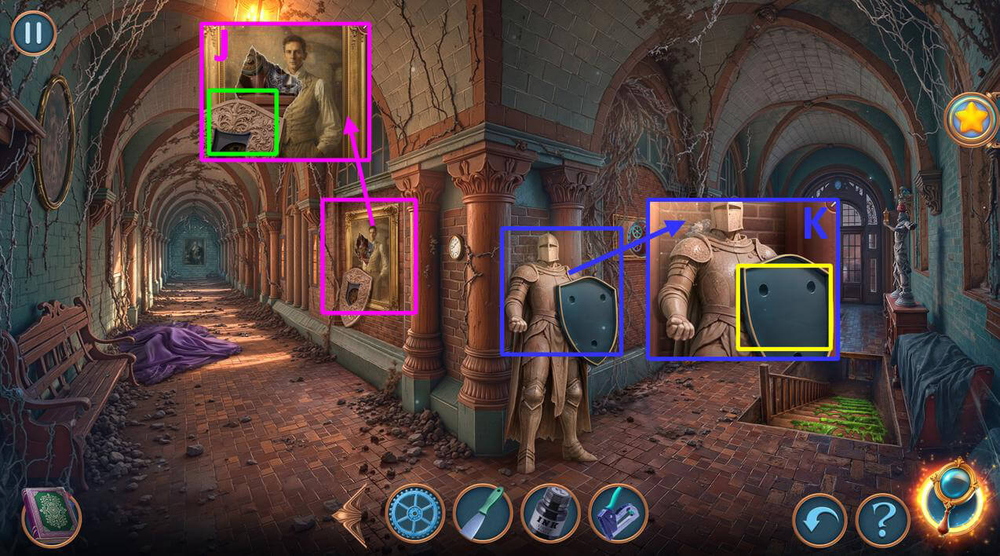
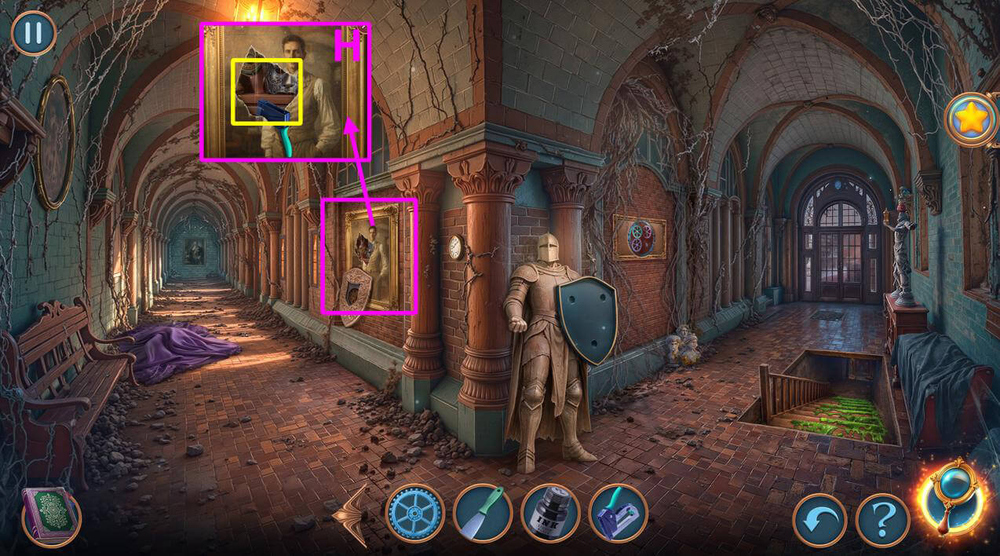
- Take SHIELD (J).
- Use SHIELD on the knight, take SCREW (K).
- Use GILDED GEAR and SCREW on the mechanism (L).
- Easy solution: Rotate the gears to set them in the position shown in the picture (M).
- Hard solution: Rotate the gears to set them in the position shown in the picture (N).
- Take DUKE’S PAINTING.
- Select this option (O).
- Go to the Duke’s Hidden Room.
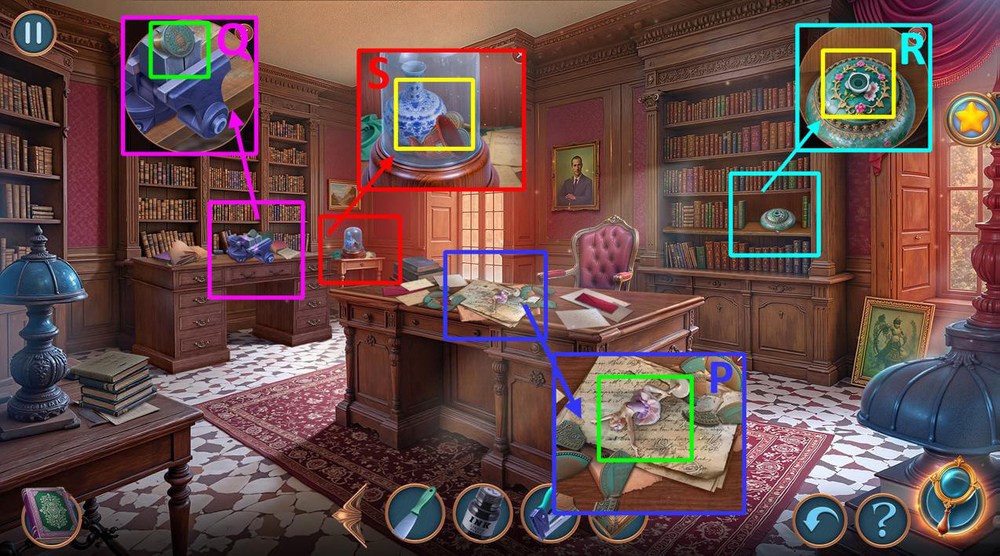
- Take BALLERINA FIGURINE (P).
- Take FAKE SEALS 1/2 (Q).
- Use BALLERINA FIGURINE on the box, take and read the note, take GLASS CUTTER (R).
- Use GLASS CUTTER on the glass, take GNOME’S HAT (S).
- Go back.
- Use DUKE’S PAINTING on the cloth (T).
- Take EXPLOSIVES, use SCRAPER on the moss (U).
- Play puzzle, earn PORTABLE VACUUM CLEANER (V).
- Use PORTABLE VACUUM CLEANER on the slime (W).
- Go to the Distorted Mansion Cellar.

- Use FURRY RAG and INK on the code, take WICK and BROOM (X).
- Use BROOM on the web, take FUNNEL (Y).
- Take GUNPOWDER (Z).
- Go to the Mansion Roof.
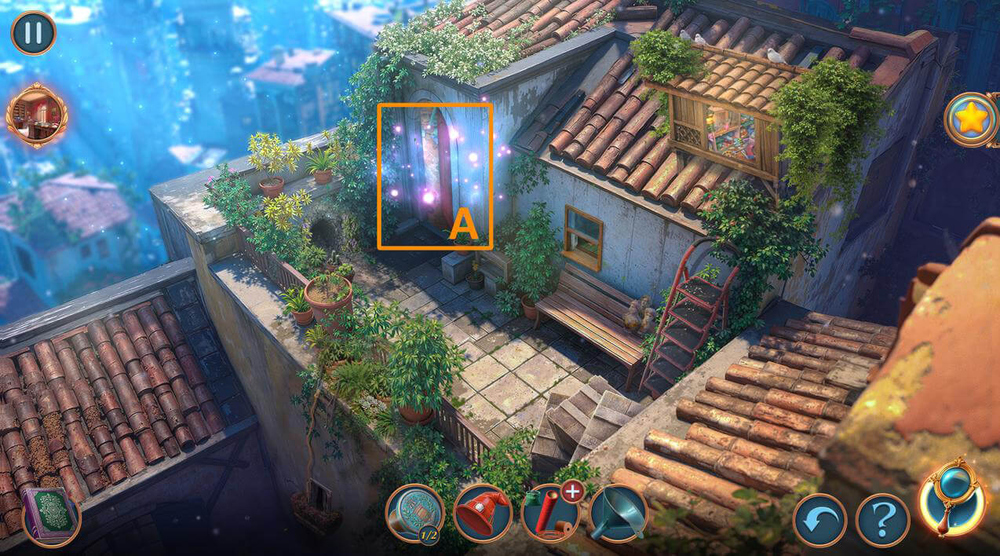
- Play puzzle, earn GARDEN TROWEL (A).
- Go back.
- Use GNOME’S HAT on the gnome, take VISE HANDLE, use GARDEN TROWEL on pile of earth, take LIQUID NITROGEN (B).
- Go to the Duke’s Hidden Room.
- Use VISE HANDLE on the vise, take FAKE DIAMOND (C).
- Go to the Secret Balcony.
- Use LIQUID NITROGEN on the wire, take CLOTH and CHARCOAL POWDER (D).
- Use CHARCOAL POWDER on the wall (E).
- Play puzzle, earn PAINTING PART (F).
- Select this option (G).
- Go forward.
- Use STAPLER and PAINTING PART on the painting, take MAIDEN MASK and FISHING ROD, use FAKE DIAMOND on the box, take RECEIPT (H).
- Go to the Duke’s Hidden Room.

- Use RECEIPT on the seals, earn FAKE SEALS 2/2, (I).
- Use FAKE SEALS 2/2 on the table (J).
- Easy solution: Mark all the differences as shown in the picture (K).
- Hard solution: Mark all the differences as shown in the picture (L).
- Take and read the note.
- Go to the Mansion Roof.
- Use FISHING ROD on the dog figurine (M).
- Easy solution: Click the screen when the fishing line and hook pass through the green square.
- Repeat this action until you collect the dog figurine (N).
- Hard solution: Click the screen when the fishing line and hook pass through the green square.
- Repeat this action until you collect the dog figurine (O).
- Earn DOG FIGURINE.
- Go to the Distorted Mansion Cellar.
- Use DOG FIGURINE on the box lid, take MASK PART, POUCH, and CIGAR GUILLOTINE (P).
- Use CIGAR GUILLOTINE on the ropes (Q).
- Easy solution: Press down on the vertical strands so that a horizontal strand is in the area of the tear.
- Repeat until all horizontal strands are gone (R).
- Hard solution: Press down on the vertical strands so that a horizontal strand is in the area of the tear.
- Repeat until all horizontal strands are gone (S).
- Take ROTTENBURG CREST.
- Go back.

- Use ROTTENBURG CREST on the shield, take BLOOD (T).
- Play puzzle, earn SICKLE (U).
- Go back.
- Use SICKLE on the plants, use POUCH on the pollen, earn GLOWING POLLEN (V).
- Use GLOWING POLLEN on the wall (W).
- Play puzzle, earn PROTECTION AMULET (X).
- Go to the Distorted Mansion Cellar.
- Use PROTECTION AMULET on the ghost, take DETONATOR (Y).
- Use WICK, GUNPOWDER and DETONATOR on EXPLOSIVES, earn EXPLOSIVES (Z).

- Use EXPLOSIVES on the wall (A).
- Easy solution: Connect the items as shown in the picture (B).
- Hard solution: Connect the items as shown in the picture (C).
- Go forward.

- Select this option (D).
- Use FUNNEL and BLOOD on the hole (E).
- Play puzzle, earn SKELETON’S HAND (F).
- Use SKELETON’S HAND on the helmet, earn SAFETY HAT (G).
- Use SAFETY HAT on the dark (H).
- Play puzzle, earn PERFUME (I).
- Use PERFUME on the spiders, take BREATHING TUBE and HEINRICH’S BRACELET (J).
- Go to Heinrich’s Secret Passage.
- Use HEINRICH’S BRACELET on the box, take ANTIQUE MUSKET and PAINTS (K).
- Go to The Walled-Up Room.
- Use CLOTH and PAINTS on the table (L).
- Easy solution: Color the picture as shown in the image (M).
- Hard solution: Color the picture as shown in the image (N).
- Take CLOAK.
- Use CLOAK on the skeleton, earn HEINRICH’S REMAINS, take FEATHER PENDANT (O).
- Go to the Mansion Roof.
- Use FEATHER PENDANT on the door (P).
- Play puzzle, earn TONGS (Q).
- Go to The Walled-Up Room.

- Use TONGS on the crack, earn GEM (R).
- Use MASK PART and GEM on MAIDEN MASK, earn IRON MAIDEN MASK (S).
- Use IRON MAIDEN MASK on the iron maiden (T).
- Play puzzle, earn METAL KEY (U).
- Use METAL KEY on the cache, take CANDLES and DUKE’S BUST (V).
- Go back.
- Use DUKE’S BUST on the pedestal, take NAME PLAQUE 1/2 and PICKAXE (W).
- Go forward.
- Use PICKAXE on the stones (X).
- Play puzzle (Y).

- Select this option, earn AGNES’S AMULET (Z).
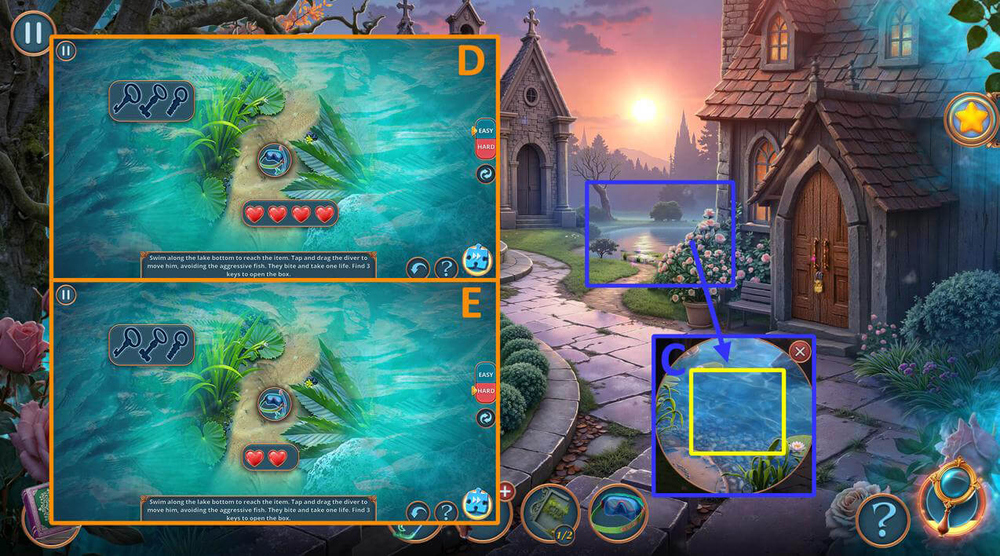
- Take DIVING MASK (A).
- Use DIVING MASK on BREATHING TUBE, earn DIVING MASK (B).
- Use CLOTH and PAINTS on the table (C).
- Easy solution: Find all keys (D).
- Hard solution: Find all keys (E).
- Earn SCYTHE.
- Use SCYTHE on the hand, take BULLETS (F).
- Use BULLETS on ANTIQUE MUSKET, earn LOADED MUSKET (G).
- Use LOADED MUSKET on the lock (H).
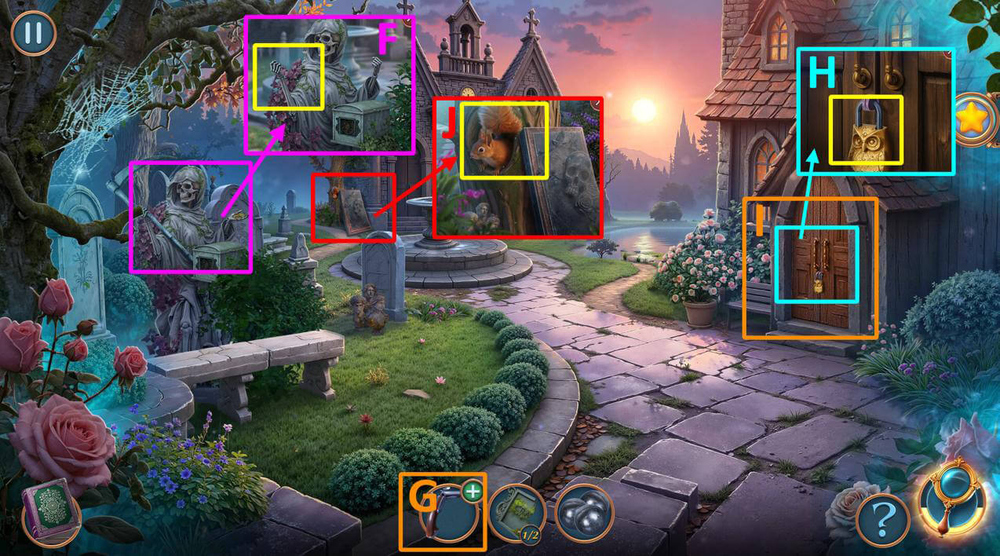
- Play puzzle, earn NUTS (I).
- Use NUTS on the squirrel, take NAME PLAQUE 2/2 (J).
- Use NAME PLAQUE on the mechanism, take BRUSH (K).
- Play puzzle, earn POLISH (L).
- Use BRUSH and POLISH on the sarcophagus lid, take SARCOPHAGUS LID (M).
- Use HEINRICH’S REMAINS, CANDLES, AGNES’S AMULET, SARCOPHAGUS LID on the sarcophagus (N).
- Easy solution: Click on the circles in the following order: stage 1: C-F-B-G-E-D-H, stage 2: H-D-F-B-A-G-E, stage 3: C-A-G-E-B-F-H (O).
- Hard solution: Click on the circles in the following order: stage 1: C-F-B-G-E-D-H, stage 2: H-D-F-B-A-G-E, stage 3: C-A-G-E-B-F-H (P).
Congratulations! You have completed the game Hidden Legacy 2: Whispering Walls.


