Mind Echoes 2: Remnants of the Past (Bonus Chapter) – Emily must return to the medieval park, where this time people are disappearing without a trace, leaving behind no bodies or clues. The park manager suspects a fortune teller who has herself disappeared, leaving only mysteries behind. New paranormal phenomena and investigations await you, where every discovery can change the course of events. You will explore the locked tent of the Silver Moon fortune teller, use an electromagnetic field detector, and uncover the story of a ghost suffering from loneliness after a fire that separated him from the living world forever. To free the missing, you will have to find the amulet that connects the ghost to the kingdom and trust the compass that will lead you to the rescue of the people locked in the ancient village. There are no killer knights in this adventure, but the danger is no less. You will have to use your wits to navigate the mist of mysticism and restore peace to a world where the line between the living and the dead is more fragile than ever.
Bonus Chapter Walkthrough
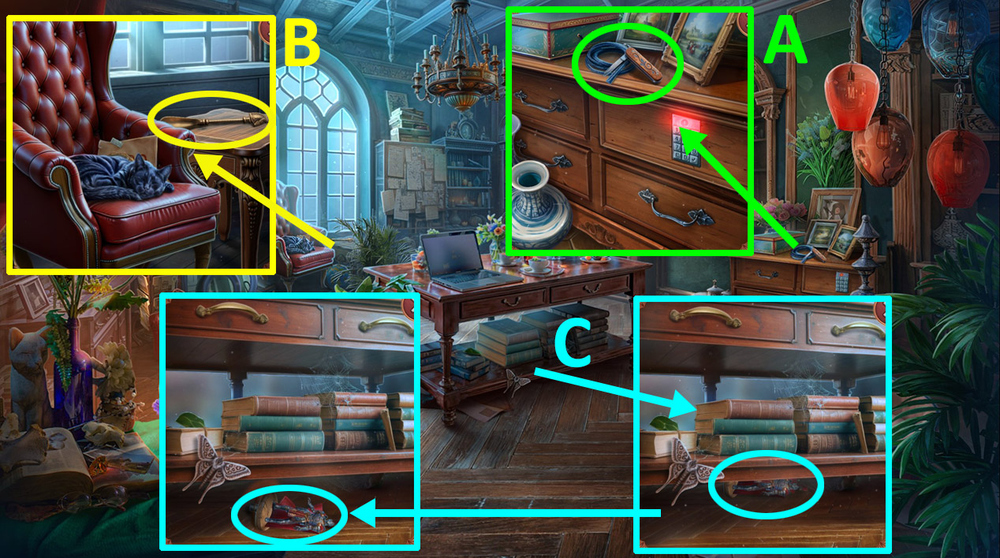
- Take SWISS KNIFE and SHOELACE (A).
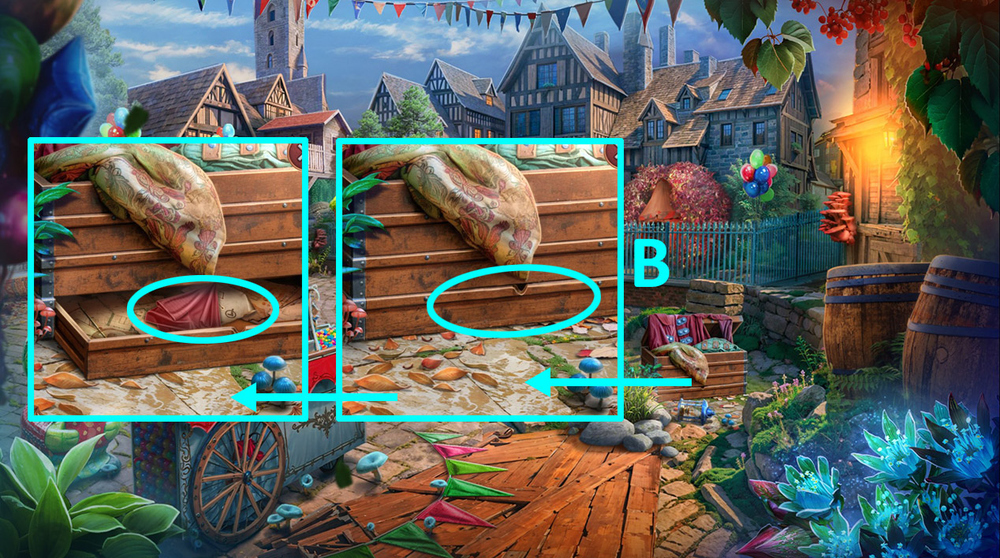
- Take SHOEHORN (B).
- Use SHOEHORN under the table, take KNIGHT FIGURINES 1/2 and BOW TIE (C).
- Use BOW TIE on SHOELACE, get CAT TOY.
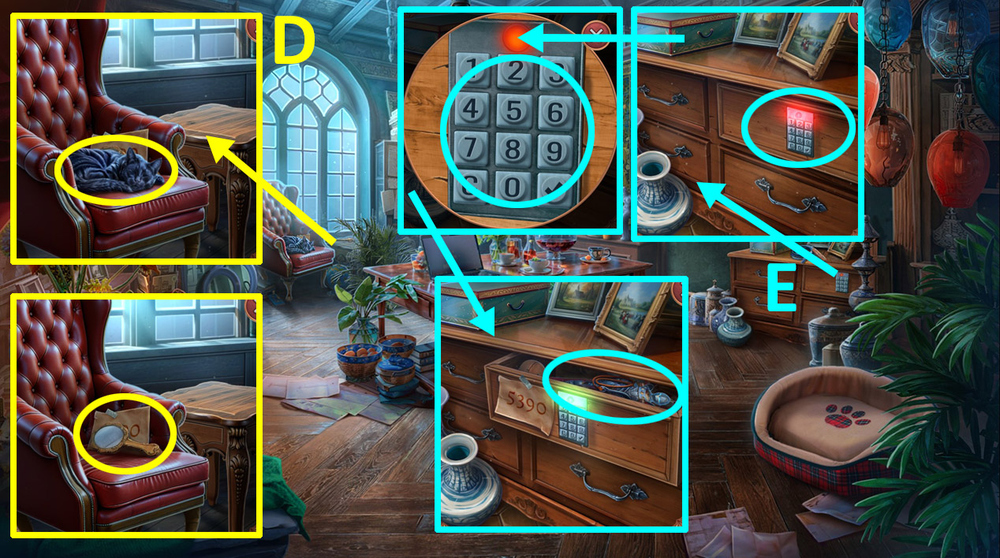
- Use CAT TOY on the cat, take SMALL MIRROR and NOTE WITH CODE (D).
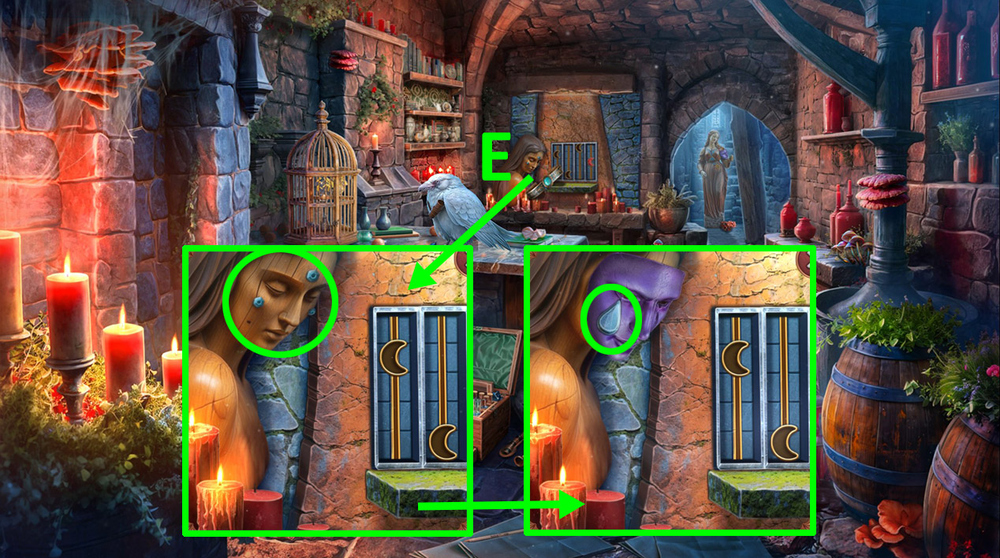
- Examine the code panel, use NOTE WITH CODE on the panel, enter the code, take HOOK AND LINE and KNIGHT FIGURINES 2/2 (E).
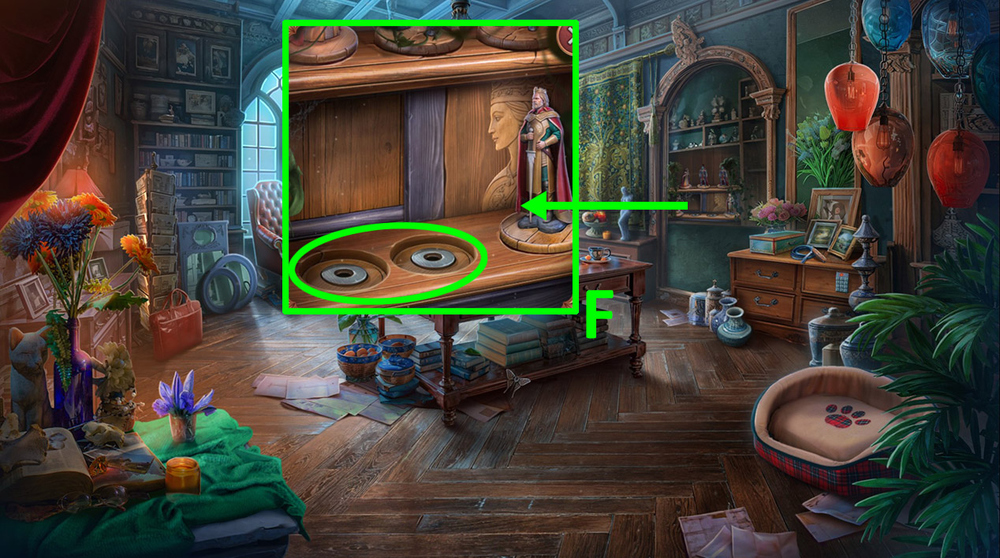
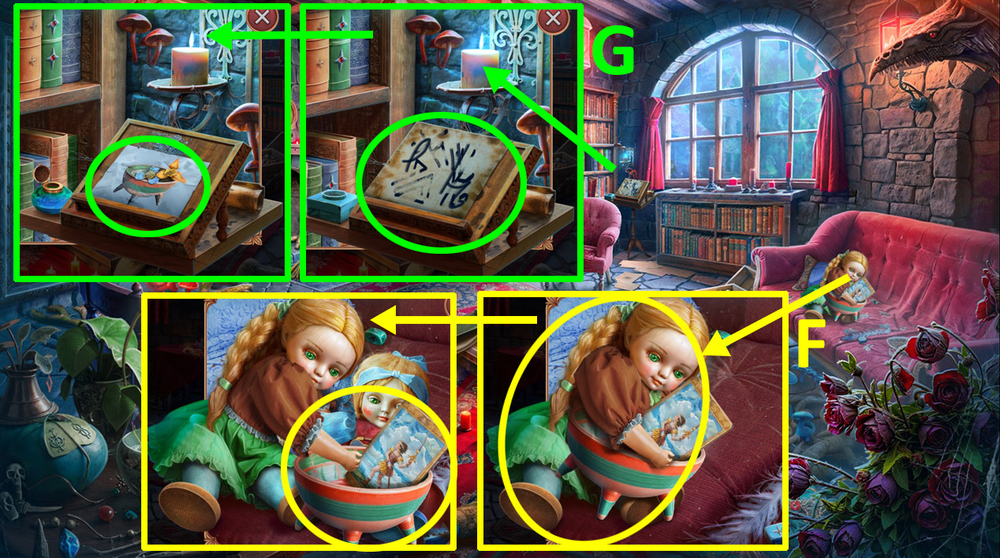
- Use KNIGHT FIGURINES on the shelf (F).
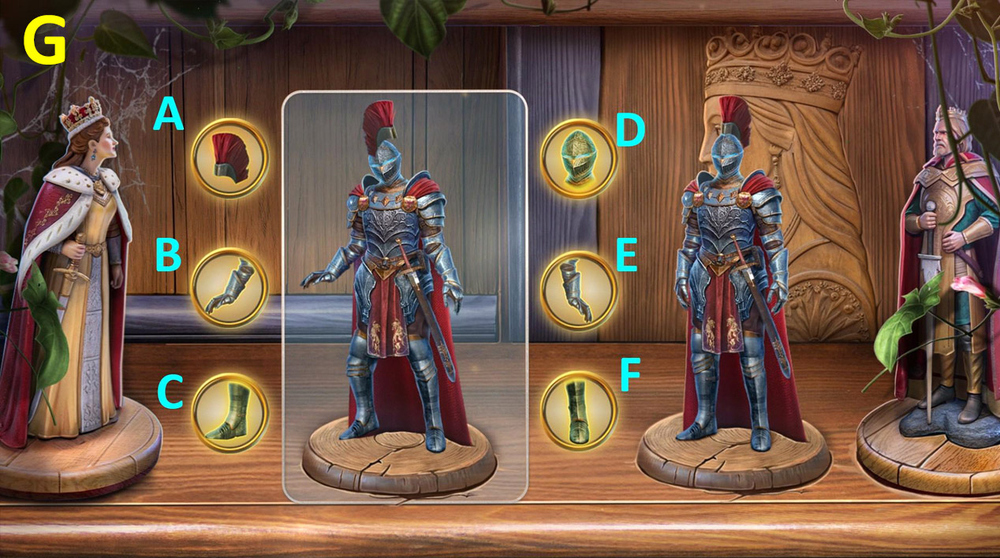
- Easy solution: Click: Ax2, B, C, Dx3, Ex2, Fx3 (G).
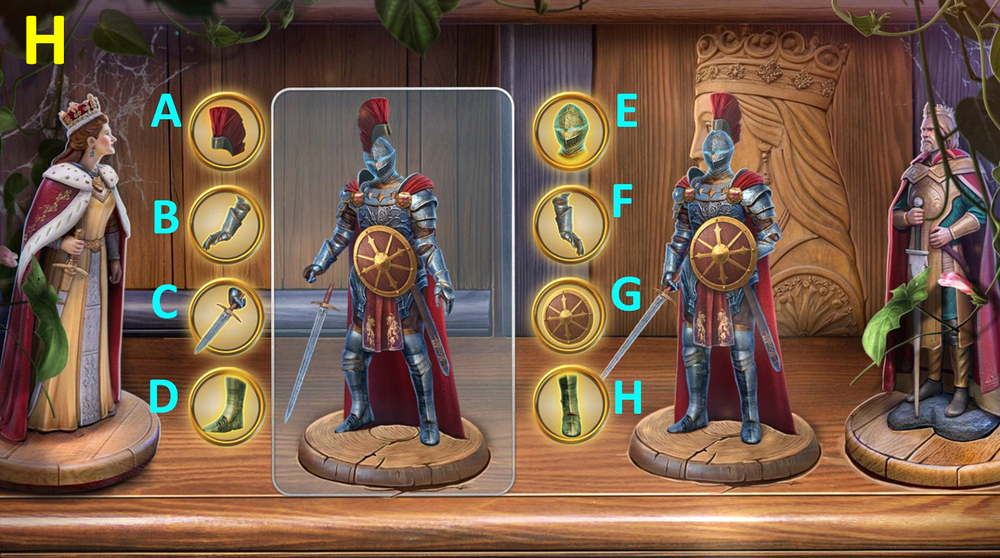
- Hard solution: Click: Ax2, B, Cx2, D, Ex3, F, Gx2, Hx3 (H).
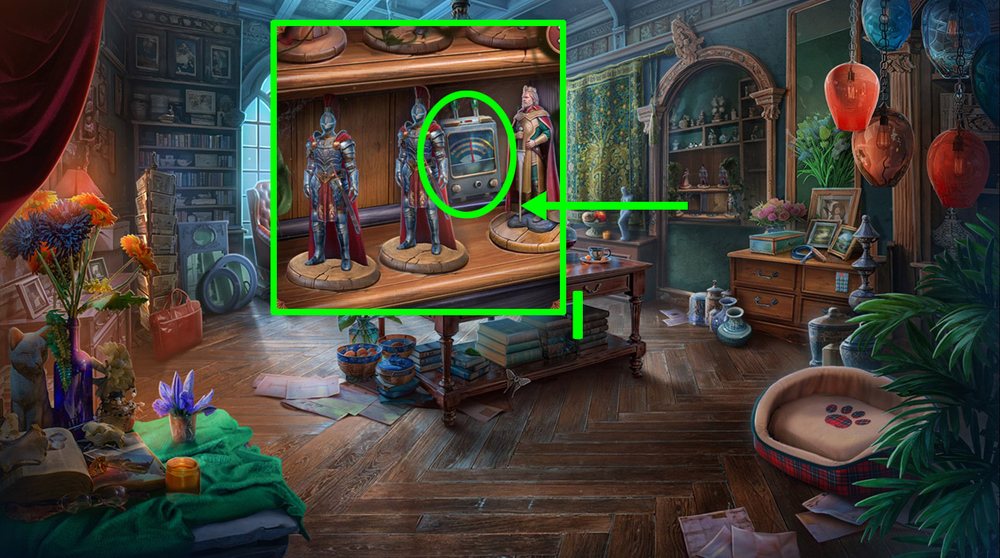
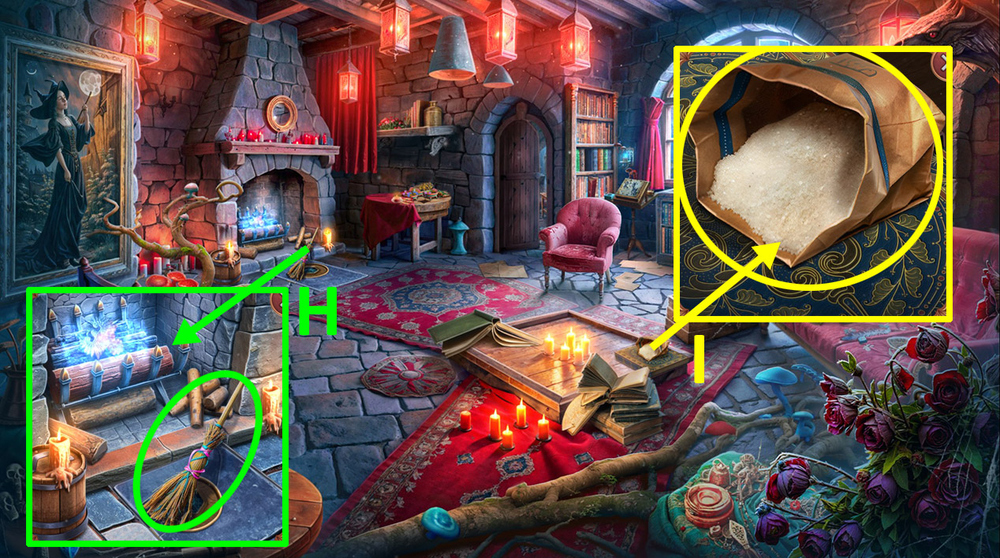
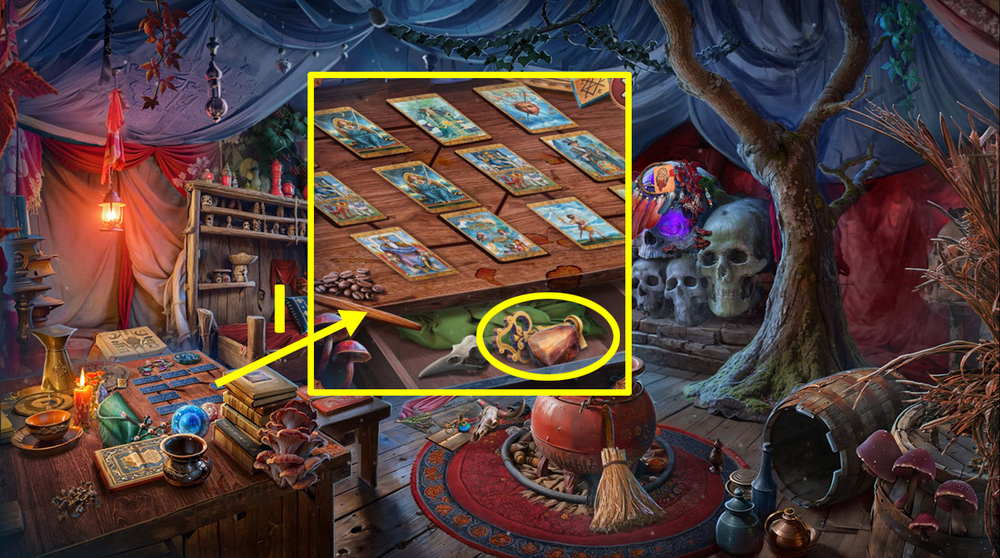
- Take the EMF detector (I).
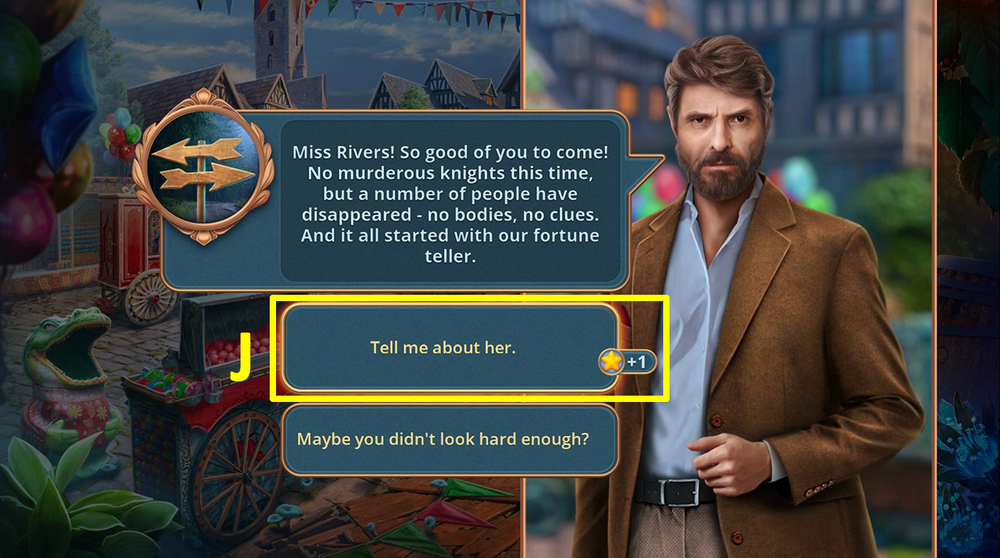
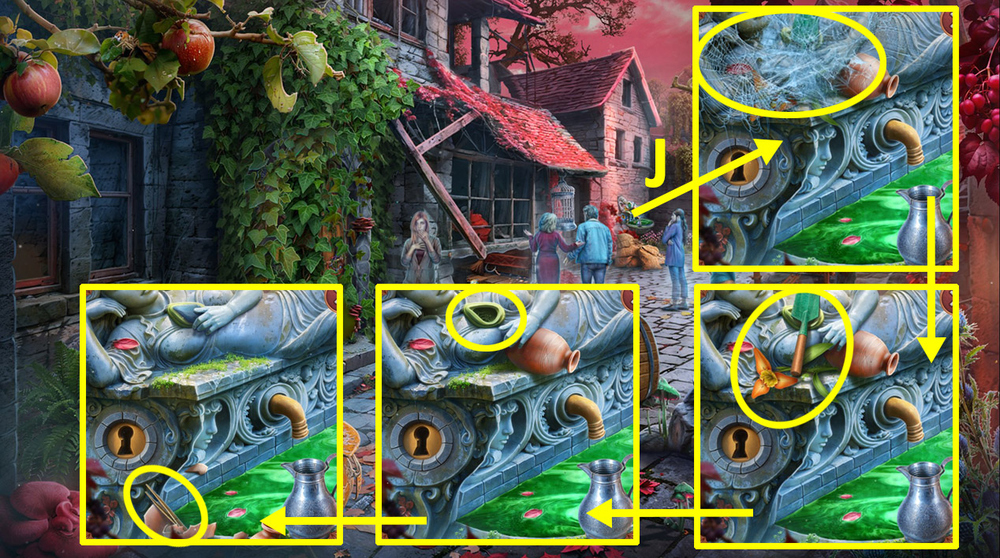
- Select this option (J).
- Use the EMF detector on the background.
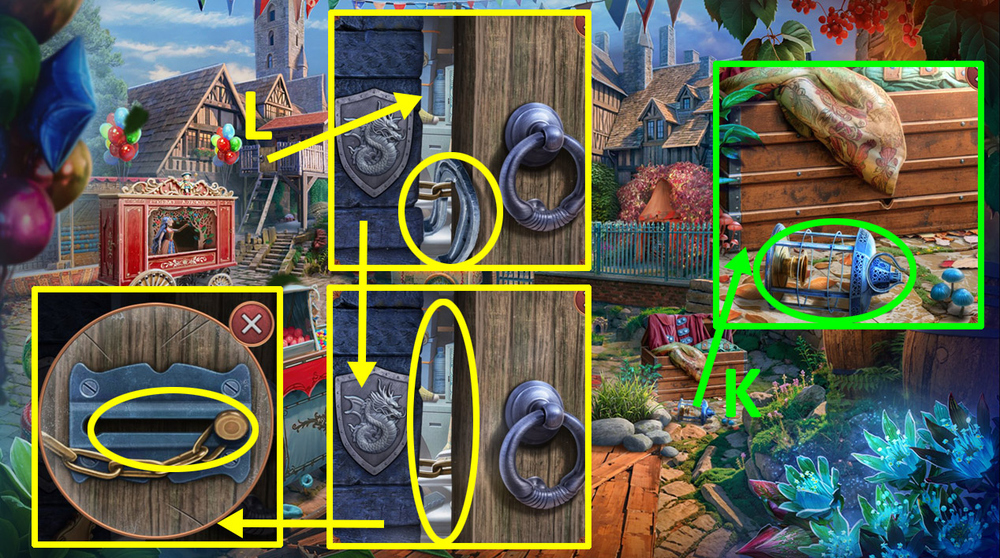
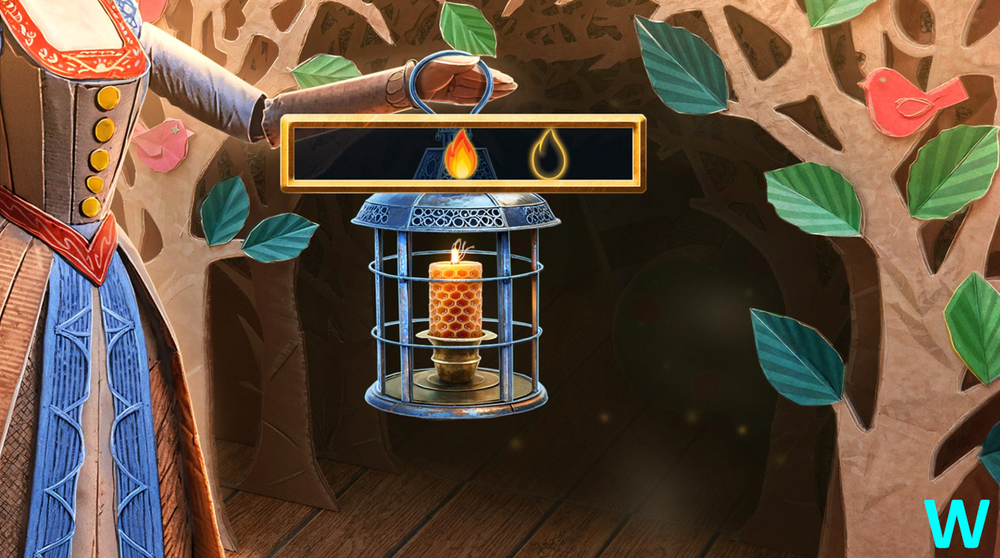
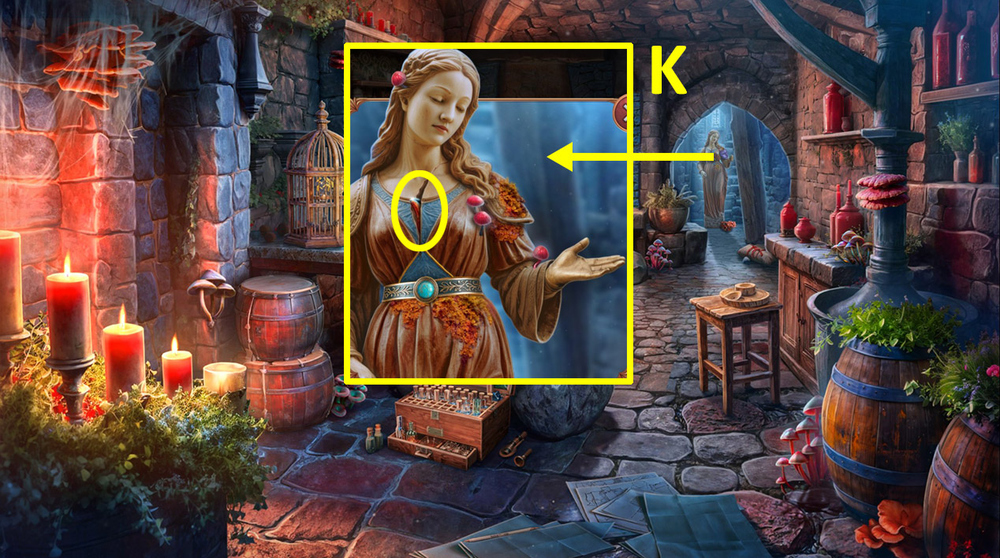
- Take LANTERN (K).
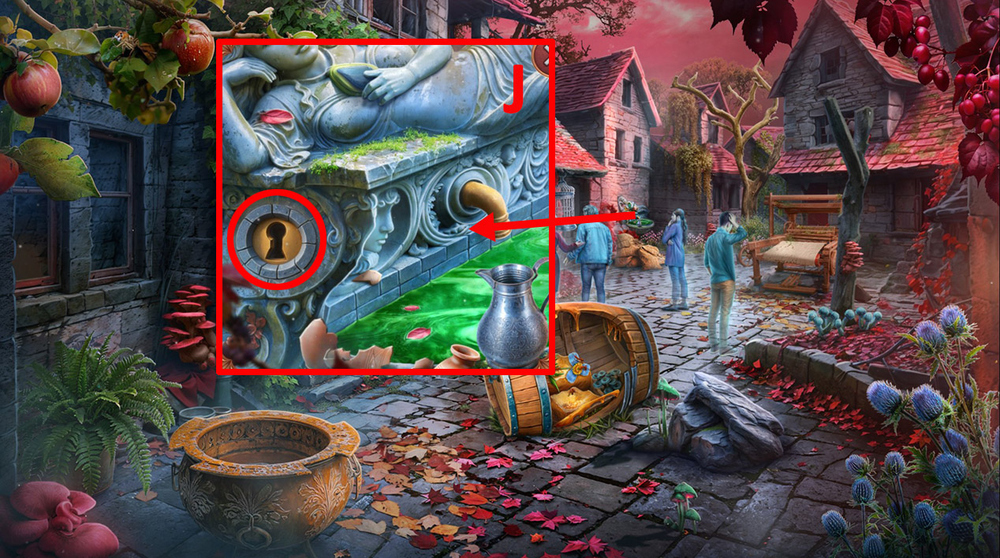
- Take HORSESHOE, use SMALL MIRROR on the gap, use HOOK AND LINE on the latch (L).
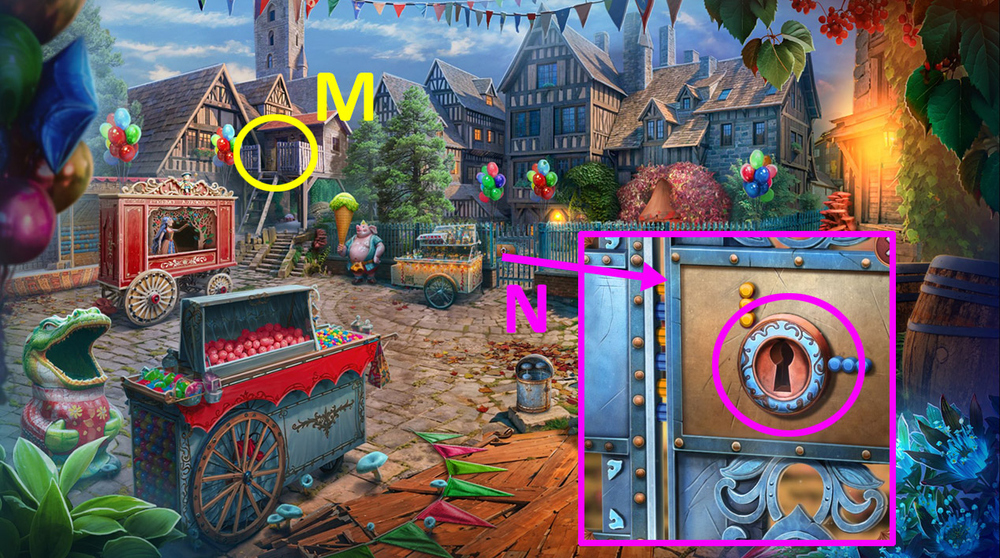
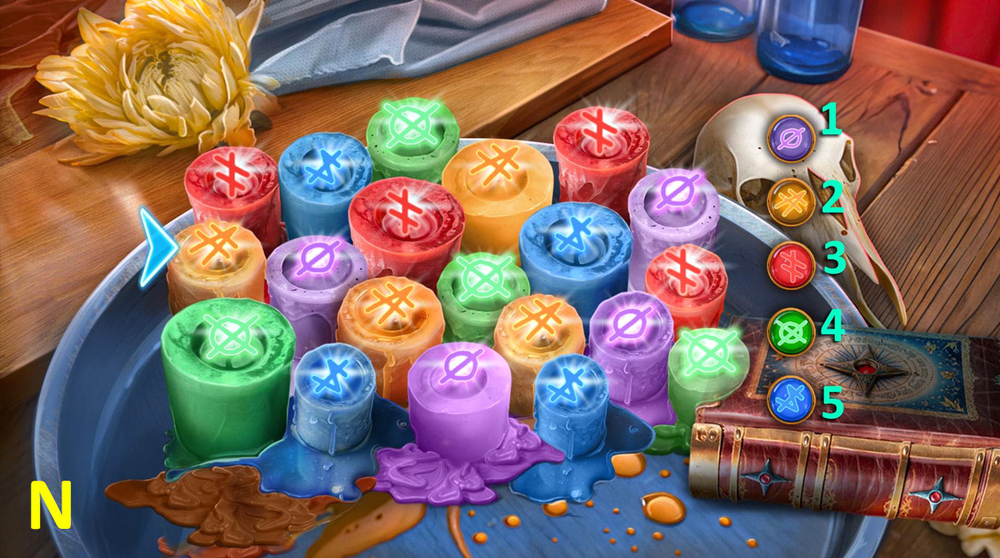
- Play puzzle, earn LOCK PICKS (M).
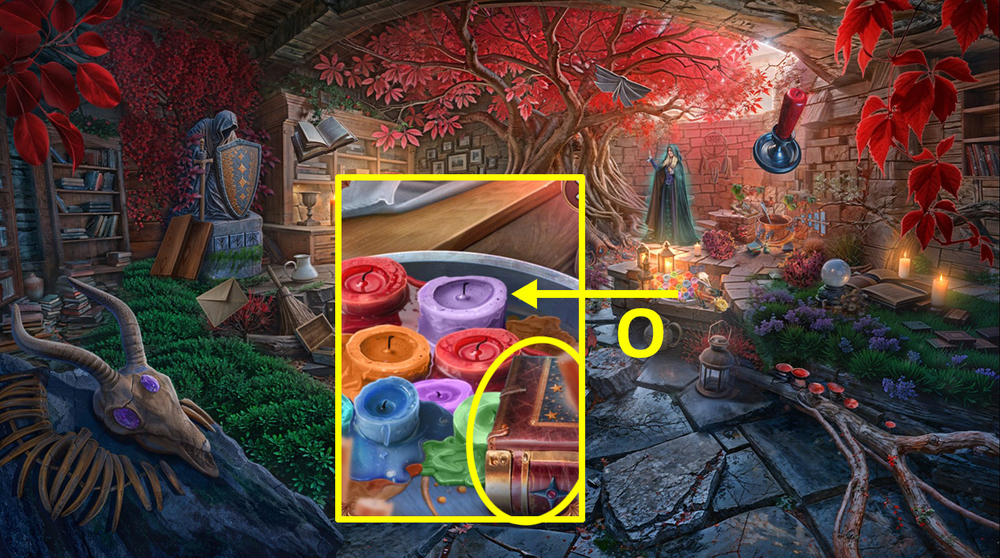
- Use LOCK PICKS on the lock (N).
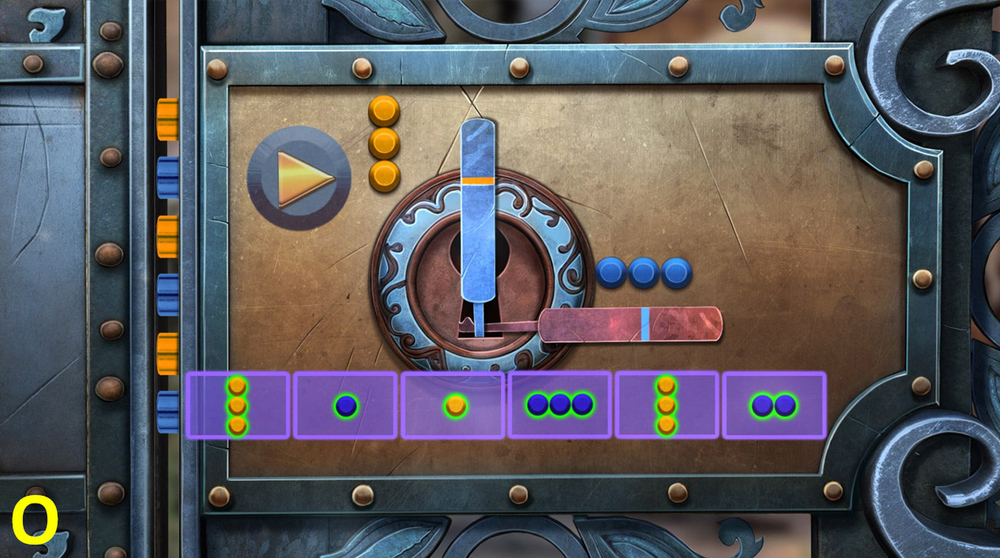
- Easy solution: Arrange as shown in the picture (O).
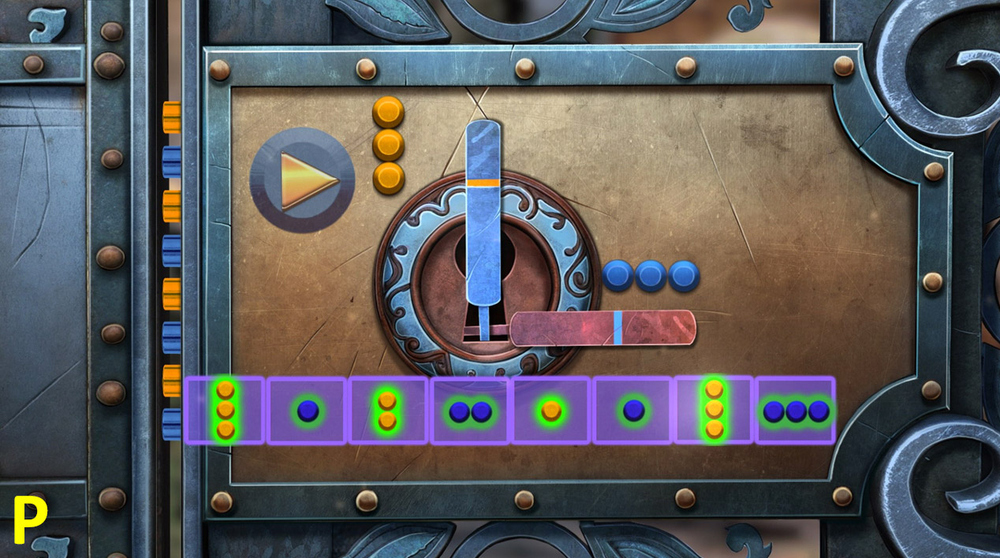
- Hard solution: Arrange as shown in the picture (P).
- Go forward.
- Use the EMF detector on the background.
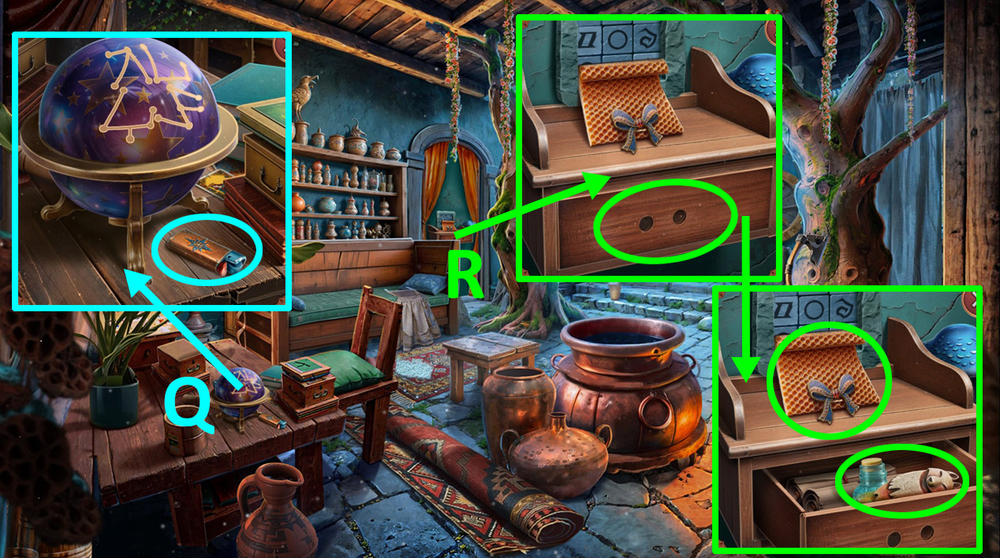
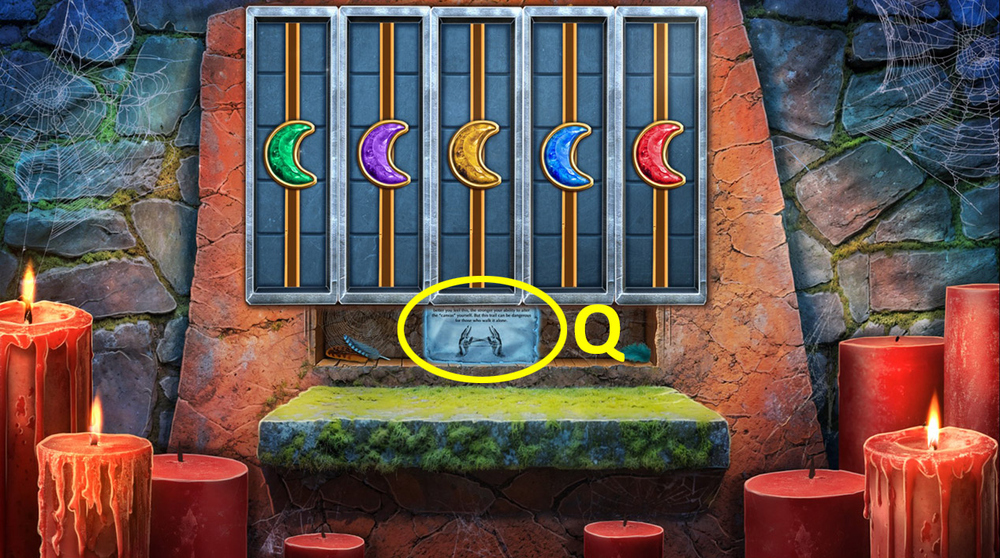
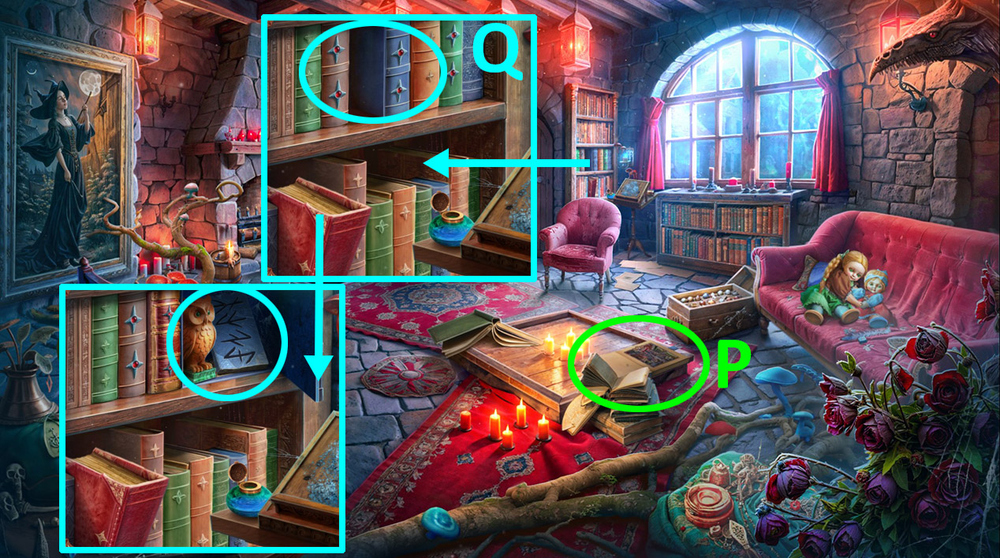
- Take LIGHTER (Q).
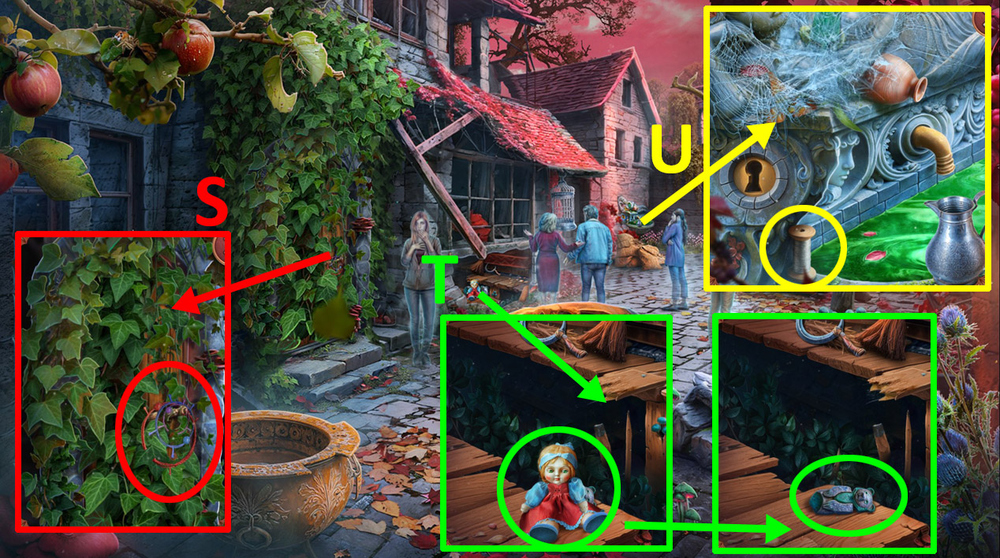
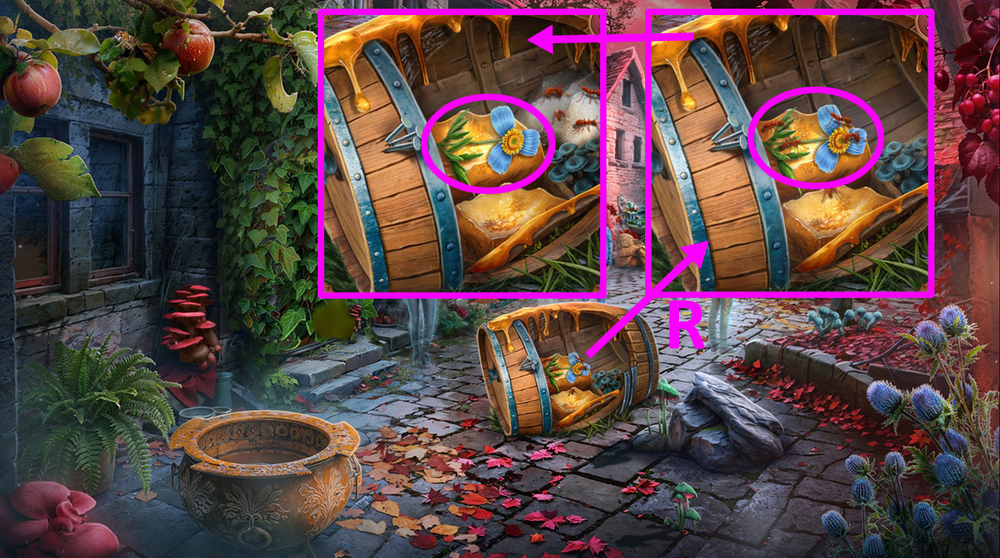
- Use HORSESHOE on the drawer, take BOW PIN, BEESWAX, PROTECTIVE AMULETS 1/2, and LEMON JUICE (R).
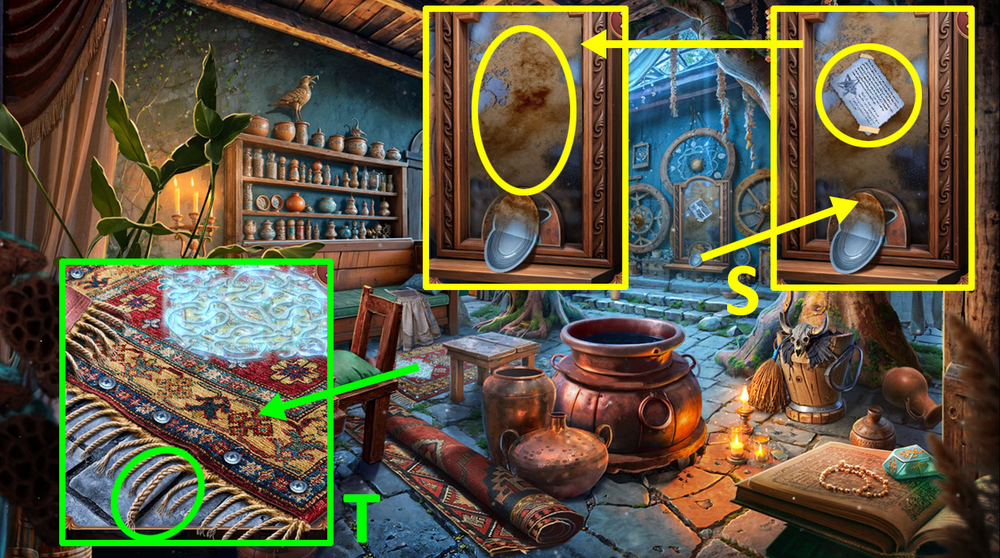
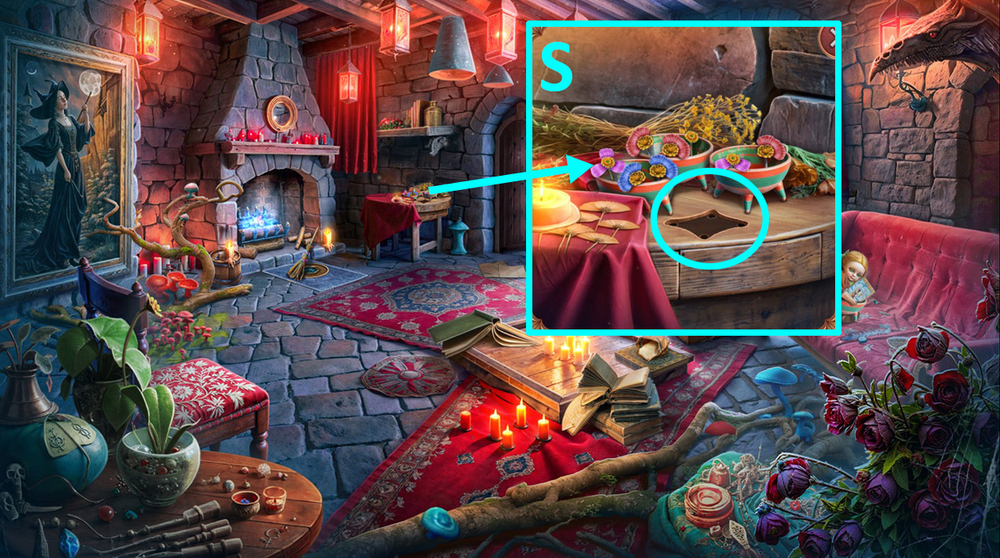
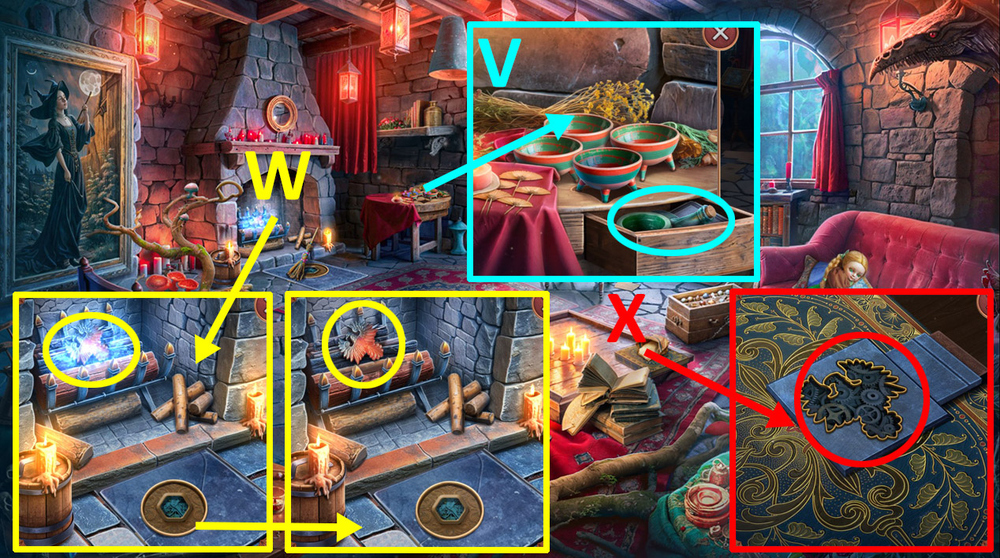
- Read the note, use LEMON JUICE on the mirror (S).
- Use SWISS KNIFE on the carpet tassels, get IMPROVISED WICK (T).
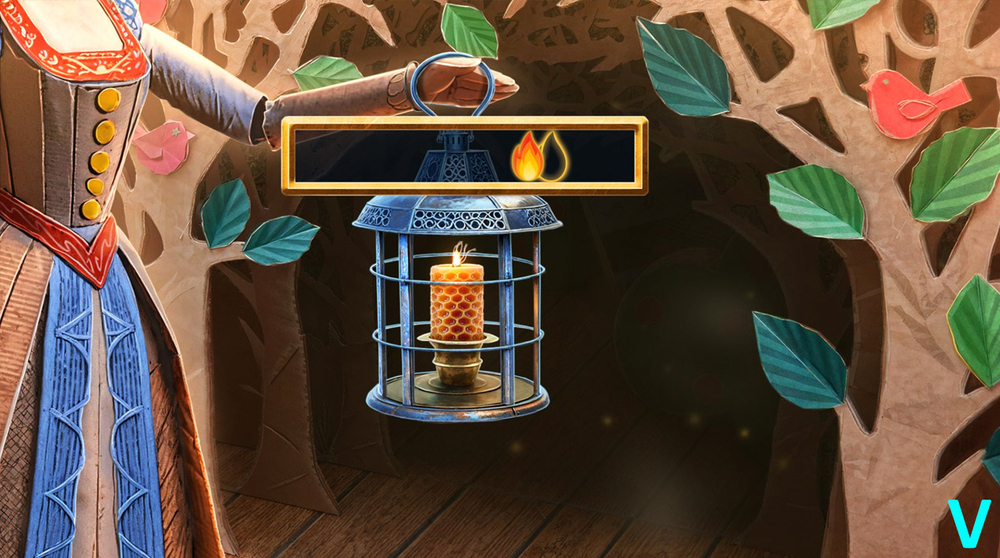
- Use LIGHTER, BEESWAX, and IMPROVISED WICK on LANTERN, get DECORATIVE LANTERN.
- Go back.
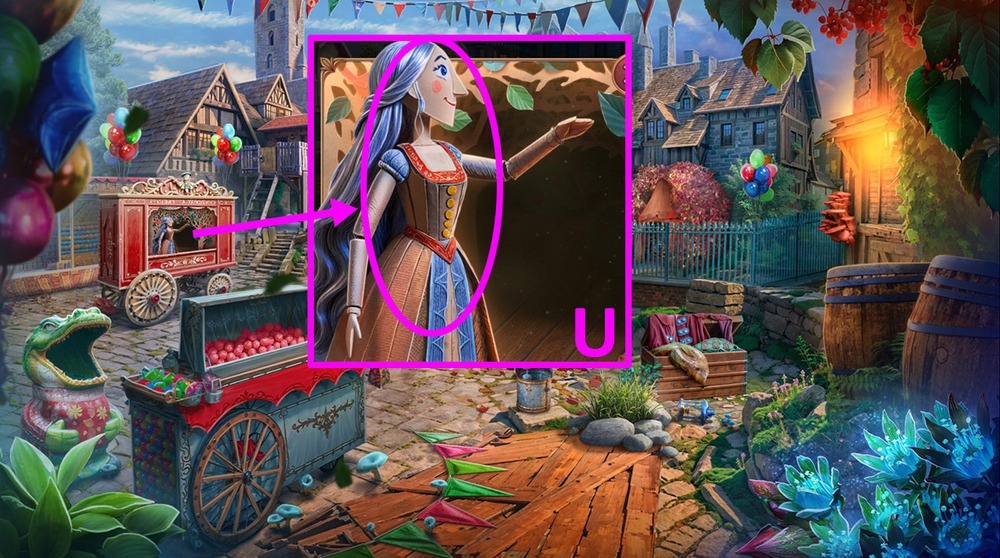
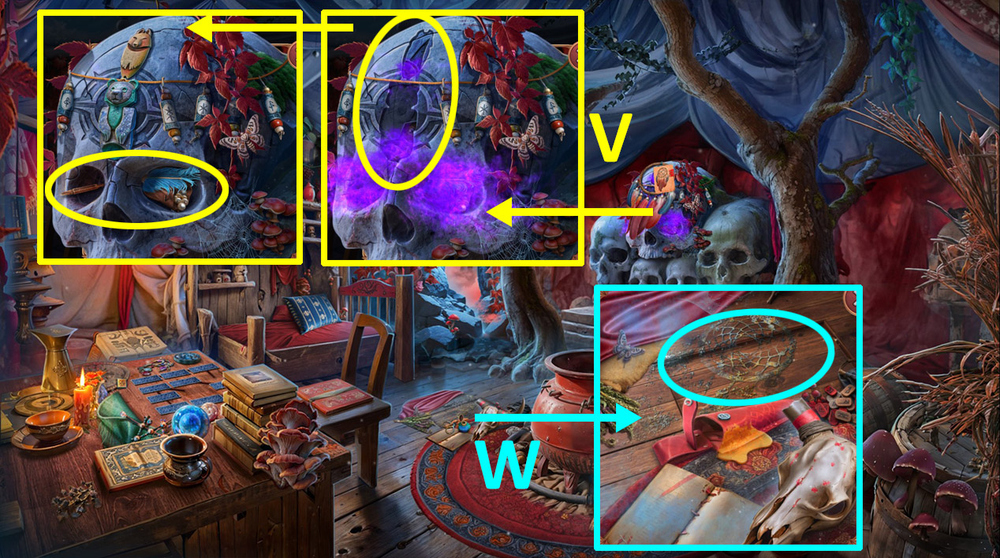
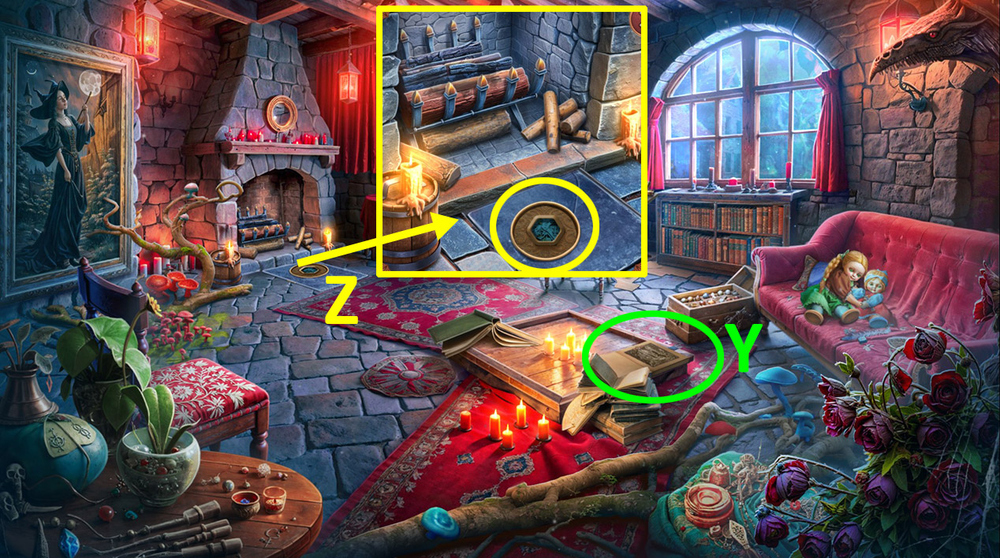
- Use DECORATIVE LANTERN on the doll (U).
- Easy solution: Solution is random (V).
- Hard solution: Solution is random (W).
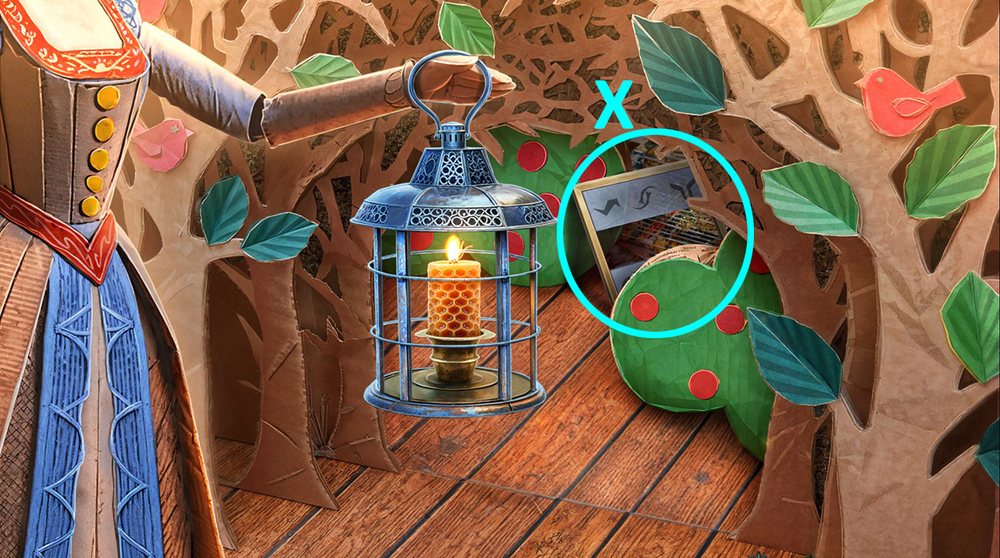
- Take STENCIL (X).
- Go forward.
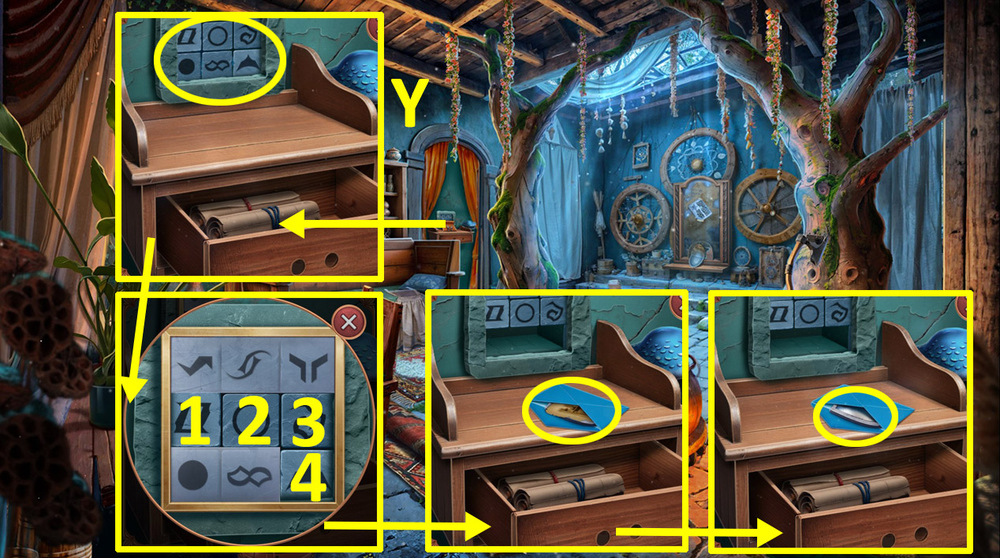
- Use STENCIL on the puzzle on the wall, press all the active symbols, read the note, take MYSTERIOUS LENS (Y).
- Go back.
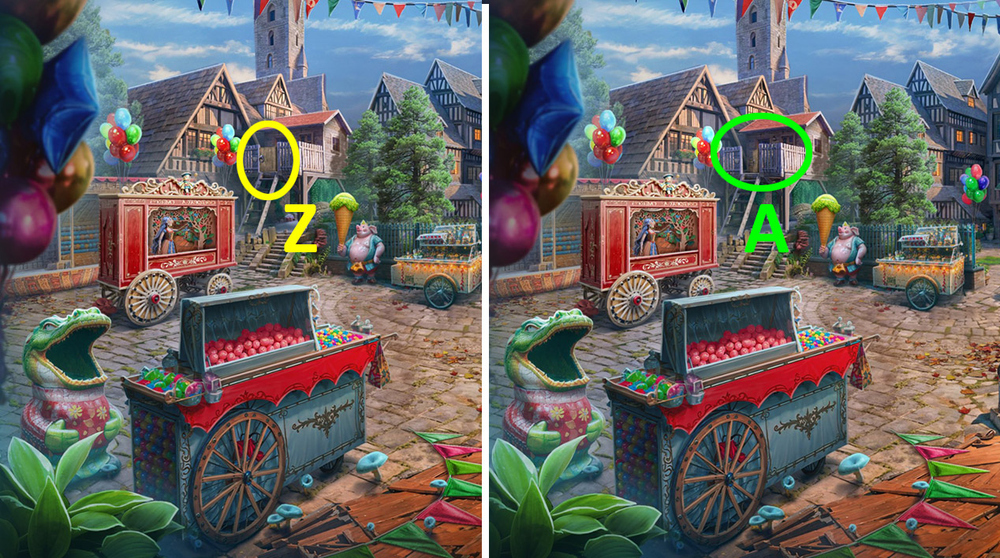
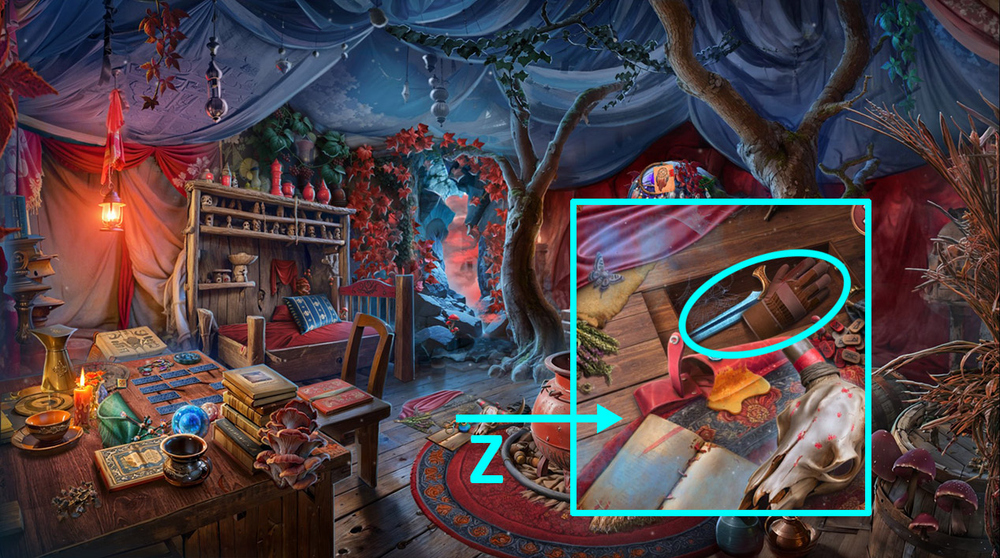
- Use MYSTERIOUS LENS on the gate at the top of the ladder (Z).
- Play puzzle, earn SILVER KNITTING NEEDLE (A).
- Use SILVER KNITTING NEEDLE on the lower drawer, take SILK HANDKERCHIEF and STAR MAP (B).
- Go forward.
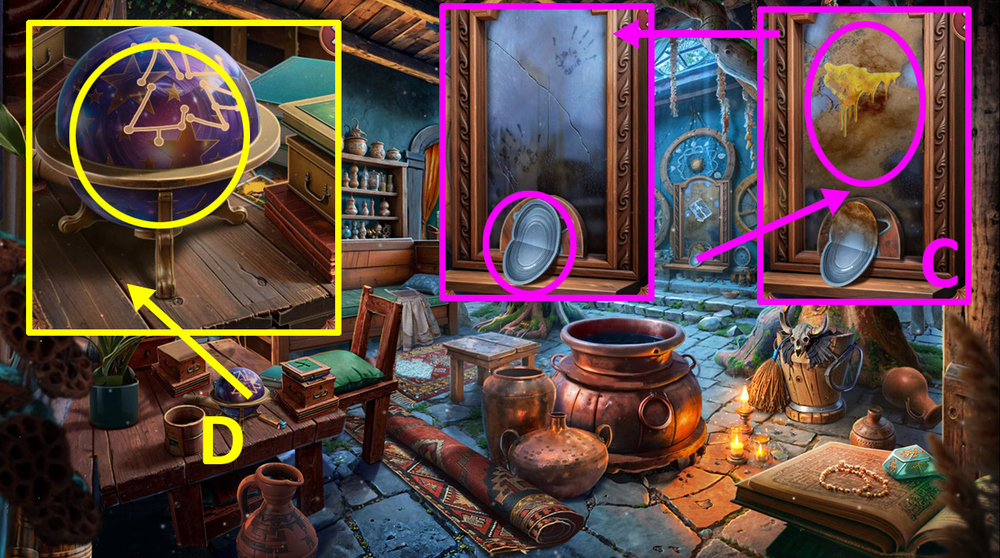
- Use SILK HANDKERCHIEF on the mirror, take METAL PLATE (C).
- Use STAR MAP on the globe (D).
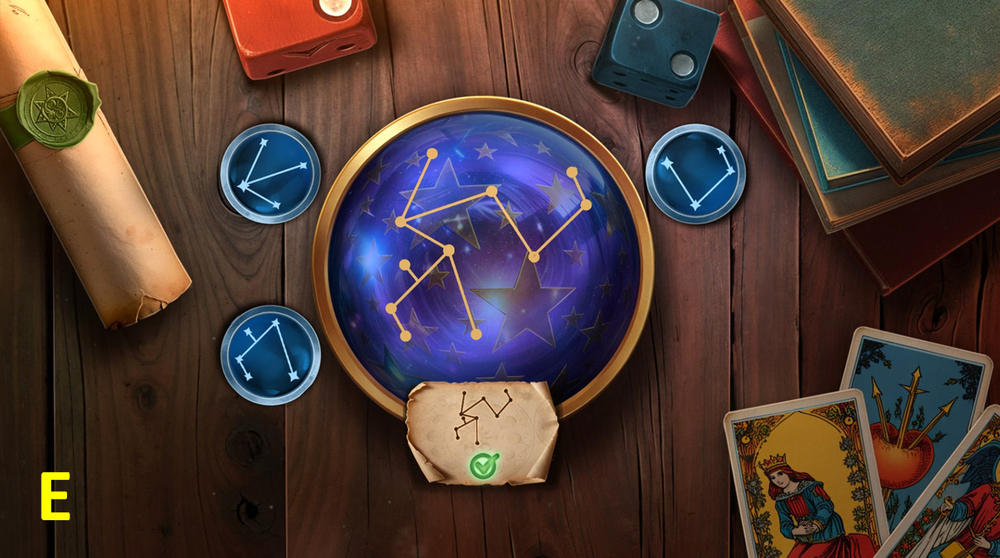
- Easy solution: Arrange as shown in the picture (E).
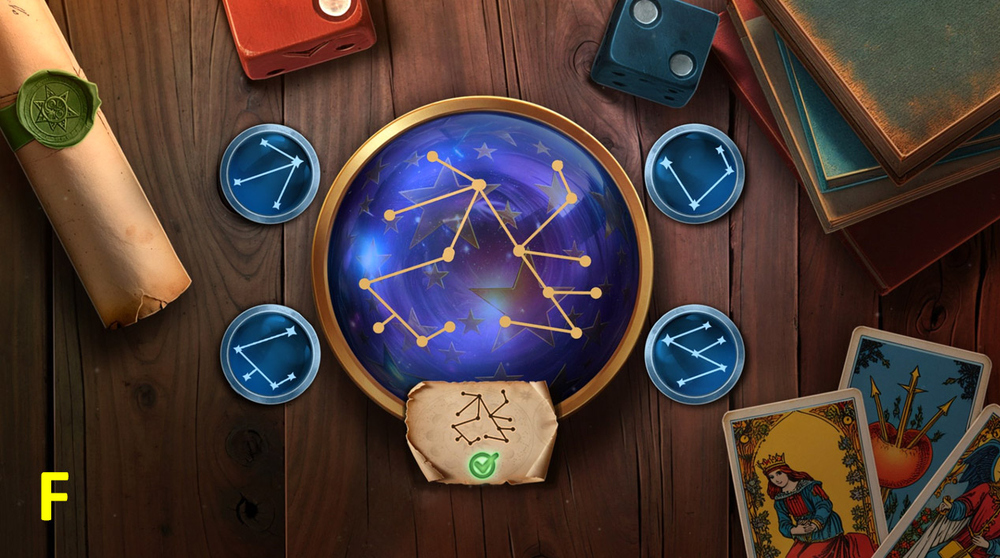
- Hard solution: Arrange as shown in the picture (F).

- Read the note, take BOTTLE WITH STRANGE LIQUID (G).
- Use BOTTLE WITH STRANGE LIQUID on the illuminated symbol, take STAR-SHAPED CRYSTAL (H).
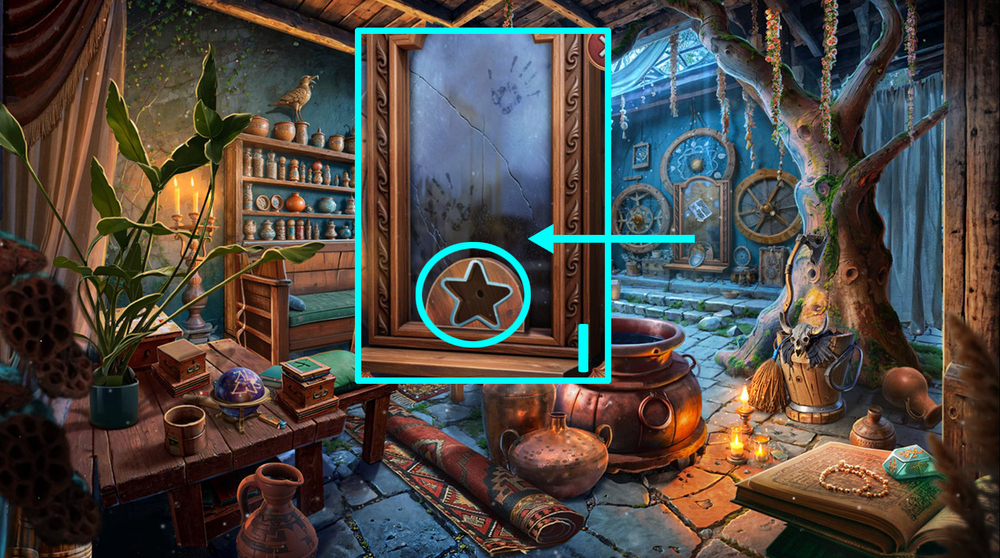
- Use STAR-SHAPED CRYSTAL on the star-shaped hollow space (I).
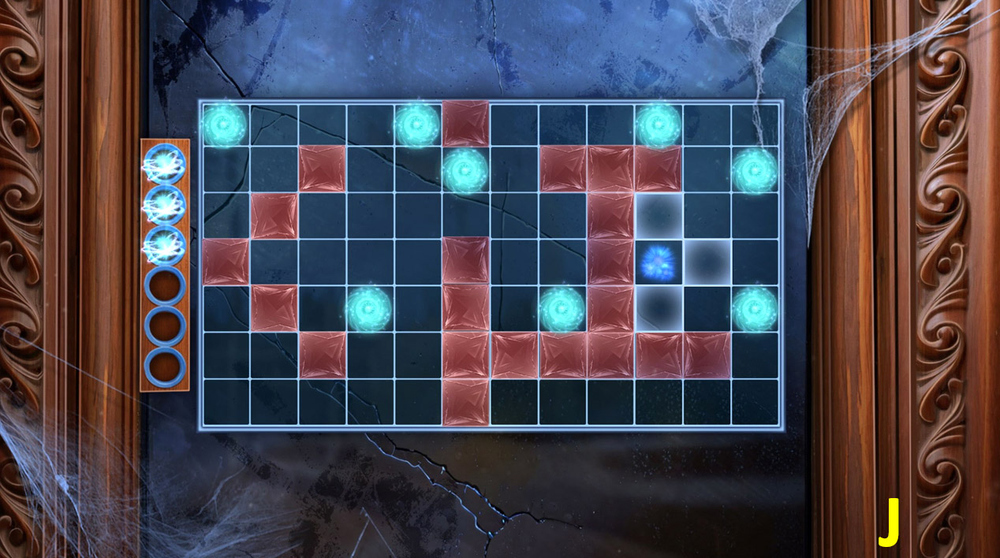
- Easy solution: Solution is random (J).
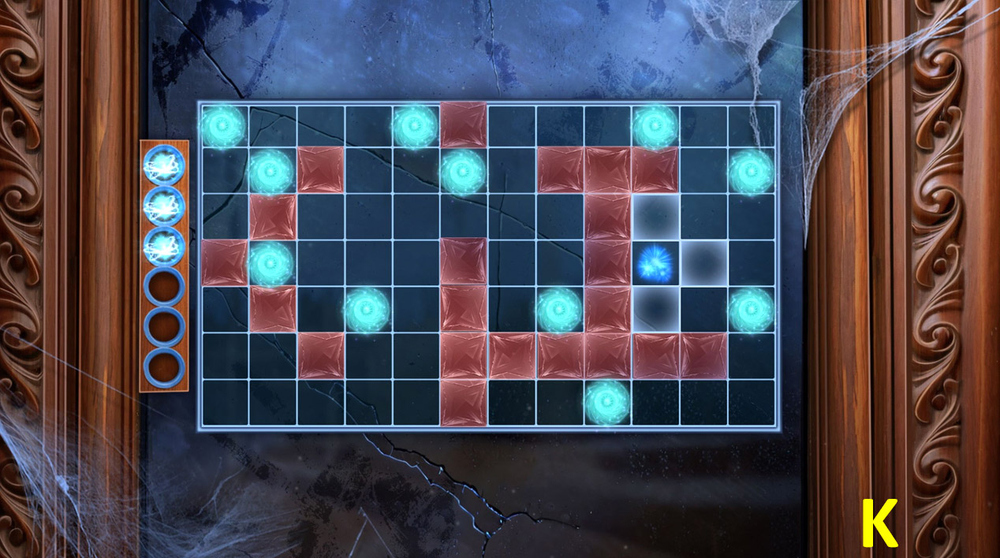
- Hard solution: Solution is random (K).
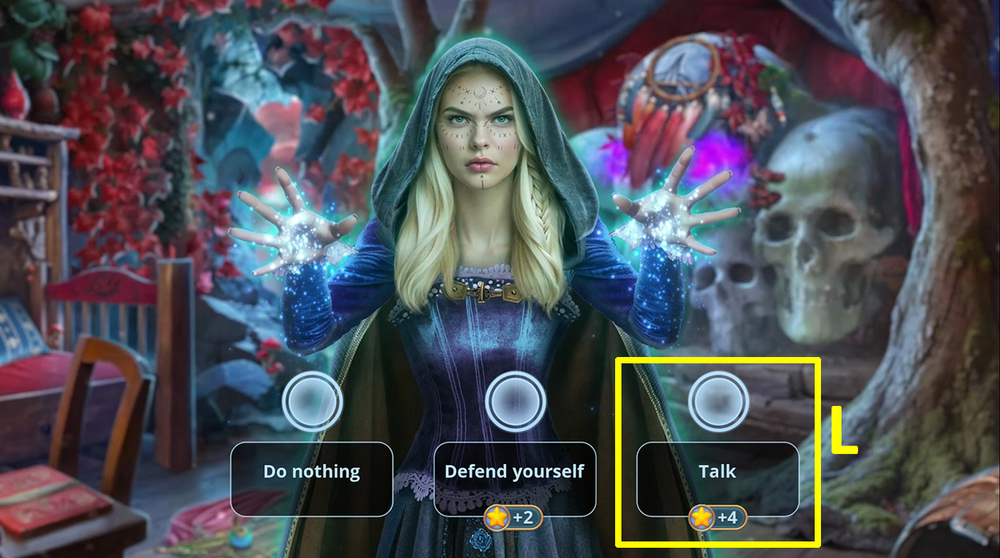
- Select this option (L).
- Talk with the character.
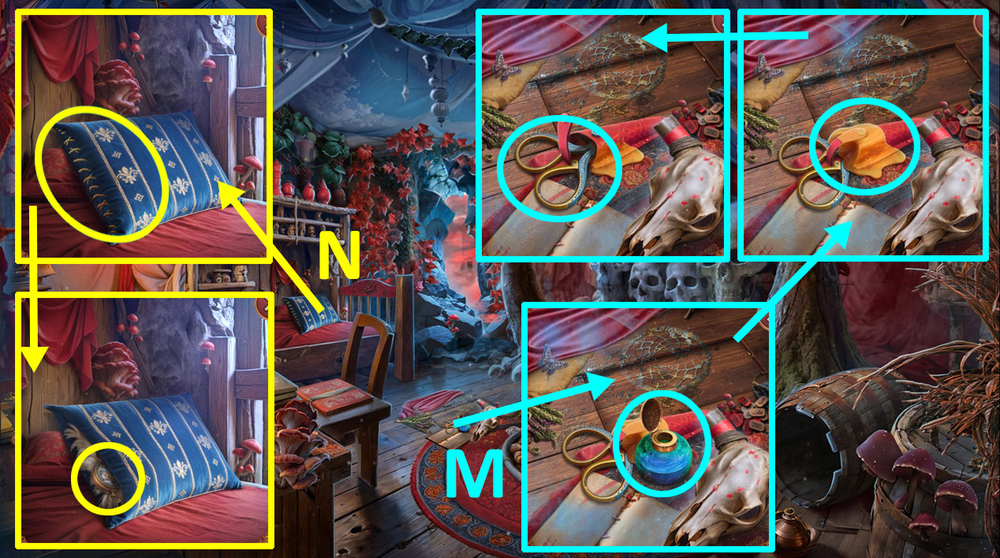
- Take INKWELL, use METAL PLATE on the scissors, get SCISSORS (M).
- Use SCISSORS on the pillow, take GHOSTLY COMPASS (N).
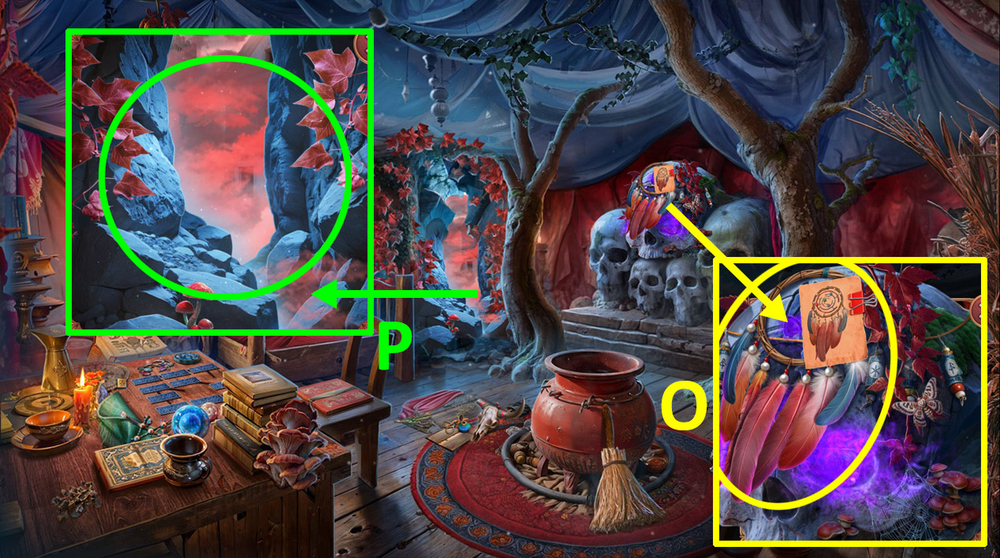
- Take UNFINISHED DREAMCATCHER (O).
- Use GHOSTLY COMPASS on the crevice (P).
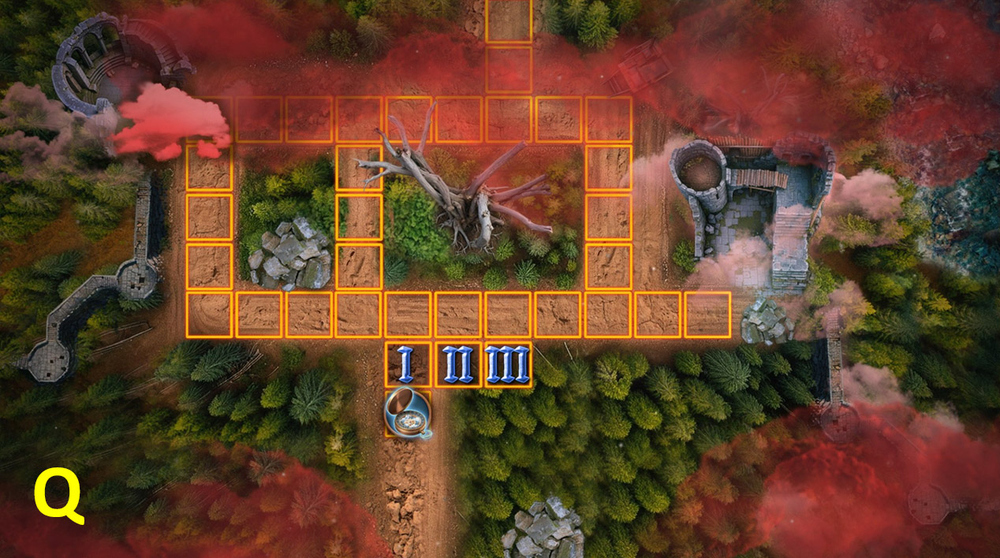
- Solution: Solution is random (Q).
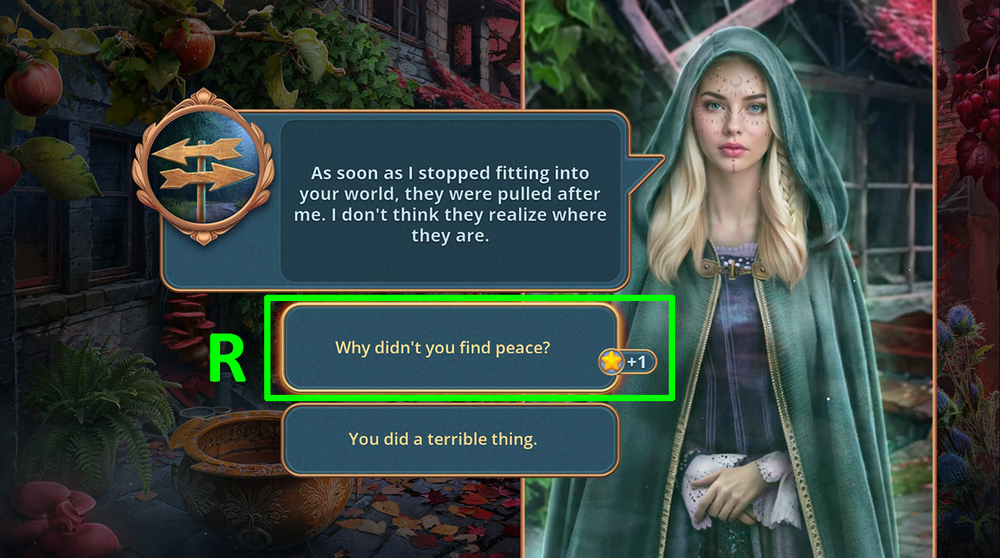
- Select this option (R).
- Take DREAMCATCHER DIAGRAM (S).
- Use BOW PIN on the doll, get TATTERED DOLL, take PROTECTIVE AMULETS 2/2 (T).
- Take SILVERY THREAD (U).
- Go back.
- Use PROTECTIVE AMULETS on the skull, take CALLIGRAPHY PEN and PEARLS (V).
- Use DREAMCATCHER DIAGRAM, SILVERY THREAD, and PEARLS on UNFINISHED DREAMCATCHER, get DREAMCATCHER.
- Use DREAMCATCHER on the loose floorboard (W).
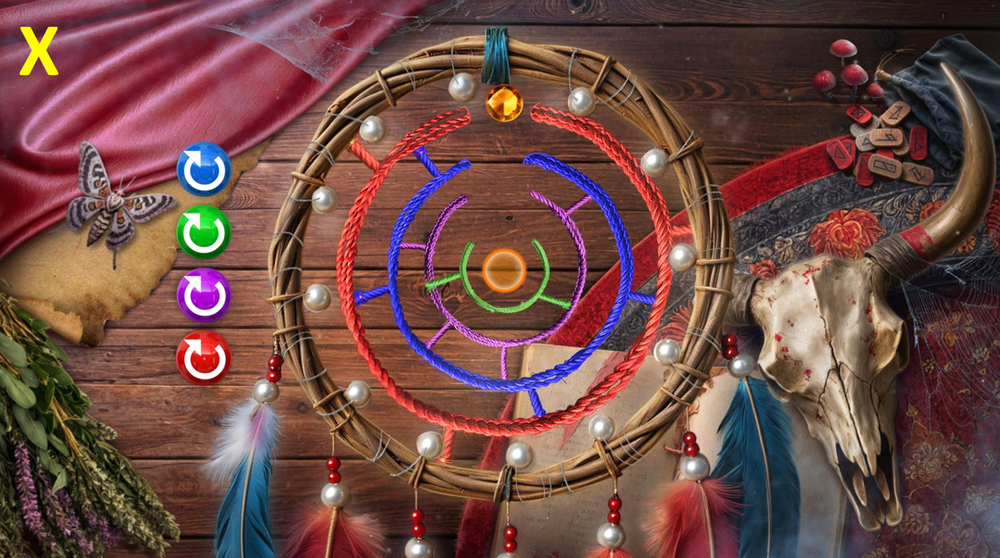
- Easy solution: Arrange as shown in the picture (X).
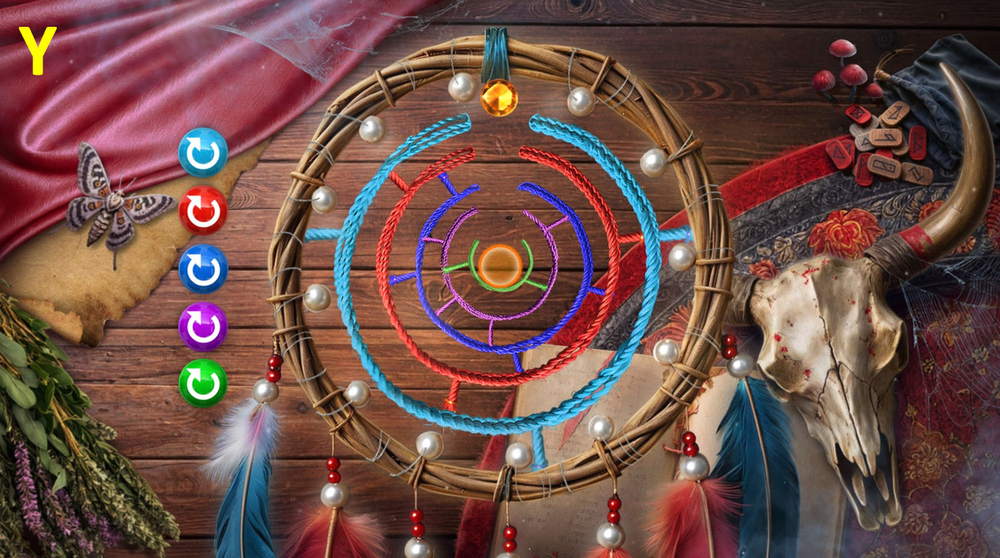
- Hard solution: Arrange as shown in the picture (Y).
- Take FIREPROOF GLOVE and CEREMONIAL SWORD (Z).
- Go to the Nether Village.
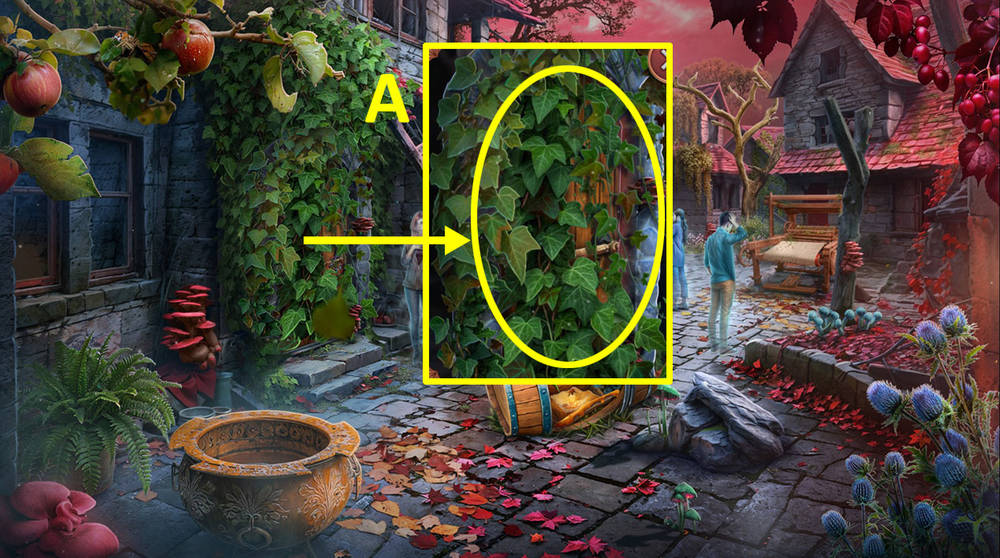
- Use CEREMONIAL SWORD on the leaves (A).
- Go forward.
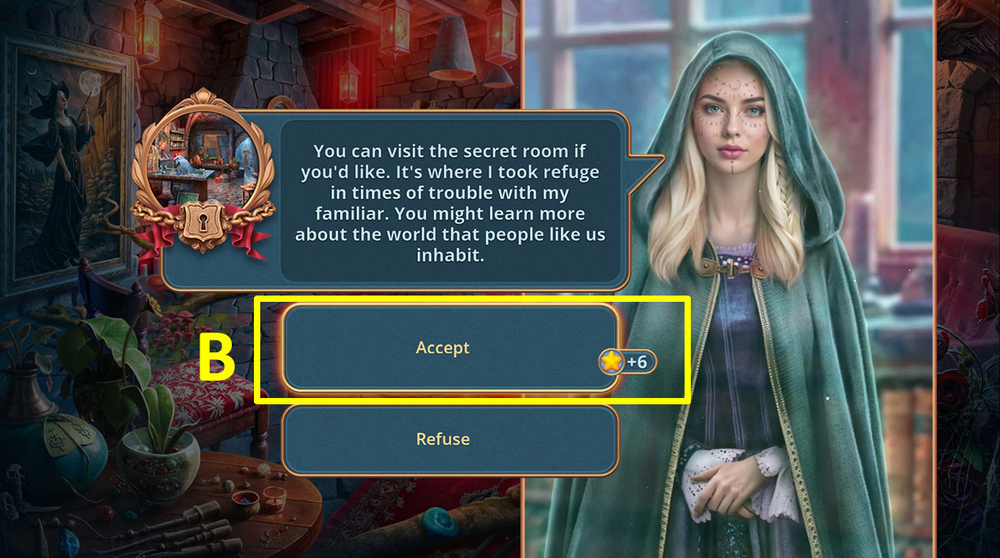
- Select this option (B).
- Go forward.
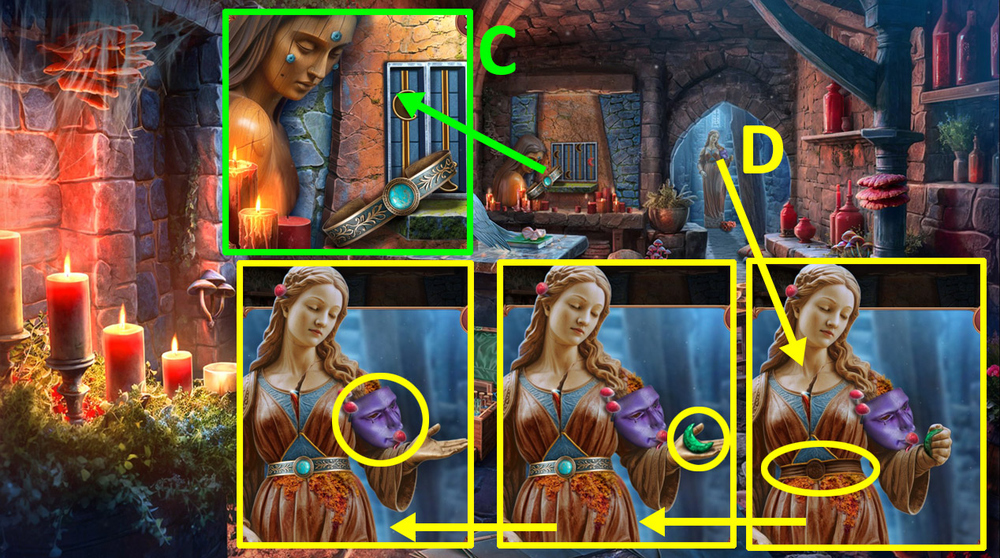
- Take SILVER BELT (C).
- Use SILVER BELT on the waist of the statue.
- Take MOONSTONES 1/3 and WEEPING MASK (D).
- Use WEEPING MASK on the face of the statue, take FROZEN TEAR (E).
- Go back.
- Use TATTERED DOLL on the doll, take TAROT CARD 1/3 and FLORAL BOWL (F).
- Use INKWELL and CALLIGRAPHY PEN on the stand, take PATTERN (G).
- Take BROOM (H).
- Take POUCH OF SUGAR (I).
- Go back.
- Use BROOM on the cobwebs, take TROWEL and DRIED LILY, use FROZEN TEAR on the statue, take TWEEZERS (J).
- Go to the Hidden Chamber.
- Use TWEEZERS on the chest of the statue, get AMBER (K).
- Go back.
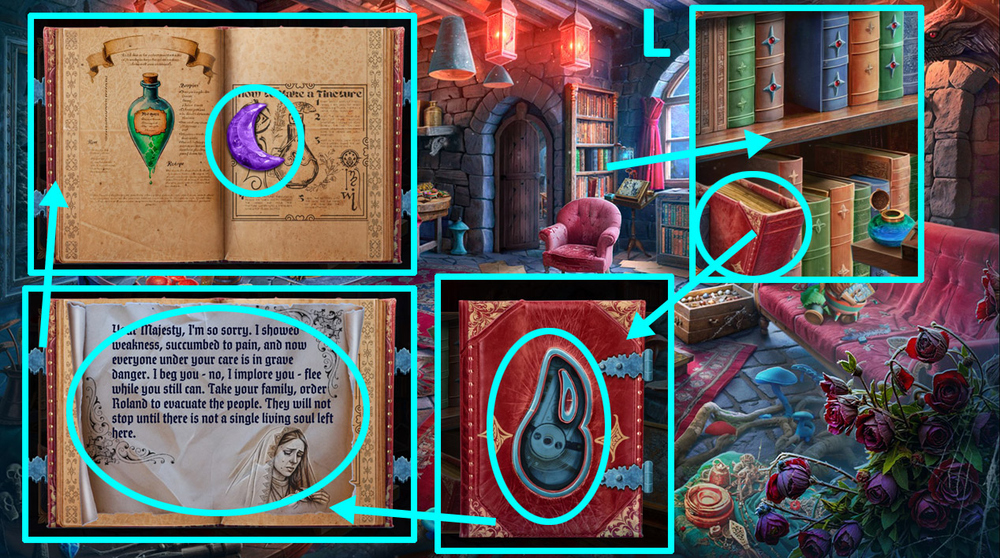
- Examine the red book, use AMBER on the cover, read and take SILVER MOON’S LAST LETTER, take MOONSTONES 2/3 (L).
- Go to the Hidden Chamber.
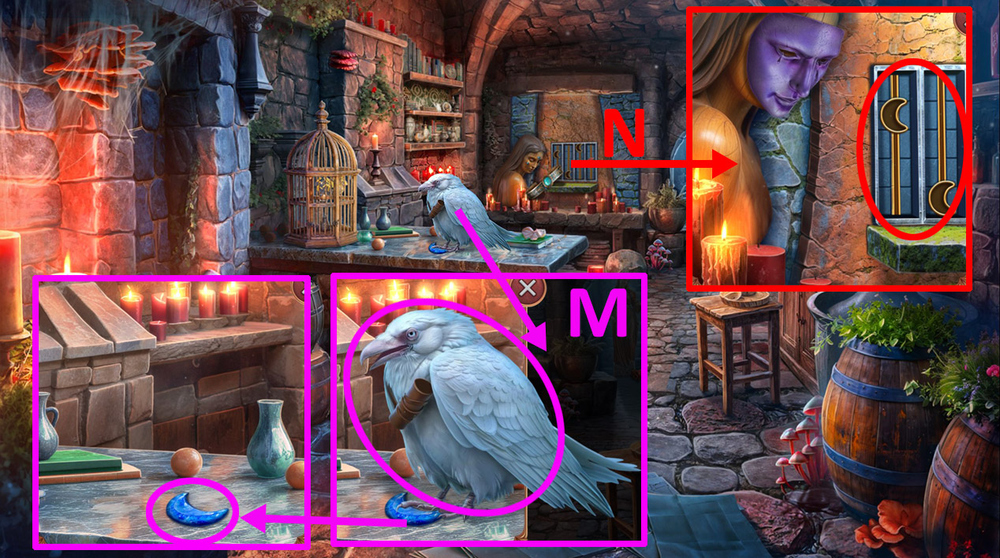
- Use SILVER MOON’S LAST LETTER on the raven, take MOONSTONES 3/3 (M).
- Use MOONSTONES on the puzzle on the wall (N).
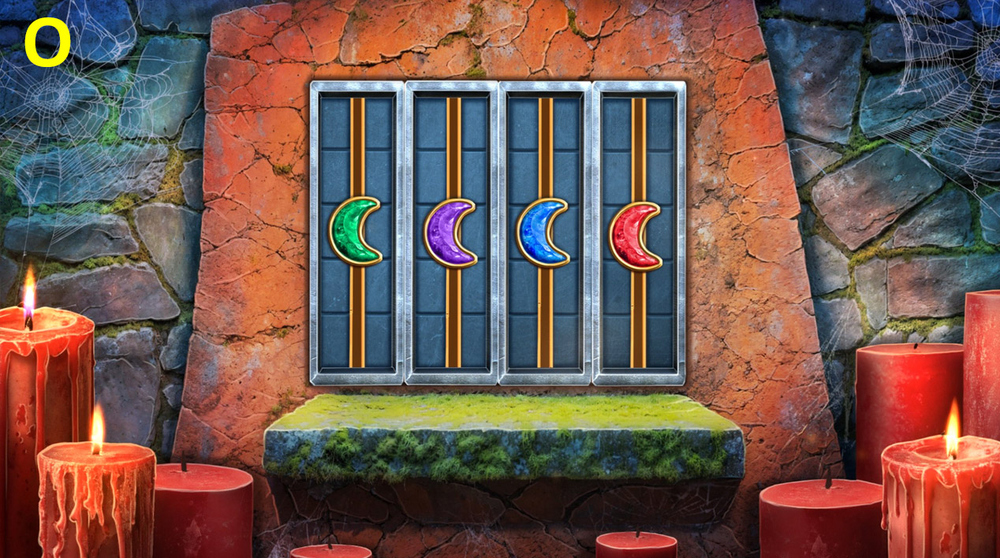
- Easy solution: Arrange as shown in the picture (O).
- Hard solution: Arrange as shown in the picture (P).
- Read the note (Q).
- Talk with the character.
- Go to the Nether Village.
- Use POUCH OF SUGAR on the ants, take DRIED BLUE POPPY (R).
- Use PATTERN, DRIED LILY, and DRIED BLUE POPPY on FLORAL BOWL, get FLORAL ARRANGEMENT.
- Go to Silver Moon’s Sanctuary.
- Use FLORAL ARRANGEMENT on the table (S).
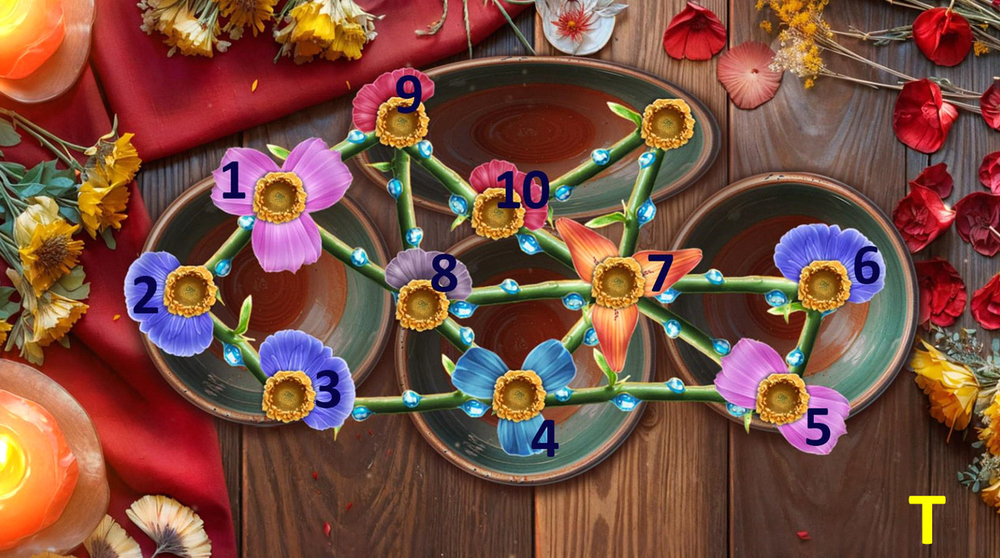
- Easy solution: Click: 1, 2, 3, 4, 5, 6, 7, 8, 9, 10 (T).
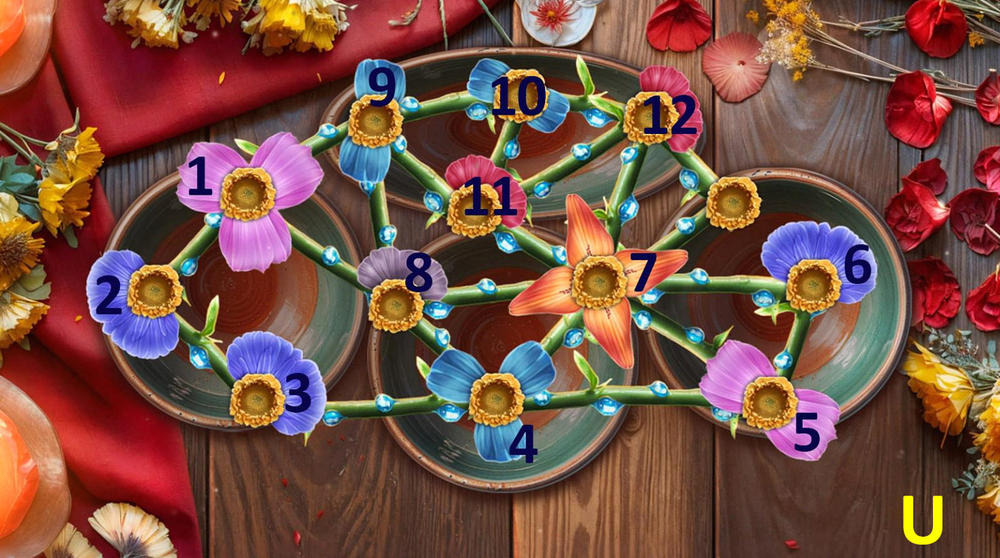
- Hard solution: Click: 1, 2, 3, 4, 5, 6, 7, 8, 9, 10, 11, 12 (U).
- Take MORTAR AND PESTLE and BOTTLE OF MURKY WATER (V).
- Use BOTTLE OF MURKY WATER on the blue flame, use FIREPROOF GLOVE on the item in the fireplace, get ROYAL SEAL (W).
- Use ROYAL SEAL on the hollow space (X).
- Play puzzle, earn SILVER MOON’S MEDALLION (Y).
- Use SILVER MOON’S MEDALLION on the floor (Z).
- Go forward.
- Select this option (A).
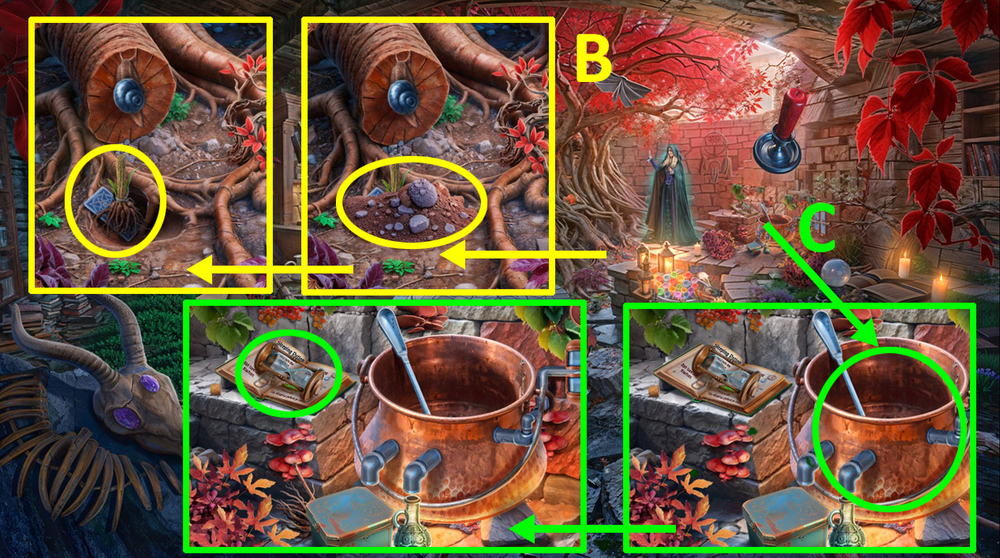
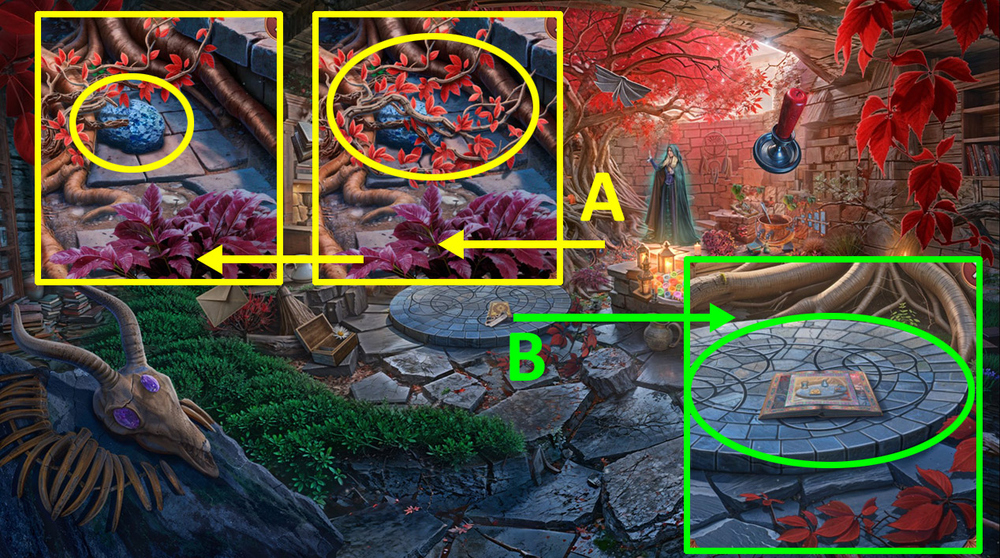
- Use TROWEL on the fresh soil, take VALERIAN ROOT and TAROT CARDS 2/3 (B).
- Use VALERIAN ROOT on the cauldron, take EMPTY HOURGLASS (C).
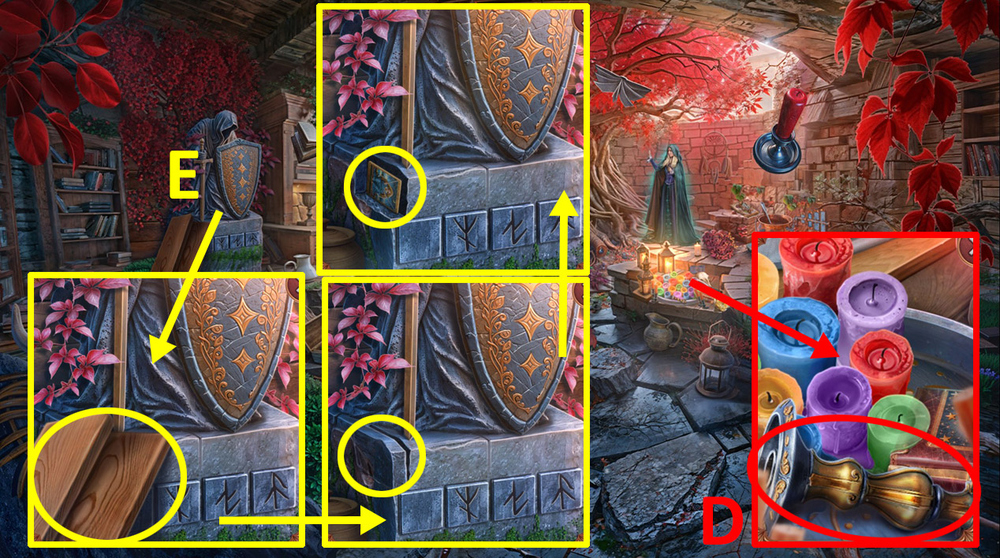
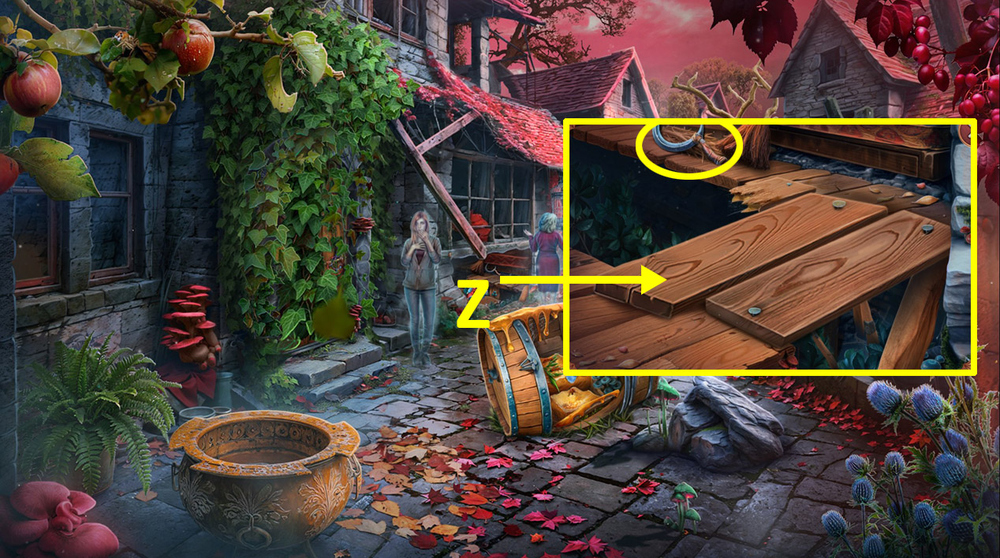
- Take CANDLESTICK (D).
- Take WOODEN PLANKS, use CANDLESTICK on the loose stone, take TAROT CARDS 3/3 (E).
- Go to the Nether Silver Moon’s Tent.
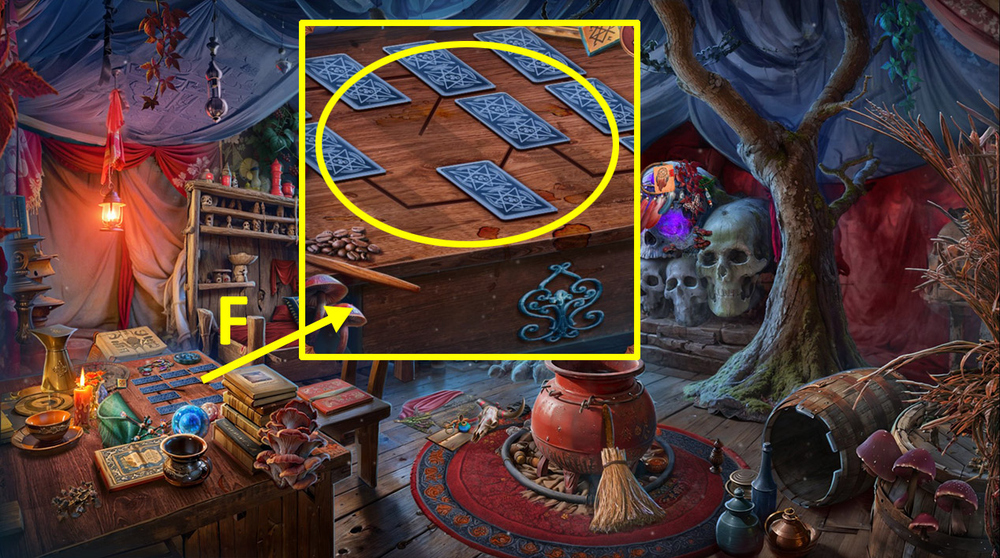
- Use TAROT CARDS on the cards on the table (F).
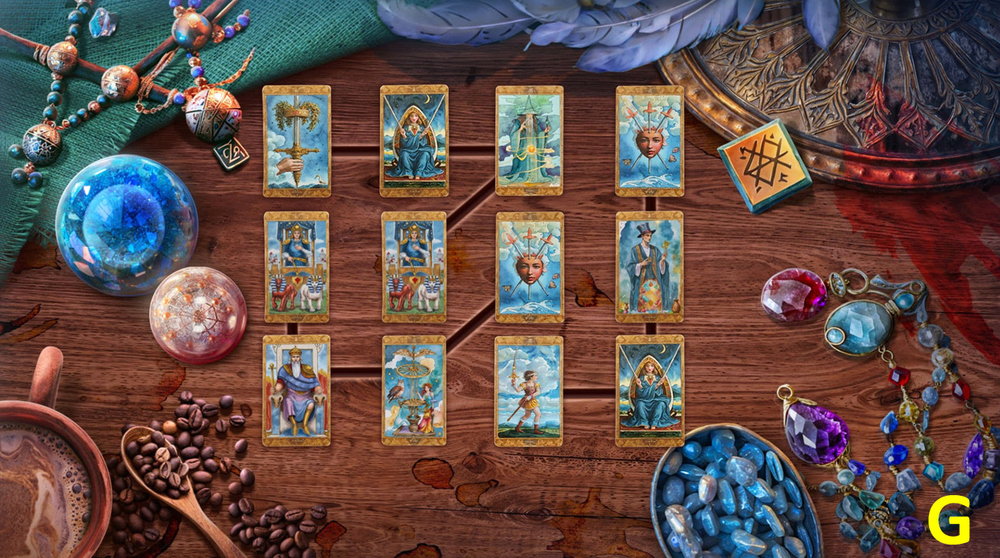
- Easy solution: Arrange as shown in the picture (G).
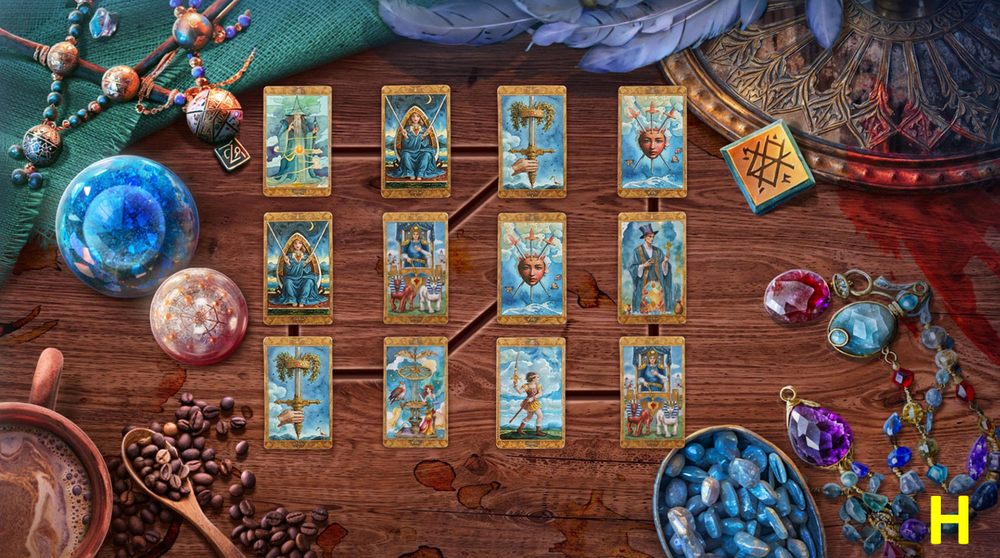
- Hard solution: Arrange as shown in the picture (H).
- Take FLINT AND STEEL 1/2 and RHOMBUS-SHAPED KEY (I).
- Go to the Nether Village.
- Use RHOMBUS-SHAPED KEY on the keyhole, get CLEAN WATER (J).
- Go to the Ritual Site.

- Use CLEAN WATER on the cauldron (K).
- Take FLINT AND STEEL 2/2, examine the book, play puzzle (L).
- Use FLINT AND STEEL on the candles (M).
- Solution: Click: 4, 3, 1, 5, 3, 2, 4, 1, 2, 5, 1, 3, 4 (N).
- Read and take ENCHANTED JOURNAL (O).
- Go back.
- Play puzzle, get DIAMOND BLADE (P).
- Use ENCHANTED JOURNAL on the upper shelf, take HEAVY STATUETTE and SYMBOL TILE (Q).
- Go to the Ritual Site.

- Use DIAMOND BLADE and SYMBOL TILE on the symbols, enter the sequence, take LAVENDER TINCTURE (R).
- Use LAVENDER TINCTURE on the cauldron (S).
- Solution: Click: E, A, E, B, B, A, E, B, B (T).
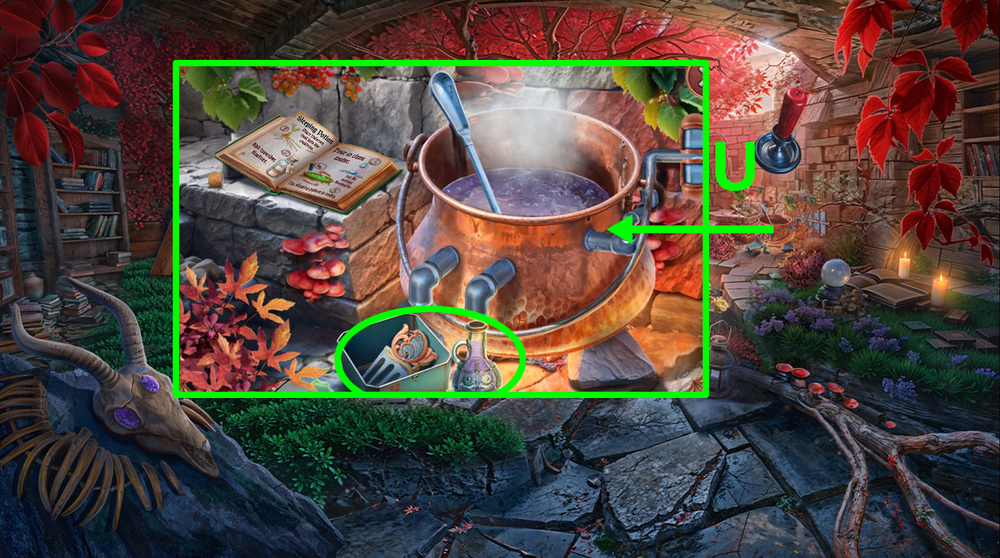
- Take SLEEPING POTION and COMB (U).
- Go to the Nether Village.
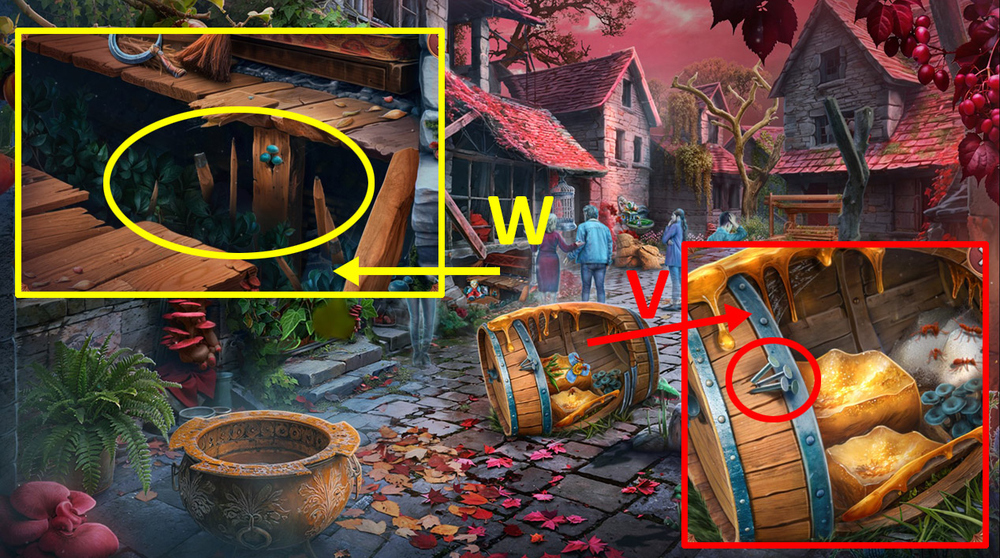
- Use COMB on the nails, get NAILS (V).
- Use WOODEN PLANKS, HEAVY STATUETTE, and NAILS on the gap (W).
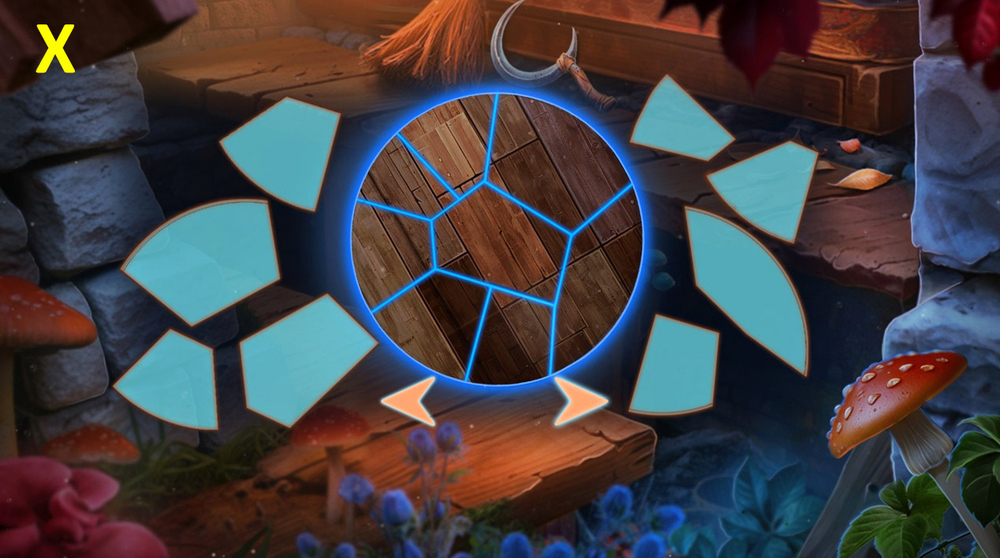
- Easy solution: Arrange as shown in the picture (X).
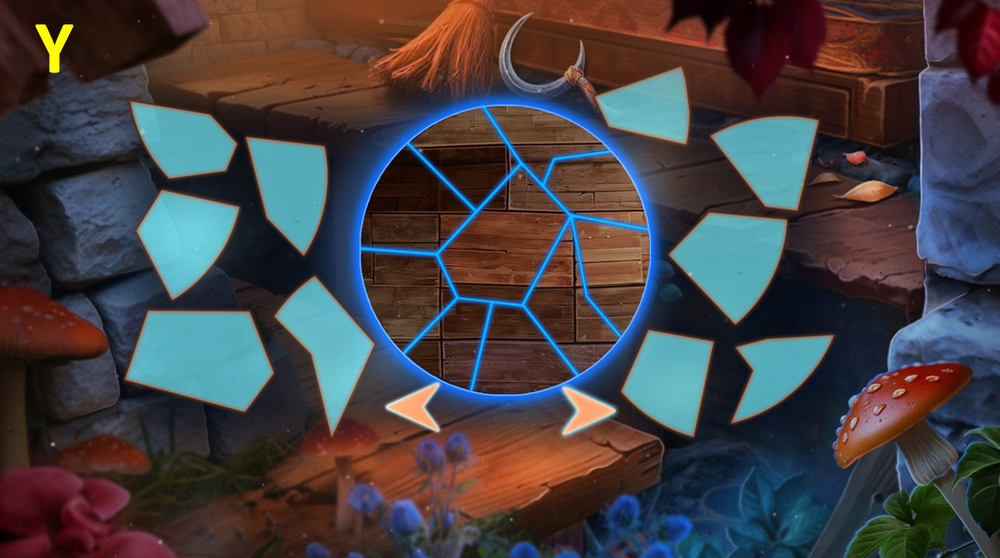
- Hard solution: Arrange as shown in the picture (Y).
- Take SICKLE (Z).
- Go to the Ritual Site.
- Use SICKLE on the branches, take CRUMBLY STONE (A).
- Use MORTAR AND PESTLE and CRUMBLY STONE on EMPTY HOURGLASS, get HOURGLASS.
- Use SILVER MOON’S MEDALLION, SLEEPING POTION, and HOURGLASS on the ritual circle (B).
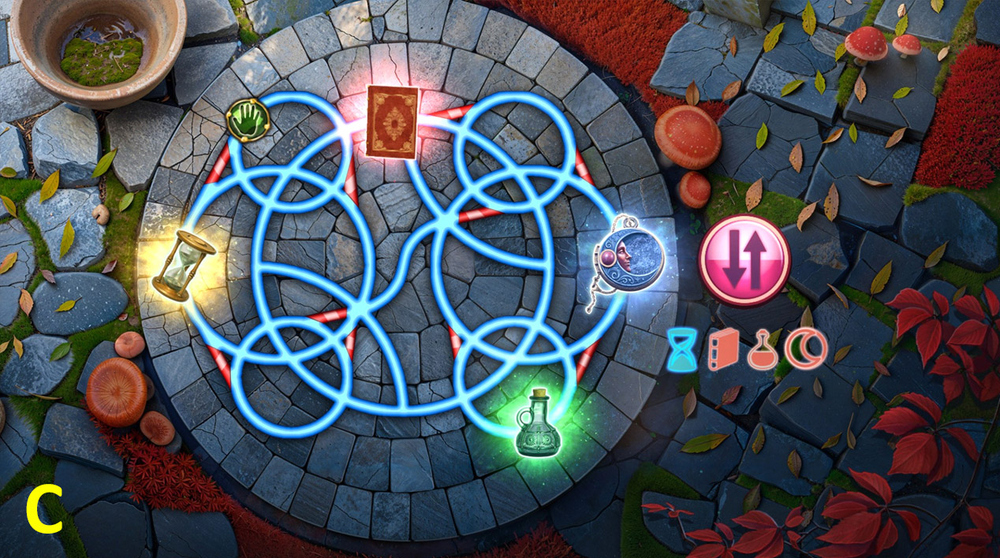
- Solution: Solution is random (C).
Congratulations! You have completed the game Mind Echoes 2: Remnants of the Past.


