
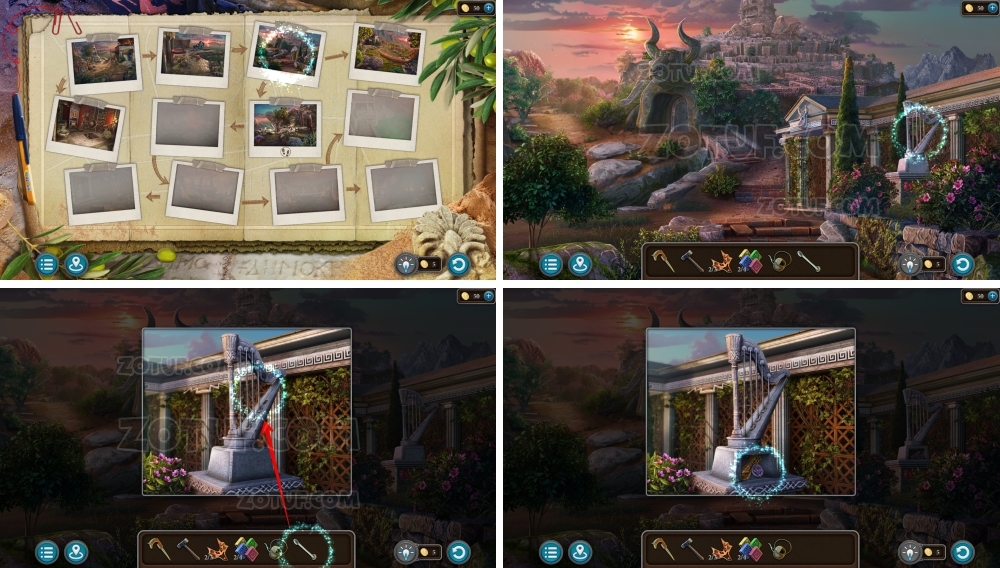
Artifact Seekers Episode 5: Ancient Coast – The fifth episode of the TV show takes you to a picturesque island off the coast of the Aegean Sea, where the world of ancient myths comes to life among unusual sets and pavilions. This time you will have to descend into the afterlife. It all started with a joke of a girl from the film crew that she is ready to sell her soul to a joke, which turned out to be dangerous in a place where ancient artifacts are guarded by powerful gods. Now it’s your job to travel to a neighboring island and negotiate with the ancient gods to get her soul back from the world of the dead.
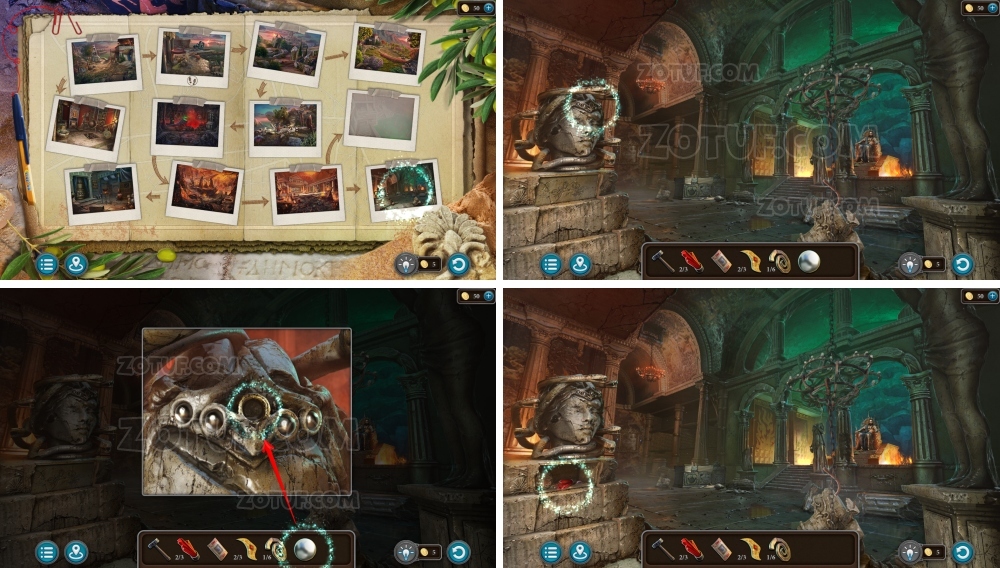
Artifact Seekers Episode 5: Ancient Coast – Walkthrough
Here you can watch the full walkthrough for Episode 5: Ancient Coast in Artifact Seekers and get out of the underworld.
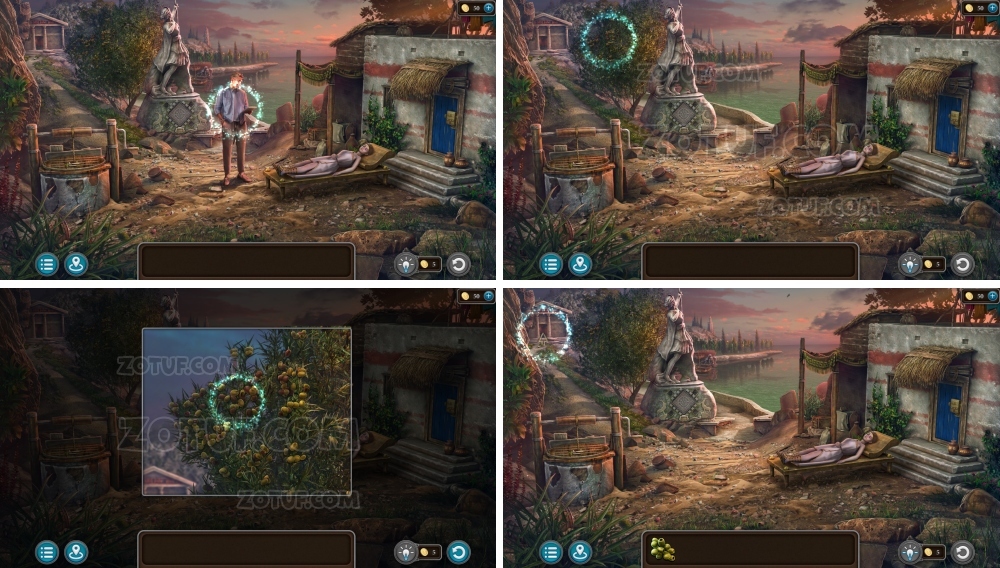
- Talk.
- Take olives.
- Go forward.
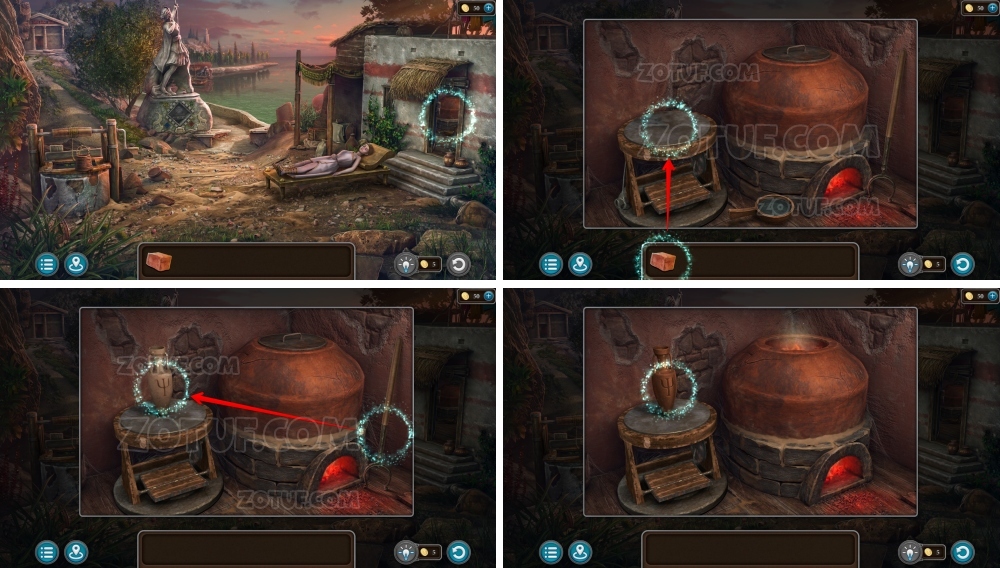
- Take planks.
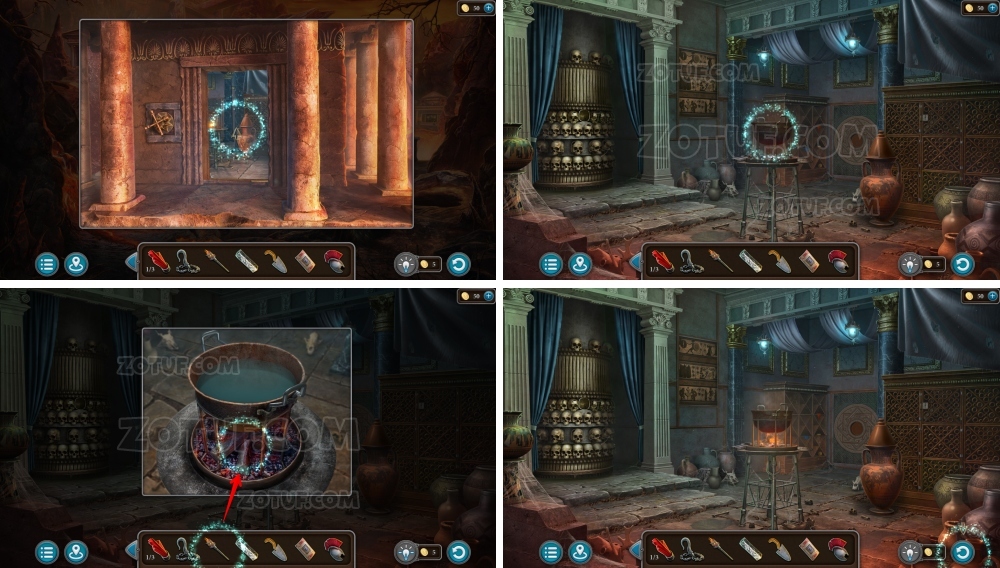
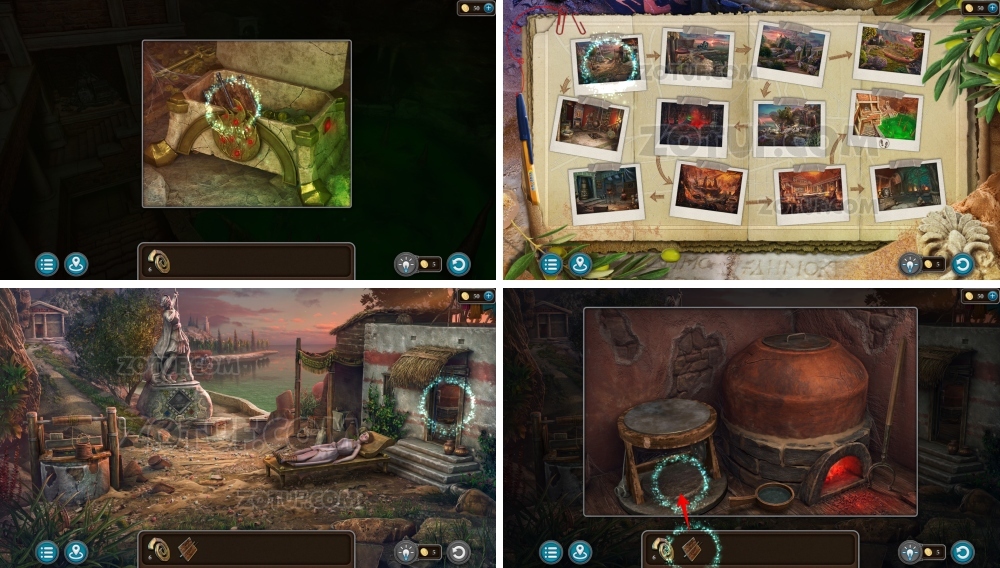
- Use olives.
- Move the jug, get oil.
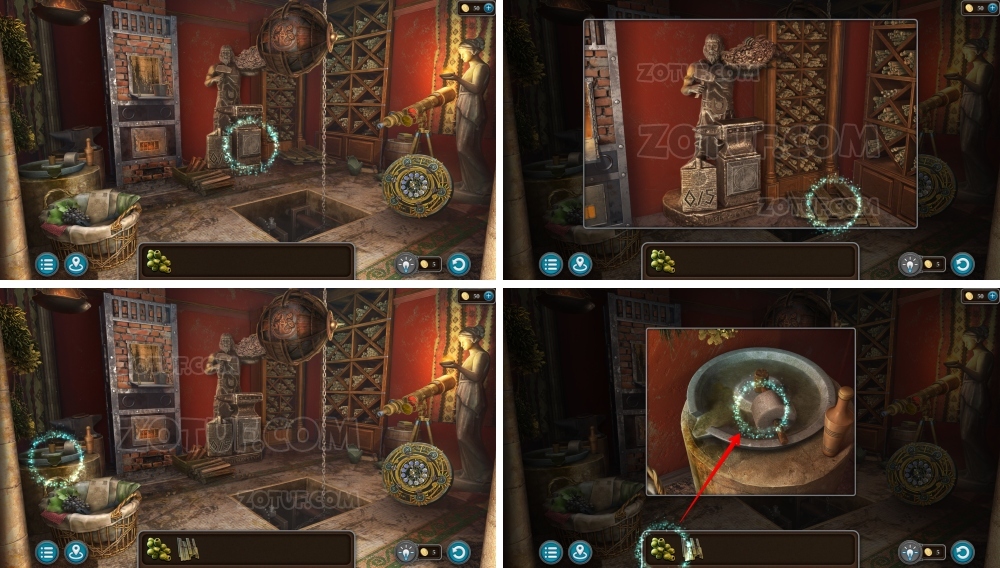
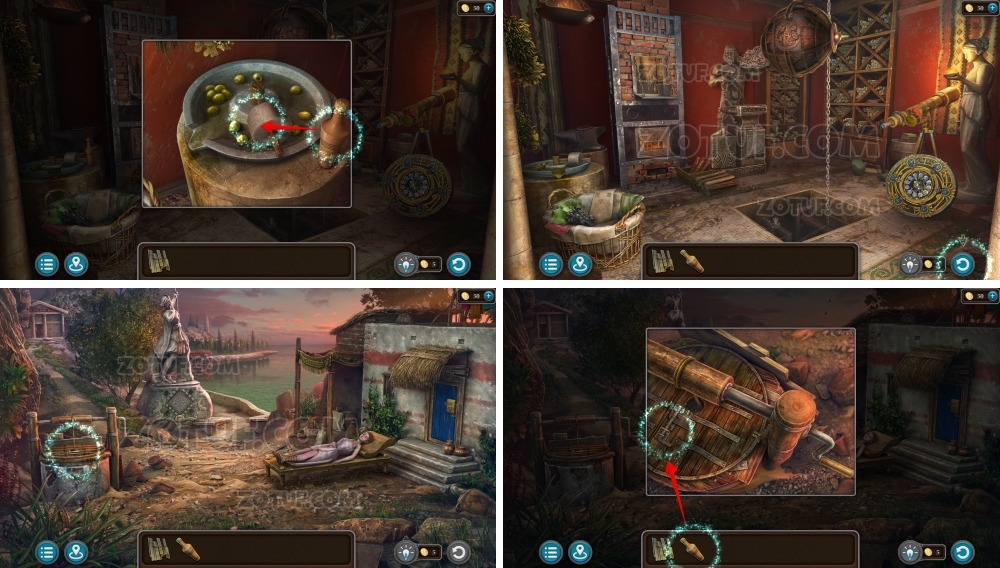
- Use oil.
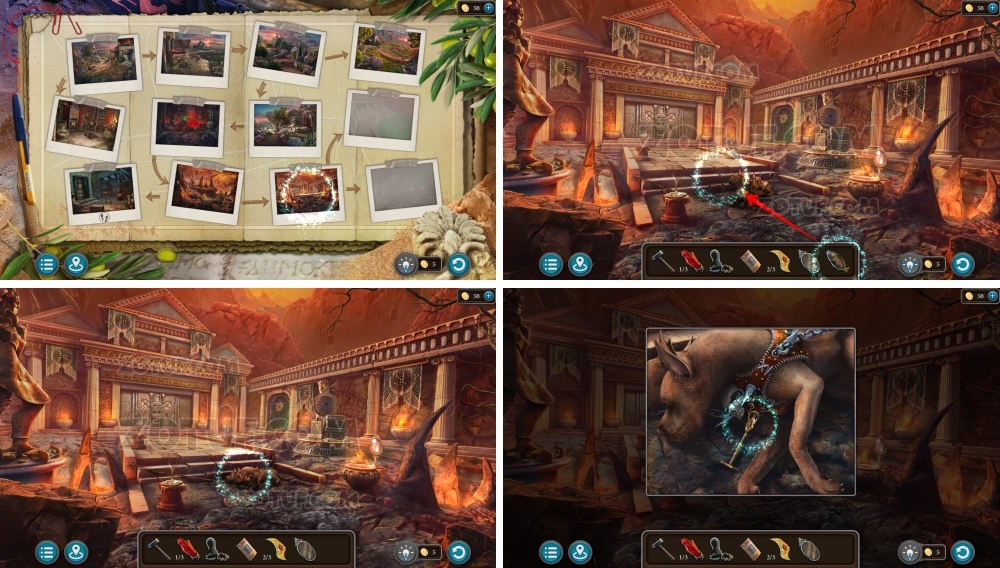
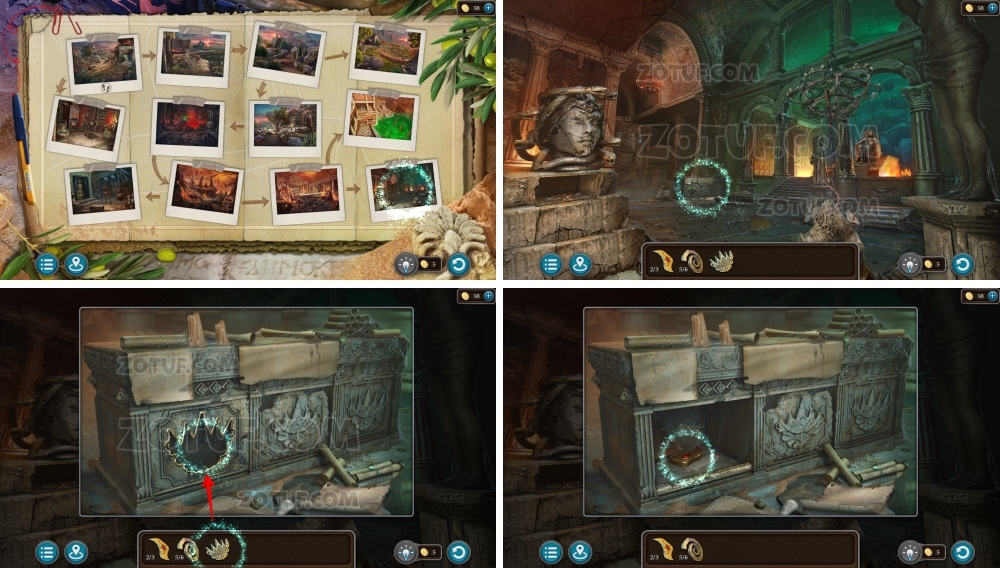
- Take file and disk fragment 1/3.
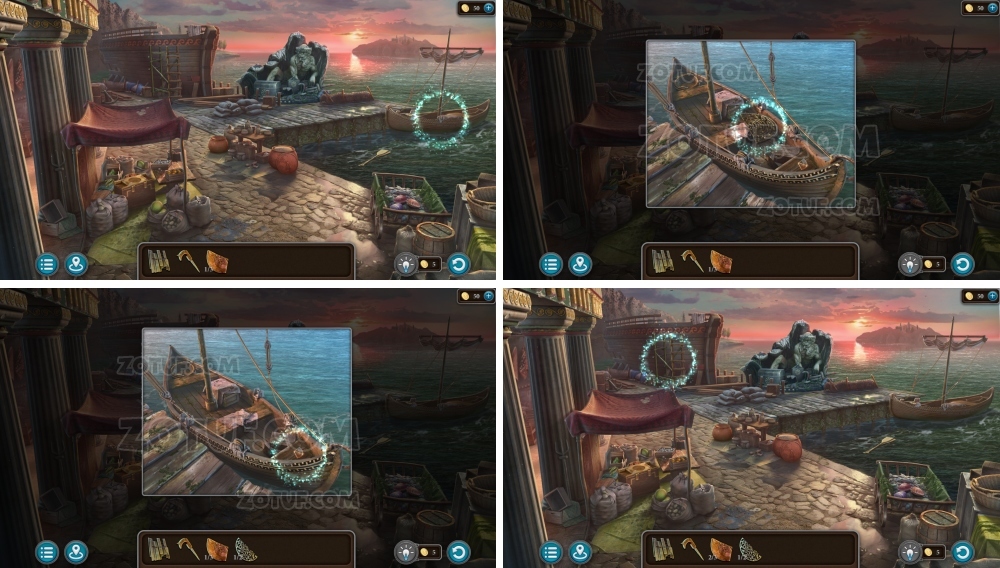
- Take labyrinth fragment 1/2 and disk fragment 2/3.
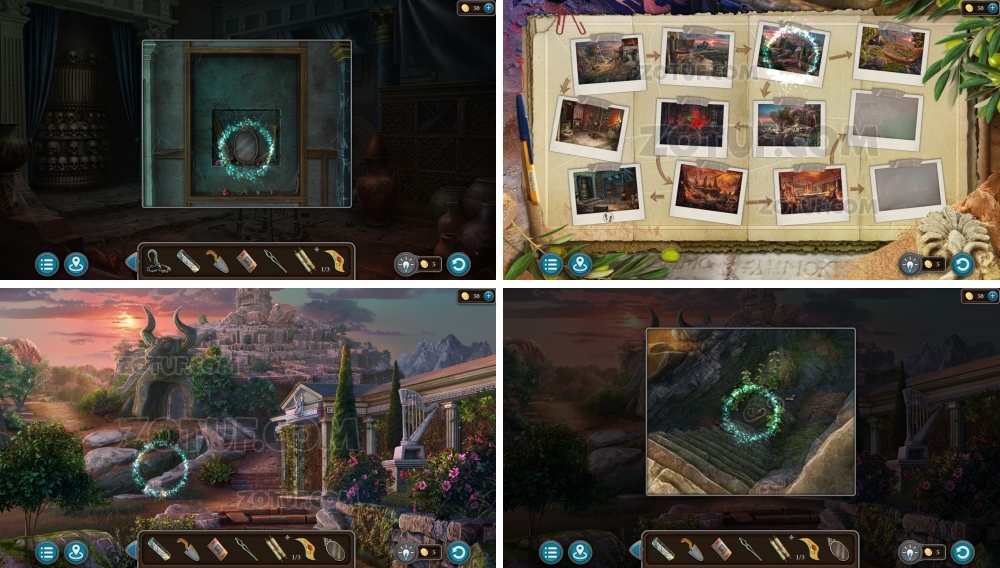
- Use planks.
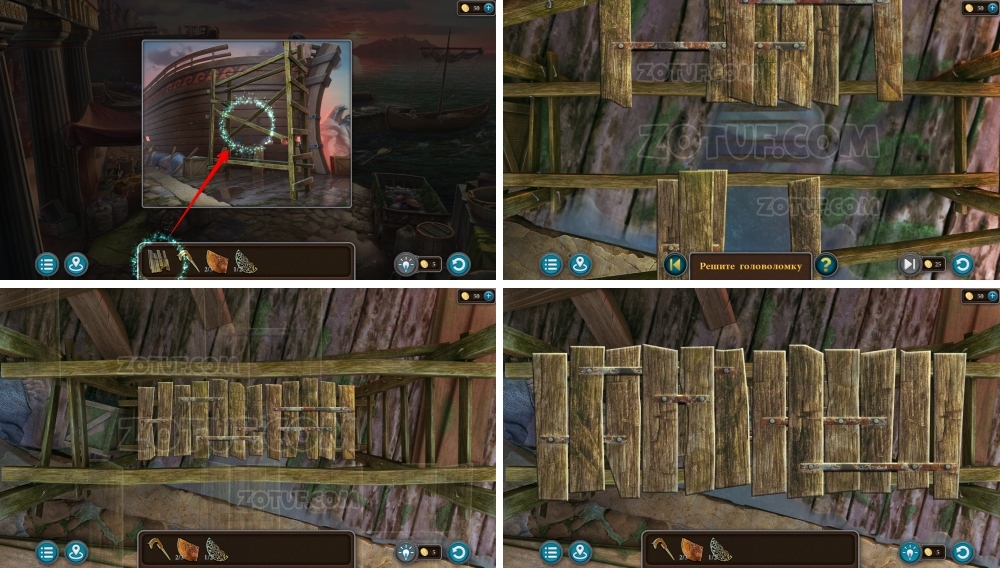
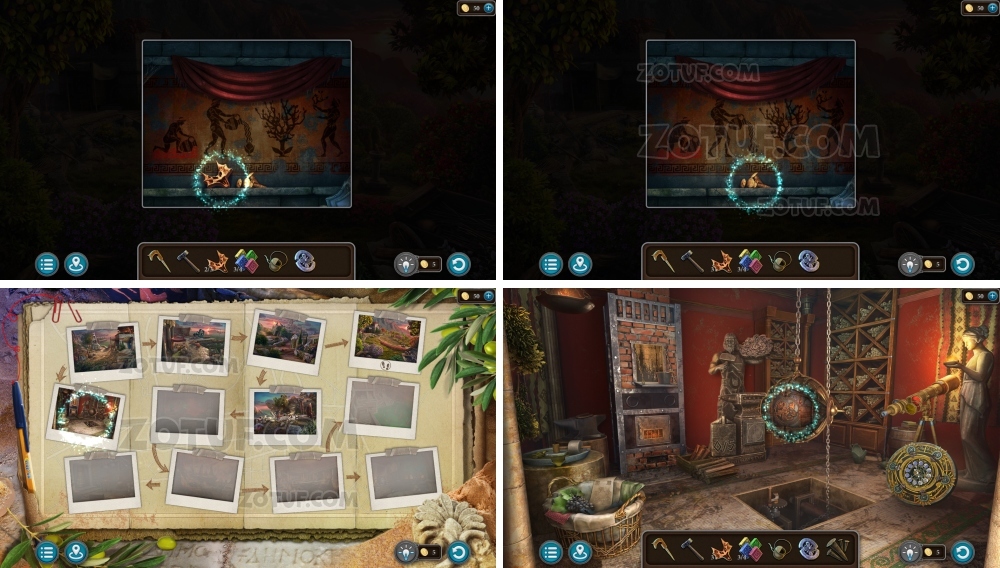
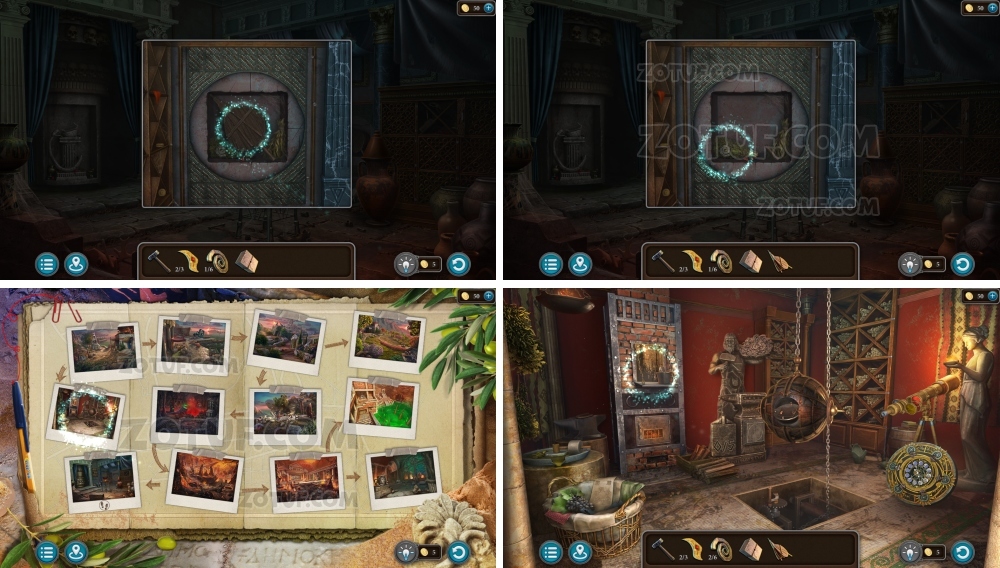
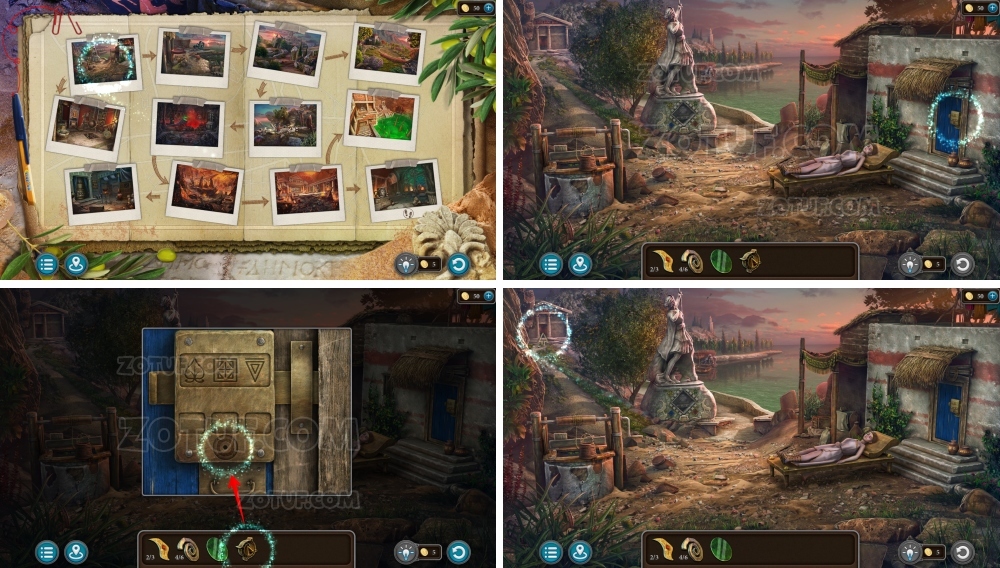
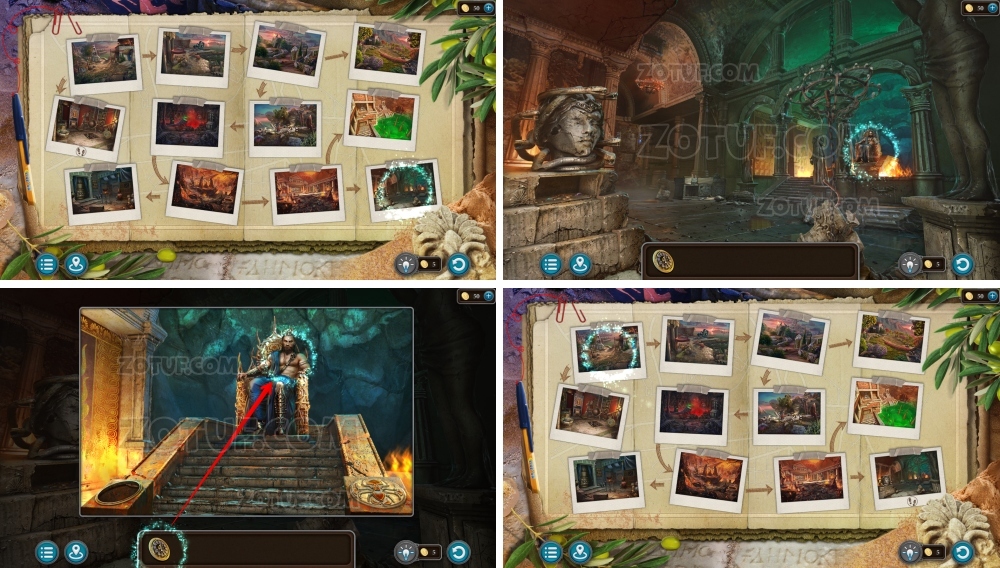
- Solve the puzzle: Arrange the planks on the scaffolding to create a gap-free path.
- Solution in the photo.
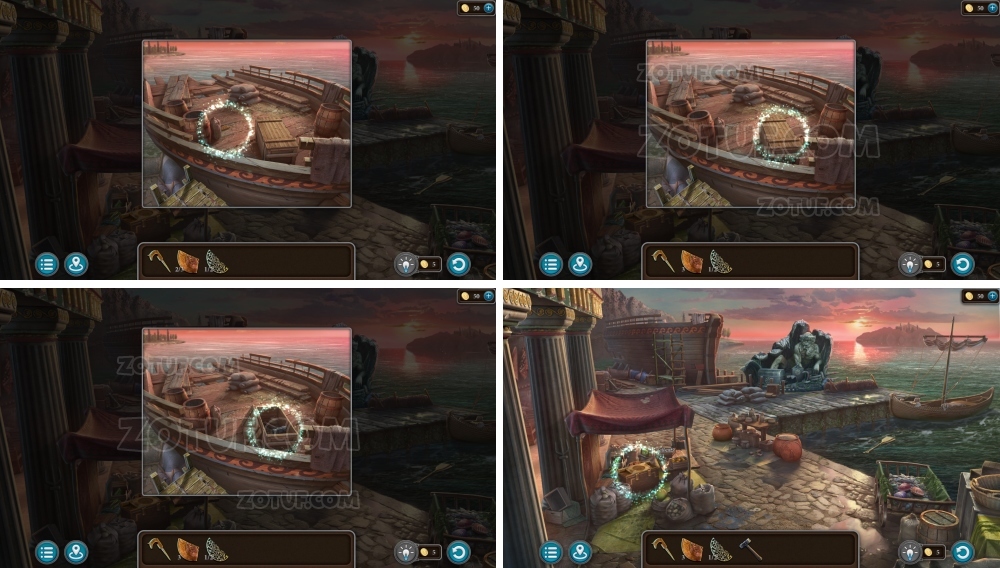
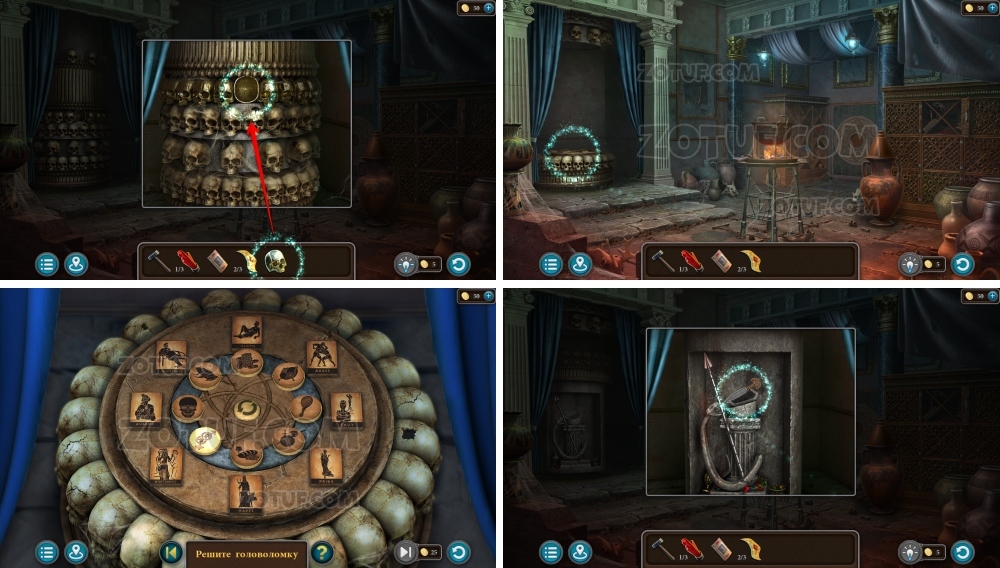
- Take disk fragment 3/3.
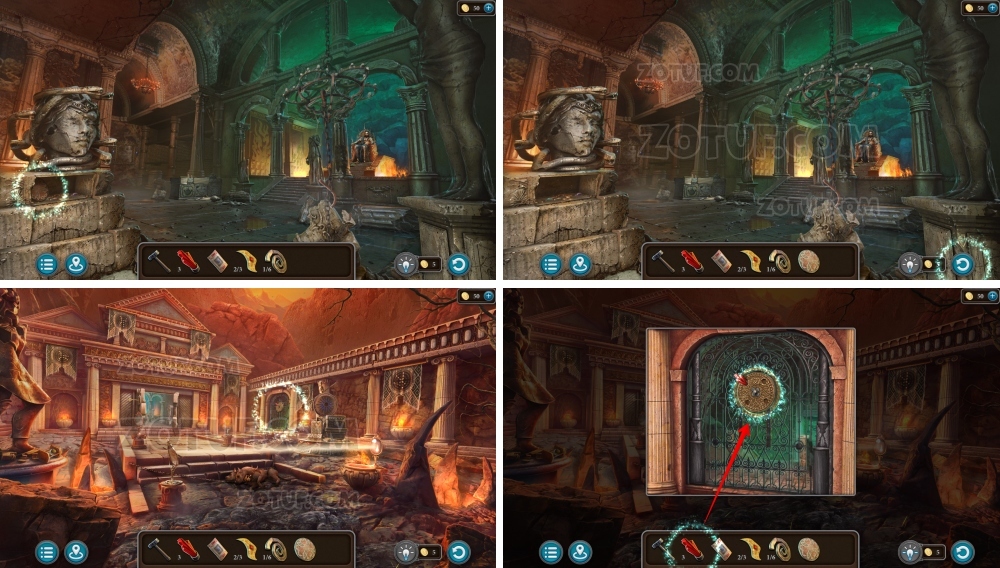
- Take hammer.
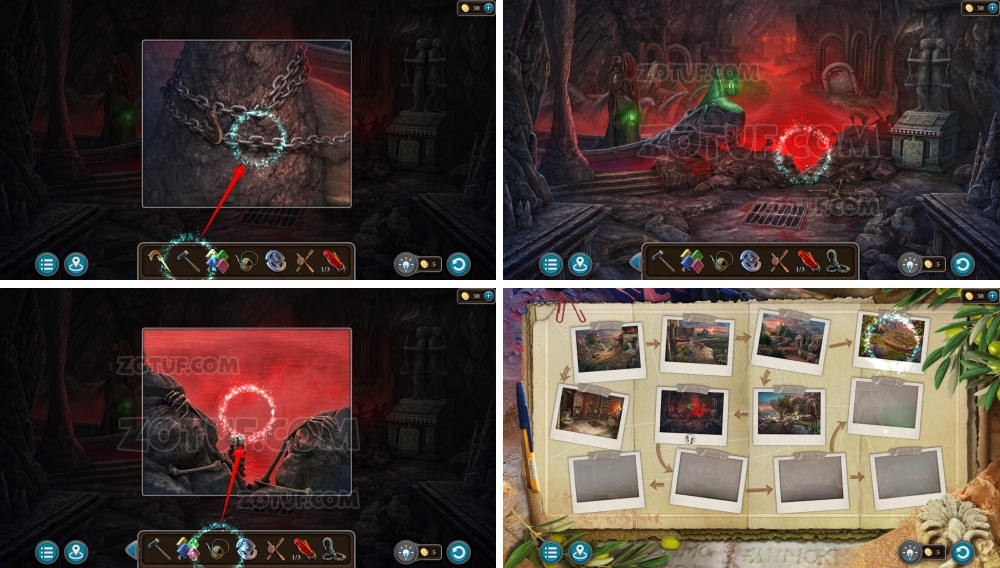
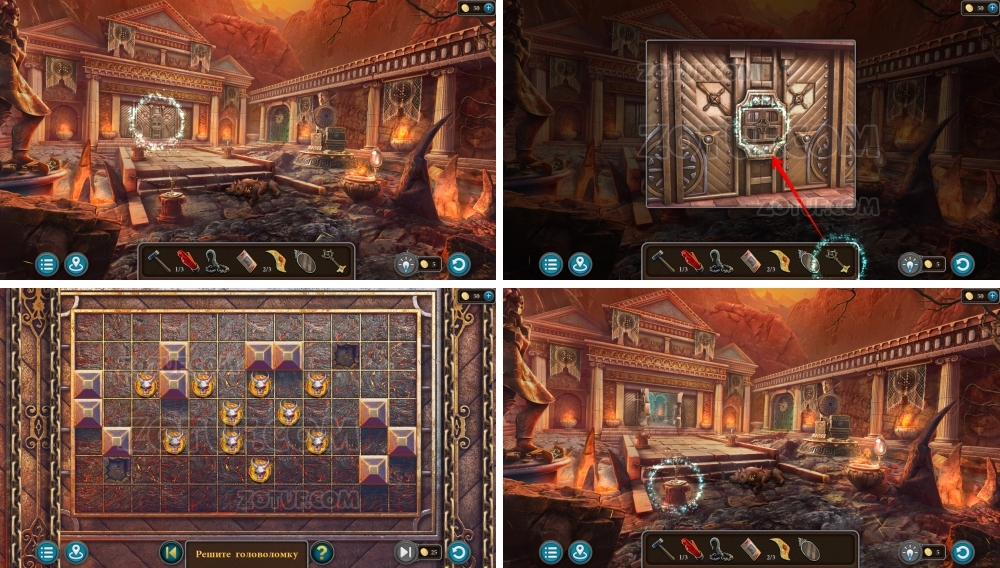
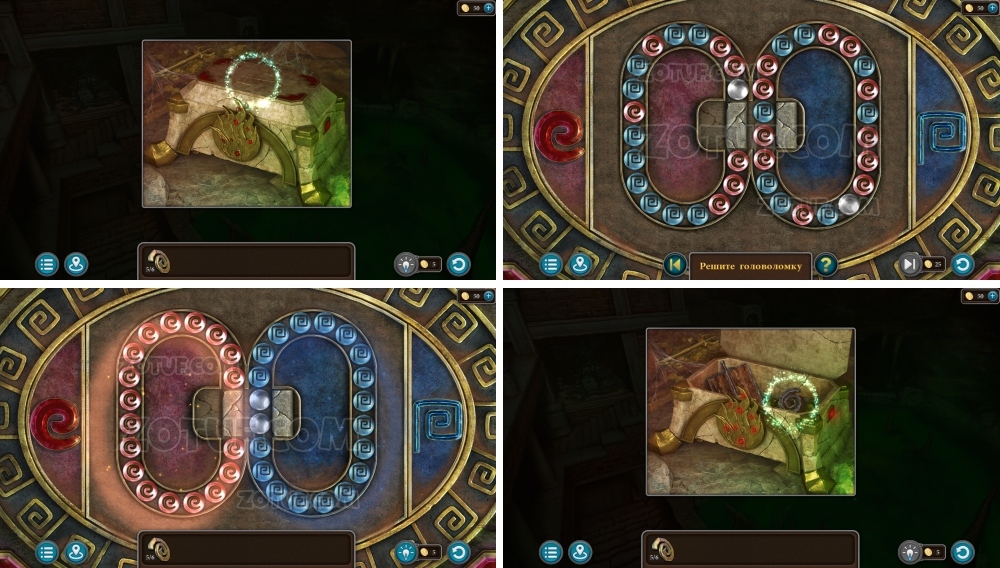
- Use three disk fragments.
- Solve the puzzle: Rearrange the planks so that their edges align. Press the arrow button to view the top planks.
- Solution in the photo.
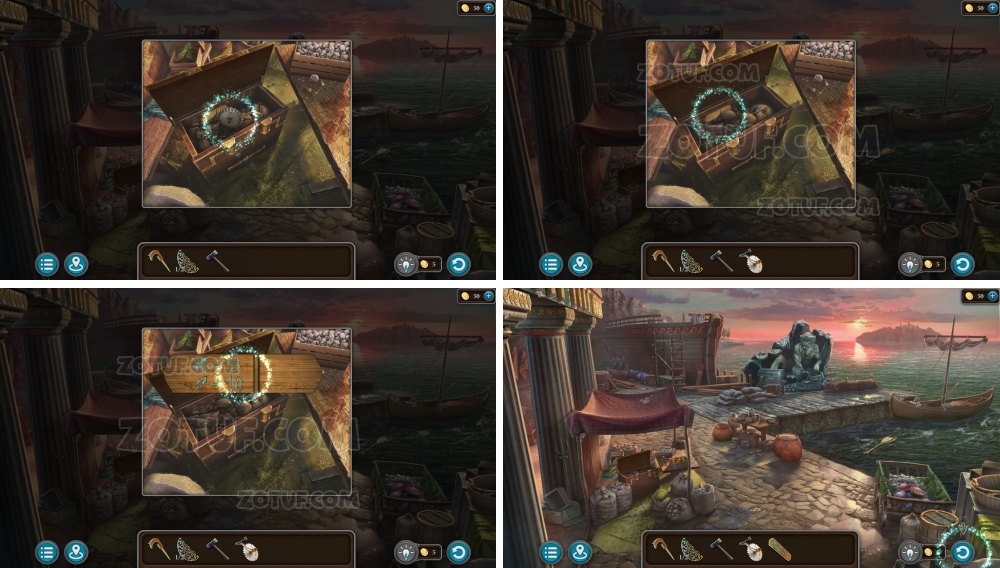
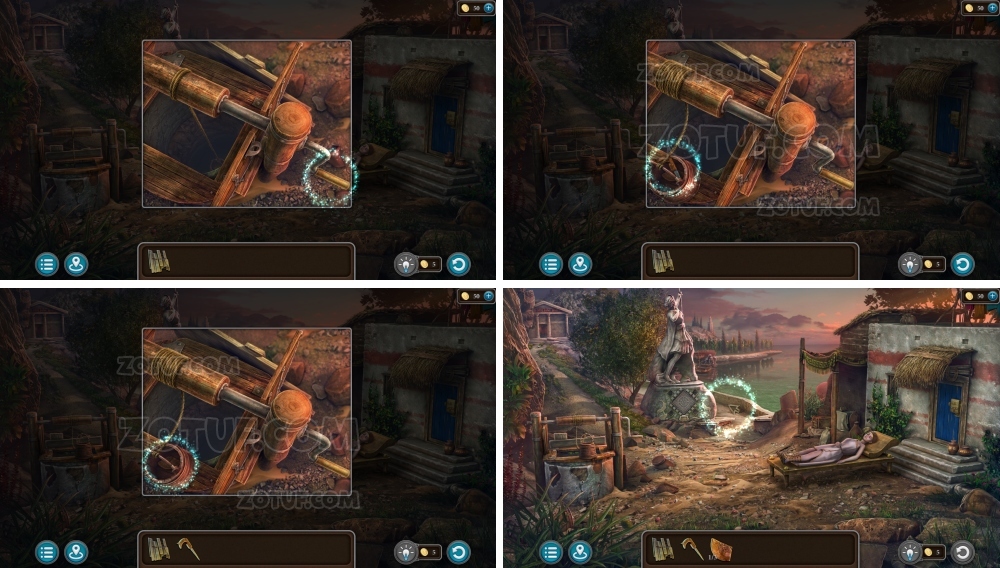
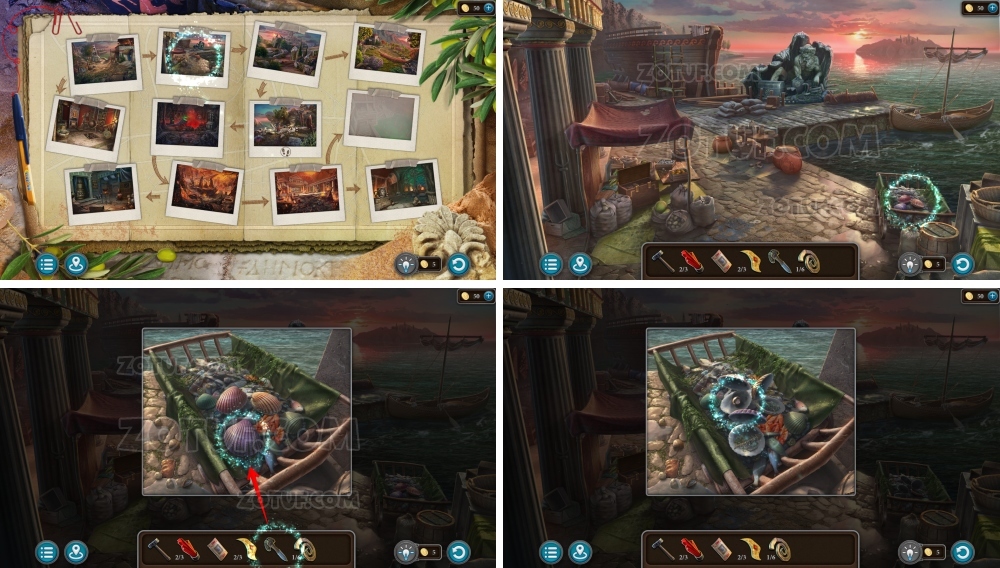
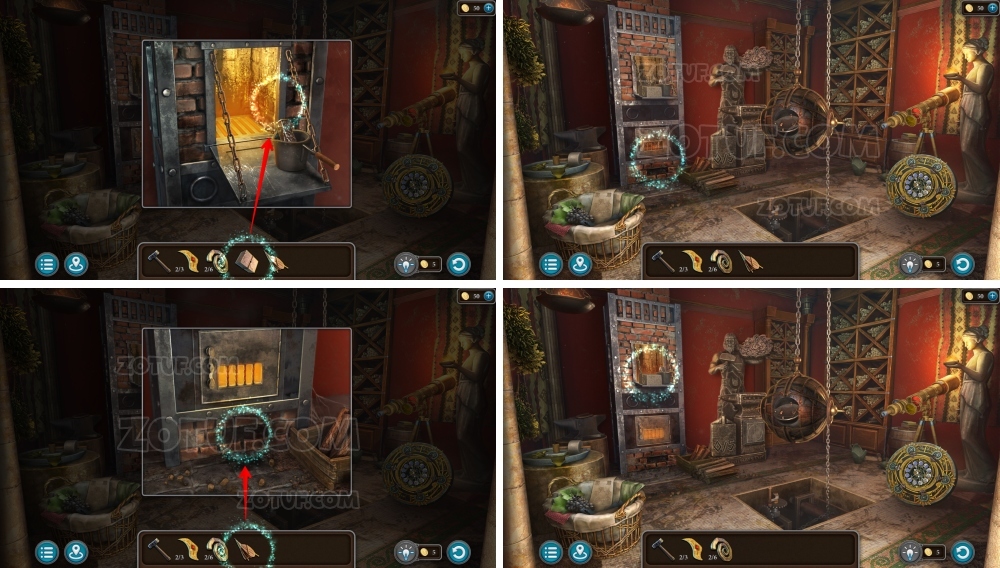
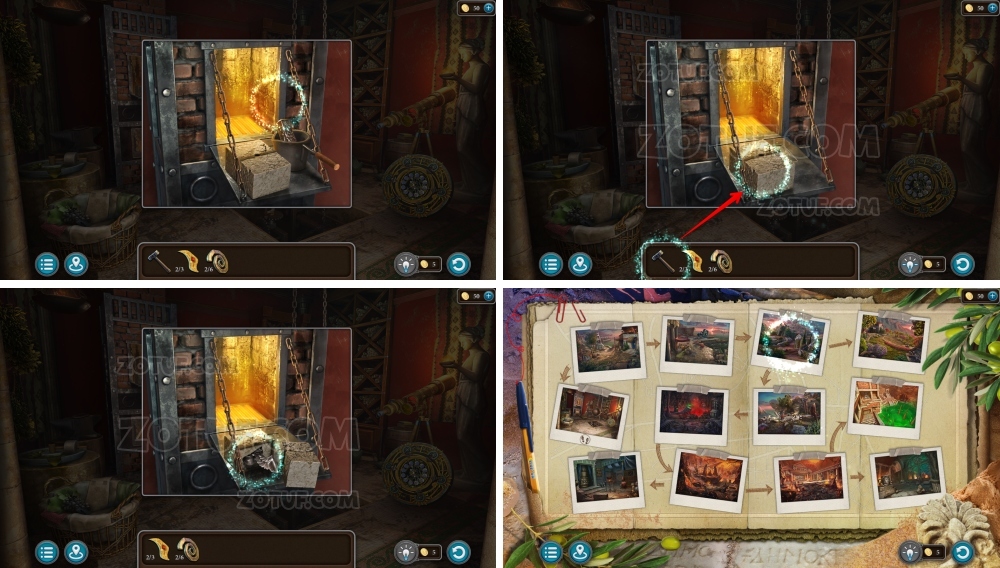
- Take handle and plate.
- Use hammer, get Hydra head 1/3 and net.
- Use net, get oars.
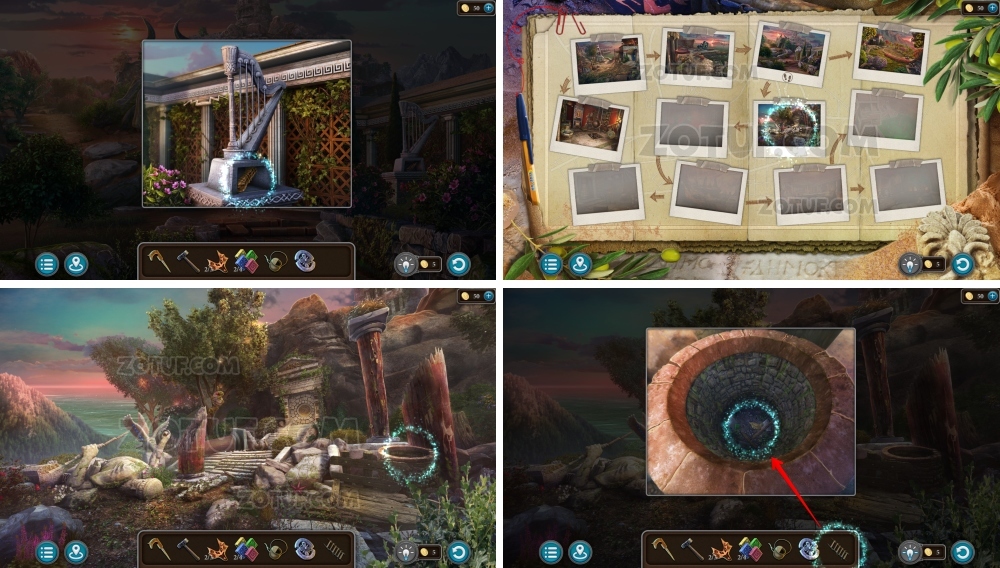
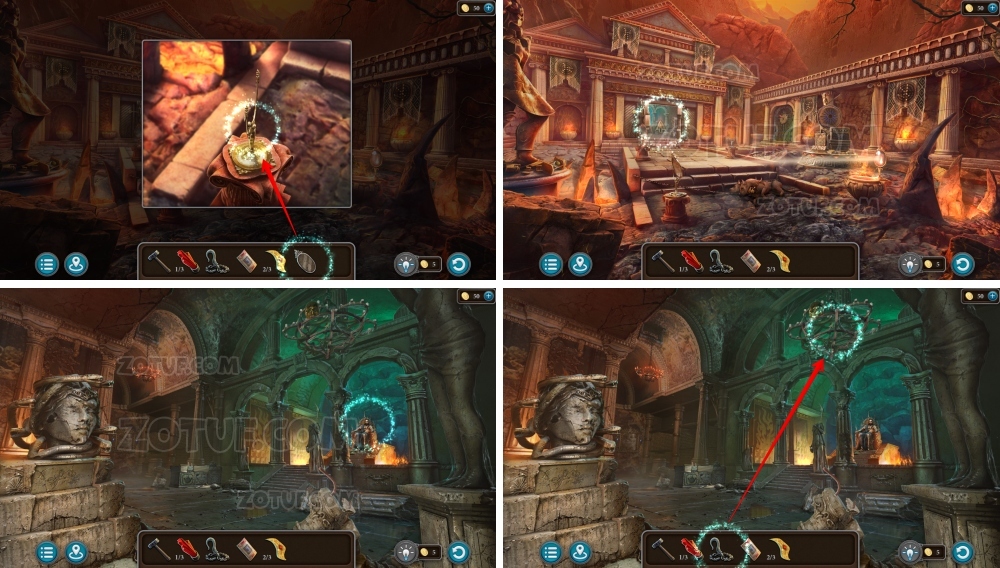
- Use oars.
- Use handle.
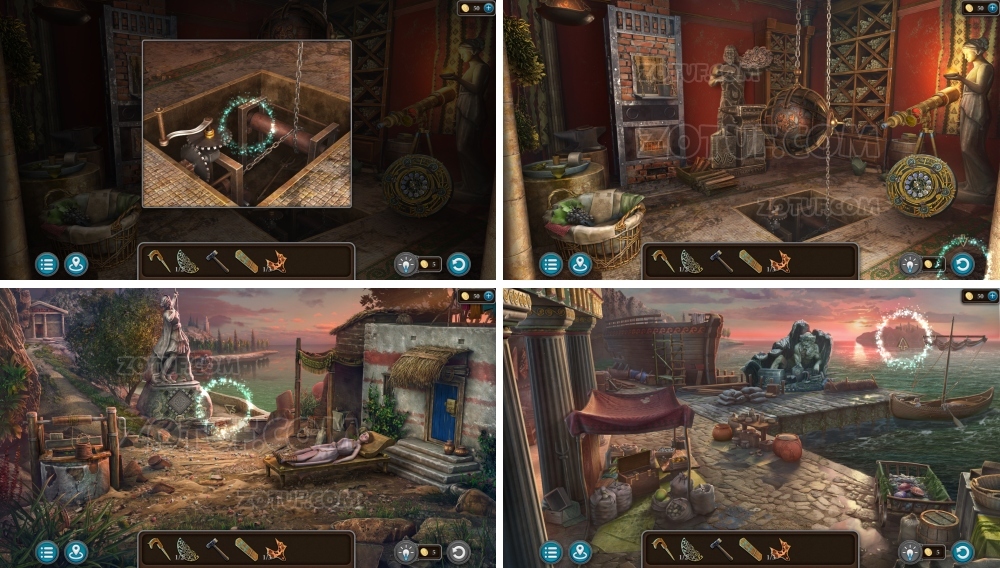
- Press handle.
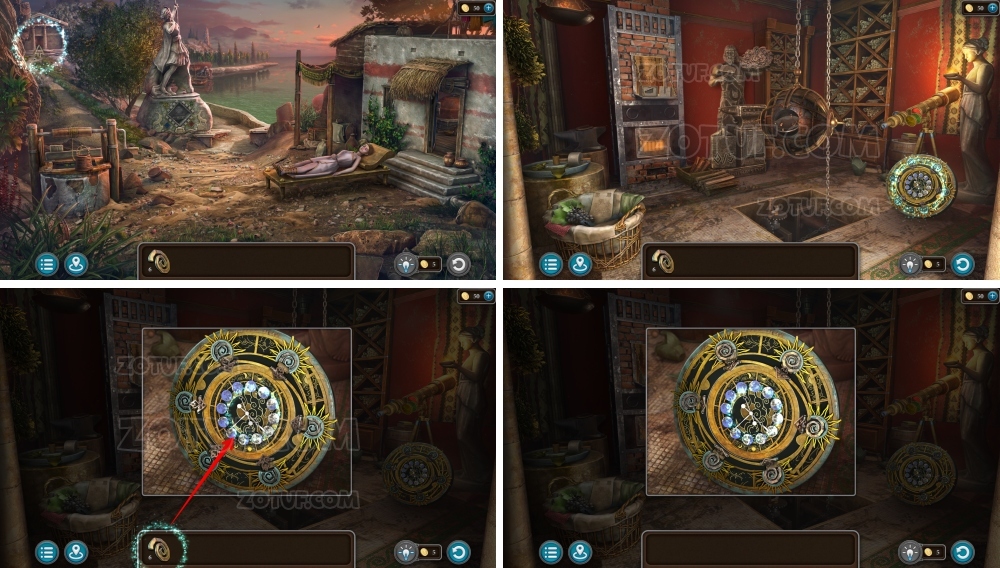
- Sail to the island.
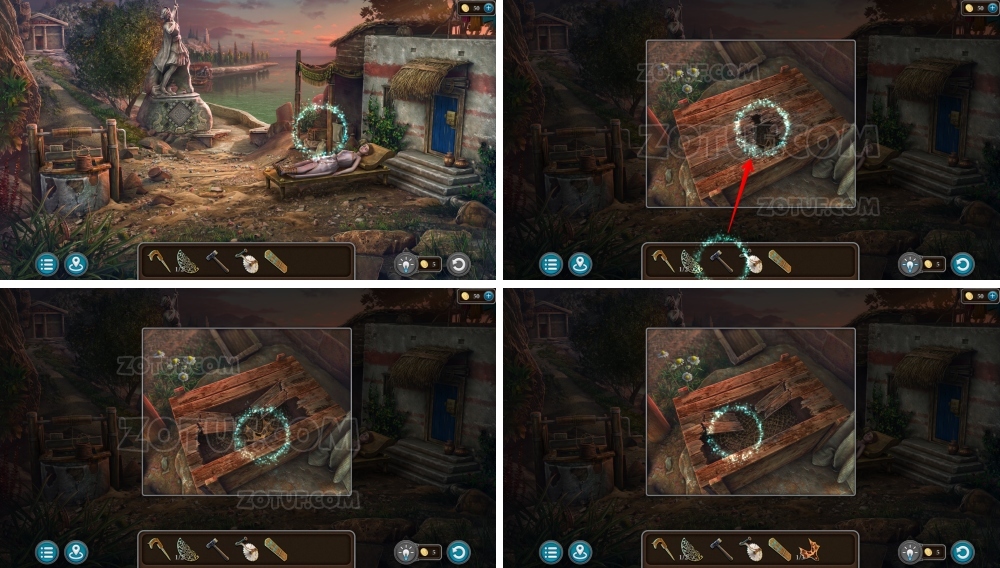
- Take pedestal part 1/4.
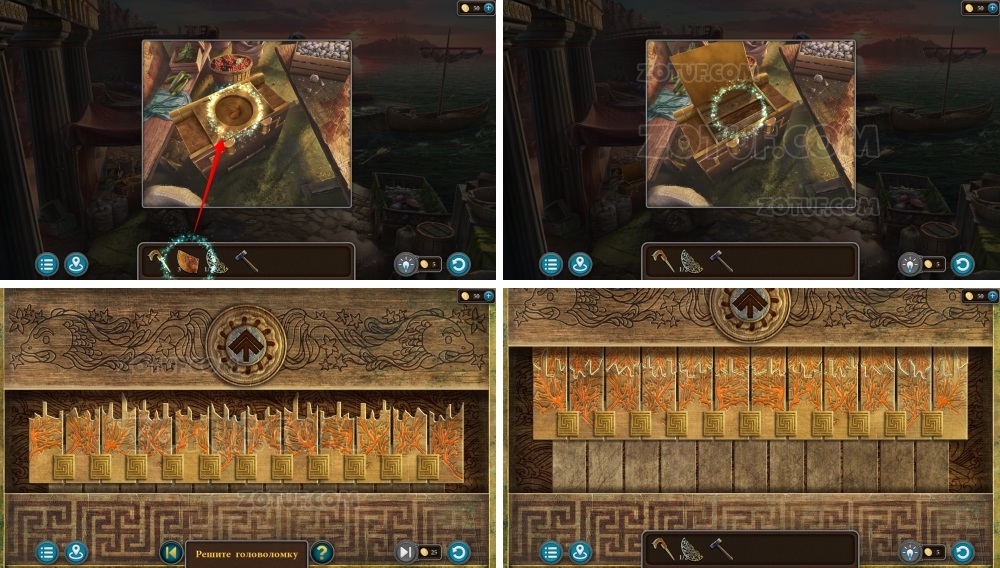
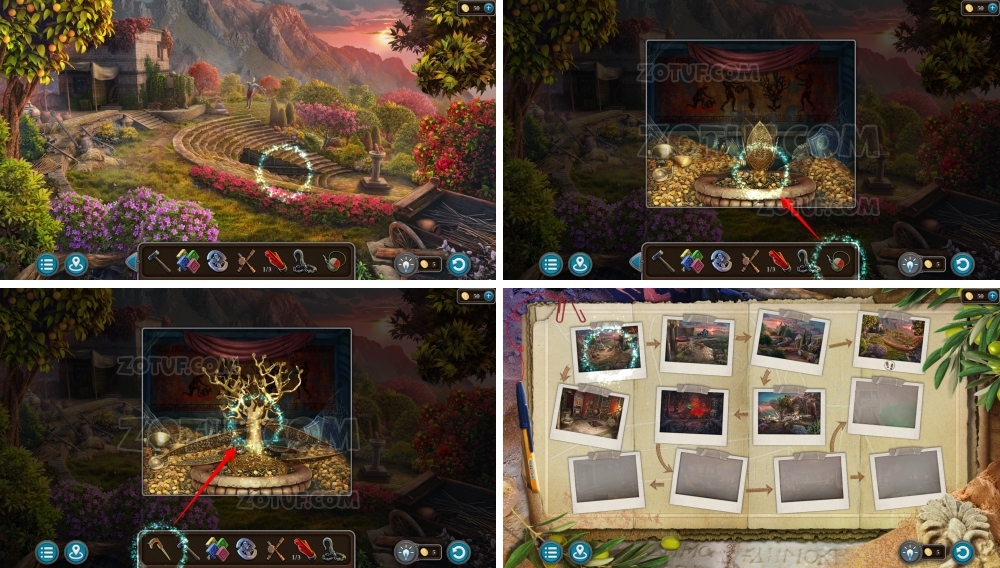
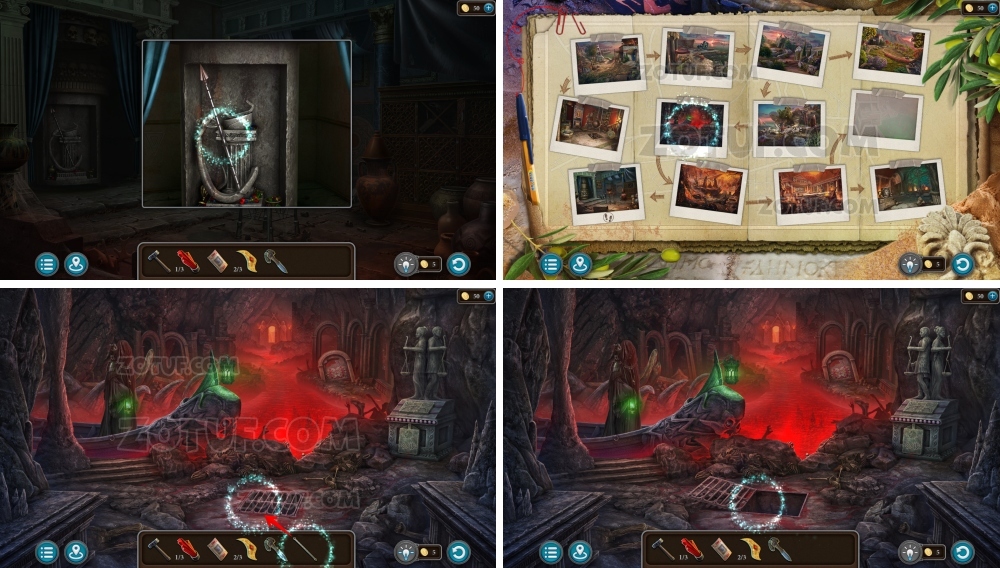
- Use plate.
- Solve the puzzle: Balance the number of symbols on the plates above with the numbers on the bottom chart.
- Solution in the photo.
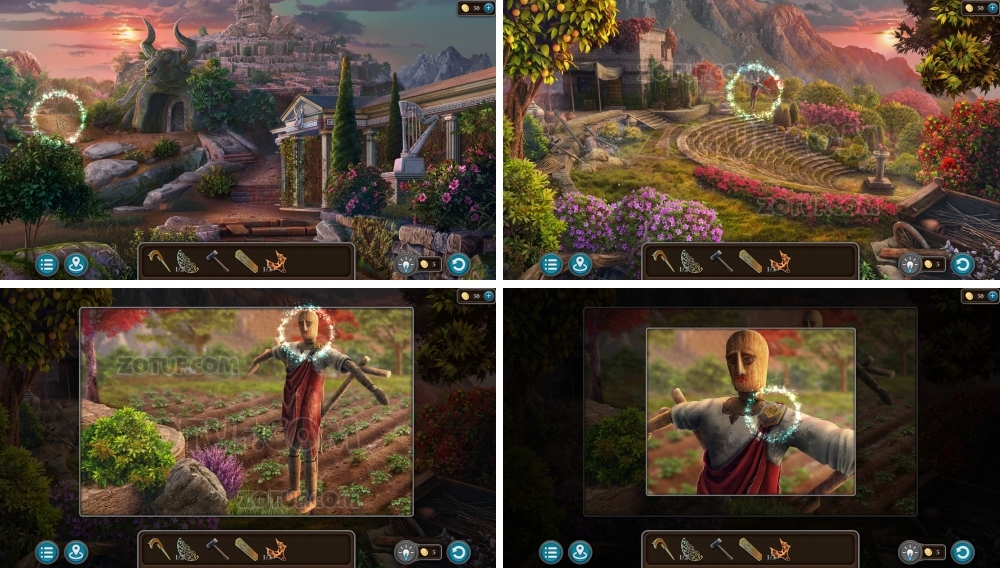
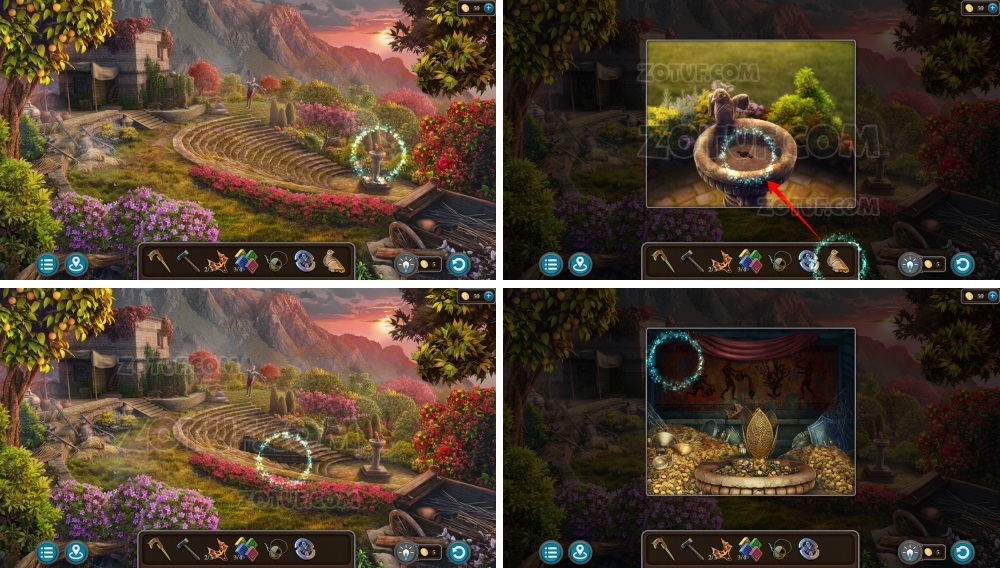
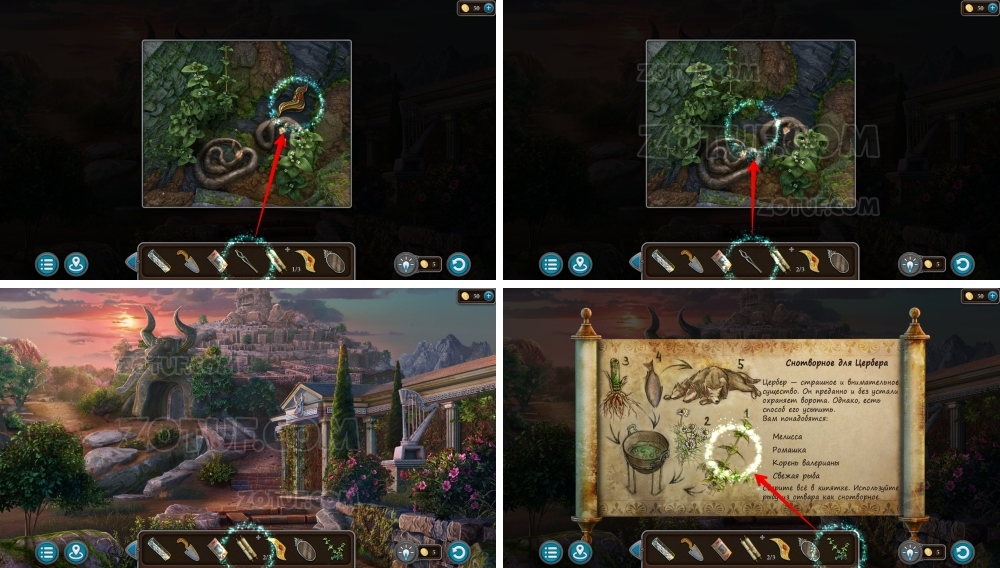
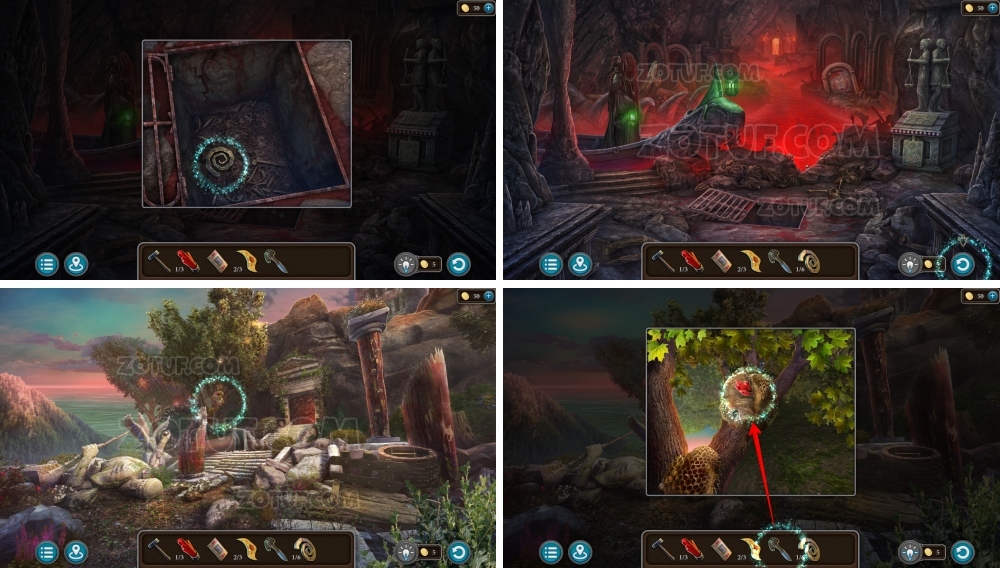
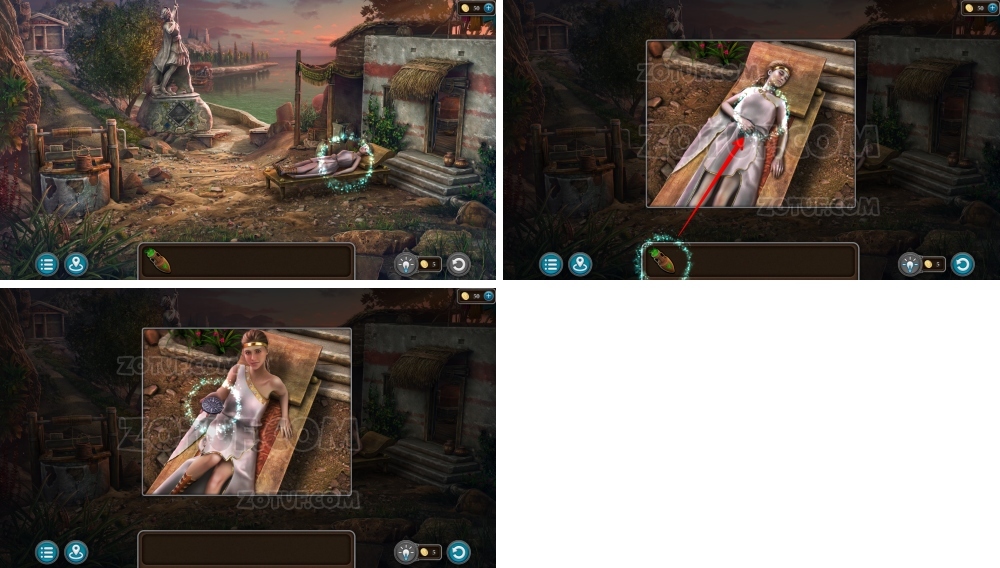
- Take watering can.
- Take pruner.
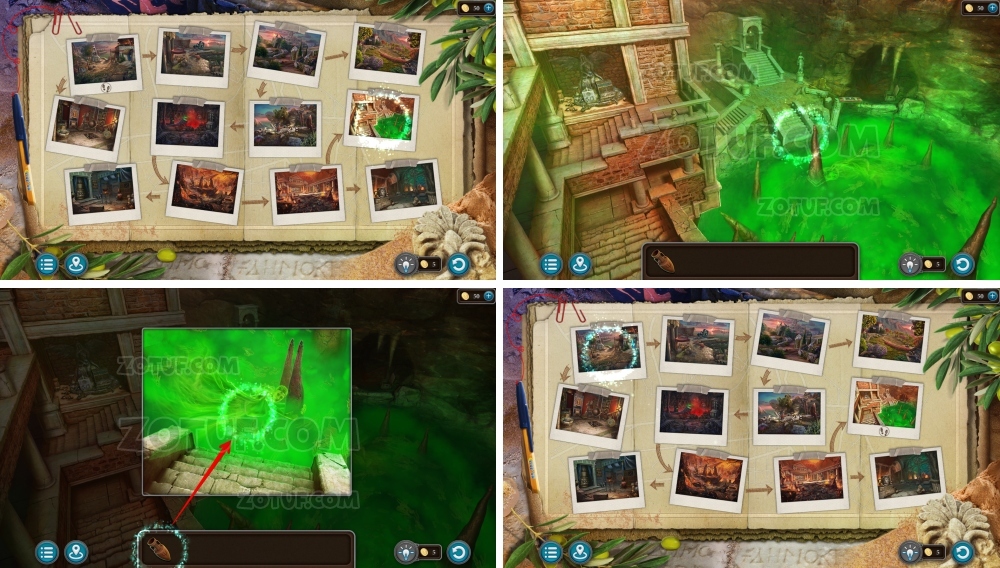
- Use pruner.
- Take labyrinth fragment 2/2 and Hydra head 2/3.
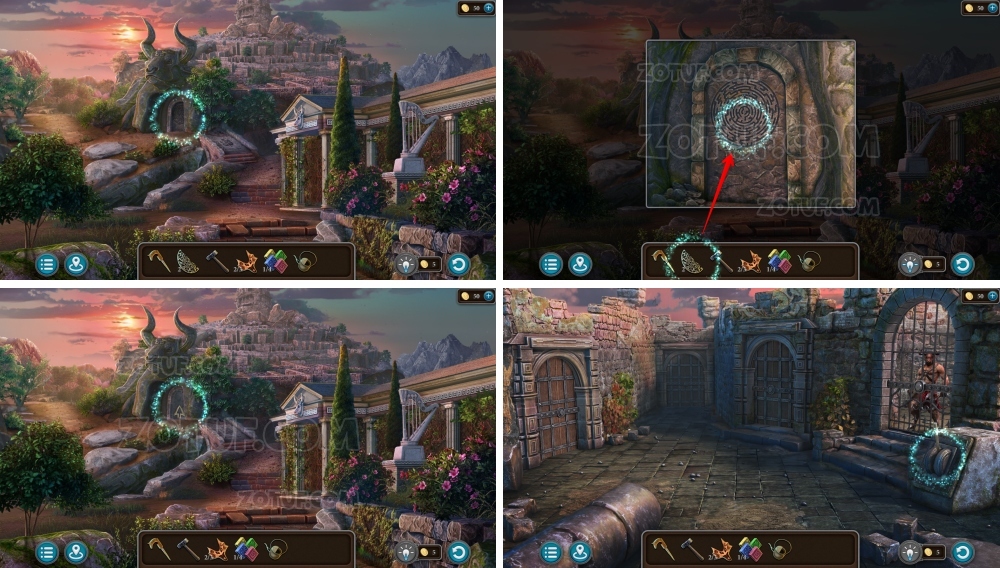
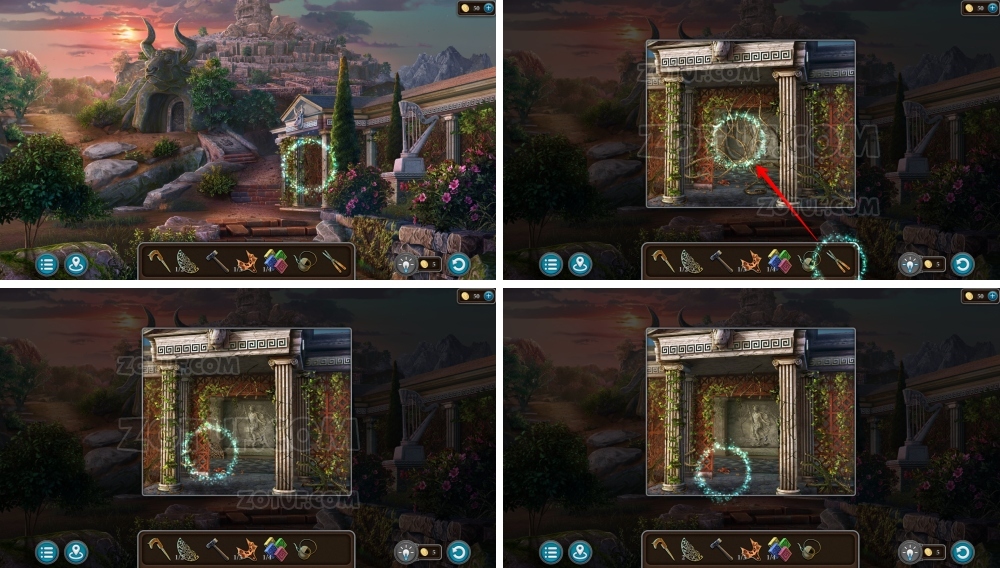
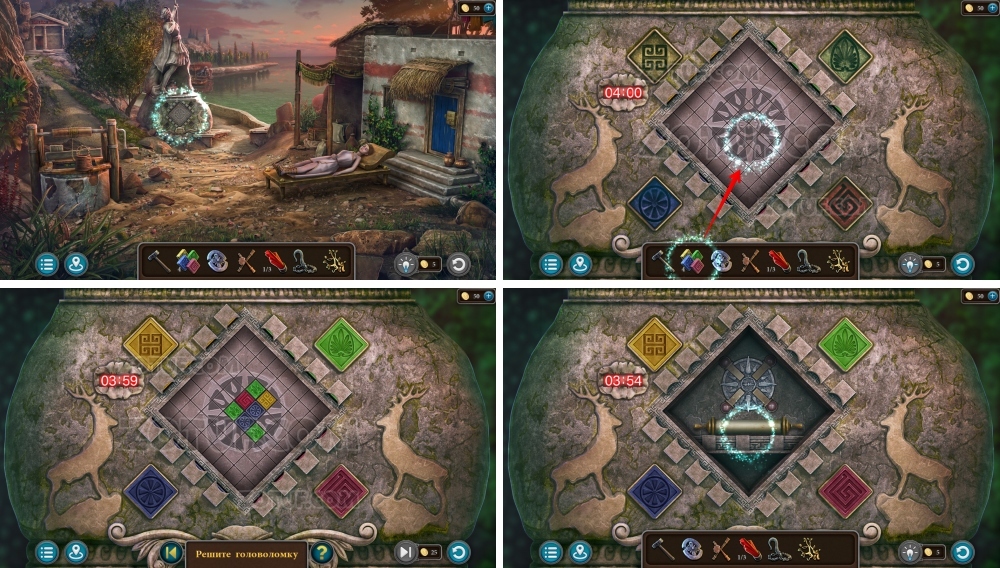
- Use two labyrinth fragments.
- Pull the lever and pass the labyrinth.
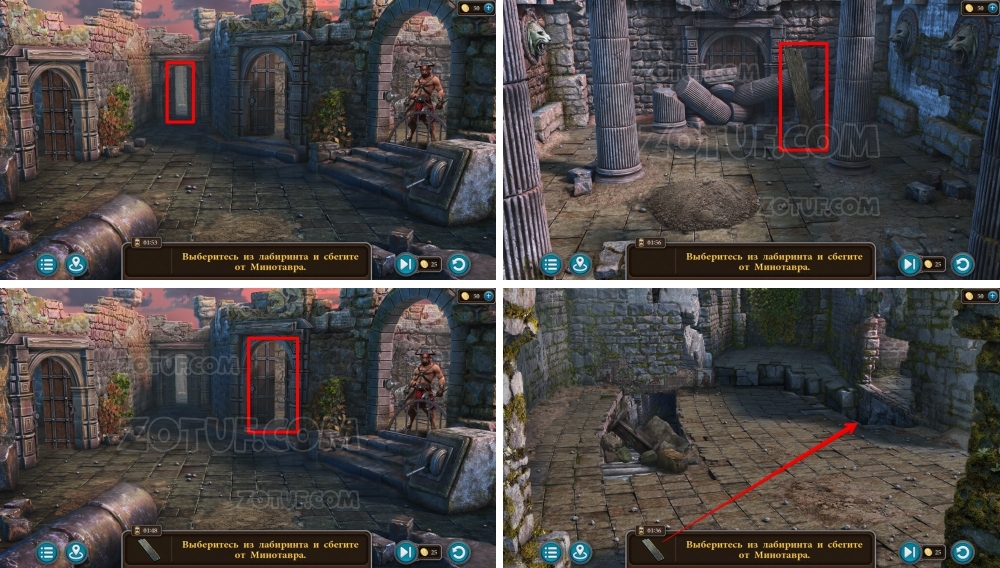
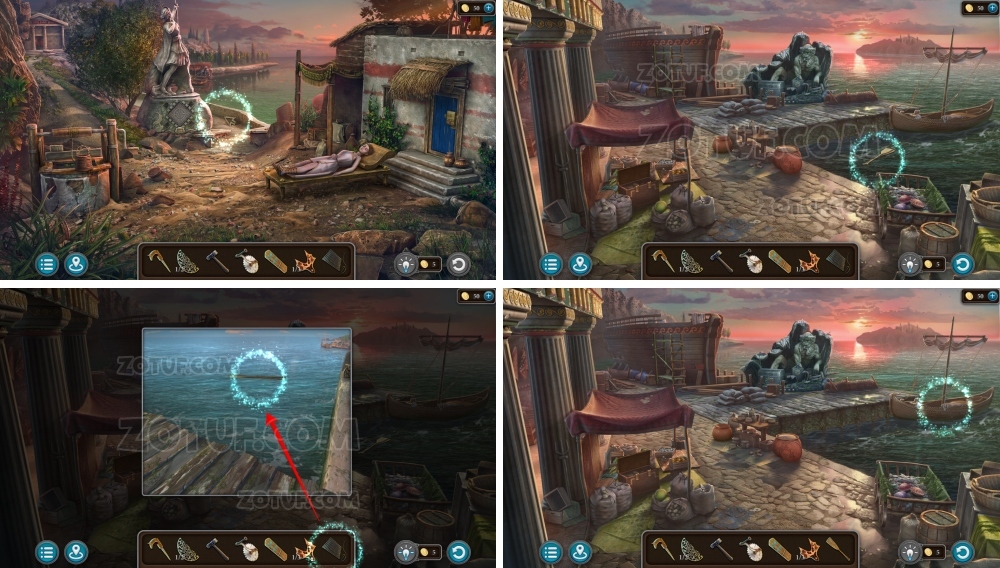
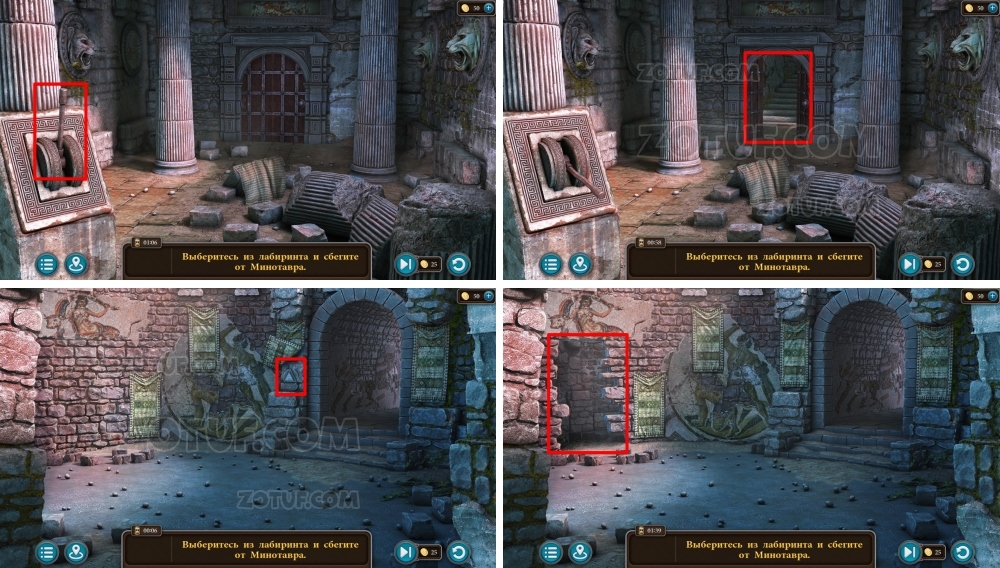
- Escape the labyrinth and run from the Minotaur.
- Go forward.
- Take plank and return.
- Go right.
- Use plank.
- Walk across the plank to the right.
- Take lever.
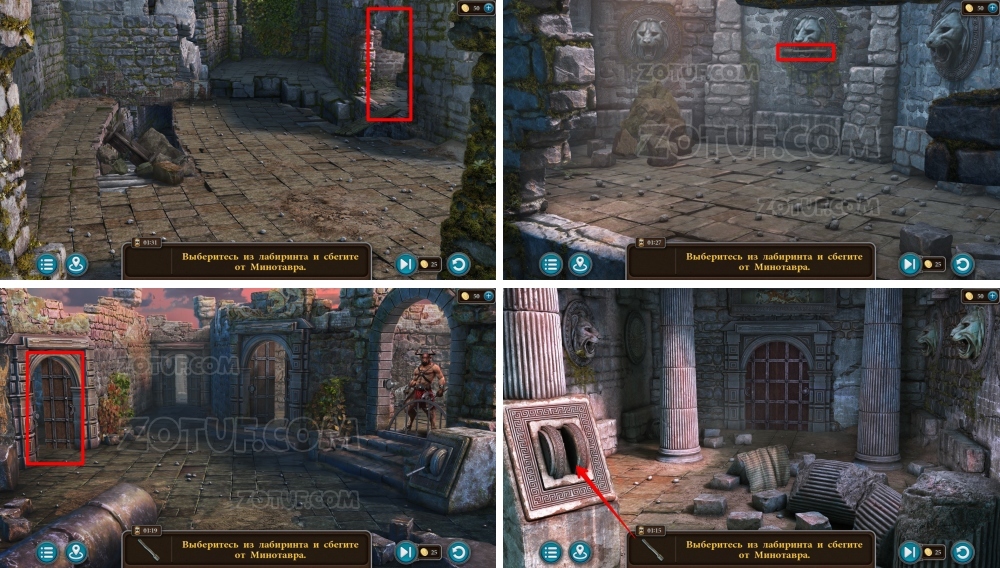
- Return to the start and go left.
- Use lever.
- Press lever.
- Go forward.
- Press triangular button.
- Go left.

- Take rope, go back.
- Go right.
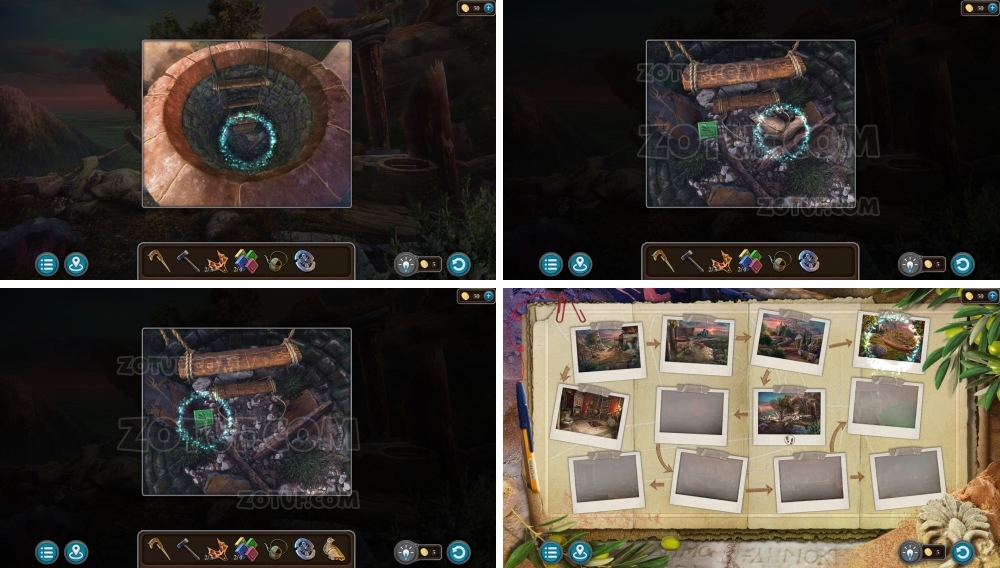
- Go down.
- Use rope.
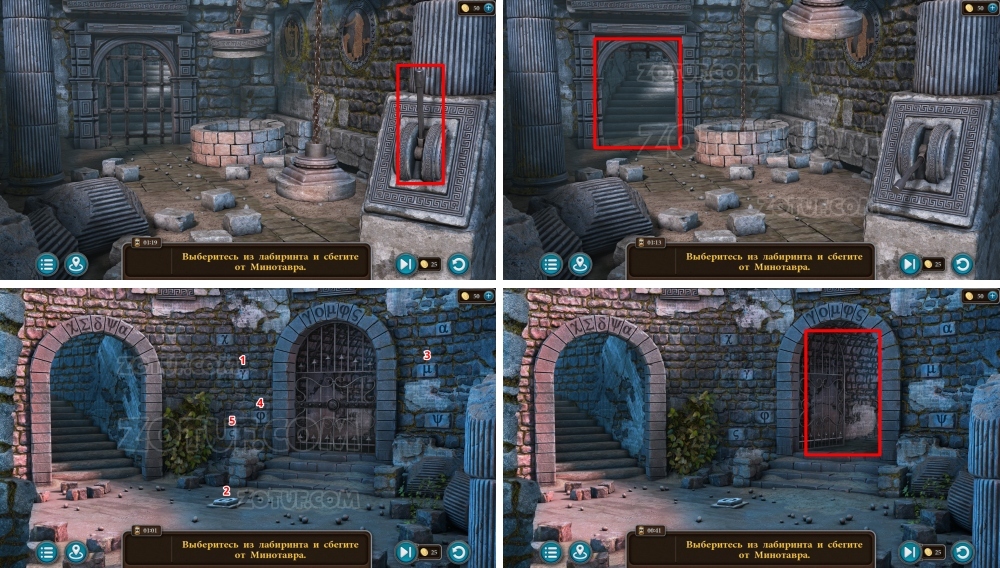
- Press lever.
- Go forward.
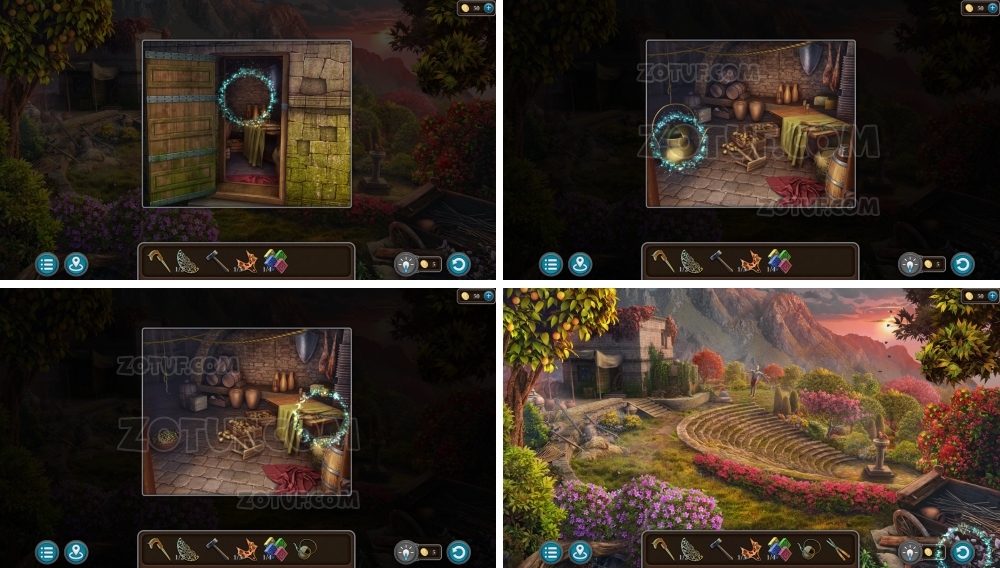
- Press stone buttons, enter (word above door).
- Go forward.
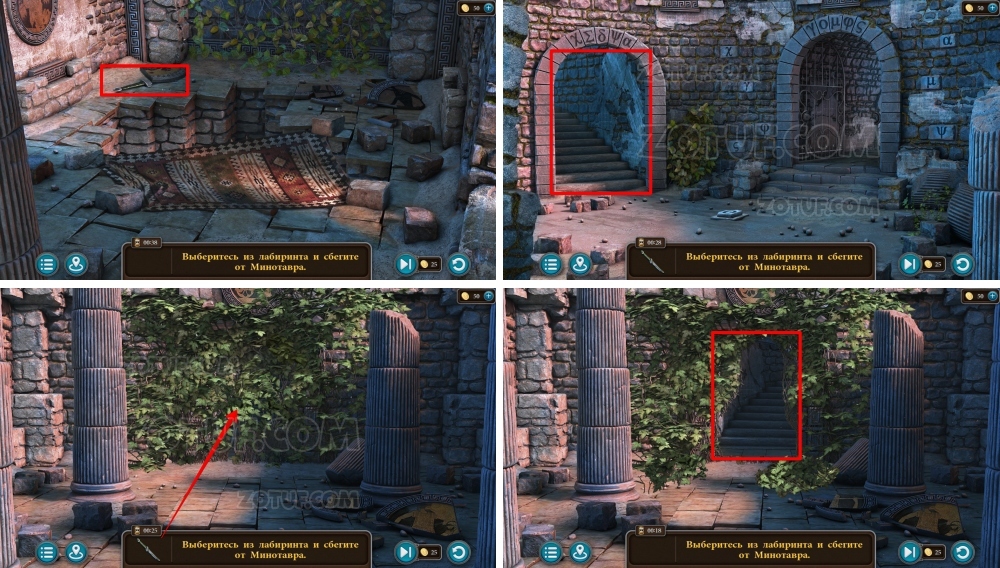
- Take dagger, go back.
- Go left.
- Use dagger.
- Go forward.
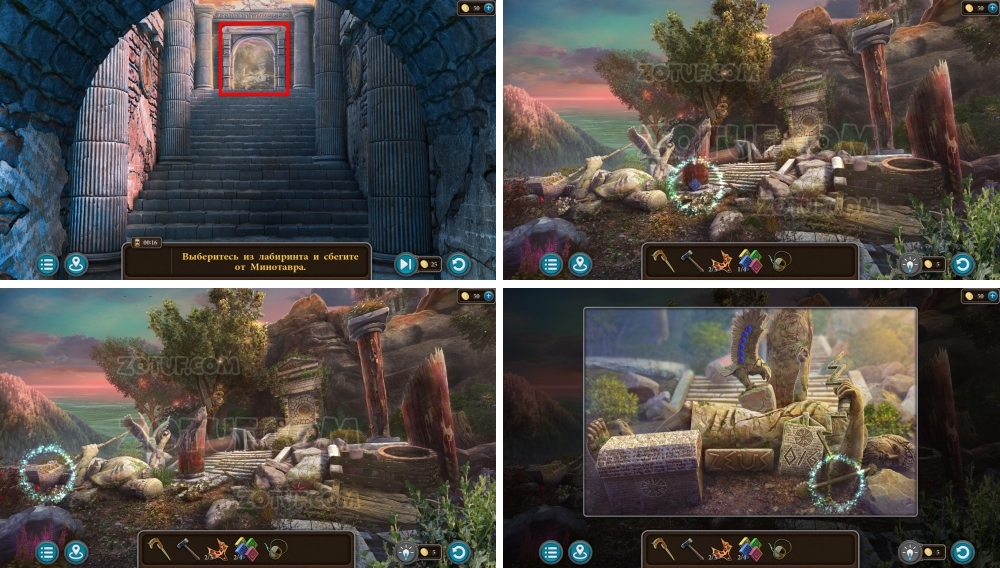
- Exit the labyrinth.
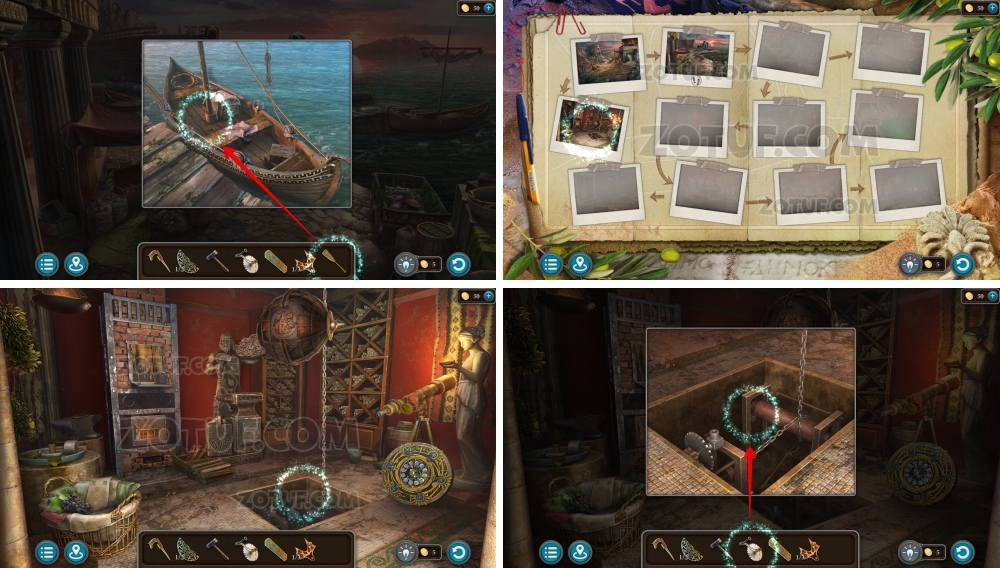
- Take pedestal parts 2/4.
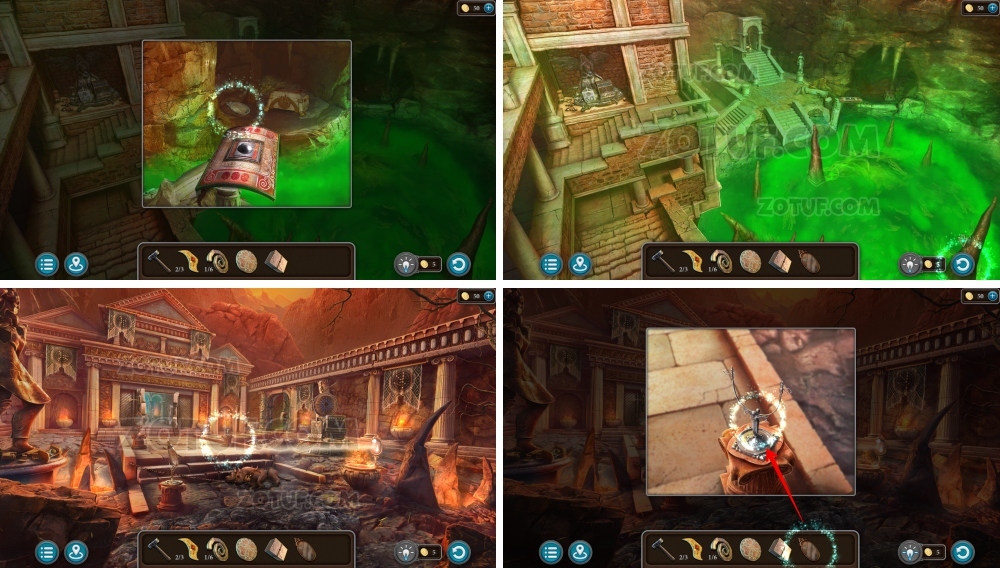
- Take string.
- Use string, get medallion.
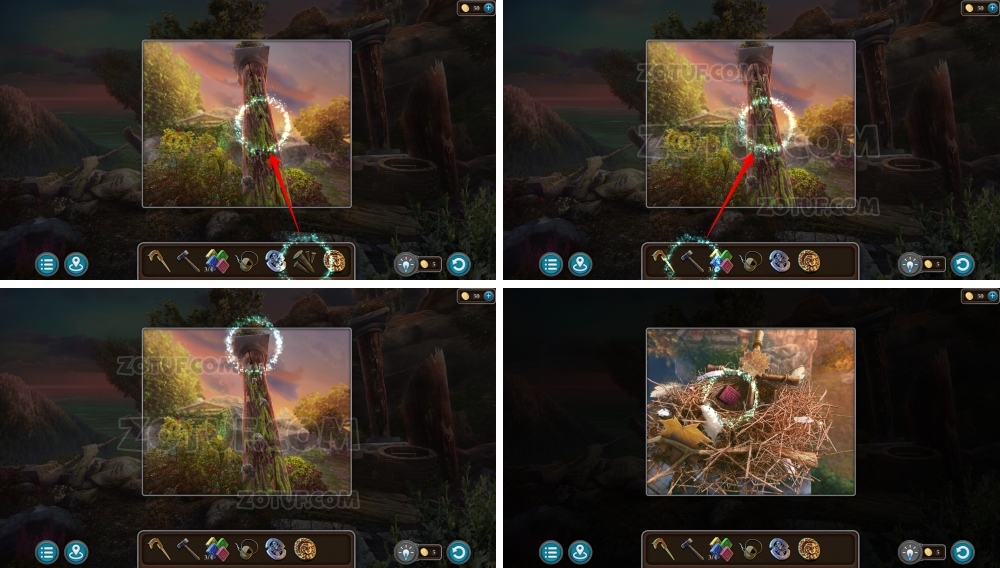
- Take ladder.
- Use ladder.
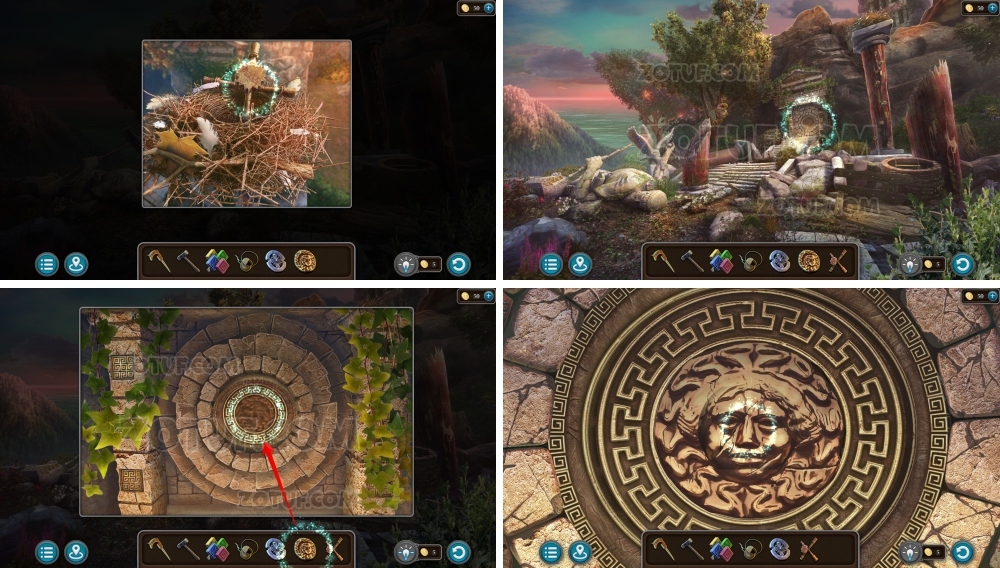
- Take bird figurine and pedestal parts 3/4.
- Use bird figurine.
- Take Hydra head 3/3 and pegs.
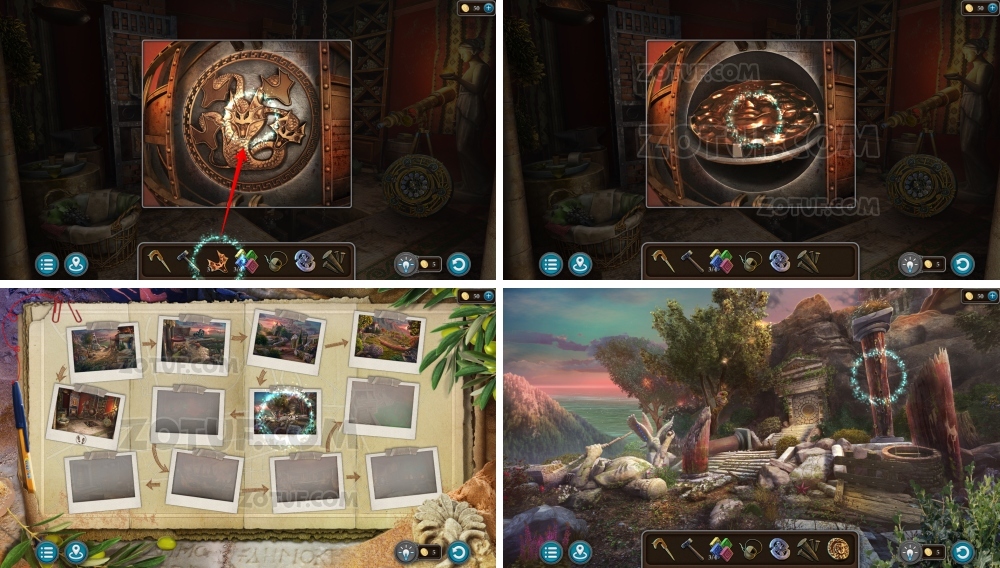
- Use three Hydra heads, get bas-relief.
- Use pegs and hammer.
- Take pedestal parts 4/4.
- Take cross-key.
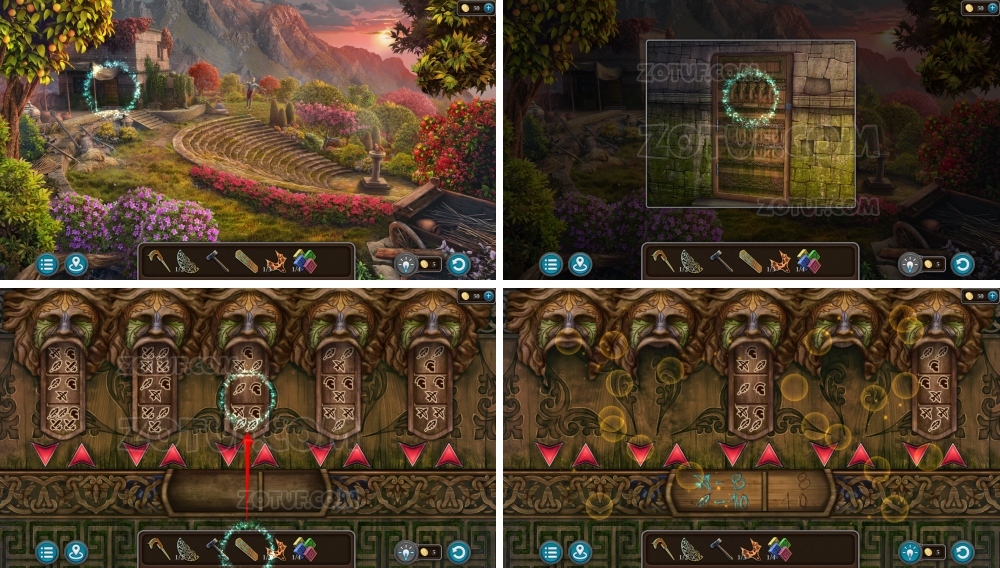
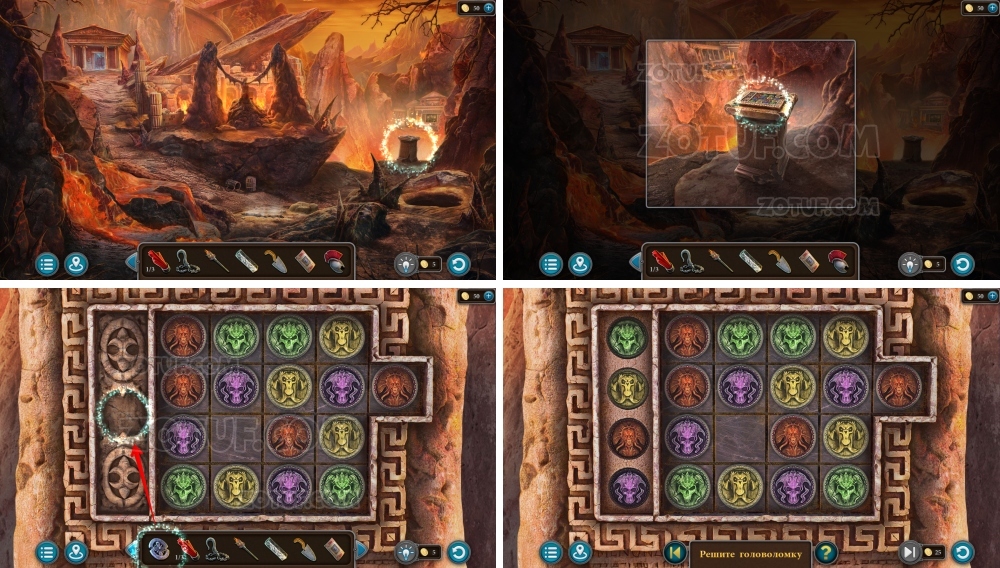
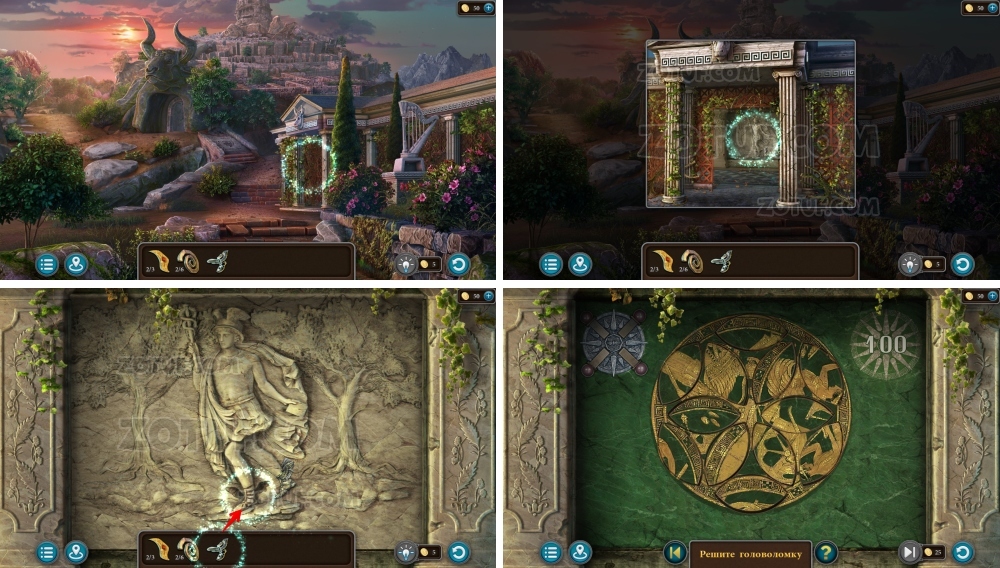
- Use bas-relief.

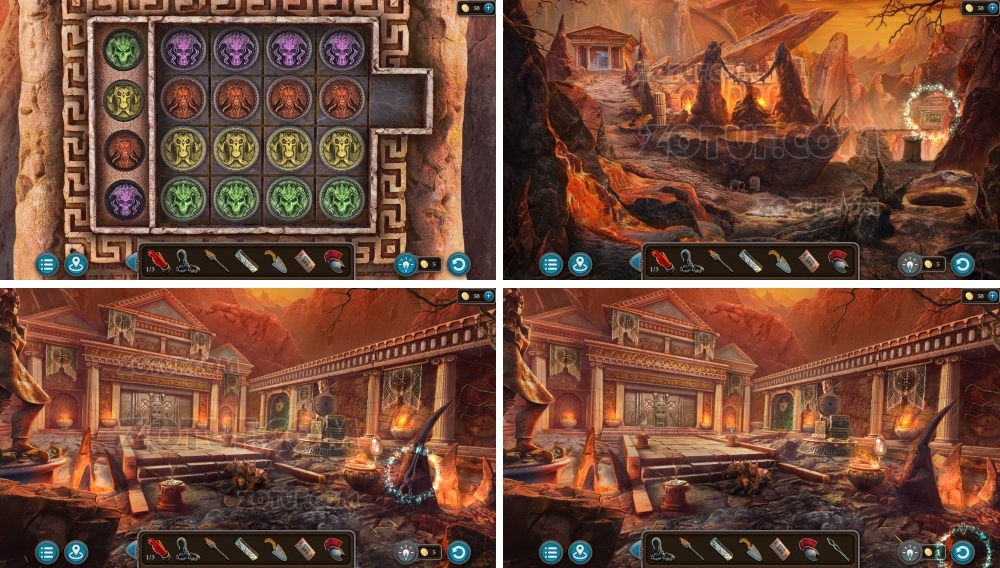
- Solve the puzzle: Rearrange the zodiac signs by pressing the arrows to put them in place.
- Solution in the photo.

- Talk to Haran.
- Take crystal 1/3.
- Use hammer, get hook.
- Use watering can, get filled watering can.
- Use filled watering can and file, get golden branches.
- Use four pedestal parts.
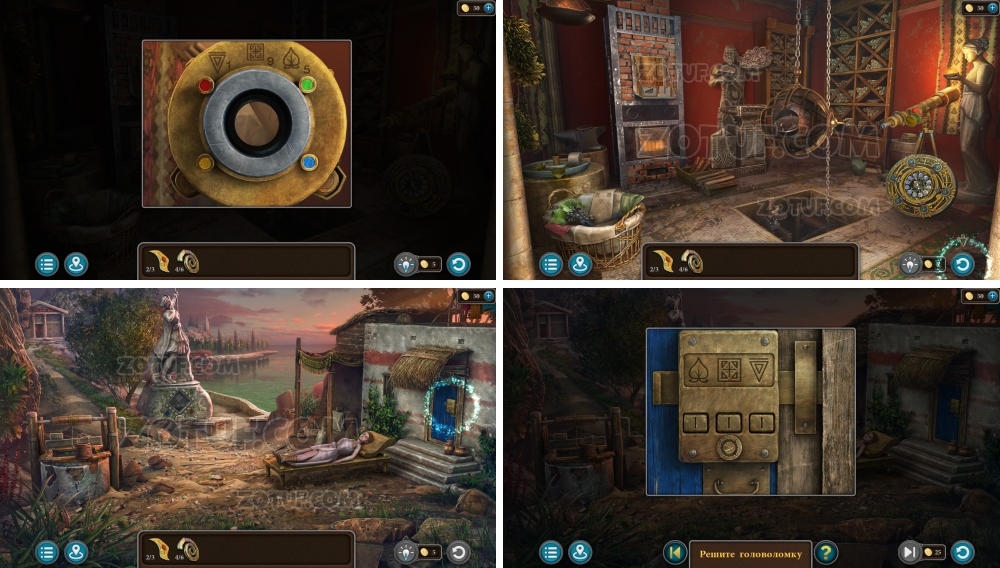
- Solve the puzzle: Place the pieces on squares of matching colors in the center. Press buttons along the edge to release pieces.
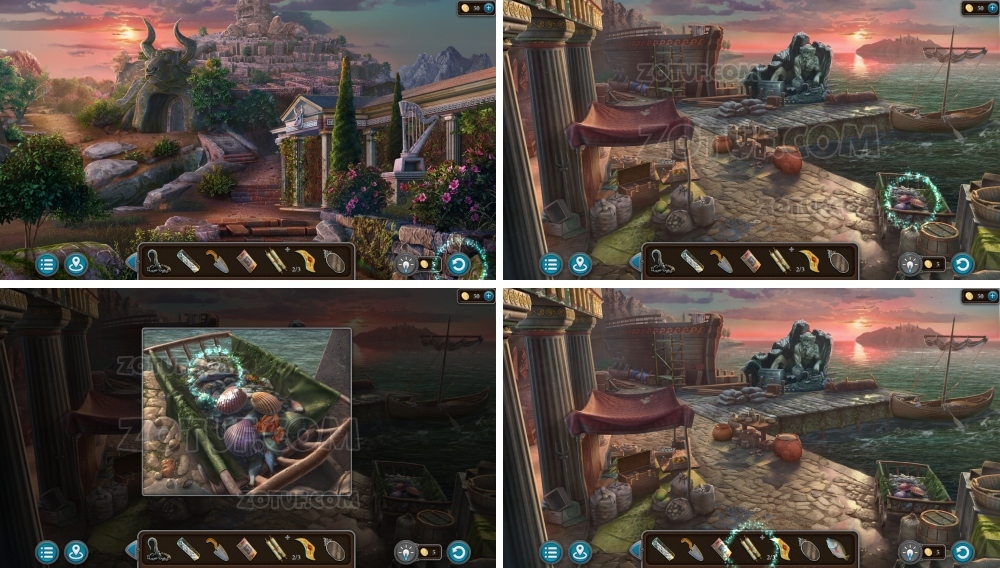
- Take scroll.

- Give golden branches.
- Take torch.
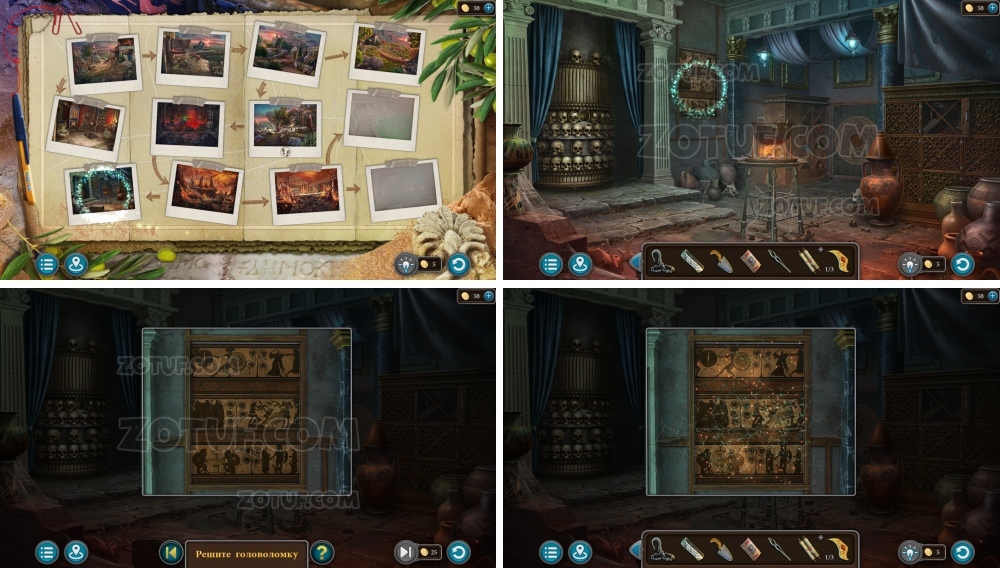
- Use scroll.
- Solve the puzzle: Move stone rows to rearrange them correctly. Use the hint found earlier.
- Solution in the photo.
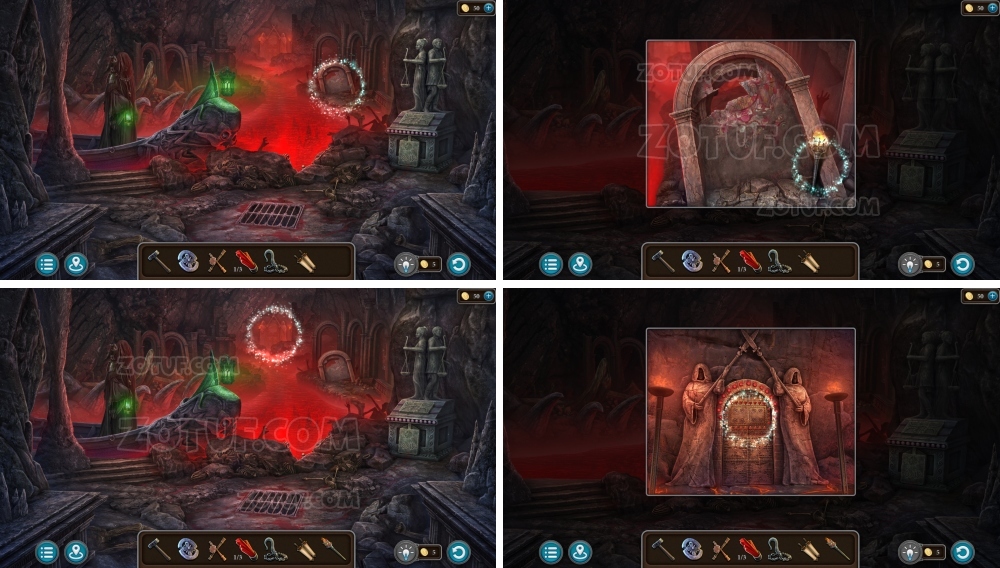
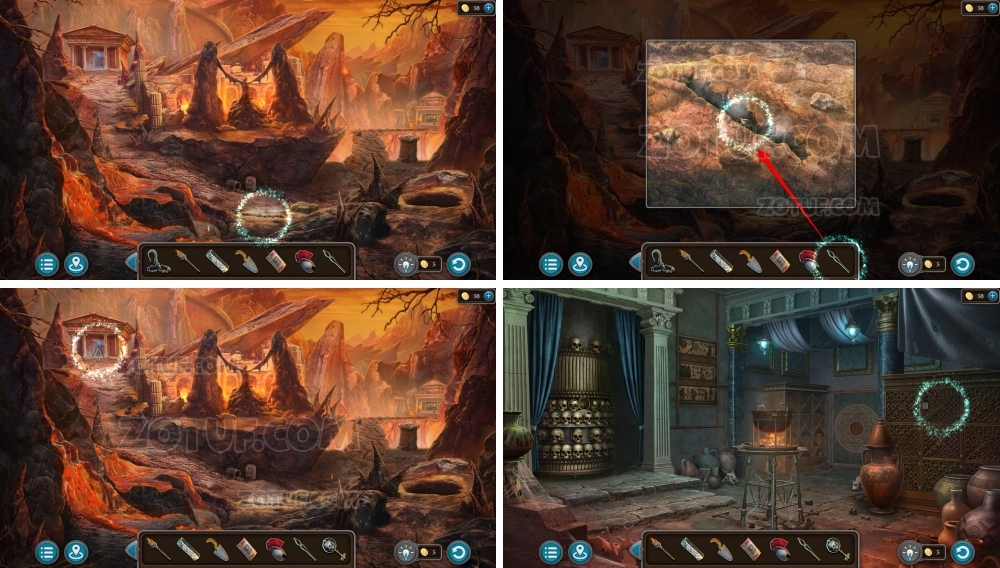
- Use torch.
- Take silver and shovel.
- Take shield.
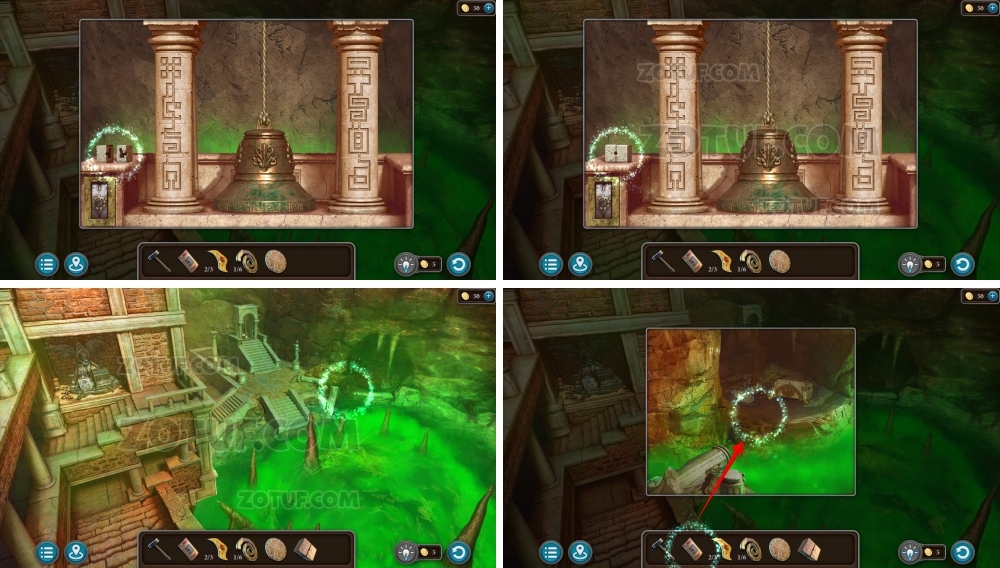
- Use hammer.
- Take helmet.
- Use cross-key.
- Use torch.
- Use medallion.
- Solve the puzzle: Arrange pieces in rows opposite matching tokens.
- Take pincers.
- Use pincers, get key.
- Use key.
- Take recipe and part 1/3.
- Use helmet.
- Note down the hint for a future puzzle (count shields, birds, and three-tiered fruit plates).
- Use torch.
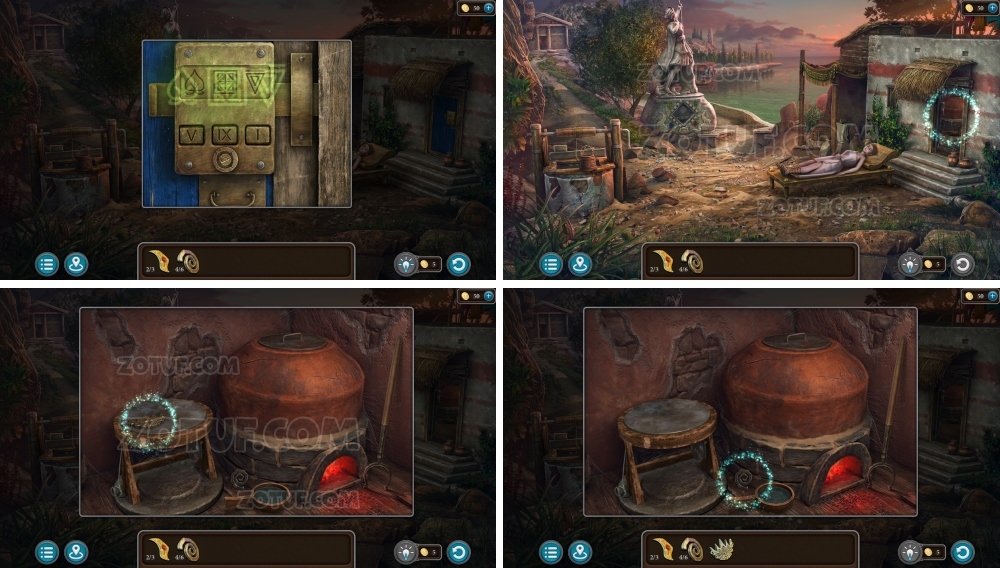
- Solve the puzzle: Press symbols a specific number of times to unlock the cache. The hint has appeared before.
- Solution: Press shield, bird, and three-tiered fruit plate from top to bottom, using the number of items in the red clue. (each has a different count).
- Take mirror.
- Use pincers, get part 2/3.
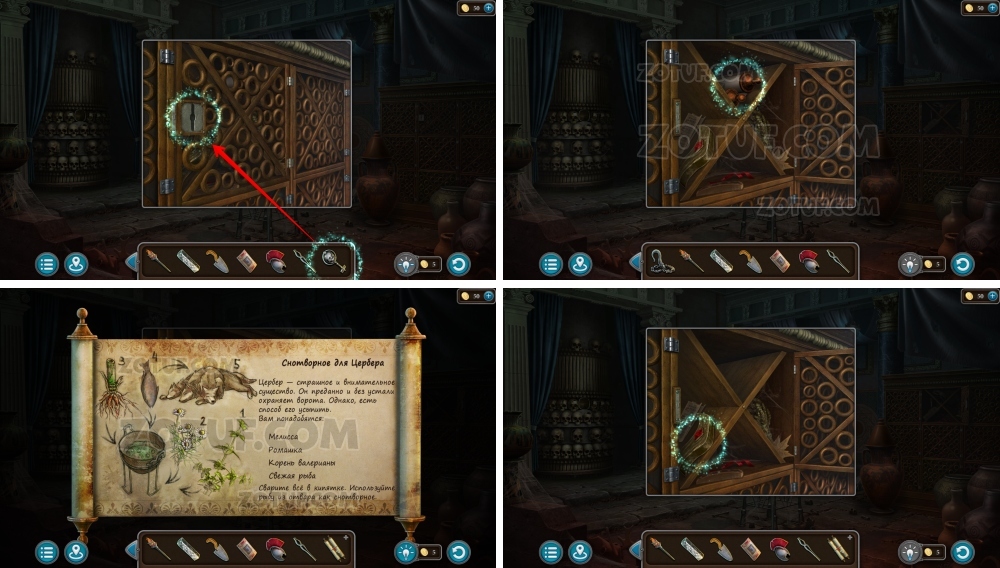
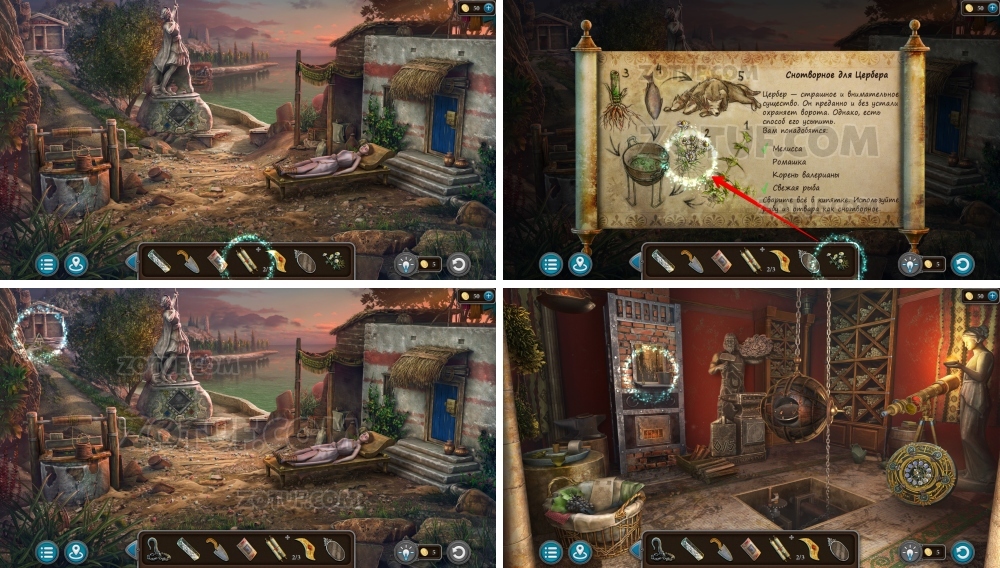
- Use pincers, get melissa.
- Open recipe, use melissa.
- Take fish.
- Open recipe.
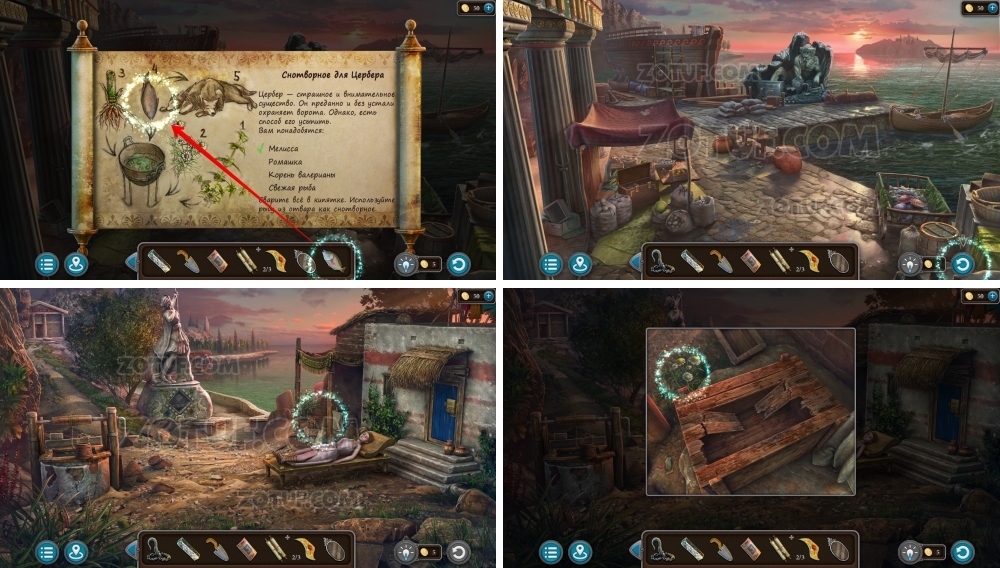
- Use fish.
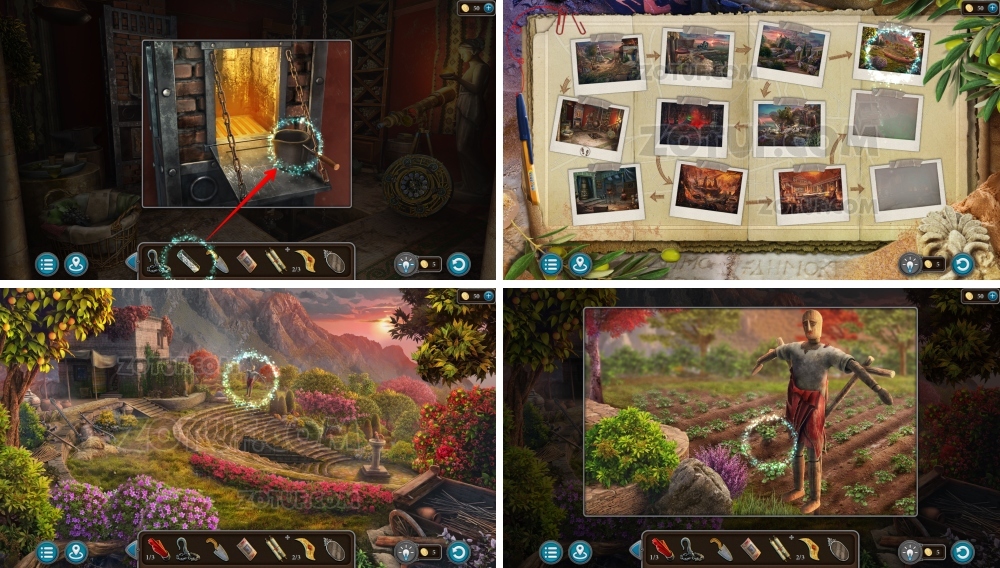
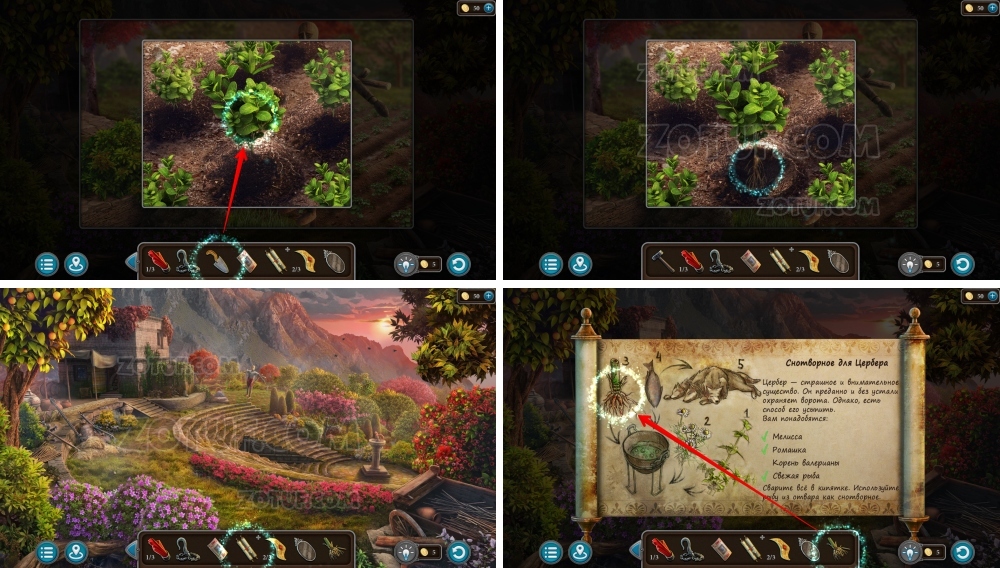
- Take chamomiles.
- Open recipe.
- Use chamomiles.
- Use silver.
- Use shovel, get valerian root.
- Open recipe.
- Use valerian root, get ingredients.
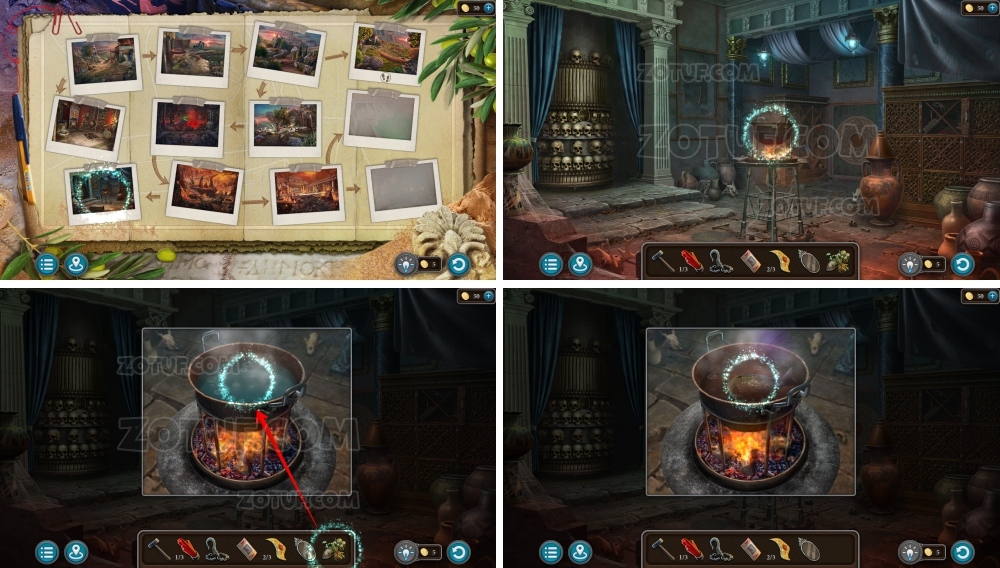
- Use ingredients, get sleeping fish.
- Use sleeping fish.
- Take key.
- Use key.
- Solve the puzzle: Push all seals off the board into the funnels.
- Use mirror.
- Talk to Hades.
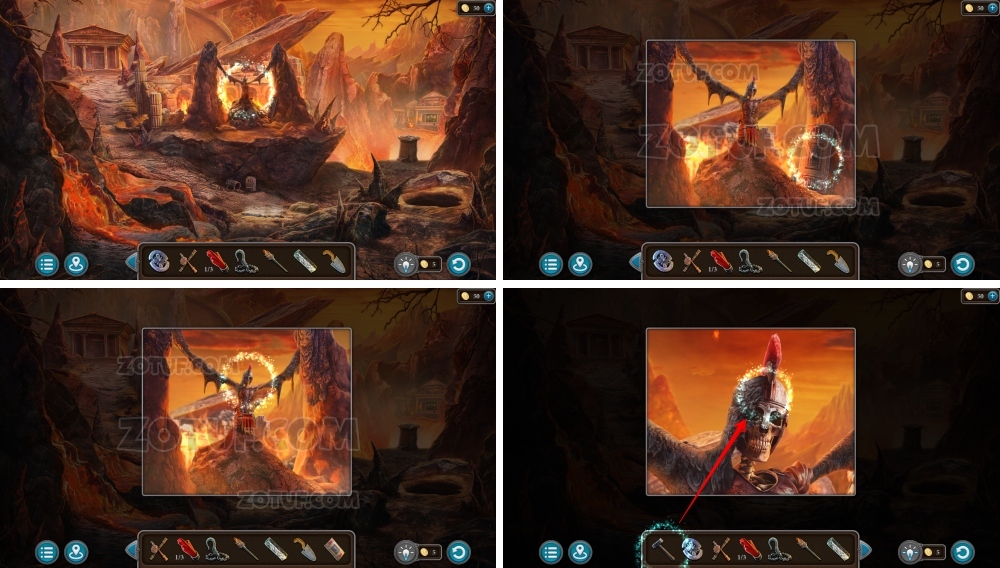
- Use hook.
- Take skull.
- Use skull.
- Solve the puzzle: Place tokens near images they represent.
- Solution: Sloth – pillow, Anger – shield with sword, Envy – frog, Pride – mirror, Hades – skull, Wantonness – jewelry, Avarice – coins, Gluttony – bread.
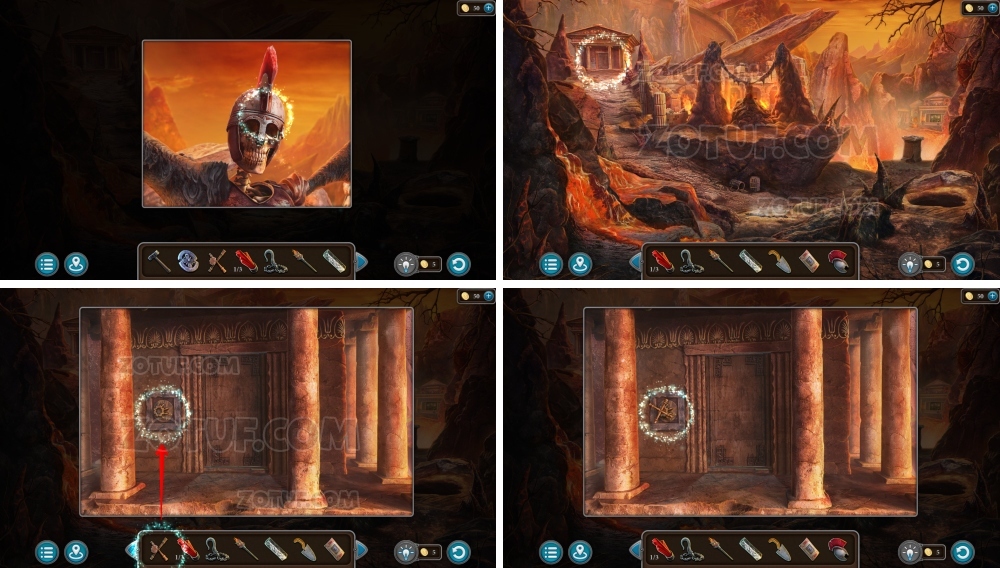
- Take dagger.
- Take spear.
- Use spear.
- Take clock part 1/6.
- Use dagger, get crystal 2/3.
- Use dagger, get pearl.
- Use pearl, get crystal 3/3.
- Take mosaic piece.
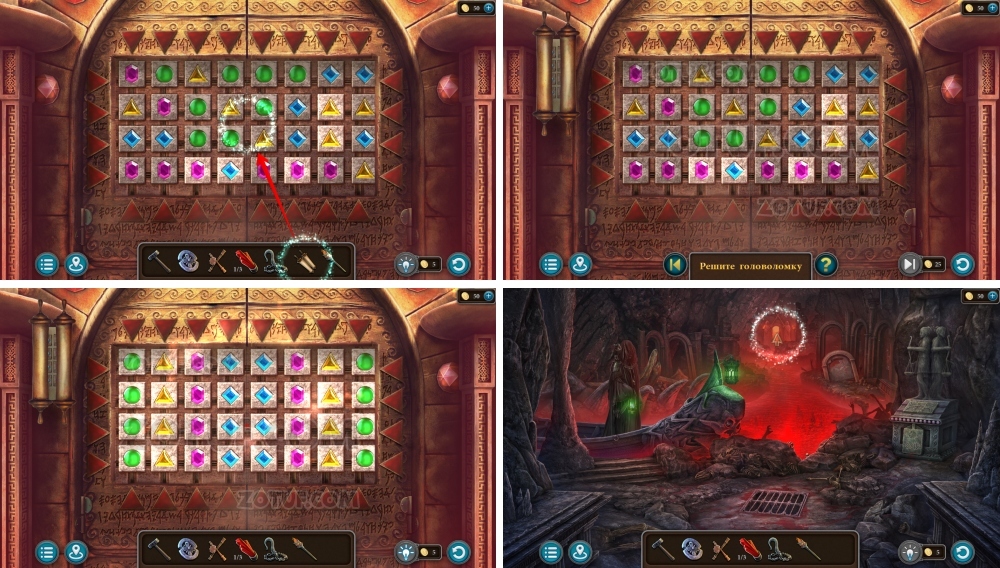
- Use three crystals.

- Solve the puzzle: Assemble mythical creatures using the hint. Use the circle and grid to form the right shapes.
- Take mold.
- Use shield.
- Take mirror.
- Use mirror.

- Use mosaic piece.
- Take bellows and clock part 2/6.
- Use mold.
- Use bellows.
- Use hammer, get sandal.
- Use sandal.
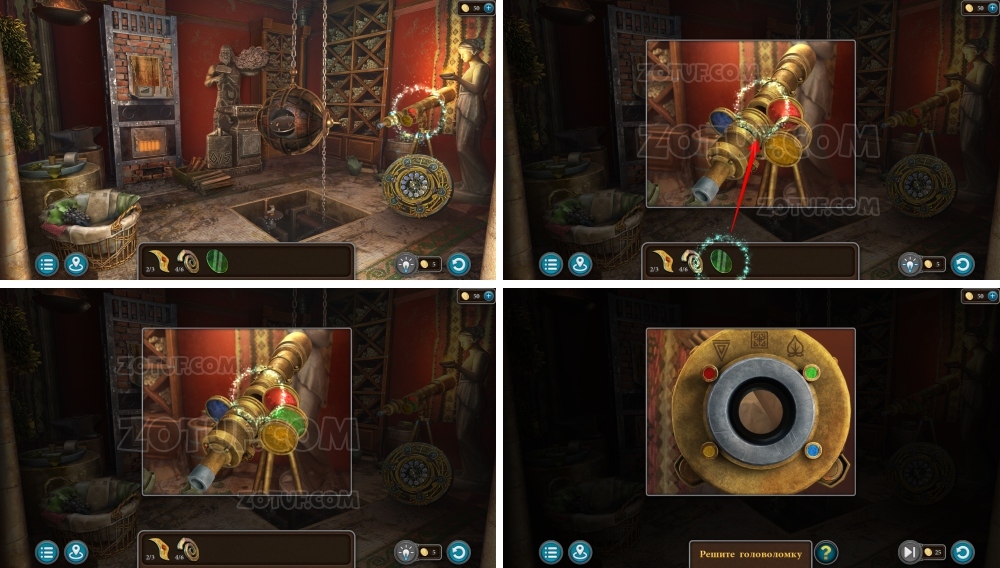
- Solve the puzzle: Restore the picture by rotating rings with image fragments, moving them into place.

- Solution in the photo.
- Take spider and clock part 3/6.
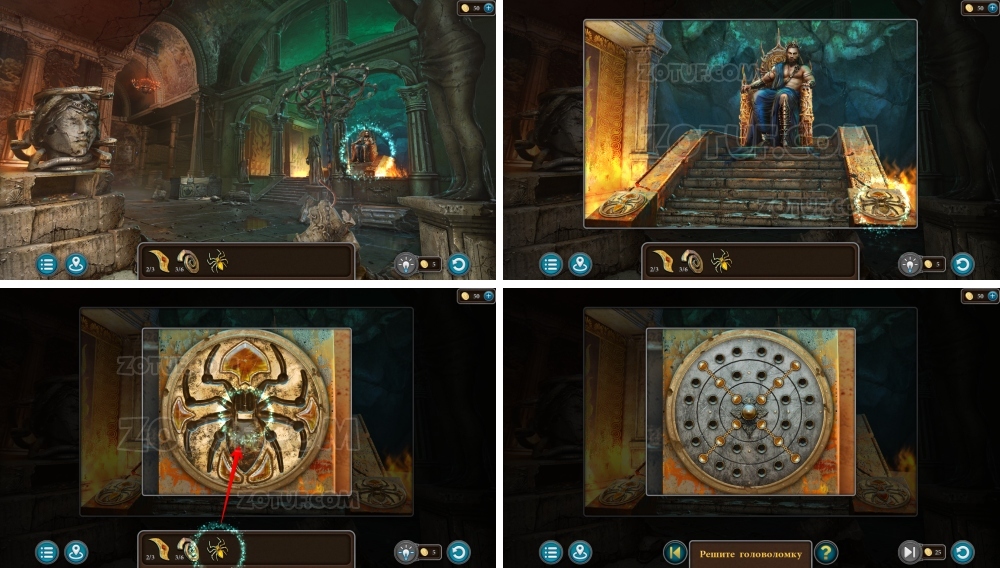
- Use spider.
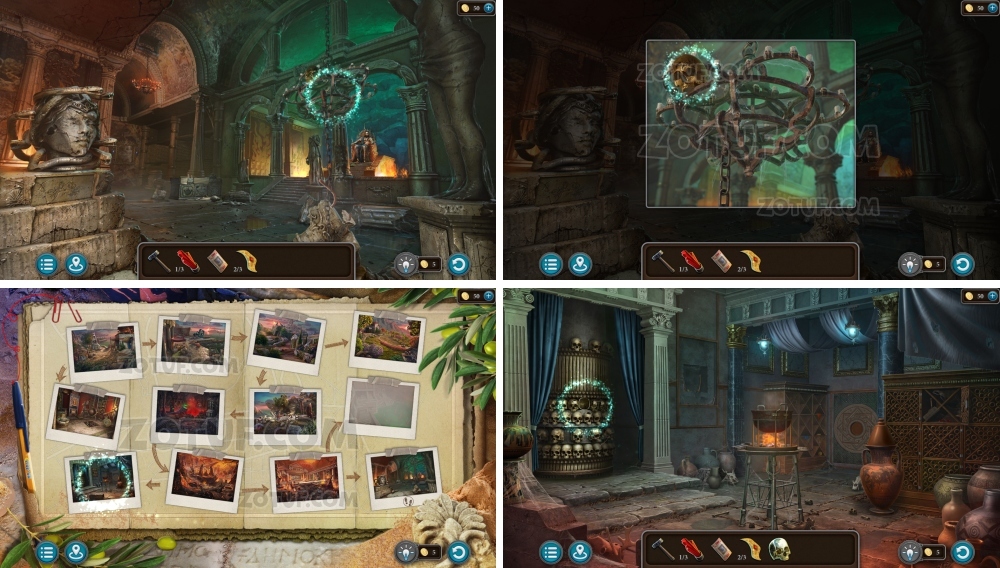
- Solve the puzzle: Arrange stones and chains to form the required image, seen previously in the game.
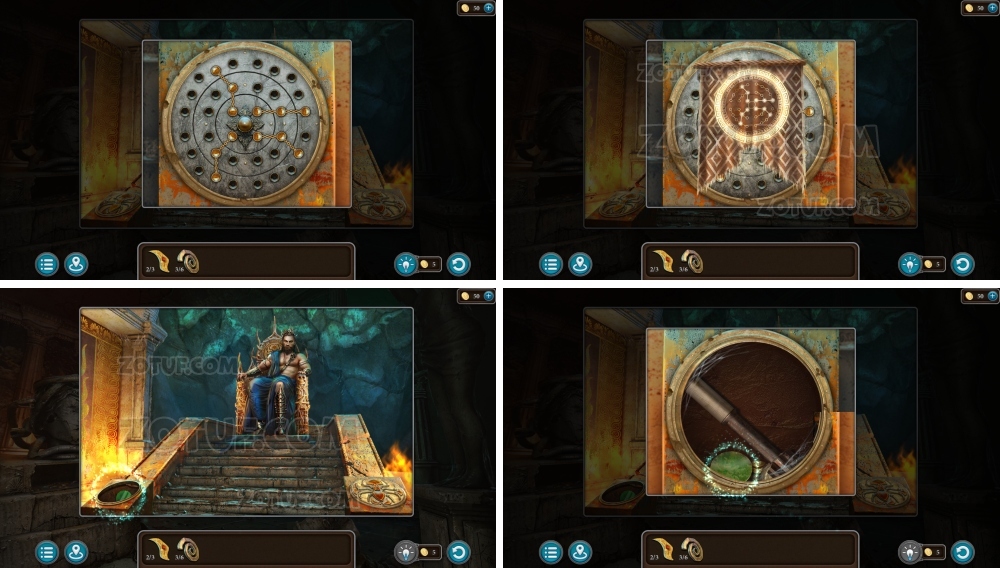
- Solution in the photo.
- Take lens.

- Take lever.
- Use lever.
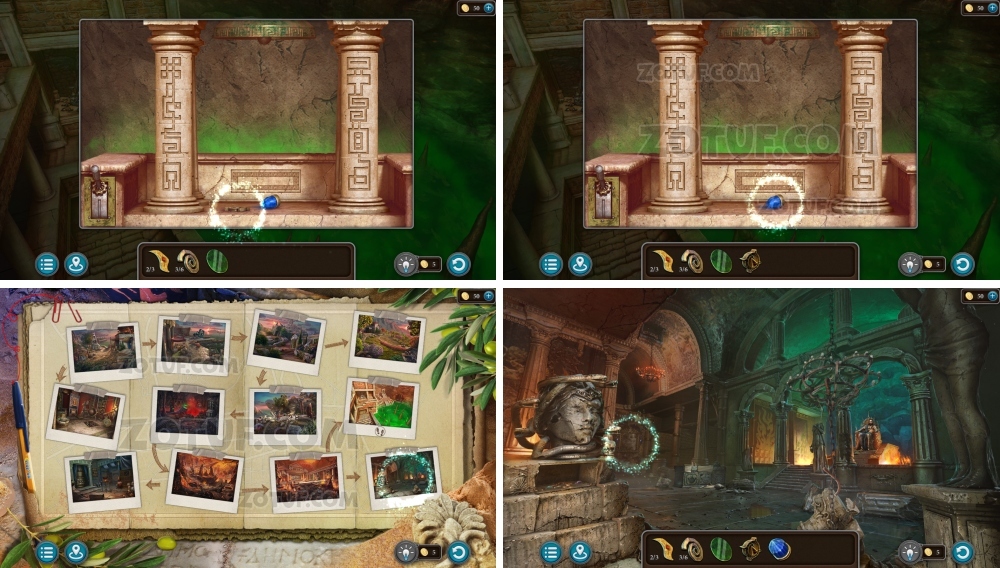
- Take button and sapphire.
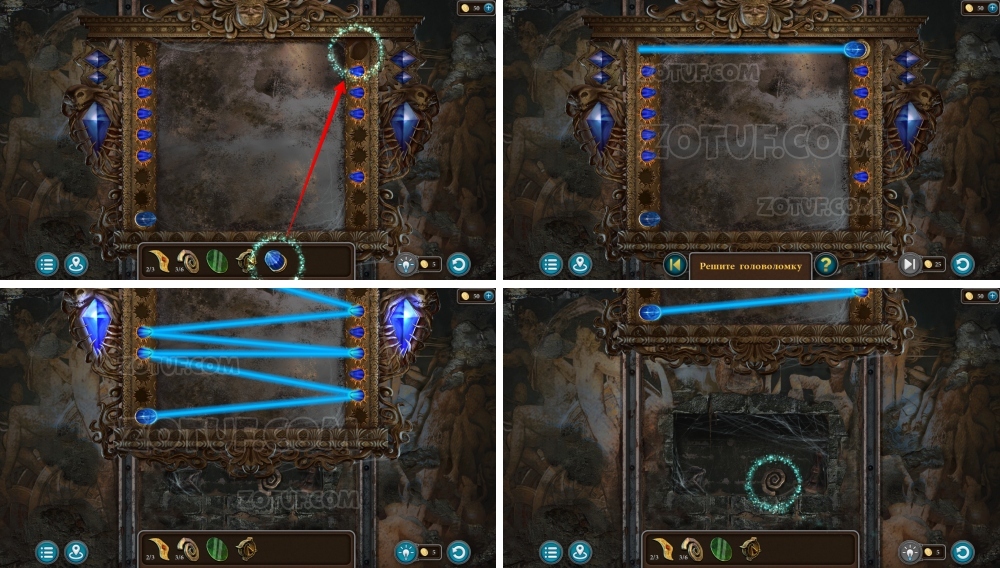
- Use sapphire.
- Solve the puzzle: Direct the beam to the large crystal below to activate it.
- Solution in the photo.
- Take clock part 4/6.
- Use button.
- Use lens.
- Solve the puzzle: Adjust lenses and overlap them to reveal all required marks.
- Remember lock code, code 195.
- Solve the puzzle: Press buttons under symbols to set the correct numbers.
- Solution: V, IX, I.
- Take bas-relief and clock part 5/6.
- Use bas-relief, get part 3/3.

- Use three parts.
- Solve the puzzle: Fill channels with marbles of the same color.
- Take clock part 6/6.
- Take pedal.
- Use pedal.
- Use six clock parts, get Hades’ clock.
- Give Hades’ clock, get clay.
- Use clay.
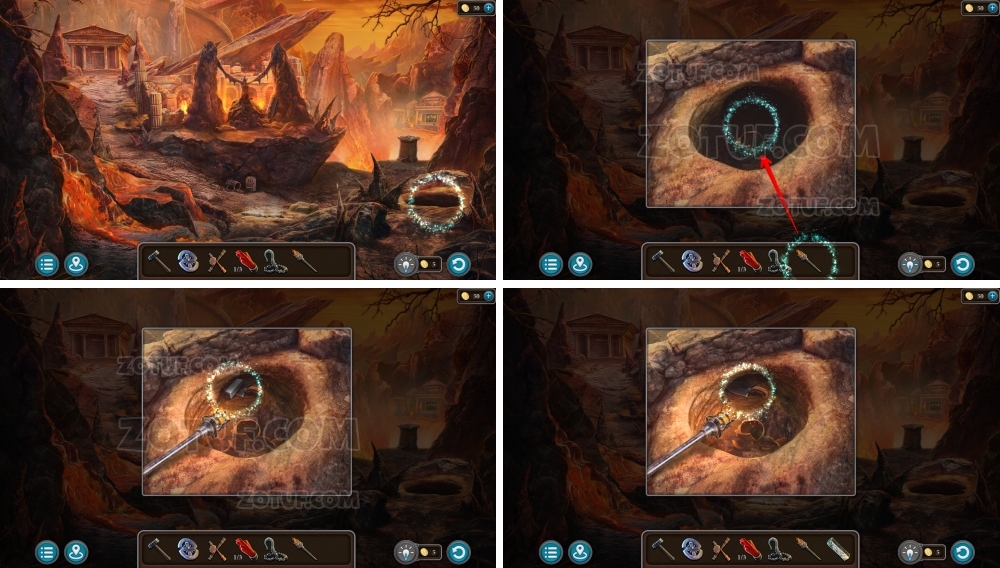
- Use pot grasper to take amphora.
- Use amphora, get soul amphora.
- Use soul amphora.
Congratulations! You have successfully completed Artifact Seekers Episode 5: Ancient Coast.


