
Bridge to Another World 1: Burnt Dreams (Bonus Chapter) – The Countess has been left behind, but her evil is not yet gone. Only you have saved the island when the irreparable happens, Brian’s portrait has come to life, and the creature created by her power is gaining power by the minute. Now your only hope is to reach the portal that will lead you home, but the path to it is full of dangers. A race against time awaits you as Brian battles the monster inside him, and the fog threatens to consume all that is dear. Help him find his humanity and find his way back to his world.
Bonus Chapter Walkthrough

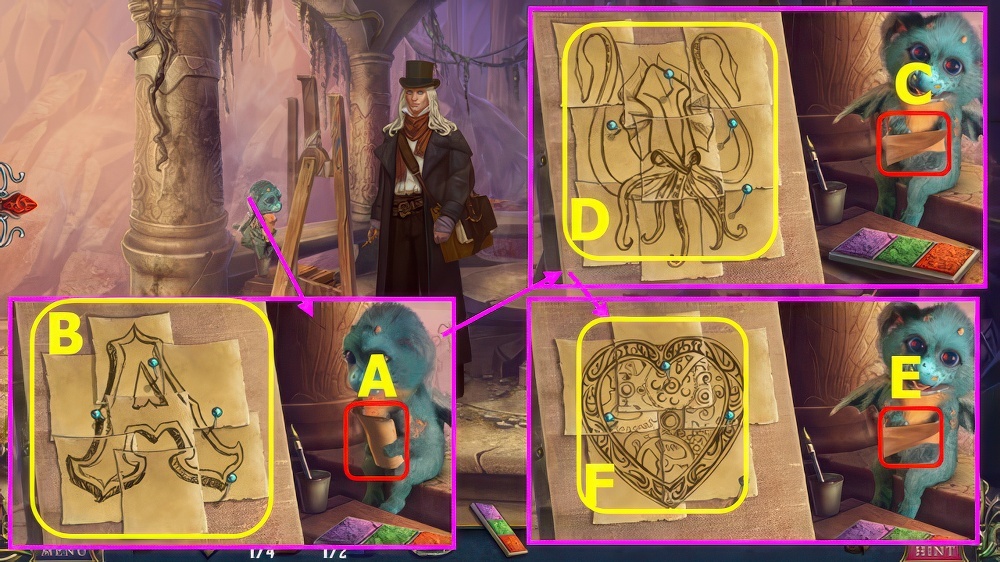
- Open lamp, take LOCK PART (A).
- Place LOCK PART, solution (B).
- Read note, take BOWL and HAMMER (C).
- Go forward (D).
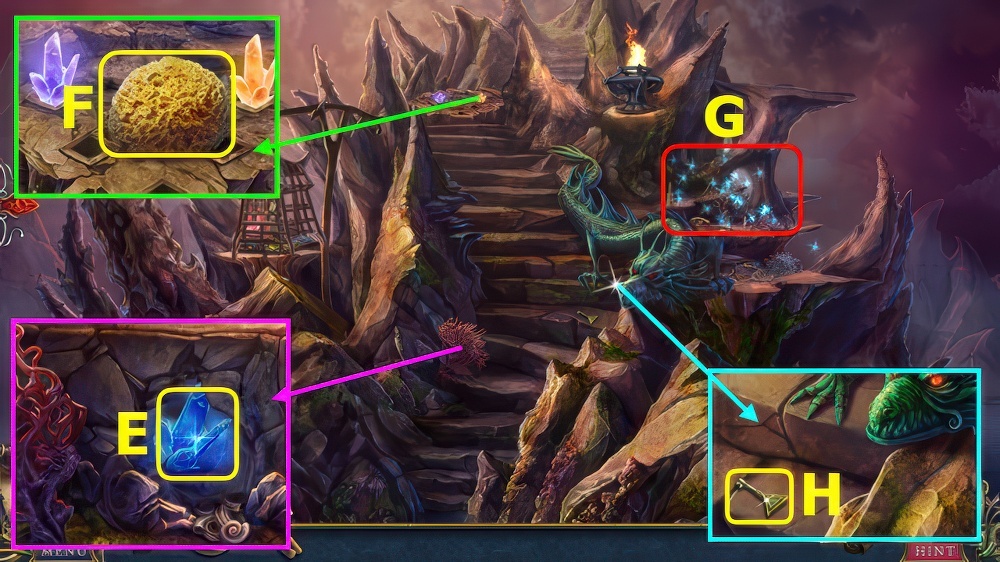
- Take CORAL, use HAMMER, take 1/4 CRYSTAL (E).
- Take SPONGE (F).
- Play puzzle, earn ANCHOR (G).
- Take TRIANGLE KEY (H).
- Walk down.

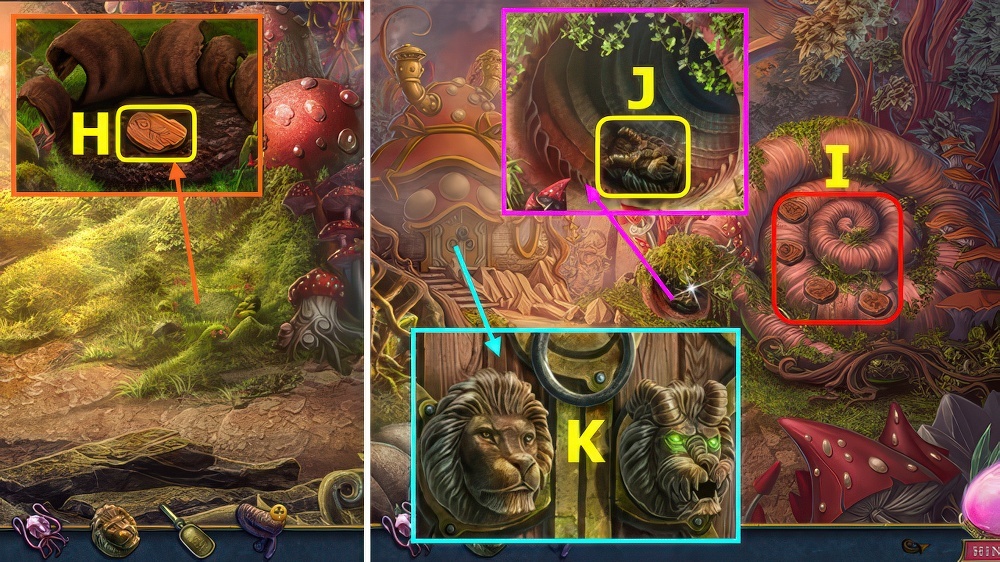
- Place and select ANCHOR (I).
- Take 2/4 CRYSTALS and 1/2 PEARL (J).
- Use HAMMER, take CANVAS and BABY DRAGON (K).
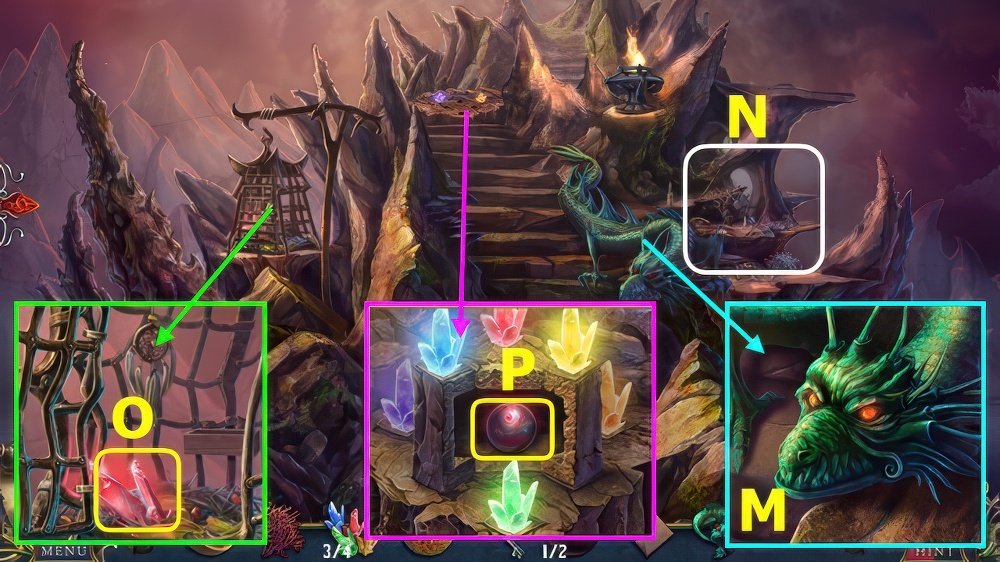
- Take 3/4 CRYSTALS (L).
- Go forward.
- Give BABY DRAGON (M).
- Play puzzle, earn ROUND KEY (N).
- Read note, use TRIANGLE KEY and ROUND KEY, take 4/4 CRYSTALS (O).
- Place CRYSTALS, take 2/2 PEARL (P).
- Walk down.
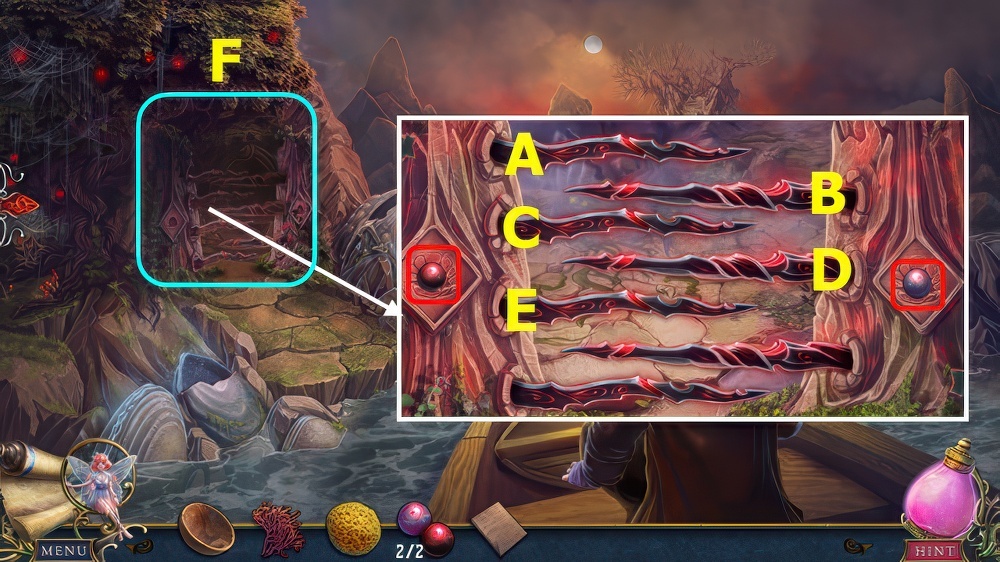
- Place PEARLS, select Ax2-Cx2-Dx2-Bx2-Ex2.
- Go left (F).

- Select (G), talk, take POLLEN.
- Use POLLEN (G).
- Take 1/4 RUNE (H).
- Take BRANCH (I).
- Take BANDAGES (J).
- Go left.

- Read note, take BUG (L).
- Take FIRE STRIKER, place BUG (M).
- Take CRAB (N).
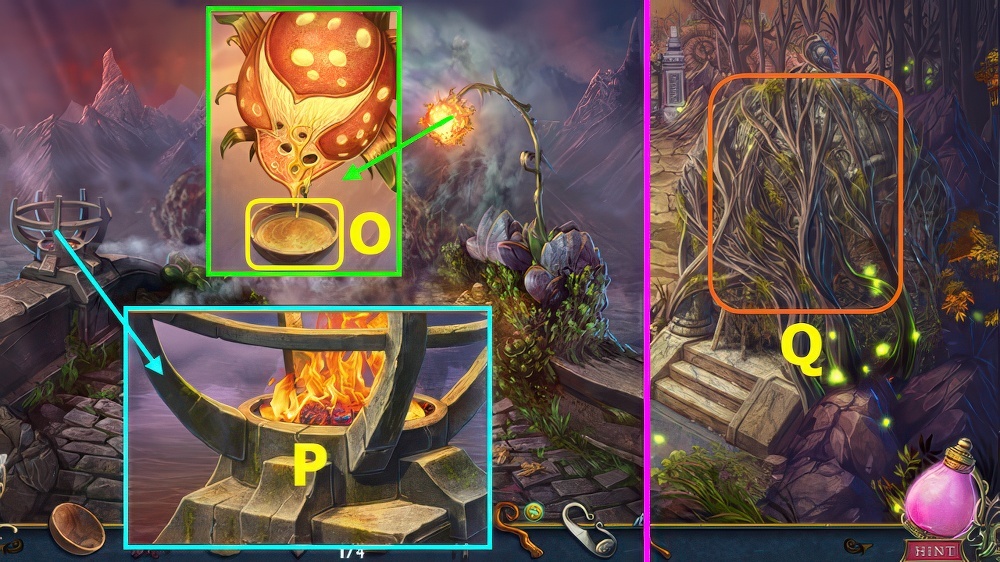
- Use BOWL, earn RESIN (O).
- BANDAGES and RESIN on BRANCH, take TORCH.
- Use FIRE STRIKER and TORCH, earn FLAMING TORCH (P).
- Walk down.
- Use FLAMING TORCH (Q).

- Use CRAB, take RED BERRIES and GLOVES (R).
- Use GLOVES, earn GREEN PETAL (S).
- Use FIRE STRIKER, read note, take MALACHITE (T).
- Go right (U).

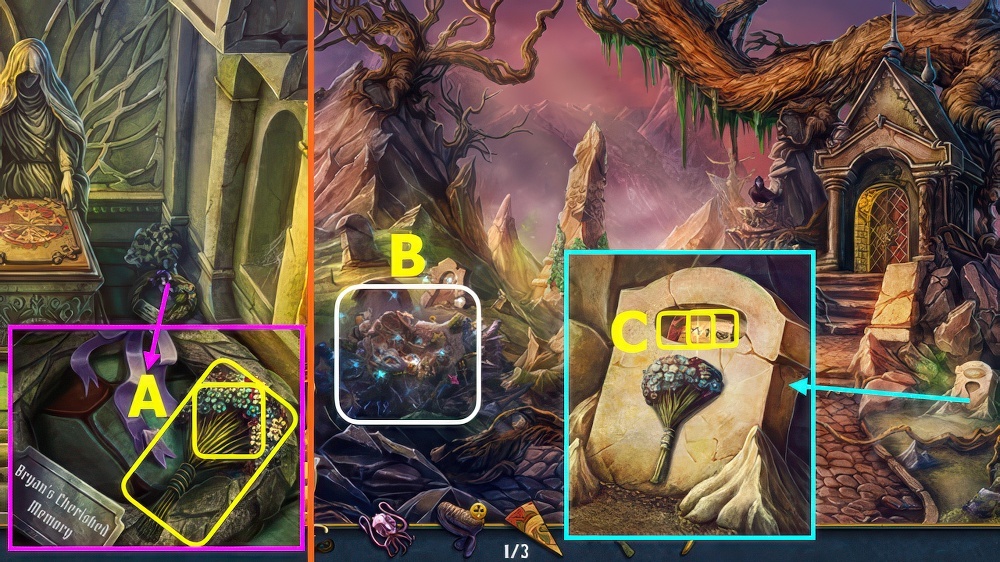
- Talk (A).
- Take SHELLFISH and VIOLET FLOWER, read book, take 1/2 EYE, PAINT RECIPE, and MEDALLION (B).
- Walk down, go left.
- Place PAINT RECIPE, SPONGE (C), SHELLFISH (D), and VIOLET FLOWER (E): move (D-F)-(G-F)-(E-F)-(G-F)-(C-F-H).
- Place MALACHITE (I) and GREEN PETAL (J), move (I-K)-(L-K)-(J-K)-(L-K)-(M-K)-(N-K-O).
- Place CORAL (P) and RED BERRIES (Q), move (P-R)-(S-R)-(Q-R)-(S-R)-(T-R-U), take FULL PALETTE.
- Walk down, right.
- Place FULL PALETTE and CANVAS, select (A).
- Solution (B), select, take LETTER.
- Select (C), solution (D).
- Select, take CUTTLEFISH.
- Select (E), solution (F).
- Select, take HEART.
- Walk down.

- Place HEART (J).
- Go forward.
- Play puzzle, earn COUNTESS’ PORTRAIT (K).
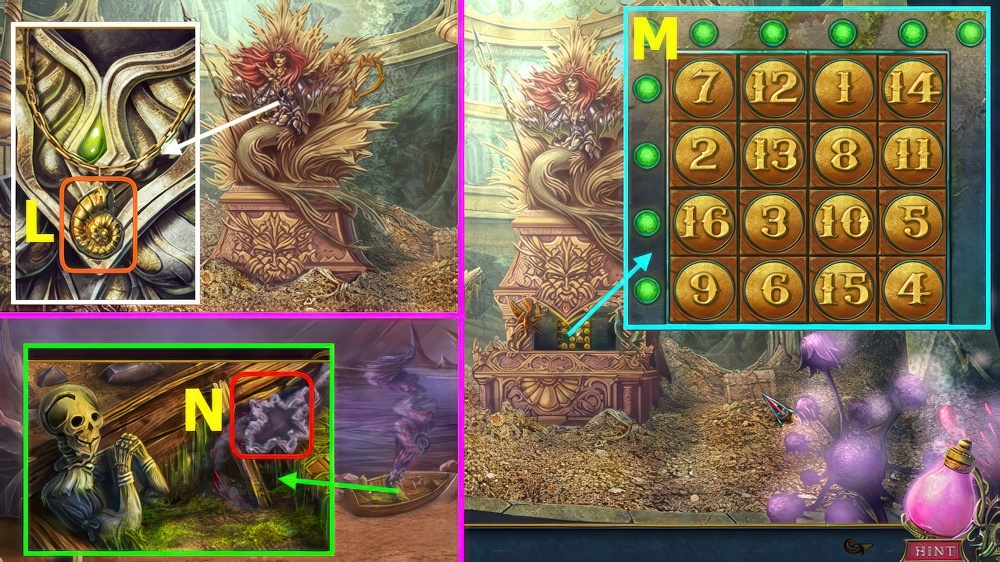
- Select MEDALLION, solution (L), read note, place COUNTESS’ PORTRAIT.

- Read note, take HOOK (M).
- Take ROPE (N).
- ROPE on HOOK.
- Use HOOK (O).

- Read note, take 2/4 RUNES (P).
- Place MEDALLION, take SAW (Q).
- Use SAW (R).
- Walk left.

- Play puzzle, earn LION HEAD (A).
- Select pairs (B).
- Read note, take WHETSTONE (C).

- Take 3/4 RUNES (D).
- Use WHETSTONE, take CLIPPERS (E).
- Go forward.
- Take MERMAID (F).
- Use CLIPPERS, take SCOOP (G).
- Walk down.
- Use SCOOP, take 4/4 RUNES (H).
- Go forward.
- Place RUNES (I).
- Take CHIMERA HEAD (J).
- Place LION HEAD and CHIMERA HEAD (K).
- Walk forward.

- Play puzzle, earn 2/2 BLUE GEMS (M).
- Walk down 2x.
- Play puzzle, earn 1/2 DRAGON HEAD (N).
- Place BLUE GEMS, take MONSTER HEAD (O).
- Go forward 2x.

- Play puzzle, earn AXE (P).
- Place MONSTER HEAD, select Q-R.
- Read note, take 2/2 DRAGON HEADS (S).
- Walk down.

- Use AXE, solution (T), read note, take DRAGON KEY (U).
- Go forward.
- Place DRAGONS and DRAGON KEY (V).

- Solution part 1-A-A-B-C-B-C-A-A.
- Part 2-E-D-E-F-F-E.
- Part 3-I-I-G-G-H-G-H.
- Select, take CASKET KEY (J).
- Place CASKET KEY, take BRYAN’S DIARY (K).
- Walk down 3x.

- Place BRYAN’S DIARY, take TWEEZERS (L).
- Use TWEEZERS, earn 1/3 PUZZLE PART, place LETTER (M).
- Go right (N).

- Play puzzle, earn JAR (O).
- Remove decorations, use JAR, select 1-5, take CATERPILLARS (P).
- Use CATERPILLARS, take LOCK PART and DAGGER (Q).
- Read note, place LOCK PART, solution (R).
- Go forward.
- Use DAGGER, earn BOUQUET, take BASS CLEF (A).
- Walk down.
- Play puzzle, earn TREBLE CLEF (B).
- Place BOUQUET, take 1/2 SOLUTION PART and 2/3 PUZZLE PARTS (C).
- Go forward.

- Place BASS CLEF and TREBLE CLEF, restore items (D), take 3/3 PUZZLE PARTS.
- Place PUZZLE PARTS, select E-F-G-H-E-I.
- Select, take 2/2 CODE, read note, take BRYAN’S PALETTE (J).
- Walk down.

- Place CODE, select 1-5 (L), take 1/2 MERMAID PARTS.
- Walk down.
- Place BRYAN’S PALETTE, take FAIRY KEY (M).
- Use FAIRY KEY, take 2/2 MERMAID PARTS (N).

- MERMAID PARTS on MERMAID, rotate pieces as shown (O), take MERMAID.
- Place MERMAID (P).
- Go forward (Q).

- Take BRUSH and BOX (A).
- Take NETTING (B).
- Use BRUSH, take BROKEN NET (C).
- Play puzzle, earn JELLYFISH (D).
- Place CUTTLEFISH and JELLYFISH (E).
- Go forward.

- Take PUZZLE PART (F).
- PUZZLE PART on BOX, solution (G), read note, take THREAD.
- NETTING and THREAD on BROKEN NET, take REPAIRED NET.
- Use REPAIRED NET, earn PUFFERFISH (H).

- Use PUFFERFISH, take 1/3 BUTTON and SNAKE STAFF (I).
- Walk down.
- Play puzzle, earn 2/3 BUTTONS (J).
- Place SNAKE STAFF, take PENDANT and 3/3 BUTTONS (K).
- Go forward.
- Place PENDANT (L).
- Place BUTTONS, solution (M), take BRYAN’S LAMP.
- Walk down 2x.
- Place BRYAN’S LAMP (N).
Congratulations! You have completed the game Bridge to Another World 1 Remastered: Burnt Dreams.


