
Bridge to Another World 5: Through the Looking Glass (Bonus Chapter) – You are in a hurry to reach your destination, but a hurricane forces you to delay, eventually your boat is thrown onto an unknown shore, and it doesn’t look like a chess kingdom.
Bonus Chapter Walkthrough

- Speak (A), take BOARD 1/2 (B), take ACORNS 1/5 (C).
- Take KNIFE (D), find ACORNS 2/5.
- Take INCOMPLETE CRUTCH and BAG (E).
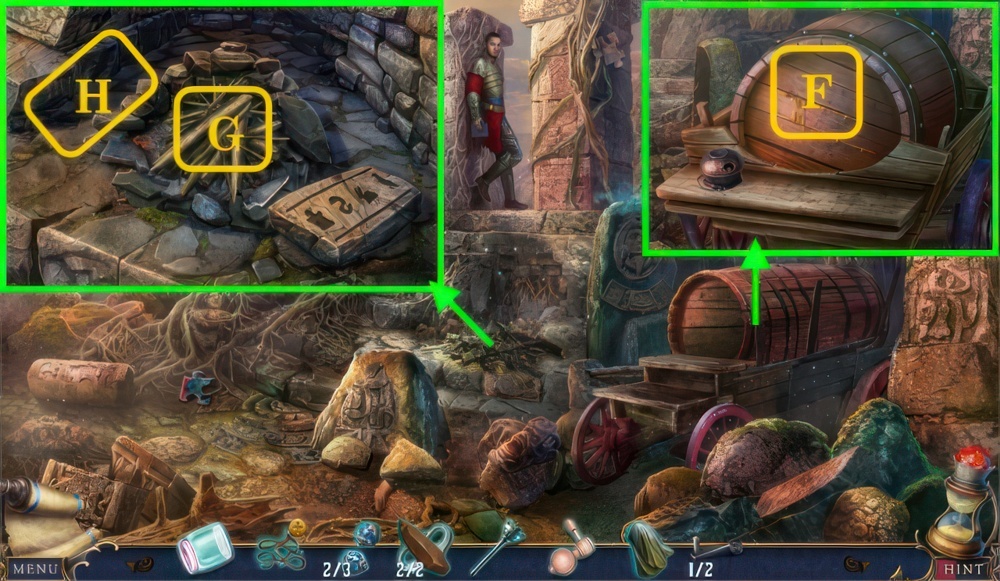
- Take ACORNS 3/5 (F), use KNIFE (G), take BANDAGES.
- Take BOARDS 2/2 and ACORNS 4/5 (H).
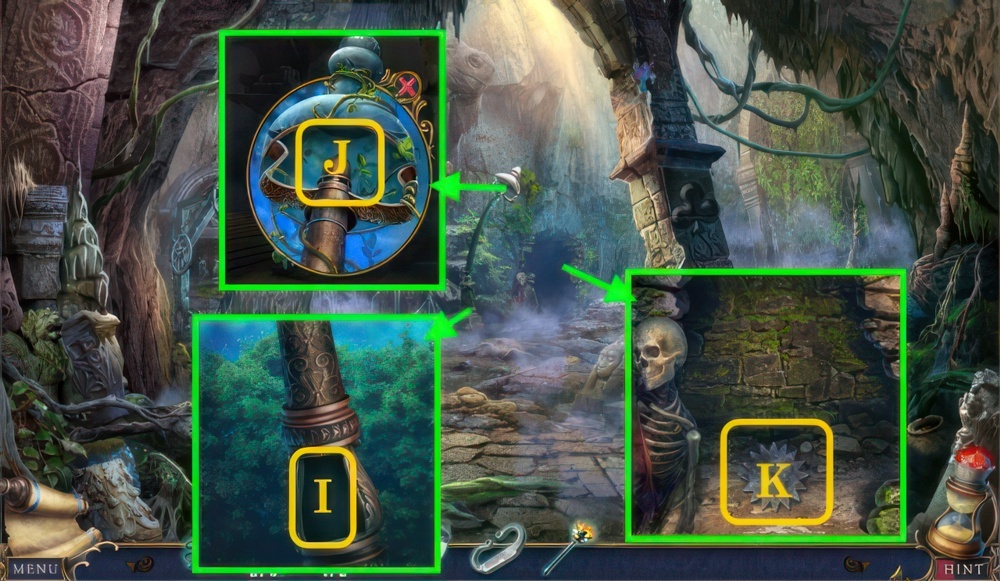
- Fill BAG (I), receive PILLOW.

- Read (J), take ACORNS 5/5.
- Give ACORNS (K), take BRANCHES.
- Use KNIFE (L), receive ROPE.
- KNIFE, BRANCHES, PILLOW and ROPE on INCOMPLETE CRUTCH, receive IMPROVISED CRUTCH.
- Place BOARDS and BANDAGES (M), give IMPROVISED CRUTCH (N).
- Go right.
- Walkthrough (O): B-C×2-B×2-A-B-C×2-D-C-B-A-B×2-C-B-A-D-A-B.

- Speak (P).
- Take SUNSTONE 1/6 (Q).
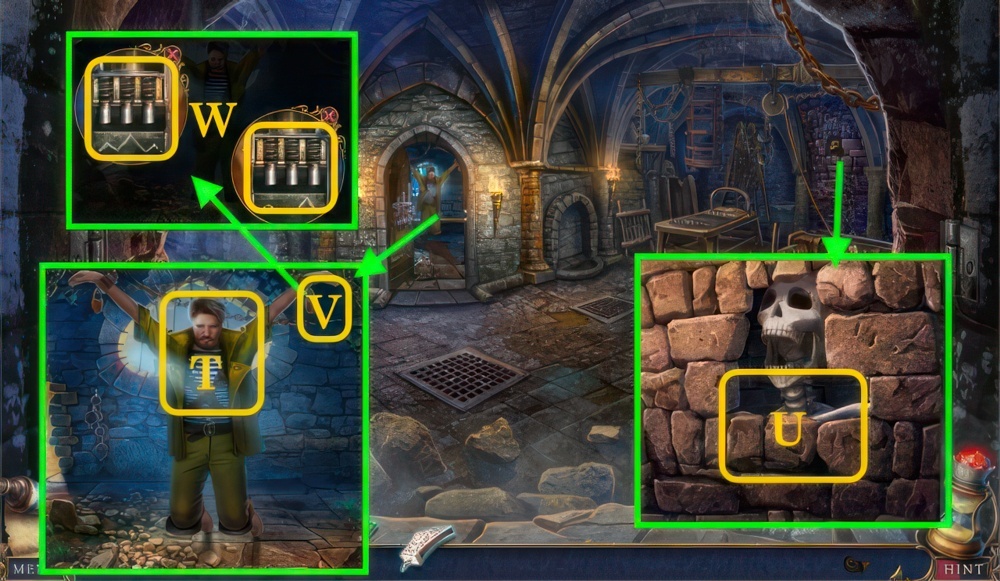
- Take HALF OF GARDEN PRUNERS (R), take BRANCH and ROPE (S), use KNIFE (T).
- Take (U), receive BRUSH WITH RESIN.
- Take BROKEN BUCKET (V).

- Use BRANCH (W), receive SCORCHING HOOP.
- Place SCORCHING HOOP (X), receive BROKEN BUCKET HOOP.
- Use BRUSH WITH RESIN and BROKEN BUCKET HOOP on BROKEN BUCKET, take BUCKET.
- Fill BUCKET (@), receive BUCKET WITH WATER.
- Use BUCKET WITH WATER (W), take LADDER RUNG 1/5 (X) and GARDEN PRUNERS HALF (Y).
- Go forward.

- Use BUCKET WITH WATER (Z).
- Clear (A), find METAL IRON and LADDER RUNG 2/5.
- Take LADDER RUNG 3/5 (B), open (C), take LADDER RUNG 4/5.
- Use METAL IRON (D), take SUNSTONES 2/6 and FLOWER ORNAMENT.
- Open (E), find LADDER RUNG 5/5 and SUNSTONES 3/6.

- Place LADDER RUNG and ROPE (F), take LADDER.
- Go down.
- Speak (G).
- Use LADDER (H).
- Use KNIFE (I), open, receive SUNSTONES 4/6.
- Enter (J).

- Take FEATHER DUSTER (K).
- Take SCARF (L).
- Place FLOWER ORNAMENT (M), find KEY, pull lever.
- Play puzzle (N), receive EMPTY CUPPING-GLASS.
- Go down.

- Use EMPTY CUPPING-GLASS and FEATHER DUSTER (O), take CUPPING-GLASS WITH CRUMBS.
- Move to House.
- Use KEY (P), find SUNSTONES 5/6 and POTION OF GROWTH.
- Use POTION OF GROWTH (Q), take LEMON.
- GARDEN PRUNERS HALF, LEMON and SCARF on HALF OF GARDEN PRUNERS, take GARDEN PRUNERS.
- Go down.

- Use GARDEN PRUNERS and CUPPING-GLASS WITH CRUMBS (R), receive EMPTY CUPPING-GLASS, take SUNSTONES 6/6.
- Move to Library.
- Use GARDEN PRUNERS (S), place SCARF and SUNSTONES (T).
- Play puzzle (U), receive BOOK OF ACES.
- Go down.

- Speak (V), give BOOK OF ACES.
- Go left.
- Speak (W), take PAGE.
- Take BOLAS (X).

- Take BOLAS STONES 1/3 (Y) and STEEL 1/2 (Z).
- Place PAGE (A), use (B), receive COAL and HALF OF CODE.
- Take MALLET (C).
- Use GARDEN PRUNERS (D), place HALF OF CODE and COAL (E), take CODE.

- Use CODE (F), select 1-7.
- Speak (G), enter (H).

- Speak (I).
- Look (J), play puzzle, receive COINS.
- Take CHISEL (K) and STONE PLATE (L).
- Inspect (M), take BOLAS STONES 2/3.
- Place COINS (N).
- Walkthrough (O), take WISDOM SYMBOL and CRACKED SPHERE.

- Use (P-Q), take PRECIOUS STONE 1/2.
- Use CHISEL and MALLET (P).
- Take ORNAMENT PART (R).
- Play puzzle (S), receive HORSE HELMET.
- Go down.
- CHISEL and MALLET on CRACKED SPHERE, find PRECIOUS STONE 2/2.
- Place STONE PLATE and PRECIOUS STONE (T).
- Walkthrough (U): A×2, B×3, C×3, D, E.
- Take SHIELD and KINDNESS SYMBOL.
- Move to Scepter Room.

- Play puzzle (V), receive TORCH.
- Place SHIELD and HORSE HELMET (W).
- Walkthrough (X).
- Go right.

- Place ORNAMENT PART (Y), take OILED RAG.
- Take SPEAR (Z).
- Take LOCK LATCH (A), use SPEAR (B), receive LIANA.
- Use SPEAR (C), take VALVE and FLINT AND STEEL 2/2.
- Go down.

- Place LOCK LATCH (D), find METAL GLOVE and LEVER 1/2.
- Go right.
- Use METAL GLOVE (E).
- Move to Stone Circle.
- Use VALVE and EMPTY CUPPING-GLASS (F), fill, take CUPPING-GLASS WITH OIL.
- Strike FLINT AND STEEL (G), place TORCH and OILED RAG (H), take BURNING TORCH.
- Move to Dungeon.
- Replace CUPPING-GLASS WITH OIL (I), use BURNING TORCH (J).
- Take WINCH PARTS 2/2 and BOLAS STONES 3/3 (K).

- Use WINCH PARTS (L).
- LIANA and BOLAS STONES on BOLAS, take BOLAS WITH LIANA.
- Throw BOLAS WITH LIANA (M).
- Walkthrough (N), take COURAGE SYMBOL.
- Go down.

- Place WISDOM SYMBOL (O), COURAGE SYMBOL (P) and KINDNESS SYMBOL (Q), speak, take SCEPTER OF SUITS.
- Go down.
- Speak (R), give SCEPTER OF SUITS.

- Speak (S), receive KEY PART 1/4.
- Take WINE (T) and LETTER WITH RING (U).
- Take CUIRASS and KEY PARTS 2/4 (V), place WINE (W), take FROZEN WINE.
- Take PAWN (X).
- Place PAWN (U).
- Enter (Y).

- Play puzzle (Z), receive BATTLE HAMMER.
- Look (A), find RING KEY.
- Investigate LETTER WITH RING, use RING KEY, take GEAR.
- Take WICK and FORCEPS (B).
- Read (C), place FROZEN WINE and FLINT AND STEEL (D), take FUEL.
- Take WOODEN TOKEN (E), use FUEL and CUIRASS.
- Go down.

- Use BATTLE HAMMER (@).
- Place WOODEN TOKEN (F), take KEY PARTS 3/4.
- Move to Soldier Forge.

- Play puzzle (G), receive PUNCHED CARD.
- Take KEY PARTS 4/4 (H).
- Place GEAR and PUNCHED CARD (I), take HELMET.
- Place KEY PARTS (J).
- Move (K), use FORCEPS (L), receive PARTS OF ROYAL KEY.
- Place PARTS OF ROYAL KEY (M), receive SCORCHING PARTS OF ROYAL KEY.
- Place FROZEN WINE (M), take GRAPE JUICE.
- Place HELMET (N), give BATTLE HAMMER and SCORCHING PARTS OF ROYAL KEY (O), take HOT ROYAL KEY (O).

- Dip HOT ROYAL KEY (P), receive ROYAL KEY.
- Go down.
- Place ROYAL KEY (Q).
- Go forward.

- Take POWDER (R).
- Walkthrough (S): 1-7.
- Give GRAPE JUICE (T), speak, receive EMPTY BOTTLE.
- POWDER and WICK on EMPTY BOTTLE, take IMPROVISED BOMB.
- Use IMPROVISED BOMB and FLINT AND STEEL (U), take PICKLOCK SET.
- Look (V), use PICKLOCK SET (W).

- Walkthrough (X).
- Speak (Y).

- Take SCEPTER (Z).
- Use SCEPTER (A).
- Walkthrough (1-3).
Congratulations! You have completed the game Bridge to Another World 5: Through the Looking Glass.


