Bridge to Another World 6: Gulliver Syndrome (Bonus Chapter) – You, as Gulliver, are sentenced to imprisonment for the crimes you have committed against Lilliput. And the ruler of the nation tells you that there is no key to your shackles, for you will wear them for the rest of your life. Embark on a mesmerising journey between the worlds of giants and Lilliputians as you strive to unravel the final piece of a mysterious story.
Bonus Chapter Walkthrough
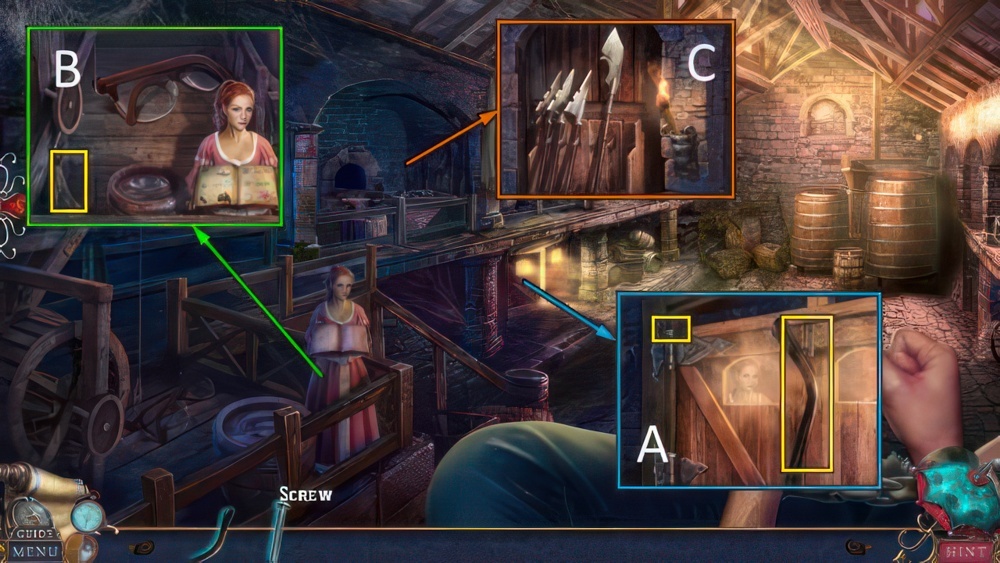
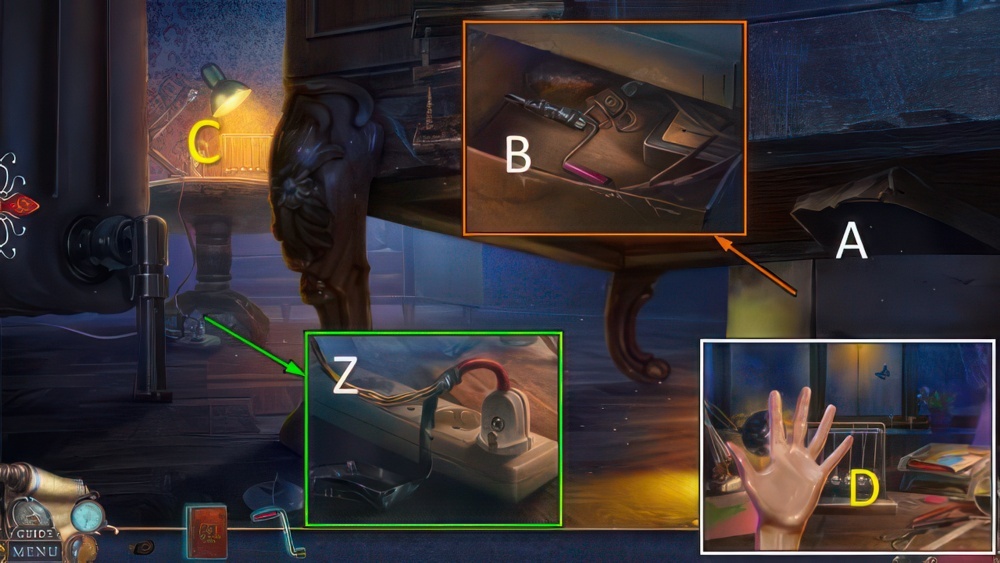
- Talk, take EARPIECE and SCREW (A).
- Talk, place EARPIECE and SCREW and take MATCH (B).
- Use MATCH, take HALBERD (C).
- Use HALBERD.
- Take and use GLASSES (B).
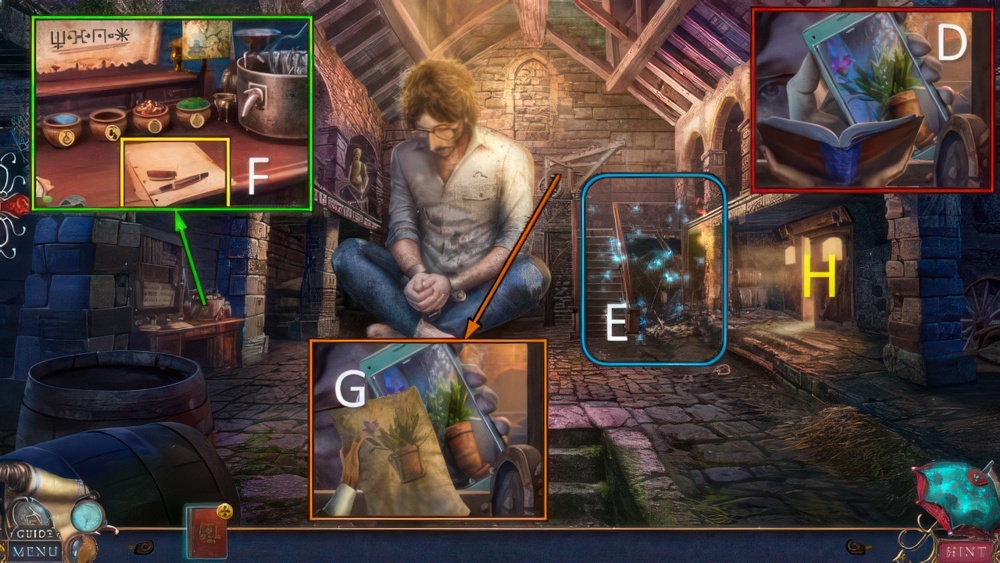
- Take BOOK (D).
- Play puzzle (E), receive VIALS.
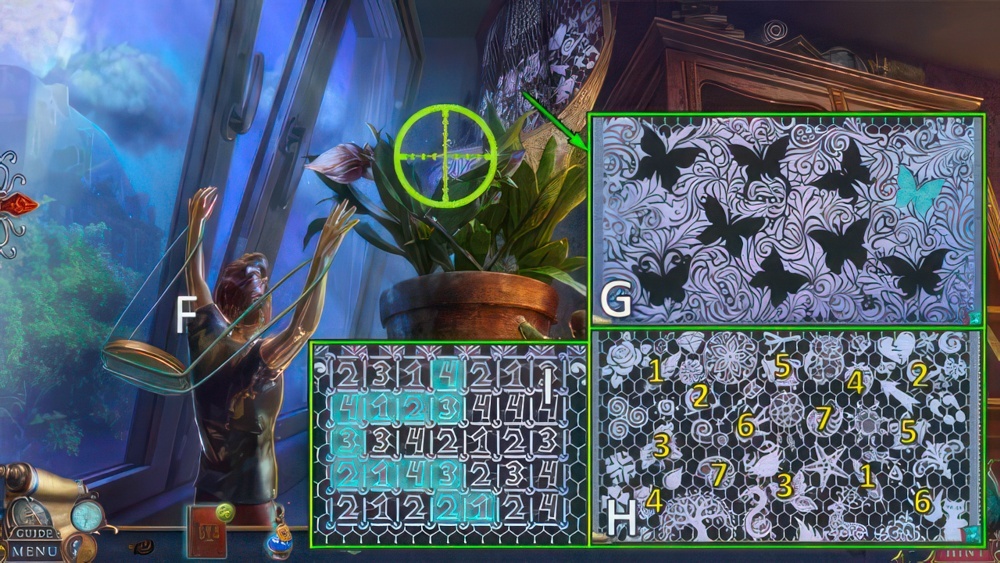
- Take PEN AND PAPER (F).
- Use PEN AND PAPER, take HINT (G).
- Go (H).
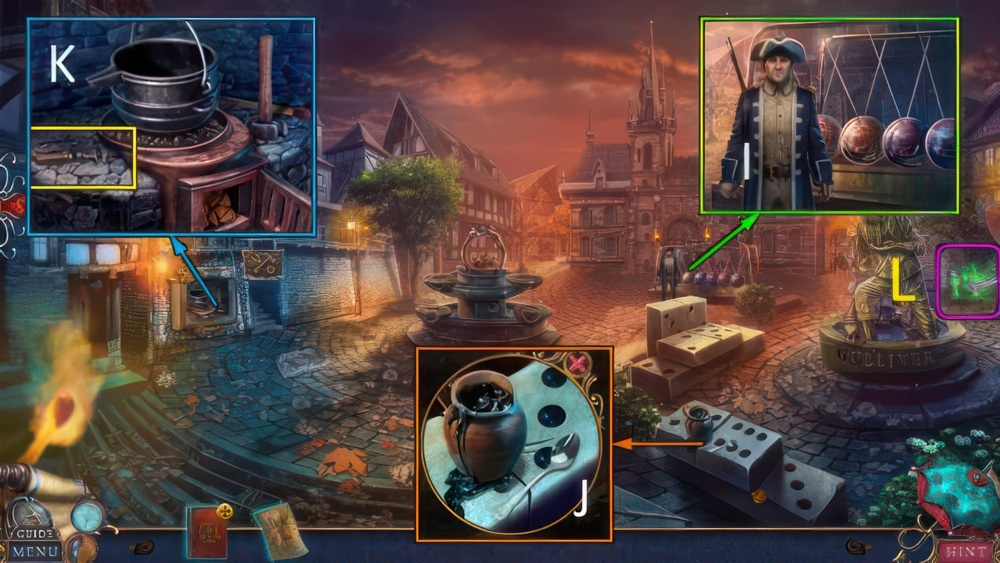
- Talk (I).
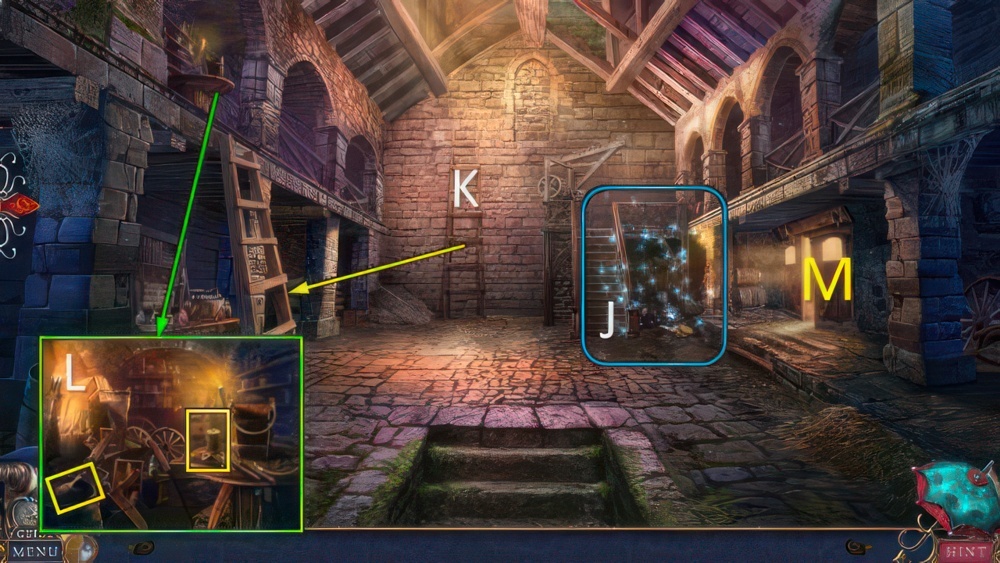
- Use spoon, receive TAR (J).
- Take WRENCH (K).
- Go (L).
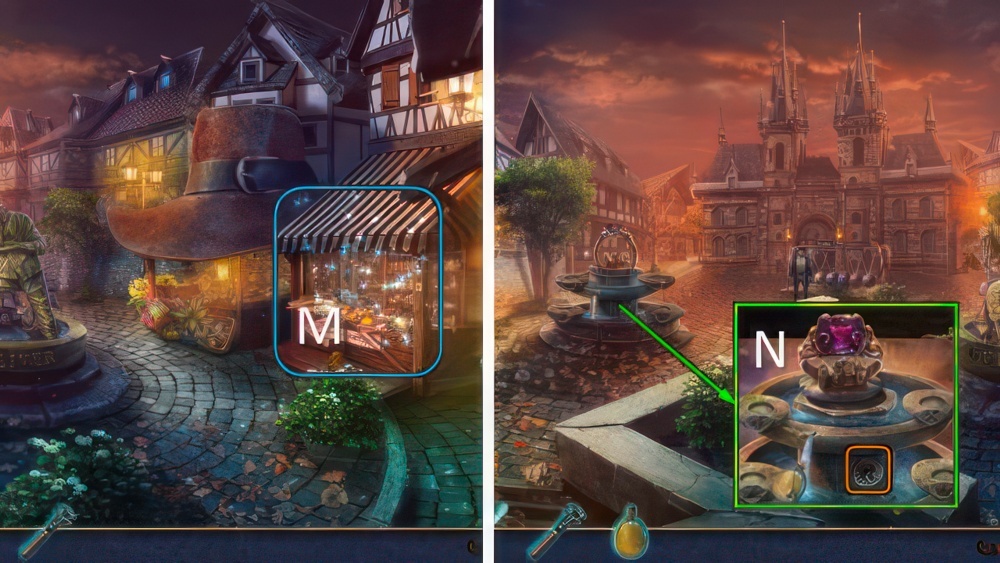
- Play puzzle (M), receive EMPTY FLASK.
- Scroll left.
- Use WRENCH and EMPTY FLASK (N), receive WATER FLASK.
- Go down.
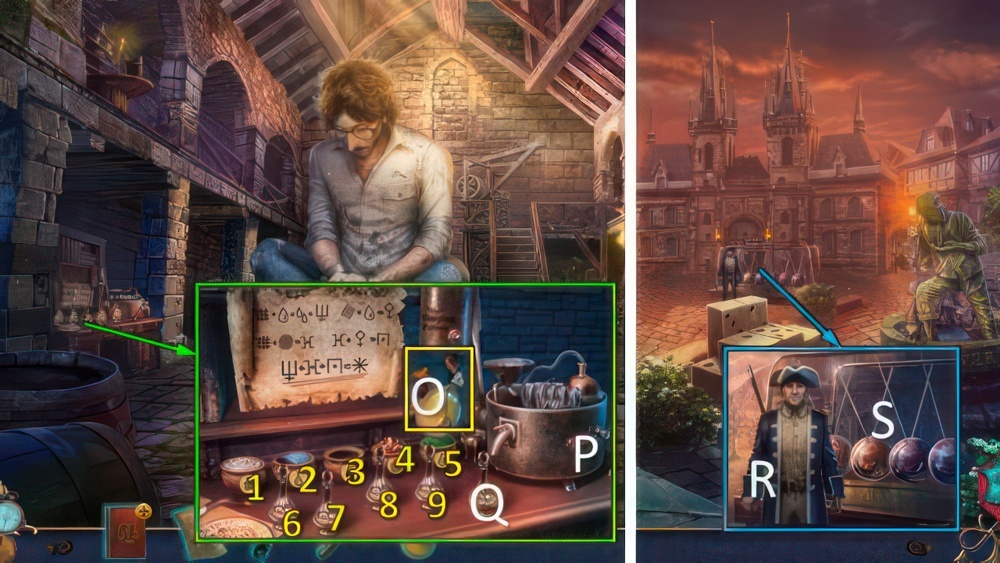
- Use WATER FLASK and WRENCH (O), take SLEEPING POTION.
- Place VIALS and TAR.
- Follow the formulas to fill all the flasks with potions by putting ingredients into the machine and then pulling the lever to combine them.
- Walkthrough: 1-2-3-P, 5-2-P, 1-4-P, 8-6-P, 9-8-7-P.
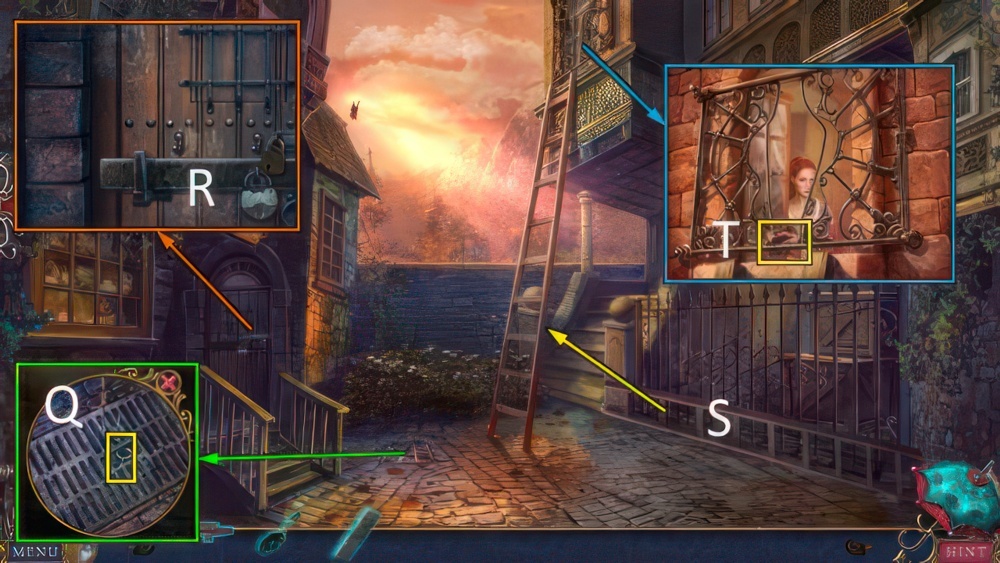
- Take POTION AGAINST TURNING TO PORCELAIN (Q).
- Go right.
- Offer SLEEPING POTION (R).
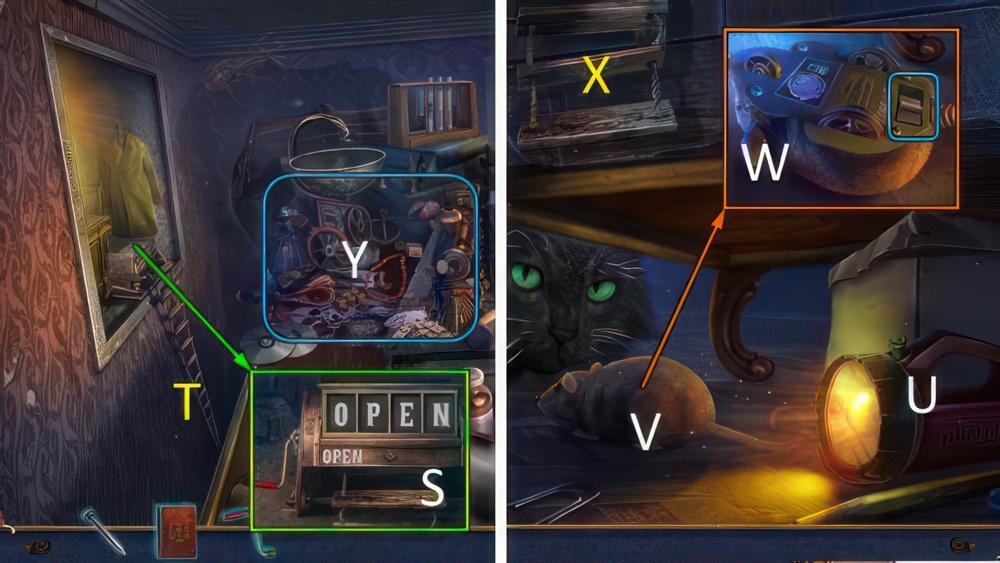
- Go (S).
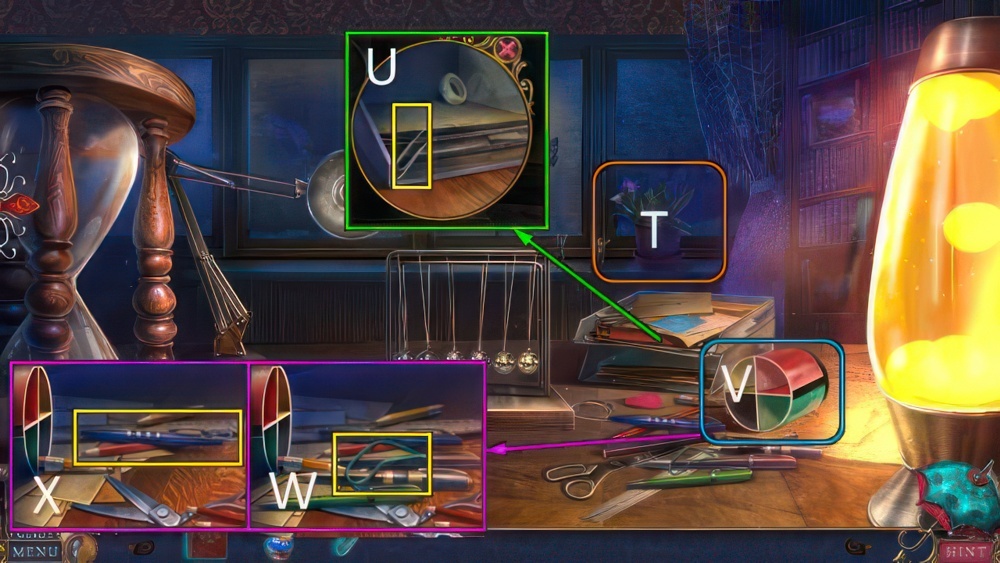
- Use HINT (T).
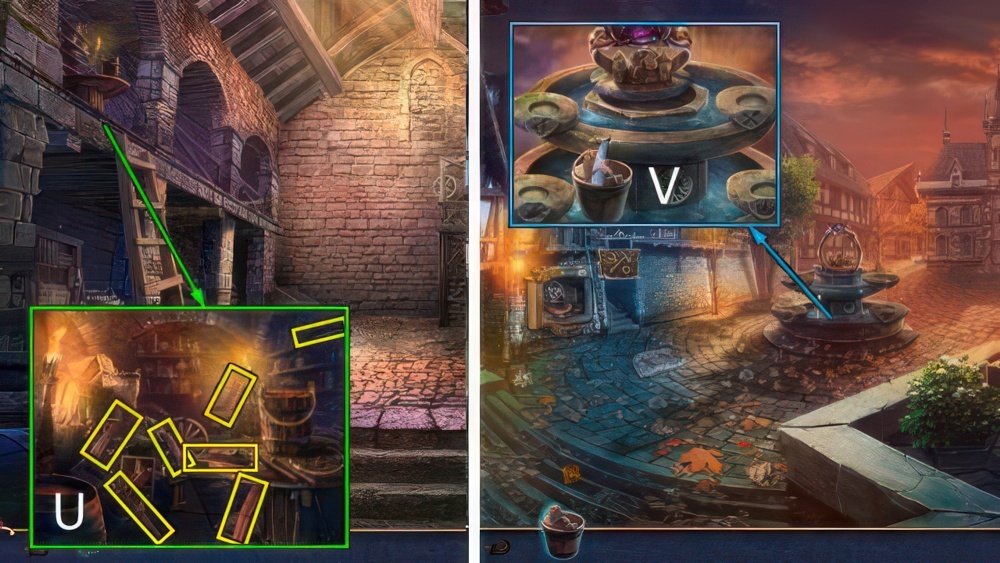
- Take CLIP (U).
- Touch (V).
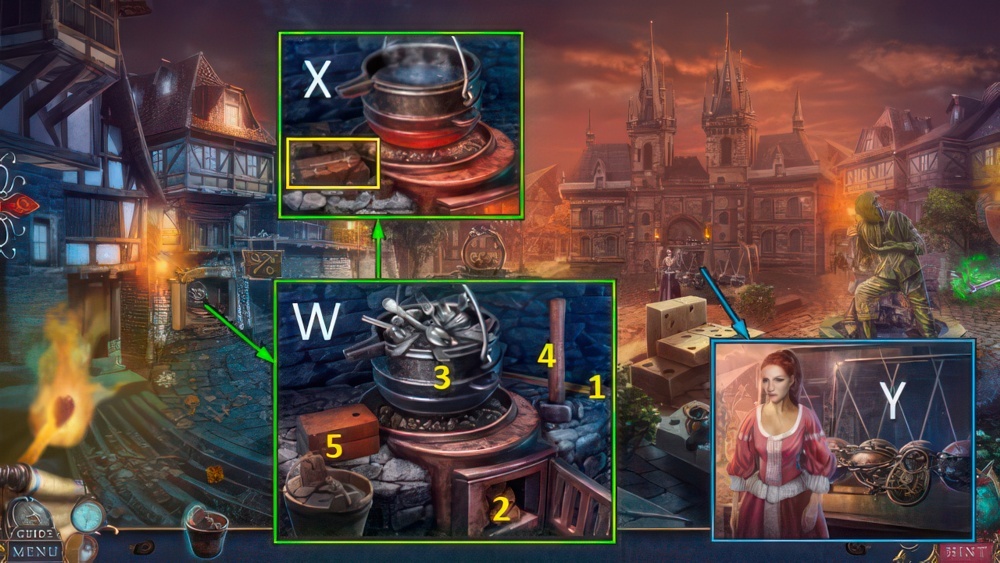
- Take RUBBER BAND, move pens (W).
- Place CLIP, take HOOK (X).
- Use HOOK, take TAPE (Y).
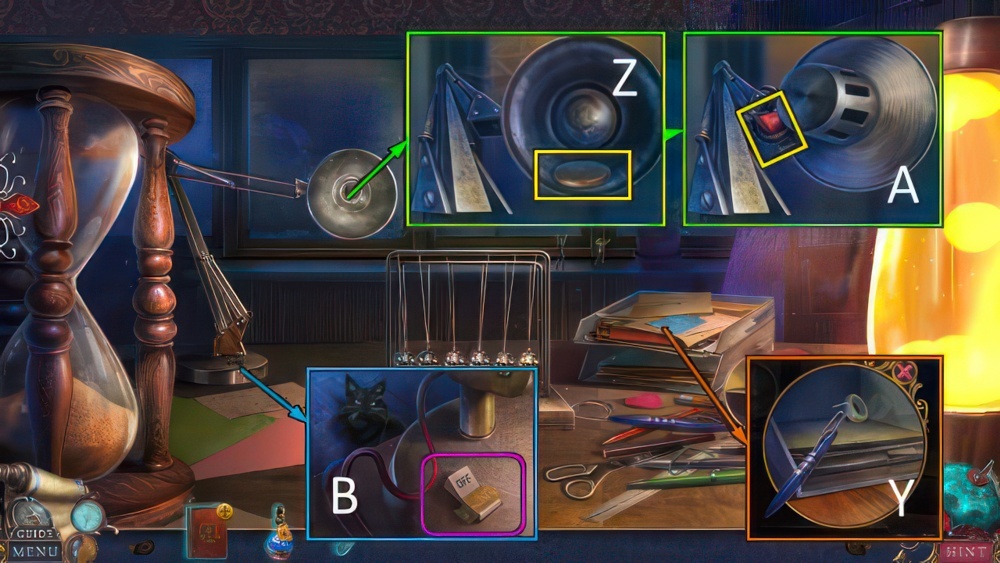
- Use HOOK, take COIN (Z).
- Turn, take POWER SWITCH (A).
- Place POWER SWITCH and TAPE (B).
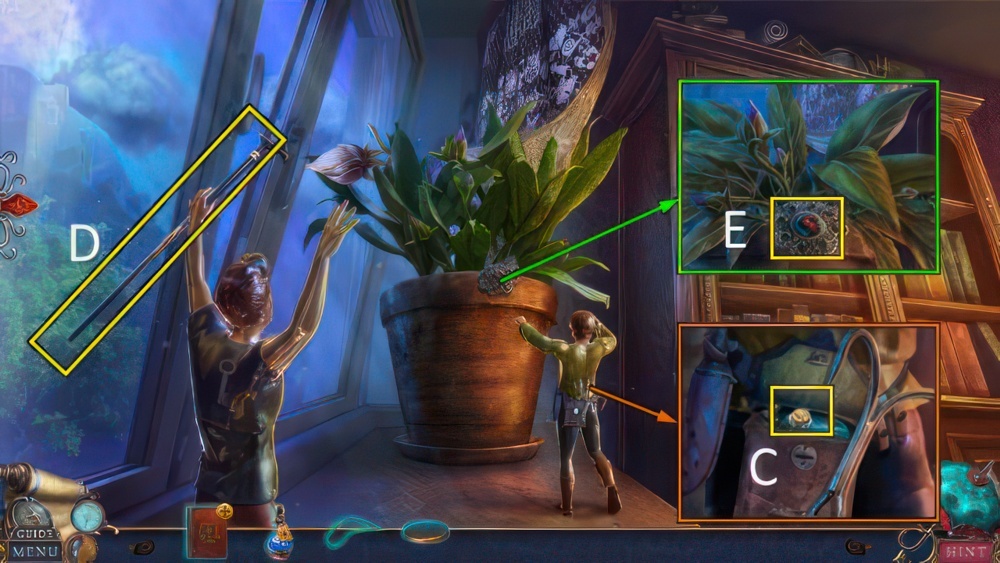
- Take OIL (C).
- Take CANE with OIL (D).
- Take BROOCH, place CANE (E).
- Place RUBBER BAND and COIN (F).
- Shoot.
- Find all of the 9 butterflies.
- Walkthrough 1 (G).
- Find the 7 symbol pairs.
- Walkthrough 2 (H).
- Draw a path from bottom to top following the correct sequence.
- Walkthrough 3 (I).

- Use POTION AGAINST TURNING TO PORCELAIN (J).
- Play puzzle (K), receive ROPE.
- Place BROOCH (L).
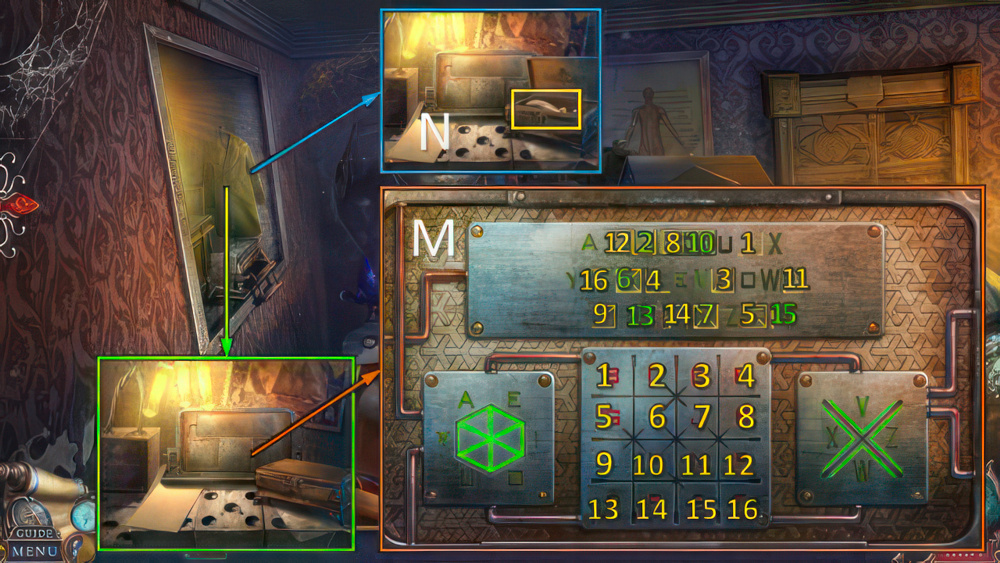
- Put the symbols into their correct spots on the table below to decipher their meaning.
- For the middle part of the table, the resulting image must have five X-like shapes incorporated within it.
- Walkthrough (M).
- Receive CIPHER KEY.
- CIPHER KEY on third page of BOOK, take KEY.
- Use KEY, take ELIXIR (N).
- Go down.

- Place ROPE, take GRAPPLING HOOK (O).
- Use GRAPPLING HOOK (P).
- Use ELIXIR, take INGREDIENT (Q).
- Go (R).
- INGREDIENT on BOOK, take NAIL and BOOK WITH INGREDIENT.
- Place CIPHER KEY, spell O-P-E-N.
- Turn handle.
- Enter the correct sequence of letters to unlock the mechanism.
- Use NAIL, receive LEVER (S).
- Go (T).
- Touch (U).
- Turn (V).
- Use NAIL (W).
- Go (X).
- Play puzzle, receive BATTERY (Y).
- Go (T).
- Place BATTERY, move switch (W).
- Take TAPE (Z).
- Open (A).
- Place LEVER and TAPE, take SCREWDRIVER (B).
- Use SCREWDRIVER (Z).
- Go (C).
- Go (D).
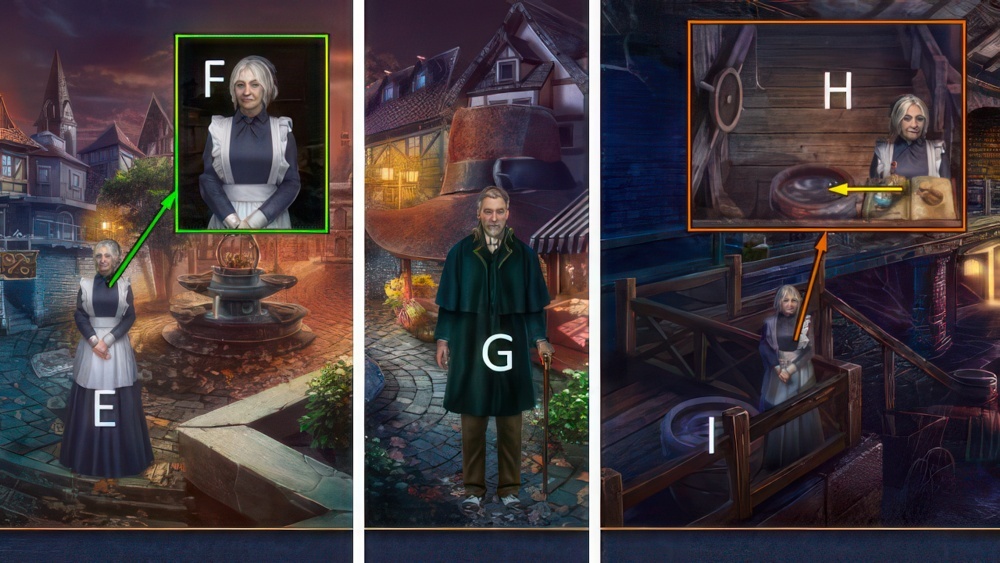
- Talk (E).
- Offer BOOK WITH INGREDIENT (F).
- Talk (G).
- Talk, move items (H).
- Drink (I).
- Play puzzle (J), receive SILVERWARE.
- Move (K).
- Take HOOK and BRUSH (L).
- Go (M).

- Play puzzle (N), receive JACK.
- Use BRUSH (O), receive BRUSH WITH TAR.
- Scroll left.
- Go (P).
- Take PADLOCK KEY with HOOK (Q).
- Use PADLOCK KEY, take METAL BAR (R).
- Move (S).
- Talk.
- Place JACK and METAL BAR, take KEY MOLD (T).
- Go down twice.
- Find staves, use BRUSH WITH TAR.
- Take BUCKET (U).
- Go right.
- Place BUCKET, receive WATER BUCKET (V).
- Place SILVERWARE, KEY MOLD and WATER BUCKET (W).
- Use 1 on 2.
- Pour 3.
- Use 4 on 5.
- Take CRADLE KEY (X).
- Use CRADLE KEY, go (Y).
Congratulations! You have completed the game Bridge to Another World 6: Gulliver Syndrome.


