
Bridge to Another World 7: Secrets of the Nutcracker (Bonus Chapter) – For saving the kingdom, the Mouse King owes you a debt of gratitude. You are now a friend to both toys and mice, so he invites you to Spielland for the annual Christmas Ball.
Bonus Chapter Walkthrough

- Examine scene.
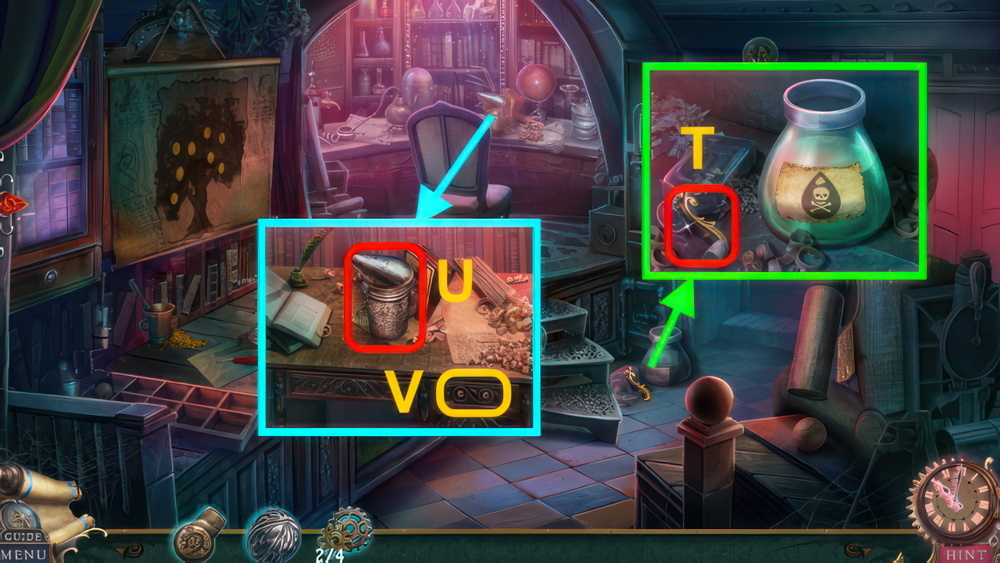
- Take JEWELRY BOX (U).
- Examine JEWELRY BOX, take BUTTON (1/2).
- Examine note (V), move snow.
- Take LIGHTER.
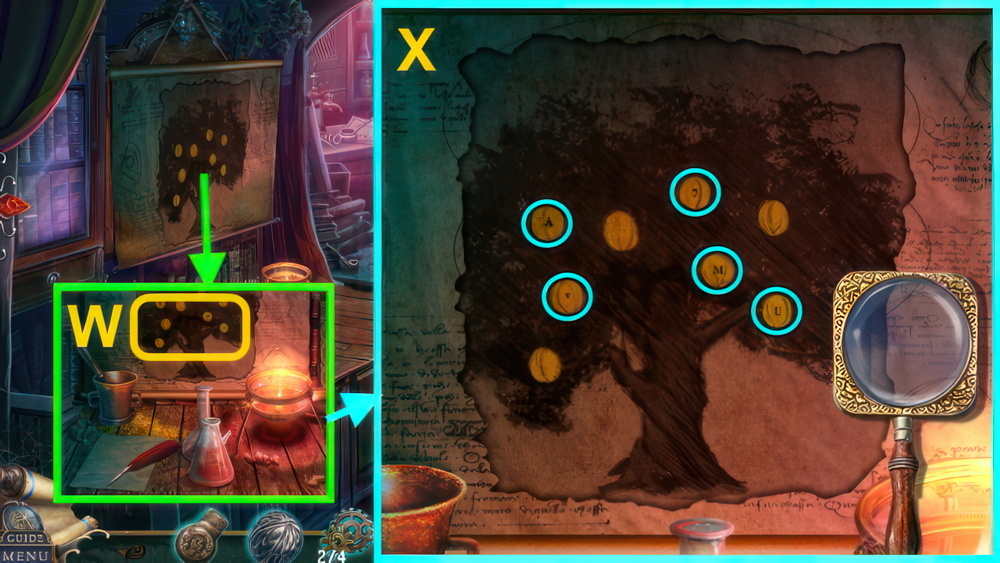
- Remove snow (W), take BUTTONS (2/2).
- Use LIGHTER (X), take SWEET SHAPE.
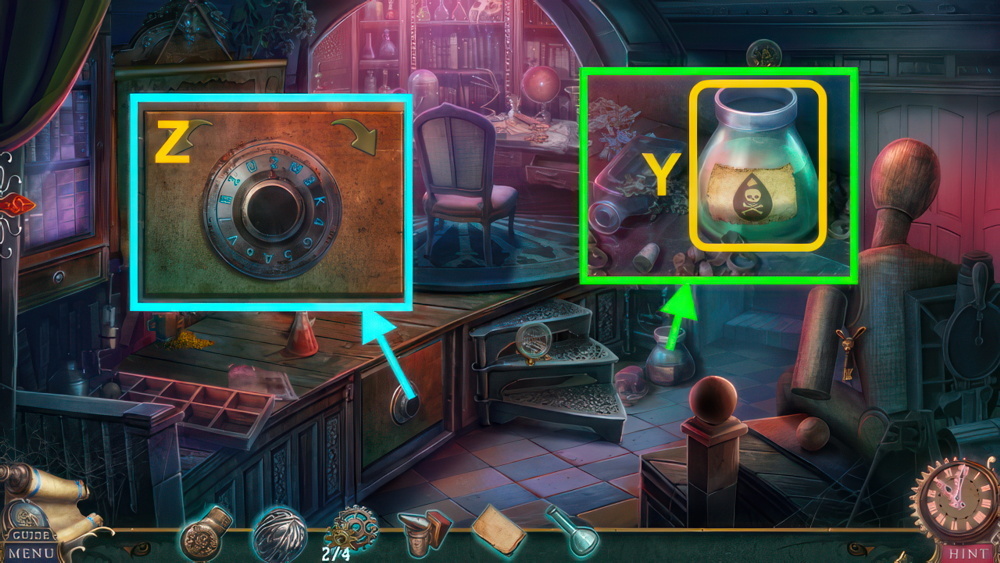
- Examine poster (Y), take CARROT.
- Take JACK and POT (Z).
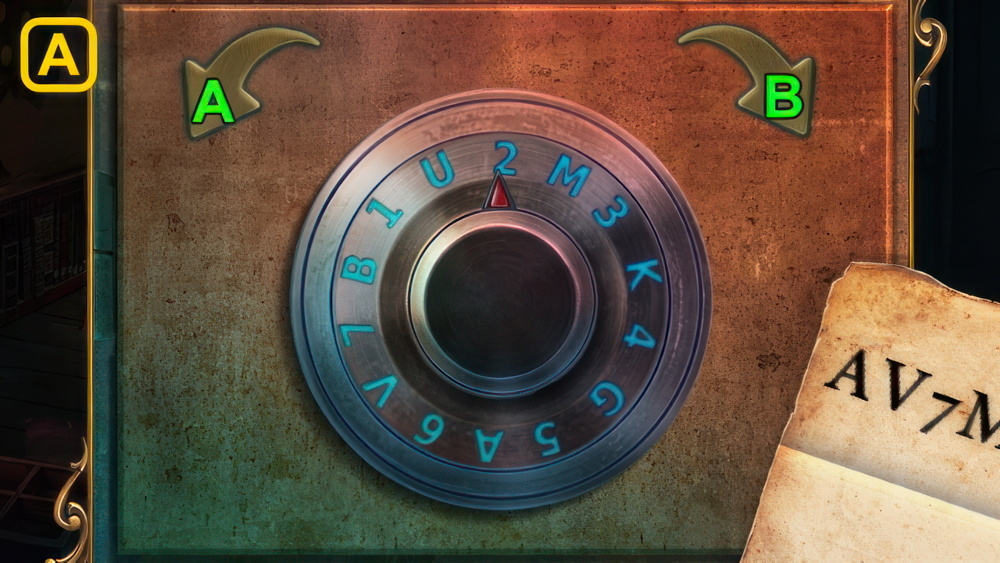
- Move snow (A).

- Assemble snowman (B), place BUTTONS (2/2) and CARROT.
- Take WINDOW KEY.
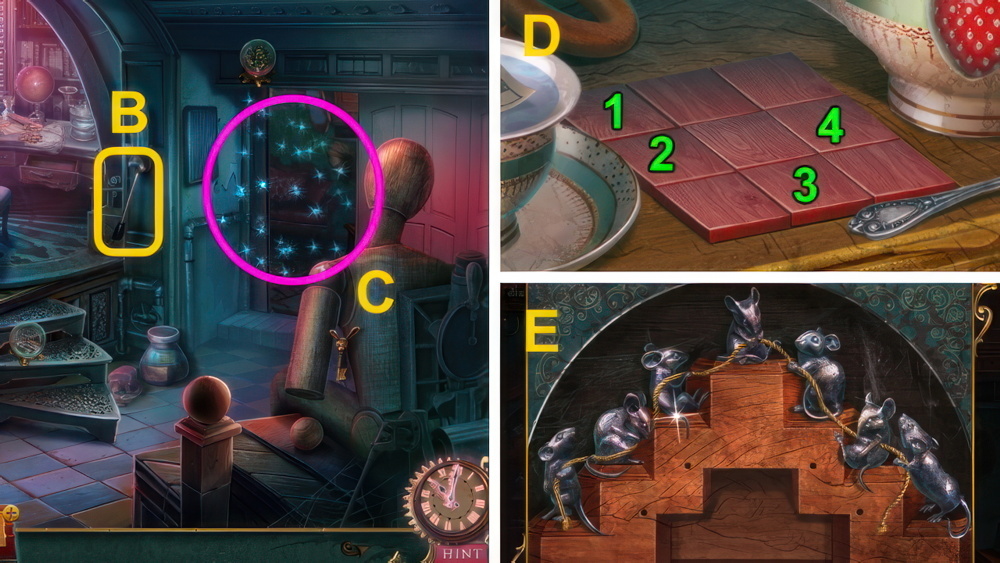
- Examine (C).
- Use SWEET SHAPE (D), take CANDY.

- Use WINDOW KEY and CANDY (E).
- Walk right.
- Examine scene.
- Use JACK (F), examine.
- Play puzzle, receive GIFT (G).
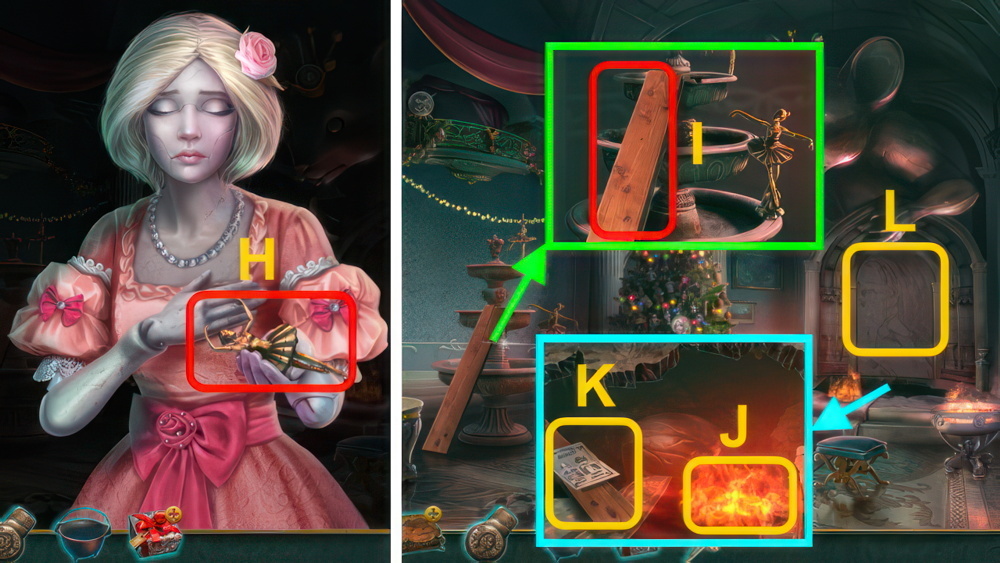
- Take STATUETTE (H).
- Take BOARD (I), place STATUETTE.
- Use POT, receive POT WITH WATER.
- Use POT WITH WATER (J).
- Examine note and board (K), place BOARD.
- Examine ×2 (L).

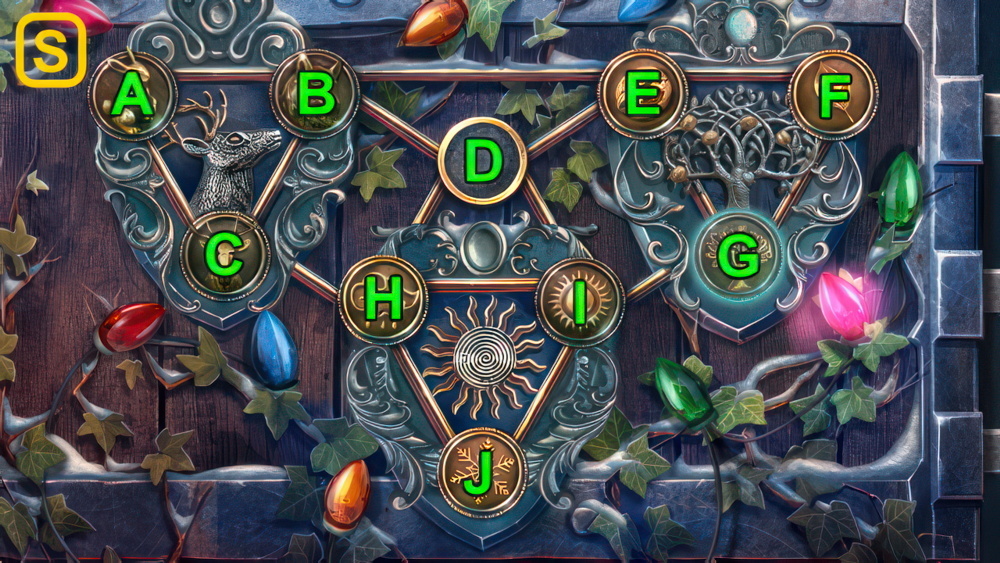
- Using the board as reference, find all the parts of the symbols.
- When you have selected the correct parts the symbol will be highlighted on the Board.
- Walkthrough (M).

- Examine (N).
- Take KNIFE (O).
- Read note (P), take TRIANGLE PIECE (1/2).
- KNIFE on GIFT, read note.
- Take NECKLACE.
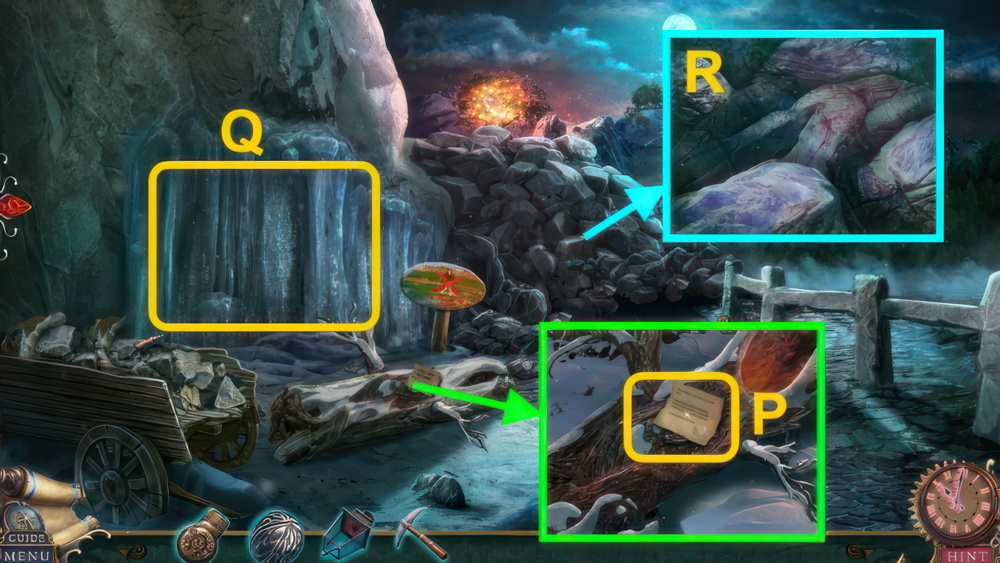
- Take LADDER (Q).
- Use LIGHTER, take TRIANGLE PIECES (2/2).

- Use LADDER (R).
- Take SPRIG (1/3) (S).
- Place NECKLACE (T), place TRIANGLE PIECES (2/2).

- Restore the picture.
- Select two triangles of the same shape and angle to swap them.
- Walkthrough (U).

- Take CRACKATOOK (V).
- Walk down.
- Give CRACKATOOK (W), take SPRIGS (2/3).
- Play puzzle, receive BUTTERFLIES (X).
- Walk forward.

- Place BUTTERFLIES (Y), take MOUSE KEY.
- MOUSE KEY on JEWELRY BOX, take SPRIGS (3/3).
- Walk down.
- Move curtain (Z), use SPRIGS (3/3).
- Walk right.
- Use CRACKATOOK on scene, take BROKEN CRACKATOOK.
- Examine (A).

- Take GEARS (1/4) (B), use snow on flames.
- Take CHIP (1/2).
- Talk (C), take MOUSE.
- Read note (D), examine.
- Use LIGHTER, take WING.

- Take MACE (E).
- Walk right.
- Take BROKEN NET (F).
- Use WING (G), take THREAD.
- Read note (H), take SNOWFLAKE (1/2).

- Place MOUSE (I), take GEARS (2/4) and TOOLKIT.
- Swap the pendulums according to the forms behind them.
- Select two to swap them.
- Place MACE, walkthrough.
- Take PENDULUM (J).
- Walk down.

- Use PENDULUM (K), receive SNOWFLAKES (2/2).
- Walk right.
- Examine (L).

- Restore the picture.
- Select two adjacent pieces to swap them.
- Walkthrough (M).
- Place SNOWFLAKES (2/2), take SCISSORS and NEEDLE.
- THREAD and NEEDLE on BROKEN NET, take NET.
- SCISSORS on TOOLKIT, take PLIERS.

- Use NET (N).
- Play puzzle, receive CHIP (2/2).
- Select matching symbols to close the fan.
- Complete the picture.
- Select and drag picture parts to move them.
- Puzzle walkthrough (O-P).
- Walk down.

- Examine (Q), use PLIERS.
- Talk.
- Place CHIP (2/2) (R).
- Place the chips on the correct slots according to the image.
- Select a chip to move it to an empty place.
- Walkthrough (S): E-F-G-I-D-E-F-G-I.
- D-E-F-G-E-D-I-G-E-D.
- H-C-B-A-C-H-D-B-A.
- C-B-D-I-H-J-I-H-D.
- Walk left.
- Take HANDLE (T).
- Take SMOKER (U).
- Place HANDLE (V), take note and MAGNIFIER.
- Use MAGNIFIER (W).
- Walkthrough (X).
- Take CODE.
- Move flask, take FLASK.
- Use FLASK (Y), receive ACID .
- Use ACID and CODE (Z).
- Enter the code.
- Select an arrow to move the pointer to the symbol.
- Correct symbols will be highlighted.
- You can’t move through selected symbols.
- Walkthrough (A): B×7-B×2-B-B×5-A×2.
- Take LEVER ARM and BOOK.
- Use LEVER ARM (B).
- Play puzzle, receive SILHOUETTE (C).
- Press the buttons as indicated on the piece of paper.
- Put the figurines of mice in the correct position.
- Puzzle walkthrough (D-E).

- SILHOUETTE on BOOK, walkthrough (F).
- Take KEY.
- Walk down, then right.

- Play puzzle, receive GEARS (3/4) (G).
- Use SMOKER (H), take GEARS (4/4).
- Walk down.
- Examine (I), place GEARS (4/4).

- Walkthrough (J).
- Use KEY.
- Walk forward.

- Examine (K).
- Examine (L), take GLUE.
- Examine (M), use GLUE.
- Take PICKAX HANDLE.
- Take LAMP (N).
- Use PICKAX HANDLE (O), take PICKAX.
- Read note (P), take BOWSTRING.
- Use PICKAX and LAMP, receive LIGHTNING BUG LAMP.
- Use PICKAX and LIGHTNING BUG LAMP (Q).
- Play puzzle, receive DYNAMITE.
- Use DYNAMITE and LIGHTER (R).
- Walk forward.

- Take OILER (S).
- Walk down.
- Play puzzle, receive CROSSBOW BOLTS (T).
- Use OILER (U), take HANDLE.
- Walk forward.

- Examine bucket (V).
- Use HANDLE (W).
- Take BUCKET.
- Use BUCKET (X), take CROSSBOW PIECES.
- Use CROSSBOW PIECES, BOWSTRING, and CROSSBOW BOLTS (Y), take CROSSBOW.

- Use CROSSBOW (Z).
- Hit the nut above Pinocchio.
- Move the crosshairs to aim.
- To fire, select when the circles overlap.
- Walkthrough (A): stop circles when they overlap.

- Choose the correct sequence by selecting the fingers.
- Walkthrough (B), take MOON.
- Use MOON (C).
- Examine globe (D), Place BROKEN CRACKATOOK.

- Rotate wire parts to connect the beginnings and ends of wire of the same color.
- Walkthrough (E).
Congratulations! You have completed the game Bridge to Another World 7: Secrets of the Nutcracker.


