
Crossroads 2: Escaping the Dark (Bonus Chapter) – A new encounter with Mrs. Eve awaits you as you find yourself at the center of a tense intellectual duel. An unexpected guest, called the Traveler, shows up at the Crossroads Bar on a mysterious mission and seems to know more than he should. Now Mrs. Eve has to not only serve him a drink, but also protect her bar and its purpose. You will witness a tense dialog full of hidden hints and unexpected twists and turns. Prepare a cocktail that can leave an impression and help Eve prove that behind her actions are good intentions and not manipulation. However, be prepared for the Traveler to try to question everything she does.
Bonus Chapter Walkthrough
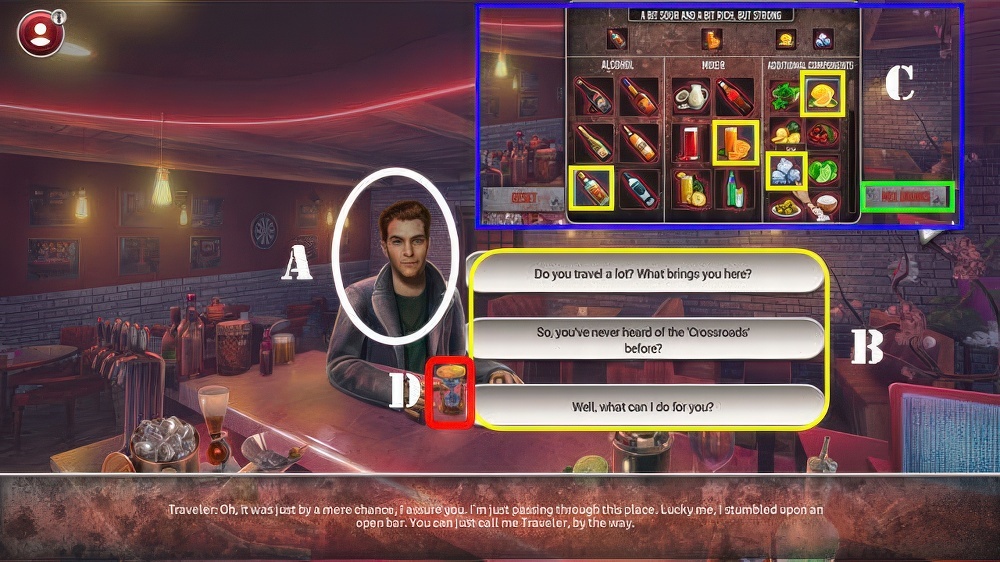
- Talk (A).
- Select any question (B).
- Make your drink choices and select ‘Mix Drinks’ (C).
- Talk (A).
- Select hourglass (D).

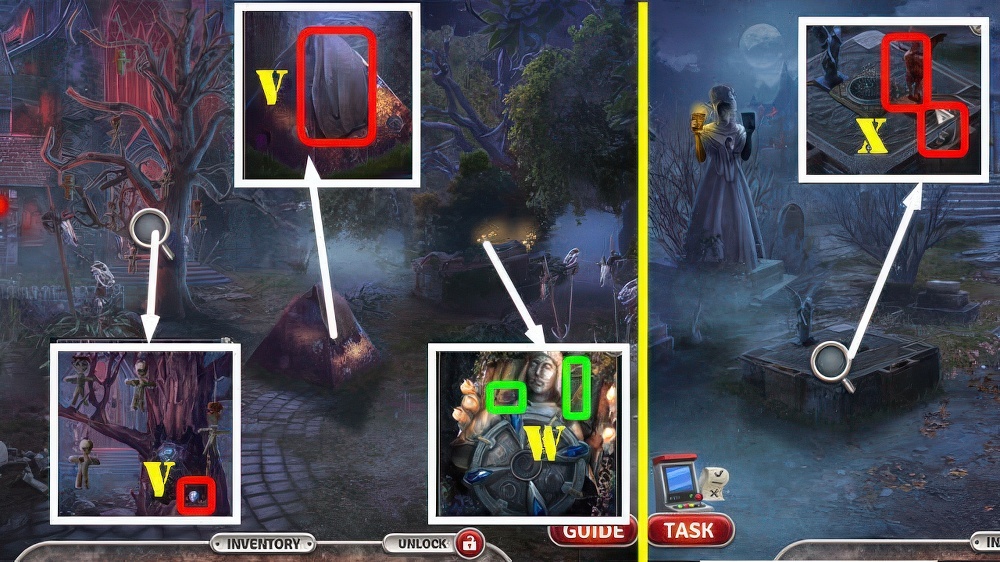
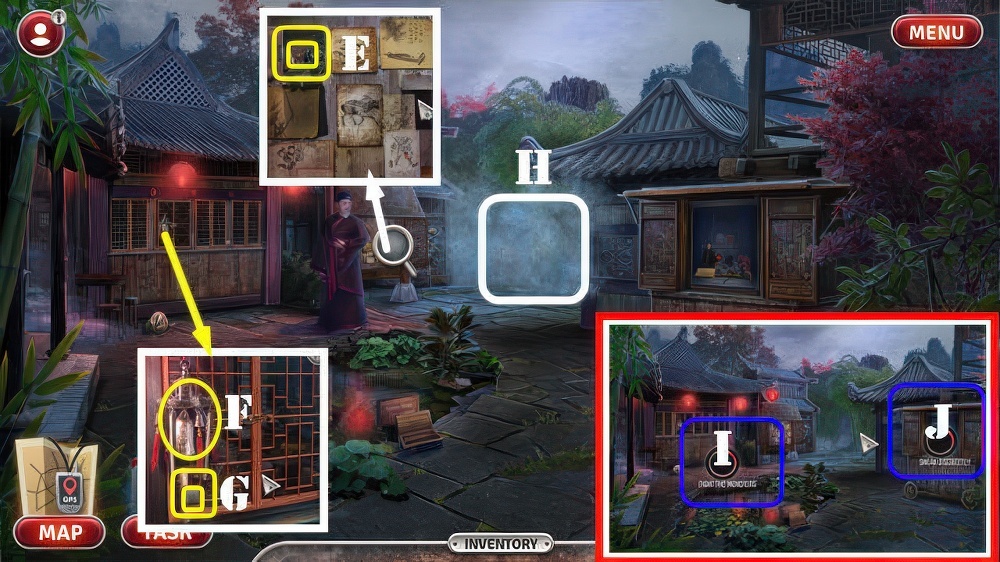
- Take DRAGON EYE, CODE WHEEL, and VINTAGE CASE (E).
- Place DRAGON EYE (F).
- Take DARKNESS ESSENCE and LIGHTER (G).
- Use LIGHTER (H).
- Play puzzle (I), receive PICTURE PLATE.

- PICTURE PLATE and CODE WHEEL on VINTAGE CASE.
- Select: (Jx3-Kx2-L).
- Take SKULL KEY and RIDDLE 1.
- Use SKULL KEY (M).
- Go (N).

- Receive UNUSUAL CAMERA.
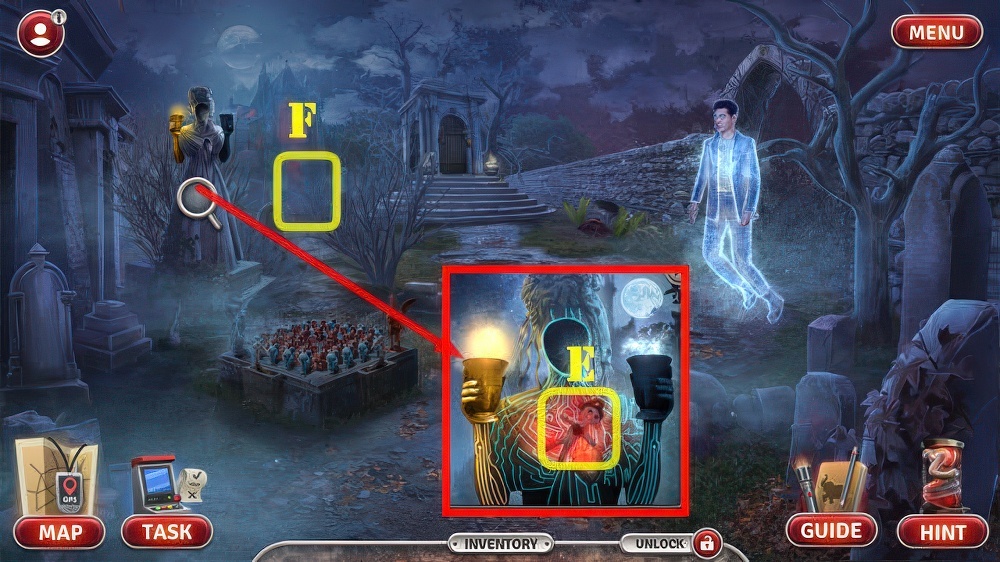
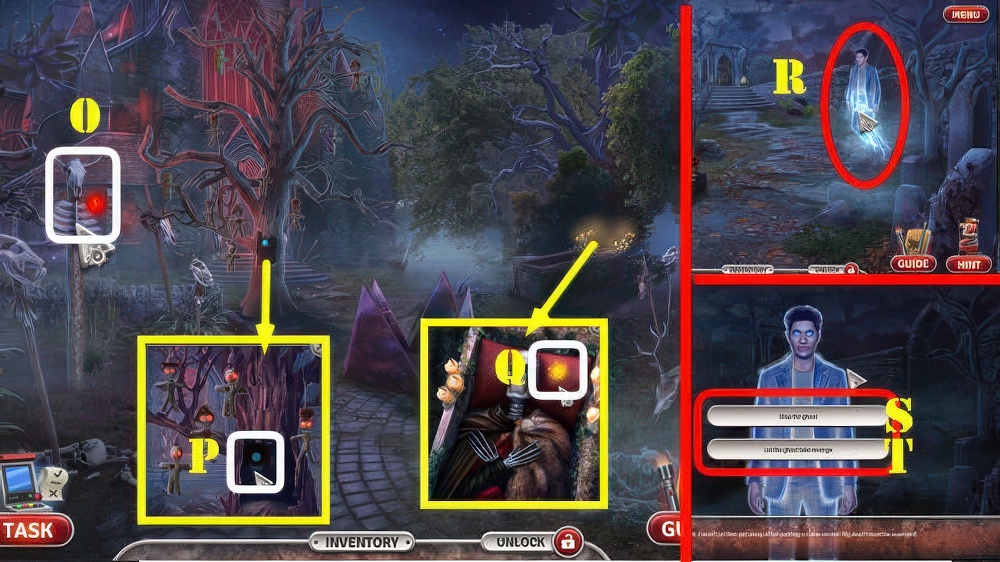
- Take CHISEL, MYSTERIOUS RUNE 1/4, and VIEWFINDER (O).
- Use CHISEL, take LENS and LIGHT ESSENCE (P).

- Place DARK ESSENCE (Q) and LIGHT ESSENCE (R).
- Take CAMERA CARTRIDGE and DEMON FIGURINE (S).
- CAMERA CARTRIDGE, VIEWFINDER, and LENS on UNUSUAL CAMERA, take MYSTERY CAMERA.
- Use MYSTERY CAMERA (T), receive UNUSUAL CAMERA.
- Go (U).
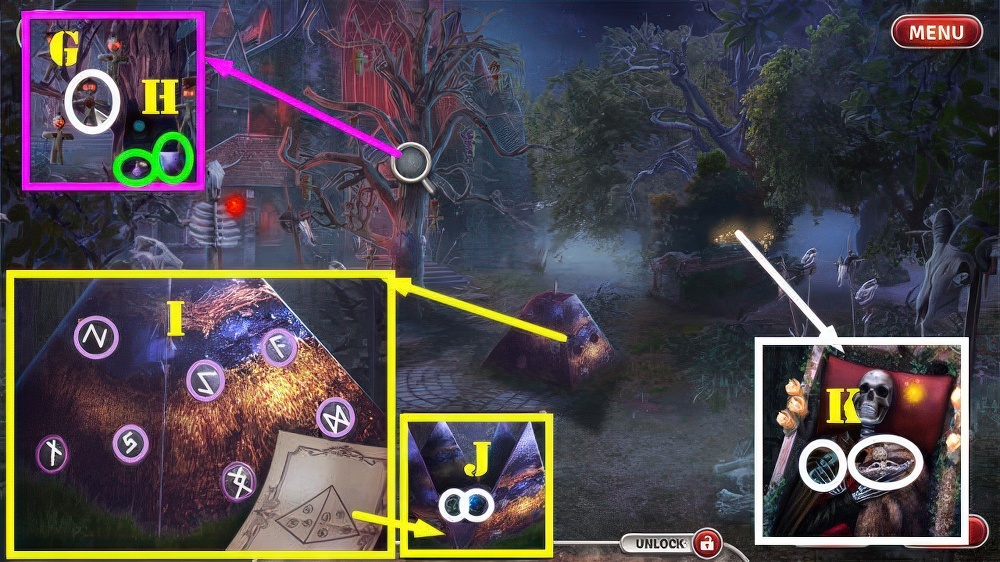
- Take MYSTERIOUS RUNE 2/4 and BAG (V).
- Use LIGHTER, take MYSTERIOUS RUNE and SCYTHE LEVER 3/4 (W).
- Walk down.
- Place DEMON FIGURINE and SCYTHE LEVER (X).

- Solution: (Bx4-Ax4-C-Ax8-C).
- Take MYSTERIOUS RUNE 4/4 and STONE HEART (D).
- Place STONE HEART, take CURSED DOLL (E).
- Go (F).
- Place CURSED DOLL (G).
- Take MAGICAL DEVELOPER and PYRAMID TOP (H).
- MAGICAL DEVELOPER on RIDDLE 1, take PYRAMID CLUE.
- Place MYSTERIOUS RUNE 4/4, PYRAMID TOP, and PYRAMID CLUE.
- Solution (I).
- Take SHIELD INLAY and DEATH SYMBOL (J).
- Place SHIELD INLAY, take JEWELED CUP and INFINITY SYMBOL (K).
- Walk down.

- Use BAG and JEWELED CUP (L), take SOIL-FILLED BAG (L1).
- Place SOIL-FILLED BAG (M).
- Play puzzle, receive VESSEL OF MEMORIES.
- Go (N).
- Use VESSEL OF MEMORIES 3x (O-P-Q).
- Walk down.
- Use VESSEL OF MEMORIES (R).
- Play puzzle.
- Select (S or T).

- Place DEATH SYMBOL and INFINITY SYMBOL, take DOOR RING and RIDDLE 2 (U).
- Place DOOR RING (V).
- Go (W).
- Receive VILLAGE HEAD RING.
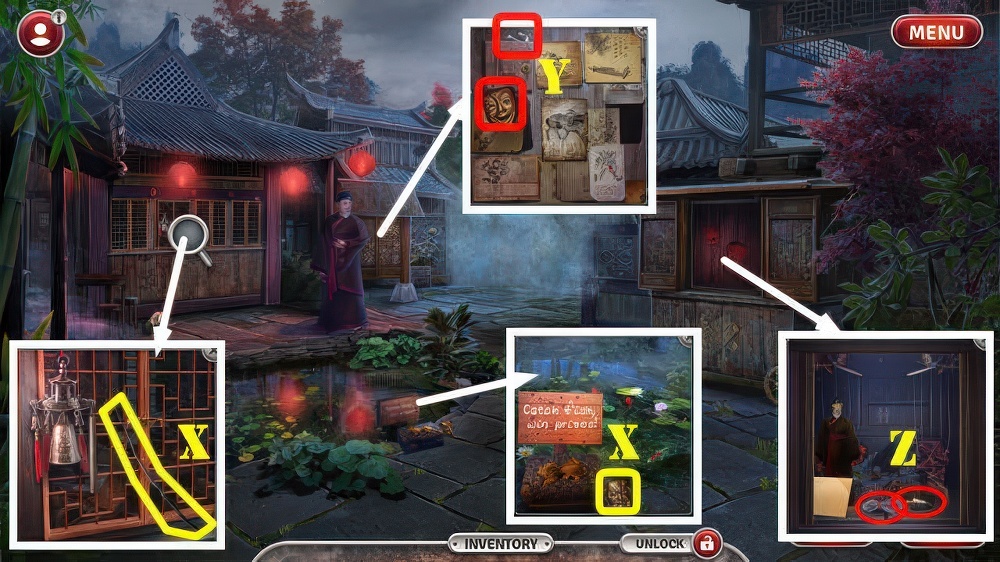
- Take LONG BRANCH and EVIL MASK (X).
- Use VILLAGE HEAD RING, take GOOD MASK and HOOK (Y).
- Place EVIL MASK and GOOD MASK, take BELL and FISHING LINE (Z).
- HOOK and FISHING LINE on LONG BRANCH, take IMPROVISED ROD.
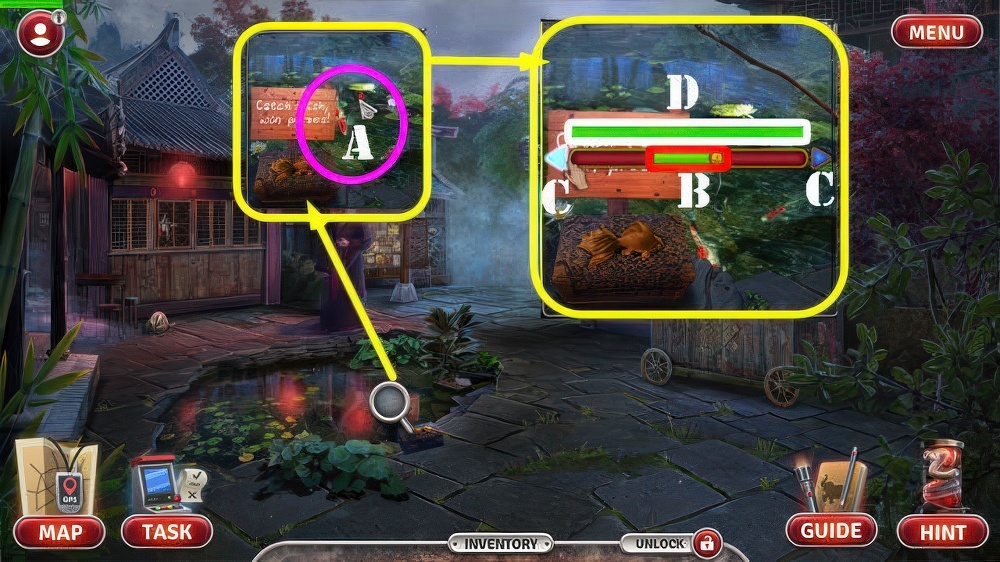
- Use IMPROVISED ROD (A).
- The solution is random.
- Keep your fishing rod in the green zone (B) by pressing on the arrows (C).
- You will catch a fish once the bar fills with green (D).
- Take WET DIARY and LITTLE KEY.
- Use LITTLE KEY and look at note, take METAL CYLINDER and BROKEN PUPPET (E).
- Place BELL and METAL CYLINDER (F), take CAMERA CARTRIDGE and POSTER 1/2 (G).
- CAMERA CARTRIDGE on UNUSUAL CAMERA, take MYSTERY CAMERA.
- Use MYSTERY CAMERA (H).
- Select one (I-J).
- Play puzzle (H).
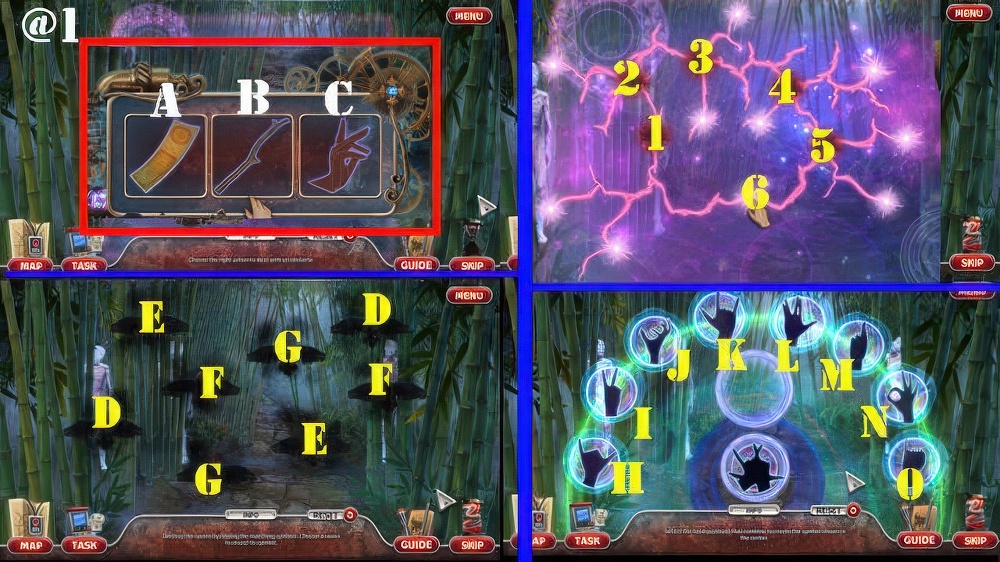
- (@1) Select (A).
- Select (1-6).
- Select (B).
- Select pairs of ravens (D-E-F-G).
- Select (C).
- Solution: (H-K)-(H-N)-(I-M).
- Go forward to Outskirts.

- Take TURTLE FIGURINE, PUPPET HEAD, and DRY BRANCHES (Q).
- Use TURTLE FIGURINE, take PUPPET HAND and DRUMSTICK (R).
- Walk down.

- PUPPET HAND and PUPPET HEAD on BROKEN PUPPET, take EVE PUPPET.
- Place EVE PUPPET (S), take POSTER 2/2 and CORKSCREW (T).
- Place POSTER 2/2 (U).
- Play puzzle, receive BLOWGUN and PIPA.
- Go (V).

- Use DRUMSTICK, RIDDLE 2, and PIPA.
- Select moon-wind-drum-owl-star (1-5).
- Take OILER and SLEEPING POTION (W).
- Use CORKSCREW and OILER (X), receive OIL.
- Walk down.

- Use OIL (Y).
- Play puzzle, receive CAVE MODEL.
- Look at note (Y1).
- Place CAVE MODEL, take FLINT and DART BASE (Y2).
- Go (Z).
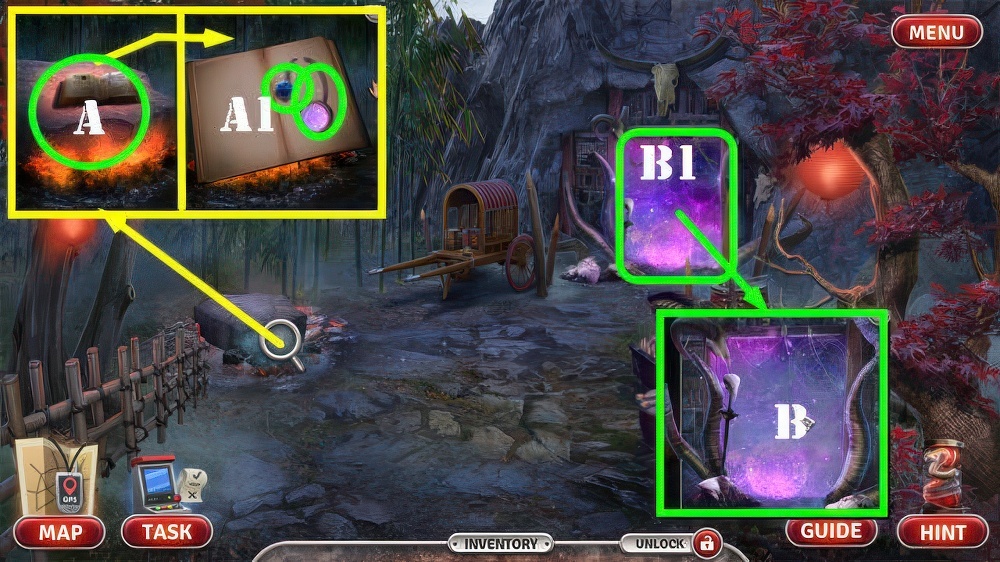
- Use DRY BRANCHES, FLINT, and WET DIARY (A), select diary 3x, take BARRIER AMULET and THREADS (A1).
- Use BARRIER AMULET (B) and go (B1).

- Take FEATHERS (C).
- FEATHERS, DART BASE, THREADS, and SLEEPING POTION on BLOWGUN, take LOADED BLOWGUN.
- Use LOADED BLOWGUN (D).
- Select chains (E).
- Look note, take SPINNING WHEEL and PAINT (F).

- Place SPINNING WHEEL (G).
- Solution: (H).
- Take MUSIC BOX and PROTECTIVE GLOVES (H1).
- Use PROTECTIVE GLOVES (I), receive STENCIL.
- Walk down.
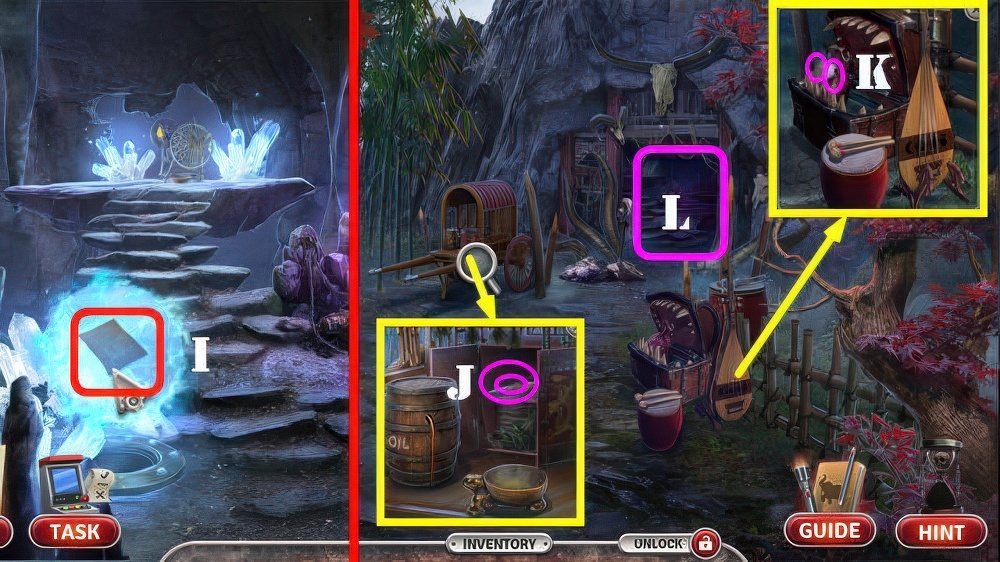
- Use STENCIL and PAINT, take BOX LEVER and DAGGER (J).
- Use DAGGER, take DEVICE DETAIL and MUSIC DISK (K).
- Go (L).

- Place DEVICE DETAIL (M).
- Play puzzle (M1).

- Solution: (1-2)-(3-1)-(4-3)-(2-5)-(6-4)-(5-6).
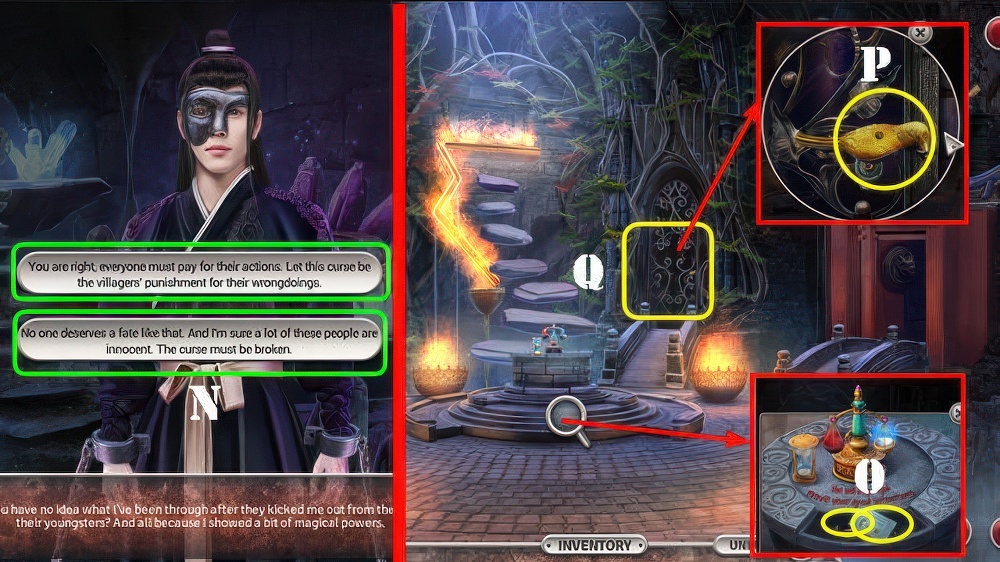
- Select either answer (N).
- Take DANCER FIGURINE and RIDDLE 3 (O).
- DANCER FIGURINE, BOX LEVER, and MUSIC DISK on MUSIC BOX.
- Take BIRDWING and BIOLOCATION PENDULUM.
- Place BIRDWING (P).
- Go (Q).
- Take SPYGLASS PART 1/4 (R).
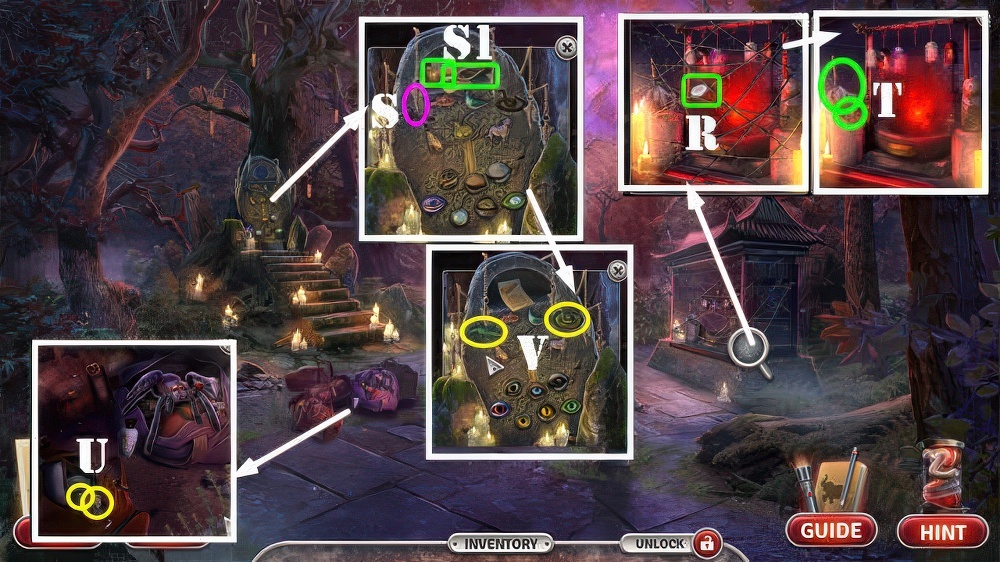
- Place BIOLOCATION PENDULUM (S) and look at note, take CLIPPERS and BROKEN SPYGLASS (S1).
- Use CLIPPERS, take FEATHER DUSTER and LIZARD AMULET (T).
- Use FEATHER DUSTER, take SPYGLASS PART 2/4 and SNAKE AMULET (U).
- Place LIZARD AMULET and SNAKE AMULET (V).
- Solution: arrange the eyes as shown (W).
- Take SPYGLASS PART 3/4 and CAMERA CARTRIDGE (X).
- CAMERA CARTRIDGE on UNUSUAL CAMERA, take MYSTERY CAMERA.
- Use MYSTERY CAMERA (Y).

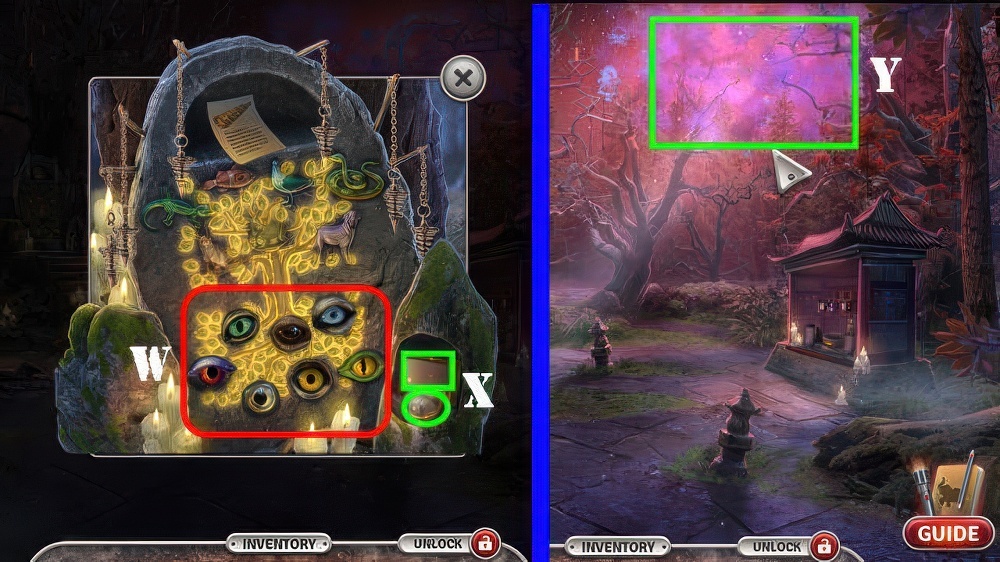
- Take UNUSUAL CRYSTAL and MAGIC TALISMAN (A).
- Hang MAGIC TALISMAN (B), take SPYGLASS PART 4/4 (C).
- SPYGLASS PART 4/4 and UNUSUAL TALISMAN on BROKEN SPYGLASS, take UNUSUAL SPYGLASS.
- Use UNUSUAL SPYGLASS (D).
- Play puzzle.
- Go (E).

- Select any choice (F-G-H).
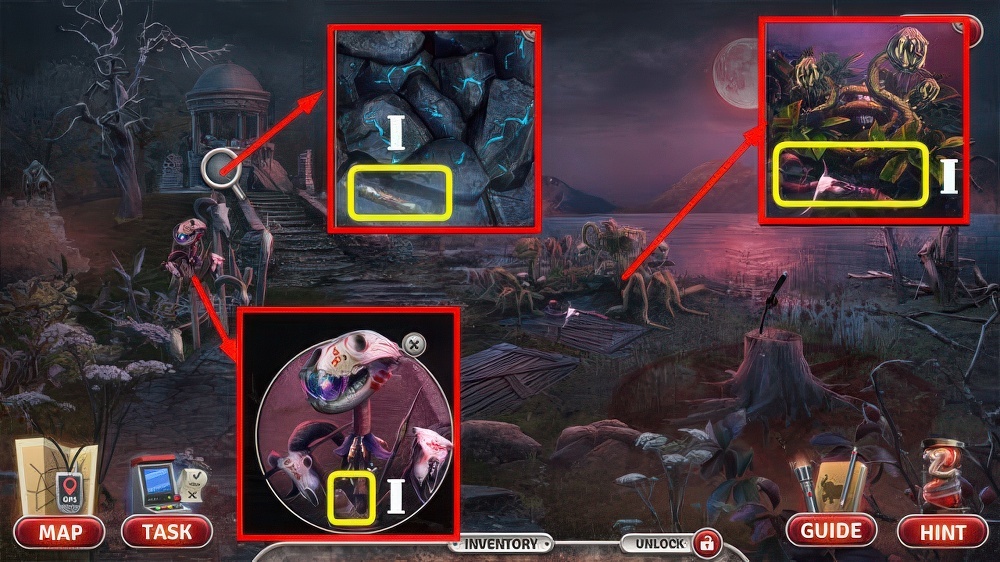
- Take STONE TOTEM, DOMESTICATION SCROLL, and ANCIENT STAFF (I).
- Walk down.

- Use DOMESTICATION SCROLL and RIDDLE 3 on spider.
- Select 3 items (orange).
- Take ANIMAL FANG 1/3 and OFFERING (J1).
- Place OFFERING (K) and STONE TOTEM (L).
- Take ANIMAL FANG 2/3 and WOODEN HANDLE (K).
- Go (M).
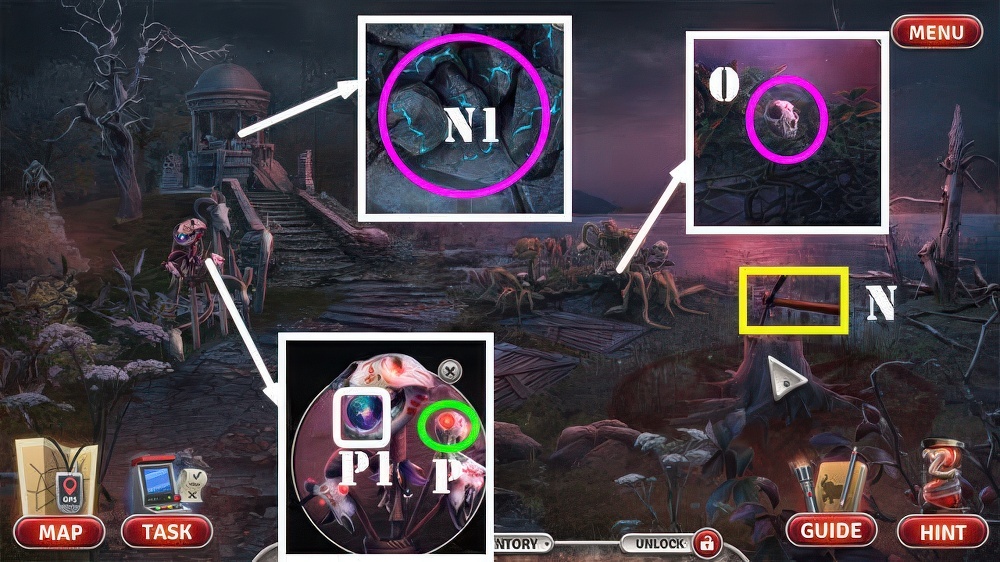
- Use WOODEN HANDLE, take PICKAXE (N).
- Use PICKAXE (N1).
- Play puzzle, receive PLANT POISON and ANIMAL FANG 3/3.
- Use PLANT POISON, take ANIMAL SKULL (O).
- Place ANIMAL SKULL (P).
- Take ORB (P1).

- ORB and ANIMAL FANG 3/3 on ANCIENT STAFF, take DEFENSIVE STAFF.
- Use DEFENSIVE STAFF (Q).
- Play puzzle (R).

- The solution is random.
- Collect the falling symbols (S) in the order shown here (T).
- Move Eve around so her book is positioned to catch the symbols in her book (U).
- Look at note (V).
Congratulations! You have completed the game Crossroads 2: Escaping the Dark.


