Darkness and Flame 4: Enemy in Reflection (Bonus Chapter) – The main character woke up from a dream that seemed too real. Her mother assured her that everything was fine, but she soon found out the truth. But something went wrong, and now the monster she accidentally unleashed must be stopped. Below you can watch the walkthrough of the bonus chapter of Darkness and Flame 4: Enemy in Reflection.
Bonus Chapter Walkthrough

- Take CHAIR LEG (A).
- Go forward.
- Take 1/3 LADDER PARTS, remove vines, take 2/3 LADDER PARTS, and 3/3 LADDER PARTS (B).
- Walk down, left.

- Take ROPE, use CHAIR LEG, take 1/2 FLOWER FIGURINES and WHETSTONE (C).
- Select rope, take BOX (D).
- Walk down.

- Use WHETSTONE and ROPE, earn ROPES (E).
- ROPES on LADDER PARTS, restore ladder, earn HANDMADE LADDER.
- Go forward.
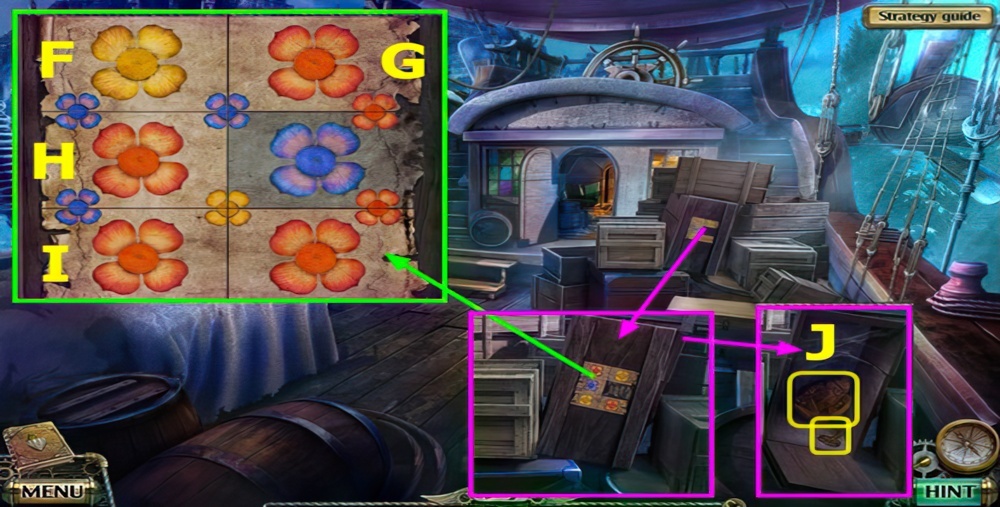
- Place HANDMADE LADDER (F).

- Take 2/3 FLOWER FIGURINES and LASSO (G).
- Go left.
- Take 3/3 FLOWER FIGURINES (H).

- Take GLASS FRAGMENT (I).
- Take STICK (J).
- Use LASSO, earn SCREWDRIVER (K).
- Walk down 2x.

- Move foliage, place FLOWER FIGURINES and open box, remove items, take GASOLINE, SWAMP SHOES, and 1/3 PATCHES (L).
- Go forward.
- Use STICK and SWAMP SHOES (M).
- Take TOAD FIGURINE (N).
- Place TOAD FIGURINE, take DOOR KNOCKER (O).
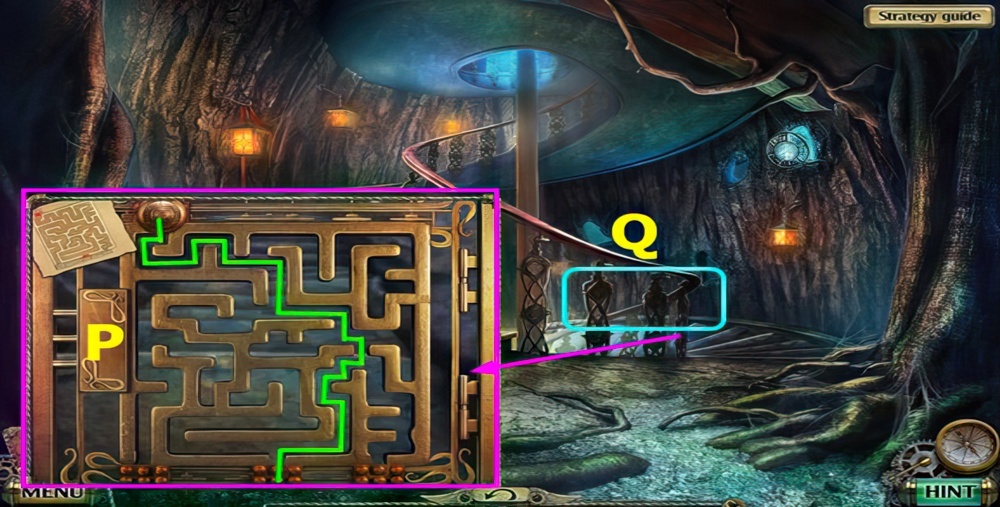
- Use DOOR KNOCKER and SCREWDRIVER, select (P).
- Go right.

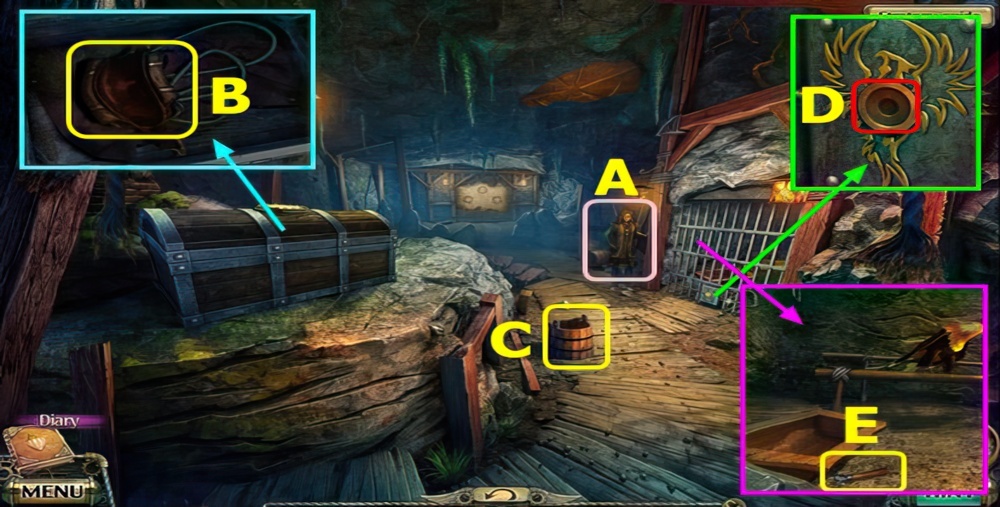
- Talk (A).
- Take KEY, remove blanket (B). Play puzzle, take POLE CLIMBERS.
- Take MATCHES and PAPER AND SLATE PENCIL (C).
- Use KEY, take 1/5 FIGURINES (D).
- Walk down 2x.

- Place POLE CLIMBERS (E).
- Use PAPER AND SLATE PENCIL, take HINT (F).
- Select (G).
- Select H-I-J-K-L-M.
- Move items, take 2/5 FIGURINES, MEDALLION, and LOCKPICK (N).
- Walk down, left.

- Use LOCKPICK, take SHADE and 3/5 FIGURINES (O).
- Go forward.
- Select (P).
- Use GASOLINE, SHADE, and MATCHES (Q).
- Select (R).

- Take 2/3 PATCHES (A).
- Remove rag, take WIRE CUTTERS (B).
- WIRE CUTTERS on BOX, unwrap and open box, take 3/3 PATCHES and NEEDLE AND THREADS.
- Select (C).

- Place PATCHES and NEEDLE AND THREADS, solution (D).
- Take PART OF THE PICTURE (E).
- Walk down.

- Place PART OF THE PICTURE, solution Fx7-Gx7-Hx8-Ix7.
- Take 4/5 FIGURINE and KEY (J).
- Go forward.

- Use KEY (K).
- Play puzzle: earn 5/5 FIGURINES (L).
- Go to Teacher Young’s House.

- Use MEDALLION, earn TWINE WRAPPED ENVELOPE (A).
- Open TWINE WRAPPED ENVELOPE, take INGREDIENTS LIST and TABLET WITH SYMBOLS.
- Place FIGURINES, solution, take GLUE and LEECH TRAP (B).
- Walk down, left.

- Place HINT and TABLET WITH SYMBOLS, solution (C).
- Go forward.
- Take HINT (D).
- Take POKER (E).
- Walk down.

- Use POKER, earn RETICULE, take GLASS FRAGMENT (F).
- Go forward, up.
- Select (G).
- Take CROWBAR (H).
- Select (I).
- Go forward.

- Talk (J).
- Move PILLOWS, take HANDLE (K).
- Take TOOTHBRUSH and HACKSAW, use HANDLE (L).
- Take KEY (M).
- Use KEY, take HAMMER and HARNESS (N).
- Walk down.

- Use CROWBAR, HAMMER, and GLASS FRAGMENT, take TWEEZERS (O).
- Walk down.
- Use TWEEZERS, earn EYE (P).
- Go to Dark Forest.

- Use HAMMER, take WHEEL (A).
- Walk down.
- Use HACKSAW, earn PETRIFIED MATERIAL (B).
- Place HARNESS (C).
- Go to Old Part of the Settlement.

- Place WHEEL (D).
- Select 1-8 (E).
- Take METAL PLATE (F).
- Go forward 2x.

- Open doors, take MINERALS and ACID (G).
- Place EYE, take MAGNET (H).
- Place MAGNET, drag item on path, earn KNOB (I).
- Use KNOB, take IVY INFUSION and GAS RECEIVER (J).
- Walk down 2x.

- Use ACID, take SHOVEL (K). Use CROWBAR, take TURPENTINE.
- TURPENTINE on RETICULE, open and remove items, take PATTERNED LENS.
- Walk down.
- Use PATTERNED LENS and GLUE (L).
- Use TOOTHBRUSH, select (M).

- Rotate disc clockwise to find the highlighted images 1-7 (N).
- Take KNOB (O).

- Place HINT and KNOB, solution (P).
- Go (Q).

- Talk, earn KEY TO THE CAGE (A).
- Place and select METAL PLATE, take SADDLE (B).
- Take BUCKET (C).
- Use KEY TO THE CAGE (D).
- Take CAN OPENER (E).
- Go to Dark Forest.

- Use SHOVEL, earn IMMORTELLE (F).
- Walk down.
- Use BUCKET, earn BUCKET WITH WATER (G).
- Go to Teacher Young’s House.

- Use CAN OPENER, take CANNED FISH and FIRE PEPPER (H).
- CANNED FISH on LEECH TRAP.
- Walk down, left.
- Use LEECH TRAP, earn LEECHES (I).
- Go to Basement.

- Use BUCKET WITH WATER and FIRE PEPPER (J).
- Place SADDLE (K), take PART OF THE PICTURE (L).
- Place PART OF THE PICTURE (M), play puzzle.

- Select (N).
- Select (O) to begin, use the arrows to avoid obstacles.
- You earn METHANOL.

- PETRIFIED MATERIAL, MINERALS, IVY INFUSION, METHANOL, IMMORTELLE, and LEECHES on INGREDIENTS LIST, earn INGREDIENTS.
- Walk down.
- Place GAS RECEIVER and INGREDIENTS (P).

- Move (A-B)-(C-B)-(D-B)-(E-F)-(G-F)-(H-F).
- Select (F), move (F-B).
- Move (I-J), select (K-L).
- Move (C-J).
- Select (M), move (N-M)-(M-J)-(O-J)-(P-J).
- Move (Q-R), select (S).
- Take RECEIVER WITH GAS (K).
- Go forward.

- Place RECEIVER WITH GAS (T).
Congratulations! You have completed the game Darkness and Flame 4: Enemy in Reflection.


