![Dream Escape β Chapter 7 Walkthrough](https://zotuf.com/wp-content/uploads/2023/01/Dream-Escape-Chapter-7.jpg)
Dream Escape: Chapter 7 – After the ship was destroyed by the monster, the main character and the doctor fled to the submarine next to the ship. The submarine took them to the depths of the sea. As the boat sank, they became more and more worried.
Dream Escape: Chapter 7 – Walkthrough
Here you can watch the complete walkthrough of Chapter 7: Deep sea, in the game Dream Escape.
![Dream Escape Chapter 7 Walkthrough - Step 1](https://zotuf.com/wp-content/uploads/2023/01/1-22.jpg)
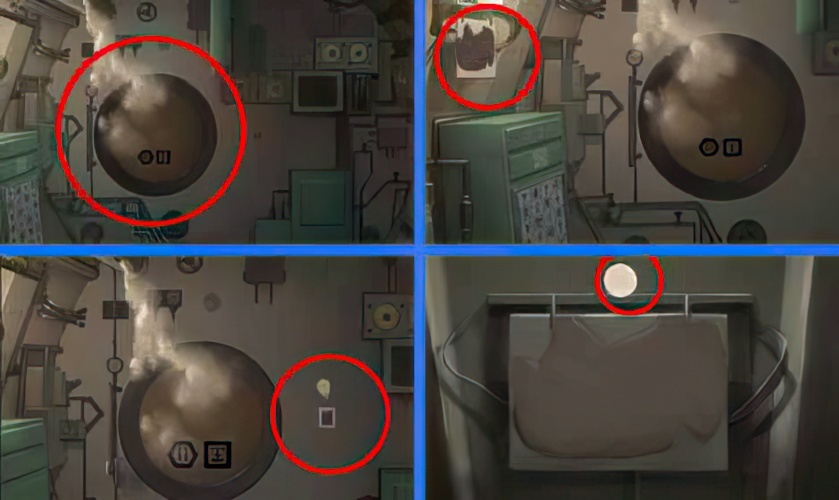
1. Turn off the lights in the scene and remove the light bulb on the left side of the scene.
![Dream Escape Chapter 7 Walkthrough - Step 2](https://zotuf.com/wp-content/uploads/2023/01/2-23.jpg)
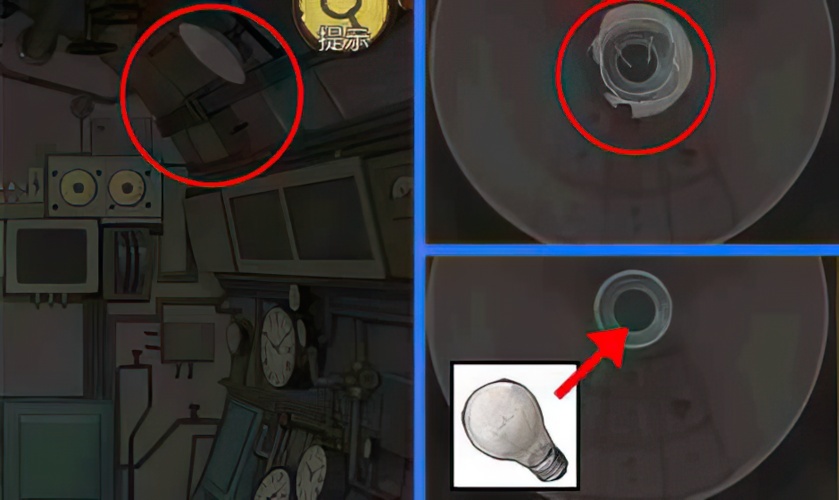
2. Remove the broken bulb on the right side of the scene.
![Dream Escape Chapter 7 Walkthrough - Step 3](https://zotuf.com/wp-content/uploads/2023/01/3-23.jpg)
3. Install the bulb under the lampshade on the right.
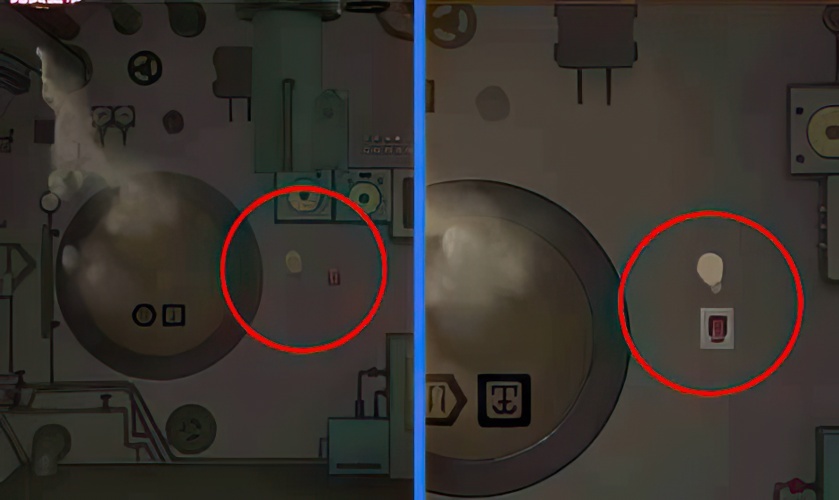
![Dream Escape Chapter 7 Walkthrough - Step 4](https://zotuf.com/wp-content/uploads/2023/01/4-24.jpg)
4. Turn on the lights of the scene.
![Dream Escape Chapter 7 Walkthrough - Step 5](https://zotuf.com/wp-content/uploads/2023/01/5-23.jpg)
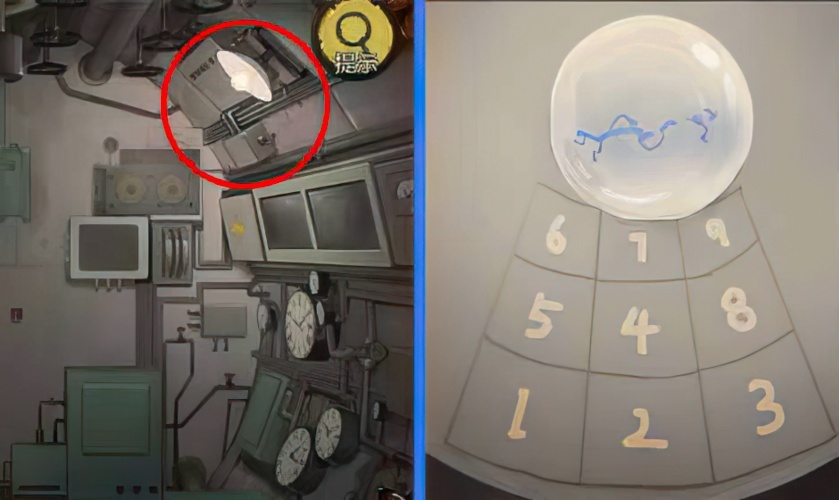
5. Check the numbers on the lampshade on the right.
![Dream Escape Chapter 7 Walkthrough - Step 6](https://zotuf.com/wp-content/uploads/2023/01/6-22.jpg)
6. According to the number on the lampshade on the right, open the middle drawer on the left and get the solvent.
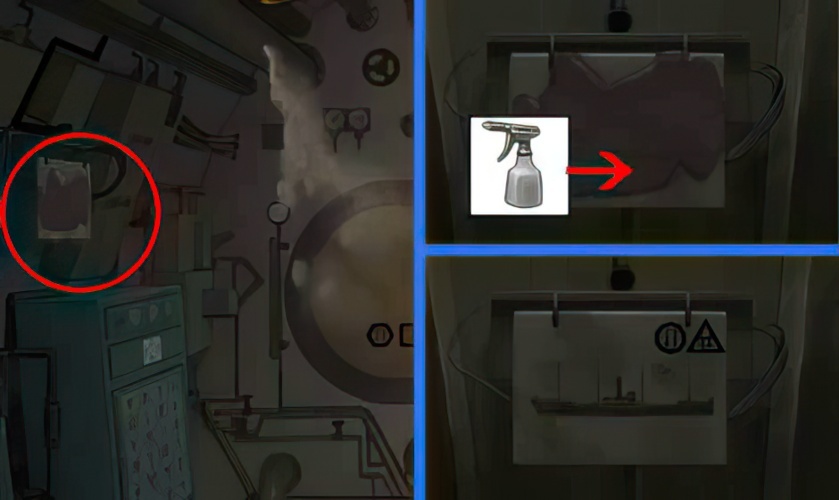
![Dream Escape Chapter 7 Walkthrough - Step 7](https://zotuf.com/wp-content/uploads/2023/01/7-22.jpg)
7. Use a solvent to dissolve the oil stains on the left tag, check the clues on the tag.
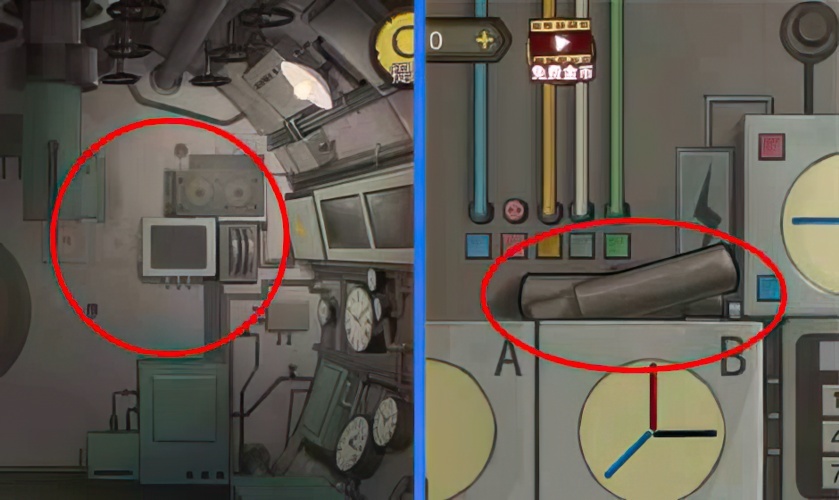
![Dream Escape Chapter 7 Walkthrough - Step 8](https://zotuf.com/wp-content/uploads/2023/01/8-22.jpg)
8. Take away the periscope handle from the dial.
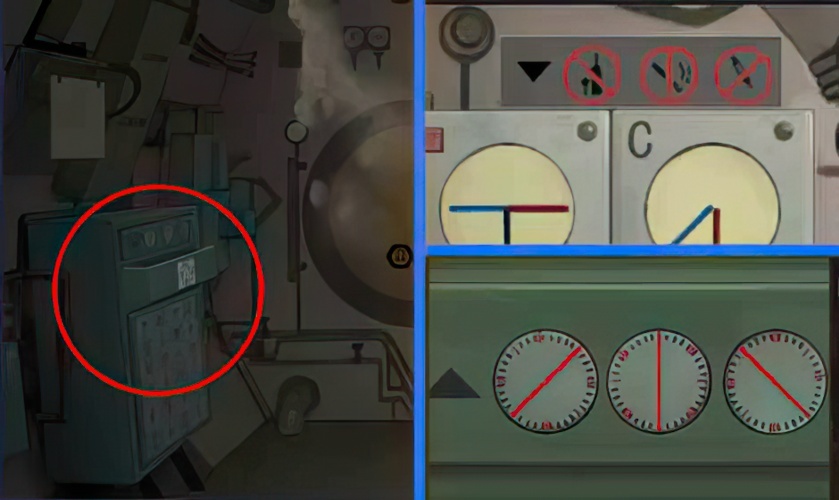
![Dream Escape Chapter 7 Walkthrough - Step 9](https://zotuf.com/wp-content/uploads/2023/01/9-22.jpg)
9. According to the sign above the dial, open the upper drawer on the left and get the portfolio.
![Dream Escape Chapter 7 Walkthrough - Step 10](https://zotuf.com/wp-content/uploads/2023/01/10-22.jpg)
10. Open the portfolio and check the clues on the portfolio.
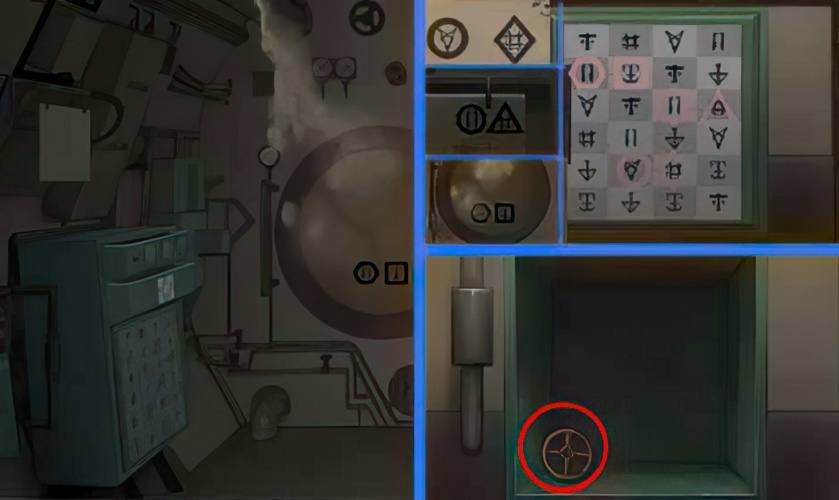
![Dream Escape Chapter 7 Walkthrough - Step 11](https://zotuf.com/wp-content/uploads/2023/01/11-22.jpg)
11. According to the clues on the doorway, portfolio and tag, open the cabinet and get the valve.
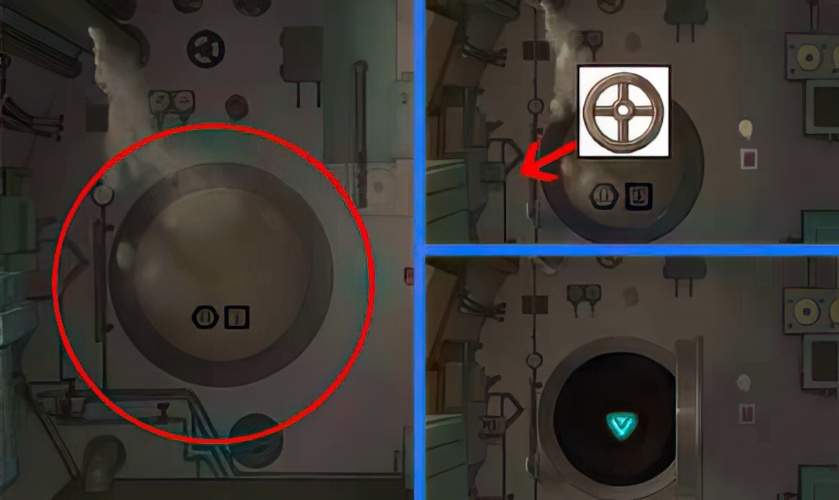
![Dream Escape Chapter 7 Walkthrough - Step 12](https://zotuf.com/wp-content/uploads/2023/01/12-22.jpg)
12. Install the valve on the steam pipe next to the doorway, turn off the valve, and enter the next scene.
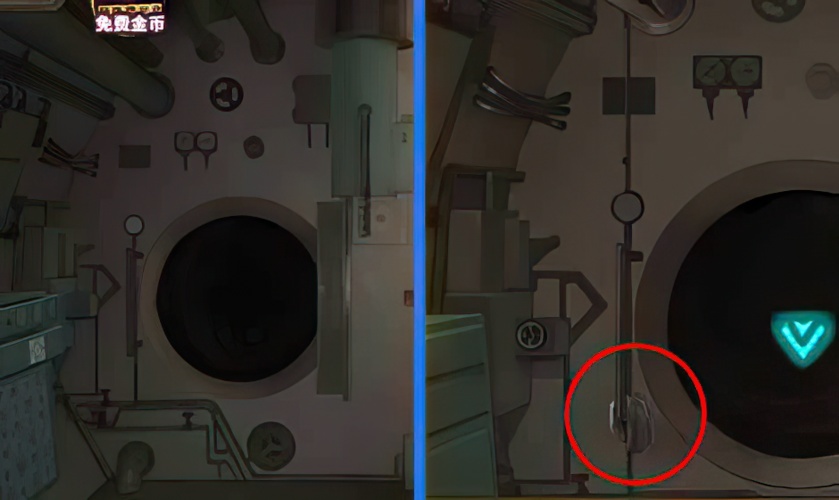
![Dream Escape Chapter 7 Walkthrough - Step 13](https://zotuf.com/wp-content/uploads/2023/01/13-22.jpg)
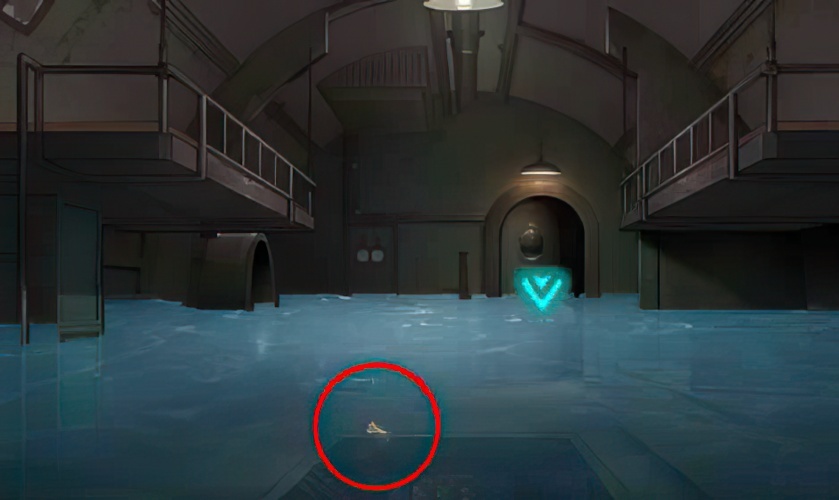
13. Take the towel beside the doorway.
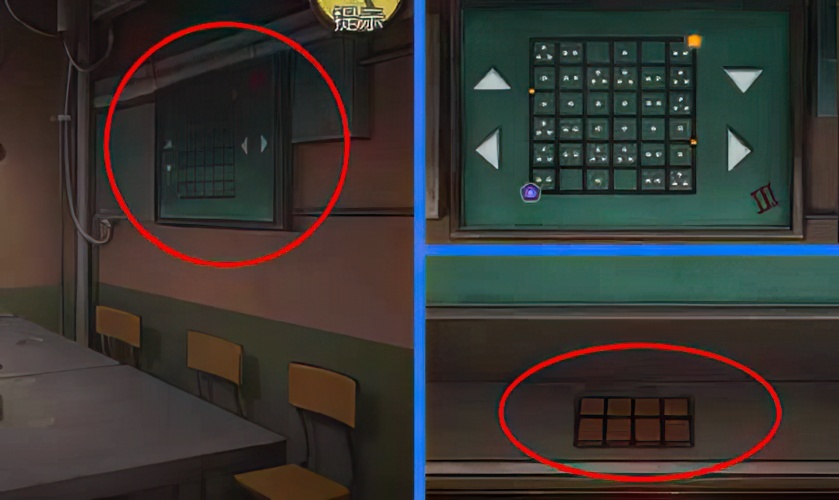
![Dream Escape Chapter 7 Walkthrough - Step 14](https://zotuf.com/wp-content/uploads/2023/01/14-22.jpg)
14. Complete the game on the wall in the submarine restaurant and get chocolates.
![Dream Escape Chapter 7 Walkthrough - Step 15](https://zotuf.com/wp-content/uploads/2023/01/15-22.jpg)
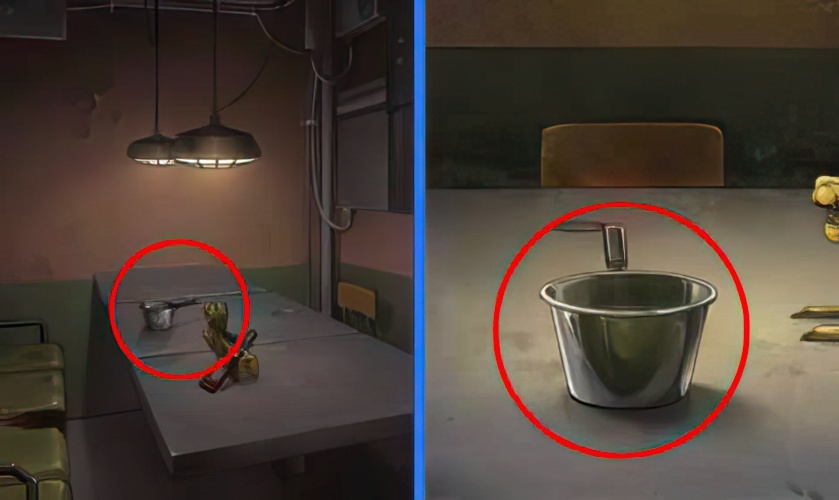
15. Get the milk pot on the table in the submarine restaurant.
![Dream Escape Chapter 7 Walkthrough - Step 16](https://zotuf.com/wp-content/uploads/2023/01/16-22.jpg)
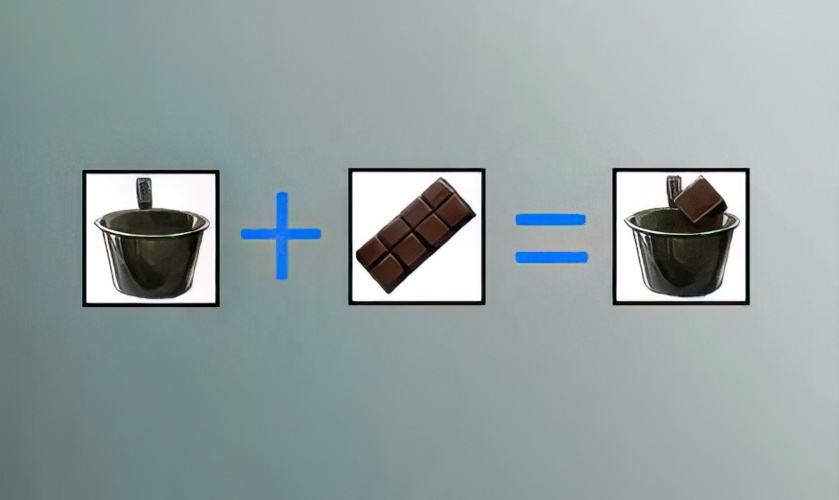
16. Put the chocolate in the milk pan.
![Dream Escape Chapter 7 Walkthrough - Step 17](https://zotuf.com/wp-content/uploads/2023/01/17-22.jpg)
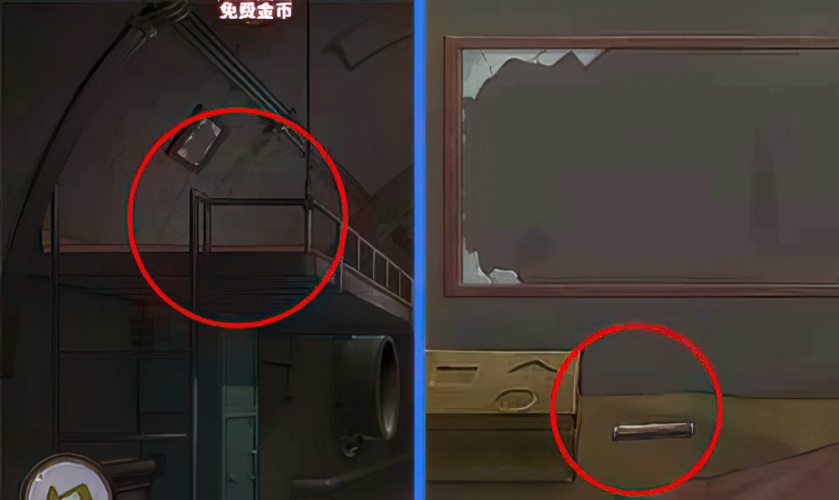
17. Take the guillotine handle on the left bed.
![Dream Escape Chapter 7 Walkthrough - Step 18](https://zotuf.com/wp-content/uploads/2023/01/18-22.jpg)
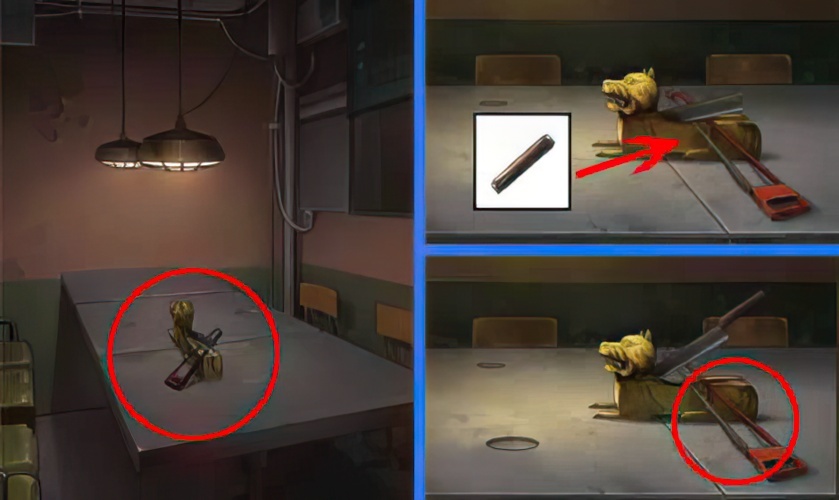
18. Install the guillotine handle on the guillotine on the dining room table and remove the jammed saw.
![Dream Escape Chapter 7 Walkthrough - Step 19](https://zotuf.com/wp-content/uploads/2023/01/19-22.jpg)
19. Return to the submarine crewβs lounge and use a saw to cut off the steel pipe fixing the right bed.
![Dream Escape Chapter 7 Walkthrough - Step 20](https://zotuf.com/wp-content/uploads/2023/01/20-22.jpg)
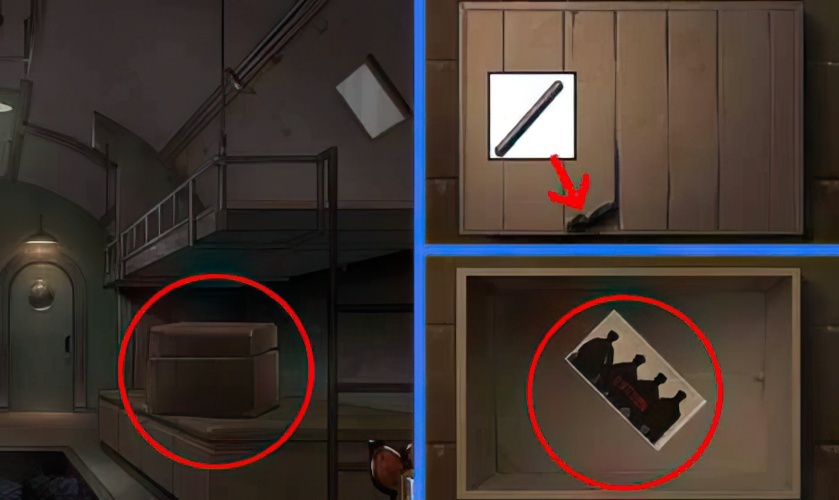
20. Use a steel pipe to pry and open the wooden box on the bed to get the old photo.
![Dream Escape Chapter 7 Walkthrough - Step 21](https://zotuf.com/wp-content/uploads/2023/01/21-22.jpg)
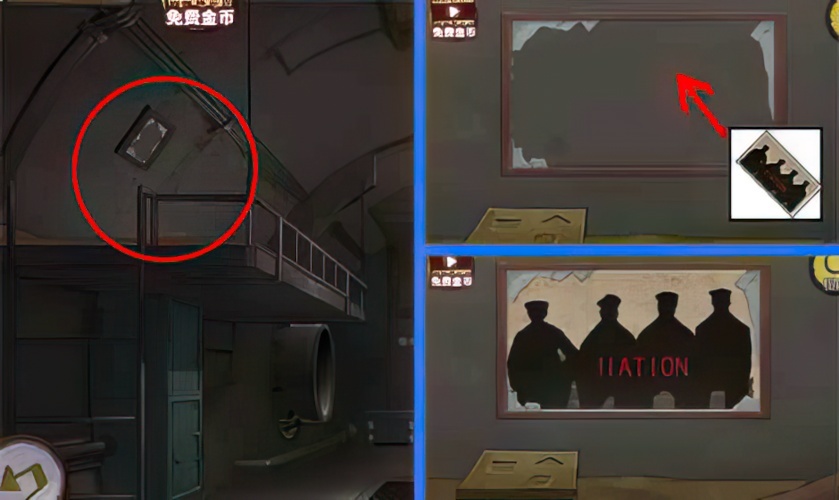
21. Put the photo in the empty frame on the left bed.
![Dream Escape Chapter 7 Walkthrough - Step 22](https://zotuf.com/wp-content/uploads/2023/01/22-22.jpg)
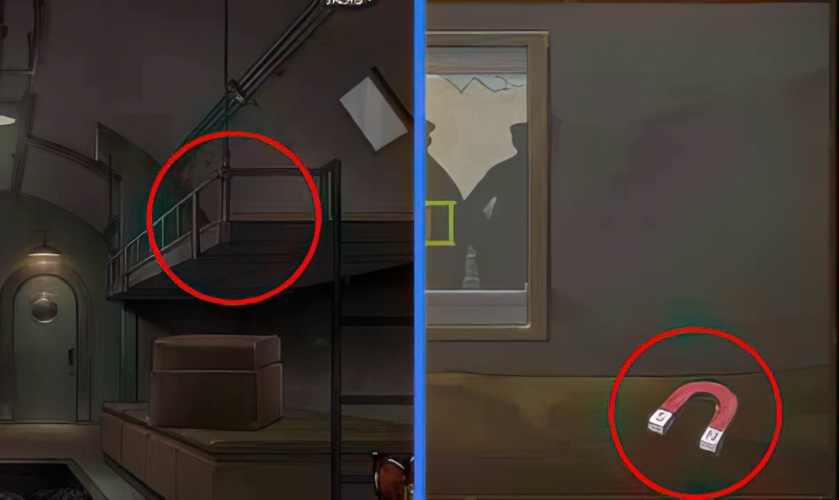
22. Get the magnet on the bed on the right side of the lounge.
![Dream Escape Chapter 7 Walkthrough - Step 23](https://zotuf.com/wp-content/uploads/2023/01/23-23.jpg)
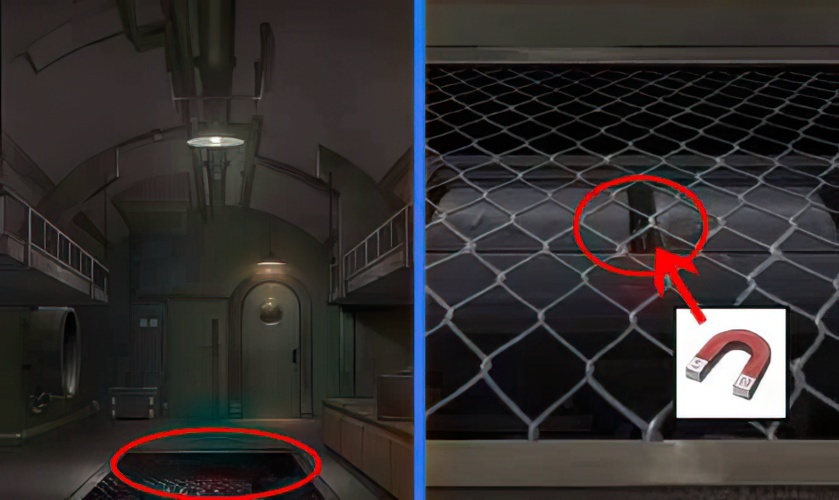
23. Use a magnet to suck up the key under the battery pack railing.
![Dream Escape Chapter 7 Walkthrough - Step 24](https://zotuf.com/wp-content/uploads/2023/01/24-22.jpg)
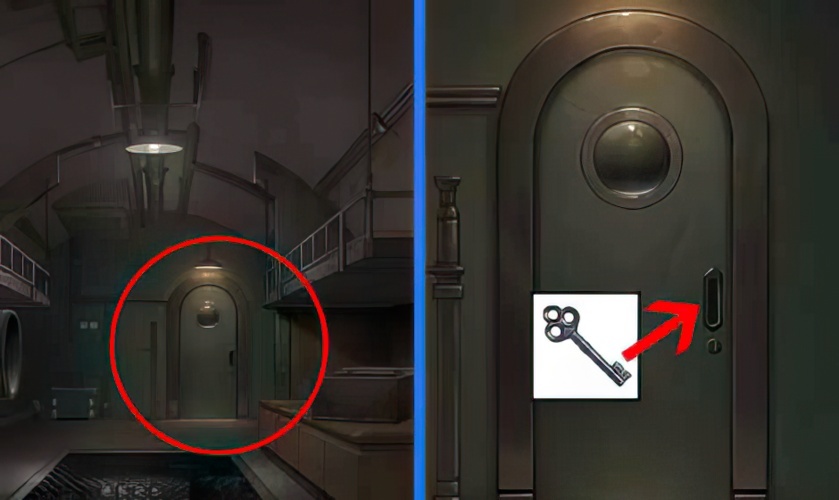
24. Use the key to open the door at the end of the lounge and enter the torpedo cabin.
![Dream Escape Chapter 7 Walkthrough - Step 25](https://zotuf.com/wp-content/uploads/2023/01/25-23.jpg)
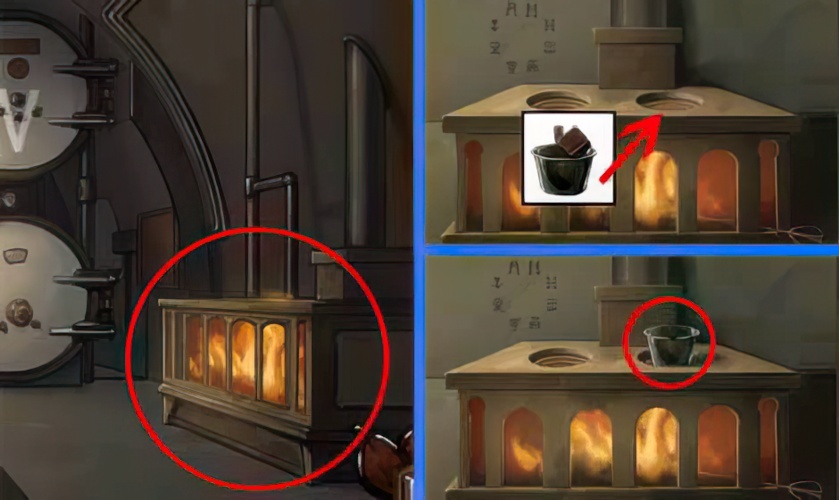
25. Place the pan with chocolate on the stove to get the melted chocolate.
![Dream Escape Chapter 7 Walkthrough - Step 26](https://zotuf.com/wp-content/uploads/2023/01/26-22.jpg)
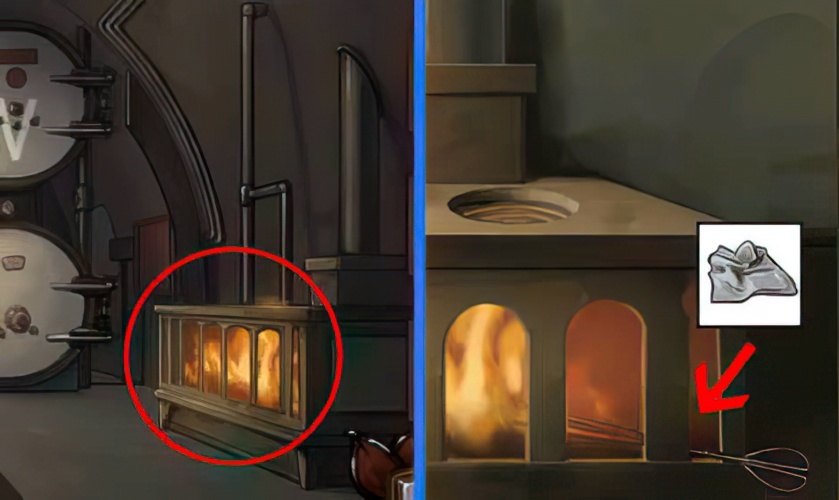
26. Wrap the iron tongs with a towel and clamp half of the tongs out of the stove.
![Dream Escape Chapter 7 Walkthrough - Step 27](https://zotuf.com/wp-content/uploads/2023/01/27-21.jpg)
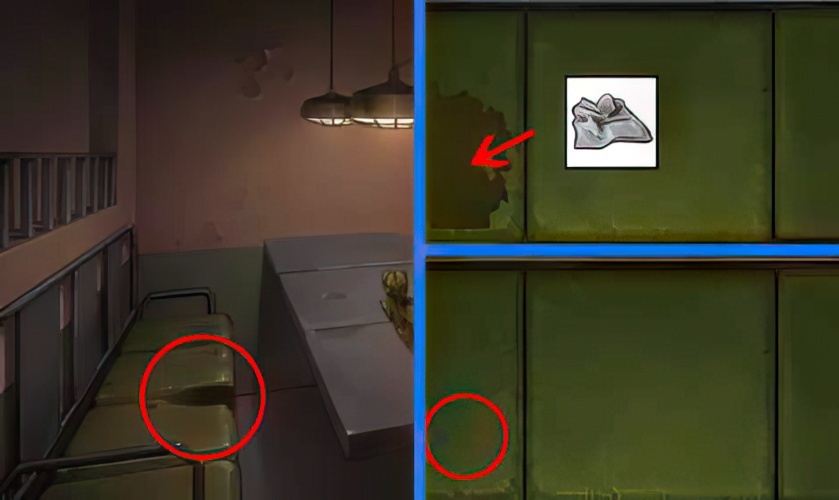
27. Use a towel to clean the coffee stains on the bench.
![Dream Escape Chapter 7 Walkthrough - Step 28](https://zotuf.com/wp-content/uploads/2023/01/28-23.jpg)
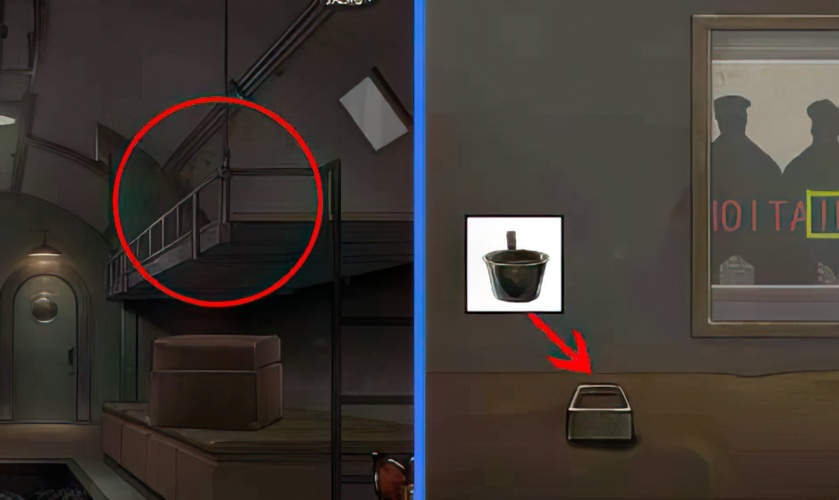
28. Pour the melted chocolate into the bowl on the bed on the right, and get a square cube.
![Dream Escape Chapter 7 Walkthrough - Step 29](https://zotuf.com/wp-content/uploads/2023/01/29-21.jpg)
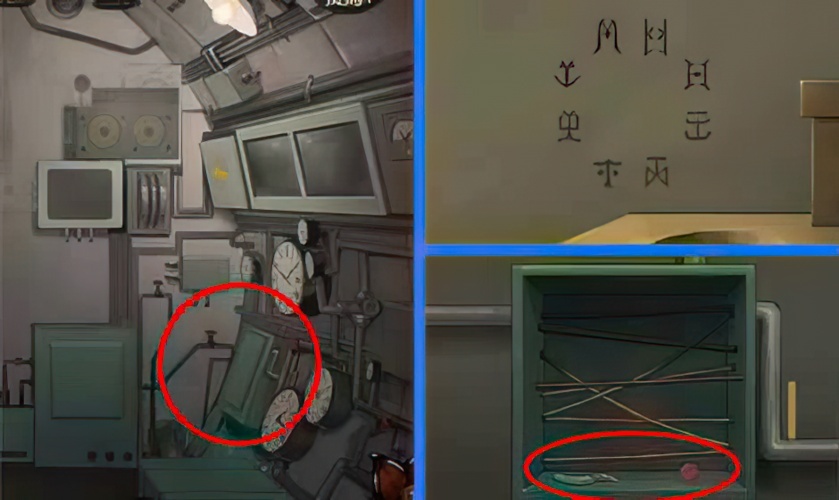
29. According to the pattern on the stove wall, open the box under the light bulb and get the round square and half of the pliers 2.
![Dream Escape Chapter 7 Walkthrough - Step 30](https://zotuf.com/wp-content/uploads/2023/01/30-21.jpg)
30. Open the bench and get the triangle square.
![Dream Escape Chapter 7 Walkthrough - Step 31](https://zotuf.com/wp-content/uploads/2023/01/31-21.jpg)
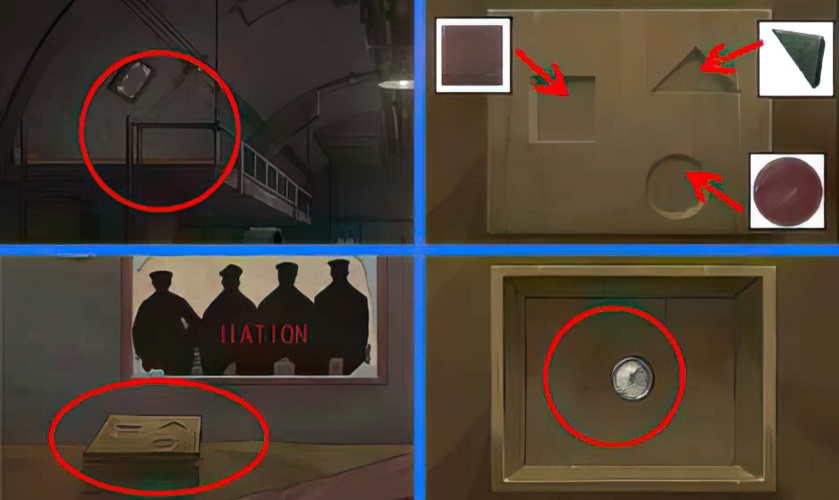
31. Place three shapes of squares on the box on the left bed and get the coin.
![Dream Escape Chapter 7 Walkthrough - Step 32](https://zotuf.com/wp-content/uploads/2023/01/32-22.jpg)
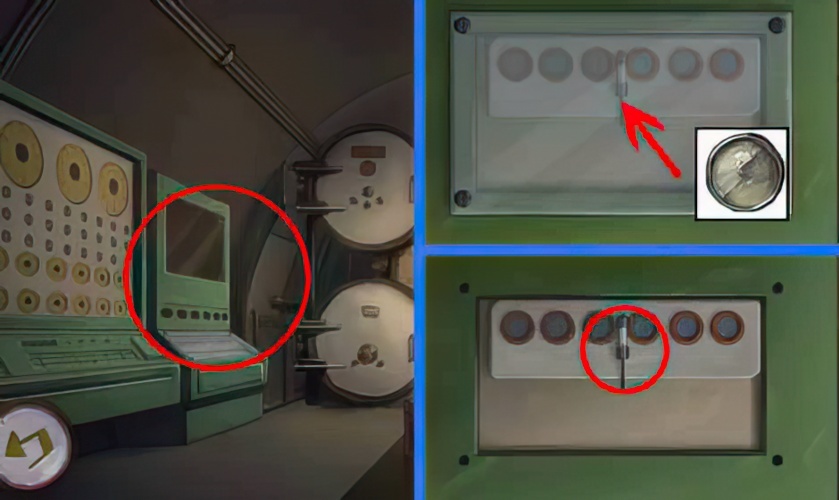
32. Use a coin to unscrew the device on the wall of the torpedo cabin to obtain the resistance wire.
![Dream Escape Chapter 7 Walkthrough - Step 33](https://zotuf.com/wp-content/uploads/2023/01/33-19.jpg)
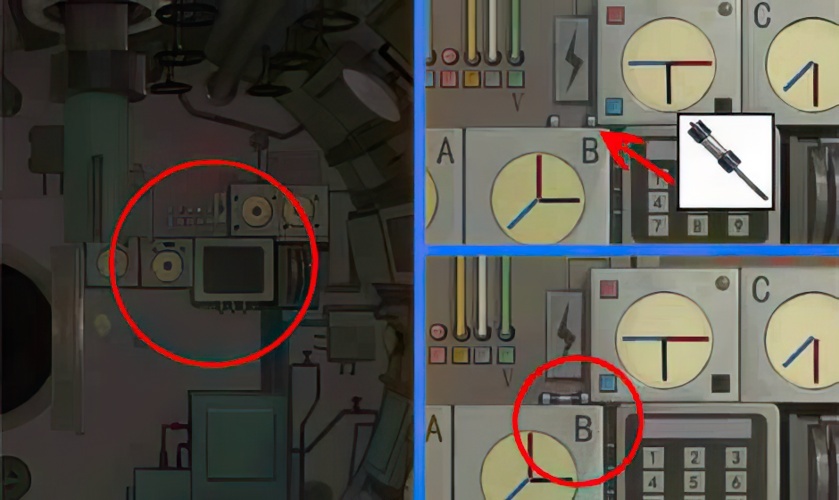
33. Install the resistance wire above the dial.
![Dream Escape Chapter 7 Walkthrough - Step 34](https://zotuf.com/wp-content/uploads/2023/01/34-20.jpg)
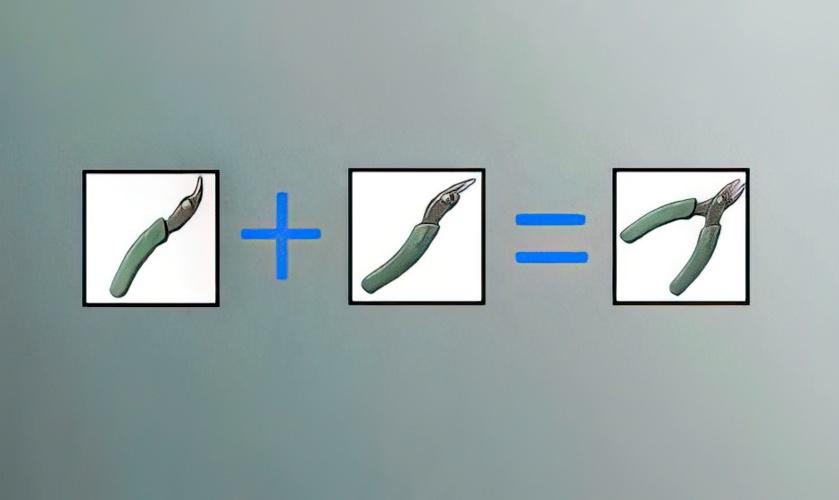
34. Assemble two halves of pliers together.
![Dream Escape Chapter 7 Walkthrough - Step 35](https://zotuf.com/wp-content/uploads/2023/01/35-20.jpg)
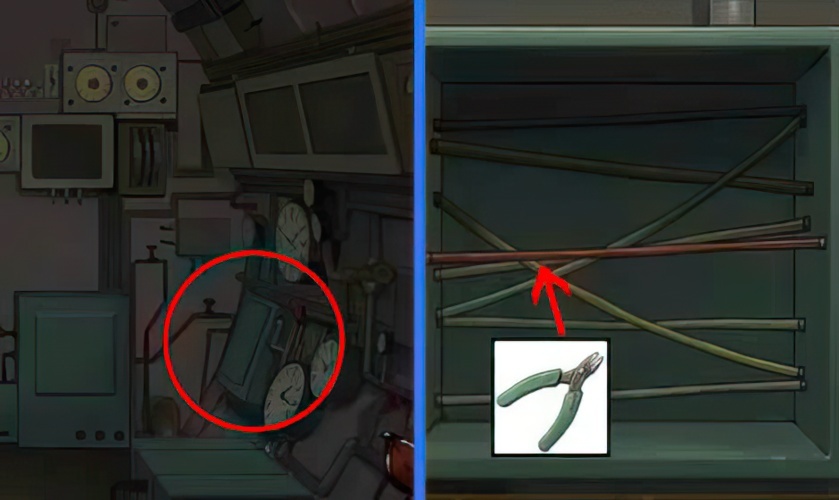
35. Use pliers to cut the wire under the bulb and get the red wire.
![Dream Escape Chapter 7 Walkthrough - Step 36](https://zotuf.com/wp-content/uploads/2023/01/36-19.jpg)
36. Install the red wire above the dial to light up the bulb below the wire.
![Dream Escape Chapter 7 Walkthrough - Step 37](https://zotuf.com/wp-content/uploads/2023/01/37-17.jpg)
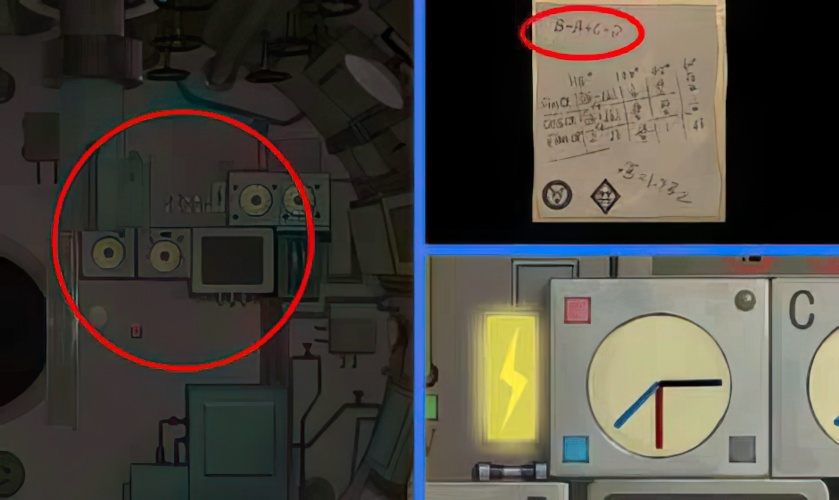
37. Turn the pointer on the dial to the correct position.
![Dream Escape Chapter 7 Walkthrough - Step 38](https://zotuf.com/wp-content/uploads/2023/01/38-15.jpg)
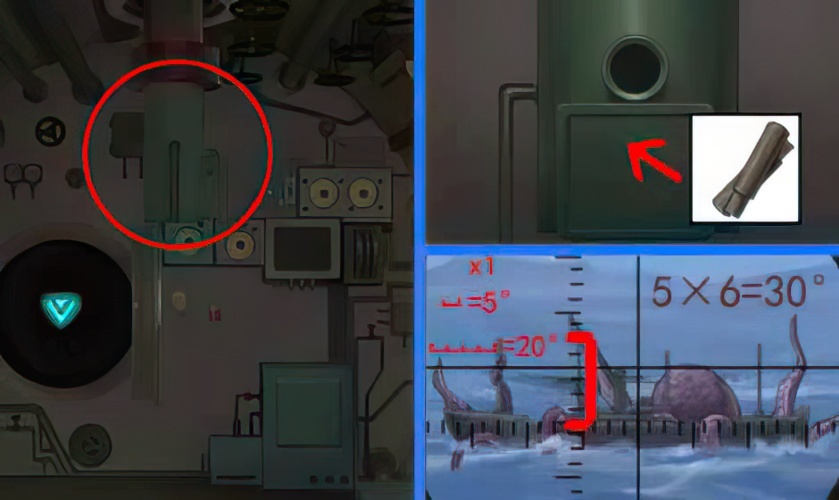
38. Install the handle of the periscope on the periscope and check the angle between the octopus and the submarine.
![Dream Escape Chapter 7 Walkthrough - Step 39](https://zotuf.com/wp-content/uploads/2023/01/39-15.jpg)
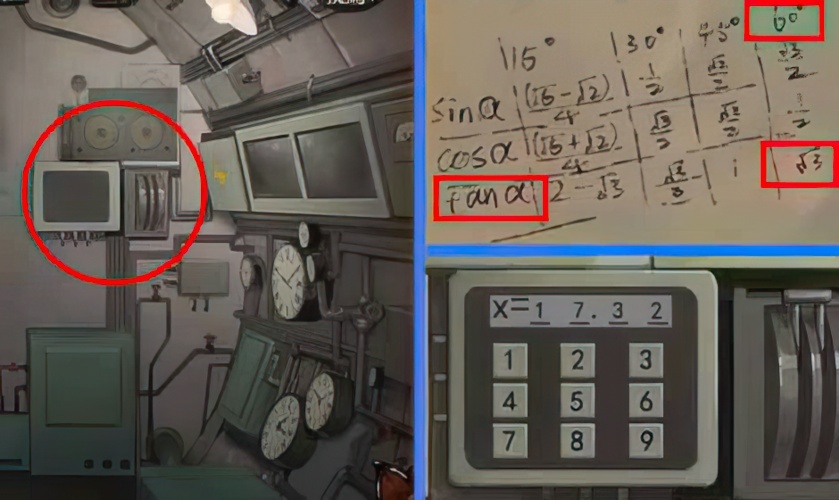
39. Combine the angle in the periscope, the number on the tag and the scratch paper, calculate the distance of 17.32, and pull down the handle.
![Dream Escape Chapter 7 Walkthrough - Step 40](https://zotuf.com/wp-content/uploads/2023/01/40-14.jpg)
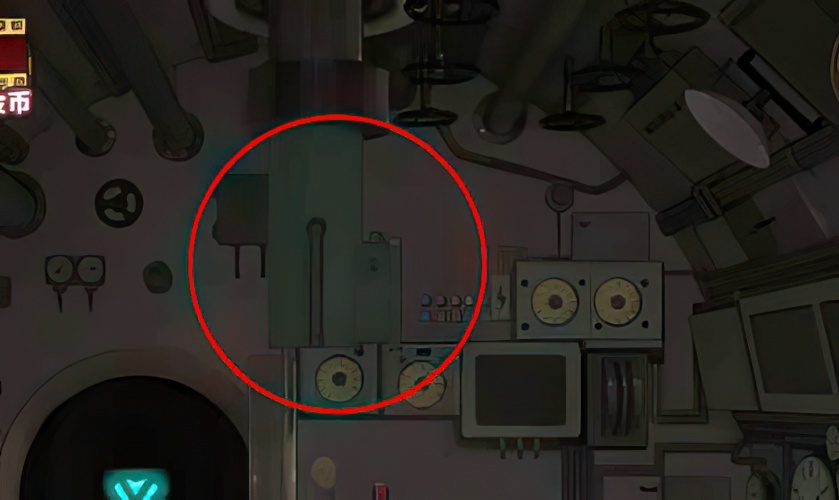
40. Check the periscope.
![Dream Escape Chapter 7 Walkthrough - Step 41](https://zotuf.com/wp-content/uploads/2023/01/41-13.jpg)
41. Picked up a note in the submarine’s lounge.
![Dream Escape Chapter 7 Walkthrough - Step 42](https://zotuf.com/wp-content/uploads/2023/01/42-13.jpg)
42. According to the clues on the note, open the note of the torpedo cabin.
![Dream Escape Chapter 7 Walkthrough - Step 43](https://zotuf.com/wp-content/uploads/2023/01/43-13.jpg)
43. Click the torpedo cabin lid to escape the submarine.
![Dream Escape Chapter 7 Walkthrough - Step 44](https://zotuf.com/wp-content/uploads/2023/01/44-13.jpg)
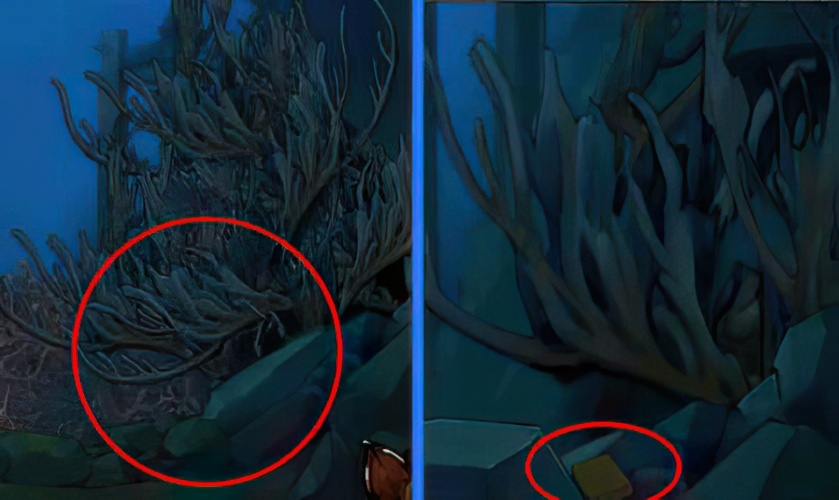
44. At the mouth of the coral group, get a sponge.
![Dream Escape Chapter 7 Walkthrough - Step 45](https://zotuf.com/wp-content/uploads/2023/01/45-12.jpg)
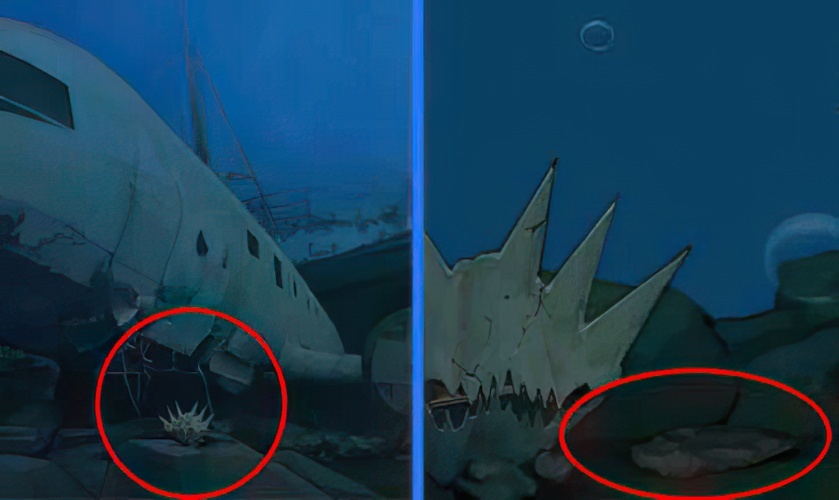
45. Get sharp stones next to mutated shells.
![Dream Escape Chapter 7 Walkthrough - Step 46](https://zotuf.com/wp-content/uploads/2023/01/46-12.jpg)
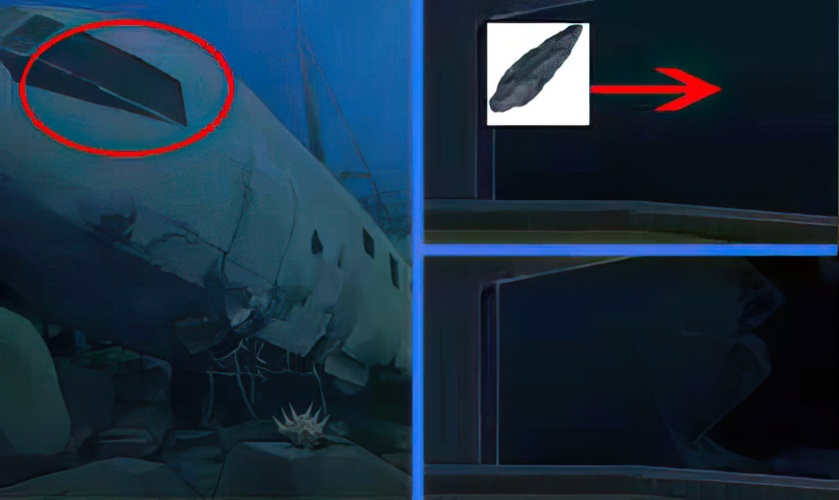
46. Break the glass of the airplane’s front window with a stone.
![Dream Escape Chapter 7 Walkthrough - Step 47](https://zotuf.com/wp-content/uploads/2023/01/47-12.jpg)
47. Take away the searchlight from the plane.
![Dream Escape Chapter 7 Walkthrough - Step 48](https://zotuf.com/wp-content/uploads/2023/01/48-12.jpg)
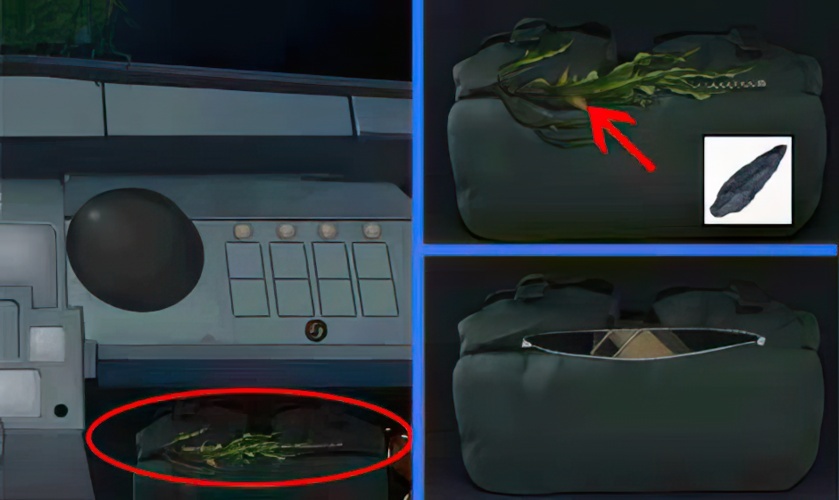
48. Use a sharp stone to remove the seaweed from the parachute bag.
![Dream Escape Chapter 7 Walkthrough - Step 49](https://zotuf.com/wp-content/uploads/2023/01/49-12.jpg)
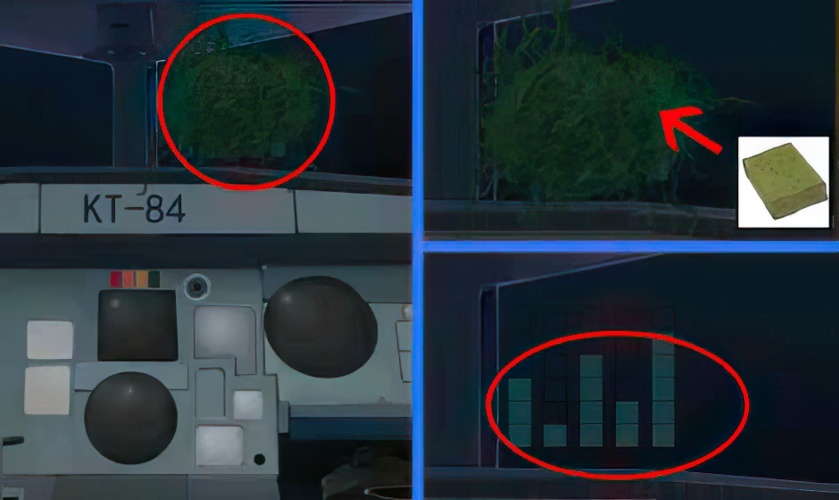
49. Use a sponge to clean the seaweed on the glass window.
![Dream Escape Chapter 7 Walkthrough - Step 50](https://zotuf.com/wp-content/uploads/2023/01/50-13.jpg)
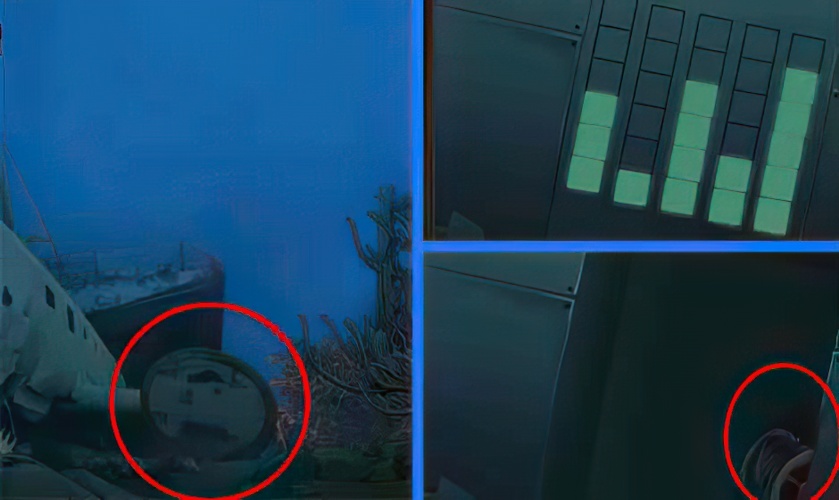
50. According to the pattern 31425 on the glass window, open the auxiliary fuel tank and get the winch without handle.
![Dream Escape Chapter 7 Walkthrough - Step 51](https://zotuf.com/wp-content/uploads/2023/01/51-12.jpg)
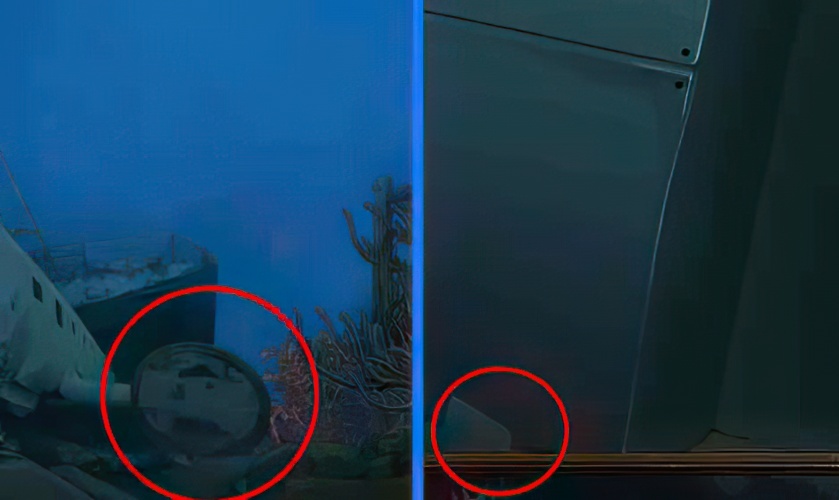
51. Picked up the iron piece next to the auxiliary fuel tank.
![Dream Escape Chapter 7 Walkthrough - Step 52](https://zotuf.com/wp-content/uploads/2023/01/52-12.jpg)
52. Use the iron piece to remove the screws from the handle in the cabin to get the handle.
![Dream Escape Chapter 7 Walkthrough - Step 53](https://zotuf.com/wp-content/uploads/2023/01/53-12.jpg)
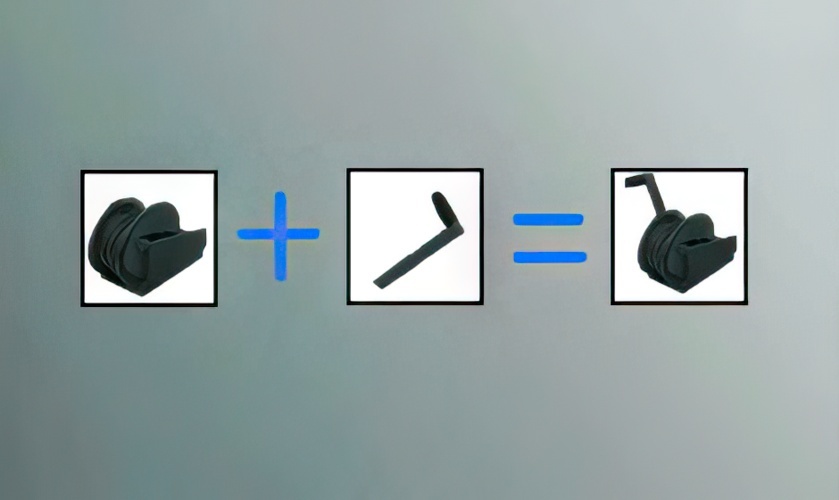
53. Combine the winch machine and the handle to get a complete winch machine.
![Dream Escape Chapter 7 Walkthrough - Step 54](https://zotuf.com/wp-content/uploads/2023/01/54-12.jpg)
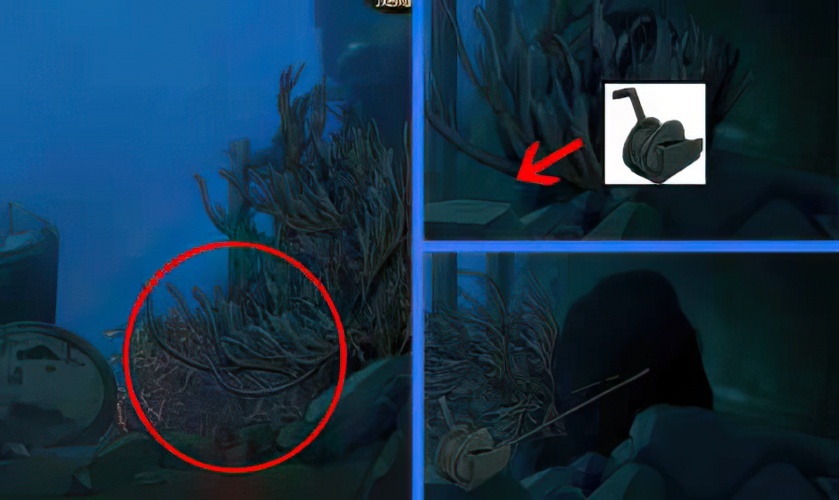
54. Use a winch on the coral to break the coral blocking the cave entrance and enter the cave.
![Dream Escape Chapter 7 Walkthrough - Step 55](https://zotuf.com/wp-content/uploads/2023/01/55-12.jpg)
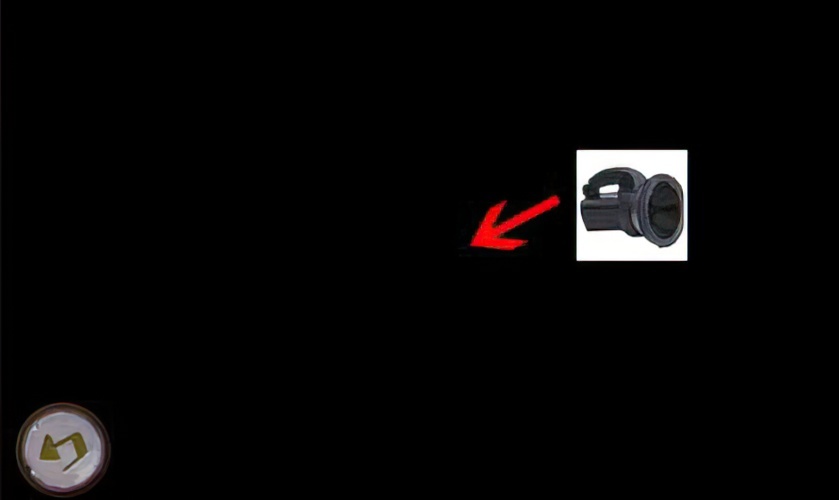
55. Use searchlights in the cave to illuminate the scene.
![Dream Escape Chapter 7 Walkthrough - Step 56](https://zotuf.com/wp-content/uploads/2023/01/56-12.jpg)
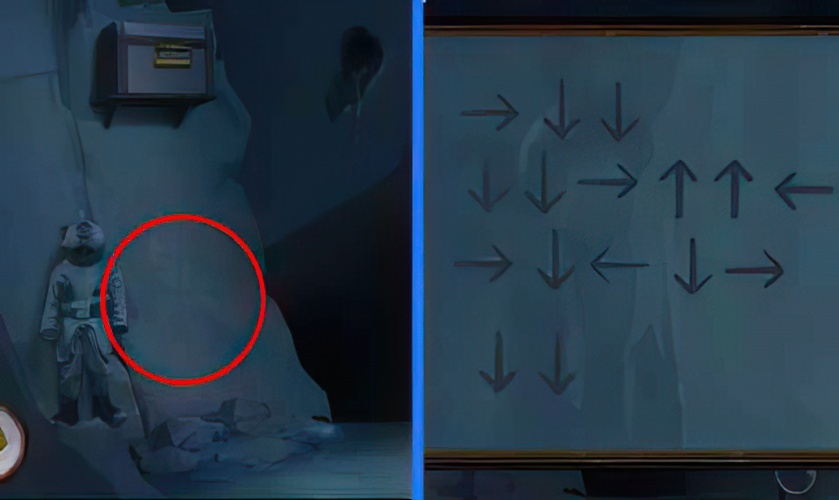
56. Check the arrow symbol on the wall of the submarine cave.
![Dream Escape Chapter 7 Walkthrough - Step 57](https://zotuf.com/wp-content/uploads/2023/01/57-12.jpg)
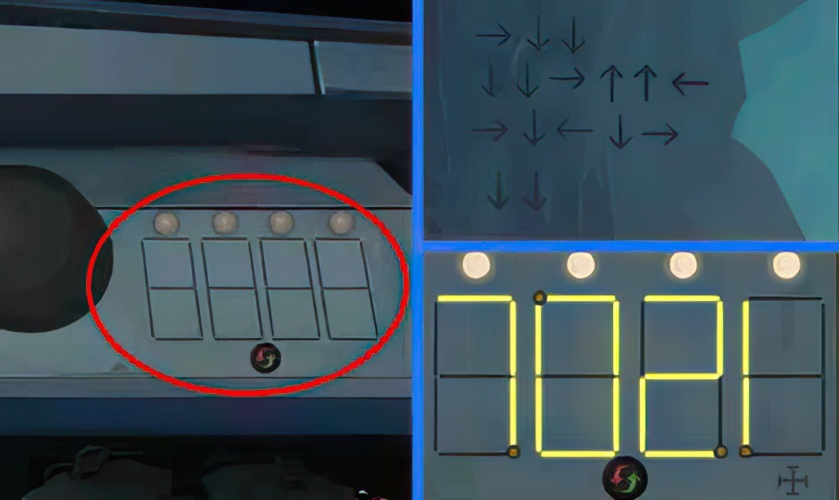
57. Follow the arrow symbols in the cabin to restore the numbers on the dashboard.
![Dream Escape Chapter 7 Walkthrough - Step 58](https://zotuf.com/wp-content/uploads/2023/01/58-12.jpg)
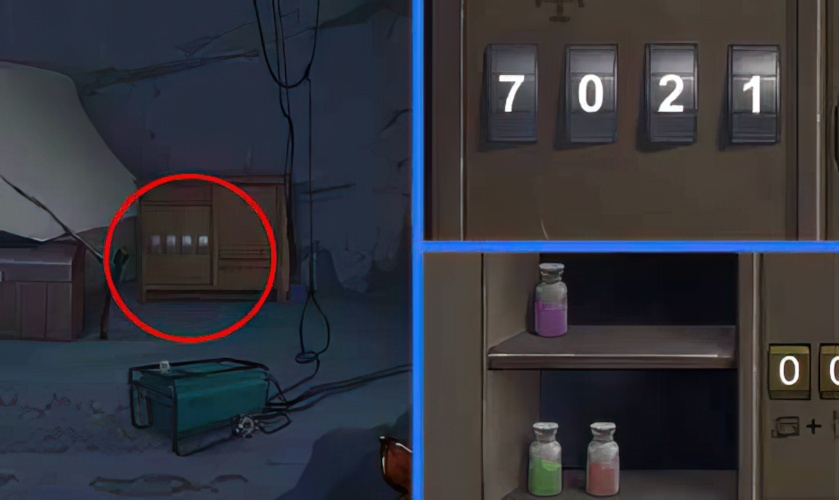
58. Enter the number 7021 on the dashboard on the left cabinet of the camp cabinet, and get three bottles of potions.
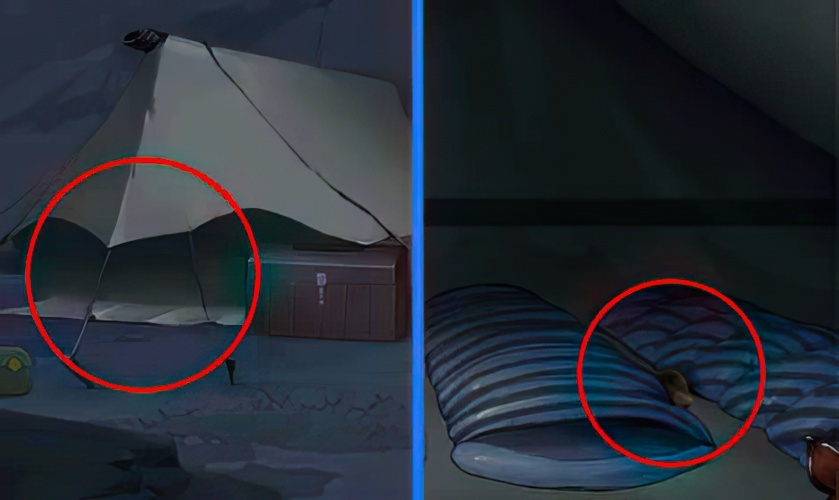
![Dream Escape Chapter 7 Walkthrough - Step 59](https://zotuf.com/wp-content/uploads/2023/01/59-12.jpg)
59. The bomb shell is picked up next to the sleeping bag in the camp.
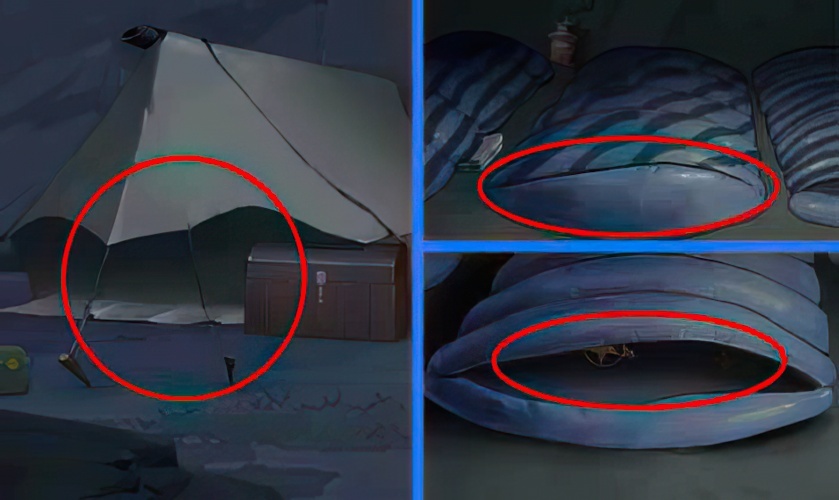
![Dream Escape Chapter 7 Walkthrough - Step 60](https://zotuf.com/wp-content/uploads/2023/01/60-12.jpg)
60. Unzip the sleeping bag in the camp and find the broken key.
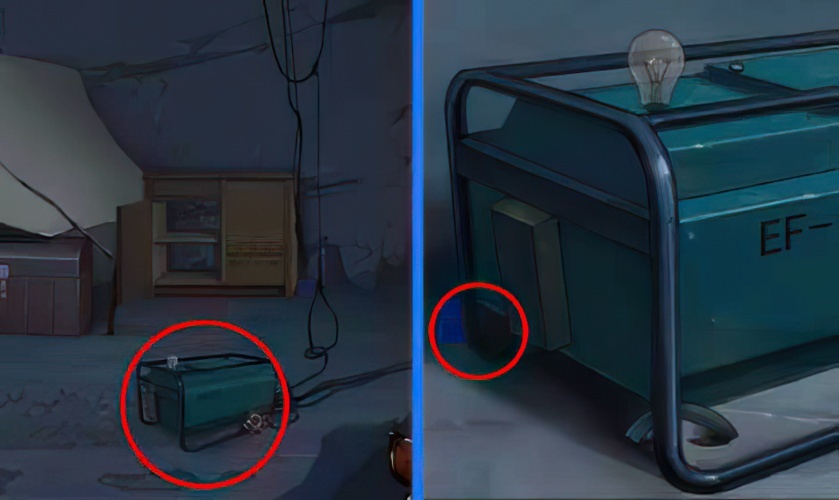
![Dream Escape Chapter 7 Walkthrough - Step 61](https://zotuf.com/wp-content/uploads/2023/01/61-12.jpg)
61. Check the dark blue cube next to the camp generator.
![Dream Escape Chapter 7 Walkthrough - Step 62](https://zotuf.com/wp-content/uploads/2023/01/62-12.jpg)
62. Turn on the printer on the table in the test area and get the orange square.
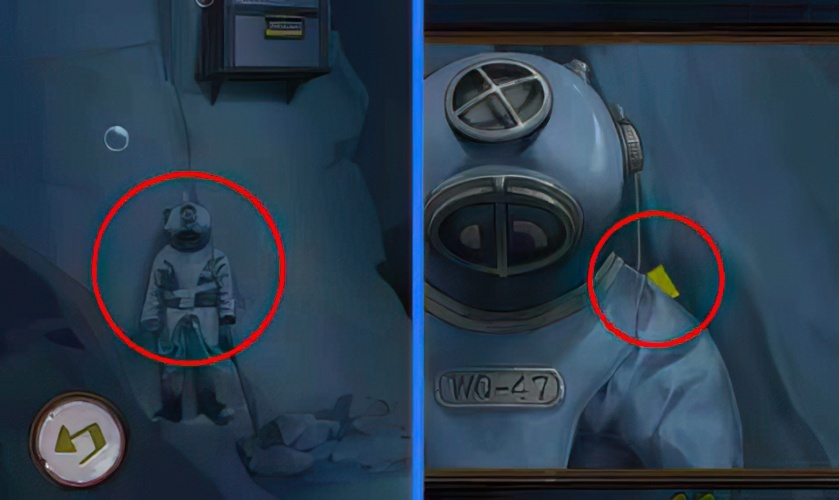
![Dream Escape Chapter 7 Walkthrough - Step 63](https://zotuf.com/wp-content/uploads/2023/01/63-12.jpg)
63. Find the yellow square on the back of the wetsuit.
![Dream Escape Chapter 7 Walkthrough - Step 64](https://zotuf.com/wp-content/uploads/2023/01/64-13.jpg)
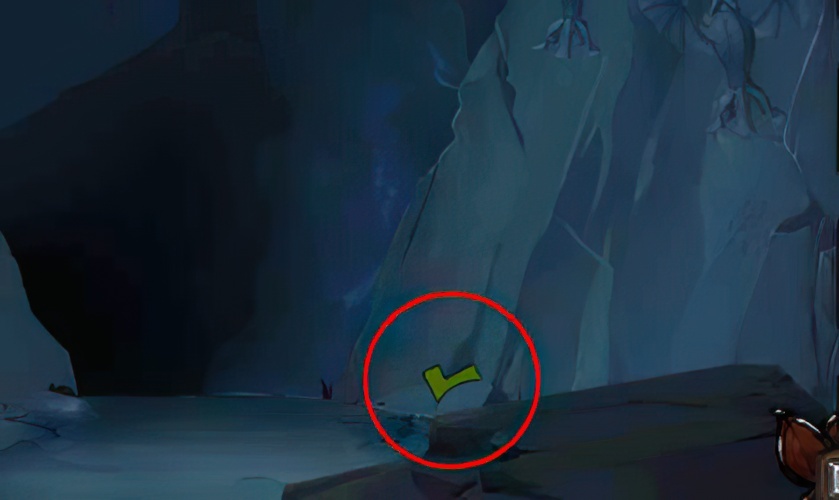
64. Find the green cube in the underwater cave scene.
![Dream Escape Chapter 7 Walkthrough - Step 65](https://zotuf.com/wp-content/uploads/2023/01/65-13.jpg)
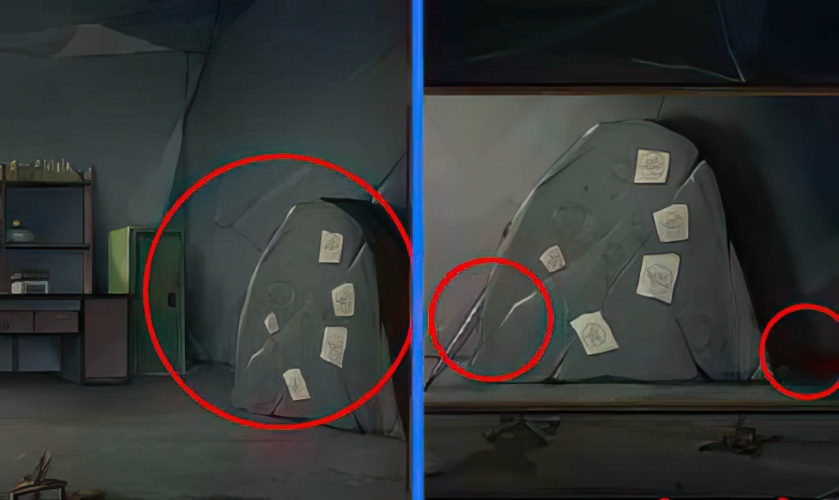
65. Pick up the red cube and umbrella next to the doorway.
![Dream Escape Chapter 7 Walkthrough - Step 66](https://zotuf.com/wp-content/uploads/2023/01/66-13.jpg)
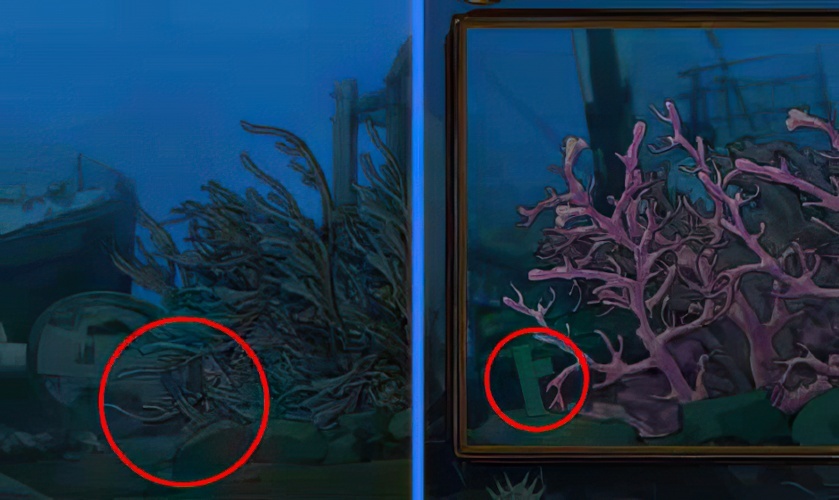
66. Check the block next to the red coral.
![Dream Escape Chapter 7 Walkthrough - Step 67](https://zotuf.com/wp-content/uploads/2023/01/67-12.jpg)
67. Find the blue square behind the reagent cabinet.
![Dream Escape Chapter 7 Walkthrough - Step 68](https://zotuf.com/wp-content/uploads/2023/01/68-12.jpg)
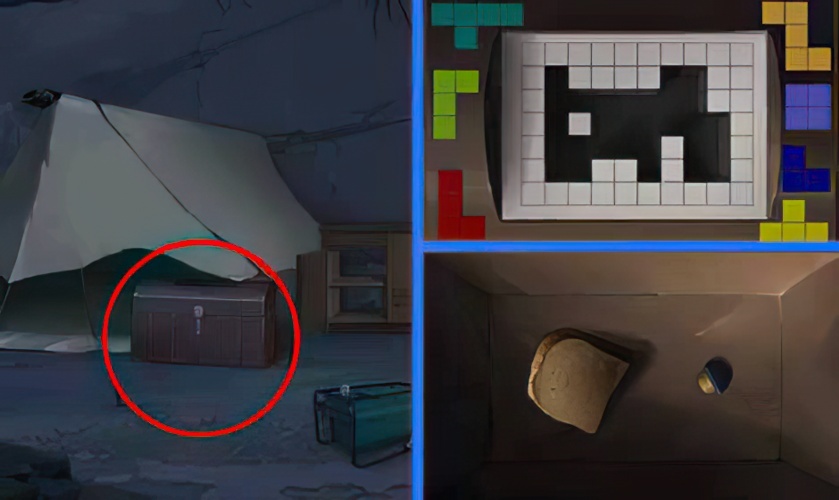
68. Install all the cubes on the box, get the bread in the box and the coil of the generator.
![Dream Escape Chapter 7 Walkthrough - Step 69](https://zotuf.com/wp-content/uploads/2023/01/69-12.jpg)
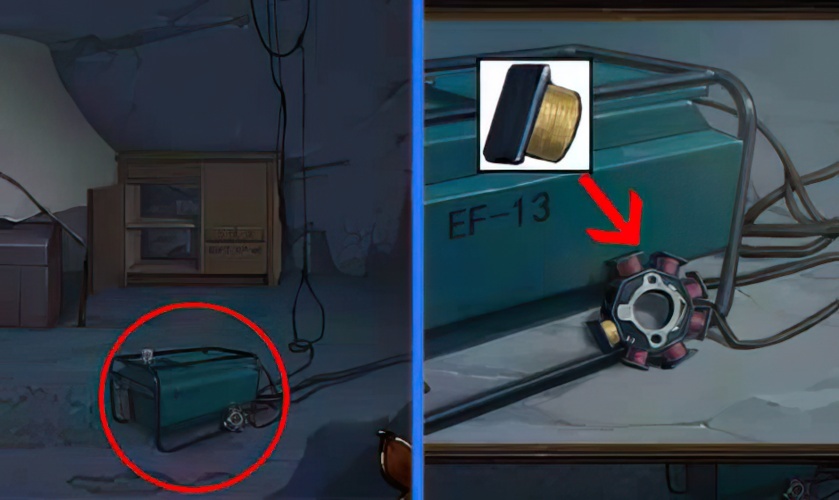
69. Install the coil of the generator on the generator to energize the device.
![Dream Escape Chapter 7 Walkthrough - Step 70](https://zotuf.com/wp-content/uploads/2023/01/70-12.jpg)
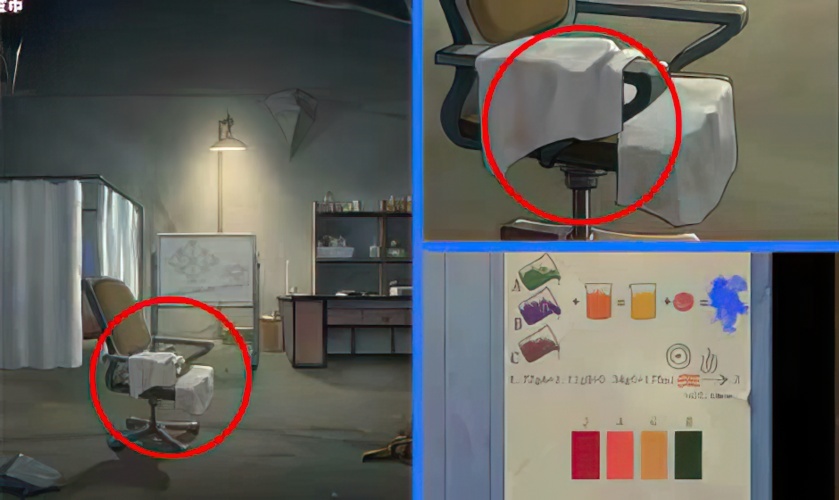
70. Open the lab coat on the stool and check the lab report book below.
![Dream Escape Chapter 7 Walkthrough - Step 71](https://zotuf.com/wp-content/uploads/2023/01/71-12.jpg)
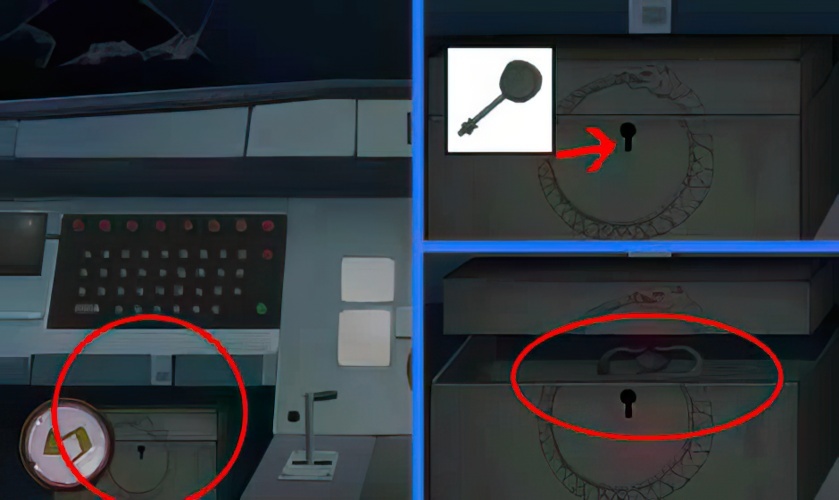
71. Combine the wetsuit, aircraft cabin, generator and balance model to get the code6047, open the cabinet on the right.
![Dream Escape Chapter 7 Walkthrough - Step 72](https://zotuf.com/wp-content/uploads/2023/01/72-12.jpg)
72. Open the box in the aircraft cabin and get the fire sickle in the box.
![Dream Escape Chapter 7 Walkthrough - Step 73](https://zotuf.com/wp-content/uploads/2023/01/73-12.jpg)
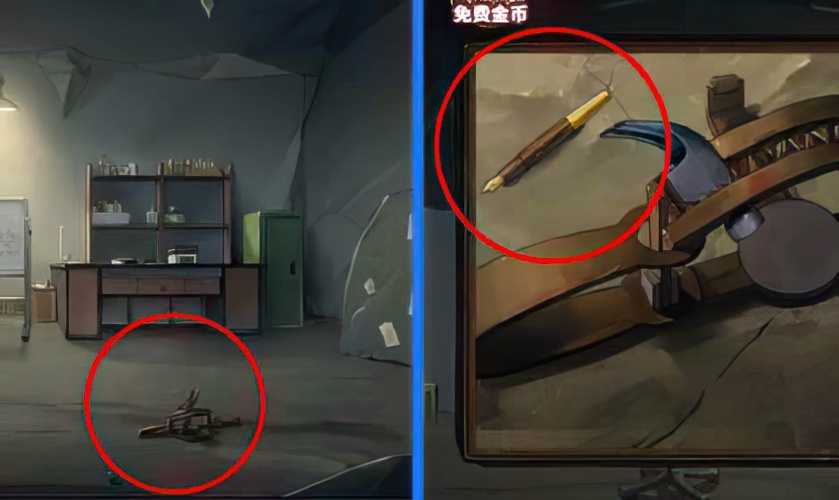
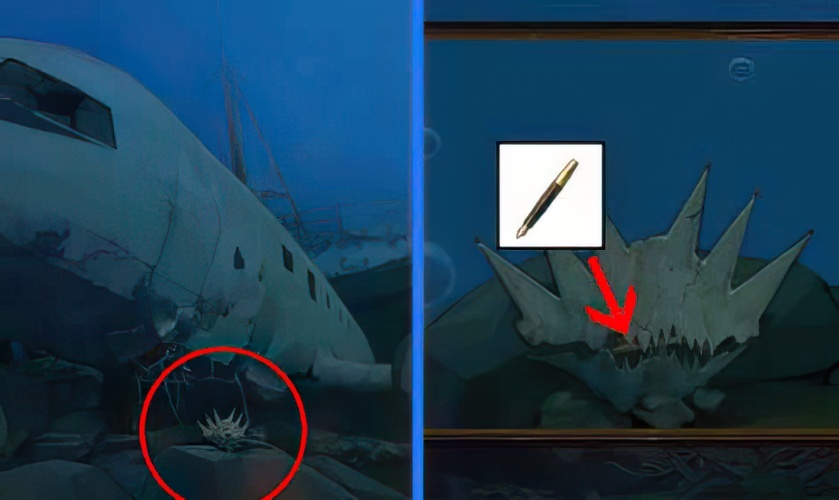
73. Pick up the broken pen beside the beast trap.
![Dream Escape Chapter 7 Walkthrough - Step 74](https://zotuf.com/wp-content/uploads/2023/01/74-12.jpg)
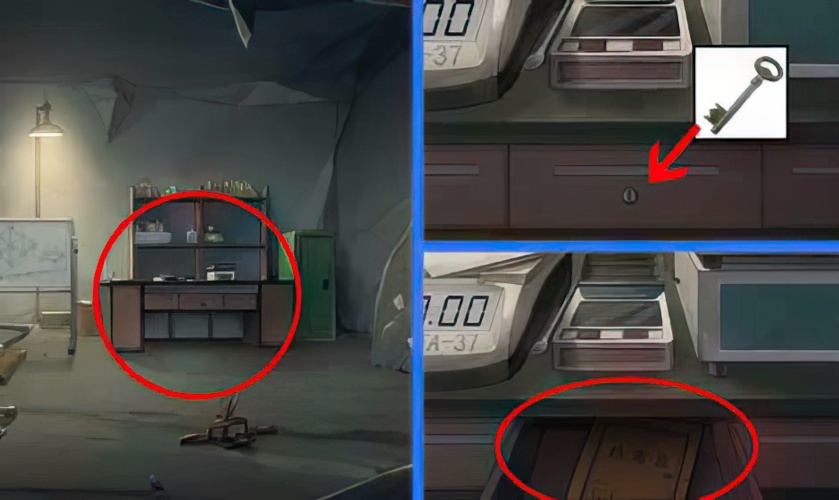
74. Open the shell with a pen to get the key in the shell.
![Dream Escape Chapter 7 Walkthrough - Step 75](https://zotuf.com/wp-content/uploads/2023/01/75-12.jpg)
75. Open the desk drawer and get the portfolio.
![Dream Escape Chapter 7 Walkthrough - Step 76](https://zotuf.com/wp-content/uploads/2023/01/76-12.jpg)
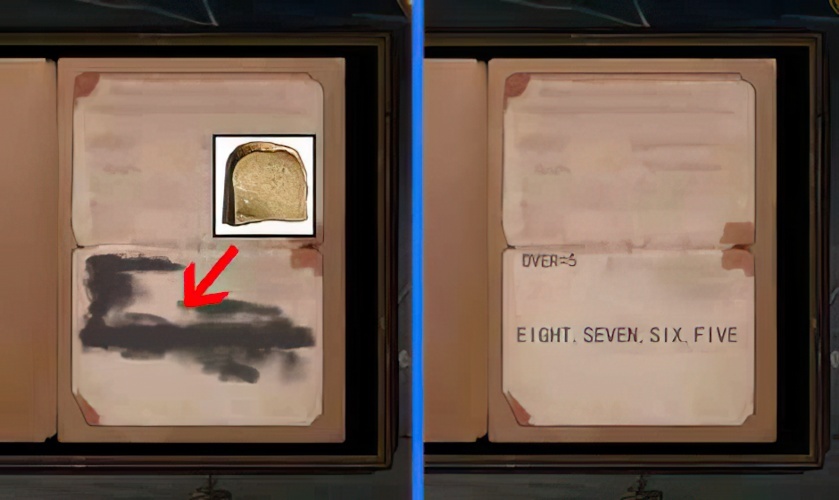
76. Use dry bread to wipe off the charcoal marks on the portfolio to obtain the password clues.
![Dream Escape Chapter 7 Walkthrough - Step 77](https://zotuf.com/wp-content/uploads/2023/01/77-12.jpg)
77. According to the clue 1594 on the portfolio, open the cigarette case in the tent and get half of the statue.
![Dream Escape Chapter 7 Walkthrough - Step 78](https://zotuf.com/wp-content/uploads/2023/01/78-12.jpg)
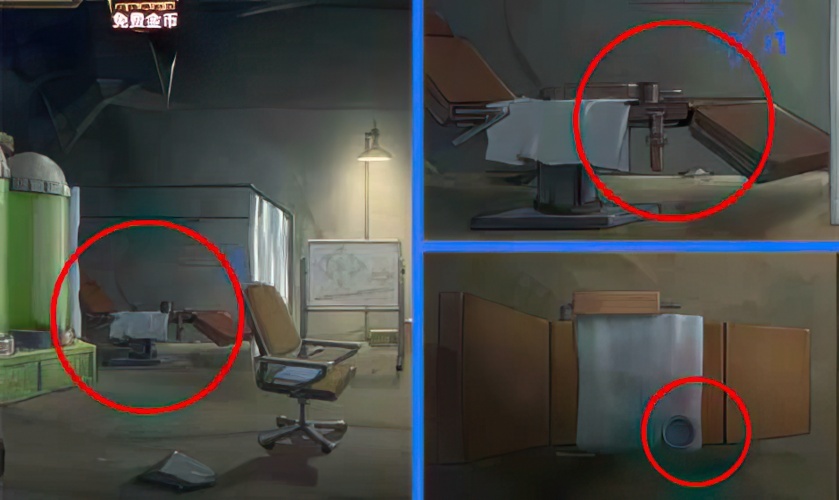
78. Open the curtain and take away the empty jar on the bed.
![Dream Escape Chapter 7 Walkthrough - Step 79](https://zotuf.com/wp-content/uploads/2023/01/79-12.jpg)
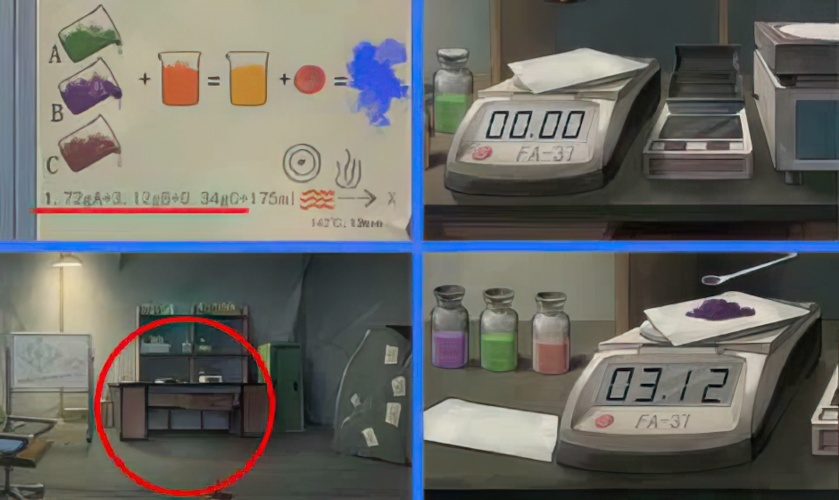
79. Place the three medicines next to the balance, open the lid, and get the spoon next to the balance.
![Dream Escape Chapter 7 Walkthrough - Step 80](https://zotuf.com/wp-content/uploads/2023/01/80-12.jpg)
80. According to the numbers in the experiment report booklet on the stool, weigh the three kinds of medicines ABC 1.72g, 3.12g, 0.34g.
![Dream Escape Chapter 7 Walkthrough - Step 81](https://zotuf.com/wp-content/uploads/2023/01/81-12.jpg)
81. Obtain the gel in the cavity of the sea cave.
![Dream Escape Chapter 7 Walkthrough - Step 82](https://zotuf.com/wp-content/uploads/2023/01/82-12.jpg)
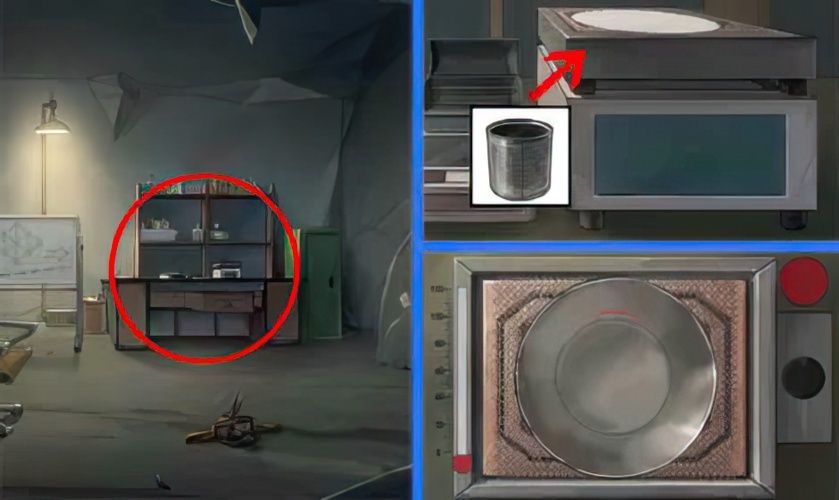
82. Put the empty jar on the small electric stove on the table.
![Dream Escape Chapter 7 Walkthrough - Step 83](https://zotuf.com/wp-content/uploads/2023/01/83-12.jpg)
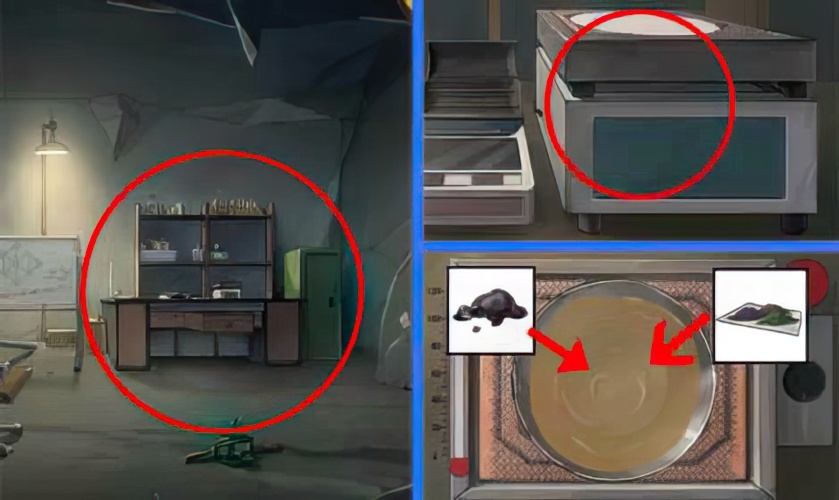
83. Put the gel and the weighed powder into the jar, complete the preparation of the medicine, and obtain the can filled with liquid.
![Dream Escape Chapter 7 Walkthrough - Step 84](https://zotuf.com/wp-content/uploads/2023/01/84-13.jpg)
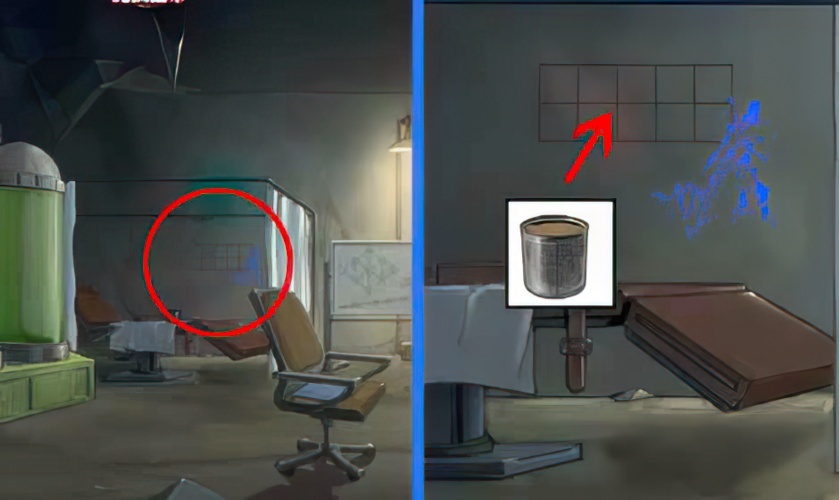
84. Apply the liquid to the red frame on the wall.
![Dream Escape Chapter 7 Walkthrough - Step 85](https://zotuf.com/wp-content/uploads/2023/01/85-13.jpg)
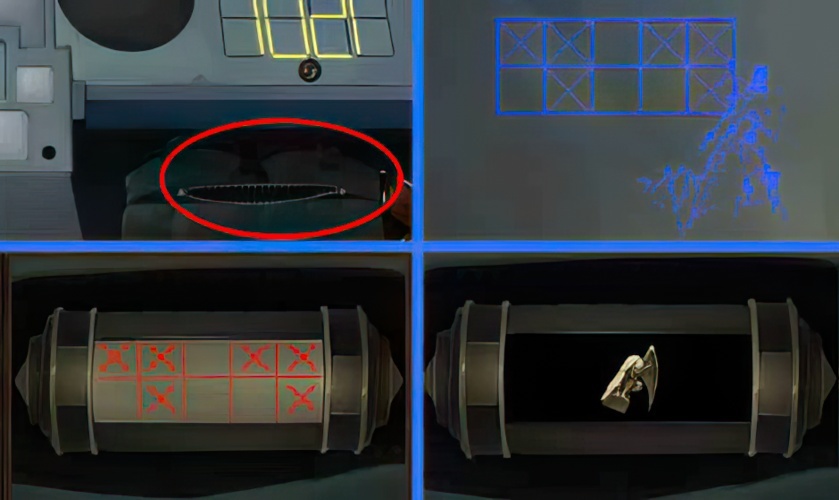
85. Open the cryptex in the bag in the cabin and get half of the statue 2.
![Dream Escape Chapter 7 Walkthrough - Step 86](https://zotuf.com/wp-content/uploads/2023/01/86-12.jpg)
86. Assemble two statues together.
![Dream Escape Chapter 7 Walkthrough - Step 87](https://zotuf.com/wp-content/uploads/2023/01/87-13.jpg)
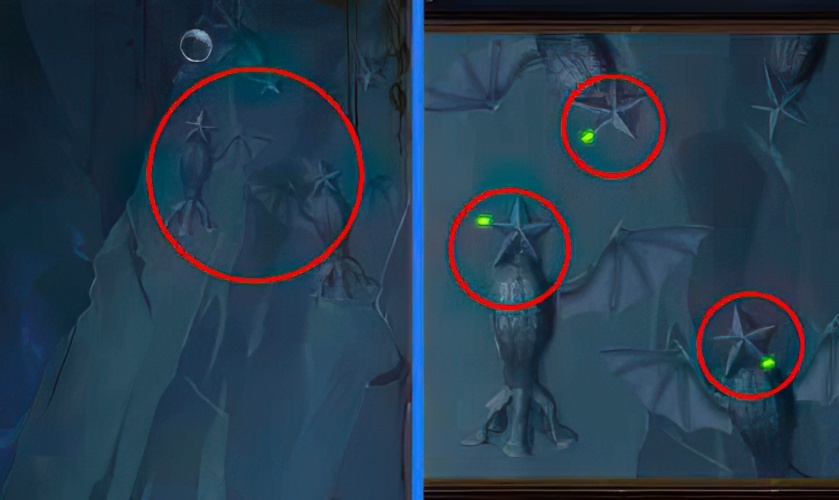
87. View fossils on the wall of an underwater cave.
![Dream Escape Chapter 7 Walkthrough - Step 88](https://zotuf.com/wp-content/uploads/2023/01/88-12.jpg)
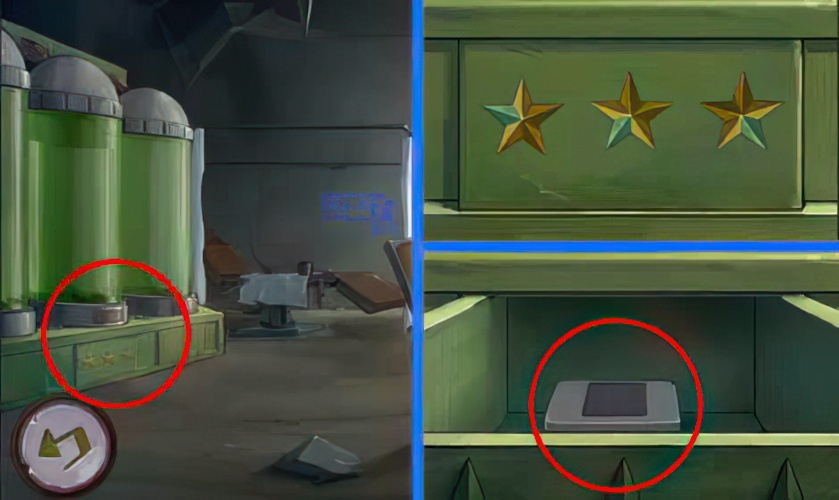
88. Open the drawer below the can with the specimen and get a box.
![Dream Escape Chapter 7 Walkthrough - Step 89](https://zotuf.com/wp-content/uploads/2023/01/89-13.jpg)
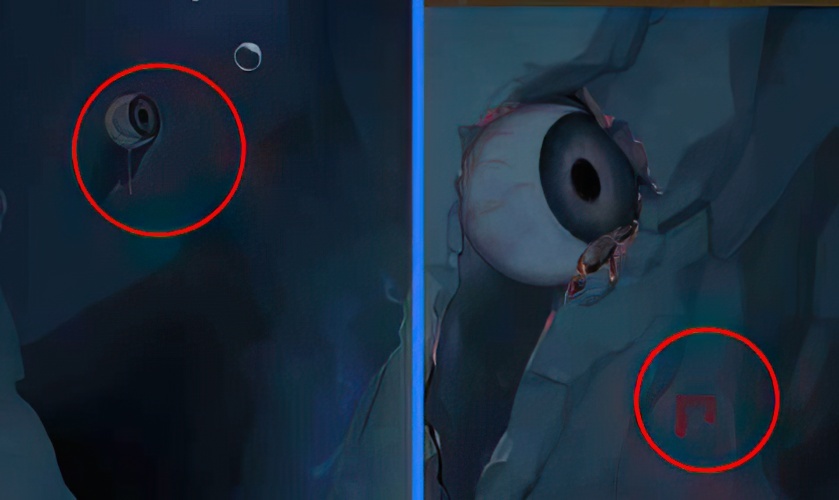
89. Check the position of the eyes in the submarine cave.
![Dream Escape Chapter 7 Walkthrough - Step 90](https://zotuf.com/wp-content/uploads/2023/01/90-12.jpg)
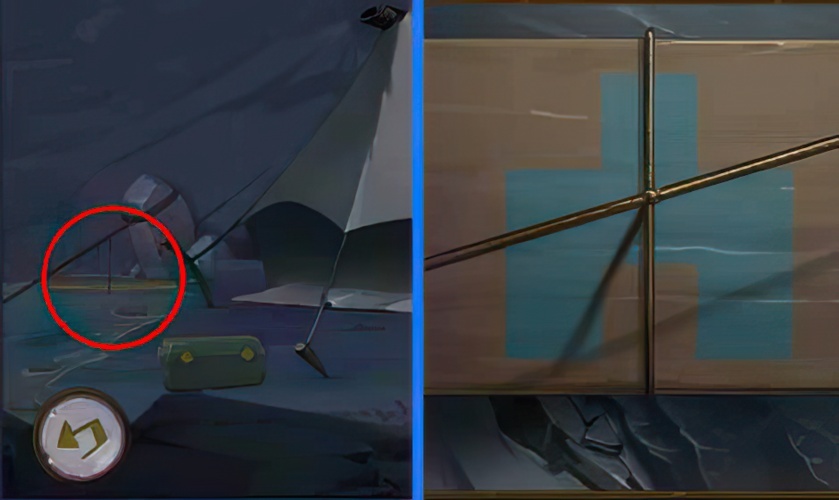
90. Check the planks of the camp.
![Dream Escape Chapter 7 Walkthrough - Step 91](https://zotuf.com/wp-content/uploads/2023/01/91-12.jpg)
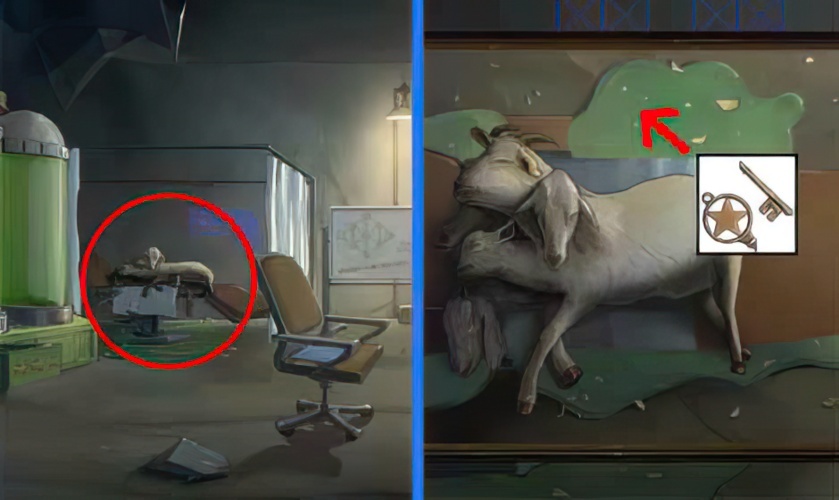
91. Use the mucus under the goat bed to glue the broken key.
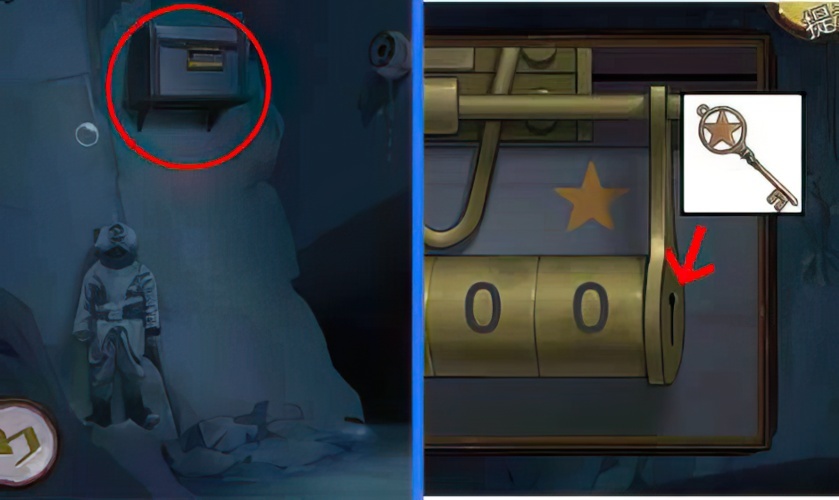
![Dream Escape Chapter 7 Walkthrough - Step 92](https://zotuf.com/wp-content/uploads/2023/01/92-12.jpg)
92. Unlock the box padlock above the sea cave.
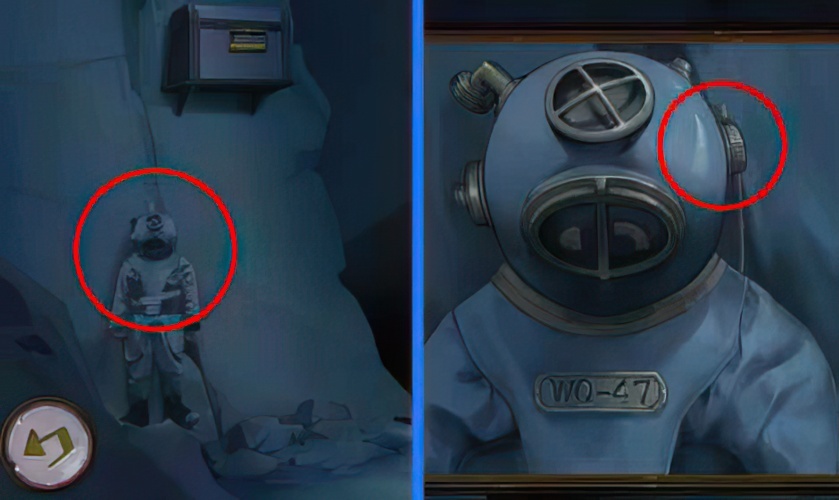
![Dream Escape Chapter 7 Walkthrough - Step 93](https://zotuf.com/wp-content/uploads/2023/01/93-12.jpg)
93. Get the round knob next to the diving suit helmet in the sea cave.
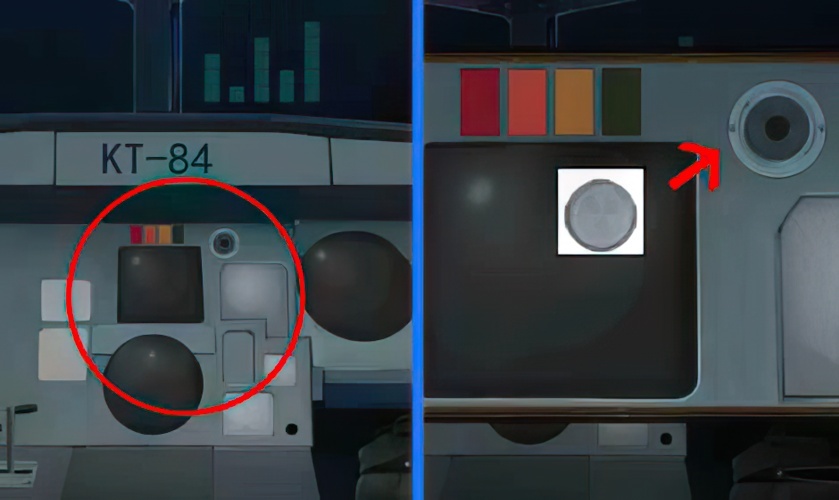
![Dream Escape Chapter 7 Walkthrough - Step 94](https://zotuf.com/wp-content/uploads/2023/01/94-12.jpg)
94. Install the knob on the side of the screen in the cabin to check the order of the flashing lights.
![Dream Escape Chapter 7 Walkthrough - Step 95](https://zotuf.com/wp-content/uploads/2023/01/95-12.jpg)
95. Combine the colored lights and the experiment report book, get the password 6824, and open the box in the sea cave.
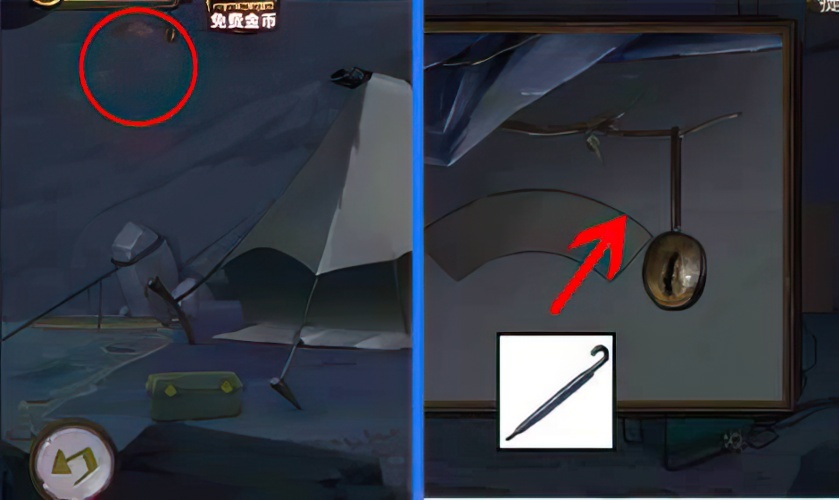
![Dream Escape Chapter 7 Walkthrough - Step 96](https://zotuf.com/wp-content/uploads/2023/01/96-12.jpg)
96. Use an umbrella to remove the bead necklace hanging from the ceiling of the cave in the camp.
![Dream Escape Chapter 7 Walkthrough - Step 97](https://zotuf.com/wp-content/uploads/2023/01/97-12.jpg)
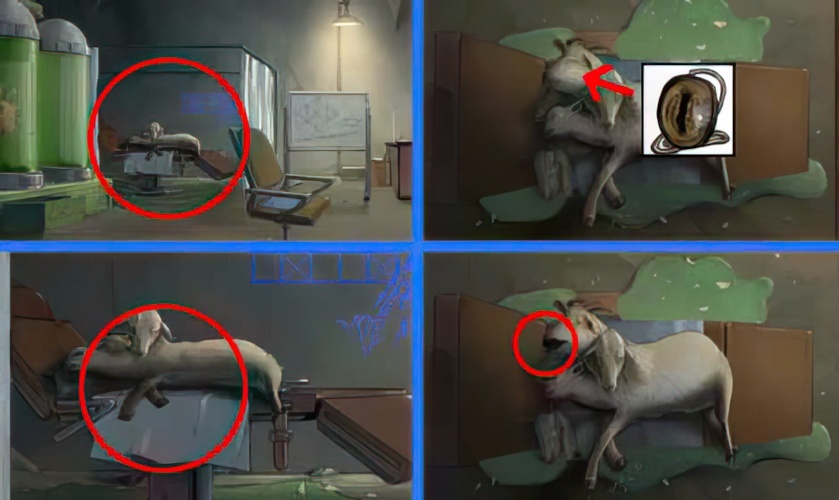
97. Install the beads in the eye sockets of the sheep on the hospital bed to obtain the ring fragment.
![Dream Escape Chapter 7 Walkthrough - Step 98](https://zotuf.com/wp-content/uploads/2023/01/98-13.jpg)
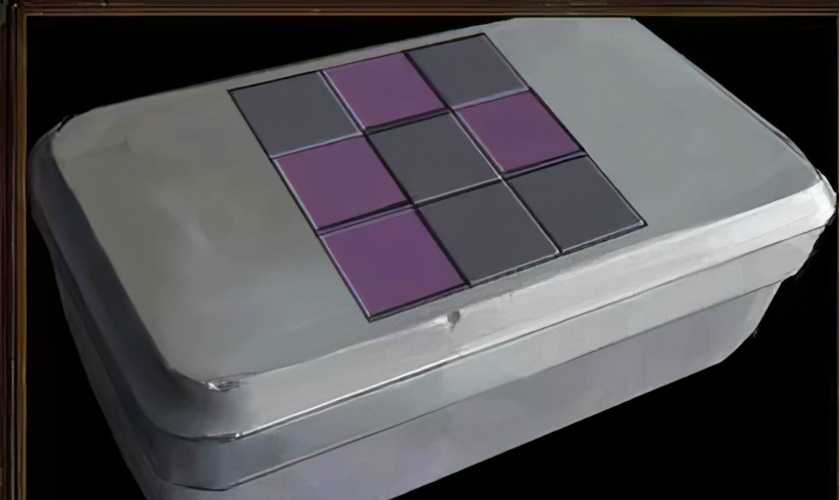
98. Open the lunch box and find the ring fragment.
![Dream Escape Chapter 7 Walkthrough - Step 99](https://zotuf.com/wp-content/uploads/2023/01/99-12.jpg)
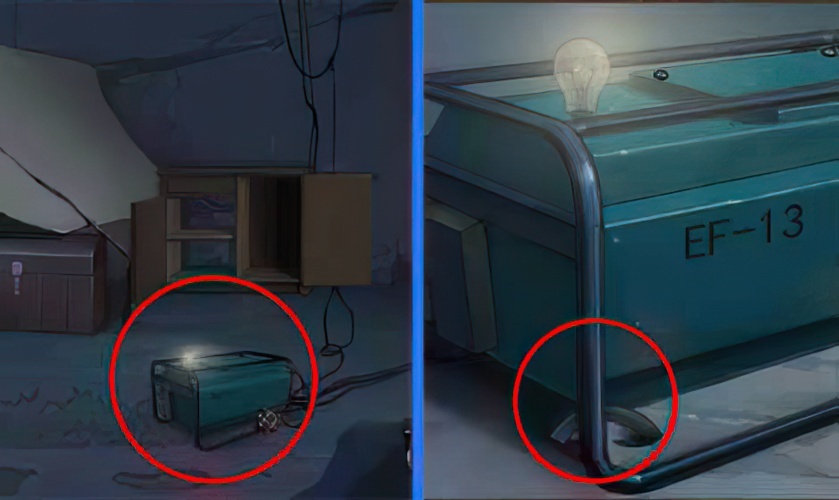
99. Find the ring fragment next to the generator.
![Dream Escape Chapter 7 Walkthrough - Step 100](https://zotuf.com/wp-content/uploads/2023/01/100-12.jpg)
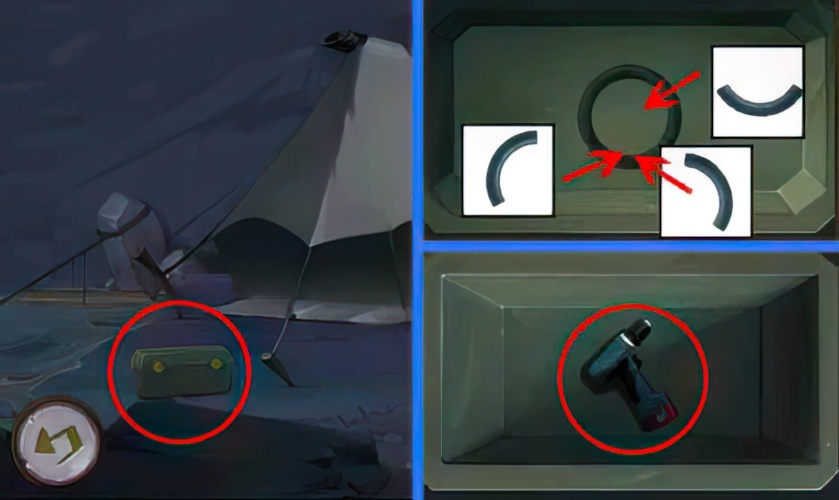
100. Install the three ring fragments on the box on the campsite and get the electric drill that lacks drill bits.
![Dream Escape Chapter 7 Walkthrough - Step 101](https://zotuf.com/wp-content/uploads/2023/01/101-12.jpg)
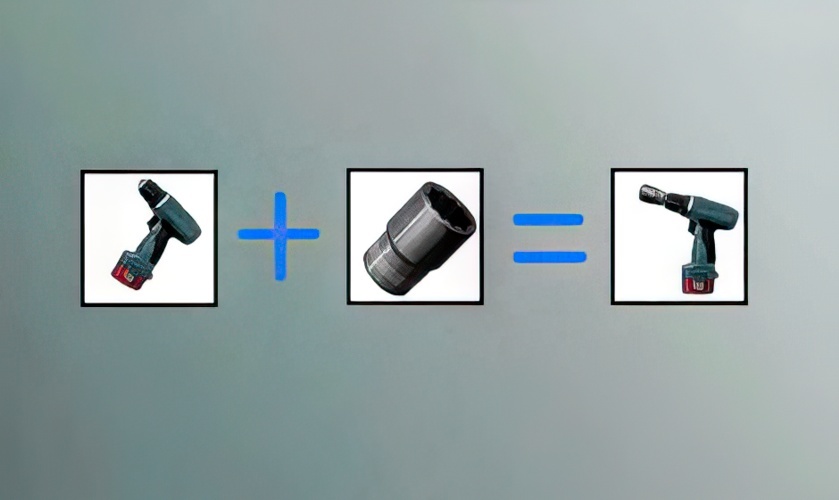
101. Install the sleeve head on the electric drill.
![Dream Escape Chapter 7 Walkthrough - Step 102](https://zotuf.com/wp-content/uploads/2023/01/102-13.jpg)
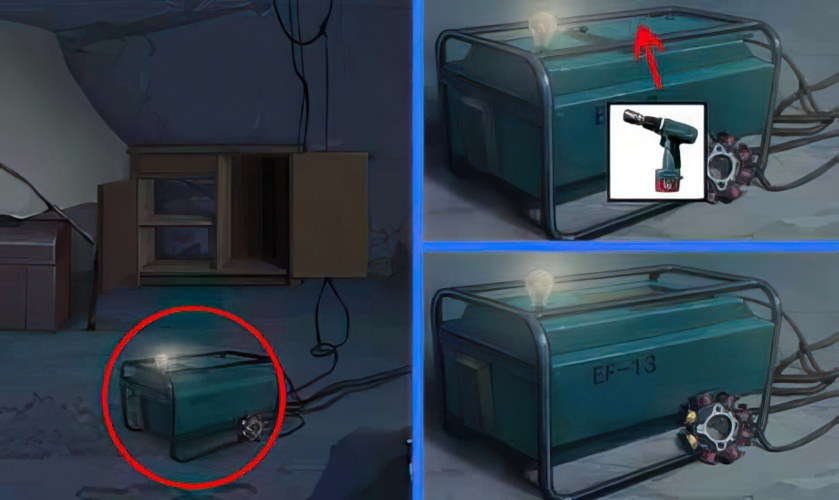
102. Use an electric drill to remove the nails from the generator.
![Dream Escape Chapter 7 Walkthrough - Step 103](https://zotuf.com/wp-content/uploads/2023/01/103-13.jpg)
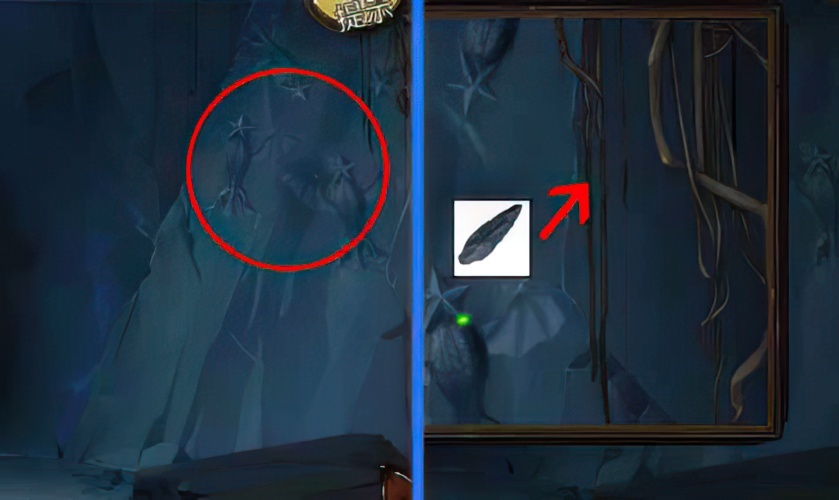
103. Cut the vines in the sea cave with sharp stones to obtain the vines.
![Dream Escape Chapter 7 Walkthrough - Step 104](https://zotuf.com/wp-content/uploads/2023/01/104-12.jpg)
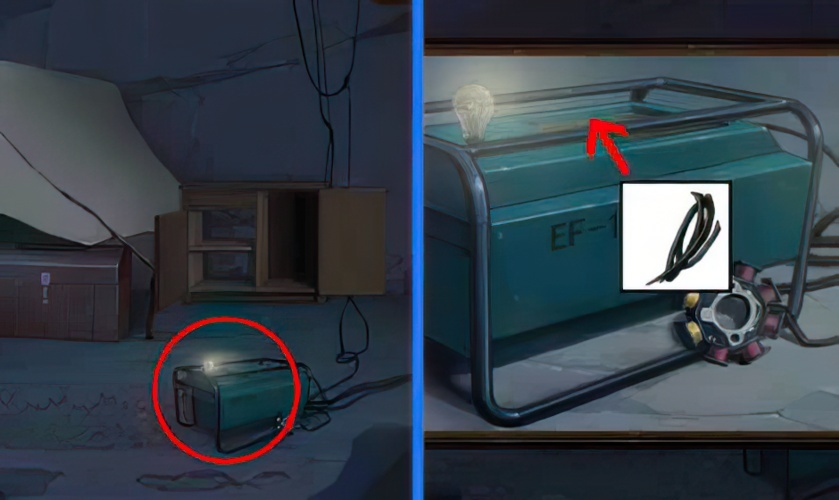
104. Soak the vines in the fuel tank of the generator.
![Dream Escape Chapter 7 Walkthrough - Step 105](https://zotuf.com/wp-content/uploads/2023/01/105-13.jpg)
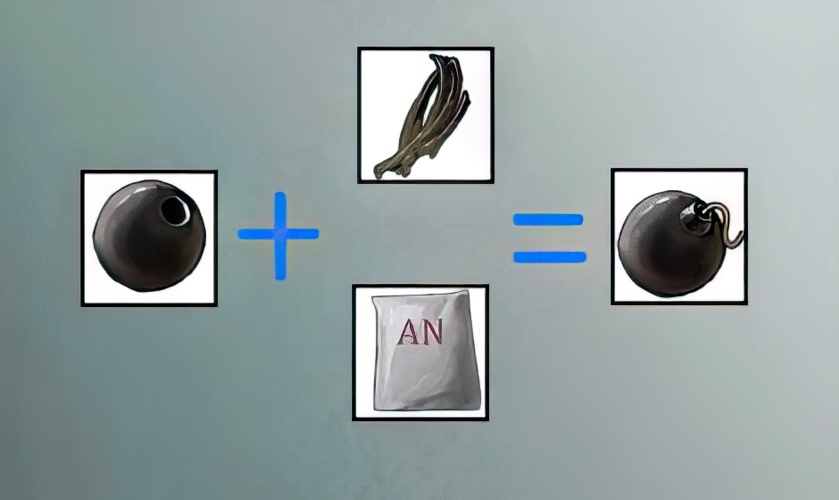
105. Assemble bomb shells, oiled vines and AN to get bombs.
![Dream Escape Chapter 7 Walkthrough - Step 106](https://zotuf.com/wp-content/uploads/2023/01/106-13.jpg)
106. Put the bomb in front of the doorway and ignite it with a fire sickle.
![Dream Escape Chapter 7 Walkthrough - Step 107](https://zotuf.com/wp-content/uploads/2023/01/107-13.jpg)
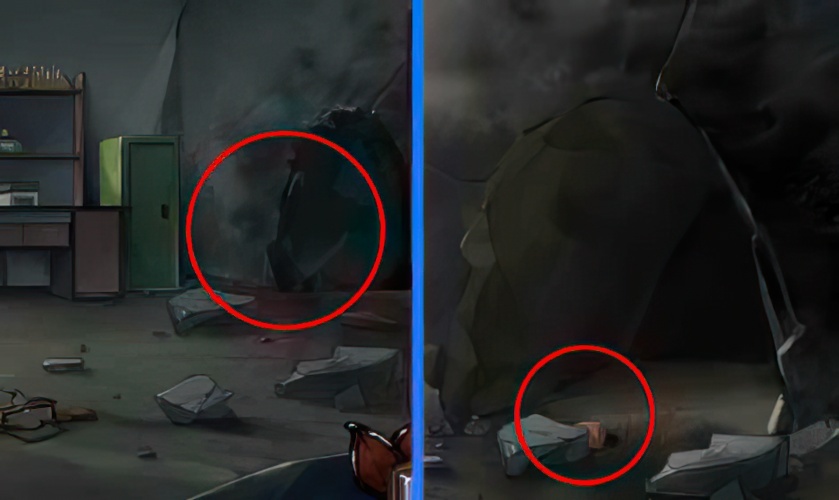
107. Pick up the orange cube dropped by the explosion.
![Dream Escape Chapter 7 Walkthrough - Step 108](https://zotuf.com/wp-content/uploads/2023/01/108-13.jpg)
108. Install the orange cube on the channel wall, complete the game, and get a card and key.
![Dream Escape Chapter 7 Walkthrough - Step 109](https://zotuf.com/wp-content/uploads/2023/01/109-13.jpg)
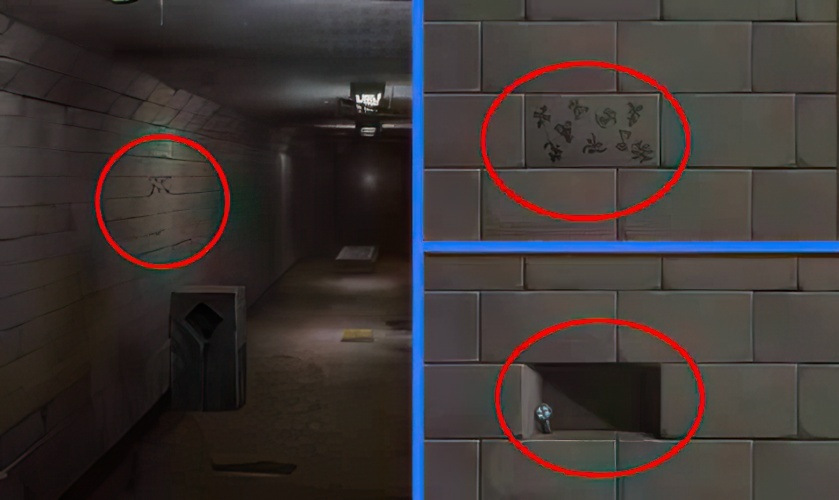
109. Remove the bricks with symbols on the wall to get a key.
![Dream Escape Chapter 7 Walkthrough - Step 110](https://zotuf.com/wp-content/uploads/2023/01/110-13.jpg)
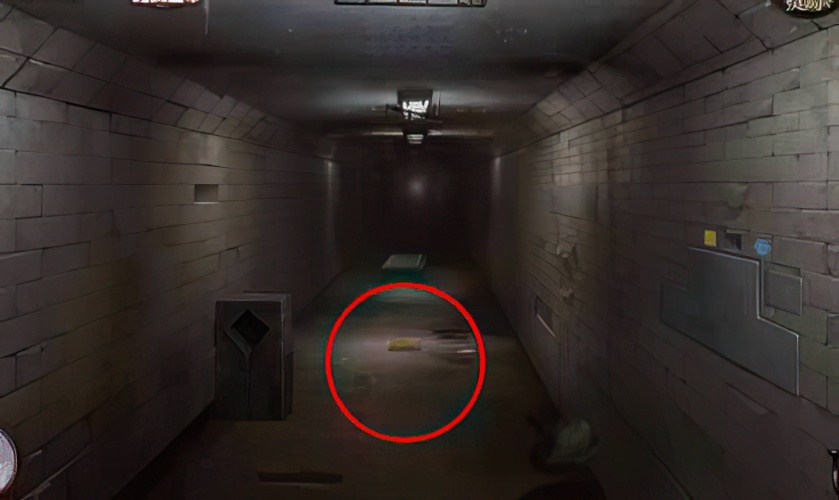
110. Pick up the puzzle piece on the ground.
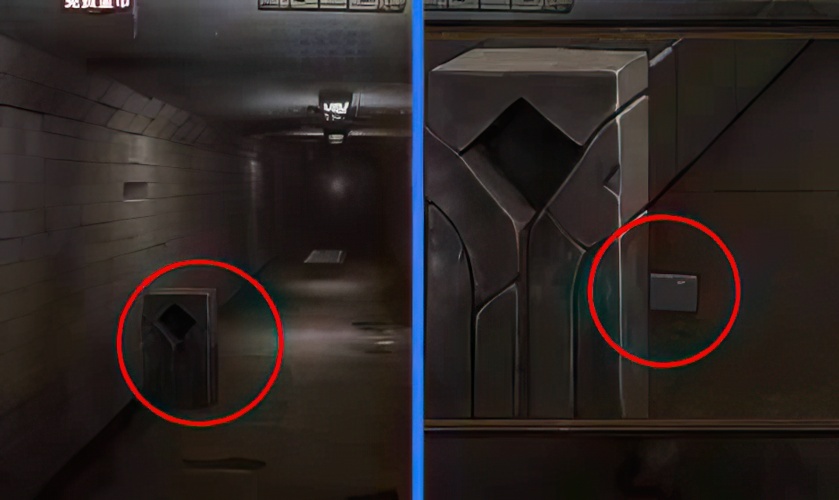
![Dream Escape Chapter 7 Walkthrough - Step 111](https://zotuf.com/wp-content/uploads/2023/01/111-13.jpg)
111. Find the slider behind the big rock.
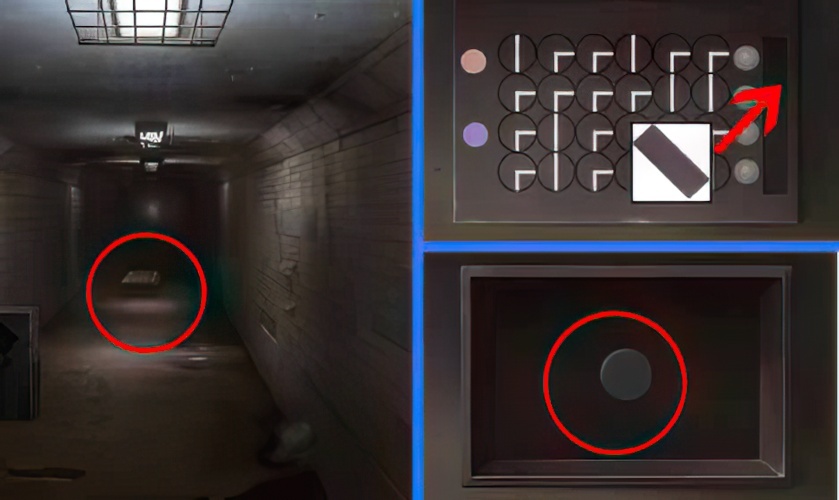
![Dream Escape Chapter 7 Walkthrough - Step 112](https://zotuf.com/wp-content/uploads/2023/01/112-13.jpg)
112. Install the slider on the box on the ground to complete the game and get a black chess piece.
![Dream Escape Chapter 7 Walkthrough - Step 113](https://zotuf.com/wp-content/uploads/2023/01/113-12.jpg)
113. Install the black chess piece on the box under the statue to complete the game and get the guillotine handle.
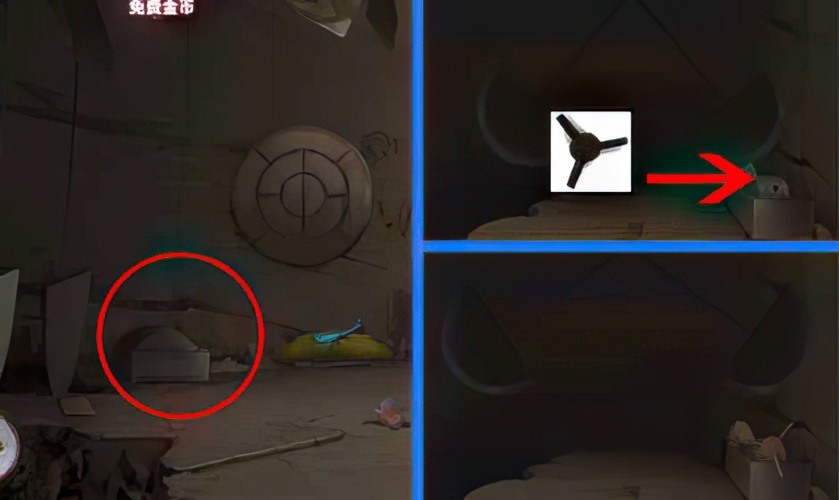
![Dream Escape Chapter 7 Walkthrough - Step 114](https://zotuf.com/wp-content/uploads/2023/01/114-13.jpg)
114. Install the handle on the switch in front of the guillotine, turn the switch to turn off the guillotine.
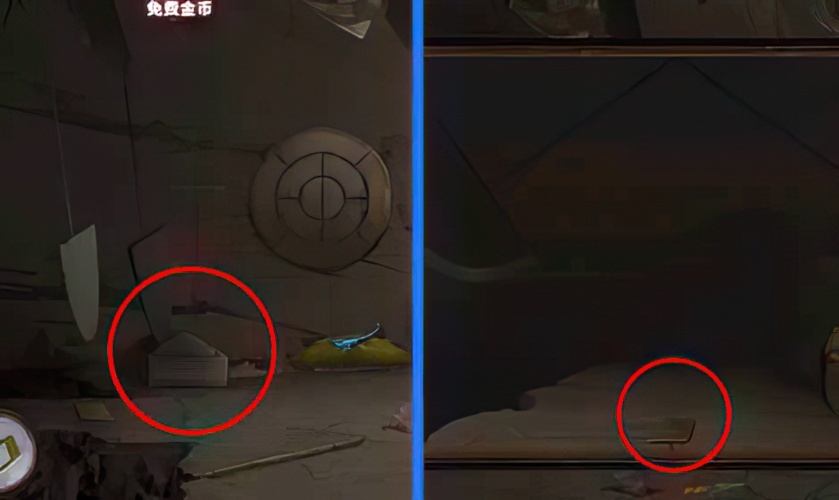
![Dream Escape Chapter 7 Walkthrough - Step 115](https://zotuf.com/wp-content/uploads/2023/01/115-12.jpg)
115. Pick up the puzzle piece under the guillotine.
![Dream Escape Chapter 7 Walkthrough - Step 116](https://zotuf.com/wp-content/uploads/2023/01/116-12.jpg)
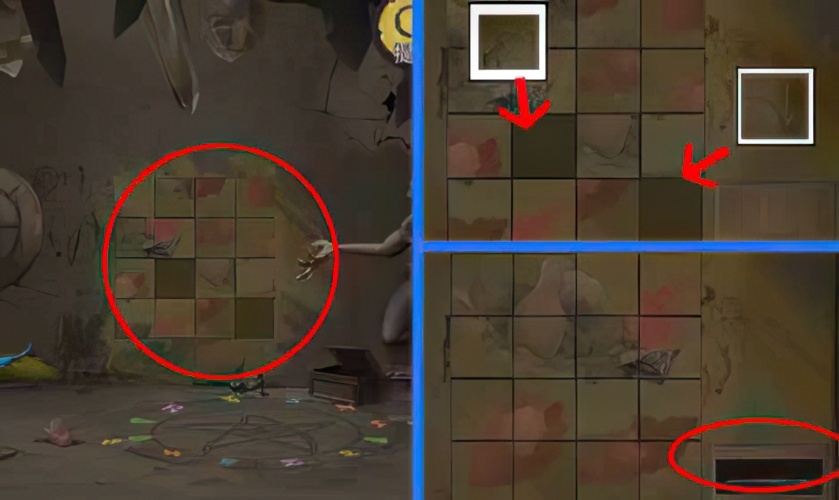
116. Install the two puzzle pieces obtained on the mural to complete the puzzle game on the mural.
![Dream Escape Chapter 7 Walkthrough - Step 117](https://zotuf.com/wp-content/uploads/2023/01/117-13.jpg)
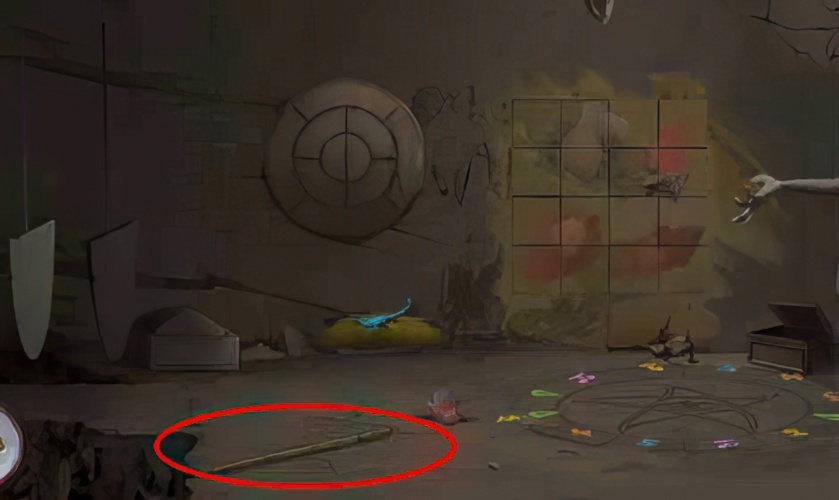
117. Pick up the bamboo poles on the ground.
![Dream Escape Chapter 7 Walkthrough - Step 118](https://zotuf.com/wp-content/uploads/2023/01/118-12.jpg)
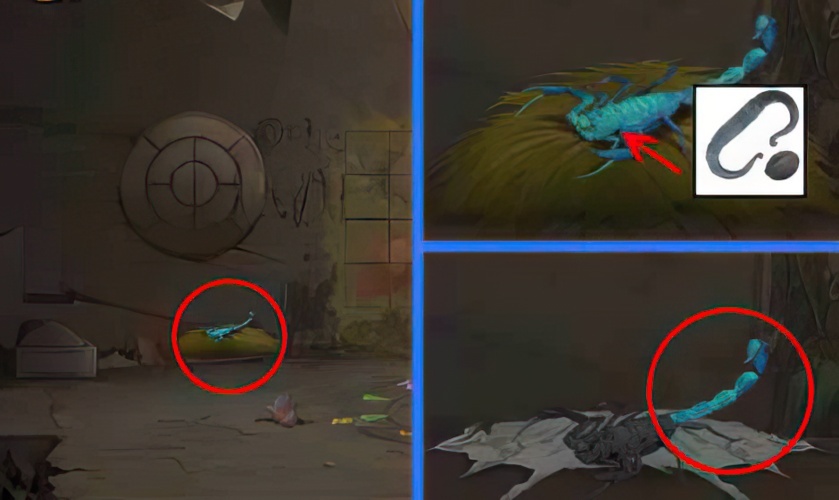
118. Use the fire sickle on the mutant scorpion to burn the scorpion and get the scorpion’s tail.
![Dream Escape Chapter 7 Walkthrough - Step 119](https://zotuf.com/wp-content/uploads/2023/01/119-12.jpg)
119. Assemble scorpion tail and bamboo pole together.
![Dream Escape Chapter 7 Walkthrough - Step 120](https://zotuf.com/wp-content/uploads/2023/01/120-10.jpg)
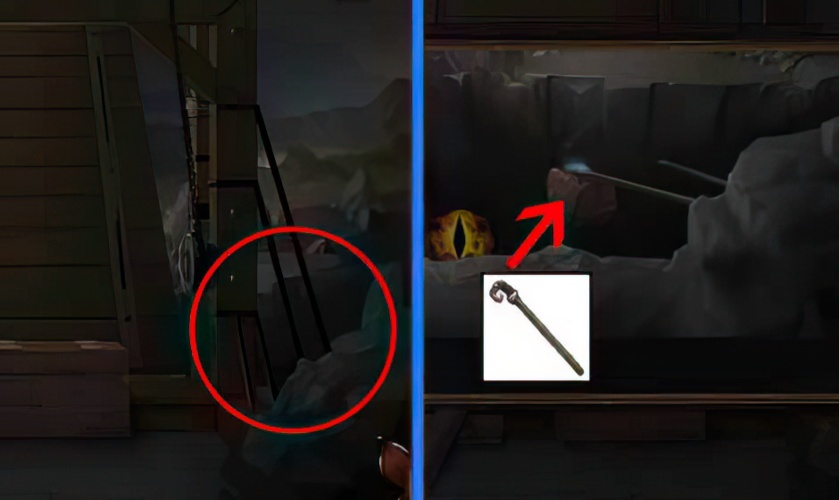
120. Under the broken bridge, catch the backpack with a hook.
![Dream Escape Chapter 7 Walkthrough - Step 121](https://zotuf.com/wp-content/uploads/2023/01/121-10.jpg)
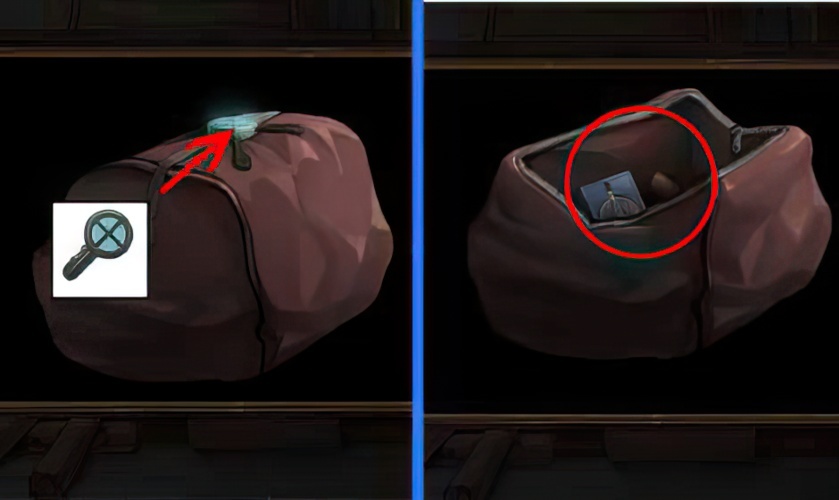
121. Open the backpack with the key, get the notebook and the saw handle.
![Dream Escape Chapter 7 Walkthrough - Step 122](https://zotuf.com/wp-content/uploads/2023/01/122-10.jpg)
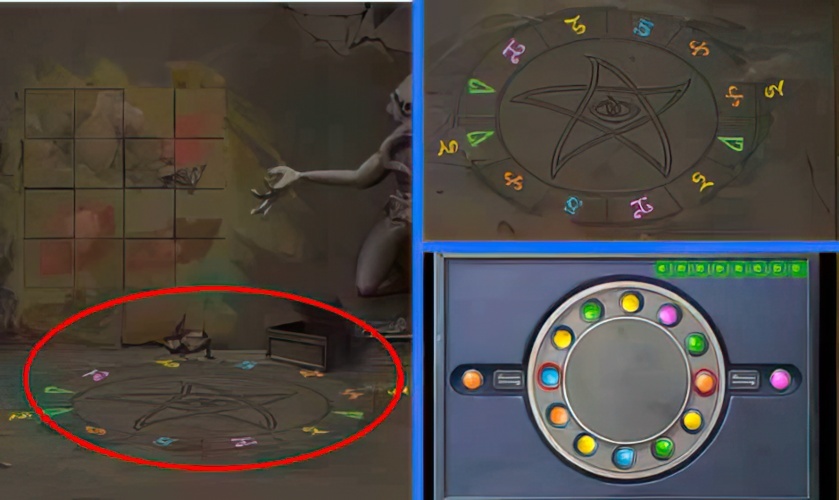
122. Complete the game on the notebook according to the color of the symbols on the ground in the cave.
![Dream Escape Chapter 7 Walkthrough - Step 123](https://zotuf.com/wp-content/uploads/2023/01/123-10.jpg)
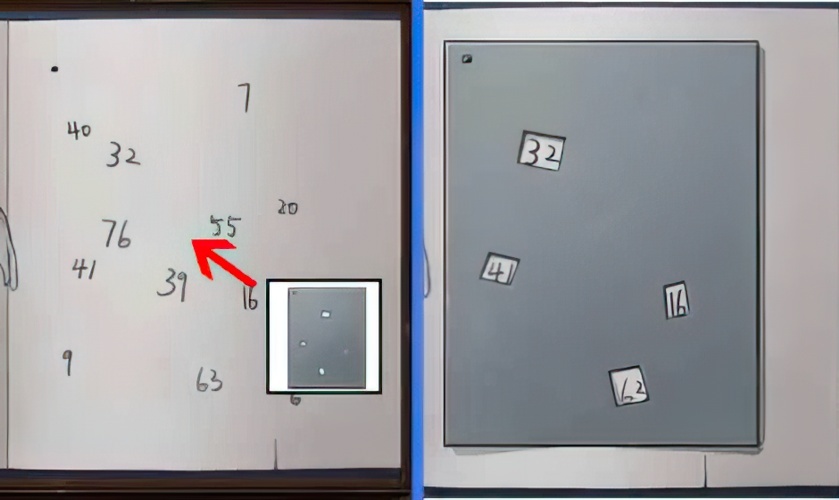
123. Overlap the card on the notebook to get 4 coordinate numbers.
![Dream Escape Chapter 7 Walkthrough - Step 124](https://zotuf.com/wp-content/uploads/2023/01/124-9.jpg)
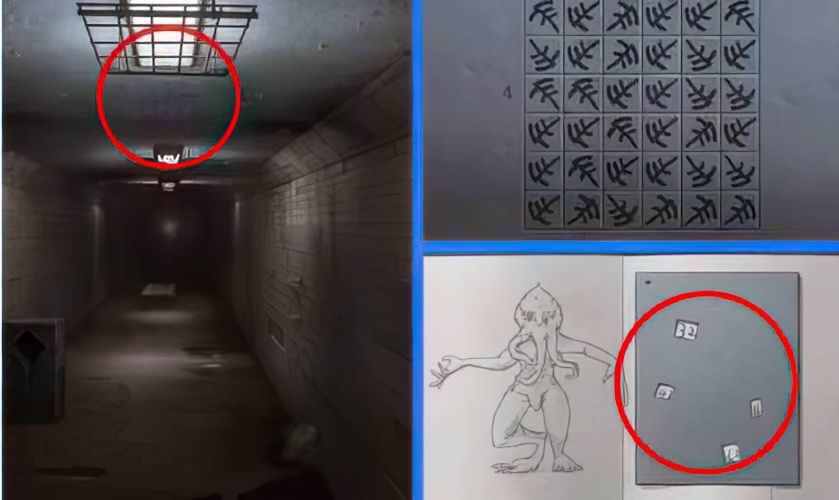
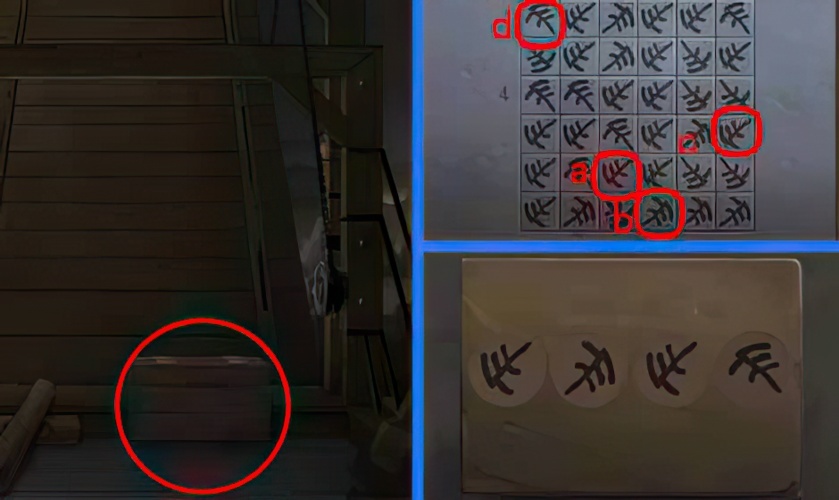
124. Check the position of the symbol on the brick at the top of the aisle.
![Dream Escape Chapter 7 Walkthrough - Step 125](https://zotuf.com/wp-content/uploads/2023/01/125-11.jpg)
125. According to the symbol orientation on the coordinate position on the brick, open the box next to the broken bridge and take away the two tools.
![Dream Escape Chapter 7 Walkthrough - Step 126](https://zotuf.com/wp-content/uploads/2023/01/126-10.jpg)
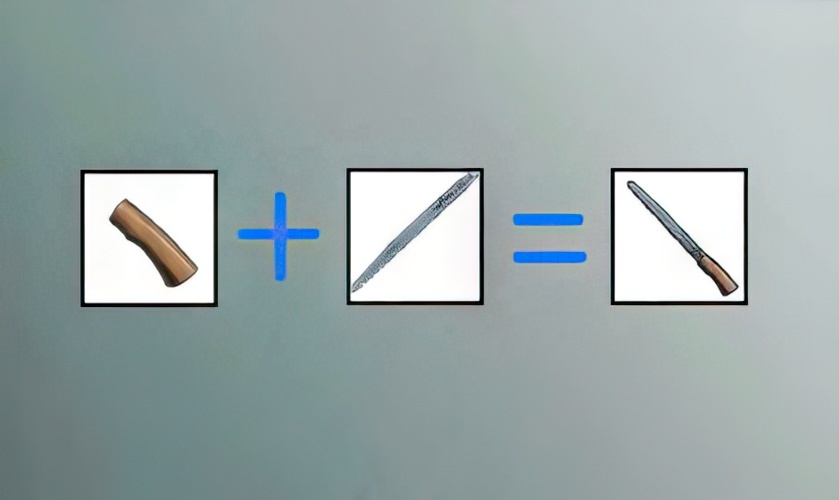
126. Assemble the saw blade and handle together into a finished wood saw.
![Dream Escape Chapter 7 Walkthrough - Step 127](https://zotuf.com/wp-content/uploads/2023/01/127-10.jpg)
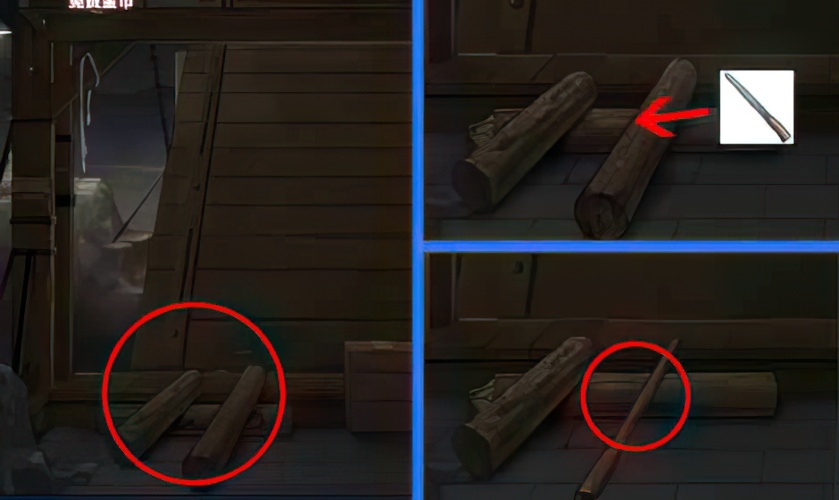
127. Use a saw to cut the logs next to the broken bridge to obtain sticks.
![Dream Escape Chapter 7 Walkthrough - Step 128](https://zotuf.com/wp-content/uploads/2023/01/128-9.jpg)
128. Find the broken sword beside the statue.
![Dream Escape Chapter 7 Walkthrough - Step 129](https://zotuf.com/wp-content/uploads/2023/01/129-9.jpg)
129. Use the sword to open the beast trap and get the hammer head.
![Dream Escape Chapter 7 Walkthrough - Step 130](https://zotuf.com/wp-content/uploads/2023/01/130-9.jpg)
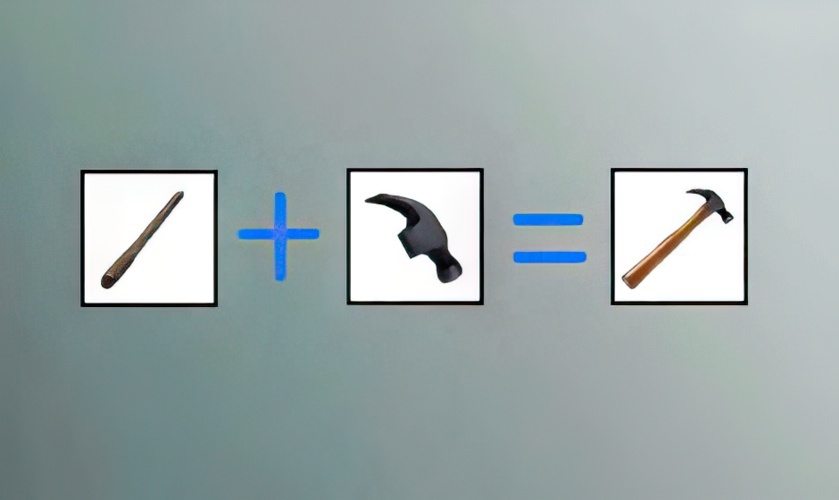
130. Assemble the stick and the head of the hammer together into a hammer.
![Dream Escape Chapter 7 Walkthrough - Step 131](https://zotuf.com/wp-content/uploads/2023/01/131-9.jpg)
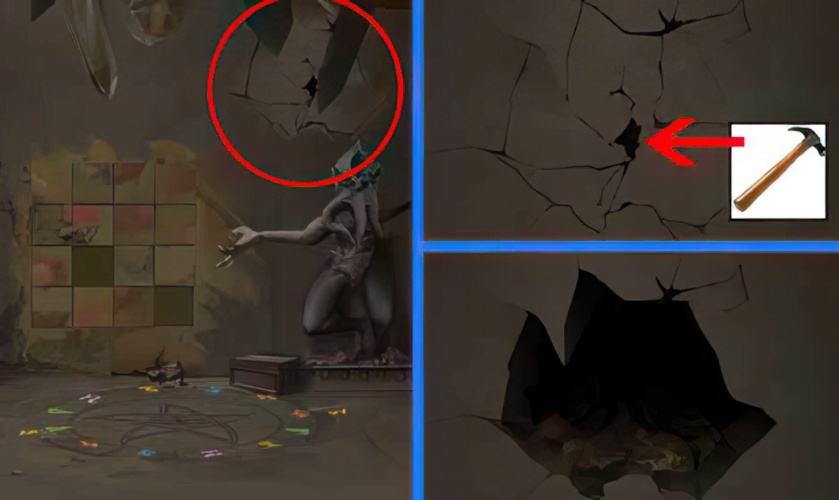
131. Smash the cracks with a hammer.
![Dream Escape Chapter 7 Walkthrough - Step 132](https://zotuf.com/wp-content/uploads/2023/01/132-9.jpg)
132. Place the head of the deity on the body of the deity and get half a stone.
![Dream Escape Chapter 7 Walkthrough - Step 133](https://zotuf.com/wp-content/uploads/2023/01/133-8.jpg)
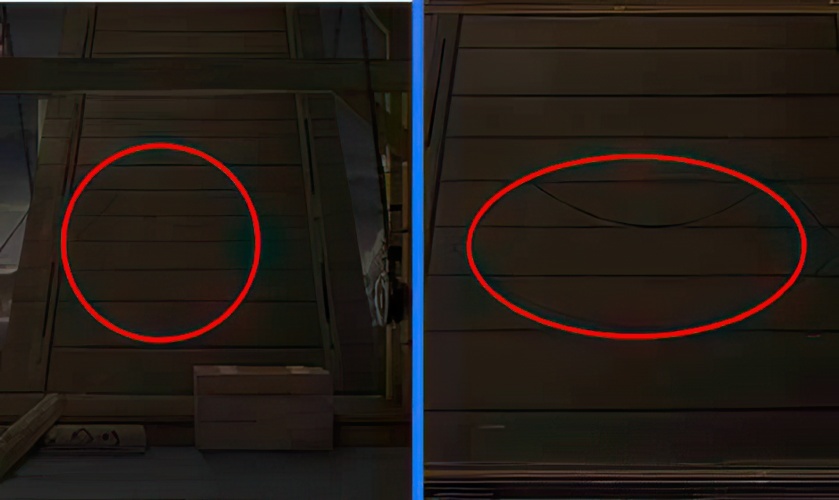
133. Check the symbols on the bridge.
![Dream Escape Chapter 7 Walkthrough - Step 134](https://zotuf.com/wp-content/uploads/2023/01/134-8.jpg)
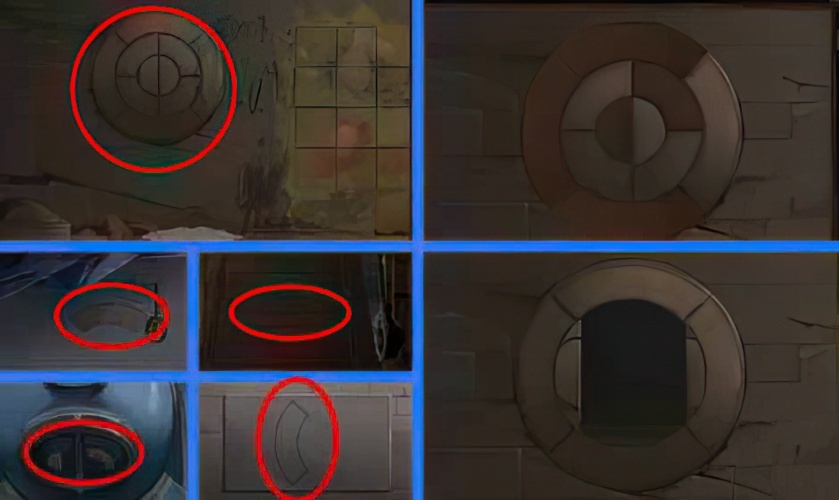
134. According to the clues on the bridge deck, the top of the camp cave, the diving suit and the iron plate of the passage, open the mechanism of the cave.
![Dream Escape Chapter 7 Walkthrough - Step 135](https://zotuf.com/wp-content/uploads/2023/01/135-8.jpg)
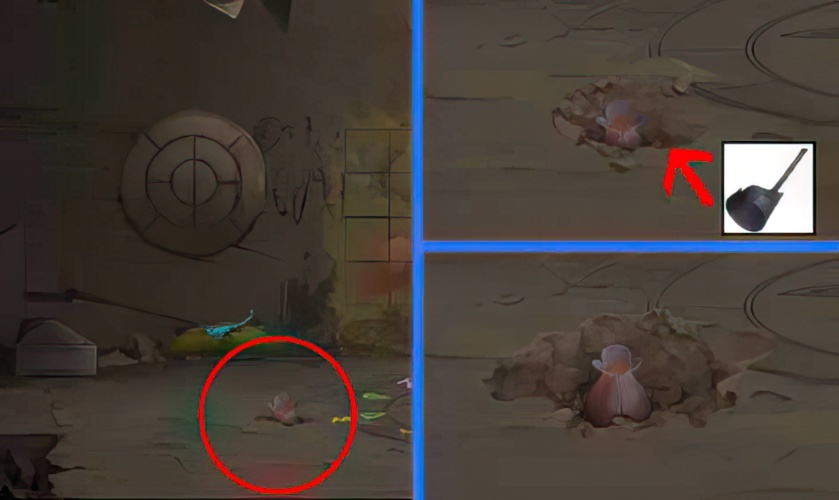
135. Use a sand shovel to dig out the incubator buried in the mud.
![Dream Escape Chapter 7 Walkthrough - Step 136](https://zotuf.com/wp-content/uploads/2023/01/136-8.jpg)
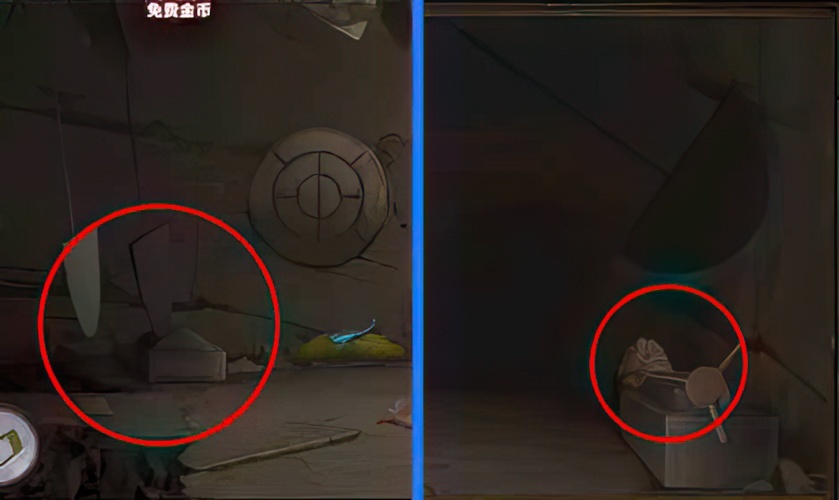
136. Loot an egg next to the guillotine mechanism.
![Dream Escape Chapter 7 Walkthrough - Step 137](https://zotuf.com/wp-content/uploads/2023/01/137-8.jpg)
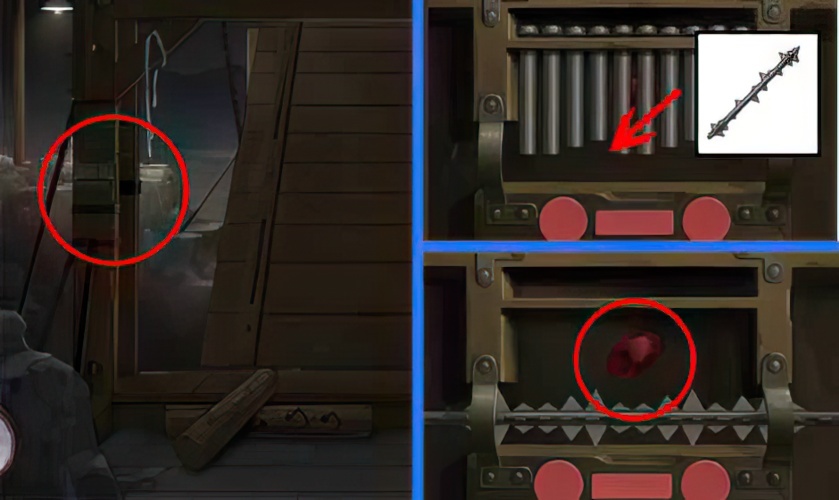
137. Install the bolt lock on the mechanism next to the suspension bridge, open the lock and get the ruby.
![Dream Escape Chapter 7 Walkthrough - Step 138](https://zotuf.com/wp-content/uploads/2023/01/138-8.jpg)
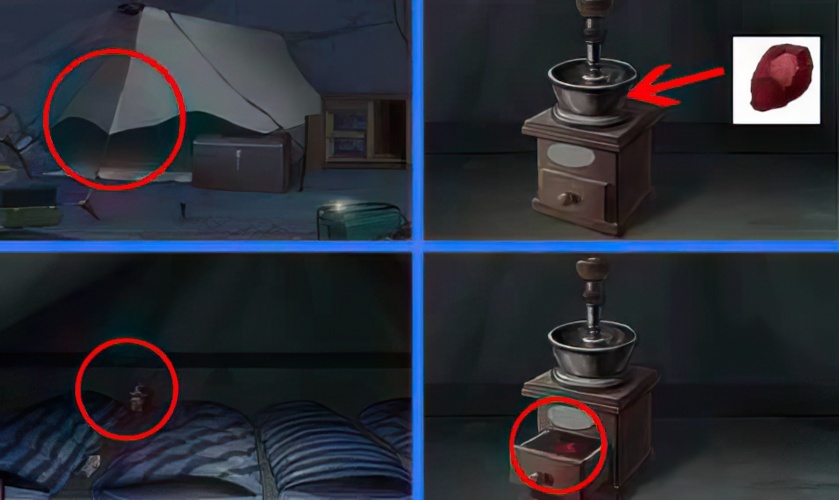
138. Use the crusher in the camp to crush the ruby into powder.
![Dream Escape Chapter 7 Walkthrough - Step 139](https://zotuf.com/wp-content/uploads/2023/01/139-8.jpg)
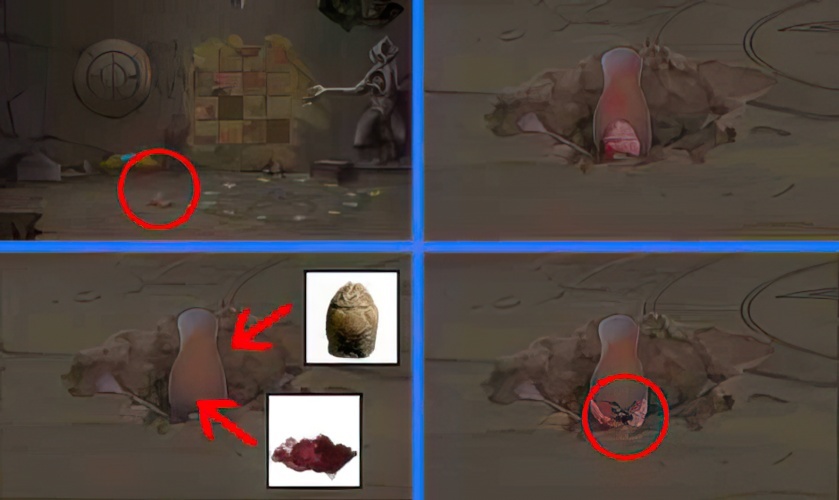
139. Put the egg and ruby powder in the incubator, close the lid, and get half a stone.
![Dream Escape Chapter 7 Walkthrough - Step 140](https://zotuf.com/wp-content/uploads/2023/01/140-7.jpg)
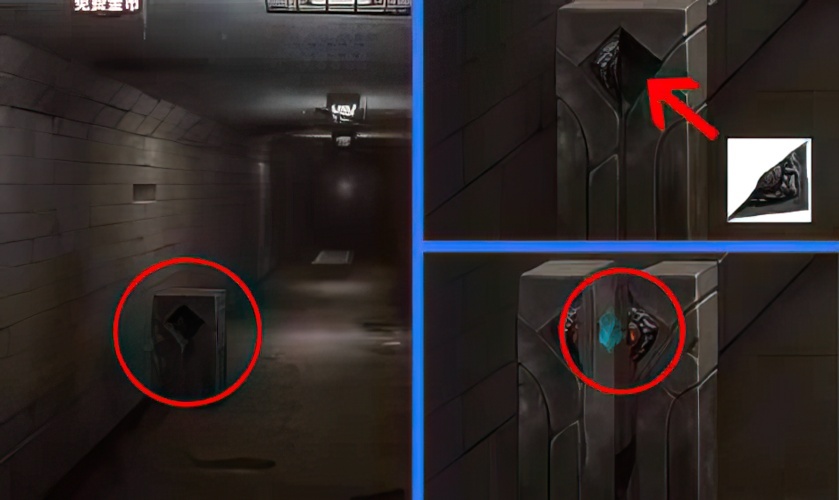
140. Put two and a half stones on the big stone in the passage, and the big stone will split to get the sapphire.
![Dream Escape Chapter 7 Walkthrough - Step 141](https://zotuf.com/wp-content/uploads/2023/01/141-7.jpg)
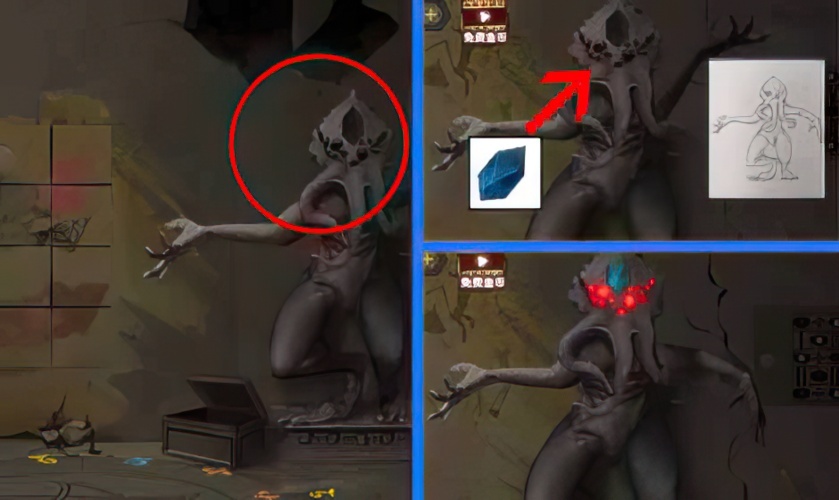
141. Place the crystal on the head of the statue and adjust the statue according to the movement of the statue in the notebook.
![Dream Escape Chapter 7 Walkthrough - Step 142](https://zotuf.com/wp-content/uploads/2023/01/142-6.jpg)
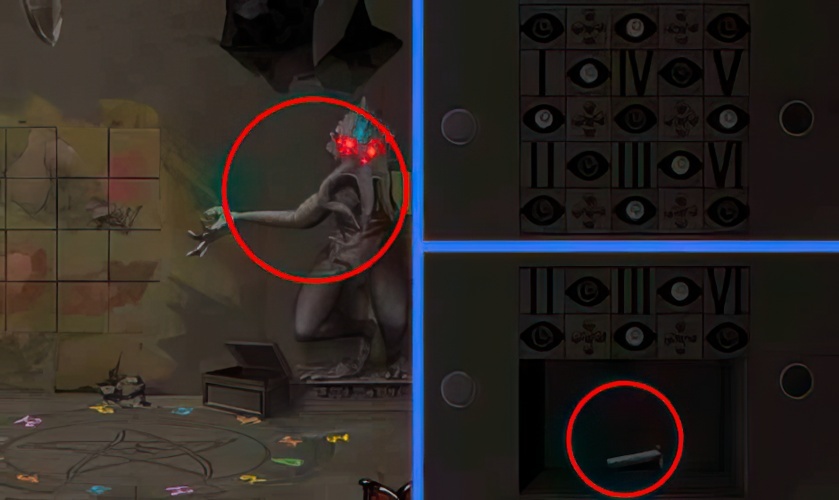
142. Finish the game next to the statue.
![Dream Escape Chapter 7 Walkthrough - Step 143](https://zotuf.com/wp-content/uploads/2023/01/143-6.jpg)
143. Find the metal piece next to the log.
![Dream Escape Chapter 7 Walkthrough - Step 144](https://zotuf.com/wp-content/uploads/2023/01/144-6.jpg)
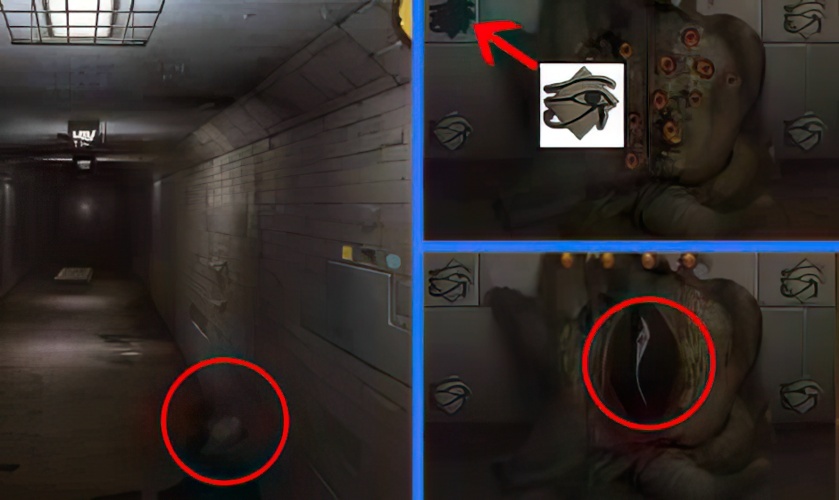
144. Install the metal piece in the groove above the eye pile of the passage to complete the game.
![Dream Escape Chapter 7 Walkthrough - Step 145](https://zotuf.com/wp-content/uploads/2023/01/145-4.jpg)
145. Assemble two and a half chick-nosed pliers to get a complete chick-nosed pliers.
![Dream Escape Chapter 7 Walkthrough - Step 146](https://zotuf.com/wp-content/uploads/2023/01/146-4.jpg)
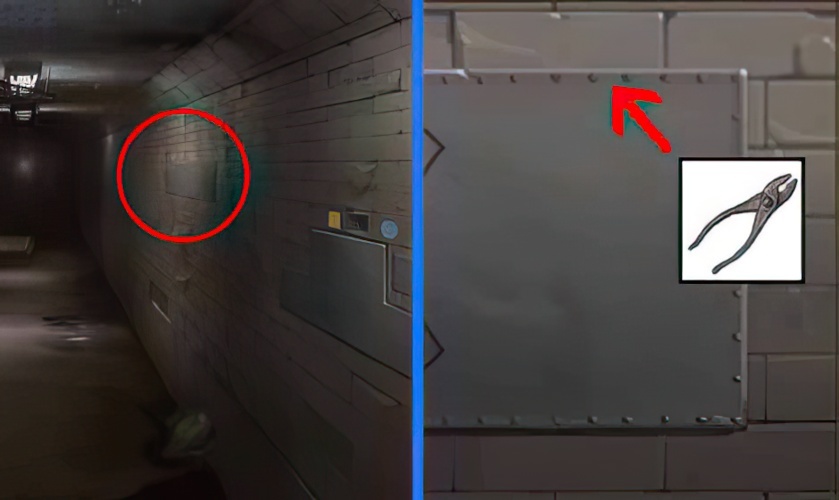
146. Use chick-nose pliers to pass through the rivets on the iron wall to get the rivets.
![Dream Escape Chapter 7 Walkthrough - Step 147](https://zotuf.com/wp-content/uploads/2023/01/147-4.jpg)
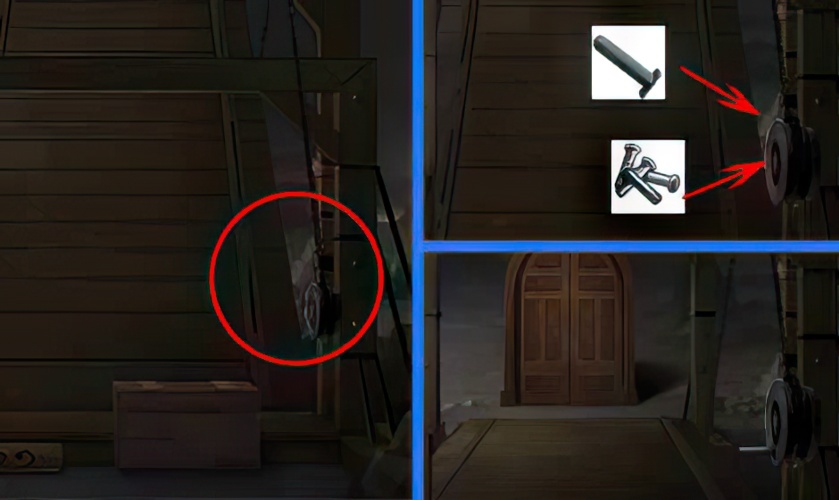
147. Fix the handle of the broken bridge with rivets, pull down the bridge deck, and enter the opposite side.