
Fatal Evidence 2: The Missing (Bonus Chapter) – After receiving a video message from an anonymous person, you pass out after being hit with a stun gun. Apparently, this disgruntled citizen doesn’t like journalists much, and you find that you only have one hour to escape, thinking naturally.
Bonus Chapter Walkthrough
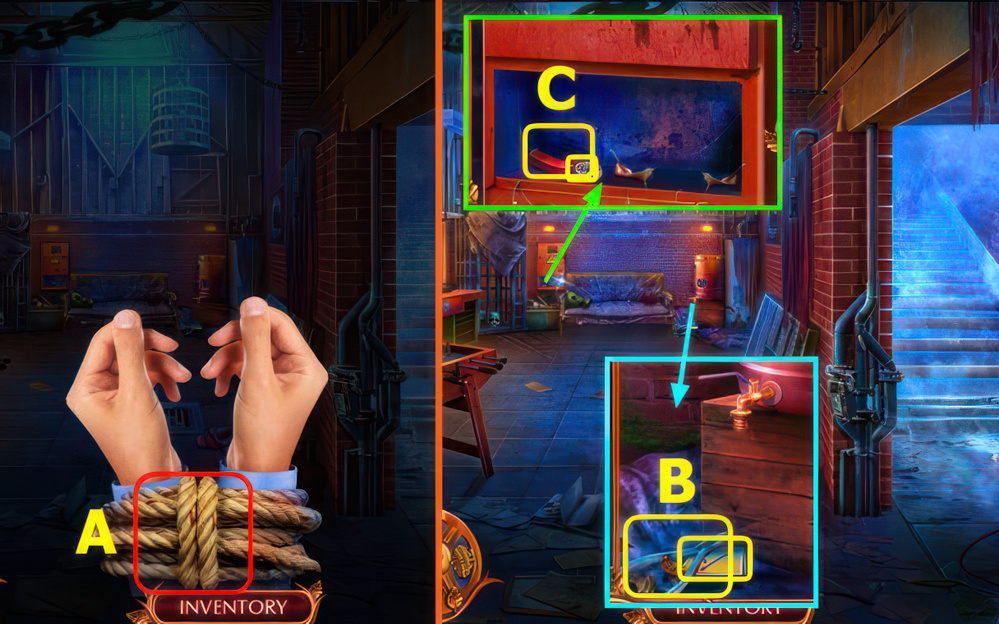
- Select (A).
- Take CUTTERS and MATCHES (B).
- Use MATCHES, take BUTTON and MAGNET (C).
- Use MAGNET, earn CROCHET HOOK (D).
- Read note, take hint camera, ROPE, and 1/4 PLAYER FIGURINES (E).
- Use CROCHET HOOK, take WOODEN BOARD (F).
- Place WOODEN BOARD (G).
- Go right.

- Take CHOPSTICKS and 2/4 PLAYER FIGURINES.
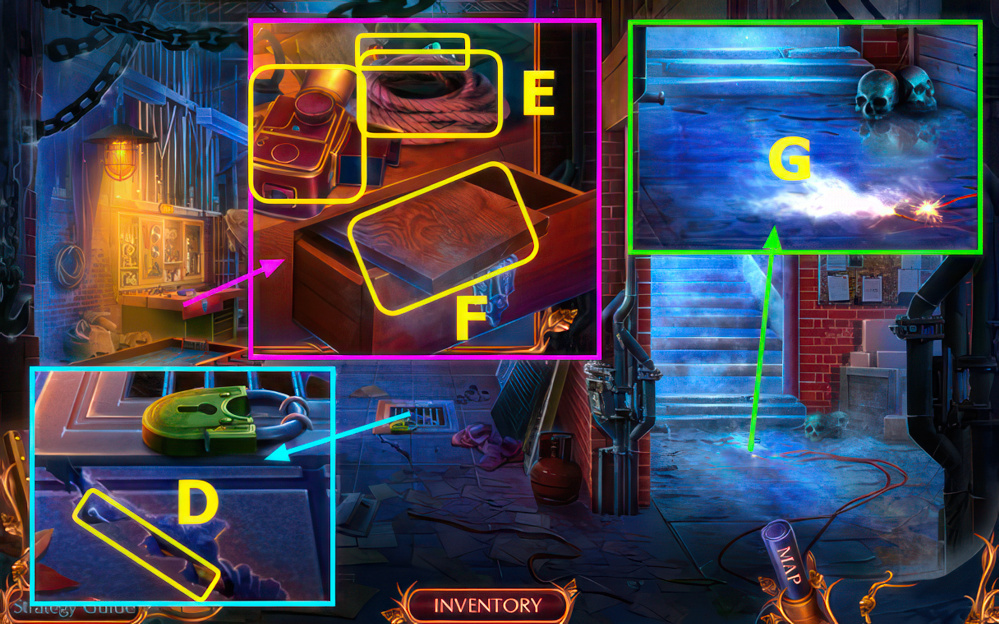
- Use CUTTERS, take RUNGS (H).
- Place ROPE and RUNGS (I).
- Select (J).
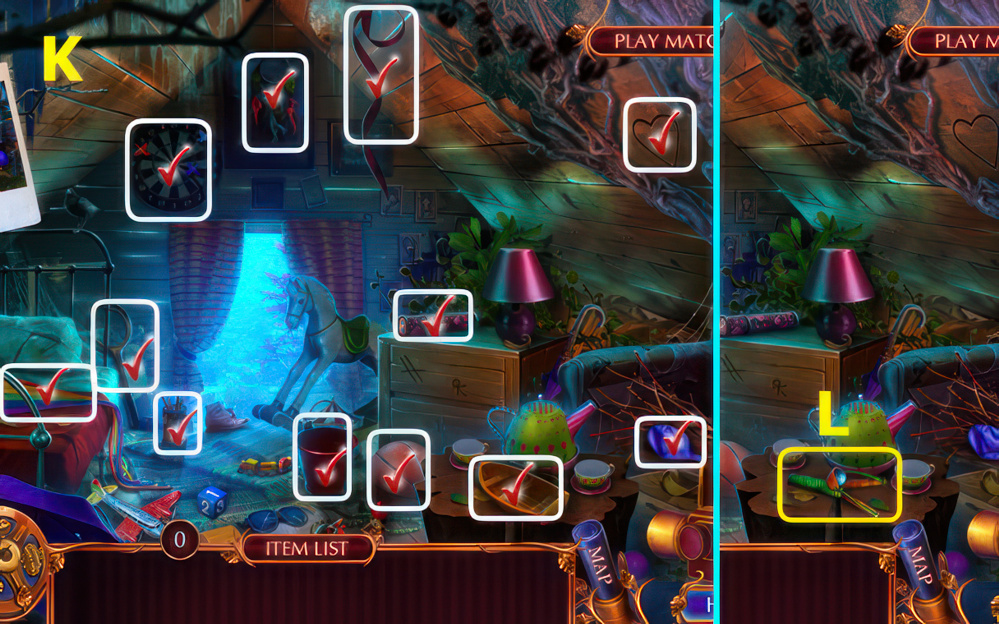
- Find the differences (K).
- Take SLINGSHOT (L).

- Use SLINGSHOT, take DUSTER and GEAR (M).
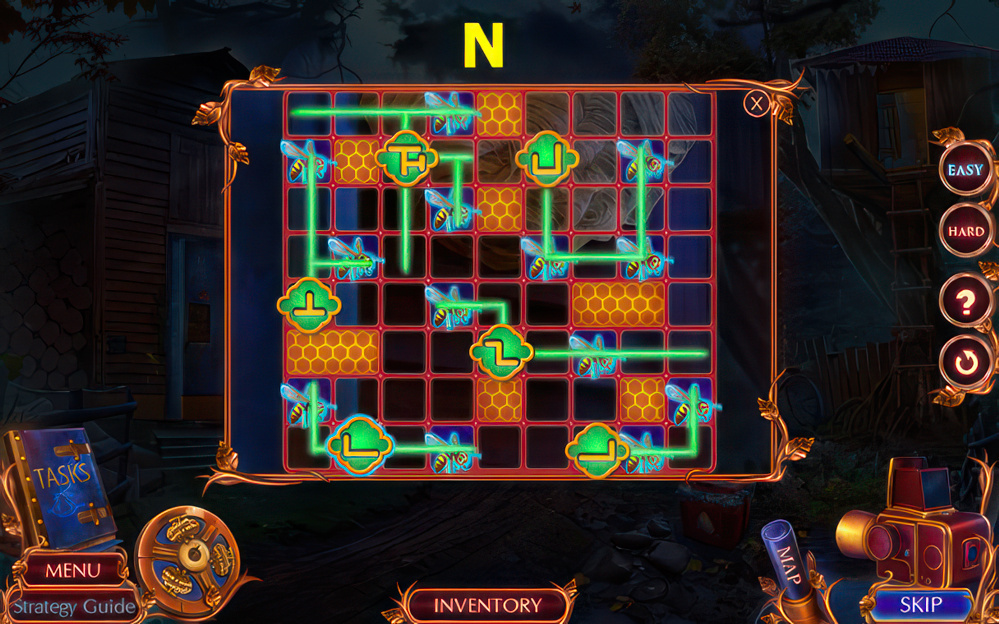
- Place GEAR (N).
- Go left.

- Use DUSTER, take SOLVENT (O).
- Use CHOPSTICKS, take 1/2 KEY (P).
- Use SOLVENT, take CROWBAR (Q).
- Take 3/4 PLAYER FIGURINES, use BUTTON, take GLUE (R).

- Take WRENCH (S).
- Use CROWBAR, take STICK and 4/4 PLAYER FIGURINES (T).
- Walk down 2x.
- Use PLAYERS FIGURINE and GLUE (U).

- Solution C-B-Ex2-C-A-C-B-C-Fx3-C-A-Ex2-C-Ex2-A-D-E-A-Cx2-Fx2-B-C-E-C-Bx2-C.
- Take ACCESS CARD.

- Use ACCESS CARD, take LEVER KNOB (H).
- Go to Barn.
- Place LEVER KNOB (I).
- Earn LOCKER INLAY.
- Place LOCKER INLAY, take DUCT TAPE and 2/2 KEY (J).
- Walk down 2x.

- Use KEY, take EMPTY SPRAY BOTTLE (K).
- Use EMPTY SPRAY BOTTLE, take INSECTICIDE (L).
- Go right.
- Use INSECTICIDE (M).
- Easy solution (N).
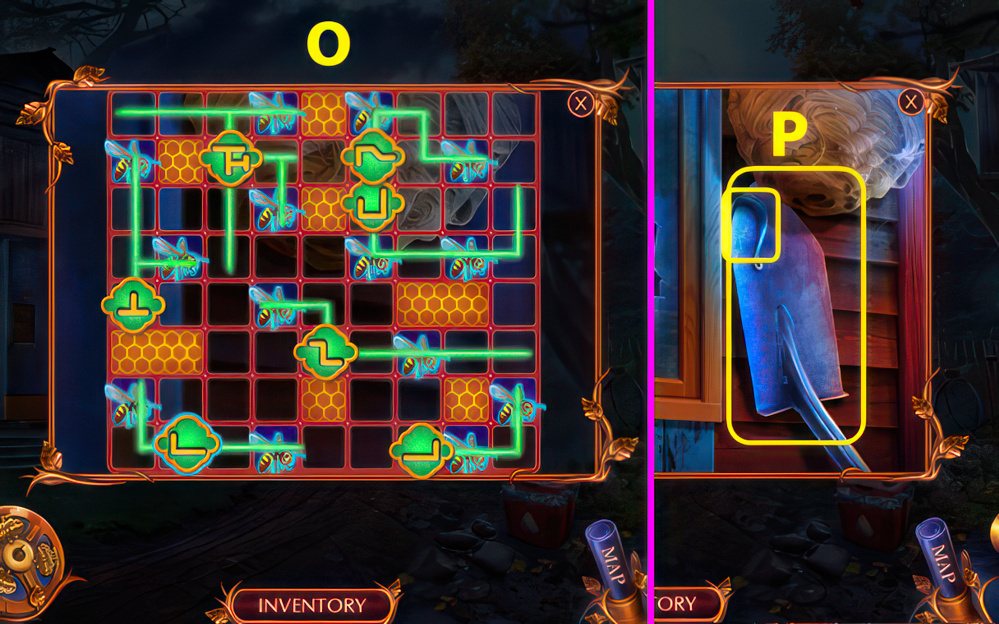
- Hard solution (O).
- Take FISHING HOOK and SHOVEL (P).

- Use SHOVEL (A).
- Go forward.
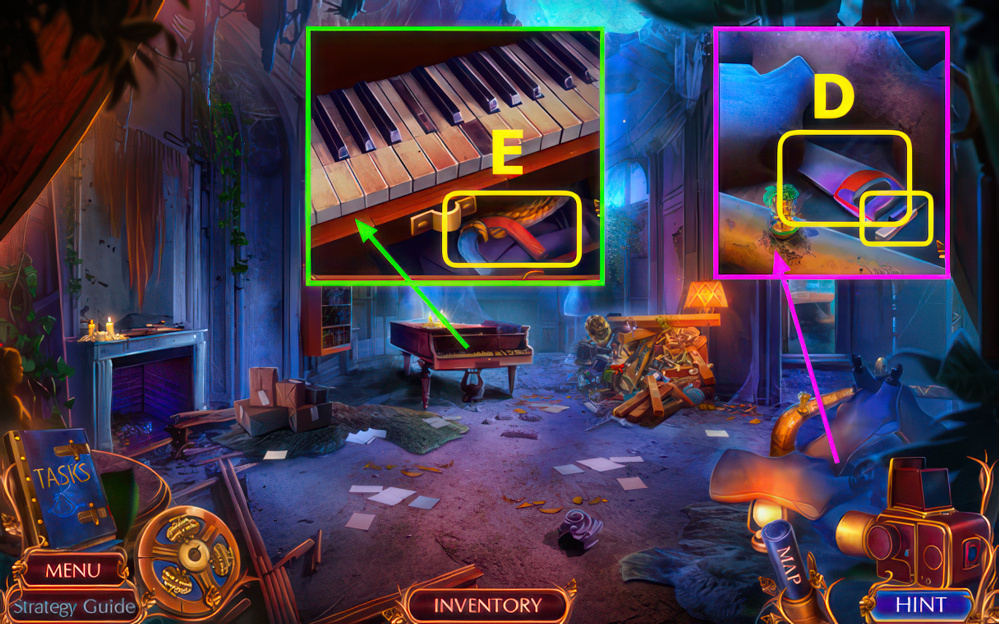
- Use WRENCH, take MIRROR and BROKEN FISHING ROD (B).
- Take FISHING REEL (C).
- Use STICK and DUCT TAPE, take COIN and BROKEN HELICOPTER (D).
- Walk down, left.

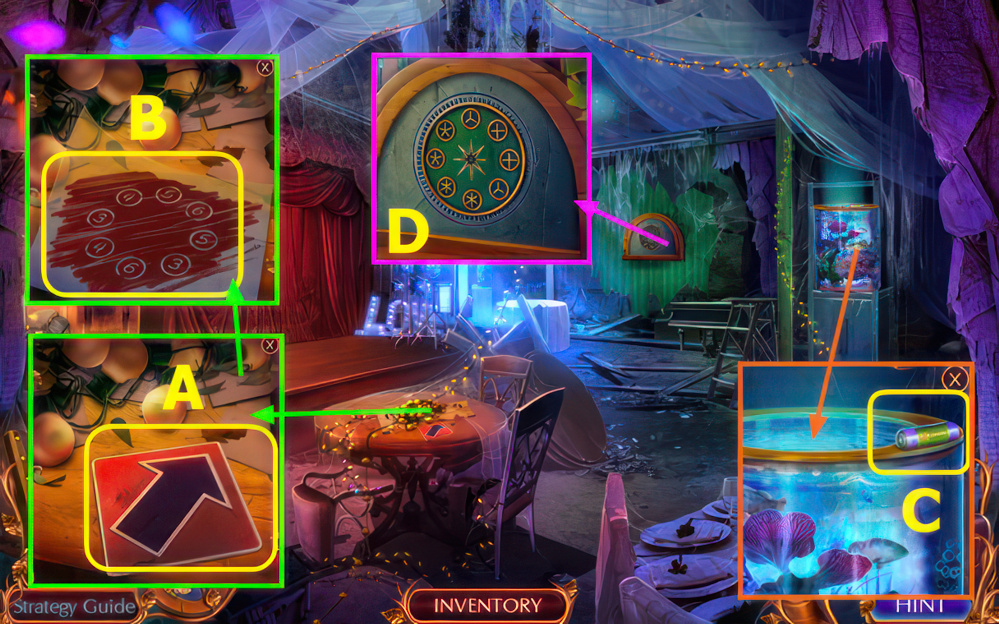
- Use COIN (E).
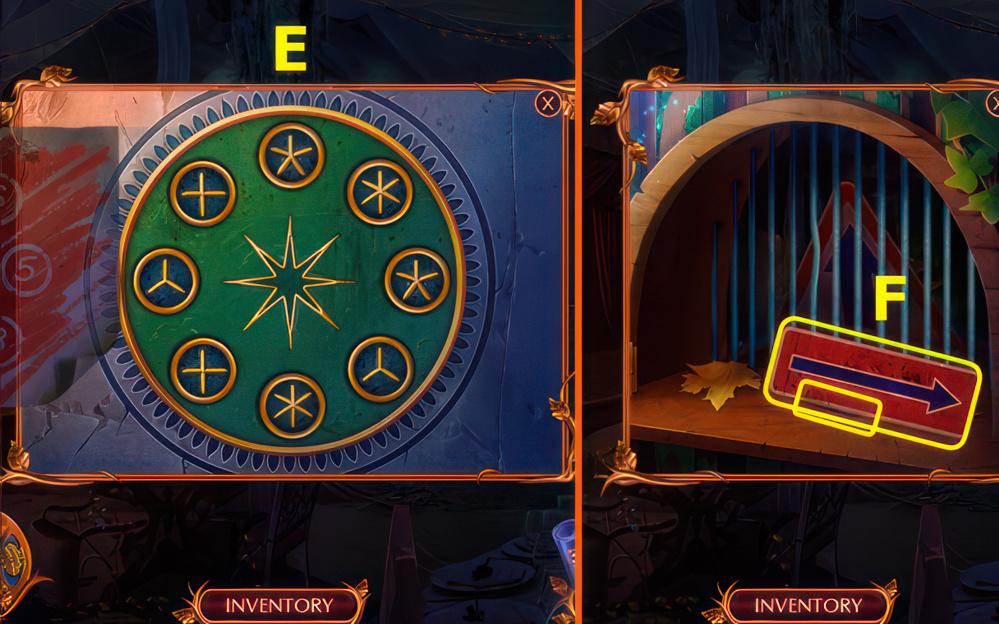
- Select pairs (F), take TOY JACK.

- Use TOY JACK, take HELICOPTER BLADES and LONG HOOK (G).
- Walk down, forward.
- Use MIRROR and LONG HOOK, take BUCKET ON ROPE and REMOTE CONTROL (H).
- HELICOPTER BLADES and REMOTE CONTROL on BROKEN HELICOPTER, earn HELICOPTER.
- Use HELICOPTER, read note, take TWEEZERS and GLOVE (I).
- Walk down.

- Use GLOVE, take DUSTER and GAS TORCH (J).
- Use GAS TORCH, take SCRAPER and FISHING LINE (K).
- FISHING HOOK, FISHING REEL, and FISHING LINE on BROKEN FISHING ROD, earn FISHING ROD.
- Go forward.
- Use FISHING ROD (L).

- Easy solution (M).
- Hard solution (N).
- Take FUEL (O).
- Use FUEL (P).

- Take CAN OPENER, use BUCKET ON A ROPE, earn BUCKET WITH WATER (A).
- Use BUCKET WITH WATER, take GUN (B).
- Use GUN (C).
- Go forward.

- Use DUSTER, take SCREWS, use SCRAPER, earn POSTER (D).
- Take SPOON and CLIPPERS (E).
- Use TWEEZERS, take HAT (F).

- Use HAT (G).
- Play puzzle, earn WINE STOPPER (H).
- Use WINE STOPPER, take 1/4 PIANO KEYS, WIRE CUTTERS, and COCKTAIL STRAW (I).
- Use COCKTAIL STRAW and POSTER, use (J-K).
- Go right.

- Use WIRE CUTTERS, select tape (L).
- Use CLIPPERS, take FORK and 2/4 PIANO KEYS (M).
- Take CANNED DOG FOOD and OVEN MITT (N).
- Use SPOON, earn 3/4 PIANO KEYS (O).
- CAN OPENER on CANNED DOG FOOD, earn DOG FOOD.
- Walk down 2x.

- Place DOG FOOD (A).
- Select pairs (B).
- Take HOBBY HORSE (C).
- Go forward.
- Use HOBBY HORSE, take SAW and 4/4 PIANO KEYS (D).
- Place PIANO KEYS, take MAGNET ON ROPE (E).
- Walk down.

- Use MAGNET ON ROPE, earn SCREWDRIVER (F).
- Use SCREWS and SCREWDRIVER, take REFRIGERATOR KEY (G).
- Go forward, right.
- Use REFRIGERATOR KEY (H), earn BOTTLE OPENER.

- Use BOTTLE OPENER, take VALVE KNOB and WATER BOTTLE (I).
- Use VALVE KNOB and OVEN MITT, earn METAL CANE, take WIRE CUTTERS (J).
- Use METAL CANE (K).
- Go left (L).

- Use SAW, earn STEPS, take SHOVEL (M).
- Take 1/4 RAILROAD PARTS (N).
- Take 2/4 RAILROAD PARTS, use FORK, earn PICTURE (O).

- Place PICTURE (P).
- Play puzzle, earn MARRIAGE CERTIFICATE (Q).
- Place MARRIAGE CERTIFICATE (R), enter 2-2-0-8-1-4 (S).
- Take DOLLHOUSE KEY (T).
- Walk down 2x.

- Use DOLLHOUSE KEY, take 3/4 RAILROAD PARTS and CRAYON (A).
- Use SHOVEL, take CLAMPS and 4/4 RAILROAD PARTS (B).
- Go to Attic.
- Place RAILROAD PARTS, solution (C).
- Take GYPSUM (D).

- Read note, place WATER BOTTLE and GYPSUM, move (E-F).
- Take 1/4 BATTERIES, FUR BRUSH, and LADDER (G).
- STEPS on LADDER, earn ROPE LADDER.
- Place ROPE LADDER (H).
- Go right.

- Take TRACING PAPER and SCARF (I).
- Use FUR BRUSH, take WHEEL (J).
- Take 2/4 BATTERIES, use WIRE CUTTERS, earn HOSE (K).
- Walk down 2x.

- Place HOSE and CLAMPS (L).
- Solution (M).
- Take CORKSCREW (N).
- Go left, right.

- Use CORKSCREW, take JACK (O).
- Place WHEEL and JACK (P).
- Go forward.
- Take 1/3 ROAD SIGNS (A).
- Use TRACING PAPER and CRAYON, take COMBINATION (B).
- Take 3/4 BATTERIES (C).
- Place COMBINATION (D).
- Solution (E).
- Take 2/3 ROAD SIGNS and 4/4 BATTERIES (F).
- Return to Attic.

- Place BATTERIES, take CRANK (G).
- Go right, forward.
- Use CRANK (H).
- Play puzzle, earn NET (I).
- Use NET, earn TWEEZERS (J).
- Walk down.

- Use TWEEZERS, earn CASINO CHIP (K).
- Use CASINO CHIP, take METAL ROD (L).
- Go forward.
- Use SCARF and METAL ROD.
- Take 3/3 ROAD SIGNS (M).
- Walk down.
- Select (N).

- Place ROAD SIGNS on arms.
- Select a-b-c-d-b-e.
Congratulations! You have completed the game Fatal Evidence 2: The Missing.


