
Gloomy Tales 3: Hotel Frightsylvania (Bonus Chapter) – This time events take an unexpected turn, the guests of the castle, including the monsters, have become aggressive and chaos reigns in the hotel. Ghosts of the past and ancient legends come to life, and the usual order collapses. An old acquaintance responds to your request, because he knows about your ability to uncover secrets. Your task is to restore balance and search for Vlad, who disappeared under strange circumstances. While the castle literally breathes secrets, you will have to act decisively to protect people and unravel the true nature of events.
Bonus Chapter Walkthrough

- Take GEM EYES 1/2, VILE OF ACID, and WRENCH (A).
- Take MOSAIC PARTS 1/3, use WRENCH on the bolts, take GEAR (B).
- Take GARGOYLE BOWL, use GEAR on the octopus (C).

- Easy solution: Click on the right slots: 1-4-3 (D).
- Hard solution: Click on the right slots: 2-6-3 (E).
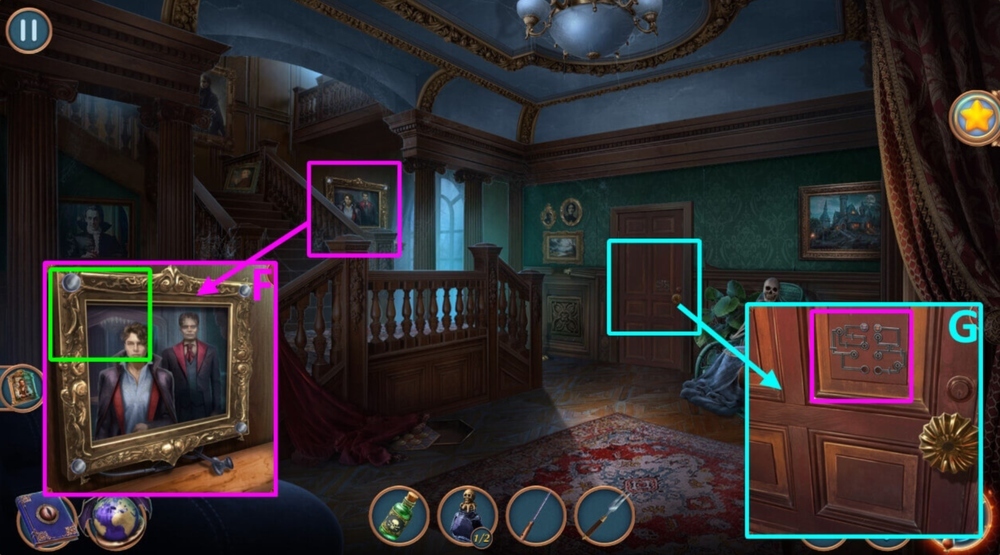
- Take ROPE.
- Use ROPE on the person (F).

- Solution: Assemble as shown in the image (G).
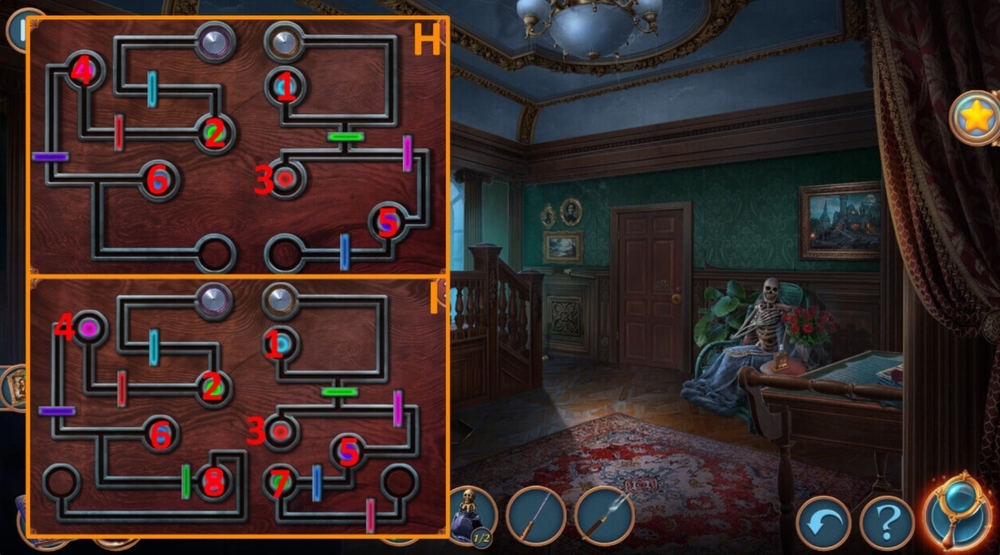
- Solution: Assemble as shown in the image (H).
- Solution: Assemble as shown in the image (I).
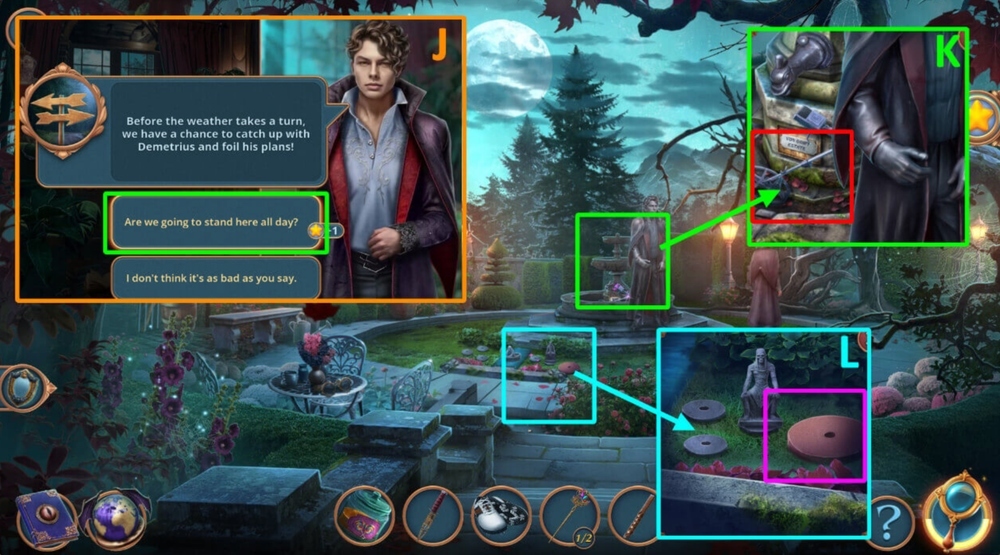
- Select this option, earn VLAD’S KEY (J).
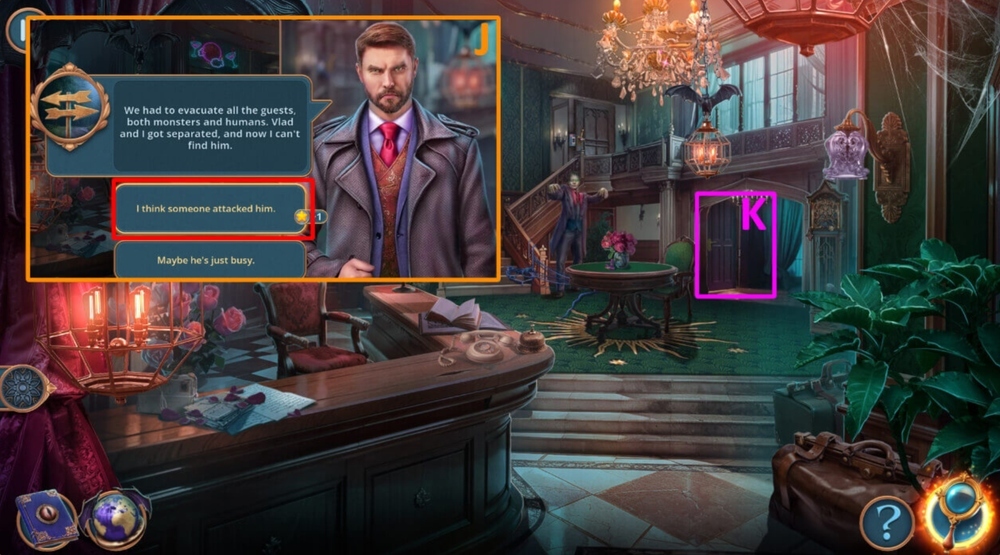
- Use VLAD’S KEY on the door (K).
- Go forward.
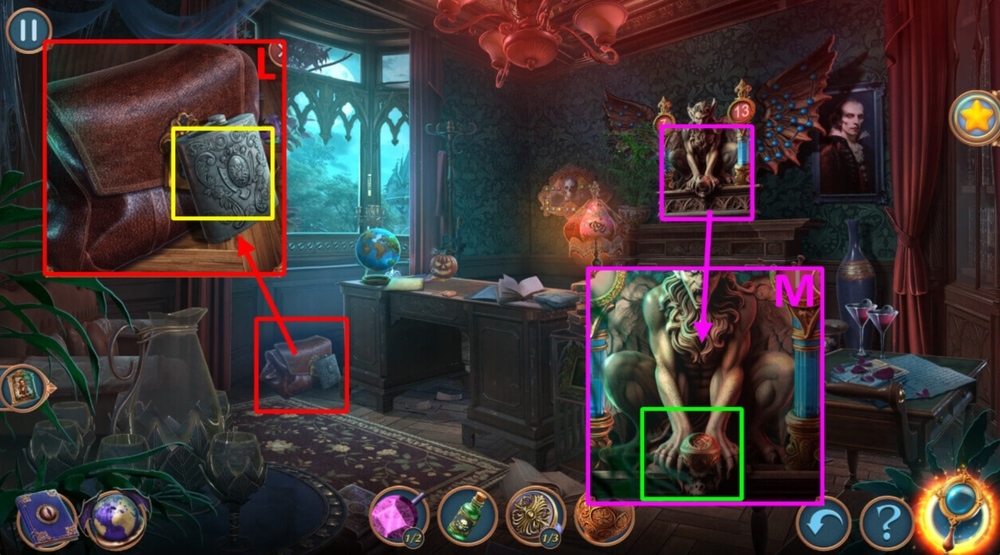
- Take ANTIQUE WATER FLASK (L).
- Use GARGOYLE BOWL and ANTIQUE WATER FLASK on the gargoyle (M).

- Easy solution: The correct measurements are shown in the image (N).
- Hard solution: The correct measurements are shown in the image (O).
- Take HOOK.

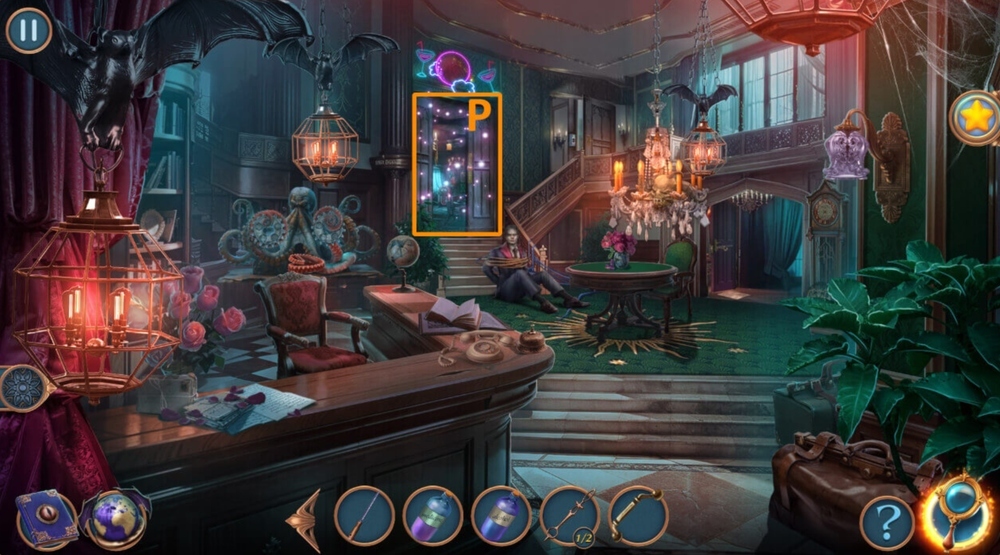
- Click on the inkwell, take QUILL AND INKWELL 1/2, use HOOK on the crack, get PUMPKIN AMULET (P).
- Go back.
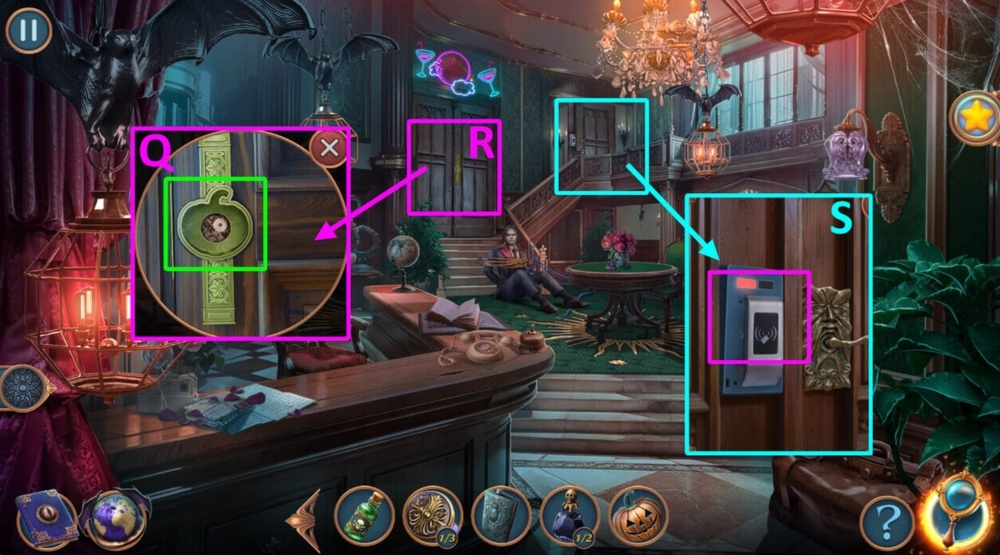
- Use PUMPKIN AMULET on the door (Q).
- Play HOP, earn STUN GUN (R).
- Use STUN GUN on the door (S).
- Go forward.

- Take MOSAIC PARTS 2/3 (T).
- Take MOSAIC PARTS 3/3 (U).
- Take CANDELABRA, use MOSAIC PARTS on the puzzle (V).

- Easy solution: 1-2×3-6-5×2-4×3-3-2×2-3×3-2-3 (W).
- Hard solution: 6-1×2-6-3-2-5×4-4-3×2-4×4-3-4-3×3 (X).
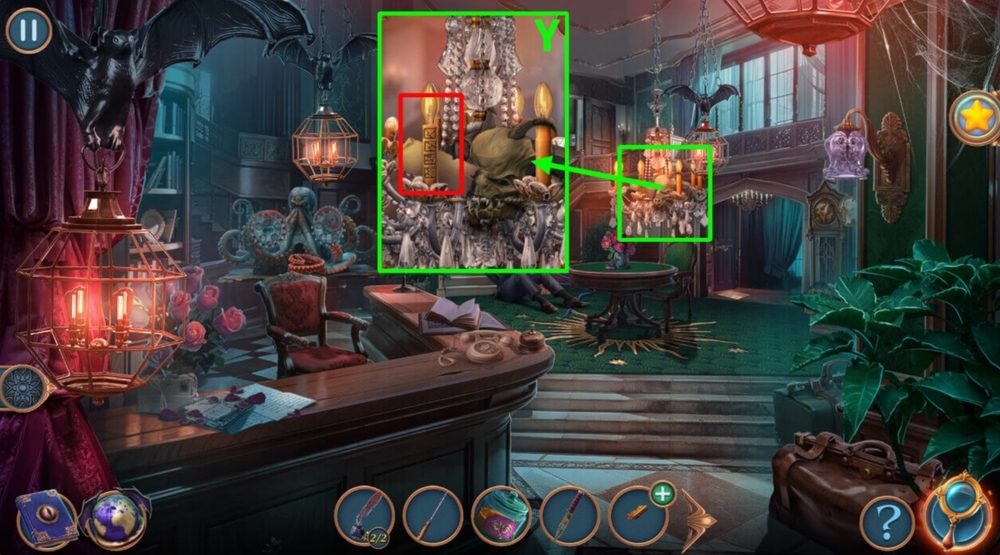
- Take DRAGON CANE and WIG.
- Use ANTIQUE WATER FLASK and WIG on the stain, get GEM EYES 2/2, use CANDELABRA on the wooden pattern (Y).
- Go back.

- Use DRAGON CANE on the chandelier, take FILE (Z).
- Go to Vlad’s Office.

- Use GEM EYES on the skull (A).
- Easy solution: Change colors as shown in the image (B).
- Hard solution: Change colors as shown in the image (C).
- Take SKELETON HAND.
- Go to Hallway.
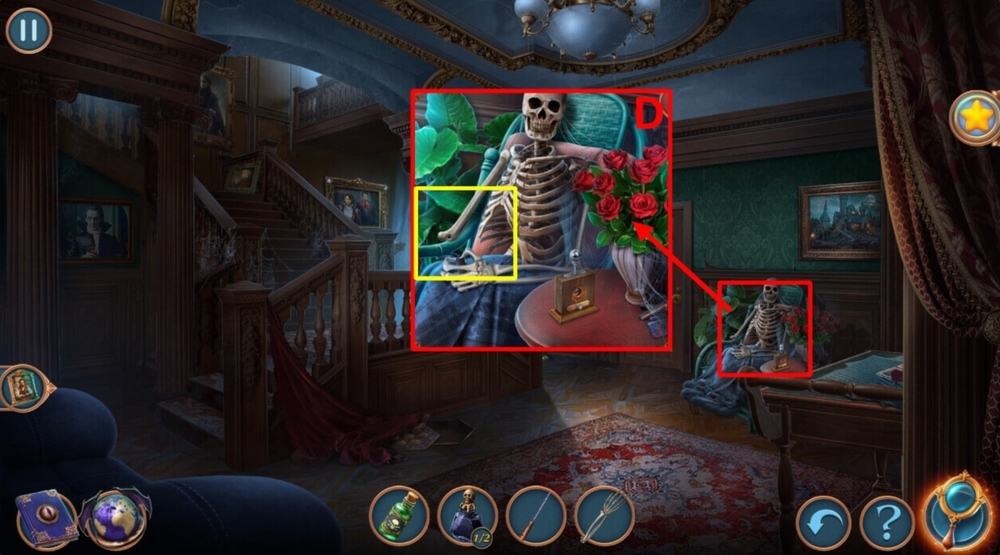
- Use SKELETON HAND on the skeleton, take LIPSTICK (D).
- Go to Vlad’s Office.

- Use LIPSTICK on the paper, examine the paper, click on Africa, North America, Australia, South America, then Eurasia, take FORK (E).
- Go to Hallway.
- Use FORK on the nails, take STETHOSCOPE (F).
- Use STETHOSCOPE on the door (G).
- Easy solution: Follow the instructions on the image (H).
- Hard solution: Follow the instructions on the image (I).
- Go forward.

- Take MEDICINE and DIAMOND CUT RING (J).
- Use DIAMOND CUT RING on the glass, take ALCOHOL and WHEEL (K).
- Use WHEEL on the tray trolley, read the note, take CLOCK HANDS 1/2, use VILE OF ACID on the chain, take DIADEM (L).

- Use DIADEM on the drawer, read the note, take THERMOSTAT HANDLE (M).
- Use THERMOSTAT HANDLE on the boiler, take CHEST HANDLE (N).
- Use CHEST HANDLE on the chest (O).
- Go to Castle Hall.
- Play HOP, earn MELTED CARAMEL (P).
- Go to Demetrius’s Room.

- Use MELTED CARAMEL on the chest, take PARCHMENT, ANTIDOTE RECIPE, and LIGHTER (Q).
- Use LIGHTER on the lamp, use MEDICINE, ALCOHOL, and ANTIDOTE RECIPE on the chemistry set, take CLOCK HANDS 2/2 (R).
- Go to Castle Hall.
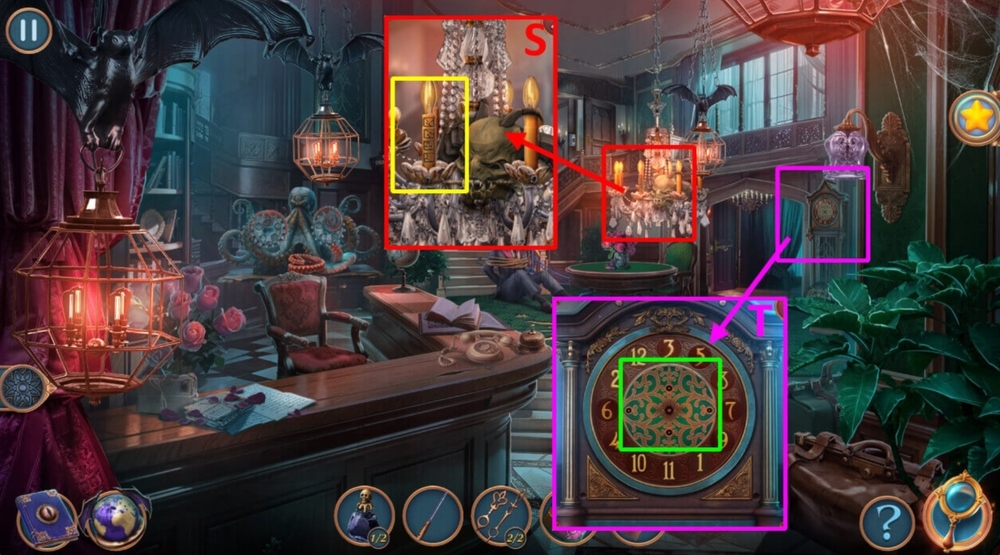
- Use PARCHMENT on the candle (S).
- Use CLOCK HANDS on the clock (T).

- Easy solution: 3-2-1×2-A-5-3-2-A-4-1×5-A-2-5-A-4-1×2-A-2-6-5-A (U).
- Hard solution: A-4×2-3×3-2×3-1-A-4-2×2-1×2-A-4-2×3-A-2-3×2-A-2×2-4×3-3-A-2×3-1-A-1-4×2-3×2-A (V).
- Take DULL KNIFE, PIECE OF KEY, and SHOE.
- Go to Hallway.

- Use SHOE on the wooden pattern, take SPIKED SHOES, NEEDLE AND BARRETTE, and PHEASANT FEATHER (W).
- Use PHEASANT FEATHER on the cigar clipper, get QUILL AND INKWELL 2/2 (X).
- Go back.
- Use QUILL AND INKWELL on the candle, get CODE (Y).
- Go to Hallway.
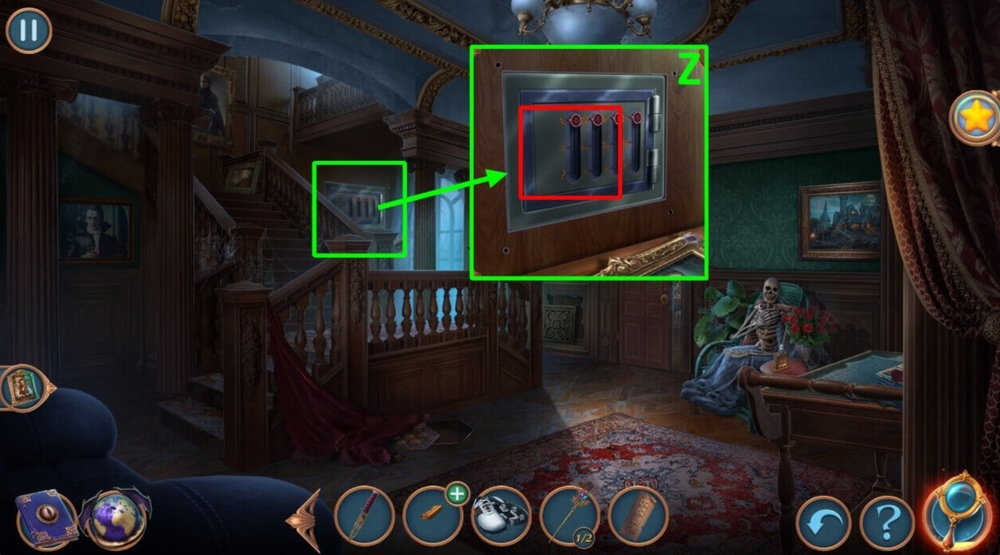
- Use CODE on the safe (Z).
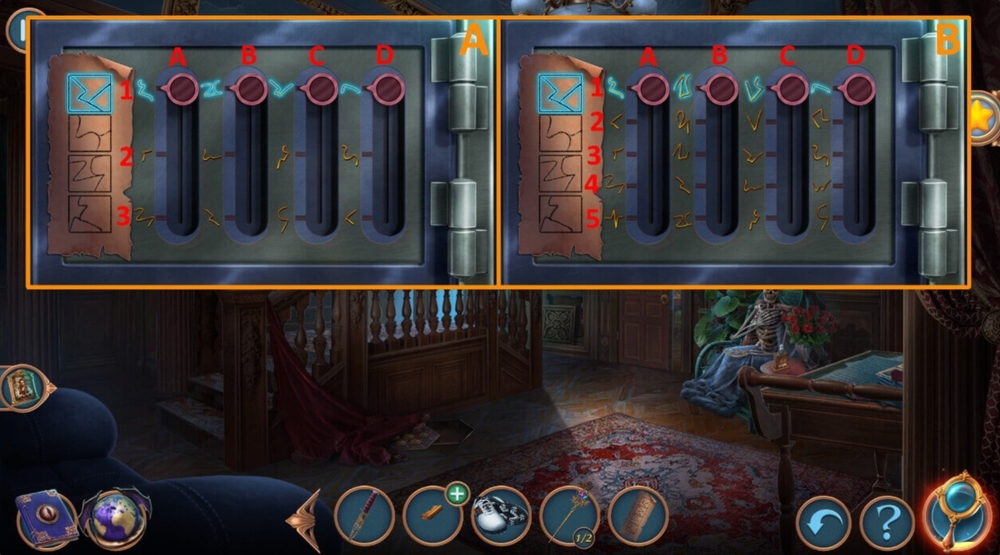
- Easy solution: In the images, numbers represent the positions in each row, and letters represent the levers (A).
- Hard solution: In the images, numbers represent the positions in each row, and letters represent the levers (B).
- Take FLAT TOKEN.
- Go to Demetrius’s Room.

- Use FLAT TOKEN on the box, take METAL PLATE (C).
- Use FILE and METAL PLATE on PIECE OF KEY, get VLAD’S BAG KEY (D).
- Go to Vlad’s Office.

- Use VLAD’S BAG KEY on the bag, take RIB SPREADER (E).
- Go back.

- Use RIB SPREADER on the skull, take IRON ROD and SYRINGE (F).
- Go to Demetrius’s Room.

- Use SYRINGE on the chemistry set (G).

- Solution: 3-5-6 (H).
- Take VACCINE.
- Use VACCINE on the person (I).
- Select this option (J).
- Take BROKEN METAL DETECTOR (K).
- Use DULL KNIFE on the stone, get SHARP KNIFE (L).

- Use SHARP KNIFE on the vines (M).
- Easy solution: Arrange the fragments as shown in the image (N).
- Hard solution: Arrange the fragments as shown in the image (O).
- Take THICK CLOTH.

- Use IRON ROD and THICK CLOTH on the bars, get IRON ROD, take AXE (P).
- Use AXE on the trees (Q).
- Go forward.

- Select this option (R).
- Go forward.
- Take FLASHLIGHT, GLOVE, and TUNING FORK (S).
- Use IRON ROD and TUNING FORK, take ROPE (T).
- Use FLASHLIGHT and ROPE on the pit, take WAX CANDLE (U).
- Go back.

- Use SPIKED SHOES on the rocks (V).
- Take BATTERIES and TRUNK KEY (W).
- Use TRUNK KEY on the trunk (X).
- Play HOP, earn SKULL (Y).

- Use SKULL on the bag, take WIRE and CORKSCREW, use WAX CANDLE on the zipper, take HAND FAN (Z).
- Go forward.

- Use HAND FAN on the smoke, use GLOVE on the brush, get LITTLE METAL BRUSH (A).
- Use LITTLE METAL BRUSH on the crystals, take MAGNET (B).
- Go to Yard.

- Use MAGNET on the plaque, take SCISSORS (C).
- Go to Demetrius’s Cave.

- Use SCISSORS on the stitch, take GAME CHIPS (D).
- Use GAME CHIPS on the chest (E).

- Easy solution: Arrange the chains of tokens as shown in the image (F).
- Hard solution: Arrange the chains of tokens as shown in the image (G).
- Read the journal.
- Go to Yard.

- Use CORKSCREW on the barrel, take FIGURINES 1/2 and DUCT TAPE (H).
- Use BATTERIES, WIRE, and DUCT TAPE on BROKEN METAL DETECTOR, get METAL DETECTOR (I).
- Go to Foothills.

- Use METAL DETECTOR on the sand, take AXE and PICKAXE (J).
- Use PICKAXE on the rocks (K).

- Easy solution: Choose the right order of stones.
- Use images as a hint (L).

- Easy solution continued (L).

- Hard solution: Choose the right order of stones.
- Use images as a hint (M).
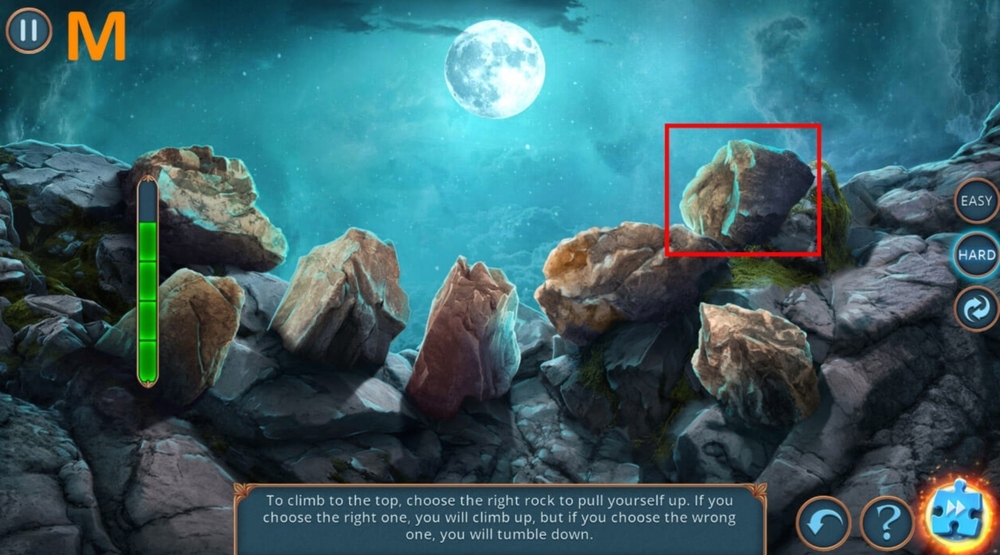
- Hard solution continued (M).

- Select this option (N).

- Use MELTED CARAMEL on the bees (O).
- Take NEEDLE AND BARRETTE (P).
- Use NEEDLE AND BARRETTE on the box (Q).

- Easy solution: A-B-A-B-B-B (R).
- Hard solution: B-A-B-A-A-A (S).
- Take CHAMPAGNE.
- Use CHAMPAGNE on the tree, take MEGAPHONE SPEAKER (T).
- Go back.

- Use MEGAPHONE SPEAKER on the bird, take WRENCH (U).
- Play HOP, earn FUNNEL (V).
- Select this option (W).
- Go to Mountaintop.

- Use FUNNEL on the bees, take FIGURINES 2/2 (X).
- Go to Yard.

- Use FIGURINES on the stones (Y).
- Solution: 4-A-4-B-2-A-2-4-B-4-3-A-3-B-4-A-4 (Z).
- Take VALVE.
- Use NUT, WRENCH, and VALVE on the fountain, take KEY OF INFINITY (A).
- Go to Mountaintop.

- Use KEY OF INFINITY on the machine (B).
- Easy solution: K-C-D-G-J-I-B-A-G-B-L-K-J-G-H-G-D-C-D-H (C).
- Hard solution: N-M-L-F-K-I-H-B-A-B-M-L-J-I-H-G-H-I-H-N-M-J-E-D-N-I-N-O-N (D).
Congratulations! You have completed the game Gloomy Tales 3: Hotel Frightsylvania.


