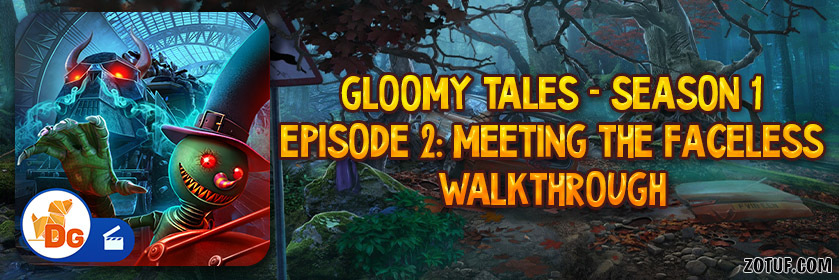
Gloomy Tales Season 1 Episode 2: Meeting the Faceless – The game’s walkthrough begins when your friend Millie is captured by a monster named Ollister’s, who leaves his cursed mark on you. He turns her into a werewolf. Once the sun rises, Millie will be a monster forever. According to legends, every Halloween, a train full of ghosts and monsters arrives. They walk among the living, but must return before dawn. The only monsters that can return the following year are those that brought a human with them. In doing so, the victim must look like a monster. The rest will never again enter the world of the living. More than anything, ghosts want to return to the world of the living, so Ollister will probably try to get in your way. If you can not pass any of the puzzles or do not know where the items are, on our site you can watch the walkthrough of the game Gloomy Tales Season 1 Episode 2: Meeting the Faceless One, and save the kidnapped people.
Gloomy Tales Season 1 Episode 2: Meeting the Faceless – Walkthrough
Here you can see the full walkthrough of Gloomy Tales Season 1 Episode 2: Meeting the Faceless game, namely the main story.

- Take NET, BOTTLE and HAMMER (U).
- Take WORMWOOD and COMB (V).
- Use HAMMER, take TORN PICTURE 1/2 (W).

- Use NET (X).
- Take HAIR CLIP and TORN PICTURE 2/2 (Y).
- Move (Z).
- Place TORN PICTURE, solution (A).
- Take note (B).

- Find 12 footprints (C).

- Take ANTI-GHOST SOLUTION INSTRUCTIONS and ACID (D).
- Use ACID (E), take LADDER (F).

- Place LADDER (G).
- Easy solution (H): 7-1-8-7-3-8-4-12-8-1-10-1.
- Hard solution (I): Jx5-Kx5-Jx3-Kx3.
- Go (L).

- Take RIPPER, STATUE 1/2 and SALT (M).
- Take SWITCH, take IRON NAIL with COMB (N).
- WORMWOOD, IRON NAIL, SALT and BOTTLE on ANTI-GHOST SOLUTION INSTRUCTIONS, receive SOLUTION.
- Use SOLUTION (O).

- Easy solution (P).

- Hard solution (Q).

- Select 1 or 2 (R).
- Receive NAVIGATOR.
- Go (S).

- Take CUT BOTTLE and LIGHT BULBS 1/2 (T).
- Take LEATHER FLAP with RIPPER (U).
- Take note, take LIGHT BULBS 2/2 with LEATHER FLAP (V).
- Walk down twice.

- Place LIGHT BULBS (W).
- Place SWITCH (X).
- Play puzzle (Y), receive GARDEN SHEARS.

- Use GARDEN SHEARS, take STONE (Z).
- Use CUT BOTTLE, take SOUVENIR HORSESHOE (A).
- Go (B).

- Use SOUVENIR HORSESHOE (C).
- Take HALLOWEEN CHIP and BATTERY (D).
- Take MOSAIC PIECE with HAIR CLIP (E).

- Place MOSAIC PIECE (F).
- Find items (G).
- Take BOTTLE OPENER (H).
- Go (I).

- Take LONG ANTENNA with BOTTLE OPENER (J).
- Take STATUE 2/2 with LONG ANTENNA (K).
- Walk down.

- Place STATUE (L).
- Easy solution (M).
- Hard solution (N).
- Take RITUAL CANDLE (O).
- Go (P).

- Use RITUAL CANDLE, take BIKE KEY (Q).
- Walk down twice.
- Play puzzle (R), receive GASOLINE.
- Place NAVIGATOR, BIKE KEY and GASOLINE (S).

- Easy solution (T): U-(1-2)-(2-3)-V-(4-5)-(5-6)-(5-4)-W-(8-9).
- Hard solution (X): Y-(1-2)-(2-3)-(3-4)-(2-1)-Z-(5-6)-(6-7).
- (7-8)-(5-6)-(6-7)-A-(9-10)-(10-11)-(11-12)-(11-10)-(10-9).
- (11-12)-B-(16-15)-(15-14)-(14-13)-(14-15)-(15-16)-(14-15).

- Select 1 or 2 (C).
- Take CHISEL (D).
- Use CHISEL and STONE (E).
- Take WIND CHIMES (F).

- Take RAVEN SKULLS 1/3, place WIND CHIMES (G).
- Easy solution (H): (4-5)-(1-6)-(2-3)-(3-6)-I.
- Hard solution (J): (4-5)-(1-7)-(3-2)-(1-3)-(1-6)-K.
- Go (L).

- Select 1 or 2 (M).
- Go (N).

- Take STYLUS and PACK OF PENCILS (O).
- Use PACK OF PENCILS, take MAGIC COLORED PENCILS (P).
- Use MAGIC COLORED PENCILS (Q).

- Easy solution (R).
- Hard solution (S).
- Take COPYING PAPER (T).
- Walk down.

- Take NON-FUNCTIONAL LAMP and CEREMONIAL NEEDLE (U).
- Use HALLOWEEN CHIP (V).
- Take RAVEN SKULLS 2/3 (W).
- Take note, take RAVEN SKULLS 3/3 with CEREMONIAL NEEDLE (X).

- Place RITUAL CANDLE and RAVEN SKULLS, use CEREMONIAL NEEDLE (Y).
- Easy solution (Z).

- Hard solution (A).
- Go (B).

- Take BENT SPOON and UV LAMP (C).
- BATTERY and UV LAMP on NON-FUNCTIONAL LAMP, receive UV LAMP.
- Use UV LAMP (D).
- Play puzzle (E), receive DREAM CATCHER.
- Use DREAM CATCHER, take BAG AND SHOVEL 1/2 and MATCHES (F).

- Use MATCHES, take TINY KEY (G).
- Remove drape (H).
- Use TINY KEY, take BRUSH, TAROT CARDS and FORTUNE-TELLER’S SHAWL (I).
- Place STYLUS and COPYING PAPER, take FORTUNE-TELLING INSTRUCTIONS (J).
- Play puzzle (K), receive MUSIC RECORDS.
- Walk down twice.

- Place MUSIC RECORDS and HALLOWEEN CHIP (L).
- Easy solution (M): O-P-Qx5-Rx9-S.
- Hard solution (T): V-W-Xx2-Yx8-Zx6-A.
- Take BAG AND SHOVEL 2/2 (B).

- Use BAG AND SHOVEL, take SAND and LIGHTER (C).
- Use SAND, take CROCHET HOOK (D).
- Use CROCHET HOOK (E).
- Take DIAMOND PENDANT (F).
- Go (G).

- Use DIAMOND PENDANT, take note, MAGIC CRYSTALS and STONE PYRAMID (H).
- Place FORTUNE-TELLER’S SHAWL, STONE PYRAMID and TAROT CARDS (I).
- Play puzzle (J), receive VASE TOP.
- Select 1 or 2 (K).
- Use VASE TOP, take BONE TREAT (L).
- Go (M).

- Place FORTUNE-TELLING INSTRUCTIONS (N).
- Easy solution (O): Px2-Q-Px2.
- Hard solution (O): Qx2-P-Qx2-P-Q-Px2-Qx3-Px2-Q-P.
- Q-P-Q-P-Qx2-Px2-Qx2-P-Q-P-Qx2-Px2-Qx4.
- Take BONE HAND (R).
- Use BONE HAND, take PAPERWEIGHT (S).
- Go to Ritual Hall.

- Use BONE TREAT, take BLUE ROSE.
- Use BRUSH, receive RESIN BRUSH (T).
- Use PAPERWEIGHT, take BOOK AMULET (U).
- Use RESIN BRUSH, take HORN (V).
- Use BENT SPOON, receive SPOON (W).
- Go to Astra’s Library.

- Place BOOK AMULET (X).
- Play puzzle (Y).
- Walk down twice.
- Use HORN (Z).
- Take CARVING KNIFE (A).
- Go (B).

- Use SPOON, CARVING KNIFE and LIGHTER, take JACK-O-LANTERN (C).
- Play puzzle (D), receive FORTUNE-TELLER RING.
- Go (E).
- Place BLUE ROSE, MAGIC CRYSTAL, FORTUNE-TELLER RING and JACK-O-LANTERN (F).

- Select 1 or 2 (G).
- Easy solution (H).
- Hard solution (I).
Congratulations! You have completed the game Gloomy Tales Season 1 Episode 2: Meeting the Faceless.


