
Haunted Hotel 20: A Past Redeemed – The game walkthrough begins with James and Jessica excited that their wedding will be held at the Hotel Del Pasado. Arriving at the hotel where the ceremony will take place, they are met by a mysterious local gardener named Hepin. He is just in the business of preparing weddings, and he also dabbles in chiromancy. The gardener makes a frightening prediction that threatens their future. The prediction says when you see a cross on a building, and a cloud covers the moon, and the window glare disappears the threat will hang over your wedding. You will see a black raven and a cat with a white face. A ghost will fly out of the round window. This is how the fateful events of your life will begin. A bird will rise into the sky above the signpost. A gust of wind will take away an umbrella, and a magic flower will bloom. A magic clock will help you change your destiny when the time comes. If you can not pass any of the puzzles or do not know where the items are, on our site you can watch the walkthrough of the game Haunted Hotel 20: A Past Redeemed, and learn all the secrets of Hotel Del Pasado.
Haunted Hotel 20: A Past Redeemed – Walkthrough
Here you can see the full walkthrough of Haunted Hotel 20: A Past Redeemed, namely all chapters, including bonus chapter, in pictures.
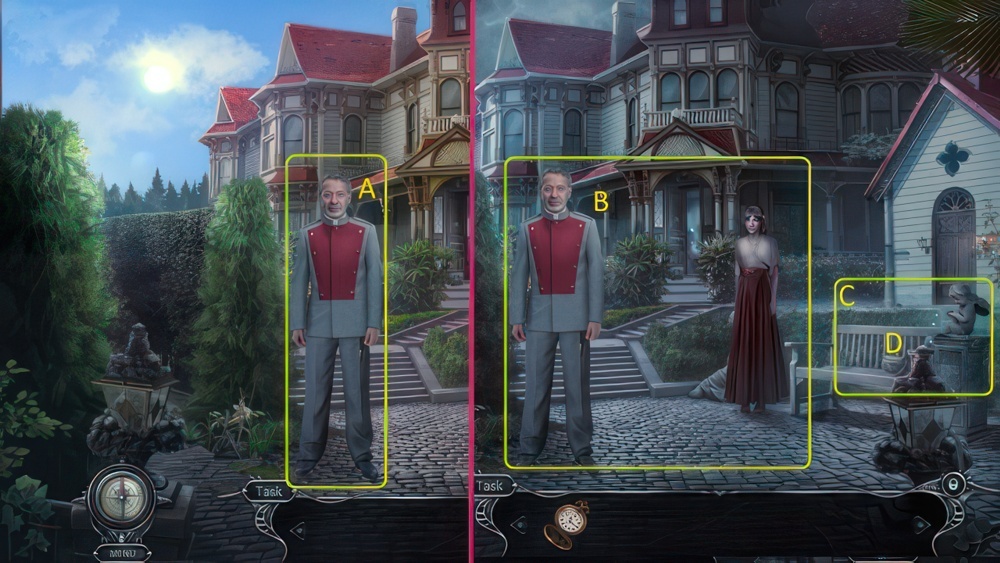
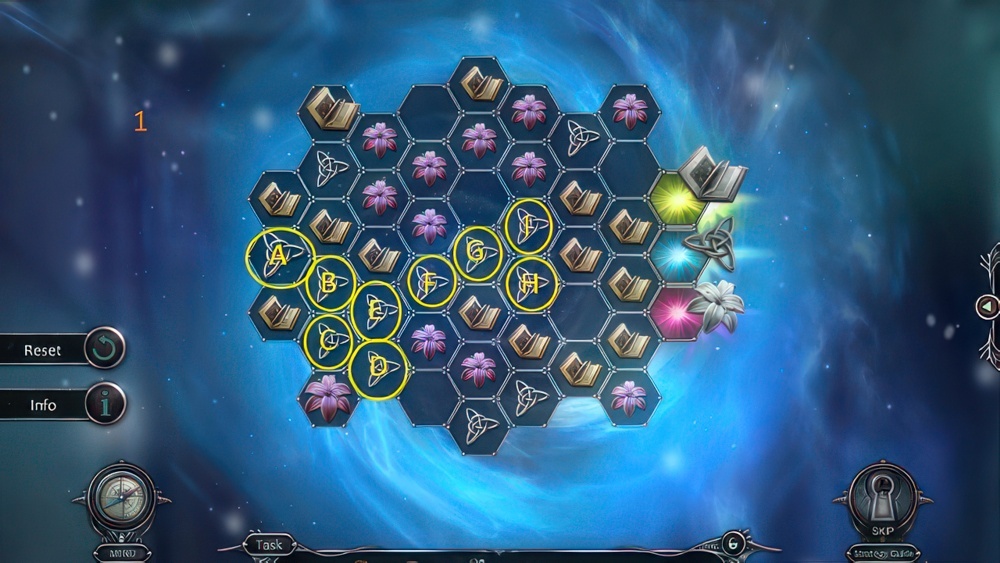
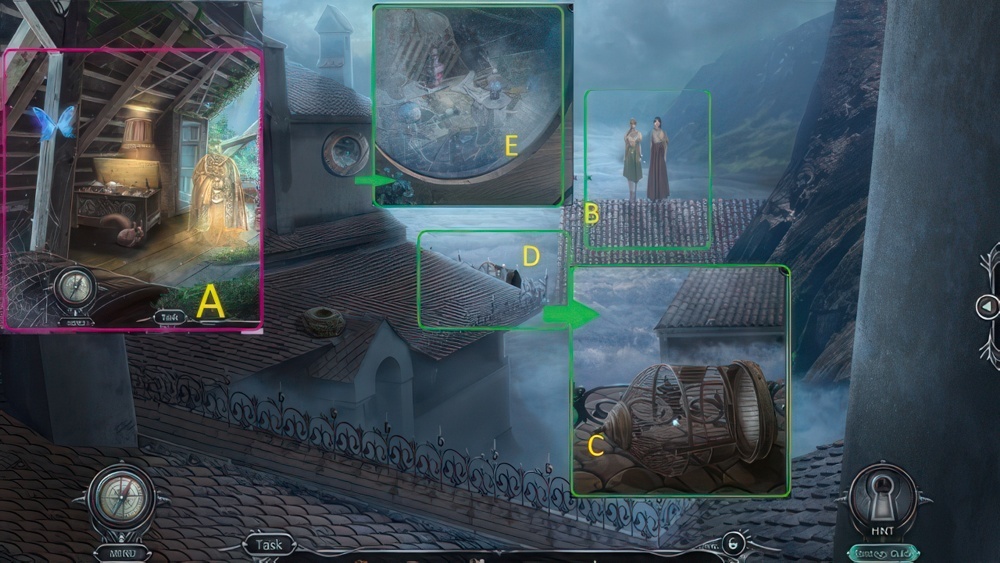
- Speak with the stranger, play puzzle, take POCKET WATCH (A).
- Talk, get ANT REPELLENT (B).
- Explore the bench (C), Take BAG (D).
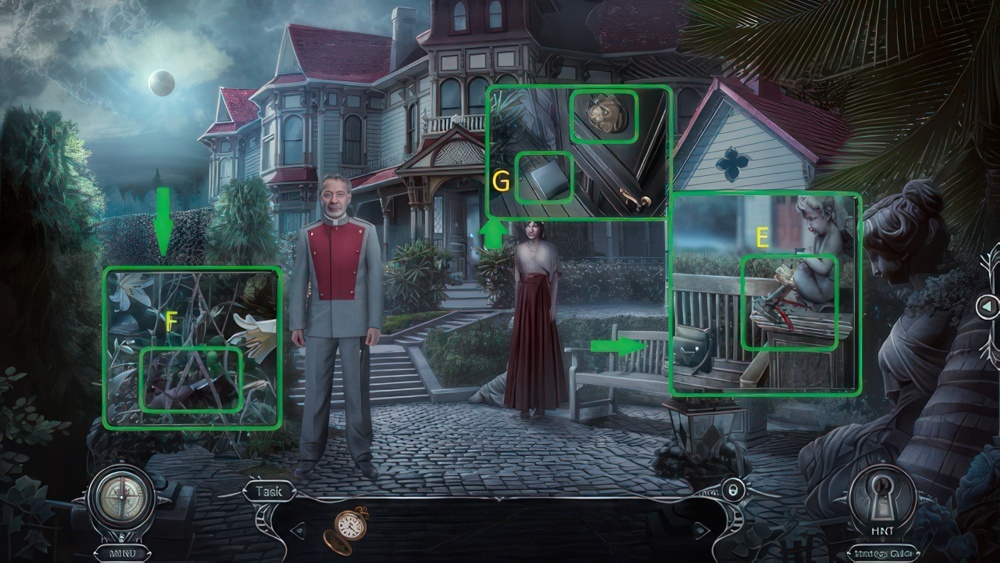
- Use ANT REPELLENT, read notes, take HAMMER and PRUNERS (E).
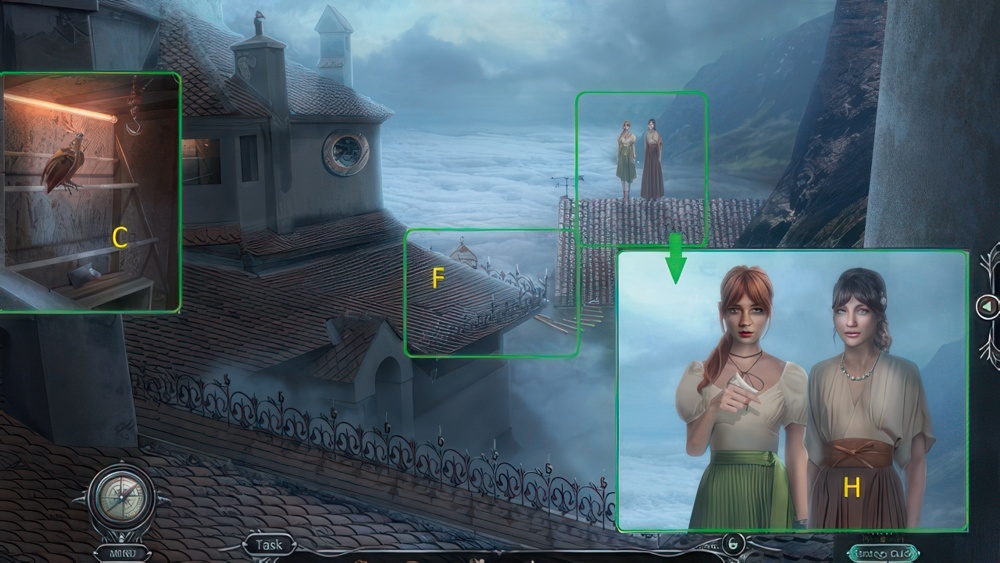
- Use PRUNERS, take CHISEL (F).
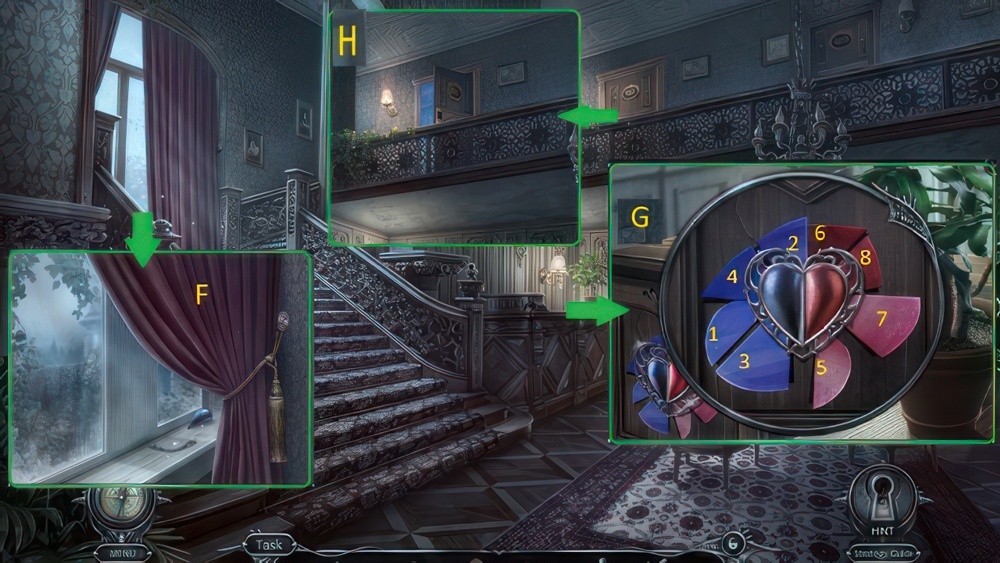
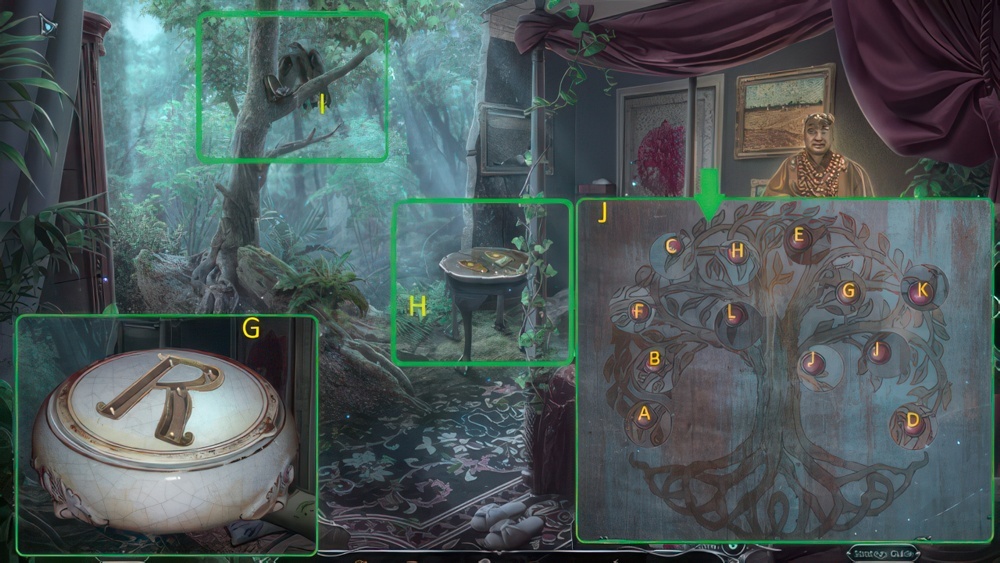
- Use CHISEL and HAMMER (G).

- Select the matching symbols to create the sculpture.
- Walkthrough: A-a-B-b-C-c-D-d, earn DOVE STATUE (H).
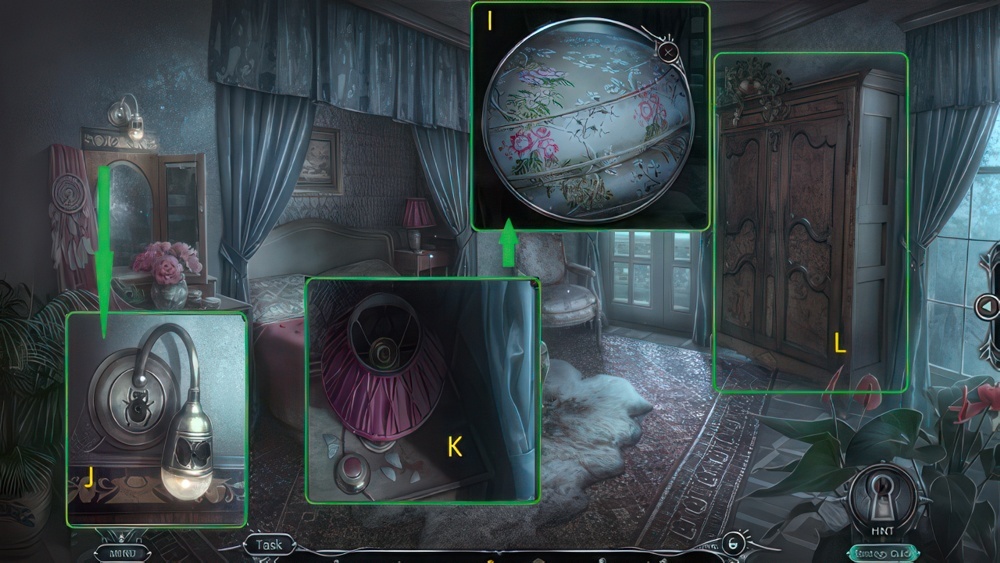
- Take GLUE (I).
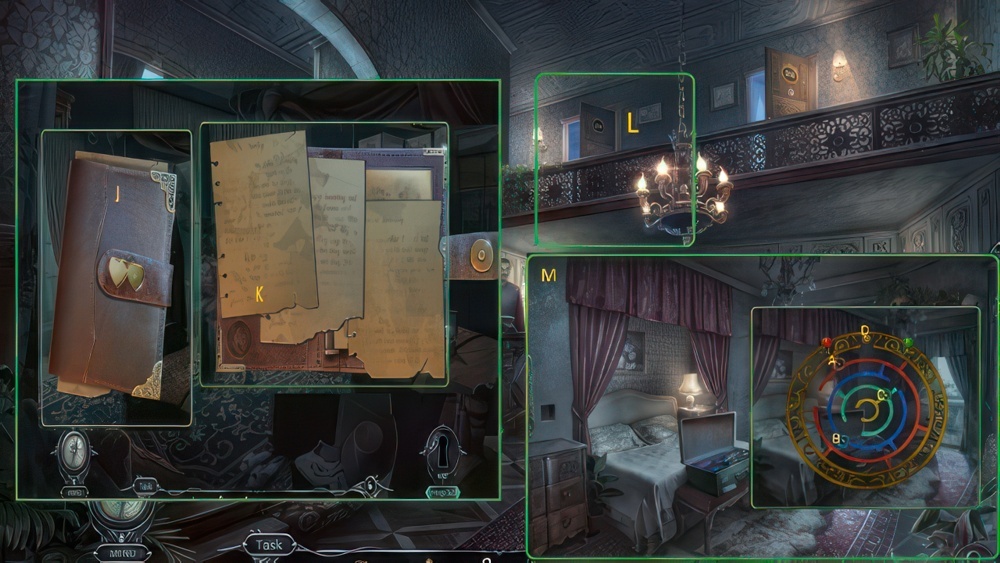
- Use DOVE STATUE with GLUE (J).
- Take PLIERS and BONE (K).
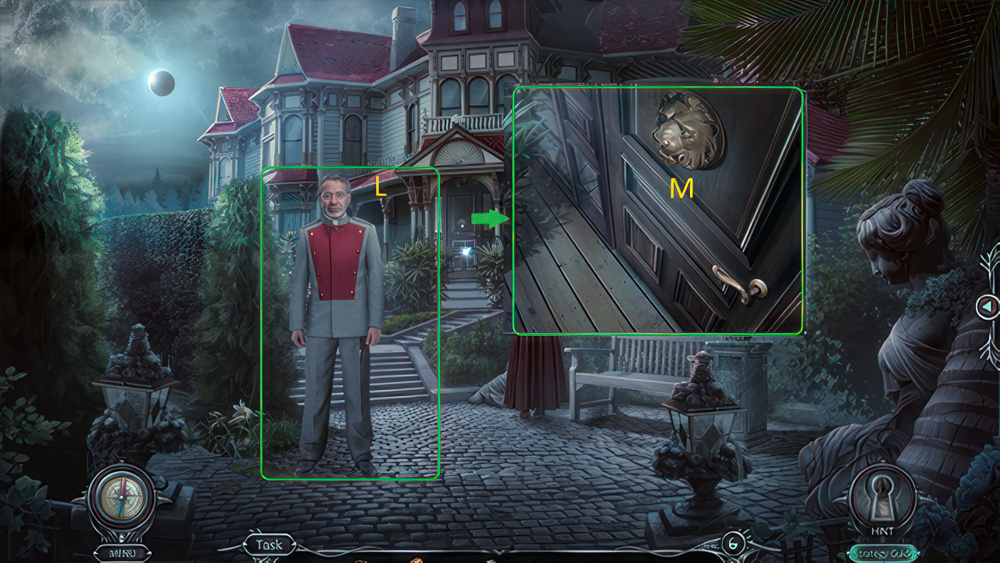
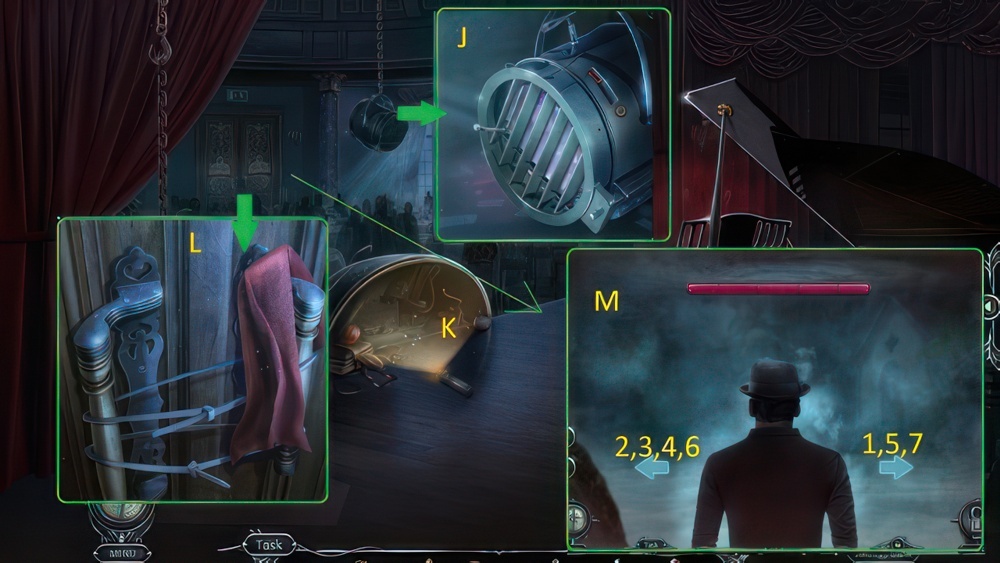
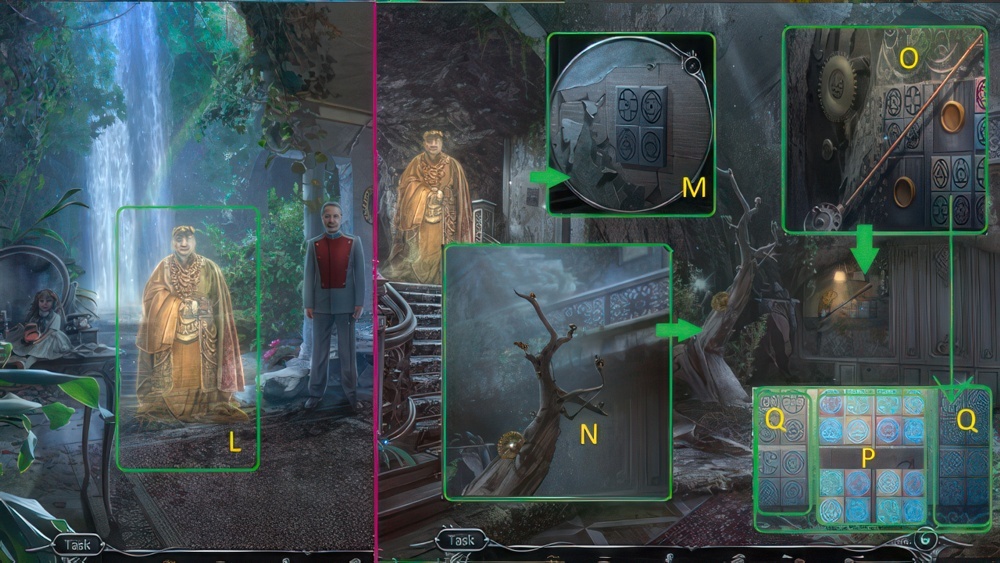
- Talk with Harpin, get KNOCKER (L).
- Use KNOCKER (M).
- Move forward.
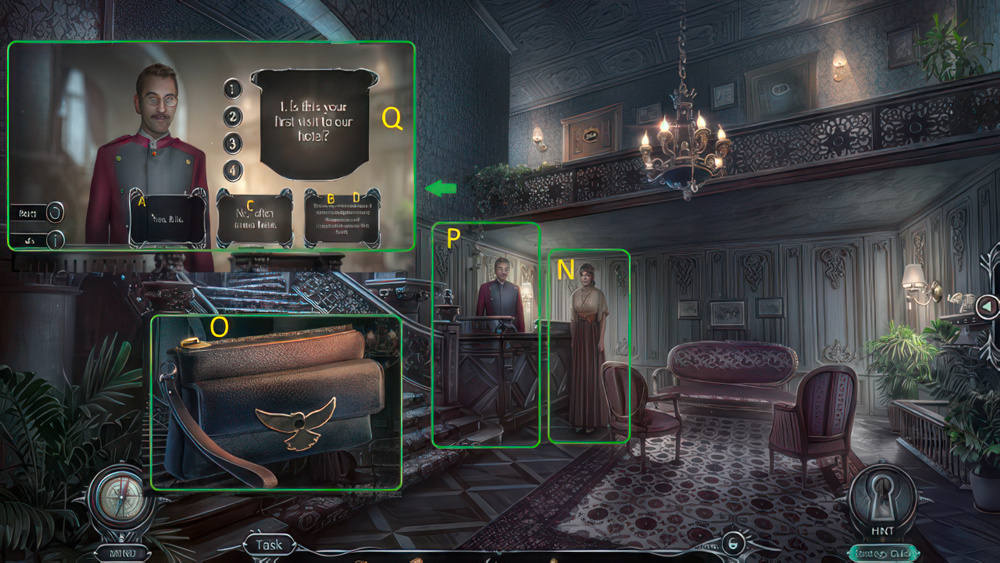
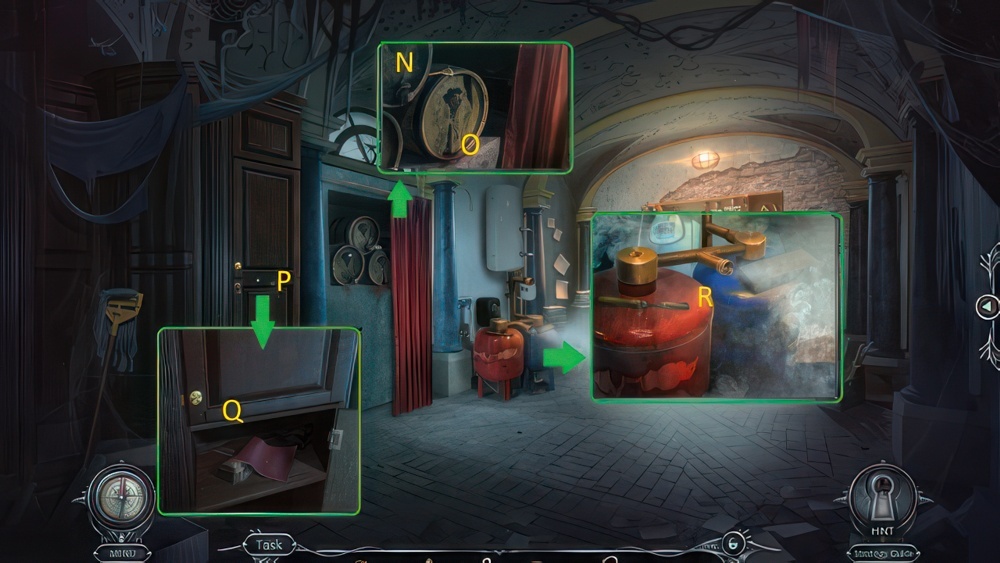
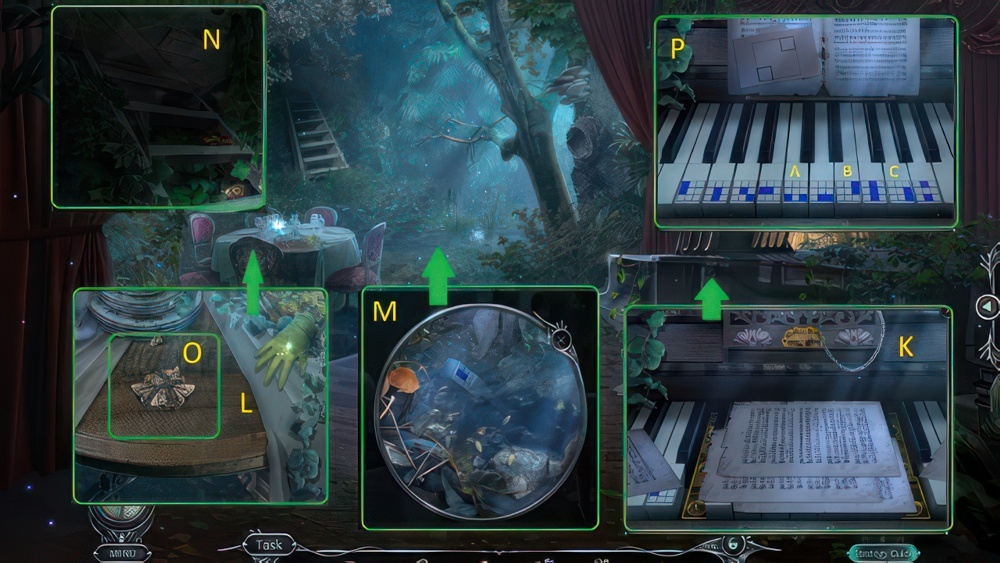
- Talk, get ZIPPER PULL (N).
- Use ZIPPER PULL, take PASSPORT (O).
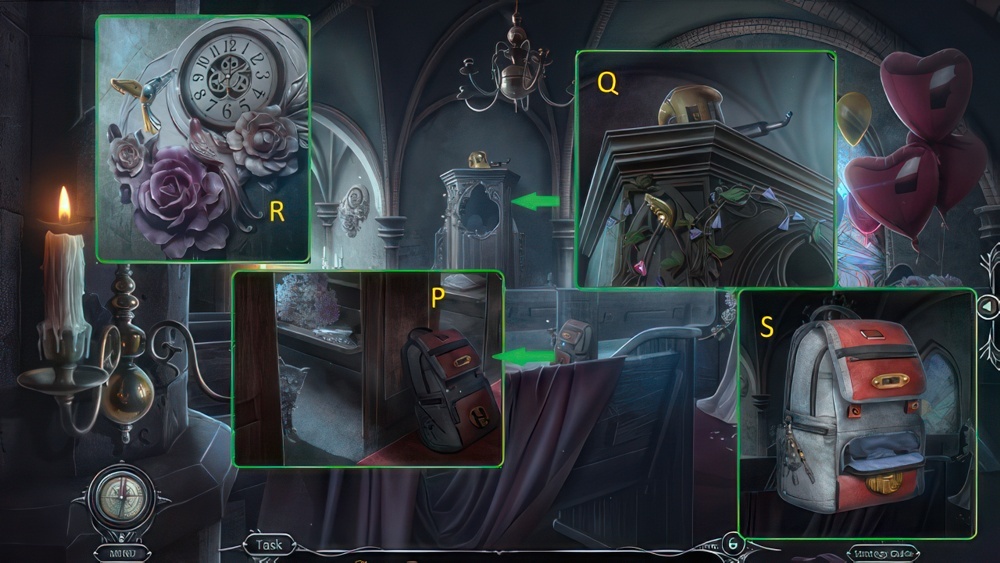
- Use PASSPORT (P).
- Choose the correct answer to each of the receptionist’s questions.
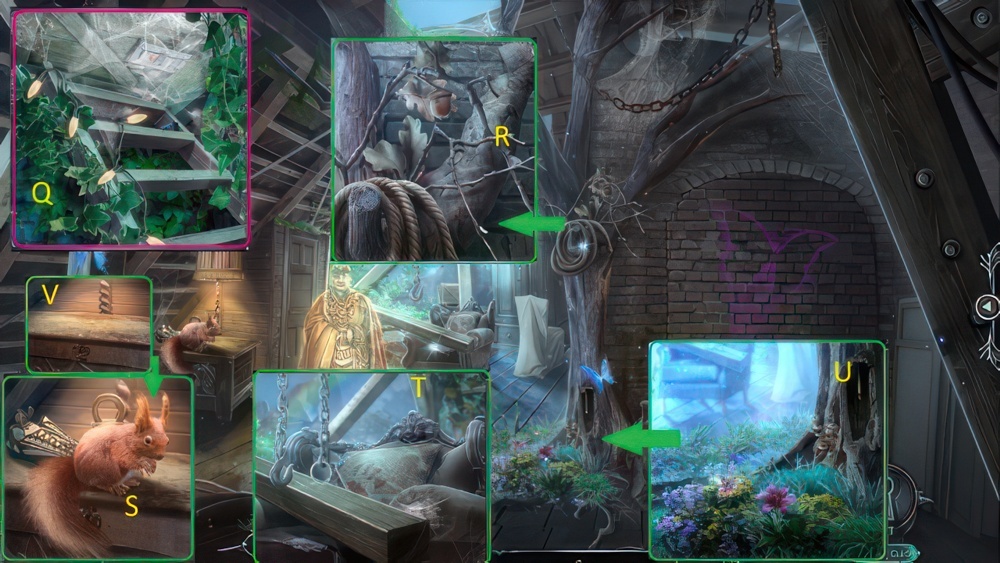
- Walkthrough: A-B-C-D, get ROOM KEY (Q).
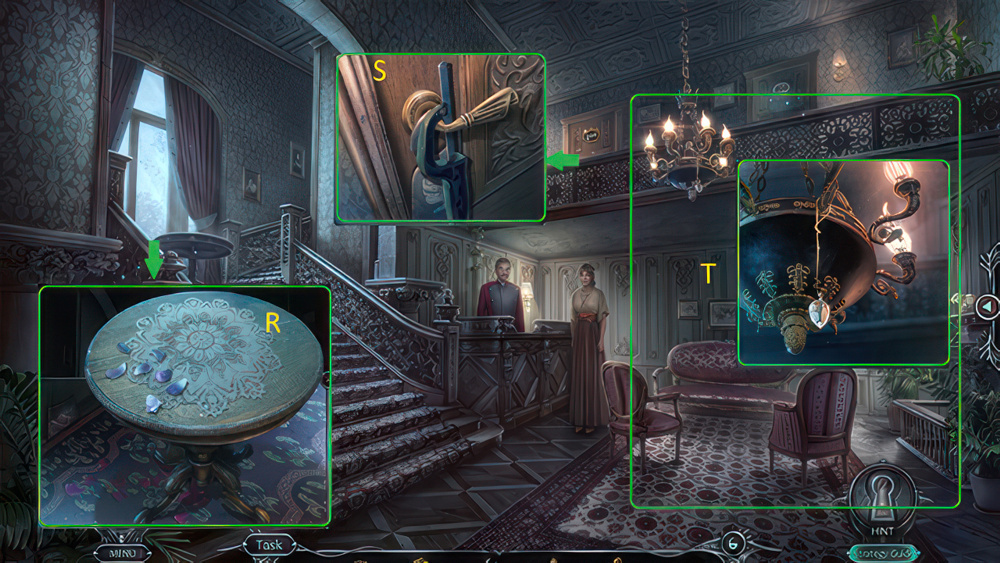
- Take TABLE (R).
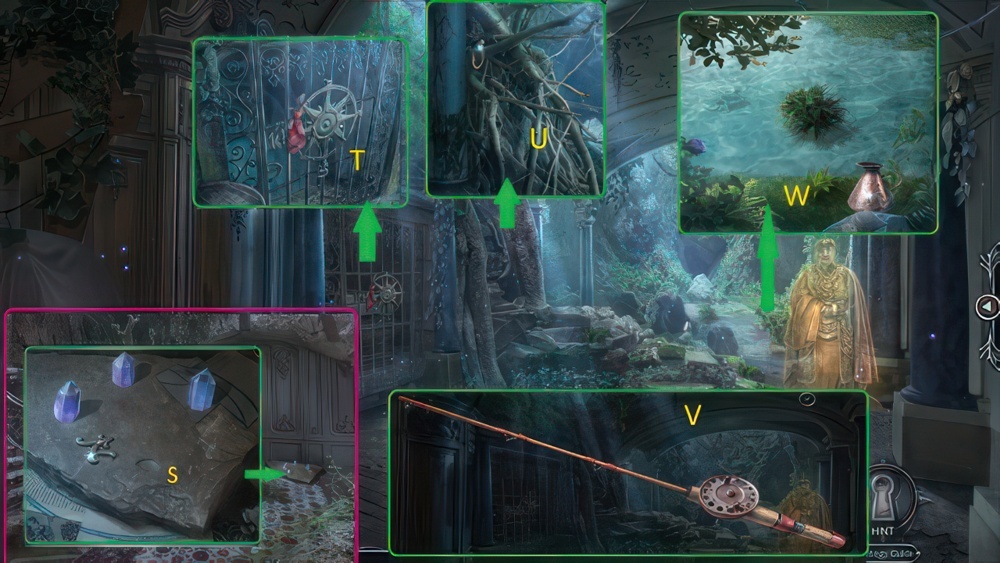
- Take HACKSAW (S).
- Use TABLE and PLIERS, get DIAMOND (T).
- Go outside.
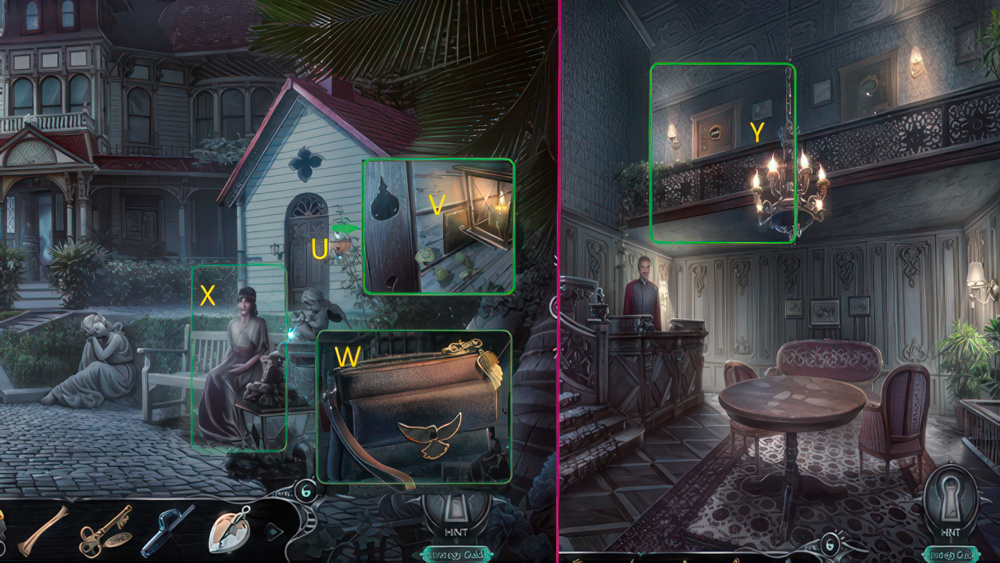
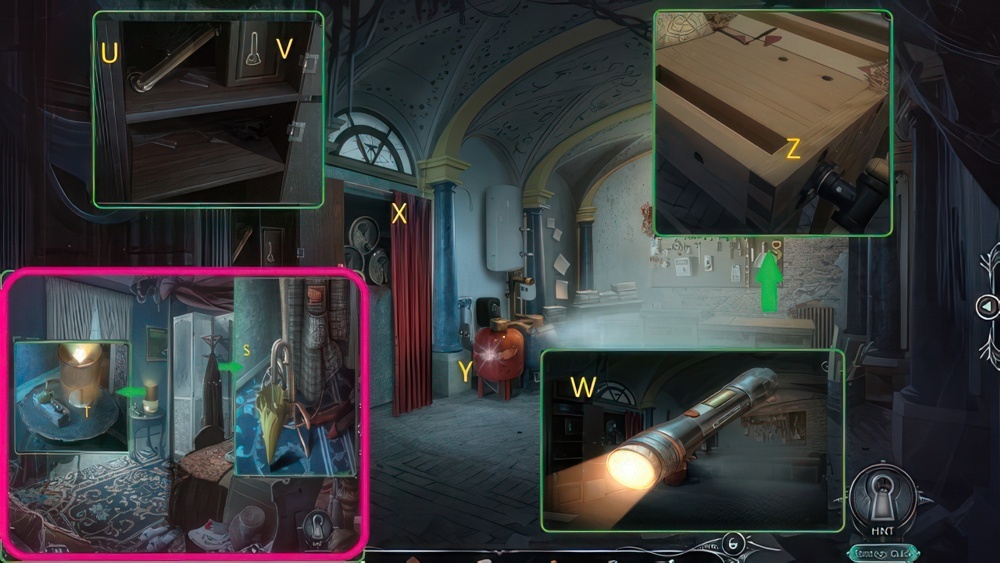
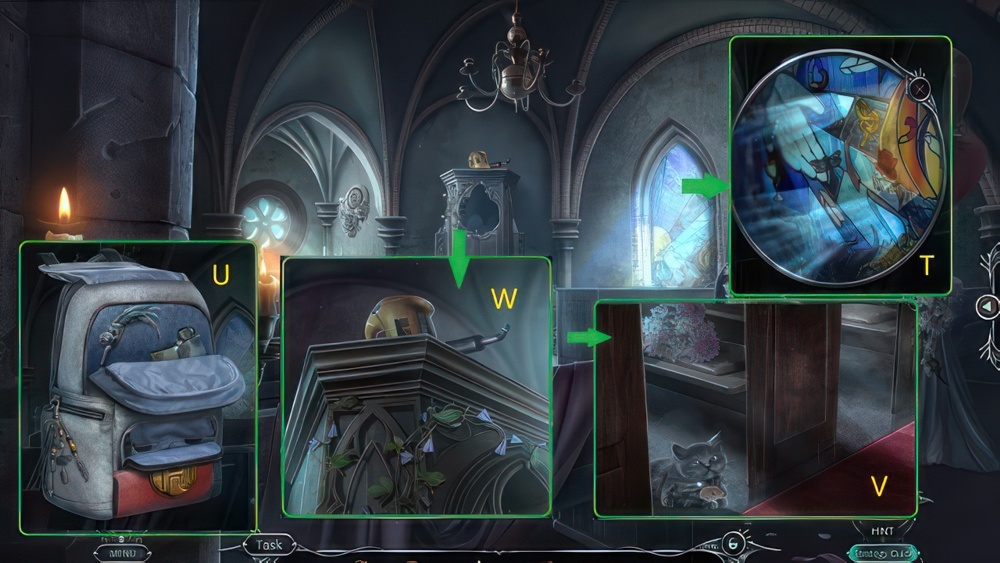
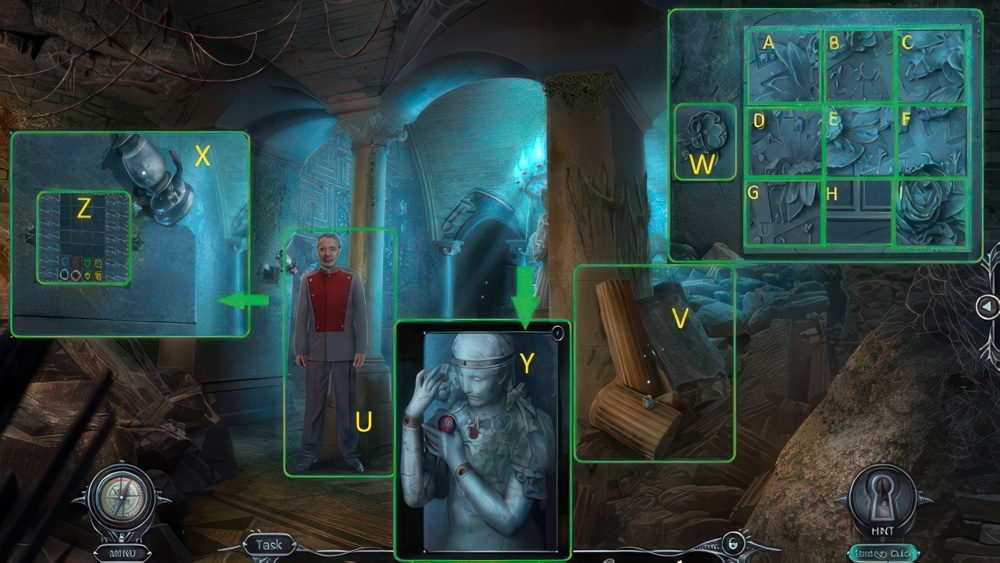
- Use HACKSAW (U).
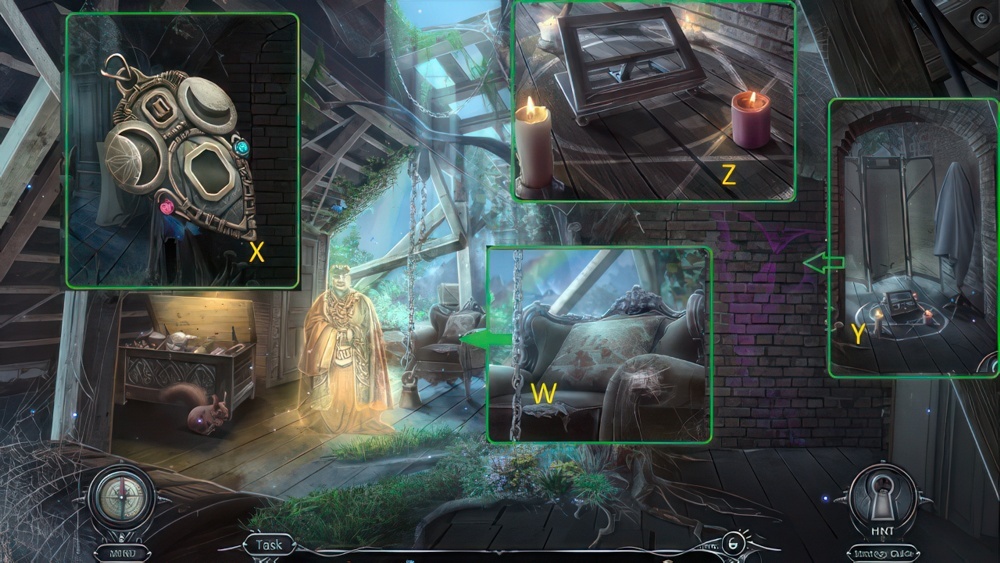
- Take BIRD AMULET and CANDLE (V).
- Use BIRD AMULET, get CODE and DAY PLANNER (W).
- Use DAY PLANNER, talk (X).
- Go to Lobby.
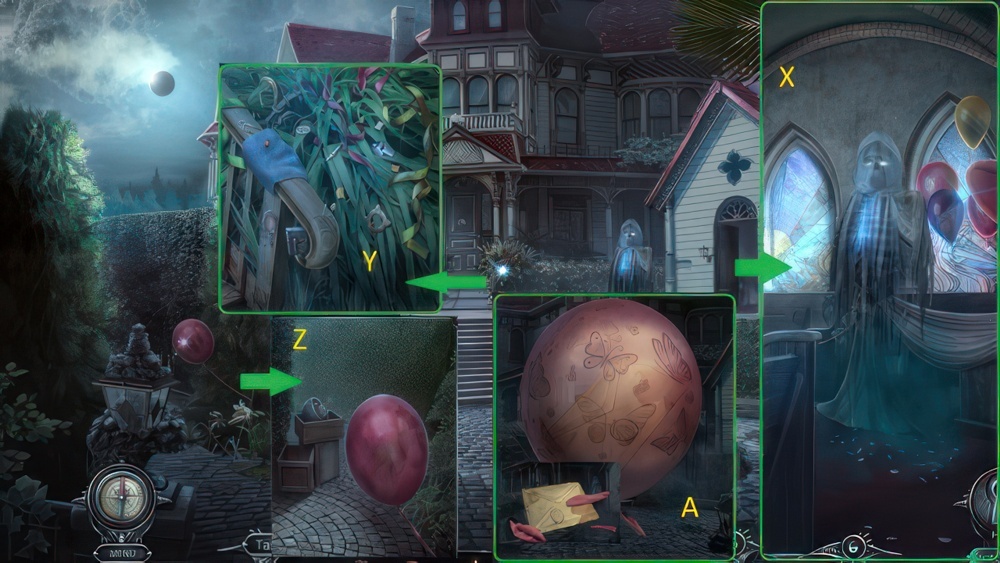
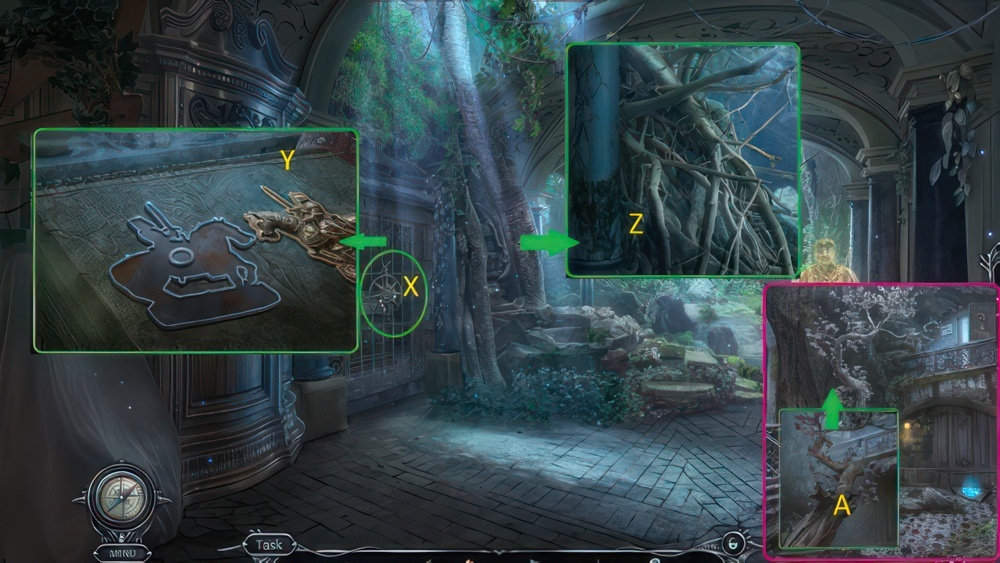
- Use ROOM KEY and go (Y).
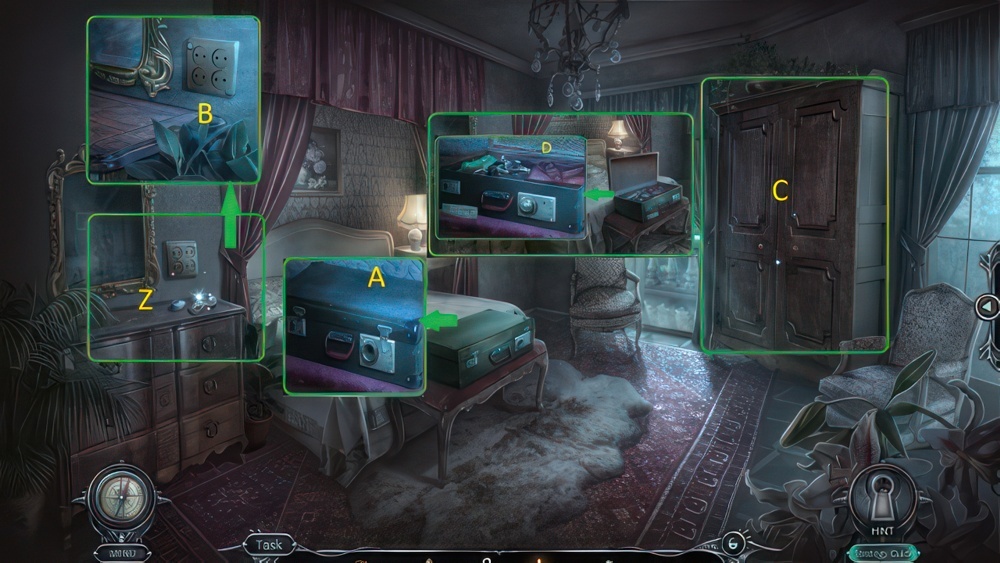
- Take WARDROBE HANDLE (1/2) and LOCK DIAL (Z).
- Use CODE and LOCK DIAL, take KEY WRENCH (A).
- Use KEY WRENCH, take WARDROBE HANDLE (2/2) and MUSIC BOX PART (B).
- Use CABINET HANDLE (2/2), play puzzle, get NAPKIN (C).
- Use NAPKIN, take EYE AMULET (D).
- Back out.
- Use EYE AMULET.
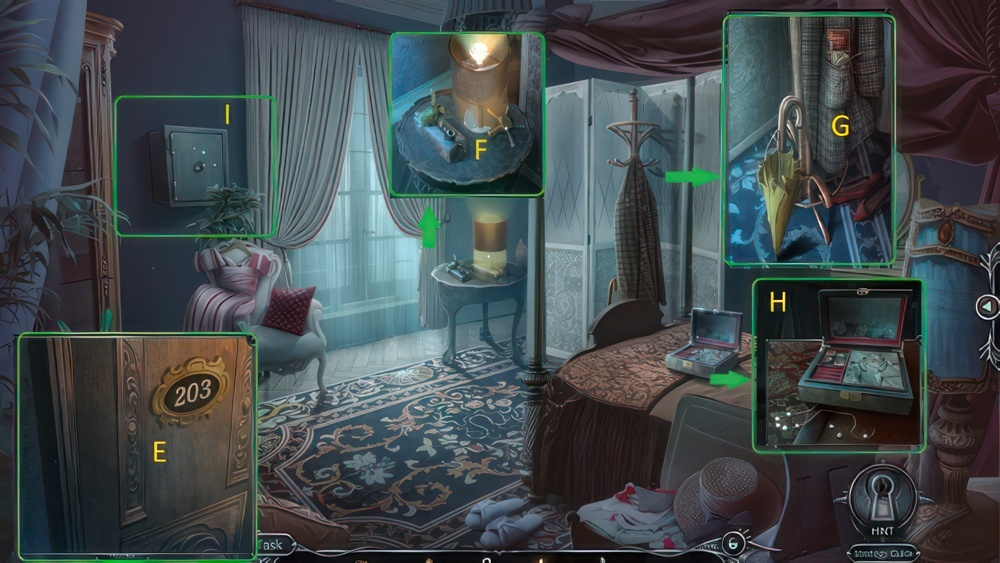
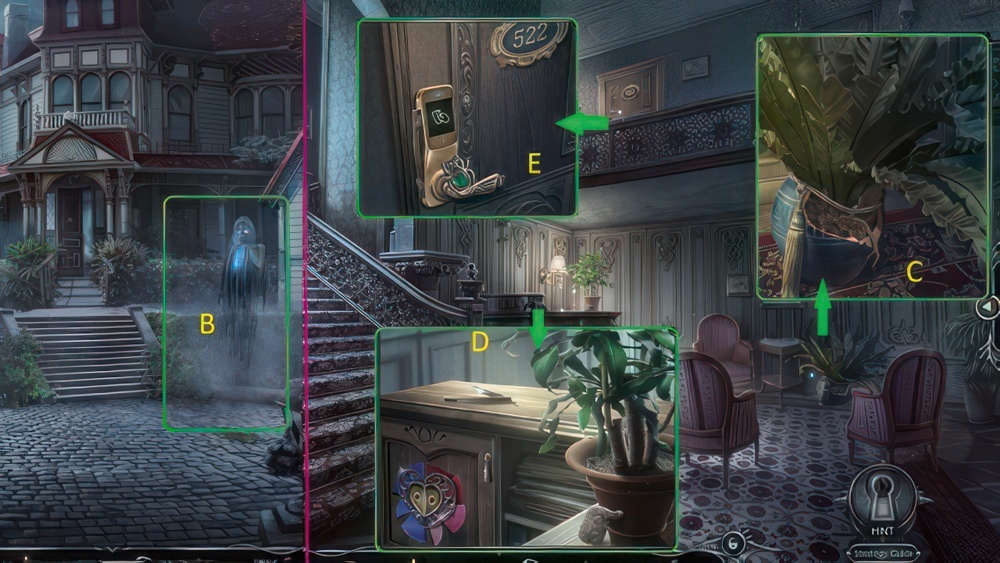
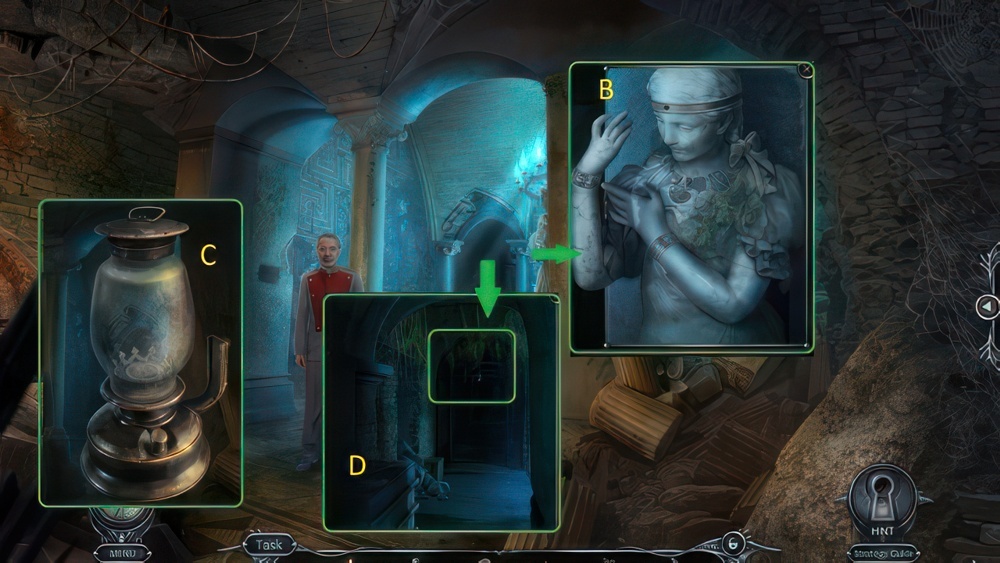
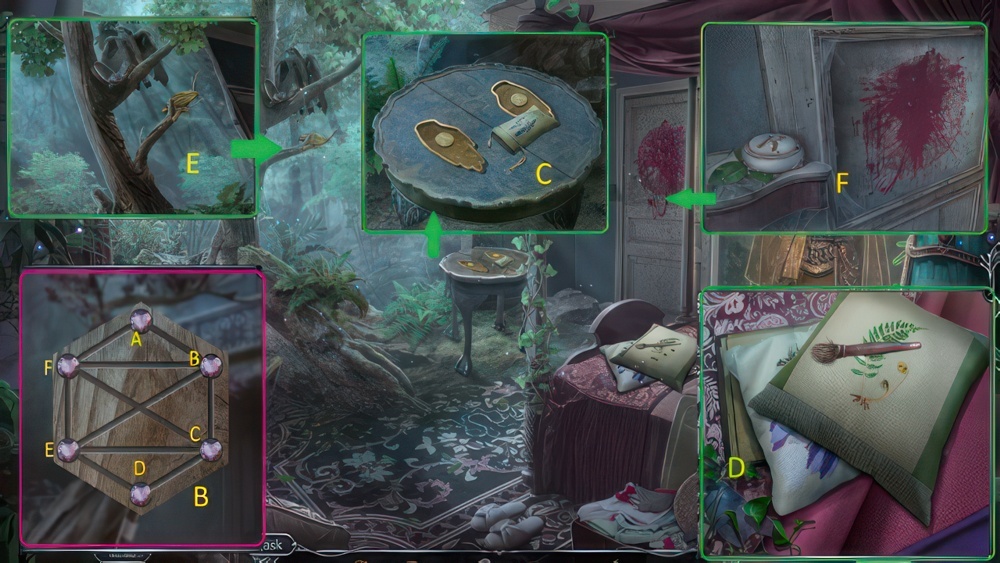
- Go forward (E).
- Take SAFE WHEEL (F).
- Take BALLERINA FIGURINE (G).
- Examine, use MUSIC BOX PART and BALLERINA FIGURINE, take WEDDING RINGS and GOLDEN PENDANT (H).
- Use SAFE WHEEL, play puzzle, get DIARY (I).
- Use GOLDEN PENDANT (J).
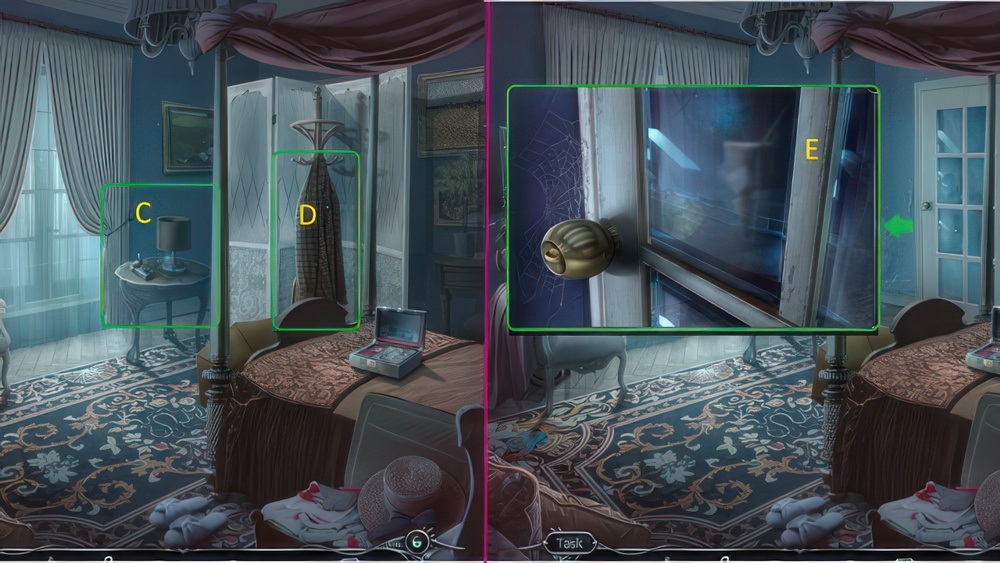
- Use CANDLE, read notes and take HOOK and PHOTO (K).
- Return to James and Jessica’s Room (L).
- Use PHOTO (M).
- Create a path for the gold sphere to reach the center of the circle.
- Select the arrow buttons to rotate the rings.
- Select the gold sphere to test a solution.
- Walkthrough: A-B-B-B-C-D.
- Move forward.
- Take BROOM AMULET (N).
- Use HOOK, get HAIRPIN and BUTTON (O).
- Use HAIRPIN (P).
- Take BRUSH and SANDPAPER (Q).
- Take WHITTLING TOOL (R).
- Return to Rachel’s Room.
- Use BUTTON, take BROKEN FLASHLIGHT and GLOVE (S).
- Use GLOVE, take BULB and RULER (T).
- Go to Basement.
- Use RULER take PIPE (U).
- Use BROOM AMULET and get BATTERY (V).
- Select BROKEN FLASHLIGHT, use BATTERY and BULB (W).
- Use FLASHLIGHT, get PRESSURE GAUGE (X).
- Use PRESSURE GAUGE and PIPE, take BOARD (Y).
- Place BOARD, SANDPAPER and WHITTLING TOOL (Z).
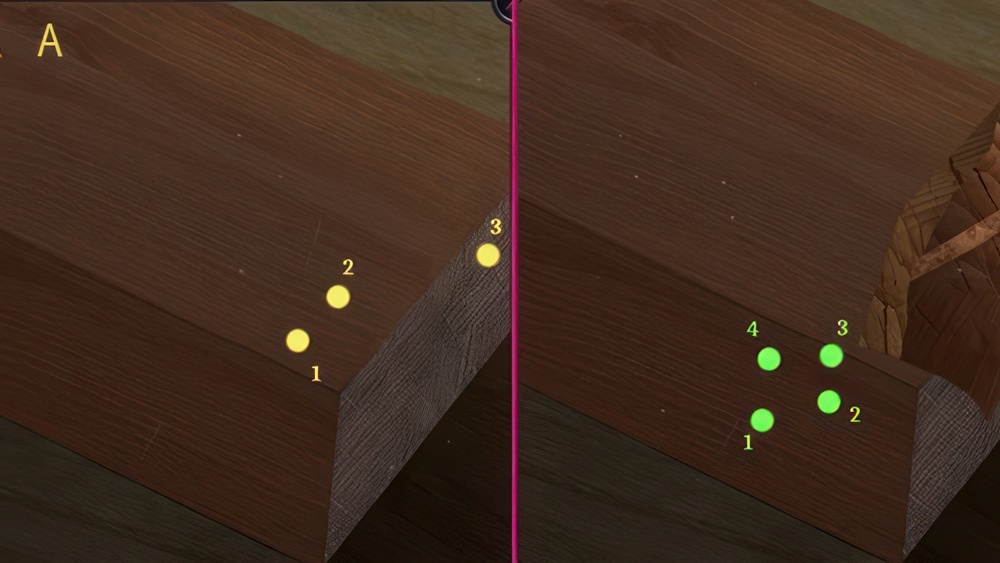
- Connect the dots in sequential order to make a shape.
- Walkthrough: 1-2-3-1, 1-2-3-4-1 (A).
- Walkthrough: 1-2-3-1, 1-2-3-4-5-6-7-1 (B).
- Get TURTLE FIGURINE, use BRUSH, read note and take STONE OF TRUTH.
- Return to Rachel’s Room.
- Use TURTLE FIGURINE, take SEAM RIPPER (C).
- Use SEAM RIPPER, take MOLDING CLAY (D).
- Use DIAMOND, go forward (E).

- Use FLASHLIGHT, take HERBICIDE and STICK (F).
- Use STICK and MOLDING CLAY, take SCREWDRIVER and LEVER (G).
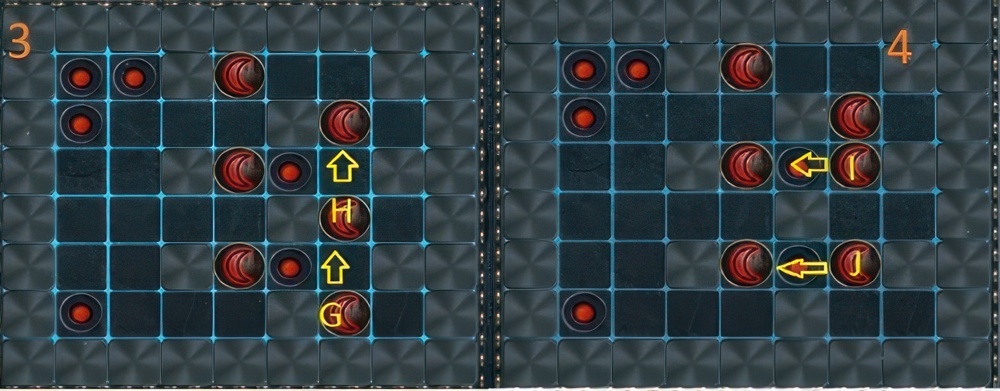
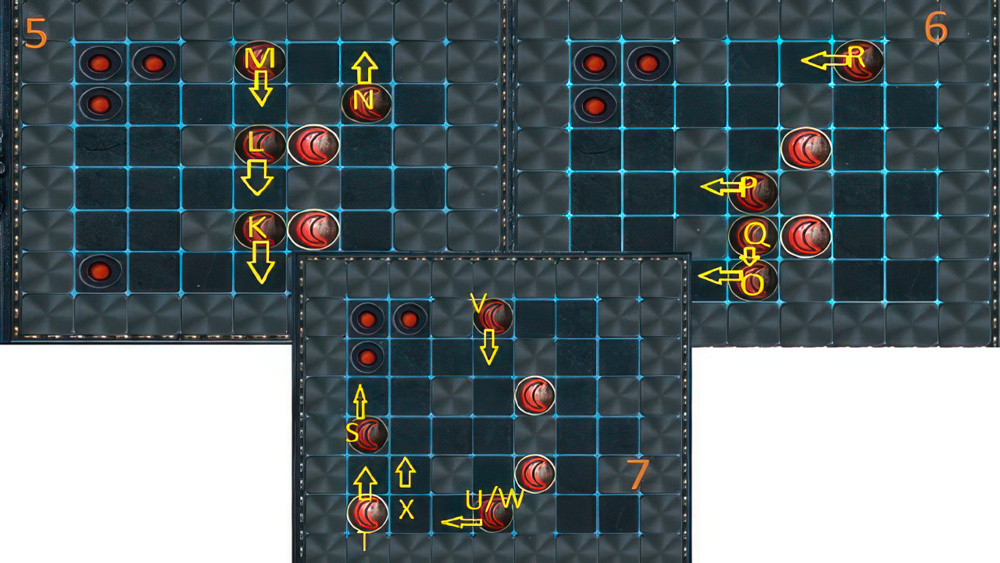
- Select STONE OF TRUTH, talk, play puzzle, get CHAIN (H).
- Use CHAIN (I).
- Use LEVER, take MAGNIFYING GLASS (J).
- Use MAGNIFYING GLASS, play puzzle, get RAZOR (K).
- Select SCARF, use RAZOR (L).
- Move forward.
- Dodge the apparitions to escape from the trap.
- Use the arrows to move in either direction.
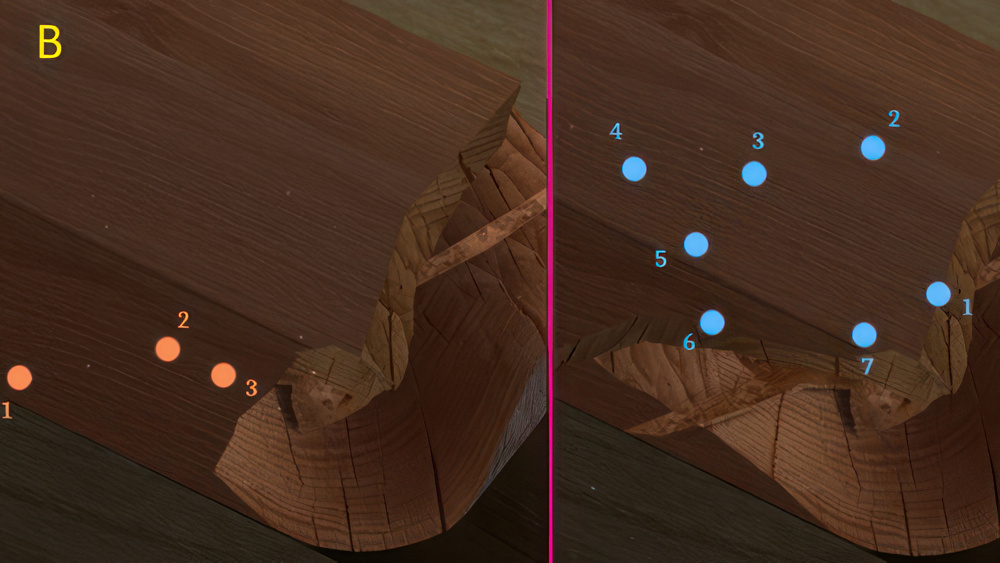
- Walkthrough: 1-2-3-4-5-6-7 (M).

- Use HERBICIDE, BONE and SCARF, get DOOR HANDLE (N).
- Use DOOR HANDLE and SCREWDRIVER (O).
- Move forward.
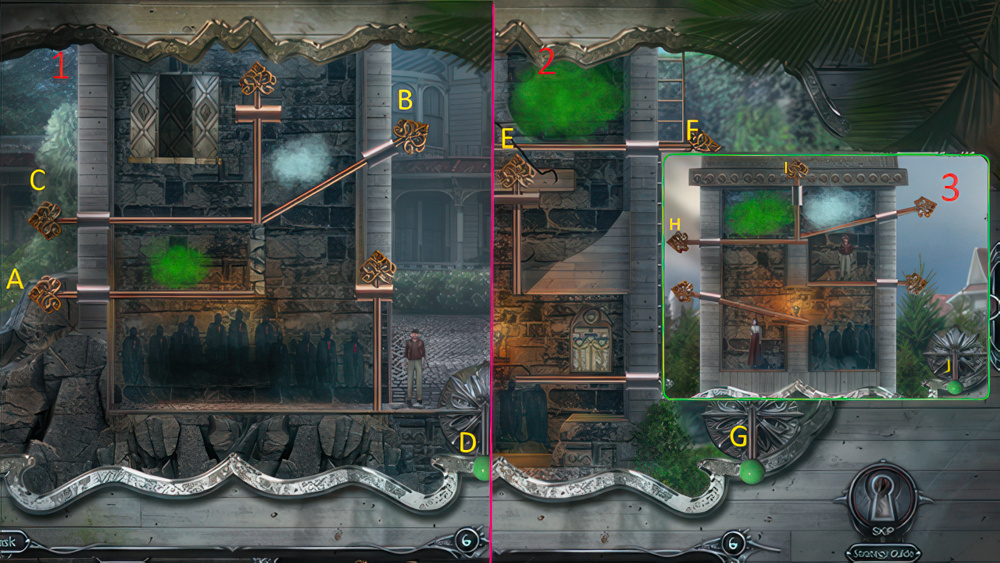
- Pull the keys in the right order to destroy the white ghosts with green smoke, and then make a path.
- Pull the green lever to complete a scenario.
- Walkthrough: A-B-C-D-E-F-E-G, H-I-J.
- Take BACKPACK and SILVER WING (P).
- Take COLORFUL GLASS and GOLD WING (Q).
- Use SILVER WING and GOLD WING, take COLORFUL GLASS and ‘H’ AMULET (R).
- Select BACKPACK, use ‘H’ AMULET, take COLORFUL GLASS and TREAT (S).
- Use COLORFUL GLASS 3/3, play puzzle, get LOCK HANDLE (T).
- Select BACKPACK, use LOCK HANDLE, take LIGHTER and CAT’S TOY (U).
- Use CAT’S TOY and TREAT, take KITTEN (V).
- Use KITTEN and CAT TOY, get STEAM CLEANER (W).
- Talk, get MAGNET (X).
- Back out.
- Take BATTERY, use MAGNET, play puzzle, get SAFETY PIN (Y).
- Take POT and SYMBOL 1/4, use LIGHTER, take BALLOON (Z).
- Use SAFETY PIN on BALLOON, use STEAM CLEANER and BATTERY, read and take HAPIN’S NOTE (A).
- Talk, get SHOVEL (B).
- Move forward.
- Take TIEBACK, use SHOVEL and POT, take HEART KEY 1/2 and BRICK (C).
- Take SYMBOL 2/4 and STRAIGHT RAZOR (D).
- Take BEETLE AMULET (E).
- Take SCREWDRIVER, use TIEBACK, take WIRE and HEART KEY 2/2 (F).
- Use HEART KEY.
- Swap the parts to assemble the heart.
- Walkthrough: 1-2-3-4-5-6-7-8, take PLASTIC CARD (G).
- Use WIRE and PLASTIC CARD, move forward (H).
- Use STRAIGHT RAZOR, take BUTTERFLY AMULET and LEVER (I).
- Use BEETLE AMULET and BUTTERFLY AMULET, play puzzle, get BULB (J).
- Use BULB, take EXTENSION LADDER and SYMBOL 3/4 (K).
- Use EXTENSION LADDER, move plant to get MAZE MAP, use SCREWDRIVER, get VALVE and ANCIENT BOOK (L).
- Return to Hotel Grounds.
- Talk, get TROWEL (M).
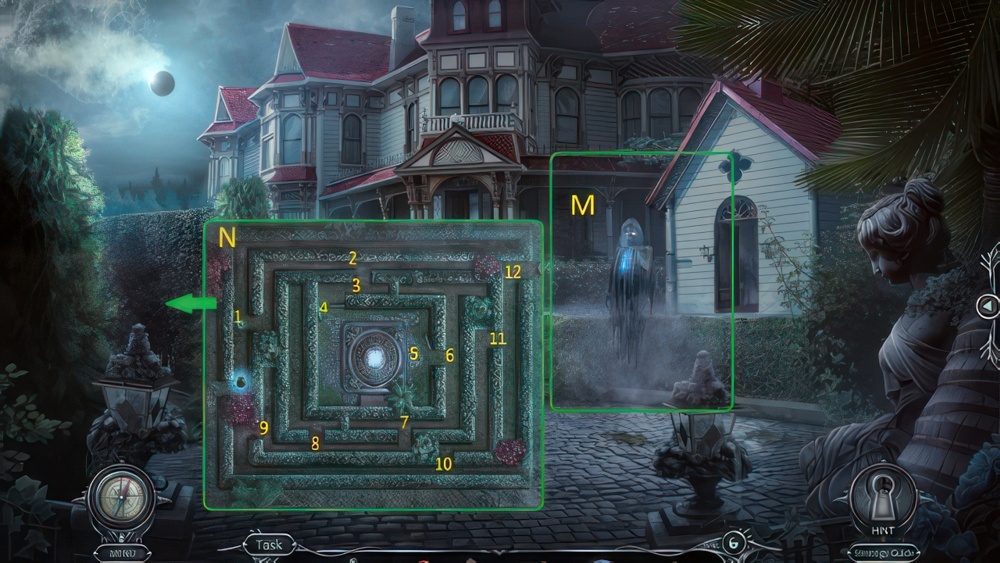
- Use MAZE MAP.
- Move along the intersections to guide James to the exit of the labyrinth.
- Walkthrough: 1-2-3-4-5-6-7-8-9-10-11-12, get WET CEMENT (N).
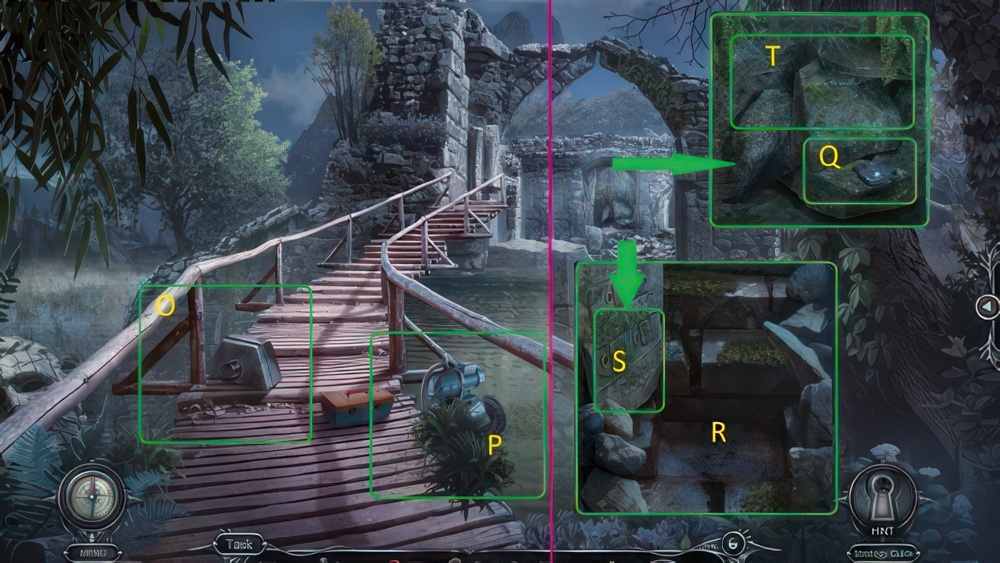
- Use LEVER (O), use VALVE (P).
- Use BRICK, TROWEL and WET CEMENT (R).
- Take SYMBOL 4/4 (Q).
- Use SYMBOL 4/4, play puzzle, take CROWBAR (S).
- Use CROWBAR (T).
- Move forward.
- Use ANCIENT BOOK and NOTE, talk, get STATUE PENDENT (U).
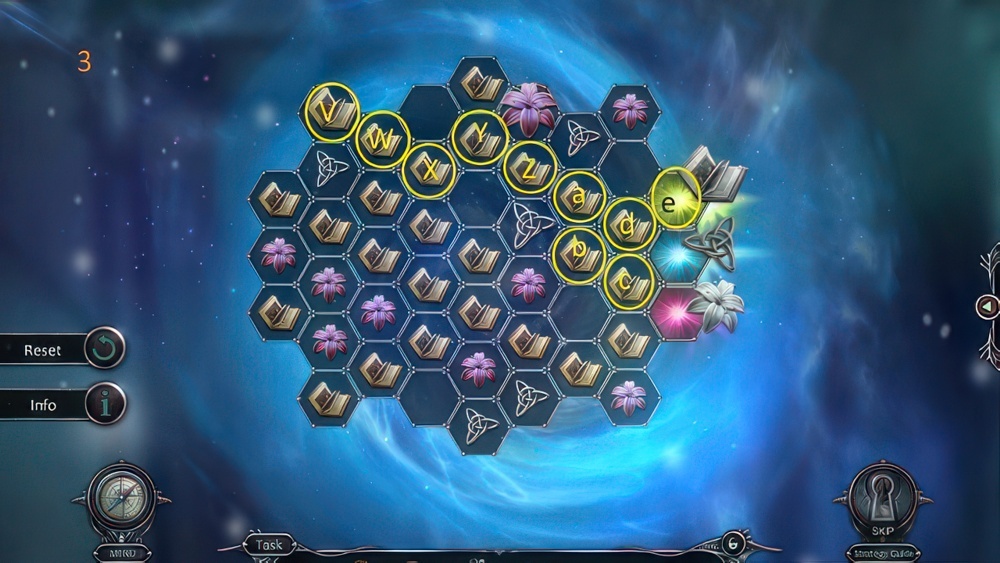
- Take BRACELET 1/2 and PUZZLE SYMBOL, use CROWBAR (V).
- Slide the tiles to complete the image.
- Walkthrough: H-G-D-E-B-A-D-E-B-C-F-E-D-A-B-C-F-E-H-G-D-E-H-I-F-E-D-G-H-I.
- Get WICK (W).
- Take BROKEN LANTERN and BRACELET 2/2 (X).
- Take PUZZLE SYMBOL, use BRACELET 2/2 and STATUE PENDANT (Y).
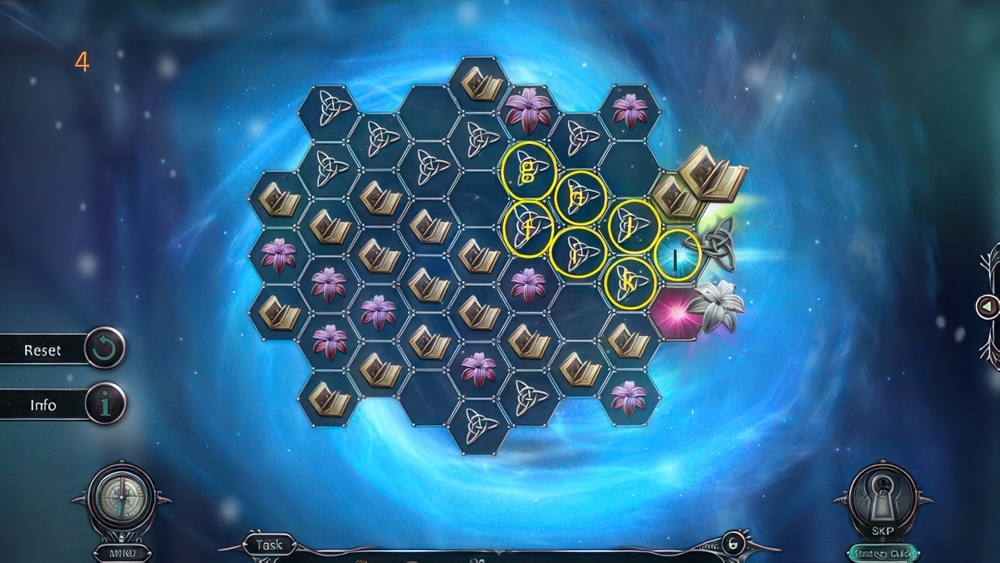
- Use PUZZLE SYMBOLS (Z).

- Select the symbols and move them so they are aligned by color.
- Walkthrough: (1) A-B-C-D, (2) A-B-C-D-E-F.
- Walkthrough: (3) G-H, (4) I-J.
- Walkthrough: (5) K-L-M-N, (6) O-P-Q-R, (7) S-T-U-V, W-X, get HEADBAND (A).
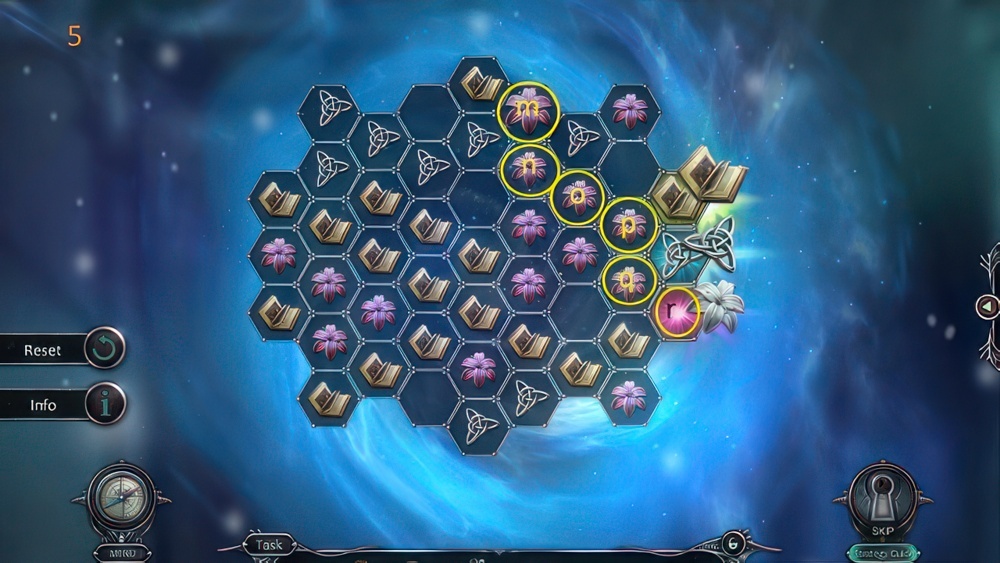
- Use HEADBAND, take KEROSENE and BUCKET (B).
- Select BROKEN LANTERN, use WICK, KEROSENE and LIGHTER, take LANTERN (C).
- Use LANTERN, take HAIRPIN and POKER, select LANTERN (D).
- Move forward.

- Use BUCKET, get WATER and KEY (E).
- Use WATER and POKER, take BOX and WINDOW HANDLE (F).
- Use WINDOW HANDLE, take CREAM and ACID (G).
- Select BOX, use KEY and ACID, take BROOCH and PERFUME (H).
- Use HAIRPIN, BROOCH, CREAM and PERFUME, play puzzle, get TINCTURE (I).

- Talk, get SPELL (J).
- Use SPELL and TINCTURE (K).
- Talk, get PUZZLE TILE and CRYSTAL (L).
- Use STRAIGHT RAZOR, get PUZZLE TILE and BALL (M).
- Take COGWHEEL (N).
- Take BROKEN FISHING ROD, use PUZZLE TILE, PUZZLE TILE and COGWHEEL (O).
- Swap adjacent tiles to arrange the four tiles on each board as shown in the patterns on the sides.
- Swapping two tiles may also move another.
- This puzzle is randomly generated.
- Swap tiles (P) to match scheme (Q).
- Get KNIFE and COLORED GLASSES (R).
- Take NORTH AMULET, use COLORED GLASSES, use CRYSTAL (S).
- Move forward.
- Use KNIFE, get FISHING LINE and NAPKIN (T).
- Get HOOK (U).
- Select BROKEN FISHING ROD, HOOK, FISHING LINE, get FISHING ROD (V).
- Take WATER JUG, use FISHING ROD, get WARRRIOR FIGURINE and EAST AMULET (W).
- Use EAST AMULET and NORTH AMULET (X).
- Take LASSO, use NAPKIN and WARRIOR FIGURINE, play puzzle, earn PLANT GROWTH STIMULANT (Y).
- Use PLANT GROWTH STIMULANT and WATER JUG (Z).
- Back out.
- Use LASSO (A).
- Connect lines between all the gems.
- You cannot use the same path more than once.
- Walkthrough: A-B-C-D-E-C-F-B-E-F-A (B).
- Move forward.
- Take POUCH (C).
- Take PAINTBRUSH, move pillow to use KNIFE and POUCH, get SLINGSHOT and DRY LAVENDER (D).
- Use SLINGSHOT and BALL, take RIGHT-EYE AMULET and MONOGRAM (E).
- Take POWDER BOX (F).
- Select POWDER BOX, use MONOGRAM, find BOUTONNIERE, use PAINTBRUSH, get LEFT-EYE AMULET (G).
- Use RIGHT-EYE AMULET and LEFT-EYE AMULET, play puzzle, earn SOLVENT and RATTLE (H).
- Use RATTLE, get BRUSH and PIONO DECORATION (I).
- Use SOLVENT and BRUSH.
- Swap the parts to complete the image.
- Walkthrough: A-B-C-D-E-F-G-H-I-J-K-L-A (J).
- Move forward.
- Take CHAIN, use PIANO DECORATION and move sheet of music (K).
- Get GLOVE (L).
- Use GLOVE, get FESTIVE LIGHTS and PIANO KEYS 1/2 (M).
- Use FESTIVE LIGHTS, take DAMAGED CHARM, CAT’S PAW AMULET and PIANO KEY 2/2 (N).
- Use DRY LAVENDER, place CAT’S PAW AMULET, take DUSTER and CLIPPERS (O).
- Use PIANO KEY 2/2.
- Press the piano keys to toggle the colors so that only the two squares are green.
- Walkthrough: A-B-C, get LATCH (P).
- Use DUSTER and LATCH (Q).
- Move forward.
- Take ROPE, use CLIPPERS, get NUT and RED HIEROGLYPH (R).
- Use NUT, get CLIMBING SHOES and WEIGHT (S).
- Use WEIGHT and ROPE, get SCOOP NET and BLUE HIEROGLYPH (T).
- Get RITUAL FLOWER, use SCOOP NET, take MAGICAL BUTTERFLY and PICKLOCK (U).
- Use PICKLOCK, play puzzle, earn AWL (V).
- Use PAINTBRUSH, use AWL, take GEM and TALISMAN (W).
- Select DAMANGED CHARM, use RED HIEROGLYPH, BLUE HIEROGLYPH, GEM and CHAIN, get PROTECTION CHARM (X).
- Select PROTECTION CHARM, use MAGICAL BUTTERFLY, speak (Y).
- Use ANCIENT BOOK, RITUAL FLOWER and TALISMAN (Z).
- Move the three parts from the left to their corresponding slots on the right.
- A part can only move along adjacent tiles with matching images.
- The images on the tiles will change after a part passes over it.
- Walkthrough: A-B-C-D-E-F-G-H-I.

- Walkthrough: J-K-L-M-N-O-P-Q-R-S-T-U.
- Walkthrough: V-W-X-Y-Z-a-b-c-d-e.
- Walkthrough: f-g-h-i-j-k-l.
- Walkthrough: m-n-o-p-q-r, get PILLOW.
- Go left (A).
- Talk, get SAFTEY ROPE (B).
- Take BIRDCAGE (C).
- Use SAFETY ROPE and CLIMBING SHOES, take PIPE (D).
- Get GRAIN, use PIPE, play puzzle, get ROPE LADDER (E).
- CAGE and GRAIN, get MAGIC BIRD (C).
- Use ROPE LADDER and MAGIC BIRD, talk (F).
- Use PILLOW, WEDDING RINGS and BOUTONNIERE, speak, use POCKET WATCH (H).
- Walkthrough Bonus Chapter, at the link below.


