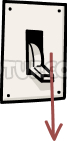
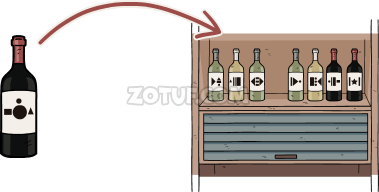
Hidden Memories – A puzzle game from developer Dark Dome in which you find yourself locked in a strange place with no memory of how you got there. As Lucian, you must piece together the events of last night, recreating lost fragments of memory step by step. But the truth you uncover may be far more terrifying than you expected. Explore every corner of the house, solve puzzles, and interact with characters. Among the fragments of memory, a girl appears again and again is she a savior or the source of a nightmare? Each decision you make can bring you closer to the exit. An atmosphere of anxiety, unexpected twists, and dark secrets of the past await those who dare to seek the truth. The city where the events unfold is not just a backdrop. It is a place full of strangeness, disappearances, and silent shadows of the past. Someone has already disappeared here. Perhaps more than one person. Now it’s your turn. The door is locked. You don’t remember what happened. You need to find a way out. Or at least understand how it all began. If you can’t solve one of the puzzles or don’t know where to find the items, you can check out the Hidden Memories walkthrough on our website and get out of the house.
Hidden Memories – Walkthrough
Here you can see the complete walkthrough for Hidden Memories, specifically in pictures.
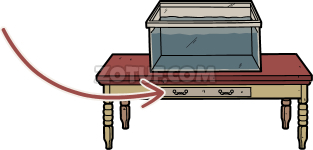
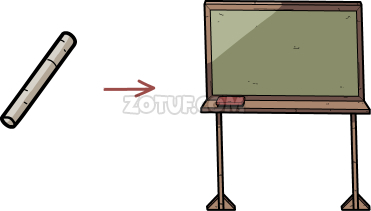
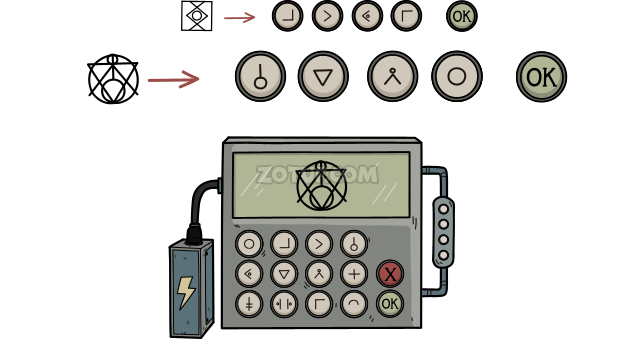
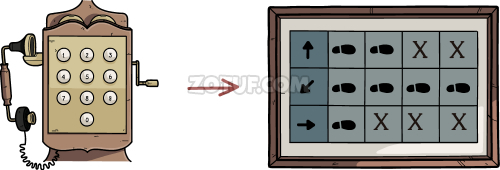
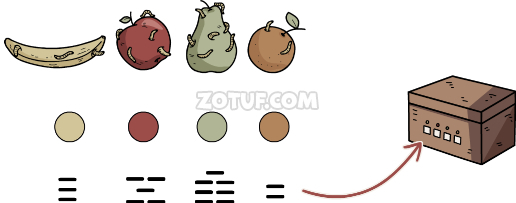
- Take the phone from the drawer.
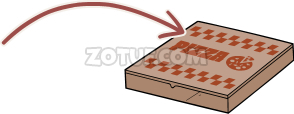
- Take a slice of pizza.
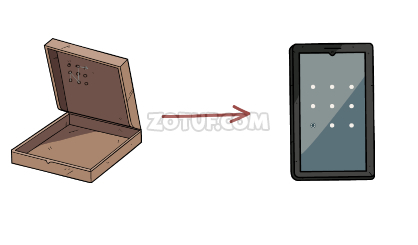
- Memorize the password drawn on the pizza box.
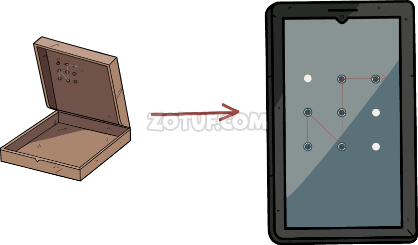
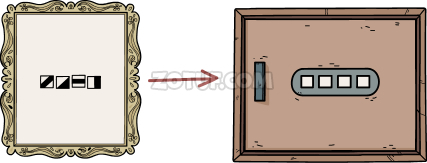
- Enter the code into the phone.
- Solution in the picture.
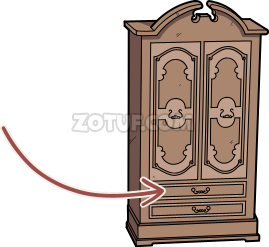
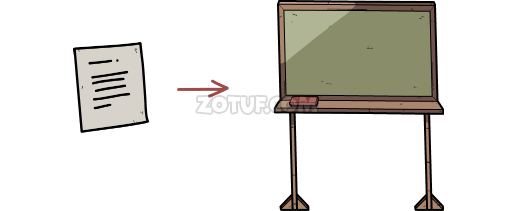
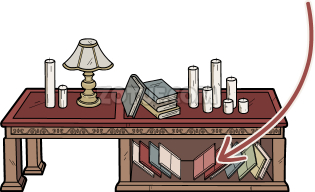
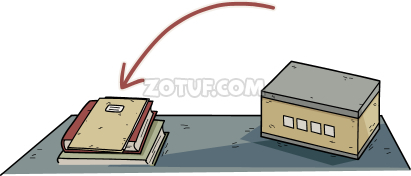
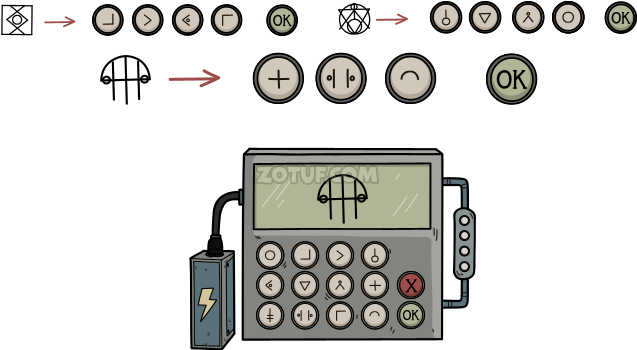
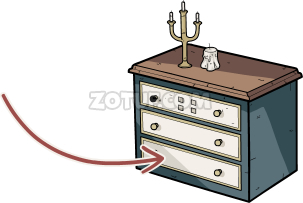
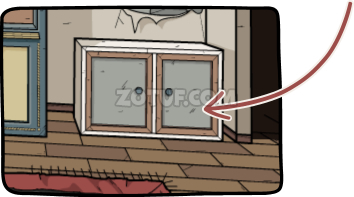
- Take the notebook from the top drawer of the cabinet.
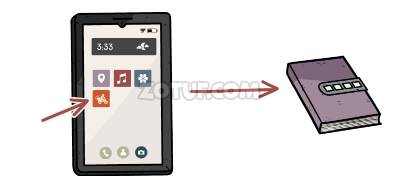
- Click on the delivery app.
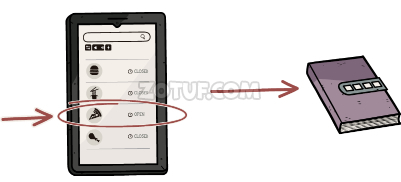
- Click on the pizza.
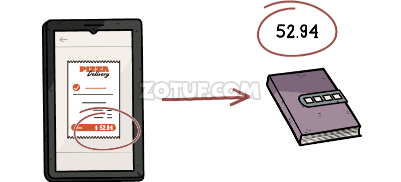
- Check the price, enter the code in the notebook: 5294.
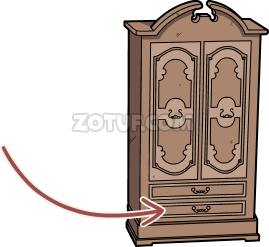
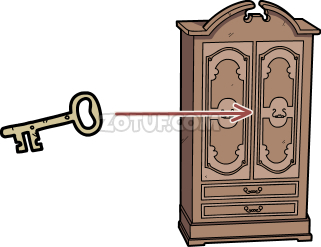
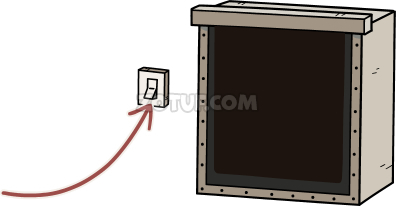
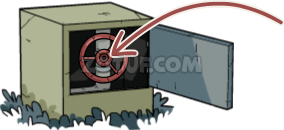
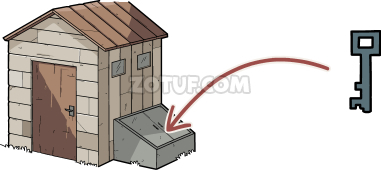
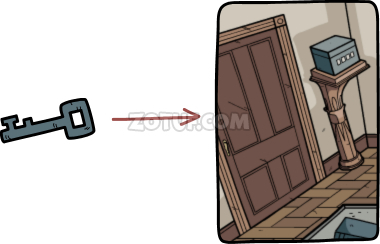
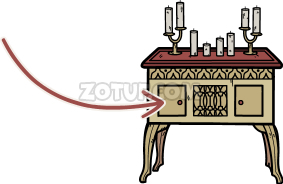
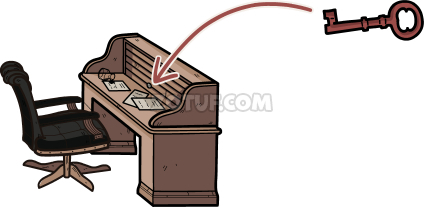
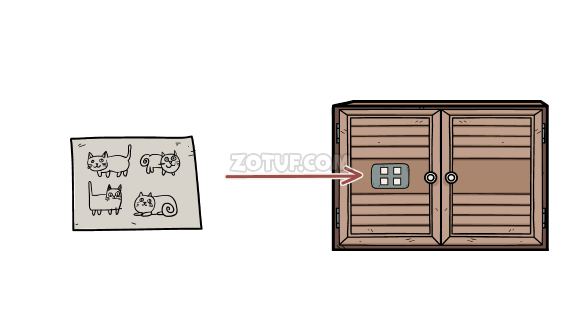
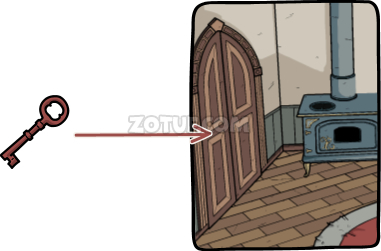
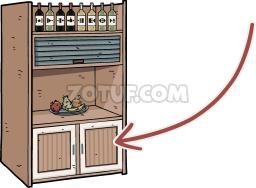
- Take the key from the bottom drawer of the cabinet.
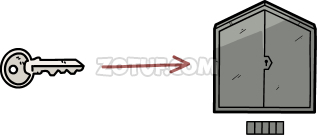
- Open the doors with the key.
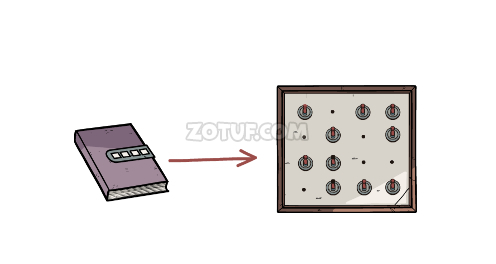
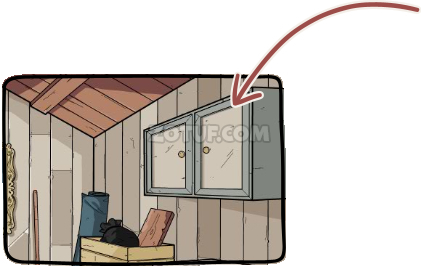
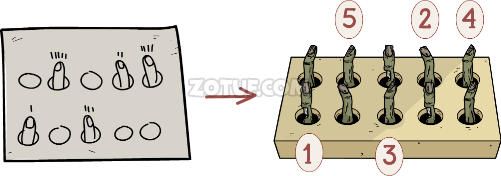
- The notebook shows the position of the toggles.
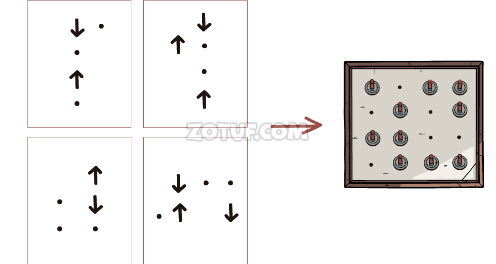
- Check the position of the toggles.
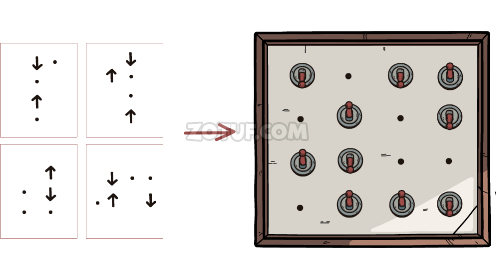
- Solution in the picture.
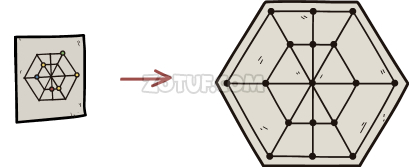
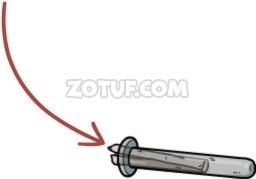
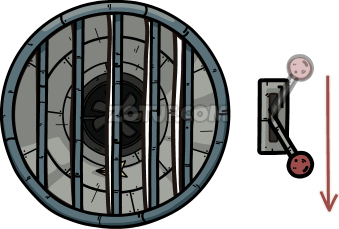
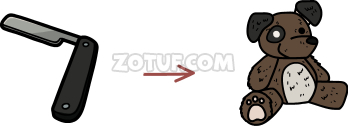
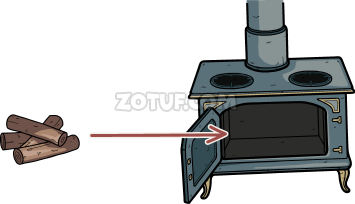
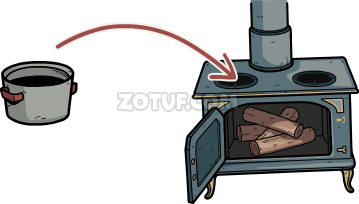
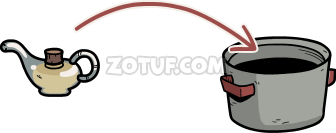
- Take the net.
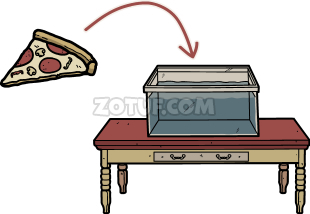
- Use the pizza.
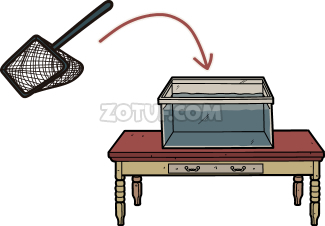
- Use the net to get the key.
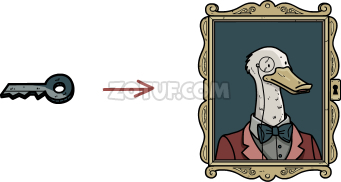
- Use the key.
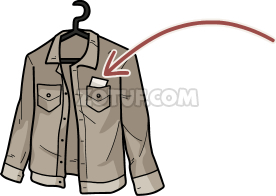
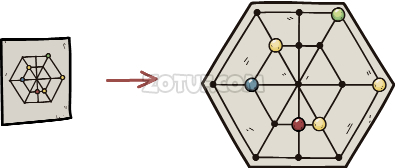
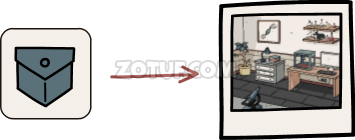
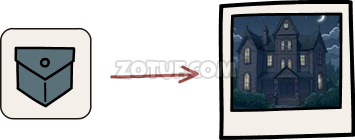
- Take the photo from the pocket.
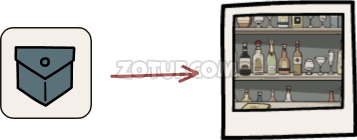
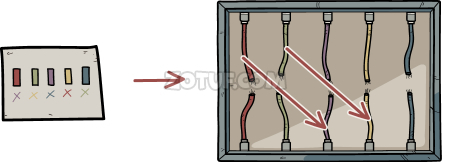
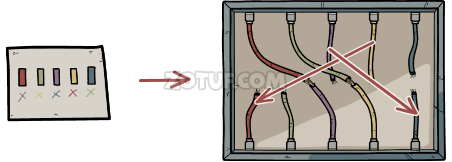
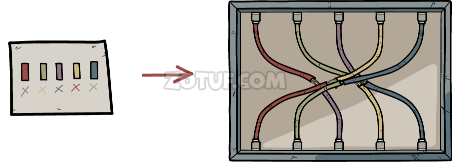
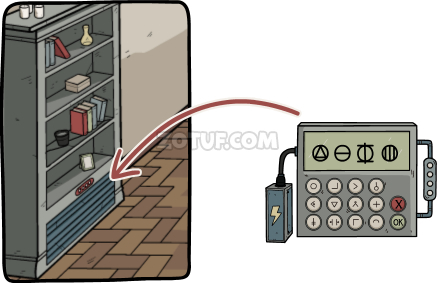
- Go to the Bar location.
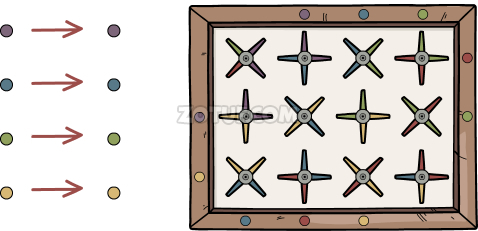
- Connect all ends with the same colors.
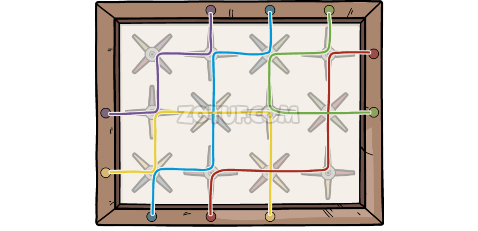
- Solution in the picture.
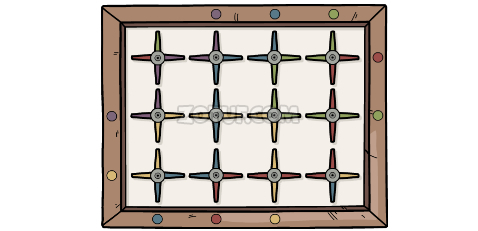
- This is how it should look.
- Take the footballer.
- Use the footballer.

- Look at the painting on the wall.
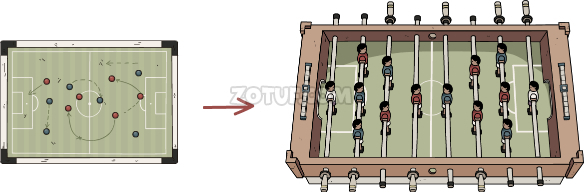
- Arrange the footballers as in the painting.
- Solution in the picture.
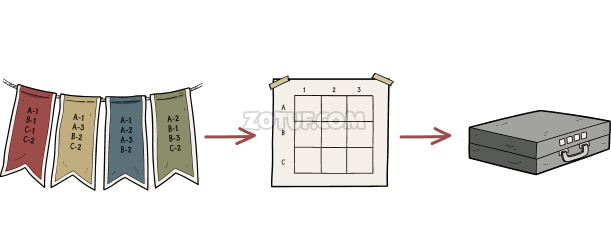
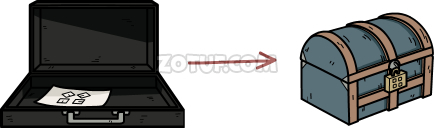
- Enter the coordinates from the flags one by one, the resulting shapes are the code for the suitcase lock.
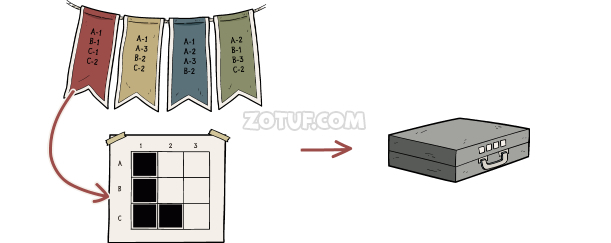
- This is how to enter the coordinates.
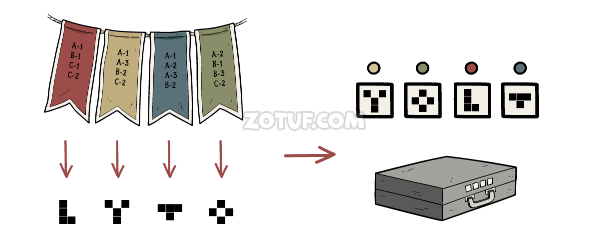
- Solution in the picture.
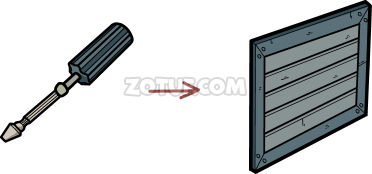
- Take the chisel and the electrical plug.

- Talk.
- Get the brush.
- Open the lid.
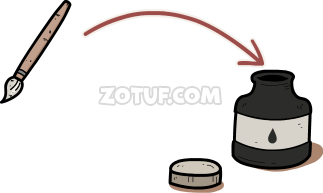
- Use the brush.
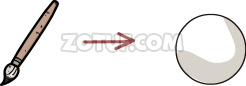
- Paint the ball to get an eye.
- Use the chisel.
- Get the red stone.
- Insert the eye.
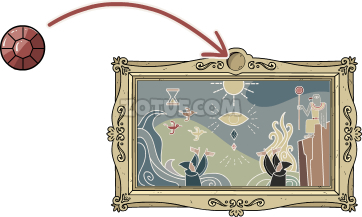
- Use the red stone.
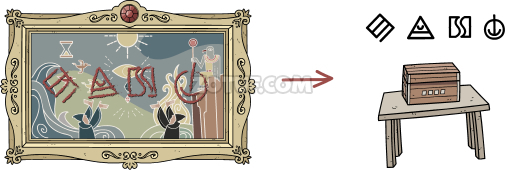
- Enter the symbols from the painting on the chest.
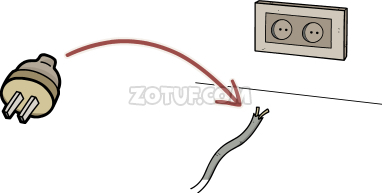
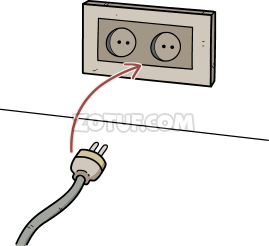
- Use the electrical plug.

- Use the light bulb.
- Insert the electrical plug.
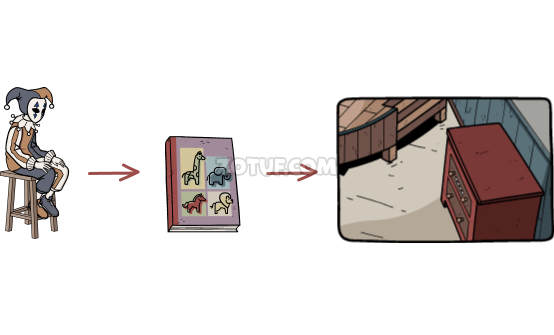
- The clown shows animals with his hands, find these animals in the book the symbols next to them are the ones to enter on the red dresser.
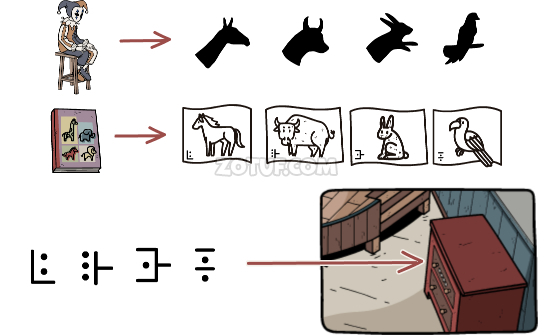
- Solution in the picture.
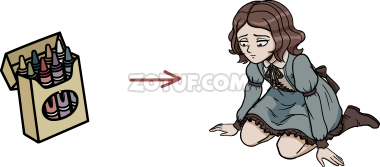
- Take the lemon from the drawer.
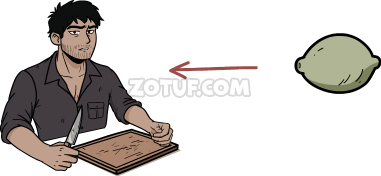
- Give the lemon.
- Take the knife.
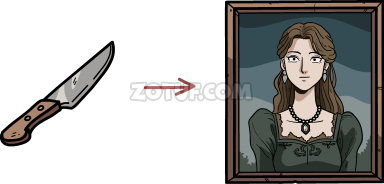
- Use the knife.
- Talk.
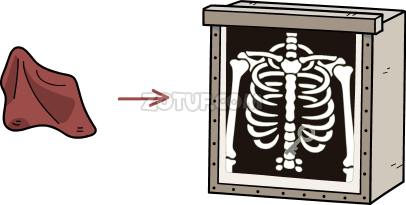
- Take the X-ray.
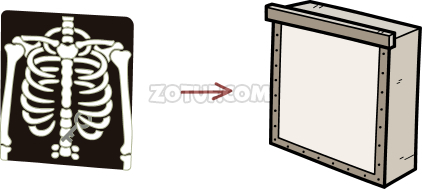
- Use the X-ray.
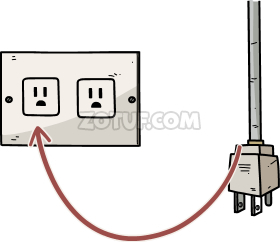
- Plug the fork into the socket.
- Press the toggle.
- Take the red magic cloth.
- Use the cloth.
- Get the red key.
- Use the red key.
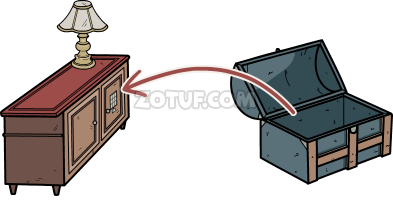
- Take the drawing and the pliers.
- Arrange the balls as in the drawing.
- Solution in the picture.
- Get the purple key.
- Use the purple key.

- Take the note from the menu.
- Arrange the jumpers as in the drawing.
- Solution in the picture.
- Use the pliers.
- Grab the toy.
- Give the toy.
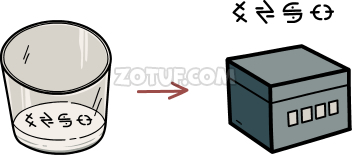
- The symbols drawn at the bottom of the glass are to be entered on the blue box.
- Take the gear and the glass.
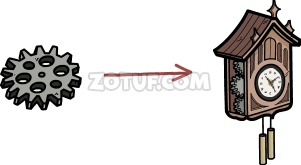
- Use the gear.
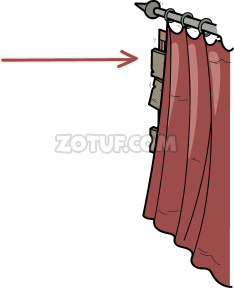
- Look at the symbols behind the curtain.
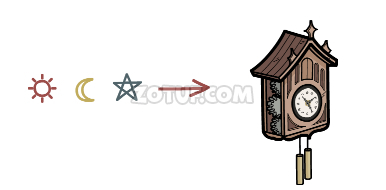
- Set the clock hands according to the symbols.
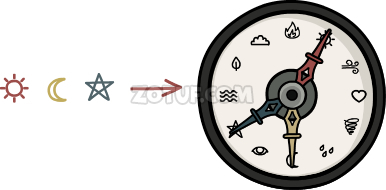
- Solution in the picture.
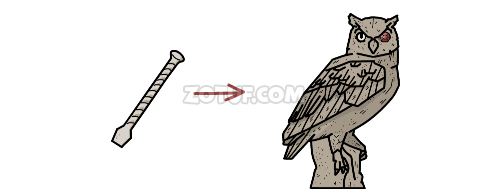
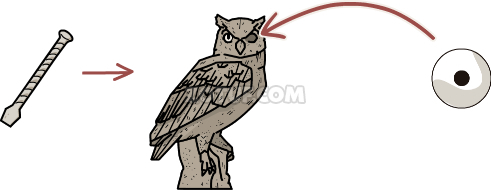
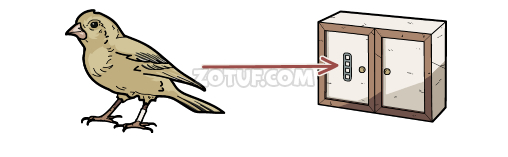
- Take the bird.

- Use the bird.
- Get the diagram.

- Arrange the symbols according to the diagram.
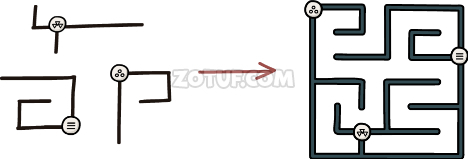
- Solution in the picture.
- Take the horseshoe.
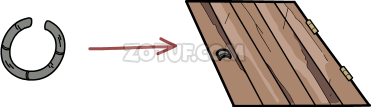
- Use the horseshoe.
- Take the photo.
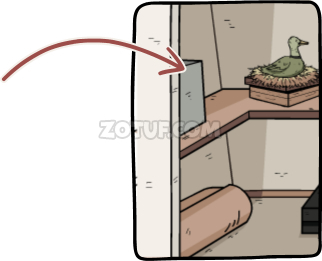
- Go to the Garden location.

- Take the note under the mushrooms.
- Arrange the frogs according to the note.

- Solution in the picture.
- Take the pencil and the valve.
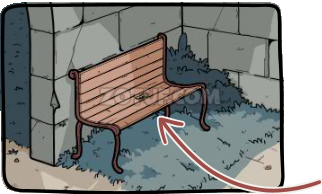
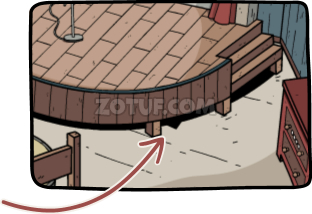
- Take the yellow key from the bench.
- Use the yellow key.
- Use the valve.
- Press the valve.
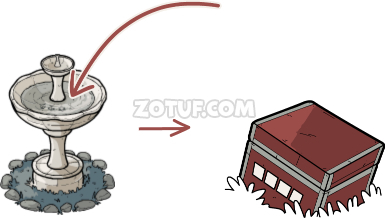
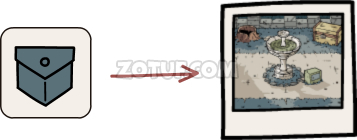
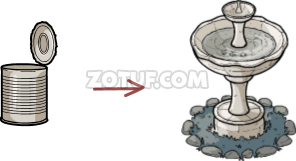
- Take the cheese and enter the symbols drawn in the fountain.
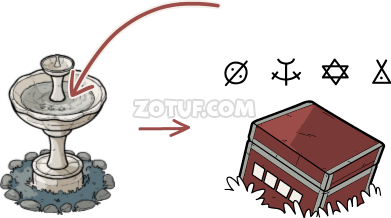
- Solution in the picture.
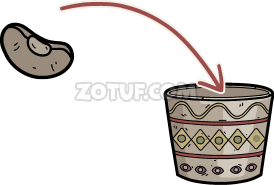
- Take the gray key and the seeds.
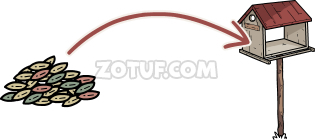
- Use the seeds.
- The symbols drawn on the bird’s leg are to be entered on the cabinet.
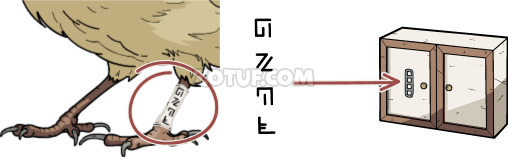
- Solution in the picture.
- Take the whistle and the white flower.
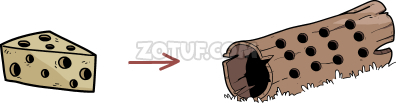
- Use the cheese.
- Use the gray key.
- Use the whistle.
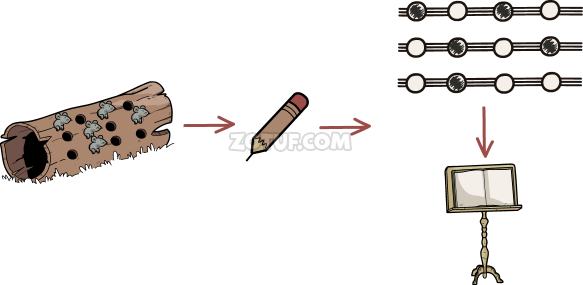
- Shade the circles with the pencil according to how the mice stick out of the log.

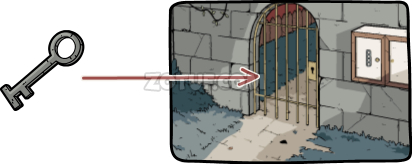
- Get the white key.
- Use the white key.
- Take the chalk.
- Use the chalk.
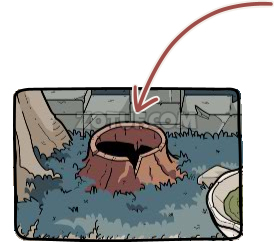
- Take the note with the text from the stump.
- Choose the options mentioned in the note: mountains, moon, bridge, lighthouse.
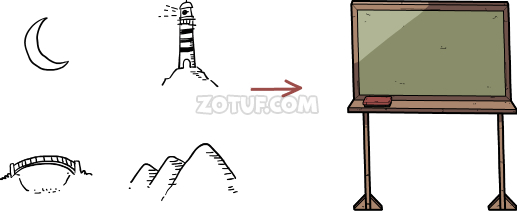
- Solution in the picture.
- Take the blue key.
- Use the blue key.
- Take the yellow flower, the seed, and the bag of sand.
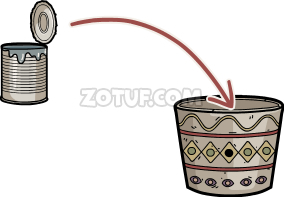
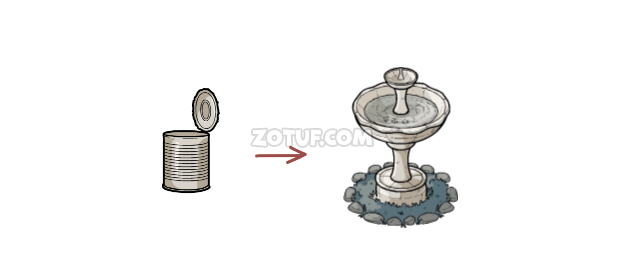
- Take the can.
- Use the can to get a can of water.
- Use the seed.
- Use the can of water.
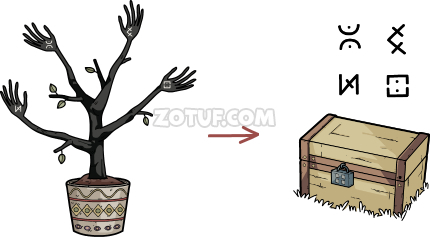
- The grown tree has symbols, enter them on the chest.
- Solution in the picture.
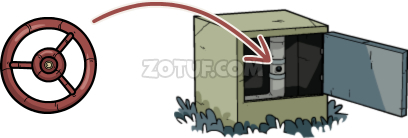
- Take the wheel and the red flower.
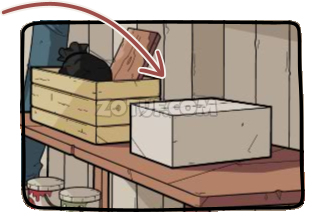
- Take the bag of cement.
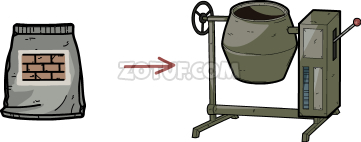
- Use the bag of cement.
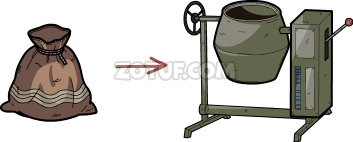
- Use the bag of sand.
- Fill with water.
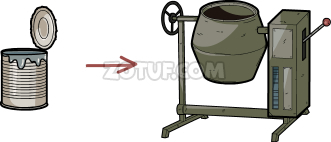
- Use the water.
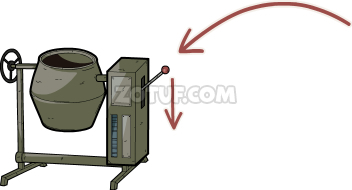
- Start the concrete mixer.
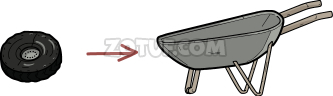
- Use the wheel.
- Take the trowel.
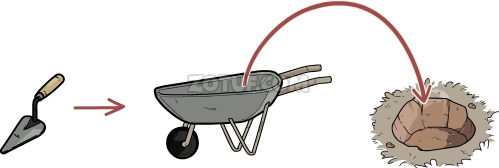
- Use the trowel.

- Insert the stick with the scarecrow.
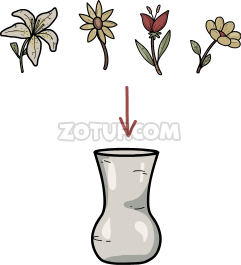
- There is a vase under the painting in the house, insert all the flowers there.
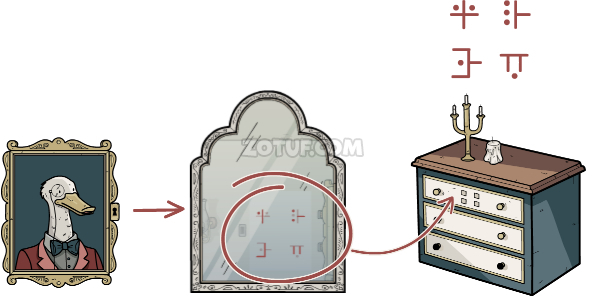
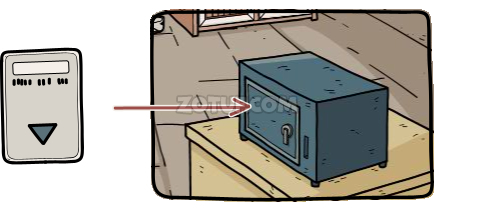
- Get the phone.
- Symbols will appear in the mirror, enter them on the safe.
- Assemble the puzzle.
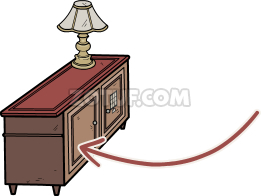
- Take the jewelry and the key.
- Take the record.
- Use the key.
- Take the part of the player.
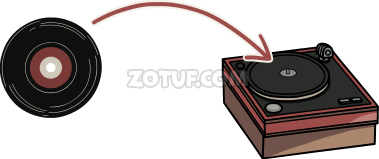
- Use the record.
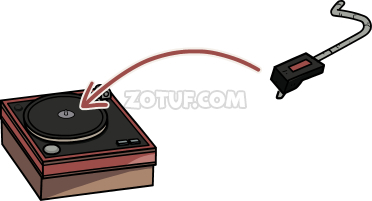
- Use the part of the player.
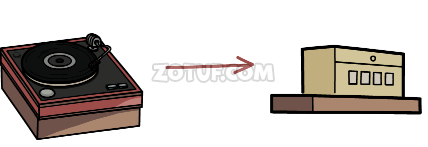
- Enter the resulting notes on the box.
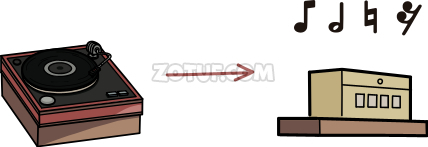
- Solution in the picture.
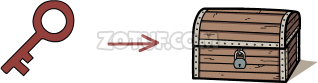
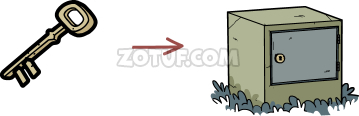
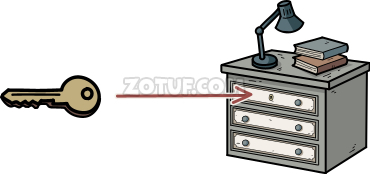
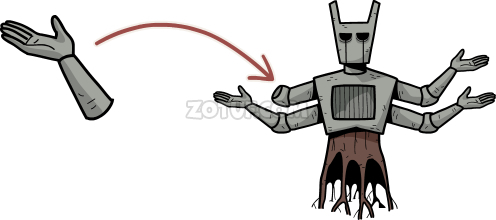
- Take the key.
- Take the robot.

- Use the key.
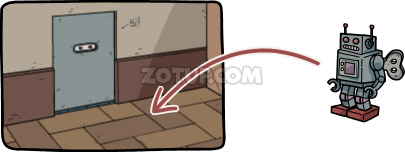
- Use the robot.
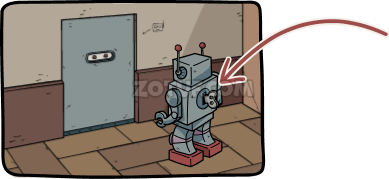
- Wind up the robot’s mechanism.
- Get the red key.
- Use the red key.
- Take the photo.
- Go to the Laboratory location.
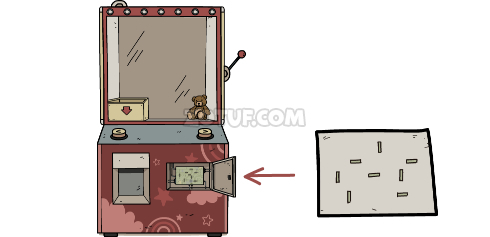
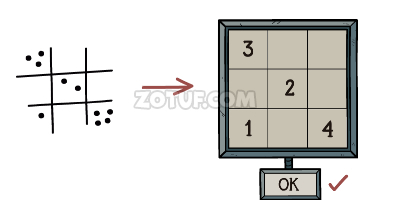
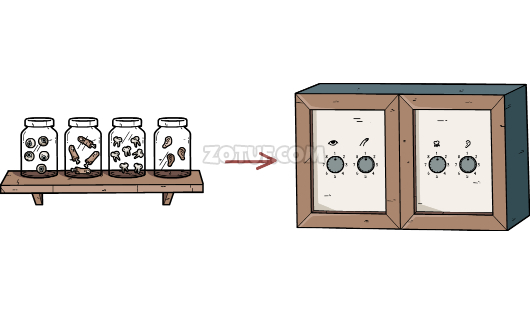
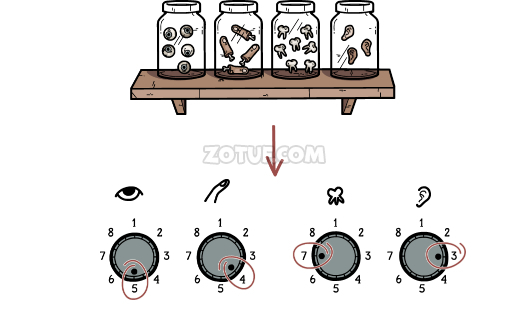
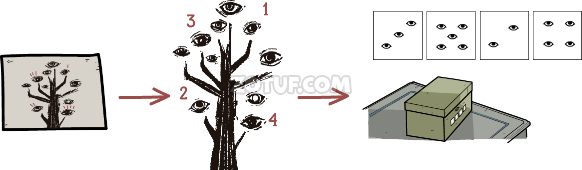
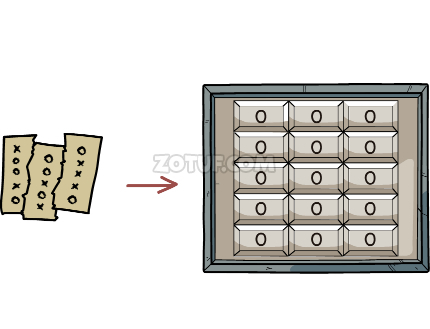
- Take the note with the cats.
- Near the first cat, count all the full flasks (4) this is how many dots to enter on the locker. Near the second cat, count the lit candles (7). Near the third cat, count the plants with leaves (3). And near the fourth cat, check the time on the clock (5).
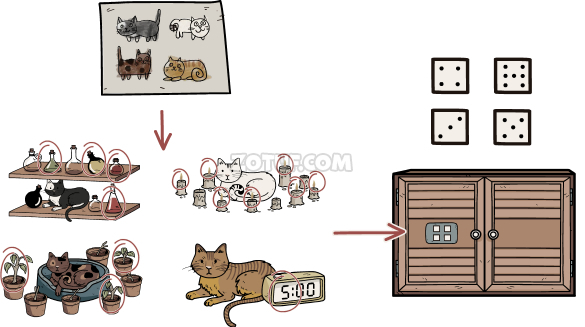
- Solution in the picture.
- Code: 47 at the top and 35 at the bottom.
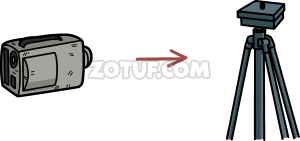
- Take the can and the video camera.
- Take the caterpillar.
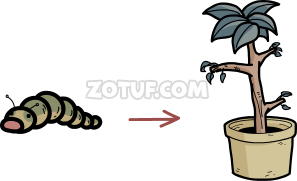
- Use the caterpillar.
- Take the chameleon.
- Look at the symbols.
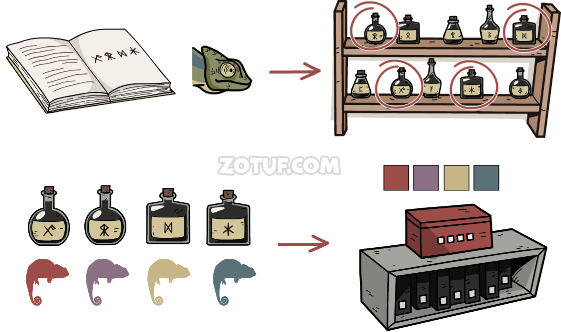
- Place the chameleon near the bottles with symbols from the book, it will glow in different colors. Each symbol is the code for the red box.
- Solution in the picture.
- Take the key, the note, and the radio knob.
- Use the key.
- Take the fly strips and the wire cutters.
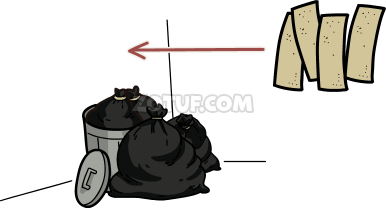
- Use the fly strips.
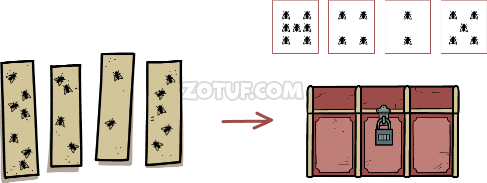
- Enter the code on the chest according to the flies.
- Code: 7425.
- Take the lens, the card, and the egg.
- Use the video camera.
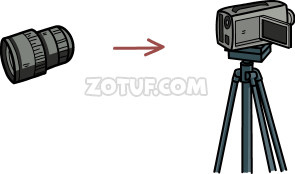
- Use the lens.
- Go to the switch.
- Turn off the light.
- Click on the camera.
- Enter the symbols on the chest.
- Solution in the picture.
- Take the flash drive and the tweezers.
- Use the flash drive.
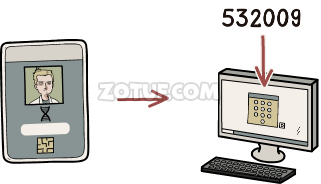
- Enter the code from the card.
- Code: 532009.
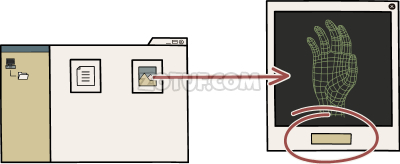
- Go to the folder with pictures.
- Click print.
- Take the index finger.
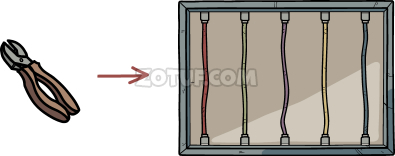
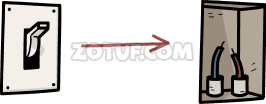
- Use the wire cutters.
- Connect the wires.
- Connect the other wires.
- Solution in the picture.
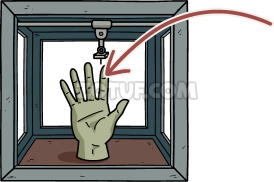
- Press the toggle.
- Use the card.
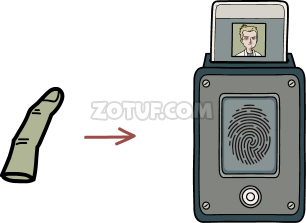
- Use the index finger.
- Take the opener and the umbrella.
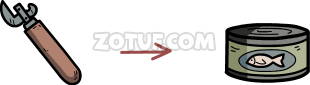
- Use the opener.
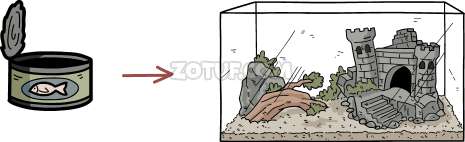
- Use the opened can.
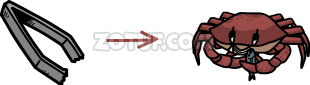
- Use the tweezers to get the crab.
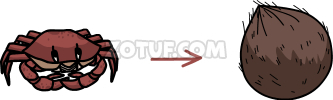
- Use the crab to get the opened coconut.
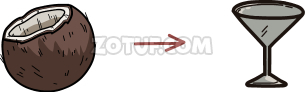
- Use the opened coconut.

- Use the umbrella to get the cocktail.
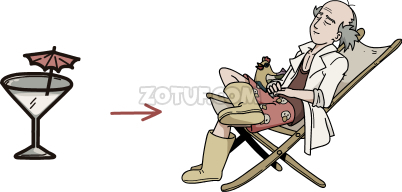
- Use the cocktail.
- Get the toy chicken.
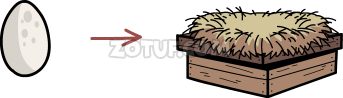
- Use the egg.

- Use the toy chicken.
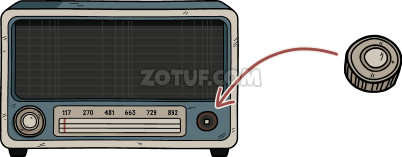
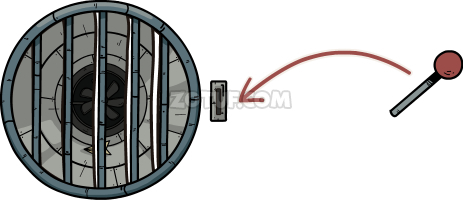
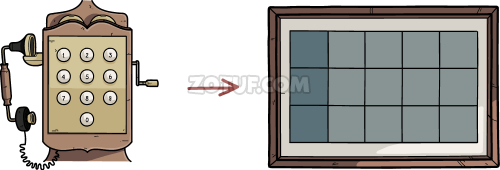
- Use the radio knob.
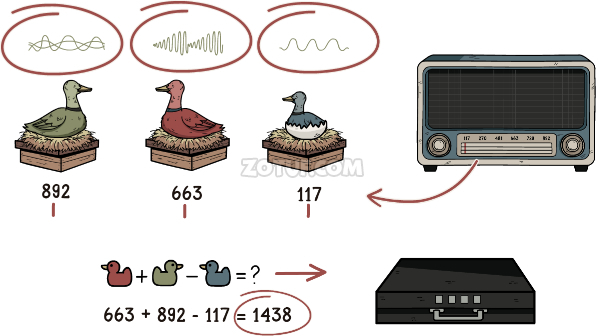
- Tune the frequencies in the receiver.
- Get the numbers 892, 663, and 117. Calculate the numbers in the correct order to get 1438.
- Suitcase code: 1438.
- Enter the symbols from the note on the chest.
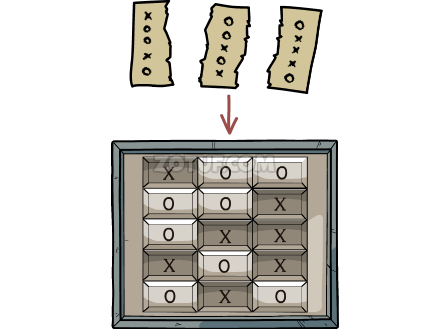
- Take the lever and the skull.
- Remember the drawing from the suitcase.
- Press the locker buttons in the correct order.
- Solution in the picture.
- Take the battery.
- Use the lever.
- Press the lever.
- Press the paper airplane to get a note.
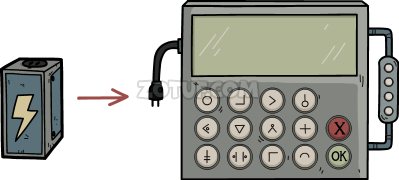
- Use the battery.
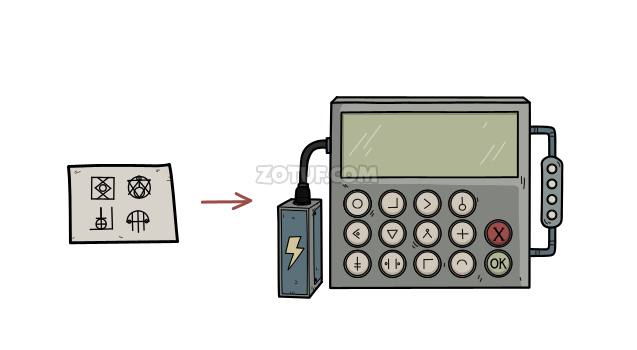
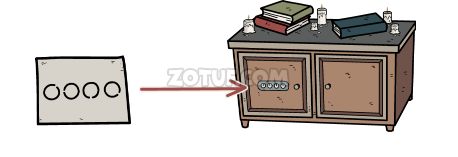
- Enter the symbols in the device.
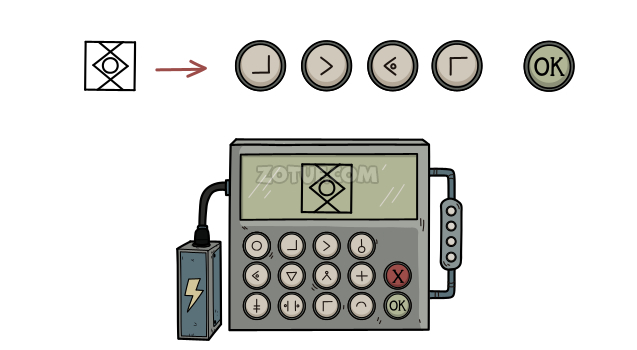
- Solution 1.
- Solution 2.
- Solution 3.

- Solution 4.
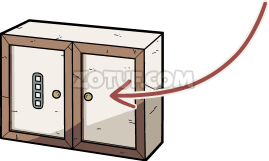
- Enter the resulting symbols on the cabinet lock.

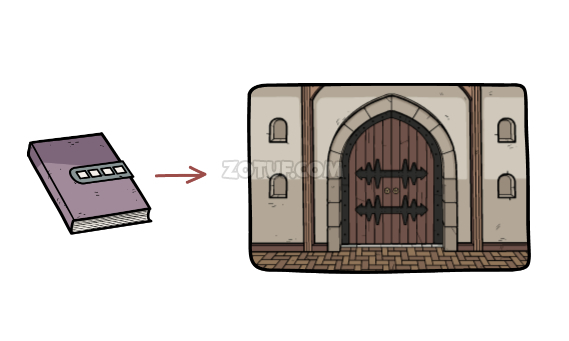
- Open the book.
- Take the photo.
- Go to the Mansion location.
- Open the locker by turning the handles to the correct numbers.
- Solution in the picture.
- Eye: 5, fingers: 4, teeth: 7, ears: 3.
- Take the firework, the note, and crystal 1/3.
- Take the red key.
- Use the red key.
- Press the fingers in this sequence.
- Take the blue key, the tape, and the part of the screwdriver.
- Use the blue key.
- Enter the symbols from the mirror.
- Take the matches and the oil.
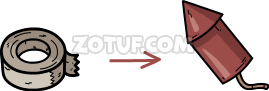
- Apply the tape to the firework.
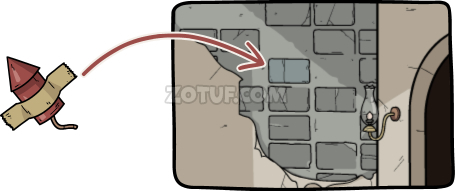
- Use the firework.
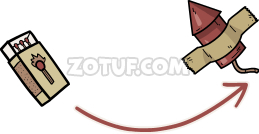
- Light the firework.
- Remember the phone number.
- Enter the phone number: 4692209.
- Arrange the symbols as in the picture.
- Take the glue.
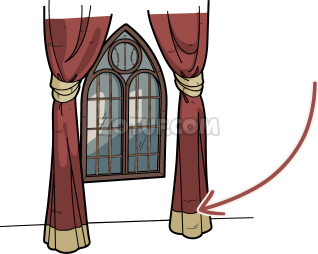
- Take the screwdriver handle from behind the curtain.
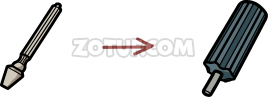
- Connect the screwdriver part with the handle.
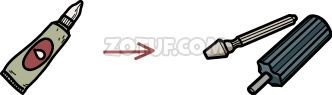
- Use the glue.
- Get the screwdriver.
- Use the screwdriver.
- Take the hand.
- Use the hand.
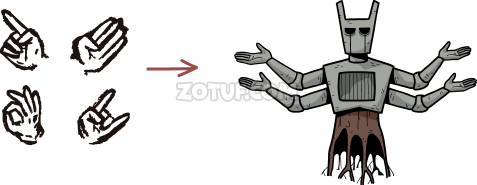
- Arrange the hands correctly.
- Solution in the picture.
- Take crystal 2/3 and the note.
- Press the eyes in this order.
- Enter the code on the green box.
- Code: 3524.
- Take the blade and the ball.
- Use the blade.
- Get the markers.
- Use the markers.
- Get crystal 3/3.
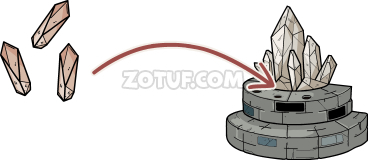
- Use the three crystals.
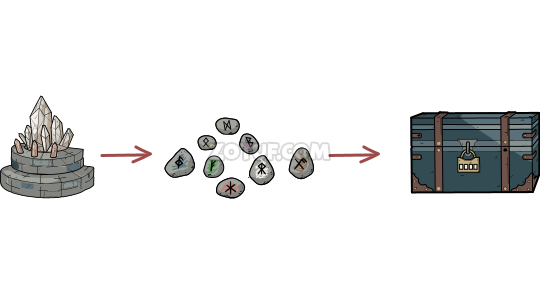
- Match the colors and symbols.
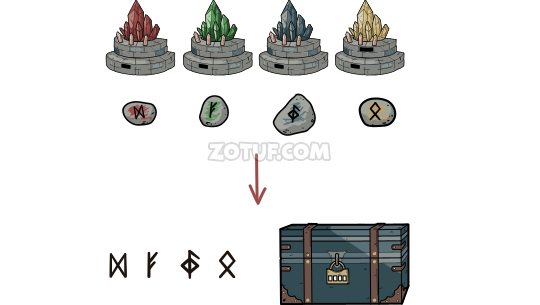
- Enter the code on the chest.
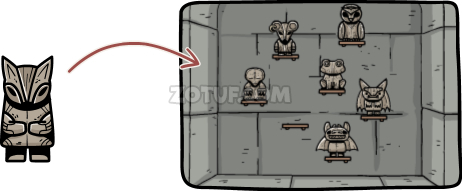
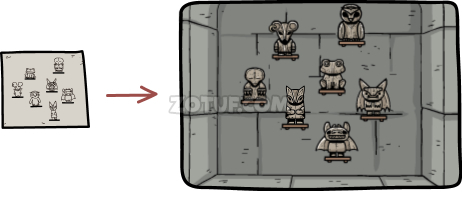
- Take the dragon figurine and the firewood.
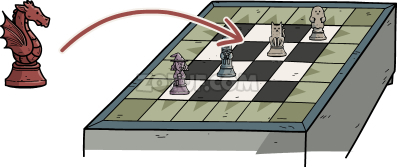
- Use the dragon figurine.
- Arrange the figurines.
- Solution in the picture.
- Take the glove.
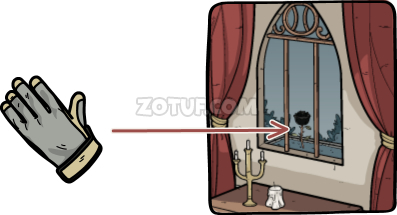
- Use the glove to get the black rose.
- Take the bucket.
- Use the firewood.

- Use the matches.
- Use the bucket.
- Use the oil.
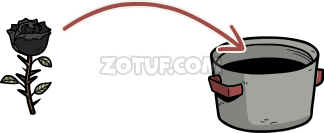
- Use the black rose.
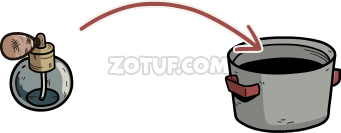
- Use the perfume bottle (it’s on the table in front of the crystals).
- Get the perfume with the black rose.
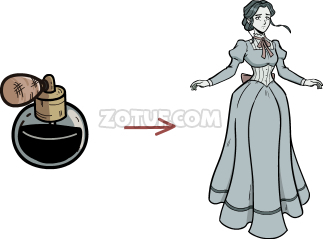
- Give the perfume with the black rose.
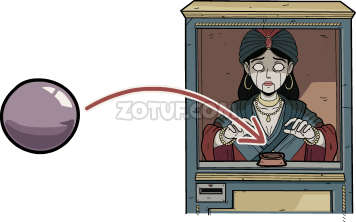
- Take the ticket.
- Use the ball.
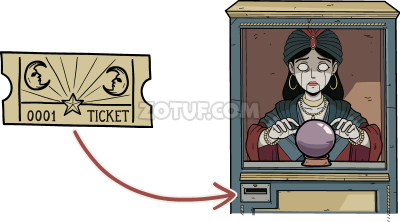
- Use the ticket.
- Remember the symbols.
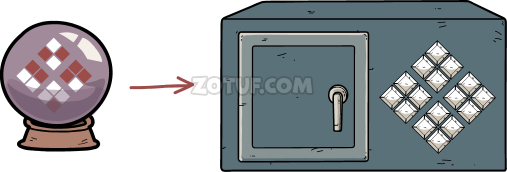
- Arrange the symbols correctly.
- Solution in the picture.
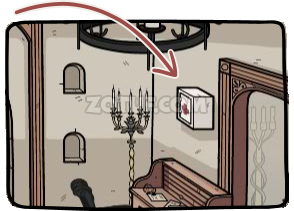
- Take the bat wing.
- Take the adhesive plaster.
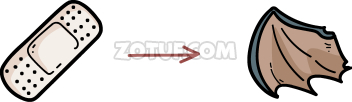
- Use the adhesive plaster.
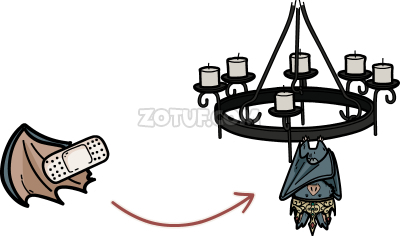
- Use the bat wing with the adhesive plaster.
- Take the crown.
- Look at the symbols in the notebook.
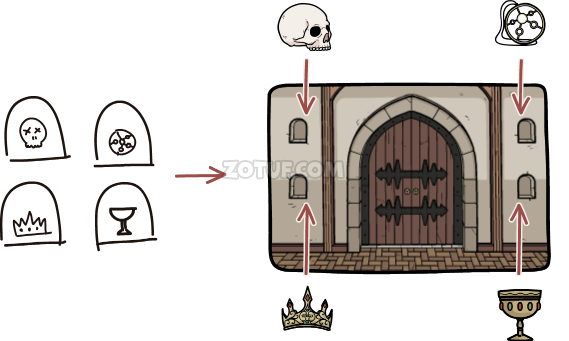
- Arrange the items correctly: skull, jewelry, crown, and glass.
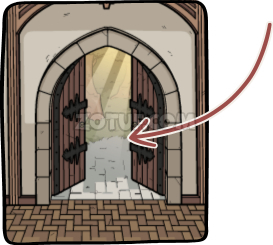
- Exit the house.
Secret ending
Two years have passed, and Lucian has accepted his new nature. He has become a vampire and he likes it. Mina, who once made a deal to save him, is now betrayed. Instead of the promised freedom, she finds herself behind bars. Lucian breaks the agreement and says he needs her. Her fate is in her hands. Now Mina must find a way to escape before she becomes the next victim.
- Enter the code on the chest.
- Code: 3572.
- Solution in the picture.
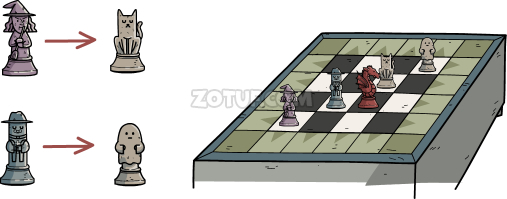
- Take the figurine.
- Take the note.
- Use the figurine.
- Arrange the figurines.

- Solution in the picture.
- Take the bottle.
- Use the bottle.
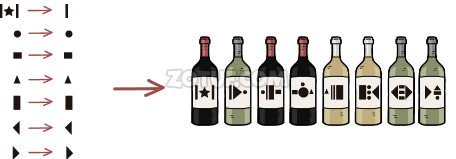
- Arrange the bottles in this sequence.
- Take the key and the note.
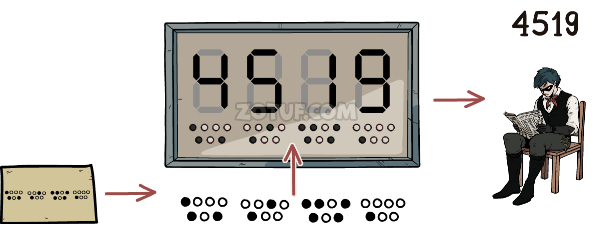
- Arrange the dots as in the picture to get the code 4519.
- Enter the code.
- Take the access card from the table and the bone.
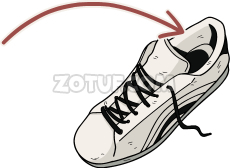
- Take part of the note 1/3 from the sneaker.

- Use the key.
- Take part of the note 2/3.
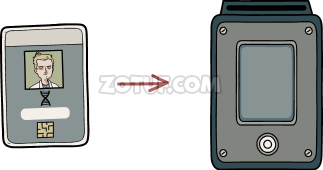
- Use the access card.
- Take part of the note 3/3 and the grater.
- Use the three notes.
- Solution in the picture.
- Take the pipette and the note.
- Adjust the knobs as drawn on the note.

- Solution in the picture.
- Take the salt shaker.
- Take the jug of water.
- Take the cobweb.
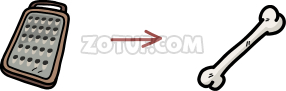
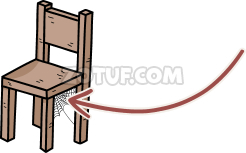
- Use the grater on the bone to get bone powder.
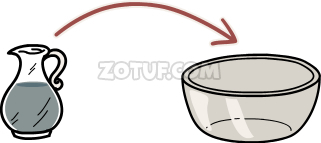
- Use the jug of water.
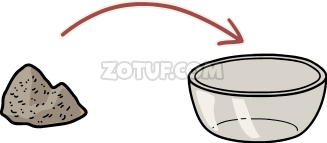
- Use the bone powder.
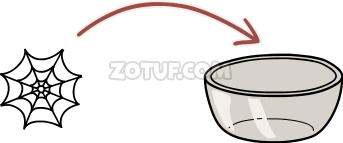
- Use the cobweb.
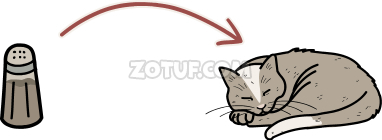
- Use the salt shaker.
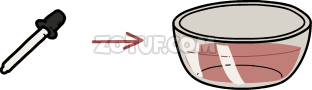
- Use the pipette to get the pipette with sleeping potion.
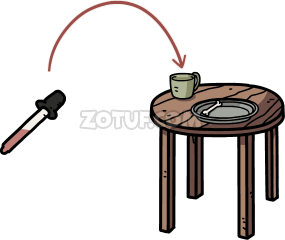
- Use the pipette with the sleeping potion.

- Use the stick (it’s on the round blue table) to get the key.
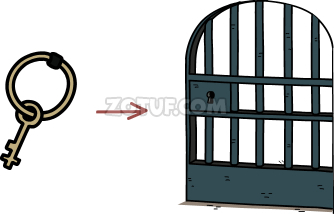
- Use the key.
Congratulations! You have completed the game Hidden Memories.


