
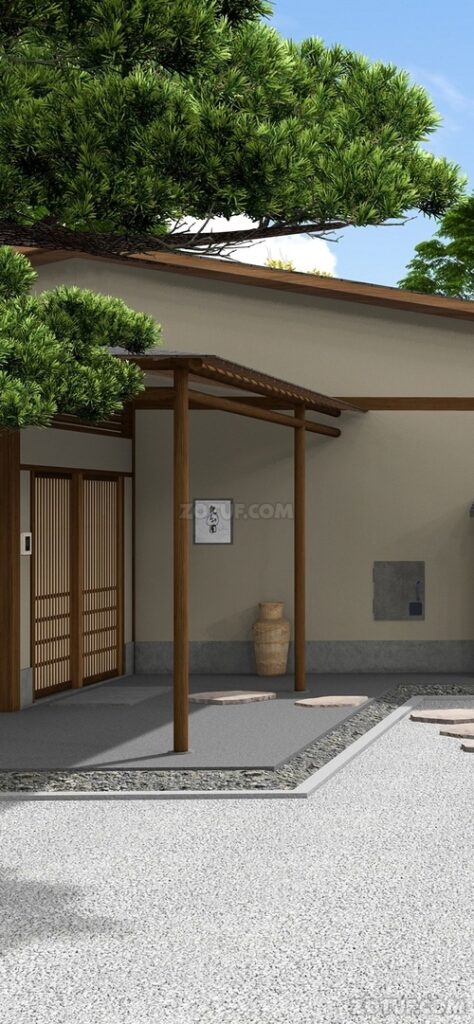
Hidden Ryokan – A puzzle game from developer ArtDigic that will take you to a Japanese atmosphere surrounded by quiet gardens and greenery. A lot of mysteries and riddles are waiting for you. In the game you need to explore the hotel, clicking on places of interest to find items and clues. These artifacts will help you solve puzzles and find clues to exit. Solve all the secrets and get out of this mysterious hotel. If you can not pass any of the puzzles or do not know where the items are, on our site you can see the walkthrough of the game Hidden Ryokan, get out of the hotel.
Hidden Ryokan – Walkthrough
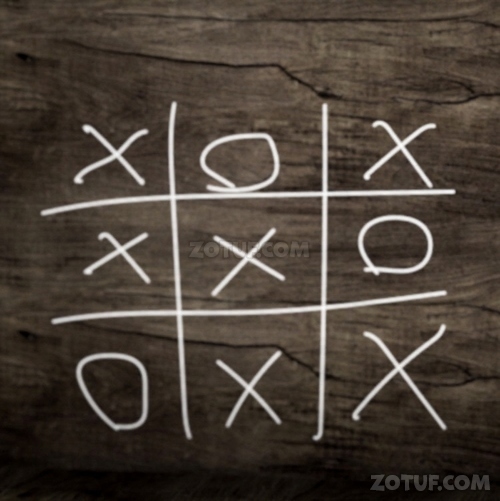
Here you can see the full walkthrough of Hidden Ryokan, in pictures.
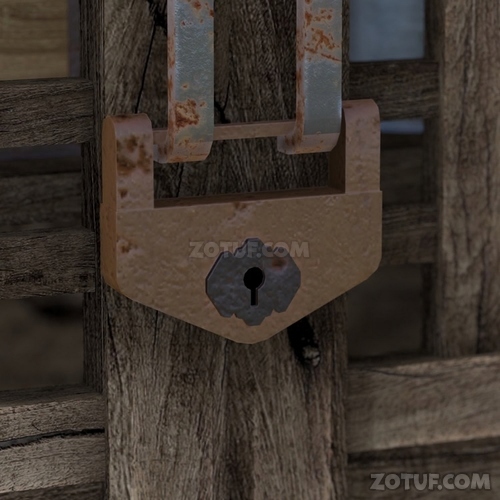
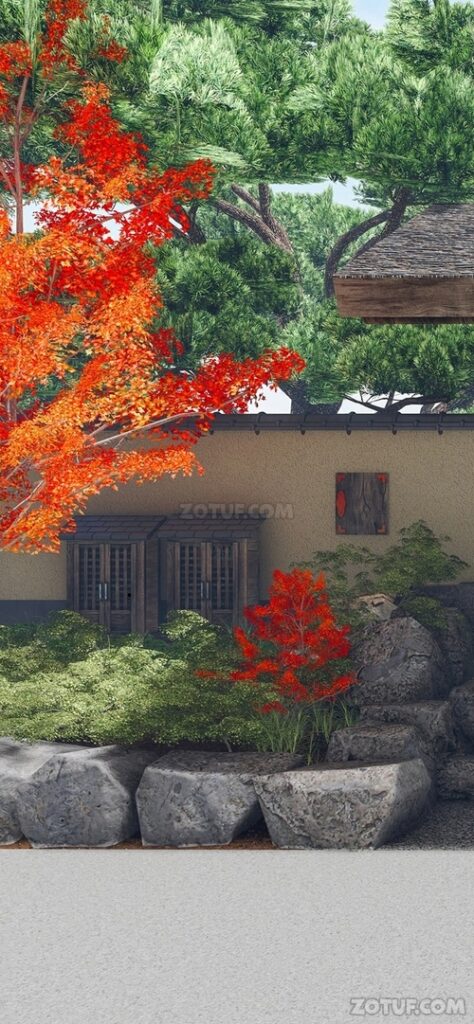
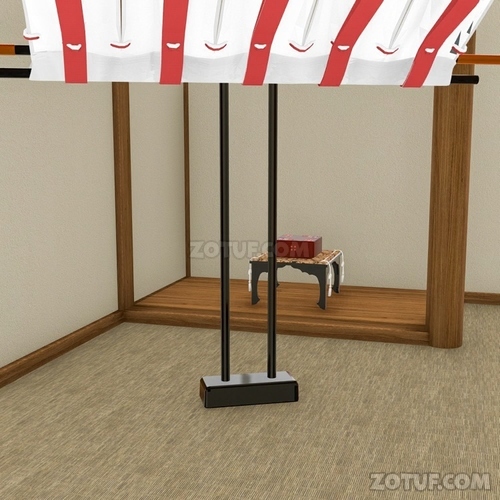
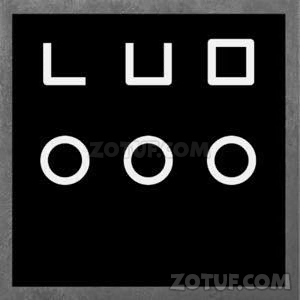
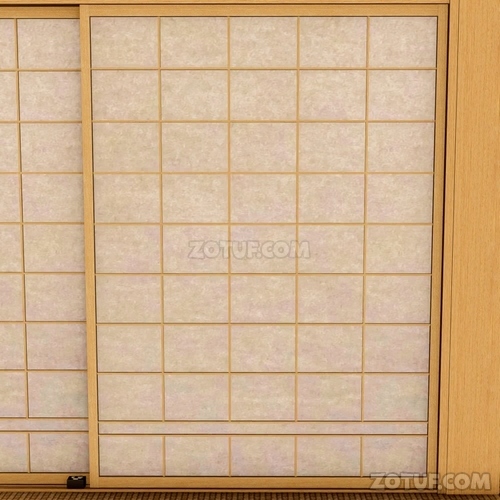
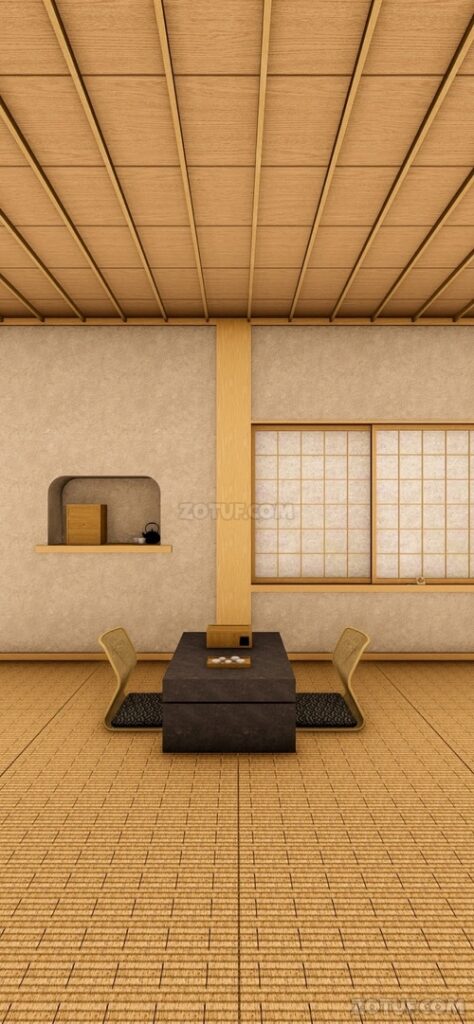
1. Move to this location and examine the left side of the fence.

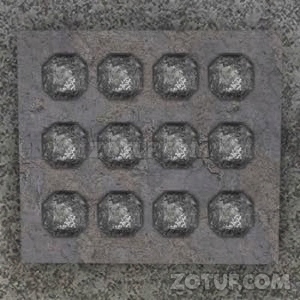
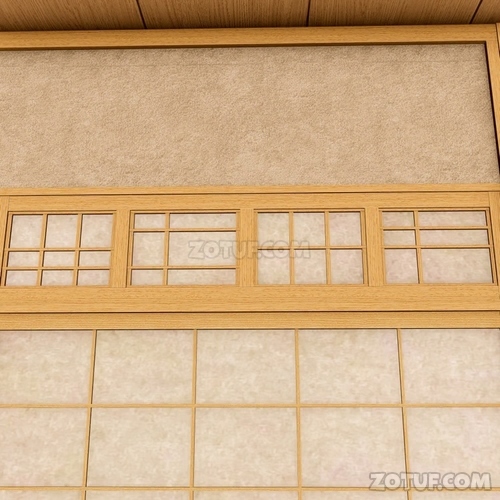
2. Confirm the pattern of the roof tiles.

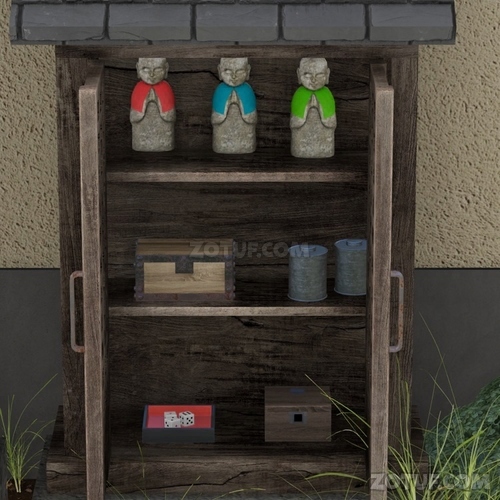
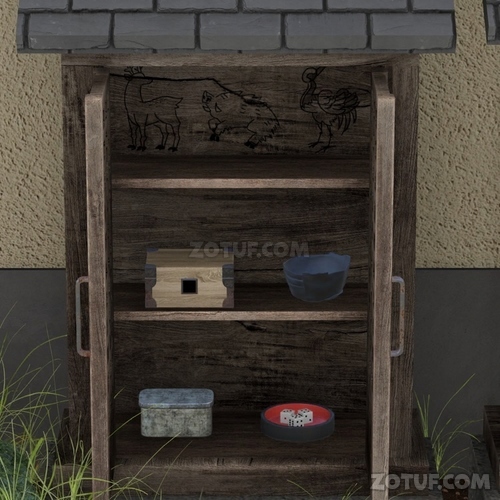
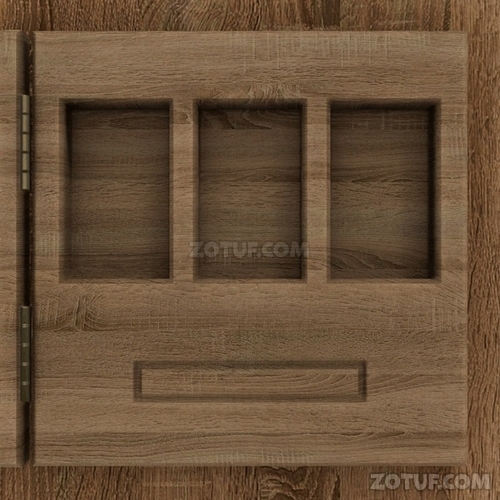
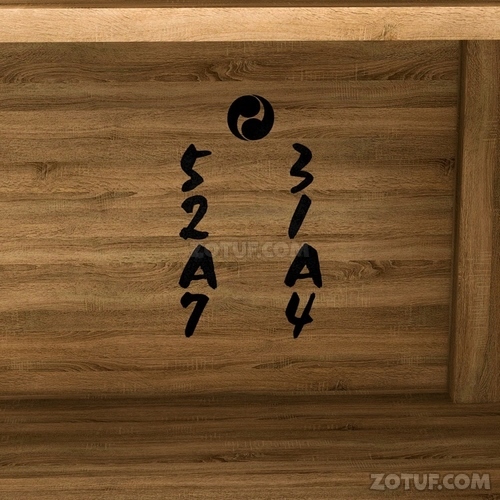
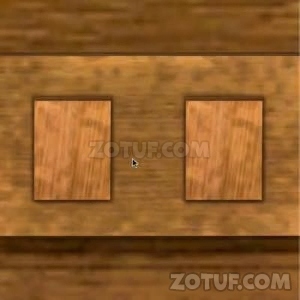
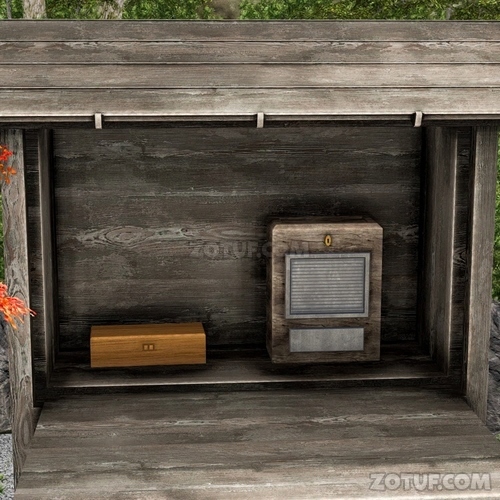
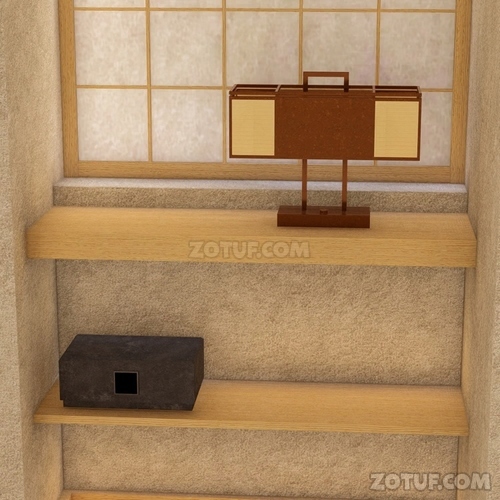
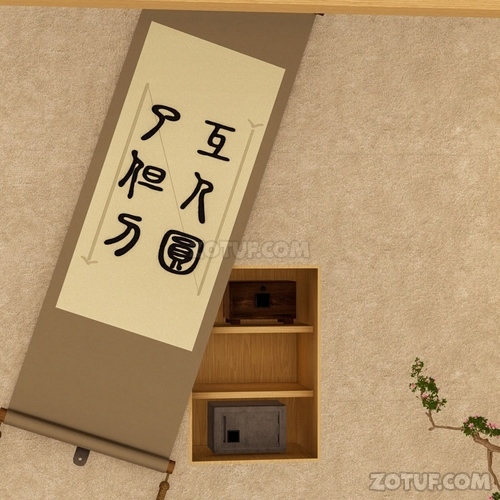
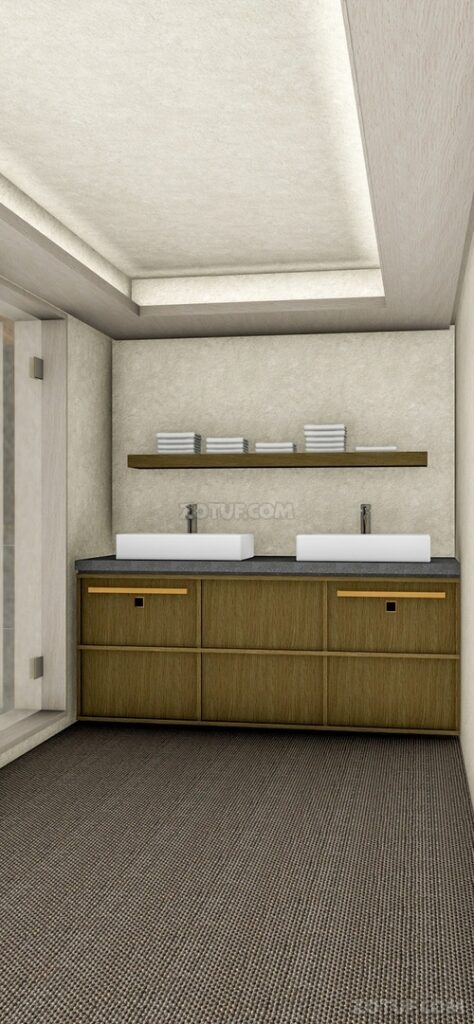
3. Move to this location and examine the shelf on the left side.

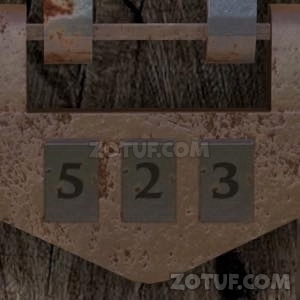
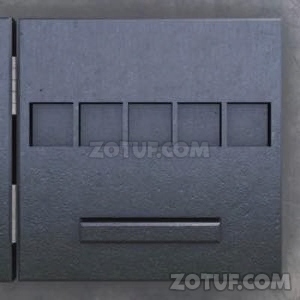
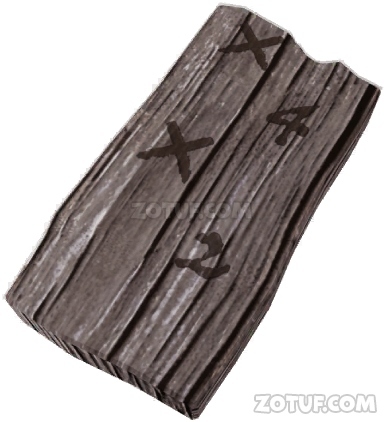
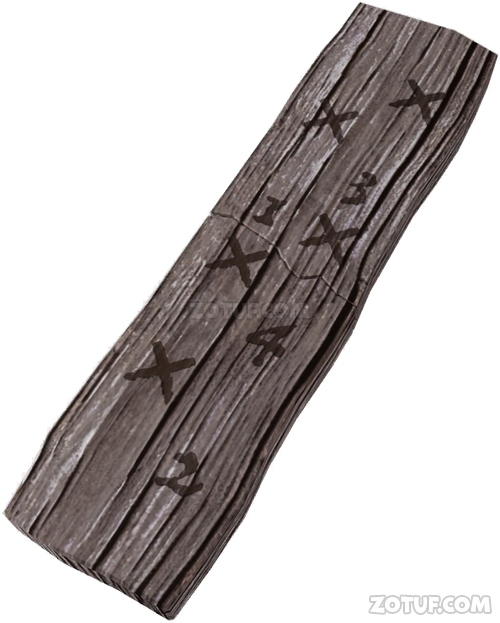
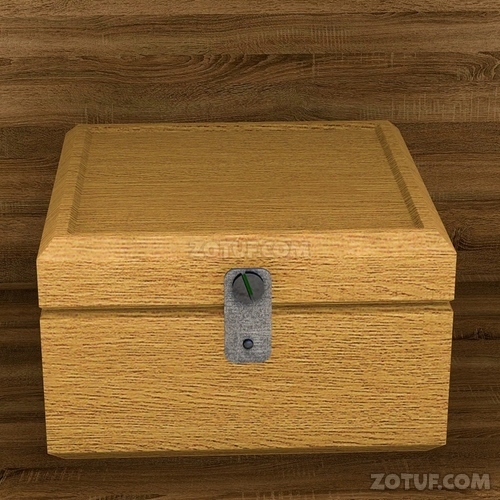
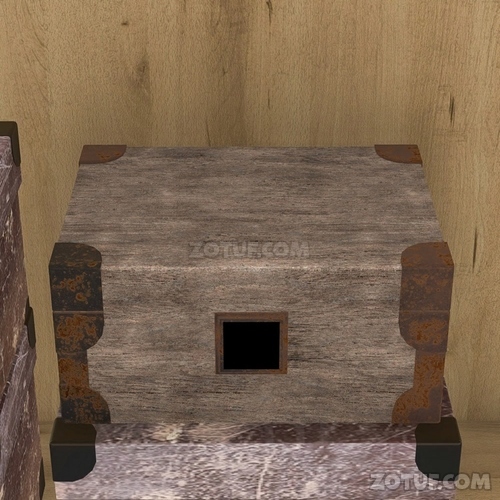
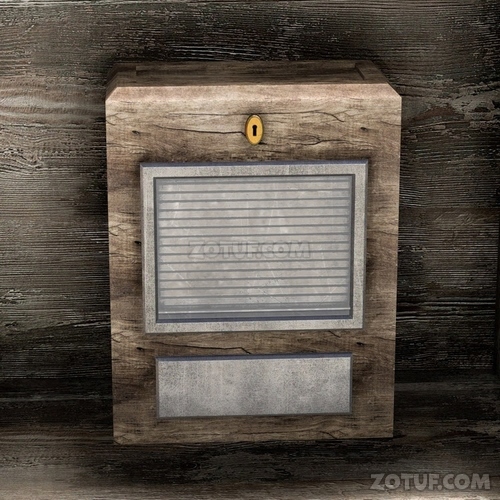
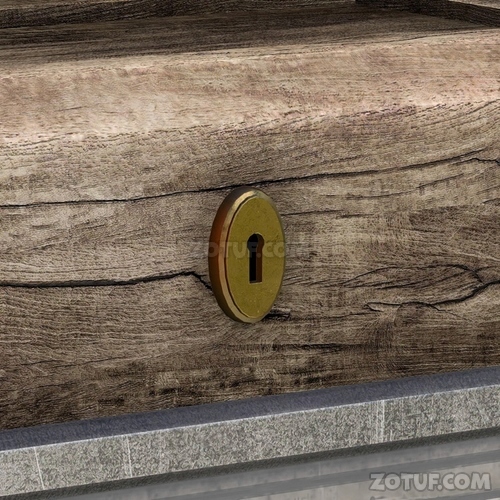
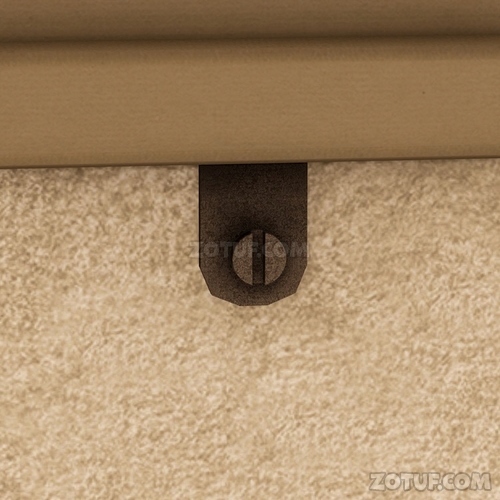
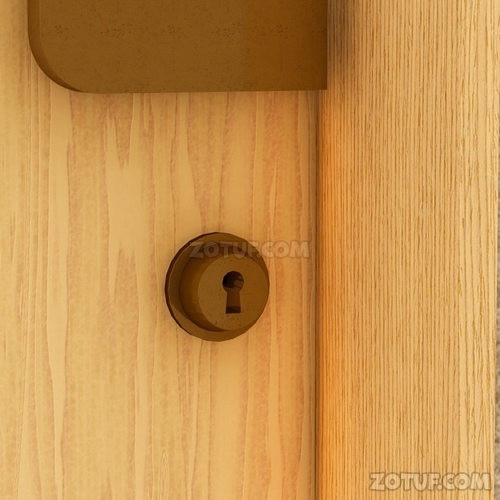
4. Examine the lock.


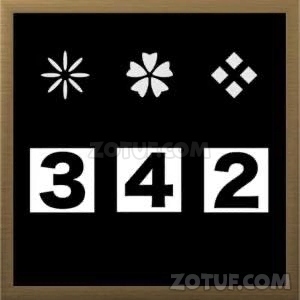
5. Input the following based on the pattern of the roof tiles.

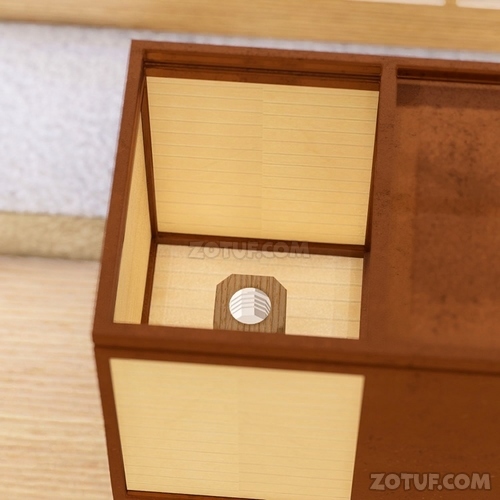
6. Examine the top shelf of the shelf.

7. Obtain a part.

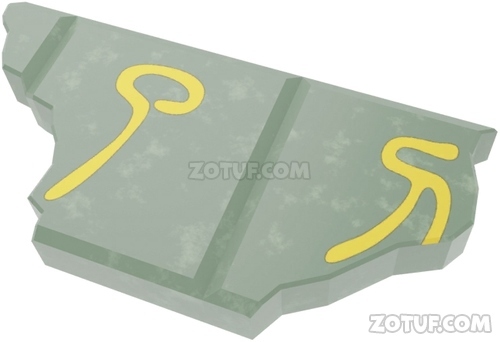
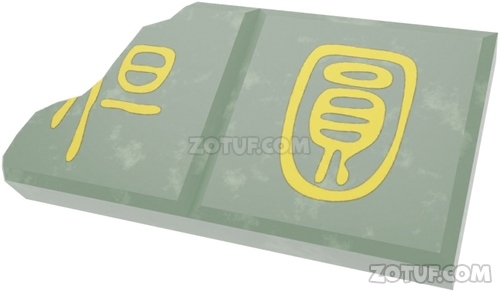
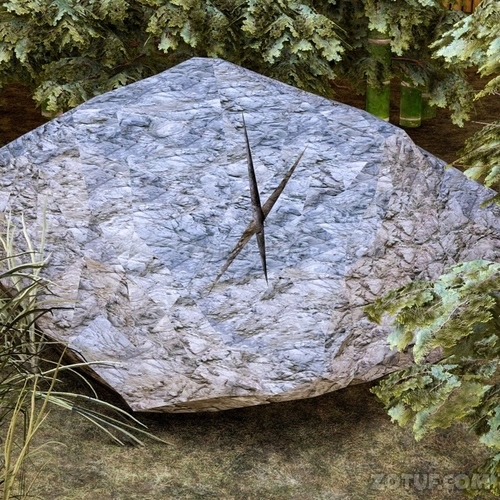
8. Move to this location and examine the stone material of the stairs on the right side of the screen.

9. Confirm the difference in stone colors.

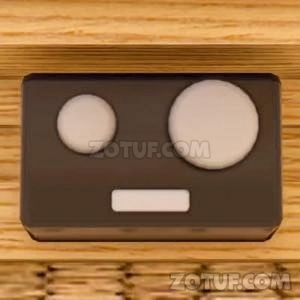
10. Move to this location and examine the device in the lower left corner of the screen.


11. Input the following based on the difference in stone colors.


12. Obtain a part.

13. Combine two parts.


14. Obtain a bamboo dragonfly.

15. Move to this location and examine the tree where the paper balloon is caught.


16. Use the bamboo dragonfly.

17. Obtain a paper balloon.

18. Examine and pop the paper balloon.

19. Obtain an acorn.

20. Move to this location and examine the squirrel in the bushes on the lower right side of the screen.


21. Give the acorn to the squirrel.

22. Move to another location and then return to the location where the squirrel was.


23. Examine what the squirrel is holding.

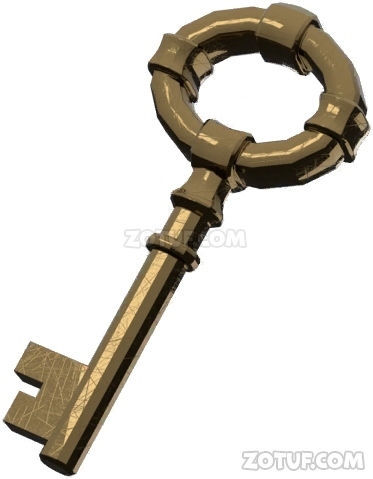
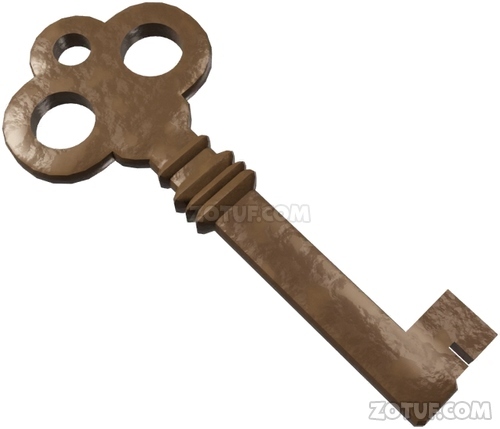
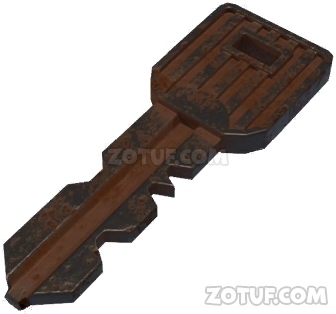
24. Obtain a key.

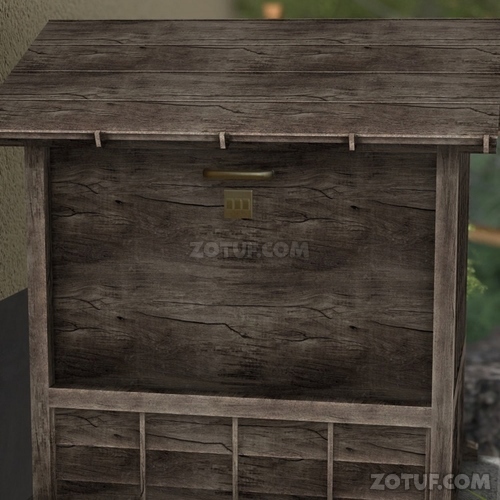
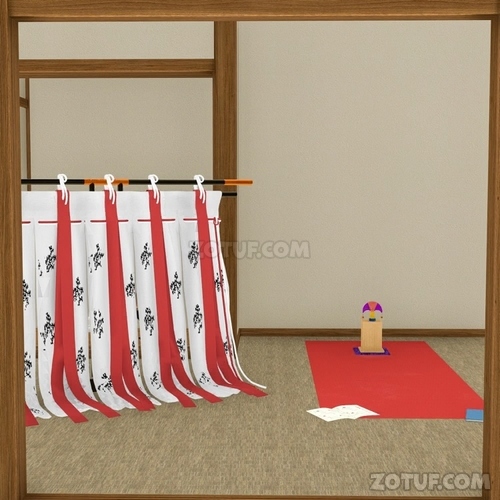
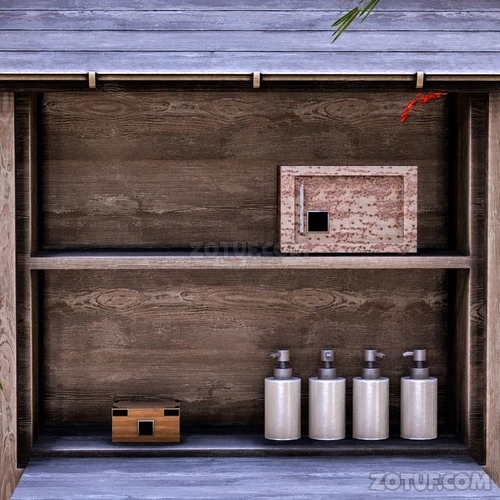
25. Move to this location and examine the shelf on the right side.


26. Use the key.

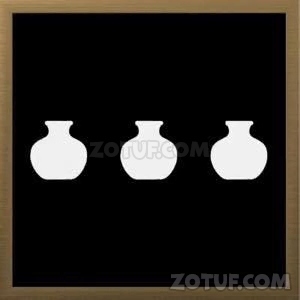
27. Examine the box in the middle shelf.

28. Obtain a flower card with a vine handle.

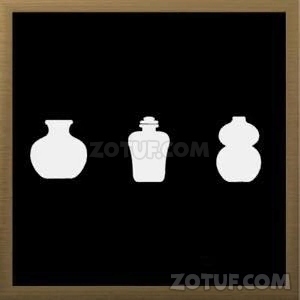
29. Move to this location and examine the shelf on the left side.
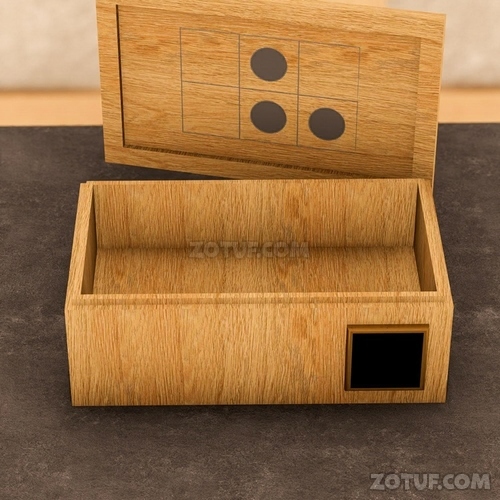
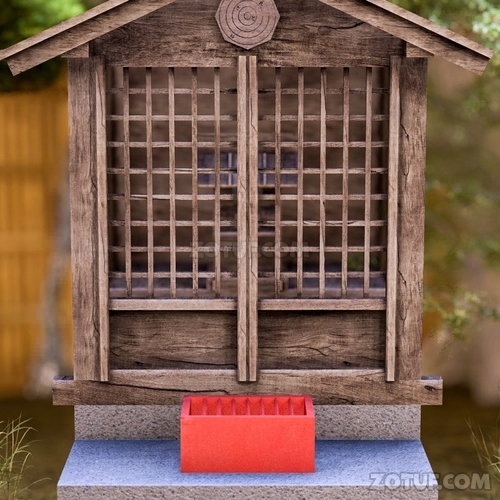
30. Examine the red circular tray on the bottom shelf of the shelf.

31. Confirm the circular shape of the tray and the dice.

32. Move to this location and examine the shelf on the right side.

33. Examine the red square tray on the bottom shelf of the shelf.

34. Confirm the dice.

35. Examine the shelf on the left side.

36. Examine the box in the middle.

37. Input the following based on the shapes of the circular and square trays and the dice numbers.


38. Obtain a flower card with a deer pattern.

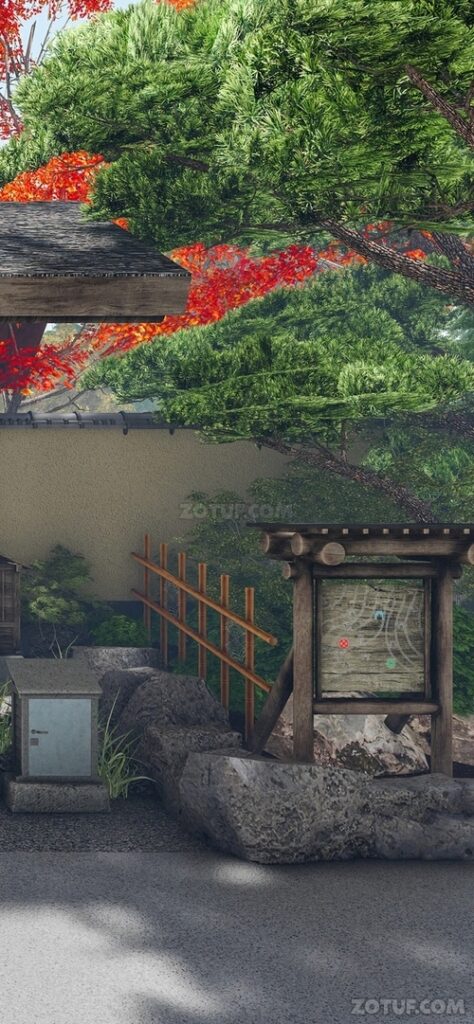
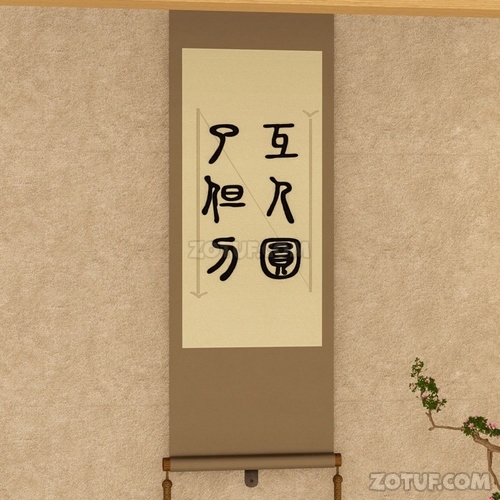
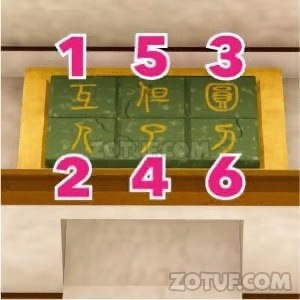
39. Move to this location and examine the shelf on the right side.

40. Confirm the colors of the three Jizo statues on the top shelf of the shelf.

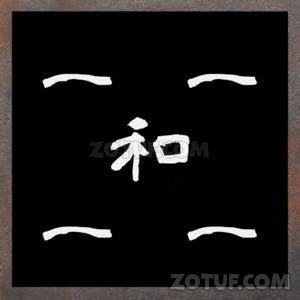
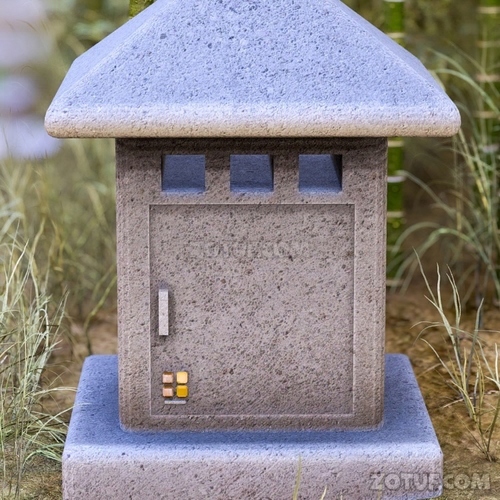
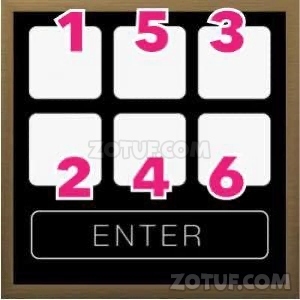
41. Move to this location and examine the signboard.
42. Confirm the shape and color of the colored symbols on the signboard.

43. Move to this location and examine the device on the right side of the gate.


44. Input the order of the colors of the Jizo statues in the shelf into the device based on the shapes and colors of the symbols.


45. Obtain a flower card with a boar pattern.

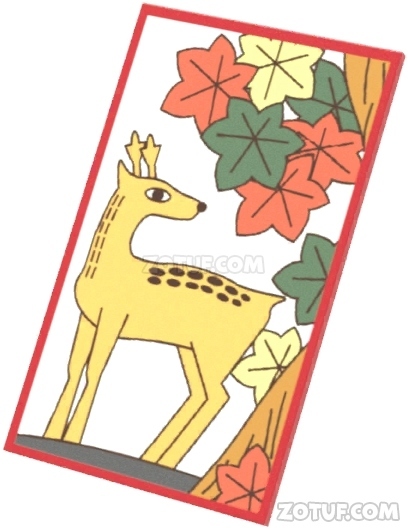
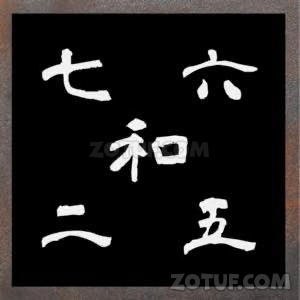
46. Move to this location and examine the shelf on the left side.

47. Examine the top shelf of the shelf.

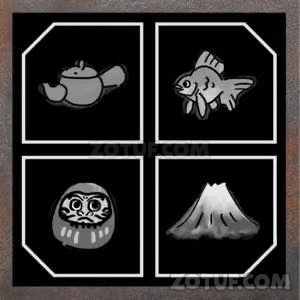
48. Confirm the illustrations of a deer, boar, and crane.

49. Move to this location and examine the device on the left side of the gate.


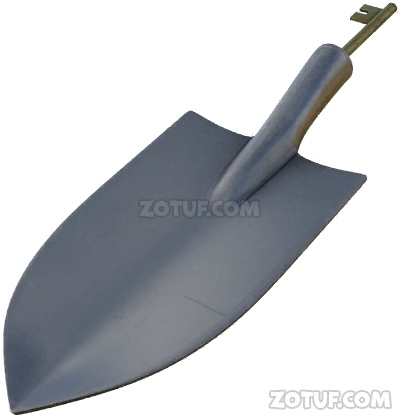
50. Input the order of the illustrations written in the shelf into the device.


51. Move to this location and examine the signboard on the wall.


52. Obtain a shovel.

53. Move to this location and examine the area with the stones on the left side of the screen.


54. Use the shovel.

55. Obtain a blue button.
56. Move to this location and examine the jar.

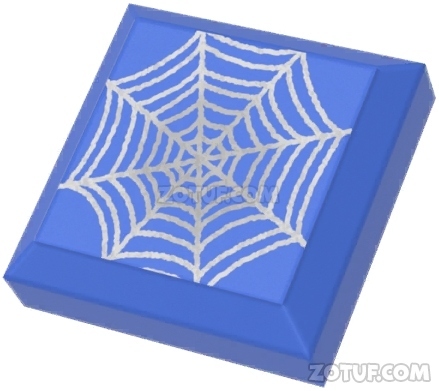
57. Examine what has fallen behind the jar to the right.

58. Obtain a blue button.

59. Move to this location and examine the fence.

60. Confirm the position of the spider web.

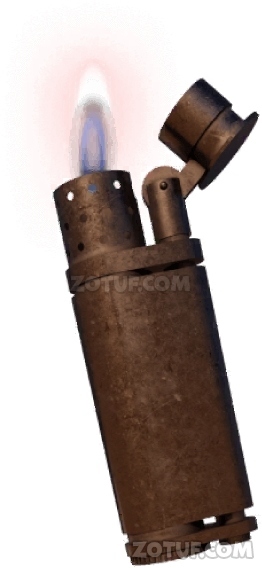
61. Move to this location and examine the device on the wall.

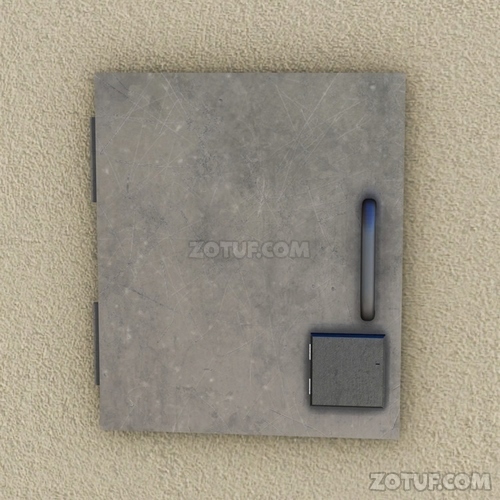
62. Set the blue button into the device based on the position of the spider web on the fence.


63. Obtain a lighter.

64. Examine the shovel.

65. Confirm that the handle of the shovel is a key.
66. Move to this location and examine the device made of stones on the right side of the screen.


67. Use the shovel key.

68. Obtain a round button.

69. Move to this location and examine the veranda.

70. Use the lighter.
71. Obtain a round button.

72. Move to this location and examine the signboard on the wall.

73. Confirm the ■◆● shapes written on the signboard.
74. Move to this location and examine the stone lantern.


75. Check the pattern carved on the stone lantern and the shape of the hole on the upper side of the lantern.

76. Move to this location and examine the stone lantern.

77. Check the pattern carved on the stone lantern and the shape of the hole on the upper side of the lantern.

78. Move to this location and examine the stone lantern.

79. Check the pattern carved on the stone lantern and the shape of the hole on the upper side of the lantern.
80. Move to this location and examine the right shelf.

81. Examine the box on the bottom shelf of the shelf.


82. Refer to the order of the ■◆● shapes written on the signboard and combine the shape of the hole in the stone lantern with the symbols.


83. Input as follows:

84. Obtain a round button.

85. Move to this location and examine the inside of the device on the right side of the gate.

86. Examine the shapes written on the wall.

87. Confirm the shapes.

88. Examine the door on the left side of this location.


89. Refer to the shapes and set three round buttons into the device.


90. Examine the door on the left side of this location.

91. Examine the item on the right side of the middle shelf of the shelf.

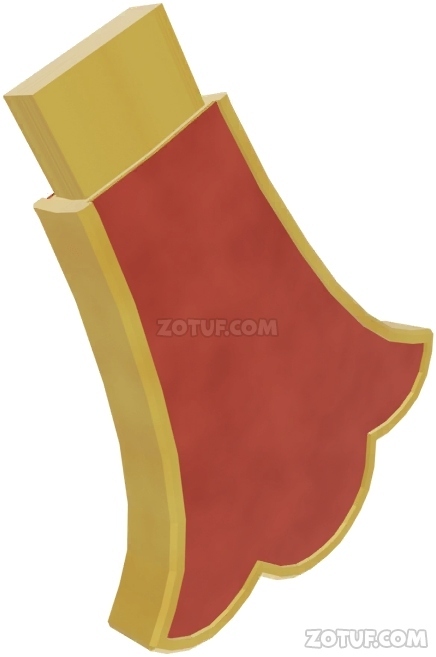
92. Obtain the folding fan.
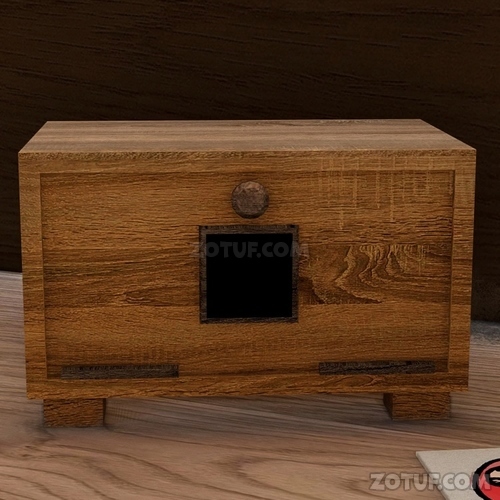
93. Open the folding fan and check the pattern on it.

94. Move to this location and examine the device made of stone on the right side of the screen.

95. Examine the wooden box.


96. Input as follows, referring to the pattern on the folding fan:


97. Obtain a part.

98. Examine the door on the left side of this location.

99. Examine the item on the top shelf on the left side of the screen.

100. Get a paper box.

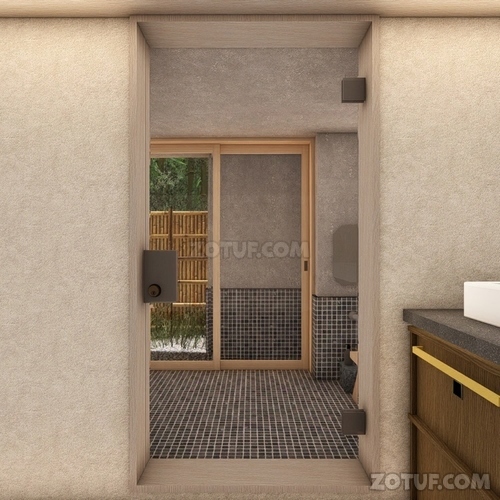
101. Use the lighter on the box.


102. Obtain the handle.

103. Move to this location and examine the door attached to the stone wall on the right side of the screen.


104. Use the handle.

105. Obtain a part.

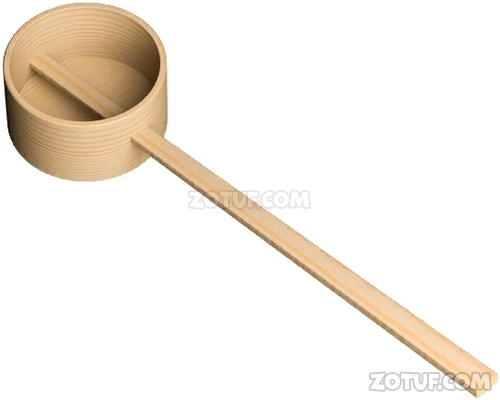
106. Move to this location and examine the area around the stone lantern.


107. Combine two parts.

108. Obtain the ladle.
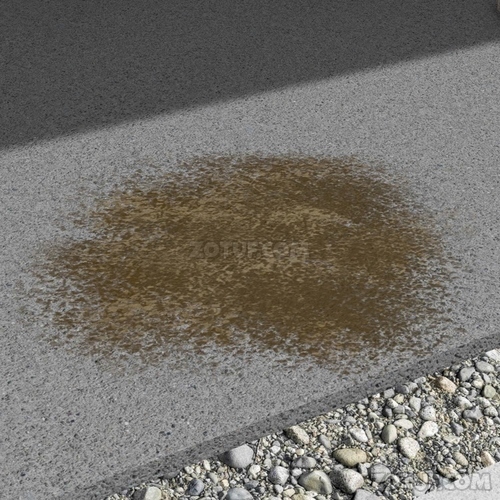
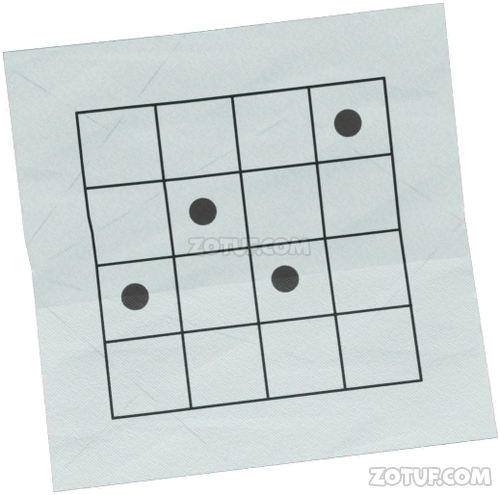
109. Use the ladle on the water.

110. Draw water with the ladle.

111. Move to this location and examine the dirty part of the floor.
112. Use the ladle with water on the floor.

113. Confirm the shapes on the floor.
114. Move to this location and examine the eaves.

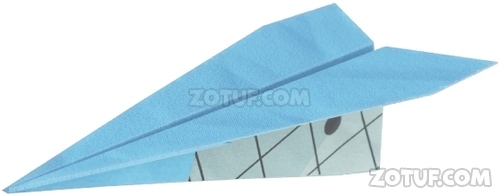
115. Confirm that a paper airplane is on the beam under the eaves.

116. Use the fan to drop the paper airplane.

117. Move to this location and examine the paper airplane on the ground at the far right of the screen.

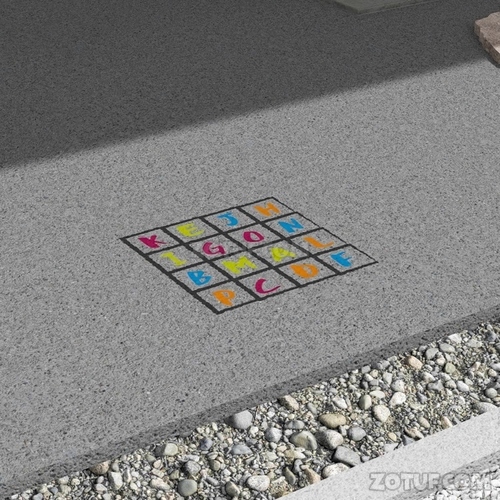
118. Obtain the paper airplane, then examine and open it.
119. Confirm the shapes.
120. Move to this location and examine the door on the left side.

121. Examine the device next to the door.


122. Combine the shapes on the paper airplane with those on the floor.


123. Align the colors of the device with the colors of the alphabet on the shapes.

124. Move to this location and examine the entrance on the left.
125. Examine the booklet on the floor to the right.


126. Confirm the rules of fan-tossing game written in the booklet.

127. Use the fan on the target for fan-tossing game.

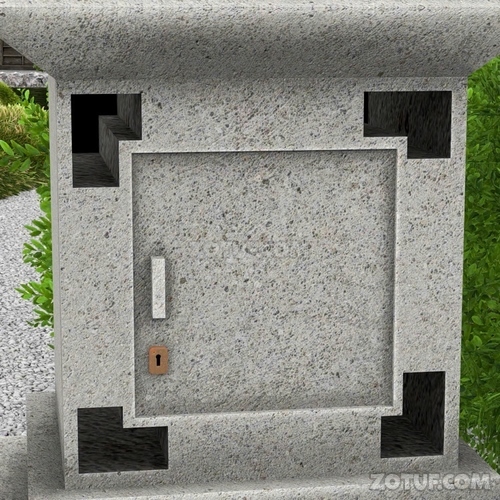
128. After throwing the fan three times, the fan will land on the target.

129. You will be able to examine the back of the room.
130. Move to this location and examine the device made of stone on the right.

131. Confirm the shapes of the four holes.

132. Move to this location and examine the left side.
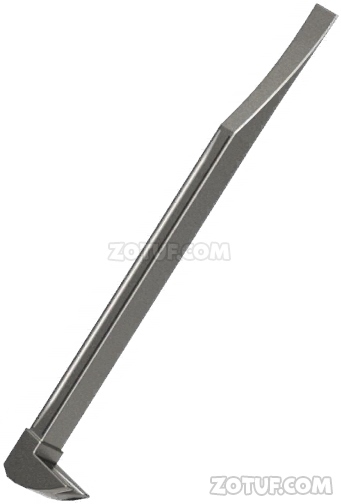
133. Examine the box at the back of the room.


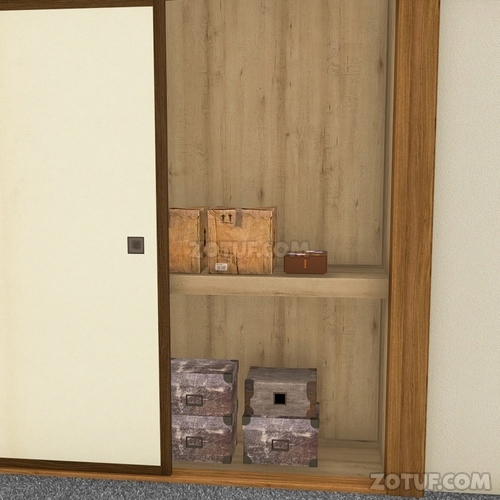
134. Input as follows, referring to the shapes of the four holes:

135. Obtain the tip of the crowbar.

136. Move to this location and examine the closet door on the left.

137. Confirm the items inside the closet.

138. Use the tip of the crowbar.

139. Obtain the wooden piece.

140. Move to this location and examine the jar.

141. Examine the inside of the jar.


142. Use the ladle with water.

143. Obtain the wooden piece.

144. Combine the two wooden pieces.
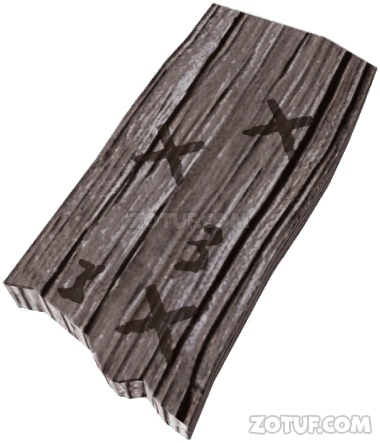
145. Check the numbers written on the pieces of wood.

146. Move to this location and examine the frame on the left.

147. Confirm the letters.
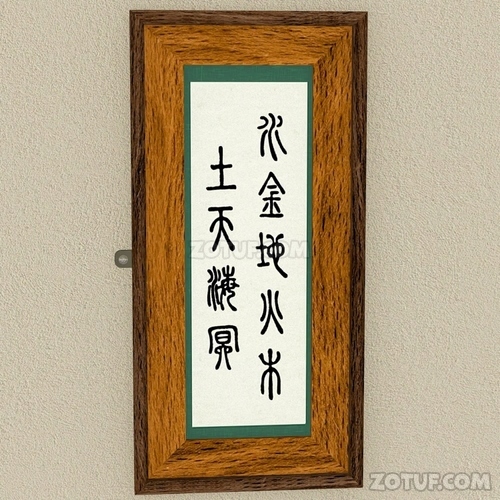
148. Move to this location and examine the shelf.

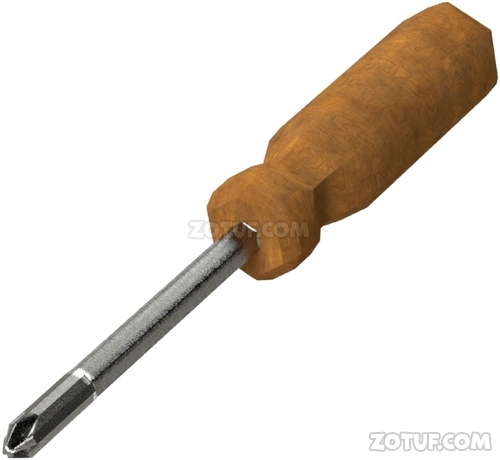
149. Examine the box on the top shelf.


150. Input as follows, referring to the letters on the frame and the numbers on the wooden pieces:


151. Obtain the handle of the screwdriver.

152. Combine the tip and the handle of the screwdriver.


153. Move to this location and examine the frame on the left.

154. Examine the screw next to the frame.


155. Use the screwdriver.
156. Examine the device.

157. Combine the shapes on the device with those on the wall.


158. Obtain the crowbar.

159. Examine the shelf in this location.

160. Examine the shapes on the wall in the middle shelf.

161. Confirm the shapes.

162. Move to this location and examine the closet on the left.
163. Examine the area around the rails of the closet on the lower left of the screen.

164. Confirm that there is a nail stuck in.

165. Use the crowbar.

166. Examine the small box on the upper shelf of the closet.


167. The numbers on the left and right in the shelf are indicated by the respective inequality signs as follows:

168. Input as follows:

169. Obtain the ball.

170. Move to this location and examine the ground on the lower right of the device made of stone on the right side of the screen.


171. Use the crowbar.
172. Obtain the coin.

173. Move to this location and examine the shelf.


174. Use the coin.

175. Obtain the ball.

176. Move to this location and examine the beckoning cat on the right side of the door.


177. Use the two balls.


178. Obtain the koban(oval gold coin).

179. Examine the koban(oval gold coin) to confirm the picture.

180. Move to this location and examine the closet on the left.

181. Examine the box on the lower shelf of the closet.
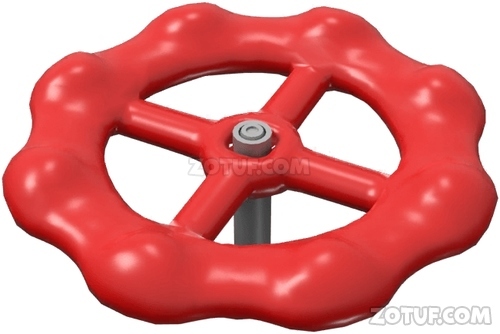
182. Reverse the characters in the center of the koban(oval gold coin) so that they match the orientation of the characters on the device.

183. Input as follows:
184. Obtain the valve handle.
185. Move to this location and examine the door on the ground on the left.


186. Use the valve handle.

187. Examine the device on the other side of the bridge.


188. Examine the box on the left.


189. Input the characters written on the coin into the device.


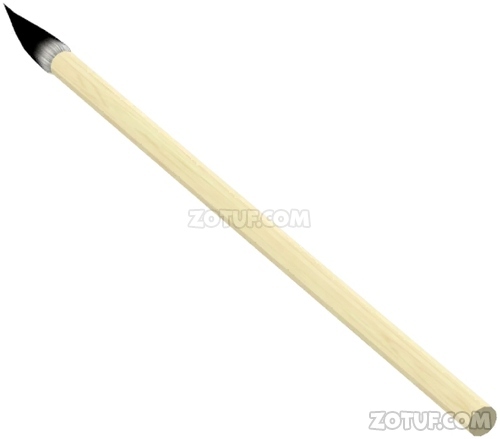
190. Obtain the brush.

191. Move to this location and examine the frame on the wall.


192. Confirm the part with the hole on the device.

193. Use the brush on the device.

194. Obtain the key.

195. Examine the device on the other side of the bridge.

196. Examine the box on the right.
197. Examine the keyhole.
198. Use the key.
199. Examine the two holes on the device.

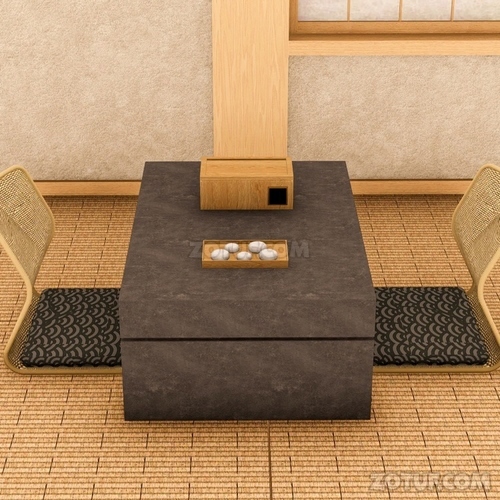
200. Use the koban(oval gold coin) and the coin in the holes of the device according to their sizes.


201. Obtain the ink.

202. Move to this location and examine the table.

203. Focus on the inkstone.

204. Use the ink.

205. Use the brush on the inkstone.

206. Use the brush on the inkstone.

207. Dip the brush in ink.
208. Move to this location and examine the ornament to the left of the door.

209. Confirm the daruma doll.

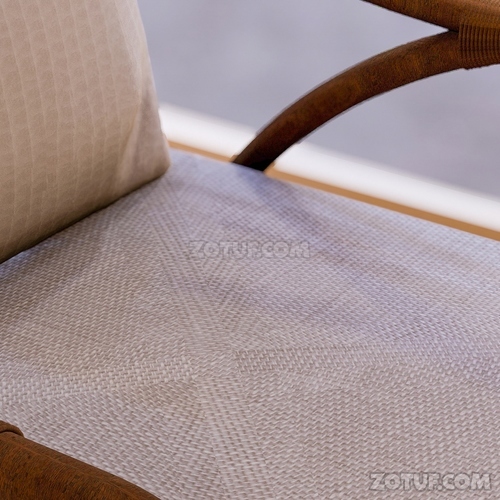
210. Use the brush.

211. Move to this location and examine around the table.

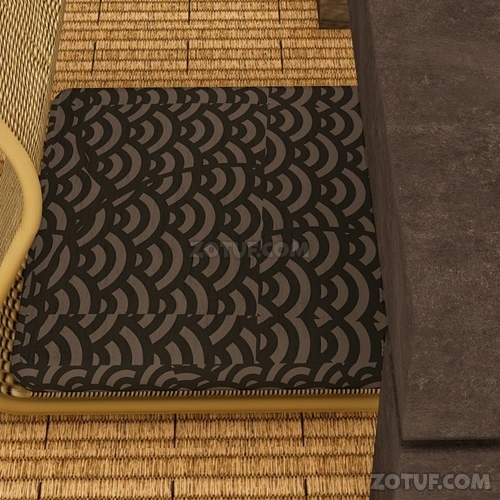
212. Examine the pattern on the cushions of the chairs on the left and right.


213. Move to this location and examine the shelf on the right side of the screen.

214. Examine the box in the lower left corner of the screen.

215. Examine the buttons of the device.


216. Enter the pattern of the cushions on the left and right sides of the table as follows.


217. Get the hook.

218. Move to this location and examine the right side of the room.

219. Examine the item in the corner of the left wall.

220. Get the rod.

221. Combine the hook and the rod.


222. Get the rod with the hook.

223. Move to this location and examine the handle on the ceiling.


224. Use the rod with the hook.

225. Matches fall.

226. Move to this location and examine around the box on the floor in the center of the screen.

227. Examine the matchbox.

228. Get the matchbox.

229. Examine the matchbox.

230. Get the coin.

231. Move to this location and examine the left side of the screen of the shoji screen.
232. Confirm that something is on the rail.

233. Use the rod with the hook.

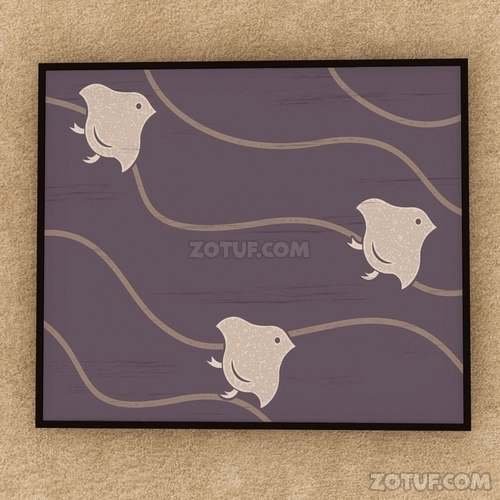
234. Get the light bulb.

235. Move to this location and examine the right side of the room.

236. Examine the frame.
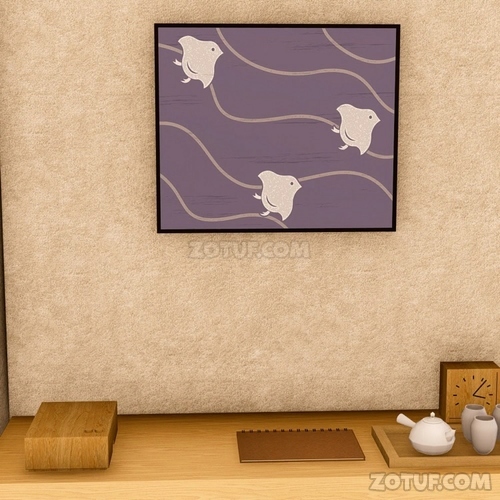
237. Check the bird painting.
238. Move to this location and examine the hanging scroll.

239. Examine the lower part of the hanging scroll.

240. Use the coin.

241. Shift the hanging scroll and examine the device on the top shelf.


242. Enter the position of the bird drawn in the picture as follows.


243. Get the light bulb.

244. Move to this location and examine the left side of the screen.

245. Examine the lamp.
246. Examine the left and right sides of the lamp.

247. Use the light bulb.

248. Set the light bulbs on the left and right sides of the lamp, and then examine the lamp.

249. Confirm the blinking on the left and right sides of the lamp.

250. Move to this location and examine the table.

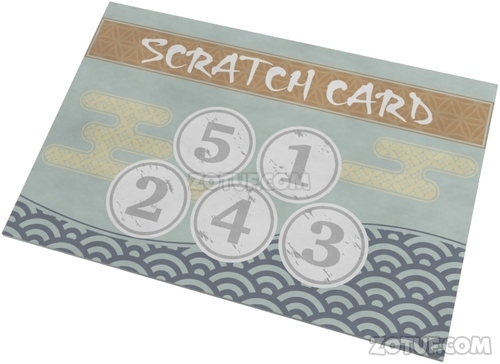
251. Examine the device on the table.


252. Enter the blinking on the left and right sides of the lamp as follows.


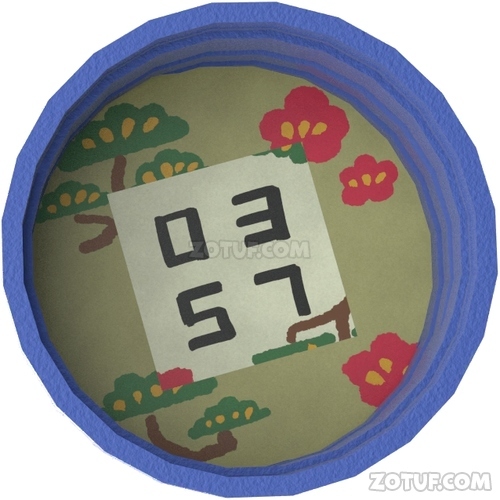
253. Get the scratch card.

254. Use a coin on the scratch card.


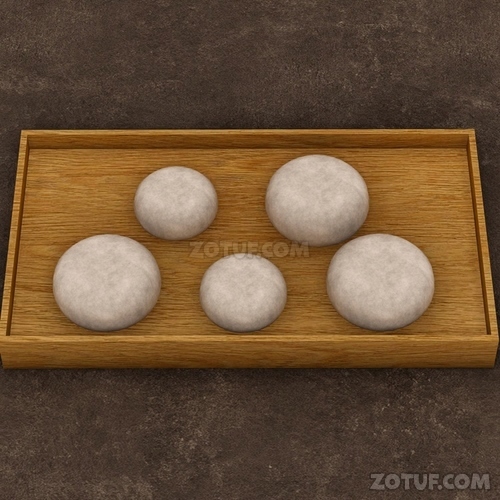
255. Check the numbers.

256. Move to this location and examine the table.

257. Examine the tray on the table.

258. Check the position and size of the manjuu
259. Move to this location and examine the shoji screen.

260. Examine the rail in the lower left of the screen.
261. Enter the manjuu position and size in the order of the numbers on the scratch card as follows.


262. Move to this location and examine the upper right part of the sliding screen.

263. Confirm the shape of the shoji screen partition.

264. Move to this location and examine the shelf next to the left sofa.
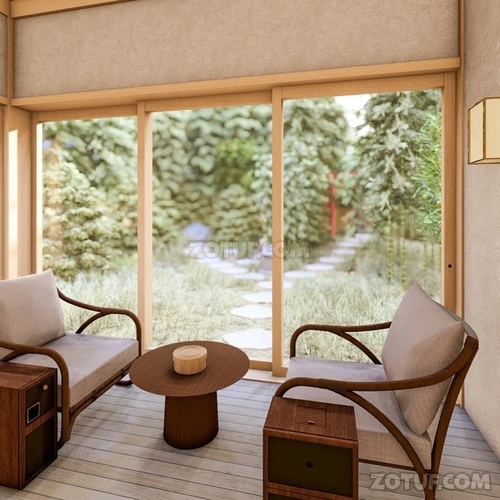


265. Enter the shape of the shoji screen partition as follows.

266. Get the green stone.

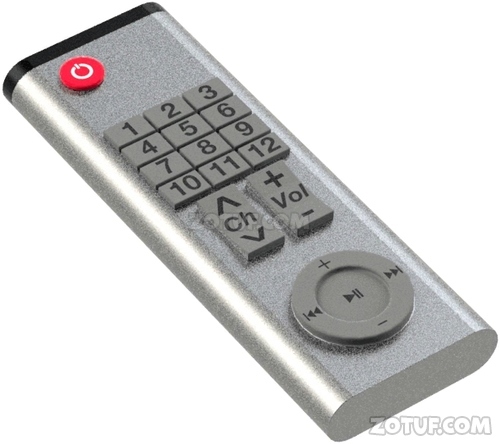
267. Move to this location and examine the left sofa.

268. Examine the items.
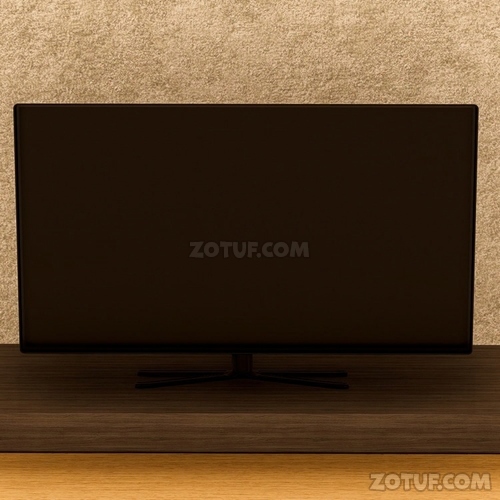
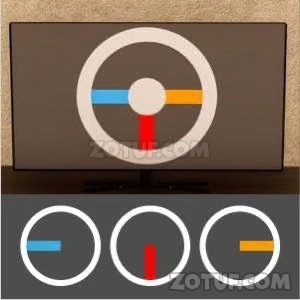
269. Get the remote control.

270. Move to this location and examine the area on the left side of the screen.

271. Examine the TV.
272. Use the remote control.
273. Check the shape.

274. Move to this location and examine the hanging scroll.
275. Examine the device on the bottom shelf behind the hanging scroll.


276. Enter the shape of the device’s buttons as follows.

277. Get the green stone.

278. Move to this location and examine the table.

279. Examine the box.

280. Get the stone slab part.

281. Shift the hanging scroll and examine the middle shelf.
282. Get the stone slab part.
283. Move to this location and examine the left shelf.

284. Examine the box on the left shelf.


285. Check the contents of the box.

286. Use the two stone slab parts.

287. Get the green stone.
288. Move to this location and examine the table.

289. Examine the device on the table.

290. Examine the lid of the box.

291. Check the shape.
292. Move to this location and examine the shelf next to the right sofa.

293. Examine the lid on the top of the shelf.


294. Based on the shape drawn on the back of the lid, arrange the three green stones as follows.


295. Get some kind of handle.

296. Move to this location and examine the right side of the window screen.

297. Confirm that there is a hole in the window frame.

298. Use some kind of handle.

299. Move to this location and examine the ground on the lower right of the screen.

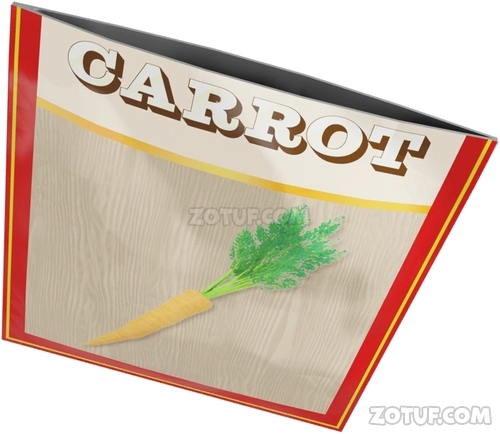
300. Check the color of the acorn and the arrow.

301. Examine the device in the lower left of the screen.


302. Obtain carrot seeds.

303. Move to this location and examine the shrine in the center of the screen.


304. Use a coin on the offering box.

305. Get a bottle of water.

306. Examine the bottle of water and remove the lid.

307. Examine the lid of the bottle to confirm the shape drawn on the back.

308. Move to this location and examine the left shelf.

309. Examine the device in the box.


310. When you align the orientation of the part of the shape drawn on the back of the bottle cap with the orientation of the part of the picture drawn on the outside of the square and the inside of the square, it will look like the following.

311. Input as follows:

312. Get the scissors.

313. Use the scissors on the bag of carrot seeds.
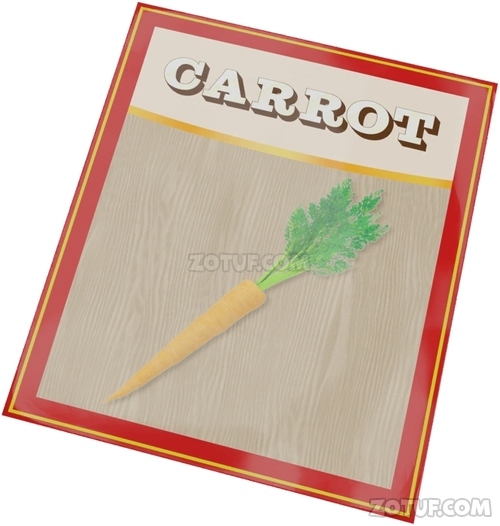

314. Open the bag.

315. Move to this location and examine the field in the lower left.

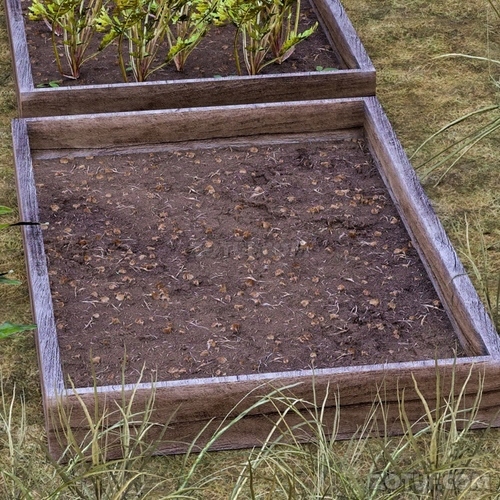
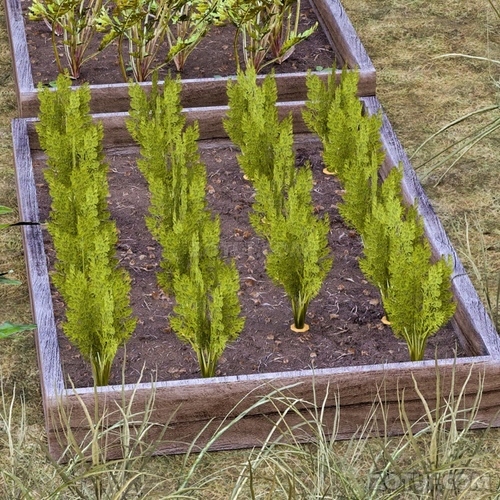
316. Use carrot seeds.
317. Use the water in the bottle.

318. Leave the field once and then return to the field.

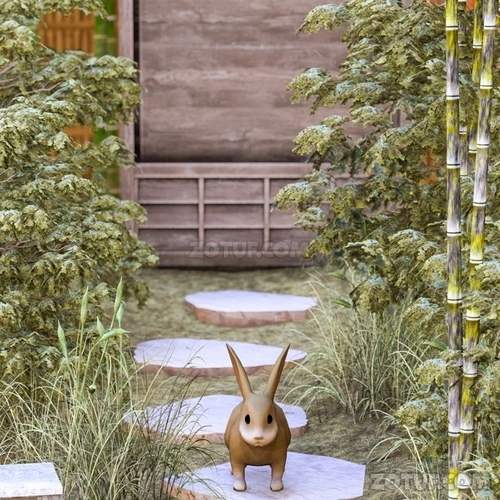
319. Examine the field.
320. Get the carrot.

321. Move to this location and examine the rabbit on the right side of the screen.
322. Use the carrot.

323. Examine the shelf at the back of the road.


324. Examine the item on the left side of the top shelf.

325. Get the scroll.

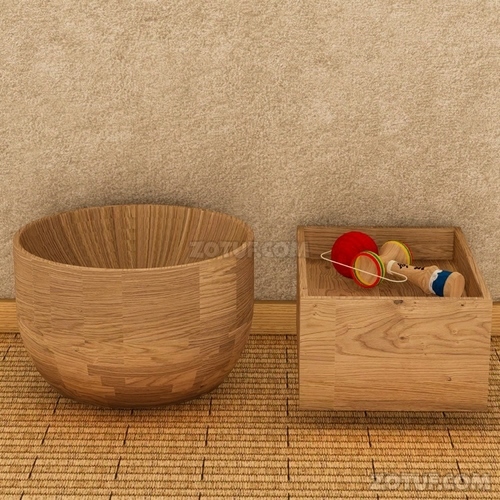
326. Use the scissors on the scroll.


327. Remove the string from the scroll.

328. Move to this location and examine the box on the floor in the center of the screen.

329. Examine the items in the box on the right side of the screen.
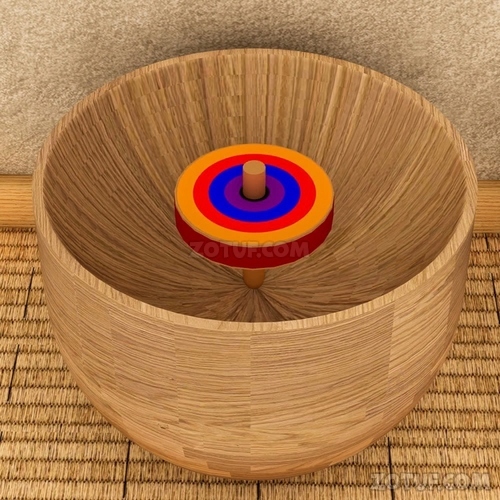
330. Get the spinning top.

331. Combine the string and the spinning top.


332. Move to this location and examine the container on the left.


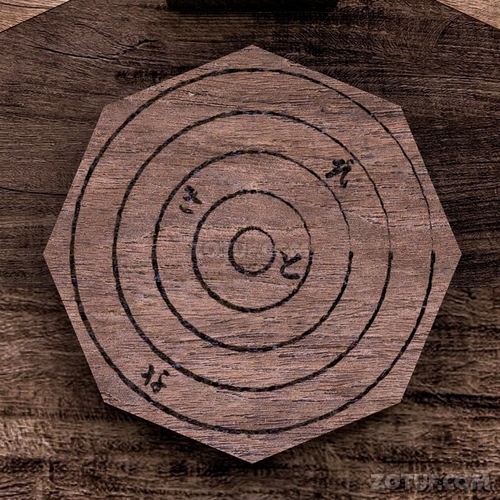
333. Use the spinning top in the container and turn it.

334. Check the color of the spinning top.
335. Move to this location and examine the shrine in the center of the screen.

336. Examine the circular plate under the roof.

337. Check the characters.
338. Move to this location and examine the small square device near the bottom center of the screen.


339. Combine the color of the spinning top and the characters written on the circular plate as follows.


340. Input as follows:
341. Get the key part.

342. Move to this location and examine the hanging scroll.

343. Confirm the characters written on the hanging scroll and the lightly drawn arrows.
344. Move to this location and examine the left shelf.

345. Examine the box on the left shelf.

346. Confirm the characters written on the stone slab.

347. Move to this location and examine the right shelf.

348. Examine the box on the lower left of the bottom shelf.


349. Enter the characters written on the hanging scroll in the order indicated by the arrows, and apply the configuration and order of the characters on the stone slab as follows.


350. Get the key part.

351. Combine the two key parts.


352. Move to this location and examine the door.

353. Examine the keyhole.

354. Use the key.
355. Move to this location and examine the four candles on the left of the screen.

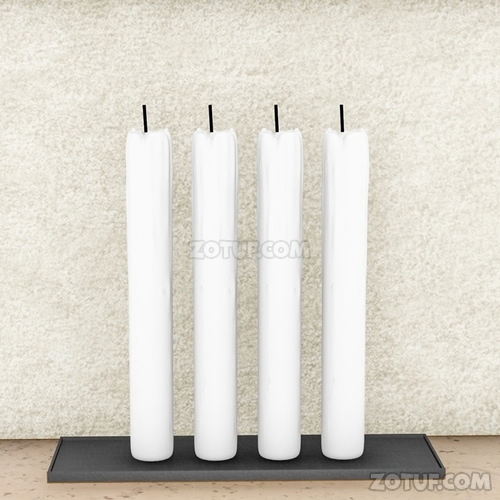
356. Use the match.

357. Leave the room and return to the location of the candle you lit earlier.

358. Check the length of the four candles.

359. Examine the device on the top shelf.


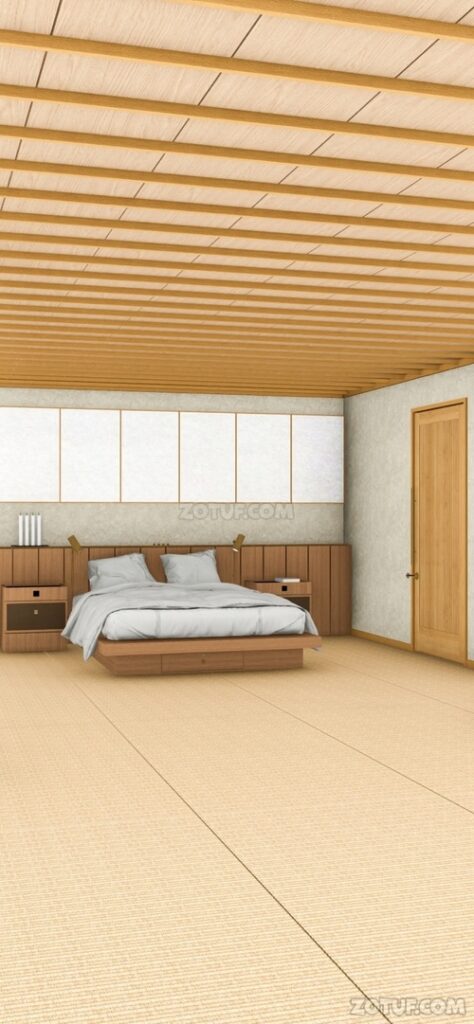
360. Input the following based on the length of the four candles:


361. Obtain a handle.

362. Move to the side table on the left side of the bed.

363. Examine the device on the top drawer of the side table.


364. Examine the scroll and check the picture.

365. Enter the colors of the kimonos worn by the five people depicted on the scroll based on the scroll’s picture.


366. Obtain a part.

367. Combine the obtained part with the handle.

368. Get the ratchet.

369. Move to this location and examine the bed frame.


370. Use the ratchet.

371. Obtain a ladder.

372. Move to this location and examine the open part of the ceiling panel.

373. Use the ladder.

374. Examine the two panels on the floor.
375. Check the pattern.

376. Move to the bottom right corner of the shoji screen and examine it.


377. Move to the bedside table on the right side of the bed and examine it.

378. Examine the device attached to the drawer on the bedside table.


379. Note the shape of the four panels with missing corners and the frame of the device, and enter as follows:


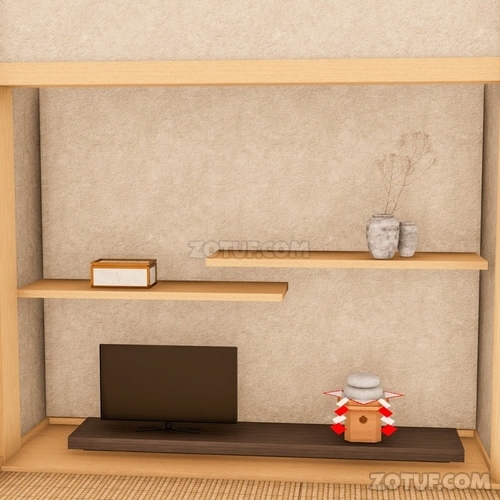
380. Obtain the citrus fruit.

381. Move to the bottom shelf on the left side of the shelf and examine it.

382. Examine the kagami mochi to the right of the TV.


383. Place the citrus fruit on the kagami mochi.

384. Obtain the key.

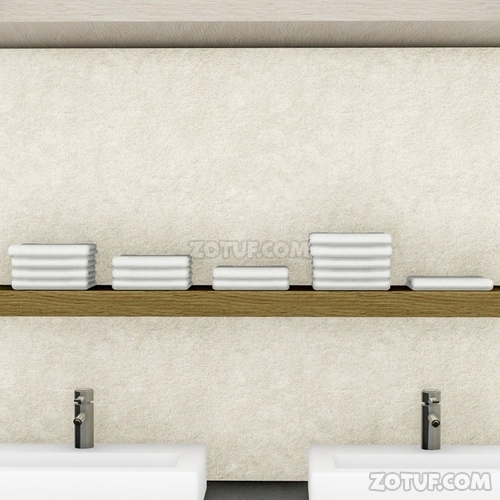
385. Move to the door on the right side of the screen.


386. Use the key.

387. Move to the shelf above the sink and examine it.
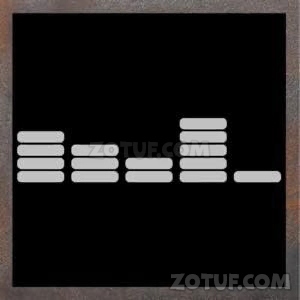
388. Check the arrangement and number of towels.
389. Move to this location and use the ladder to climb to the ceiling.

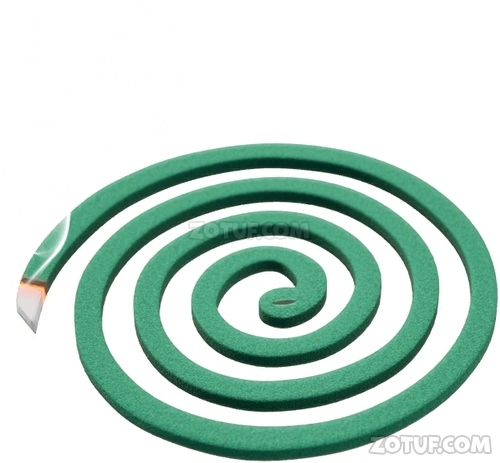
390. Examine the device on the right side of the screen.


391. Enter the following based on the arrangement and number of towels:

392. Obtain the mosquito coil.

393. Use a match on the mosquito coil.
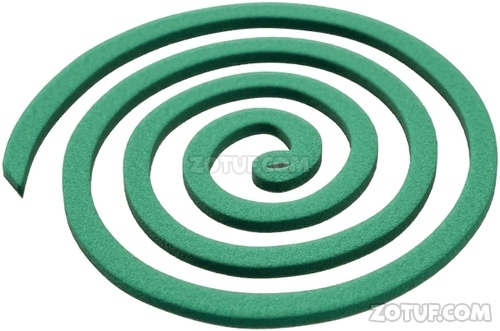

394. Light the mosquito coil.
395. Move to the left side and examine it.

396. Examine the pig-shaped ornament on the left side of the screen.


397. Use the lit mosquito coil on the pig-shaped ornament.

398. Move to this location and examine the shelf on the right side of the screen.


399. Examine the four bottles on the bottom shelf on the right side.
400. Check the orientation of the bottles.

401. Move to this location and use the ladder to climb to the ceiling.

402. Examine the device on the left side of the screen.


403. Use the orientation of the bottles as a reference and input the following:


404. Obtain the hammer.
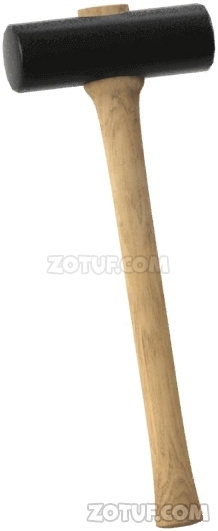
405. Move to this location and examine the left side of the screen.

406. Examine the rock.

407. Use the hammer.

408. Obtain a part of something.

409. Move to this location and examine the drawer on the right side of the screen.


410. Use the symbols drawn on the ceiling boards as a reference and input the following:

411. Obtain a handle of something.
412. Move to this location and examine the drawer on the left side.


413. Move to this location and examine the drawer on the left side.

414. Input the type of symbols and the number of each symbol drawn on the part of something into the device.

415. Obtain a knob from somewhere.

416. Move to this location and examine the shelf on the left wall.

417. Use the knob from somewhere.

418. Obtain a part of something.

419. Combine the three parts.


420. Obtain the mallet.

421. Touch and shake the magic mallet.

422. Obtain the key.
423. Move to this location and examine the door on the left side of the screen.


424. Use the key.

425. Check the illustration of the normal end bath.

426. Move to the company.

427. Touch and shake the magic mallet at this location.
428. Obtain the key.

429. Move to this location and examine the door on the left side of the screen.


430. Use the key.

Congratulations! You have completed the game Hidden Ryokan.


