
It Happened Here 3: A Storm is Brewing (Bonus Chapter) – Jessica challenges Emily to solve the mystery in her latest book. You will be exploring Jessica’s fiction story.
Bonus Chapter Walkthrough

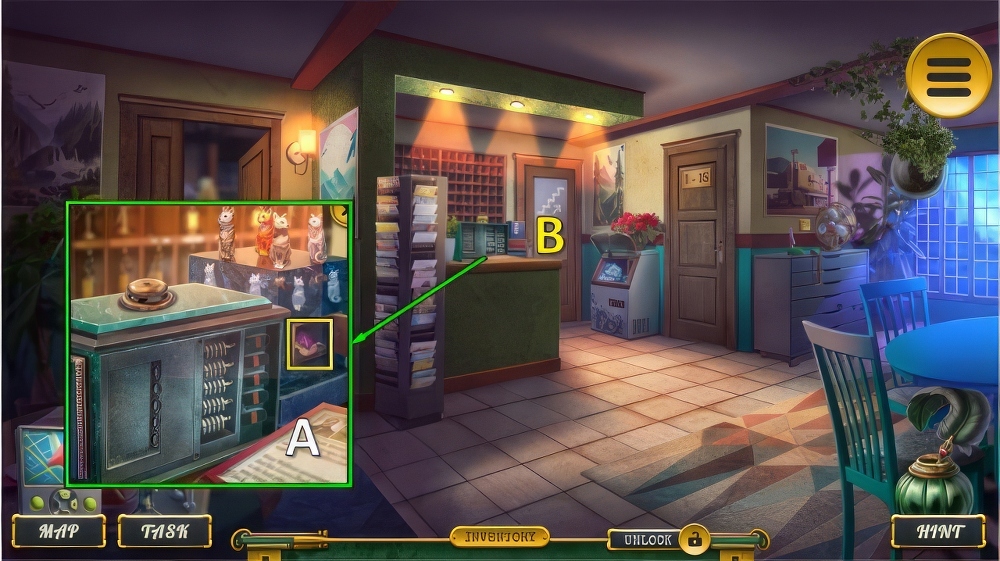
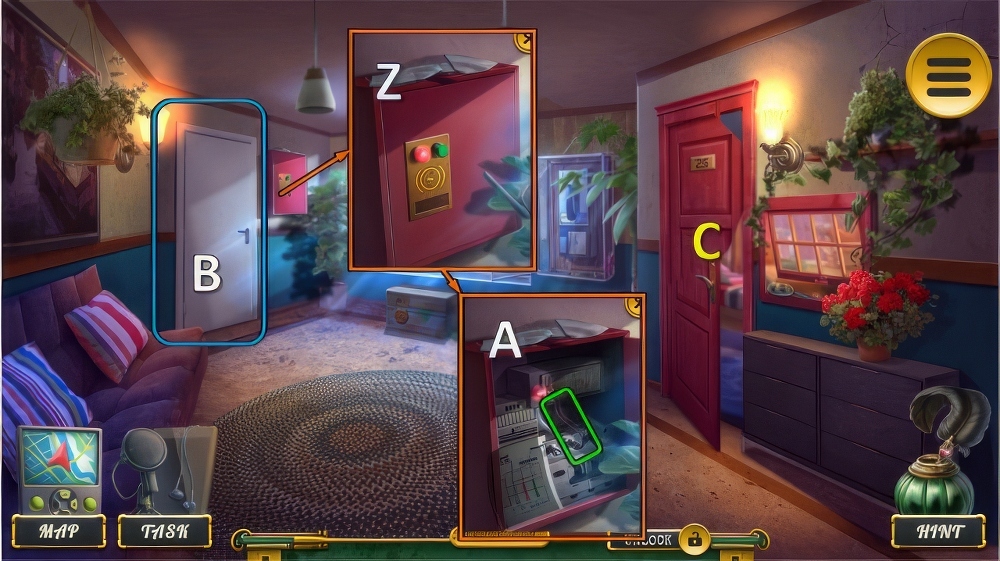
- Take QUILL FIGURINE (A).
- Take TREE TOKEN (B).
- Place TREE TOKEN for mini-puzzle (C), receive LETTER OPENER.

- Take BOOK COPY 1/3, use LETTER OPENER (D).
- Take NEW PHOTO (E).
- Place QUILL FIGURINE and NEW PHOTO, take DRAWER KEY and BOOK COPY 2/3 (F).

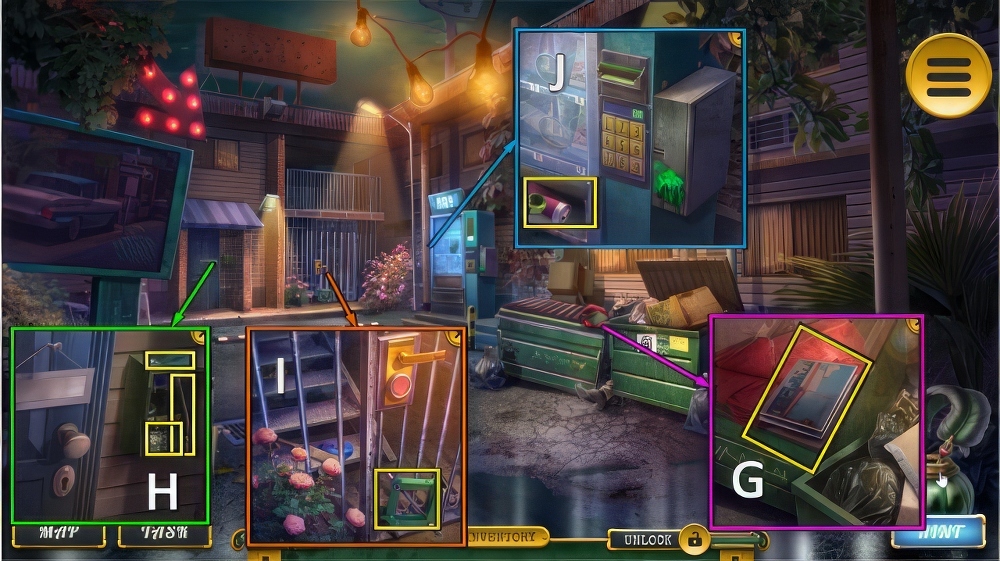
- Use DRAWER KEY (G).
- Take BOOK COPY 3/3 (H).
- Offer BOOK COPY (I).

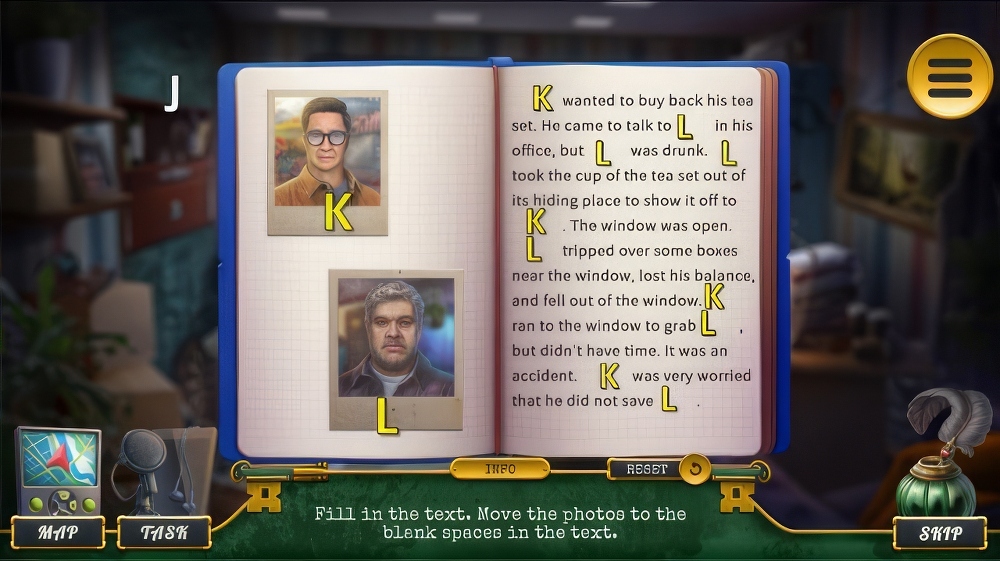
- Take MANICURE TOOL (J).
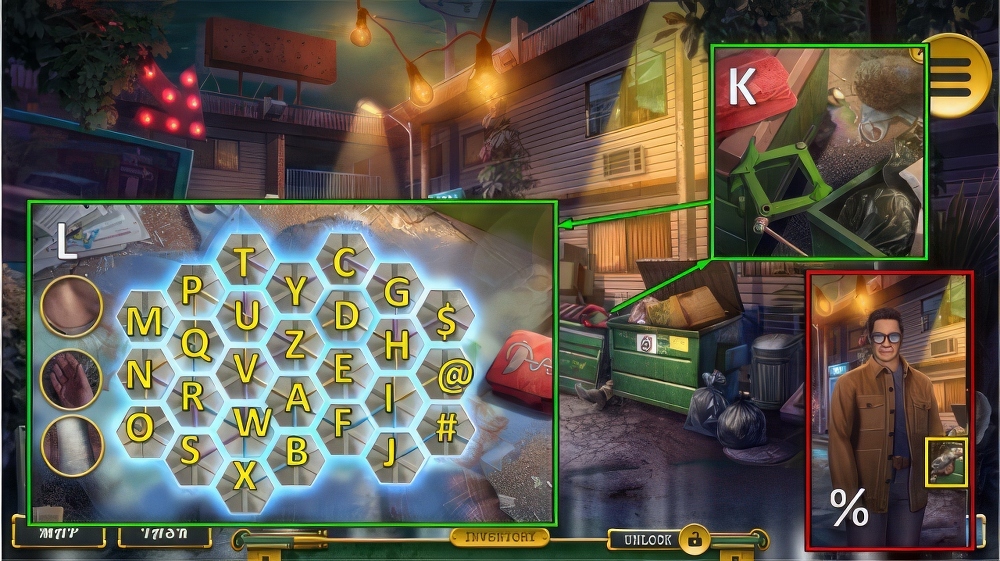
- Take SELFIE STICK (K).
- Take ELEANOR’S BAG, take DRAWER HANDLE and LIGHTER with SELFIE STICK (L).

- Use MANICURE TOOL and DRAWER HANDLE (M), take LIP BALM and TOKEN (N).
- Use TOKEN (O), receive SEA KEYCHAIN and FIVE BUTTON.
- SEA KEYCHAIN and LIP BALM on ELEANOR’S BAG, take SUITCASE INITIAL.
- Place SUITCASE INITIAL (P).
- Play puzzle (Q), receive TICKET.
- Offer TICKET (R).
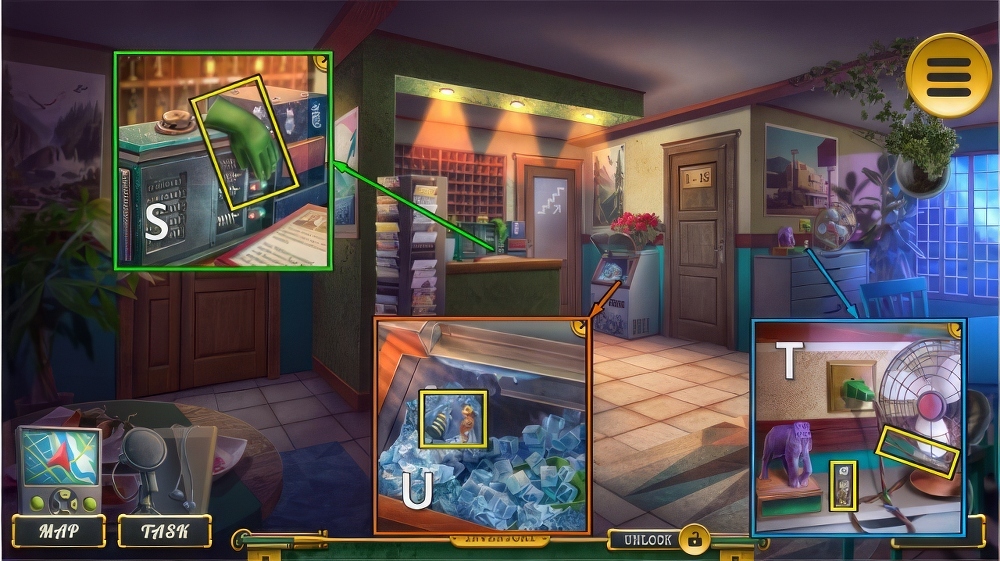
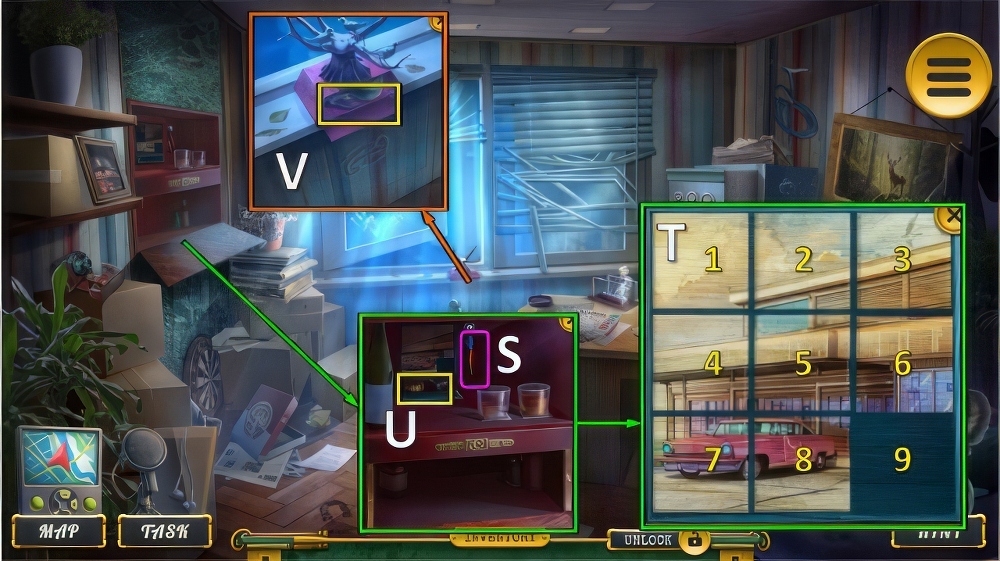
- Take RUBBER GLOVE (S).
- Use RUBBER GLOVE, take CAT FIGURINE 1/4 and NAIL FILE (T).
- Use LIGHTER and NAIL FILE, take CAT FIGURINE 2/4 and BELL PART (U).

- Place BELL PART (V), Wx3-X-Yx4-Zx2-Ax3-B.
- Take ROOM KEY (C).
- Use ROOM KEY (D).
- Take FIRST AID KIT (E).
- Go (F).
- Take MOTEL BROCHURE (G).
- Use MOTEL BROCHURE, take GLUE, JACK PART and CRUMPLED BANKNOTE (H).
- Take INCOMPLETE JACK (I).
- Place FIVE BUTTON and CRUMPLED BANKNOTE, take BIG NUT and SODA (J).
- JACK HANDLE and BIG NUT on INCOMPLETE JACK, take JACK.
- Use JACK and FIRST AID KIT (K).
- Solution (L): Mx5-Nx3-O-Px4-Qx5-Rx2-Sx3-Tx4-Ux3-Vx4-Wx5-Xx3-Yx4-Zx4.
- Ax5-Bx2-Cx5-Dx6-Ex5-Fx5-Gx5-Hx5-Ix5-Jx5-$x5-@x5-#x5.
- Receive CAT FIGURINE 3/4 and JAPANESE TEACUP.
- Take CAT FIGURINE 4/4 (%).
- Walk down.
- Place CAT FIGURINE, take SPARE KEY (A).
- Use SPARE KEY, go (B).

- Take DIRTY GLASS (C).
- Take RED HOOK (D).
- Use RED HOOK, take WHISKEY and SCREWDRIVER (E).
- Walk down.

- Use SCREWDRIVER and SODA for mini-puzzle (F), take FIGURINE PART.
- Use GLUE and FIGURINE PART, take PEN and PETER’S HANDKERCHIEF (G).
- Go (H).

- PETER’S HANDKERCHIEF and WHISKEY on DIRTY GLASS, take GLASS OF WHISKEY.
- Place GLASS OF WHISKEY, take ANTIQUE LAMPSHADE and CIPHER (I).
- Place PEN and CIPHER (J).
- Solution (K).
- Receive DRAWER COMBINATION.
- Place DRAWER COMBINATION, select 3-5-2-6.
- Take VINTAGE SCABBARD and VINTAGE BIRD 1/3 (L).
- Go to Street.

- Use VINTAGE SCABBARD, take LOCKPICK and TAPE (M).
- Use LOCKPICK (N).
- Go (O).

- Take PENNY’S BACKPACK (P).
- Take AQUARIUM NET (Q).
- Take PUZZLE PART and VINTAGE BIRD 2/3 with AQUARIUM NET (R).
- Go to Peter’s Office.
- Place TAPE and PUZZLE PART (S).
- Solution (T): 7-4-5-2-1-4-5-6-9-8-5-6-3-2-5-8-9-6-5-8-9-6-3-2-5-6-9.
- Take VINTAGE BIRD 3/3 and TUMBLER (U).
- Place VINTAGE BIRD, take WAX and BRIGHT LIGHTBULB (V).
- Go to Staff Room.

- Place BRIGHT LIGHTBULB and ANTIQUE LAMPSHADE, take SOLVENT and SCALE TOKEN (W).
- SCALE TOKEN and WAX on PENNY’S BACKPACK, take PENNY’S NOTE and BIG NAIL CLIPPER.
- Place TUMBLER and PENNY’S NOTE.
- Enter 2-5-3-7 (X).
- Play puzzle (Y), receive LIST OF GOODS.
- Offer LIST OF GOODS, take SPECIAL LEVER (Z).
- Walk down.

- Use SOLVENT and SPECIAL LEVER, take BROKEN MIRROR and KEY CARD (A).
- Use KEY CARD (B).
- Go (C).

- Take PIECE OF FABRIC (D).
- Take GEAR (E).
- Use PIECE OF FABRIC, take MIRROR SHARD and RULER (F).

- Use RULER (G), take DOUBLE-SIDED TAPE and CHEAP ASHTRAY (H).
- MIRROR SHARD and DOUBLE-SIDED TAPE on BROKEN MIRROR, take CRACKED MIRROR.
- Use CRACKED MIRROR and BIG NAIL CLIPPER for puzzle (I).

- Take INSTRUCTION (J).
- Take HOT WATER BOTTLE (K).
- Take POCKET FLASHLIGHT (L).
- Use POCKET FLASHLIGHT, take RED STAPLE REMOVER and WIRE SCHEMATIC (M).
- Go to Staff Room.

- Use RED STAPLE REMOVER (N), take MEDICAL SYMBOL and ELASTIC BANDAGE (O).
- Place MEDICAL SYMBOL and GEAR (P), take PEROXIDE and SCALPEL (Q).
- Go to Steven’s Room.

- Use SCALPEL and CHEAP ASHTRAY, take GAUZE PAD and OIL BOTTLE (R).
- GAUZE PAD, ELASTIC BANDAGE and PEROXIDE on INSTRUCTION, take FIRST AID KIT.
- Use FIRST AID KIT (S).
- Solution (T).

- Solution continued (U-V).
- Receive REMOTE CONTROL and HAND PUMP.
- Use HOT WATER BOTTLE and HAND PUMP, take RAZOR BLADE and BATTERY (W).
- Walk down.

- Use RAZOR BLADE, take TOOL INSERT and ANTENNA (X).
- Use OIL BOTTLE and TOOL INSERT, take INCOMPLETE HAND PRESS, CLOCKFACE and START BUTTON (Y).
- BATTERY, ANTENNA and START BUTTON on REMOTE CONTROL, take PANEL REMOTE CONTROL.
- Use PANEL REMOTE CONTROL (Z).
- Place WIRE SCHEMATIC, cut middle wire (A).
- Play puzzle (B), receive CLOCK PART.
- Go (C).

- Place CLOCKFACE and CLOCK PART, take TWEEZERS and PLAQUE (D).
- Use TWEEZERS, take FASTENING and FLOWER INSERT (E).
- Place FLOWER INSERT for mini-puzzle (F), receive DIAMOND RING.
- Go to Peter’s Office.

- Use DIAMOND RING, take STENCIL (G).
- FASTENING, PLAQUE and STENCIL on INCOMPLETE HAND PRESS, take SECRET PATTERN.
- Use SECRET PATTERN (H).
- Place JAPANESE TEACUP (I).
- Solution (J).
Congratulations! You have completed the game It Happened Here 3: A Storm is Brewing.


