
Legendary Tales 4: Map of Hope – In a world where magical creatures are persecuted and banished, Lucia and her brother Ulf spent years on the run, hiding from witches and left without a home or certainty of the future. Their only goal was to survive until Scarlett, an old friend, showed up, bringing news that could change everything. There is a map that shows the places where magical creatures can still live. Among these places is a werewolf camp, perhaps where Lucia and her brother will finally find someone who can accept them for who they are. But it’s not an easy journey. Her friend can’t go with them, her presence among the witches is too dangerous. So Lucia will have to act alone. However, even alone, she will not be truly lonely, ahead await a meeting with old allies, dangerous acquaintances and unexpected meetings, each of which brings closer to the dream of finding a peaceful life. The first steps begin in a tavern, where Lucia comes, hiding under a cloak from past adventures, so as not to give herself away. Scarlett informs her that the witch-hunter sitting at one of the tables has the map. To get it, she will have to act covertly, putting the witch to sleep with a potion while her friend distracts the innkeeper. With each step she remembers how long she and her brother have had to hide, but even fatigue can’t stop her if there’s even the slightest hope. The map may lead them to a place where Ulf can be helped to overcome the werewolf curse. Maybe he can become human again. Or at least feel like he’s not alone anymore. It’s up to you to find out if this place really exists, if it’s possible to find a home again, if brother and sister will find their way among the ashes of shattered hopes and years of isolation. If you can not pass any of the puzzles or do not know where the items are, on our site you can watch the walkthrough of Legendary Tales 4: Map of Hope, and find the cherished place, which is indicated by the map of hope.
Legendary Tales 4: Map of Hope – Walkthrough
Here you can see the full walkthrough of Legendary Tales 4: Map of Hope game, namely for all chapters, including bonus chapter, in pictures.
- Chapter 1: On The Road
- Find the Cloak
- Meet with Skarlett
- Prepare and administer the sleeping powder
- Steal the Map
- Find the Werewolf Camp
- Examine the Werewolf Camp
- Find the Sacred Tree
- Chapter 2 (Bonus): Strange Coincidence
- Speak with the Hermit
- Find the Birder
- Find Out Where the Maps Come From
- Find the Rune Stones
- Get Rid of the Slug
- Enter the Tower
- Kill the Oracle
- Figure Out the Mechanism
- Destroy the Mechanism
- Chapter 3: The Map Of Hope
- Embark on the Expedition
- Prepare for Departure
- Find a Way onto the Island
- Collect the Gate Keys
- Reach the Town
- Prepare the Ointment
- Cross the Bridge
- Activate the Golem
- Collect the Crystals
- Defeat the Defender
Chapter 1: On The Road
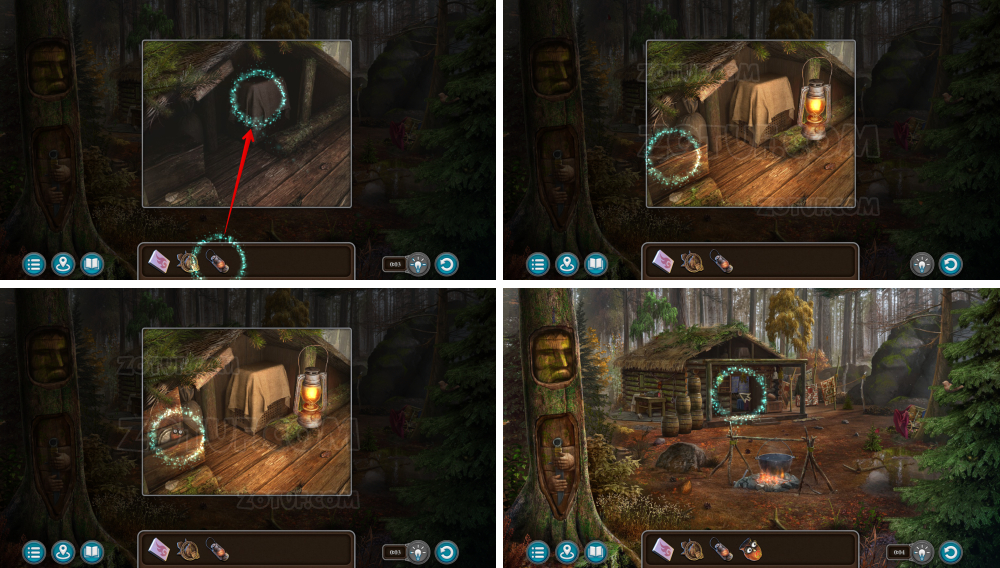
Find the Cloak
My brother and I have been wanted in town for several years now. I need a disguise if I want to go back there.

- Take the sieve.
- Take the key.

- Take the scoop.
- Pick up the flower.

- Take the wolf amulet 1/5.
- Use the key.
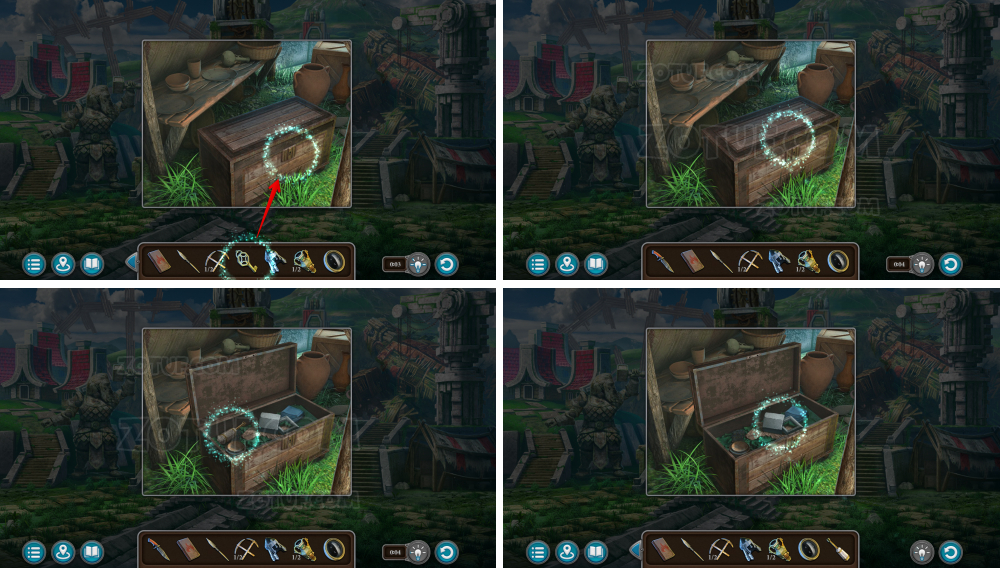
- Click on the chest.

- Take the mitten.
- Use the mitten.
- Go outside.

- Take the knife.
- Take the ladle.

- Take the broken hammer.
- Use the ladle, get the ladle with water.
- Use the knife, get the wolf amulet 2/5.

- Take the piece of wood.
- Use the sieve.

- Use the scoop.
- Take the wolf amulet 3/5.
- Click on the broken hammer, pull out the broken handle.

- Use the piece of wood, get the hammer-crowbar.
- Go back.
- Use the ladle with water.

- Take the wolf amulet 4/5.
- Use the hammer-crowbar.
- Remove the boards.

- Take the wolf amulet 5/5.
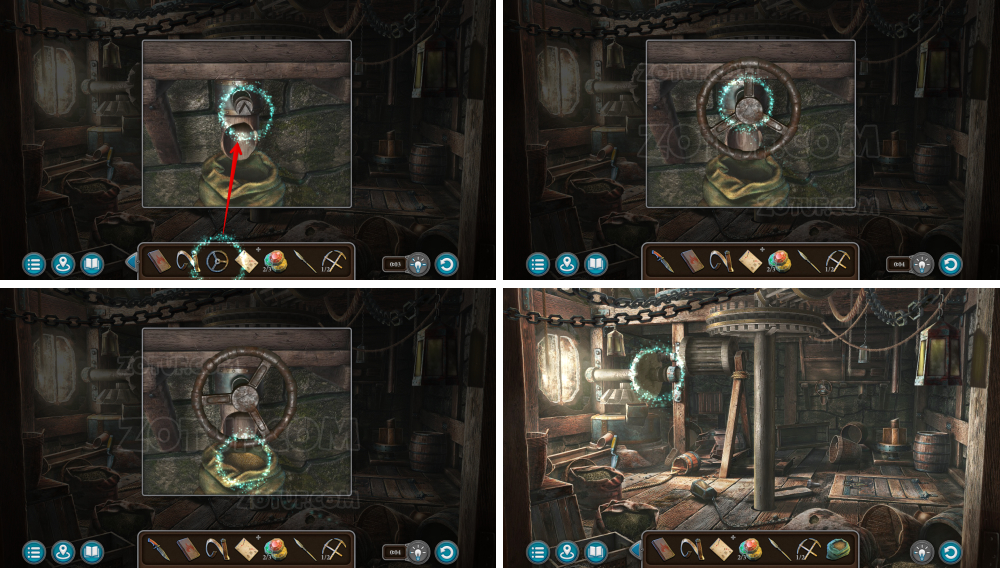
- Use the five wolf amulets.
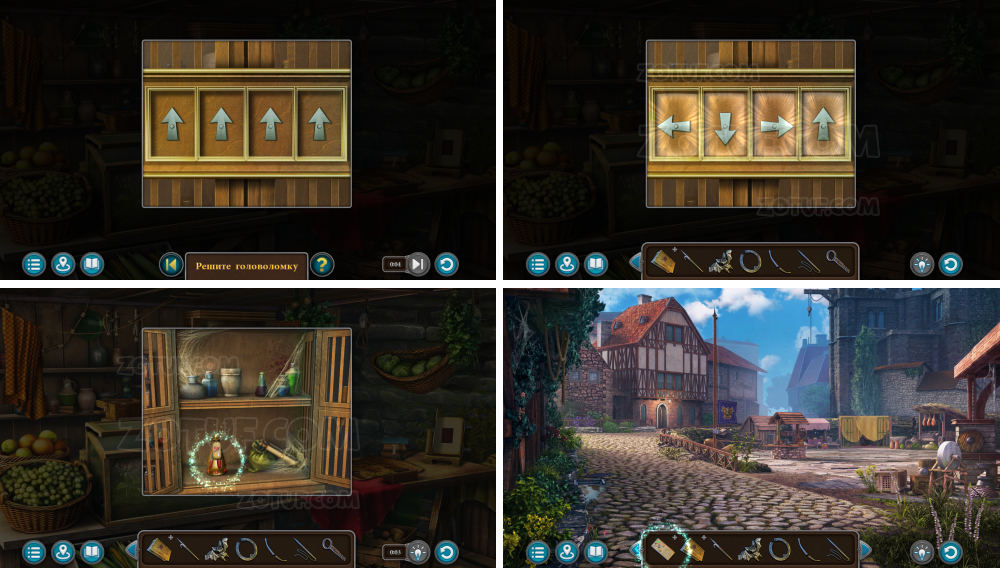
- Solve the puzzle: Restore the picture by placing the chips in their places and rotating them.
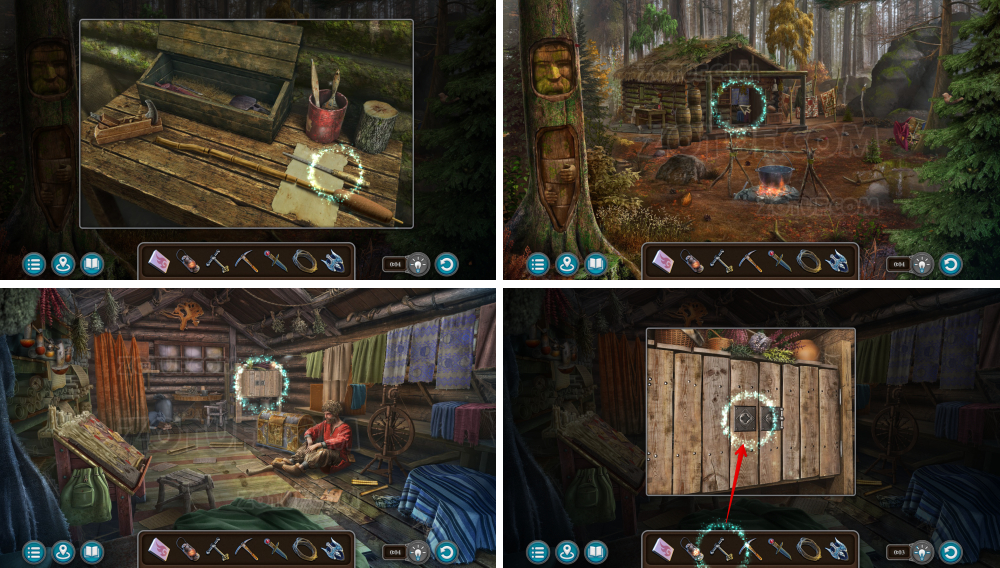
Meet with Skarlett
My old friend sent me a magical message saying that she had information for me. She is waiting for me at the “Eye of the Gargoyle” tavern.

- Put on the cloak from the chest.
- Go forward and to the left.

- Remember the symbols on the shield for a future puzzle.
- Use the hammer-crowbar.

- Take the key and the saw.
- Use the knife.

- Take the boards.
- Use the boards.

- Use the saw.
- Go into the opening.
- Lift the hatch.

- Take the thread.
- Talk.
Prepare and administer the sleeping powder
Skarlett gave me a recipe for sleeping powder that I need to prepare urgently and mix into the huntress-witch’s breakfast.

- Take the recipe.
- Remember the symbols on the wall for a future puzzle.

- Take the bread.
- Use the bread.

- Take the box.
- Take the burdock.

- Open the recipe, use the burdock.
- Take the gray berries.

- Open the recipe, use the gray berries.

- Use the key.
- Solve the puzzle: Arrange the silver gears in a continuous chain so that they rotate the golden ones.
- Solution in the picture.

- Take the hook.
- Take the gaff.

- Use the gaff.
- Use the knife.
- Take the bat 1/2 and the pen.

- Use the hook.

- Take the bear.
- Use the bear.

- Take the pliers and the moon.

- Use the moon.
- Solve the puzzle: Light up all the stones. Avoid unexpected obstacles that may prevent this.
- Take the crossbow shoulders.

- Take the lever.
- Use the pliers, get the lamp.

- Use the lever.
- Remember the symbols on the flag for a future puzzle.

- Use the lamp.
- Take the mortar.

- Take the pen.
- Take the needle and thread.

- Use the pen.

- Take the shield.
- Take the key.
- Open the recipe, use the mortar.

- Use the shield.

- Solve the puzzle.
- Take the ace, cane, oil.

- Use the cane.
- Use the oil.

- Use the ace, get the rose.
- Take the spoon.

- Use the rose.
- Take the crystal.

- Take the arrow.
- Use the crystal.
- Take the cylinder.

- Use the cylinder.

- Use the spoon.
- Take the pen.
- Use the pen.

- Take the acid.
- Use the acid.

- Remember the arrows on the bottle.
- Use the arrow.
- Solve the puzzle: Set the arrows in the correct direction. The arrow directions are drawn on the bottle.
- Solution in the picture.
- Take the fly agaric tincture.
- Open the recipe.

- Use the fly agaric tincture.

- Solve the puzzle: Enter the correct code. Earlier in the walkthrough, symbols are written that need to be remembered.
- Solution in the picture.
- Take the paw.

- Take the pecklen seeds.
- Open the recipe, use the pecklen seeds, get the sleeping potion.
- Click on the box, use the paw.

- Take the bat 2/4.
- Use the key.

- Use the sleeping potion.
- Talk, get the lockpick.
Steal the Map
I need to sneak into the witch’s room while she sleeps and steal the map that shows the locations of magical creatures.

- Use the lockpick.
- Solve the puzzle: Pick the lock by pressing all the springs with the plates in place.

- Use the gaff, get the screwdriver.
- Take the meat.
- Use the knife, get the key.
- Use the pen.

- Take the shovel and the bat 3/4.
- Close the drawer.

- Use the key.
- Use the meat.
- Take the bat 4/4.

- Use the four bats.
- Solve the puzzle: Move the bars with spiders so that their number vertically matches the number above the row.

- Solution in the picture.
- Take the map and the crab.
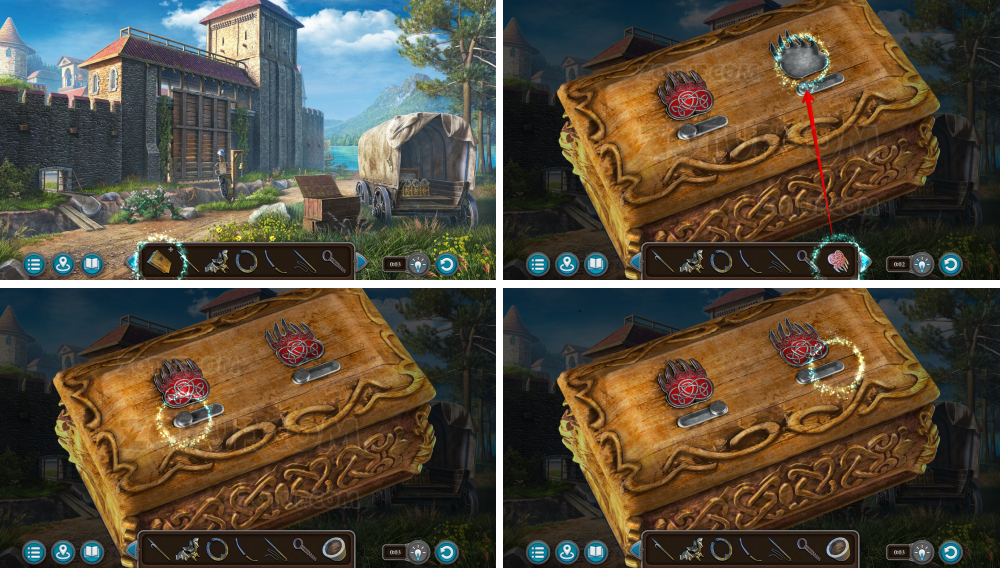
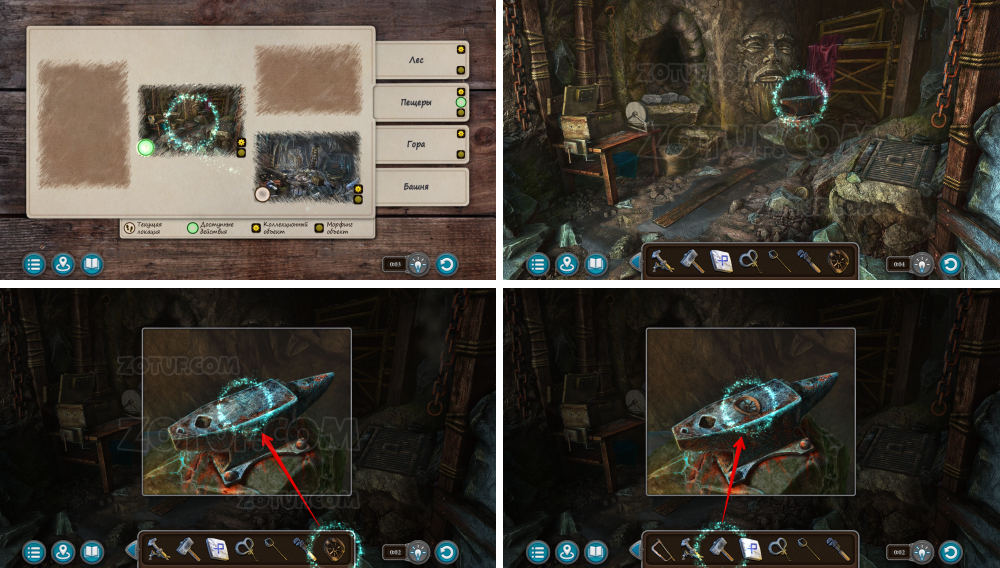
Find the Werewolf Camp
I have a map that shows the camp’s location. To reach it, I must first cross the river to the opposite shore and then head deeper into the forest.

- Use the crab.

- Solve the puzzle: Use the crab claws to remove all the balls from the field.
- Take the oil.

- Take the pliers.
- Use the pliers.
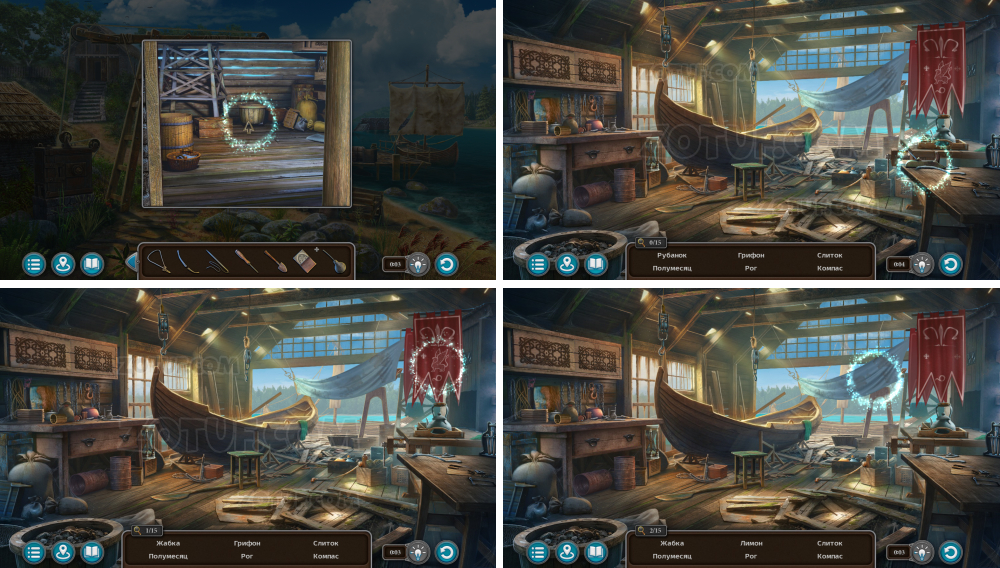
- Solve the puzzle: Find 15 items.
- Plane 1/15.
- Griffin 2/15.

- Frog 3/15.

- Horn 4/15.
- Feather 5/15.
- Hourglass 6/15.

- Octopus 7/15.

- Compass 8/15.
- Lemon 9/15.
- Rudder oar 10/15.

- Tricorne 11/15.
- Fork 12/15.

- Crescent 13/15.
- Ingot 14/15.
- Spool of thread 15/15.
- Get the rudder oar.

- Use the rudder oar.

- Use the needle and thread.

- Take the boards 1-4/7.
- Use the shovel.

- Take the axe and nails.

- Use the axe.
- Take the frog and boards 5-7/7.

- Use the seven boards.
- Use the nails and hammer-crowbar.

- Take the coin.
- Use the screwdriver.

- Use the coin.
- Take the keychain.

- Use the keychain.
- Take the lens.

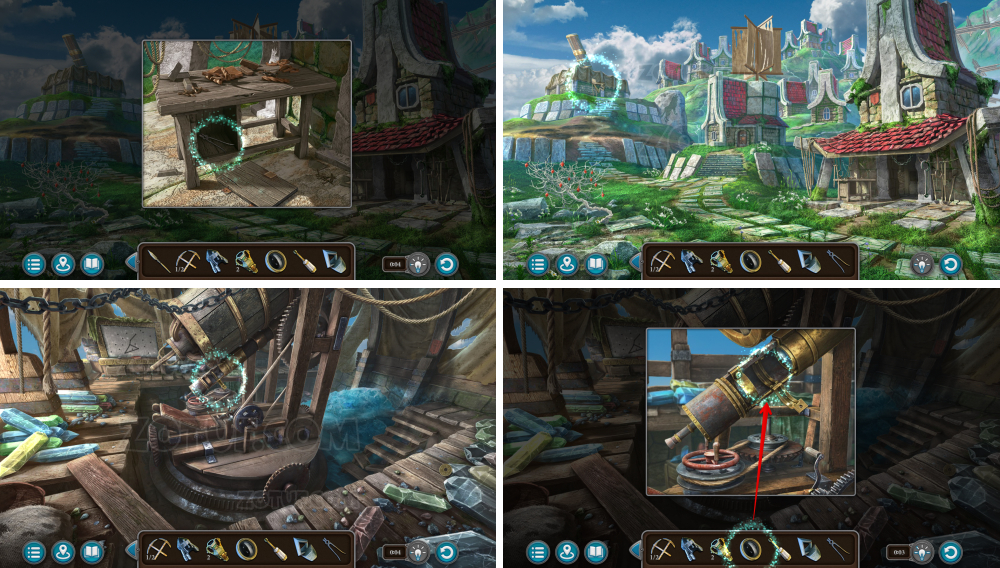
- Climb the tower.

- Use the lens and screwdriver.

- Go to the werewolf camp.
Examine the Werewolf Camp
There was no one at the werewolf camp, but it had just been abandoned recently. If we hurry, we can still find out where the werewolves went.

- Use the axe.
- Take the key.
- Use the knife.

- Use the knife.
- Take the horn.

- Torch on the fire, get the torch.
- Use the key.

- Take the bag.

- Take the ladder.
- Click on the bag.
- Use the horn.
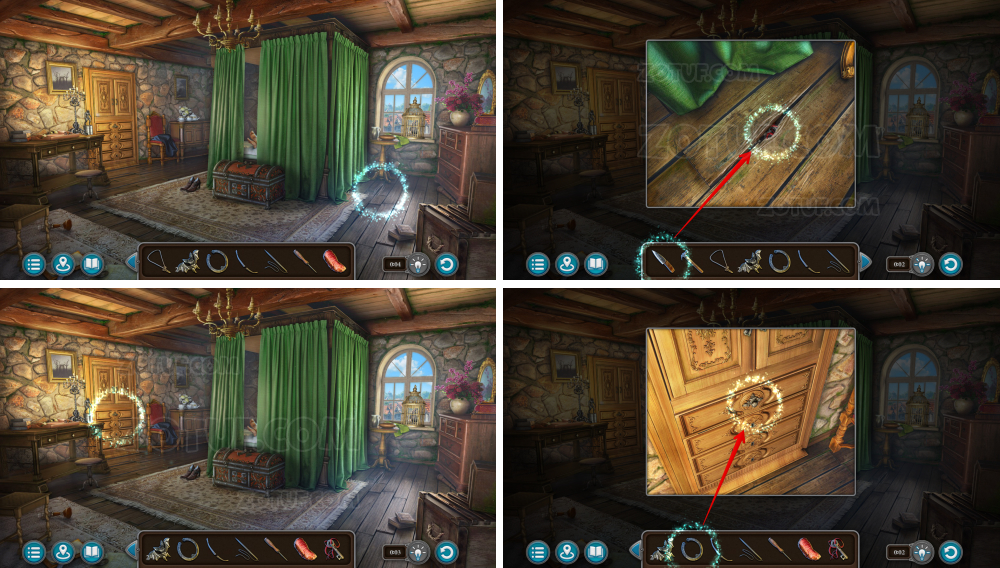
Find the Sacred Tree
My new acquaintance and I are following the werewolves’ trail. According to records, they traveled to the ancient city of the forest dwellers. If we hurry, we might catch up with them.

- Use the ladder.

- Use the knife, get the resin.
- Use the knife.
- Remember the drawing for a future puzzle.

- Take the eye.
- Use the torch.

- Take the magnet.
- Use the oil.

- Take the trigger mechanism.

- Use the knife.

- Take the staples.
- Use the magnet.

- Take the sword.
- Take the snake.

- Use the sword.

- Solve the puzzle: Move the chips so that they end up in the highlighted recesses.
- Take the crossbow.
- Click on the crossbow.

- Use the crossbow shoulders and trigger mechanism.

- Use the snake.
- Solve the puzzle: Place the snakes on the field, filling only the blue cells.

- Use the frog.
- Solve the puzzle: Move the buttons with frogs, completely filling the field on the right.

- Climb the tower.

- Use the eye.
- Solve the puzzle: Behind the stone square hides a recess that opens by pressing the green circle. Using the buttons, place the metal ball in the recess. To do this, create the correct sequence of turns and launch it.
- Take the pen.

- Take the fuse.
- Use the pen.

- Solve the puzzle: Find the skulls.
- Skulls 1-3/15.

- Skull 4/15.

- Skulls 5-7/15.

- Skull 8/15.

- Skulls 9-10/15.

- Skulls 11-13/15.

- Skulls 14-15/15.
- Take the gunpowder.

- Use the gunpowder and fuse.

- Use the resin.
- Take the explosive.

- Use the explosive and torch.

- Use the staples and hammer-crowbar.
- Take the net.

- Take the pen.
- Use the net, get the dragonfly.

- Use the dragonfly.
- Solve the puzzle: Connect all the chips. Each chip must have the number of rays indicated on the chip.
- Solution in the picture.

- Take the pen.

- Use the pen.
- Take the eye.

- Use the eye.

- Solve the puzzle: By swapping the buttons, restore the correct position of the rope according to the hint.
- Solution in the picture.
- Take the horse.

- Use the horse.
- Solve the puzzle: Restore the patterns by moving the chips.

- Take the sun.

- Use the sun.
- Take the bar.

- Take the brush.
- Use the pen.

- Click on the crossbow, use the bar and thread.
- Get the crossbow.

- Use the brush.
- Remember the position of the handles for a future puzzle.

- Use the crossbow.
- Solve the puzzle: Shoot all the flowers with accurate shots.
- Get the flowers.

- Use the flowers.
- Take the rope and pen.

- Use the pen.
- Solve the puzzle: Set the taps to the correct position. You’ve already seen it in the thicket before the cliff.

- Take the acorn.
- Use the acorn.

- Solve the puzzle: Using obstacles, guide each horse into a stall of the same color.
- Use the torch.

- Use the rope.
- Use the crossbow, get the tree.

- Use the knife.
- Use the tree.

- Solve the puzzle: Pressing a button with arrows activates all other buttons in that direction. By pressing the arrows, completely clear the field of buttons.
- Take the gear.

- Use the screwdriver.
- Use the hammer-crowbar.

- Use the gear.
- Use the hammer-crowbar on the gear.
- Use the hammer-crowbar on the boards.

- Take the handle.
- Use the handle.

- Click on the handle.
- Climb up.
Chapter 2 (Bonus): Strange Coincidence
Speak with the Hermit
It appears that the person who brought the maps to camp was correct. The maps are connected to the witches. I need to speak with him.

- Take the horseshoe.
- Use the horseshoe.
- Take the matches.

- Go left.
- Click on the blanket.

- Solve the puzzle: Find 15 items.
- Rope 1/15.
- Fork 2/15.
- Tulip 3/15.
- Mill 4/15.

- Wreath 5/15.
- Boot 6/15.
- Fire 7/15.
- Lightning 8/15.

- Ear of grain 9/15.
- Use the key from pot 1.

- Maple leaf 10/15.
- Hourglass 11/15.
- Set the pendulum in the clock.

- Cuckoo 12/15.
- Use the key from pot 2.

- Use the key from pot 3.
- Set the crystal in the pumpkin.
- Number eight 13/15.

- Nuts 14/15.
- Open the chest.
- Eye of the Vedas 15/15.
- Get the Eye of the Vedas.

- Move the barrels.

- Move the remaining barrels.
- Remember the drawings on the carpets for a future puzzle.

- Use the Eye of the Vedas.

- Solve the puzzle: Restore the drawing by pressing the buttons.
- Take the stencil and amulet.

- Use the stencil.

- Solve the puzzle: Arrange the patterns in the stencil in the correct order.
- The patterns are drawn on the carpets.
- Solution in the picture.
- Talk.
Find the Birder
The hermit stated that, based on his observations, a nearby birder is making copies of the maps. I should speak with him.

- Remember the drawings on the towels for a future puzzle.

- Take the lantern.
- Use the lantern.
- Take the owl.

- Use the owl.
- Solve the puzzle: Close the owls’ eyes according to the hint you saw earlier.

- Take the tree.
- Use the tree.

- Take the slingshot handle and saw.

- Use the saw.
- Go right.

- Take the pen.
- Take the stone.

- Use the amulet.

- Take the pickaxe.

- Use the stone.
- Solve the puzzle: Rotate the field to place the purple square in the purple section.
- Get the knife.

- Use the knife, get the rope.

- Use the knife, get the rubber band.
- Click on the slingshot handle, use the rubber band, get the slingshot.

- Use the slingshot, get the amulet.
- Use the knife.

- Use the knife, get the cattail.

- Use the amulet.
- Use the slingshot, get the bird.

- Use the cattail.
- Use the knife.
- Click on the file.
- Use the pen.

- Take the sleeping potion.
- Use the knife, get the stone with a drawing.

- Use the sleeping potion.

- Use the stone with a drawing.
- Solve the puzzle: Place the animals in their places according to the hint on the stone with the drawing.
- Solution in the picture.

- Take the chips 1/4 and needle.

- Use the needle.
- Dip the needle in the sleeping potion.
- Insert the needle into the dart, get the dart with sleeping potion.

- Use the dart with sleeping potion.
Find Out Where the Maps Come From
To continue my search, I need to find a way to get the birder to communicate without resorting to violence.

- Use the rope.
- Take the chips 2/4.

- Use the bird.
- Solve the puzzle: Swap the chips to place them in their correct positions.

- Solution in the picture.
- Take the figurine.

- Use the knife, get the grain.
- Use the grain, get the key.

- Use the key.
- Solve the puzzle: Find the items.
- Take the pliers.

- Set the petals 1.

- Set the petals 2.

- Set the petals 3.
- Take the sponge.

- Take the key.
- Use the pliers, get the perch.

- Use the key.
- Use the perch, get the first part.

- Take the key.

- Use the first part.
- Use the key.
- Take the faucet.

- Use the faucet.
- Take the bucket of water.

- Use the bucket of water and sponge.
- Take the second part.

- Use the second part.
- Take the key.
- Use the key.

- Take the medallion.

- Use the medallion.
- Solve the puzzle: Place the insect chips in their places. Pressing the button will move them the specified number of cells in the specified direction.
- Take the chips 3/4.

- Take the truth elixir recipe.

- Take the velvet flower.
- Open the truth elixir recipe, use the velvet flower.

- Solve the puzzle: Collect 15 swamp flowers.
- Get the swamp flowers.
- Open the truth elixir recipe.

- Use the swamp flowers.
- Take the mountain tea leaves.

- Take the jug.
- Use the mountain tea leaves, get the mountain tea.

- Open the truth elixir recipe, use the mountain tea, get the ingredients.

- Use the ingredients and jug, get the truth elixir.
Find the Rune Stones
I need to activate the portal to the tower where the maps originate. The birder has scattered the necessary rune stones throughout the caves.

- Use the truth elixir.
- Take the key and rope.

- Use the key.

- Take the chips 4/4.
- Use the four chips.

- Solve the puzzle: Guide the chips to the end of the field to their places. Each chip can only move on cells of its own color, repainting them to another color.

- Use the pickaxe.
- Take the oil.

- Use the figurine.
- Take the crowbar.

- Take the brush and saw.
Get Rid of the Slug
One of the stones I need is in the possession of a mountain spirit. The only way to obtain it is by completing his request-he wants me to drive the mountain slug out of the cave.

- Solve the puzzle: Select one of the stones in the recesses at the top, and highlight the item with such a stone in each row.
- Take the handles 1/2.

- Take the hammer and rhombus.

- Use the crowbar.
- Take the corkscrew.

- Use the crowbar.
- Use the oil.
- Take the net.

- Take the wrench.
- Use the wrench, get the bent gear.

- Use the wrench.
- Take the handles 2/2.
- Use the bent gear and hammer.

- Take the gear.
- Use the gear.

- Solve the puzzle: Arrange the gears so that all mounts are occupied, the gears are connected and start a continuous chain from right to left.
- Solution in the picture.
- Click on the elevator lever.

- Use the two handles.
- Take the medallion.

- Use the net and corkscrew.
- Take the claws 1/2.

- Use the medallion.
- Take the triangle.

- Take the horn and censer.

- Use the censer.
- Use the matches.

- Take the circle.

- Use the lantern.
- Use the pickaxe, get the magnetic ore.
- Click on the magnetic ore.

- Use the rope, get the rope with ore.
- Use the rope with ore.
- Take the claws 2/2.

- Take the magnifying glass.
- Use the magnifying glass.

- Use the saw, get the lens.
- Use the horn.

- Solve the puzzle: Help the goat eat all the carrots by moving the chip across the field.

- Use the circle.
- Use the triangle.

- Use the rhombus.

- Use the two claws.
- Take the book and hexagon.
Enter the Tower
The birder mentioned that the oracle resides in the tower. She is the one creating the maps. Therefore, my first task is to reach this tower and enter.

- Use the hexagon.

- Use the lens.
- Remember the arrangement of the balls on the rock for the puzzle.

- Solve the puzzle: Arrange the balls as in the picture on the rock.

- Take the dirty tablet.

- Use the dirty tablet, get the hint.

- Use the hint.
- Solve the puzzle: Enter the combinations drawn on the hint.

- Take the binoculars and flower.

- Use the flower.
- Take the handle and cast.

- Use the binoculars.
- Remember the three symbols for a future puzzle.

- Use the handle.
- Solve the puzzle: Rotate the cylinders to bring the desired runes forward. You’ve already seen them earlier in the walkthrough.
- Use the brush.

- Use the cast.
- Solve the puzzle: Place all the chips on the places of the same colors with the same signs.

- Take the triple moon, petal 1/7 and constellations.

- Use the triple moon.

- Solve the puzzle: Find 15 identical symbols.
- Symbols 1-2/15.

- Symbol 3/15.

- Symbols 4-6/15.

- Click where marked.

- Symbol 7/15.
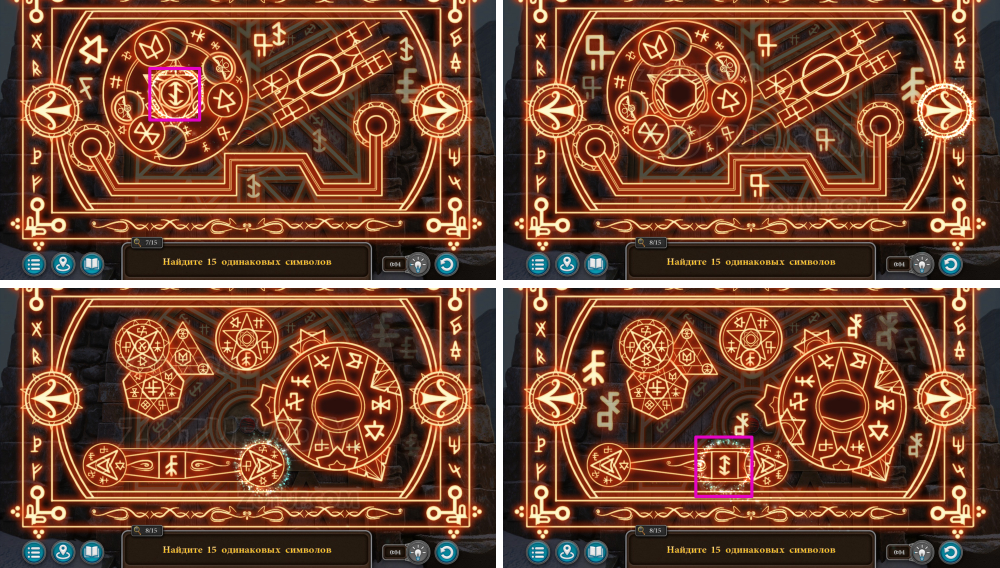
- Symbols 8-9/15.

- Symbols 10-11/15.

- Symbol 12/15.

- Symbols 13-15/15.
Kill the Oracle
If I kill the oracle, the witches will be significantly weakened. I have to move as quietly as possible and get to the top of the tower, where she resides.

- Go to the tower.
- Remember the drawing on the fabric for a future puzzle.

- Use the book.
- Take the key and petal 2/7.

- Use the key.

- Use the knife.
- Take the part.

- Take the valve.
- Take the petal 3/7.

- Use the part.
- Solve the puzzle: Connect all the stones with rays.

- Take the petal 4/7 and key.

- Use the key.
- Take the lever 1/3.
- Remember the pose of the bronze figurine for the puzzle below.

- Solve the puzzle: Place the statue in the correct pose that you’ve already seen in the closet a step earlier.

- Use the constellations.
- Solve the puzzle: Restore the constellations drawn on the hint.
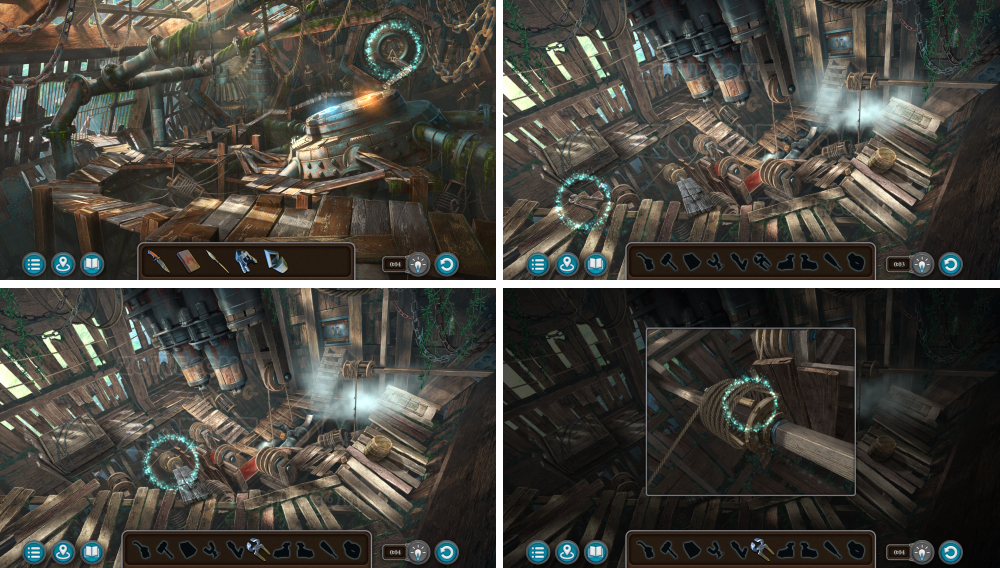
Figure Out the Mechanism
It appears there is no oracle in the tower. The maps are printed by a complex machine, and I need to understand how it functions.

- Use the valve.
- Take the petal 5/7.

- Take the petal 6/7.
- Take the mask.

- Use the mask.
- Solve the puzzle: Move the chips to their places according to the hint you saw earlier.

- Take the lever 2/3 and petal 7/7.

- Use the seven petals.

- Solve the puzzle: Place the parts of the model in their places.
- Solution 1.

- Solution 2.

- Solution 3.
- Take the archwitch’s ring and lever 3/3.

- Use the three levers.
Destroy the Mechanism
The witches’ experiment journal stated that mountain slug acid would overload the machine and cause it to explode. Therefore, I will take all of their maps away.

- Use the archwitch’s ring.
- Take the key.

- Use the key.
- Take the alloy formula.

- Take the hawk.
- Take the mold.
- Take the weights 1-3/5.

- Take the weights 4/5.

- Take the gold.
- Open the alloy formula, use the gold.

- Use the hammer.
- Use the mold.

- Take the bag of coal.

- Use the bag of coal.
- Use the matches.

- Use the hawk.
- Take the weights 5/5 and silver.

- Open the alloy formula, use the silver.

- Use the pickaxe, get the crystals.
- Open the alloy formula, use the crystals, get the alloy materials.

- Use the five weights.
- Use the alloy materials.

- Solve the puzzle: Measure the correct amount of materials for the recipe.
- Get the materials.
- Use the materials.

- Transfer the materials to the crucible.
- Click on the tongs, then on the mold and again on the tongs.

- Take the bottle.
- Use the bottle, get the acid.

- Lower the levers down.

- Use the wrench and acid.
- Close the right valve.

- Close the left valve.
- Use the wrench.
- Raise the levers up.
Chapter 3: The Map Of Hope
Embark on the Expedition
It seems the captain can indeed lead us to a mythical island where werewolves might still exist.

- Talk to the captain.
- Get the list of ship components.
- Take the fishing rod.
- Take the corkscrew.

- Take the heads 1/2 and fish.
Prepare for Departure
The captain assigned Ulf and me a list of tasks. I must gather the components needed for the voyage.

- Take the decorative element.
- Use the knife.
- Use the fishing rod, get the tongue.

- Take the key.

- Use the key.
- Solve the puzzle: Find 15 items.
- Star 1/15.
- Sole 2/15.

- Brass knuckles 3/15.
- Horn 4/15.
- Number X 5/16.
- Arrow 6/15.

- Crane 7/15.
- Triangle 8/15.
- Infinity sign 9/15.

- Candle 10/15.
- Rope ladder 11/15.

- Feather 12/15.
- Doll 13/15.

- Comb 14/15.
- Swan 15/15.
- Get the rope ladder.

- Use the rope ladder.

- Remember the three drawings on the rock for a future puzzle.
- Take the heads 2/2.

- Take the arrows 1/2.
- Use the knife.
- Take the fabric.

- Use the fish.
- Take the key.

- Use the two heads.
- Solve the puzzle: Highlight a stone to jump over the stone next to it – the jumped stone will disappear. Remove all stones from the field in this way, except one.
- Take the arrows 2/2.

- Take the amulets 1/3.
- Use the two arrows.

- Solve the puzzle: Untangle the rope by rearranging the knots.
- Solution in the picture.
- Take the amulets 2/3.

- Take the axe.
- Use the axe.

- Use the tongue.
- Use the key.

- Take the lamp and amulets 3/3.
- Use the decorative element.

- Solve the puzzle: Select the correct elements. You’ve already seen them earlier. The three drawings on the rock under the statue near the broken ships.
- Take the hammer and matches.

- Use the corkscrew and lamp, get the lamp with rum.

- Use the three amulets.
- Solve the puzzle: Guide the green ship to the opposite edge, avoiding the red ships.

- Take the helm and pliers.
- Open the list of ship components, use the fabric.

- Use the helm.
- Use the pliers.

- Take the handle.
- Use the lamp with rum.

- Use the matches.
- Use the handle.

- Take the can of thick resin.
- Use the can of resin.

- Take the can of liquid resin.
- Open the list of ship components, use the can of liquid resin, get the components.
- Give the components.
Find a Way onto the Island
We find ourselves in an underwater temple and need to reach dry land.

- Take the stones with wave 1-4/10.

- Use the knife, get the light star.
- Take the stone with wave 5/10.

- Take the stones with wave 6-8/10.

- Take the stones with wave 9-10/10.
Collect the Gate Keys
The gates to the surface require two keys. We need to open the hatch so the Vilas can help us find the first key, and then we will locate the second key ourselves.

- Use the ten stones with wave.

- Use the knife.
- Take the pearl.

- Take the brush.
- Take the stone.

- Use the stone.
- Use the brush.

- Remember the symbols for the puzzle.
- Solve the puzzle: Select two tokens on the same trajectory to swap them. Arrange the tokens as in the hint. You’ve already seen it on the stone column.
- Solution in the picture.

- Take the stone.
- Use the stone.

- Take the engraved stone.
- Use the fishing rod, get the diamond 1/3.

- Take the diamond 2/3.
- Use the engraved stone.

- Click on the lever, get the magic key.
- Use the magic key and light star.

- Solve the puzzle: Find the items.
- Take the hammer.
- Take the hook.
- Take the lightning.

- Use the hook, get the element.
- Take the wrench.

- Take the crystal.
- Use the crystal.

- Use the element.
- Use the hammer.
- Take the crystal.

- Use the wrench, get the ring.
- Use the lightning.
- Take the scissors.

- Use the scissors.
- Use the crystal.

- Use the ring.
- Solve the puzzle: Find four drawings in the sequence drawn in the hint. You’ve already seen it.
- Take the ingot.

- Use the ingot.
- Click on the lever.

- Take the trident.

- Use the trident.
- Click on the trident twice.

- Take the boards 1-2/7.

- Take the boards 3-5/7.

- Take the boards 6-7/7.

- Click on the boards.
- Use the hammer, get the bridge.

- Use the bridge.
- Use the pearl.

- Solve the puzzle: Arrange the tokens in a row according to the hint.
- Take the gate key 1/2.

- Talk, get the gate key 2/2.
- Use the first gate key.

- Use the second gate key.
- Solve the puzzle: Select the correct two symbols that make up the central symbol. Activate ten steps in this way.
Reach the Town
We’ve encountered a town that we cannot bypass. We must navigate through it to continue our journey.

- Take the key.

- Use the key.
- Take the glove and diamond 3/3.
- Use the glove.

- Take the belt.

- Use the three diamonds.
- Solve the puzzle: Flip all the diamonds stone side up, taking into account their interconnection.

- Take the part.

- Use the part.

- Solve the puzzle: Press the colored buttons to activate the movement trajectories of the figurines. Press the arrow to move them so that the figurines are placed in the recesses of the corresponding shape.
- Take the cannonball and gunpowder.
- Take the valve.

- Use the cannonball and gunpowder.
- Use the matches.
Prepare the Ointment
We need to create an ointment for the injured man using his recipe. There’s no one else here who can assist him but us.

- Talk, get the ointment recipe.
- Take the pen.
Cross the Bridge
Beyond the bridge lies a gate, and beyond that are other lands. That’s the path we must take, but first, we must deal with the bridge.

- Use the pen.
- Use the fishing rod, get the pen and ears 1/2.

- Use the matches.

- Take the gems 1-2/3.

- Take the physalis berries.
- Open the ointment recipe, use the physalis berries.

- Remember the position of the hands on the drawing on the wall for a future puzzle.
- Use the hammer, get the spear.

- Take the tile.
- Use the pen, get the unfinished part.

- Use the knife, take the ears 2/2.
- Use the unfinished part.

- Click on the saw, get the part 1/2.
- Use the tile.

- Use the two ears.

- Solve the puzzle: Find and select chips with the same pattern until the entire field is cleared.
- Open the ointment recipe valve.
- Take the grain.

- Use the belt.
- Take the spatula.
- Use the grain.

- Take the flour.
- Open the ointment recipe, use the flour.

- Use the spatula.
- Take the recinta onion.
- Open the ointment recipe.

- Use the recinta onion.
- Take the water mushroom.

- Open the ointment recipe, use the water mushroom, get the ointment ingredients.

- Use the ointment ingredients.
- Grind the ingredients in the mortar.
- Take the ointment.
Activate the Golem
The golem is a mechanism that can be activated. When we activate it, its arm will raise all the way up to the bridge, helping us cross.

- Give the ointment, get the gems 3/3.
- Use the three gems.

- Solve the puzzle: Press the stones to place the parts of the statue in the correct position. You’ve already seen it.
- Take the key, mask and eye 1/2.
Collect the Crystals
The golem’s heart generates the energy it uses to operate. To power it up, we need to find both an ice crystal and a fire crystal.

- Use the key.
- Take the key.

- Take the ladder.
- Use the mask.

- Use the ladder.
- Use the knife.

- Take the eye 2/2.

- Solve the puzzle: Draw the desired constellation with one continuous line. You’ve already seen it.
- Take the key and helmet.

- Use the key.
- Take the amphora 1/2.

- Use the two eyes, get the lens.
- Use the key.
- Take the screwdriver and weight.

- Use the screwdriver.
- Take the amphora 2/2.
- Take the tongs.
- Use the lens.

- Use the screwdriver.
- Solve the puzzle: Point the pipe at the sun.
- Solution in the picture.

- Use the two amphoras.
- Solve the puzzle: Swap the amphoras to continuously connect all the handles.

- Solution in the picture.
- Take the mirror.
- Use the mirror.

- Use the screwdriver.
- Take the part 2/2.

- Use the tongs, get the ice crystal.
- Use the two parts.

- Solve the puzzle: Place all the tiles with figurines in their places, pressing the central button to check.
- Use the tongs, get the fire crystal.

- Use the fire and ice crystals.

- Solve the puzzle: Direct the beam into the lower pipe using all the connecting elements.
- Solution in the picture.
- Solve the puzzle: Find the items.
- Take the tongs.

- Take the screwdriver.

- Use the tongs.
- Take the oiler and clamp.

- Use the clamp and screwdriver.

- Take the nails.
- Use the nails.

- Use the oiler.
- Take the first handle and magnet.

- Use the first handle.
- Use the magnet, get the second handle.

- Use the second handle.
- Take the handle.

- Take the hammer.
- Use the handle.

- Use the hammer.
- Use the knife.

- Take the rubber band.
- Use the spear.
- Take the tile.

- Use the weight.
- Solve the puzzle: Swap the weights to balance the chains according to the specified line.
Defeat the Defender
We can see the settlement beyond the bridge, but a deadly machine blocks our path. Once we overcome it, we’ll reach our destination.

- Solution in the picture.
- Take the helmet.

- Use the rubber band.

- Use the tile.
- Solve the puzzle: Place the chips on the squares of the corresponding color in the center. Press the buttons around the perimeter to release the chips.
- Take the pickaxe.

- Use the pickaxe.

- Use the two helmets.
- Take the crescent.

- Use the crescent.
- Take the explosive.

- Use the explosive and matches.
Congratulations! You have completed the game Legendary Tales 4: Map of Hope.


