Magic City Detective 2: Secret Desire (Bonus Chapter, Extra) – Vampires are sold a mysterious chemical concoction that turns them into glass statues. Uncover the villain behind this serum and find out the reason for his or her insanity.
Bonus Chapter, Extra Walkthrough
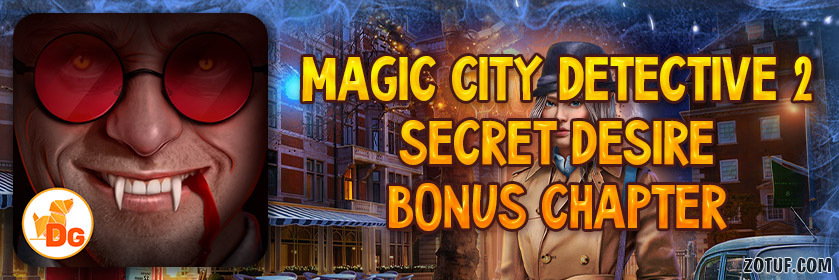
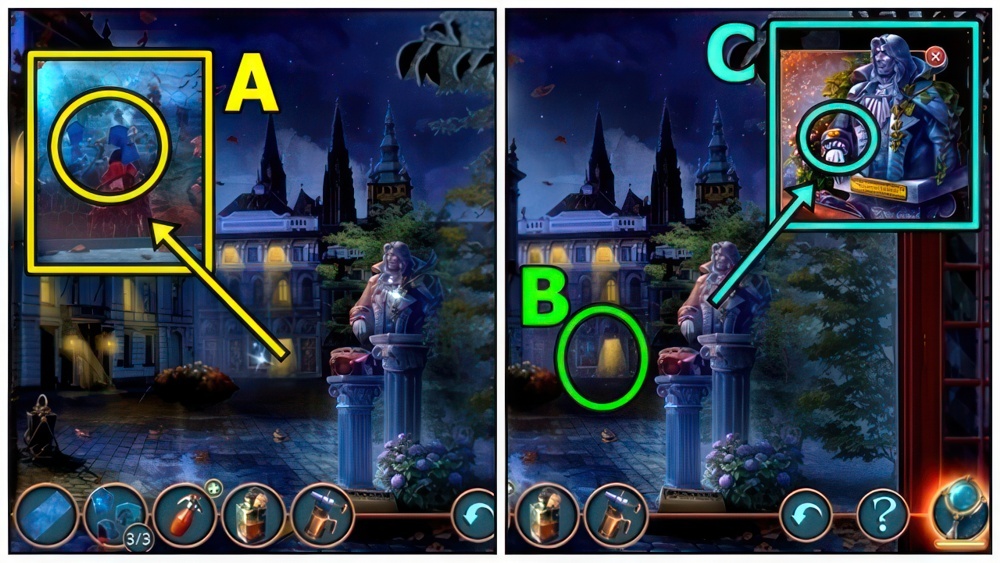
- Take BUTTON 1/3 (A) and DIAMOND RING.
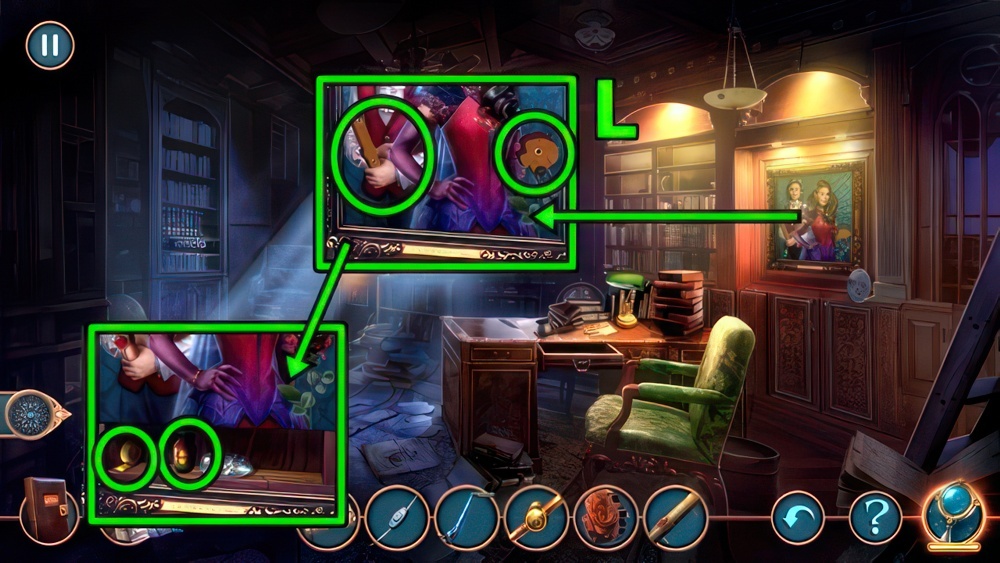
- Use DIAMOND RING (B), take NUTCRACKER PART and SCISSORS.

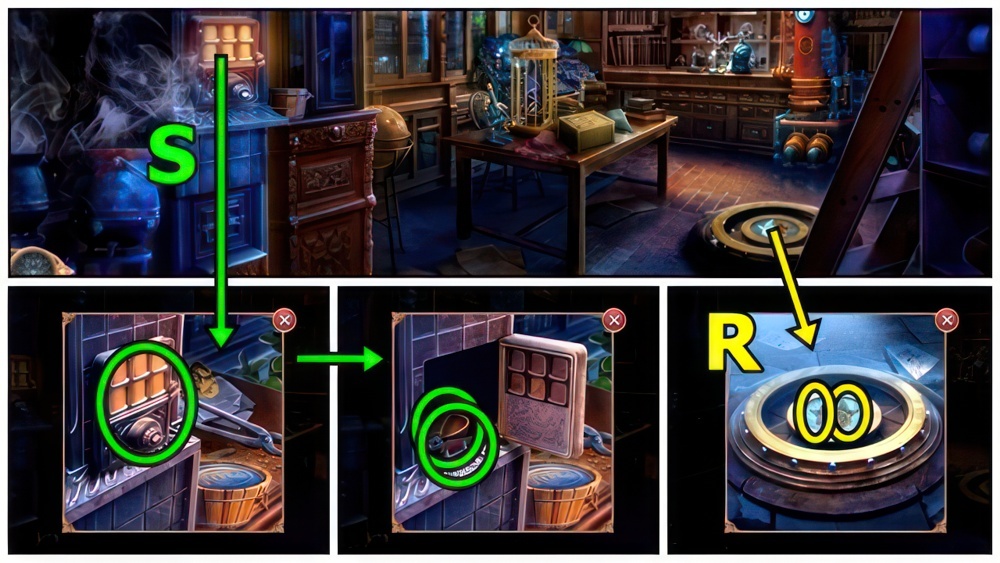
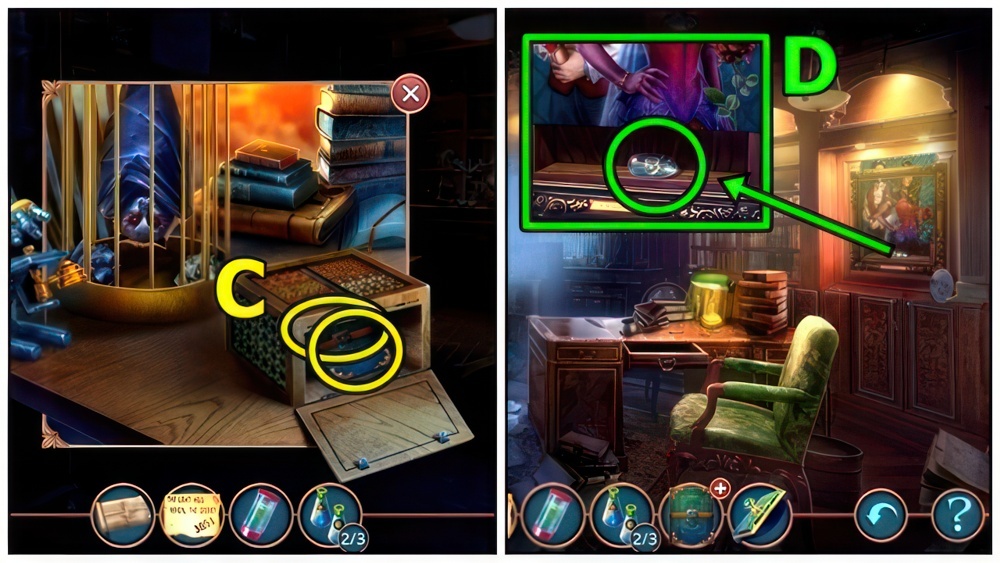
- Take LIGHTER (C).
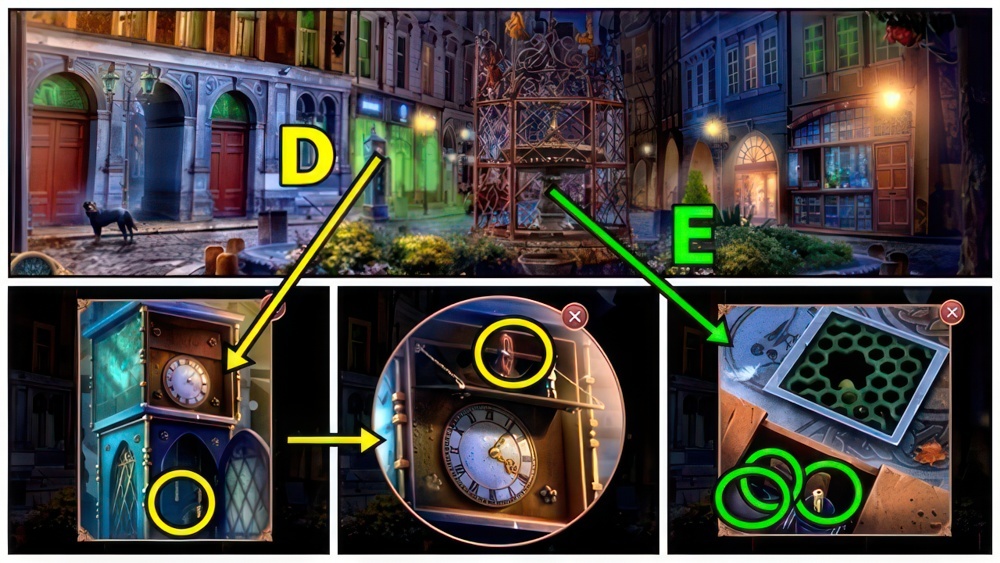
- Use SCISSORS (D).
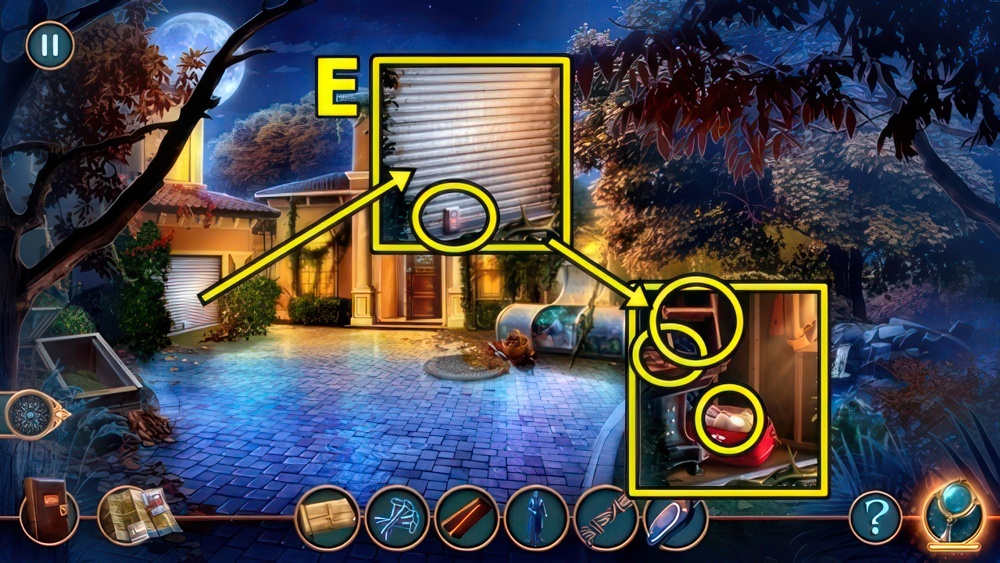
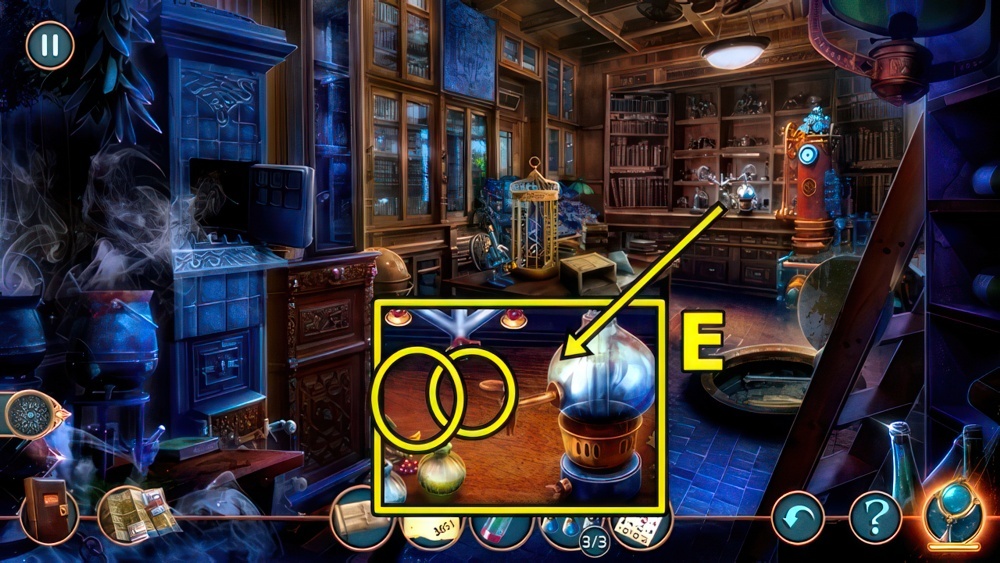
- Play puzzle (E), take STRANGE SERUM.
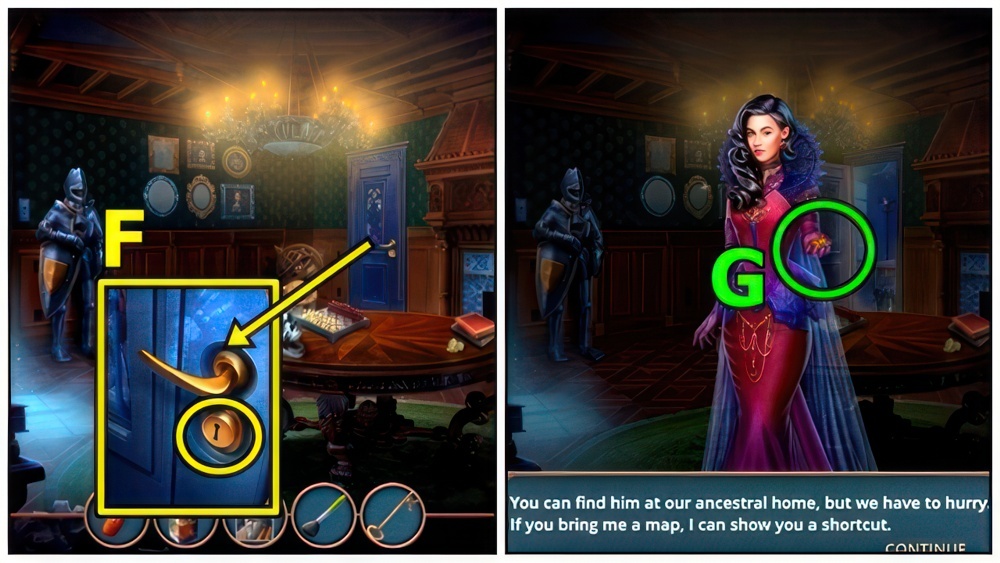
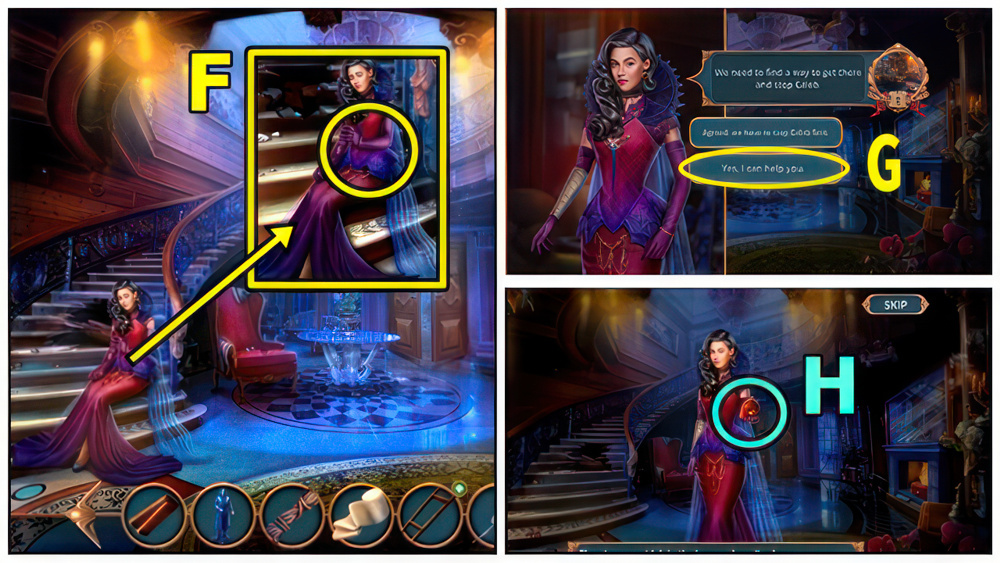
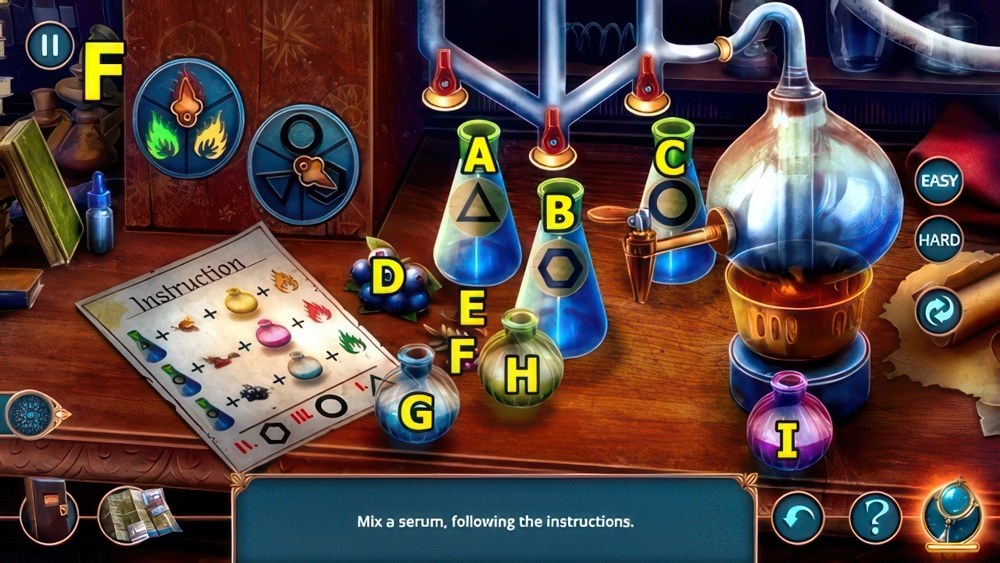
- Show STRANGE SERUM (F).
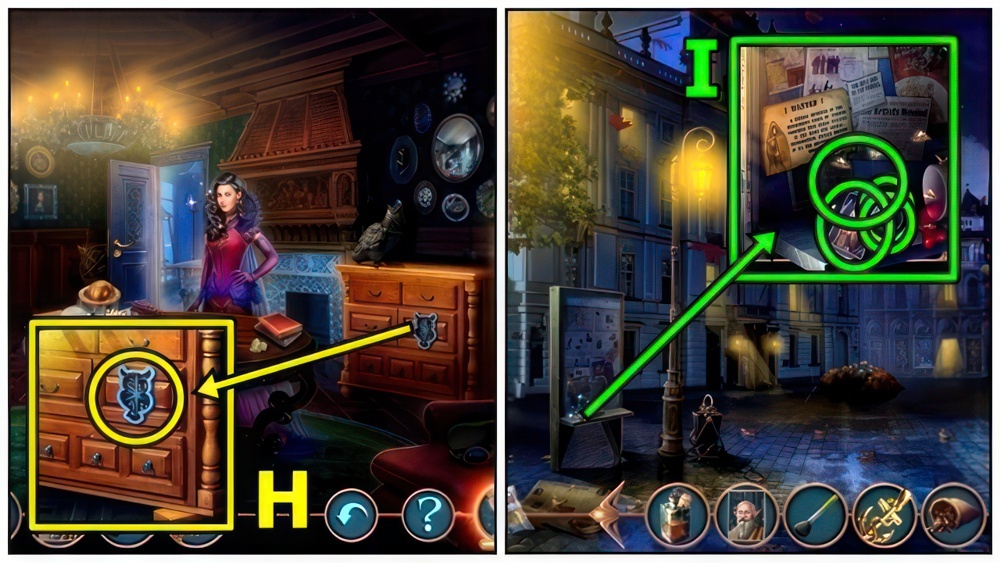
- Go to City Street.
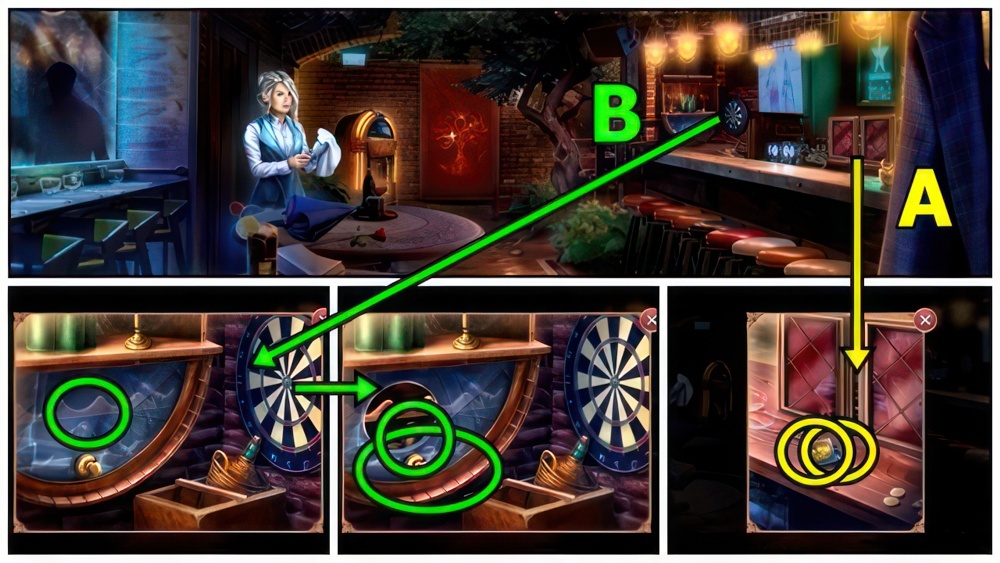
- Take BOWL (G).
- Use LIGHTER (H), take WHEEL.
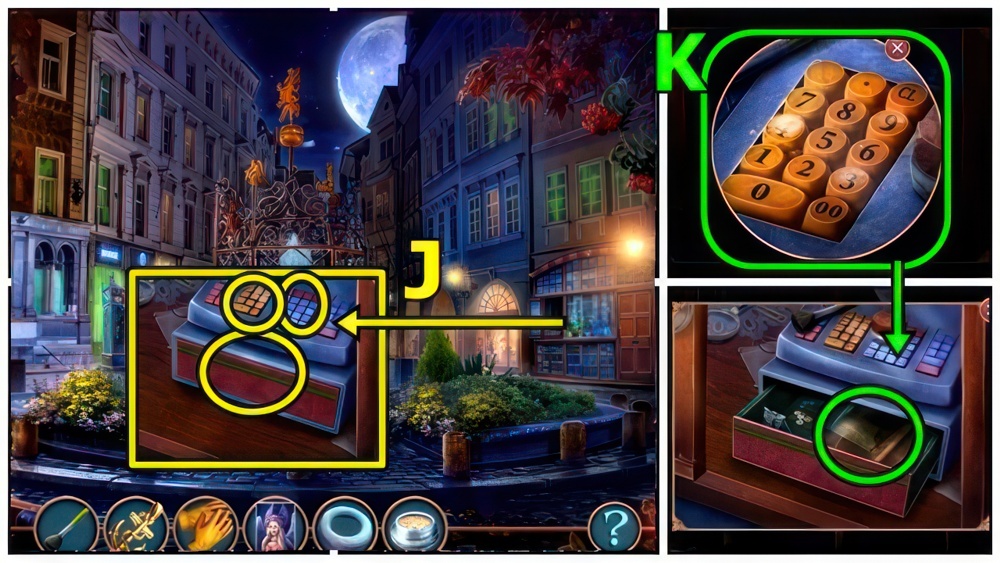
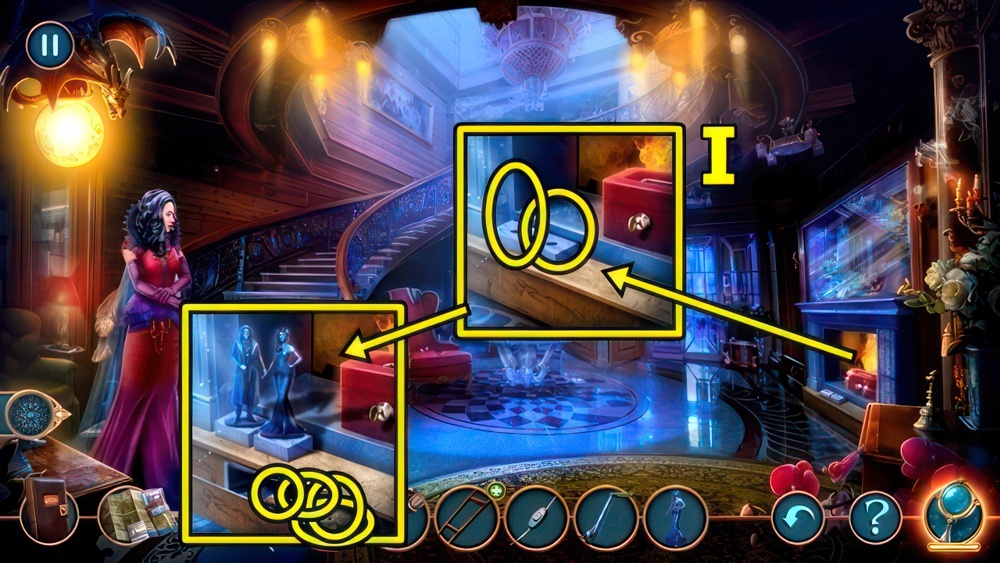
- Take BUTTON 2/3 (I). Add WHEEL.

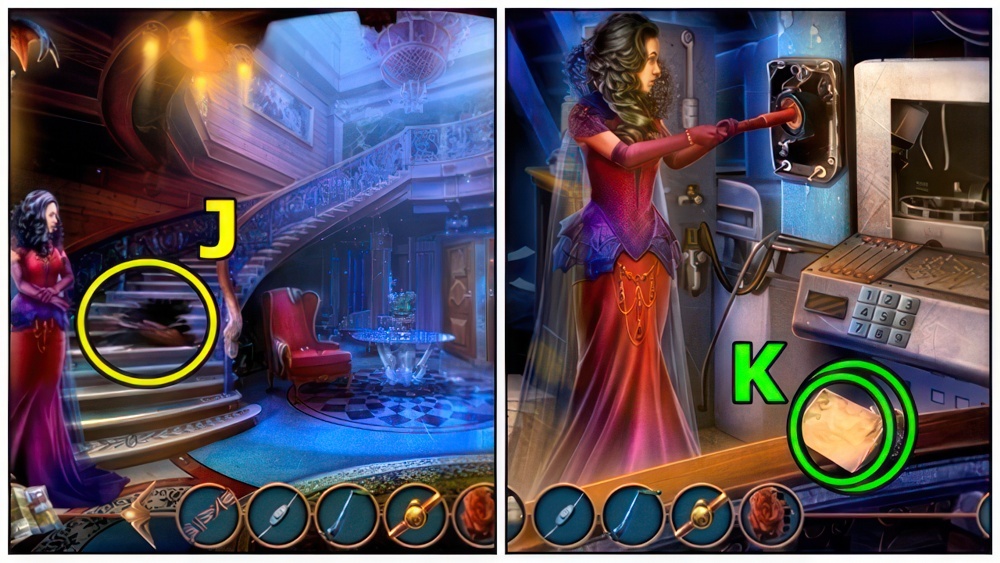
- Solution: (J).
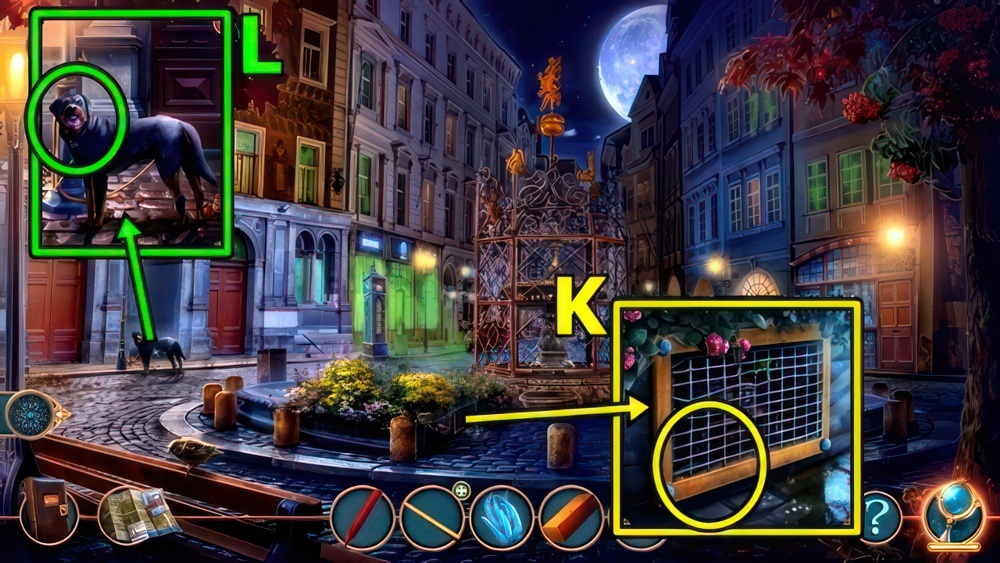
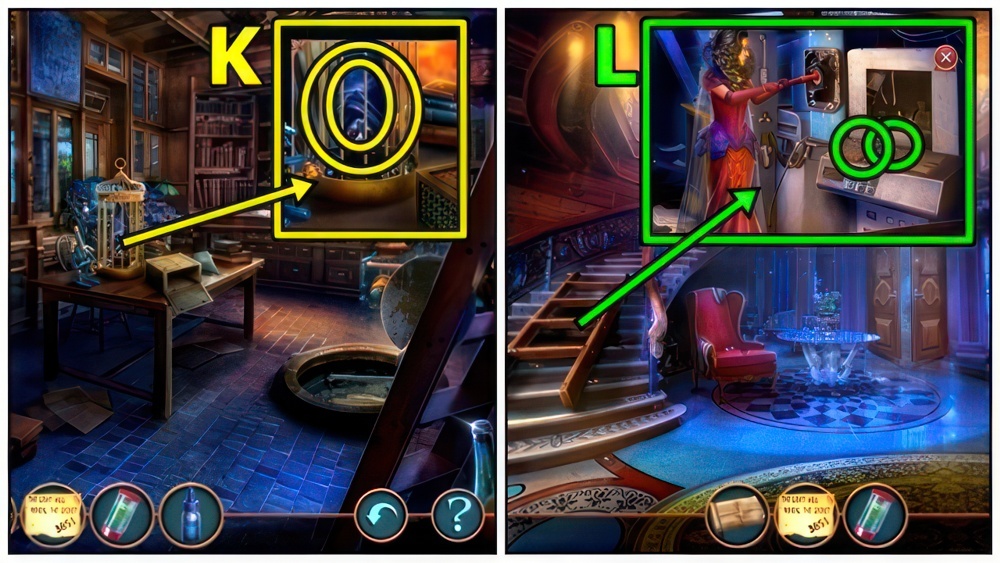
- Take SHIP (K) and SAW HANDLE.
- Add SAW HANDLE (L).
- Go to City Park.
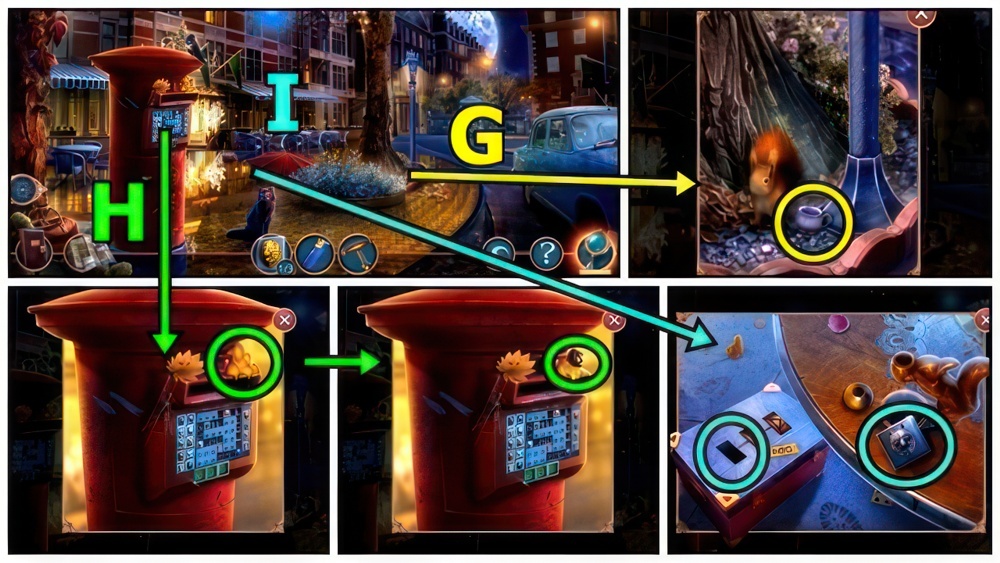
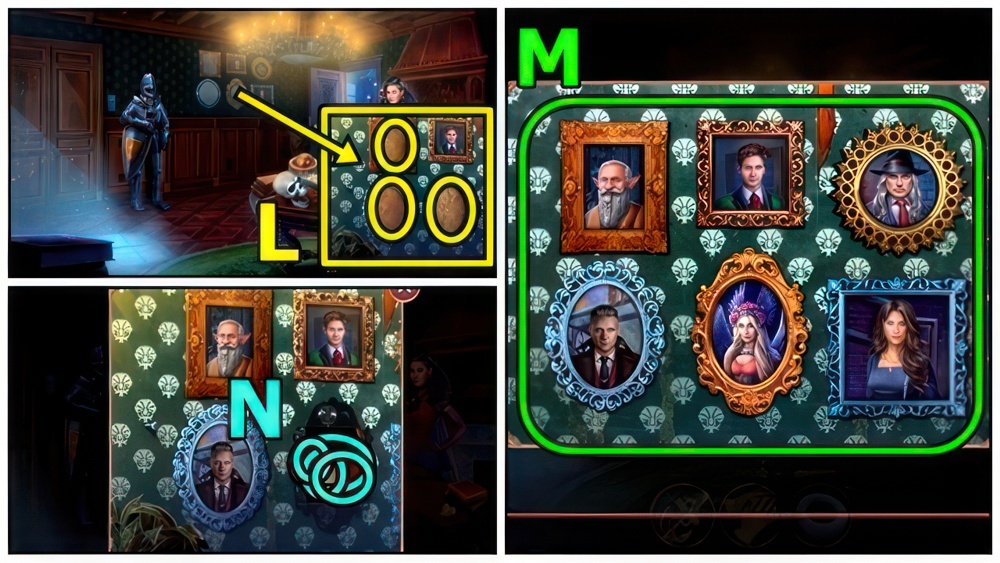
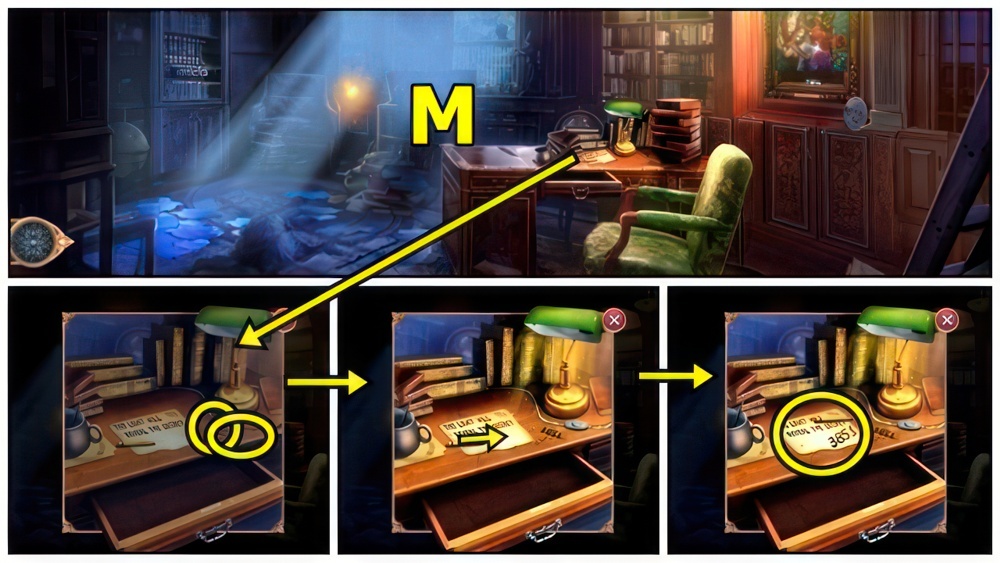
- Examine (M), take FORCEPS.
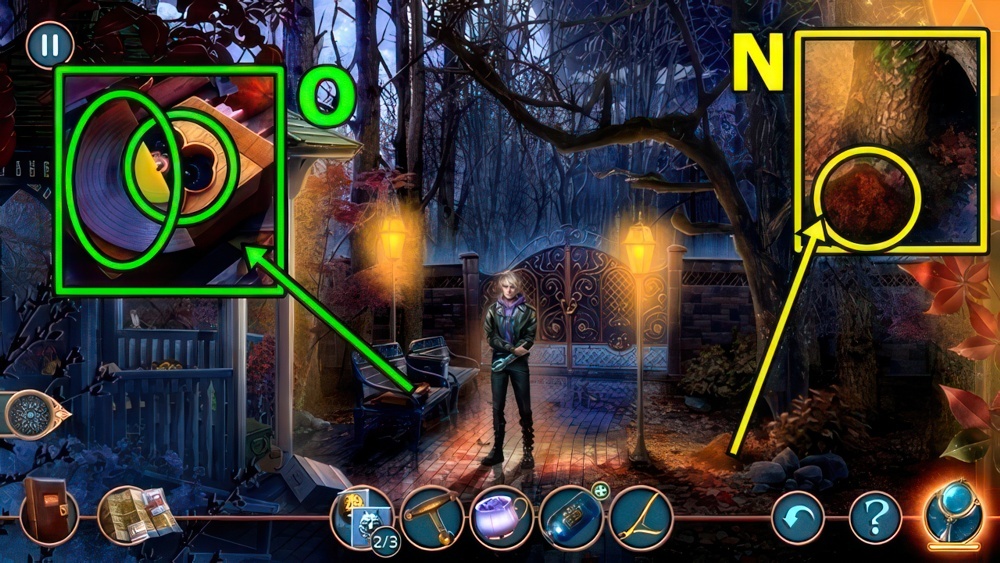
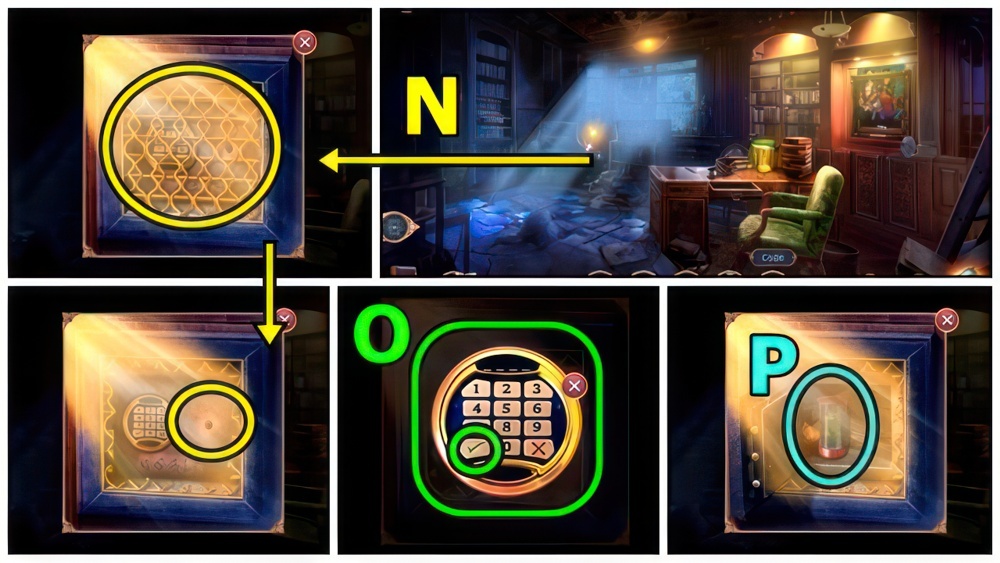
- Use BOWL (N), take CORKSCREW.
- FORCEPS and CORKSCREW on SHIP, receive CLOVER.
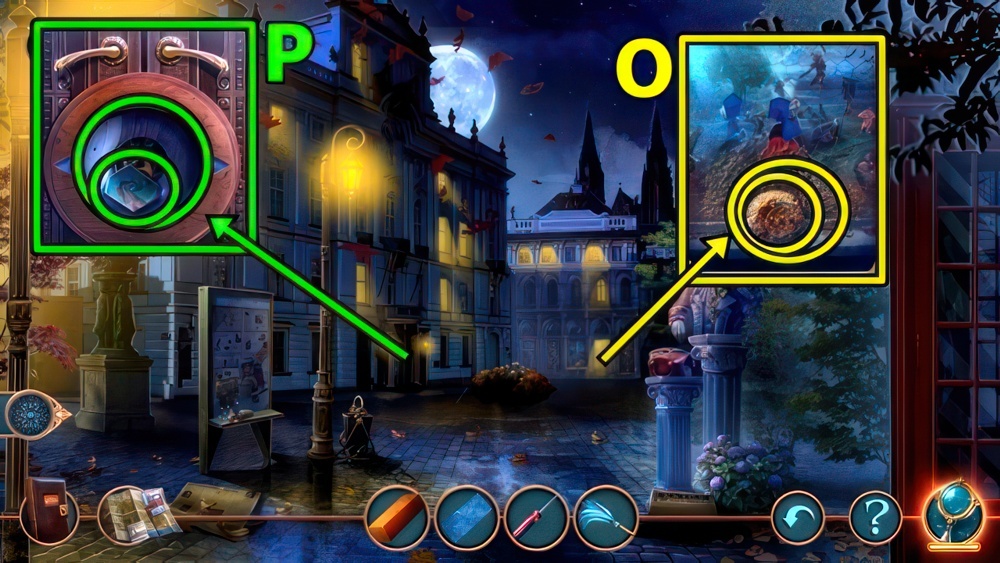
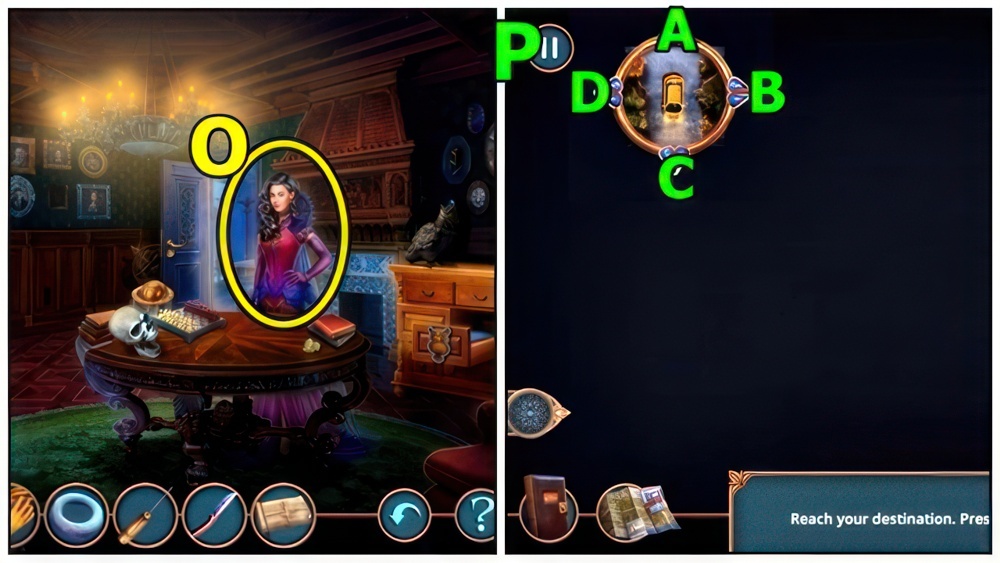
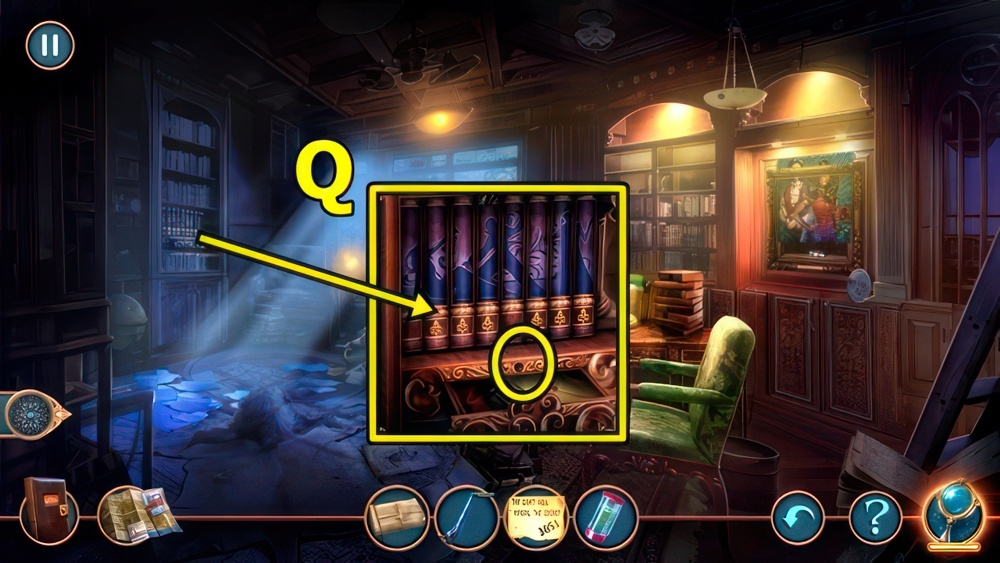
- Take BROKEN VINYL (O), add CLOVER.
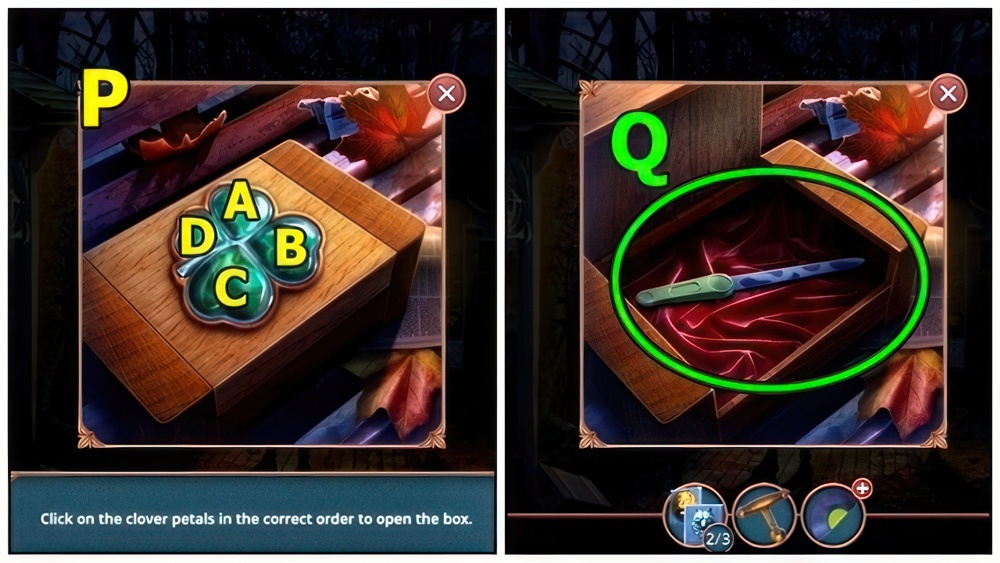
- Solution: (P) D-A-B-C.
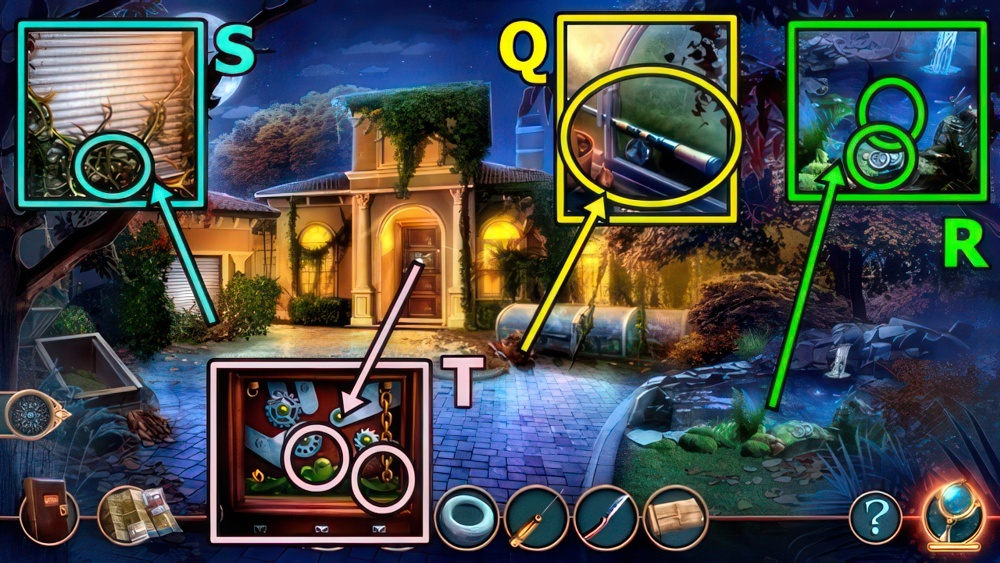
- Take NAIL FILE (Q).
- Return to Luna’s Bar.
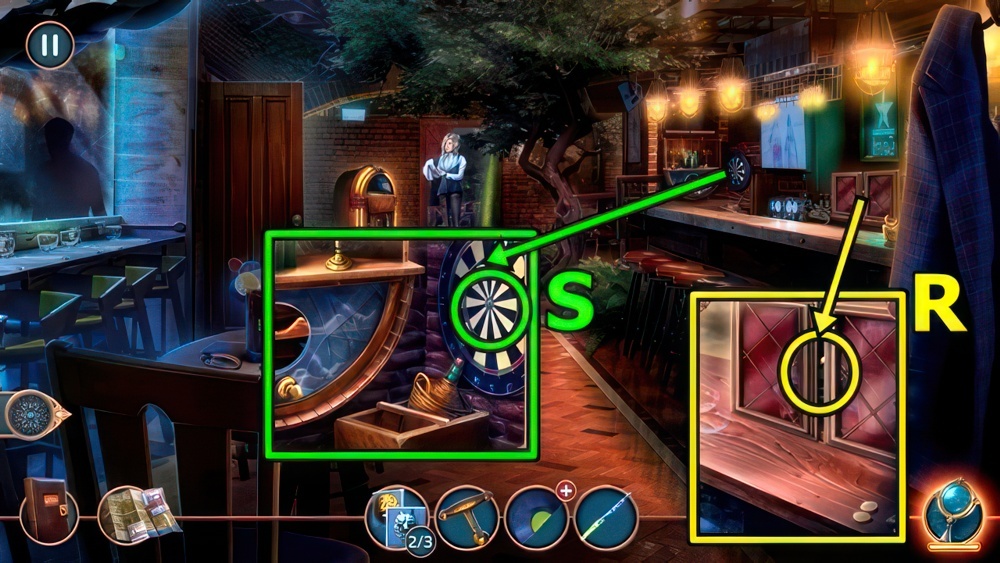
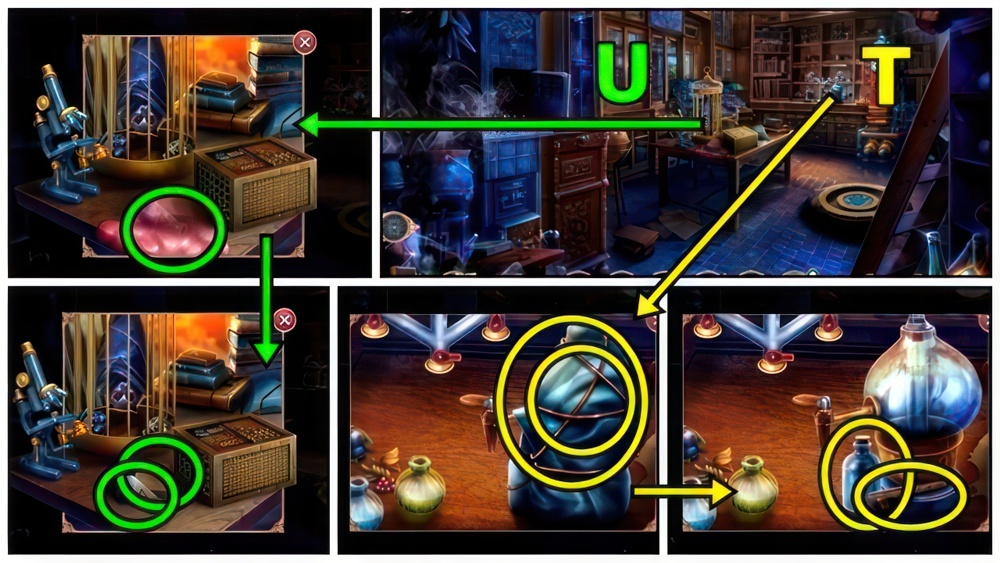
- Add NAIL FILE (R), take GLUE and DART.
- Throw DART (S), take JUKEBOX NEEDLE and ALBEDO’S ELIXIR.
- Return to City Park.

- Offer ALBEDO’S ELIXIR (T), receive ROLL.
- Return to City Street.
- Open ROLL, take BUTTON 3/3.
- Receive HANDKERCHIEF.
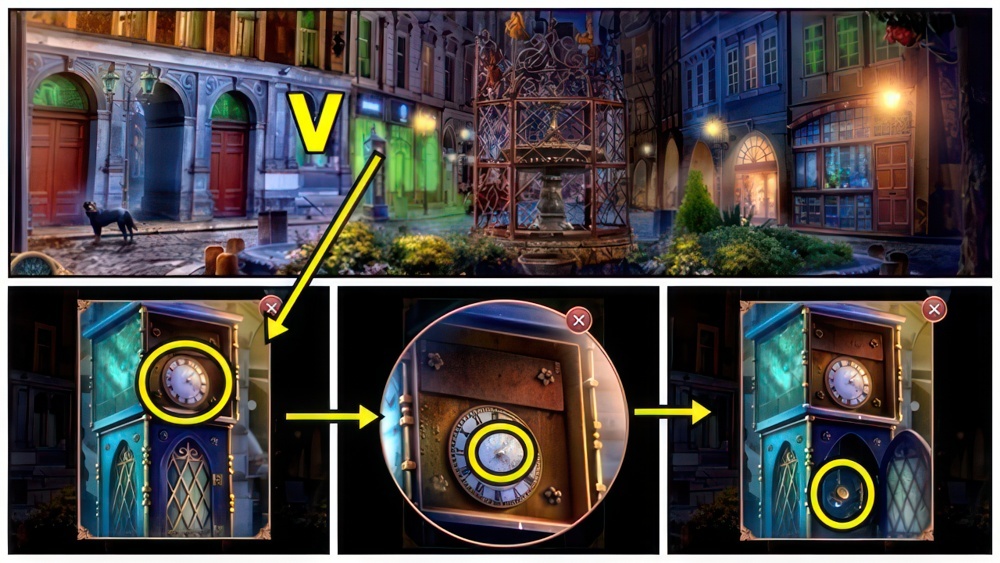
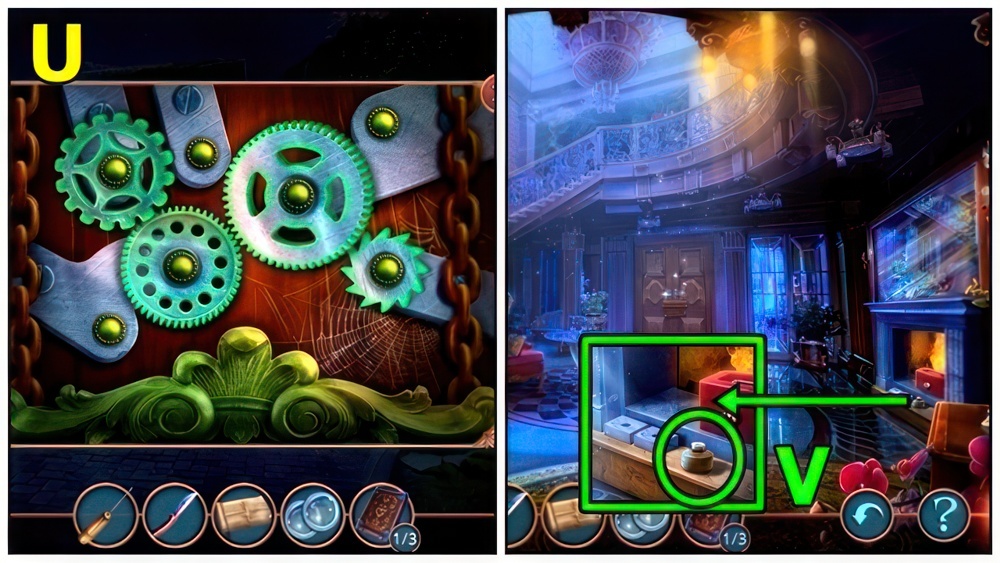
- Add BUTTON (U).
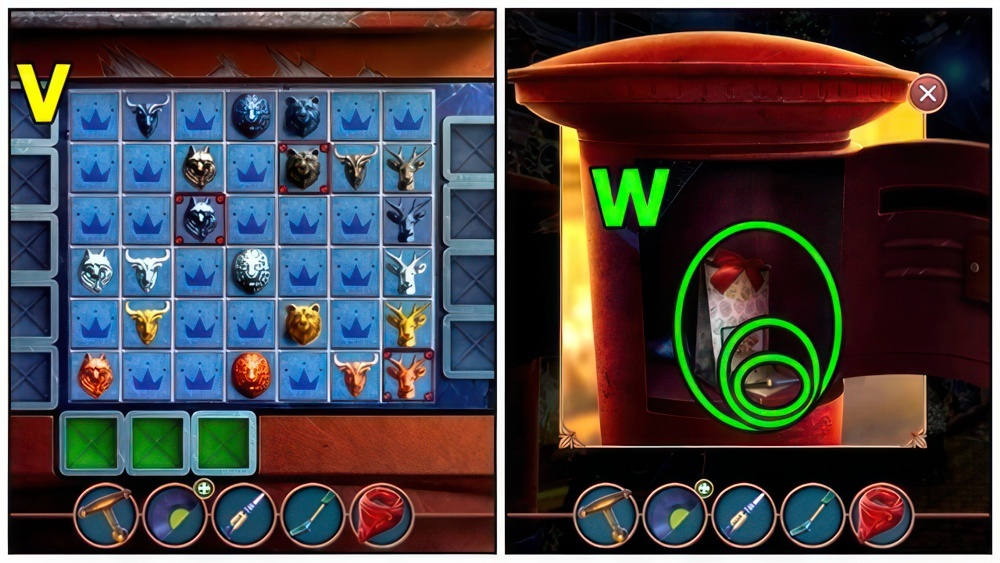
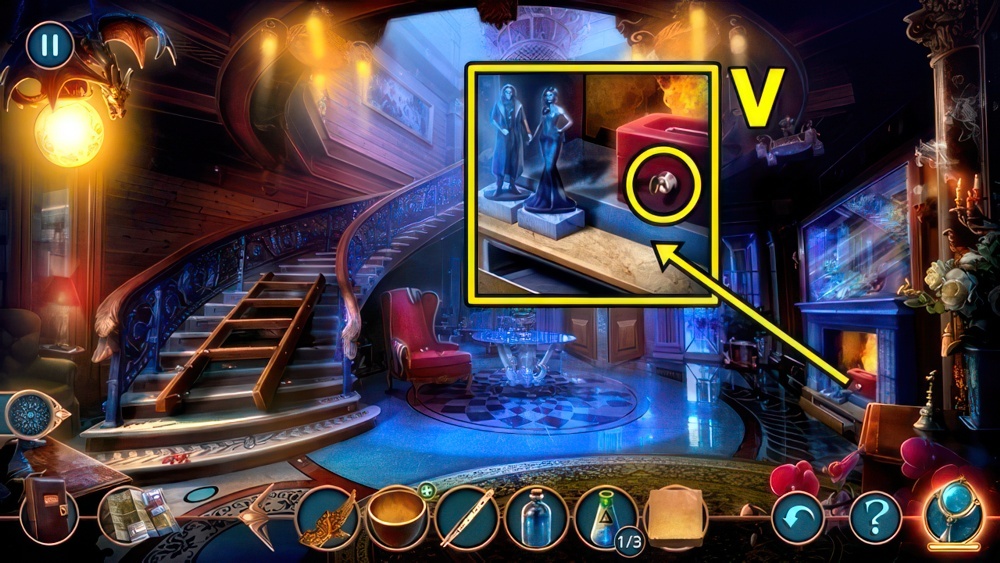
- Solution: (V).
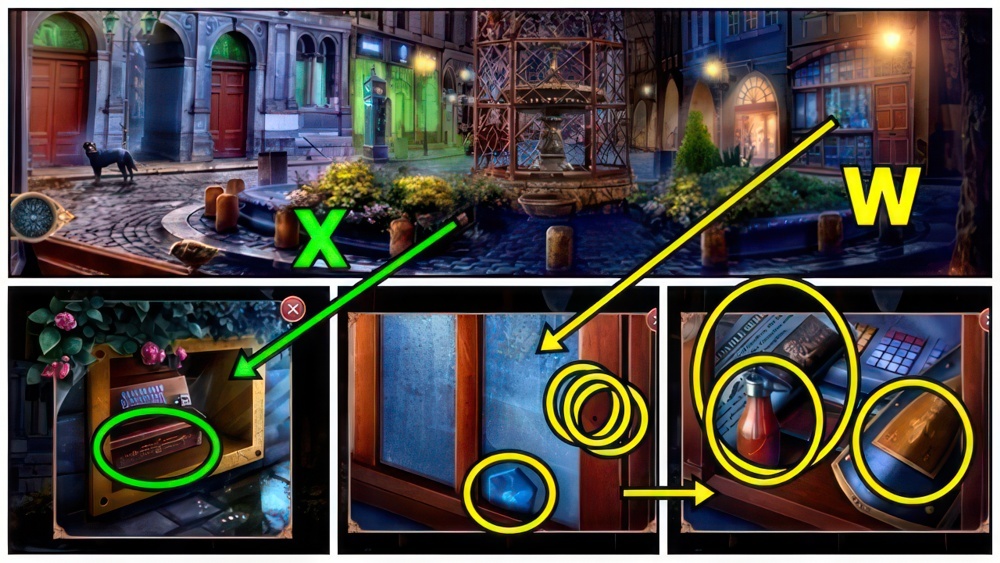
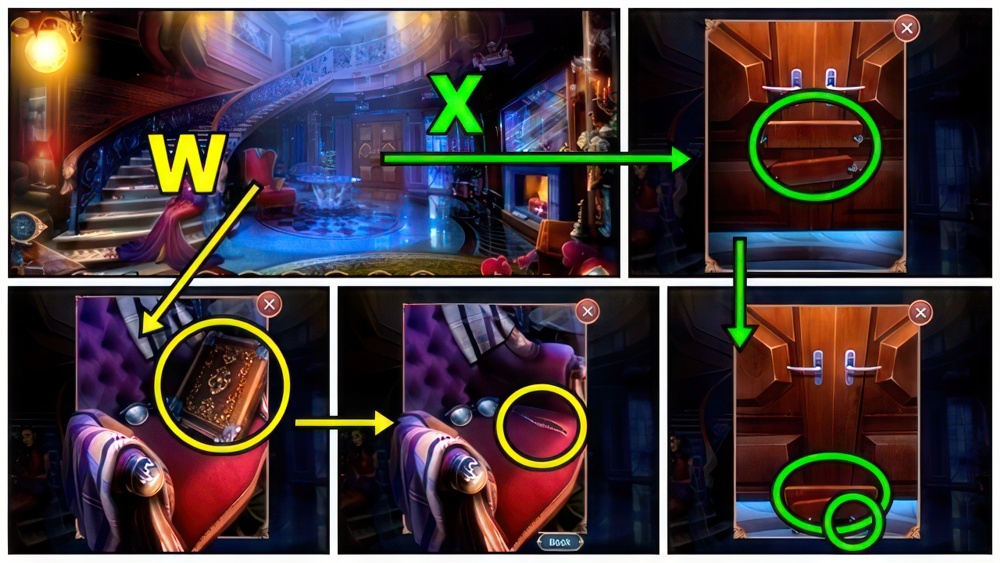
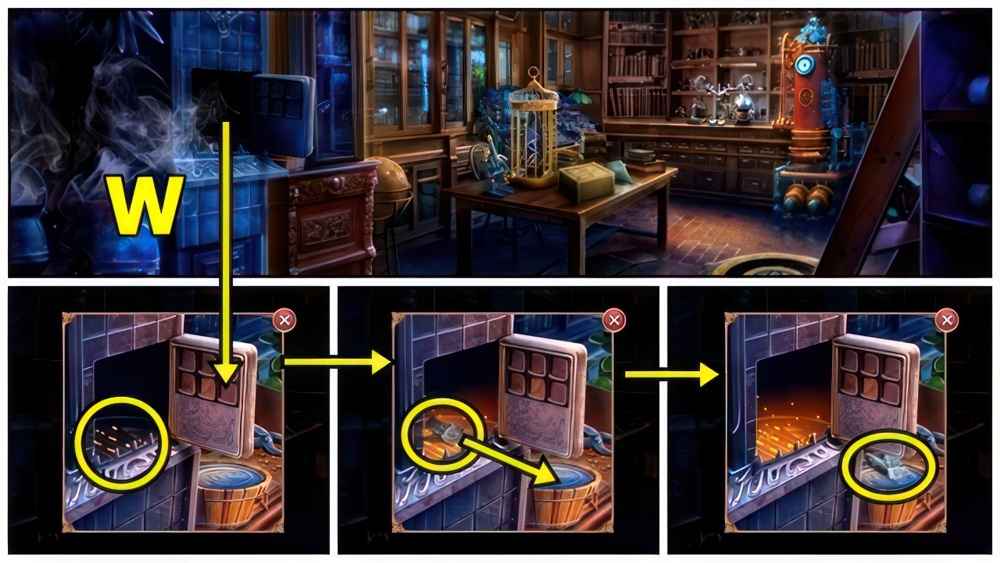
- Take LOCKPICK 1/2 (W), read, take WALNUTS.
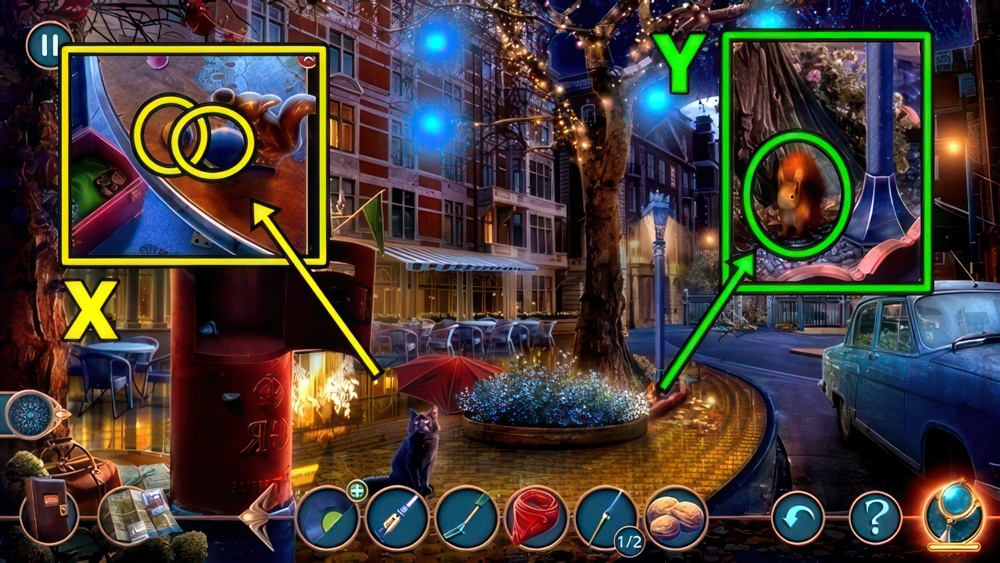
- Add NUTCRACKER PART (X) and WALNUTS, take CRACKED NUTS.
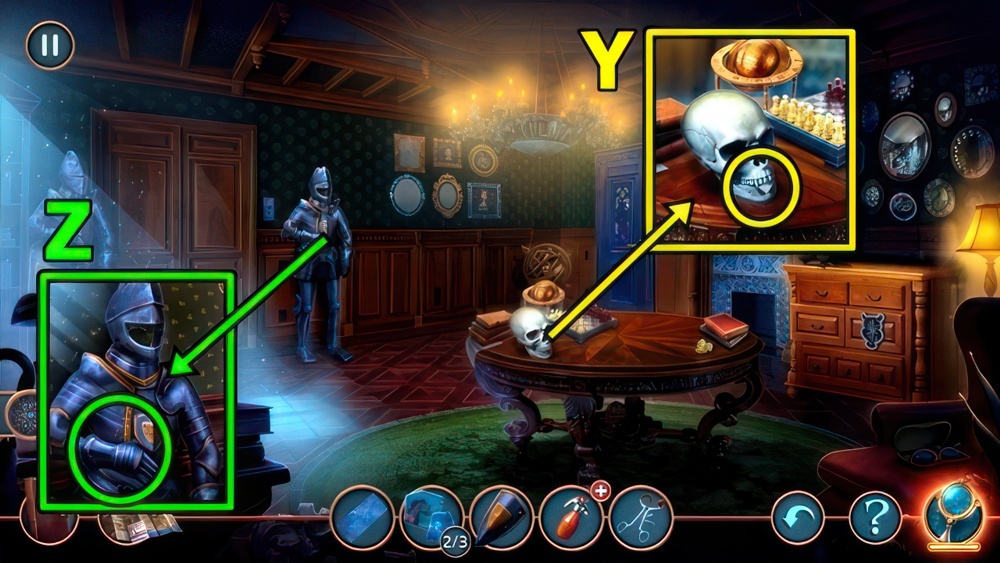
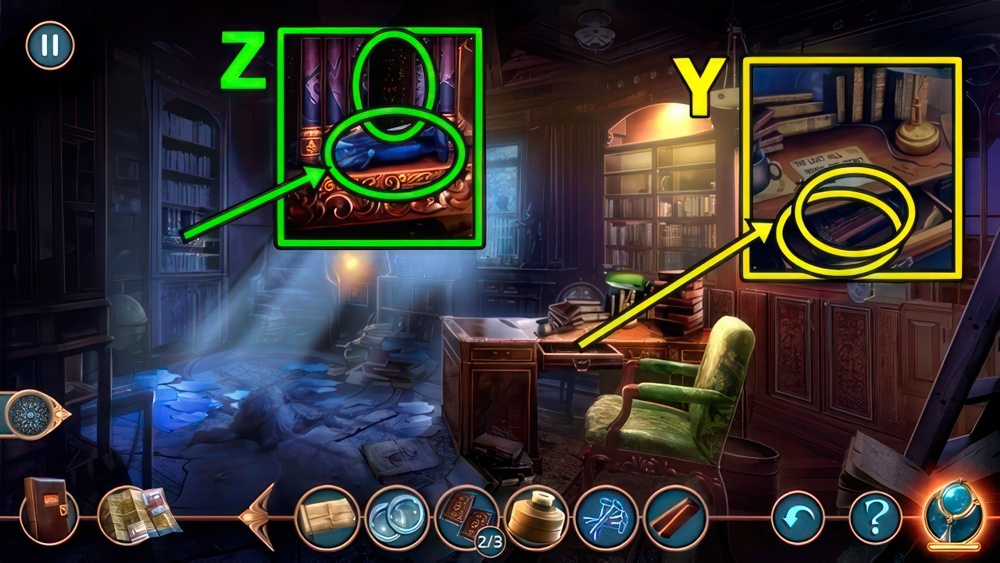
- Offer CRACKED NUTS (Y), receive SQUIRREL.
- Return to City Park.
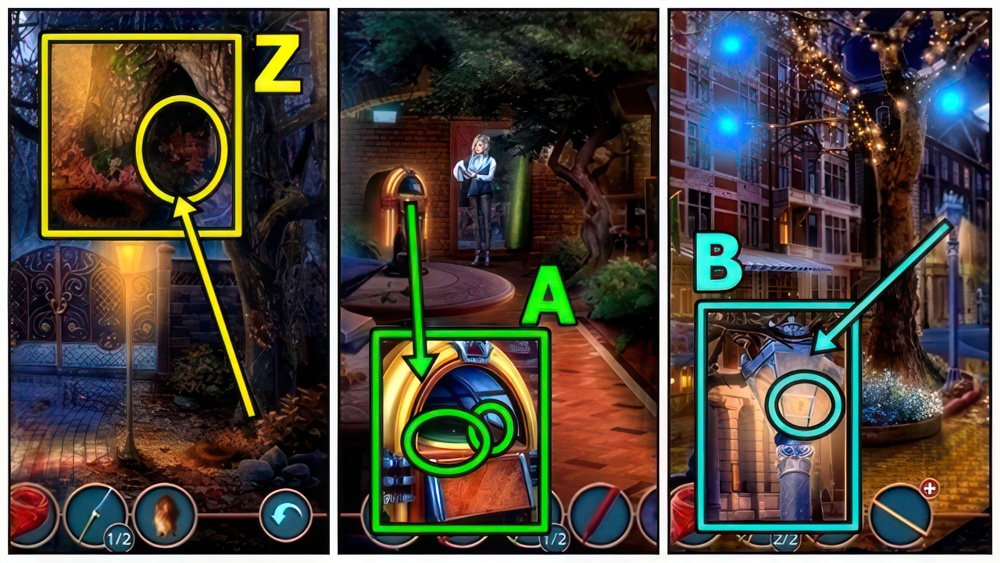
- Add SQUIRREL (Z), take WAX PENCIL and VINYL PART.
- Return to Luna’s Bar.
- GLUE and VINYL PART on BROKEN VINYL, receive VINYL.
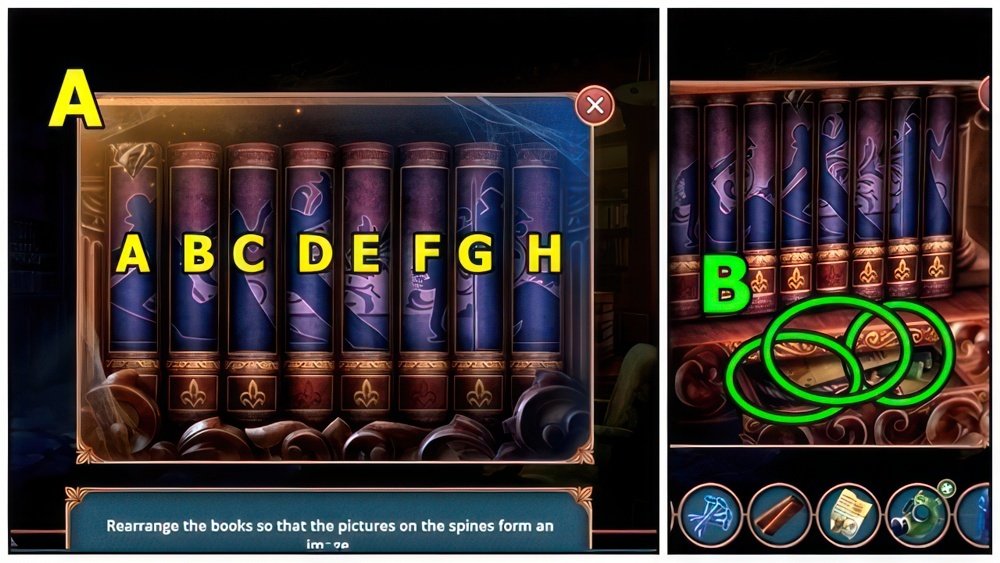
- Add VINYL (A) and JUKEBOX NEEDLE.
- Take DUSTER BASE and LOCKPICK 2/2.
- Go to City Street.
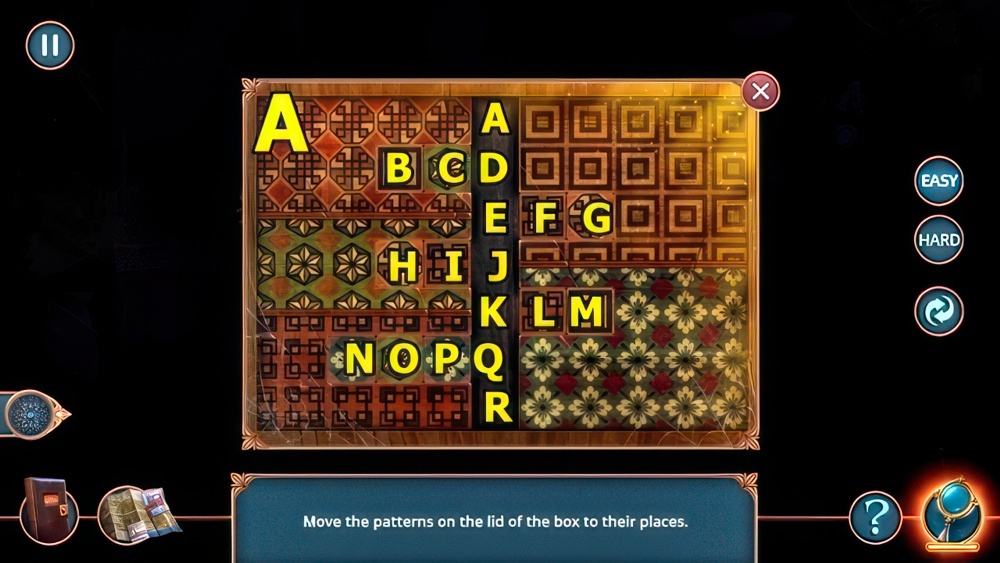
- Use LOCKPICK (B).

- Solution: (C) Easy Ax2-B-Dx2-E-G.
- Solution: (D) Hard A-Bx2-Dx2-F-Gx2-H-I.
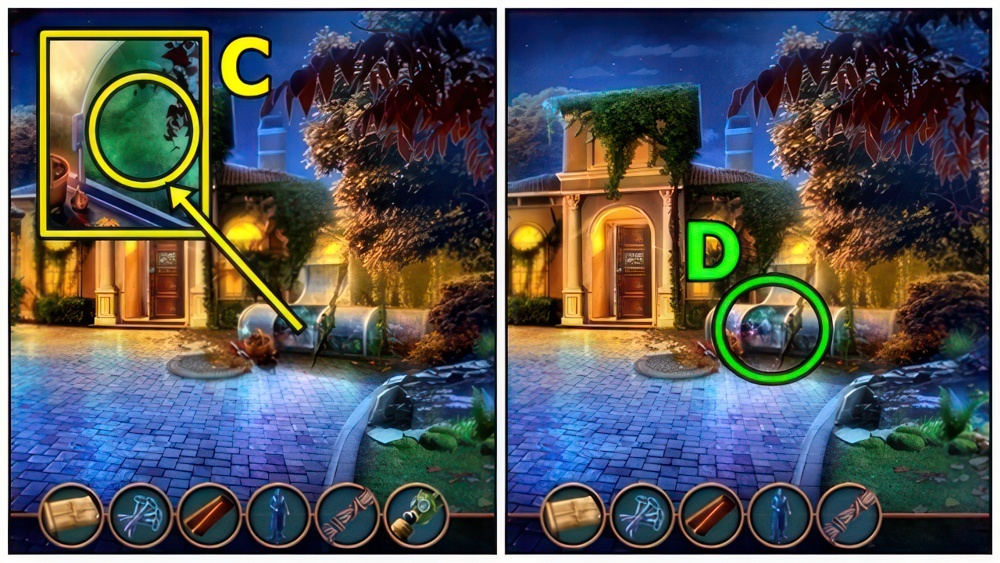
- Take FEATHERS (E) and BAR. Use HANDKERCHIEF, receive BULB.
- Go to City Park.
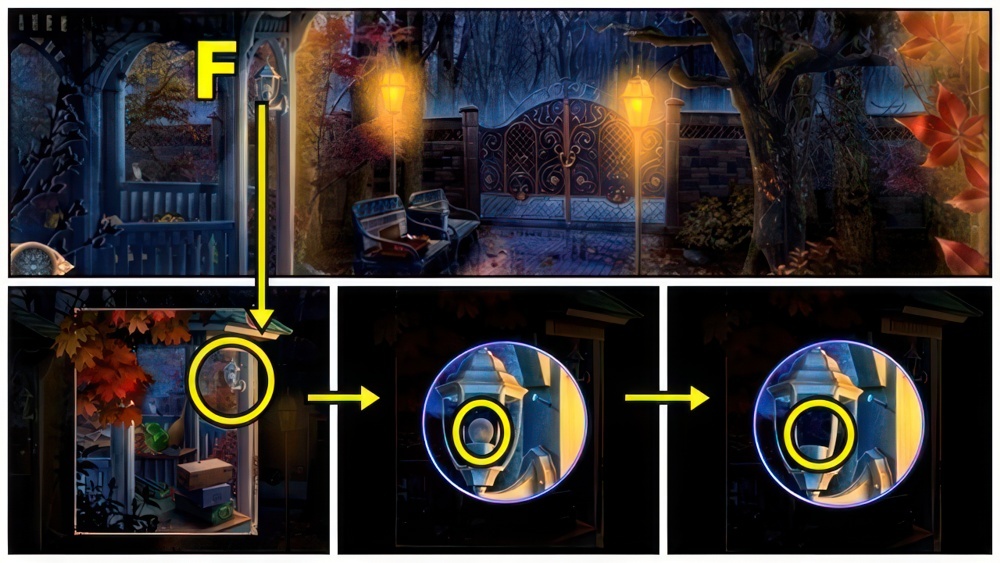
- Examine (F), remove, add BULB.
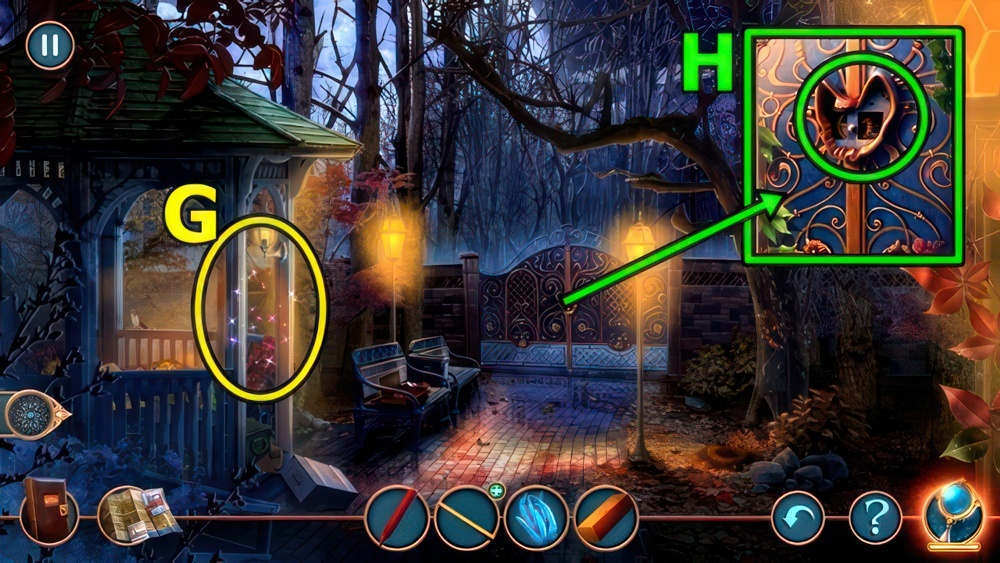
- Play puzzle (G), receive BAT SKULL.
- Add BAT SKULL (H).
- Go to City Square.

- Take SPATULA (I).
- Use SPATULA (J), open, take WRENCH.
- Use WRENCH (K), take BONE.
- Offer BONE (L).
- Enter By the Council Building.

- Take METAL PLATE (M).
- Use WAX PENCIL (N), take SCREWDRIVER and SHOE LACE.
- FEATHERS and SHOE LACE on DUSTER BASE, receive DUSTER.
- Use DUSTER (O), take PLATE.
- Take STAINED GLASS PIECE 1/2 (P).
- Add PLATE.
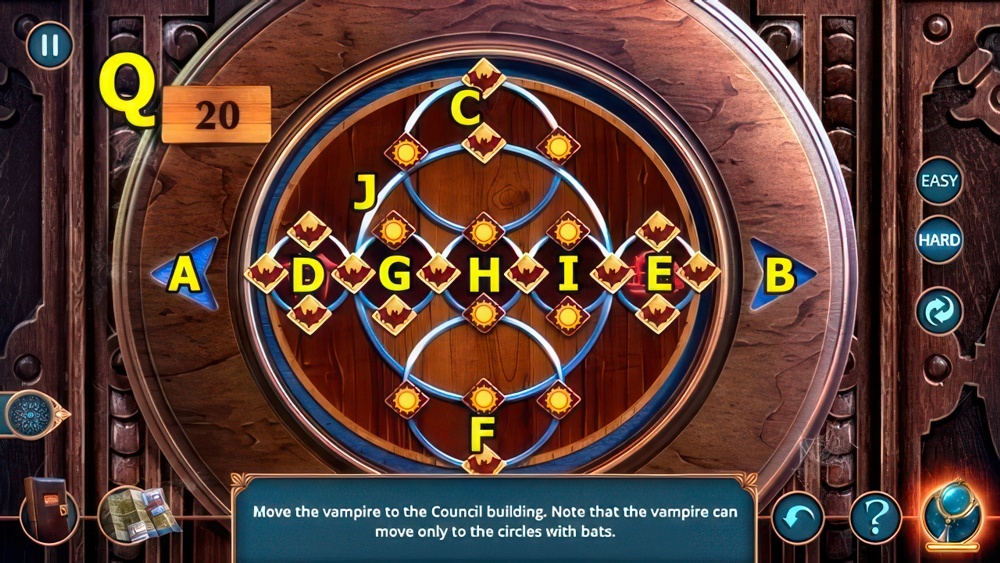
- Solution: (Q) Easy and Hard I-B-E-B-I-B-C-Bx2-F-Bx2-G.
- B-H-Ax2-I-B-J-B-E-A-D-B-J-B-I-B-J-B-H-B.
- Enter Main Hall.
- Take CLOCK HANDS (R).
- Take SCREWS (S).
- Add BAR (T), take LEMON JUICE.
- Add LEMON JUICE (U), take PHONOGRAPH CYLINDER.
- Return to City Square.
- Add CLOCK HANDS (V), take HANDLE.
- Take STAINED GLASS PIECE 2/3 (W).
- Add HANDLE, SCREWS and SCREWDRIVER, take SHIELD and SPRAY, read.
- Add PHONOGRAPH CYLINDER (X), take MOUTH EXPANDER.
- Return to Main Hall.
- Use MOUTH EXPANDER (Y), read, take ESSENTIAL OIL and STAINED GLASS PIECE 3/3.
- Add SHIELD (Z), take SOLDERING IRON.
- Go to By the Council Building.
- Add STAINED GLASS PIECE (A).
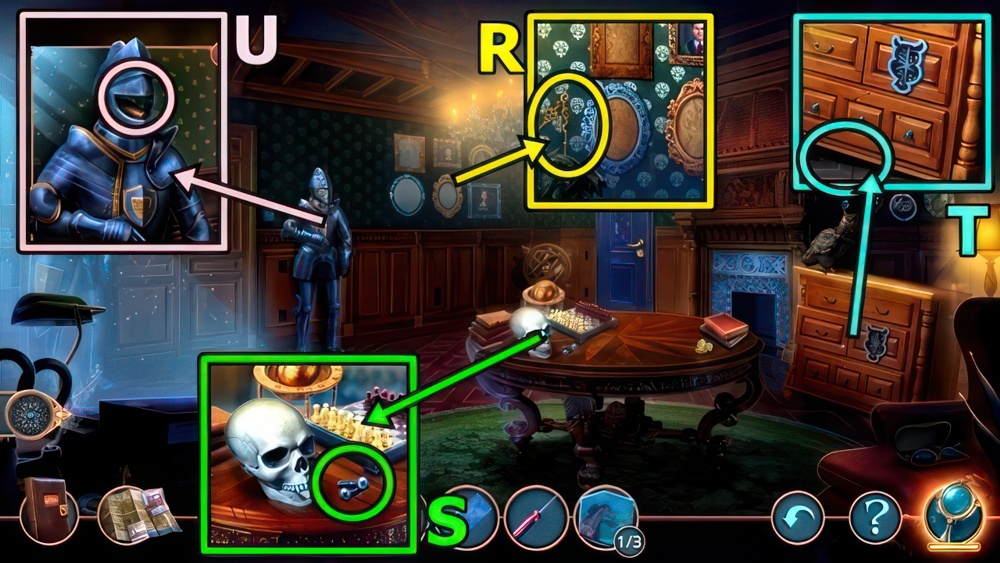
- Play puzzle (B), receive BAT.
- Add BAT (C), take PORTRAIT, PAINT BRUSH and PENDULUM.
- Go to City Square.
- Add PENDULUM (D), take VALVE.
- Add METAL PLATE (E), SOLDERING IRON, then VALVE, take KEY.
- Return to Main Hall.
- Insert KEY (F).
- Take OWL (G).
- Insert OWL (H), take ANCHOR PENDANT, CARNATION and GLOVES.
- Go to By the Council Building.
- ESSENTIAL OIL and CARNATION on SPRAY, receive INSECTICIDE.
- Use INSECTICIDE (I), take PORTRAIT, LINE and POWDER.
- Go to City Square.
- Add PAINT BRUSH (J) and POWDER, examine.
- Press buttons (K).
- Take PORTRAIT.
- Return to Main Hall.
- Add PORTRAITS (L).
- Solution: (M) Easy and Hard.
- Read (N), take AWL, KNIFE and MAP.
- Examine (O).
- Solution: (P).
- Easy: Cx2-B-C-B-C-D-A-D-C-B-C-B-A-B.
- Hard: C-B-C-B-C-D-A-D-C-B-C-B-A-B.
- Take FISHING ROD (Q).
- LINE and ANCHOR PENDANT on FISHING ROD.
- Take LENSES (R). Use FISHING ROD, receive GEAR.
- Use GLOVES (S), take BOOK 1/3 and CHAIN.
- Add GEAR (T) and CHAIN.
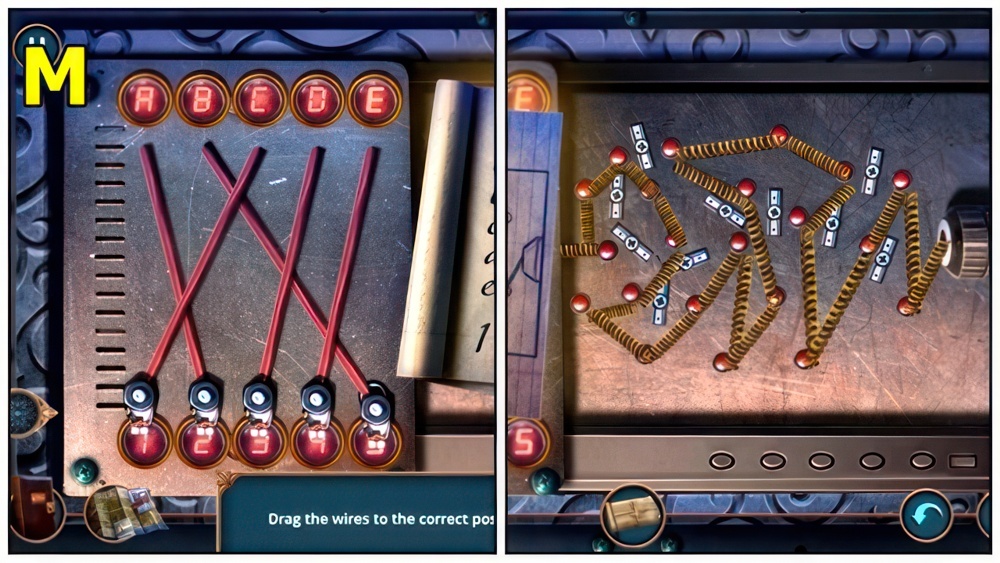
- Solution: (U).
- Enter Living Room.
- Take FILTER (V).
- Take BOOK 2/3 (W).
- Use KNIFE, take OPENER.
- Use OPENER (X), take NAILS and PLANKS.
- Enter Caleb’s Office.
- Take BOOK 3/3 (Y).
- Use AWL, take INSTRUCTIONS and FUME PROTECTION.
- Take CALEB FIGURINE (Z).
- Add BOOK.
- Solution: (A) Easy A-F-C-H-D-F-E-F.
- Hard F-Ex2-Dx2-Cx2-Bx2-A-C-B-H-Gx2.
- Fx2-Ex2-Dx2-C-F-E-F-Gx2-H.
- Read (B), take ROPE and STRAPS.
- Return to By the Mansion.
- FILTER, LENSES, INSTRUCTIONS and STRAPS on FUME PROTECTION, receive GAS MASK.
- Use GAS MASK (C).
- Play puzzle (D), receive REMOTE.
- Use REMOTE (E), take BANDAGE, LADDER BASE and SWITCH.
- Enter Living Room.
- Add BANDAGE (F).
- Select (G).
- Take SELENA’S BAG (H).
- Open SELENA’S BAG, take LEVER and SELENA FIGURINE.
- Add CALEB FIGURINE (I) and SELENA FIGURINE, take LEVER HANDLE, ROSE, read, take HAMMER.
- NAILS, PLANKS and HAMMER on LADDER BASE, receive LADDER.
- Place LADDER (J).
- Read (K). Take PARCHMENT.
- Enter Caleb’s Office.
- Add ROSE (L) and PARCHMENT.
- Take DUCT TAPE and SOLVENT.
- Add SWITCH (M) and DUCT TAPE, use pencil, take CODE.
- Use SOLVENT (N), add LEVER HANDLE.
- Solution: (O) 9-6-3-1-checkmark.
- Take SERUM (P).
- Add LEVER (Q).
- Enter Secret Lab.
- Take MEDALLION (R).
- Open (S), take PLIERS and BOWL MOULD.
- Use PLIERS (T), take CLOTH. Take TWEEZERS and WATER.
- Use CLOTH (U), take FLASK 1/3 and PLASTICINE.
- Return to Living Room.
- Use TWEEZERS (V), take PLASTER and FLASK 2/3.
- Return to Secret Lab.
- MEDALLION, WATER, PLASTICINE and PLASTER in BOWL MOULD, receive MEDALLION and MOULD.
- Add MOULD (W), add to water, take MEDALLION.

- Add MEDALLIONS (X).
- Play puzzle (Y), receive PUZZLE PART.
- Add PUZZLE PART (Z). Examine.
- Solution: (A) Easy (L-R)-(C-A)-(B-L)-(F-Q)-(G-B)-(L-G)-(M-F).
- (I-L)-(H-C)-(A-H)-(L-D)-(Q-E)-(P-M)-(O-I)-(N-L)-(E-N)-(D-O)-(R-P).

- Solution: (B) Hard (L-V)-(D-A)-(G-U)-(C-L).
- (B-N)-(H-B)-(I-D)-(L-I)-(K-E)-(J-H)-(E-G)-(N-J).
- (A-K)-(D-L)-(G-C)-(O-A)-(P-G)-(Q-D)-(U-E)-(L-Q)-(T-P).
- (S-L)-(R-O)-(V-R)-(E-S)-(A-T).
- Take SELENA’S DIARY (C) and PAPERWEIGHT.
- Return to Caleb’s Office.
- Use PAPERWEIGHT (D), take SEAL RING.
- Enter Secret Lab.
- SEAL RING on SELENA’S DIARY, read, take RECIPE and FLASK 3/3.
- Add RECIPE (E) and FLASK.
- Solution: (F) Easy D-B-G-B-E-A-H-A-F-C-I-C.
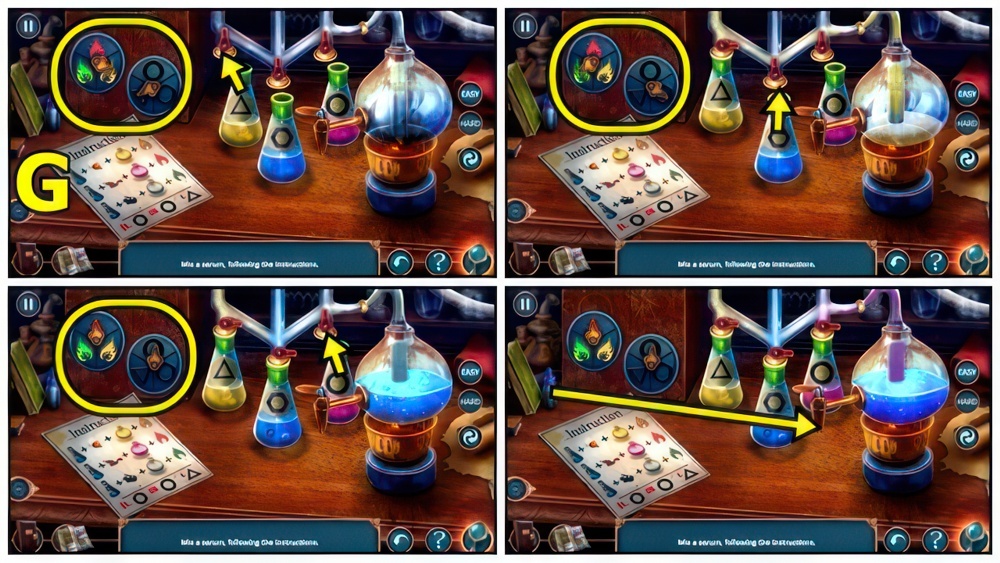
- Solution: (G) Easy.
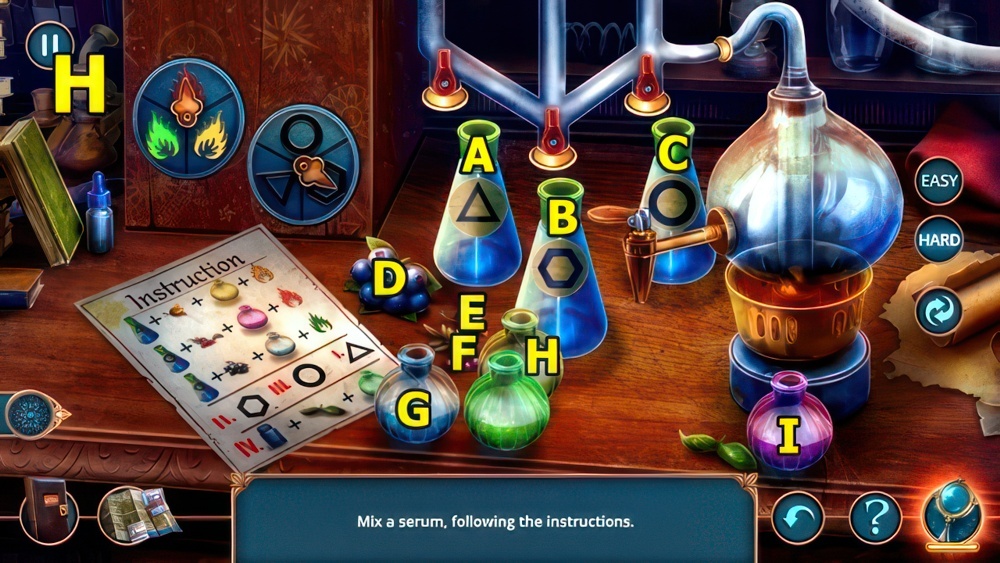
- Solution: (H) Hard D-B-G-B-E-A-H-A-F-C-I-C.
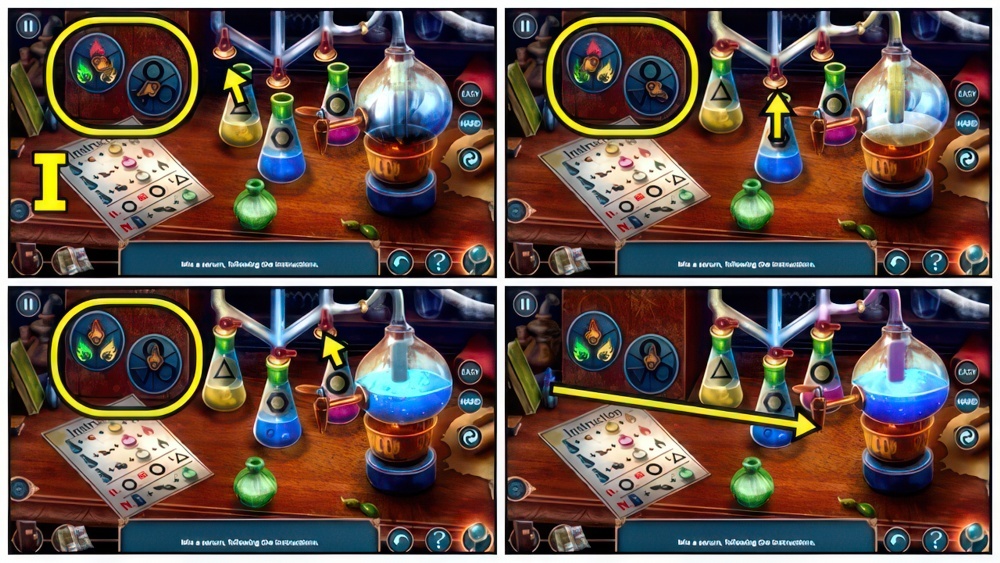
- Solution: (I) Hard.
- Solution: (J) Hard.
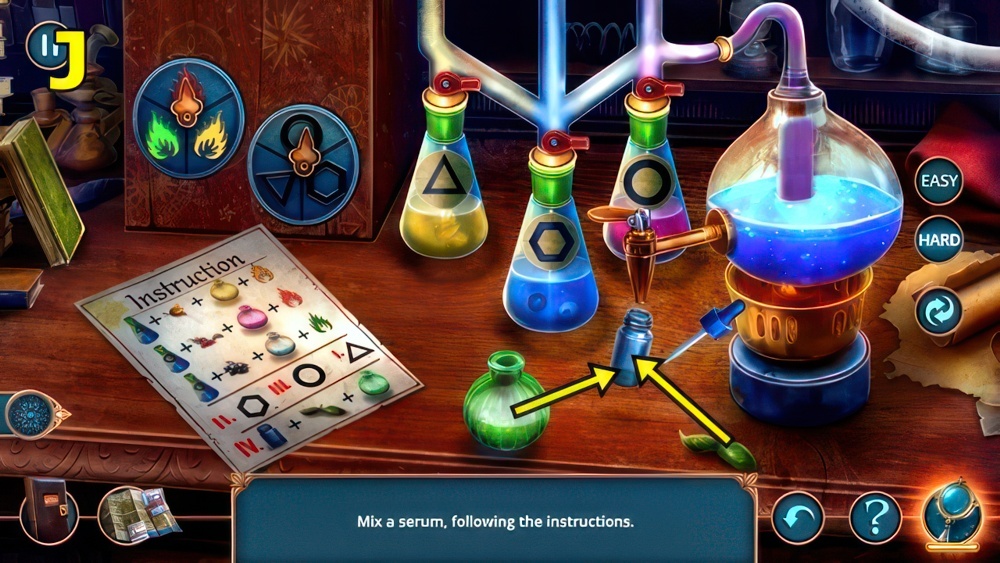
- Receive LIFE-BRINGING WATER.
- Open (K).
- Give LIFE-BRINGING WATER.
- Return to Living Room.
- Add CODE (L) and SERUM.
- Solution: (M).
Congratulations! You have completed the game Magic City Detective 2: Secret Desire.


