
Magic City Detective 3: Rage Under Moon – The walkthrough of the game begins with the fact that in the past few days in the vibrant city of Paris, more and more animagi have disappeared, and no one knows what this could be connected with. And what a coincidence, more and more bloodless bodies are coming to the local morgue. The authorities are confused, so the Ministry of Magical Race Control is called in to investigate. The investigation falls into your capable hands, along with a member of the most powerful Animagus clan in the capital. You have to explore and unravel the mystery of the city of lights. If you can’t go through any of the locations or don’t know where the items are, on our website you can watch the walkthrough of the game Magic City Detective 3: Rage Under Moon, and complete the investigation.
Magic City Detective 3: Rage Under Moon – Walkthrough
Here you can watch the complete walkthrough of the game Magic City Detective 3: Rage Under Moon, namely the main story and the bonus chapter.
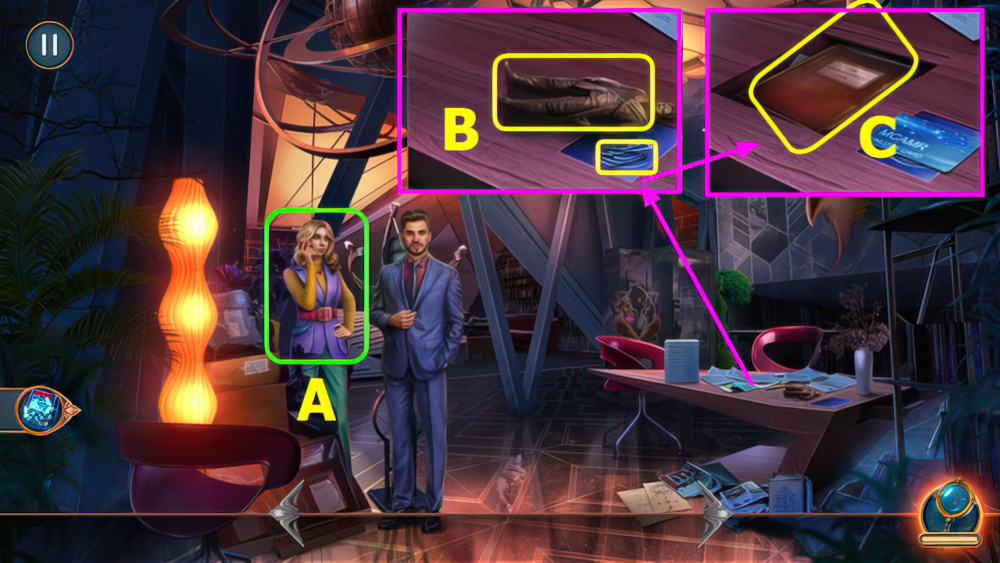
- Talk, earn DESKTOP KEY (A).
- Take VAMPIRE STATUETTE and 1/2 PIN, use DESKTOP KEY (B).
- Open folio, take CASE (C).
- Give CASE, select, play puzzle, earn MINISTRY EMBLEM (A).
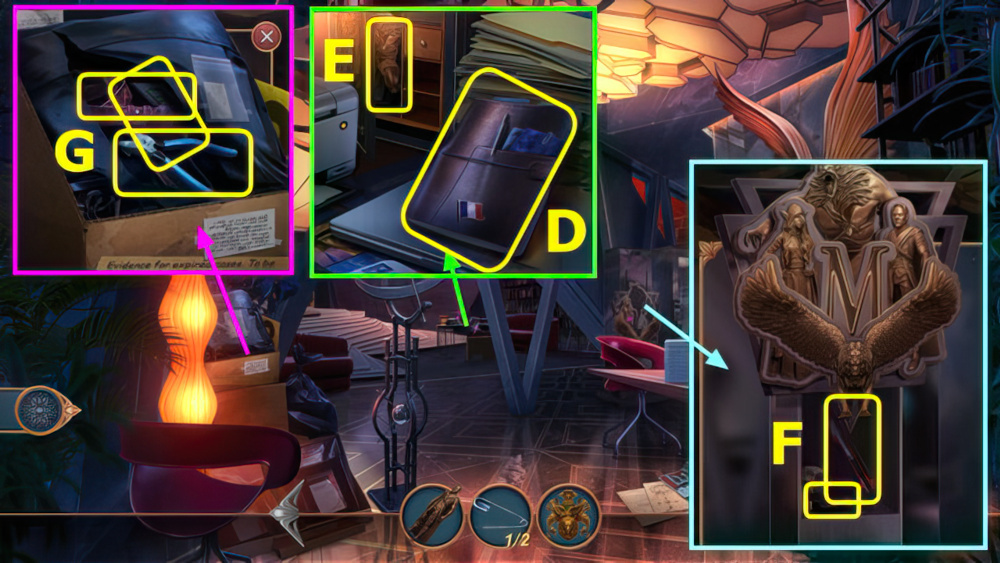
- Take task book, open laptop (D).
- Use MINISTRY EMBLEM, take WEREWOLF STATUETTE (E).
- Take map, place WEREWOLF STATUETTE and VAMPIRE STATUETTE.
- Take FLASH DRIVE and BOX CUTTER (F).
- Use BOX CUTTER, take CUTTERS, BELT, and CHARGER (G).
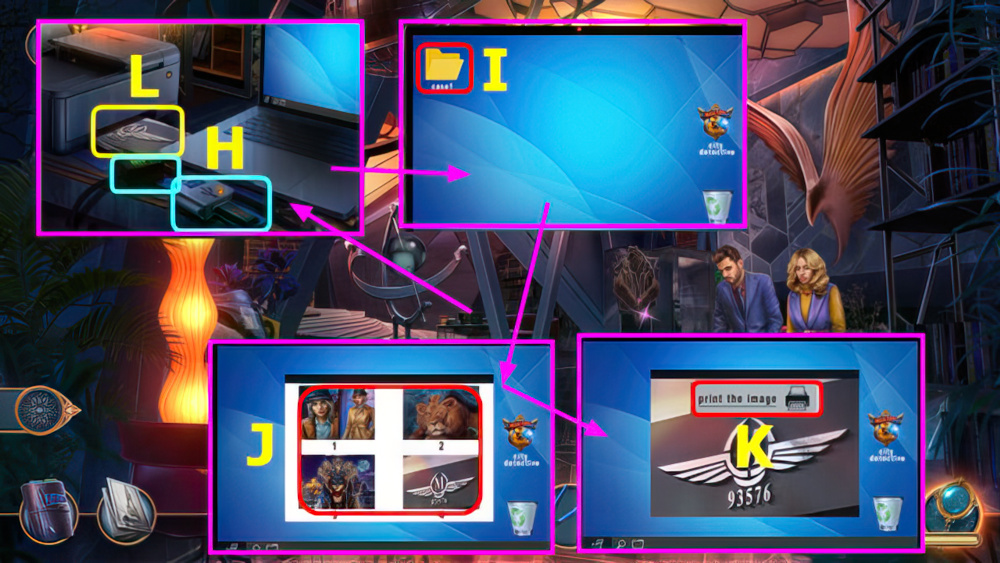
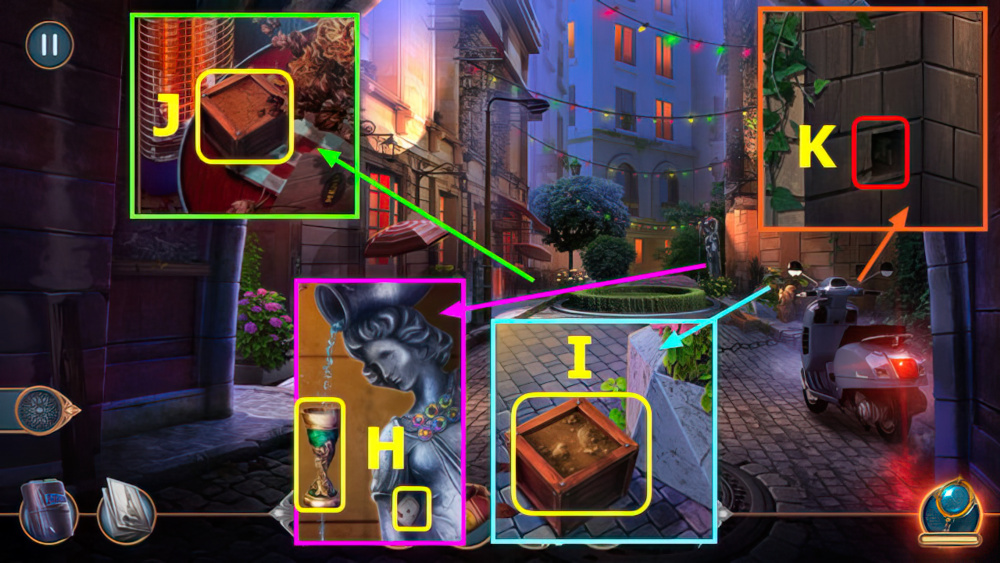
- Use CHARGER and FLASH DRIVE (H).
- Select (I), select x4 (J).
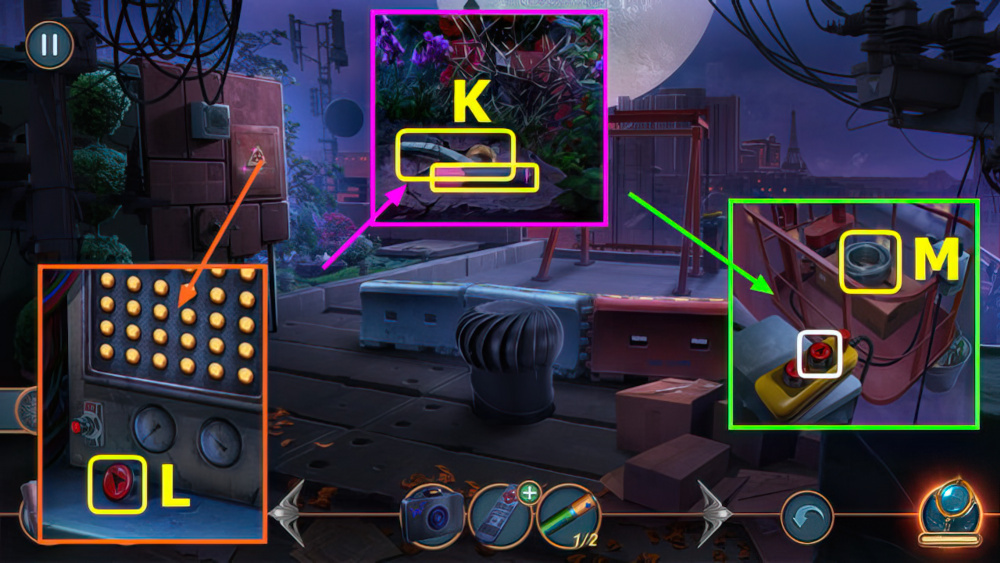
- Select (K).
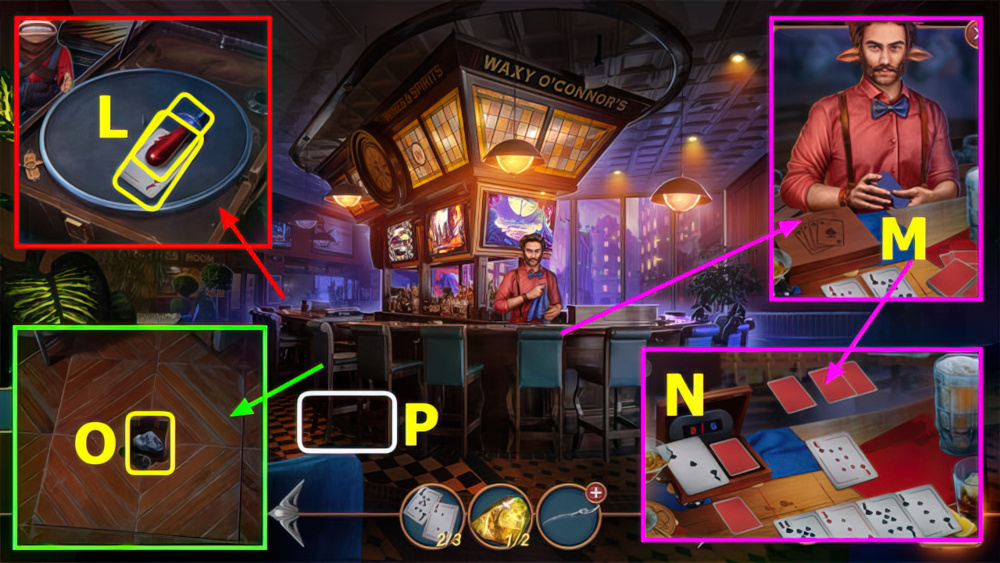
- Take PASSWORD (L).
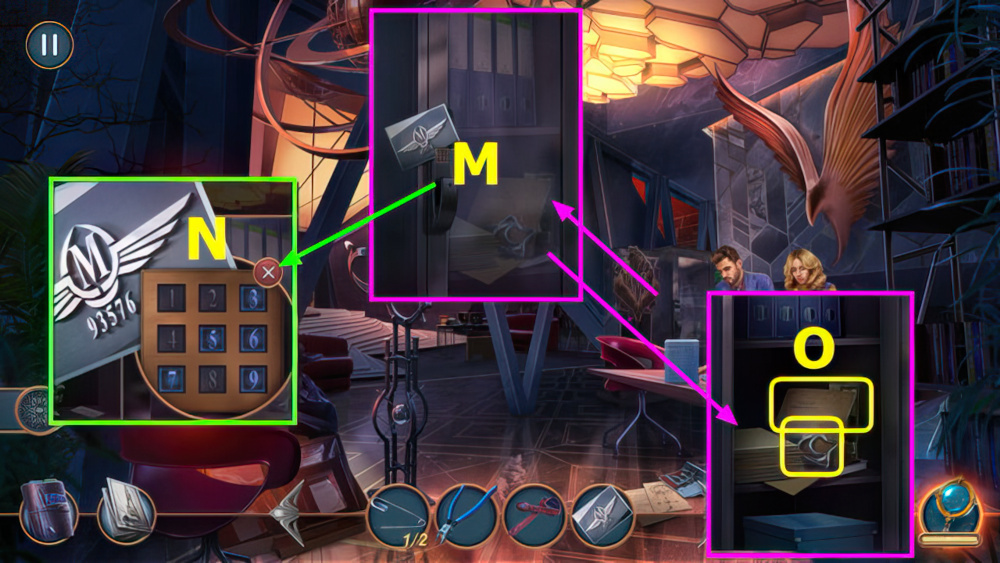
- Place PASSWORD (M).
- Select 9-3-5-7-6 (N).
- Take PAPER CLAMP, read case (O).
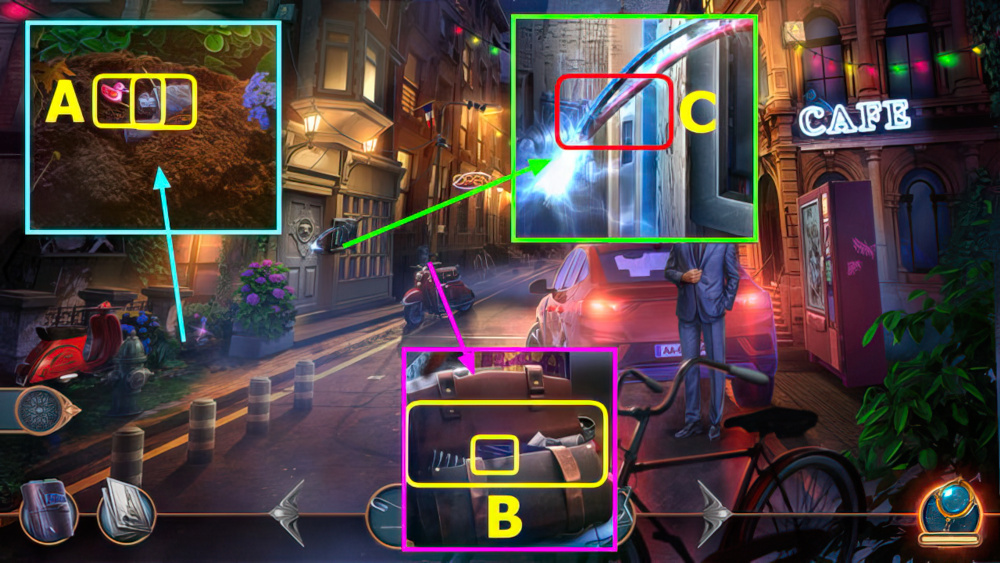
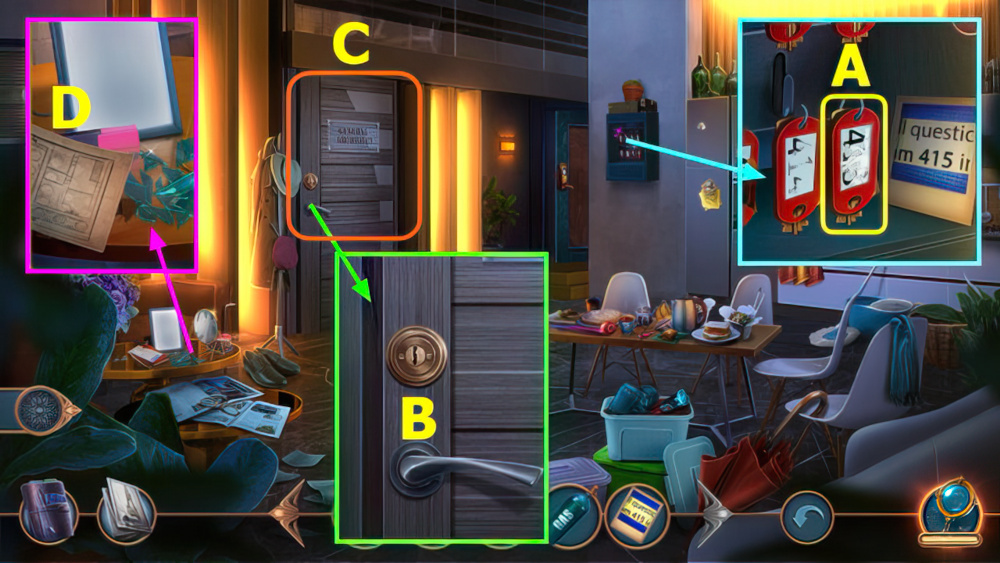
- Take LIGHTER and 2/2 PIN (A).
- Use PIN, take RUBBER GLOVE and JACK (B).
- Use RUBBER GLOVE (C).
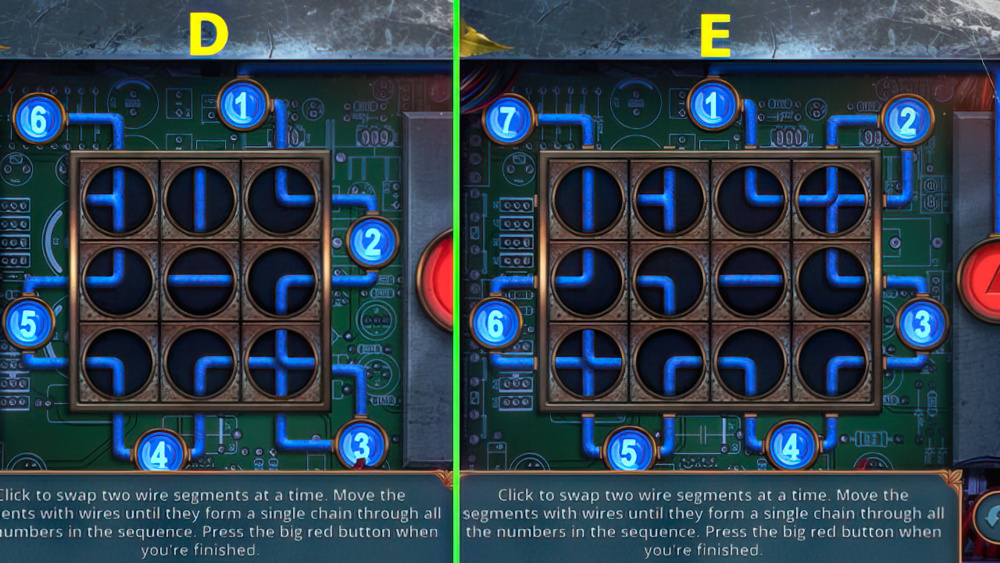
- Easy solution (D).
- Hard solution (E).
- Go left.
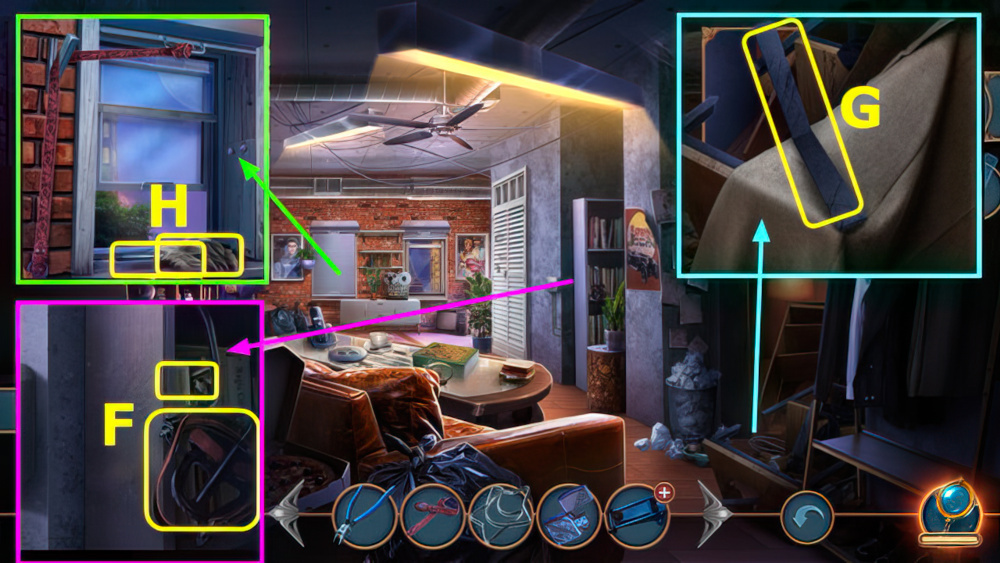
- Take 1/2 GRAPPLING HOOK and KEY PART (F).
- Take 1/5 EVIDENCE, remove blanket (G).
- Use BELT, take 2/5 EVIDENCE and SOLDERING IRON (H).
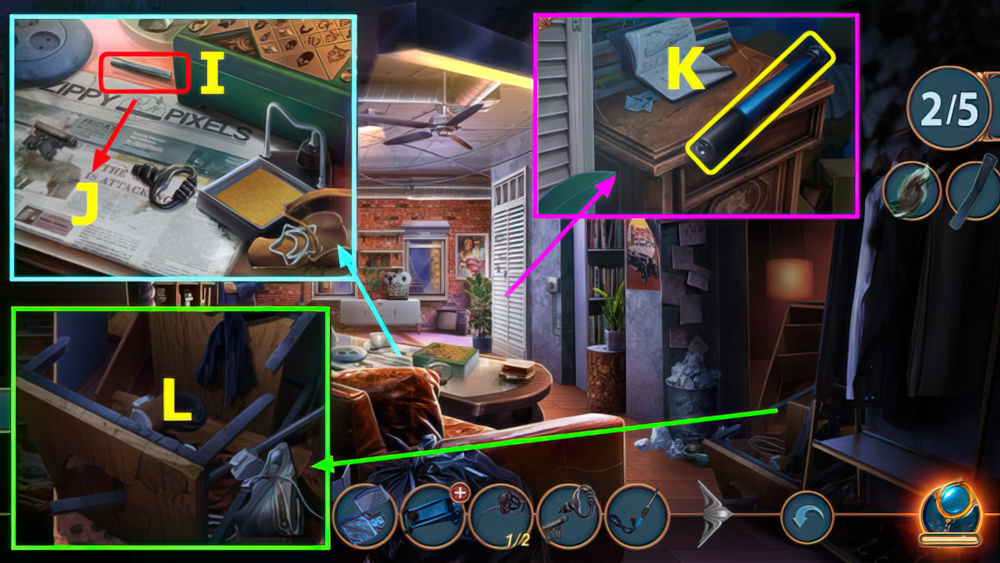
- Move (I-J), place KEY PART and PAPER CLAMP, use SOLDERING IRON, take KEY.
- Use KEY, take JACK (K).
- JACK on JACK.
- Use JACK (L).
- Go right.
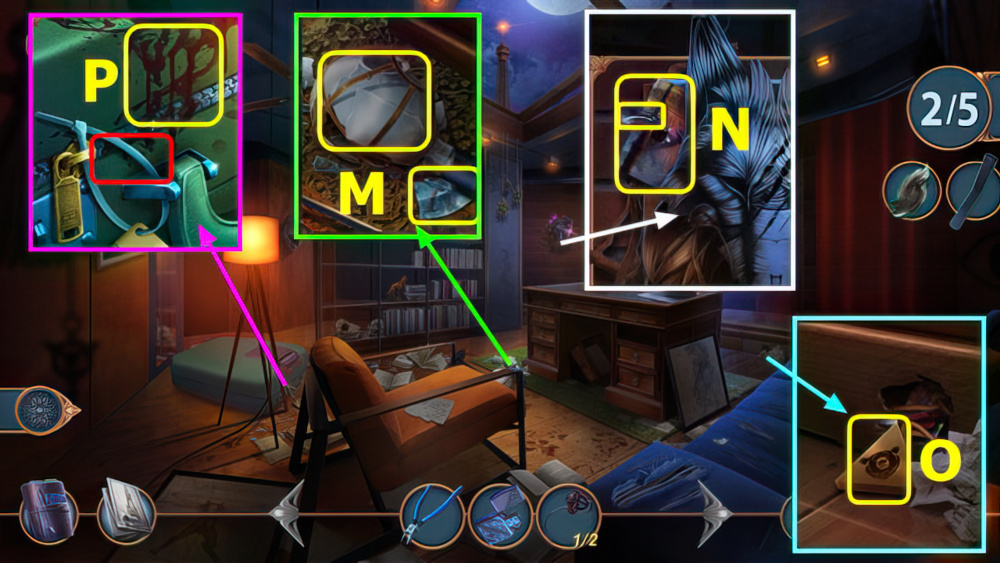
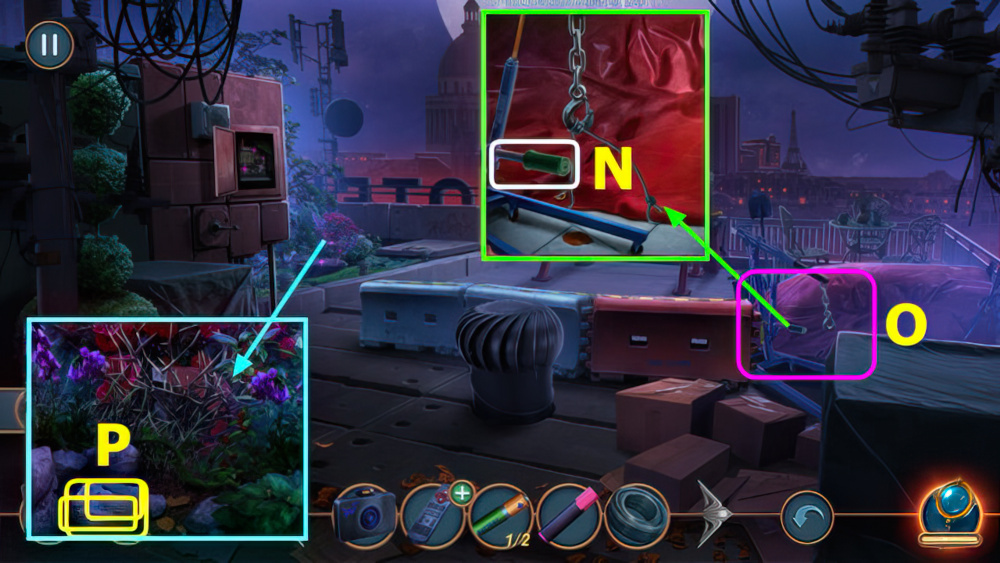
- Take 3/5 EVIDENCE and 1/2 BANKNOTE (M).
- Take 4/5 EVIDENCE and PHOTO (N).
- Take 1/2 STONE (O).
- Take 5/5 EVIDENCE, use CUTTERS (P).
- Select evidence list.
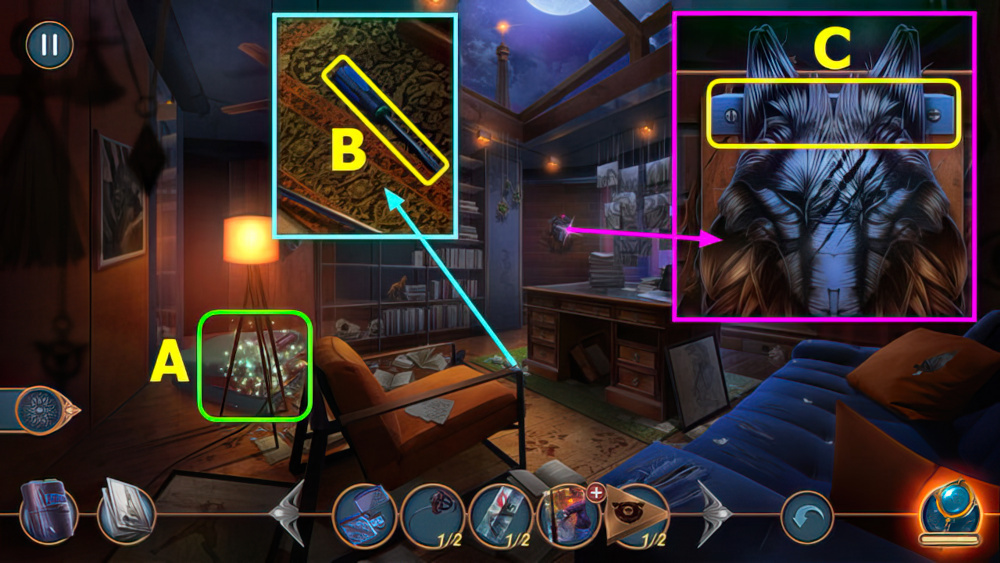
- Play puzzle, earn SHIRT (A).
- Use SHIRT, take MINI SCREWDRIVER (B).
- Use MINI SCREWDRIVER, earn RAIL (C).
- Walk down 2x.
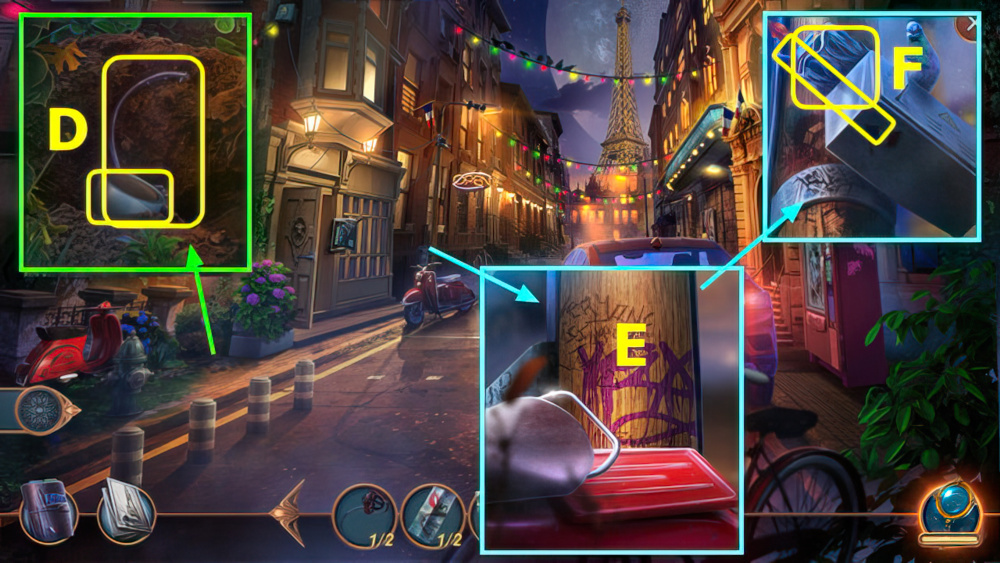
- Use RAIL, take DUCT TAPE and 2/2 GRAPPLING HOOK (D).
- Use GRAPPLING HOOK (E).
- Take HEAVY VASE and CROWBAR (F).
- Go left.
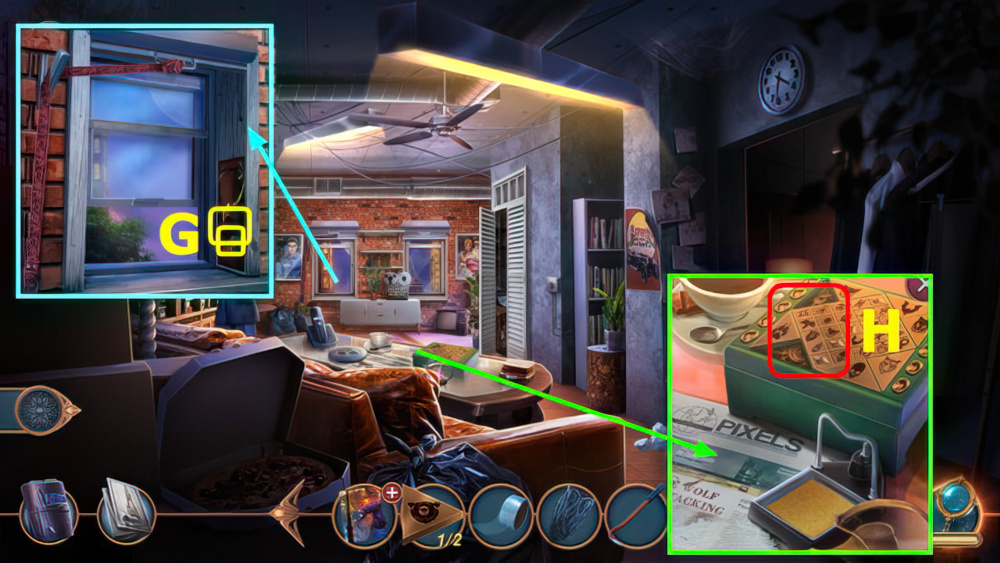
- Use CROWBAR and LIGHTER, take THIMBLE and 2/2 STONE (G).
- Place STONE (H).
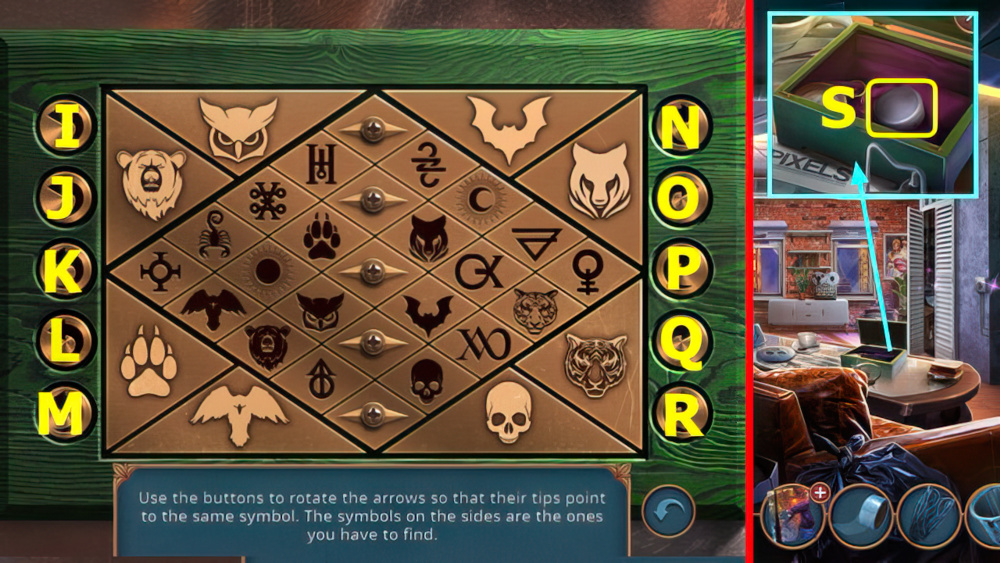
- Easy solution (K-Q)-(K-R)-(P-L)-(K-O)-(J-P)-(J-R)-(M-Q)-(M-O).
- Hard solution (K-Q)-(K-R)-(P-L)-(K-O)-(J-P)-(J-R)-(M-Q)-(M-O)-(I-Q)-(M-P).
- Take FAN RELAY (S).
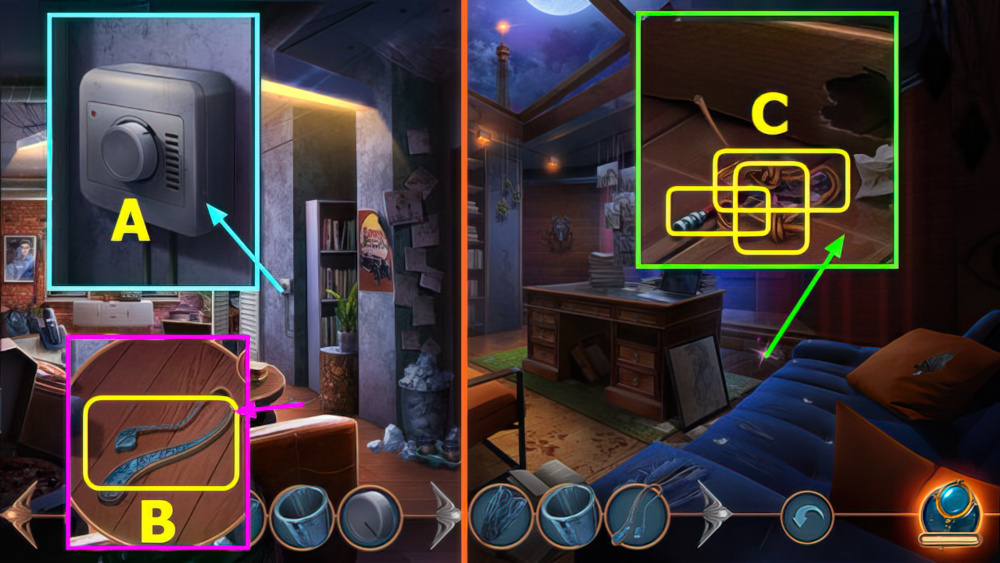
- Place FAN RELAY (A).
- Take BOOKMARK (B).
- Go right.
- Use BOOKMARK, take LACE, FISHING DART, and PHOTO PART (C).
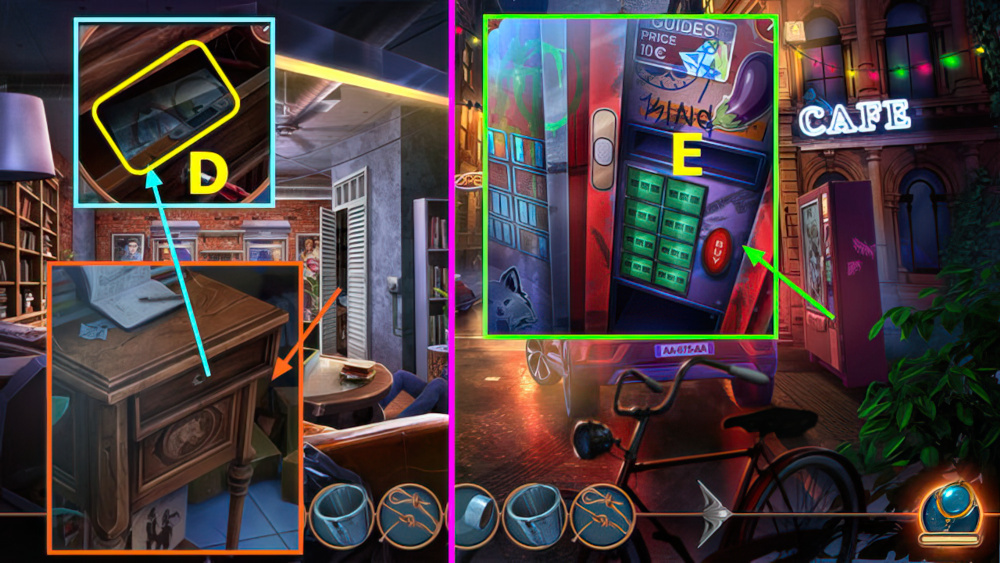
- Use PHOTO PART on PHOTO.
- Use FISHING DART, read note, take 2/2 BANKNOTE (D).
- Walk down.
- Use BANK NOTE (E).
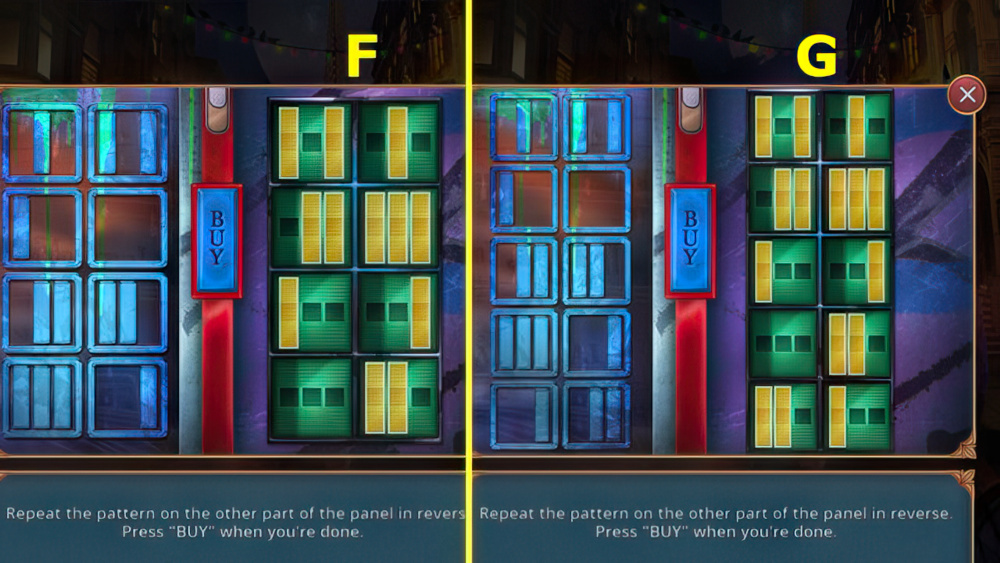
- Easy solution (F).
- Hard solution (G).
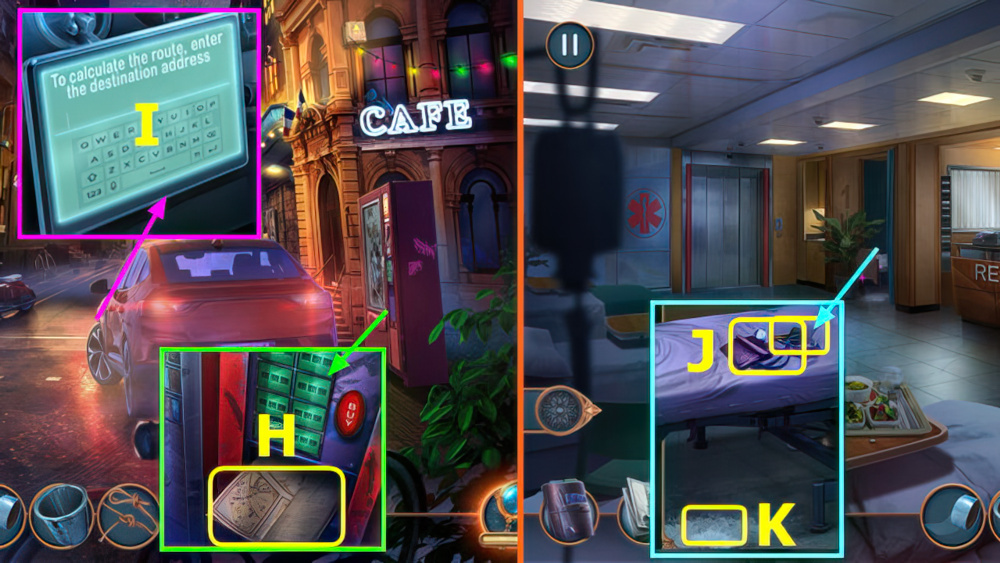
- Take GUIDE (H).
- Open door, use GUIDE (I).
- Take SPHYGMOMANOMETER and NUT (J).
- Use THIMBLE, earn TALCUM (K).
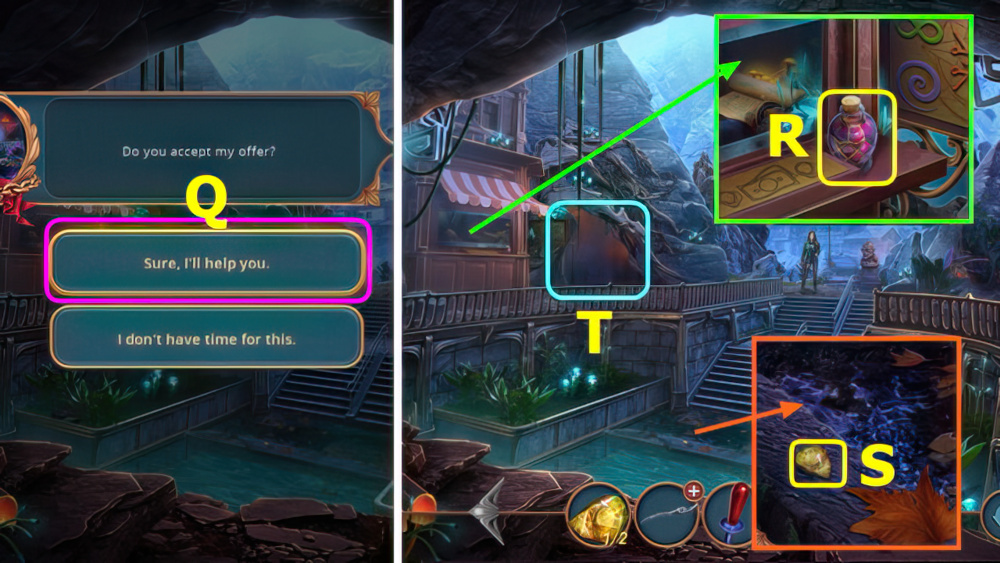
- Select (Q).
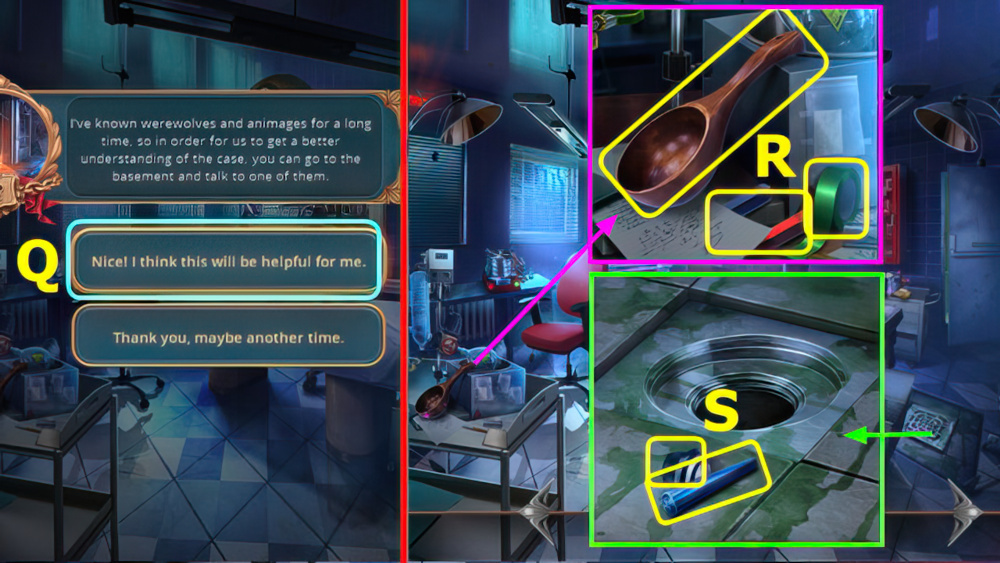
- Take LADLE, TAPE, and MAGNET (R).
- Remove grate, use LACE and MAGNET, take 1/2 WEDGE and METAL BUTTON (S).
- Go right.
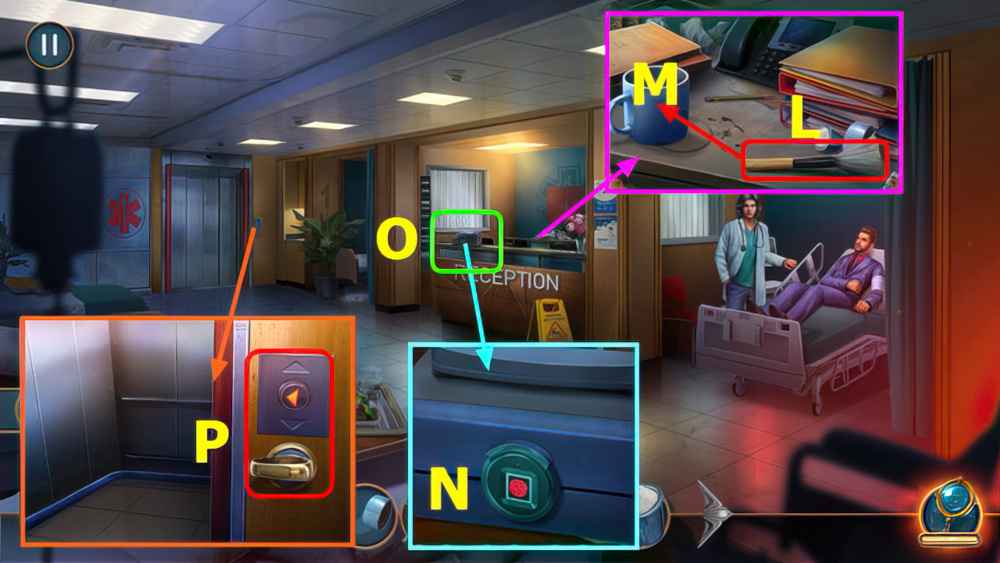
- Read note, place TALCUM and DUCT TAPE, select use (L-M), earn FINGERPRINT.
- Use FINGERPRINT (N).
- Play puzzle, earn WOLF PATPRINT RING (O).
- Select button, use WOLF PATPRINT RING (P).
- Go left.
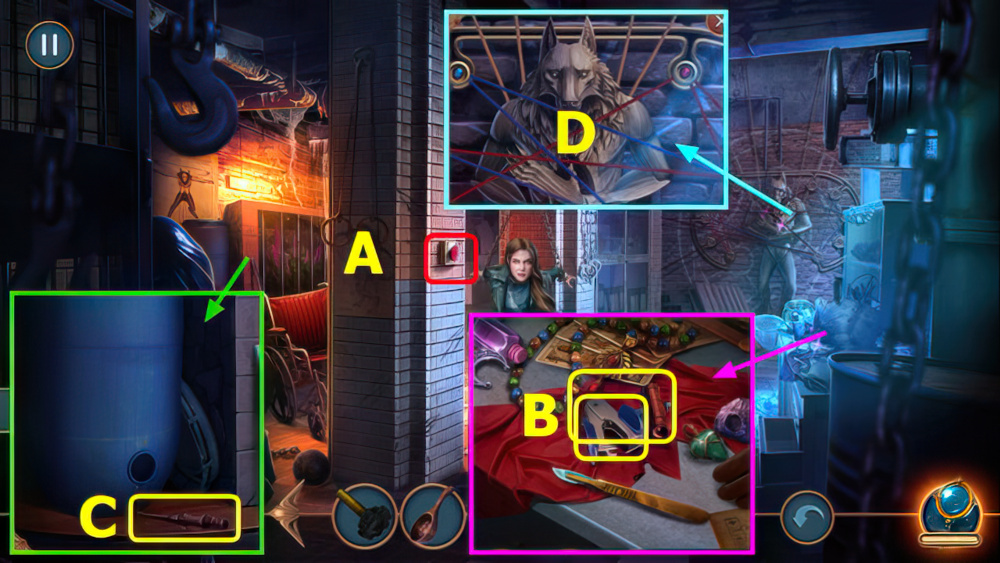
- Select (A).
- Read recipe, take STAPLE REMOVER and CORKSCREW (B).
- Use CORKSCREW, take KNITTING HOOK (C).
- Use KNITTING HOOK (D).
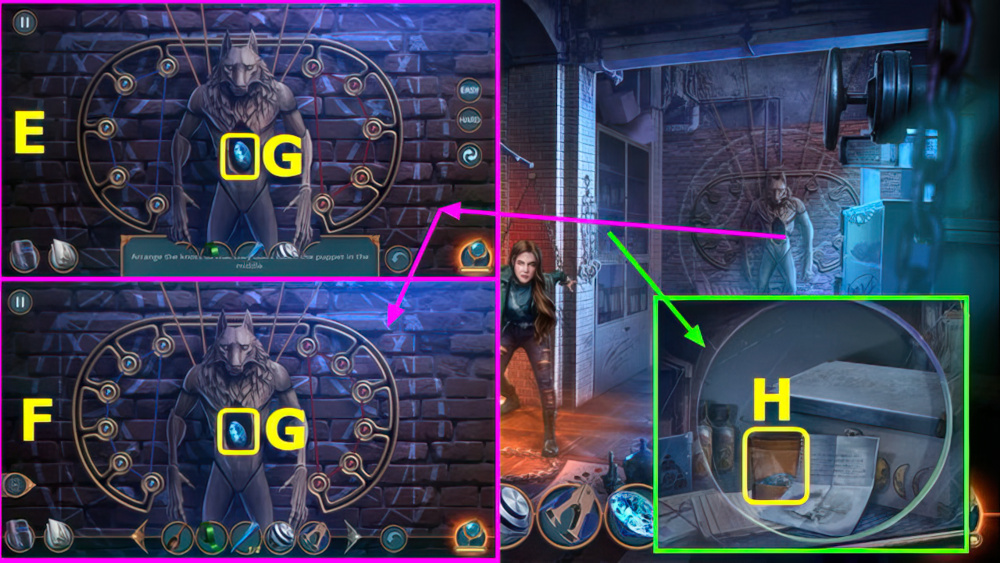
- Easy solution (E).
- Hard solution (F).
- Take DIAMOND (G).
- Use DIAMOND, read note, take SEDIMENT BAG (H).
- Walk down.
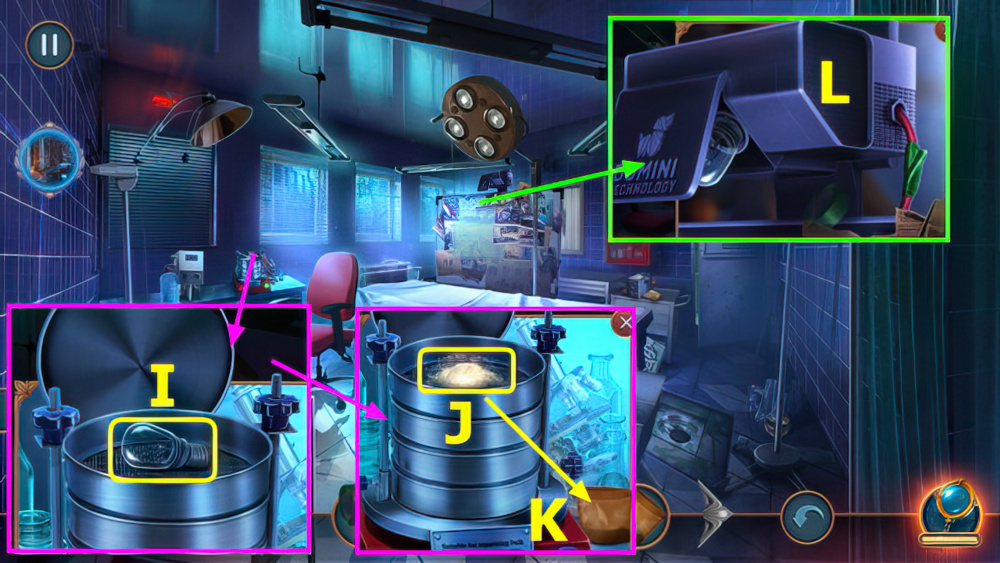
- Use METAL BUTTON, take LIGHTBULB (I).
- Use SEDIMENT BAG, move J-K, take MOON DUST VIAL.
- Use TAPE and LIGHTBULB (L).
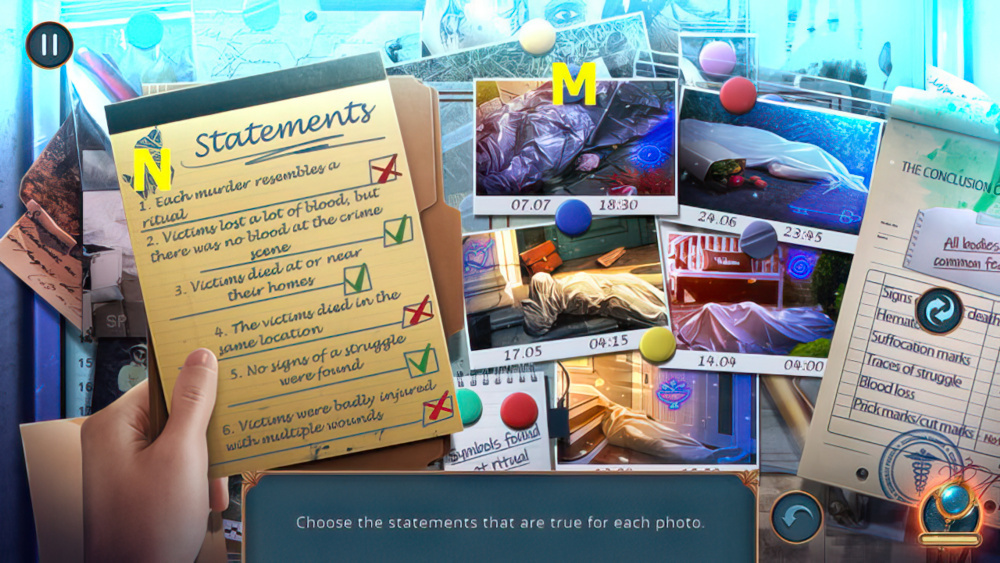
- Select (M), solution (N).
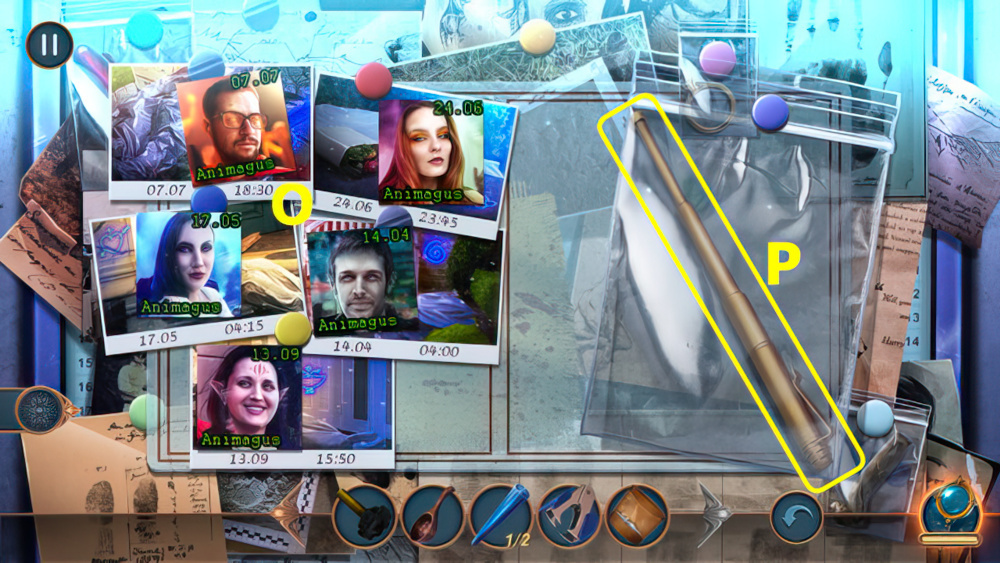
- Solution (O), take POINTER (P).
- Walk down.
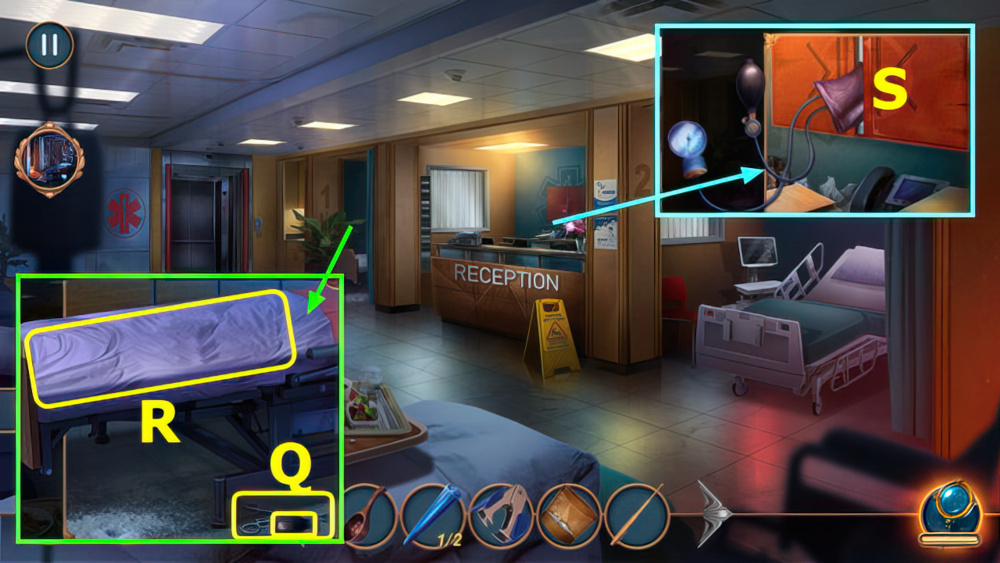
- Use POINTER, take FORCEPS and PEAR (Q).
- Use STAPLE REMOVER, take SHEET (R).
- PEAR on SPHYGMOMANOMETER.
- Use SPHYGMOMANOMETER (S).
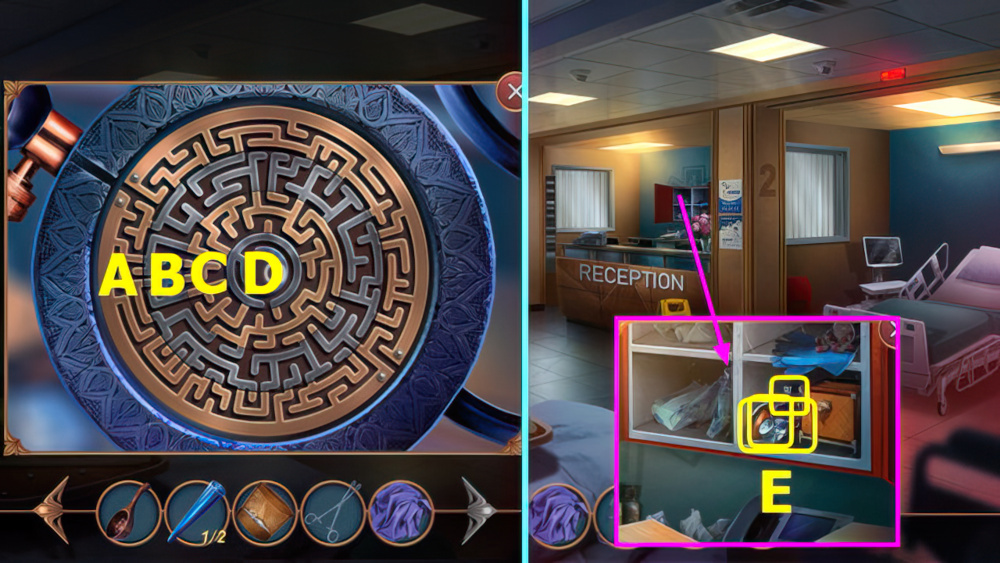
- Easy solution Ax3-Bx5-Cx5-Dx5.
- Hard solution Cx2-Bx3-Dx5.
- Take STETHOSCOPE, FUNNEL, and TOUGH FLASK (E).
- Go left, right.
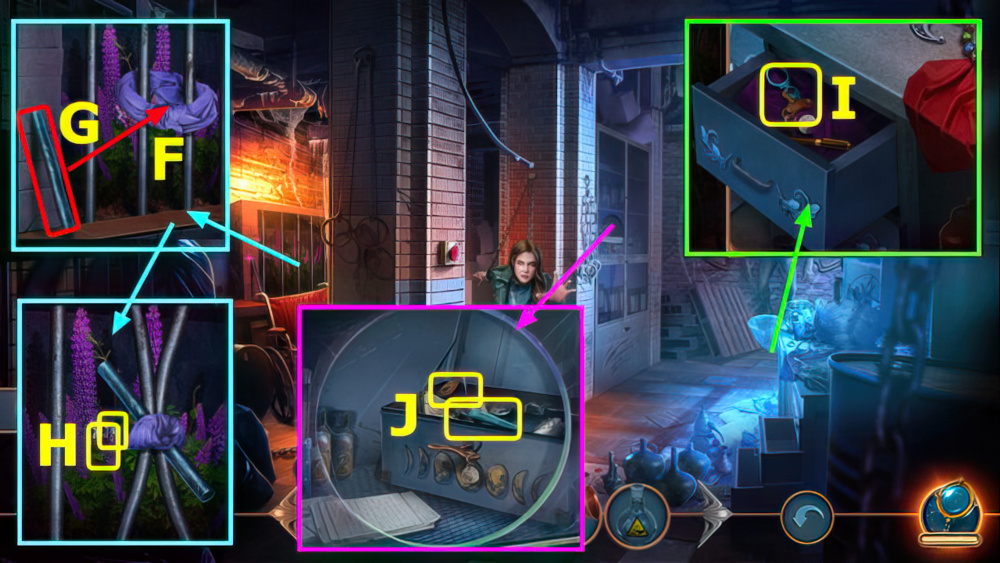
- Use SHEET (F), move (G-F), take ACONITE FLOWER and STEEL SHEET (H).
- Use STEEL SHEET, take WINDUP KEY (I).
- Use WINDUP KEY, take WOLF TEAR and NEEDLE AND THREAD (J).
- Walk down.
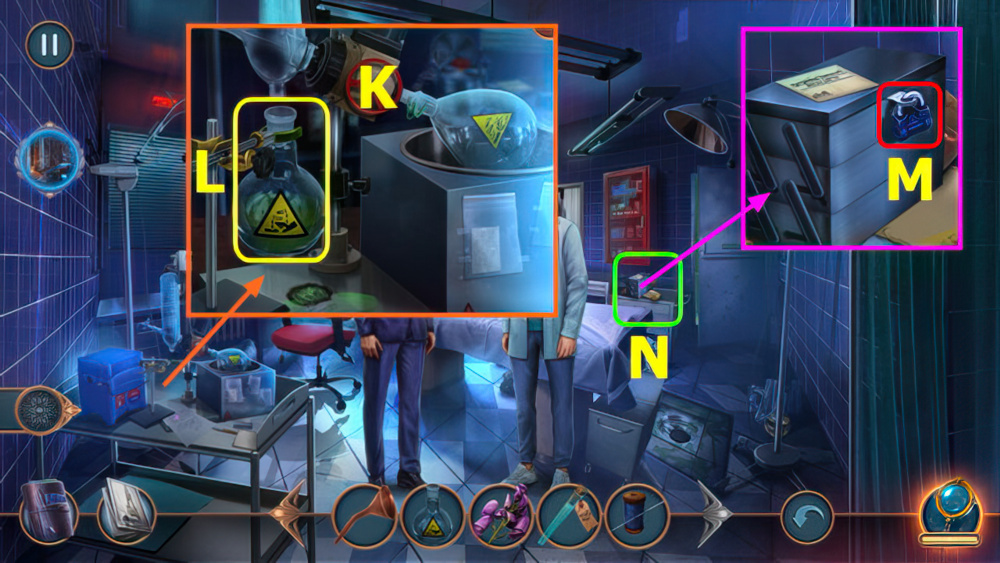
- Select (K), use NUT and TOUGH FLASK (L), select (K), take ACID VIAL.
- Use ACID VIAL (M).
- Play puzzle, earn WOLF TOOTH AMULET (N).
- Walk down.
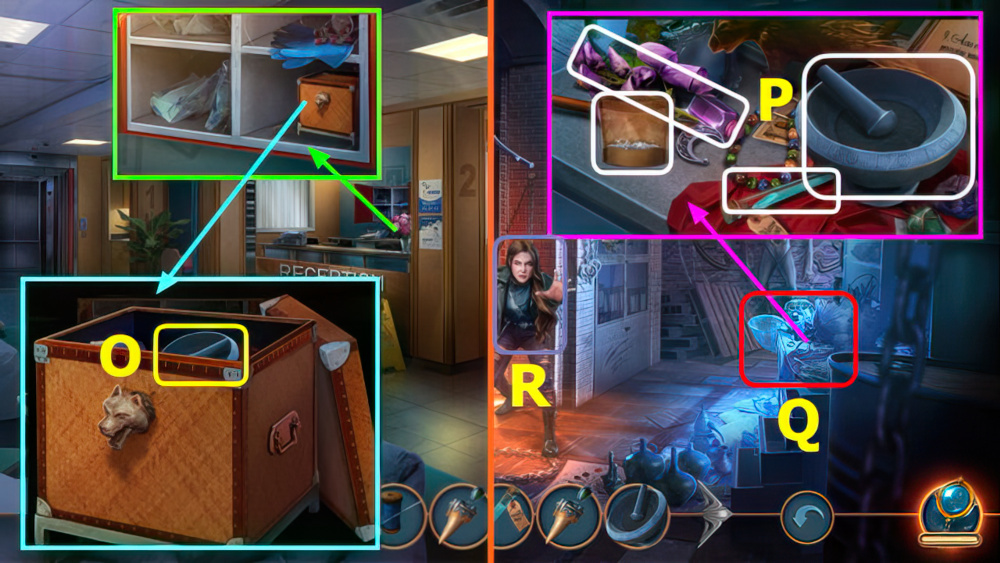
- Use NEEDLE AND THREAD, take MORTAR AND PESTLE (O).
- Go left and right.
- Place MOON DUST VIAL, ACONITE FLOWER, WOLF TEAR, and MORTAR AND PESTLE (P).
- Play puzzle, earn MOON ELIXIR (Q).
- Give MOON ELIXIR (R).
- Walk down.
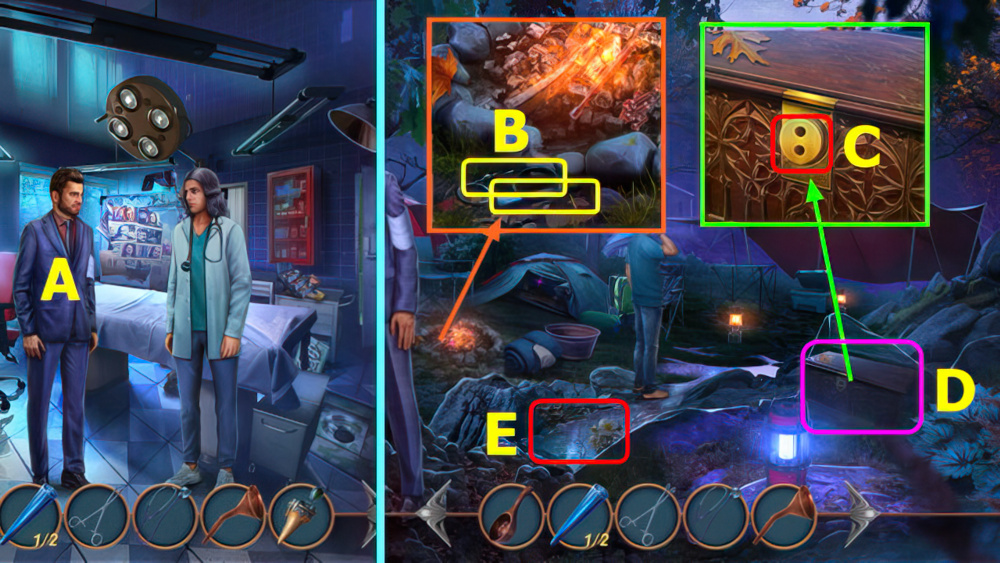
- Give WOLF TOOTH AMULET (A).
- Take STRING SAW and 2/2 WEDGE (B).
- Use WEDGE (C).
- Play puzzle, earn STUN GUN (D).
- Use STUN GUN (E).
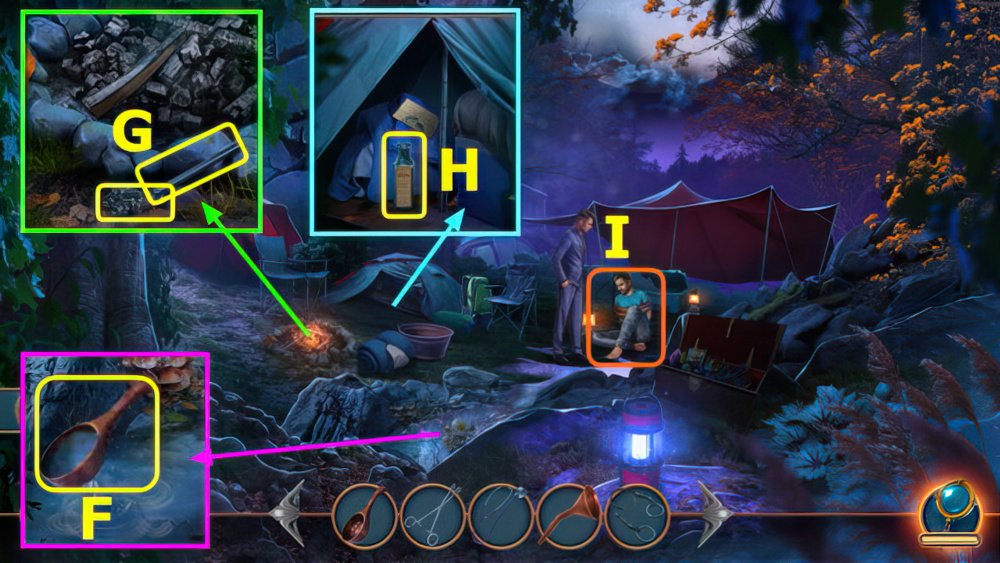
- Use LADLE, earn WATER (F).
- Use FORCEPS and WATER, take SCREWS and EXTENDABLE TUBE (G).
- Use EXTENDABLE TUBE, read note, take AMMONIA (H).
- Use AMMONIA (I).
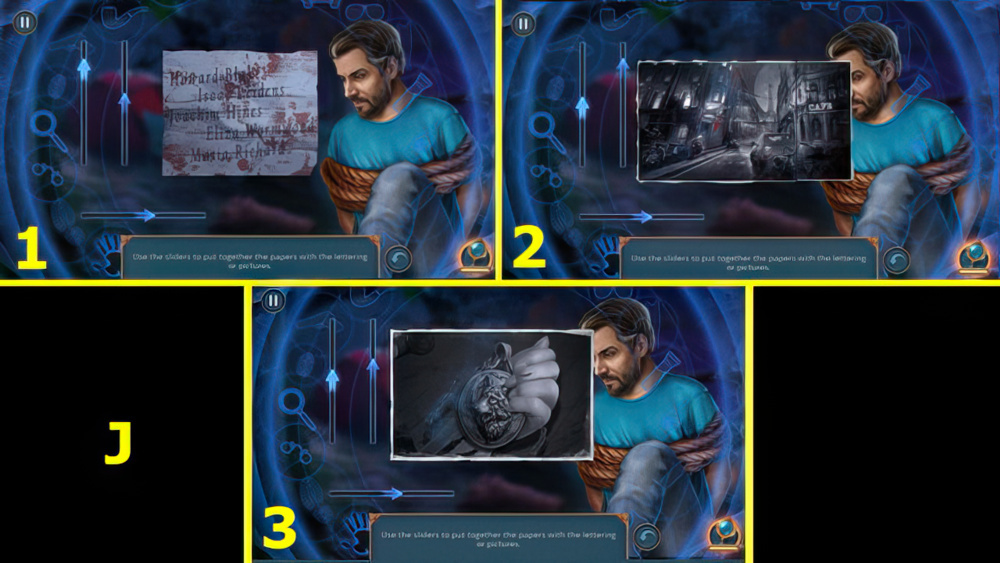
- Easy solution 1-3 (J).
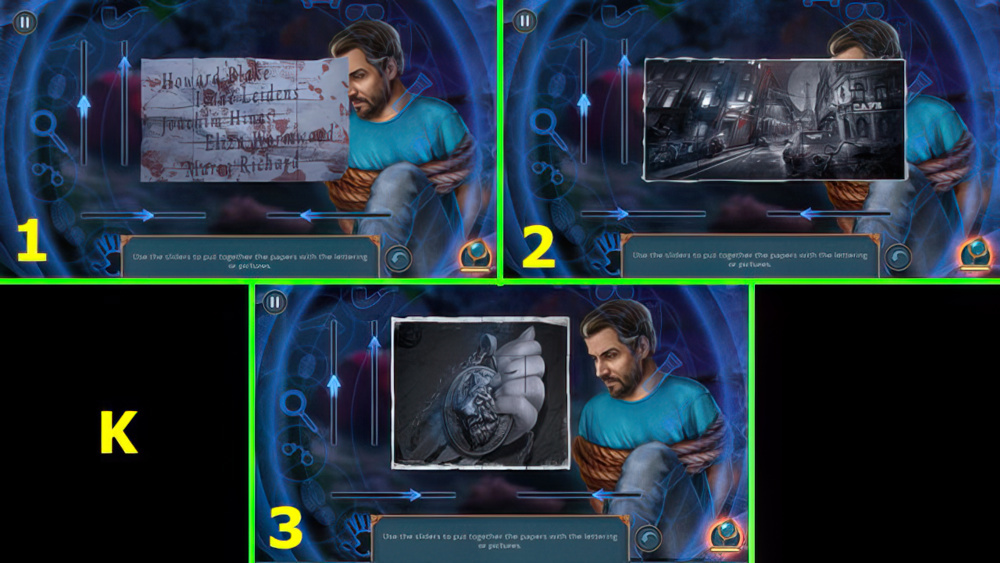
- Hard solution 1-3 (K).
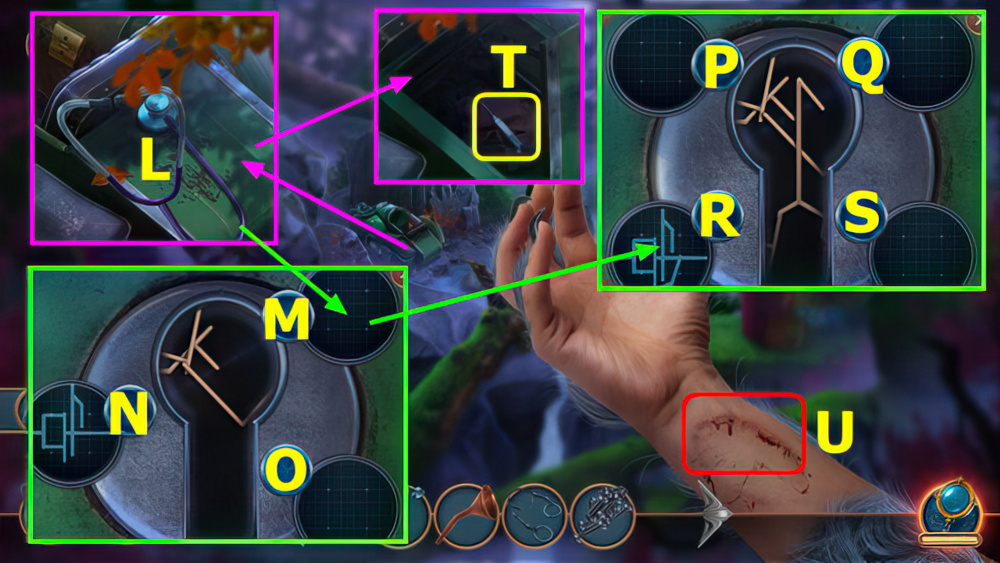
- Use STETHOSCOPE (L).
- Easy solution (M-Nx4-Ox4)-(Mx4-Nx2-Ox2)-(Mx2-Nx4-Ox4).
- Hard solution (P-Rx4-Sx4-Qx4)-(Qx4-Px2-Rx4-Sx4)
- (Px2-Rx5-Qx4-Sx4)-(Qx2-Px4-Rx2-Sx2).
- Read note, take FULL SYRINGE (T).
- Use FULL SYRINGE (U).
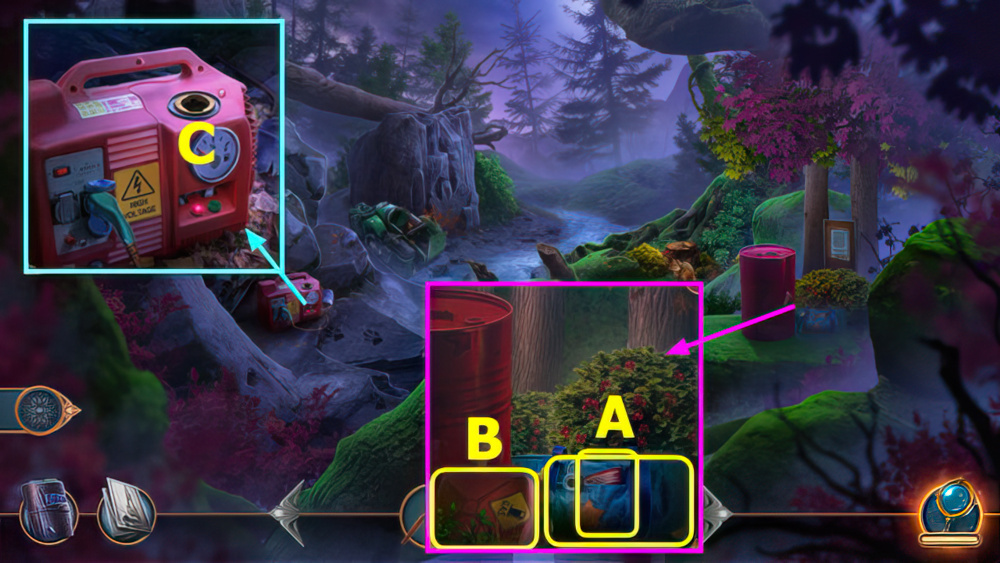
- Read note, take SPORTS BAG and BUTTER (A).
- Use FUNNEL, take GAS CANNISTER (B).
- Use GAS CANNISTER (C).
- Go left.
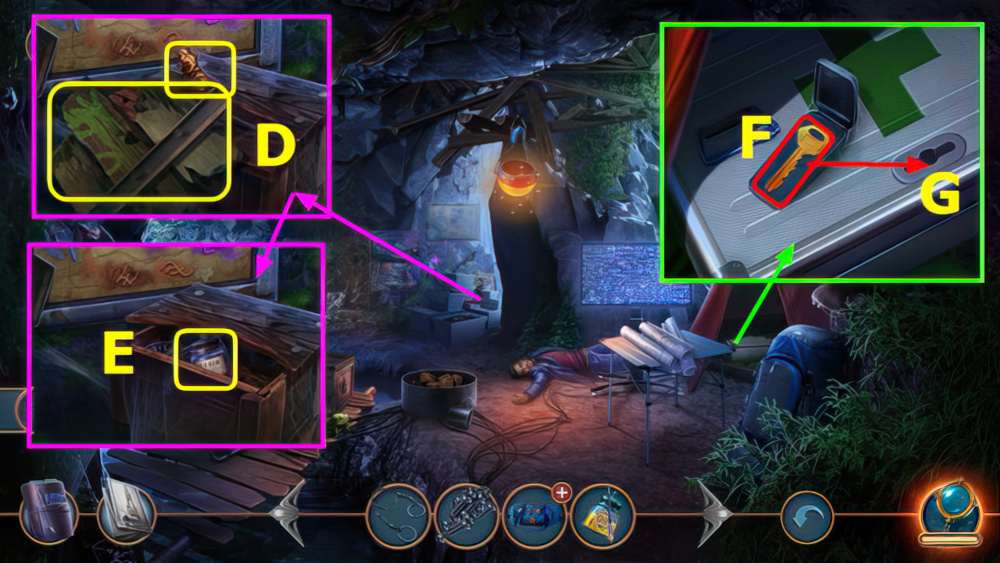
- Take TABLE PART and 1/2 WOLF FIGURINE (D).
- Use STRING SAW, read note, take EPOXY (E).
- Use EPOXY and BUTTER, move (F-G).
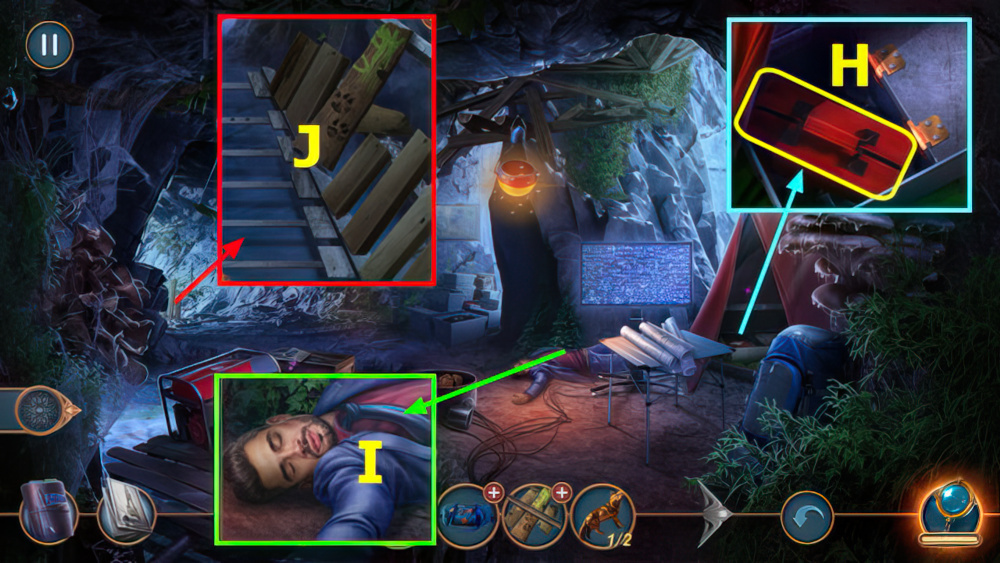
- Take FIRST AID KIT (H).
- Use FIRST AID KIT, earn MULTITOOL (I).
- MULTITOOL on TABLE PART, earn PLANKS.
- Use PLANKS and SCREWS (J).
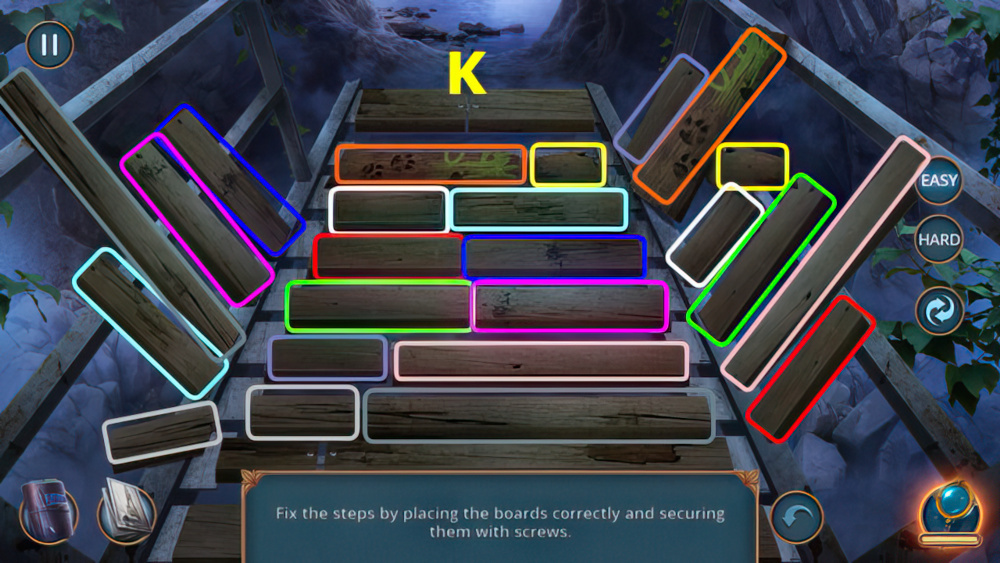
- Easy solution (K).
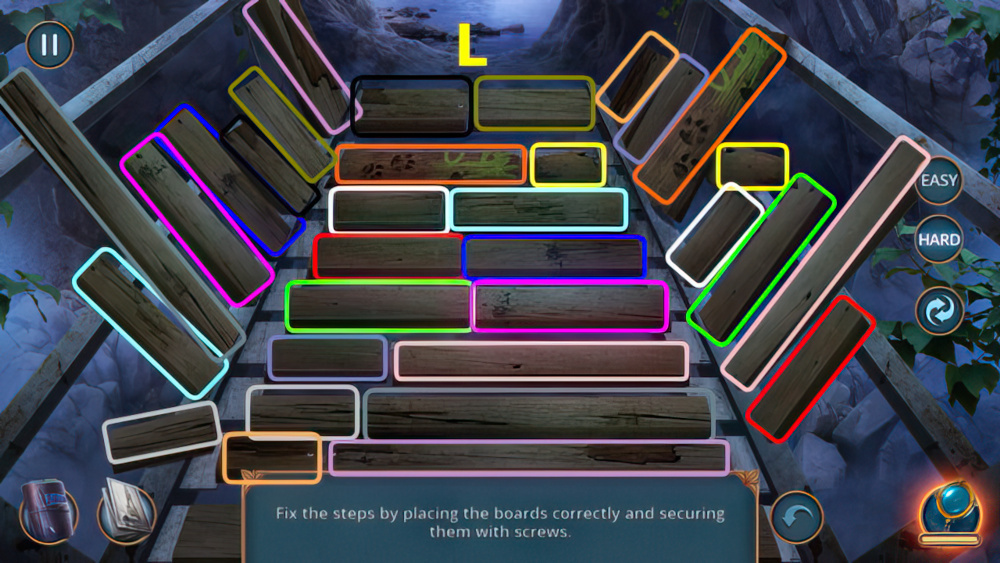
- Hard solution (L).
- Go left.
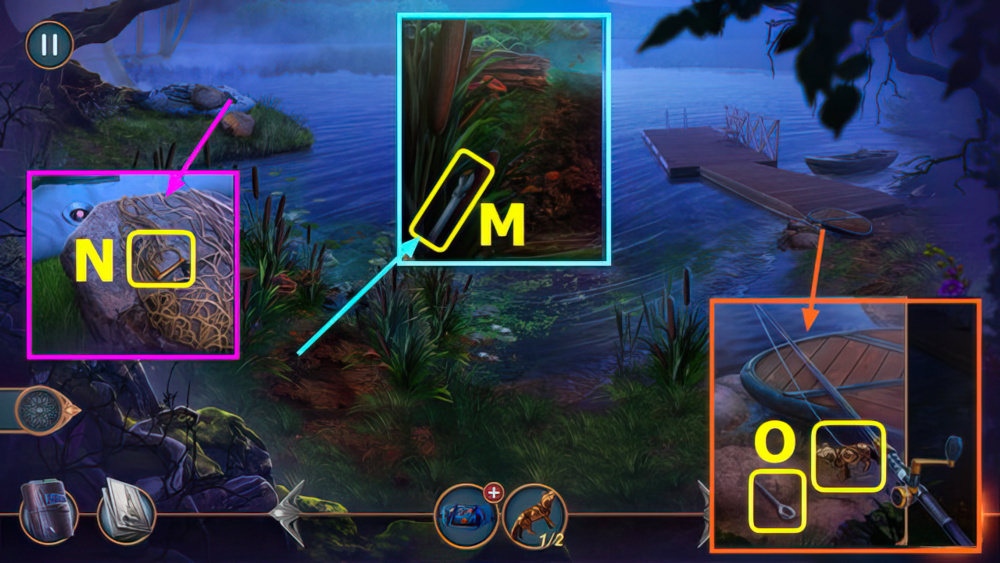
- Take CAN OPENER (M).
- Read note, use CAN OPENER, take FISH ROD HANDLE (N).
- Take CLAMP PART, place FISH ROD HANDLE, take 2/2 WOLF FIGURINE (O).
- Walk down.
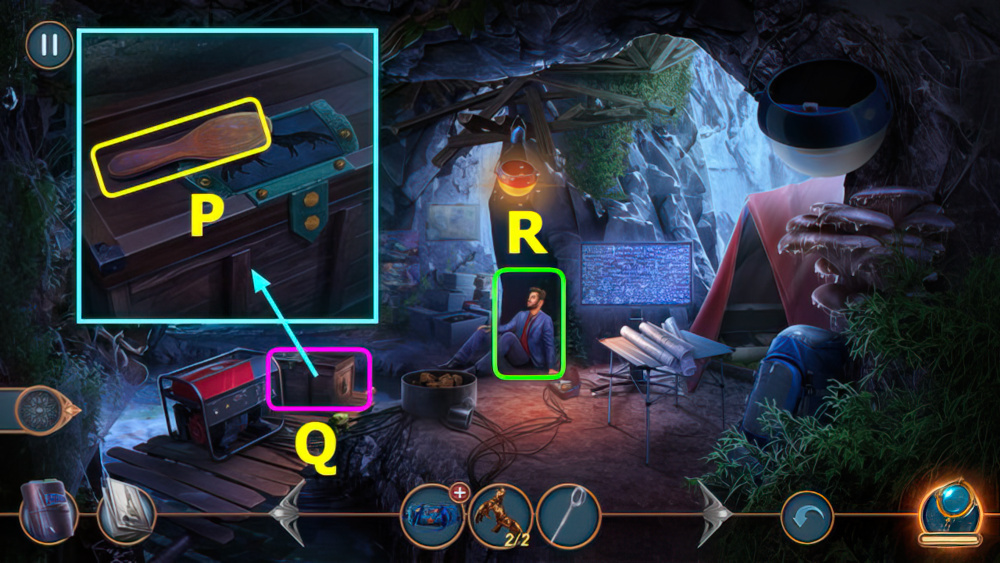
- Read note, take BRUSH, place WOLF FIGURINE (P).
- Play puzzle, earn CRISTOPH’S PHONE (Q).
- Give CRISTOPH’S PHONE, earn STAR-SHAPED AMULET (R).
- STAR-SHAPED AMULET on SPORTS BAG, take PUMP and SHARPENER.
- Walk left.
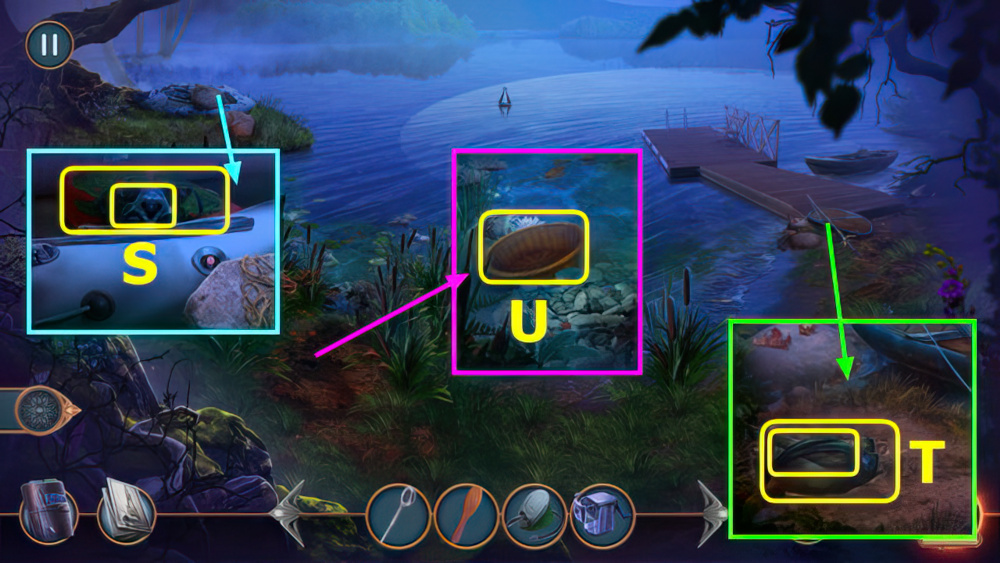
- Use PUMP, take BROKEN OXYGEN MASK. Use BRUSH, take BROKEN PADDLE (S).
- Use BROKEN PADDLE, take RUBBER HOSE and BOOTS (T).
- Use BOOTS, take WOVEN BASKET (U).
- Walk down 2x.
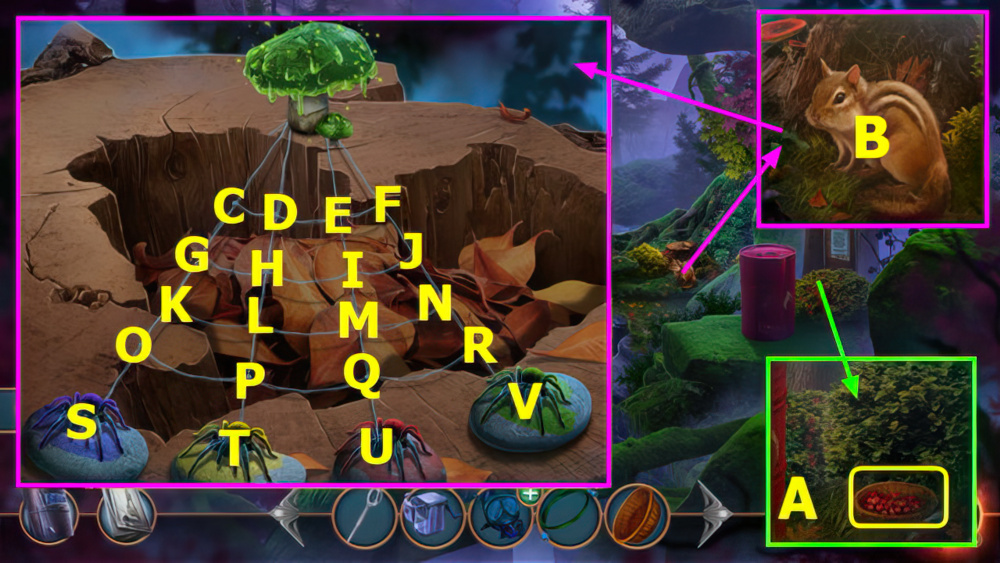
- Use WOVEN BASKET, take BERRY BASKET (A).
- Use BERRY BASKET (B).
- Easy solution (H-I-J-N-R-V)-(C-D-E-F-J-N-R)-(I-M-Q-P-O-S)-(G-K-O-P-Q-U)-(R-Q-P-T)-(O-S).
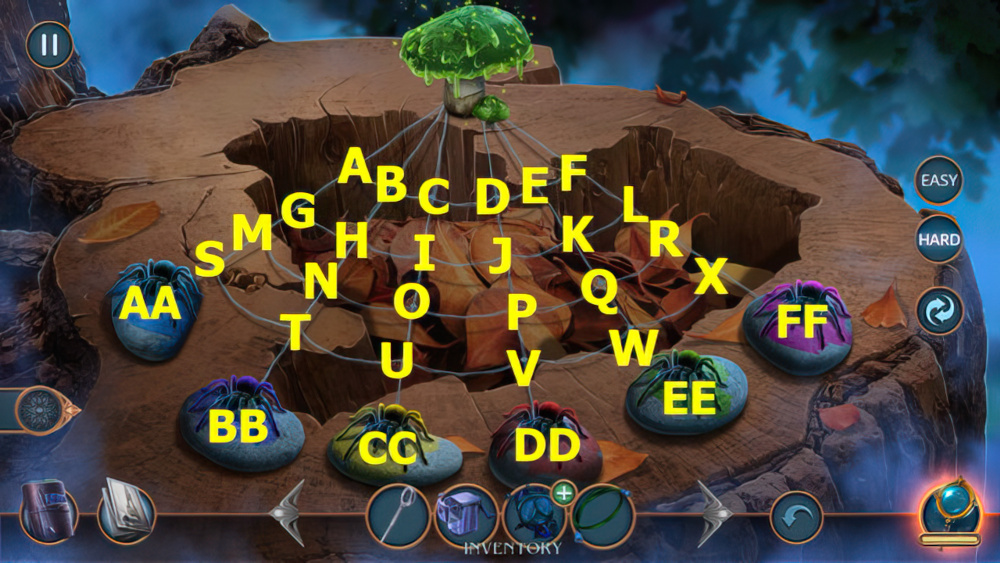
- Hard solution (H-G-M)-(F-L-R-X-W-V)-(P-O)-(U-CC)-(O-U)-(P-Q-W-EE)
- (I-J-K-L-R-X-FF)-(E-K-Q-W-X)-(S-AA)-(M-N-O-P-V-DD)-(X-W-V-U-T-BB).
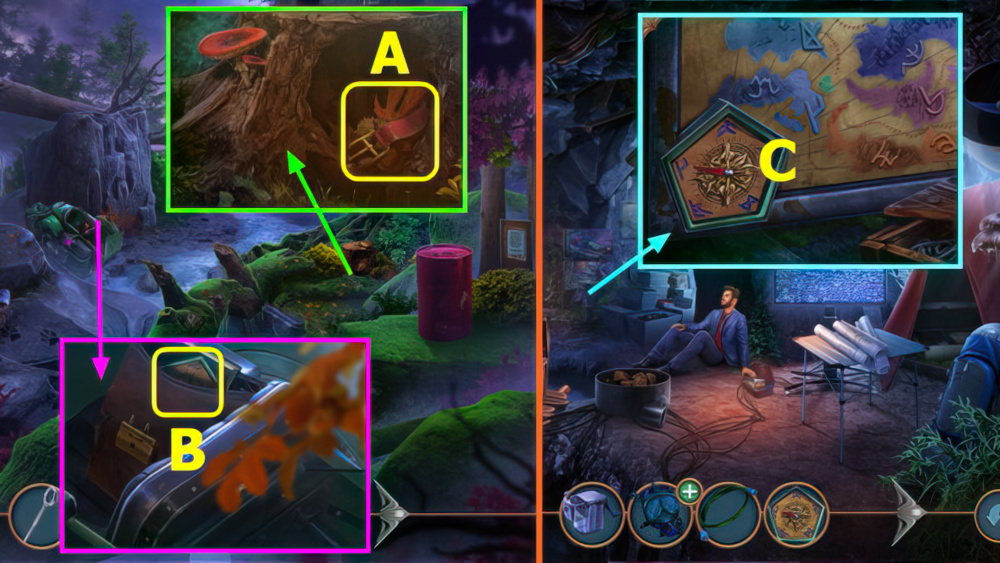
- Take SHOE BUCKLE (A).
- Use CLAMP PART and SHOE BUCKLE, take COMPASS (B).
- Go left.
- Place COMPASS (C).
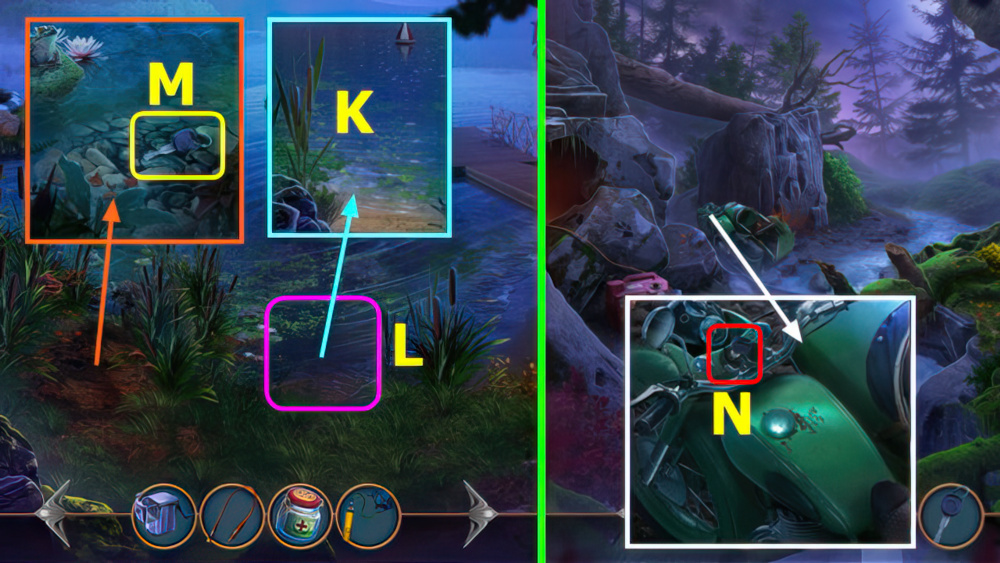
- Use OXYGEN MASK (K).
- Play puzzle, earn METAL DETECTOR (L).
- Use METAL DETECTOR, take IGNITION KEY (M).
- Walk down 2x.
- Use IGNITION KEY (N).
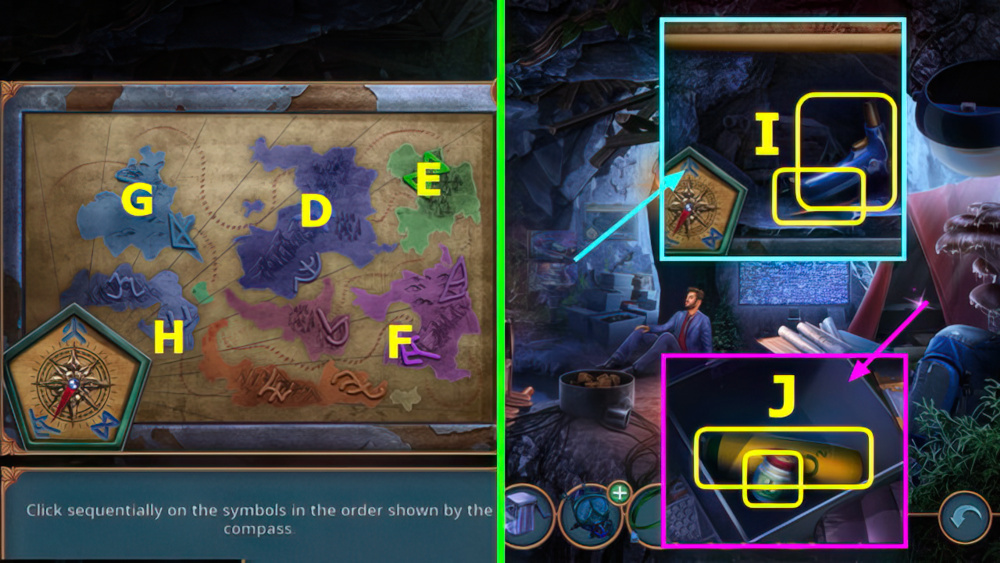
- Easy solution (E-D-F)-(D-F-E)-(D-E-F).
- Hard solution (E-D-F-G-H)-(F-G-D-E-H)-(D-E-H-G-F).
- Take WIRES and GAS BURNER (I).
- Use BURNER, read note, take POWDERED CURE and OXYGEN TANK (J).
- RUBBER HOSE and OXYGEN TANK on BROKEN OXYGEN MASK, earn OXYGEN MASK.
- Go left.
- Receive DETECTIVE’S BADGE.
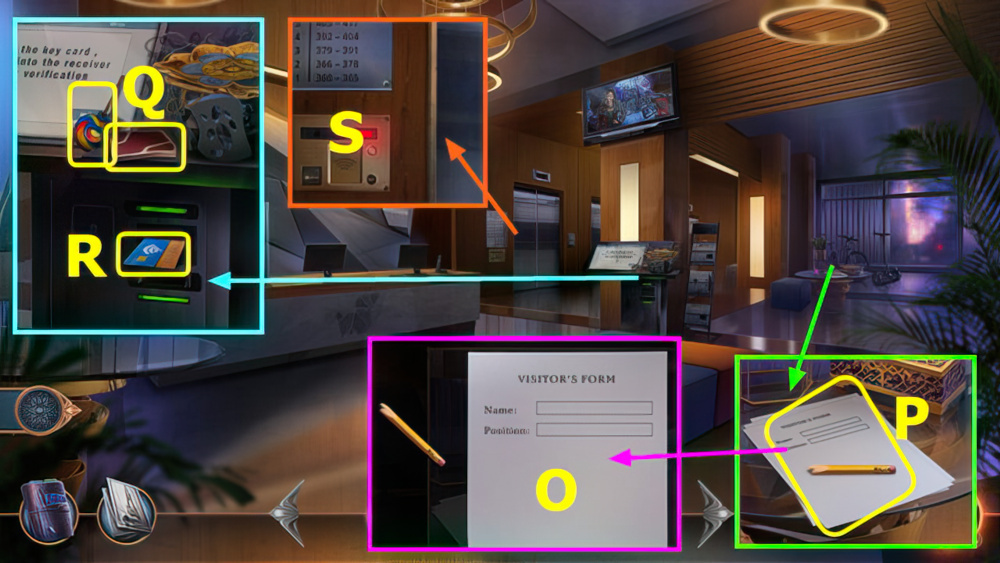
- Use SHARPENER and DETECTIVE’S BADGE (O).
- Take REGISTRATION FORM (P).
- Take 1/3 MOSAIC PIECE and LOLLIPOP (Q), use REGISTRATION FORM, take KEY CARD (R).
- Use KEY CARD (S).
- Go forward.
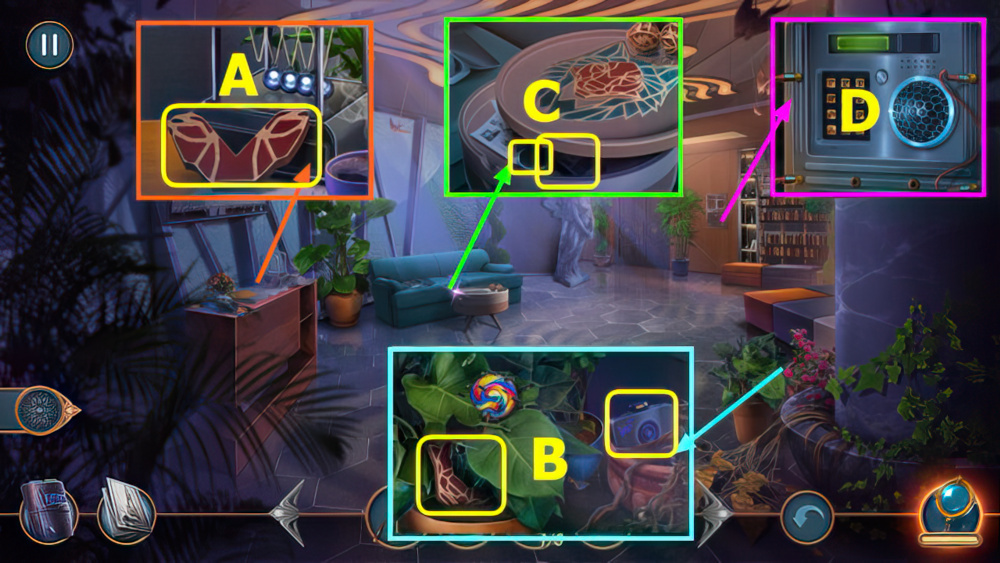
- Take 2/3 MOSAIC PIECE (A).
- Use LOLLIPOP, take 3/3 MOSAIC PIECE and POLAROID (B).
- Place MOSAIC PIECE, take SPEAKER and EMPTY REMOTE (C).
- Use WIRES and SPEAKER (D).
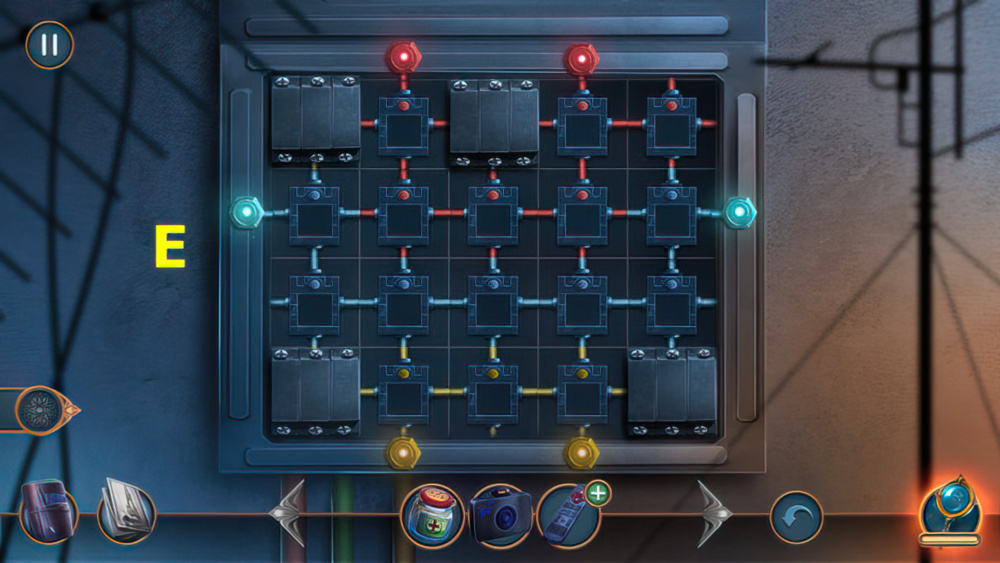
- Easy solution (E).
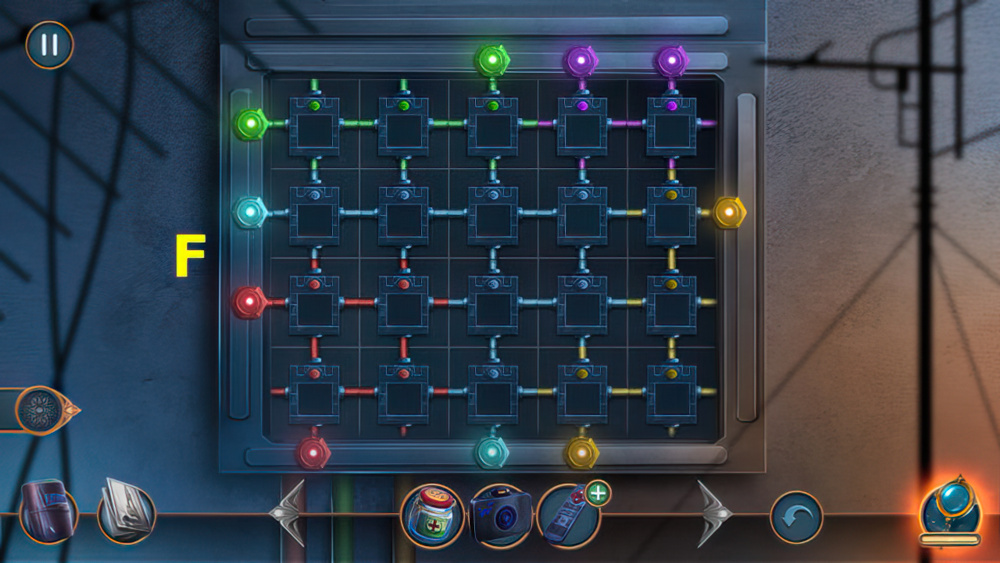
- Hard solution (F).
- Go forward.
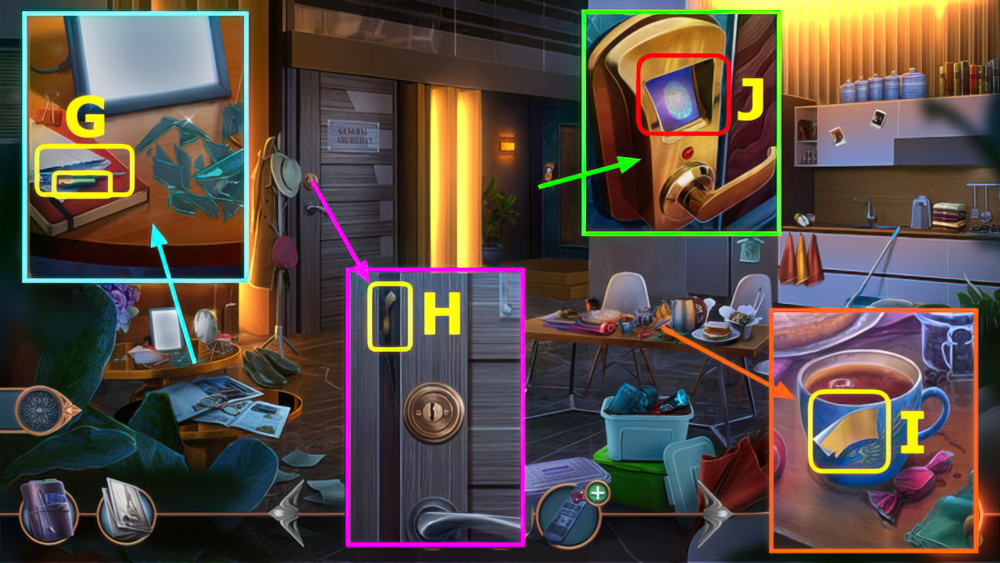
- Read note, take 1/2 BATTERIES and EYEBROW TWEEZERS (G).
- Use EYEBROW TWEEZERS, earn STICKY TAPE (H).
- Use POWDERED CURE and STICKY TAPE, earn FINGERPRINT (I).
- Use FINGERPRINT (J).
- Go forward.
- Read note, take MARKER and DOOR HANDLE (K).
- Use DOOR HANDLE, take ELEVATOR BUTTON (L).
- Place and select ELEVATOR BUTTON, take WIRE (M).
- Use WIRE, select handle (N).
- Play puzzle, earn JACKHAMMER (O).
- Use JACKHAMMER, take STONE, JUICY LEAF, and SCREEDS (P).
- Walk down 2x.
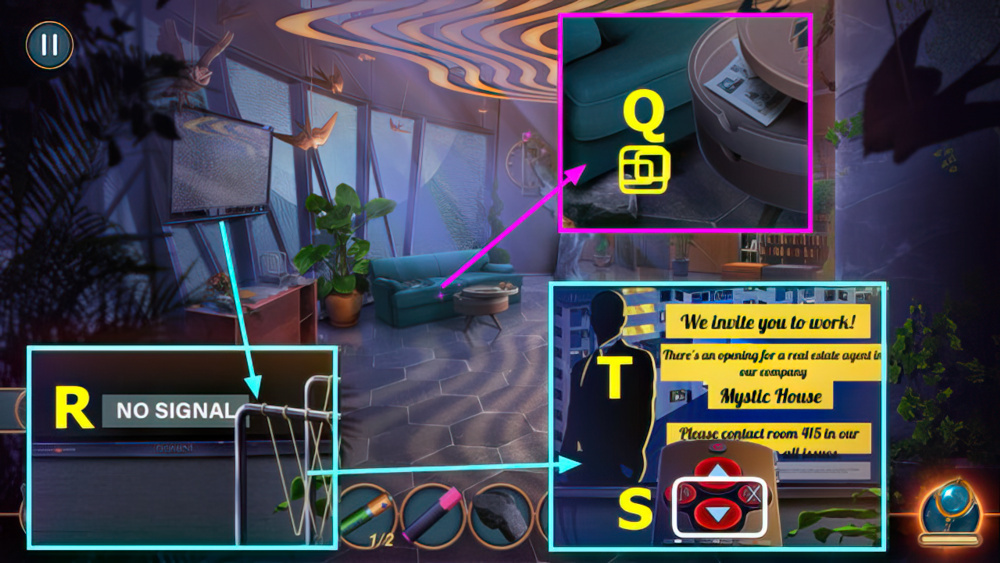
- Use STONE, take EMPTY JAR, 2/2 BATTERIES, and SLEEPING GAS (Q).
- BATTERIES in EMPTY REMOTE, earn REMOTE.
- Use REMOTE (R).
- Select Sx4, use POLAROID (T), earn PROMO CODE.
- Go forward.
- Use PROMO CODE, take ARCHITECT’S OFFICE KEY (A).
- Use ARCHITECT’S OFFICE KEY (B).
- Play puzzle, earn ILLEGIBLE PLAN (C).
- Use MARKER and ILLEGIBLE PLAN, earn BUILDING PLAN (D).
- Go forward.
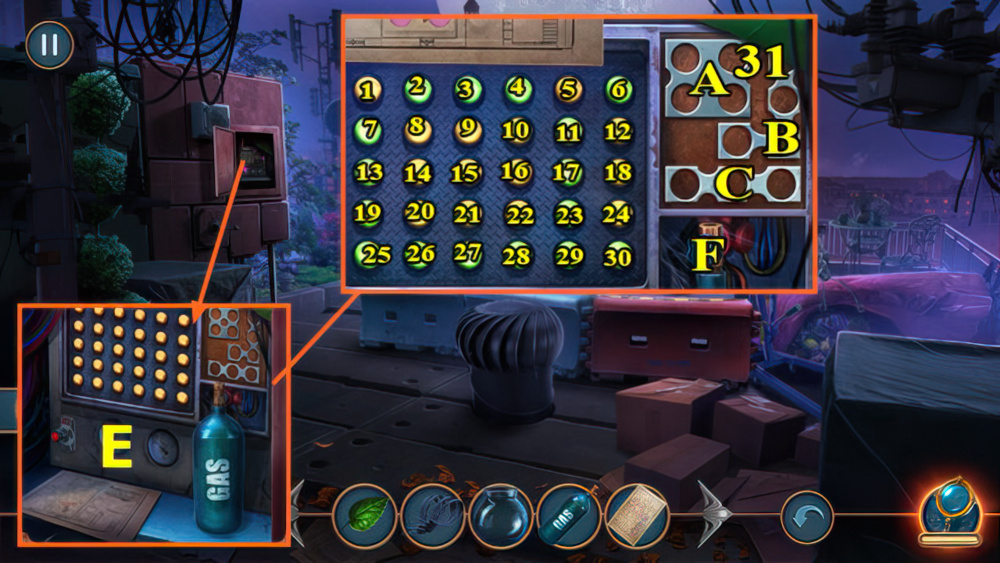
- Use BUILDING PLAN and SLEEPING GAS (E).Solution (F).
- A: 23 24 29 30 B: 14 20 25 26 C: 1 2 3 : F.
- A: 5 6 11 12 B: 18 24 29 30 C: 25 26 27 : F.
- A: 1 2 7 8 B: 6 12 17 18 C: 28 29 30 : F.
- A: 19 20 25 26 B: 2 8 13 14 C: 4 5 6 : F.
- A: 20 21 26 27 B: 3 9 14 15 : F. A-B-C 31: F.
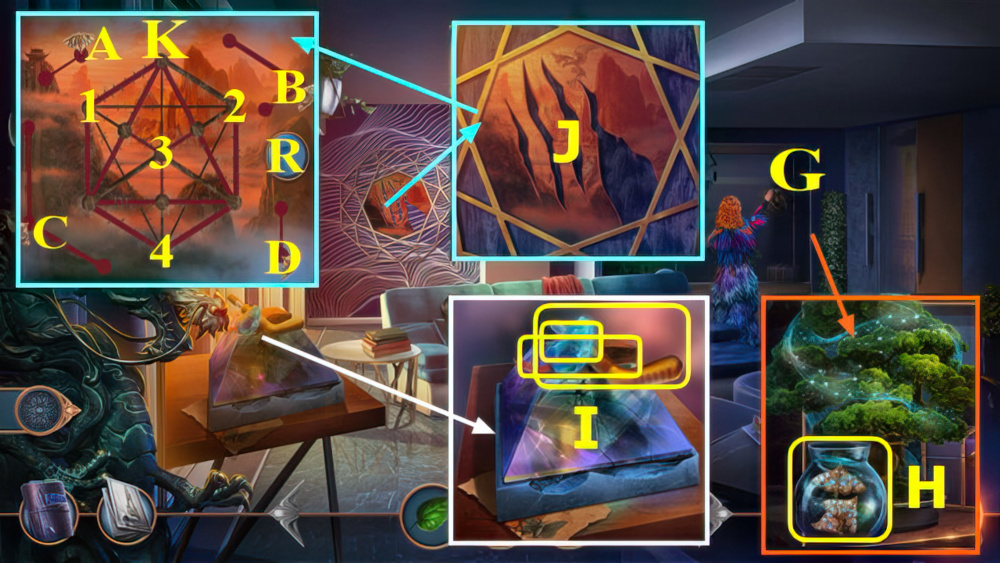
- Select (G).
- Use EMPTY JAR and JUICY LEAF, take SILKWORM BOTTLE (H).
- Read note, take 1/2 STORM SYMBOLS, NAILER, and PANEL (I).
- Use SILKWORM BOTTLE and PANEL (J).
- Solution (K): A-R-R-R-R-1, B-2, C-R-R-3, D-4
- Go forward.
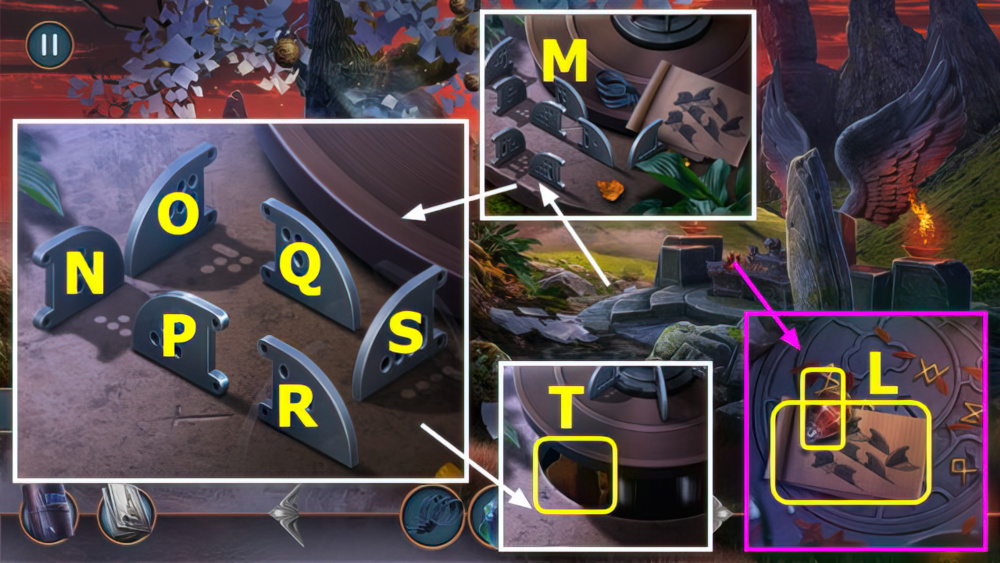
- Take PERFUME and PROMPT (L).
- Read note, use SCREEDS and PROMPT (M).
- Easy solution Sx2-Qx2-Rx2-Px2-Qx2-Ox2-Rx2-S-N-R.
- Take BOWL FRAGMENT (T).
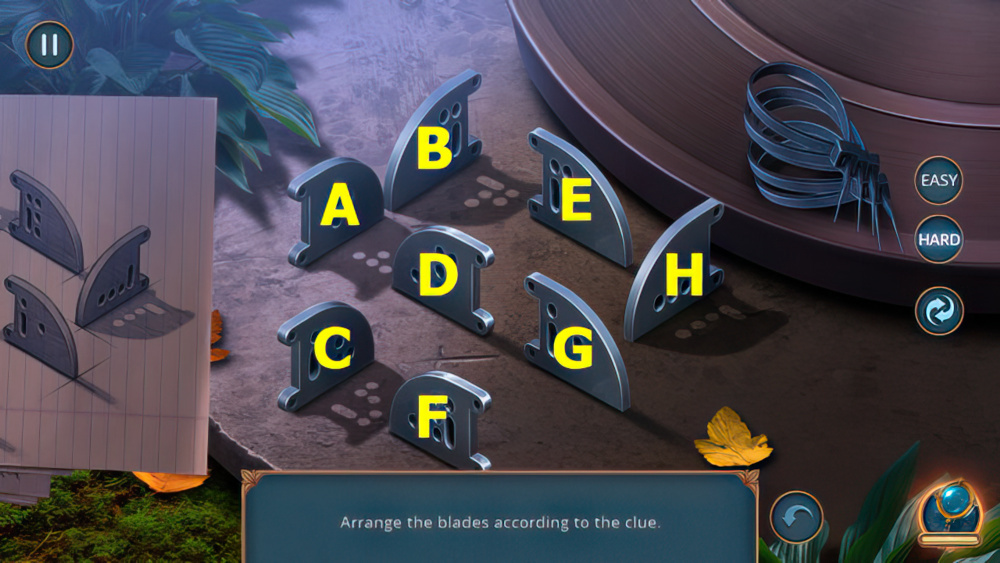
- Hard solution Bx2-F-Hx2-C-Dx3-E-B-F-G-H.
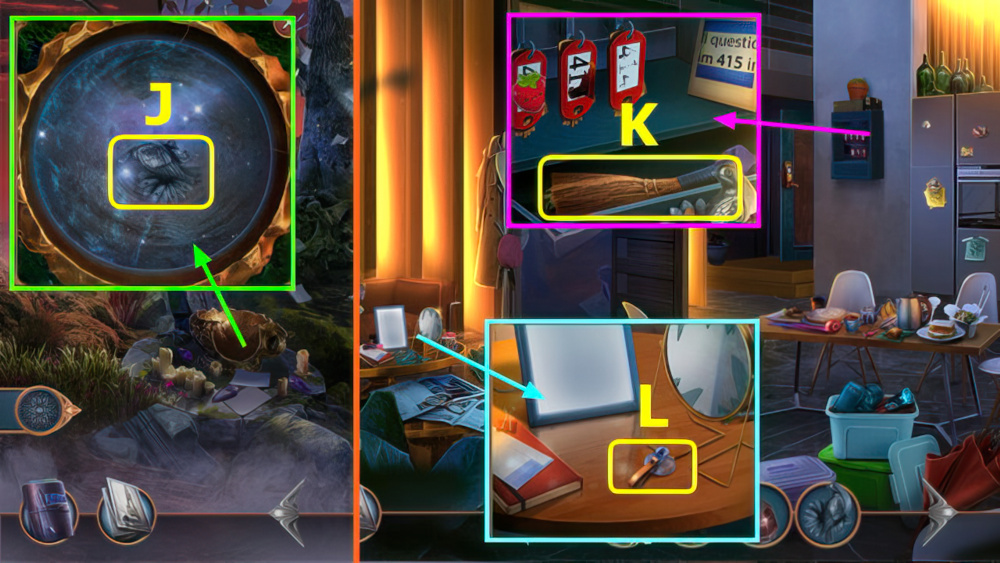
- Place BOWL FRAGMENT, take BIRD (J).
- Walk down 3x.
- Use NAILER and BIRD, take BROOMSTICK (K).
- Use BROOMSTICK, take SUCTION CUP (L).
- Walk down 2x.
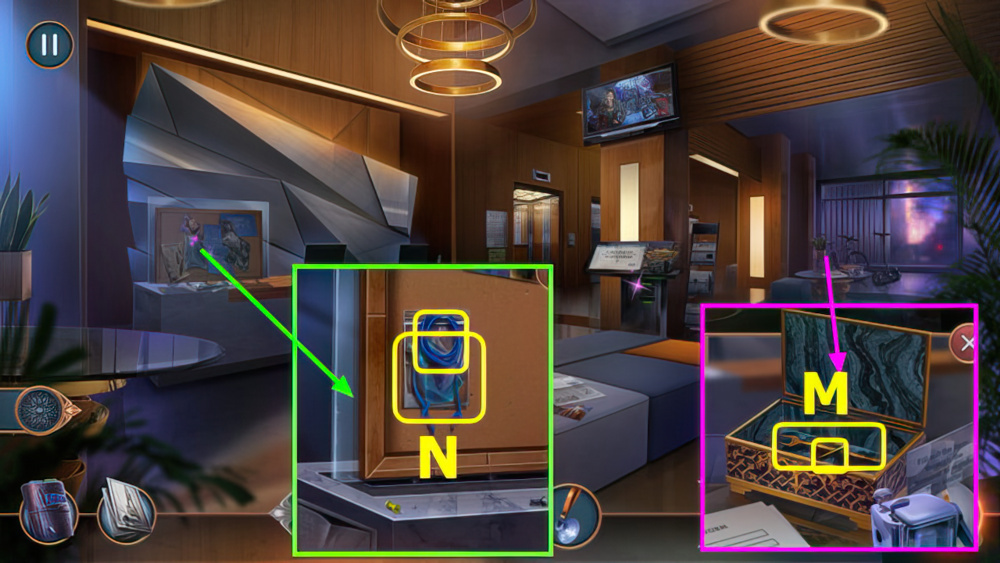
- Open box, use SUCTION CUP, take 1/3 AMULET PIECE and TWO-PRONGED HAIRPIN (M).
- Use TWO-PRONGED HAIRPIN,
- Take SHOELACE and 2/2 STORM SYMBOLS (N).
- Go forward 5x.
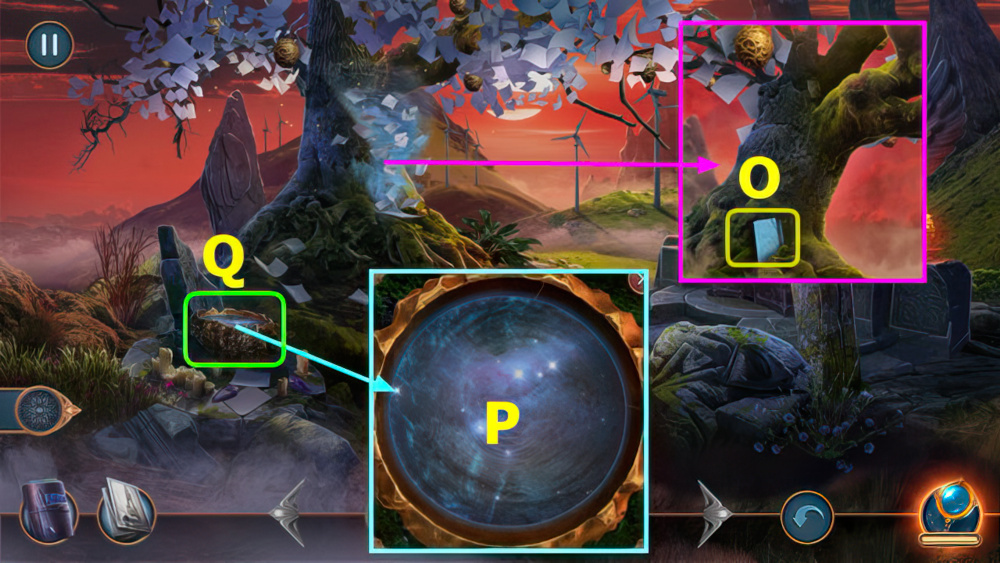
- Use STORM SYMBOLS, take CRYSTAL POMMEL BLUEPRINT (O).
- Use CRYSTAL POMMEL BLUEPRINT (P).
- Play puzzle, earn CRYSTAL POMMEL (Q).
- Walk down.
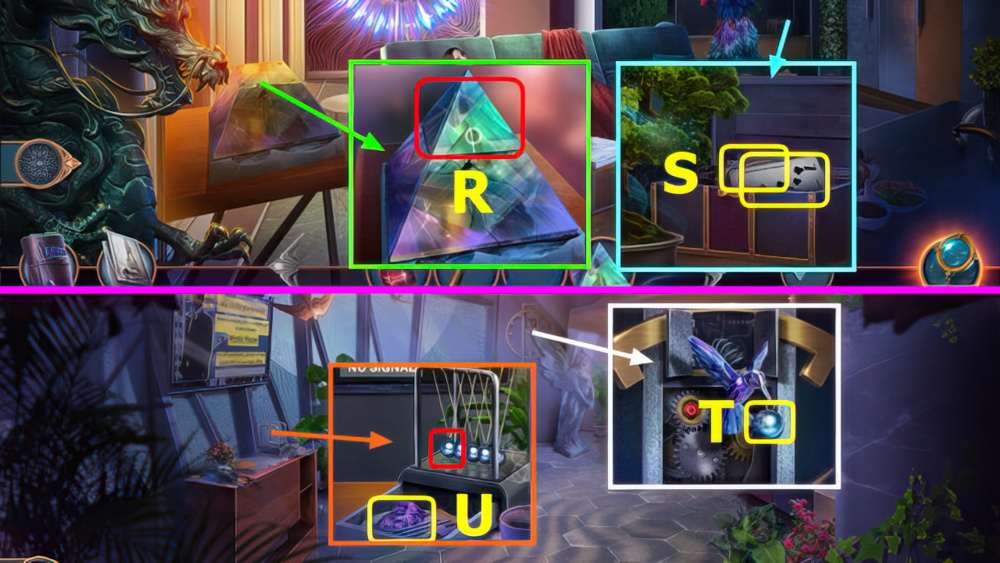
- Place CRYSTAL POMMEL (R), earn HANDKERCHIEF.
- Use PERFUME and HANDKERCHIEF, take 1/3 CARDS and GEAR (S).
- Walk down 3x.
- Place GEAR, take METAL BALL (T).
- Place METAL BALL, read note, take MAGICAL POWDER (U).
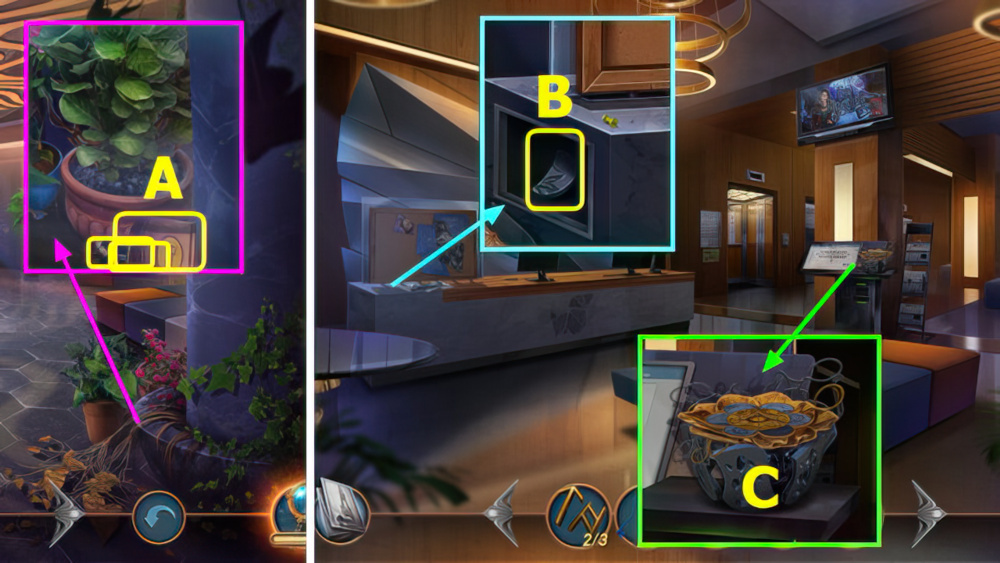
- Use MAGICAL POWDER, take PACKAGED DRY CLAY, 2/3 AMULET PIECE, and BIRD CLAW (A).
- Walk down.
- Use BIRD CLAW, take FLOWER (B).
- Place FLOWER (C).
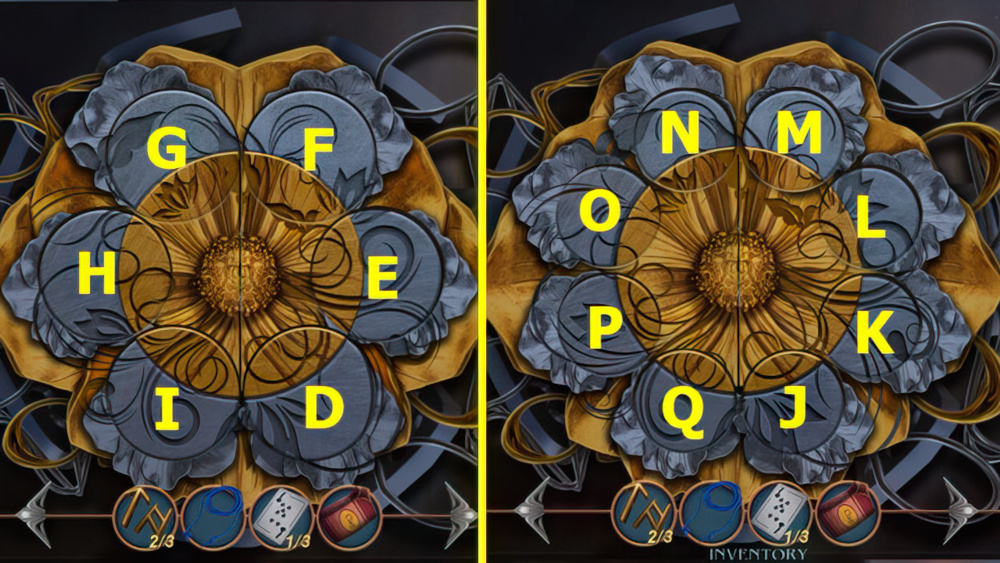
- Easy solution D-E-F-G-H-I.
- Hard solution J-K-L-M-N-O-P-Q.
- Take PRUNER.
- Go forward 3x.
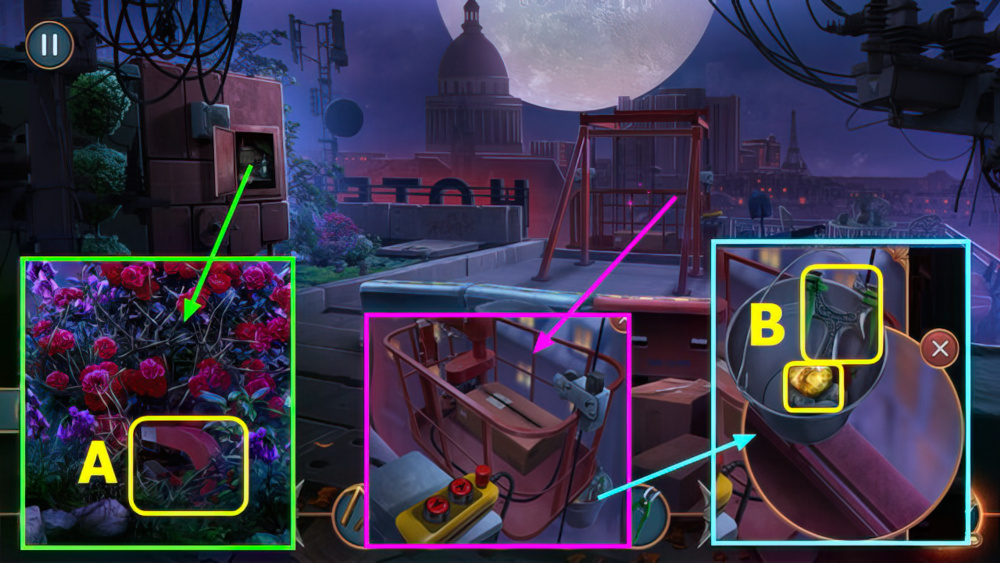
- Use PRUNER, take MAGNET (A).
- Use SHOELACE and MAGNET, take 1/2 GEMSTONES and SLINGSHOT (B).
- Go forward 2x.
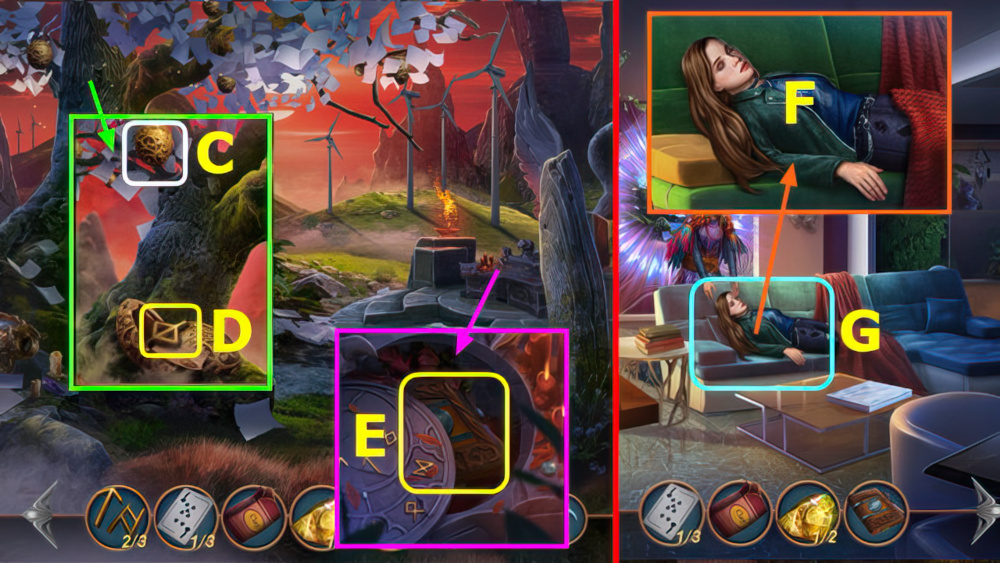
- Use SLINGSHOT (C), open egg, read note, take 3/3 AMULET PIECE (D).
- Use AMULET PIECE, take BOOK (E).
- Walk down.
- Use BOOK (F).
- Play puzzle (G).
- You earn CUP.
- Use CUP, earn CUP, take 2/3 CARDS (H).
- Take 1st PLIERS PART, use PACKAGED DRY CLAY and CUP, take CLAY MOLD (I).
- Place CLAY MOLD, take BRICK (J).
- Place BRICK (K).
- Go right.
- Take LEVER and 3/3 CARDS (L),Use CARDS (M).
- Earn the most points to win, this mini-game is randomly generated (N).
- Earn GOLDEN TOKEN.
- Take TIN, use GOLDEN TOKEN (O).
- Go forward (P).
- Select (Q).
- Take ROSE OIL (R).
- Take 2/2 GEMSTONES (S).
- Go left (T).
- Earn SCALE CUP.
- Read note, take 1/2 PLASTIC SPOKES (U).
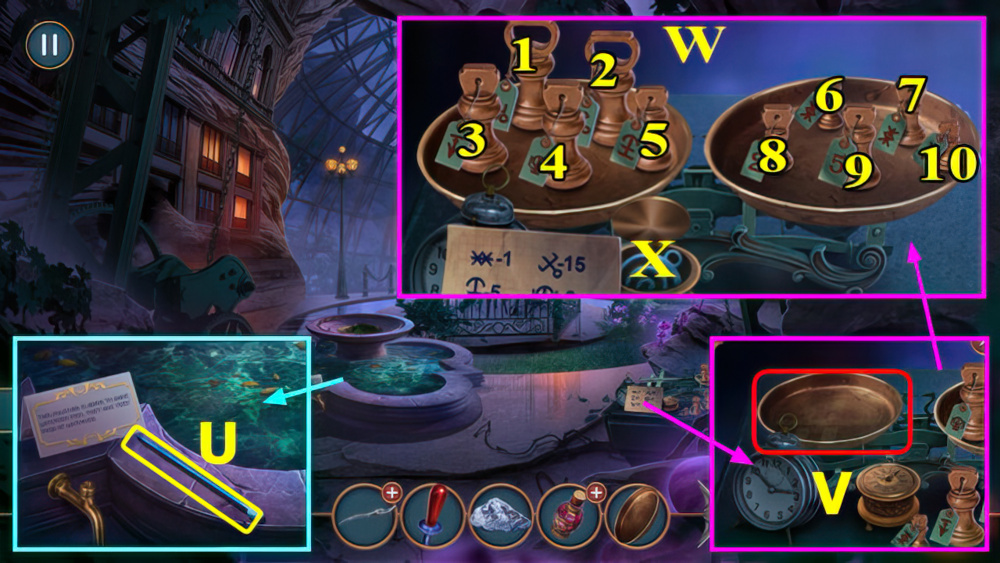
- Place SCALE CUP (V).
- Solution (W)).
- EASY: 2-6, 4-8.
- HARD: 1-6, 5-8.
- Take SPIRAL NECKLACE (X).
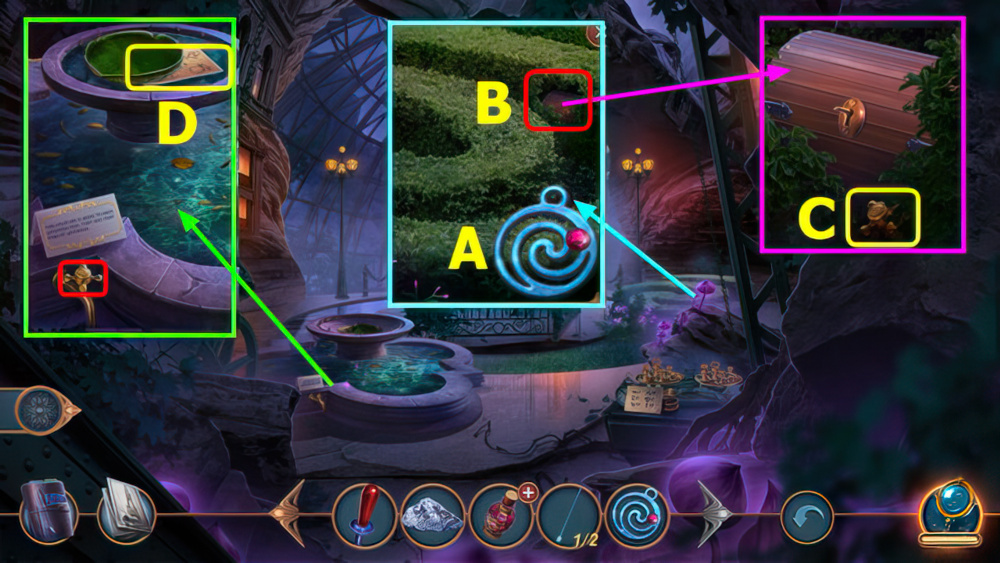
- Place SPIRAL NECKLACE (A).
- Select 2x (B).
- Take VALVE (C).
- Use VALVE, take CODE (D).
- Walk down.
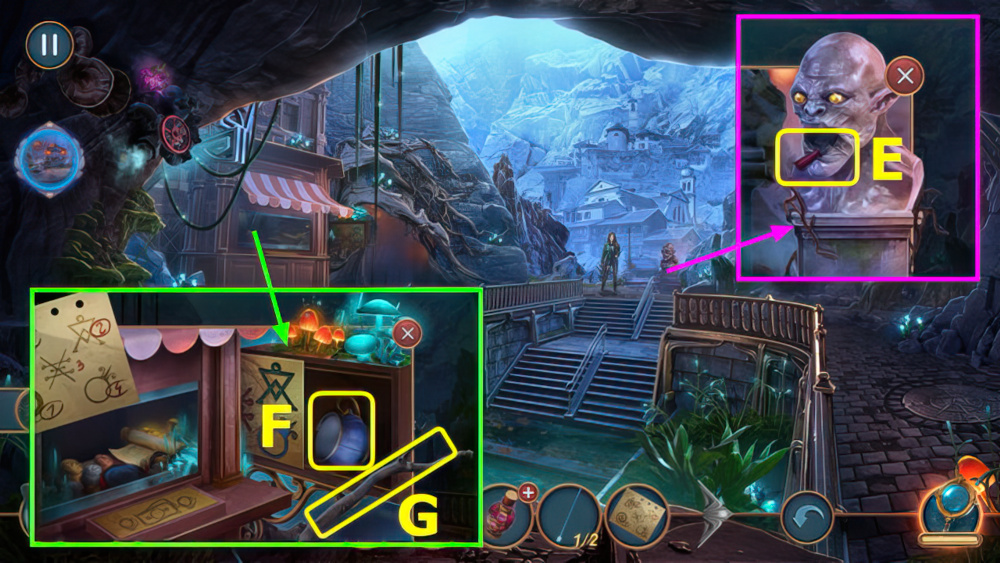
- Use GEMSTONES, take RASP (E).
- Use CODE, take PORCELAIN CUP (F).
- Use RASP, earn BRANCH (G).
- Go left.
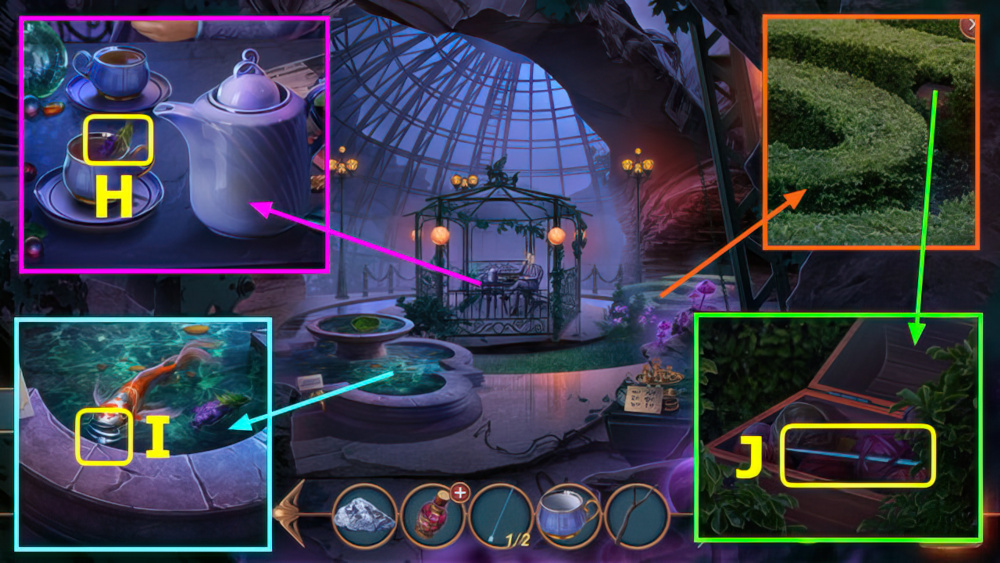
- Use PORCELAIN CUP, take LAVENDER BRANCH (H).
- Use LAVENDER BRANCH, take TWO-LAYER RING (I).
- Use TWO-LAYER RING, take 2/2 PLASTIC SPOKES (J).
- Walk down.
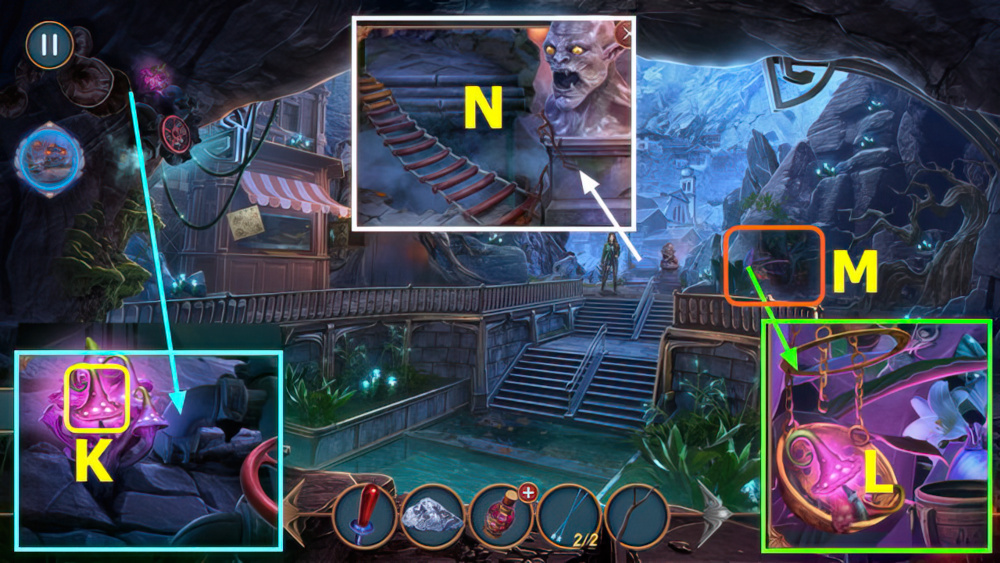
- Use BRANCH, earn GLOWING MUSHROOM (K).
- Place GLOWING MUSHROOM (L).
- Play puzzle, earn ROPE LADDER (M).
- Use ROPE LADDER (N).
- Go forward.
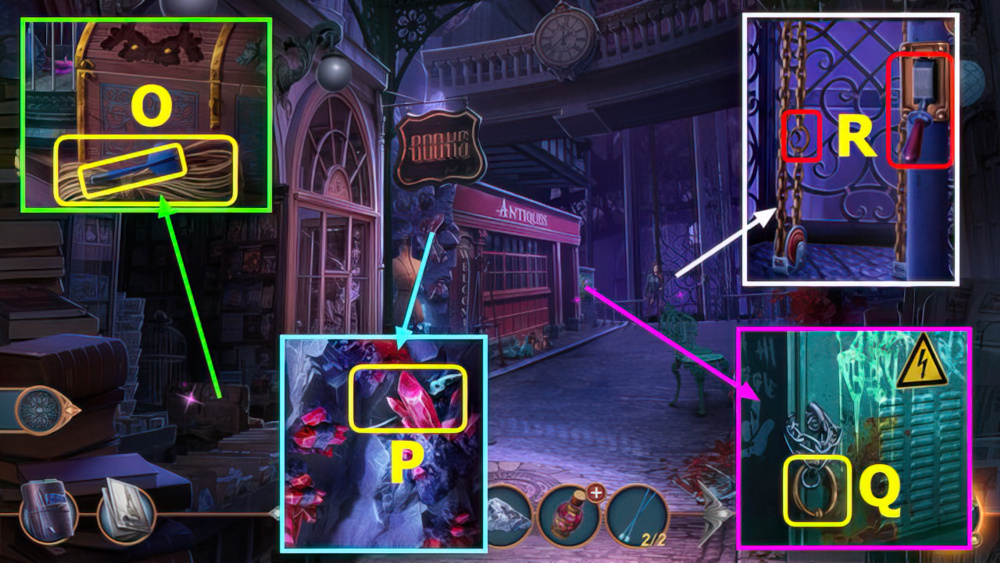
- Take 1/2 DARTS and ROPE (O).
- Read note, take 2nd PLIERS PART (P).
- PLIERS PART and ROPE on PLIERS PART, earn PLIERS.
- Use PLIERS, earn KNOCKER RING (Q).
- Use KNOCKER RING and LEVER, select lever (R).
- Go forward.
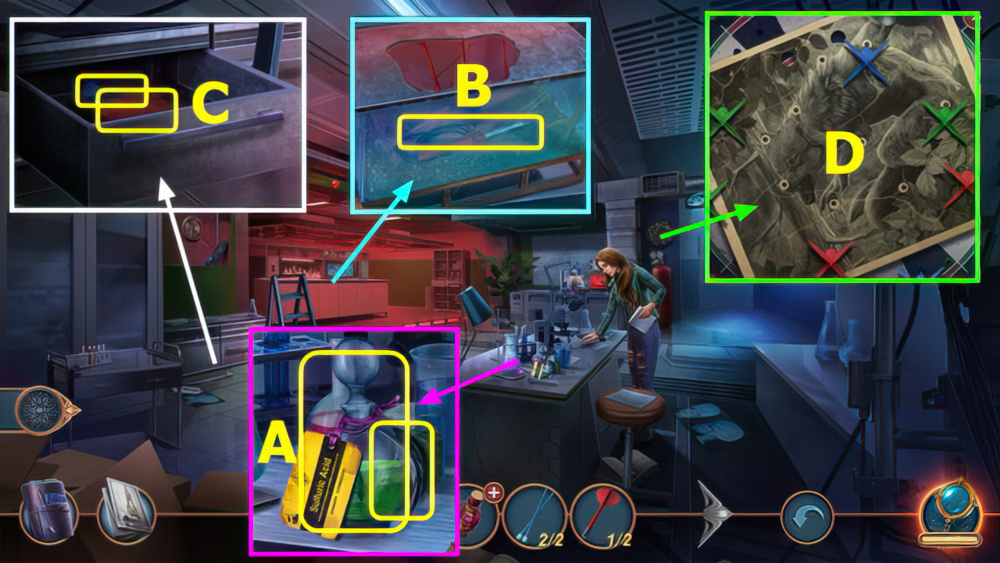
- Take ACID and MOON FIGURINE (A).
- Use ACID, read note, take SOLDERING IRON (B).
- Use TIN and SOLDERING IRON, take HARD DRIVE and 2/2 DARTS (C).
- Use DARTS (D).
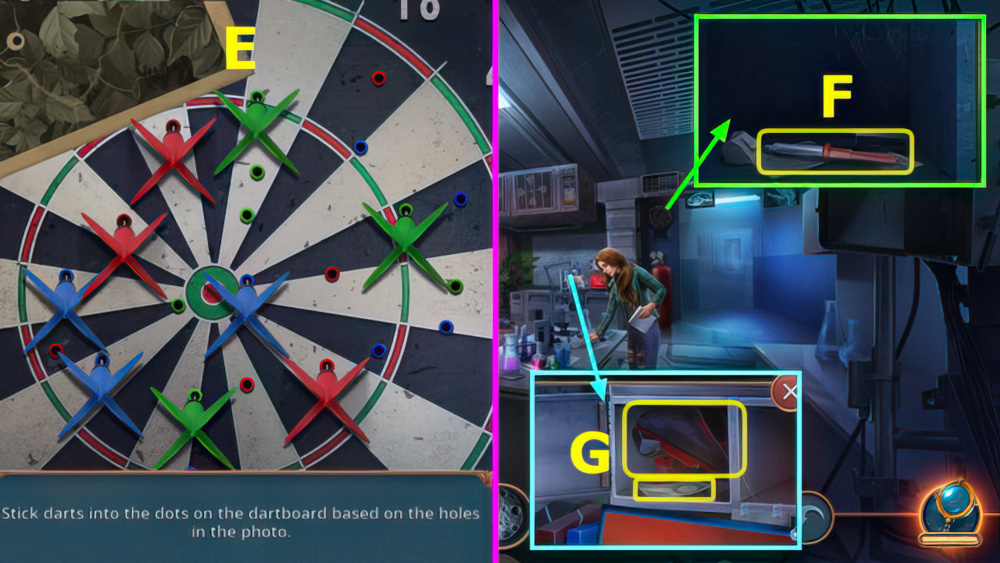
- Solution (E).
- Take PIPETTE (F).
- PIPETTE on ROSE OIL.
- Use ROSE OIL, take 1/2 BILL and FURNITURE TRANSPORTER (G).
- Walk down 3x.
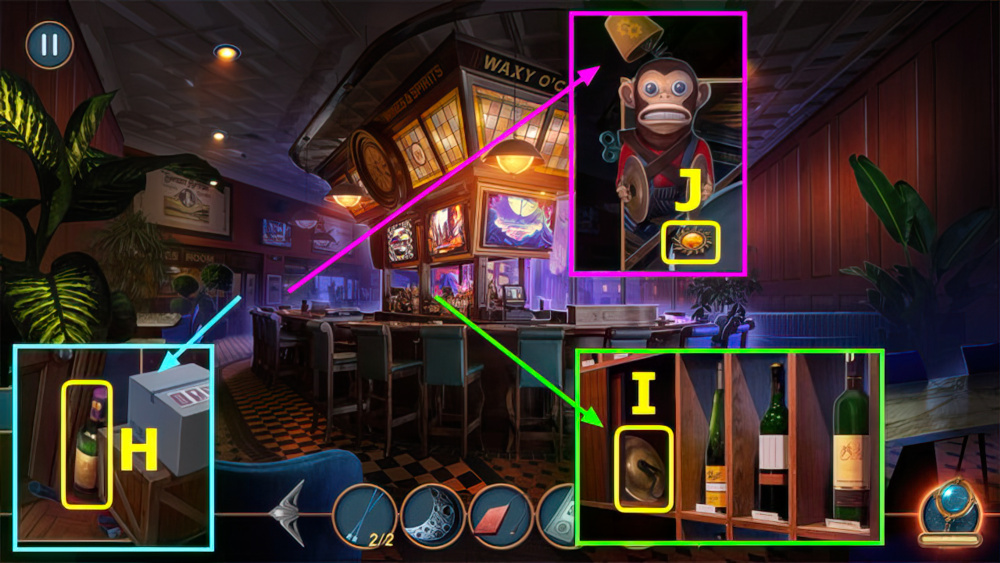
- Use FURNITURE TRANSPORTER, take WINE BOTTLE (H).
- Place WINE BOTTLE, take PLATES (I).
- Use PLATES, take SUN FIGURINE (J).
- Walk down.
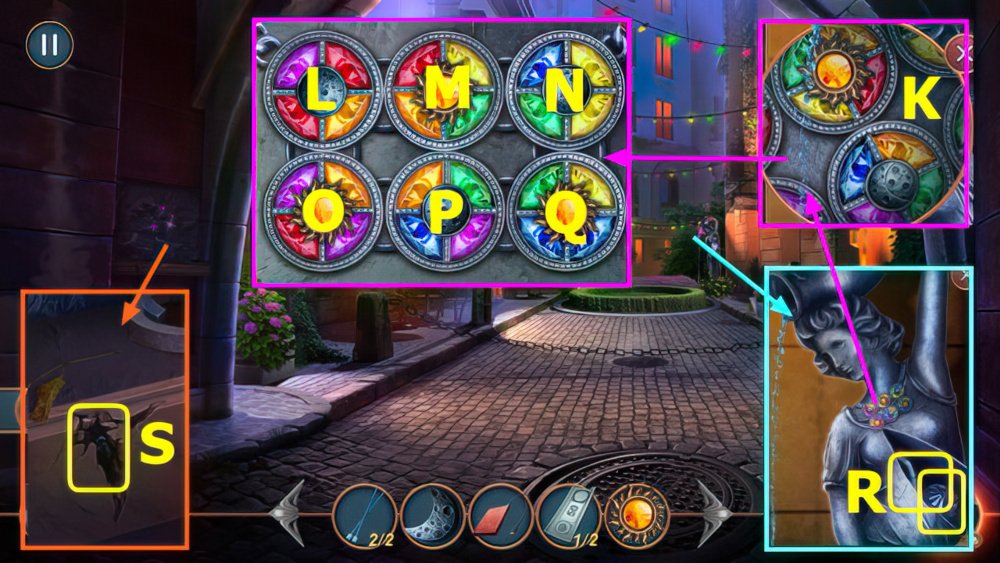
- Place SUN FIGURINE and MOON FIGURINE (K).
- Easy solution Mx2-Nx6-Ox2-Qx1.
- Hard solution Q-Ox2-Px6-N.
- Take BULLHORN and PENDULUM (R).
- Use PENDULUM, earn WIRE (S).
- Return to Cristoph’s Lab.
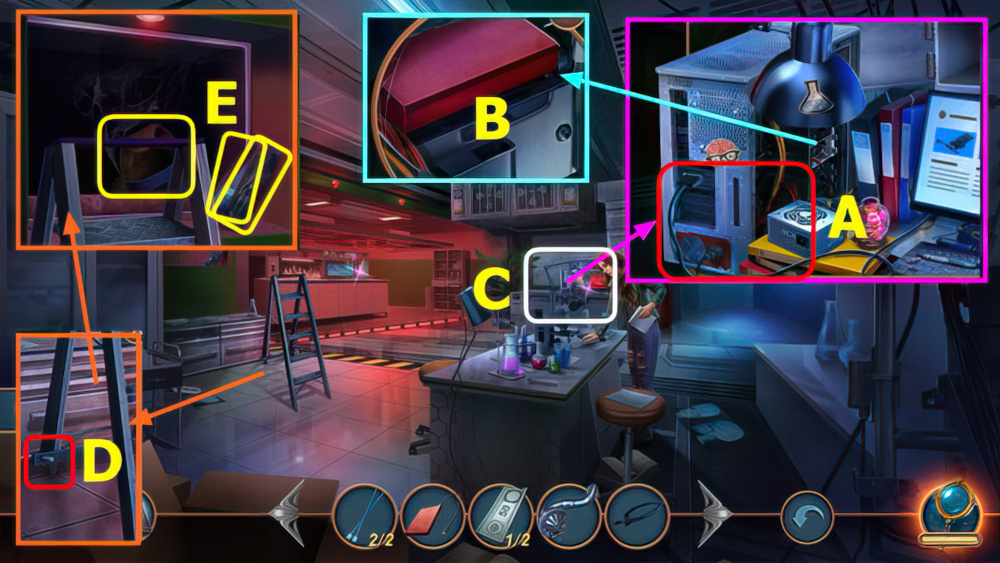
- Use WIRE (A).
- Use HARD DRIVE (B).
- Play puzzle, earn FAN (C).
- Use FAN (D).
- Take DISASSEMBLED STATUETTE and UV LAMP, use PLASTIC SPOKES, take MAGIC HAT (E).
- Walk down.
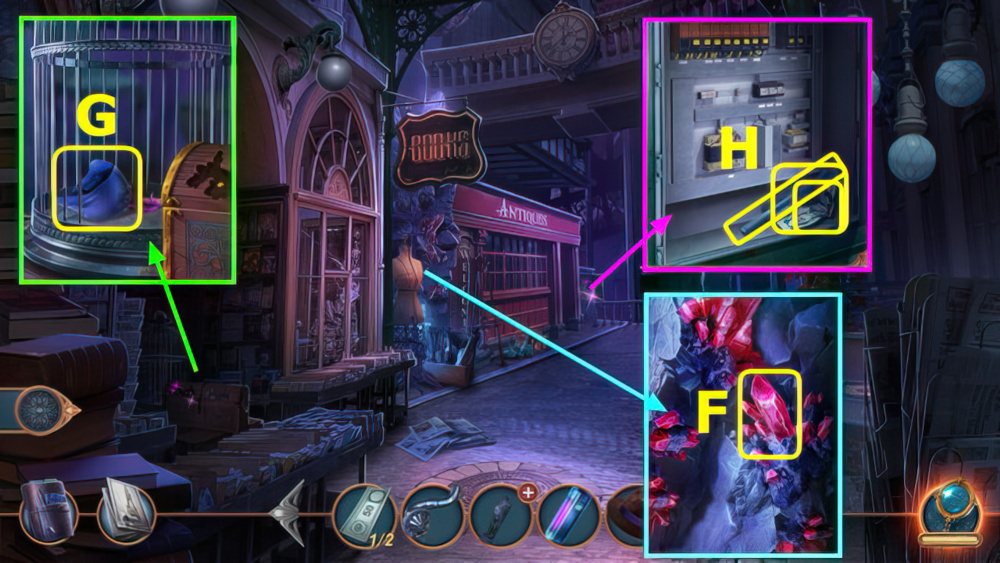
- Use UV LAMP, earn CRYSTAL (F).
- Use CRYSTAL, take SWIMMING CAP (G).
- Use SWIMMING CAP, take GLUE CORE, 1/2 PATTERN, and 2/2 BILL (H).
- Walk down.
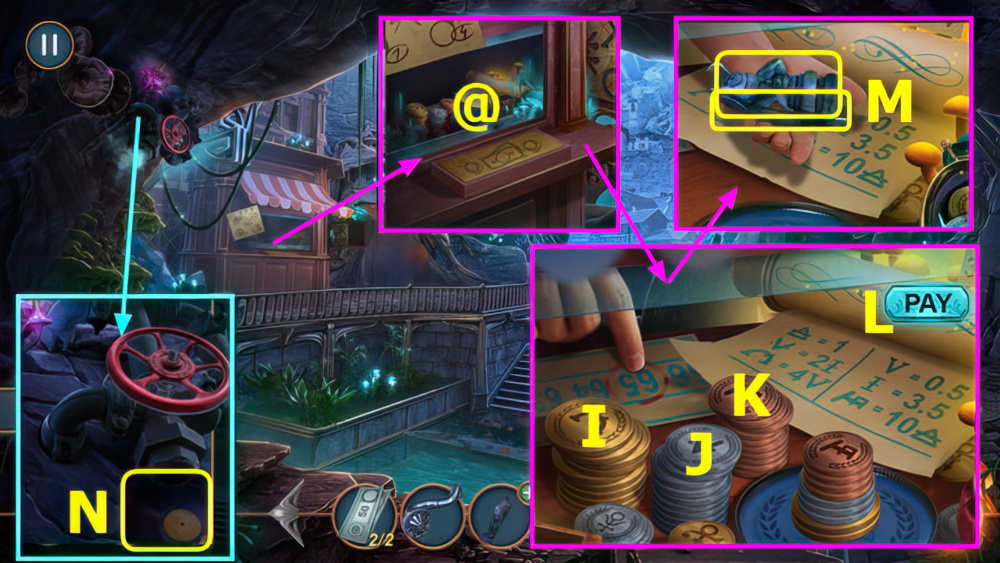
- Use BILL (@).
- Solution Ix2-Jx3-Kx4, select (L).
- Take STATUETTE PART and WRENCH (M).
- Use WRENCH, take VINYL RECORD (N).
- Walk down.
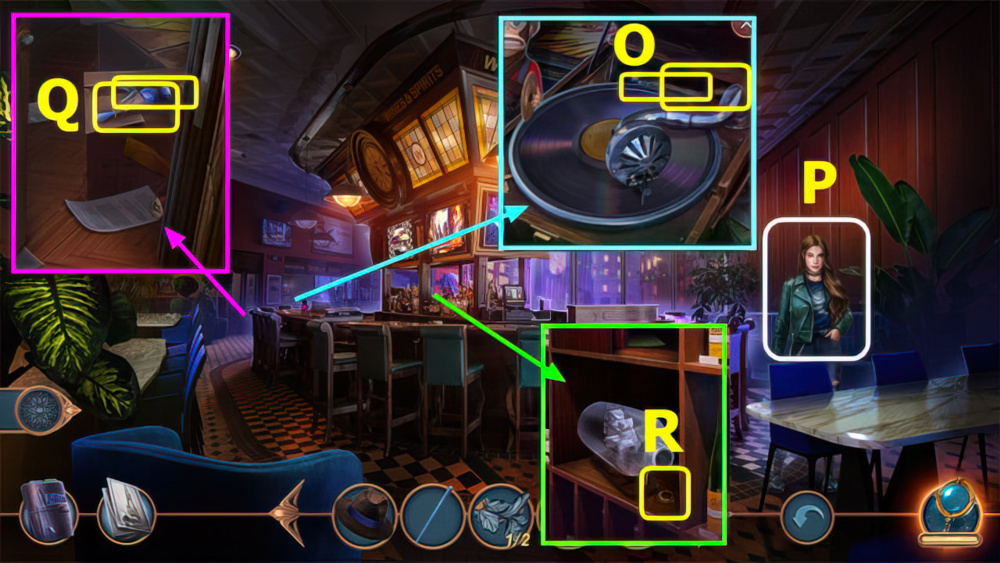
- Use VINYL RECORD and BULLHORN, take CHAIN and POTION RECIPE (O).
- Give POTION RECIPE, earn TREBLE CLEF (P).
- Place TREBLE CLEF, take MERMAID TEAR and DRILL (Q).
- Use DRILL, take GEAR (R).
- Go forward.
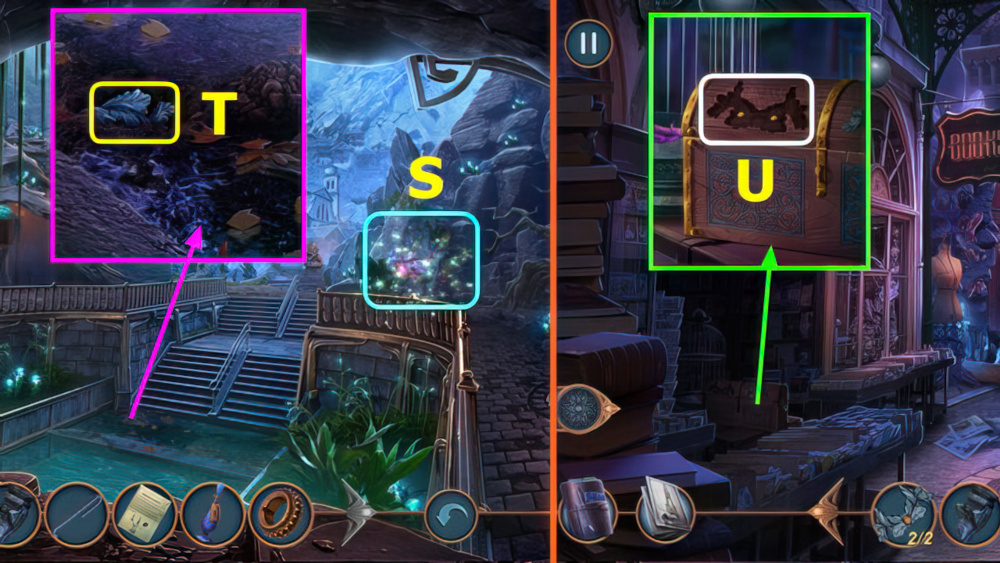
- Play puzzle, earn PEARL SHELL (S).
- Use PEARL SHELL, take 2/2 PATTERN (T).
- Go forward.
- Place PATTERN (U).
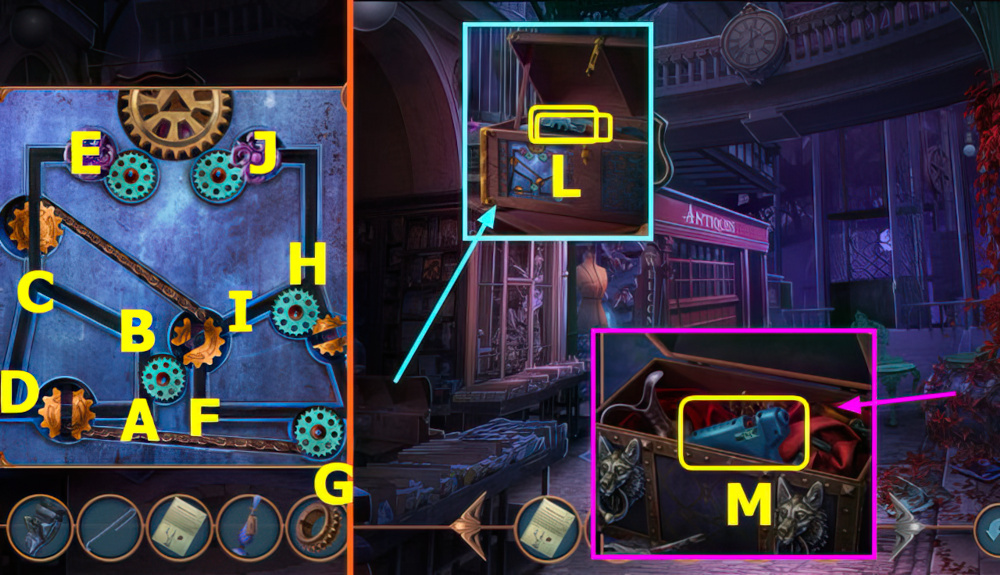
- Solution (A-B-C)-(F-I-H-G)-(C-D-A)-(G-F-I-H-K)-(A-B-C-E).
- Take GLASS CUTTER and PIEZOLIGHTER (L).
- Use PIEZOLIGHTER, take GLUE PISTOL (M).
- STATUETTE PART, GLUE PISTOL, and GLUE CORE on DISASSEMBLED STATUETTE, earn STATUETTE.
- Walk down, left.
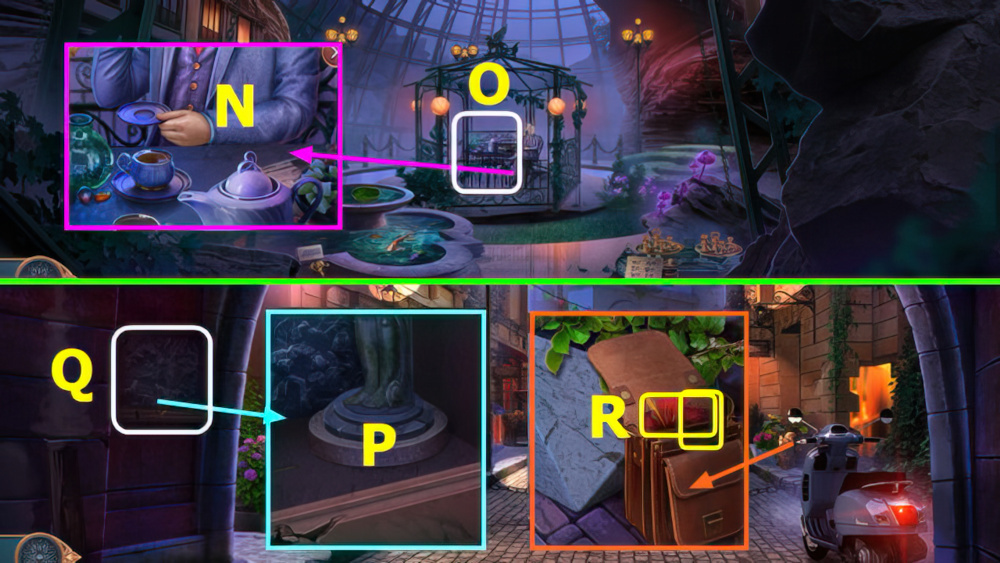
- Give MAGIC HAT (N).
- Play puzzle (O).
- Walk down 3x.
- Place STATUETTE (P).
- Play puzzle, earn NUTS (Q).
- Give NUTS, open bag, take HIBISCUS FLOWER and KEY (R).
- Walk right, go forward 3x.
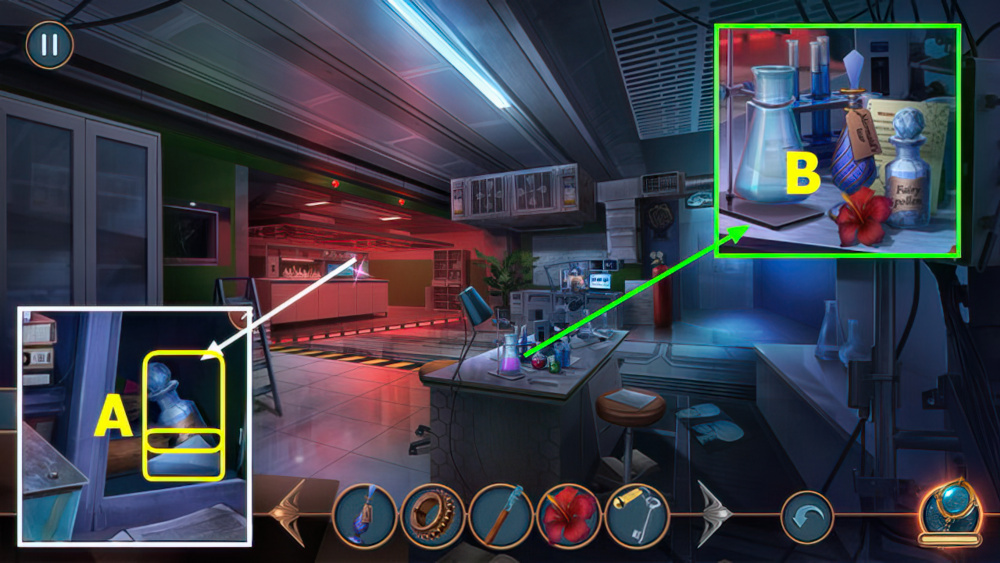
- Use KEY, take CHALK and FAIRY DUST (A).
- Use POTION RECIPE, MERMAID TEARS, HIBISCUS FLOWER, and FAIRY DUST (B).
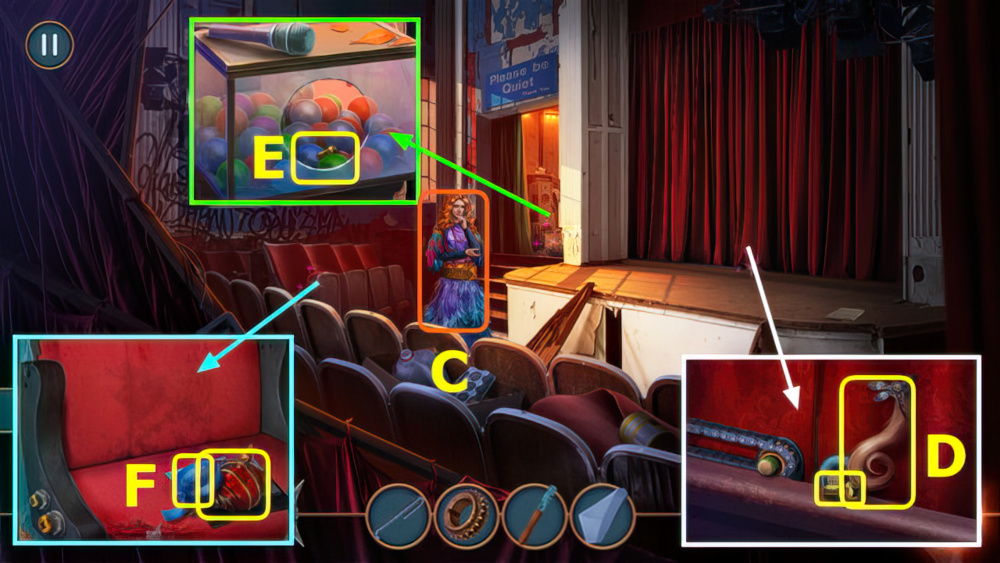
- Talk, earn MAGICAL WHISTLE (C).
- Take ELVEN LOCK and 1/2 BOLT, place GEAR and CHAIN (D).
- Use GLASS CUTTER, take 2/2 BOLT (E).
- Use BOLT, take DUCT TAPE and VAMPIRE BLOOD (F).
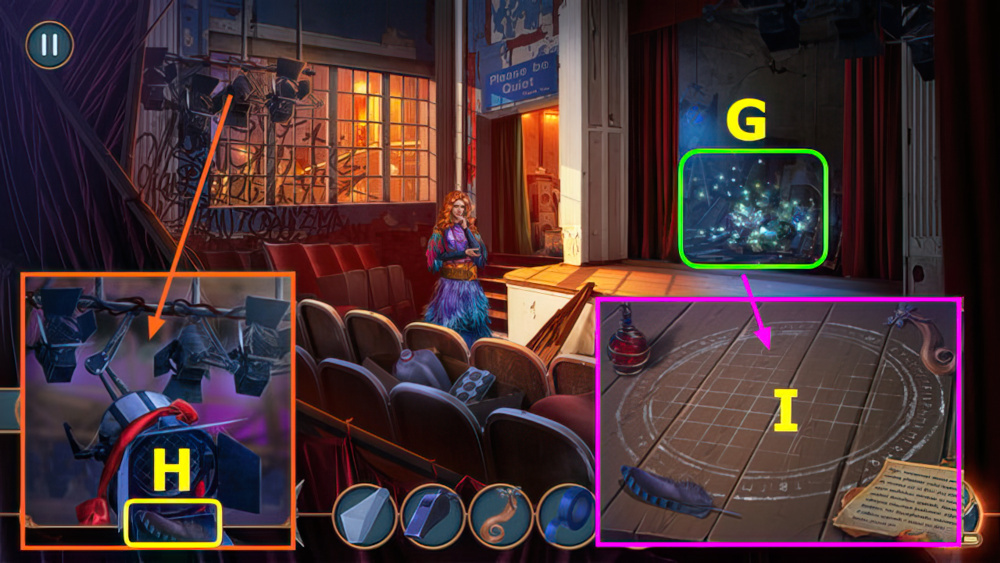
- Play puzzle, earn BUNDLE OF RIBBONS (G).
- Use BUNDLE OF RIBBONS, take HARPY FEATHER (H).
- Place CHALK, ELVEN LOCK, VAMPIRE BLOOD, and HARPY FEATHER (I).
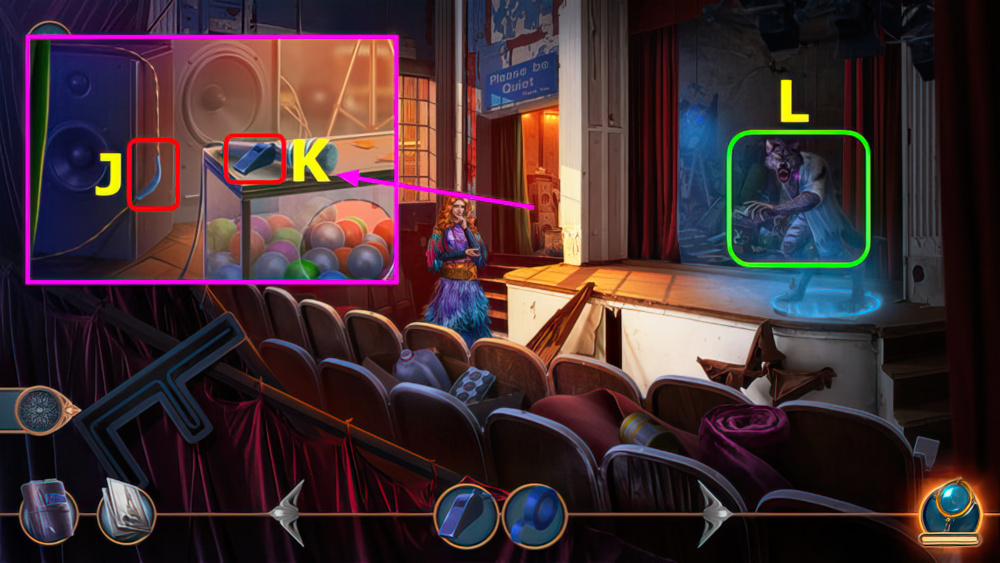
- Use DUCT TAPE (J).
- Use MAGICAL WHISTLE (K).
- Select (L).
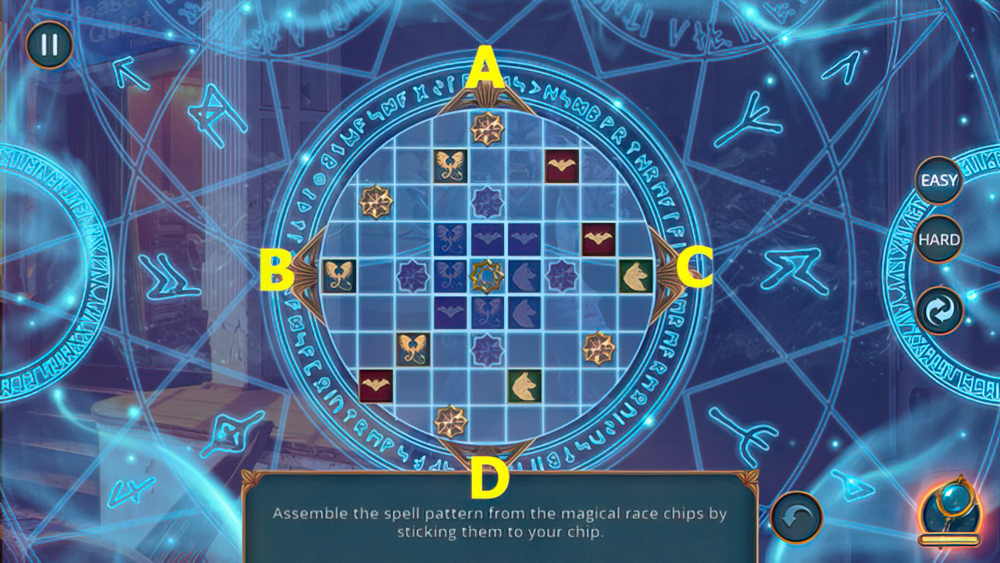
- Easy solution Bx3-Cx6-Bx5-Dx2-Cx3-Ax4-Bx2-C-Dx2.
- Hard solution Bx3-Cx5-Bx4-Dx2-A-Cx2-Ax3-B-C-D-Cx2-D-Bx2-Dx2-Ax2.
- Walkthrough Bonus Chapter, at the link below.


