Magic City Detective Season 1 Episode 1: Ocean’s Echo – The game starts with a call from a man named Guillermo asking for help, he was sent to you by the head of the ministry. In Rio de Janeiro, in the ocean was found anomalous activity. And he believes it’s related to the recent disappearance of Ribeira Lima, the main siren. According to sensors there, a tsunami is expected. But meteorologists disagree. Usually tsunamis occur after tectonic plate movements or an earthquake. Nothing like that has been detected in the area and hence the tsunami is of a different nature. In addition, there will be a carnival in the city, which attracts many people. But here, among the tropical flavors, behind the masks are hidden not only fun carnival guests, but also a real bandit. You will have to find the siren safe and sound and find out the reason for this crime. If you can not pass any of the puzzles or do not know where the items are, on our site you can watch the walkthrough of Magic City Detective Season 1 Episode 1: Ocean’s Echo, and save the local singer, known for her amazing voice.
Magic City Detective Season 1 Episode 1: Ocean’s Echo – Walkthrough
Here you can see the full walkthrough of Magic City Detective Season 1 Episode 1: Ocean’s Echo, including the main story.
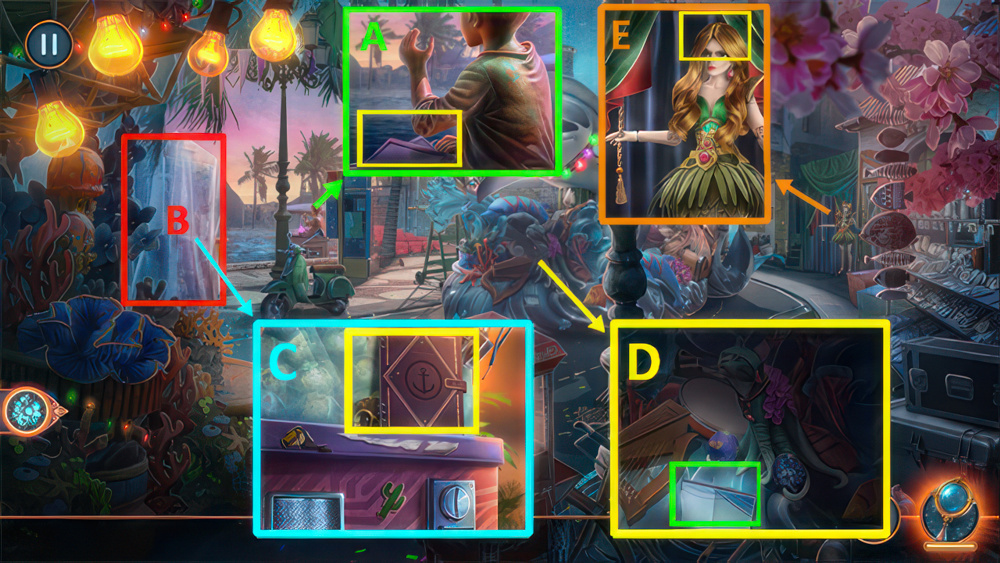
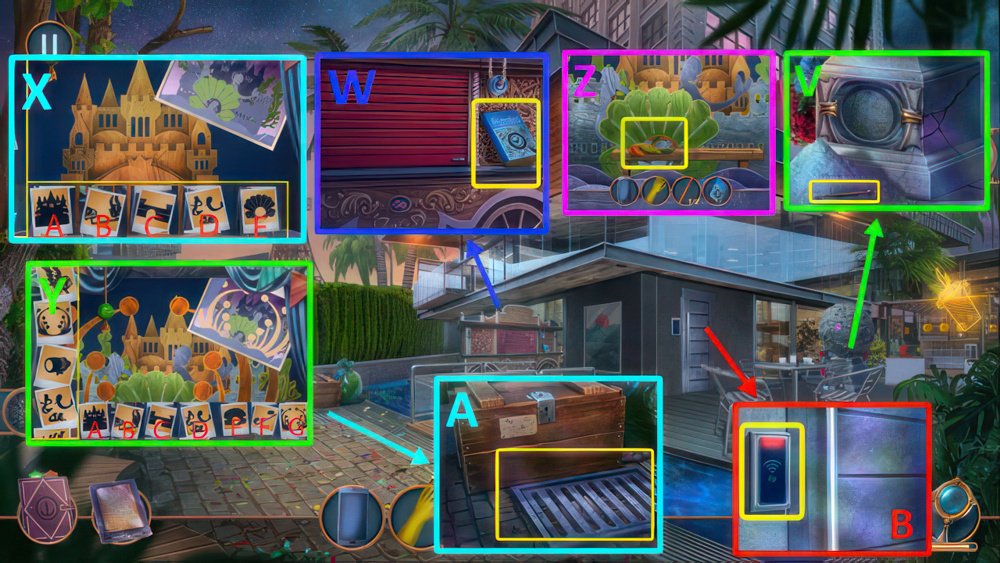
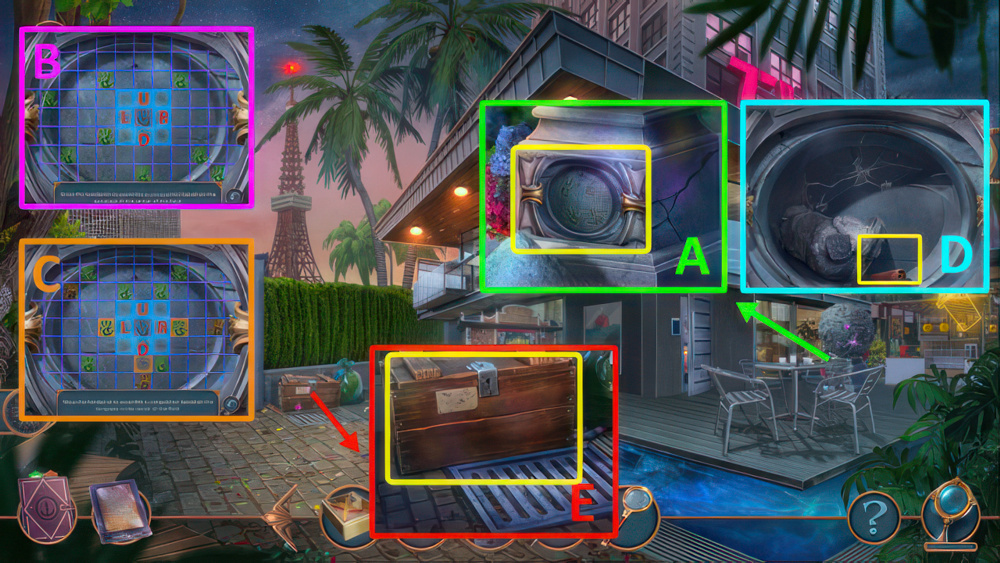
- Take MAP, PHONE, and NAIL CLIPPERS (A).
- Move (B).
- Take Taskbook, BELL CHAIN, and BINOCULAR 1/2.
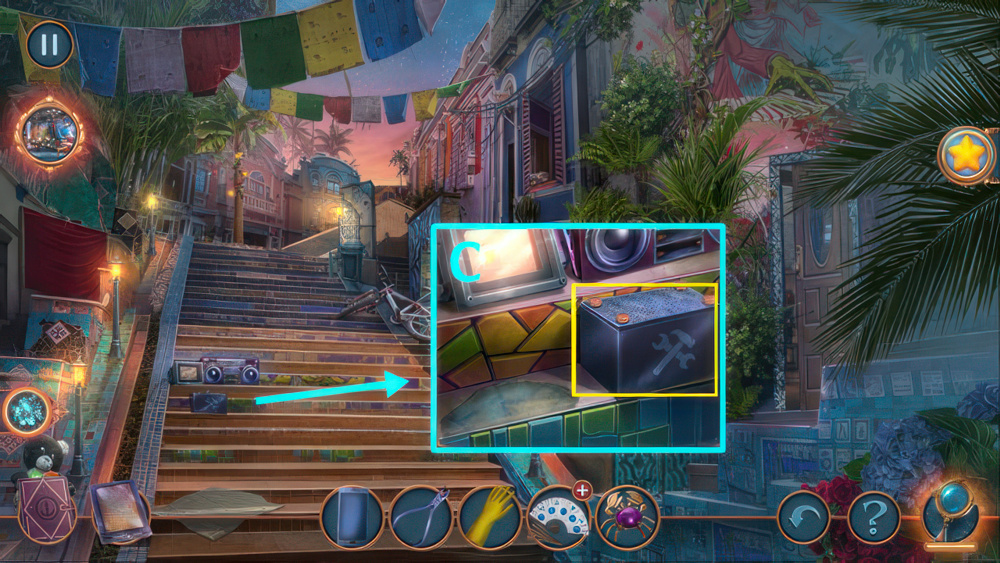
- Use NAIL CLIPPERS on the WIRES, take WIRE (C).
- Read, take SHIPWHEEL MAGNET.
- Use WIRE on the wiring panel.
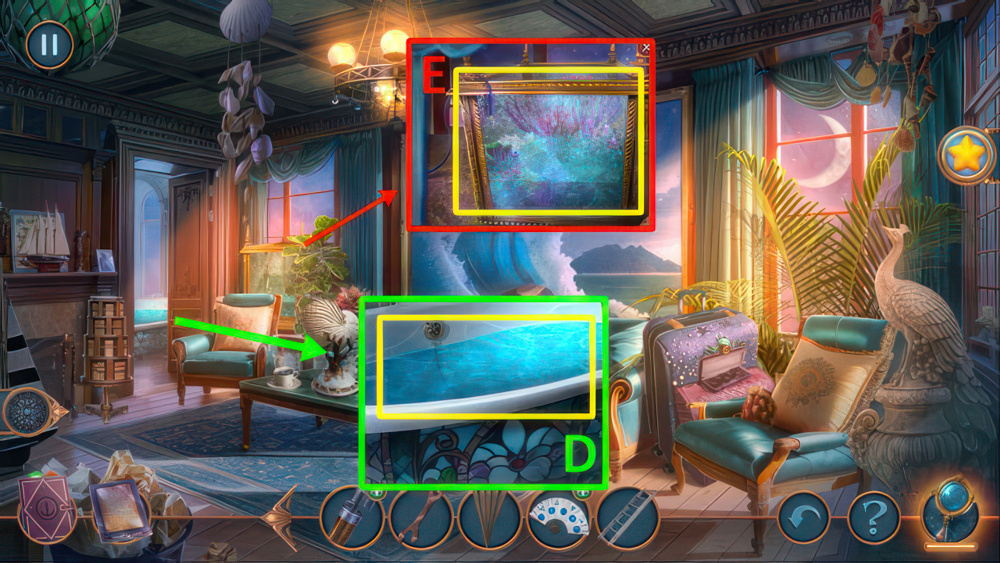
- Play puzzle, take CARNIVAL HEADDRESS (D).
- Use CARNIVAL HEADDRESS (E).
- Go forward.
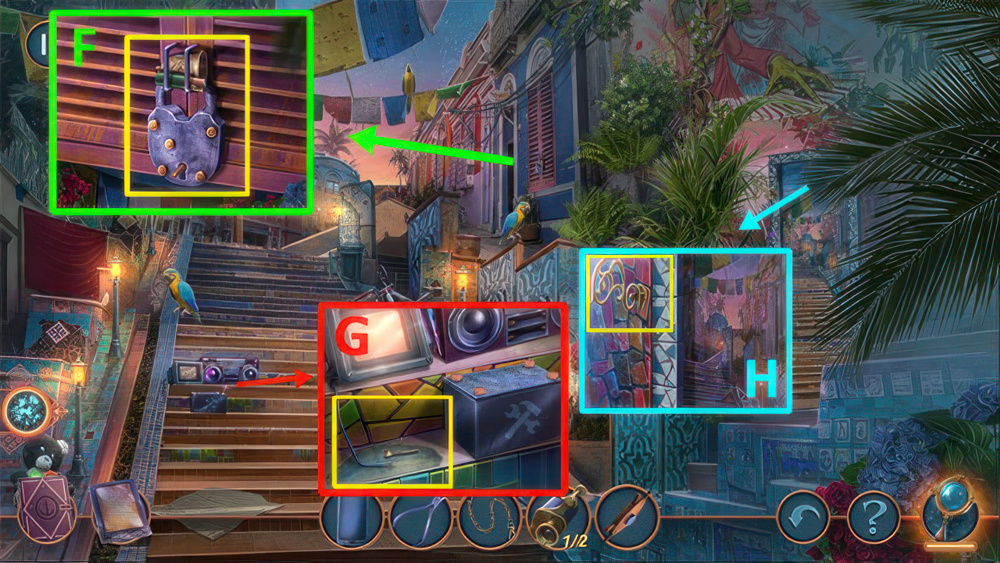
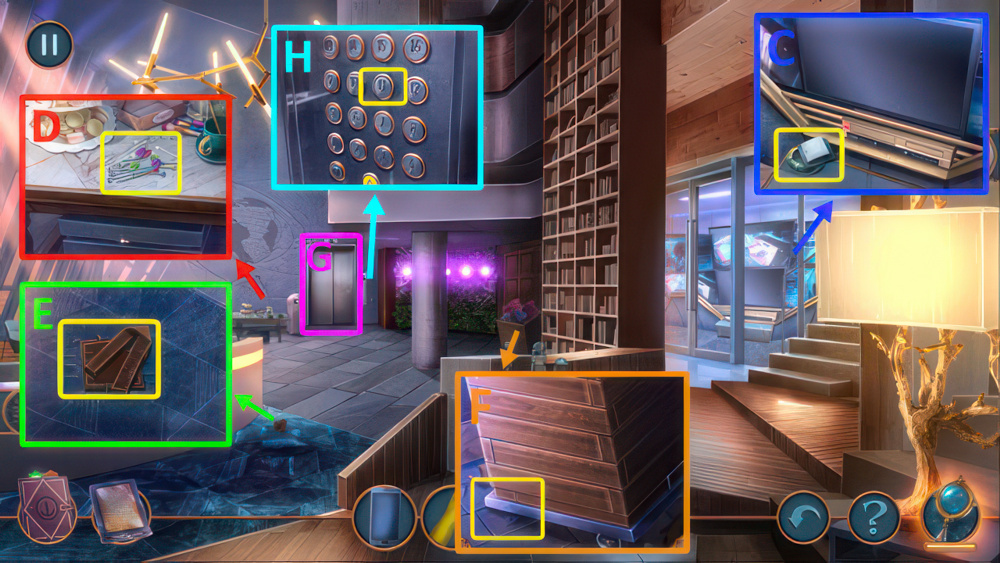
- Take BATTERY 1/2, BROKEN BELL.
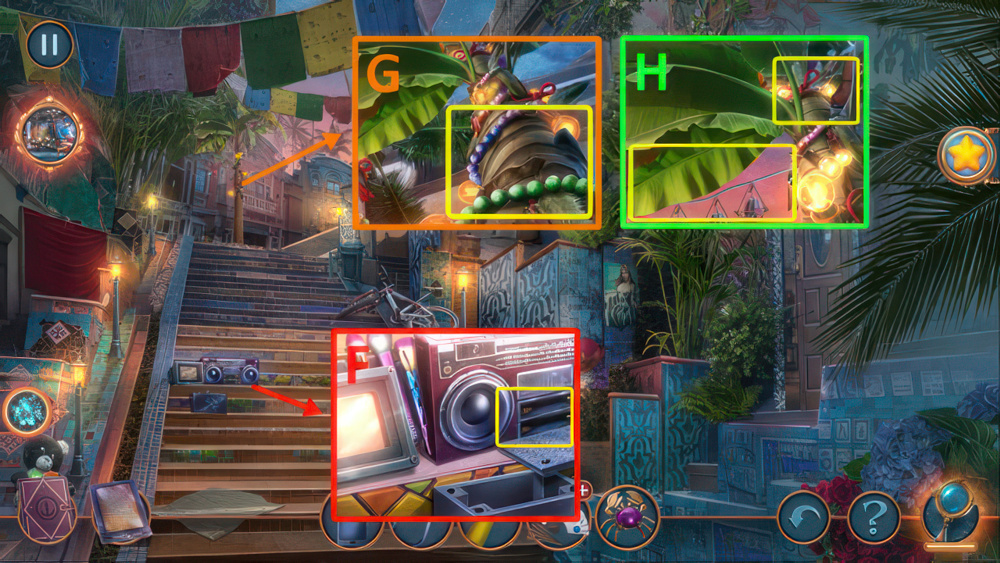
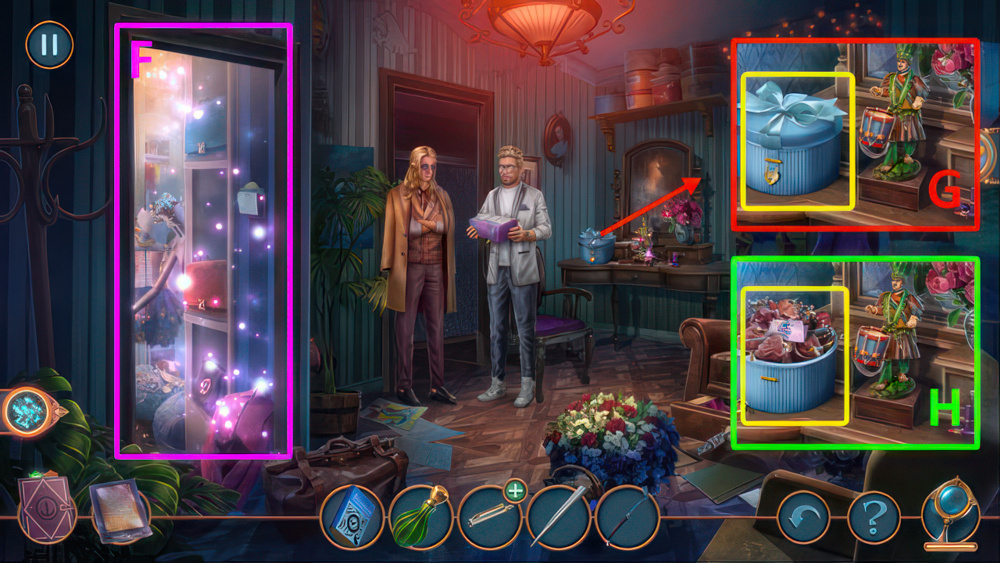
- Use NAIL CLIPPERS on the KEY, take GLOVE (F).
- Use GLOVE, take BELL TONGUE (G).
- BELL TONGUE and BELL CHAIN on BROKEN BELL, receive BELL.
- Use BELL (H).
- Go forward.

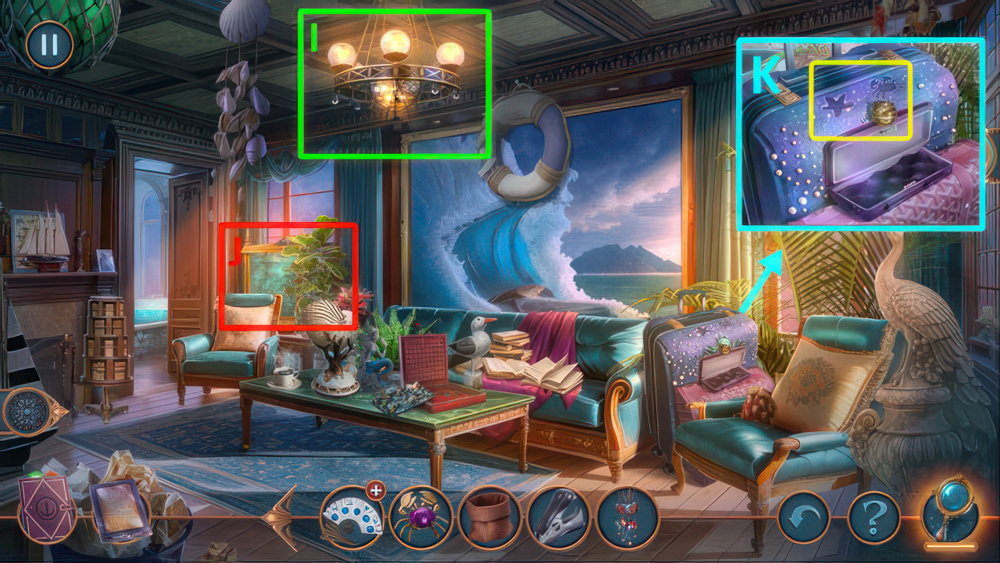
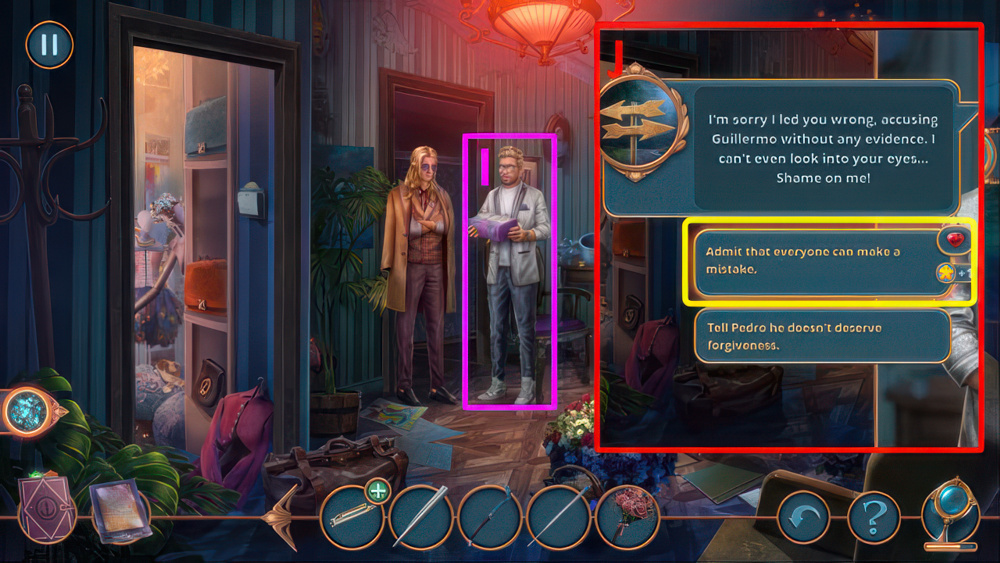
- Select (I).
- Go to Guest Bedroom.
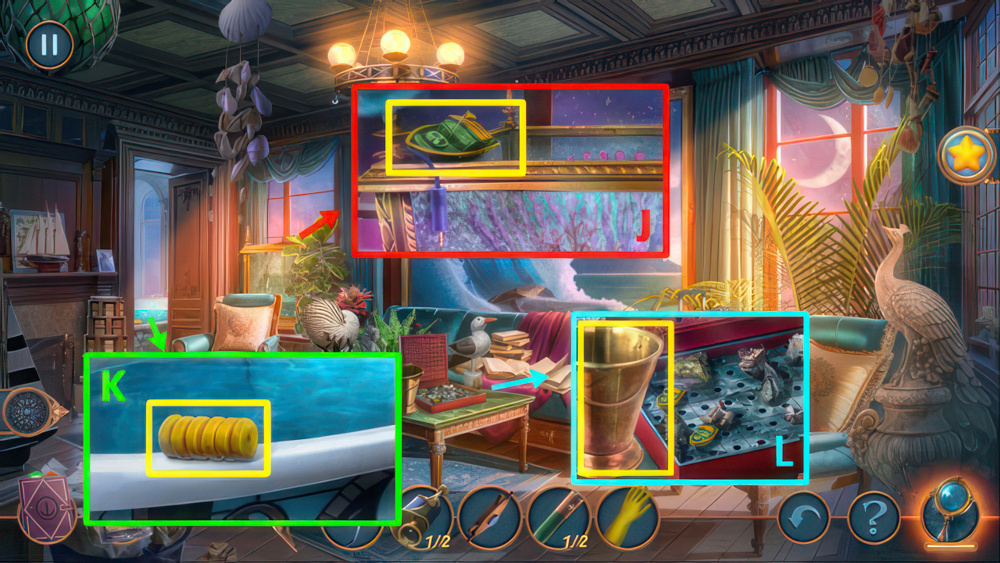
- Take SHIP (J).
- Take SPONGE (K).
- Take Bucket and Aquarium Filter.
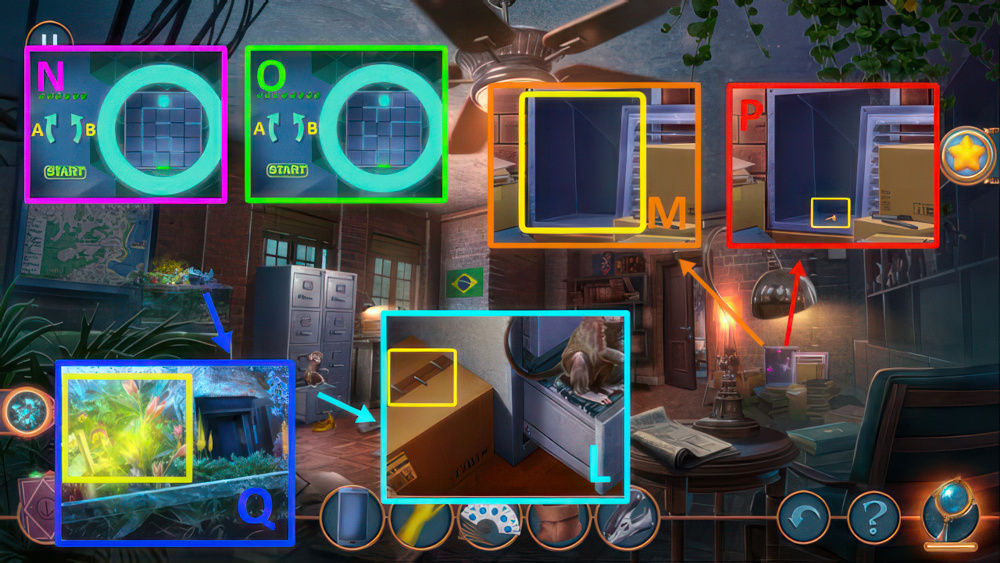
- Use Ship on the field (L).
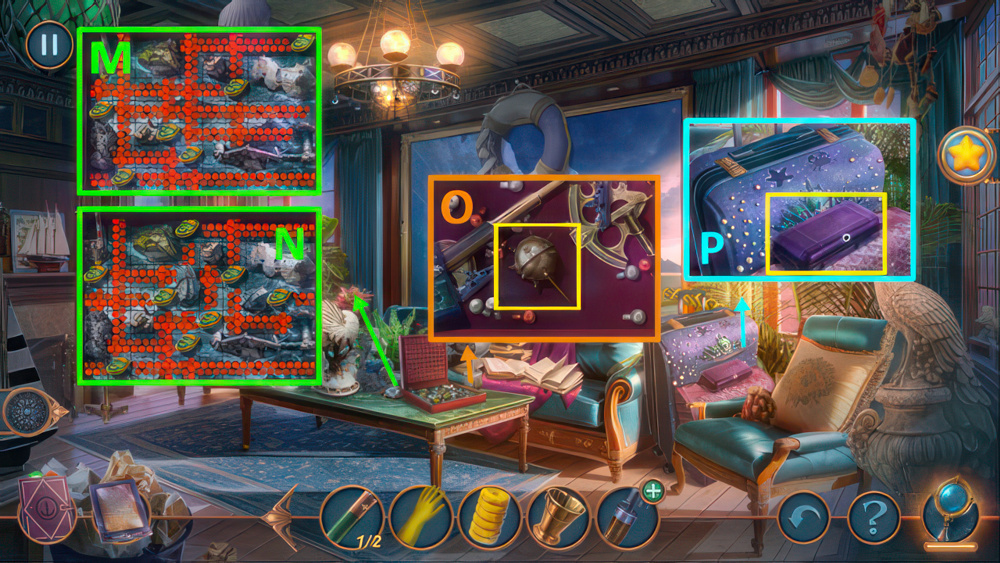
- Solution Easy: Place the ships as on the picture (M).
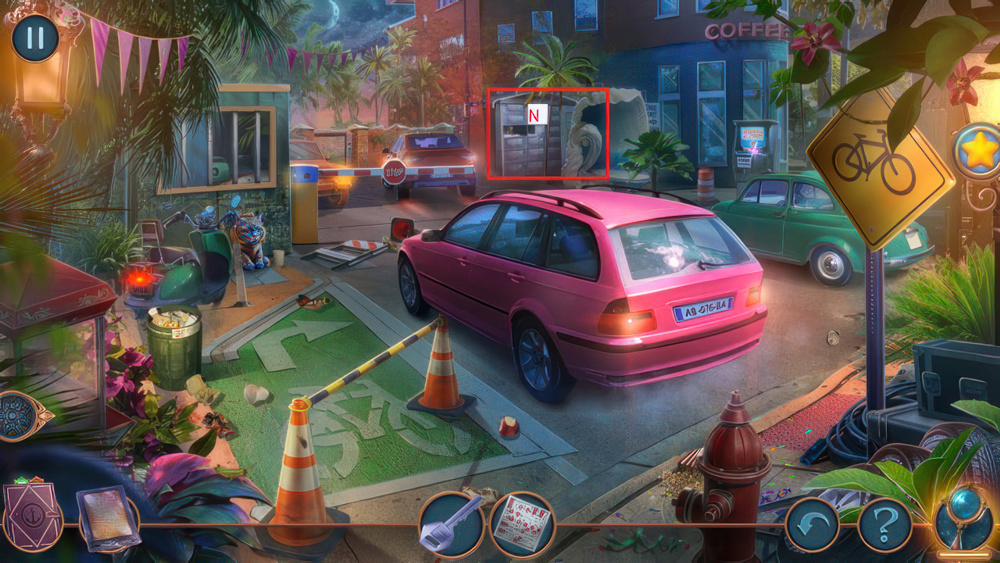
- Solution Hard: Place the ships as on the picture (N).
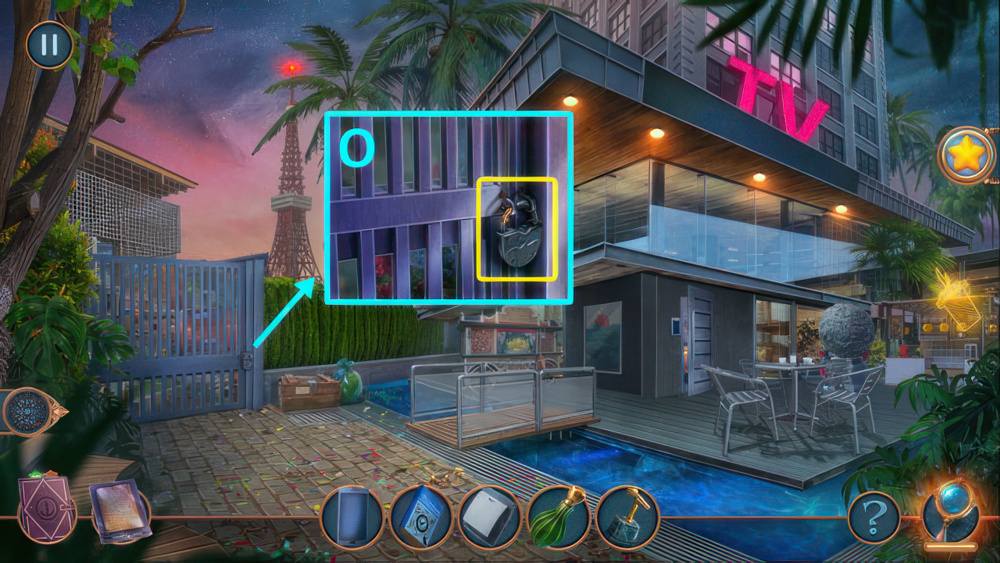
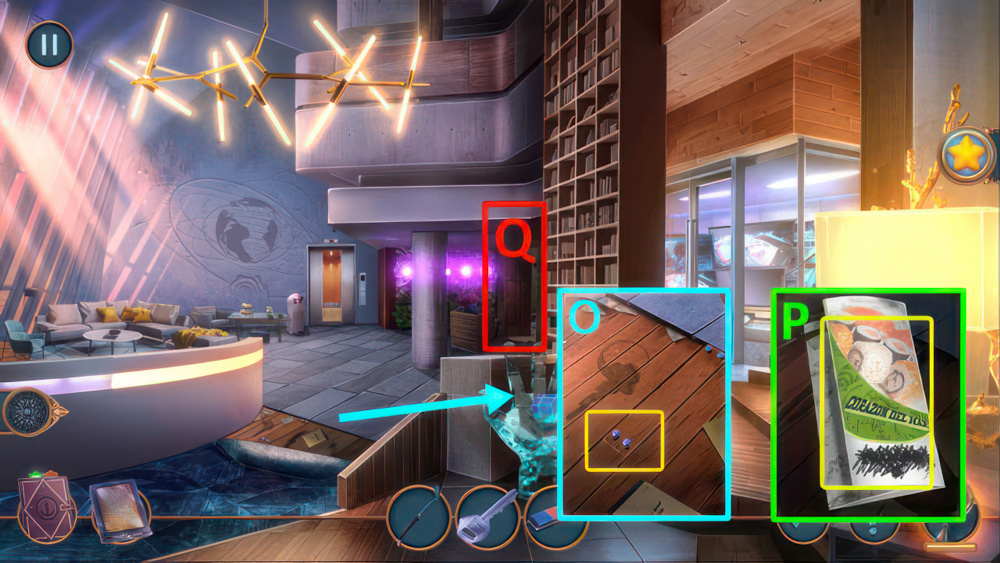
- Take SEA BATTLE MINE (O).
- Use SEA BATTLE MINE (P), receive BICYCLE WRENCH.
- Go back.
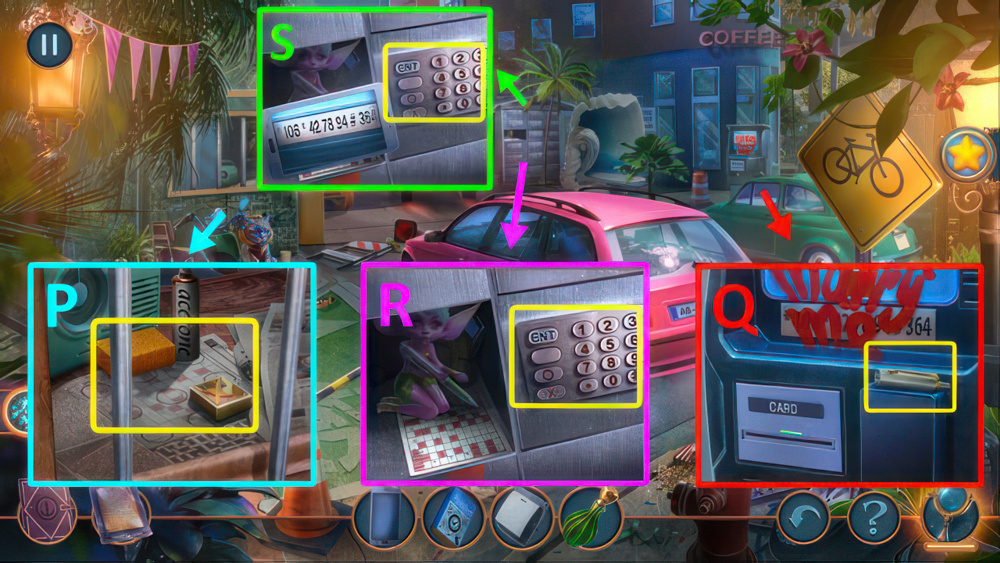
- Read (Q).
- Take PLASTIC FAN HOLDER and Electronic Board.
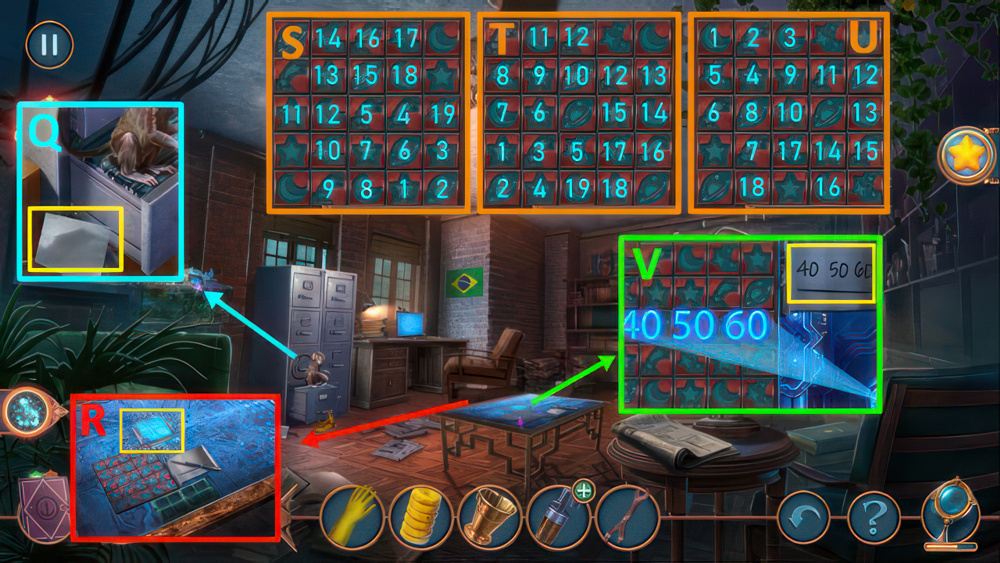
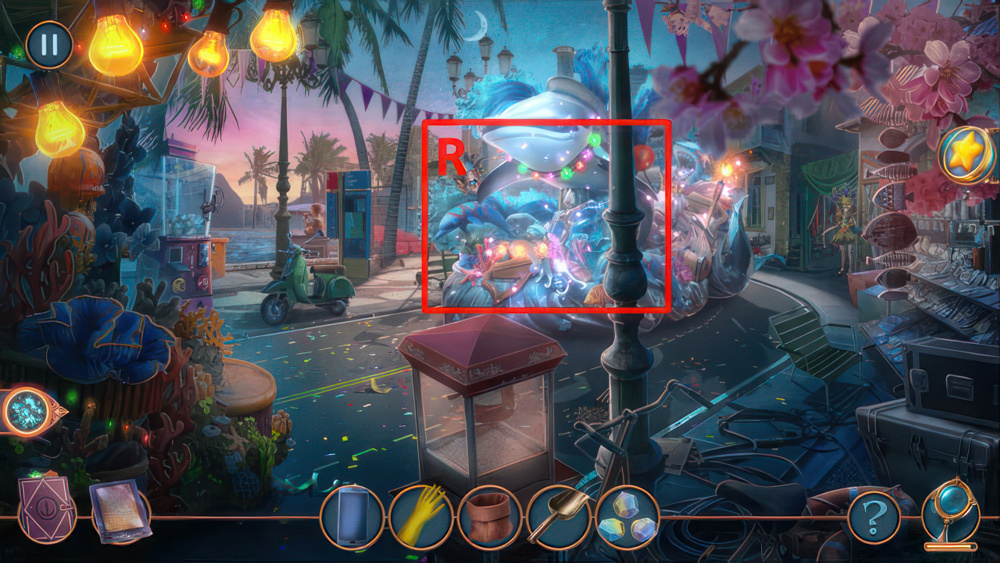
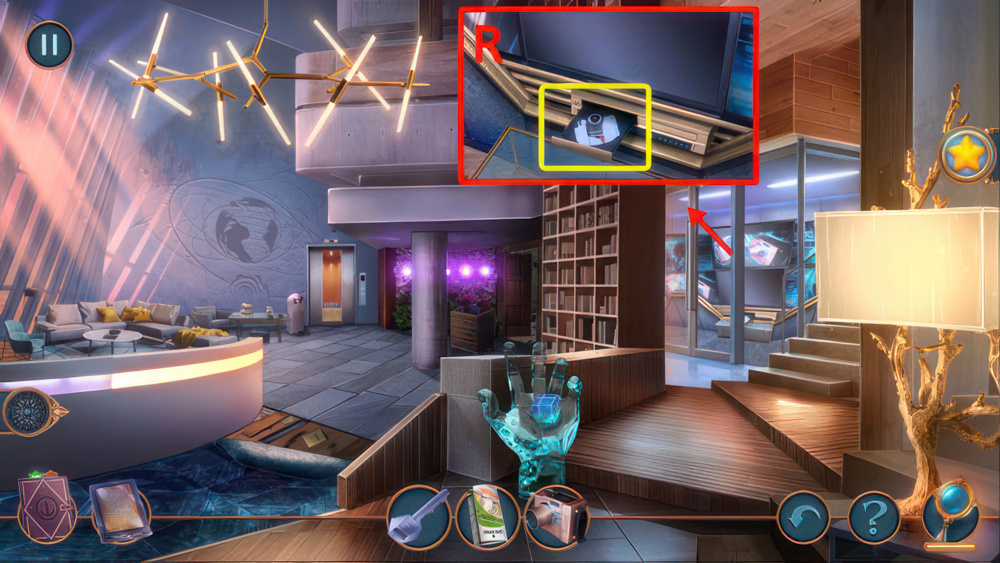
- Use Electronic Board (R).
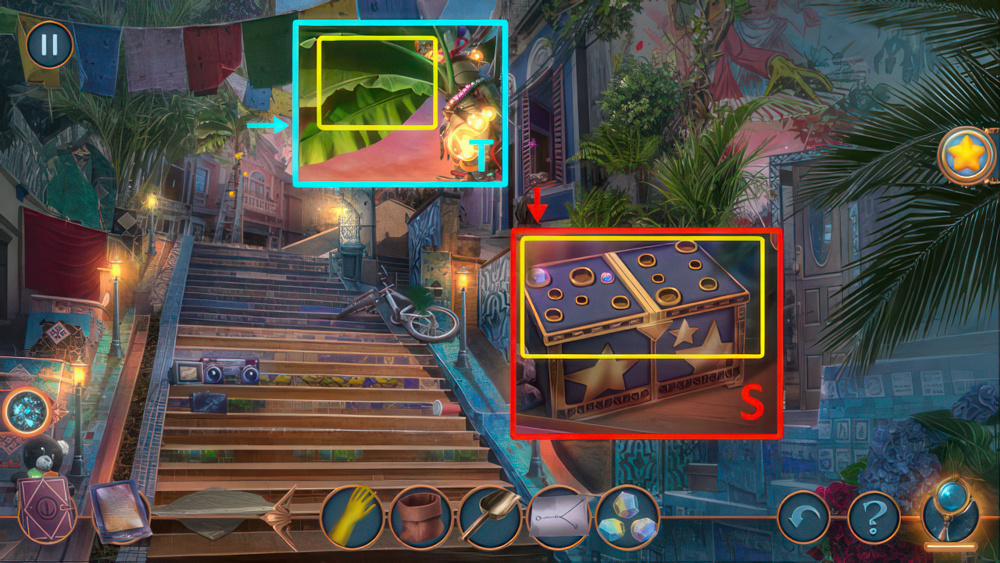
- Solution Easy: Round 1: 1-2-3-4-5-6-7-8-9-10-11-12-13-14-16-17-18-19 (S).
- Solution Hard: Round 2: 1-2-3-4-5-6-7-8-9-10-11-12-13-14-16-17-18-19-20 (T).
- Round 3: 1-2-3-4-5-6-7-8-9-10-11-12-13-14-16-17-18 (U).
- Take CODE (V).
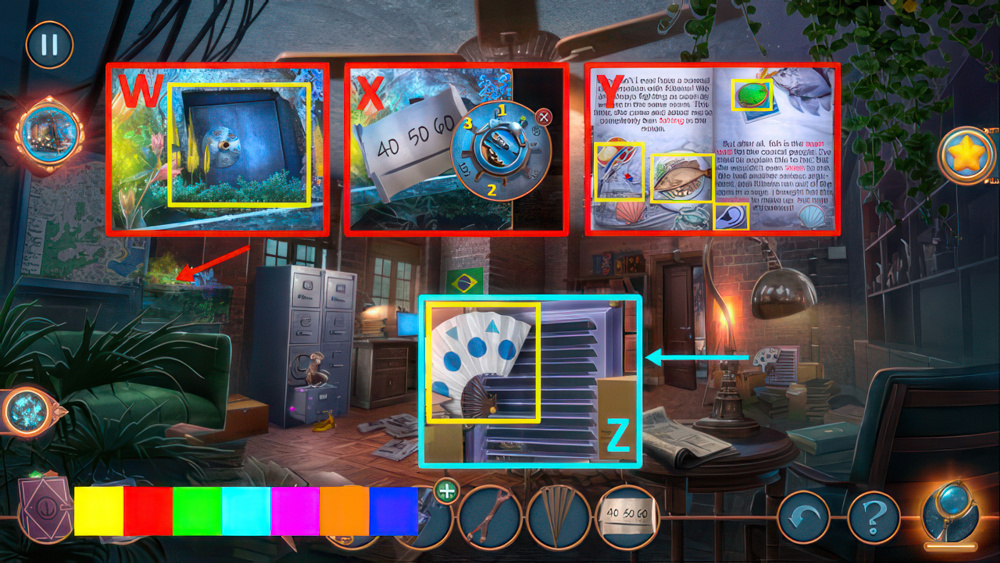
- Use SHIPWHEEL MAGNET and CODE on the safe (W).
- Solution: 1-2-3 (X).
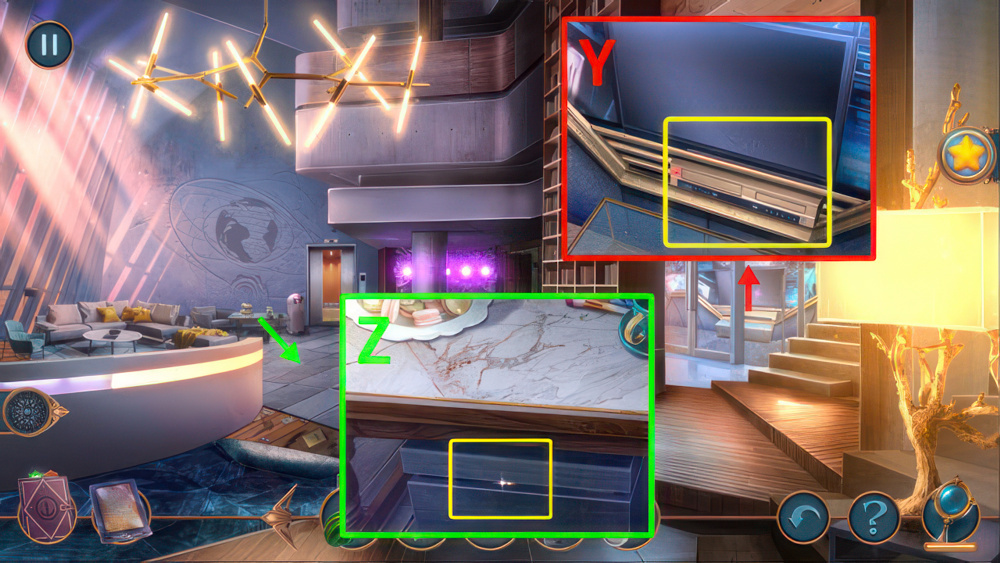
- Play puzzle, receive AGENCY LOGO (Y).
- Take BROKEN FAN.
- Use AGENCY LOGO on the SCREWS, receive BINOCULAR 2/2 (Z).
- Go back x2.
- Add BINOCULAR, take COIN (A).
- Use COIN, receive BATTERY 2/2 (B).
- Go forward.
- Use Bicycle Wrench Receive Plastic Tube (C), FILTER SPONGE and PLASTIC TUBE on AQUARIUM FILTER.
- Receive AQUARIUM FILTER.
- Go forward x2.
- Use BUCKET, take WATER (D).
- Use WATER and AQUARIUM FILTER.
- Play puzzle, take CRAB (E).
- Go back x2.
- Use BATTERY.
- Play puzzle, take LADDER (F).
- Use LADDER (G).
- Take POUCH and STAPLE REMOVER.
- Use NAIL CLIPPER on the WIRE, receive COLORED GLASS (H).
- Go forward x2.
- Use COLORED GLASS (I).
- Play puzzle, take STARFISH (J).
- Use STARFISH and CRAB.
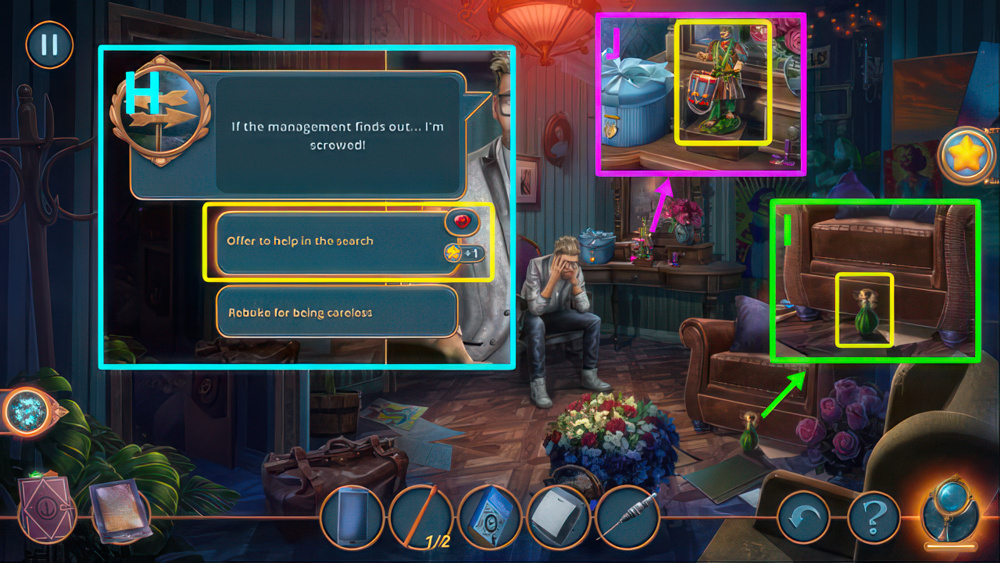
- Read (K).
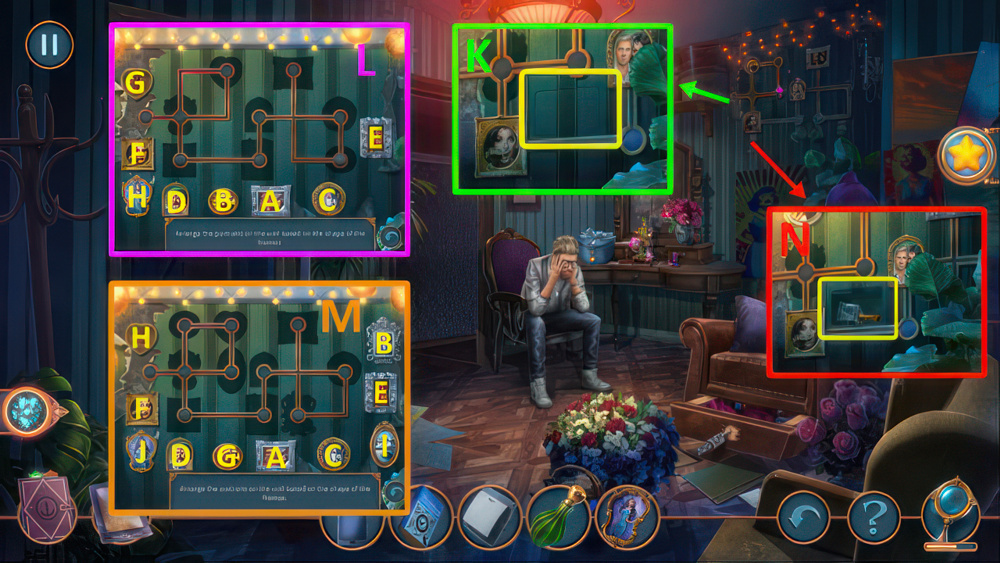
- Use STAPLE REMOVER, receive ENDOSCOPE (L).
- Use ENDOSCOPE and PHONE (M).
- Solution Easy: A-B-B-A-A-B-Start (N).
- Solution Hard: A-B-B-A-A-B-B-A-Start (O).
- Receive CUFFLINK (P).
- CUFFLINK and PLASTIC FAN HOLDER on BROKEN FAN.
- Take FAN.
- Use FAN, take SHOVEL and SHIMMERING CRYSTALS (Q).
- Go back x2.
- Play puzzle, take CONSTELLATION DIAGRAM (R).
- Go forward.
- Use CONSTELLATION DIAGRAM and SHIMMERING CRYSTALS, take MACHETE (S).
- Use MACHETE, receive ROPE and BANANA (T).
- Go forward.
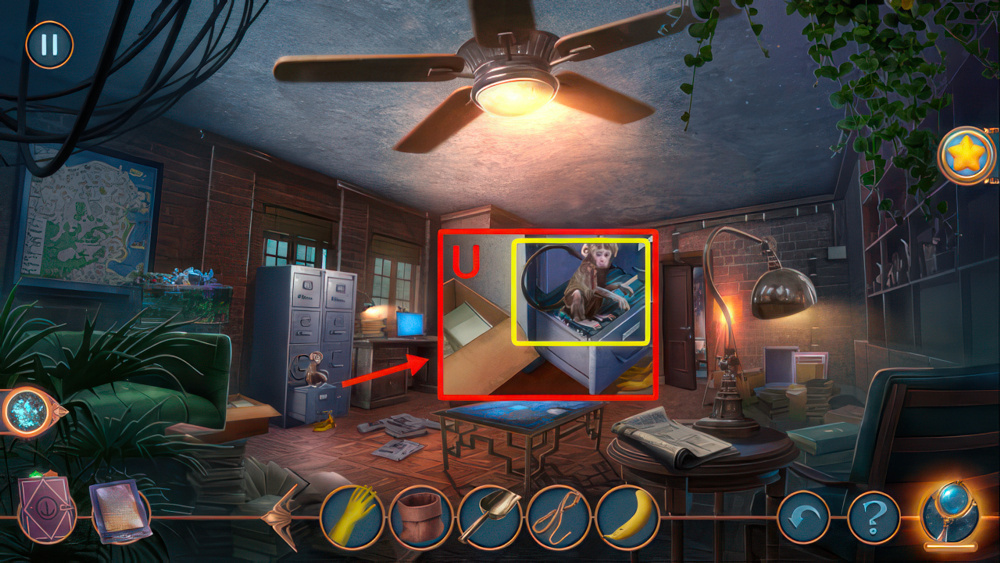
- Use BANANA, receive STUDIO ADDRESS, move (U).
- Take DRUMSTICK 1/2.
- Use POUCH and SHOVEL, take GYPSUM (V).
- Take BOOK.
- Use ROPE and GYPSUM (W).
- Solution Easy: A-B-C-D-E (X).
- Solution Hard: A-B-C-D-E-F-G (Y).
- Take TOUCAN NECKLACE (Z).
- Use TOUCAN NECKLACE on the PASS, take PASS (A).
- Use PASS (B).
- Go to Television Center.
- Take SWITCH PART and STONE ASHTRAY (C).
- Use GLOVE, take PINS (D).
- Use PINS, receive DRILL (E).
- DRILL on STONE ASHTRAY.
- Receive DRILLED STONE ASHTRAY.
- Use DRILLED STONE ASHTRAY.
- Play puzzle, receive STUDIO NUMBER (F).
- Move (G).
- Use STUDIO NUMBER.
- Choose FLOOR 11 (H).
- Select (H).
- Take PUNGENT PERFUME.
- Use DRILL on the hole, take DRUMSTICKS 2/2 (I).
- Use DRUMSTICKS, read, receive RIBEIRA’S PORTRAIT (J).
- Use RIBEIRA’S PORTRAIT (K).
- Solution Easy: A-B-C-D-E-F-G-H (L).
- Solution Hard: A-B-C-D-E-F-G-H-I-J (M).
- Take GOLDEN VOICE OF RIO AWARD (N).
- Go back x2.
- Use GOLDEN VOICE OF RIO AWARD (O).
- Go to Parking Lot.
- Take MATCHBOX and ACETONE SPONGE (P).
- Take EMPTY PEN.
- Use ACETONE SPONGE and PHONE, receive CODE PHOTO (Q).
- Use CODE PHOTO (R).
- Select *106*427894#364.
- Read, take COSMETICS SUPPLY (S).
- Go to Ribeira’s Studio.
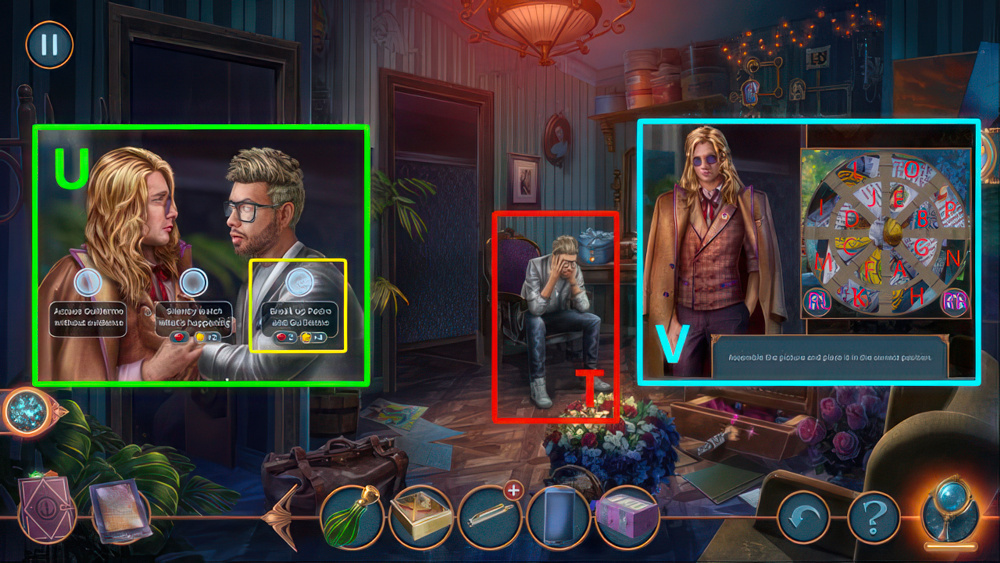
- Give COSMETICS SUPPLY (T).
- Select (U).
- Solution (V): Assemble the picture RL-A-RL-B-RL-C-RL-D-RL-E-F-G-H-I-RL.
- RL-J-RL-RL-K-RL-L-M-N-O-RL-RL-RL-P-RL-RL-RL.
- Earn COSTUME LIST.
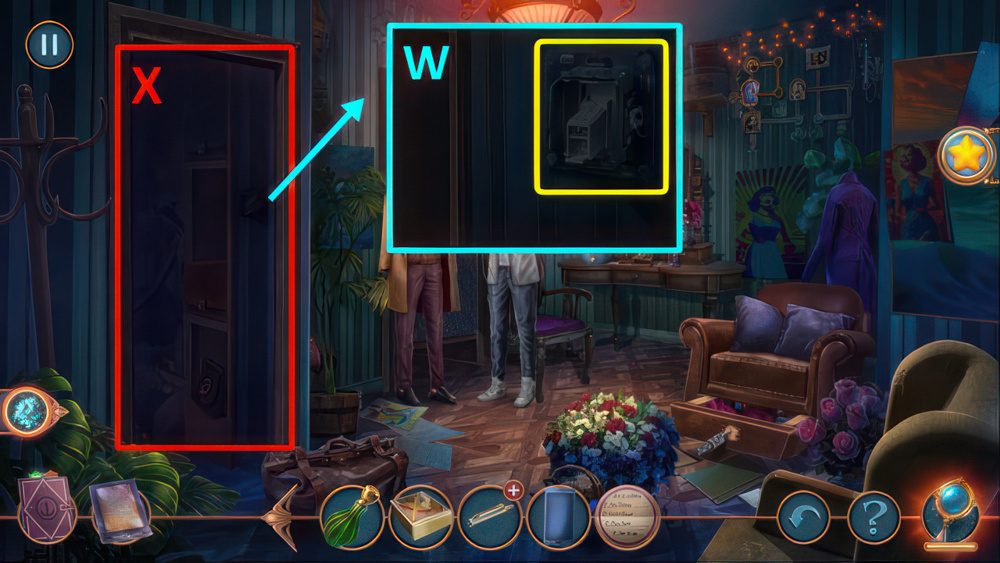
- Use SWITCH PART.
- Click on the switch (W).
- Use COSTUME LIST (X), play puzzle.
- Receive DVD REMOTE.
- Go back.
- Use DVD REMOTE, take DVD (Y).
- Use DVD, read, take PEN TIP and MAGNIFYING GLASS (Z).
- Go back.
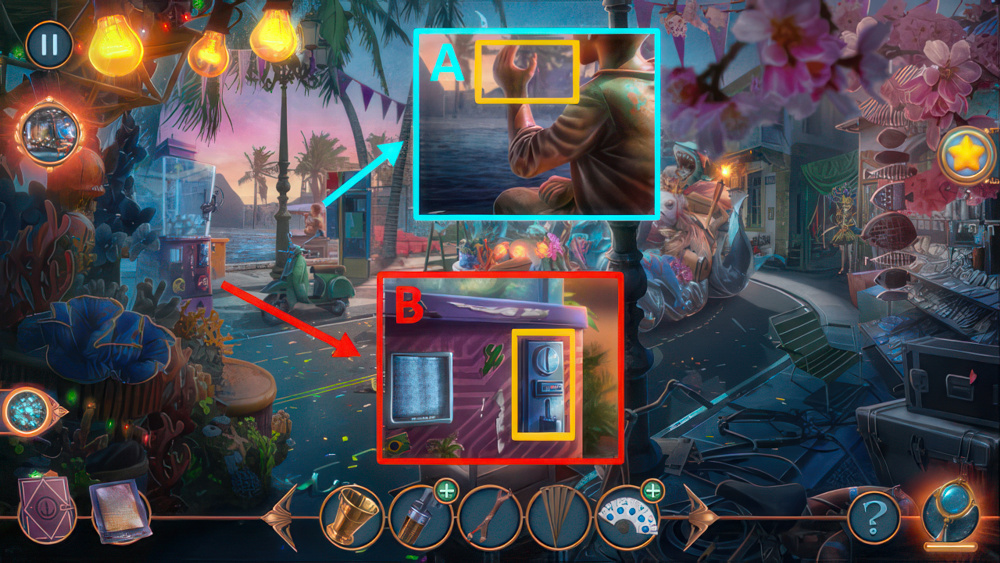
- Use PHONE and MAGNIFYING GLASS (A).
- Solution Easy: D-D-R-R-R-L-L-L-L-U-L-L-U-L-R-R-U-R-R-R-L-D (B).
- Solution Hard: L-U-L-U-R-R-R-D-D-R-L-D-U-L-L-L-D-U-R-R-D-U (C).
- Take CARNIVAL FIRECRACKER (D).
- Use MATCHBOX and CARNIVAL FIRECRACKER.
- Take MINI NAILER (E).
- Go to Ribeira’s Studio.
- Play puzzle, take TINY KEY (F).
- Use TINY KEY, take PEN REFILL (G).
- Use PUNGENT PERFUME, take MANUEL’S GIFT (H).
- Give MANUEL’S GIFT (I).
- Select (J), earn CAR KEY.
- PEN REFILL and PEN TIP on EMPTY PEN, receive PEN.
- Go to Parking Lot.

- Use PEN and BOOK (K).
- Solution: Connect G-E-D-A-E-B-A-H-I-F-B-C-E-H (L).
- Take SOLVED CROSSWORD PUZZLE (M).
- Use SOLVED CROSSWORD PUZZLE, take ERASER (N).
- Go to Television Center.
- Use MINI NAILER (O) and ERASER (P), take RESTAURANT ADDRESS.
- Play puzzle (Q).
- Receive PORTABLE X-RAY DEVICE.
- Use PORTABLE X-RAY DEVICE, click on the plank to remove it, take CREDIT CARD (R).
- Go to Parking Lot.
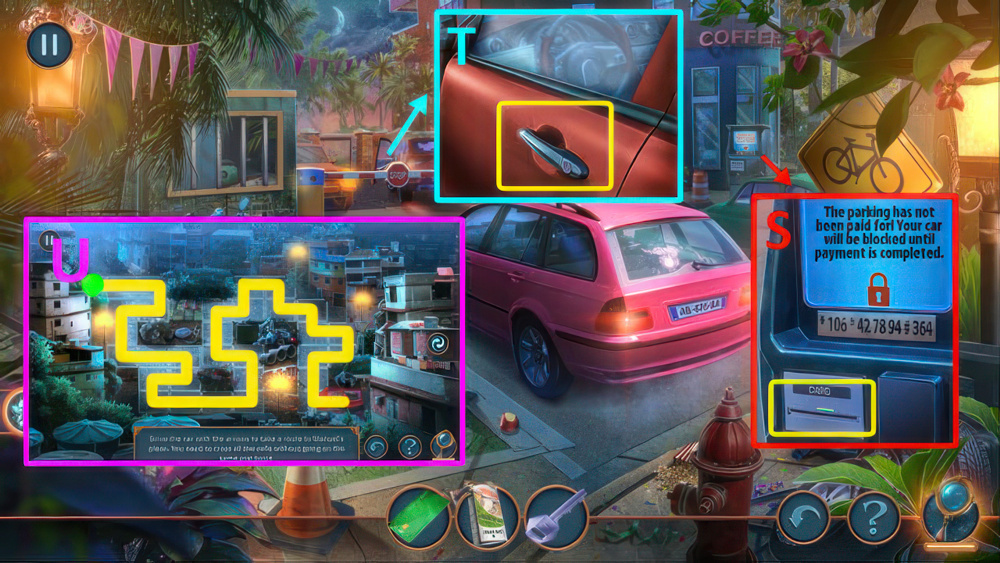
- Use CREDIT CARD (S).
- Use RESTAURANT ADDRESS and CAR KEY (T).
- Solution: drive car along the route (U).
Congratulations! You have completed the game Magic City Detective Season 1 Episode 1: Ocean’s Echo.


