Magic City Detective Season 1 Episode 3: Wrath of the Ocean – The game’s walkthrough begins as you set out to explore the underwater realm of the Siren Lord. In this world, humans are unwelcome guests, and you are a detective ready to solve the mysteries lurking in its depths. Your mission is to find the items and make a deal with a sea witch who seeks revenge. After you discover Ribeira, the good news is replaced by bad news three people who could prevent the tsunami are trapped. It’s up to you to use your detective skills to find the subjects and rescue them. The ocean is angry, and Paula and Manuel are to blame. But to resolve this conflict, you will need to convince them to cooperate. You will have to overcome risky underwater adventures and solve challenging puzzles before finding the items. Ribeira’s father is angry and intends to punish his daughter, but thanks to your intervention and the help of your loyal friend Guillermo, there is a chance to save picturesque Rio from disaster. If you can not pass any of the puzzles or do not know where the items are, on our site you can watch the walkthrough of Magic City Detective Season 1 Episode 3: Wrath of the Ocean, and complete the investigation.
Magic City Detective Season 1 Episode 3: Wrath of the Ocean – Walkthrough
Here you can see the full walkthrough of Magic City Detective Season 1 Episode 3: Wrath of the Ocean, including the main story.

- Take MAGNET, GEAR 1/2, and LIGHTER (Q).
- Move (R).
- Read.
- Play puzzle, take DRIED HERBS (S).
- Read, use DRIED HERBS and LIGHTER, take HEALING POTION (T).

- Give HEALING POTION (U).
- Select (V).

- Earn FANG NECKLACE.
- Use FANG NECKLACE, take CRESCENT BUTTON and SHARP FANGS (A) green.
- Use CRESCENT BUTTON, take PLIERS (A) blue.
- Play puzzle, take JACK (Y).

- Use JACK (Z).
- Use PLIERS (A).
- Go to Ocean Shore.

- Talk, Earn SHELL HORN.
- Open SHELL HORN, play puzzle (B).
- Take PENDANT, CORALS 1/2 (C).
- Take COMPACT, STONE, use MAGNET on the gap, take FORK (D).
- Use FORK, take FLASHLIGHT (E).

- Use FLASHLIGHT (F).
- Solution Easy: 1-2-3-4-5-6-8-9-10-11-12-13-14-16-17-18 (G).
- Solution Hard: 1-2-3-4-5-6-7-8-9-10-11-12-13-14-15-16-17-18-19-20 (H).
- Take BIG PEARL 1/2 and EARRING (I).
- EARRING on PENDANT, earn BIG PEARL 2/2.
- Give BIG PEARL 2/2.
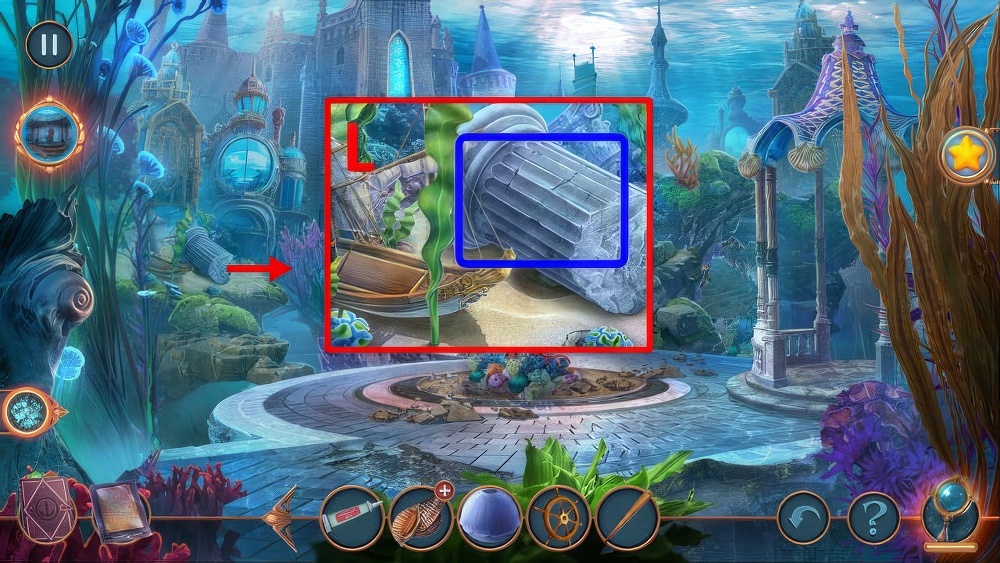
- Go to Underwater City.
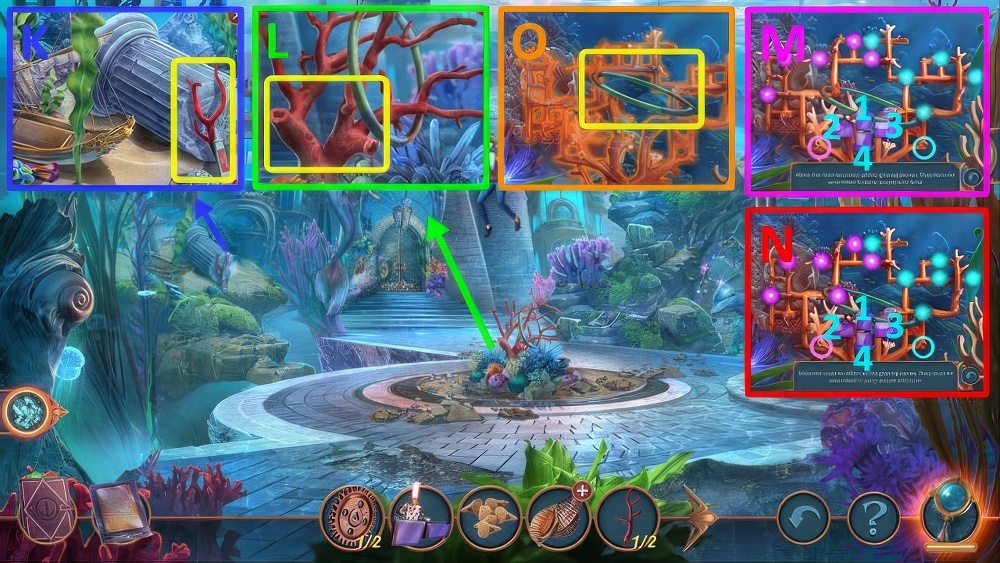
- Take WATER-RESISTANT GLUE and CORALS 2/2 (K).
- Use CORALS 2/2 (L).
- Solution Easy: 2-1-1-1-2-1-1-3-3-3-4-4-3-2-2-3-3-3-3-1-1-2-1-4-3-3-1.
- 2-2-2-2-2-1-2-4-4-1-3-3-2-2-2-4-2-1-3-3 (M).
- Solution Hard: 2-1-1-1-2-1-1-3-3-3-4-4-3-2-2-3-3-1-1-3-3-1-1-3-2-2-1.
- 3-3-3-3-2-2-4-2-2-1-1-3-1-2-2-2-3 (N).
- Take DOLPHIN RING (O).

- Use DOLPHIN RING, take WHITE MOUTHPIECE (P).
- WHITE MOUTHPIECE on SHELL HORN, earn SHELL HORN.
- Use SHELL HORN, take SHELL HORN (Q).
- Solution Easy:8-10-9-11-10-9-7-8-10-9-10-17-16-15-12-7-8-13-16-15-12-7-8-9-4-5.
- 6-11-10-5-2-3-6-11-10-8-9-7-8-9-11-10-8-9-14-17-16-15-12-7-8-9-14-17-16.
- 15-12-7-8-9-14-4-9-1-4-9-8-13-14-9-4-5-10-8-9-7-8-9-4-14-9-10-2-5-4-9-8-10-9 (R).
- Solution Hard:11-13-12-10-11-12-14-13-15-14-13-11-9-10-12-11-18-17-16-9-10-17.
- 21-20-16-9-10-11-12-14-13-6-7-8-15-14-7-3-4-8-15-14-13-11-12-10-11-9-10-17-21-20.
- 16-9-10-11-12-14-13-11-12-13-15-14-12-13-12-10-11-9-10-11-13-12-10-11-18-22-21.
- 20-16-9-10-11-12-19-23-22-21-20-16-9-10-11-12-5-1-2-3-4-8-15-14-13-6-2-3-4-8-15.
- 14-13-12-5-1-2-3-4-8-15-14-13-11-12-10-11-9-10-11-12-14-13-15-14-13-11-12-10-11-12.
- 14-13-11-12-5-6-7-14-13-6-5-19-18-17-10-11-12-19-18-11-13-6-5-12-19-18-11-13-12 (S).

- Select (T), Earn HARNESS.
- Go to Great Hall.

- Take COLORED MIRROR (U).
- Take HARP, use COLORED MIRROR on the BOX (V).
- Solution Easy: A-3, F, A-1, A-4, F, A-5, A-6, F, A-8, A-9, F, A-7, B-10, F, B-2 (W).
- Solution Hard: A-3, F, A-1, A-4, F, A-5, A-6, F, B-10, A-8, F, A-7, F, A-12, F, B-9, A-2, F, A-11 (X).
- Take STONE CODE TABLET (Y).

- Use STONE CODE TABLET, solution : 1, 2, 3, take SEAHORSE LEVER (Z).
- Use SEAHORSE LEVER, read and take MAGIC SEED (A).
- Go back.

- Give HARNESS (B).
- Select (C).
- Go to Sea Witch Cave.

- Take LAMPSHADE and CORK (D).
- Read, use CORK on the hole, take TONGS (E).
- Use TONGS, take GEAR 2/2, use MAGIC SEED, take STRINGS (F).
- Go to Great Hall.

- STRINGS on HARP, earn HARP.
- Use HARP (G).
- Play puzzle, take HELM (H).
- Go to Sea Witch Cave.
- Use GEAR 2/2, take RAKE (I).
- Go back x2.

- Use RAKE, play puzzle, take MUSSELS (J).
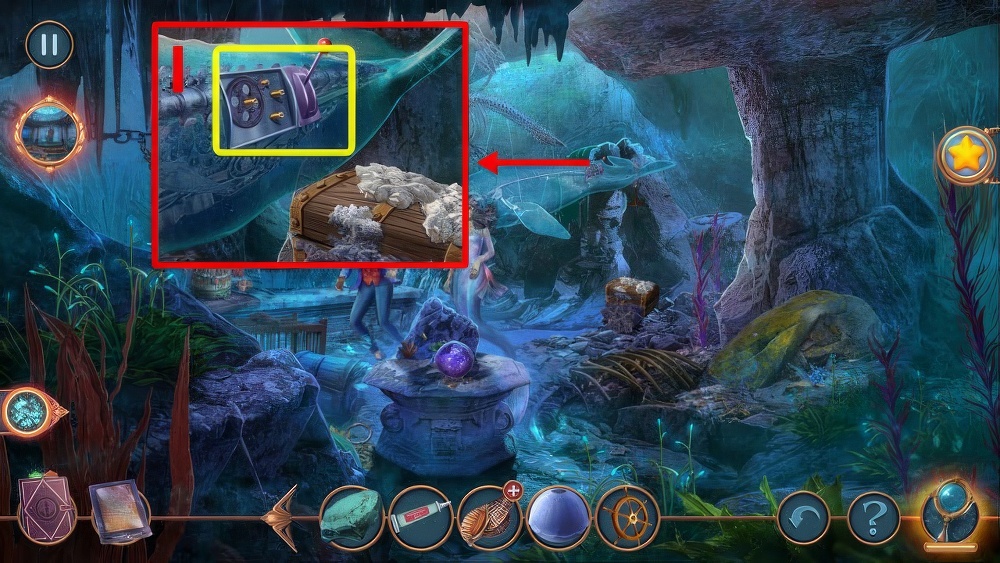
- Use MUSSELS, take ROD (K).
- Go forward.
- Use STONE and ROD, read and take BLACK MOUTHPIECE (L).
- BLACK MOUTHPIECE on SHELL HORN, earn SHELL HORN.
- Go forward.

- Use SHELL HORN (M).
- Solution Easy: A-E, A-D, A-B, A-F (N).
- Solution Hard: A-F, A-D, A-C, A-B, A-G (O).

- Select (P).
- Earn KEY.
- Use KEY, take PUMICE (Q).
- Use PUMICE, take BALL PART 1/2 (R).
- Go back x2.

- Play puzzle, take BOAT REPAIR KIT (S).
- Use BOAT REPAIR KIT and LAMPSHADE, take SAWFISH ROSTRUM (T).
- Go forward.

- Use SAWFISH ROSTRUM, take STURDY SEAWEED, use HELM, take SHORT SWORD (U).
- Go forward x2.

- Play puzzle, take TRIDENT SYMBOL (V).
- Use TRIDENT SYMBOL, take SHIELD (W).
- Use SHIELD and SHORT SWORD, read (X).
- Go to Sea Witch Cave.

- Use STURDY SEAWEED, take MAKE-UP BRUSH and BALL PART 2/2 (Y).
- Use BALL PART 2/2 and WATER-RESISTANT GLUE (Z).
- Solution Easy: 2-2-2-2-3-4-3-3-3-5-5-1-1 (A).
- Solution Hard: 3-4-4-6-5-5-4-4-7-7 (B).
- Go to Performance Hall.

- Take BUTTON and NAPKIN (C).
- Use NAPKIN and LIGHTER, take YO-YO (D).
- Use YO-YO, take SPARE KEY (E).
- Use SPARE KEY (F).
- Go to Soundman’s Booth.
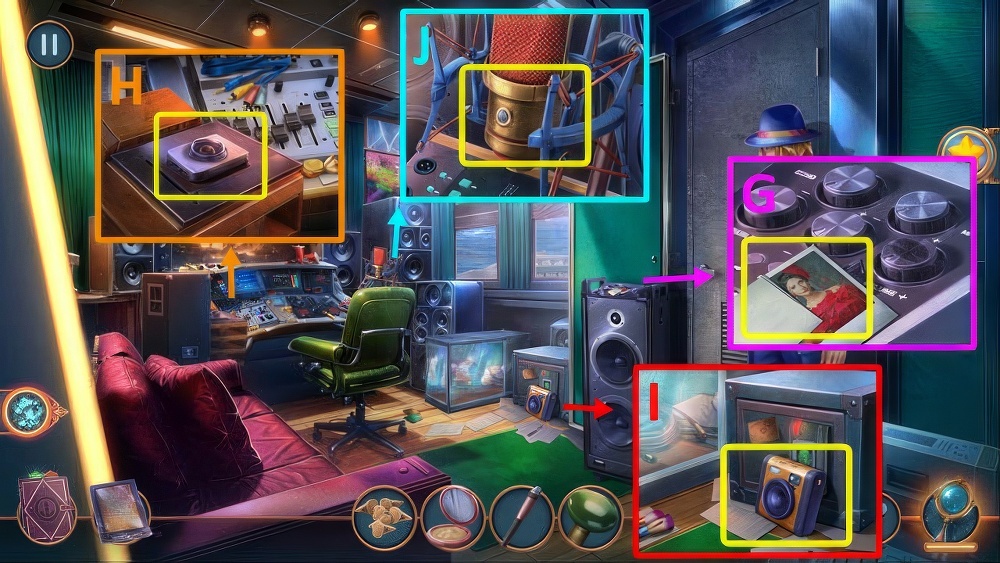
- Read and take SLIDER (G).
- Use SLIDER and BUTTON, play puzzle, take GLASSCUTTER (H).
- Take CAMERA, use GLASSCUTTER on the glass, take WIRE (I).
- Use WIRE (J).
- Go to Rio Waterfront Park.

- Take NEEDLE AND THREAD and CUTTERS (K).
- Move (L).
- Use CUTTERS, take UMBRELLA SPOKE (M).

- Use UMBRELLA SPOKE (N).
- Solution Easy: Place the sliders like it’s shown on the hint (O).
- Solution Hard: Place the sliders like it’s shown on the hint (P).
- Take SHINY STONE (Q).
- Use SHINY STONE, take DUCT TAPE (R).
- Go back.

- Use DUCT TAPE and MAKE-UP BRUSH, take IMPRINT (S).
- Use IMPRINT, take GOLD NOTE CHARM (T).
- Go back.

- Use GOLD NOTE CHARM, read and take AUCTION GAVEL (U).
- Use SHARP FANGS and AUCTION GAVEL, take CAMERA FLASH and PATCH (V).
- Play puzzle (W).
- Talk.

- Solution: 1-2-3-4 (X).
- Go forward x2.

- Move, use NEEDLE AND THREAD and PATCH, take GLOVE (Y).
- Use GLOVE, take CAMERA LENS (Z).
- Go back.

- Play puzzle, take CASSETTE TAPE (A).
- CASSETTE TAPE, CAMERA LENS, and CAMERA FLASH on CAMERA, take CAMERA.
- Go forward.

- Use CAMERA, take TSUNAMI PHOTO (B).
- Go back x2.

- Use TSUNAMI PHOTO (C).
- Solution: 1-2-1-3-4-3-4 (D).
Congratulations! You have completed the game Magic City Detective Season 1 Episode 3: Wrath of the Ocean.


