Ms. Holmes 3: The Adventure of the McKirk Ritual (Bonus Chapter) – Jane’s father and husband travelled a lot, so she was often the hostess of the guest house. She has amassed quite a collection here of the items they brought back from their wanderings.
Bonus Chapter Walkthrough
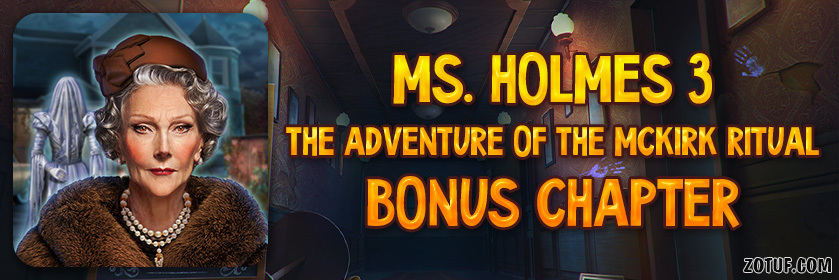
- Take SAFETY PIN (A).
- Use SAFETY PIN (B), take SOUTH MAP and LATCH BOLT.
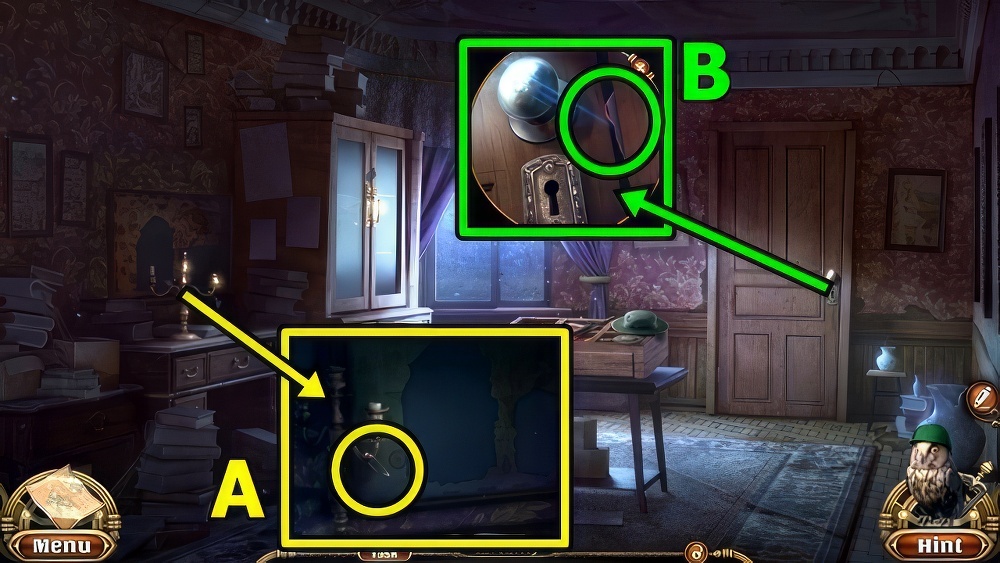
- Take PEACOCK TAIL 1/3 (C).
- Insert LATCH BOLT, take WATERPROOF MATCHES and COMPASS.
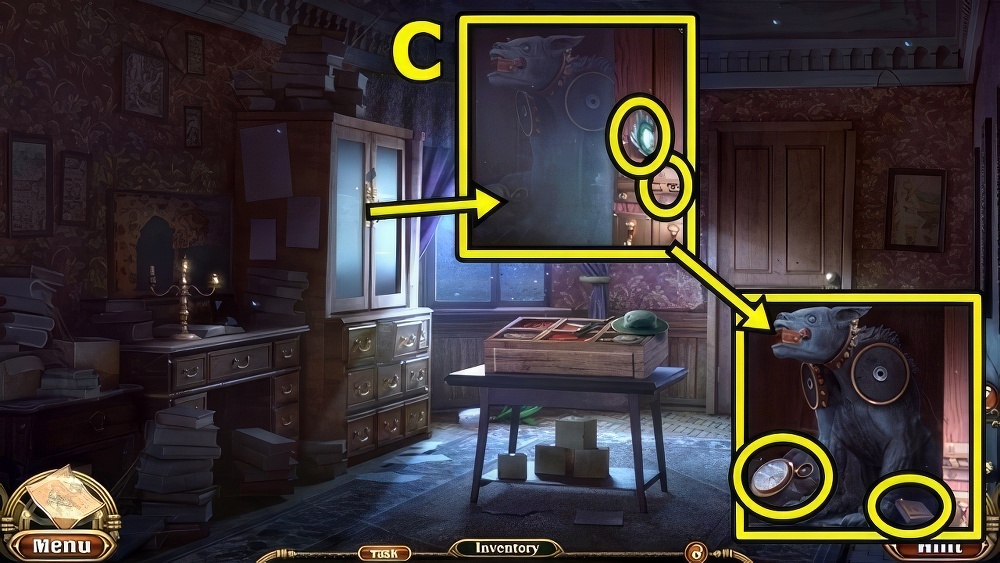
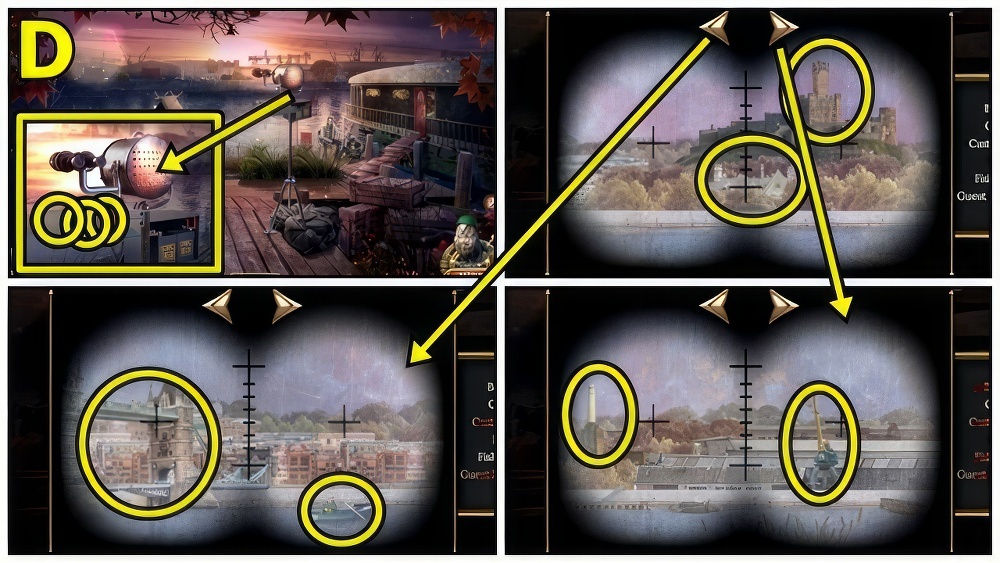
- Take ARCHAEOLOGIST’S SPADE (D).
- Insert COMPASS, take LEFT HEAD and WEST MAP.
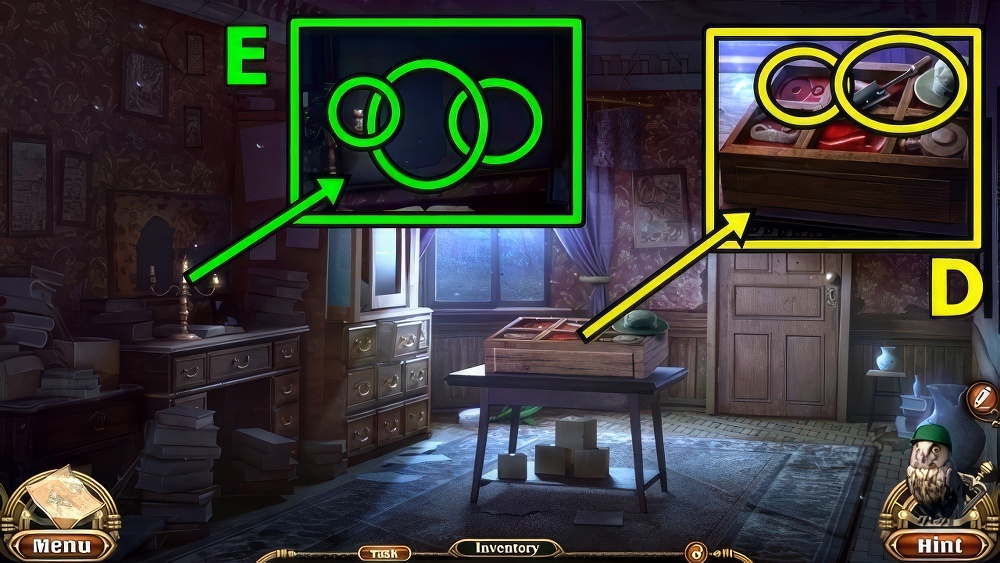
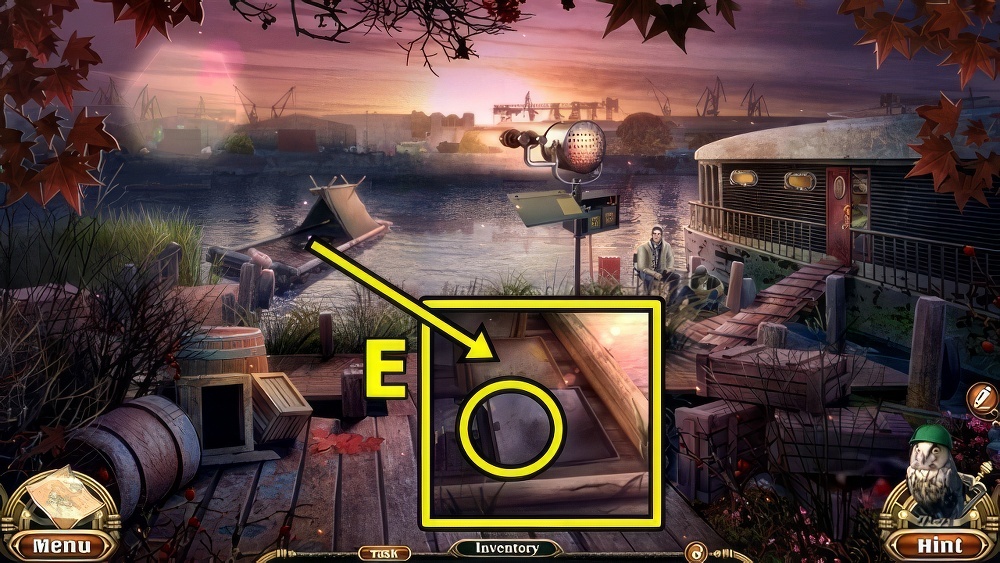
- Use WATERPROOF MATCHES (E).
- Add WEST MAP and SOUTH MAP.
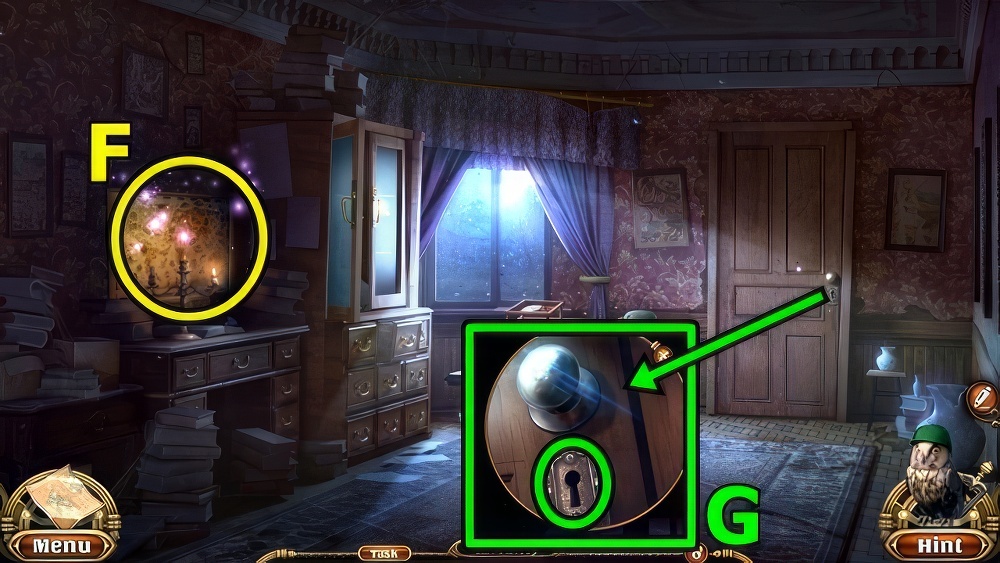
- Play puzzle (F), take MAPMAKER’S LOCKPICK.
- Use MAPMAKER’S LOCKPICK (G).
- Go to Guest House Hall.
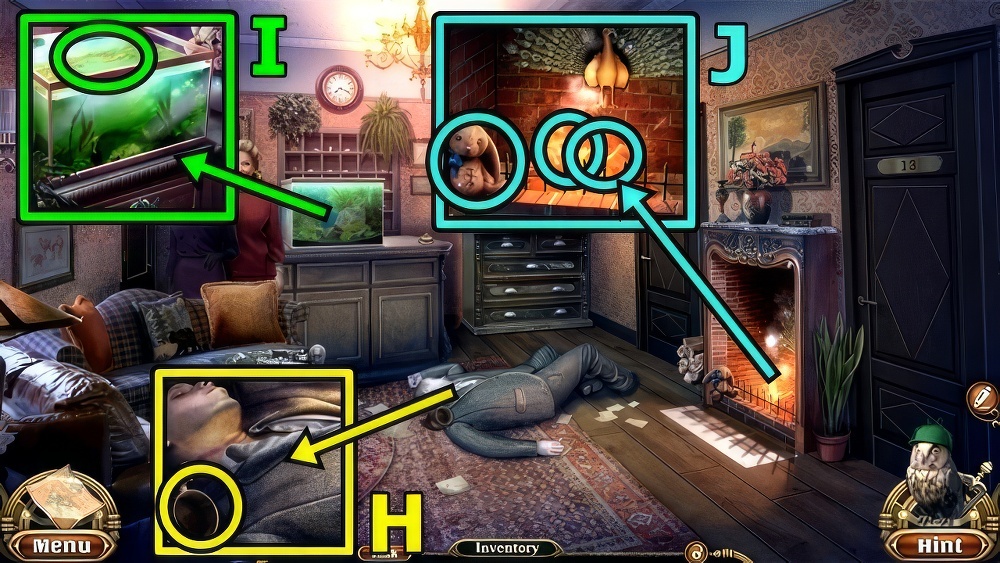
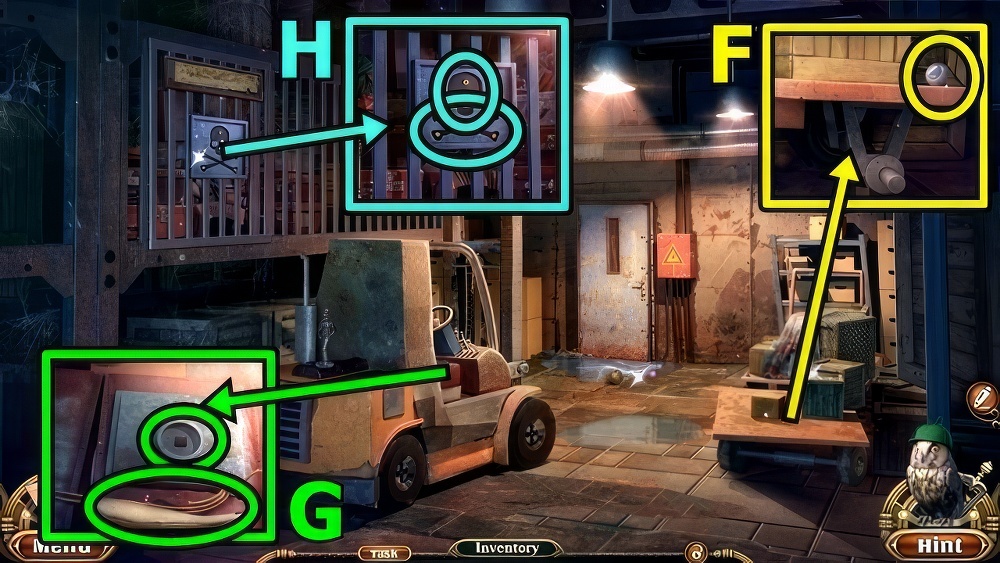
- Take JUG (H).
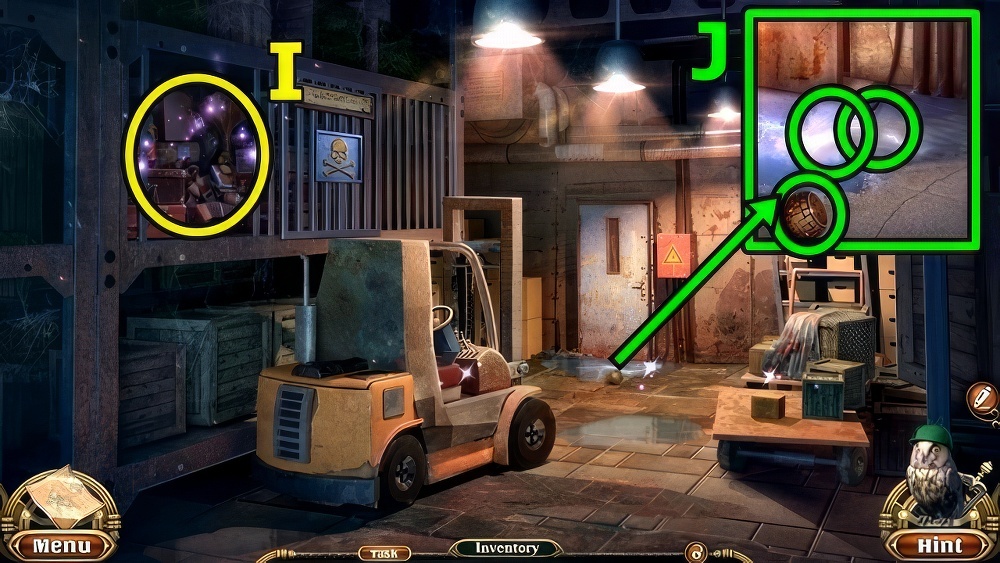
- Use JUG (I), receive WATER.
- Take STUFFED HARE TOY (J).
- Pour WATER, use ARCHAEOLOGIST’S SPADE, take STETHOSCOPE and SILVER TOWER.
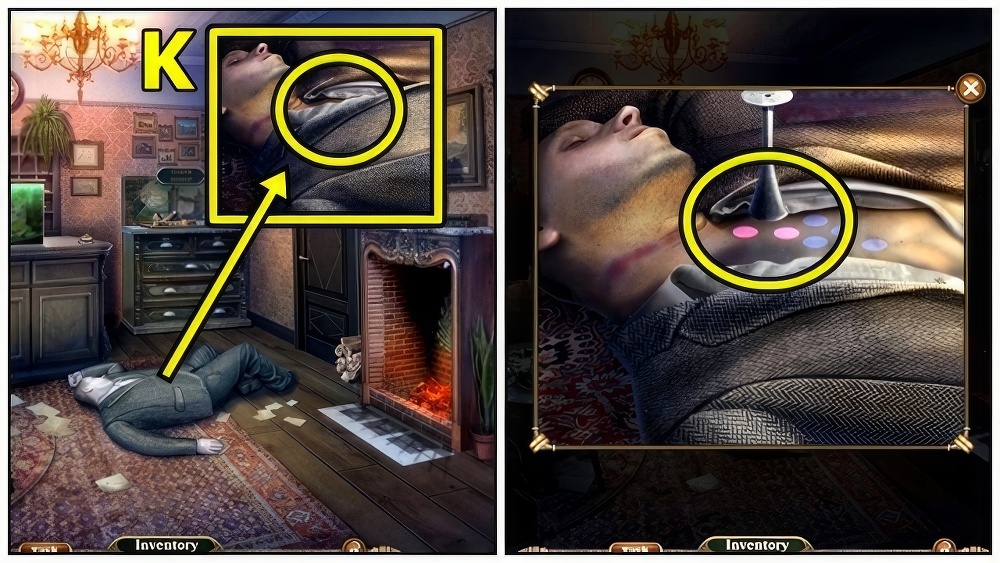
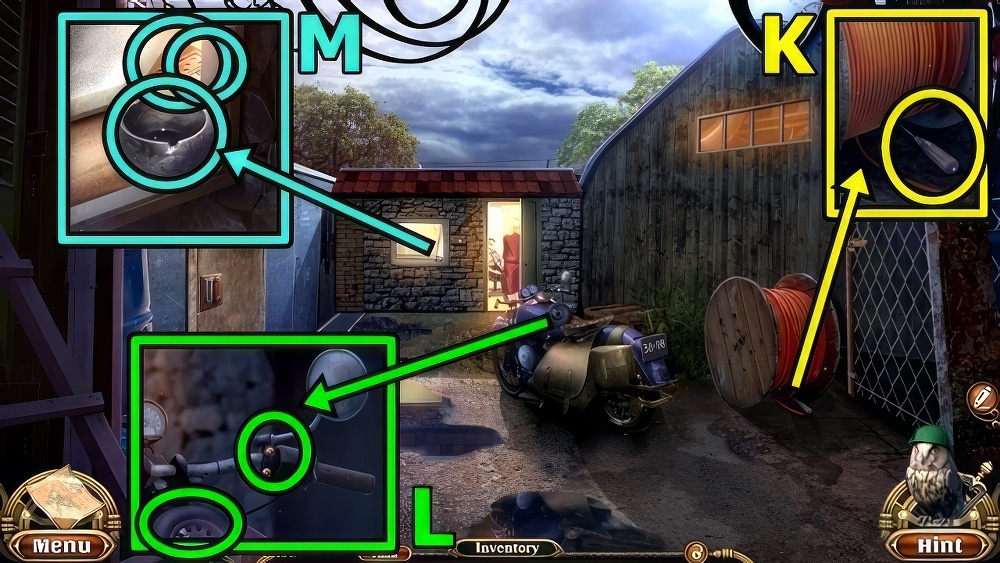
- Use STETHOSCOPE (K).
- Locate pulse.
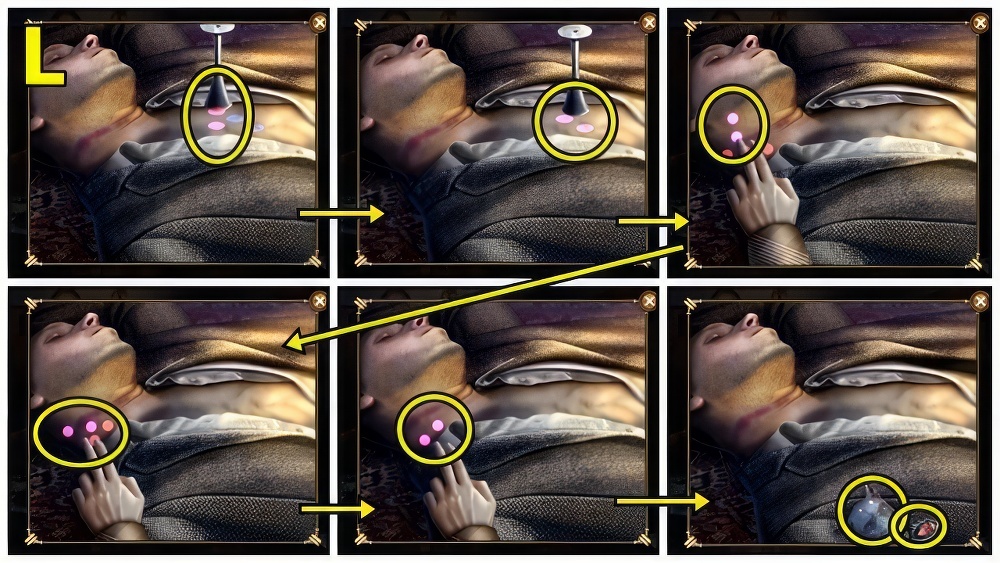
- Locate pulse (L), take PEACOCK TAIL 2/3 and RIGHT HEAD.
- Move down.
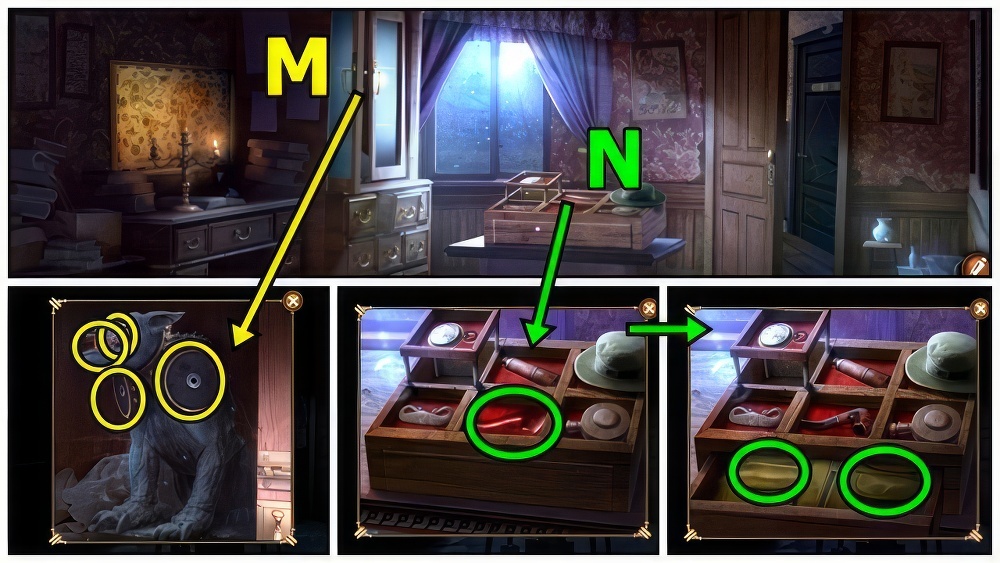
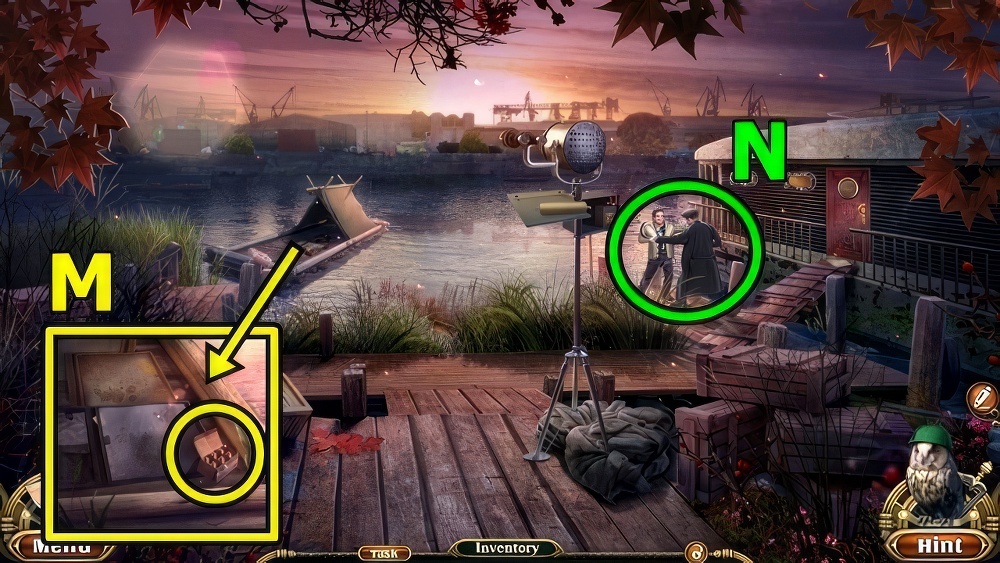
- Add LEFT HEAD (M) and RIGHT HEAD, take MUSIC BOX and PIPE.
- Add PIPE (N).
- Open, take PEACOCK TAIL 3/3 and COPPER TOWER.
- Enter Guest House Hall.
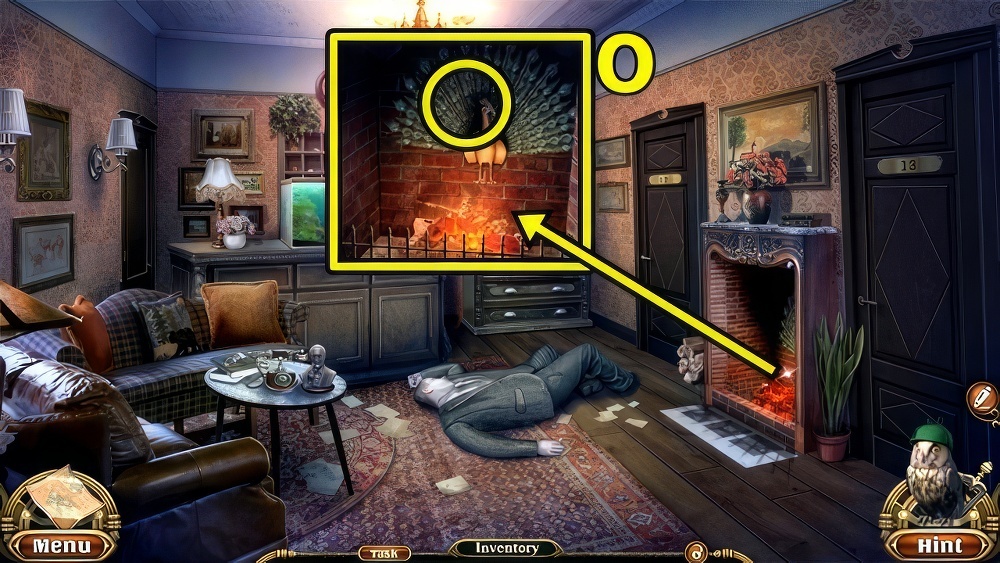
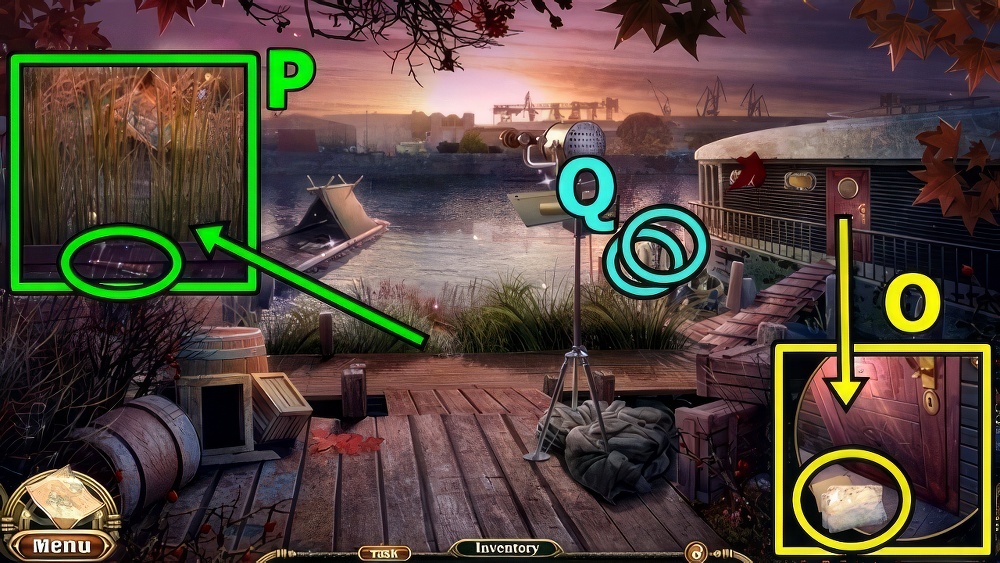
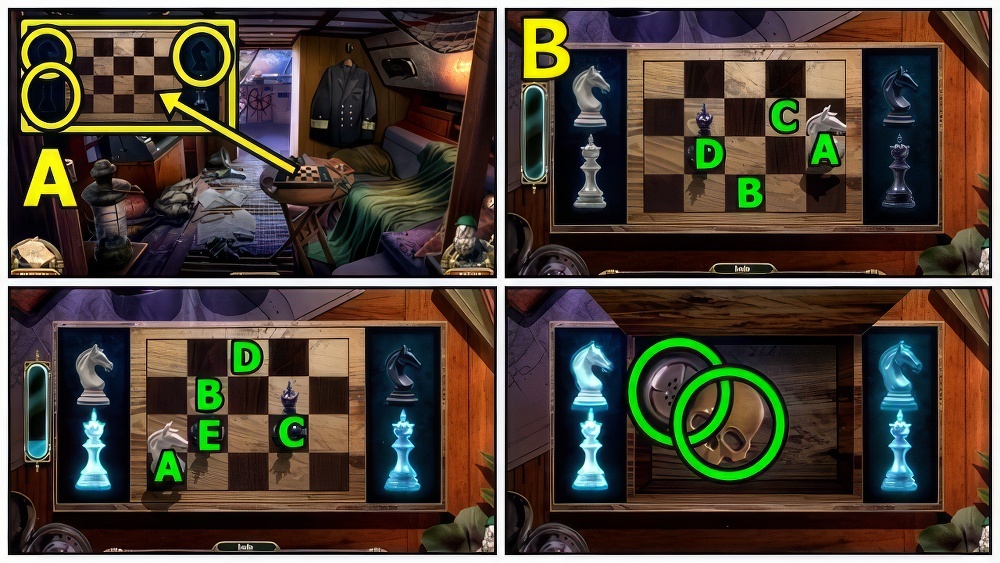
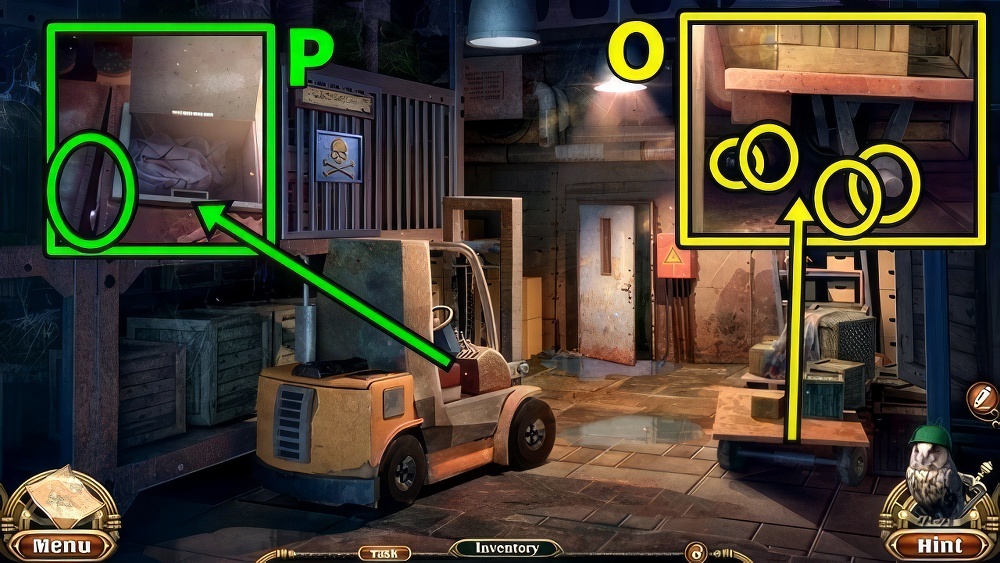
- Add PEACOCK TAIL (O).
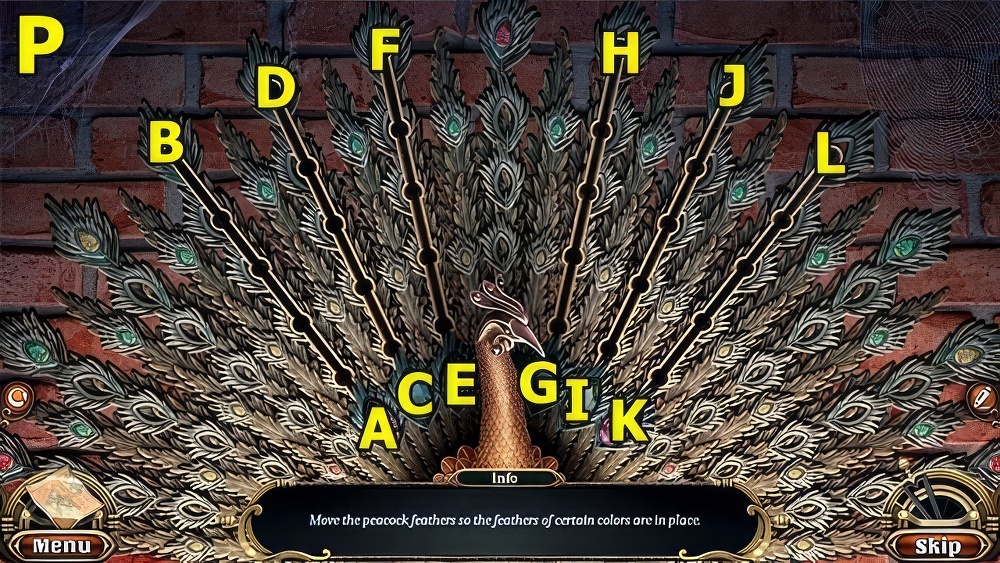
- Move the peacock crystals so all the feathers are in their proper place.
- Moving one may move others.
- Walkthrough: (P) (A-B)-(C-D)-(K-L)-(G-H).
- Take DRAWER KEY and BLADE.
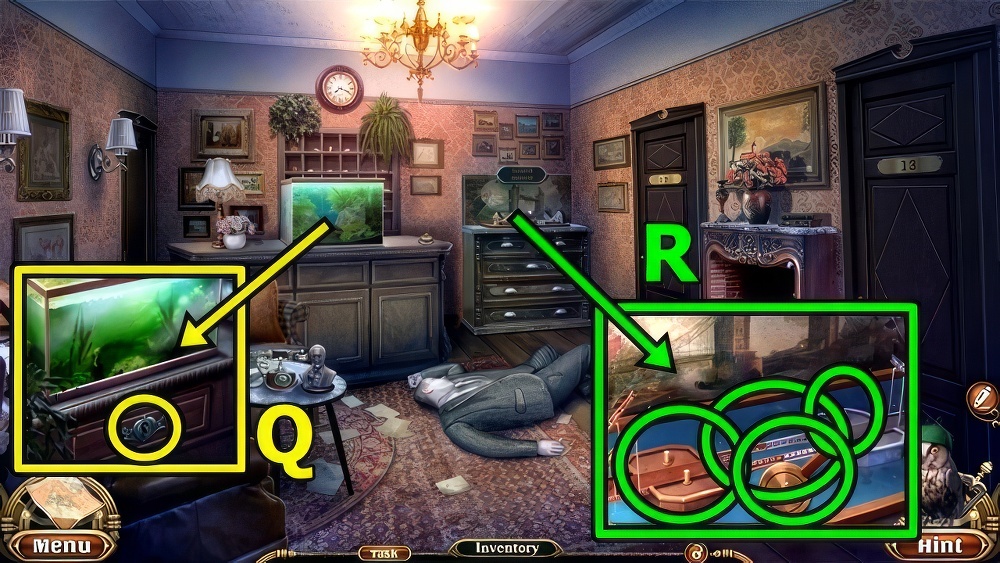
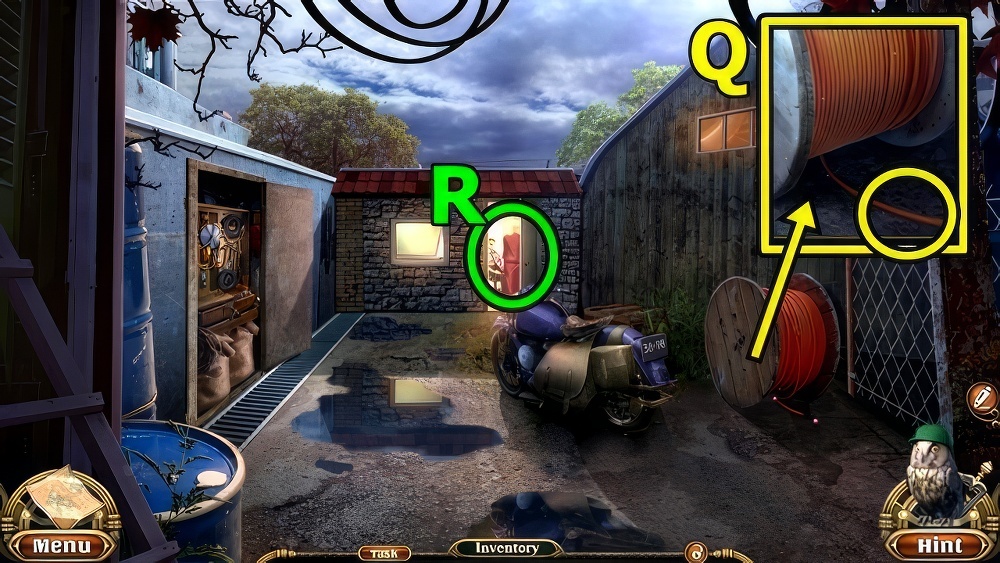
- Insert DRAWER KEY (Q), take BRIDGE.
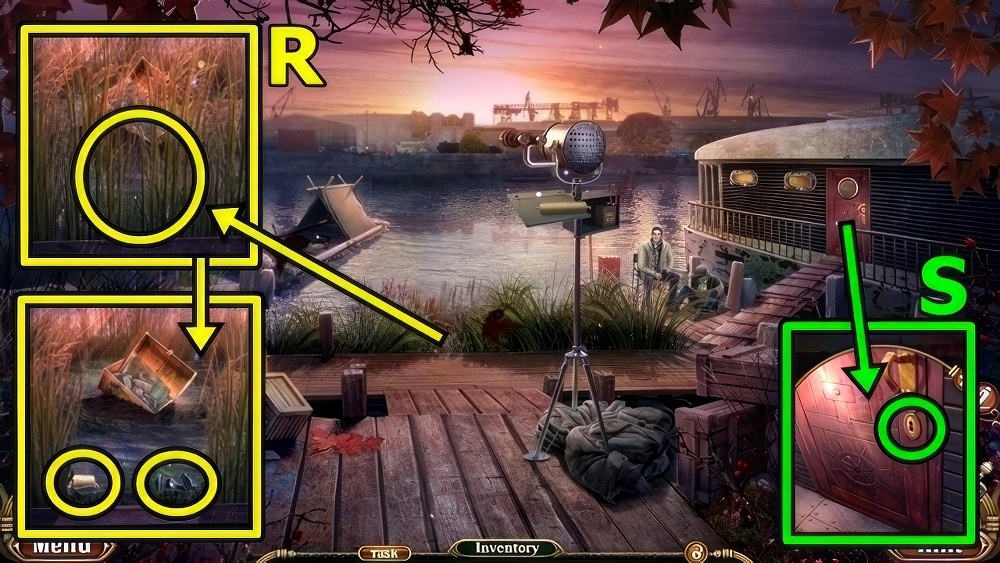
- Take PENDULUM (R).
- Add COPPER TOWER, SILVER TOWER and BRIDGE.
- Enter Secret Room.
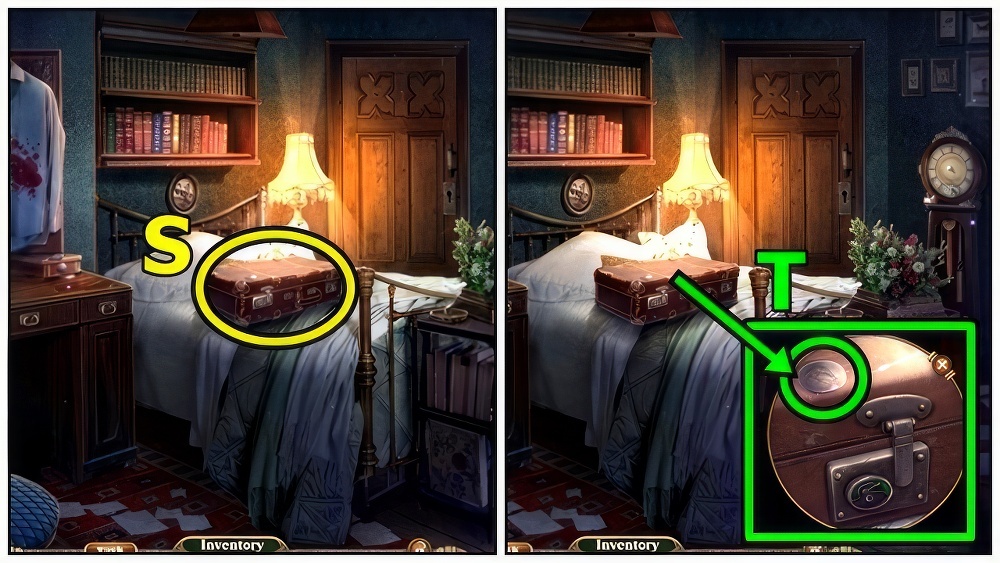
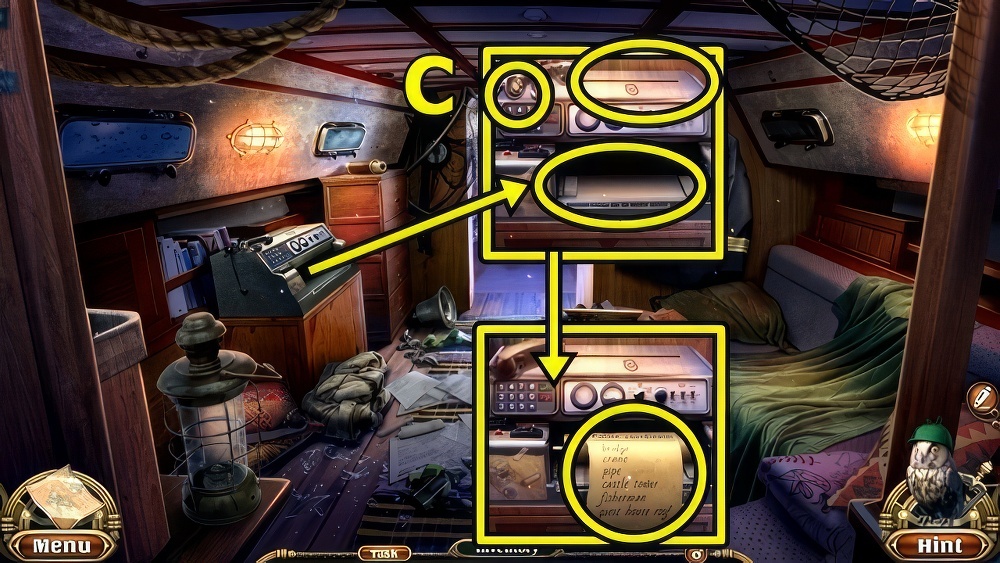
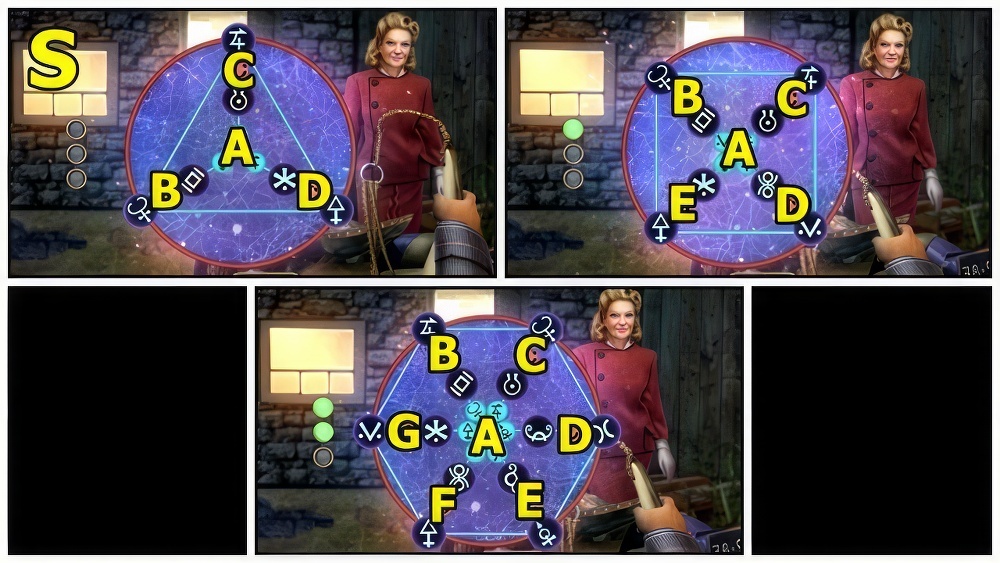
- Examine (S).
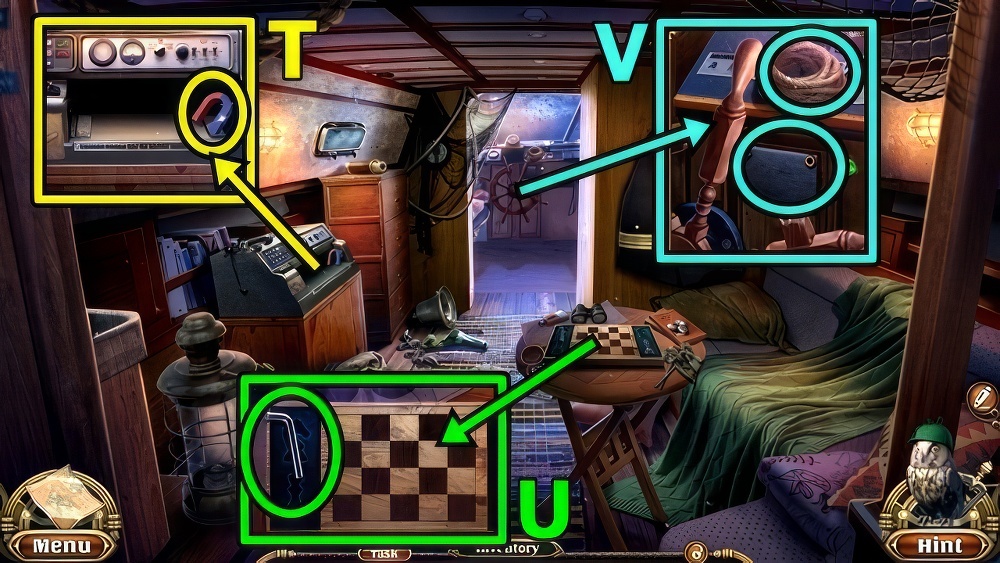
- Take COLLECTOR’S COIN (T).
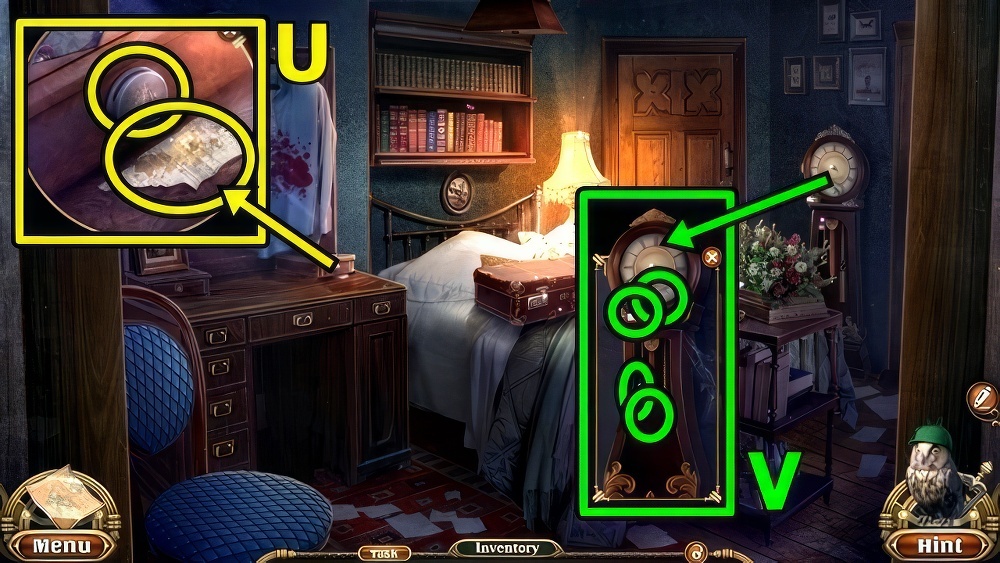
- Take NEWSPAPER FRAGMENT 1/4 (U).
- Insert COLLECTOR’S COIN, take CLOCK WEIGHT and TWEEZERS.
- Take LOCK ELEMENT (V).
- Add PENDULUM and CLOCK WEIGHT, open, take SNAKE BUCKLE and NEWSPAPER FRAGMENT 2/4.

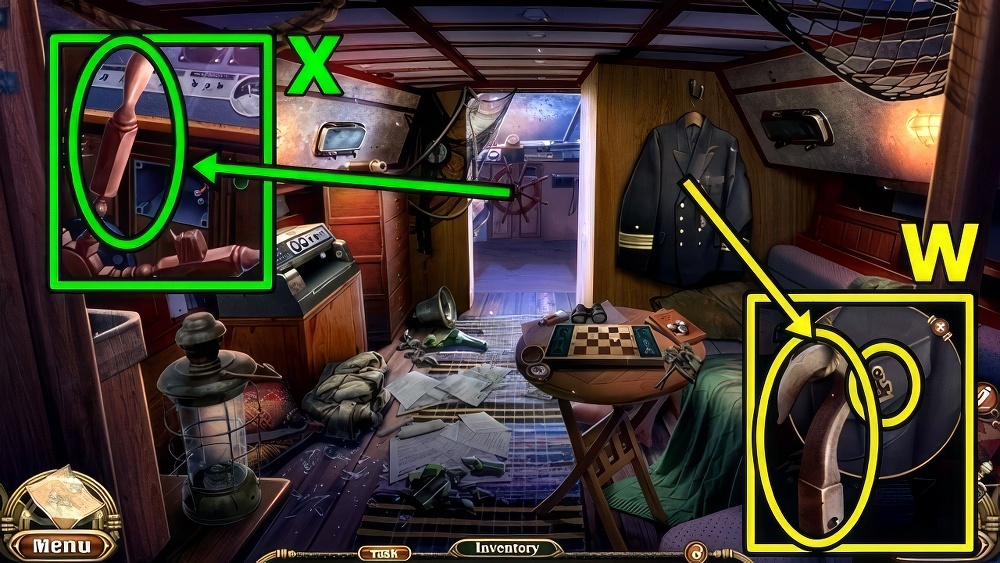
- Add SNAKE BUCKLE (W).
- Play puzzle (X), receive HEART AMULET.
- BLADE on STUFFED HARE TOY, add HEART AMULET, take BOOK DRAWING.
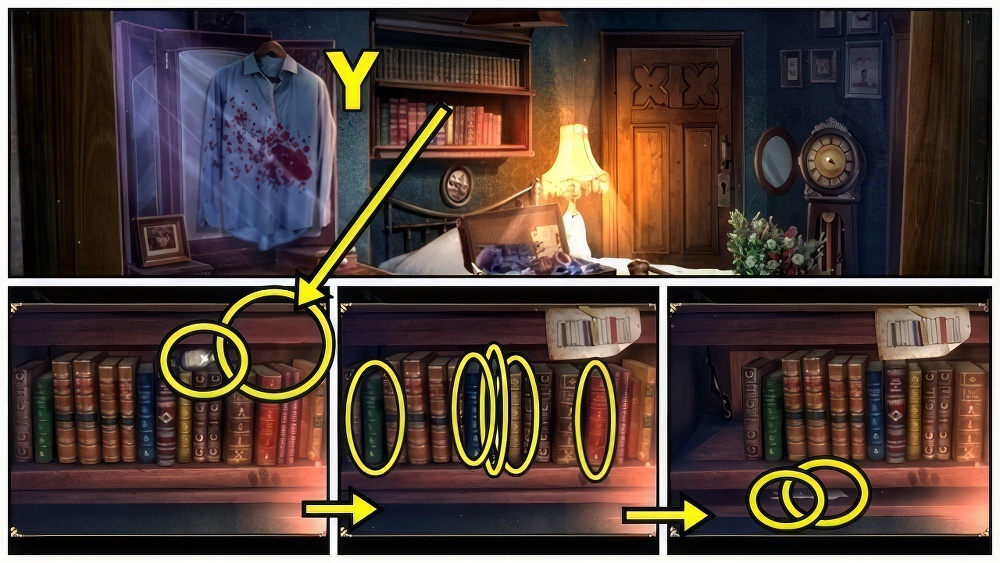
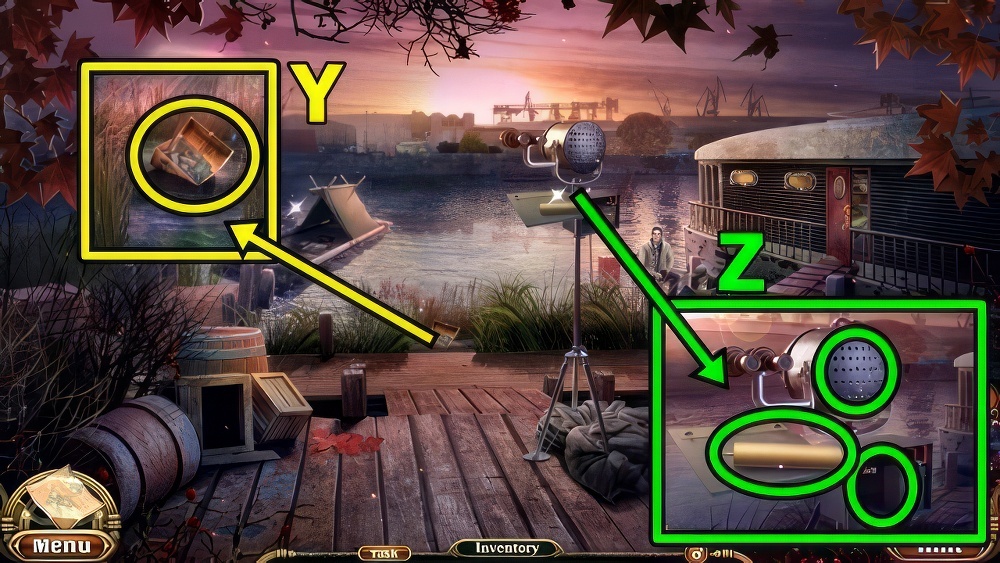
- Take GLUE (Y).
- Add BOOK DRAWING, select books.
- Take BOX HANDLE and NEWSPAPER FRAGMENT 3/4.
- BOX HANDLE on MUSIC BOX, take BASEMENT KEY.
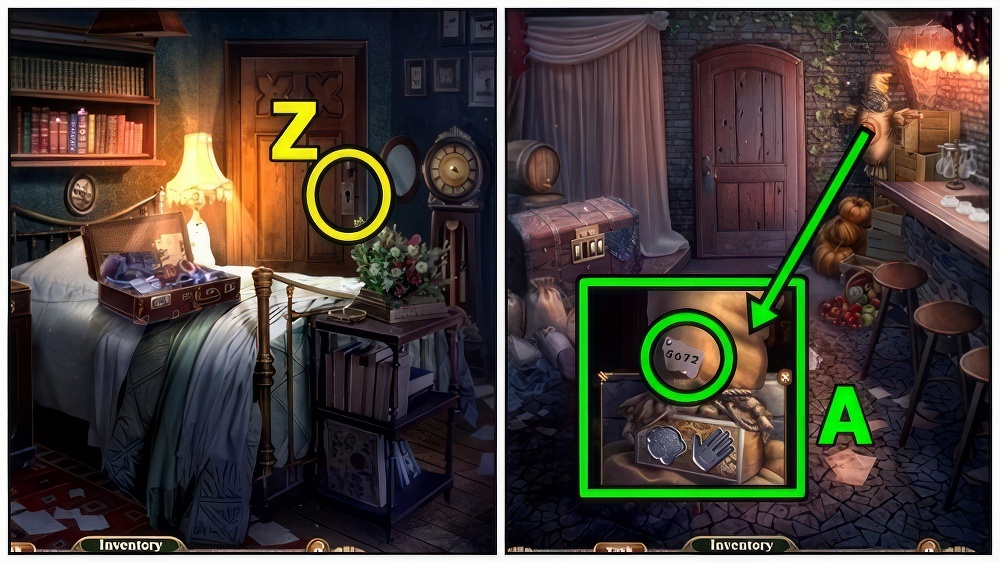
- Insert BASEMENT KEY (Z).
- Enter Hidden Passage.
- Take CHEST CODE (A).
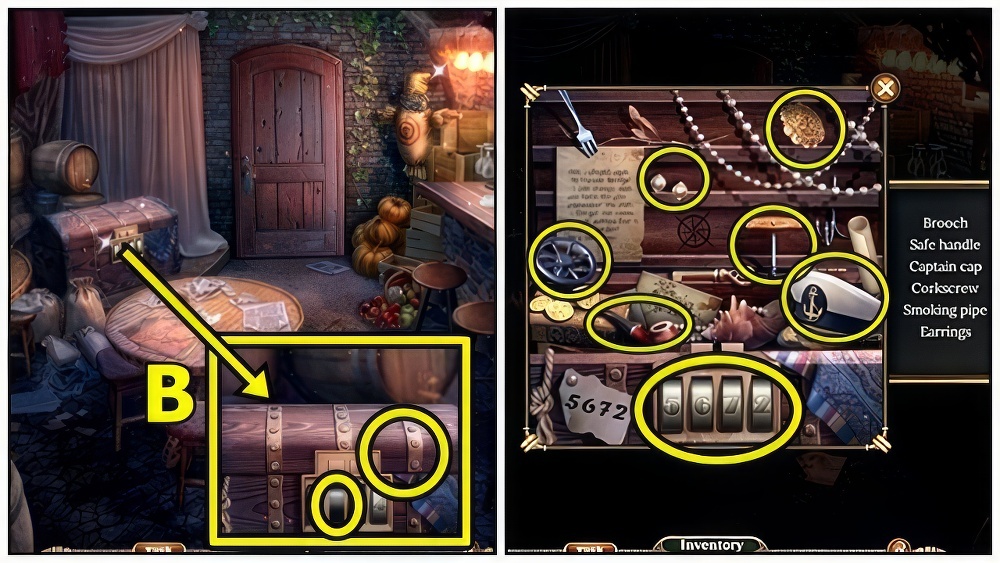
- Add LOCK ELEMENT (B) and CHEST CODE.
- Enter 5-6-7-2, find items, receive SAFE KNOB.
- Take PALM FIGURINE (C).
- Add SAFE KNOB, take COCKTAIL SPOON and BOOK STASH.
- Move down.
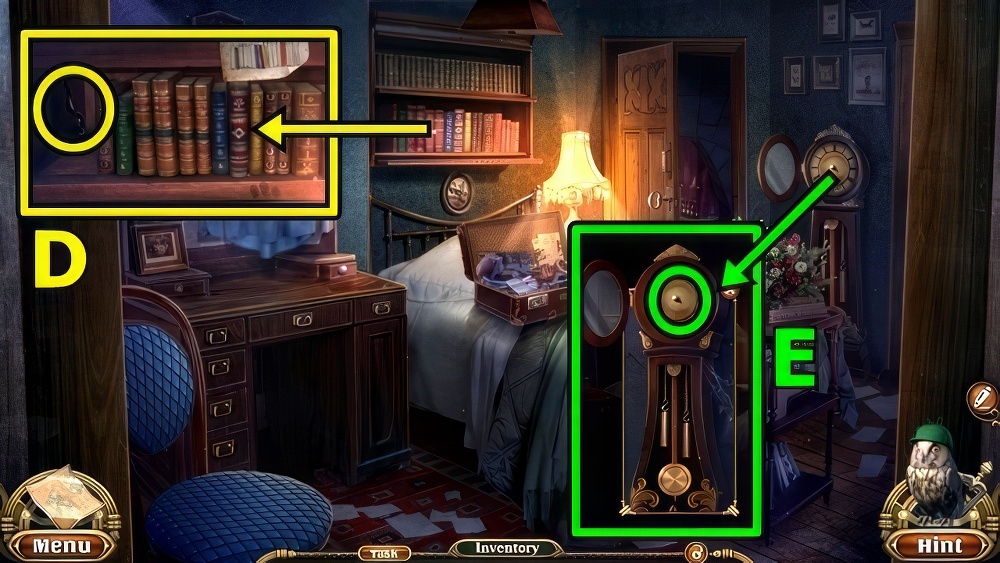
- Use COCKTAIL SPOON (D), take CLOCK HANDS.
- Add CLOCK HANDS (E), take PAW FIGURINE.
- Enter Hidden Passage.

- Add PAW FIGURINE (F) and PALM FIGURINE.
- Restore the image.
- To rotate the parts, place them over the upper-left arrow.
- Walkthrough: (G).
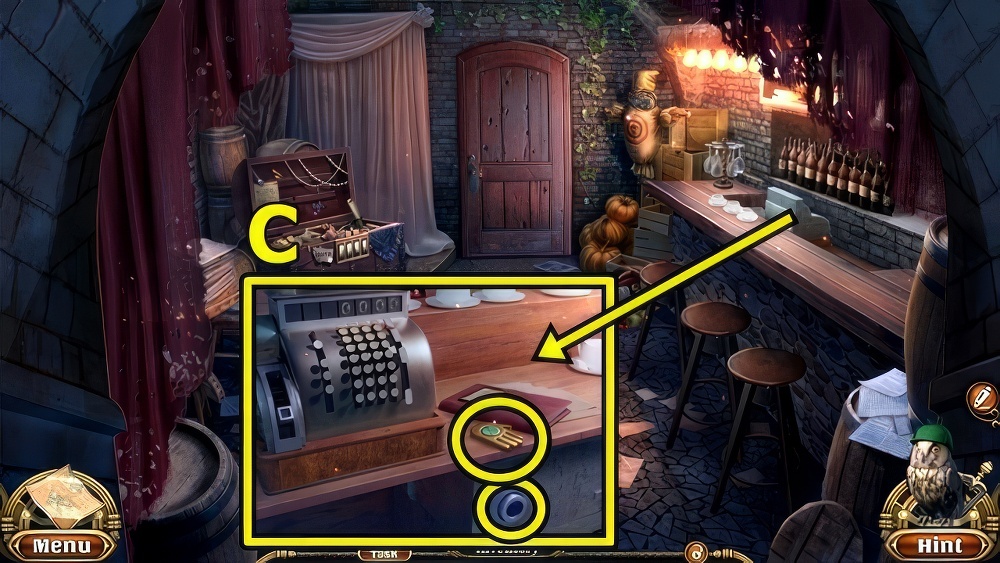
- Take REVOLVER and SOLVENT.

- SOLVENT on BOOK STASH, use TWEEZERS, take CASH REGISTER LEVER.
- Insert CASH REGISTER LEVER (H), take WHITE QUEEN and NEWSPAPER FRAGMENT 4/4.
- Add GLUE (I) and NEWSPAPER FRAGMENT.
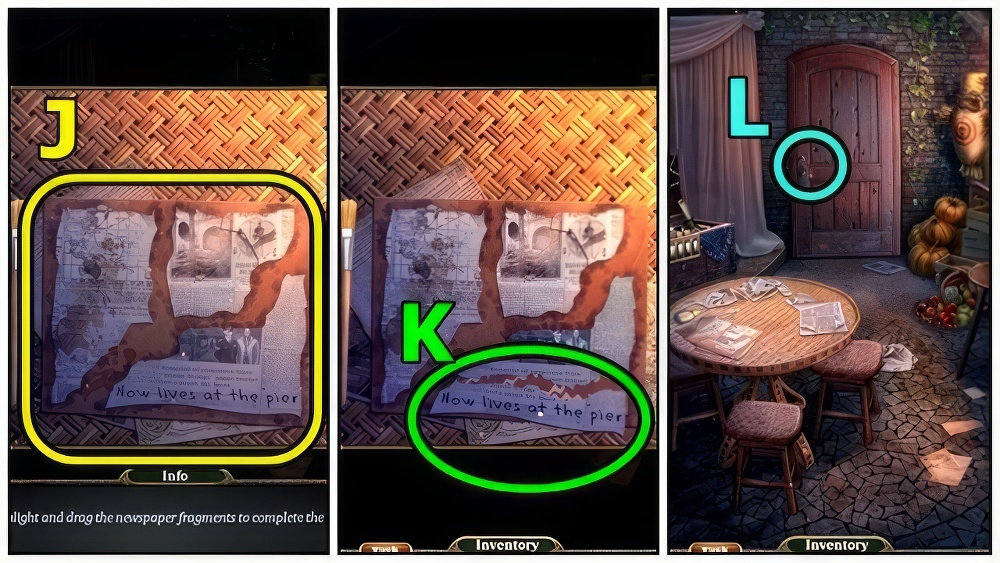
- Walkthrough: (J).
- Take CARETAKER’S ADDRESS (K).
- Use CARETAKER’S ADDRESS (L).
- Take CARTRIDGES (M).
- CARTRIDGES on REVOLVER.
- Use REVOLVER (N).
- Take STACK OF CARDS (O).
- Take INK PEN (P).
- Offer STACK OF CARDS (Q) and INK PEN.
- Play puzzle, receive PAPER, take SICKLE.
- Use SICKLE (R), take HOUSE KEYS and BLACK KNIGHT.
- Insert HOUSE KEYS (S).
- Enter Houseboat.
- Take MAGNET (T).
- Take HEX KEY (U).
- Take ROPE (V).
- Use HEX KEY, take CAPTAIN’S EMBLEM and HAND BATTERY.
- Take HOOK HEAD (W).
- Insert CAPTAIN’S EMBLEM, use MAGNET, receive FILE.
- Use FILE (X), receive WOODEN STICK.
- Move down.
- WOODEN STICK and ROPE on HOOK HEAD, take HOOK.
- Use HOOK (Y), take WET PAPERS.
- Take FAX CYLINDER (Z).
- Add HAND BATTERY and WET PAPERS, receive WHITE KNIGHT and COMPROMISING MATERIAL.
- Enter Houseboat.
- Add WHITE QUEEN (A), WHITE KNIGHT and BLACK KNIGHT.
- Use the knight to take the queen.
- Walkthrough: (B) A-B-C-D, A-B-C-D-E.
- Take SKULL AMULET and PHONE MICROPHONE.
- Add PHONE MICROPHONE (C), FAX CYLINDER and COMPOMISING MATERIAL.
- Take POLICE COORDINATES.
- Move down.
- Add PAPER (D), INK PEN and POLICE COORDINATES, find items, receive LOCATION DRAWING.
- Add LOCATION DRAWING (E).
- Take KNOB (F).
- Take LEATHER BELTS (G).
- Insert KNOB, take RUBBER GLOVES and BONES AMULET.
- Add SKULL AMULET (H) and BONES AMULET.
- Play puzzle (I), receive ADHESIVE TAPE.
- Take CANDLE HOLDER (J).
- Use RUBBER GLOVES and ADHESIVE TAPE.
- Enter Repair Yard.
- Take SCREWDRIVER (K).
- Take CART WHEEL (L).
- Use SCREWDRIVER, receive MOTORCYCLE MIRROR.
- Take ASHTRAY (M).
- Use MOTORCYCLE MIRROR, take STOREROOM PUNCH CARD.

- Insert STOREROOM PUNCH CARD (N), find items, receive JACK.
- Move down.
- Add JACK (O), then CART WHEEL.
- Take CANDY BOX and SPOOL OF THREAD.
- Use SPOOL OF THREAD (P), take PLIERS.
- Enter Repair Yard.
- Use PLIERS (Q), take CABLE.
- CANDLE HOLDER, ASHTRAY, CANDY BOX and CABLE on LEATHER BELTS, take BOLAS.
- Use BOLAS (R).
- Swap the symbols using the arrows so the inner symbols match each other.
- Select an outer rim to rotate the large arc.
- Walkthrough: (S) A×2-B-C-D, A×2-B-A-C-D-A-E, A-B-A×4-C-E-G-A×2-D-F.
Congratulations! You have completed the game Ms. Holmes 3: The Adventure of the McKirk Ritual.


