
Ms. Holmes 4: The Case of the Dancing Men – Ms. Charlotte Holmes, a distant relative of the legendary Sherlock Holmes, once again takes on a case involving family tragedy and strange messages. Decades after Sherlock solved the mystery of the Dancing Men, the Cubitt family is once again at the center of events. This time things are complicated by the disappearance of Olivia Cubitt on the eve of her wedding. To Charlotte’s rescue comes her longtime friend, forensic scientist Oscar Watson. Together they examine the evidence, study the archives, and try to figure out who is behind the return of the Dancing Men. Their investigation begins with a meeting at the famous museum at 221B Baker Street, where old secrets intertwine with new mysteries. Unravel the mysteries with Charlotte and Oscar to find out how the past is connected to the present and who is behind this dark game. If you can not pass any of the puzzles or do not know where the items are, on our site you can watch the walkthrough of Ms. Holmes 4: The Case of the Dancing Men, and find out what surprises prepare the streets of London.
Ms. Holmes 4: The Case of the Dancing Men – Walkthrough
Here you can see the full walkthrough of Ms. Holmes 4: The Case of the Dancing Men, including all chapters, including bonus chapter, in pictures.

- Talk (A).
- Select 1 or 2 (B).
- Take COIN (C).
- Take GLASS GEM (D).

- Take STAND, use COIN (E).
- Take PEARL and WATER BOTTLE (F).
- Place PEARL and GLASS GEM, take JEWELRY MAGNIFIER and PLASTER (G).
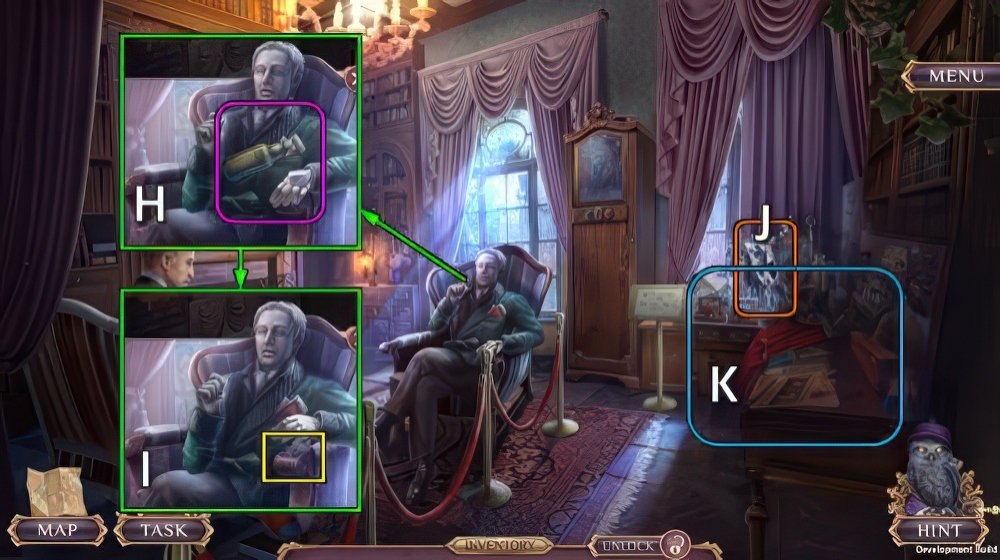
- Use PLASTER and WATER BOTTLE (H), take GLASS PANE and SHOE HEEL (I).
- Place GLASS PANE (J).
- Play puzzle, receive HOLMES’ PIPE (K).
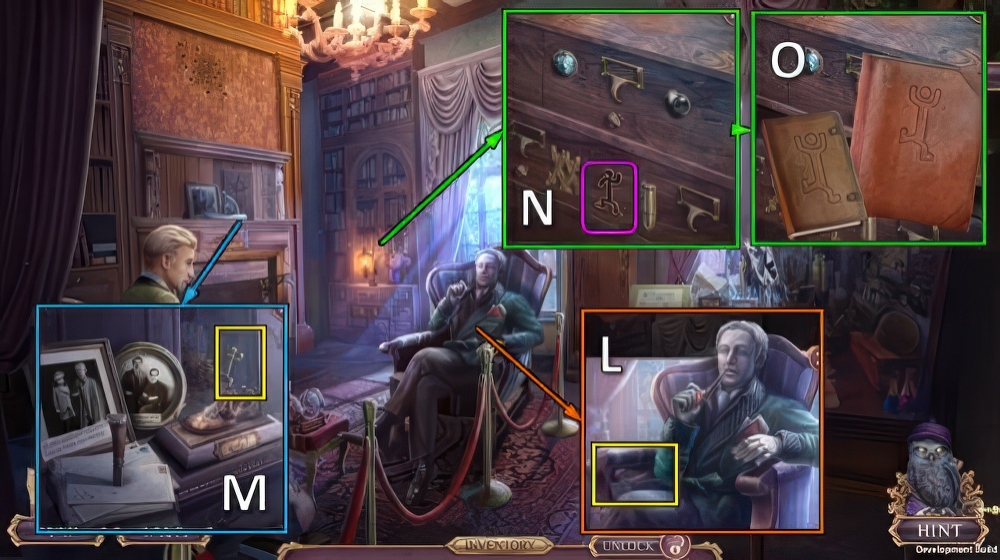
- Place HOLMES’ PIPE, take SHOE TOE and JOURNAL (L).
- SHOE TOE and SHOE HEEL on STAND, take SHOE DISPLAY.
- Place SHOE DISPLAY, take DANCING MAN (M).
- Place DANCING MAN (N).
- Use JOURNAL (O).
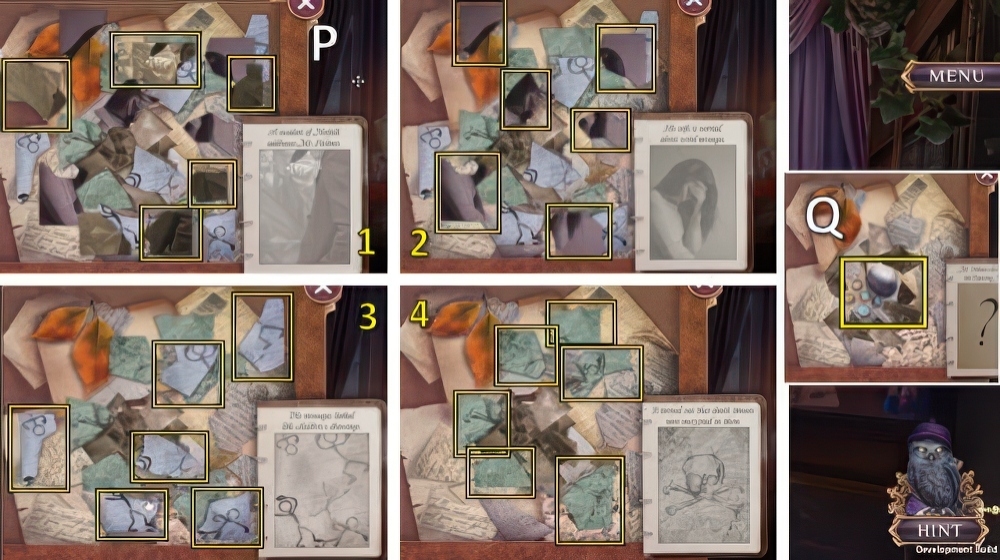
- Solution (P).
- Take TYPEWRITER KEYS and MARBLE STONE (Q).

- Take PHONE NUMBER (R).
- Place PHONE NUMBER, dial 5-2-9 (S).
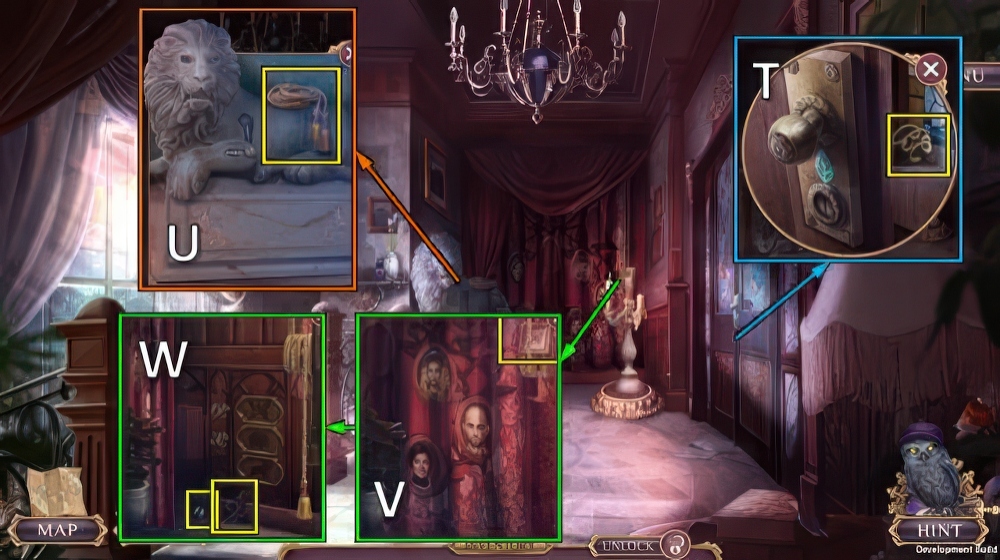
- Take MONOGRAM (T).
- Take CORD (U).
- Take EMPTY FRAME, place CORD (V).
- Take FLORISH and SCREW (W).

- Take PLATE 1/3, use FLORISH and JEWELRY MAGNIFIER (X).
- Solution (Y): (1-5)-(3-27)-(29-31)-(2-32)-(4-6)-(15-19)-(19-23)-(20-24)-(17-21)-(11-13)-(7-9)-(8-10)-(12-30)-(14-28).
- Receive FAKE GEM and KEYS.
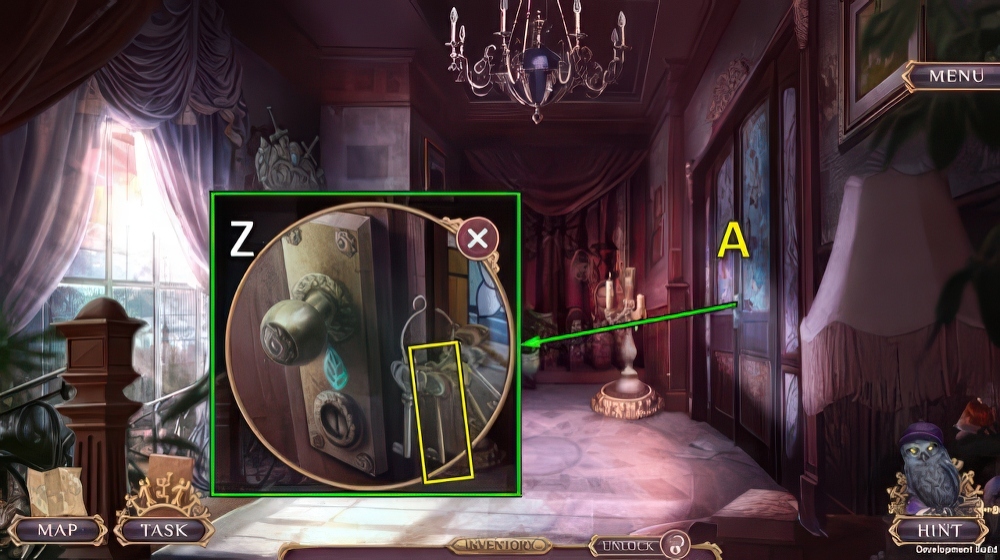
- Place KEYS, select key (Z).
- Go (A).

- Take DETECTIVE (B).
- Place DETECTIVE, take BUTTERFLY TOKEN, PLATE 2/3 and TYPEWRITER CARTRIDGE (C).
- Place TYPEWRITER CARTRIDGE and TYPEWRITER KEYS, take WAND, PINS and CHISEL (D).
- Take TEMPERATURE DIAL (E).
- Walk down.
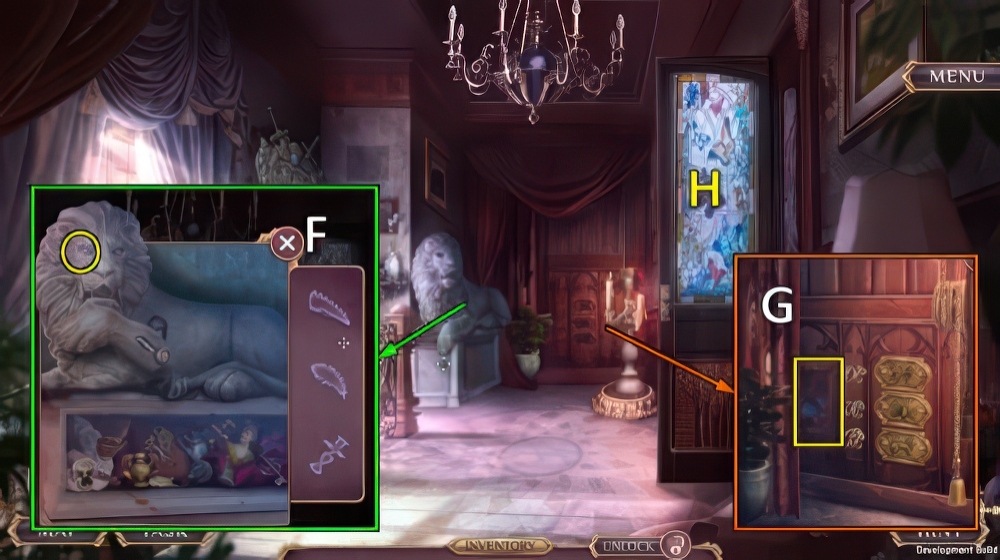
- FAKE GEM and CHISEL on MARBLE STONE, take LION’S EYE.
- Place LION’S EYE, play mini-puzzle (F).
- Receive PLATE 3/3.
- Place MONOGRAM and PLATE, take BUTTERFLY WINGS and MARBLE (G).
- Go (H).
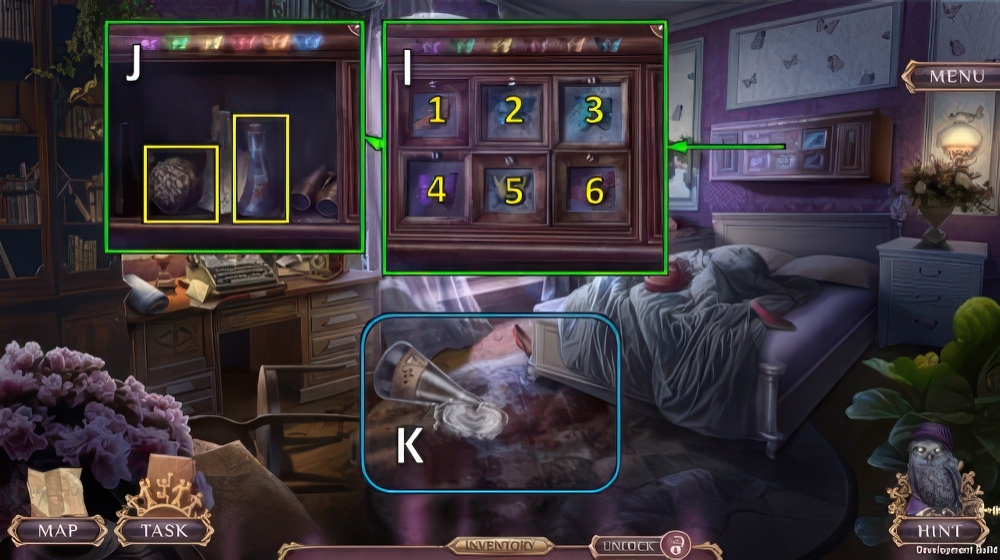
- Open EMPTY FRAME, place BUTTERFLY WINGS and PINS.
- Take FRAMED BUTTERFLY.
- Place FRAMED BUTTERFLY, SCREW and BUTTERFLY TOKEN, select 4-3-5-6-1-2 (I).
- Take TREATS 1/4 and REAGENT (J).
- Use REAGENT, play puzzle (K).
- Receive GATE HANDLE.
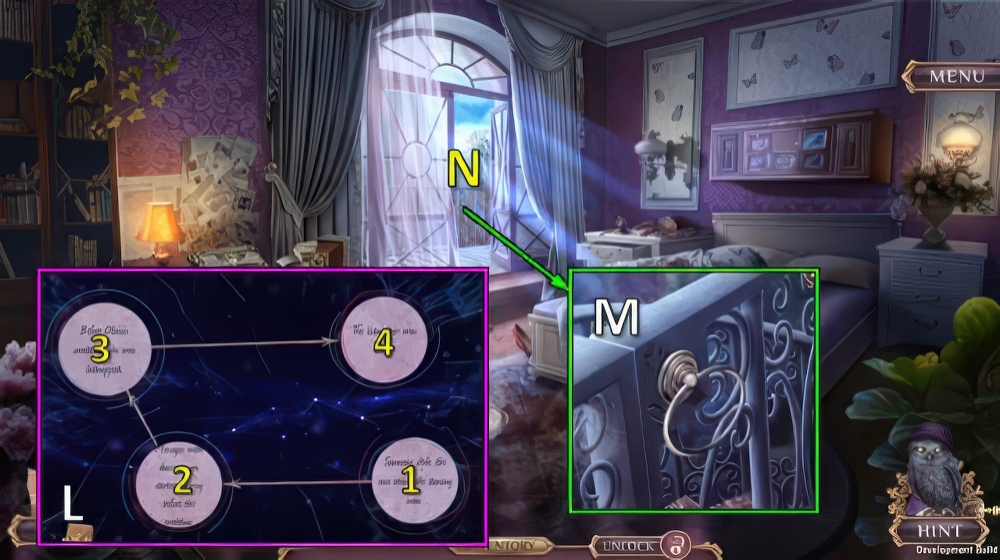
- Drag arrow 1-2-3-4 (L).
- Place GATE HANDLE (M).
- Go (N).
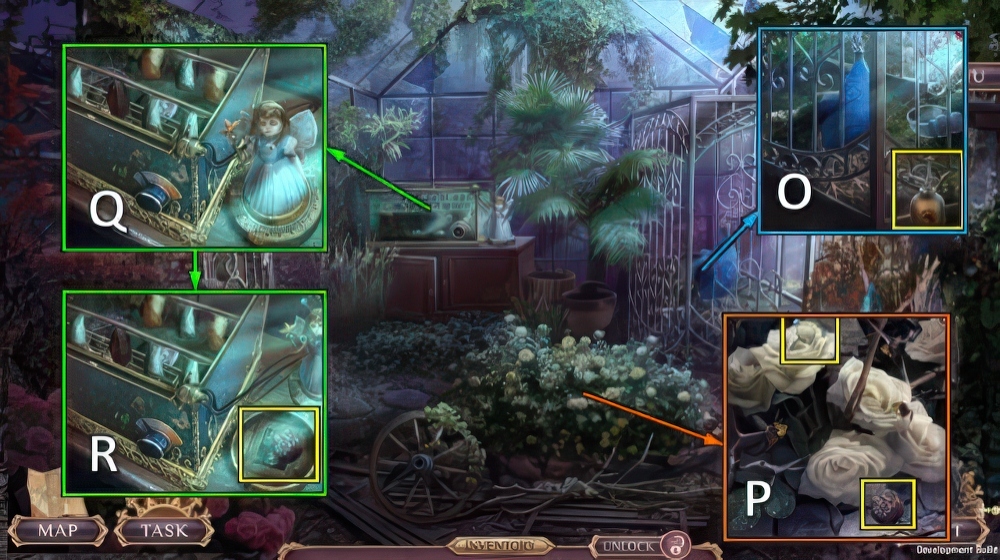
- Take INSECTICIDE (O).
- Use INSECTICIDE, take TREATS 2/4 and HEADBAND (P).
- Place WAND and HEADBAND (Q), take TREATS 3/4 and RICHARD’S PHOTO (R).
- Walk down.
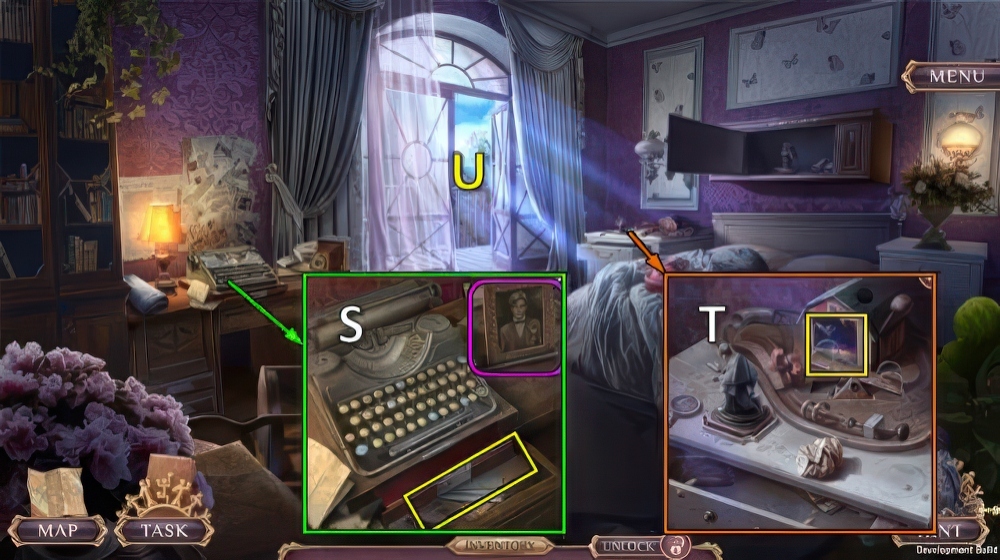
- Place RICHARD’S PHOTO, take note, INCOMPLETE KIT and SEESAW (S).
- Place SEESAW and MARBLE, move card and take POWDER and PRUNER (T).
- Go (U).
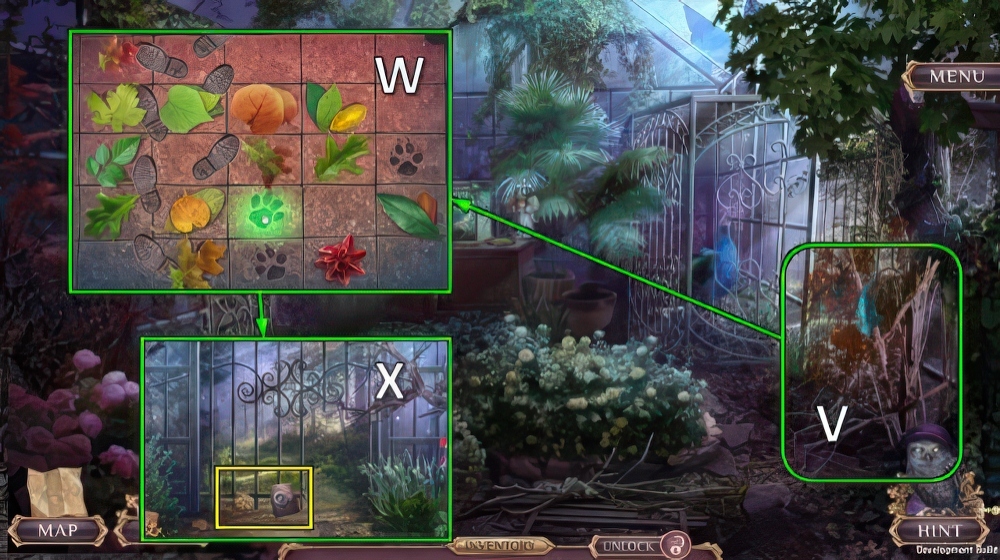
- Use PRUNER (V).
- Solution: select any square that lights up green, then alternating right and left footsteps (W).
- Take WALLET and TREATS 4/4 (X).
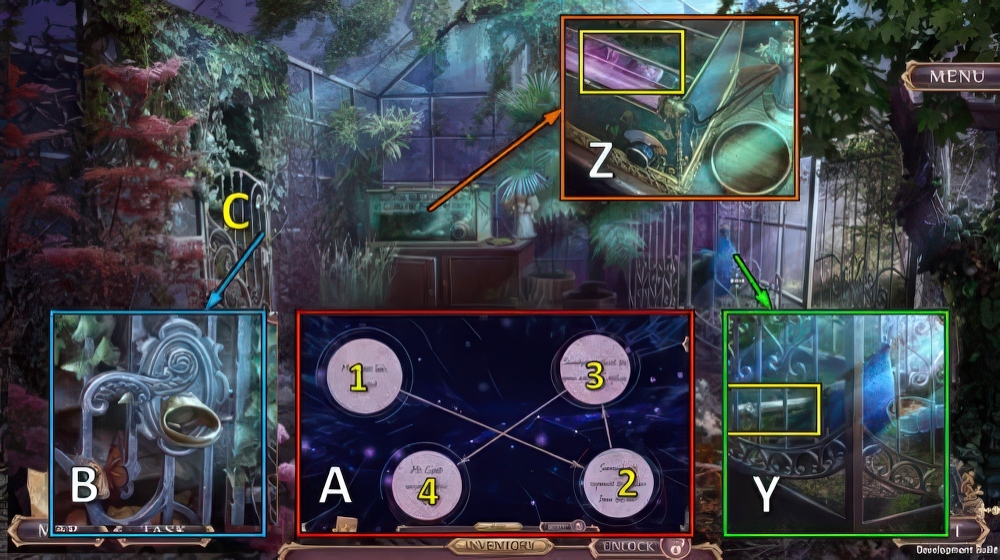
- Offer TREATS, take LION’S FACE and HEAT LAMP (Y).
- Place TEMPERATURE DIAL and HEAT LAMP, turn dial.
- Take OLIVIA’S PHOTO and LION’S MANE (Z).
- LION’S MANE and LION’S FACE on WALLET, take note, SIGNET RING and CLOCK HAND.
- Drag arrows 1-2-3-4 (A).
- Use SIGNET RING (B).
- Go (C).
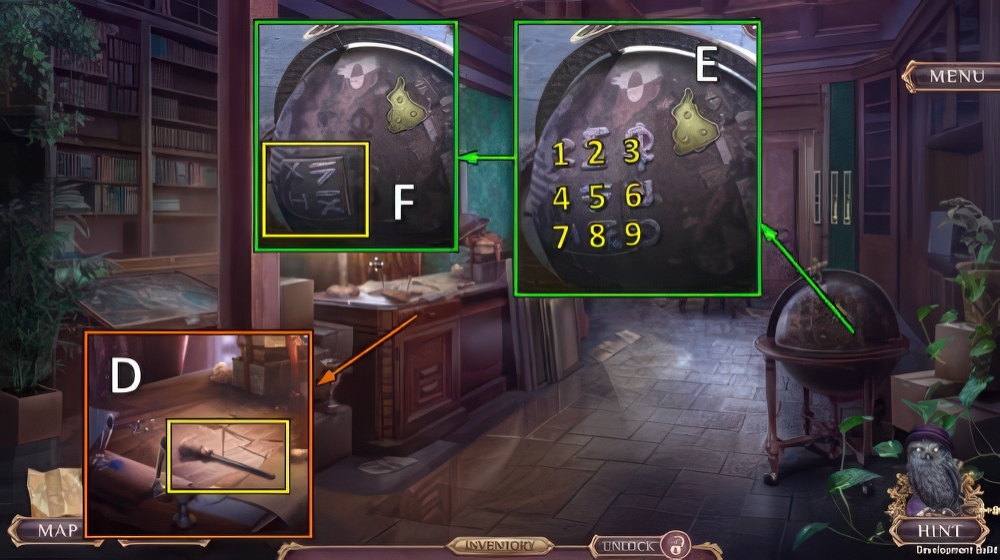
- Take FORENSIC BRUSH (D).
- POWDER and FORENSIC BRUSH on INCOMPLETE KIT, take FINGERPRINT KIT.
- Use FINGERPRINT KIT, select 1-3-7-9-5 (E).
- Receive VIAL.
- Take CODE (F).
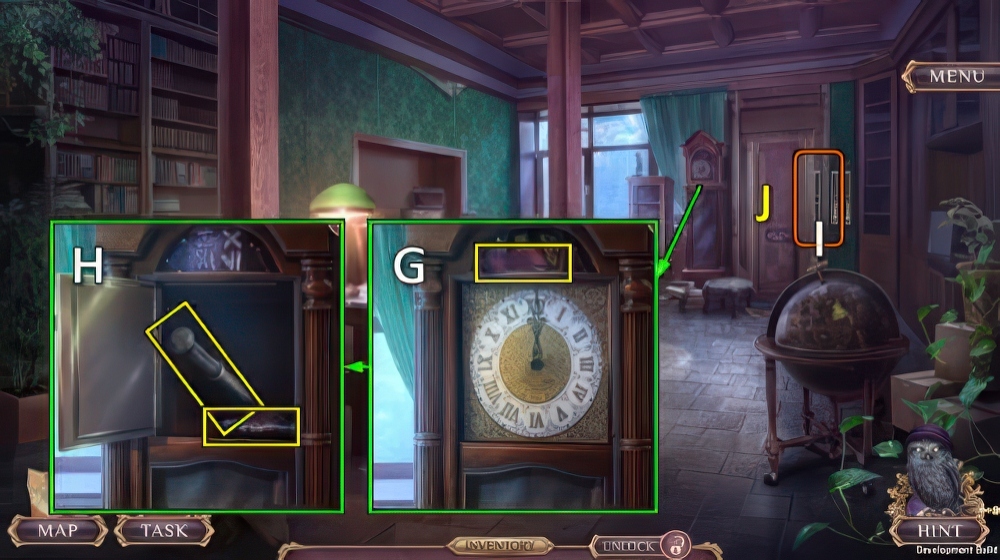
- Take SANDPAPER, place CLOCK HAND and CODE.
- Select hands twice (G).
- Take LEVER and ENGLAND (H).
- Use LEVER (I).
- Go (J).

- Take CREST (K).
- Place CREST, play puzzle (L).
- Receive FAMILY PHOTO.
- Take SCOTLAND, place OLIVIA’S PHOTO and FAMILY PHOTO (M).
- Take SCARF and THREATENING LETTERS (N).
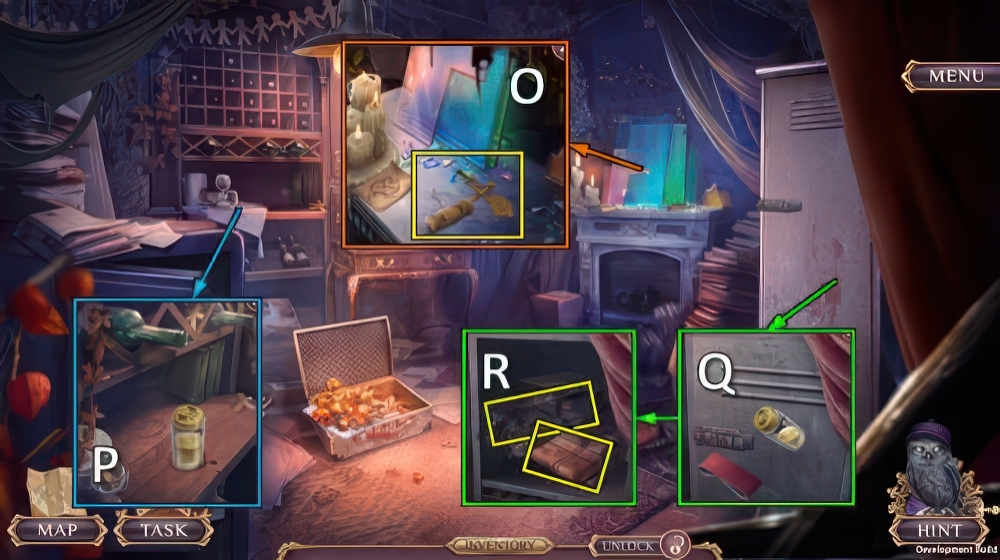
- Use SCARF, take CORKSCREW and PENDULUM (O).
- Use CORKSCREW and VIAL, take VINEGAR (P).
- Use VINEGAR and SANDPAPER (Q), take OLIVIA’S DIARY and HACKSAW (R).
- Walk down.

- Use HACKSAW (S).
- Find pairs, take WALES (T).
- Place ENGLAND, SCOTLAND and WALES (U), take WRITING UTENSILS and DAGGER (V).
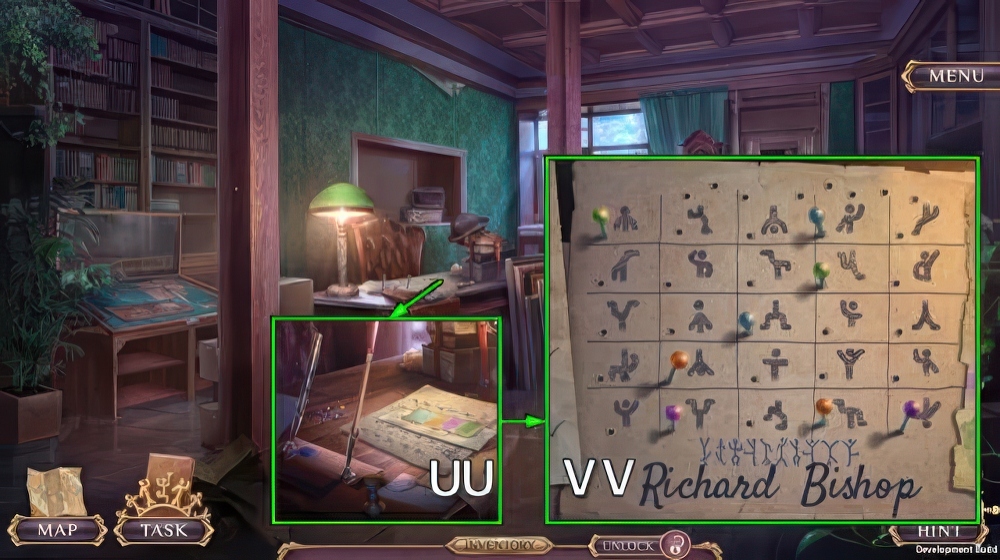
- Place THREATENING LETTERS and WRITING UTENSILS (UU).
- Solution (VV).

- Open, take GNOME (W).
- Take BROOM (X).
- Use BROOM (Y).
- Take RECEIPT and CLOCK WEIGHT (Z).

- Place CLOCK WEIGHT and PENDULUM (A).
- Select Bx2-C-B-C.
- Take BROKEN JACK and BUCKLER (D).
- Place DAGGER and BUCKLER (E), take SPRING and RECEIPT FRAGMENT (F).
- Open OLIVIA’S DIARY and place RECEIPT FRAGMENT and RECEIPT.

- Take JERKY (G).
- Offer JERKY.
- Take RUST REMOVER, ROULETTE BALL and BARREL (H).
- Place GNOME and BARREL (I).
- Play puzzle (J), receive JACK HANDLE.
- JACK HANDLE and SPRING on BROKEN JACK, take JACK.
- Use JACK (K).
- Go (L).

- Talk (M).
- Take COTTAGE KEY (N).
- Take CLIPPERS (O).
- Take POWDERED MILK.
- Use CLIPPERS, take ROULETTE POCKET (P).

- Place ROULETTE POCKET and ROULETTE BALL (Q).
- Solution (R): Tx3-Sx3-Tx4-S-T-S.
- Take SOILED OBJECTS and COIN PURSE (U).
- Walk down.
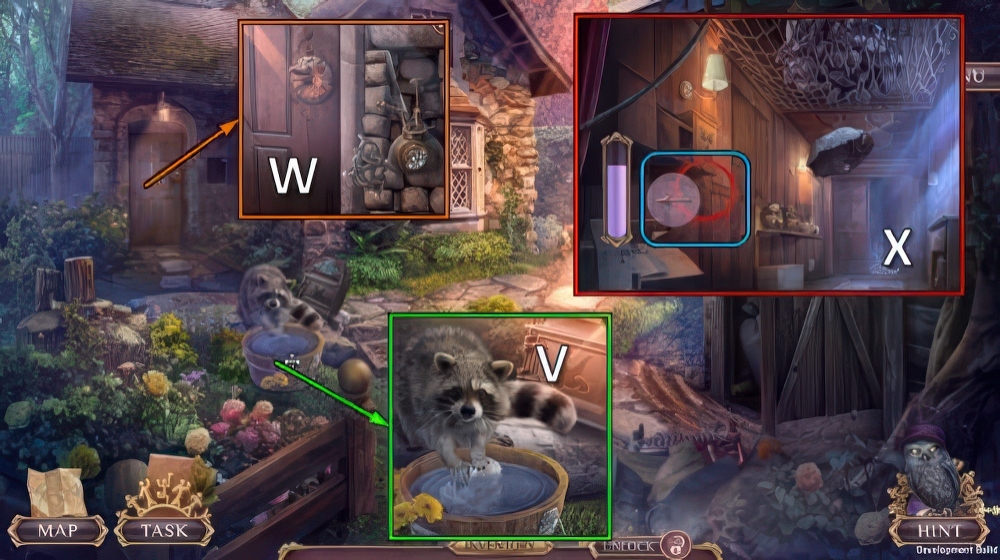
- Offer SOILED OBJECTS (V), receive LONG TWEEZERS and BUTTERFLY INLAY.
- Use RUST REMOVER, LONG TWEEZERS and COTTAGE KEY (W).
- Select circles when they overlap (X).
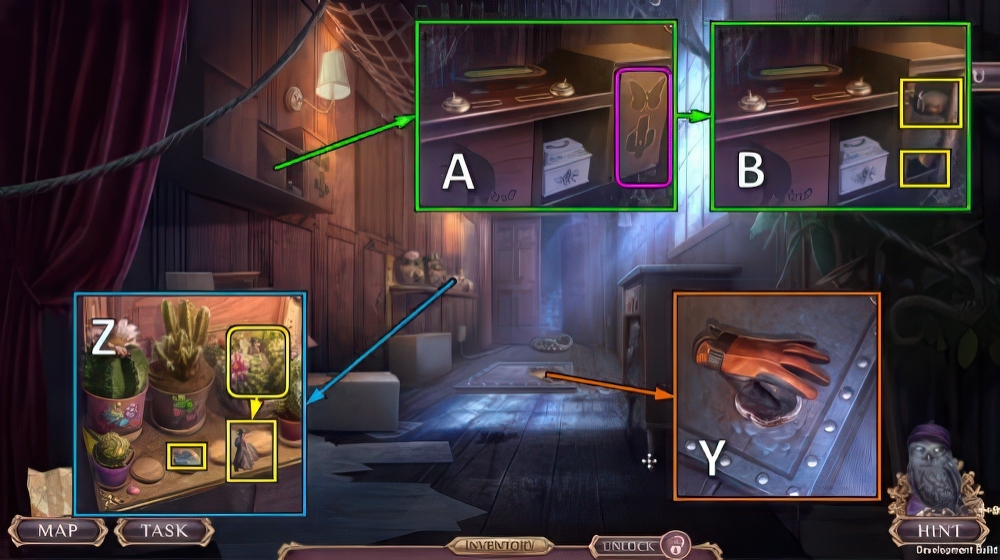
- Take GLOVE (Y).
- Use GLOVE, take SUITS 1/3, PLAYER and CACTUS INLAY (Z).
- Place CACTUS INLAY and BUTTERFLY INLAY (A), take CHOCOLATE and SUITS 2/3 (B).
- Go to Garage.
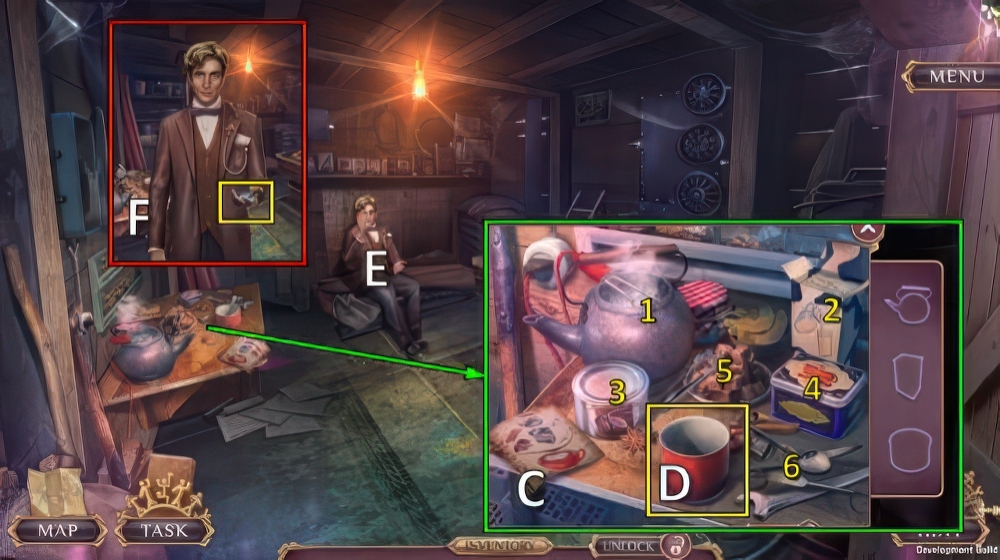
- Place CHOCOLATE and POWDERED MILK (C).
- Select 1-2-3-4-5-6.
- Take COCOA (D).
- Offer COCOA (E).
- Take SUITS 3/3 (F).
- Go to Corridor.

- Place SUITS, take BROKEN PIGEON and SCISSORS (G).
- SCISSORS on COIN PURSE, take DEALER and ZIPPER PULL.
- Place PLAYER and DEALER, take POINTER and TROWEL (H).
- Use POINTER (I).
- Go (J).
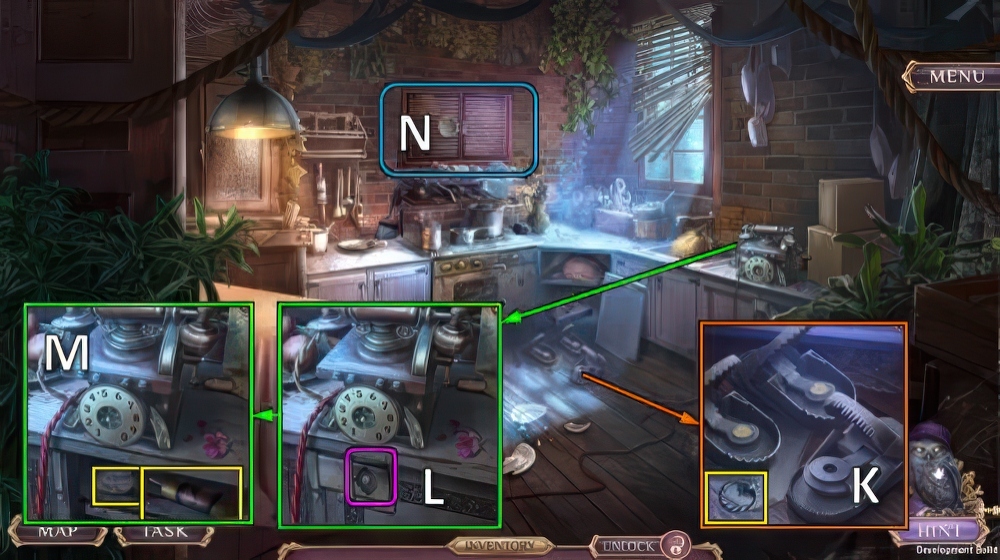
- Take DRAWER PULL (K).
- Place DRAWER PULL (L), take GLUE and FAKE COIN (M).
- Use FAKE COIN, play puzzle (N).
- Receive WINGS.
- Walk down twice.

- WINGS and GLUE on BROKEN PIGEON, receive PIGEON.
- Place PIGEON (O), take POUCH and HINGE (P).
- Use POUCH and TROWEL, take FINE POWDER and STONES (Q).
- Go to Kitchen.
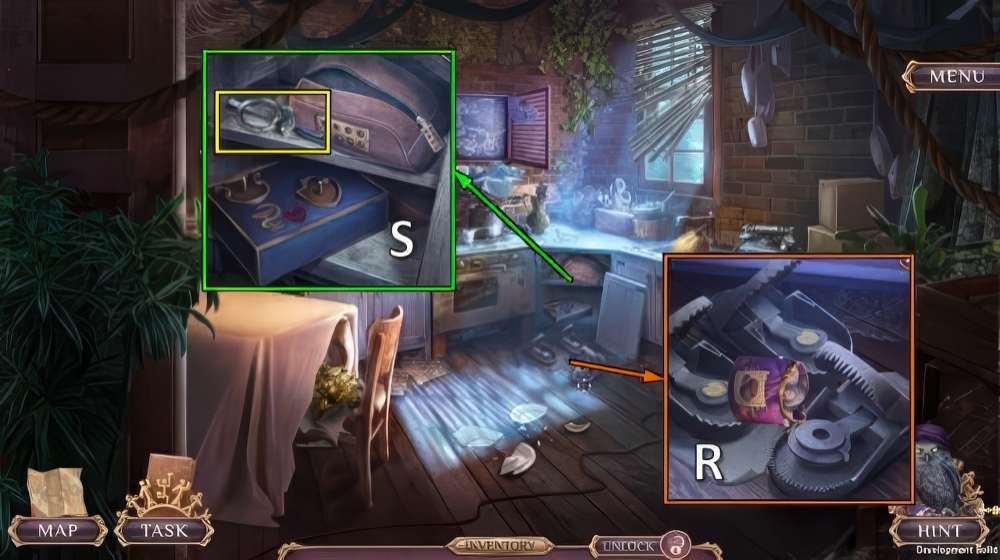
- Use STONES (R).
- Use ZIPPER PULL, take KNOCKER and SCALPEL (S).
- Walk down.

- Use SCALPEL and HINGE (T), take OIL and HEART STATUETTE (U).
- Use OIL and KNOCKER (V).
- Go (W).
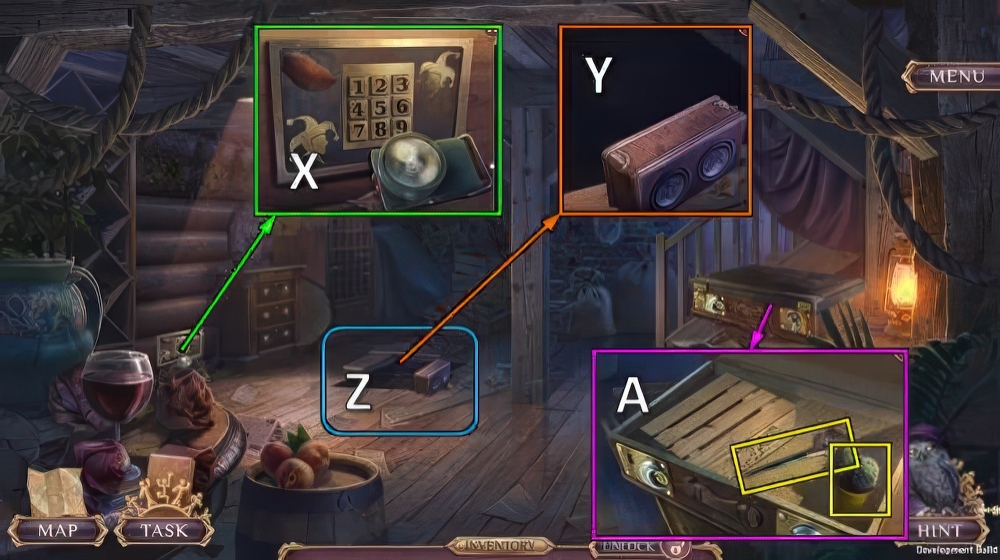
- Take FLOODLIGHT (X).
- Take CHEST, use FLOODLIGHT (Y).
- Play puzzle (Z), receive CRESCENT.
- Use CRESCENT, take SMALL CACTI 1/4 and MAKEUP BRUSH (A).

- Use FINE POWDER and MAKEUP BRUSH, select 1-4-6-8 (B).
- Take OLIVIA’S BRACELET and INSULIN (C).
- Offer INSULIN (D).
- Receive POISONED INSULIN and SNAKE STATUETTE.
- Go to Kitchen.
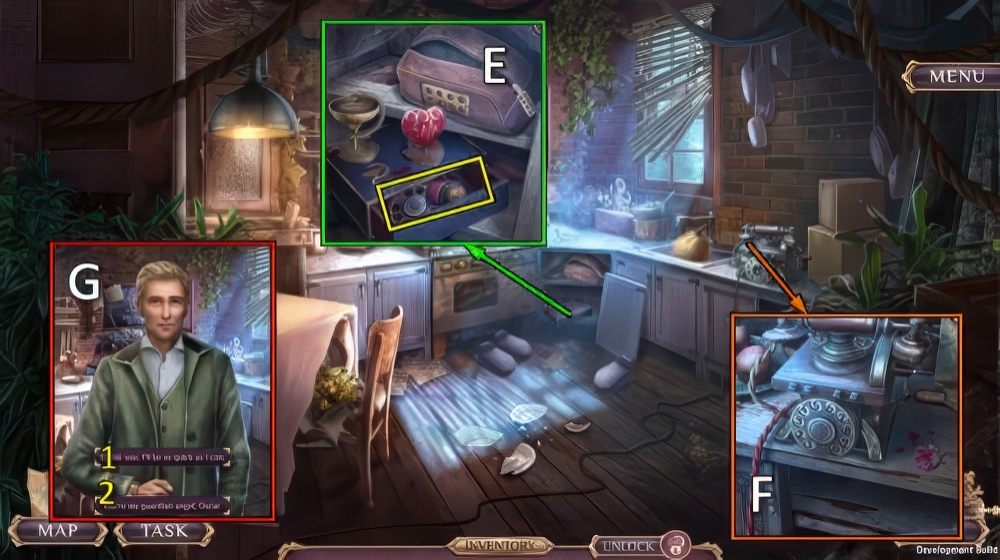
- Place HEART STATUETTE and SNAKE STATUETTE, take SMALL CACTI 2/4 and PHONE DIAL (E).
- Place PHONE DIAL (F).
- Select 1 or 2 (G).
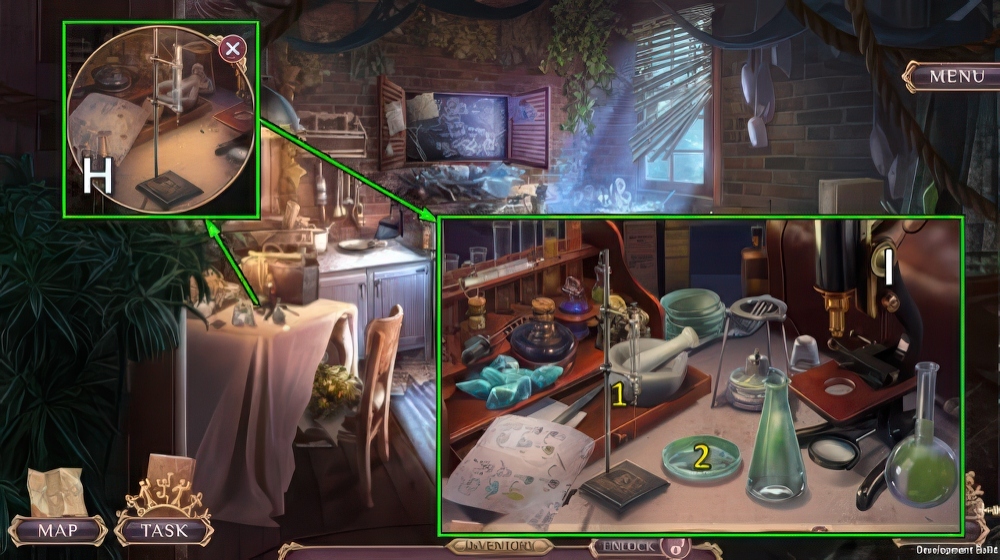
- Place POISONED INSULIN (H).
- Select 1-2 (I).

- Solution (J): (1-2)-(3-4)-(5-6), (7-8)-(9-10)-(11-12), (13-14)-(15-13)-(16-17)-(18-16)-(19-20).

- Select 1-2, 3-4, 4-2, 5-2, 2, 6-2 (K).
- Receive ANTIDOTE.
- Go to Basement.
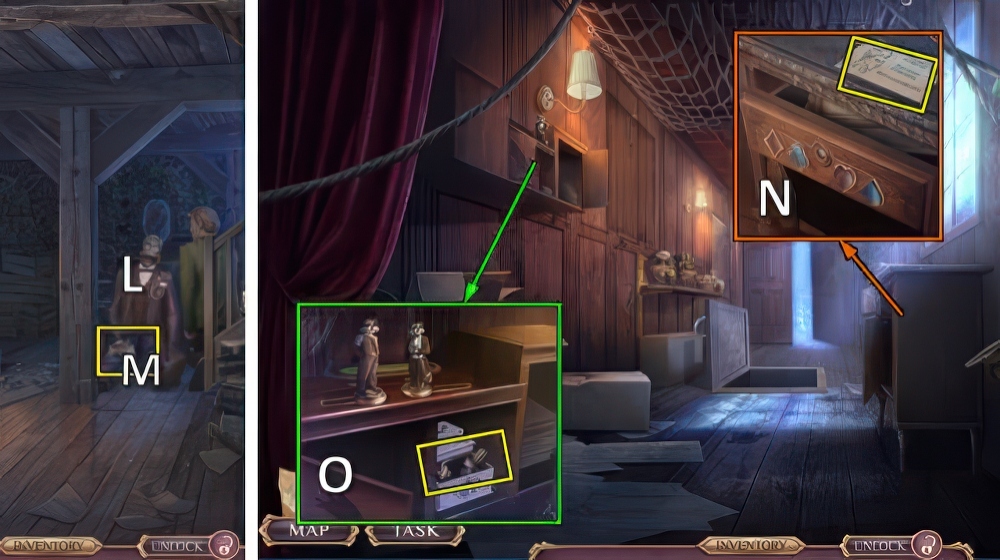
- Offer ANTIDOTE (L).
- Take RICHARD’S LETTER (M).
- Take FAREWELL MESSAGE and PAPER CLIP (N).
- Use PAPER CLIP, take RICHARD’S BRACELET and SMALL CACTI 3/4 (O).

- OLIVIA’S BRACELET and RICHARD’S BRACELET on CHEST, take DICE and SMALL CACTI 4/4.
- Place SMALL CACTI (P), take PENCIL and LOCKPICK (Q).
- PENCIL and FAREWELL MESSAGE on RICHARD’S LETTER, find differences (R).
- Take EVIDENCE.
- Drag arrows 1-2-3-4 (S).
- Go (T).

- Offer EVIDENCE (U).
- Take HANDCUFFS (V).
- Use HANDCUFFS (W), take SOLDERING IRON (X).
- Go to Garage.
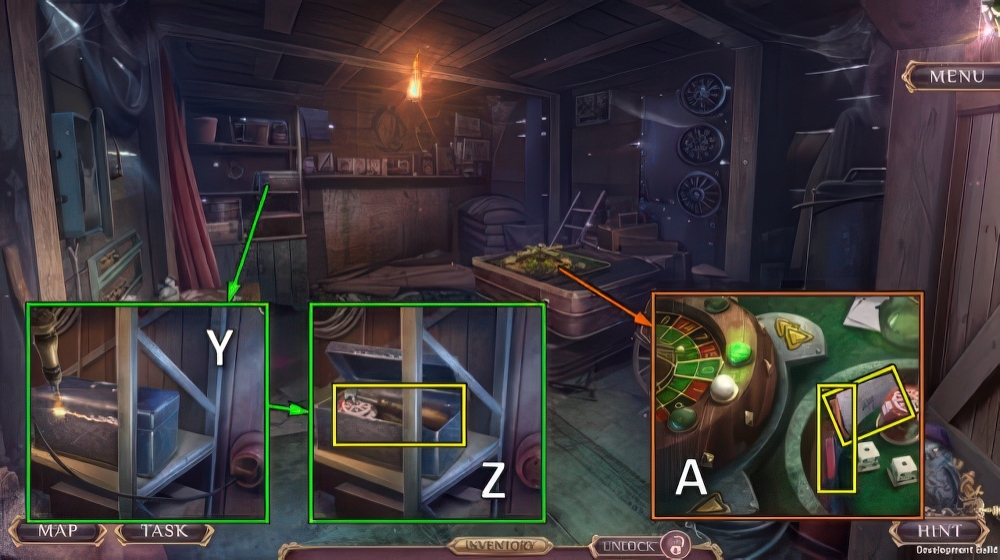
- Use SOLDERING IRON (Y), take BROKEN TOOL and CHIPS (Z).
- Place CHIPS and DICE, take MAGNET and JOKER (A).
- Walk down.

- Use MAGNET, take MAGNIFYING GLASS (B).
- Use MAGNIFYING GLASS (C).
- Solution 1 (D).

- Solution 2 (E).
- Solution 3 (F).
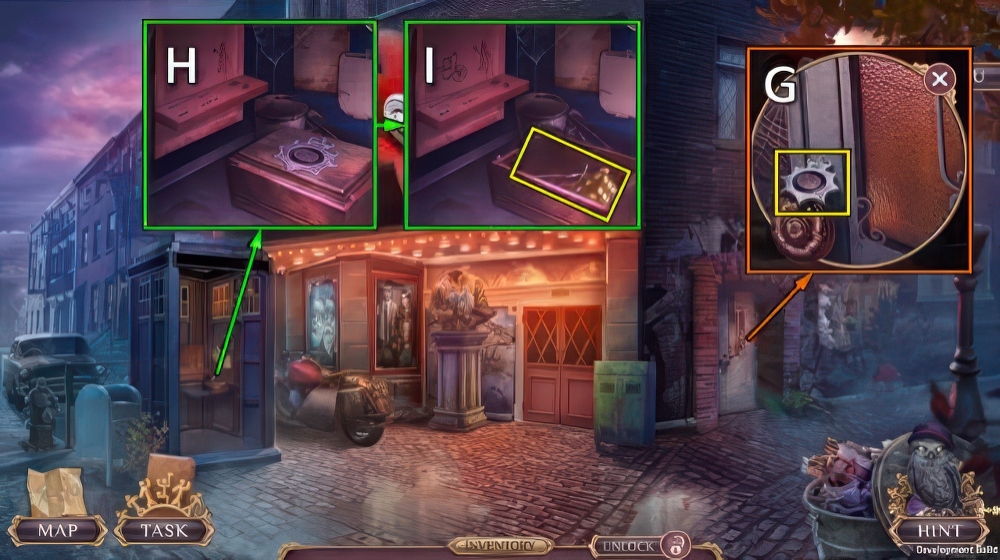
- Take BRUNSWICK STAR (G).
- Place BRUNSWICK STAR (H), take COLORFUL DICE 1/4 and METAL PICK (I).
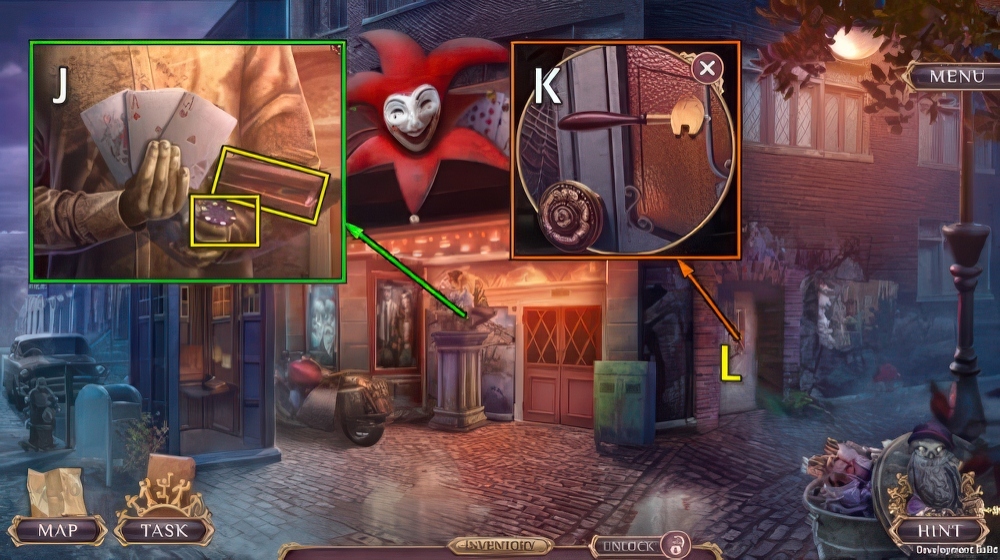
- Place LOCKPICK and METAL PICK, take BLACK CHIP, HAMMER and DIAMOND (J).
- DIAMOND on BROKEN TOOL, take GLASS CUTTER.
- Use GLASS CUTTER (K).
- Go (L).

- Take BADGE (M).
- Use BADGE (N), take COLORFUL DICE 2/4 and RED CHIP (O).
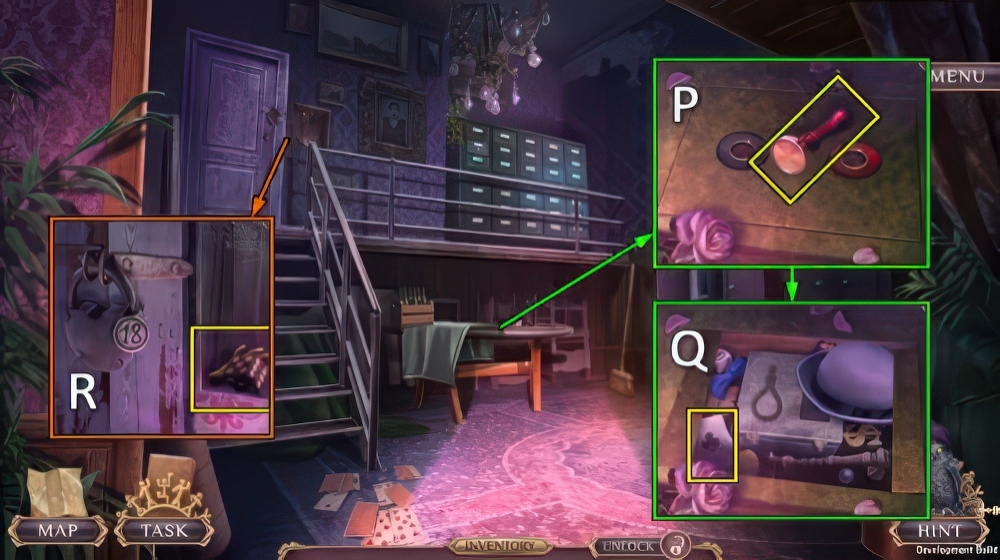
- Take BLANK STAMP, place BLACK CHIP and RED CHIP (P).
- Play mini-puzzle, receive ACE (Q).
- Take COLORFUL DICE 3/4 (R).
- Walk down.

- Place JOKER and ACE (S), take WELDING TORCH and COLORFUL DICE 4/4 (T).
- Place COLORFUL DICE, take JONATHAN’S MONOGRAM and RUBY NOOSE (U).
- Go (V).
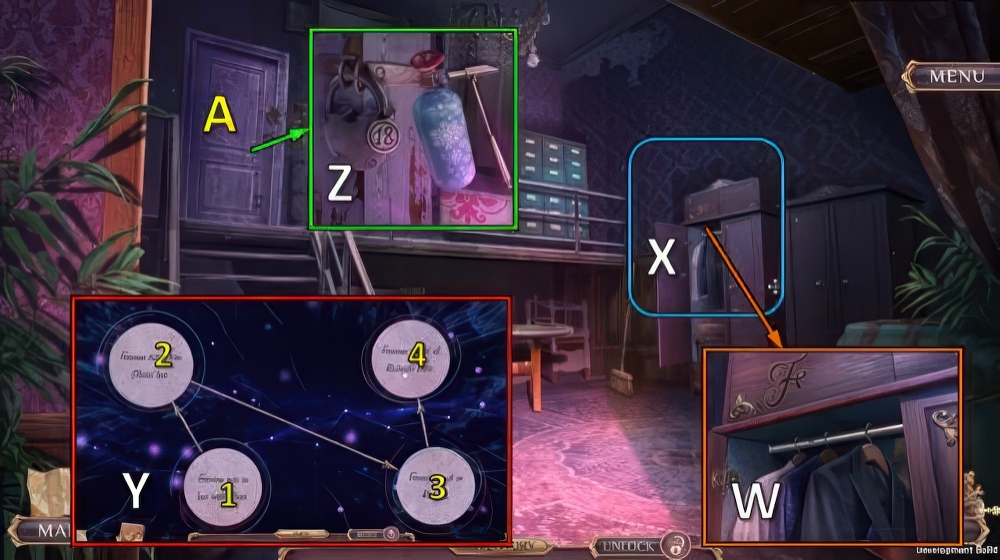
- Place JONATHAN’S MONOGRAM (W).
- Play puzzle (X).
- Drag arrows 1-2-3-4 (Y).
- Receive LIQUID NITROGEN.
- Place HAMMER and LIQUID NITROGEN (Z).
- Go (A).
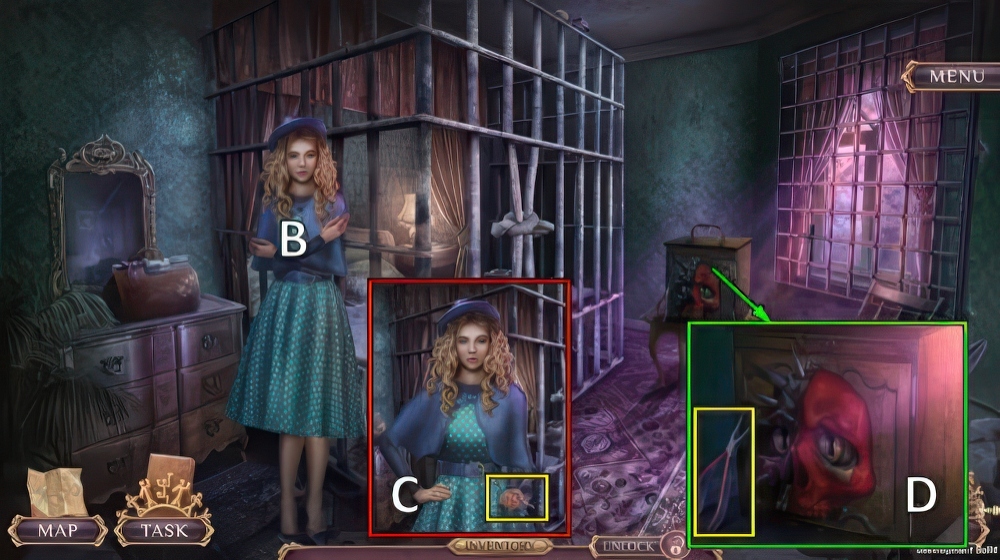
- Talk (B).
- Take KIDNAPPER’S PENDANT (C).
- Take NEEDLE-NOSE PLIERS (D).
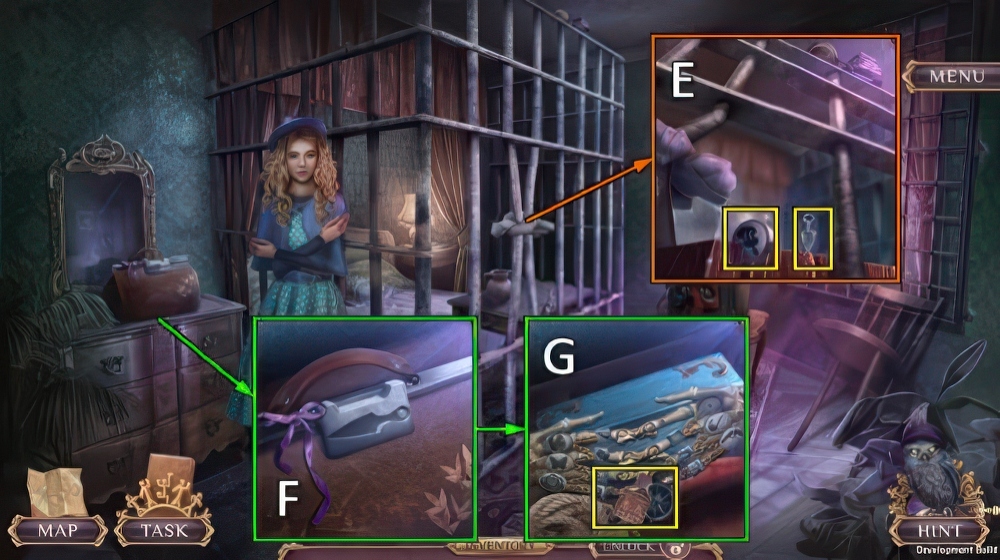
- Use NEEDLE-NOSE PLIERS, take VIOLIN TOKEN and SILVER DAGGER (E).
- Place SILVER DAGGER (F), take EMERALD POISON and SKELETON KEY (G).
- Walk down.
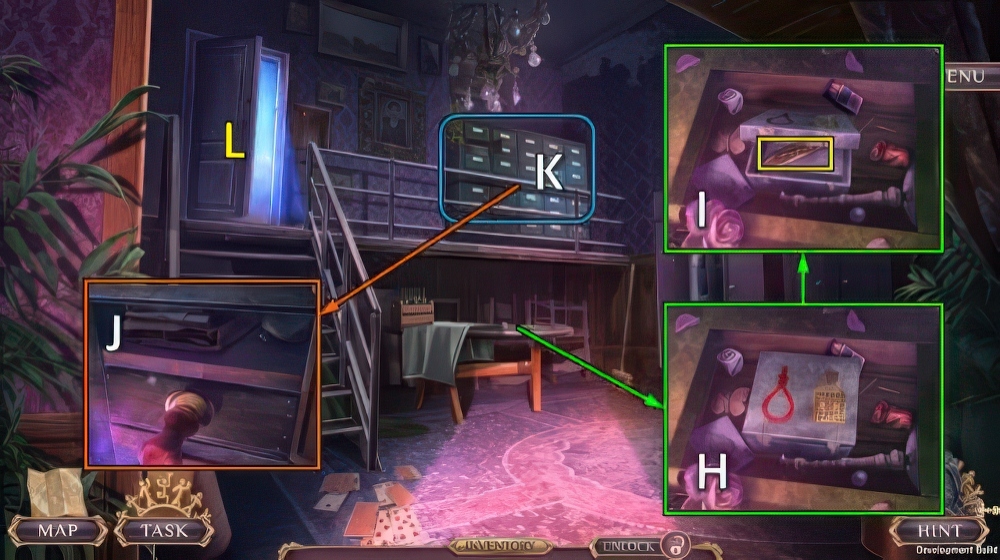
- Place RUBY NOOSE and EMERALD POISON (H), take TINY CHAIN and WAX (I).
- WAX, WELDING TORCH and KIDNAPPER’S PENDANT on BLANK STAMP, take STAMP.
- Use STAMP (J).
- Play puzzle (K), receive OLIVIA’S PHOTO.
- Go (L).

- Offer OLIVIA’S PHOTO (M).
- Take BLOODY KEY (N).
- Use SKELETON KEY and BLOODY KEY (O), take TREBLE RING and BROKEN INLAY (P).
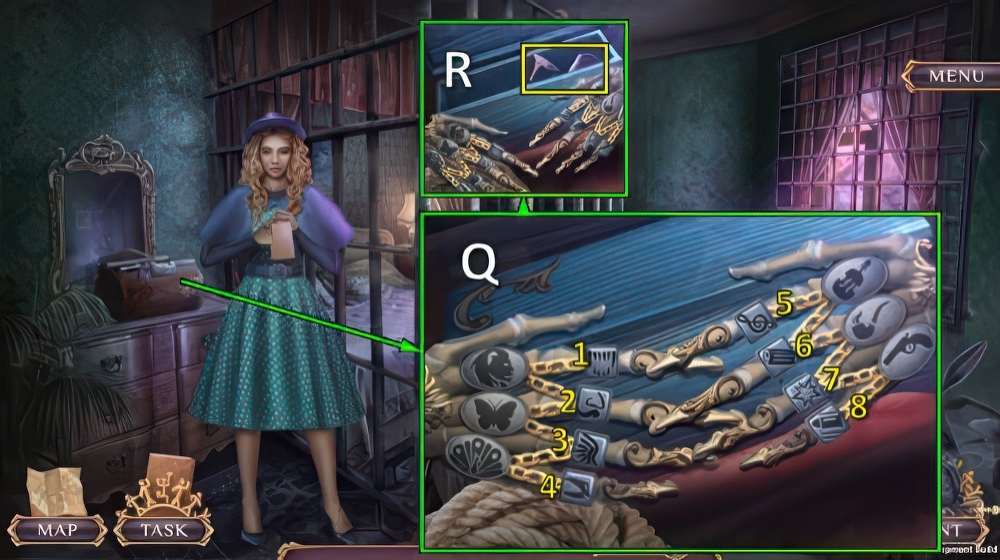
- Place VIOLIN TOKEN, TREBLE RING and TINY CHAIN (Q).
- Solution: (1-6)-(2-8)-(3-4)-(4-7)-(6-8).
- Take HEEL KEYCHAIN and WHIP (R).

- Use WHIP (S), take OIL and CAB (T).
- Use OIL, take SCRAPER and CONSTABLE (U).
- Walk down twice.
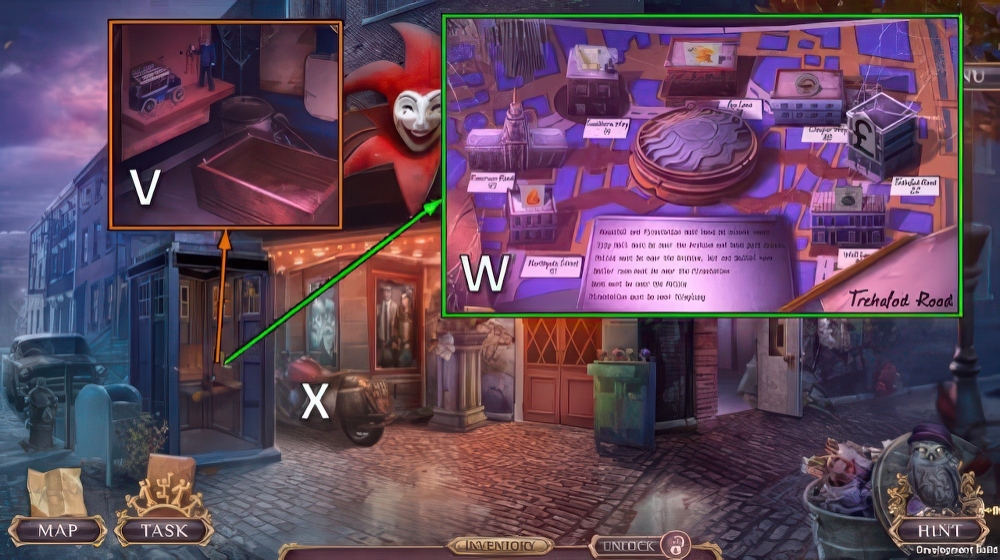
- Place CONSTABLE and CAB (V).
- Solution (W): (1-5)-(4-7)-(5-6).
- Receive SABER 1/2 and ADDRESS.
- Place ADDRESS (X).

- Take WHITE GLOVES (Y).
- Use WHITE GLOVES, take SHOELACE KEYCHAIN and GLUE JAR (Z).
- Take ROD (A).
- Place HEEL KEYCHAIN and SHOELACE KEYCHAIN, take LIGHTER and GLUE BRUSH (B).

- Use SCRAPER and LIGHTER, take SABER 2/2 and VIOLIN (C).
- SABER, GLUE JAR and GLUE BRUSH on BROKEN INLAY, take LETTER M.
- Place LETTER M (D).
- Solution (E).
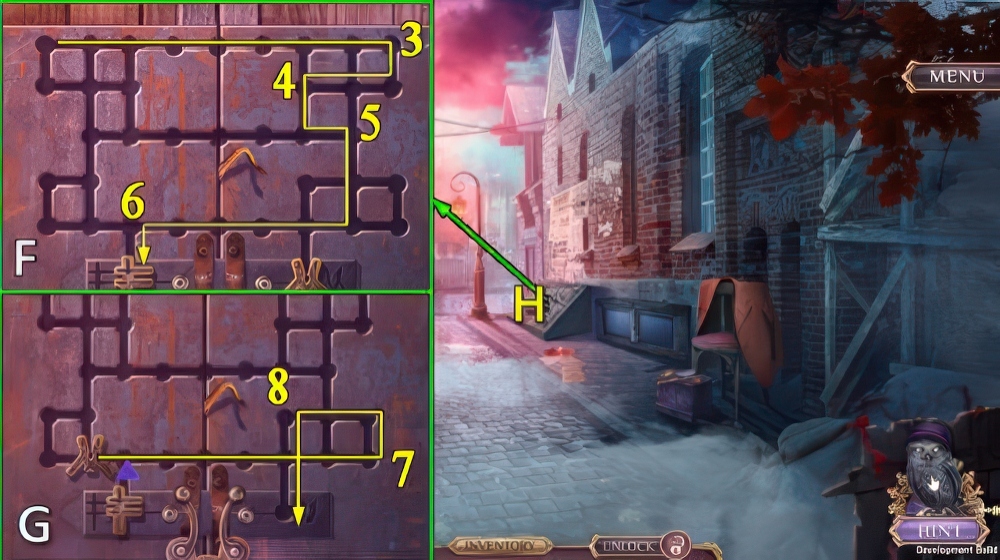
- Solution (F, G).
- Receive SAXOPHONE.
- Go (H).

- Take DEVELOPER (I).
- Take TARGET (J).
- Place TARGET, take ORNATE BOX, FISHING LINE and BLUE BUTTERFLY (K).

- Take SHARLOTTE’S PROFILE, place BLUE BUTTERFLY (L).
- Take CLUES 1/3 and MAGNET (M).
- Walk down.
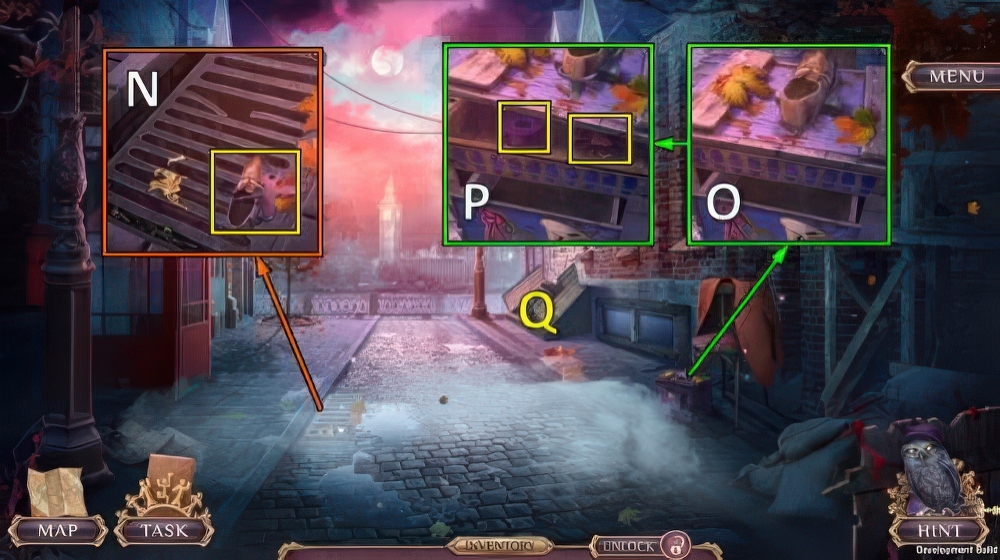
- MAGNET and FISHING LINE on ROD, take MAGNETIC POLE.
- Use MAGNETIC POLE, take TOOLS EMBLEM and IRON SHOE (N).
- Place IRON SHOE (O), take TAPE and SHERLOCK’S PROFILE (P).
- Go (Q).
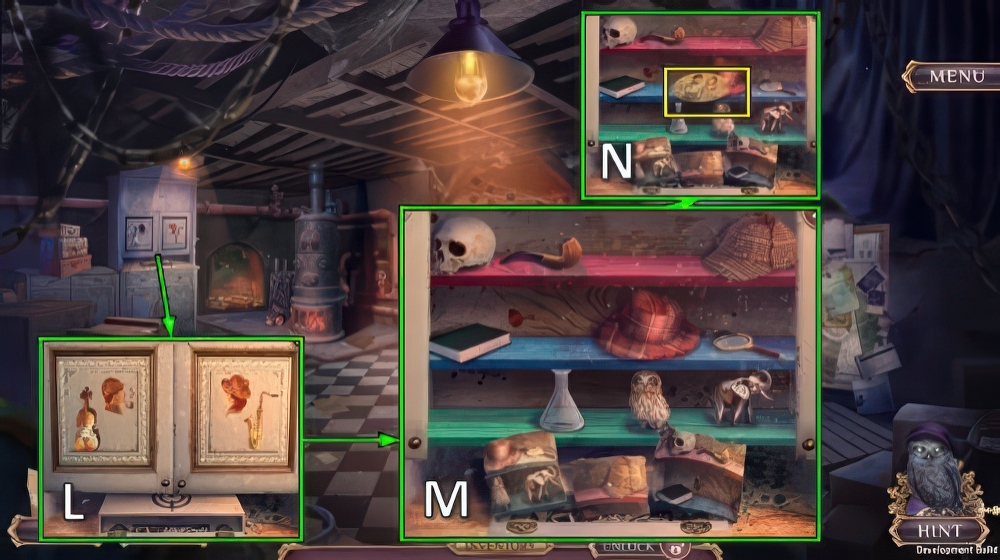
- Place VIOLIN, SAXOPHONE, SHERLOCK’S PROFILE and SHARLOTTE’S PROFILE (L).
- Solution (M).
- Take PORTRAIT (N).
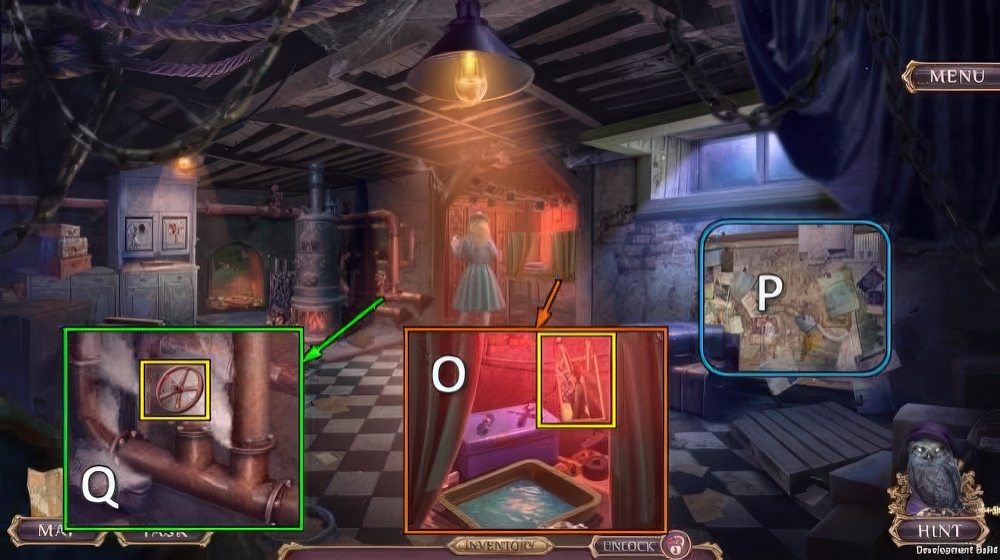
- PORTRAIT on ORNATE BOX, take CLUES 2/3 and CLOTHESPINS.
- Use DEVELOPER and CLOTHESPINS, take CLUES 3/3 (O).
- Place CLUES, play puzzle (P).
- Receive AIR RIFLE.
- Take VALVE (Q).

- Place VALVE (R), take PIPE EMBLEM and TRIGGER (S).
- Place TOOLS EMBLEM and PIPE EMBLEM (T), take WRENCH and TRANQUILIZER (U).
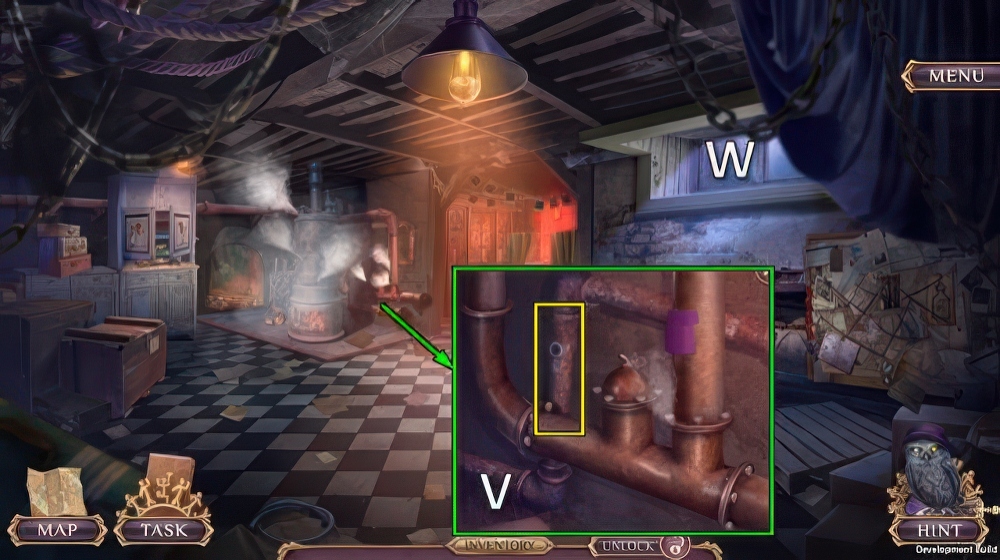
- Use WRENCH and TAPE, take METAL PIPE (V).
- Use METAL PIPE (W), receive AIR TANK.
- AIR TANK, TRIGGER and TRANQUILIZER on AIR RIFLE, take TRANQUILIZER GUN.
- Go (W).
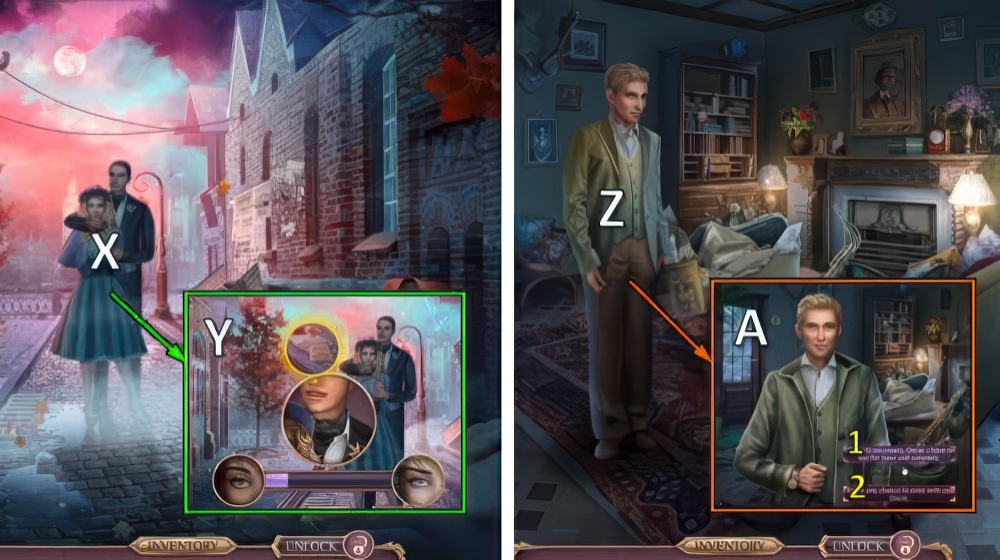
- Use TRANQUILIZER GUN (X).
- Remove red and yellow circles (Y).
- Talk (Z).
- Select 1 or 2 (A).
- Walkthrough Bonus Chapter, at the link below.


