Mystery Tales 12: Art and Souls (Bonus Chapter) – You’ve been called in to try to figure out why people go missing after a new art gallery opens. The owner’s wife died, and he found a magic brush that painted real people in the pictures, after which he became distraught. Below you can watch the walkthrough of the bonus chapter.
Bonus Chapter Walkthrough
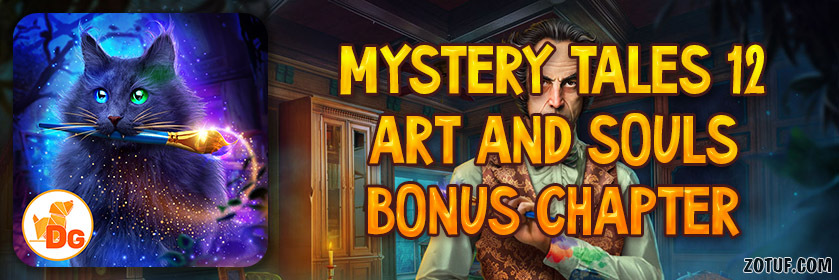
- Press (G).
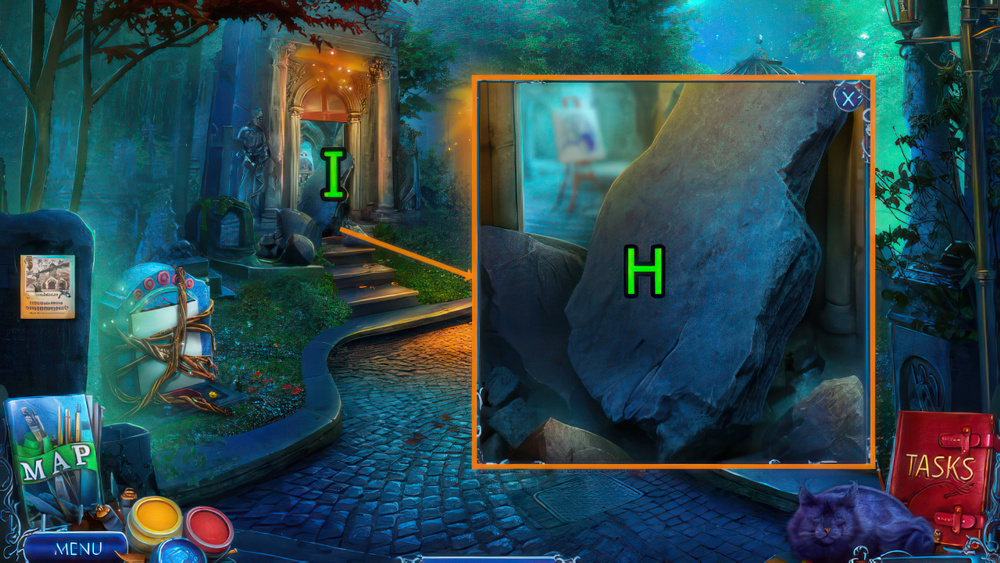
- Get CARD, RAG, and SOLVENT (H).
- Press (I), get LEAFLET.
- Use CARD on (J), get LASSO and TWEEZERS.
- Use LASSO on (K), get RUBBER GLOVE.
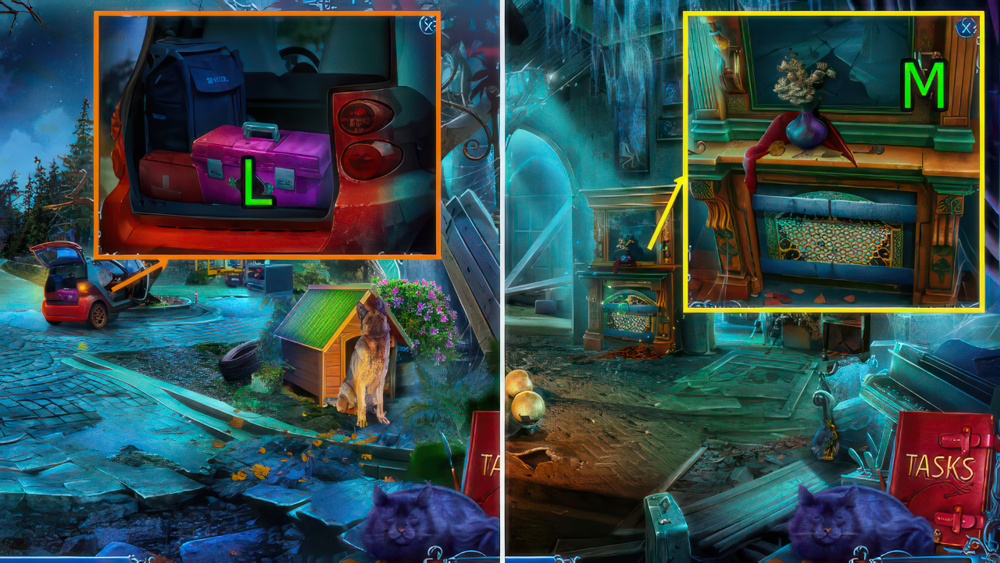
- Use RUBBER GLOVE and press (L).
- Solve puzzle (M), get SCARLETT’S DOCUMENTS.
- Use SCARLETT’S DOCUMENTS on (N).
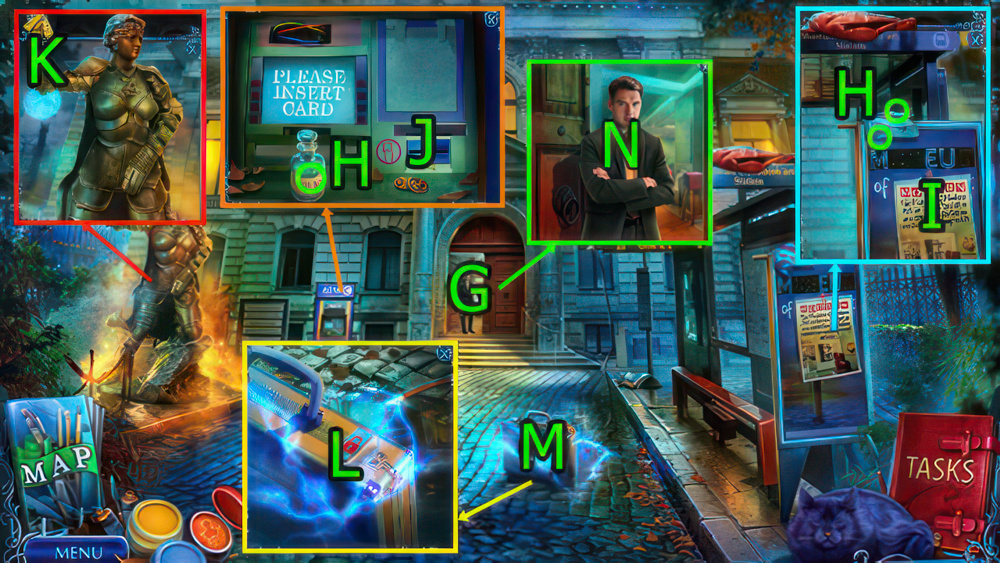
- Go (G).
- Use TWEEZERS on (H), get ACCESS CARD.
- Use ACCESS CARD on (I).
- Go (J).
- Get BATTERIES (1/2) (K).
- Go Museum Hall.
- Get MAGNET and CUTTERS (L).
- Use SOLVENT and RAG on (M), get PEN KNIFE and ANTENNA.
- Go Manager’s Office.
- Use LEAFLET on (N), use MAGNET on (O), drag (N-P), get LETTERS (1/3) and BUILDING PART.
- Use PEN KNIFE on (Q), get CLOAKROOM TOKEN.
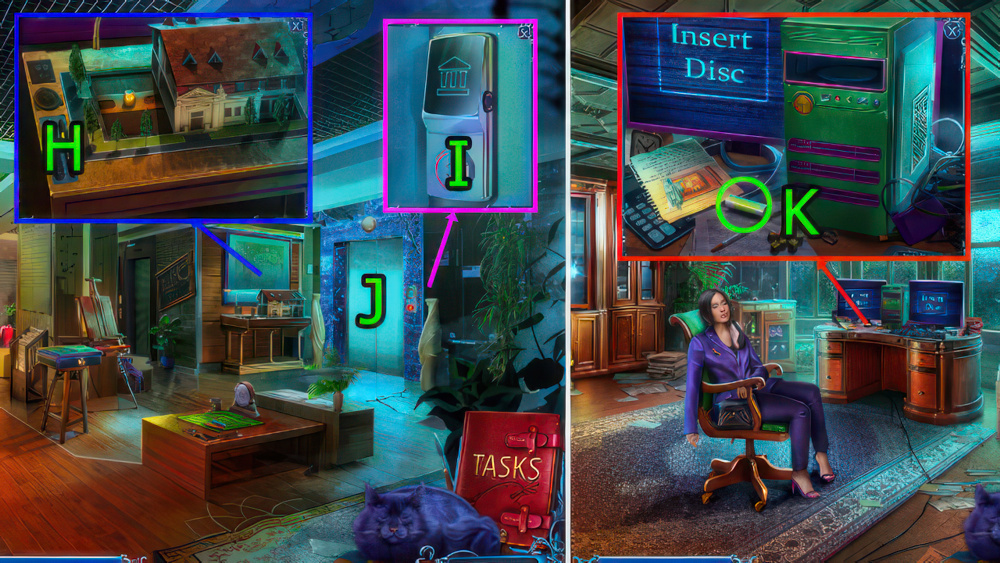
- Go Museum Hall.

- Use BUILDING PART on (R).
- Get BRUSH SWORD and LETTERS (2/3).
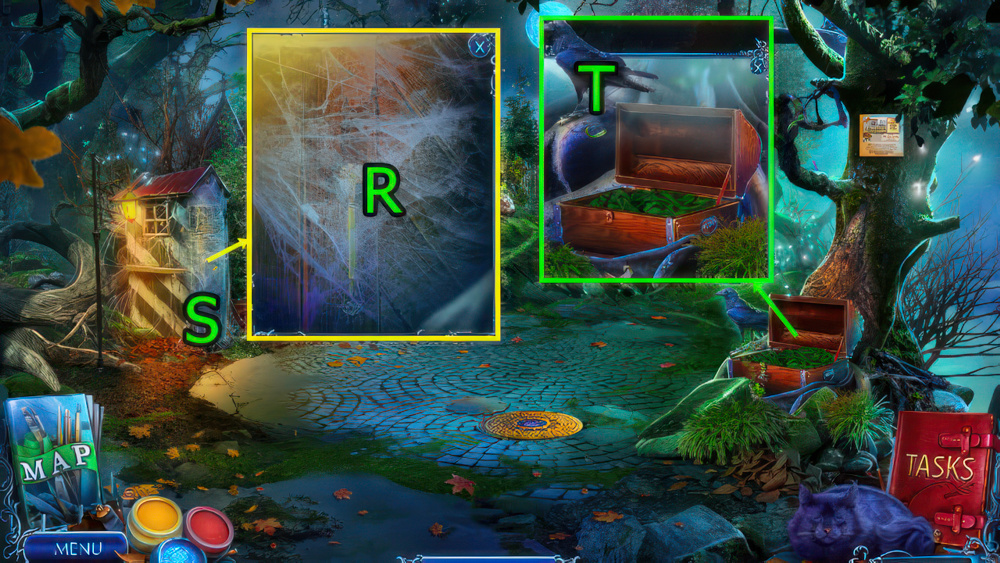
- Use CLOAKROOM TOKEN on (S).

- Easy solution (@37): Press (3-1-3-2-4-2-3-1-4-2-4-1-3).
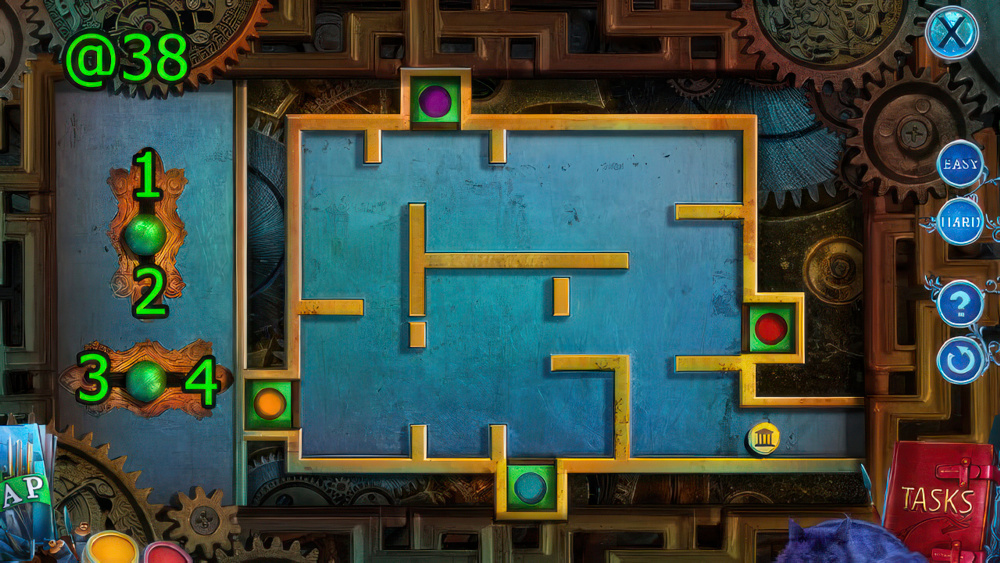
- Hard solution (@38): Press (3-1-3-2-4-2-3-1-4-2-4-1-3×2).
- (1-3-2-4-2-4-3-1-3-2).
- (3-1-3-1-3-2-4-2-3-1-4-2).

- Get AMMONIA.
- Go Manager’s Office.
- Use AMMONIA on (T), get GAVEL.
- Go Near the Museum.
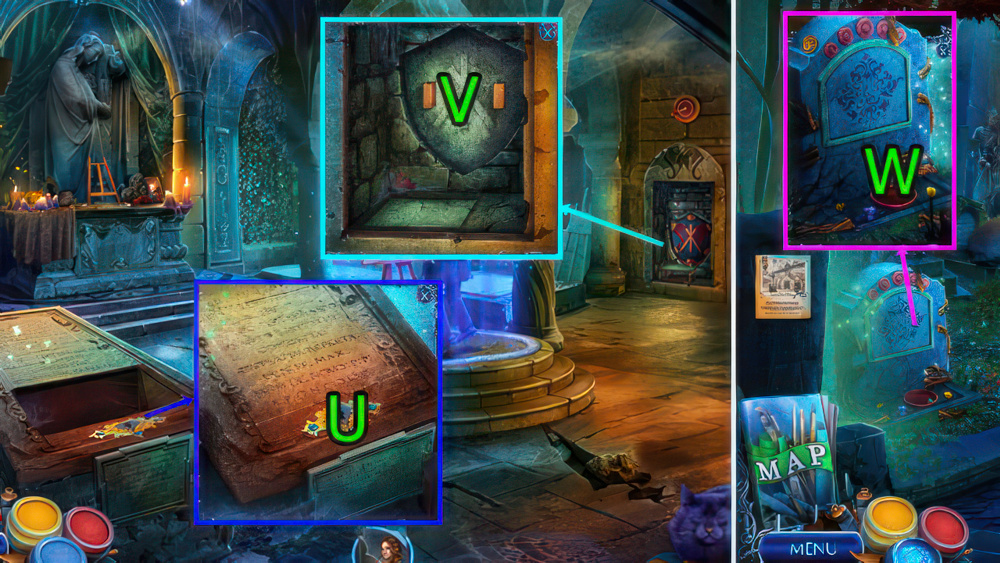
- Use BRUSH SWORD on (U), get BOX EMBLEM.
- Use ANTENNA on (V), get PARROT FOOD.
- Use CUTTERS on (W), get TOOLBOX.
- BOX EMBLEM on TOOLBOX, get DISC DRIVE, NAILS, and BATTERIES (2/2).
- Go Museum Hall.

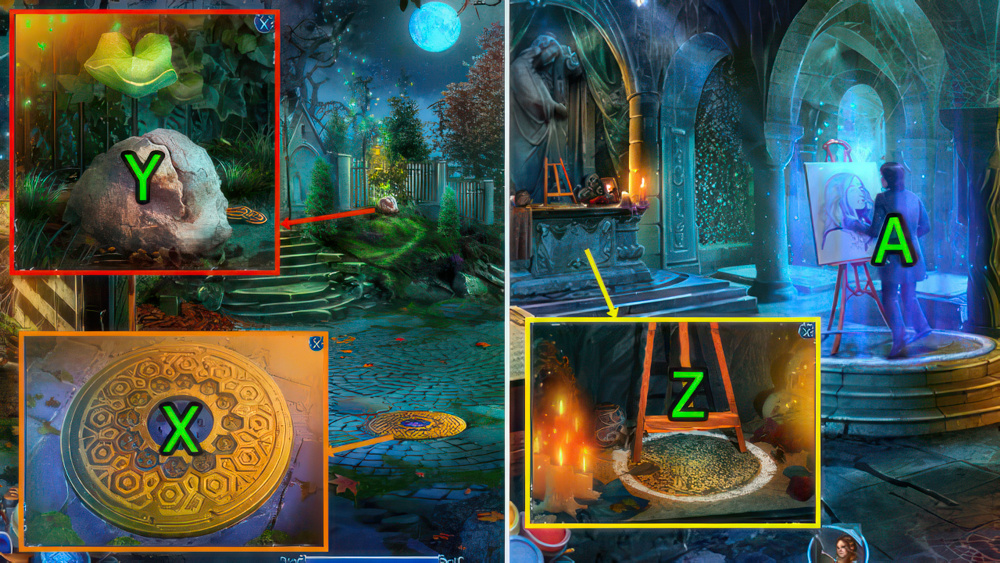
- Use BATTERIES (2/2) on (X) and press (Y), get NOTEBOOK AND PEN.
- Go Manager’s Office.
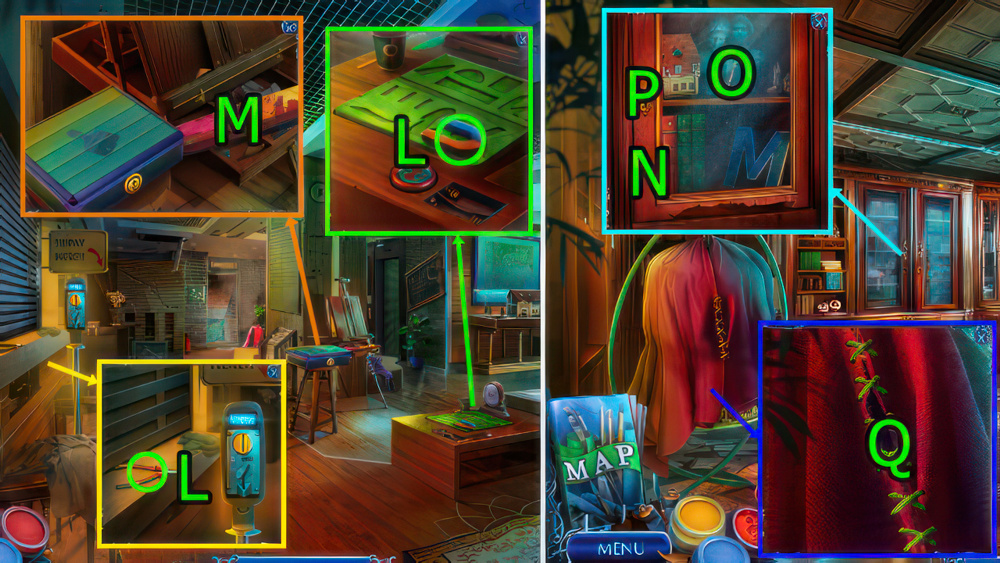
- Use PARROT FOOD on (Z), get PLIERS and LETTERS (3/3).
- Go Near the Museum.
- Use LETTERS (3/3) on (A), get STATUE SHIELD and HOSE.
- Use STATUE SHIELD on (B), get WOODEN BOARDS.
- Go Museum Hall.
- Use WOODEN BOARDS, NAILS, and GAVEL on (C).
- Go (D).
- Get FUEL and LOCKPICK (1/2) (E).
- Use PLIERS on (F), get WARDROBE KEY.
- Use WARDROBE KEY (G), get COMPACT DISC.
- Go Manager’s Office.
- Use DISC DRIVE and COMPACT DISC on (H).
- Solve puzzle (I), get BUST.
- Use BUST on (J), get BELT and GLUE.
- Go Restoration Workshop.
- Use HOSE and GLUE on (K), get RESTORATIVE SPRAY.

- Use RESTORATIVE SPRAY and NOTEBOOK AND PEN on (L), get COMBINATION.
- Go Museum Hall.
- Use COMBINATION on (M).
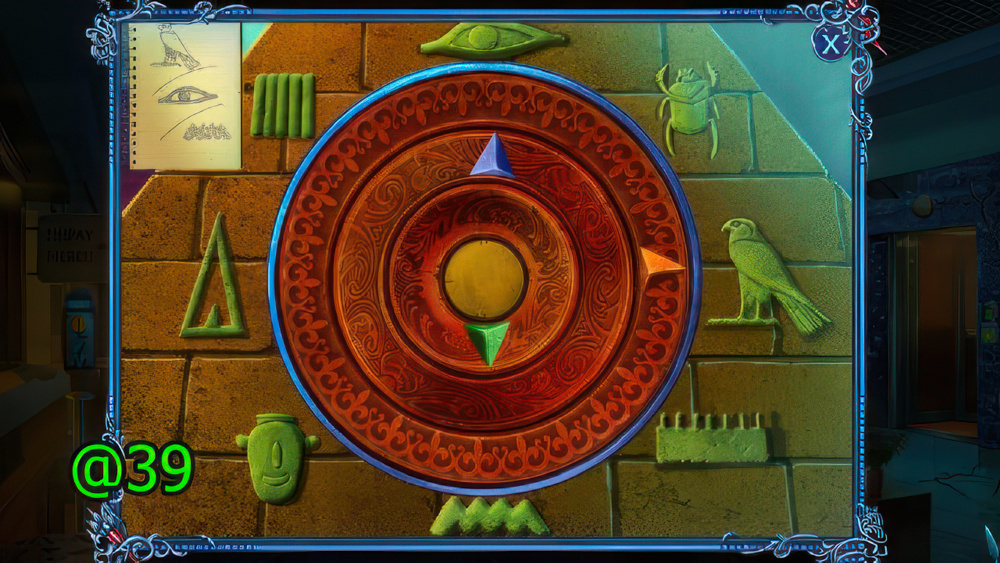
- Solution (@39):

- Get PRIZE and LOCKPICK (2/2).
- Use LOCKPICK (2/2) on (N), get FORCEPS and UV-GLASSES.
- Go Restoration Workshop.
- Take Note (Wa), press (Wb).
- Use UV-GLASSES on (O).
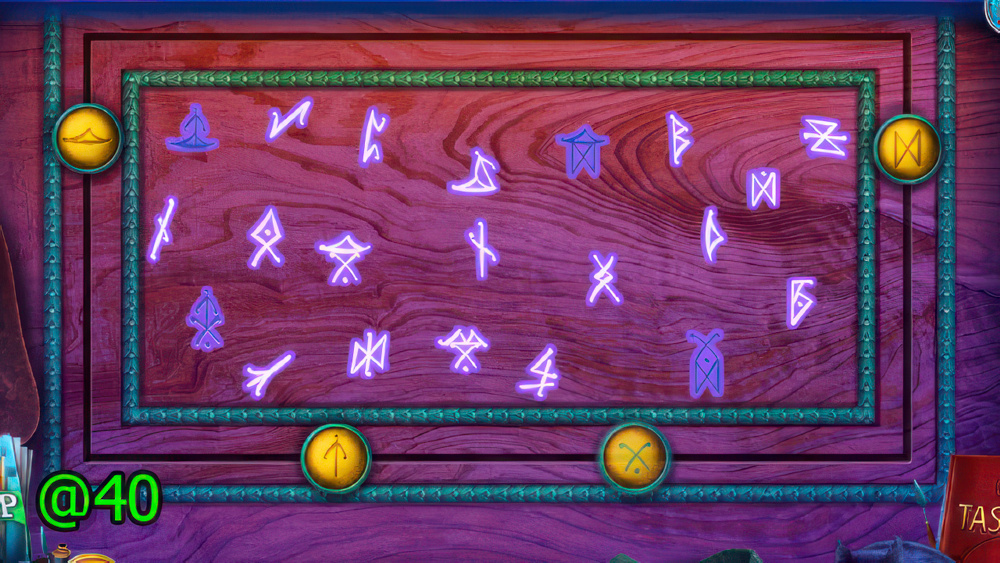
- Solution (@40).
- Get CAR KEYS.
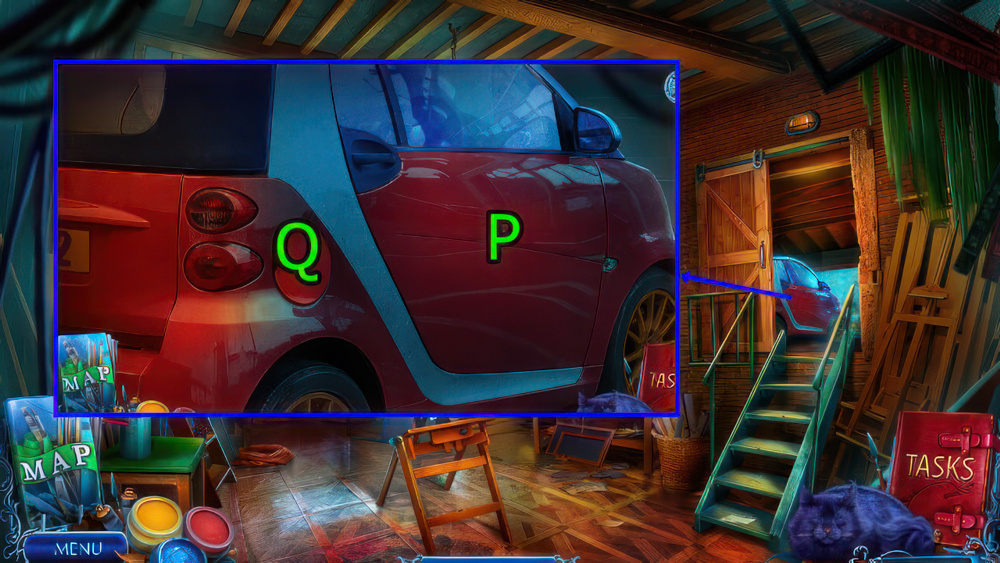
- Use CAR KEYS on (P), get CROWBAR.
- Press and use FUEL on (Q).

- Get BROKEN NEON SIGN and WIRES (1/2) (R).
- Use CROWBAR on (S), get CHAIN.
- Use BELT on (T), get BRUSH.
- Use BRUSH on (U), get MAZE MAP.
- Use FORCEPS on (U), get CANE.
- Use MAZE MAP on (V).
- Go (W).
- Get WIRES (2/2) (X).
- Use PRIZE on (Y), get 24 and BOTTLE OPENER.
- WIRES (2/2) and 24 on BROKEN NEON SIGN, get NEON SIGN.
- Use NEON SIGN on (Z).
- Solve puzzle (A), get BIRD EMBLEM.
- Use BIRD EMBLEM on (B), get LADDER.
- Use LADDER on (C).
- Go (D), get AMULET.
- Get CANNED DOG FOOD and TUMBLERS (1/3) (E).
- Press (Fx2) and use CHAIN on (G), get HEART INLAY.
- Use BOTTLE OPENER on (H), get KITE.
- Use CANE on (I), get TUMBLERS (2/3) and BOOT.
- Go Mansion Yard.

- Use KITE on (J), get WAX.
- Use HEART INLAY on (K), get CANDLESTICK.
- Go Outskirts.
- Use AMULET on (L), get RITUAL POWDER.
- Go Ruined Mansion.
- Use CANDLESTICK on (M).
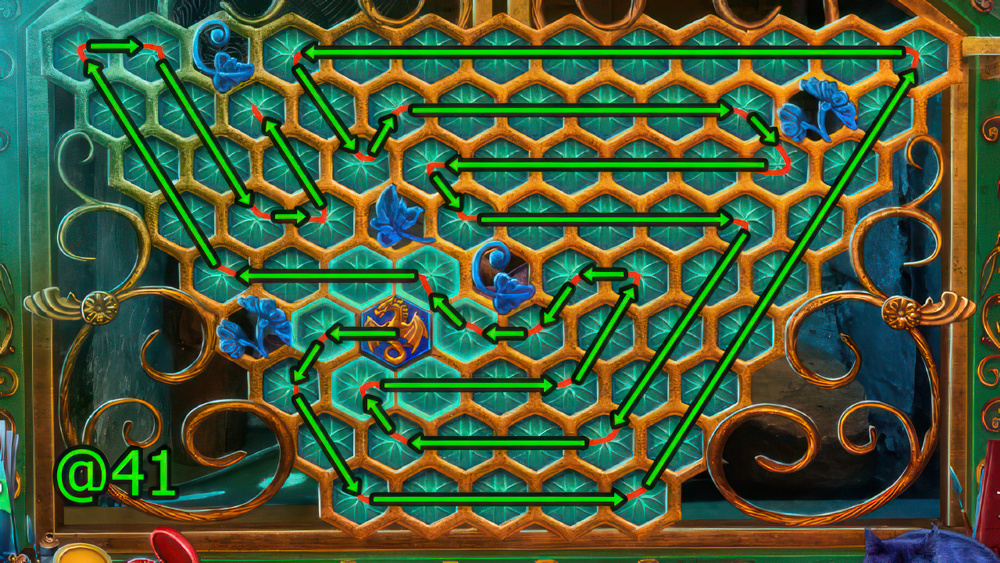
- Solution (@41).
- Get GAUNTLETS.

- Use GAUNTLETS on (N), get WICK and CAN OPENER.
- CAN OPENER on CANNED DOG FOOD, get DOG FOOD.
- Go Outskirts.
- Use DOG FOOD on (O), get BOTTLE and TUMBLERS (3/3).
- Use TUMBLERS (3/3) on (P), get ACID and WEDGE.
- Go Mansion Yard.
- Use WEDGE and BOOT on (Q), get GEAR, WRENCH, and LIGHTER.
- Use WAX, WICK, and LIGHTER on (R), get CANDLE.
- Go Ruined Mansion.

- Press (x2) and use RITUAL POWDER, LIGHTER, and CANDLE on (S), get DOME LAMP.
- Use DOME LAMP on (T), get TOY SWORD.
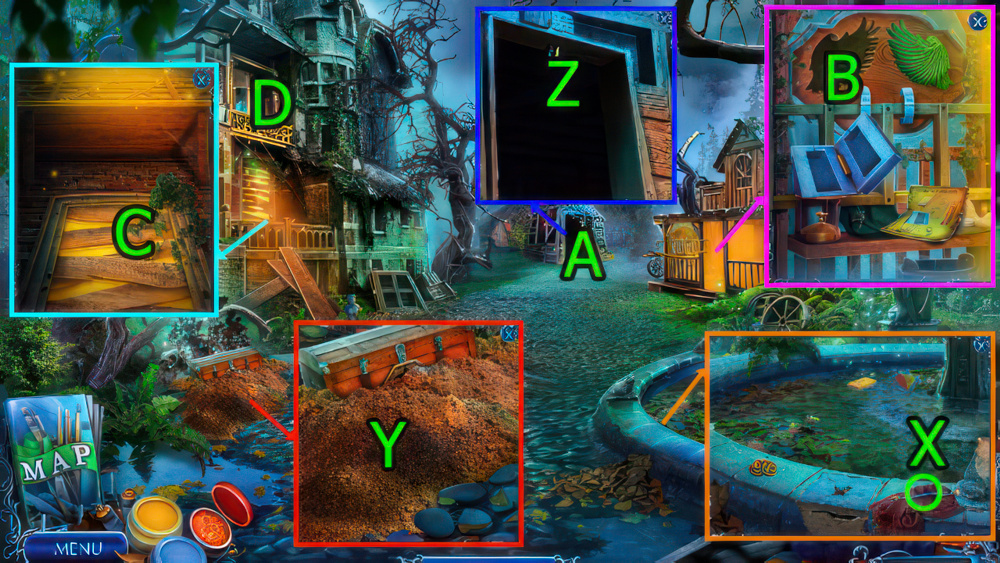
- Go Outskirts.
- Use TOY SWORD on (U).
- Solve puzzle (V), get TELEPHONE BOOK.
- Use TELEPHONE BOOK on (W).

- Get BROKEN FISHING ROD and REEL (X).
- Use BOTTLE on (Y), get WATER.
- Use ACID on (Z), get FEATHER DUSTER and MAGNET.
- REEL and MAGNET on BROKEN FISHING ROD, get FISHING ROD.
- Use WRENCH on (A), get GATE KEY.
- Use GATE KEY on (B).
- Go (C).

- Get WOODEN BRANCH and CLOTH (D).
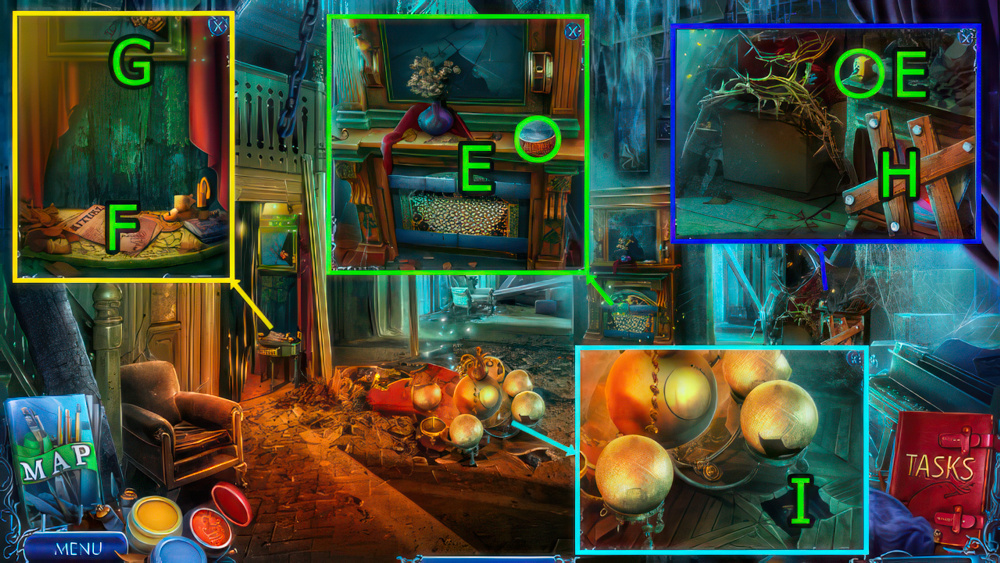
- Use GEAR on (E), get SHARP CLAW.
- Use FISHING ROD on (F), get ROUGH BRUSH and DART.
- Use WATER and ROUGH BRUSH on (G).

- Solution (@42): Press (2×3)-(5×2)-(4).
- Get SPEAR.
- Use SPEAR on (H).
- Go (I).

- Get ROPE and KEROSENE (J).
- Use FEATHER DUSTER on (K), get GARDEN SHEARS.
- Use SHARP CLAW on (L), get CENTERPIECE (1/2).
- Use DART on (M), get SALT.
- Use SALT on (N).

- Get FLINT AND STEEL and FLASK (O).
- CLOTH, KEROSENE, and FLINT AND STEEL on WOODEN BRANCH, get TORCH.
- Go Cemetery.
- Use GARDEN SHEARS on (P), get CANVAS.
- Use ROPE on (Q), get SHIELD and MEMORY SPHERES (1/4).
- Go Outside the Cemetery.
- Use TORCH on (R).
- Solve puzzle (S), get NOISEMAKER.
- Use NOISEMAKER on (T), get COFFIN KEY and MEMORY SPHERES (2/4).
- Go Ancient Crypt.
- Use COFFIN KEY on (U), get FLOWERS.
- Use SHIELD on (V), get CENTERPIECE (2/2).
- Go Cemetery.
- Use FLOWERS on (W), get MEMORY SPHERES (3/4).
- Go Outside the Cemetery.
- Use CENTERPIECE (2/2) on (X), get PICKAX.
- Use PICKAX on (Y), get MEMORY SPHERES (4/4).
- MEMORY SPHERES (4/4) on FLASK, get FLASK OF MEMORIES.
- Go Ancient Crypt.
- Use CANVAS and FLASK OF MEMORIES on (Z), get PORTRAIT SKETCH.
- Use PORTRAIT SKETCH on (A).

- Solution (@43): Press (1×3)-(2)-(1)-(2)-(1)-(2)-(1×3)-(3×2)-(1)-(3)-(1).
Congratulations! You have completed the game Mystery Tales 12: Art and Souls.


