Mystery Trackers 20: Reflections of the Past (Bonus Chapter) – A new twist on the detective story of the past and its mysteries awaits you. This time you will find out what happened to the detective and help Phantom atone for his sins, as well as stop the villain who threatens the whole world. Flashbacks will lead you to key moments from the detective’s past: meeting the Elf, first cases in the Order, and battles with dangerous supernatural foes. You’ll reconnect with the Commander who was more than a mentor to you, and uncover new details about Morpheus, the Order’s founder who betrayed his allies.
Bonus Chapter Walkthrough
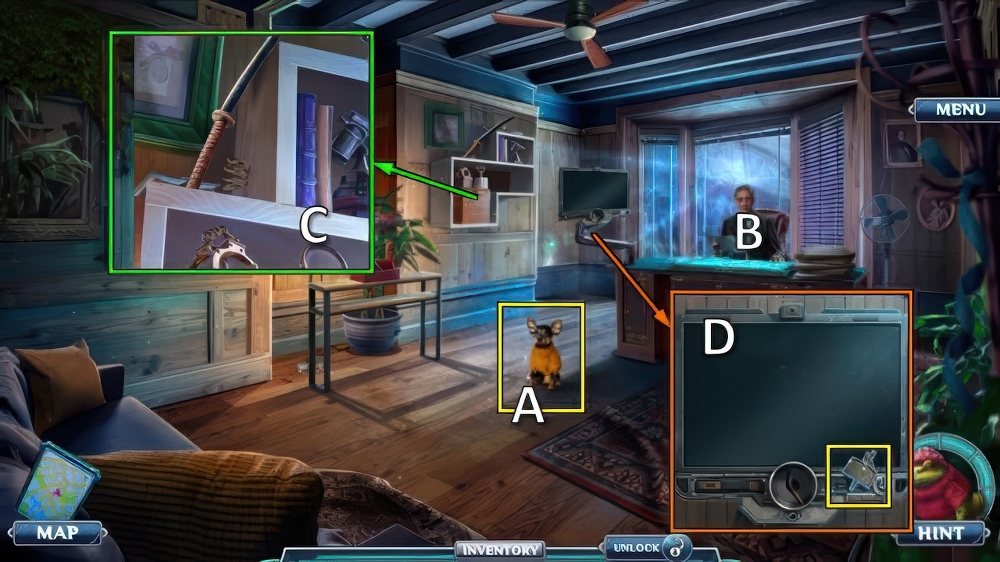
- Take ELF (A).
- Talk (B).
- Send ELF, take KATANA, SMALL BOOK and SOLDER ALLOY (C).
- Take EMPTY RIM (D).
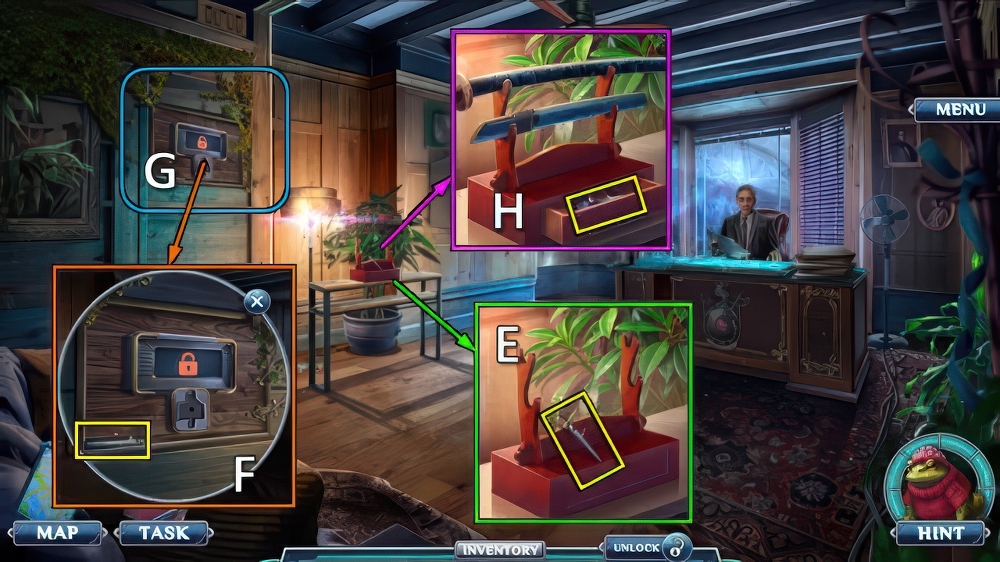
- Take SMALL RAPIER (E).
- SMALL BOOK and SMALL RAPIER on EMPTY RIM, take BOOK AND SWORD.
- Take SOLDERING IRON, place BOOK AND SWORD (F).
- Play puzzle (G), receive TANTO.
- Place KATANA and TANTO, take DAMAGED CARD and SPARE SCANNER (H).
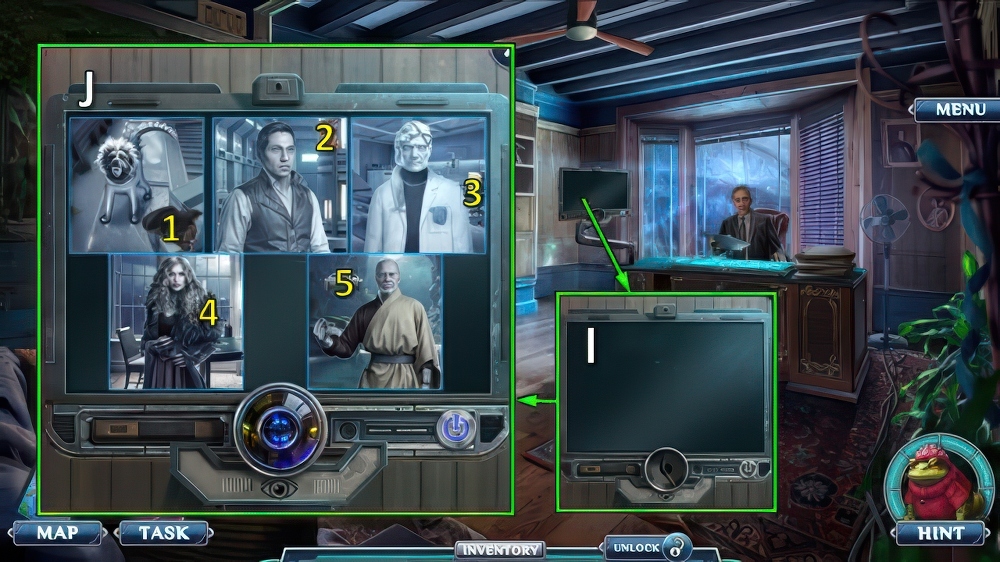
- Use SPARE SCANNER, SOLDERING IRON and SOLDERING ALLOY (I).
- Solution (J): (5-3-5)-(1-2-4-1).

- Talk (K).
- Take WALKIE-TALKIE (L).
- Send ELF, take TOOTHBRUSH and GLASS CIRCLE (M).
- Take MAGNETIC SUBSTANCE (N).
- MAGNETIC SUBSTANCE and TOOTHBRUSH on DAMAGED CARD, take DETECTIVE’S PASS.
- Use DETECTIVE’S PASS (N).
- Go (O).

- Use WALKIE-TALKIE for puzzle (P).
- Take CUP (Q).
- Take BIG PICTURE (R).
- Place BIG PICTURE, take ENGINE OIL and BURNER (S).
- Walk down.
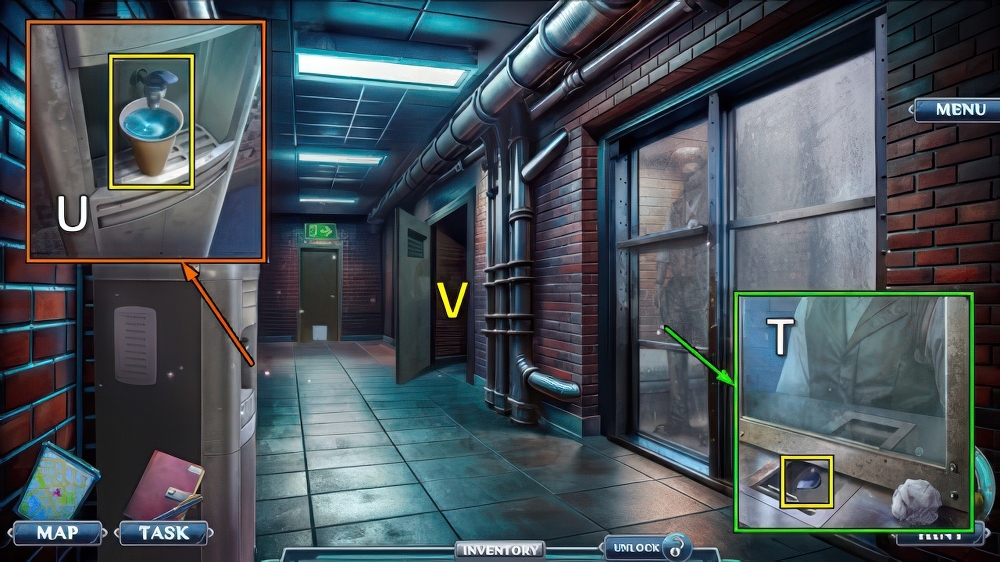
- Use ENGINE OIL, take LEVER (T).
- Place LEVER and CUP, take CUP OF WATER (U).
- Go (V).
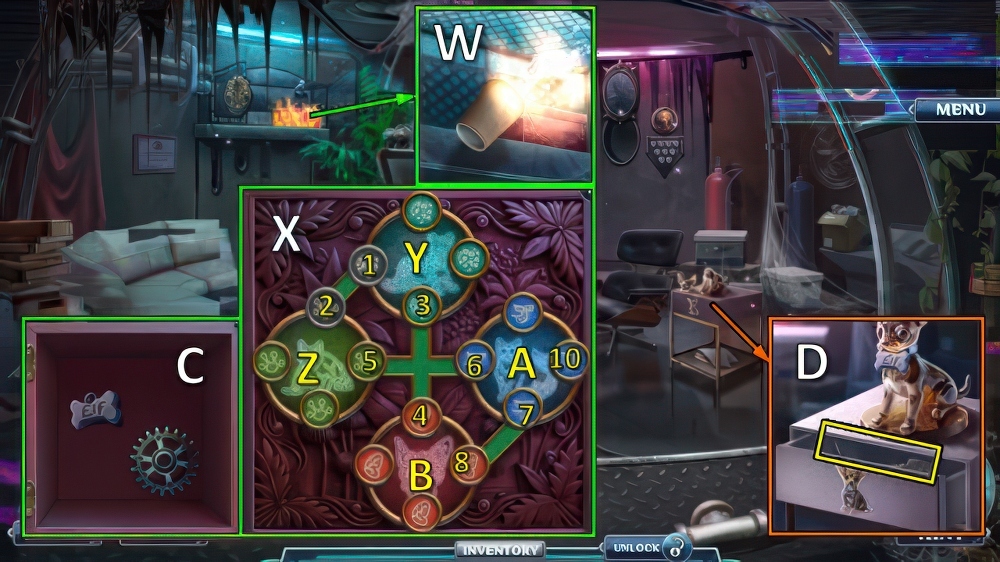
- Use CUP OF WATER (W).
- Solution (X): (5-6)-(7-8)-Ax2-Bx3-(7-8)-Y-(1-2)-Bx2-(7-8)-Bx3-(3-4)-Z-(1-2)-Z-Ax3-(5-6)-Yx2-(1-2)-Z-A-(5-6)-Zx3-Yx3-(1-2).
- Take GEAR 1/2 and DOG TAG (C).
- Place DOG TAG, GLASS CIRCLE and BURNER, take SPARE KEY and COTTON BUD (D).
- Walk down.
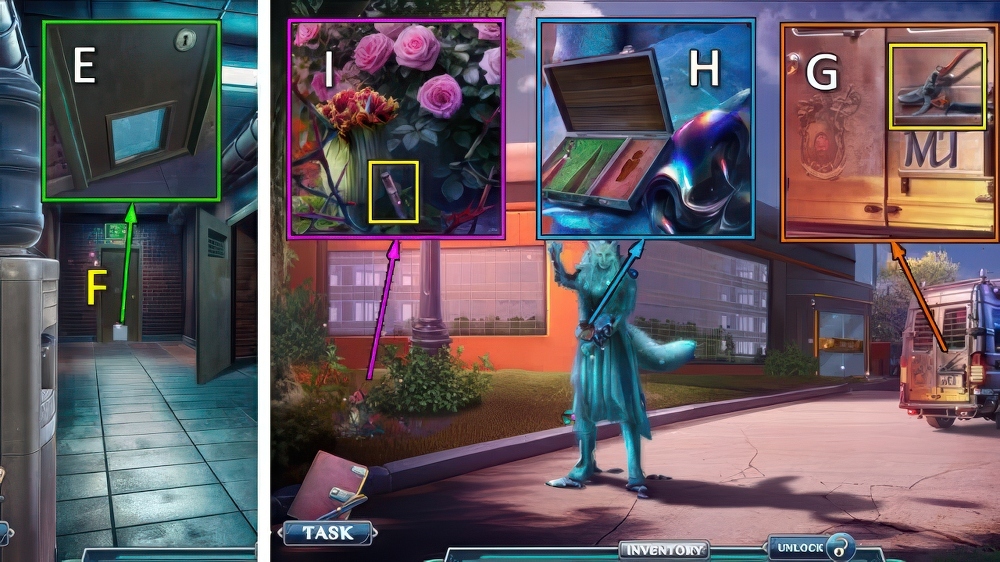
- Use SPARE KEY (E).
- Go (F).
- Take CLIPPERS (G).
- Take CARVING SET (H).
- Use CLIPPERS, take SOFT SOLVENT (I).
- Go to Alternative Room.
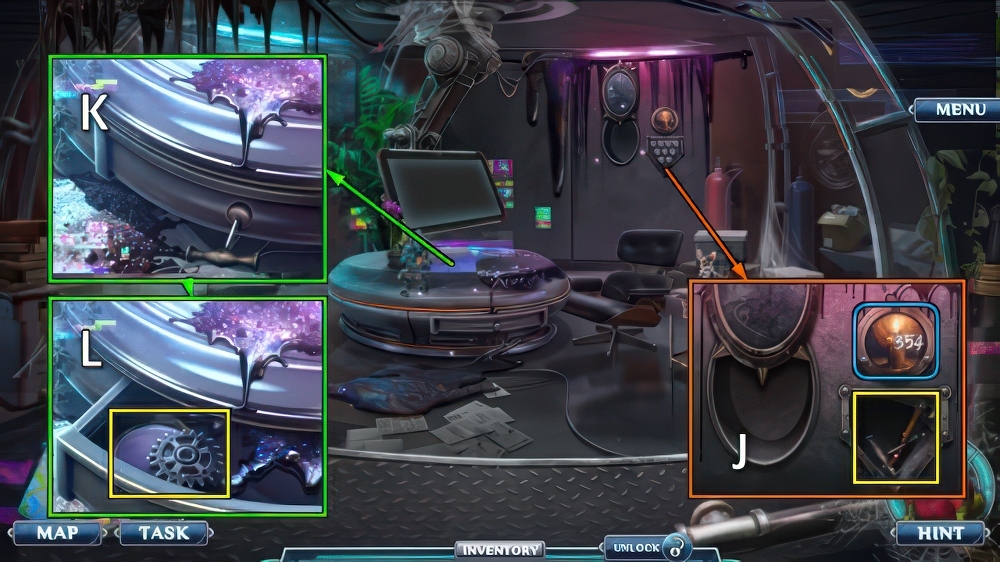
- Use SOFT SOLVENT and COTTON BUD, take CORKSCREW and HAMMER (J).
- Use CORKSCREW (K), take GEAR 2/2 and MAGNIFIER (L).
- Go to Near Laboratory.
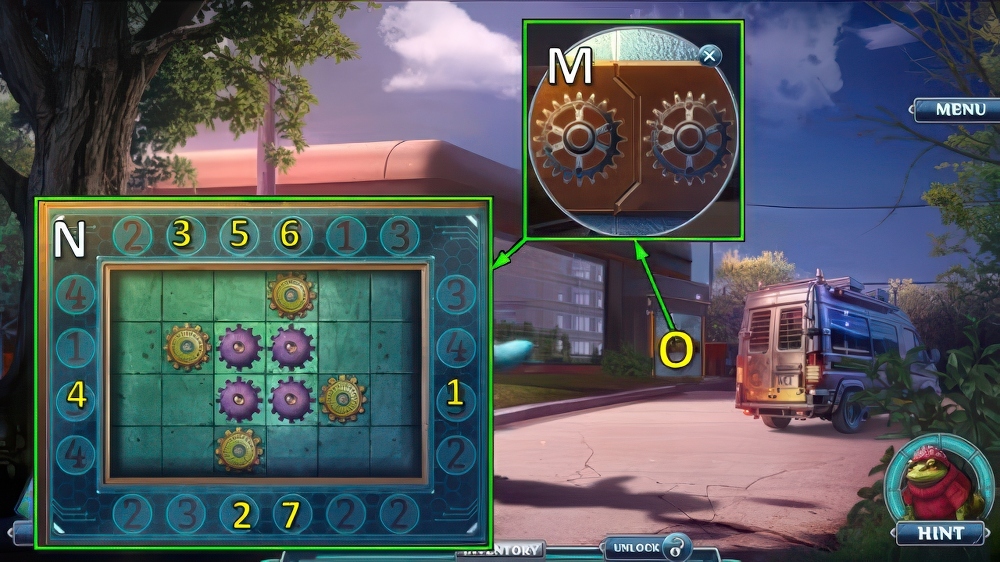
- Place GEAR (M).
- Solution (N): 1-2-3-4-5-6-7.
- Go (O).

- Take CONTROLLING COLLAR (P).
- Take OPENING CODE (Q).
- Place OPENING CODE (R), take FERTILIZER (S).
- Walk down.
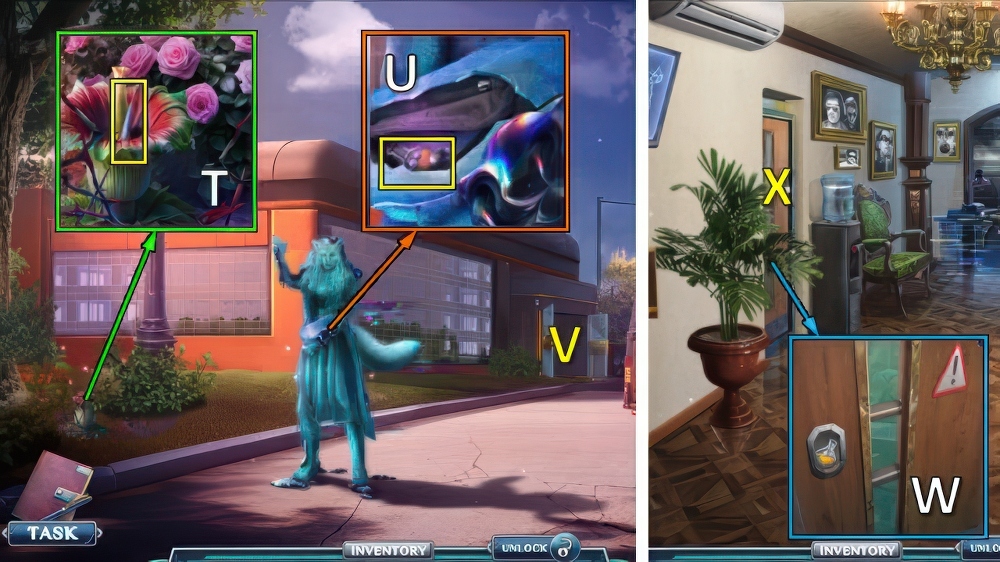
- Use FERTILIZER, take IRON ROD (T).
- Use IRON ROD and HAMMER, take ANCIENT RING and FLASK TOKEN (U).
- Go (V).
- Place FLASK TOKEN (W).
- Go (X).
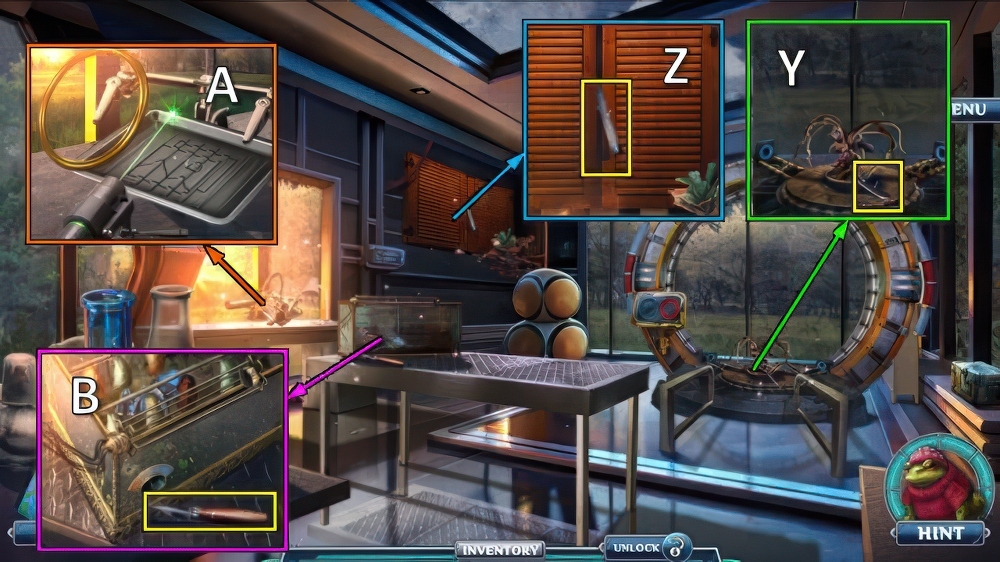
- Take SCALPEL (Y).
- Take FLUORESCENT LAMP, use SCALPEL for mini-puzzle (Z).
- Receive FIGURINE BLANK.
- Take DEVELOPING TRAY (A).
- Take SMALL CUTTER (B).
- Walk down.

- SMALL CUTTER and FIGURINE BLANK on CARVING SET, take WOODEN DETECTIVE.
- Place WOODEN DETECTIVE (C).
- Take ANCIENT AMULET and WATER (D).
- Place ANCIENT RING and ANCIENT AMULET, take DEVELOPER and SUPERTEMPORAL CHIP (E).
- Go (F).

- Place MAGNIFIER, CONTROLLING COLLAR and SUPERTEMPORAL CHIP for puzzle (G), receive UPDATED DEVICE.
- Go to Prison Corridor.
- Offer UPDATED DEVICE (H).
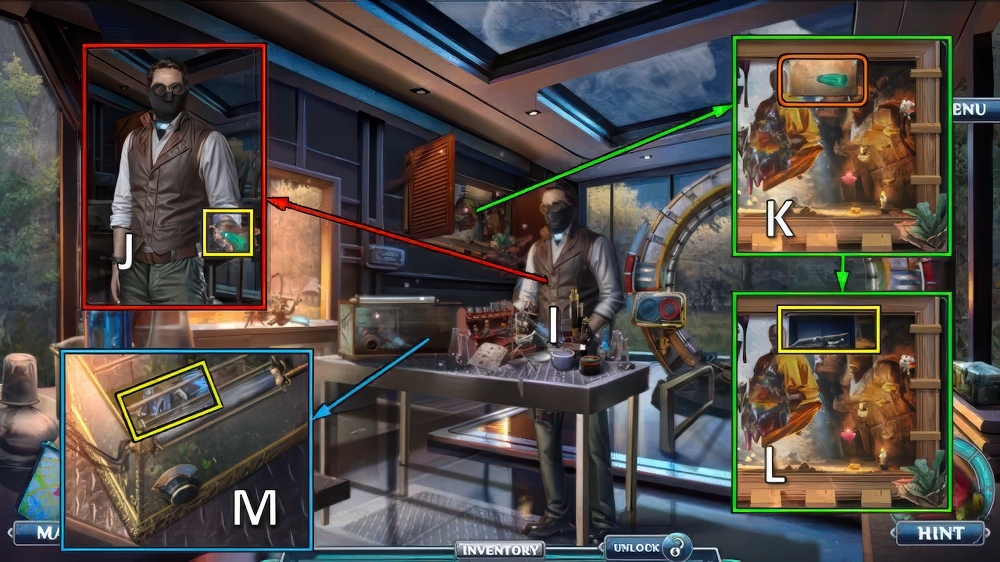
- Talk (I).
- Take SCREWDRIVER (J).
- Use SCREWDRIVER (K).
- Take HANDLE and TEMPERATURE DIAL (L).
- Place FLUORESCENT LAMP and TEMPERATURE DIAL, take BATTERY and ORDER MONOGRAM (M).
- Go to Near Laboratory.
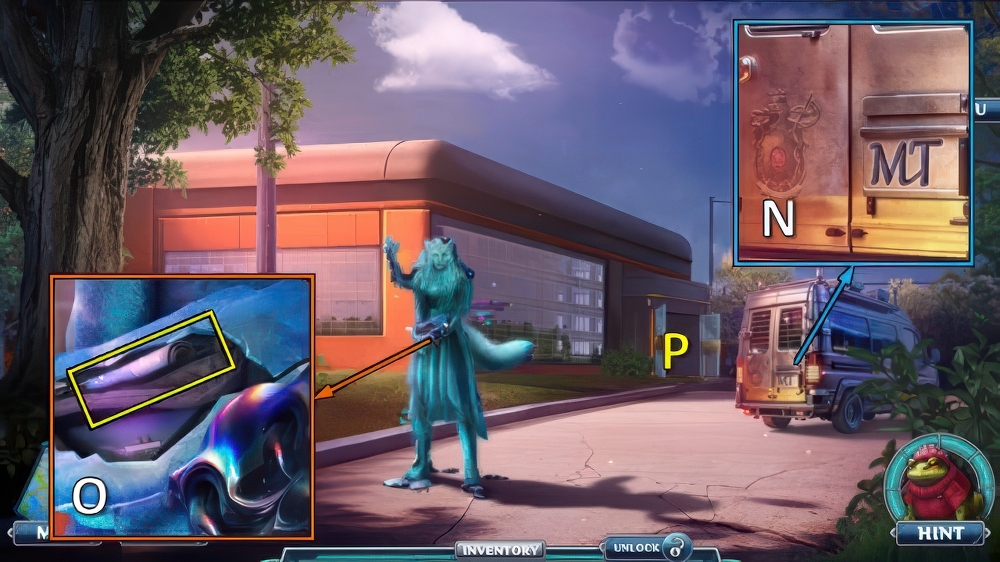
- Place ORDER MONOGRAM for mini-puzzle (N), receive PAPER CLIP.
- Use PAPER CLIP, take BLADE COVER and INNOVATIVE PHOTOPAPER (O).
- Go (P).
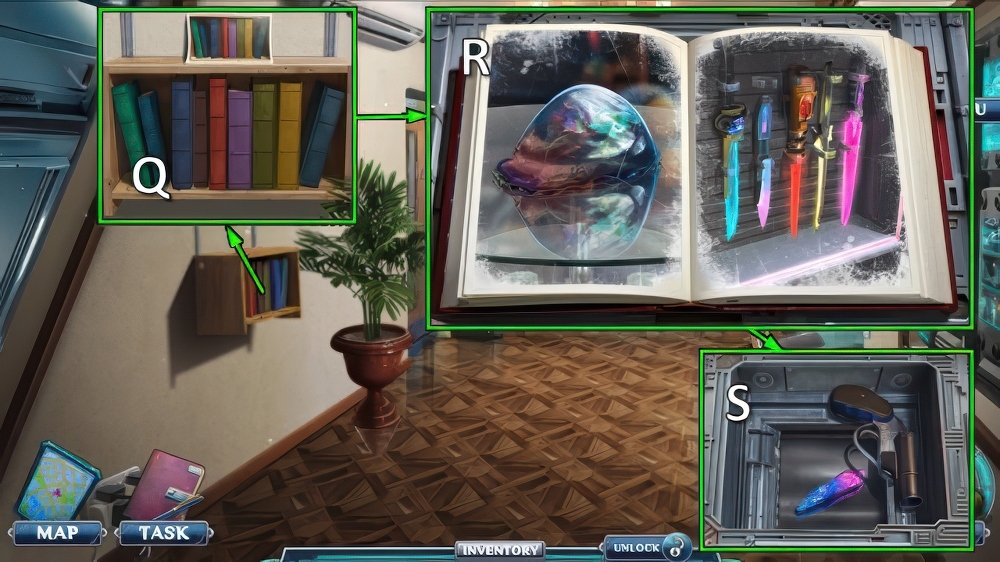
- WATER, DEVELOPER and INNOVATIVE PHOTOPAPER on DEVELOPING TRAY, take BOOK PHOTO.
- Place BOOK PHOTO (Q).
- Solution (R).
- Take EMPTY GUN and CUTTER CRYSTAL (S).
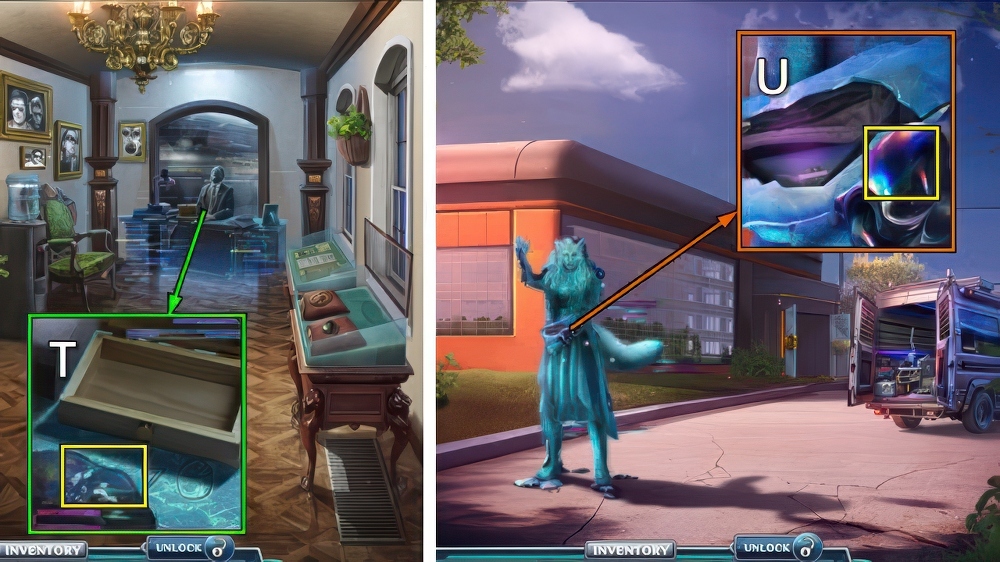
- BATTERY, CUTTER CRYSTAL and BLADE COVER on HANDLE, take LASER KNIFE.
- Use LASER KNIFE, take SUBSTANCE SAMPLE 1/5 (T).
- Walk down.
- Use LASER KNIFE, take SUBSTANCE SAMPLE 2/5 (U).
- Go to Alternative Room.
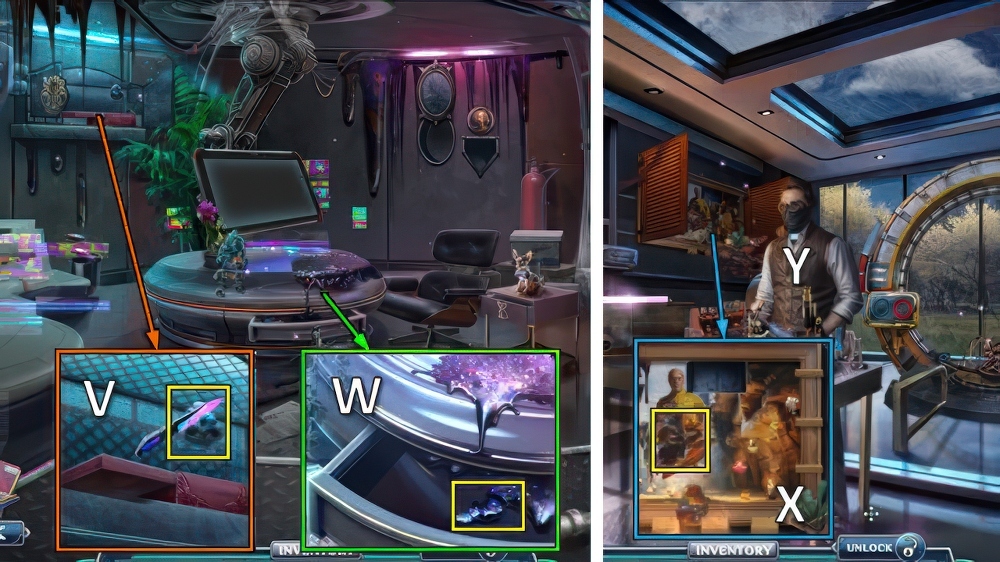
- Use LASER KNIFE, take SUBSTANCE SAMPLE 3/5 (V).
- Use LASER KNIFE, take SUBSTANCE SAMPLE 4/5 (W).
- Go to Order Laboratory.
- Use LASER KNIFE, take SUBSTANCE SAMPLE 5/5 (X).
- Offer SUBSTANCE SAMPLE (Y).
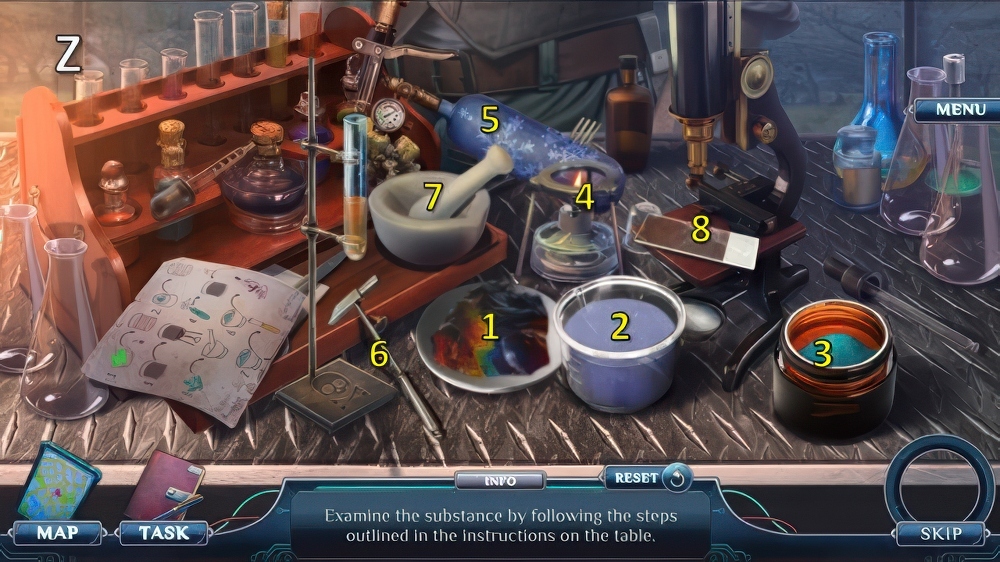
- Solution (Z): (1-2)-3-3-3-(2-4)-5-6-(4-7)-8.
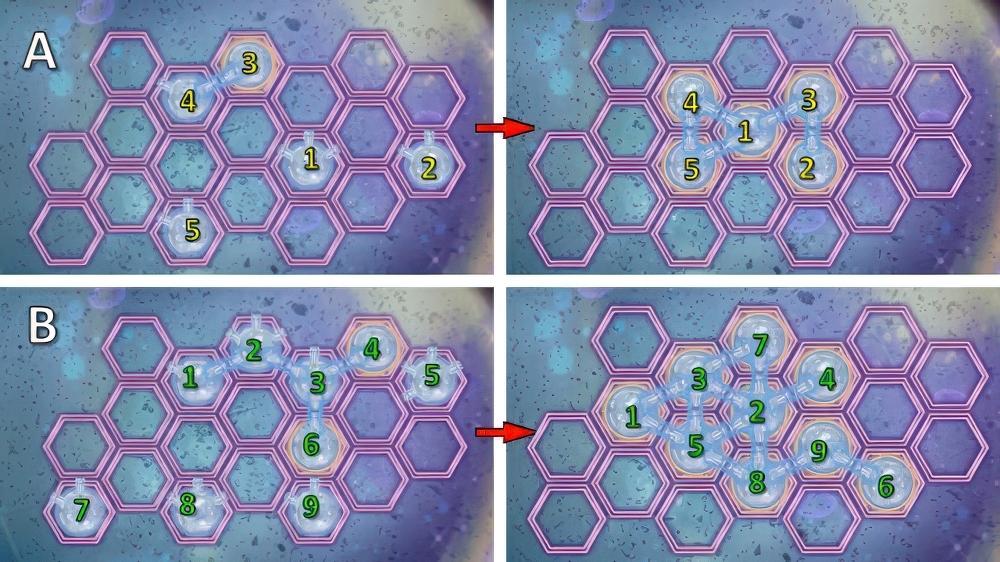
- Solution (A).
- Solution (B).

- Solution (C).
- Solution continued (D): (9-10).
- Receive BLUE EYE and SUBSTANCE ESSENCE.
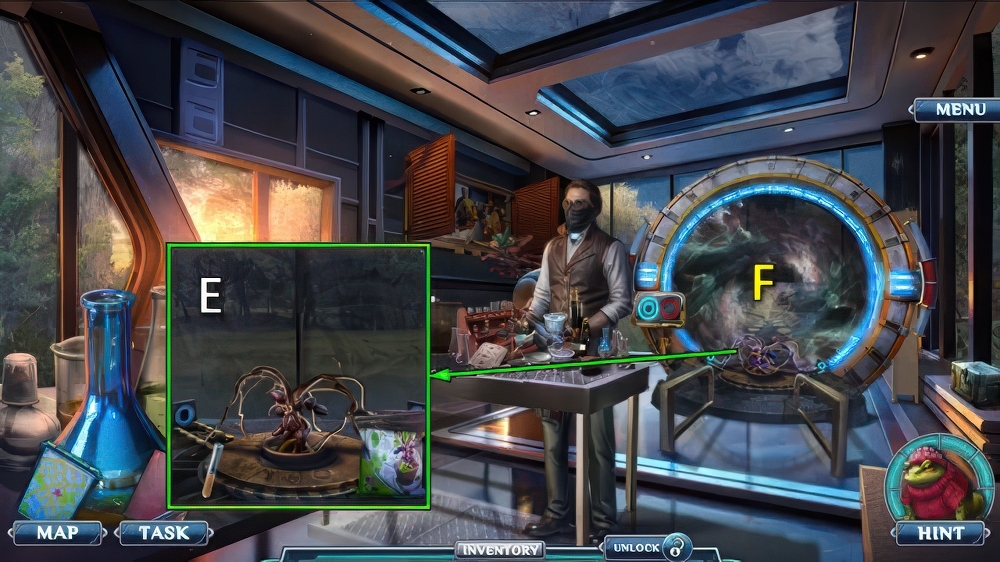
- Use SUBSTANCE ESSENCE and FERTILIZER (E).
- Go (F).
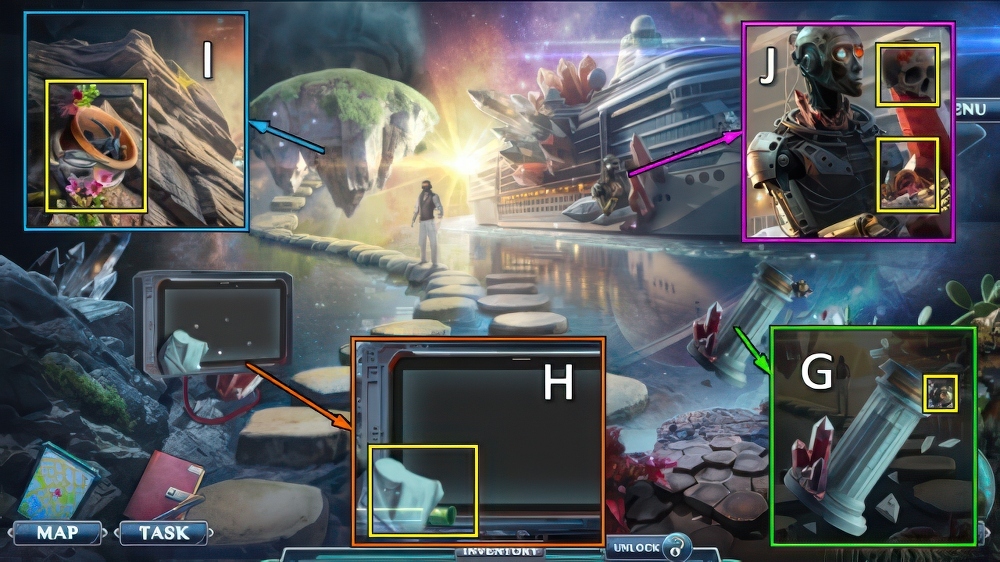
- Take RED EYE (G).
- Take BUST BASE and SMALL FIRECRACKER (H).
- Send ELF, take ALL-PURPOSE GLUE, HOOK and BOTTOM JAW (I).
- Place BLUE EYE, RED EYE and BOTTOM JAW, take ALTERNATE SKULL, PINS and ROPE (J).

- HOOK, SMALL FIRECRACKER and ROPE on EMPTY GUN, take GRAPPLING HOOK.
- Use GRAPPLING HOOK (K).
- Play puzzle (L).
- Solution (M).
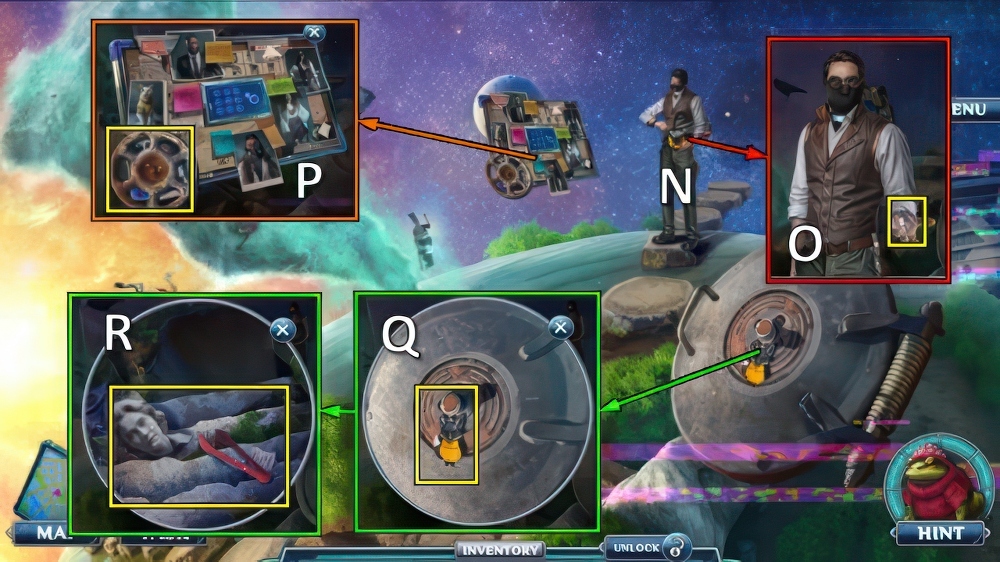
- Talk (N), take SMALL SHARD (O).
- Take SCREW (P).
- Take FOX KEYCHAIN, use SCREW (Q).
- Take BIG SHARD and INSULATED TONGS (R).
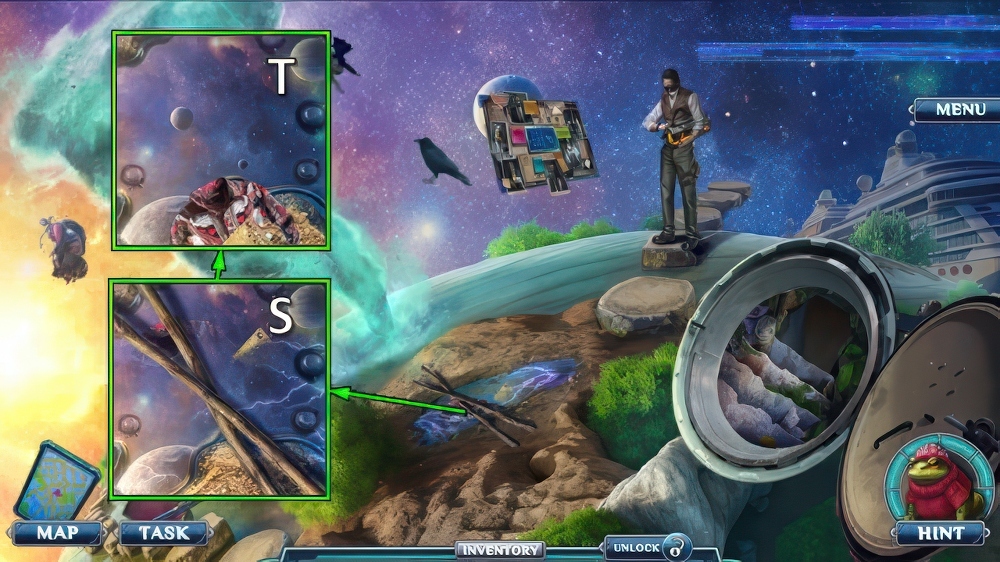
- Take STICKS, use INSULATED TONGS (S).
- Take BAIT 1/4 and FUNKY SHIRT (T).
- Walk down.
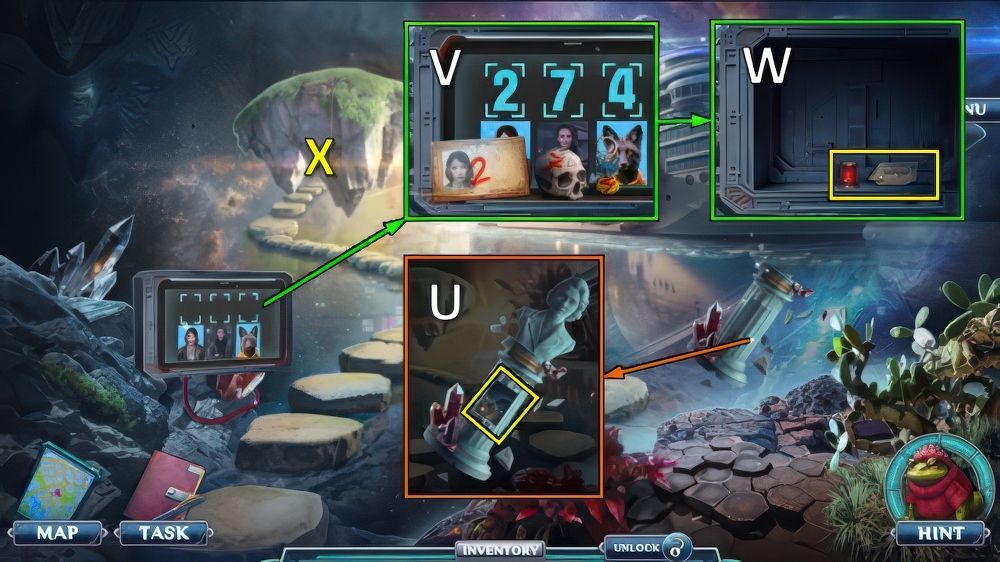
- ALL-PURPOSE GLUE, SMALL SHARD and BIG SHARD on BUST BASE, take COMMANDER BUST.
- Place COMMANDER BUST, take ALTERNATE ID and BAIT 2/4 (U).
- Turn on monitor.
- Place ALTERNATE ID, ALTERNATE SKULL and FOX KEYCHAIN, enter 2-7-4 (V).
- Take THREAD and BAIT 3/4 (W).
- Go (X).
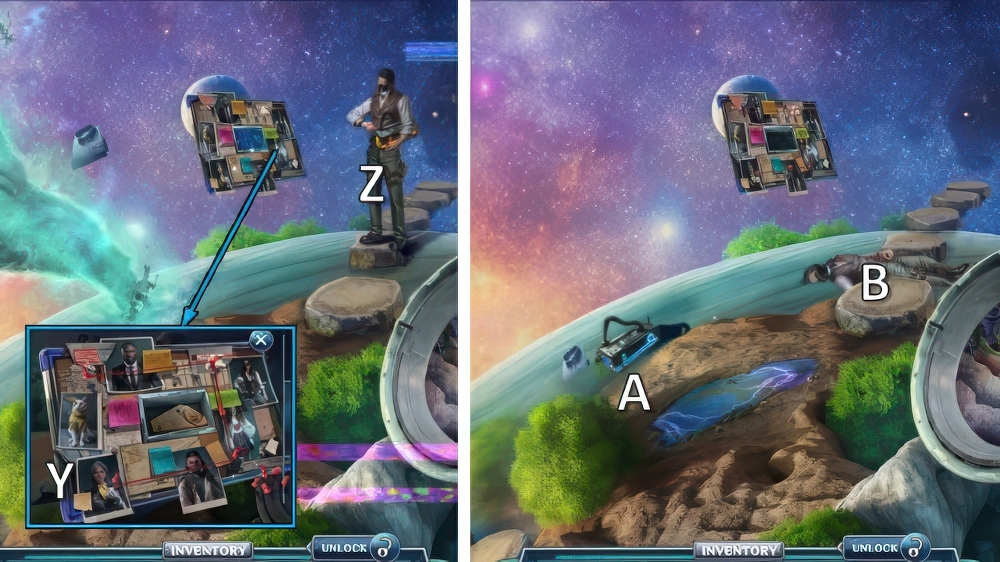
- Place PINS and THREAD for mini-puzzle, take BAIT 4/4 (Y).
- Offer BAIT for puzzle (Z), receive CHARGED TRAP.
- Place CHARGED TRAP (A), receive USUAL SHIRT.
- FUNKY SHIRT and USUAL SHIRT on STICKS, take IMPROVISED STRETCHER.
- Use IMPROVISED STRETCHER (B).
Congratulations! You have completed the game Mystery Trackers 20: Reflections of the Past.


