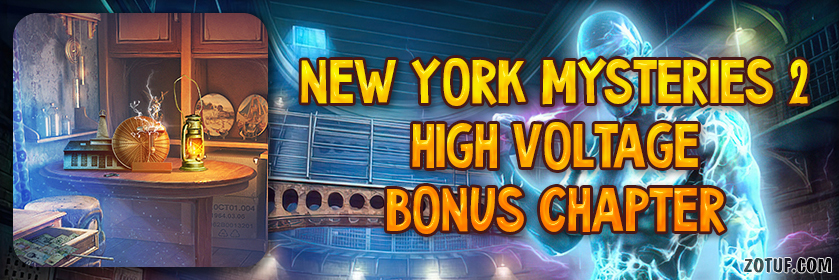
New York Mysteries 2: High Voltage (Bonus Chapter) – When a string of strange murders take place in the city, you are called in to investigate. Eyewitness reports point to otherworldly forces, as no person could have committed the crime. You quickly realize that the truth is even stranger than you might have imagined, a secret electrical force is traveling through the city and taking people away.
Bonus Chapter Walkthrough
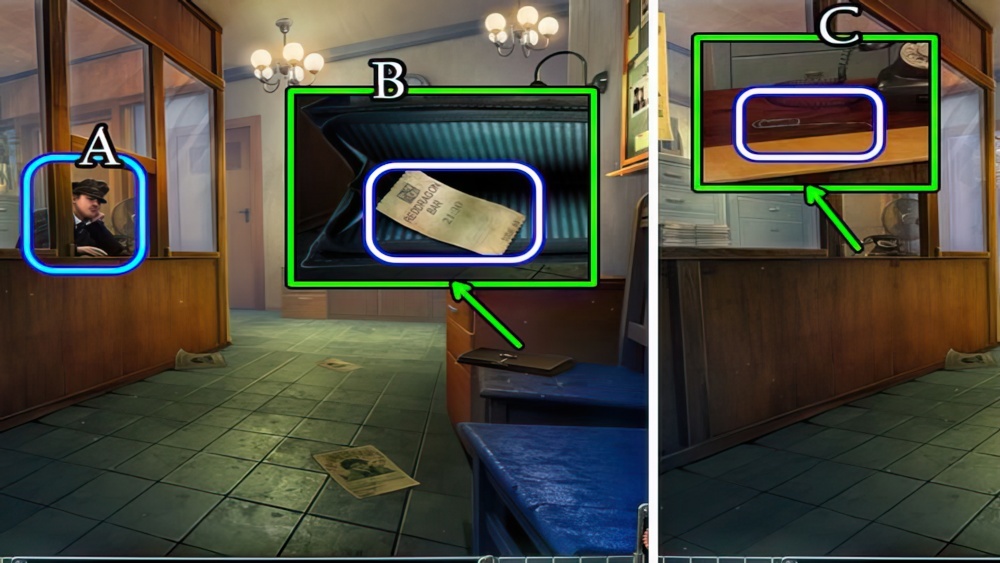
- Speak to the officer (A).
- Open the wallet, uncover a RECEIPT (B).
- Give the RECEIPT (A), take the PAPER CLIP (C).

- Use the PAPER CLIP (D).
- Solution (E).
- Take the KNIFE.
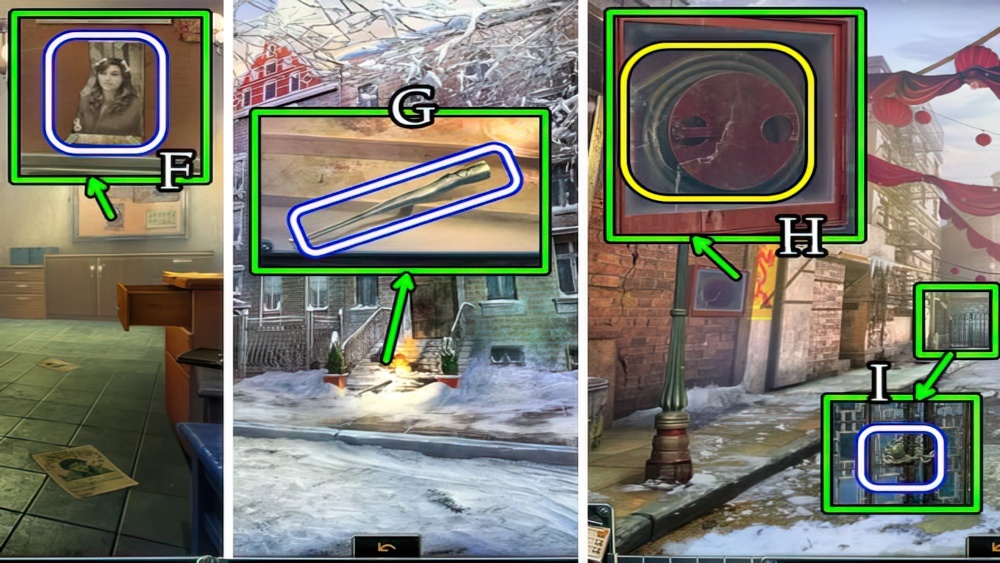
- Use the KNIFE, take the PIECE OF VICTIM’S PHOTO (F).
- Walk forward.
- Take the BAT (G), walk left.
- Use the BAT, take the FIRE HOSE (H).
- Take the PLANET (I).
- Walk down.
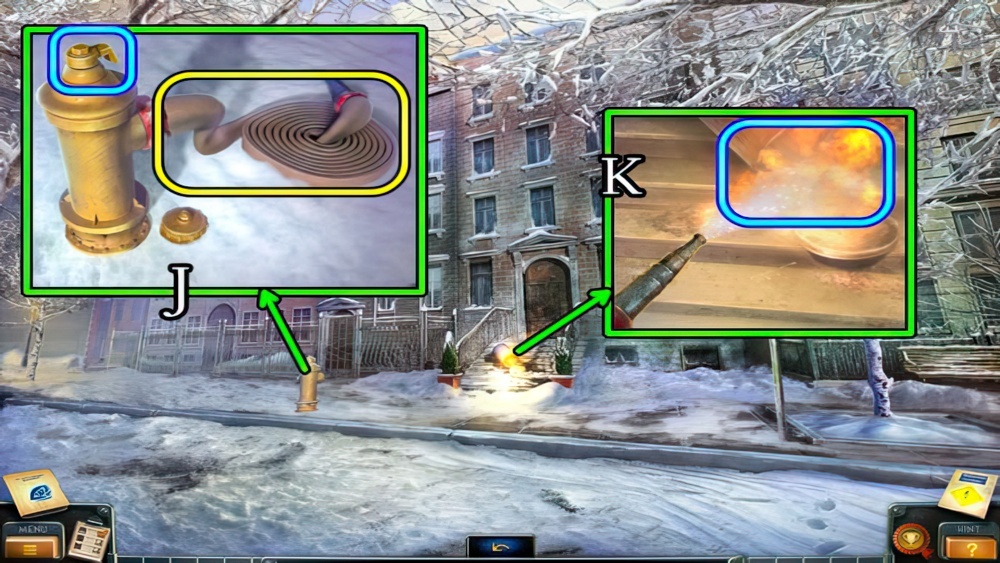
- Place, attach and select the FIRE HOSE (J), select the tap, use (K).
- Walk right, upstairs, then open and enter.
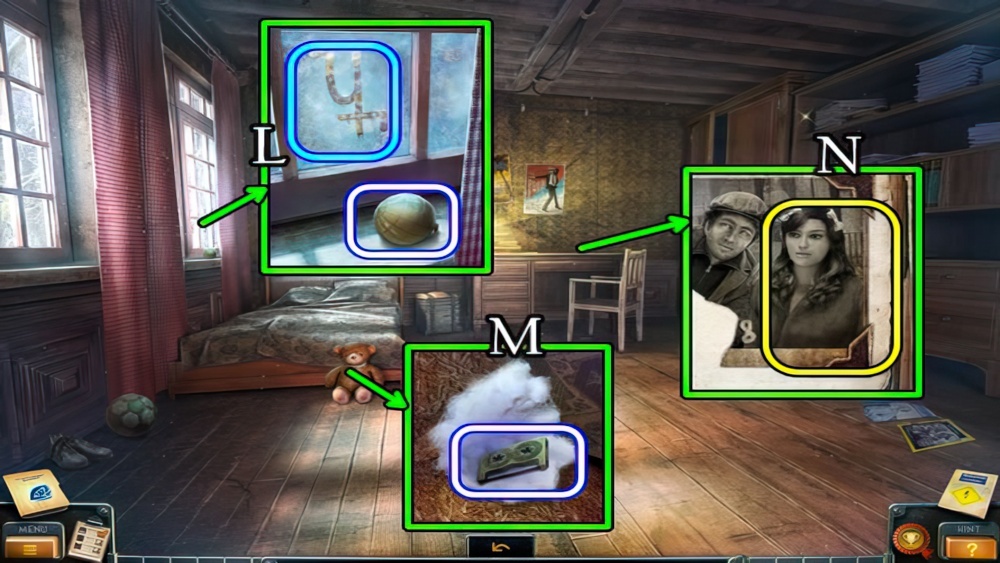
- Take the PLANET, select the window (L).
- Select the head, take the CASSETTE TAPE (M).
- Place the PIECE OF VICTIM’S PHOTO (N).
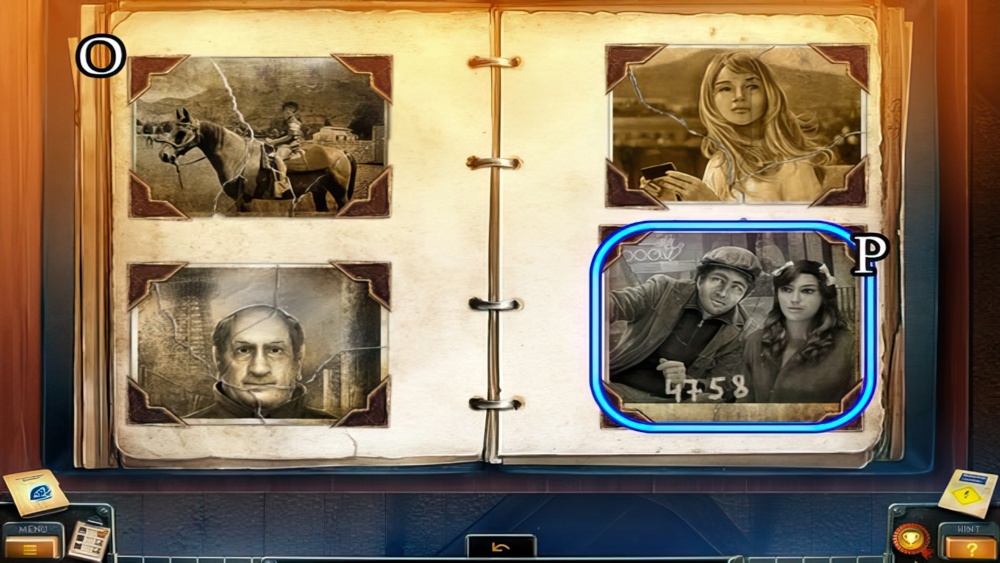
- Solution (O).
- Select (P).
- Walk down.
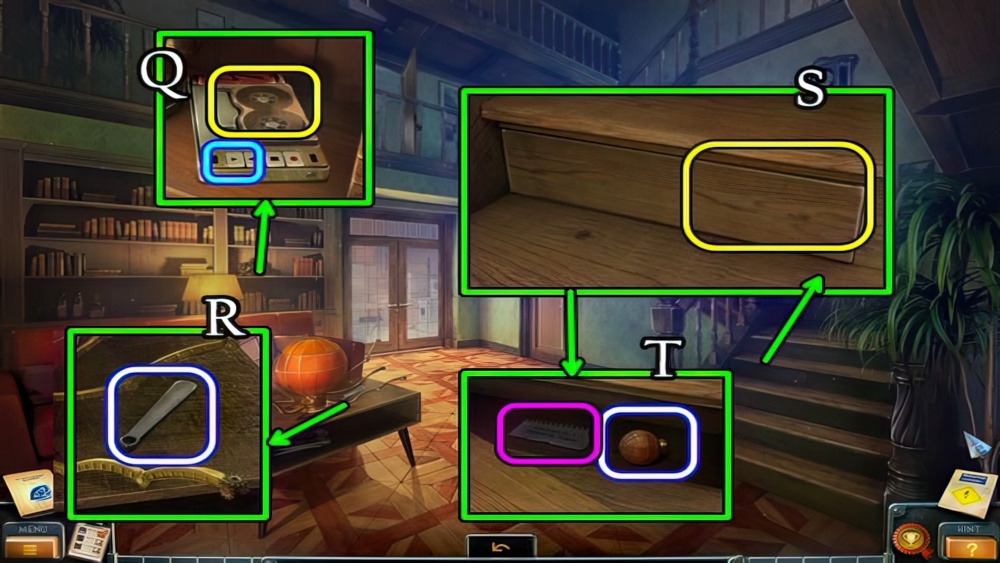
- Place the CASSETTE TAPE, press play (Q).
- Take the SHOEHORN (R).
- Use the SHOEHORN (S), take the PLANET and note (T).
- Walk down, the right.
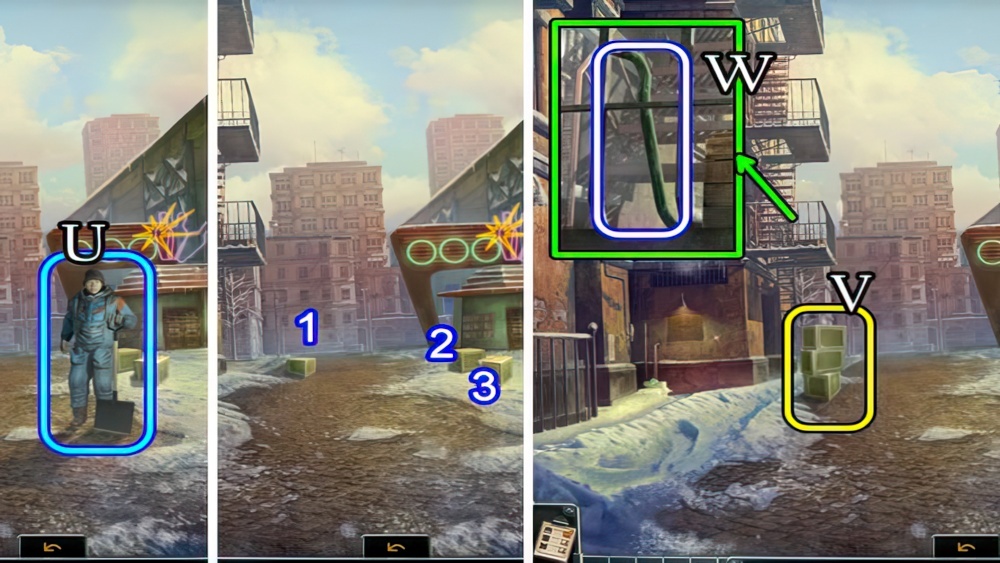
- Speak to the man (U), receive a BOW.
- Collect (1-2-3) and stack (V), take the CROWBAR (W).
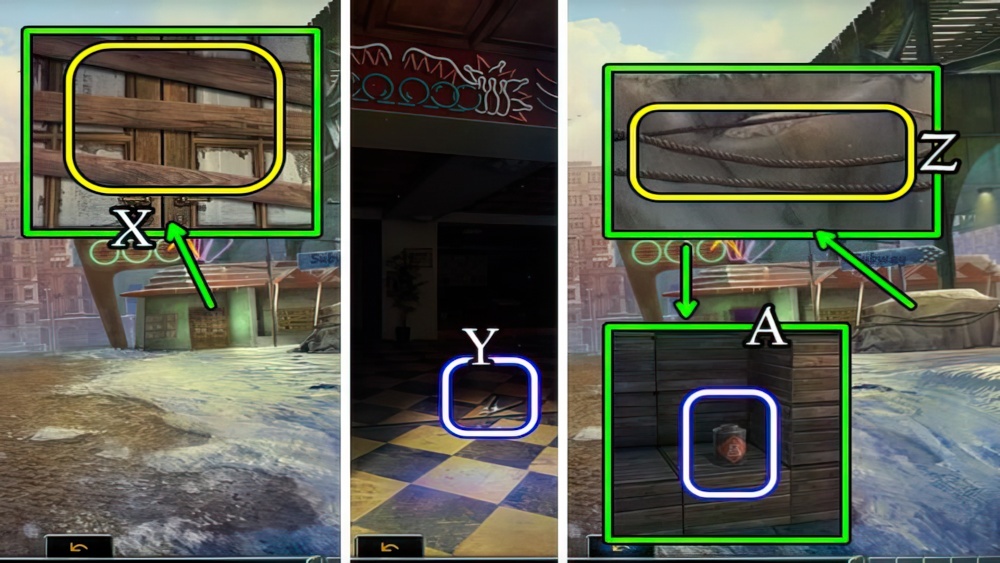
- Use the CROWBAR (X), walk left.
- Grab the PLIERS (Y), walk down.
- Use the PLIERS (Z), uncover, take the DISSOLVENT (A).
- Walk left.
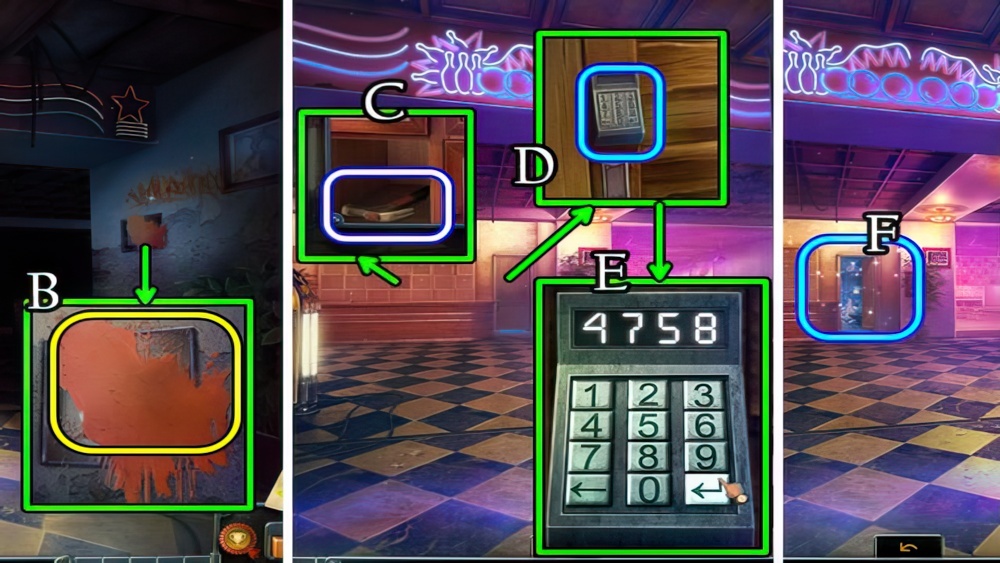
- Use the DISSOLVENT (B).
- Open the cover, flip the switch.
- Take the HAMMER (C).
- Select (D) and enter 4-7-5-8 and the arrow key (E).
- Play the puzzle (F) to receive a BOWLING BALL.
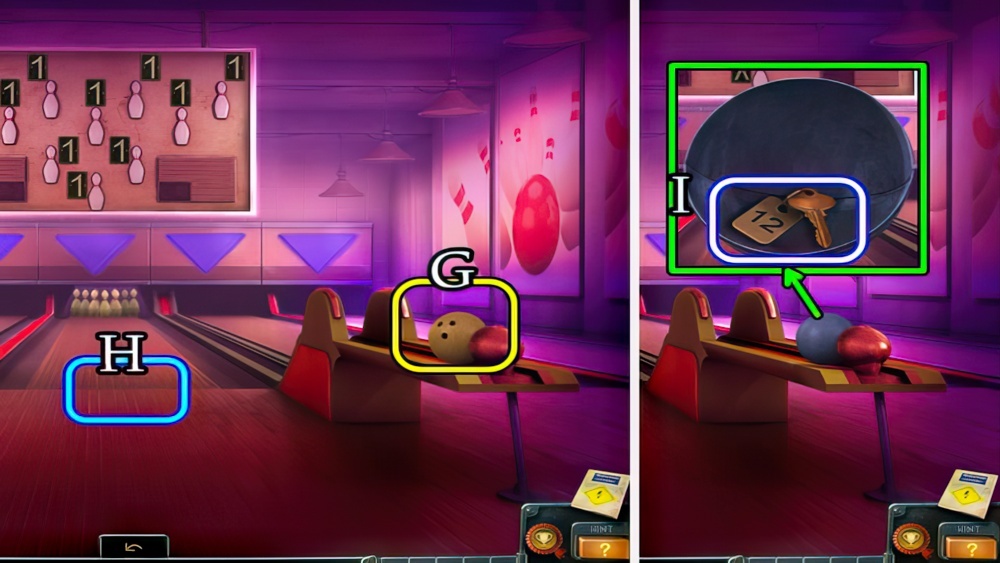
- Place the BOWLING BALL (G).
- Select and place (H) the BOWLING BALL 3x.
- Take the ball, open, take the KEY (I).
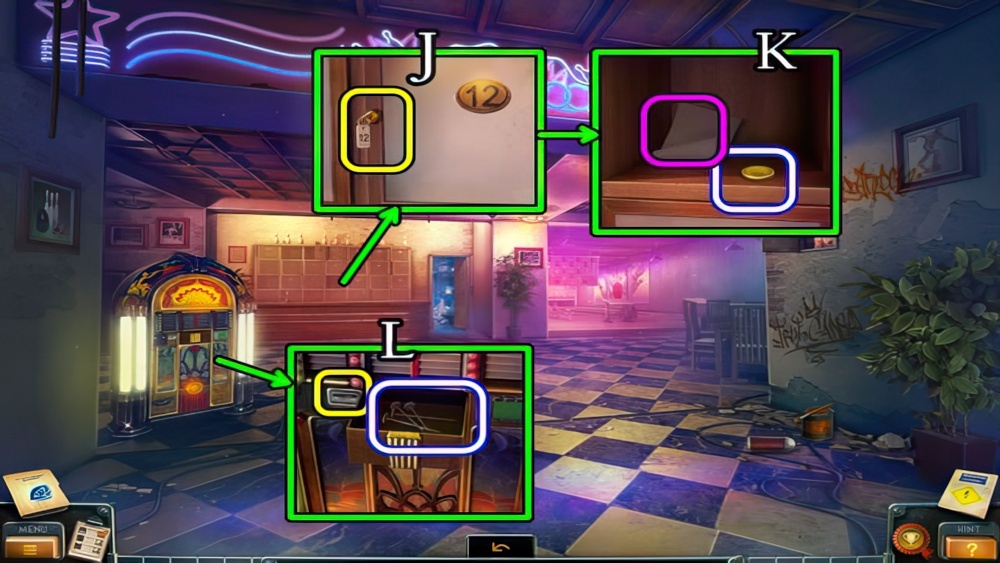
- Use the KEY (J), take the note and TOKEN (K).
- Use the TOKEN, take the NAILS (L).
- Walk down, then right.
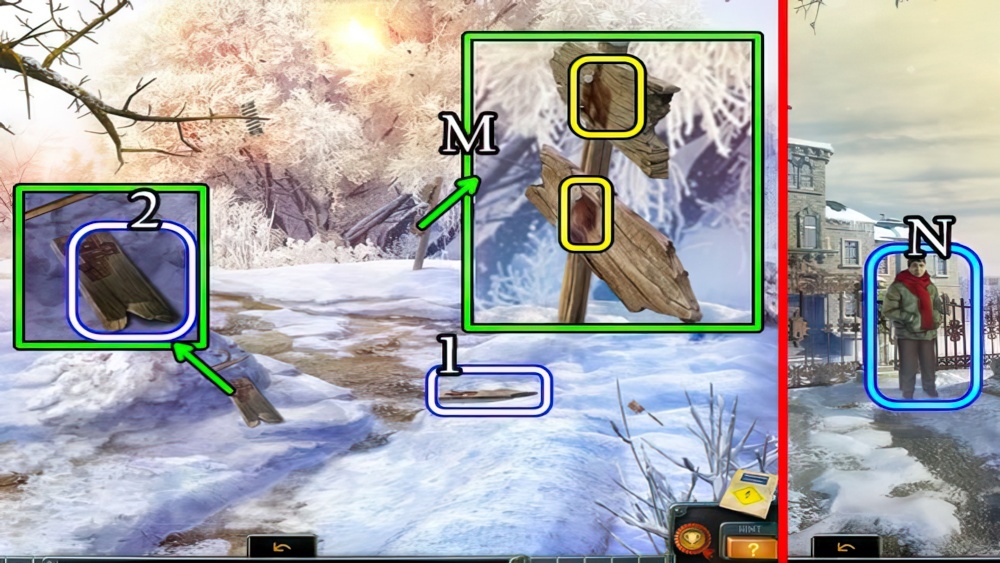
- Take the SIGN-POST PARTS (1-2).
- Place the SIGN-POST PARTS and NAILS. Use the HAMMER (M).
- Walk left.
- Speak to the woman (N), receive a COIN.
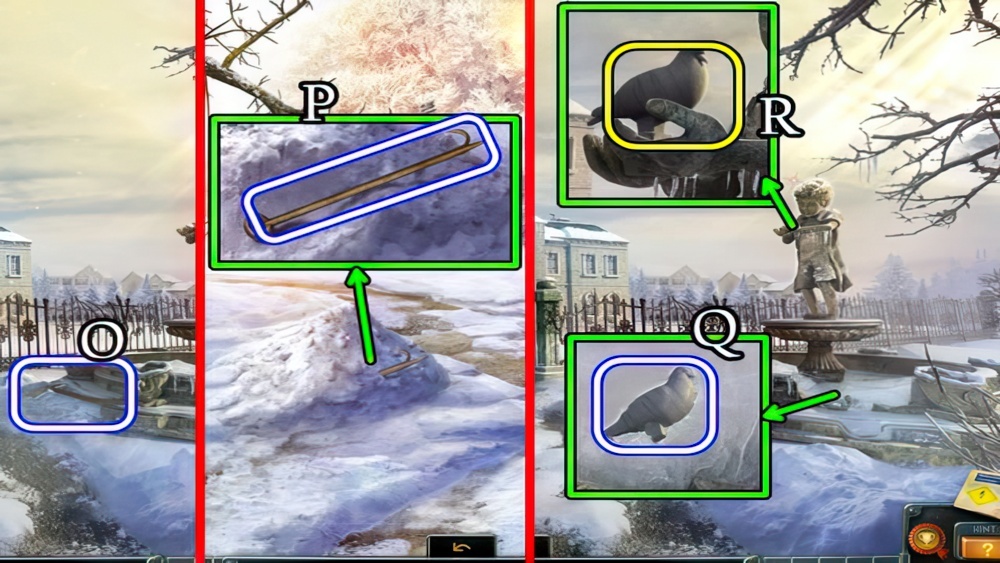
- Take the SHOVEL (O).
- Walk down.
- Use the SHOVEL, take the GAFFING HOOK (P).
- Walk left.
- Use the GAFFING HOOK, take the STONE PIGEON (Q).
- Place the STONE PIGEON (R).
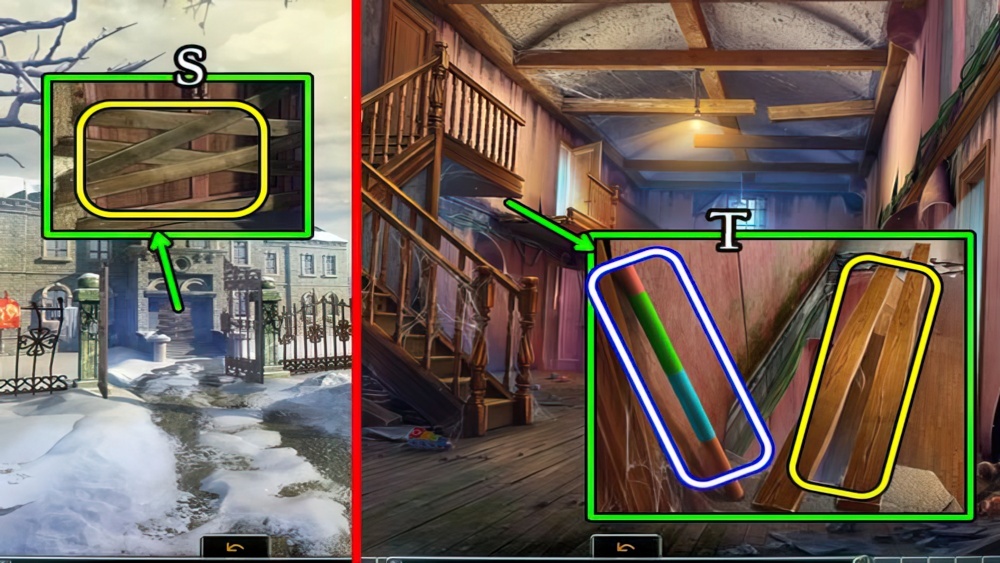
- Use the HAMMER for PLANKS (S).
- Walk left.
- Take the STICK, place the PLANKS (T).
- Walk left.
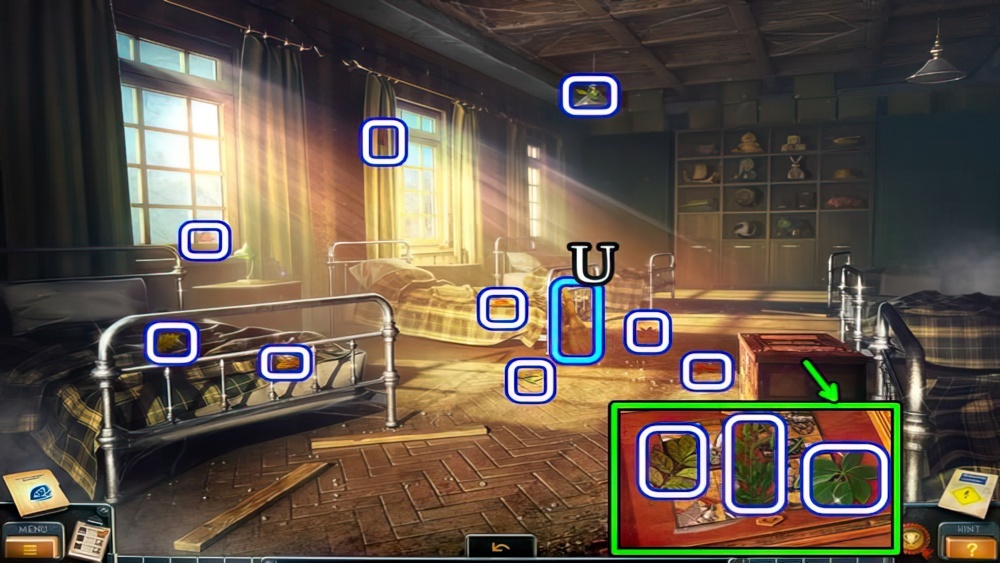
- Take the BROOM (U).
- Collect LEAVES 12/13.
- Walk down.
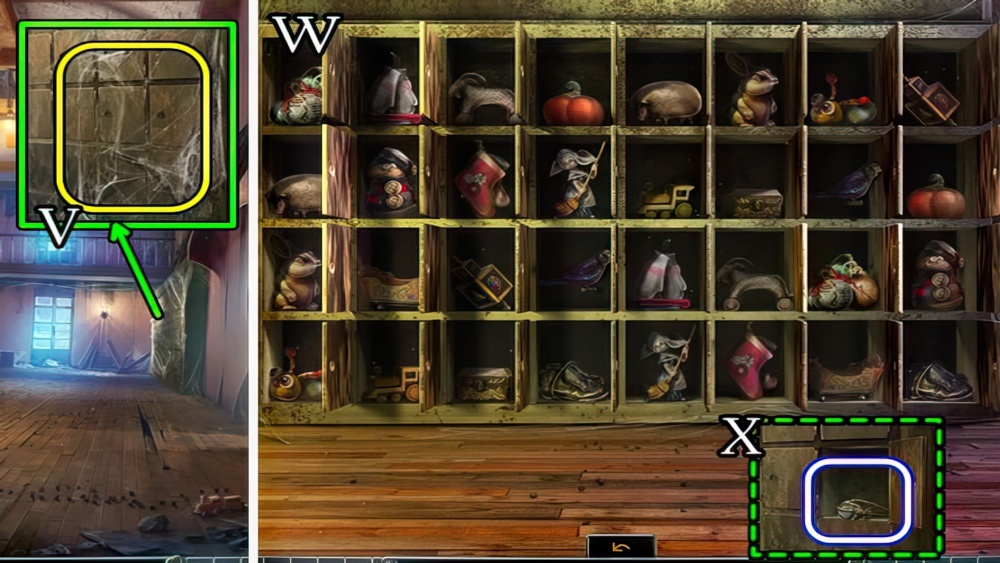
- Use the BROOM (V).
- Solution (W).
- Take the ROPE WITH ROCK (X).
- Walk right.
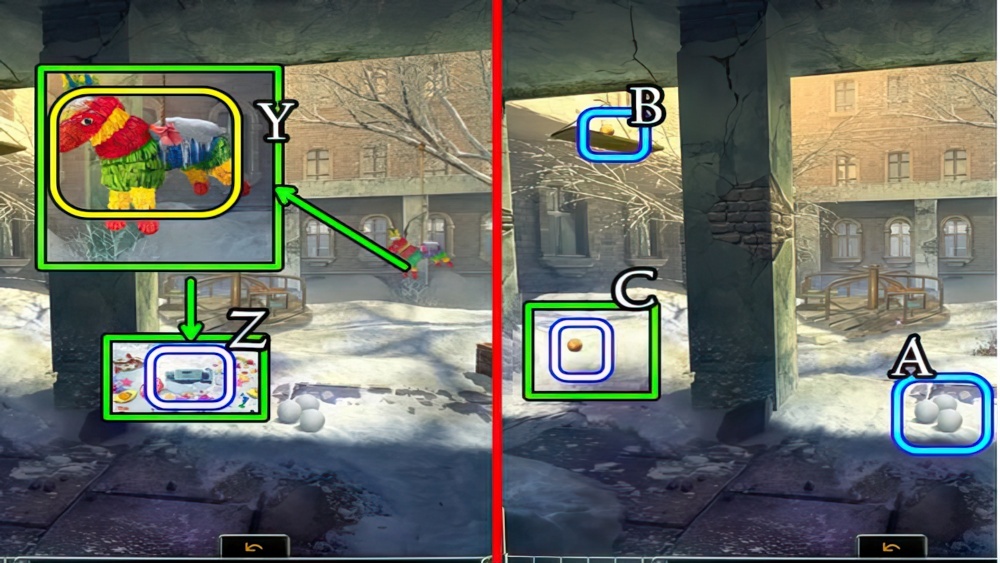
- Use the STICK (Y), take the SWITCH (Z).
- Use (A) to drop (B).
- Take the PLANET (C).
- Walk down.
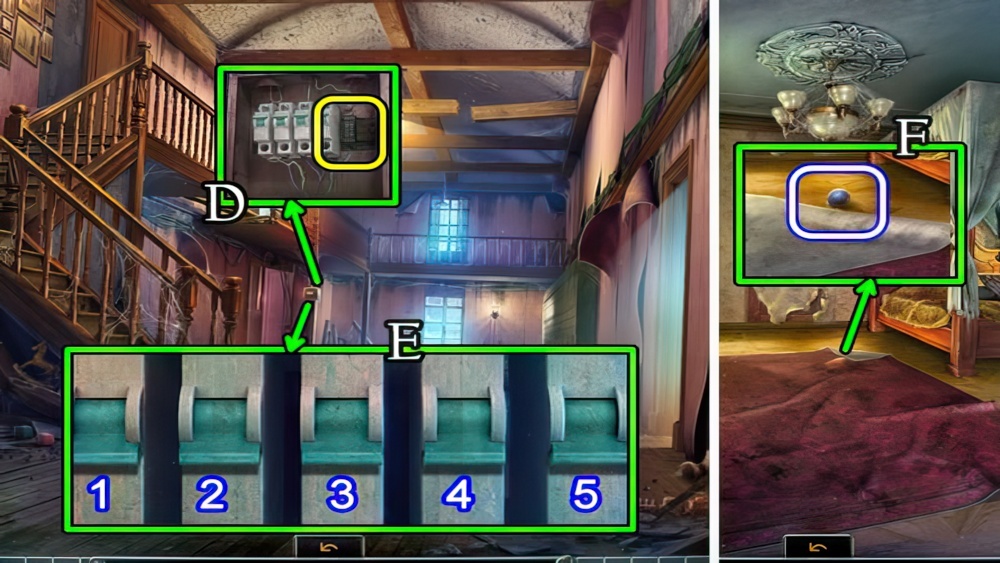
- Place the SWITCH (D).
- Solution (E). 4-1-5-2-3.
- Enter the room.
- Lift the rug, take the PLANET (F).
- Walk down 3x.
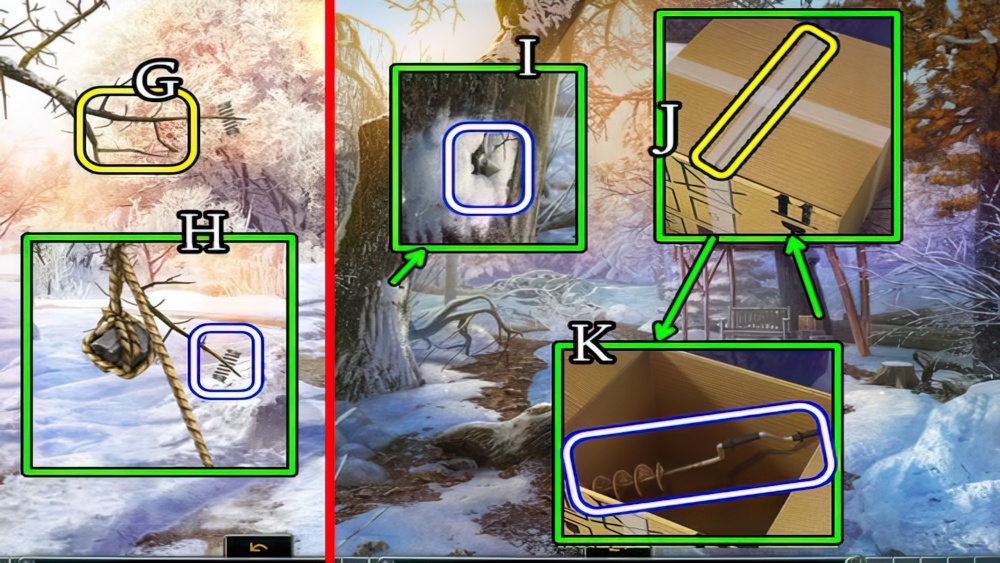
- Use the ROPE WITH ROCK (G), pull to take a SPRING (H).
- Walk right.
- Take the SHURIKEN (I).
- Use the SHURIKEN (J).
- Take the DRILL BIT (K).
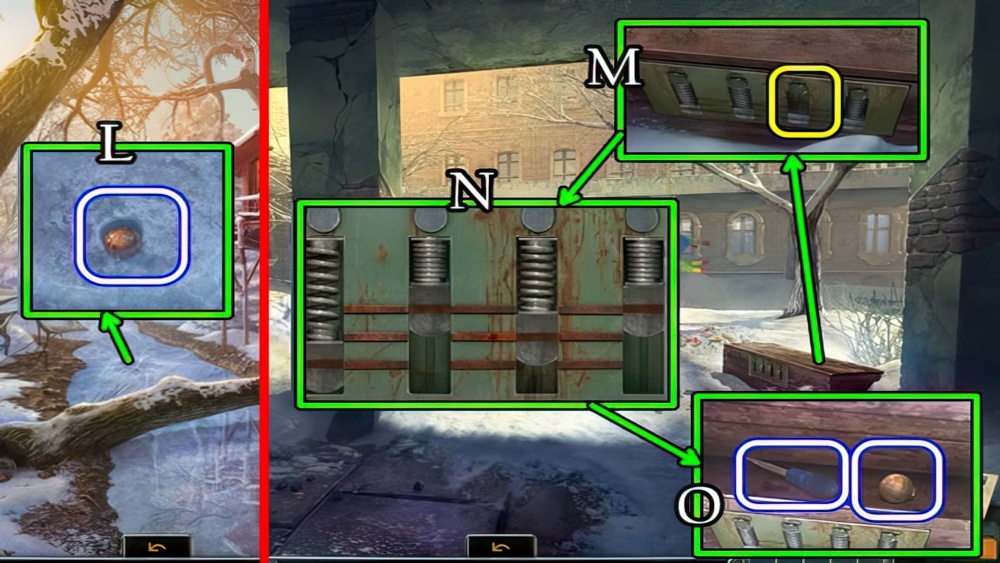
- Use the DRILL BIT, take the PLANET (L).
- Return to the Backyard.
- Place the SPRING (M).
- Solution (N).
- Uncover and take the PLANET and SCREWDRIVER (O).
- Walk down 2x.
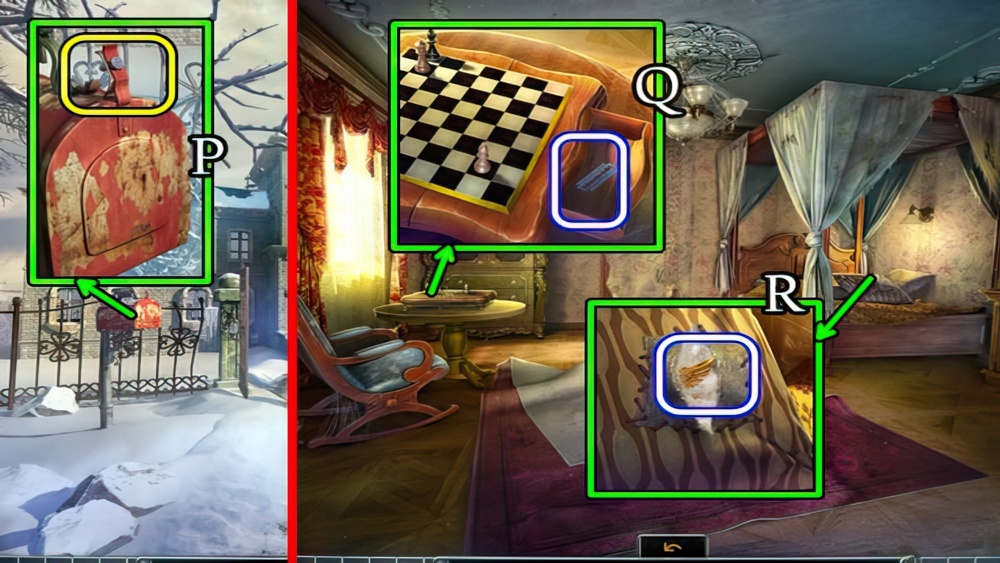
- Use the SCREWDRIVER (P), take the note and CHESS PIECE.
- Return to the Teacher’s Room.
- Place and select the CHESS PIECE, take the RAZOR BLADE (Q).
- Use the RAZOR BLADE to get a PIGEON FIGURINE (R).
- Return to Under the Bridge.
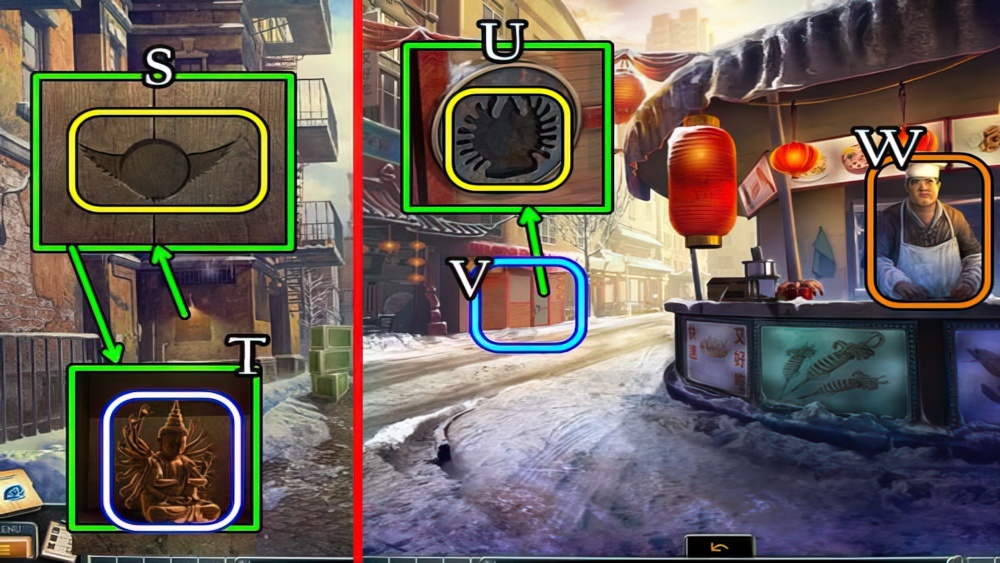
- Place the PIGEON FIGURINE (S), take a BUDDHA STATUE (T).
- Walk down, left, then right.
- Place the BUDDHA STATUE (U).
- Play a puzzle (V), receive an OILCAN.
- Give (W) the COIN, take the CUP OF TEA.
- Walk down.
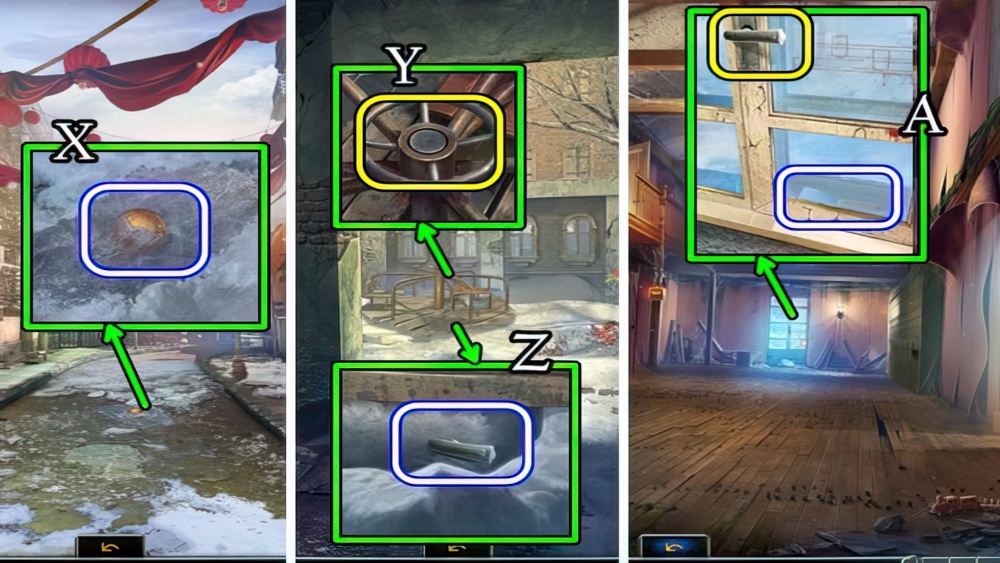
- Use the CUP OF TEA, take a PLANET (X).
- Return to the Backyard.
- Use the OILCAN (Y), spin, take the WINDOW HANDLE (Z).
- Walk down.
- Use the WINDOW HANDLE (A), take a SPATULA.
- Enter the lower left room.
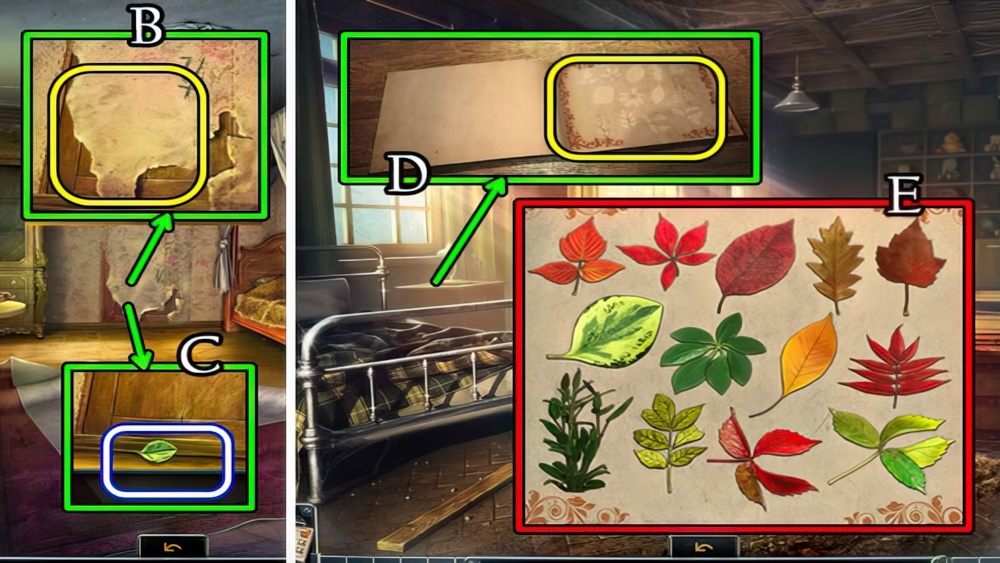
- Use the SPATULA (B), take LEAVES 13/13 (C).
- Walk down and enter upper left.
- Place LEAVES 13/13 (D).
- Solution (E).
- Take the PHOTO.
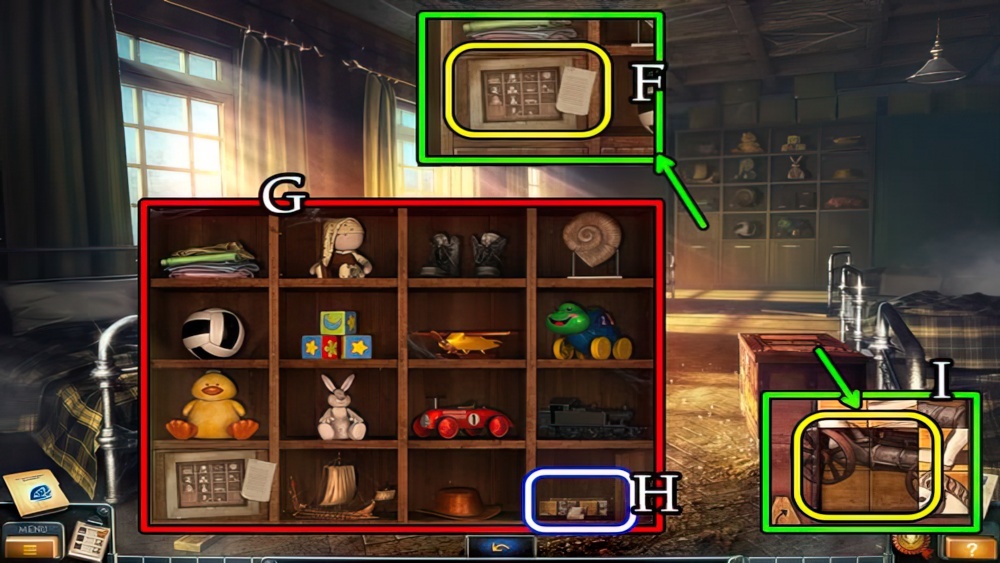
- Place the PHOTO (F).
- Solution (G).
- Take the PUZZLE PIECES (H).
- Place the PUZZLE PIECES (I).
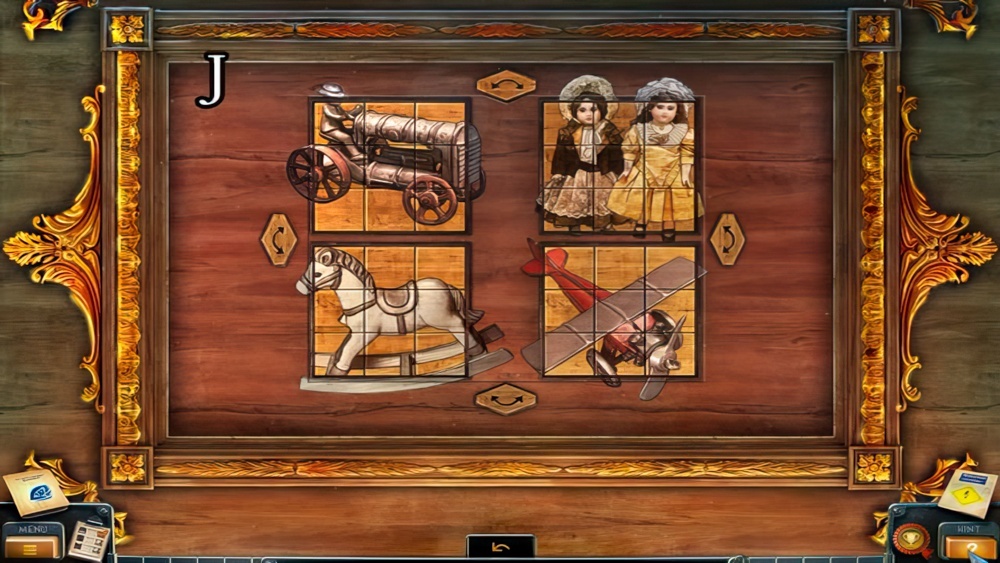
- Solution (J).
- Take the LADDER.
- Return to the Hunter’s Lodge.
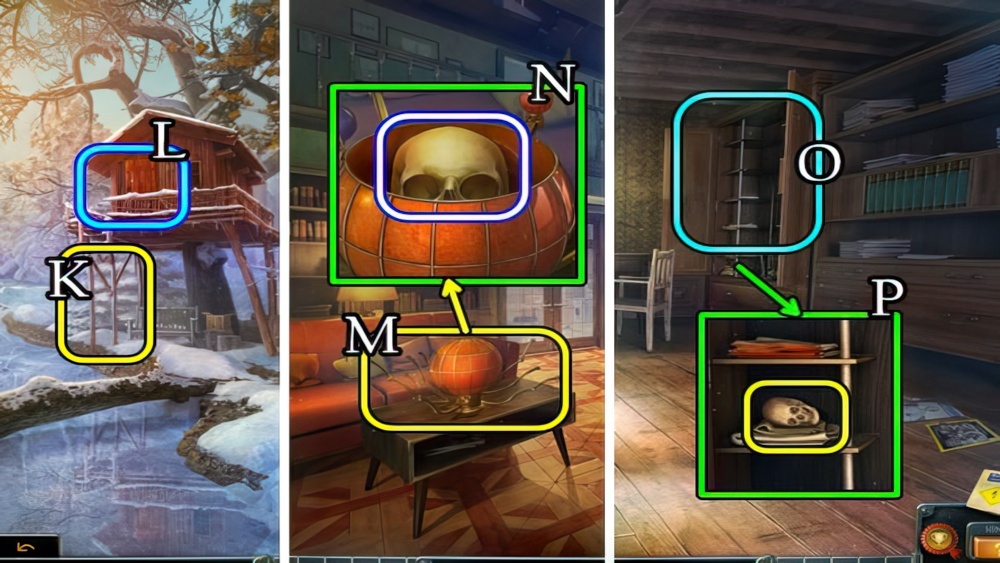
- Place the LADDER (K)
- Play a puzzle (L). Receive a PLANET.
- Return to the Hall.
- Place each PLANET (M), take a SKULL (N).
- Walk left.
- Open (O), place the SKULL (P).
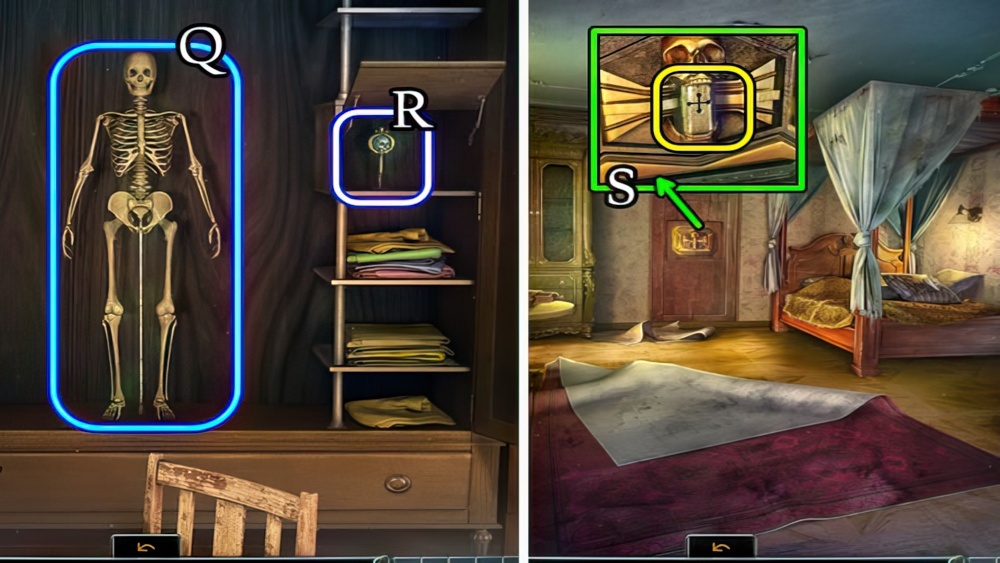
- Assemble the skeleton (Q).
- Take the KEY (R).
- Return to the Teacher’s Room.
- Use the KEY (S).
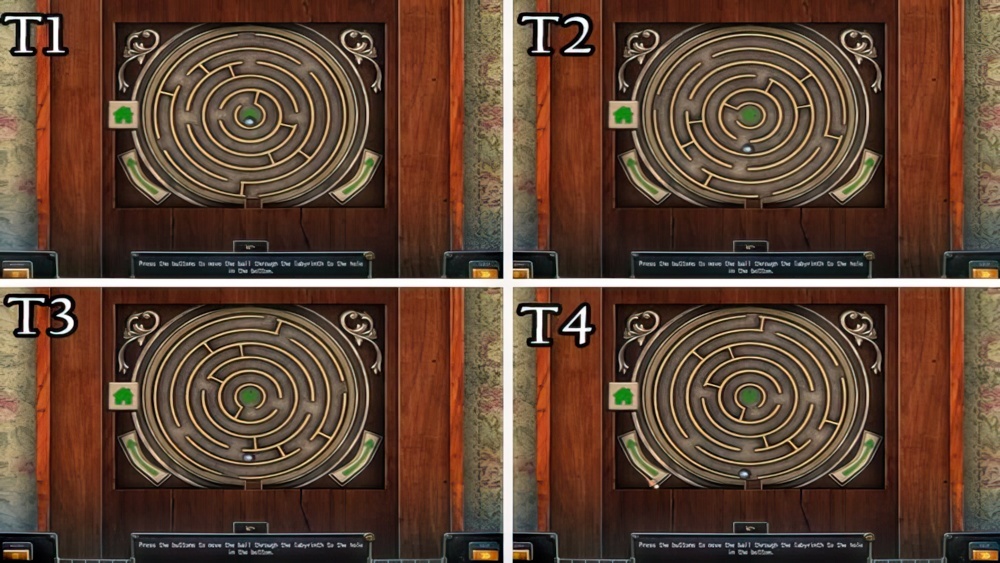
- Solution (T1-T4).
Congratulations! You have completed the game New York Mysteries 2: High Voltage.


