
Paper Bride 5 Chapter 3: Illusions – The heroes are abandoned in a strange abandoned room, and come across a wind-up toy in a box that looks very much like a man from their village. In this room, the cabinets are filled with doll parts, it looks like an abandoned workshop where dolls were made for performances.
Paper Bride 5: Two Lifetimes – Chapter 3: Illusions – Walkthrough
Here you can see the walkthrough of Paper Bride 5: Two Lifetimes, specifically on Chapter 3: Illusions, in pictures.
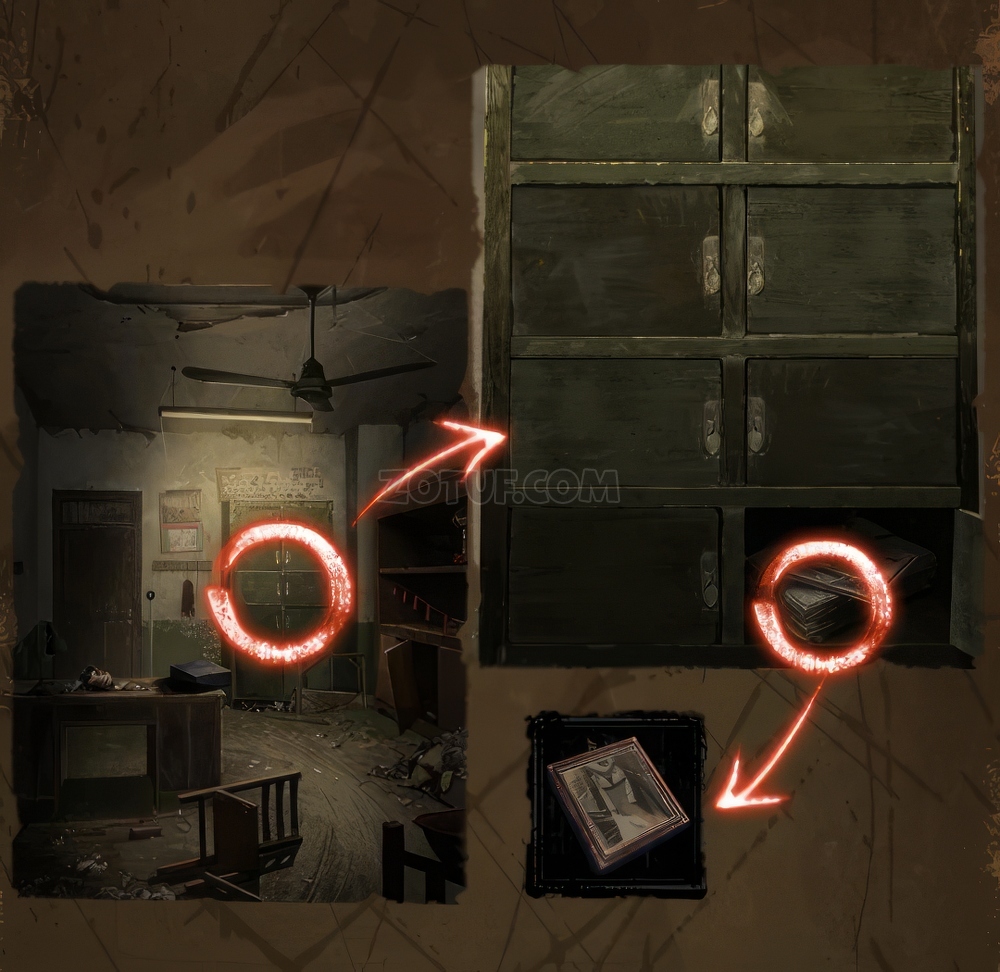
- Obtain the Photo from the file cabinet.
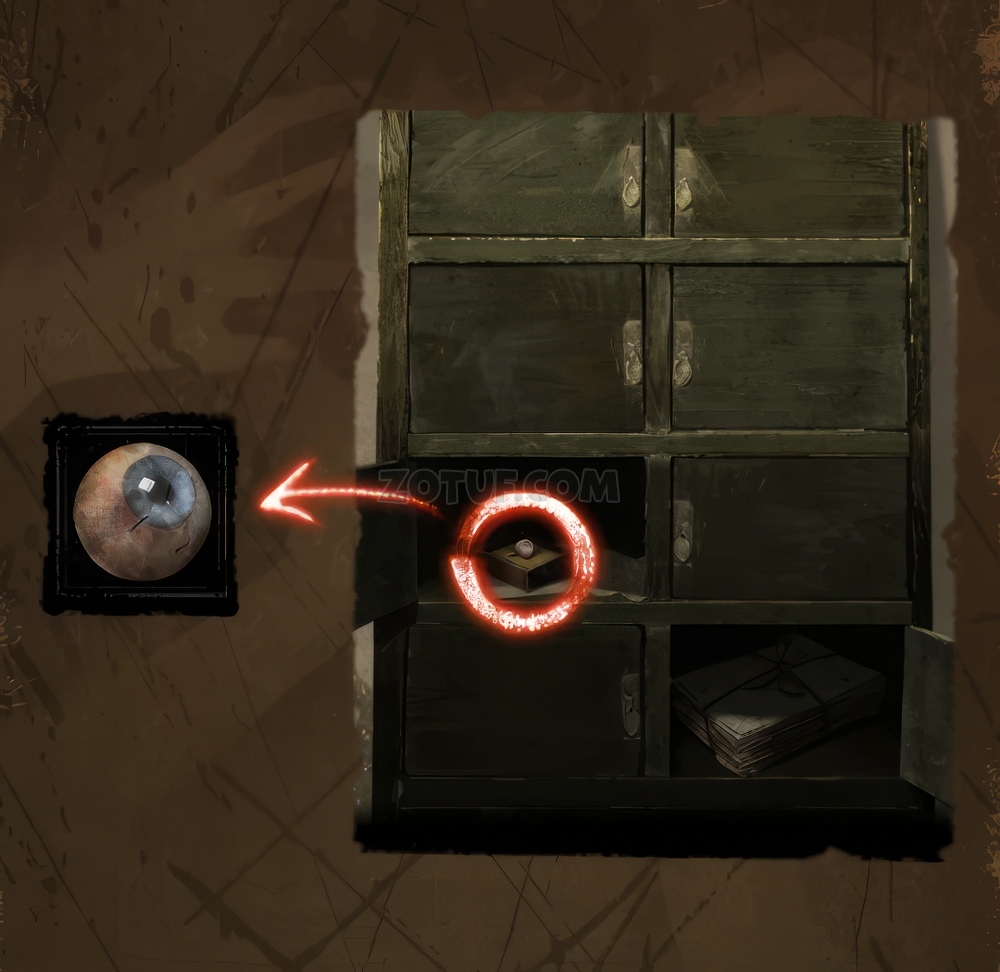
- Obtain the Fake Eye from the file cabinet.
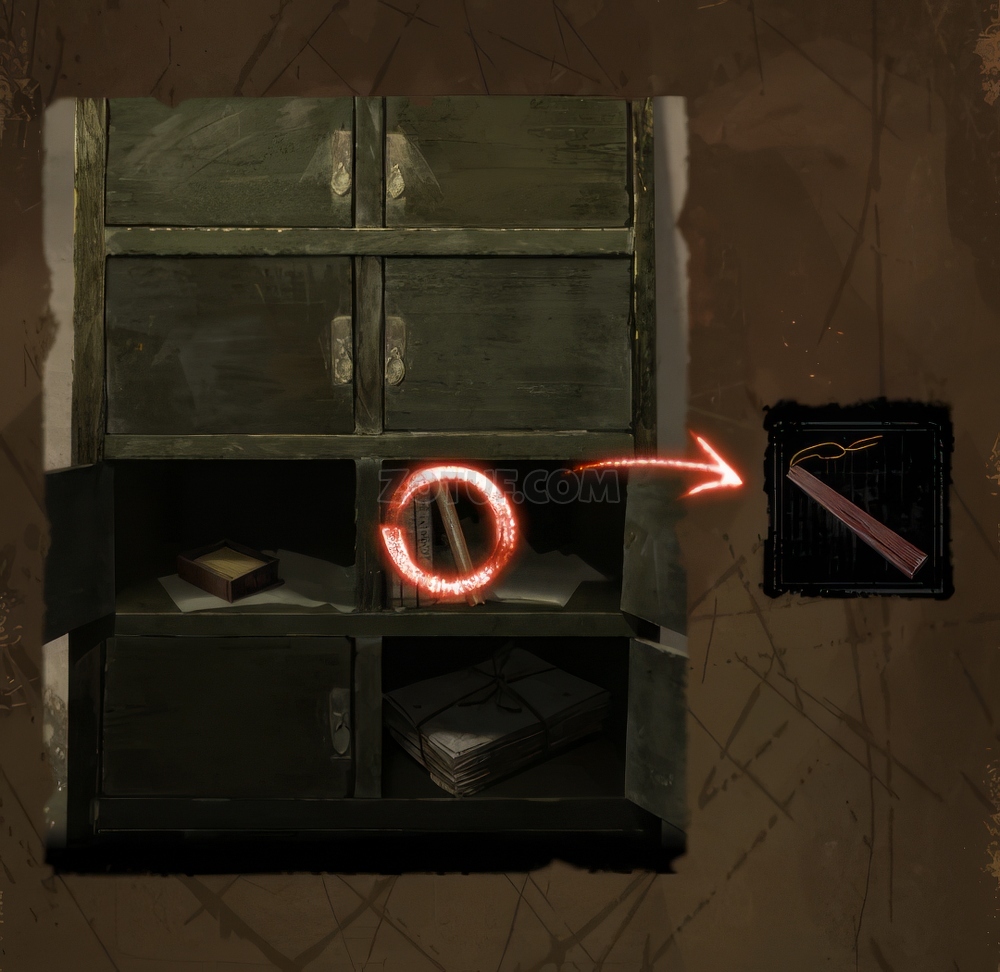
- Obtain a Bookmark from the journal in the file cabinet.
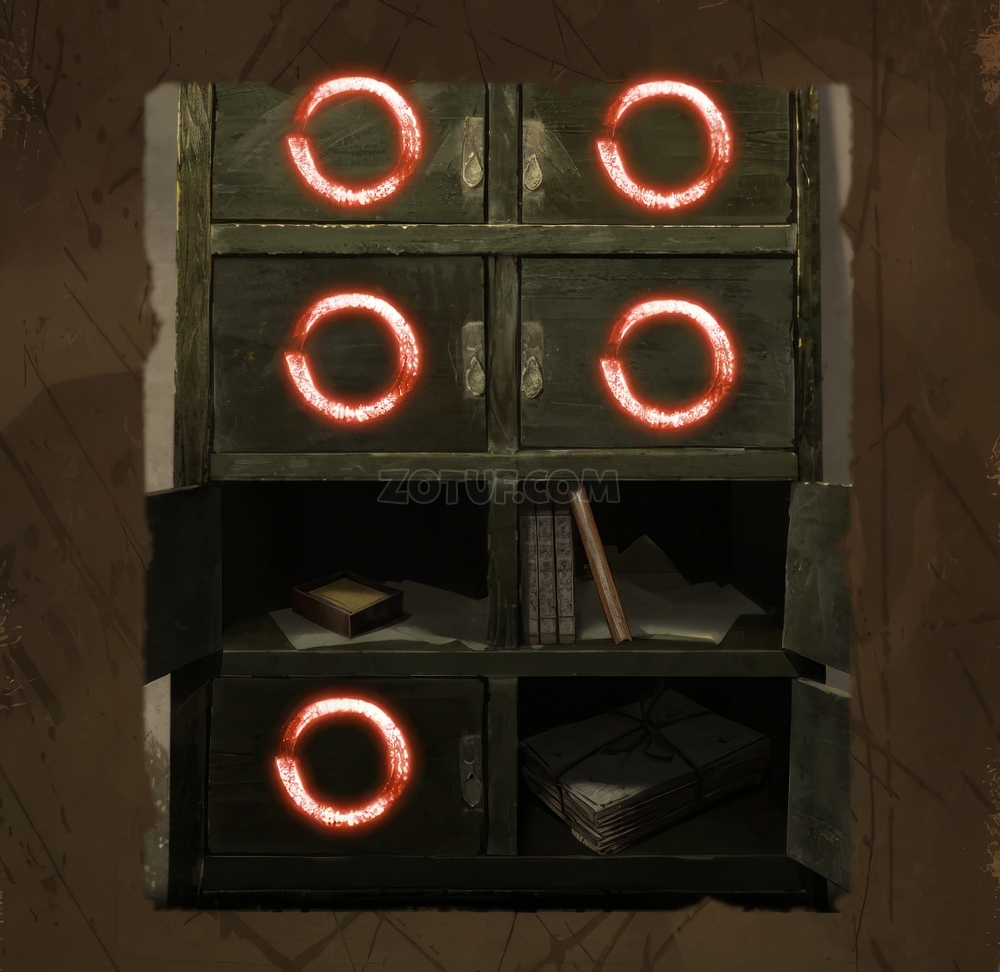
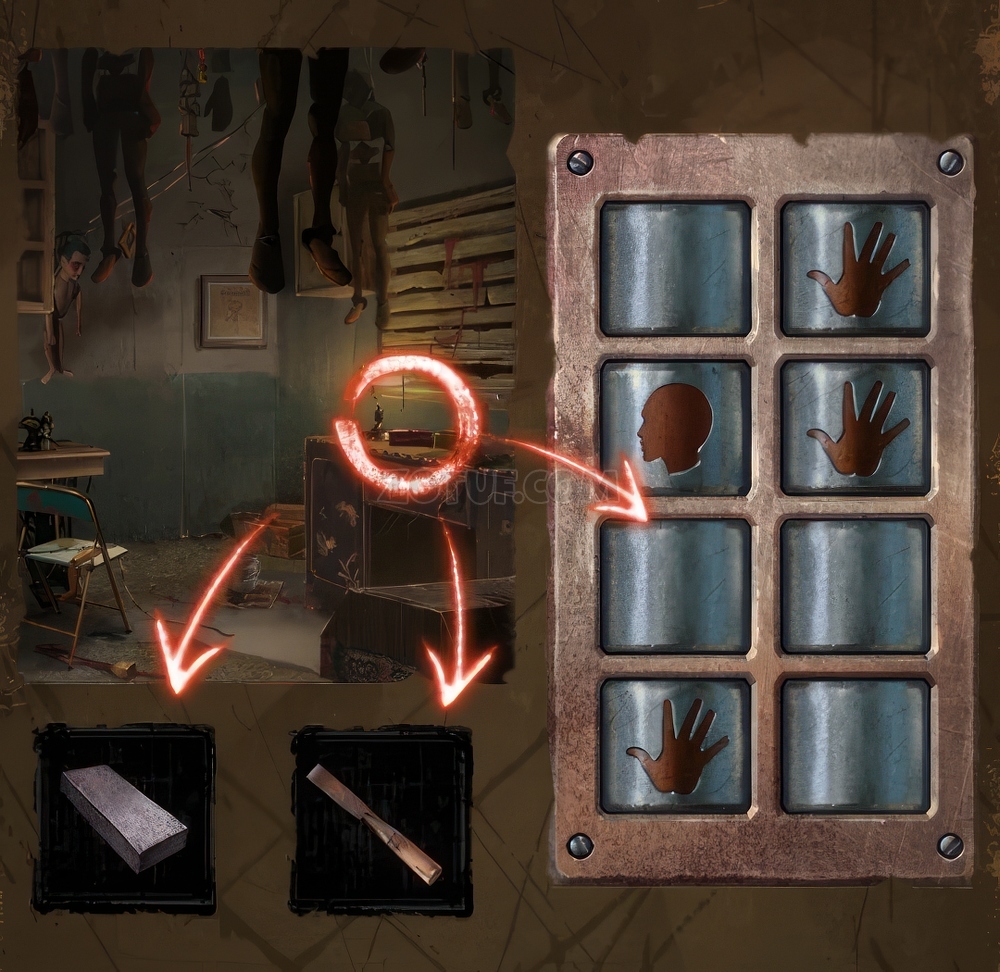
- Open all the drawers in the file cabinet to reveal the position of the puppet head and arms for an important clue.

- Slide all the blocks in the sliding puzzle on the office desk to their respective positions to obtain a Miniature Puppet.

- Use the Bookmark to unscrew the vent.

- Use the Minature Puppet to retrieve the Marble from the Vent.

- Insert the Fake Eye and the Marble into the puppet s eye sockets to open the door to the workshop.
- Use the clues in the office file cabinet to unlock the toolbox with following password to obtain a Carving Knife and Grindstone.
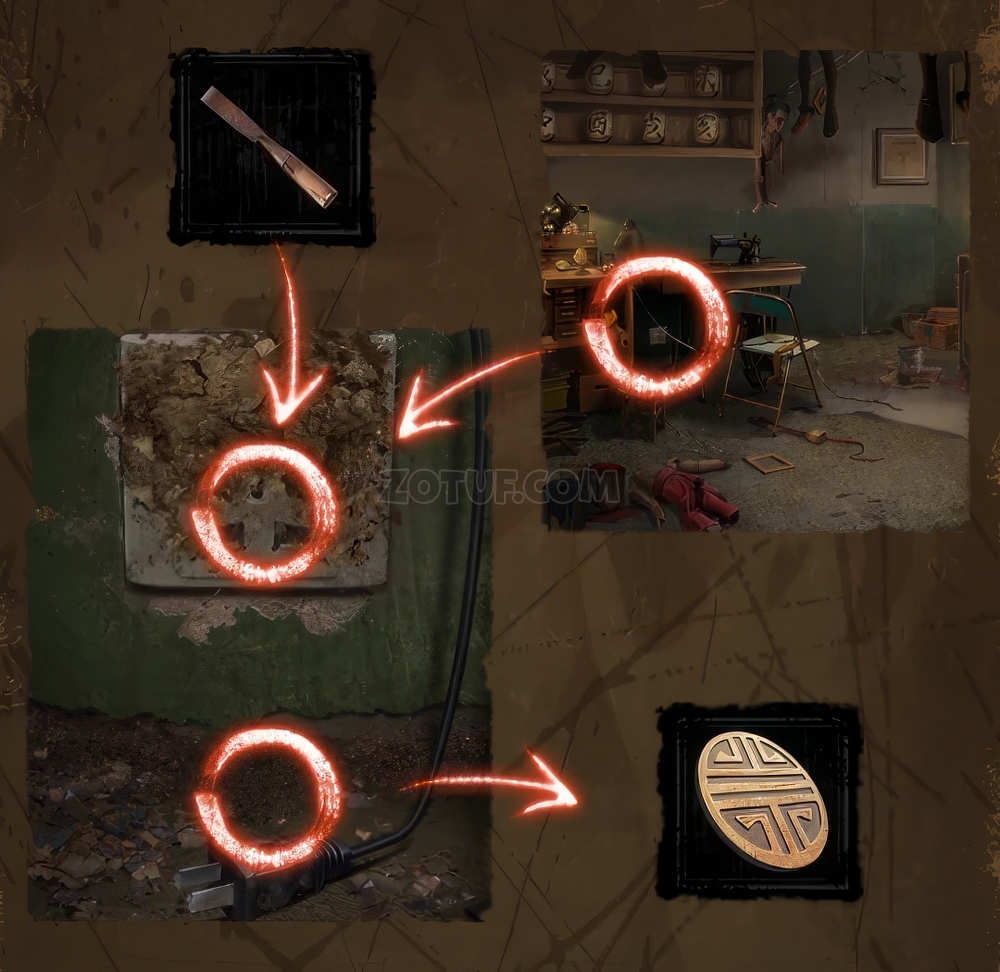
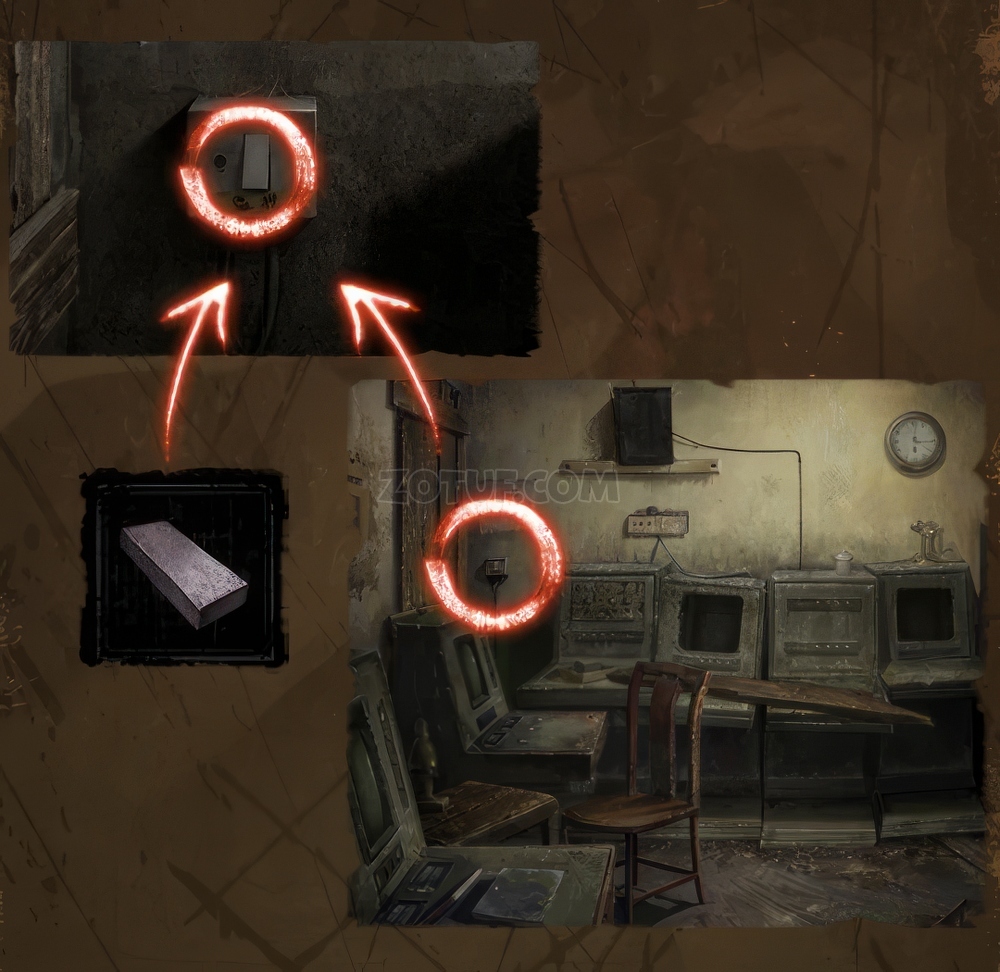
- Use the Carving Knife to chisel off the mud on the outlet, and pick up the Ornament.

- Plug the sewing machine into the outlet.
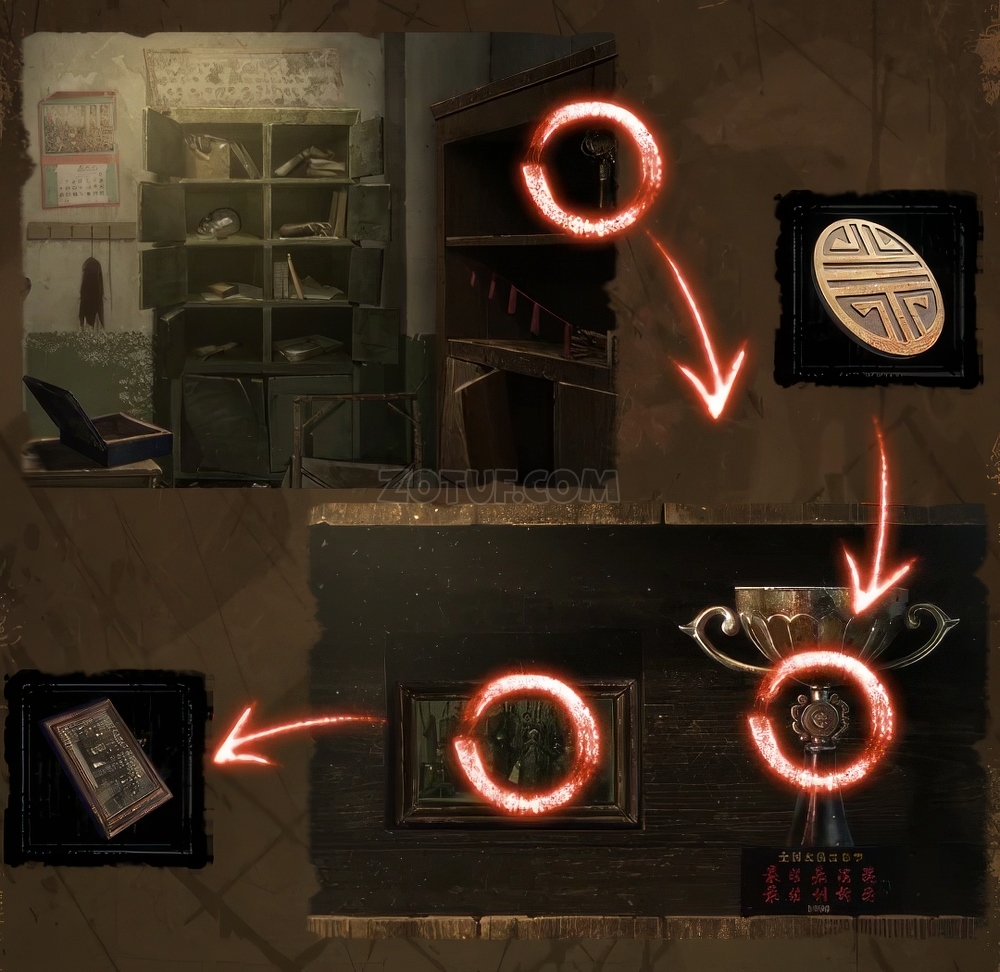
- Return to the office, then insert the Ornament into the groove on the trophy to obtain a Photo.

- Hang the 2 photos on the wall in the hallway, then use the clues in the journal to arrange the photos according to the image and collect the Key.
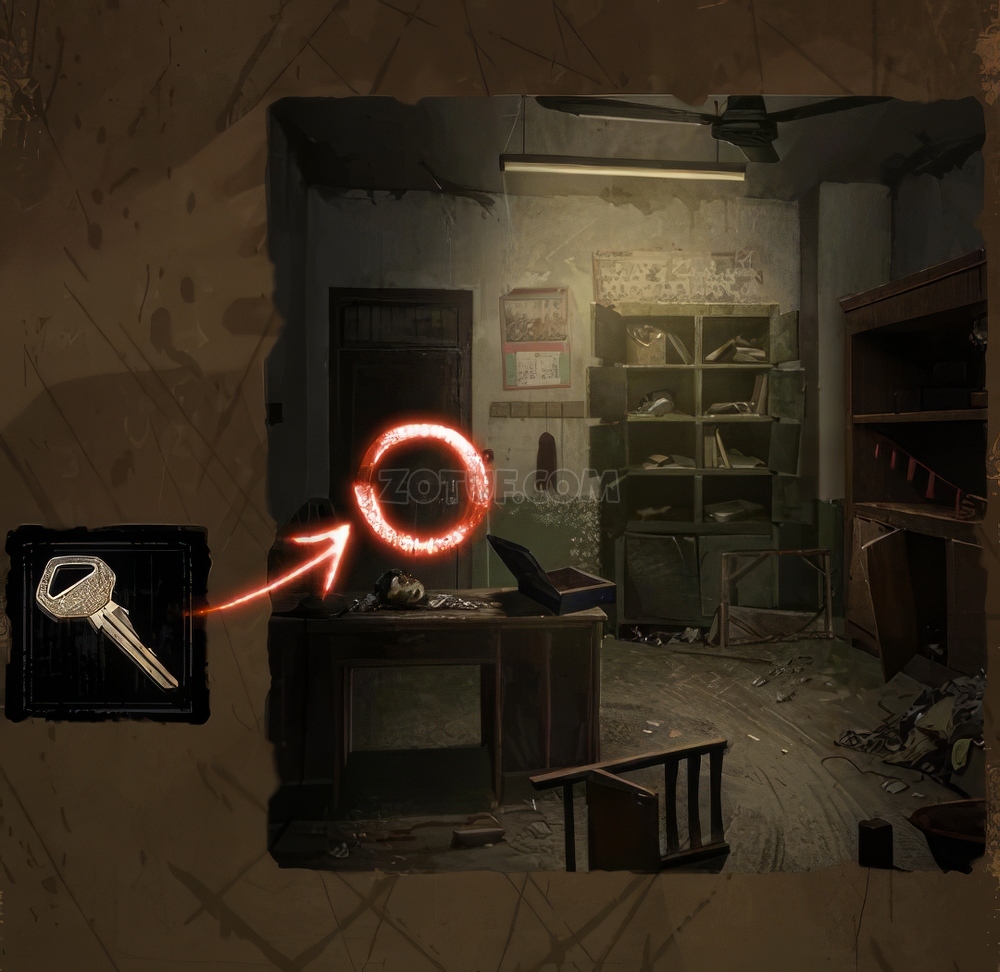
- Return to the Office, then use the Key to open the door to the security room.
- Use the Grindstone to smash open the switch on the wall.

- Check the channels on the left monitor for clues.
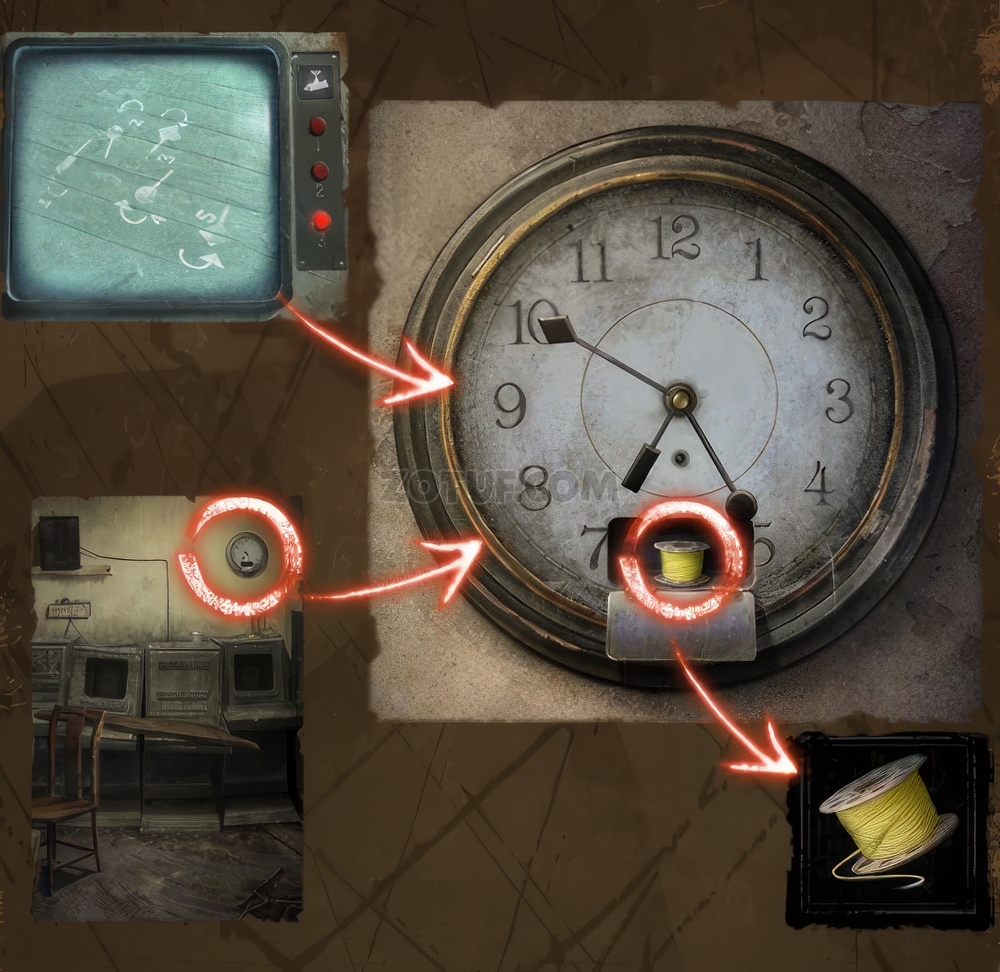
- Use the clues on the monitor to adjust the hands on the clock on the wall according to the image to obtain a Spool.
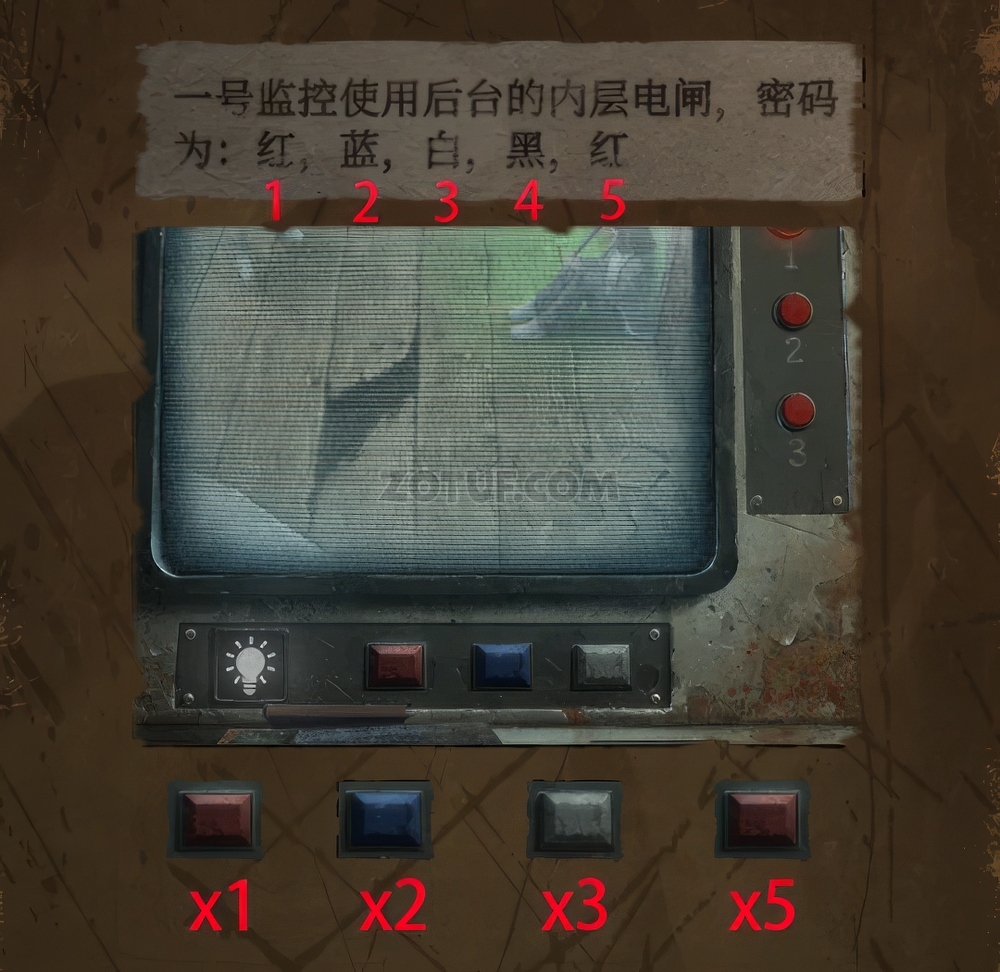
- On the first channel, press the colored buttons according to the sequence: Red xl, Blue x2, White x3, Red x5, to send a message with the light.

- Check the right monitor for clues.
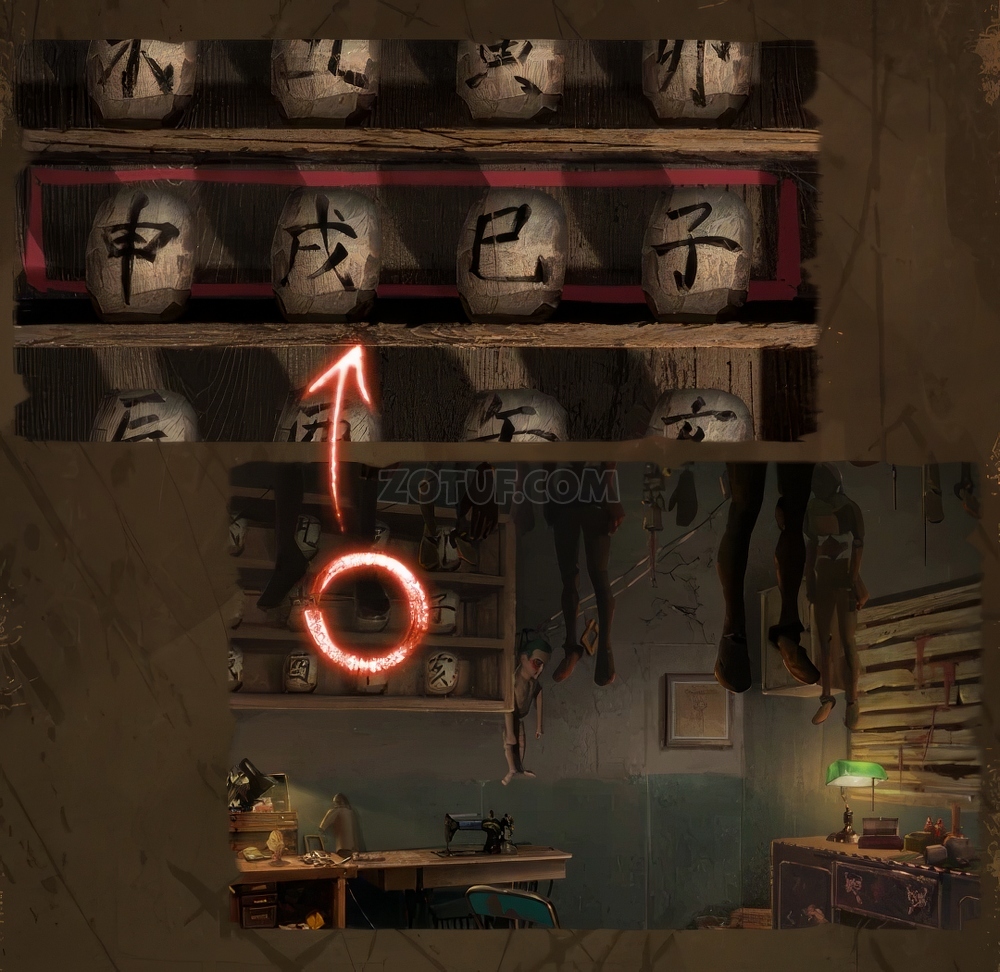
- Return to the workshop and arrange the puppet heads on the shelf according to the image to open the door to the secret room.
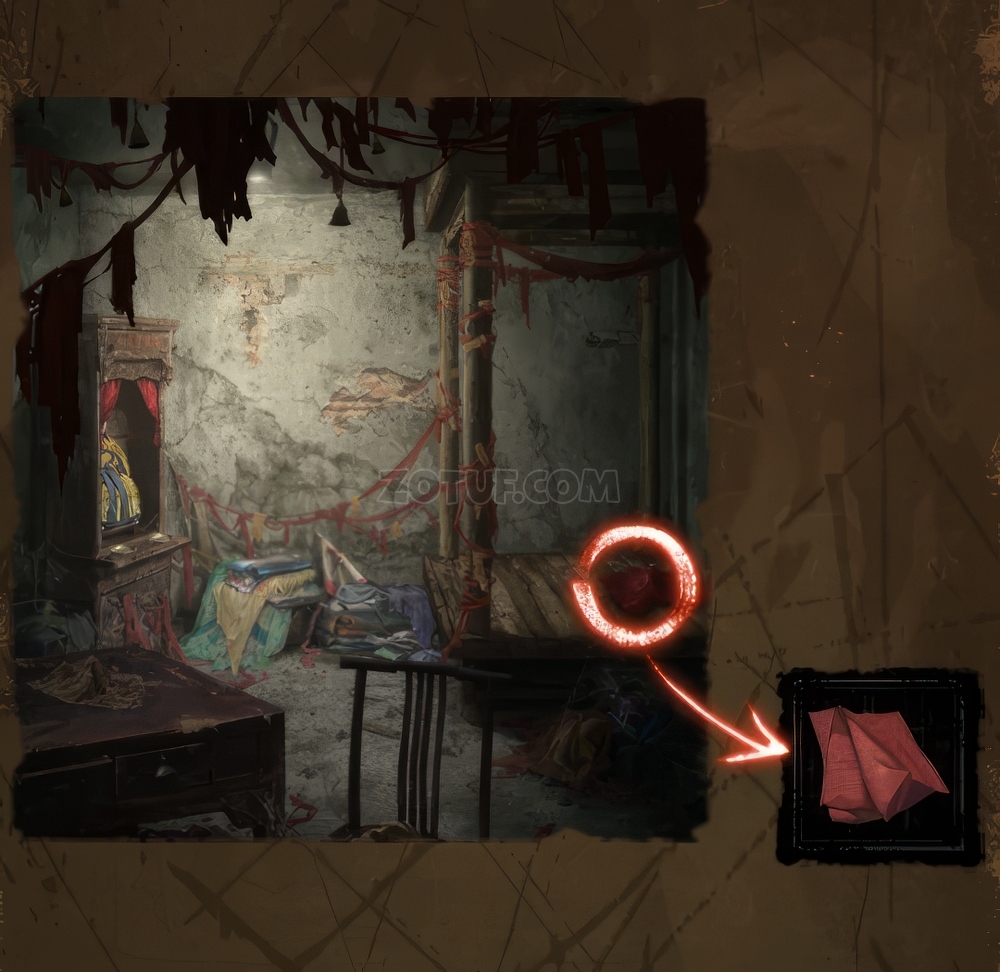
- Collect the Red Veil from the miniature stage.
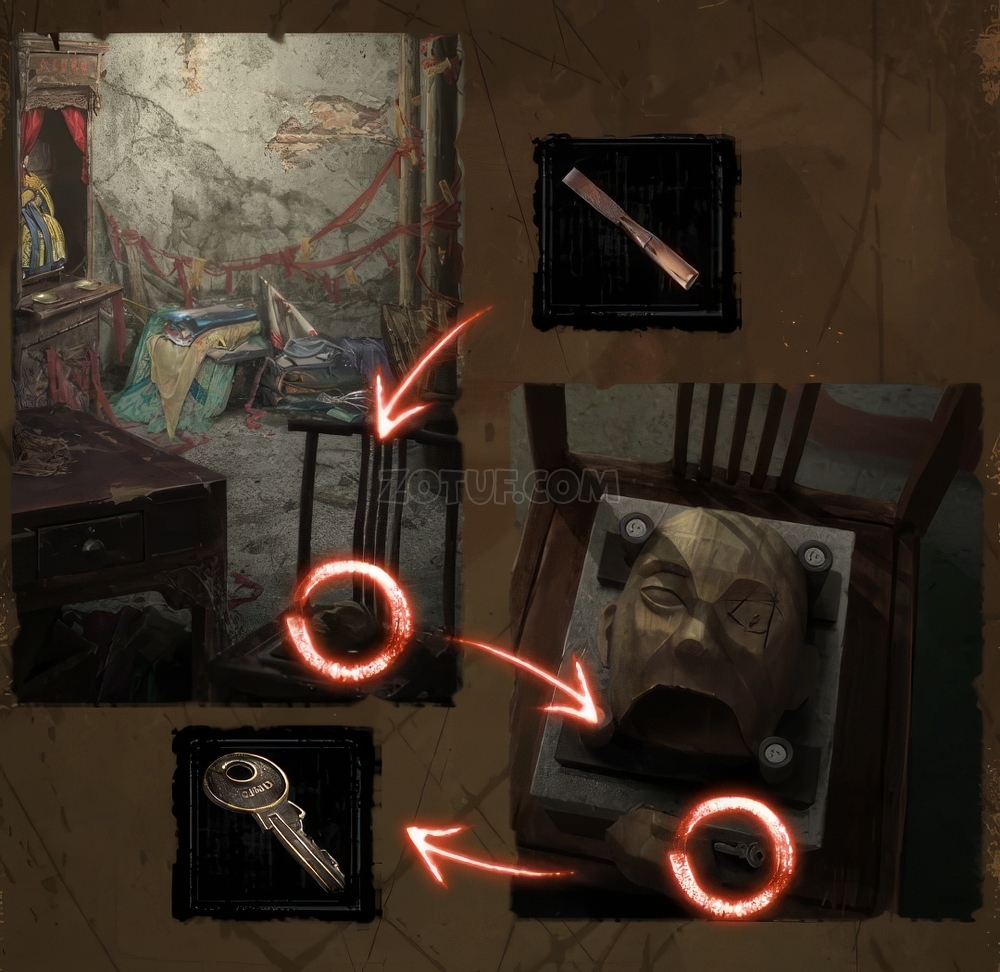
- Etch an eye on the puppet head with the Carving Knife to obtain a Key.

- Use the Key to open the desk drawer, then collect the Fist Statue and the Crank.
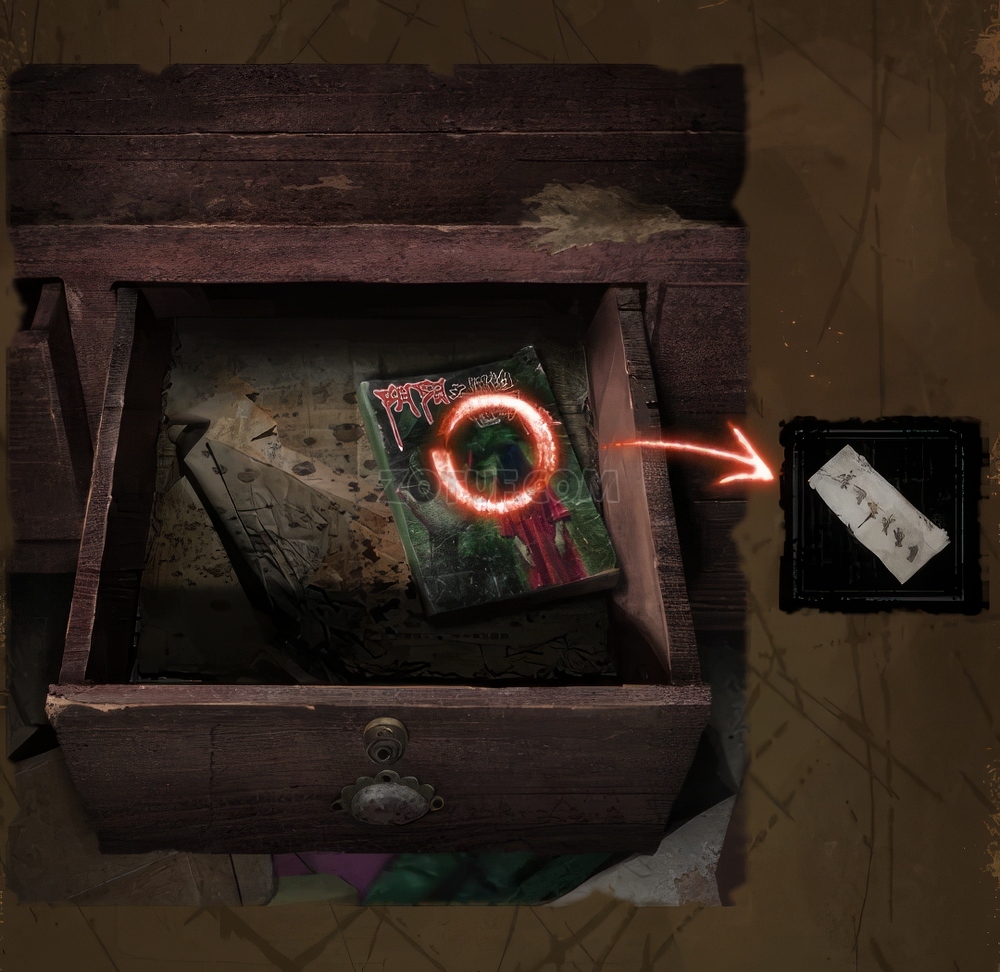
- Check the last page of the book in the drawer for a Paper Slip.

- Check the puppet photo on the workshop wall for a clue regarding the puppet’s position and strings.

- Install the Crank onto the toy stage in the workshop, then adjust the puppet’s pose according to the prompt to obtain a Small Mask.
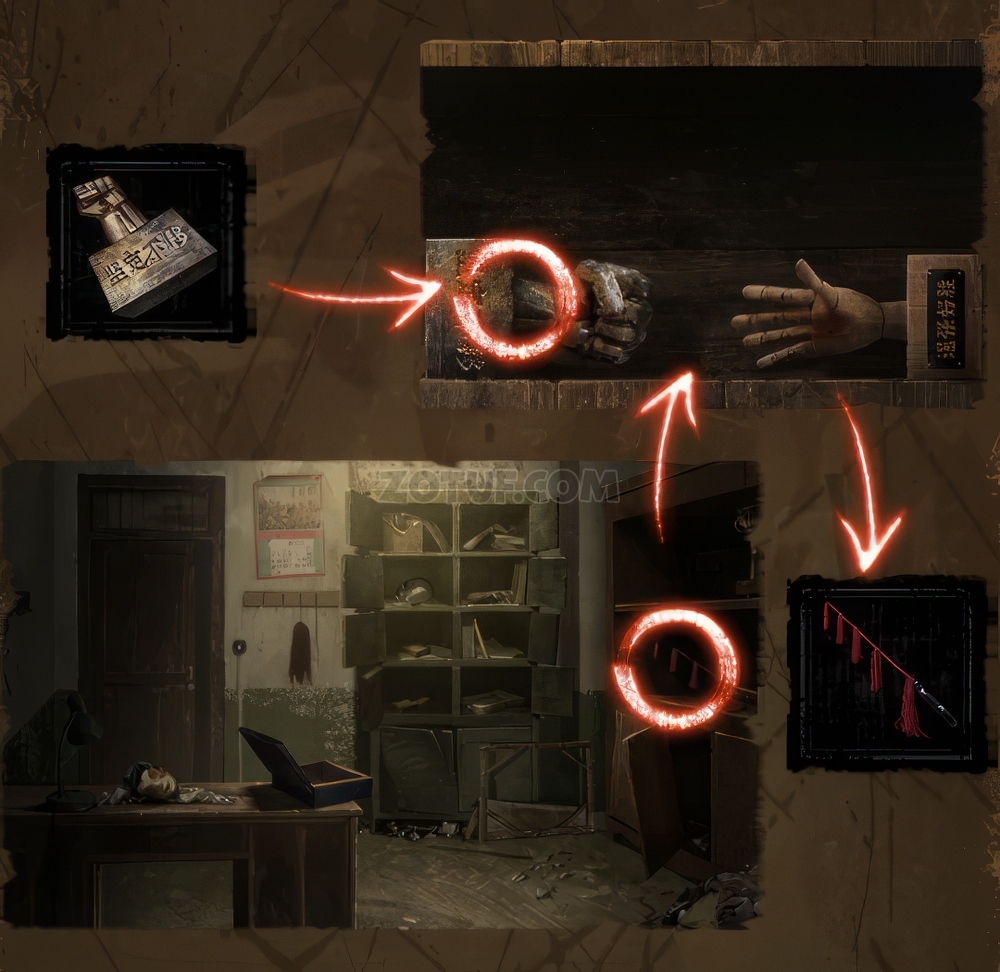
- Return to the office, then place the Fist Statue on the lower shelf of the display case to obtain a Whip.
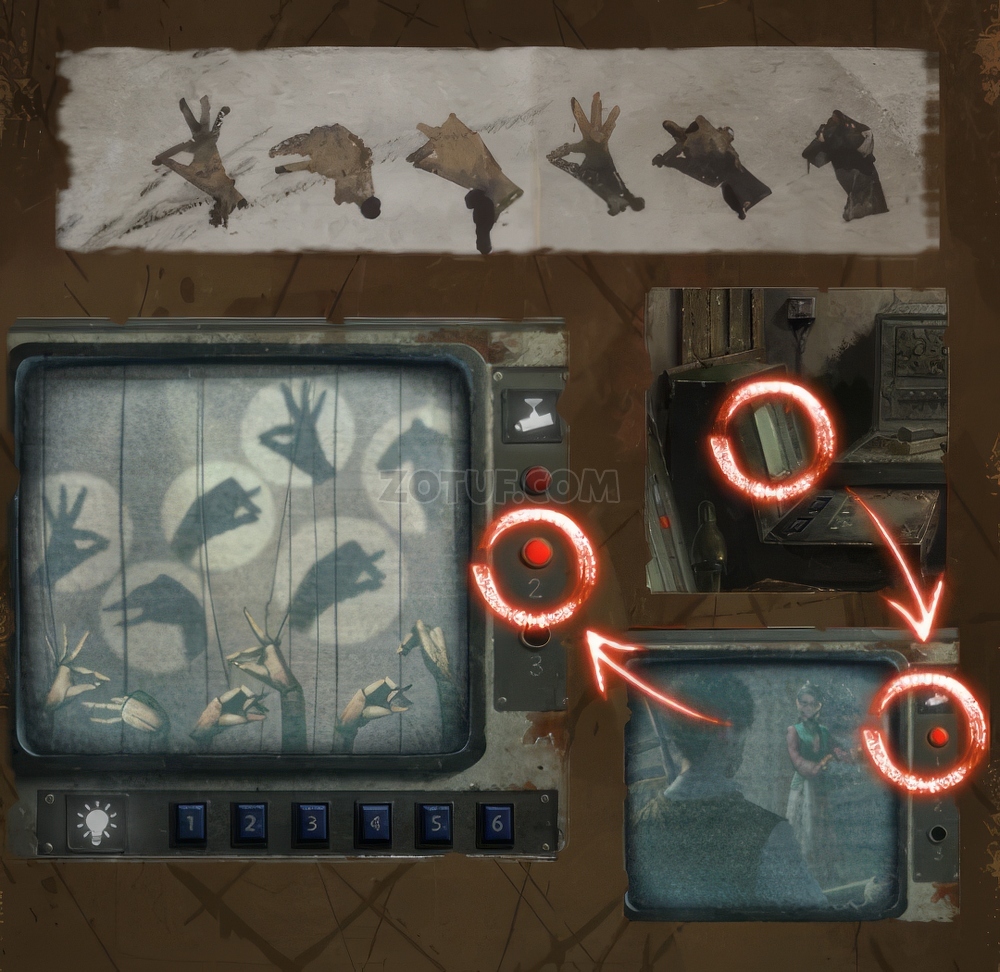
- Turn to channel 2 on the right monitor, then illuminate the hands according to the Paper Slip to send the password.
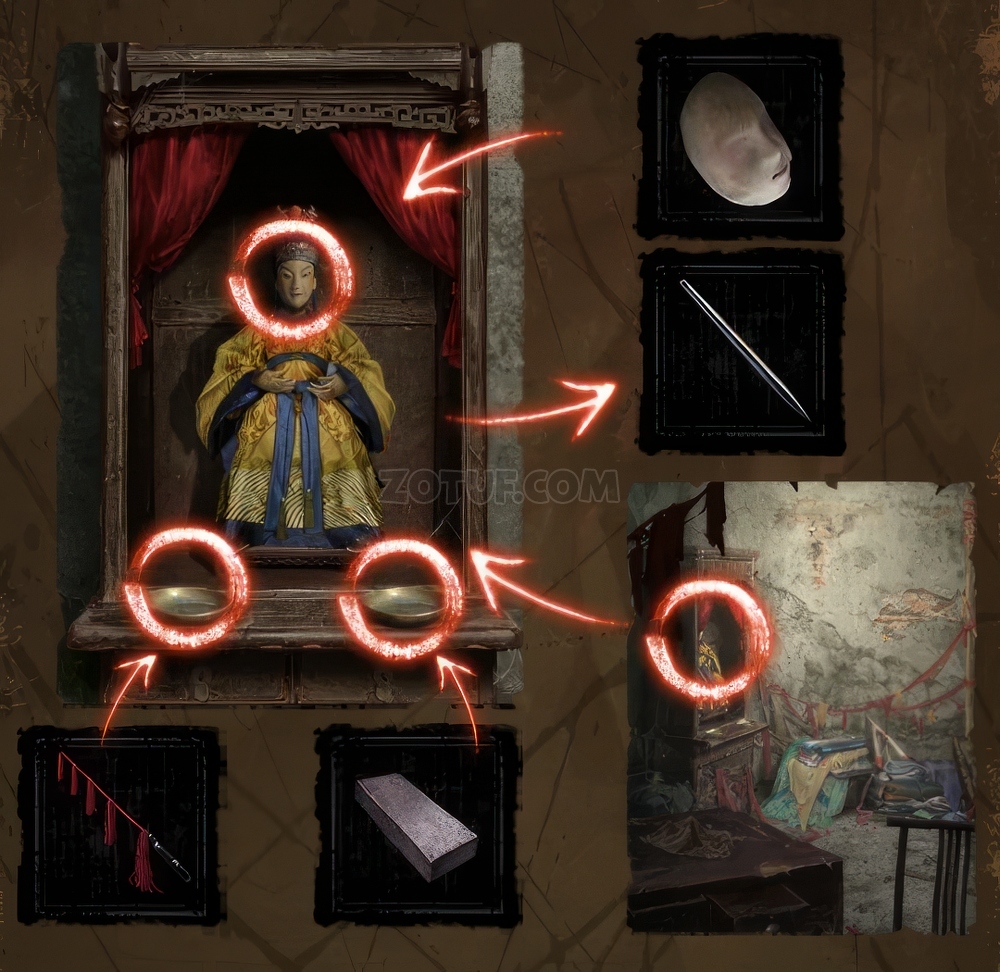
- Return to the secret room, then place the Whip, Grindstone, and Small Mask on the shrine to obtain a Needle.

- Return to the workshop, then place the Red Veil, Spool, and Needle into the sewing machine.
- Finish sewing the arrow to obtain a Red Cloth.
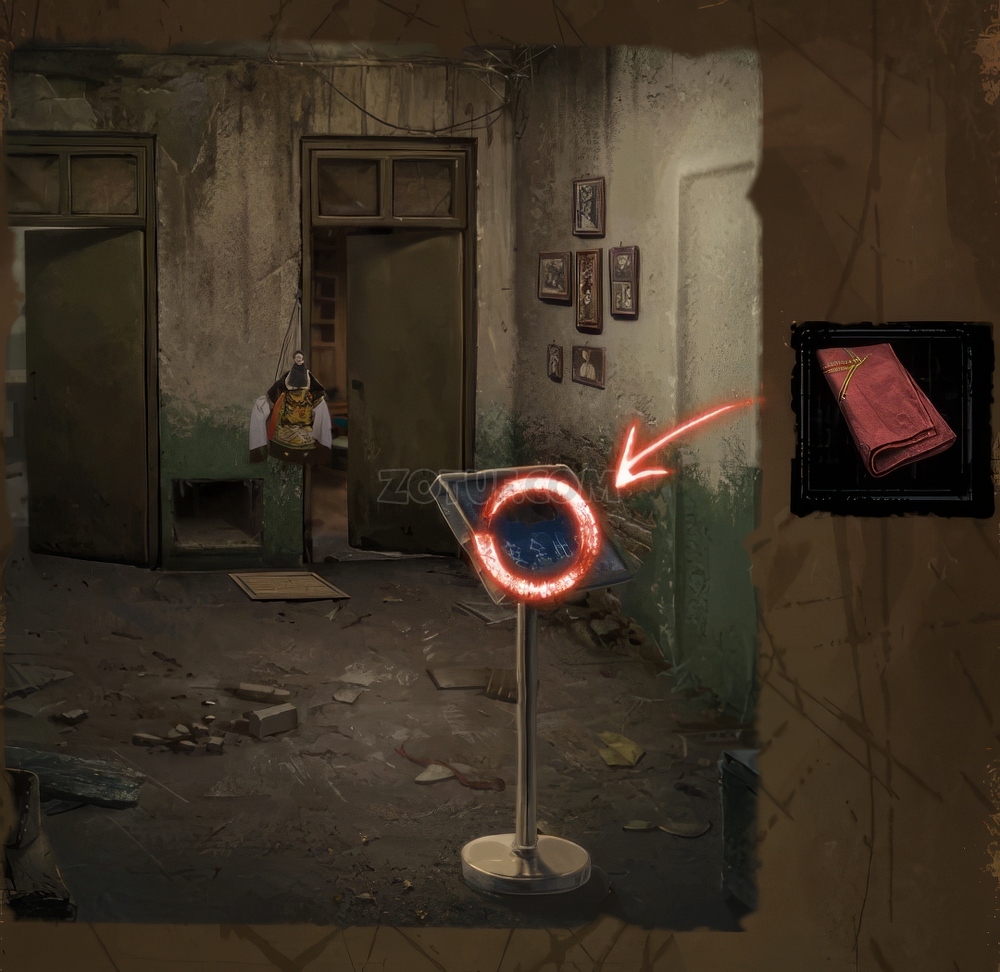
- Place the Red Cloth on the sign in the hallway.
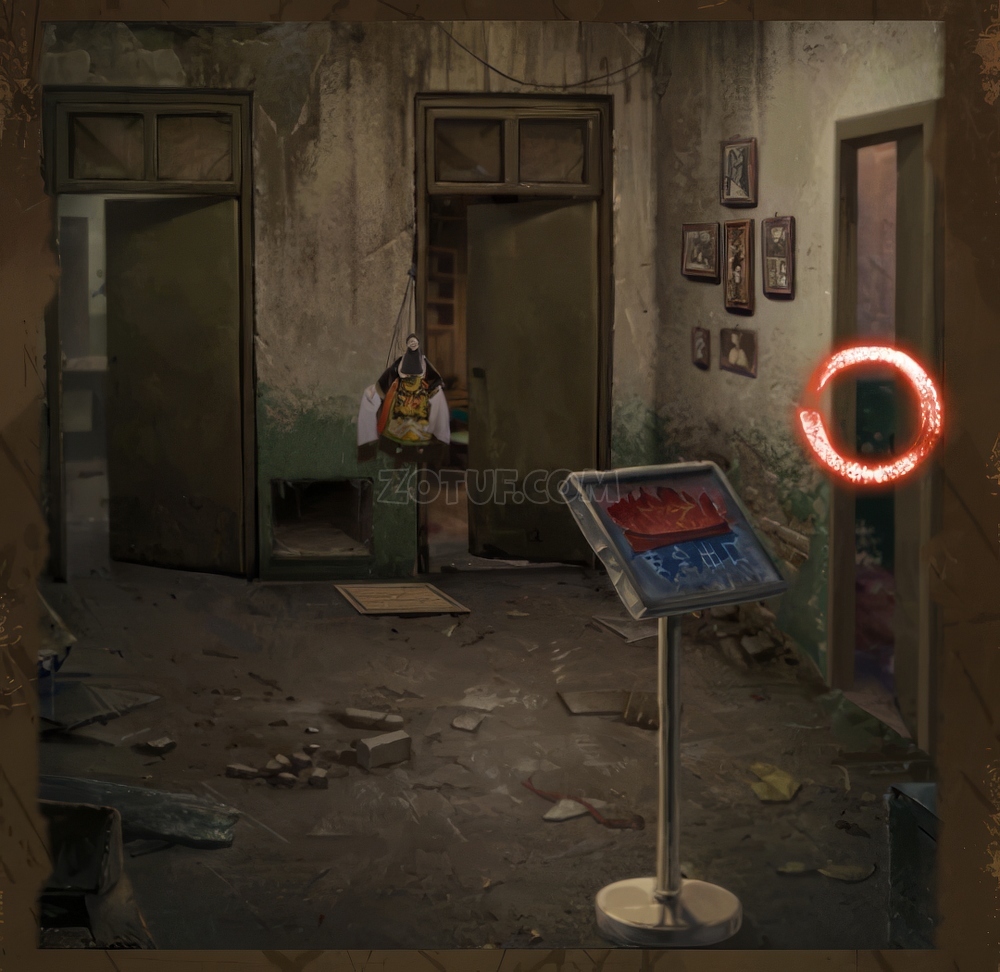
- Enter through the door that appeared in the wall.
Congratulations! You have successfully completed Chapter 3: Illusions in the game Paper Bride 5: Two Lifetimes.


