Park Escape: Chapter 4 – The main characters managed to survive after a collision with an evil clown. You find yourself on the road in the forest, where there is a broken motorcycle and a strange suitcase, you have to solve puzzles and look for objects, and find out what happened.
Park Escape: Chapter 4 – Walkthrough
Here you can watch the complete walkthrough of Chapter 4, in the game Park Escape.

1. Check the tree hole to get the pinecone.

2. Continue to clear the pinecones, find the key hidden under them.

3. Open the dark red box on the highway with key, take the aluminum powder and brush.
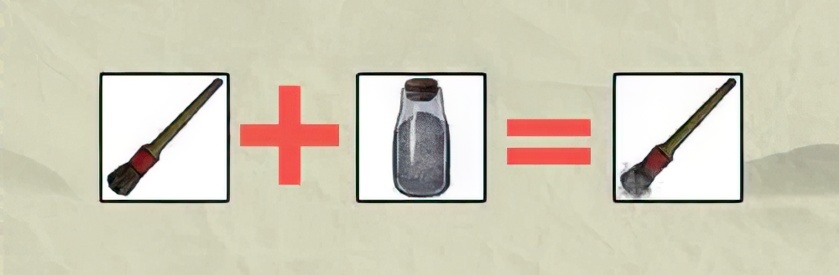
4. Cover the brush with aluminum powder.
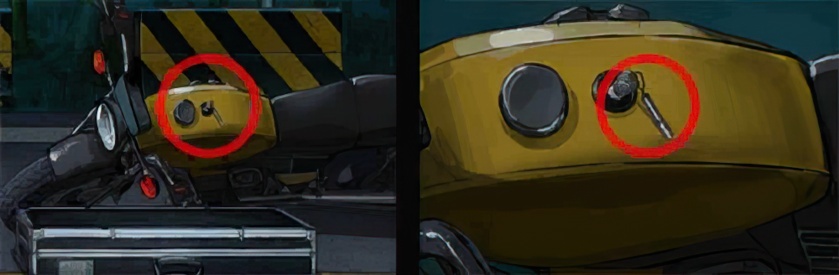
5. Get the self-luminous key chain on the motorcycle.

6. Go back to the woods, put the pinecone on the branch, take the adhesive tape after the squirrel took the pinecone.
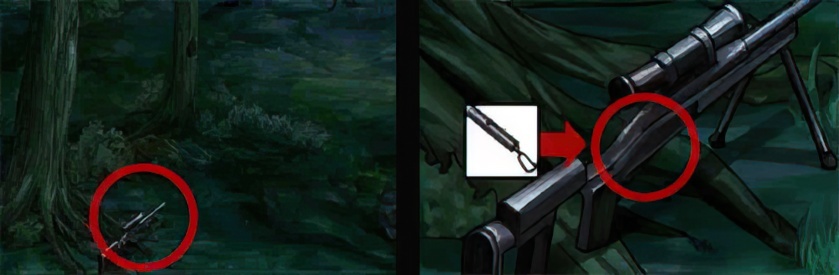
7. Use self-luminous key chain on the sniper gun, find the fingerprint.

8. Use brush to sprinkle aluminum powder on the fingerprint after you find it, then use adhesive tape to tape it down.

9. Check the piece of sleeve on the right side branch.
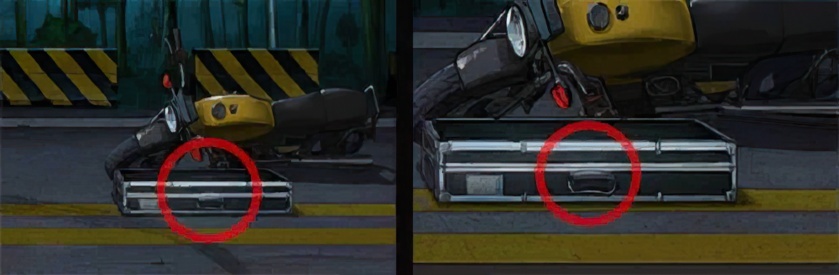
10. Check the long box in front of the motorcycle.

11. Enter the correct password on the box according to the pattern on the sleeve.
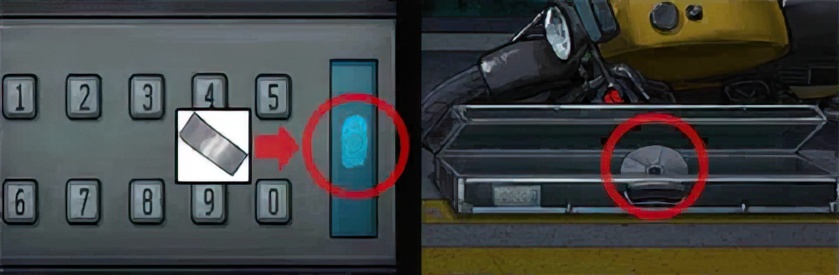
12. A fingerprint prompt appearedon the box, use tape with fingerprint on it to open the box, take the CD.
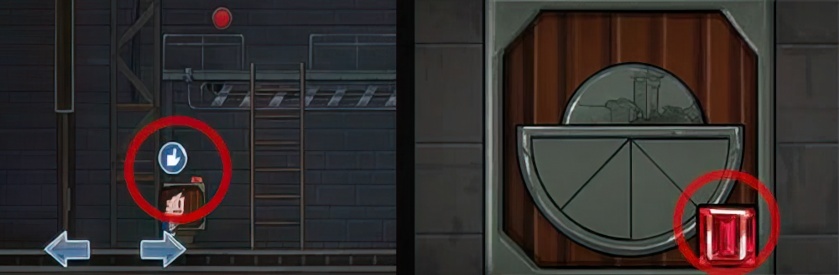
13. Check the box beside the ladder to get the red crystal.
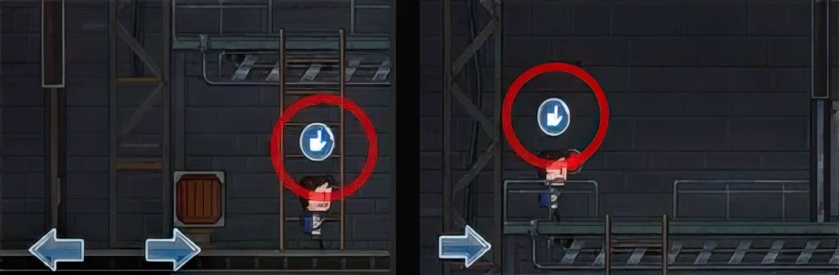
14. Climb on the ladder and press the button beside it.

15. Move all the way to the right, pick up the green crystal after passing the trap.
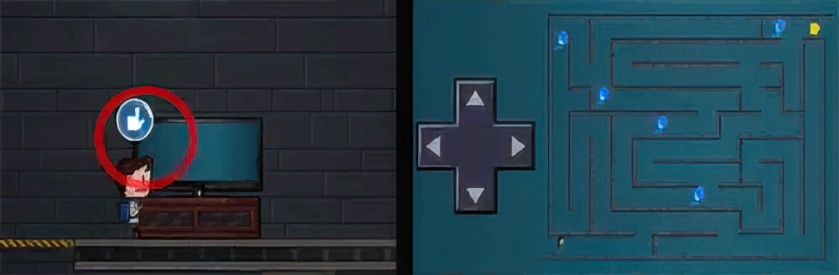
16. Move right to check the TV.

17. Complete the maze on the TV, then check the green groove appeared on the wall.

18. Insert green crystal into the green groove.

19. Press the button appeared on the wall, take the pump.

20. Climb on the ladder which appeared on the left side, check the red groove.
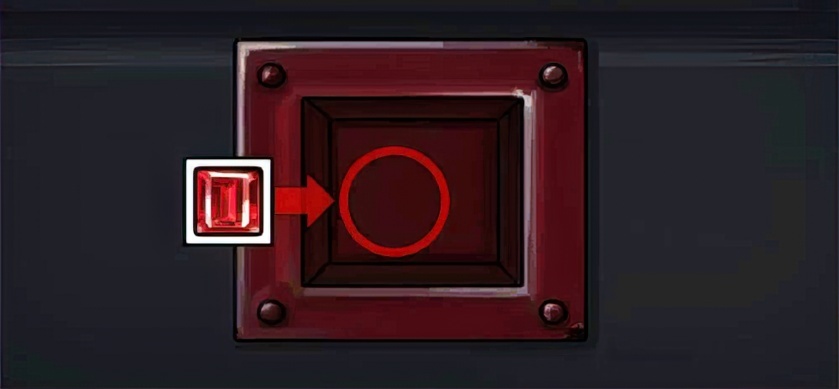
21. Insert red crystal into the red groove.

22. Climb down the ladder, move left and control the switch which appeared beside the flower bed.
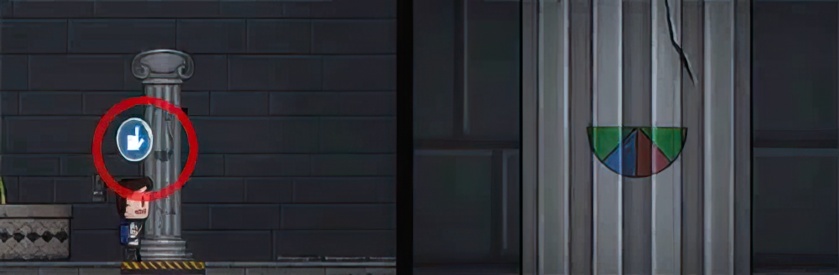
23. Check the pattern on the stone pillar which rose on the right side.

24. Take “statue of a child” on the stone pillar which lowered on the left side.

25. Check the tank and use pump to pump water, take the pumped out blue crystal after the pump stopped working.

26. Come to the box.

27. Open the box beside the ladder according to the pattern on the stone pillar on the right to get another part of the blue crystal.
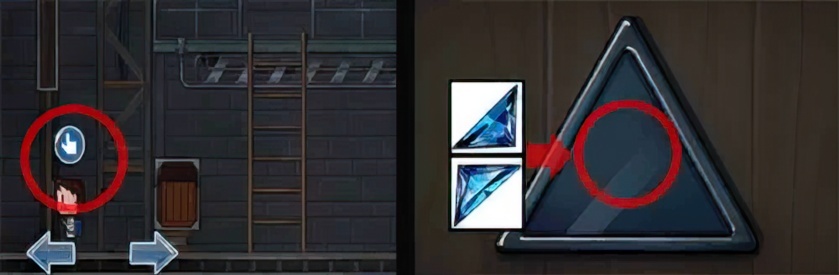
28. Insert two parts of blue crystal on the groove on the door.
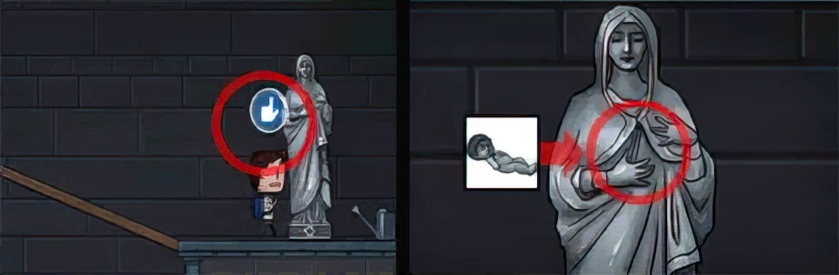
29. Go to the right most scene to check the statue of virgin, put the child statue on it’s hands.

30. Dodge the rolling stones and take the pot.
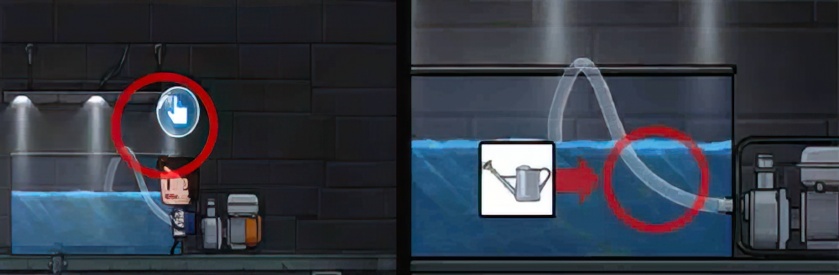
31. Fill the pot with water in the tank.
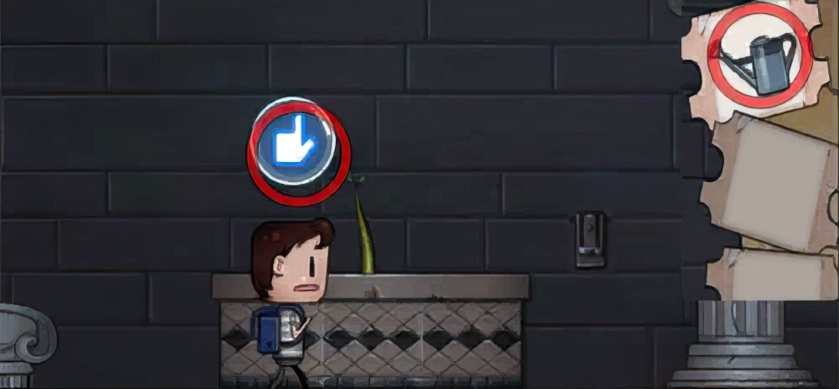
32. Choose the pot filled with water, use pot on the sapling on the flowerbed.
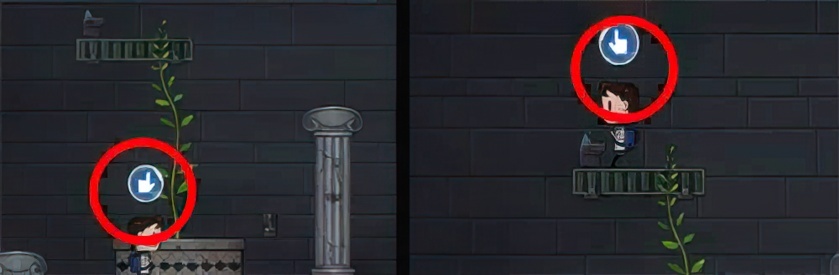
33. Climb on the newly grown vines, control the console on the platform.

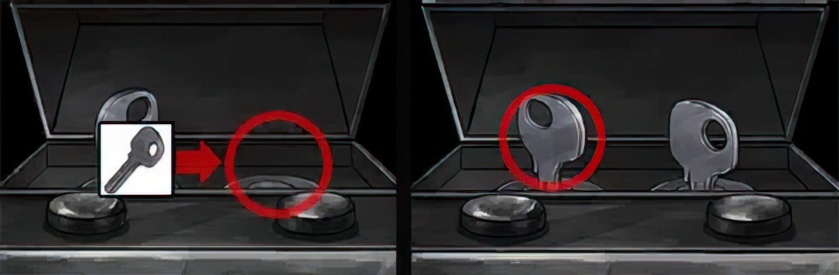
34. Go back to the scene on the left side, get past the laser transmitter to get the key.
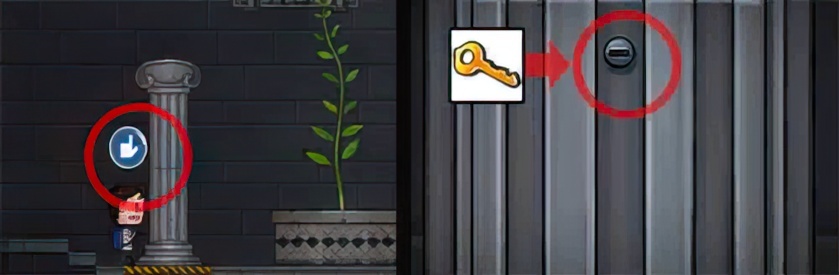
35. Use key to open the secret compartment on the leftside stone pillar, get the last part of blue crystal.

36. Insert the last part of blue crystal on the groove on the door to open the door.

37. Get fruit knife from the table side cabinet.

38. Cut the apple on the table with fruit knife to get the paper.

39. Check the box on the table.

40. Use patterns on the paper and the box to guess the password, open the box, take the key on the right side.

41. Open the room door on the left side of the corridor with key, go into the bedroom on the left side.

42. Open the wardrobe on the leftside bedroom, check the puzzle on the wall.

43. Complete the puzzle to get half a piece of plastic.
44. Insert the key back to the box on the table, take the key on the left.

45. Go to the balcony, open the lock of the cabinet with key to get the nutrition.

46. Check the flower pot on the right side of the balcony, take the broom.
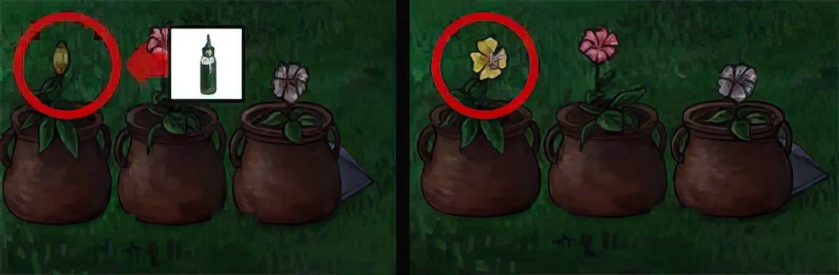
47. Use nutrition on yellow flower bud, get another “half a piece of plastic” after it blossomed.
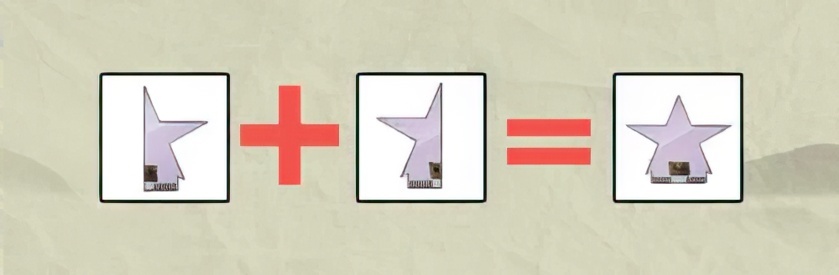
48. Combine two “half a piece of plastic” into a complete plastic sheet.

49. There’s a TV stand in the leftside bedroom, insert the plastic sheet into it, then check the pattern appeared on the TV.

50. Check the TV in the living room.

51. Complete the puzzle on the TV in the living room according to the pattern on the TV in the leftside bedroom, get half of a green crystal in the opened drawer.

52. Get another half of green crystal in the bin in the corridor on the upper floor.

53. Combine two “half of a green crystal” into a complete green crystal.

54. Insert green crystal into the square groove on the leftside door in the corridor on the upper floor, go into the rightside bedroom.
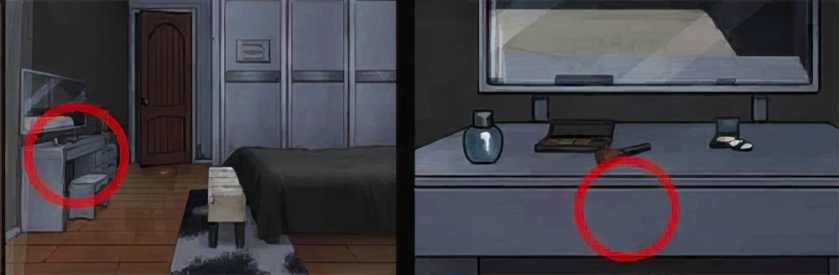
55. Get half red crystal in the drawer of the dresser in the right side bedroom.
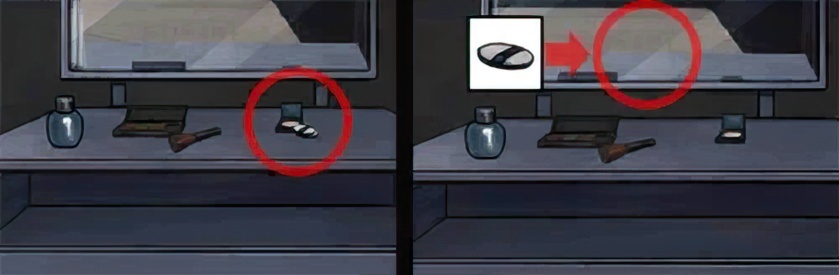
56. Use poweder on the dresser on the mirror, check the pattern which appeared.

57. Check the bench at the end of the bed in the left side bedroom.
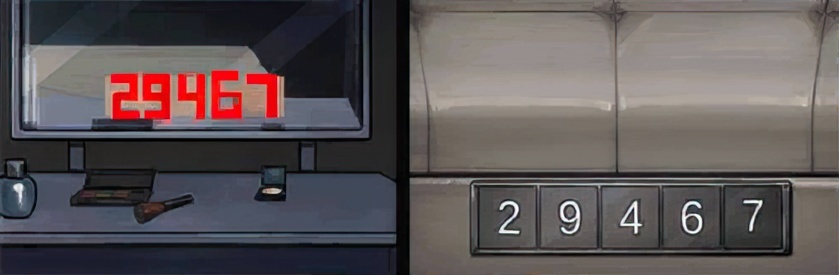
58. Open the bench at the end of the bed with the pattern on the mirror of the dresser in the right side bedroom, get another half of the red crystal.

59. Combine two “half of a red crystal” into a complete red crystal.

60. Get pencil case in the yellow schoolbag in the corridor on the upper floor.

61. Insert red crystal into the round groove on the pencil box to get the pencil.

62. Use broom under the bed in the right side bedroom to get crumpled paper.

63. Use paper and pencil to rub the pattern on the side of the cabinet.

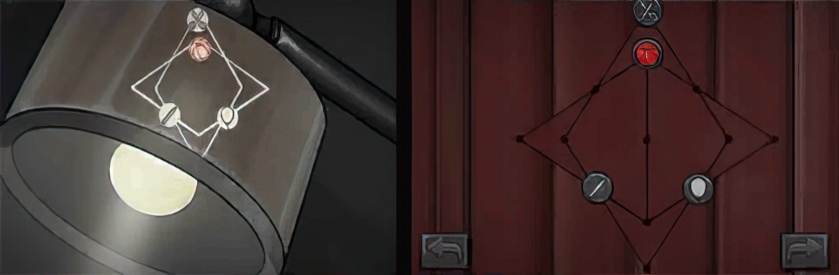
64. Check the wardrobe on the right side bedroom.

65. Open the puzzle on the wardrobe according to the rubbed pattern to get bulb and round stone.

66. Instal the bulb on the lamp of the left side bedroom.

67. Instal the round stone on the puzzle on the door of the cabinet in the balcony.
68. Complete the puzzle on the door of the cabinet in the balcony, get the lunch box in the cabinet.

69. Open the cabinet according to the numbers of the petals of the 3 flowers on the balcony to get a part of blue crystal.

70. Use fruit knife on the quilt on the sofa of the living room, get another part of the blue crystal.

71. Use fruit knife to cut the crack on the bench at the end of the bed to get the last part of the blue crystal.

72. Combine 3 a part of blue crystals into a complete blue crystal.

73. Check the pattern on the quilt of the right side bedroom.

74. Check the pattern on the quilt of the right side bedroom.
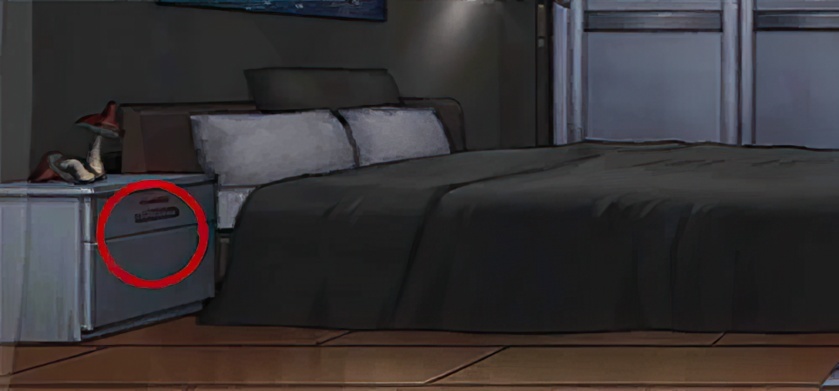
75. Check the nightstand of the left side bedroom.

76. Combine patterns on the two quilts to get the code, open the nightstand to get hexagonal metal block.
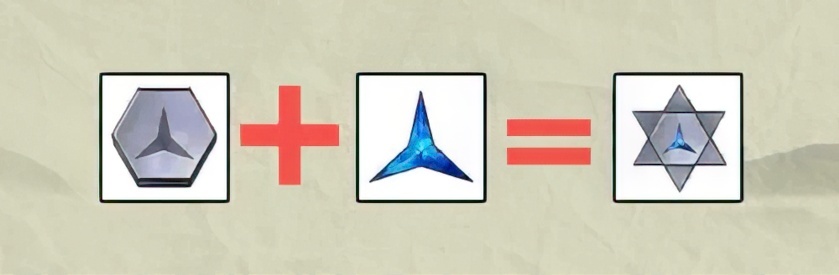
77. Insert blue crystal into the groove of the hexagonal metal block to tranform it into hexagram metal block.
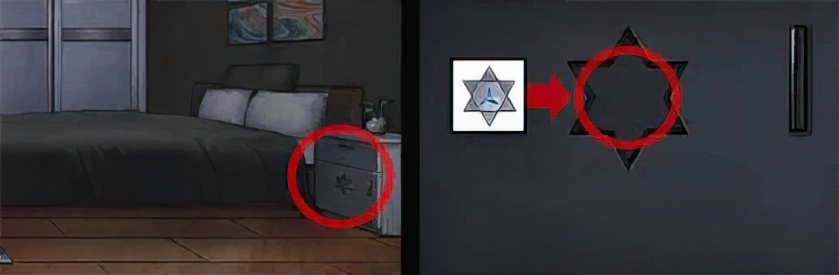
78. Insert hexagram metal block into the groove of the nightstand in the right side bedroom to open the nightstand.

79. Complete the puzzle in the nightstand to get the notebook.


