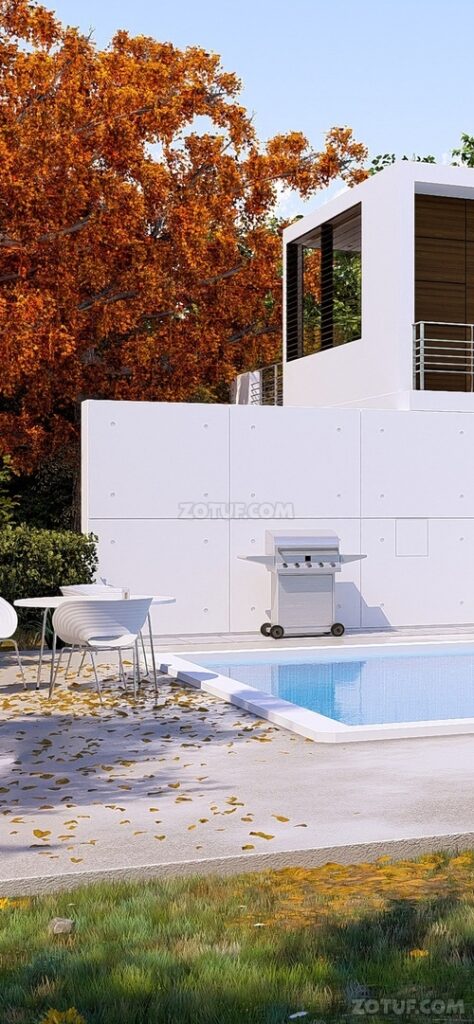
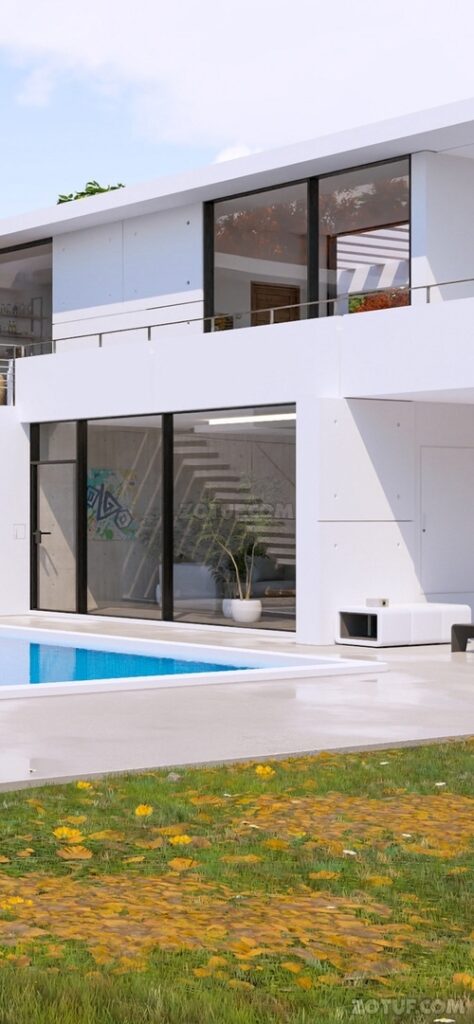
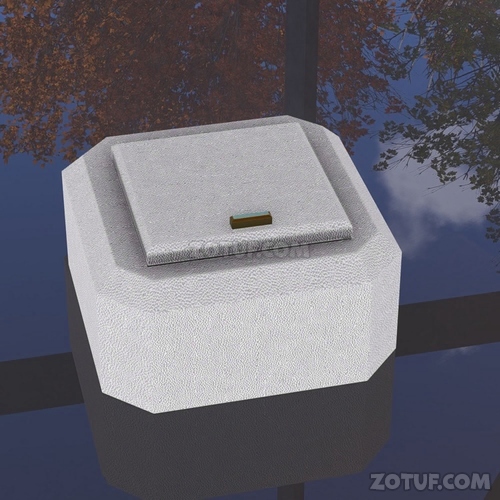
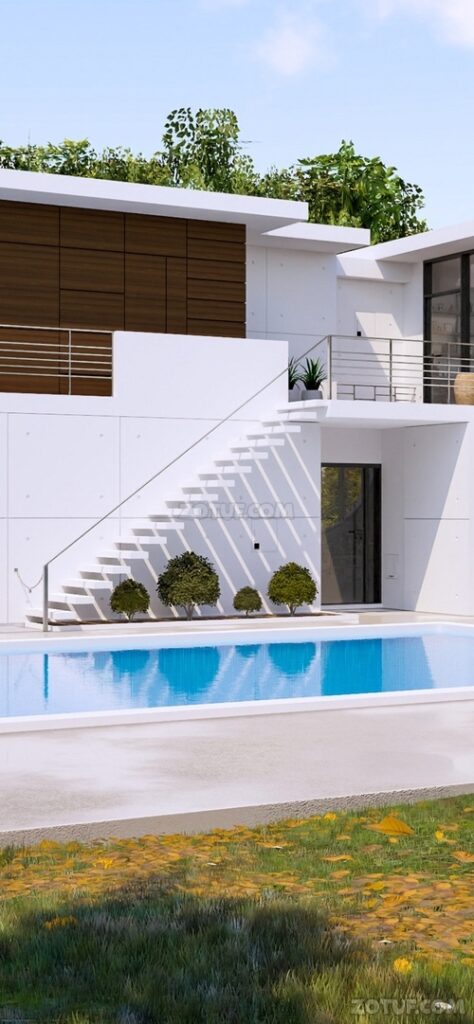
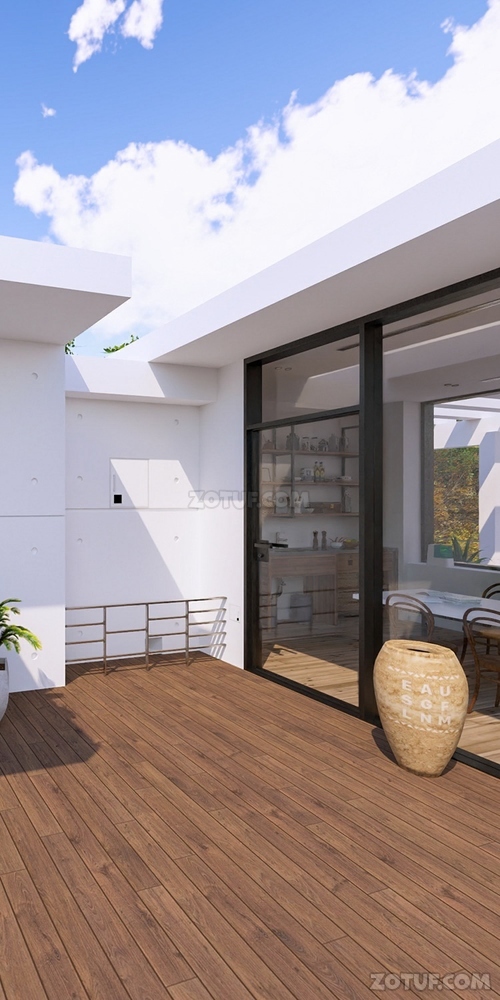
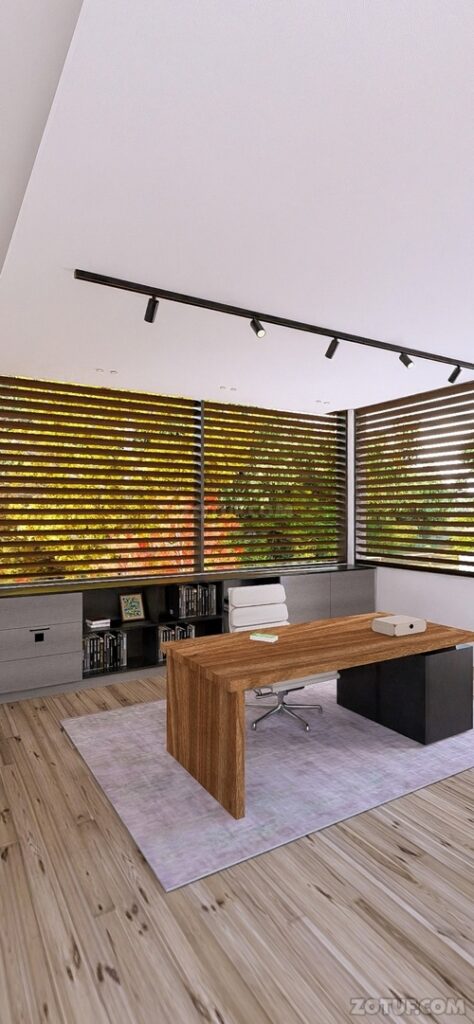
Pool House – A puzzle game from developer ArtDigic, set in a secluded house by a pool surrounded by trees already touched by the breath of autumn. The calm water surface holds memories of summer, while the golden foliage outside the window hints at the changing seasons and the fleeting nature of moments. In this unhurried, almost meditative space, you will have to unravel a chain of puzzles, exploring every corner of the mansion, from the dining table to the top shelves, from locked doors to a mysterious barbecue. Observation, logic, and attention to detail will help you collect fragments of keys, decipher color and geometric codes, understand nature’s hints, and connect seemingly disparate elements into a single chain. Every find, be it a battery button or a brush, every painting, every reflection or line on the floor, everything here is important. You will look for clues in the leaves, watch the height of the trees, connect objects, combine shapes and colors until you get closer to the exit. If you can’t solve one of the puzzles or don’t know where to find the items, you can check out the Can You Escape Pool House walkthrough on our website and open the last door.
Pool House – Walkthrough
Here you can see the complete Pool House walkthrough in pictures.
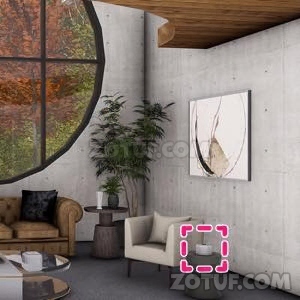
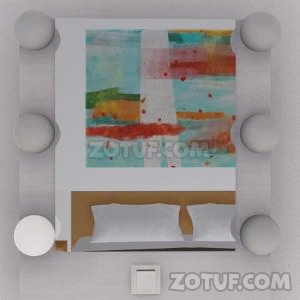
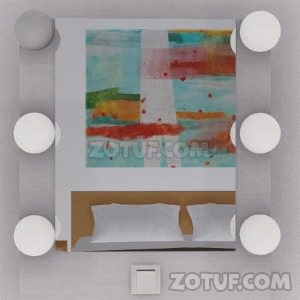
1. Move to this location and examine the area around the table.

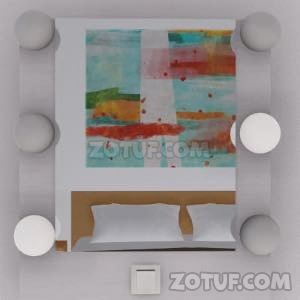
2. Examine the seat of the chair on the right side of the screen.
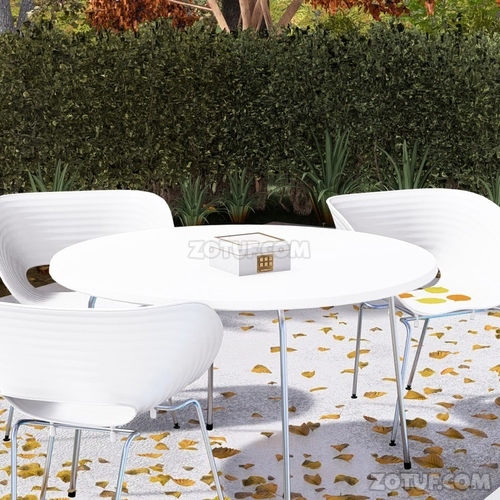
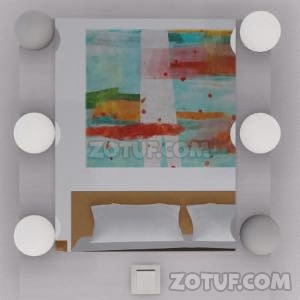
3. Check the fallen leaves.
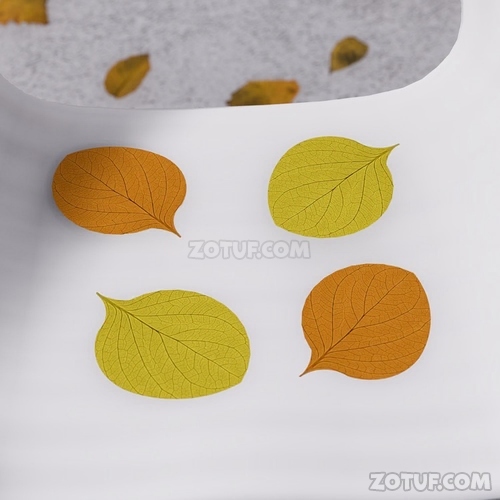
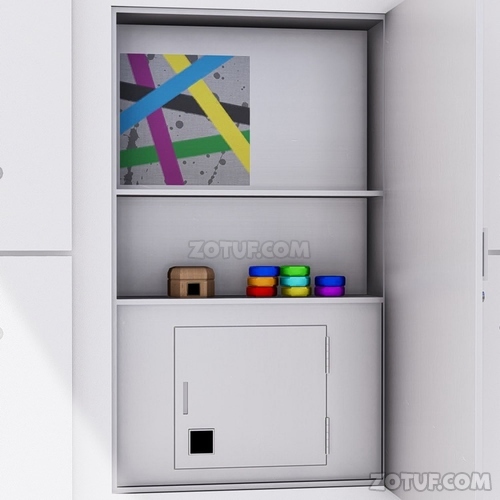
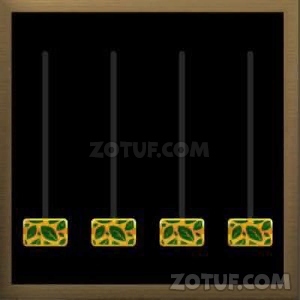
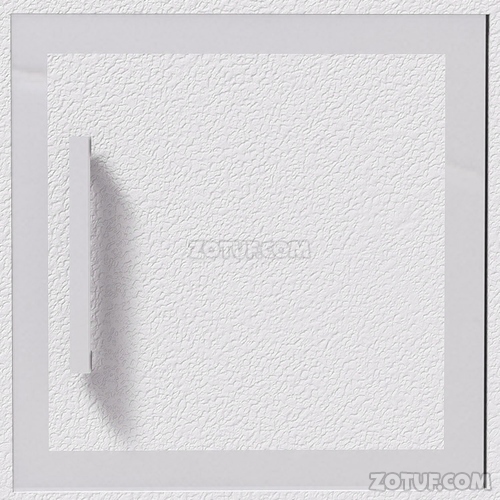
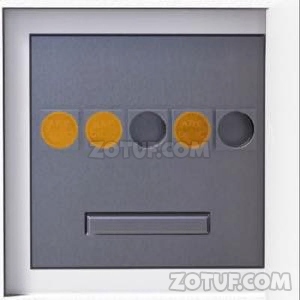
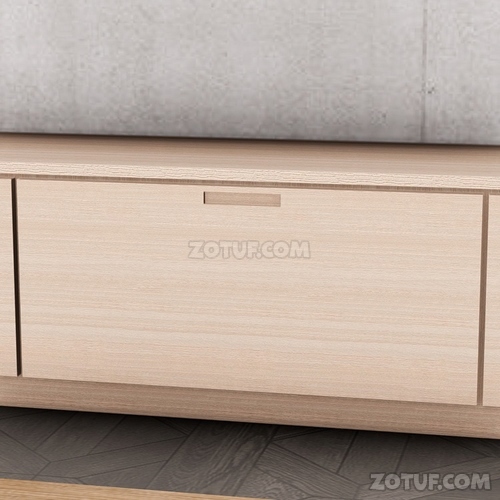
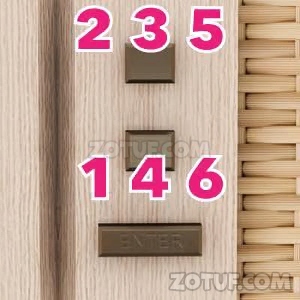
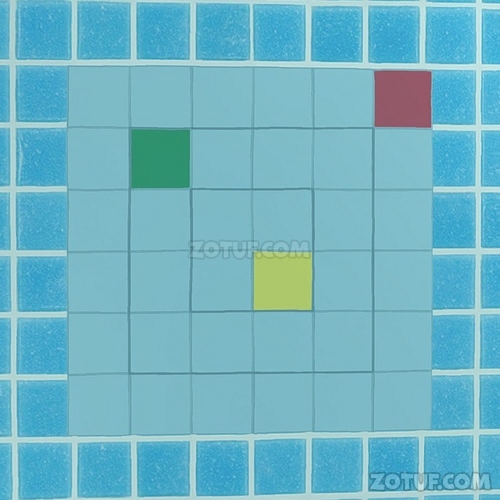
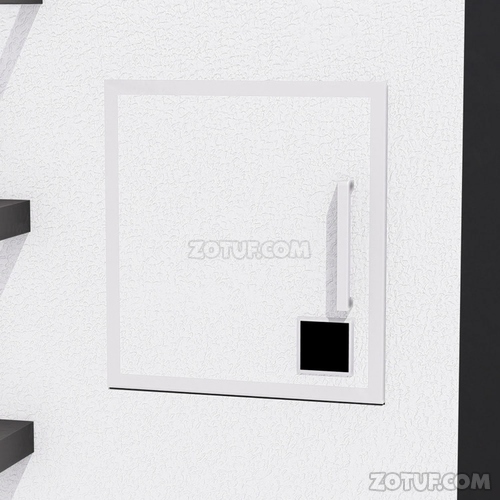
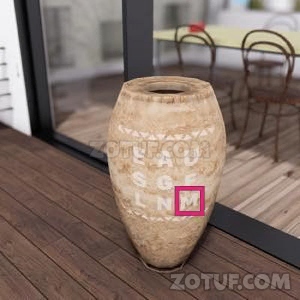
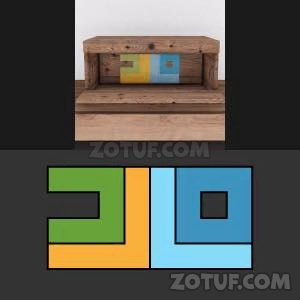
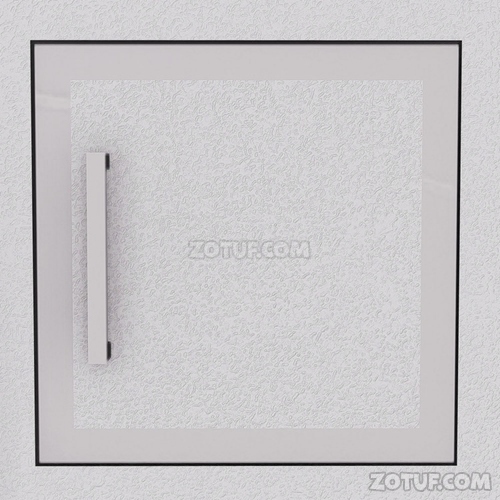
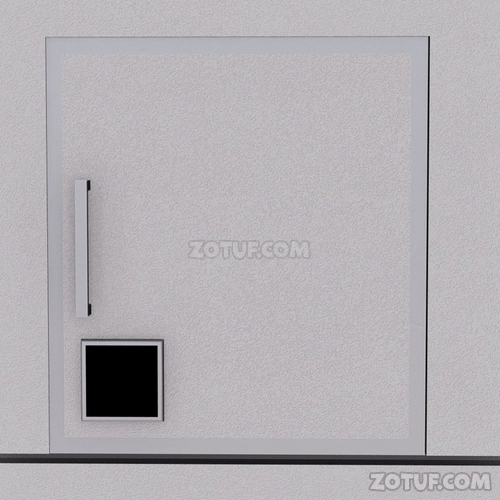
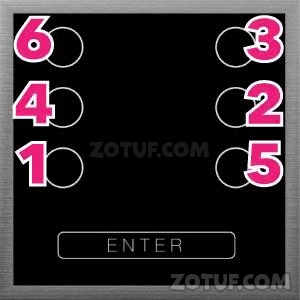
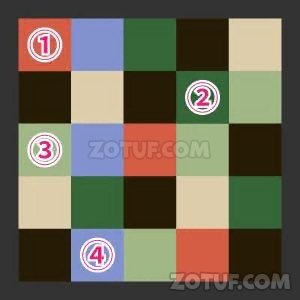
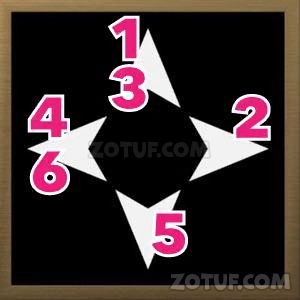
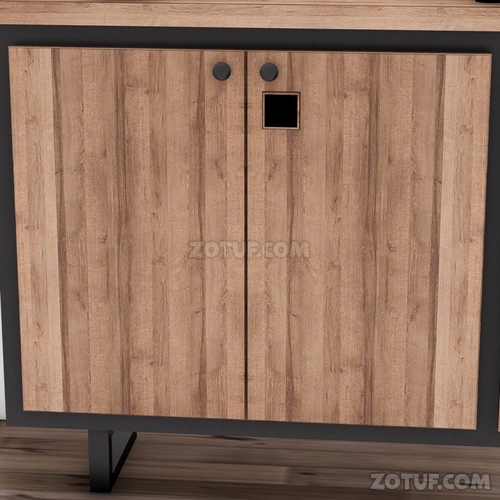
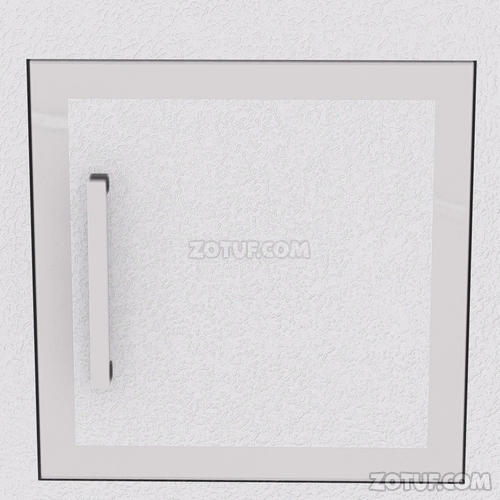
4. Move to this location and examine the small door on the wall near the center of the screen.
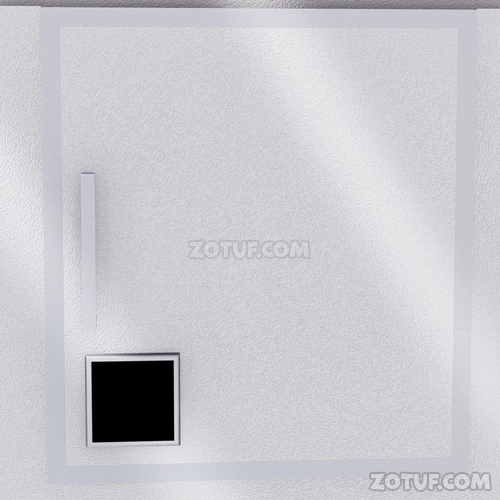

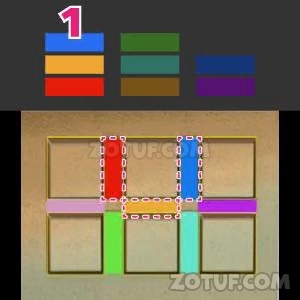
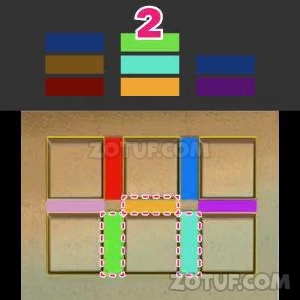
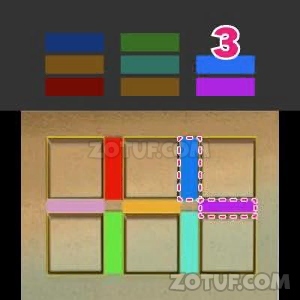
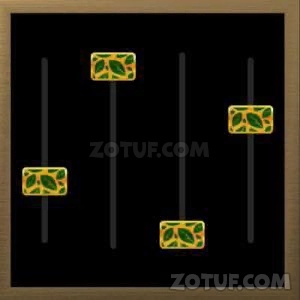
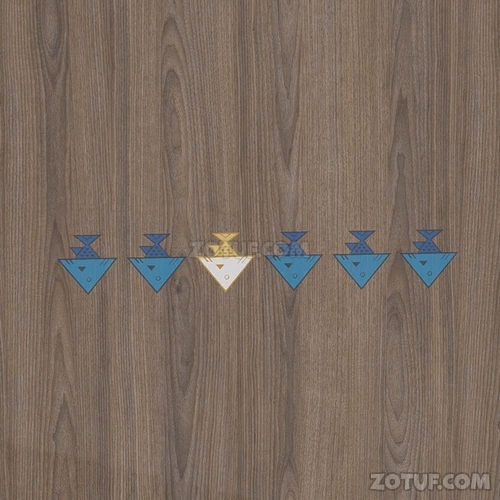
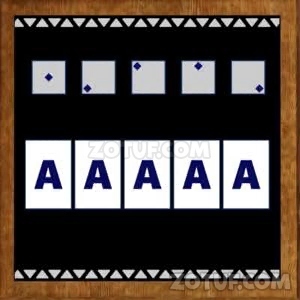
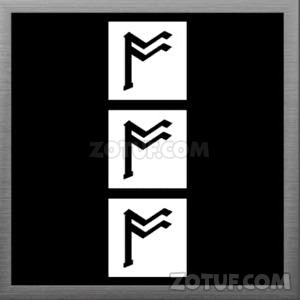
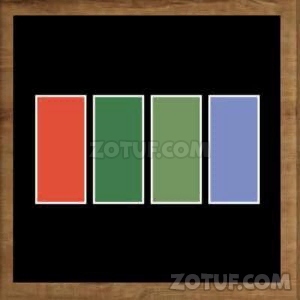
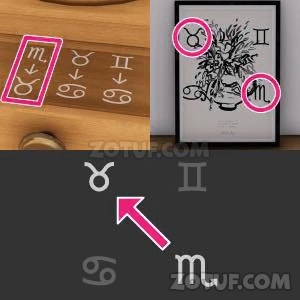
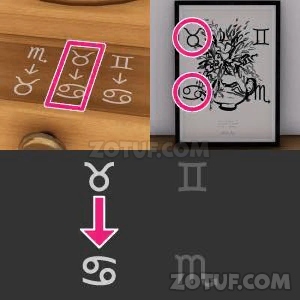
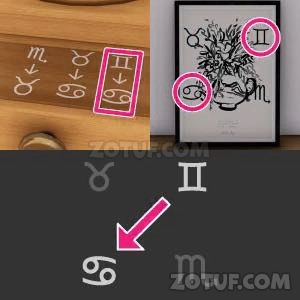
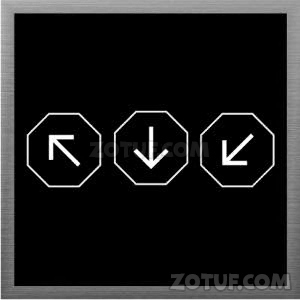
5. Input as follows, referencing the colors and orientation of the fallen leaves.


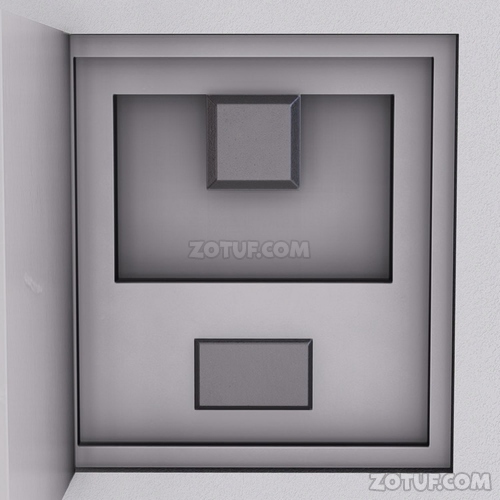
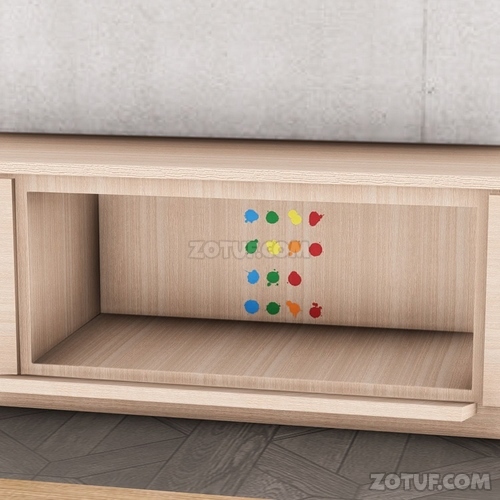
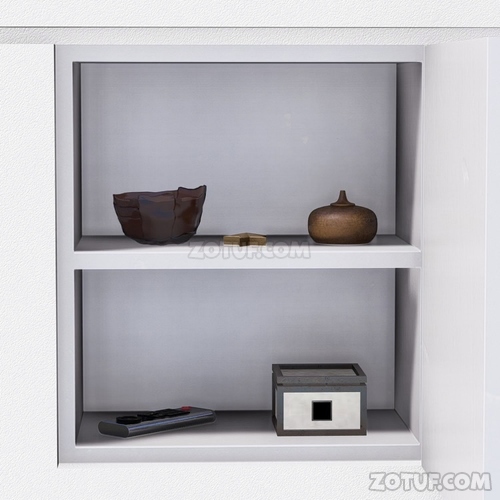
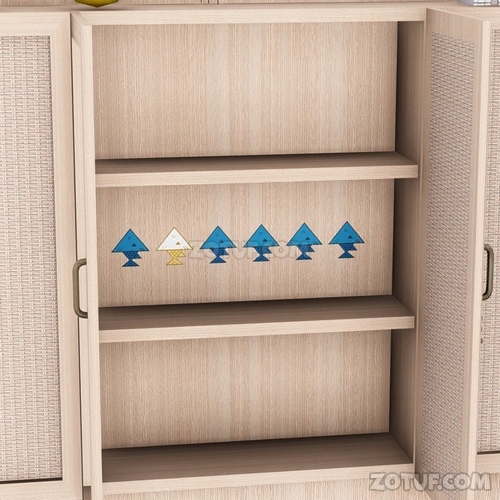
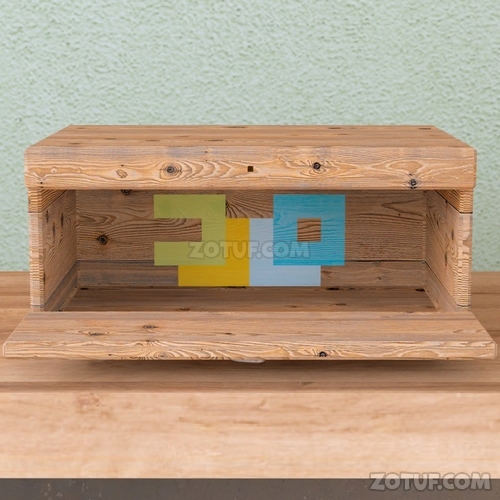
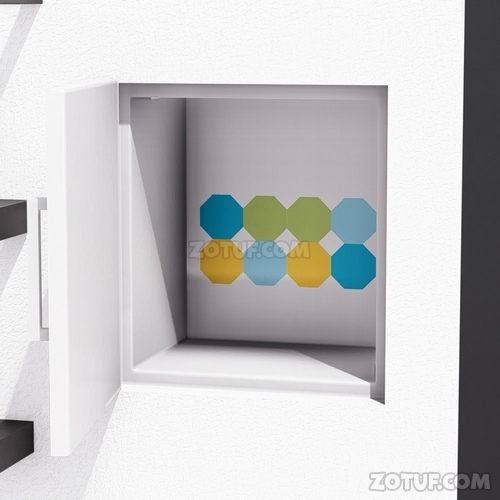
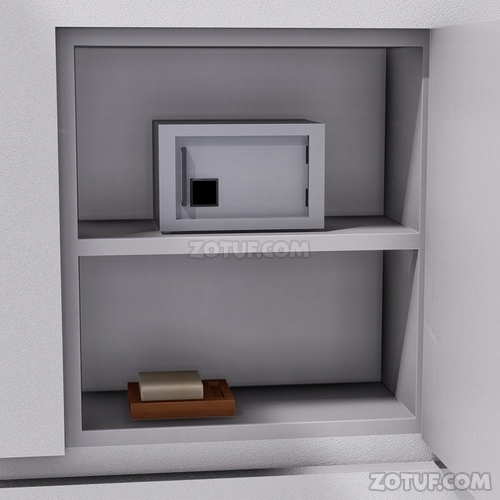
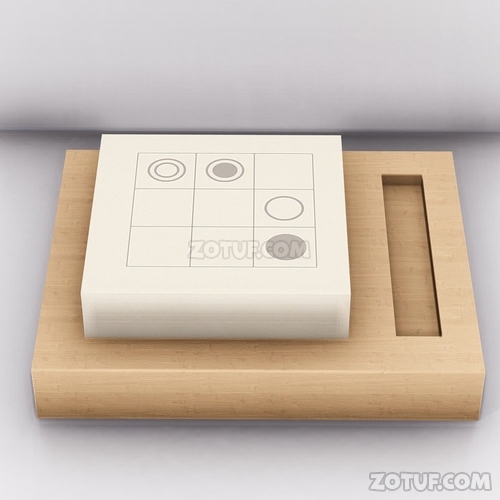
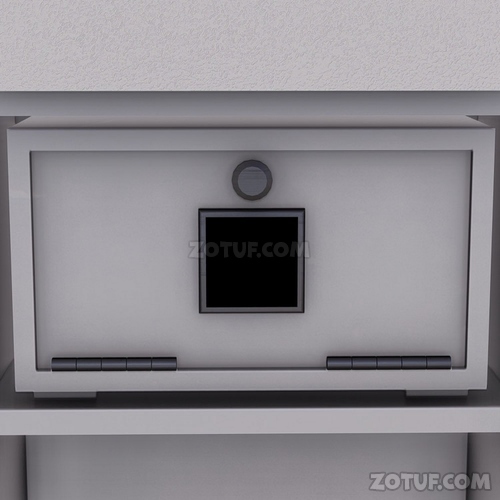
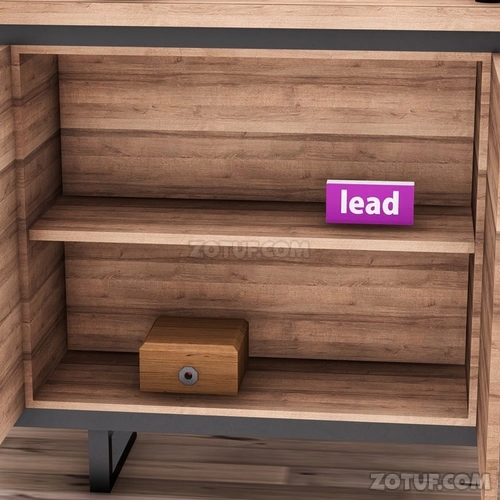
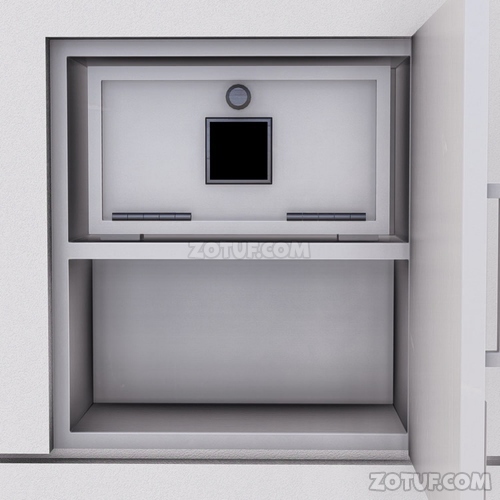
6. Move to this location and examine inside the small door on the wall near the center of the screen.

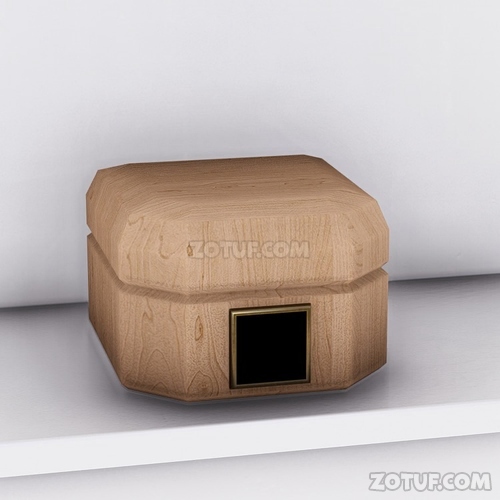
7. Examine the object on the lower shelf.

8. Obtain a part of something.
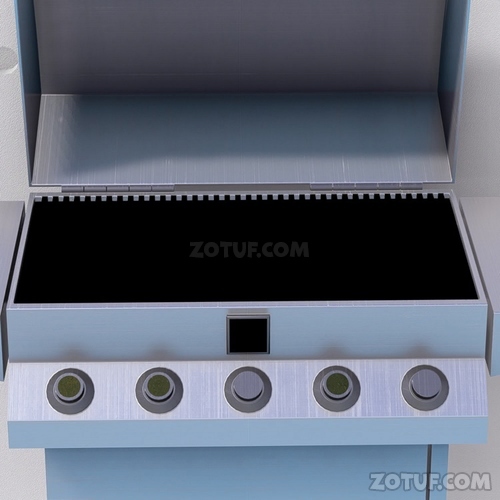
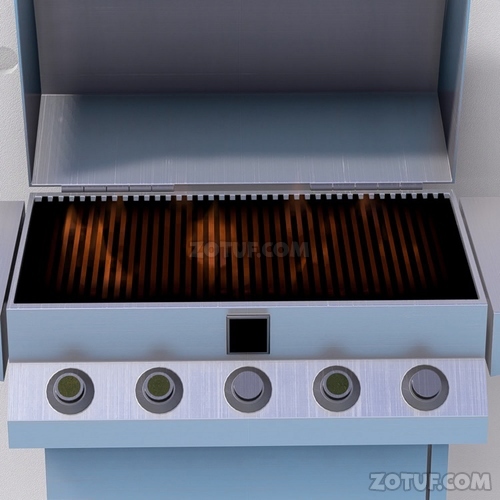
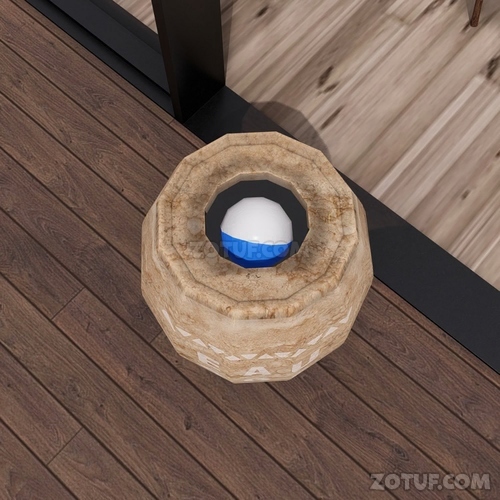
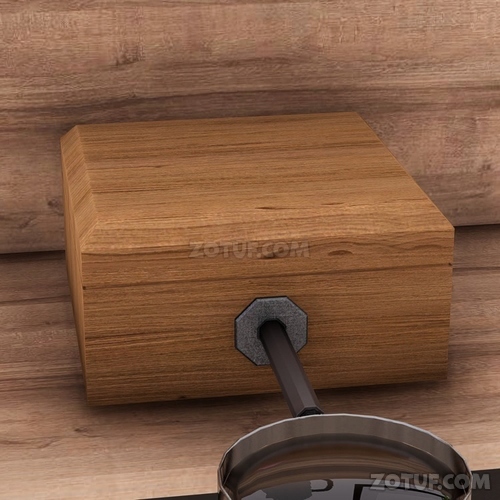
9. Move to this location and examine the barbecue grill.

10. Open the grill lid.


11. Obtain a part of something.
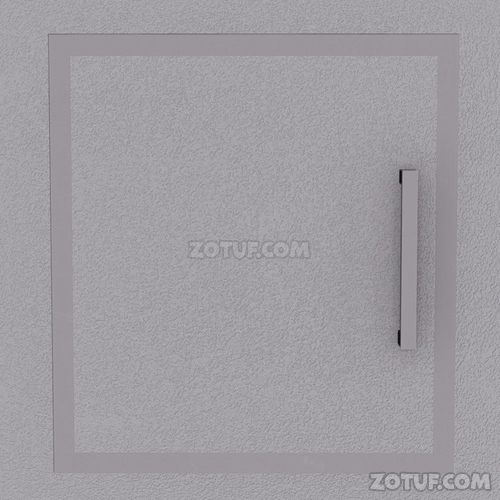
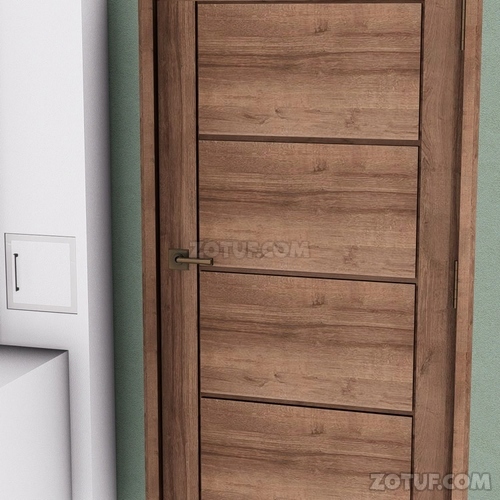
12. Move to this location and examine the area around the door on the right side of the screen.

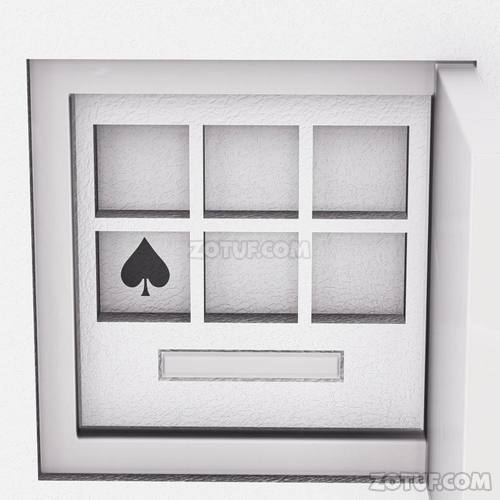
13. Examine the small door to the right of the main door on the screen.

14. Open the door.
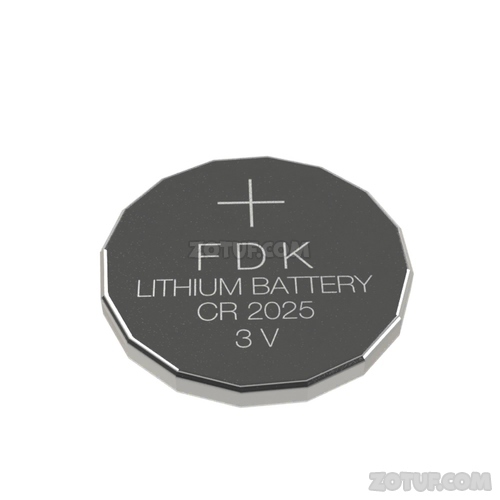
15. Use two parts of something.


16. Fit the two parts precisely into the device.

17. Obtain a button battery.

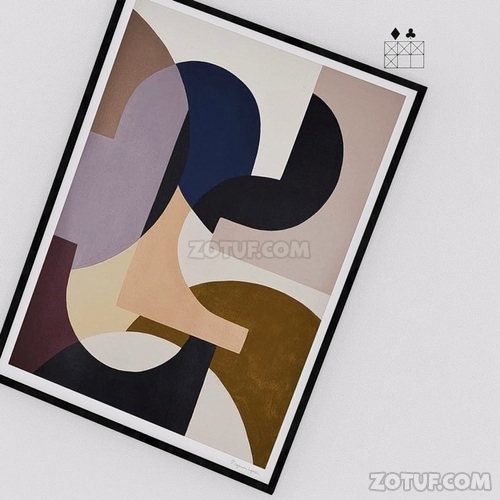
18. Move to this location and examine the door on the left side of the screen.

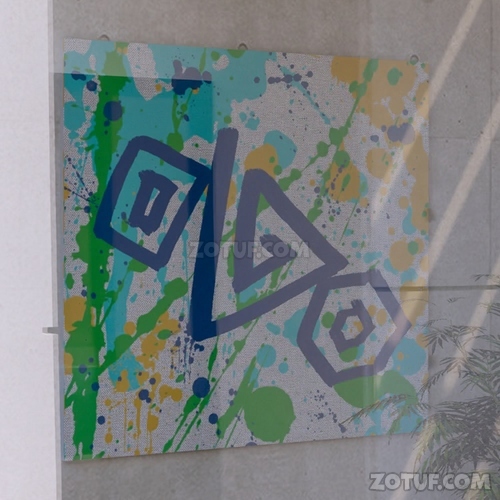
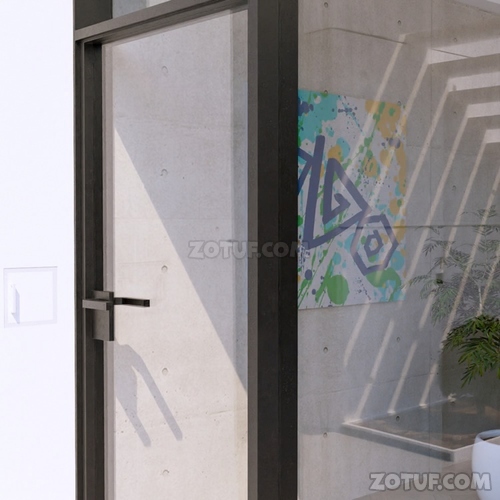
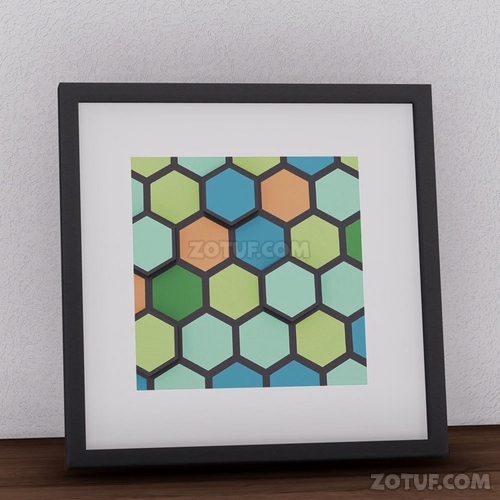
19. Examine the painting on the other side of the glass wall.

20. Check the painting.
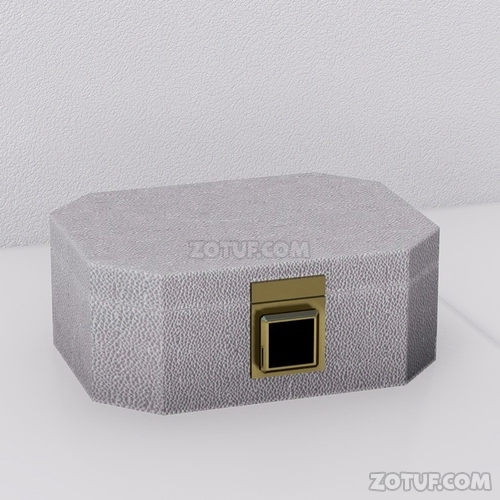
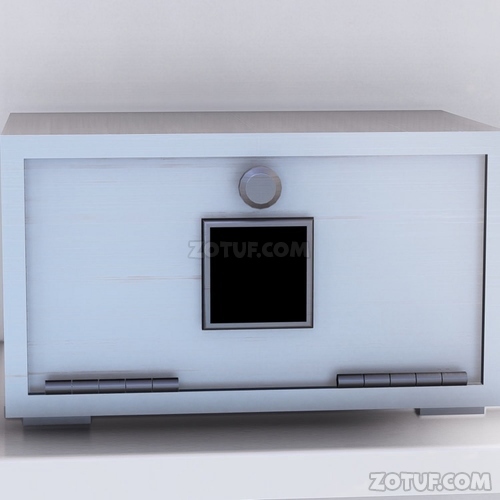
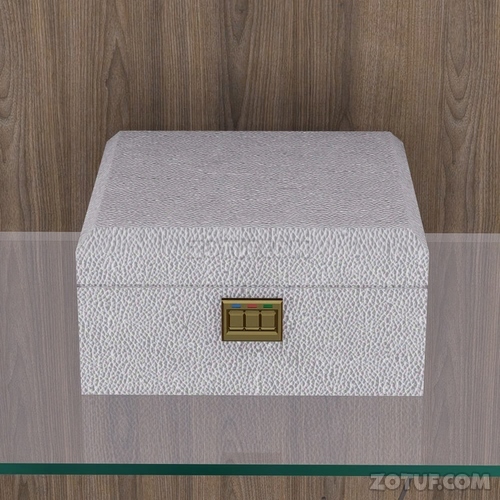
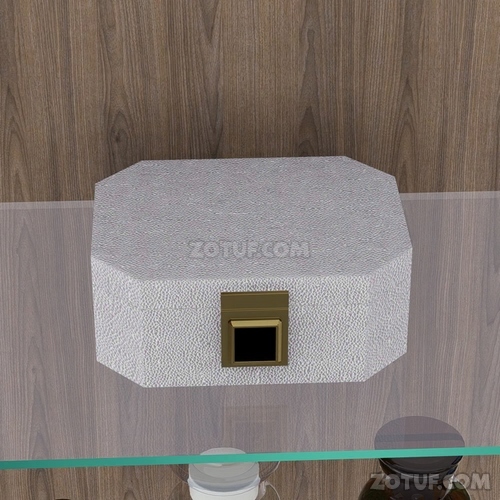
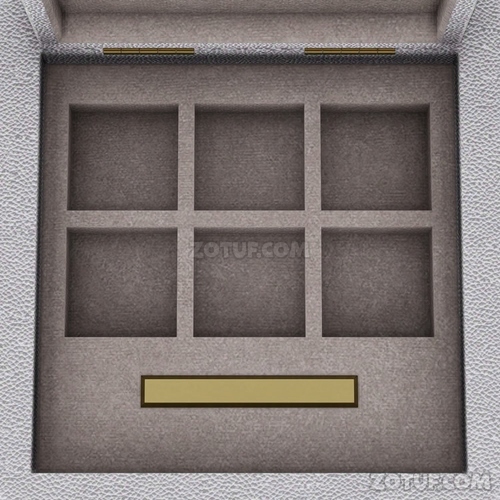
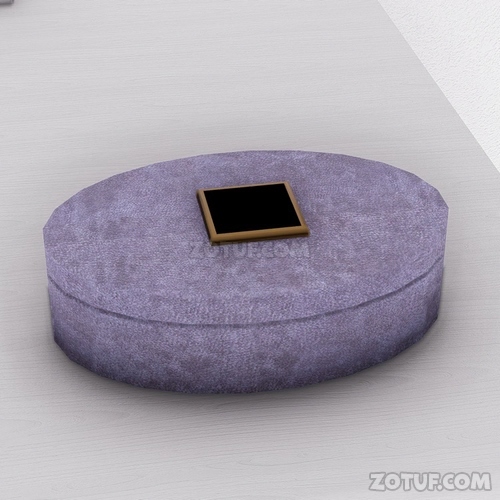
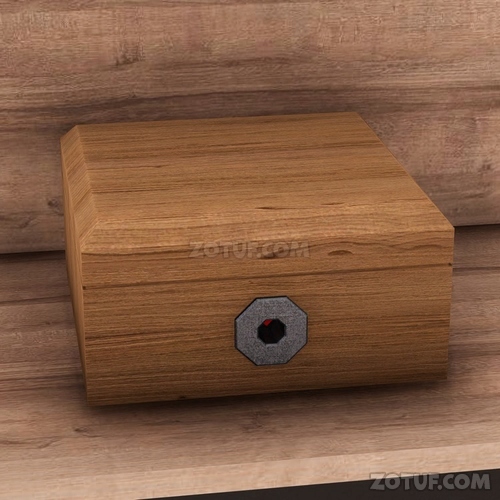
21. Move to this location and examine the box on the sofa on the right side of the screen.

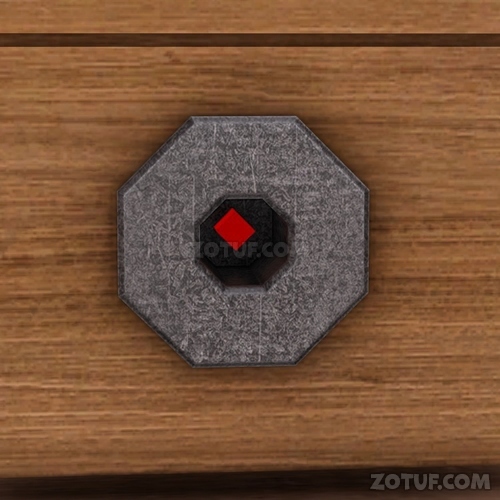
22. Examine the device on the box.
23. Examine the left side of the device.

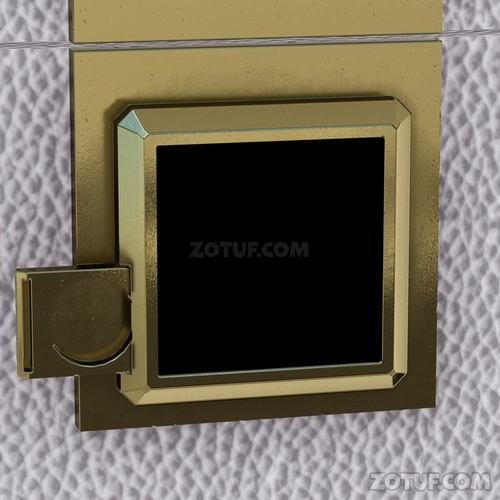
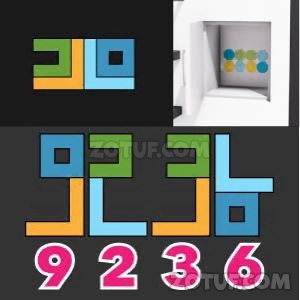
24. Use the button battery.
25. The device powers on.

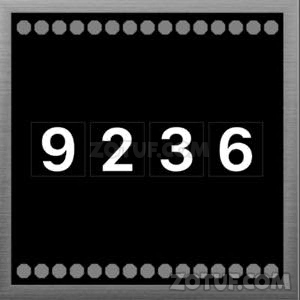
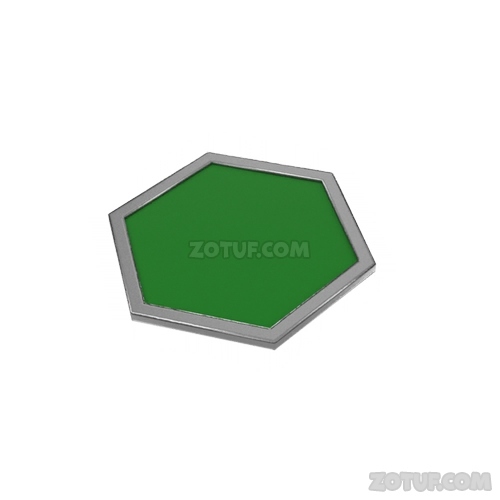
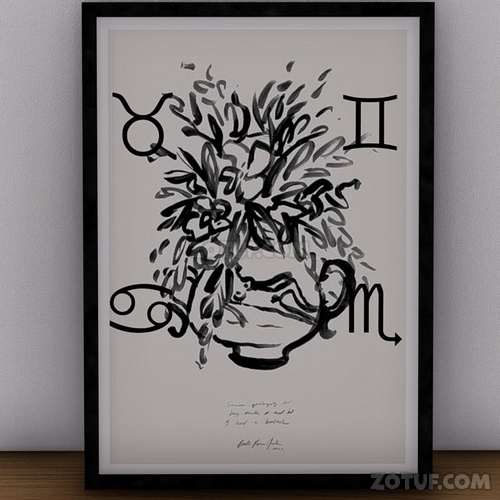
26. Input as follows, using the shape drawn in the painting as a reference.

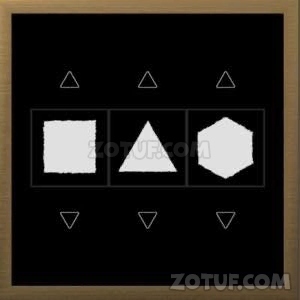
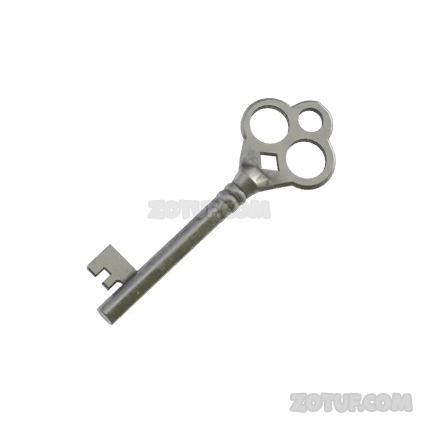
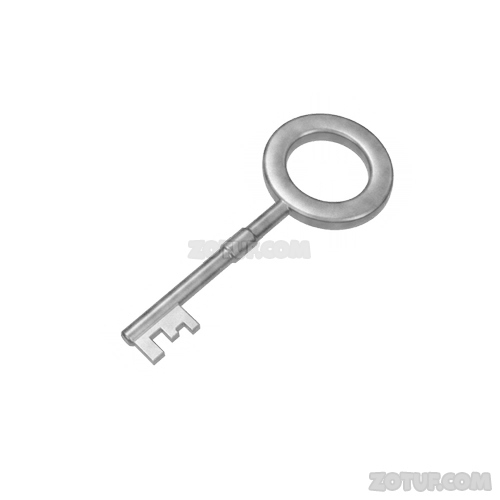
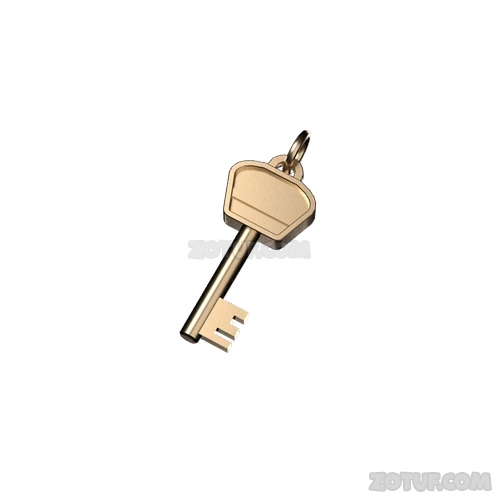
27. Obtain a key.
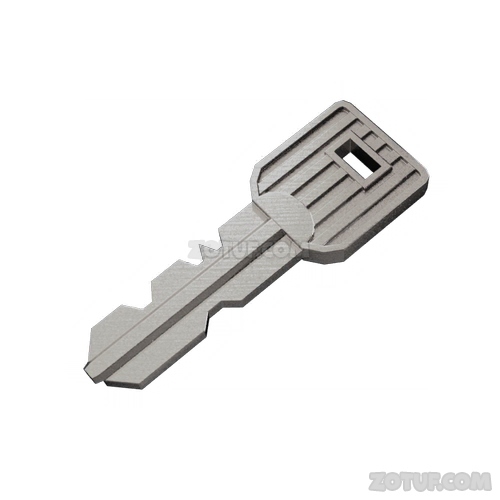
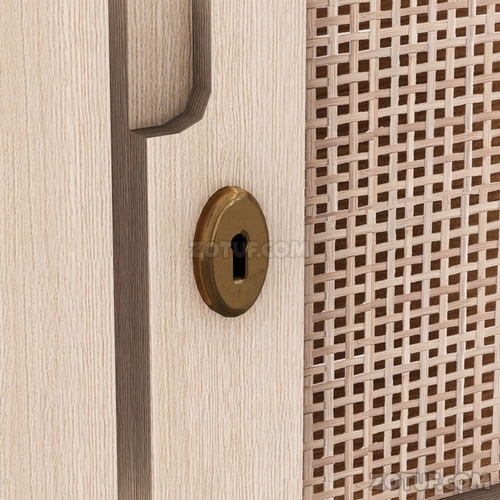
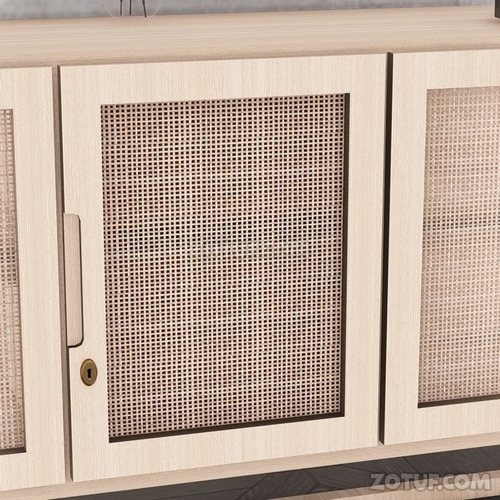
28. Move to this location and examine the white door on the right side of the screen.

29. Examine the keyhole.
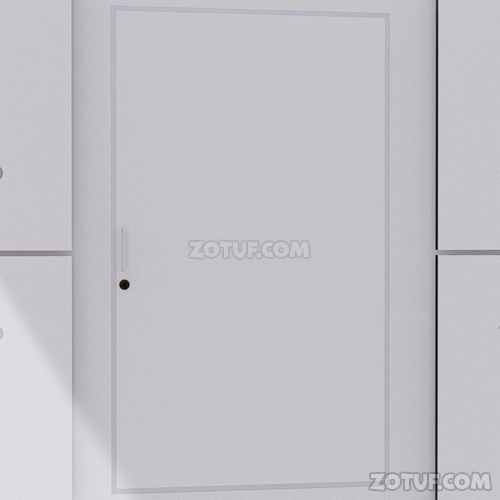
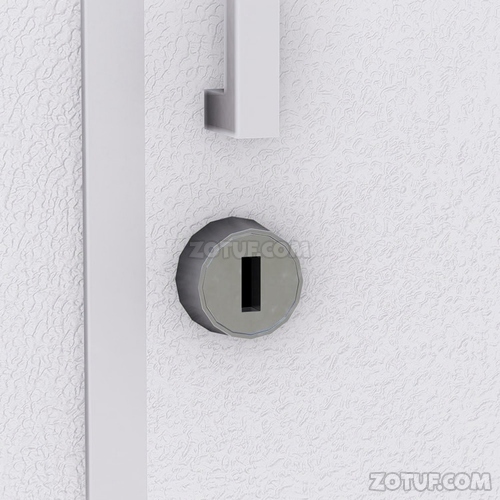
30. Use the key.

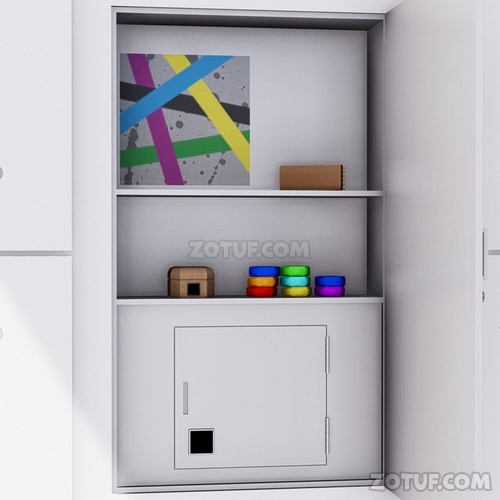
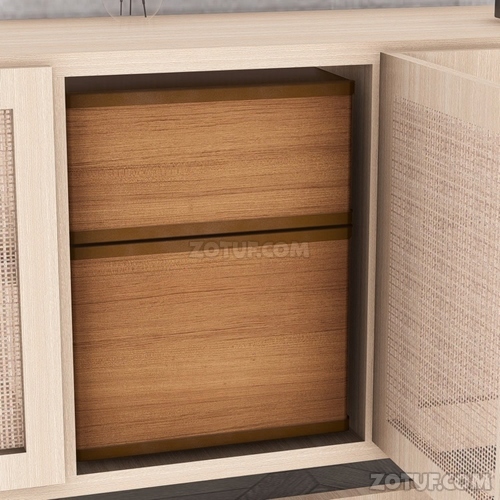
31. Move to this location and examine inside the white door on the right side of the screen.

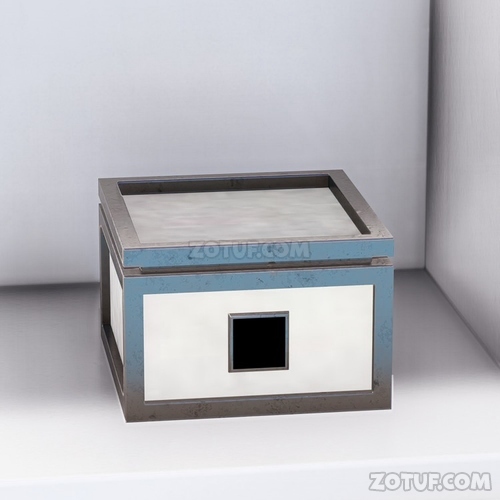
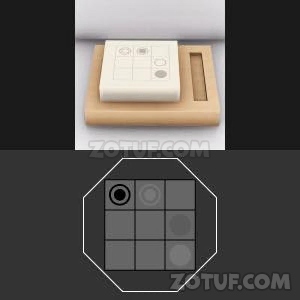
32. Check the color of the object on the right side of the lower shelf.
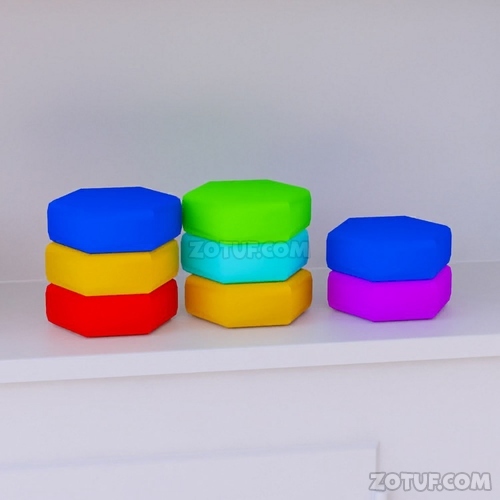
33. Move to this location and examine the area around the table.

34. Examine the box on the table.

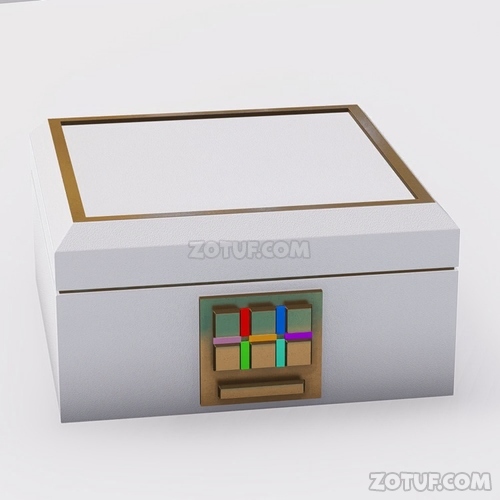
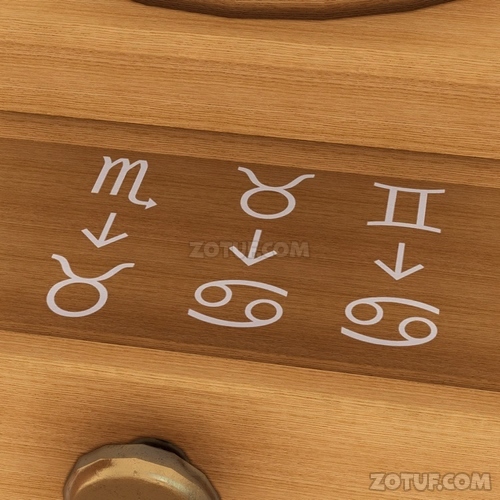
35. Combining the colors of the objects on the shelf with the colors of the device results in the following.

36. Focus on the button of the device surrounded by the color of the leftmost object.
37. Focus on the button of the device surrounded by the color of the central object.
38. Focus on the button of the device surrounded by the color of the rightmost object.
39. Press the buttons in the following order.
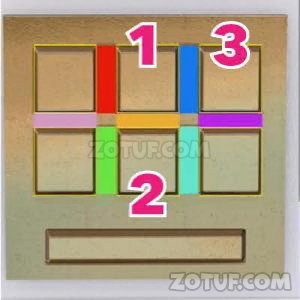
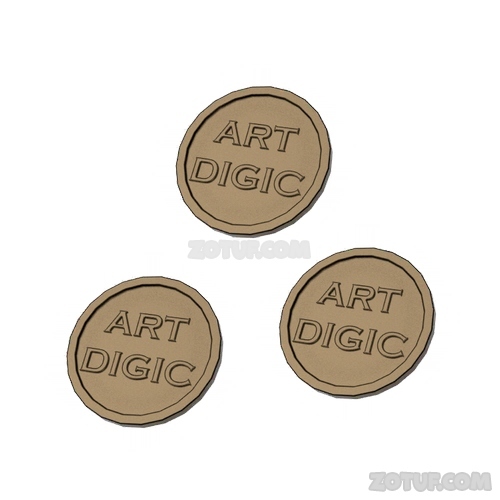
40. Obtain a coin.
41. Move to this location and examine inside the white door on the right side of the screen.

42. Examine the object on the right side of the upper shelf.

43. Obtain a brush.
44. Move to this location and examine the upper floor of the pool area on the right side of the screen.
45. Confirm that the floor is dirty.
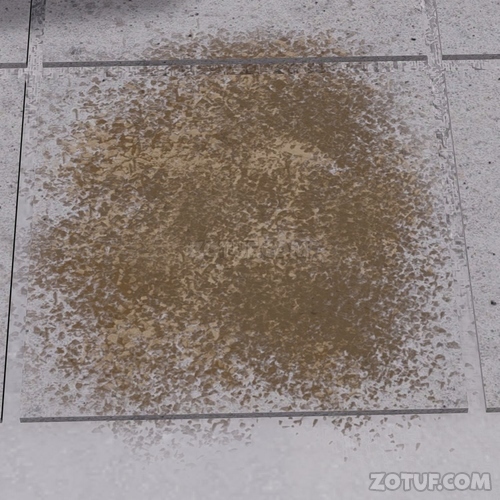
46. Use the brush.

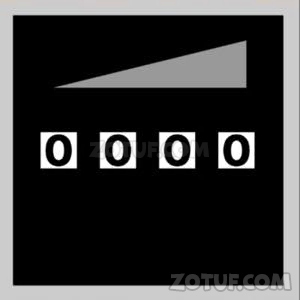
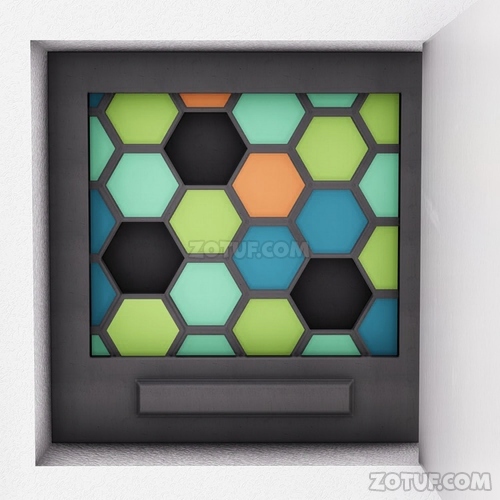
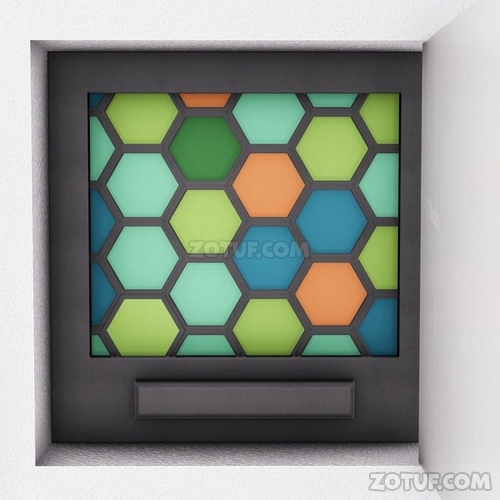
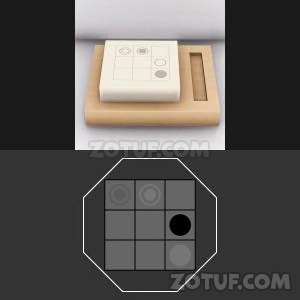
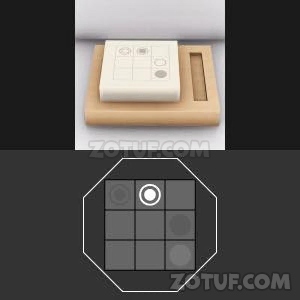
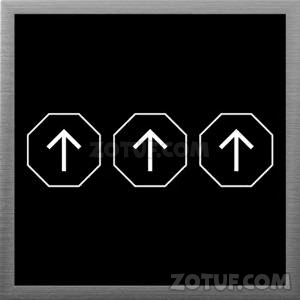
47. Check the shape.

48. Move to this location and examine inside the small door on the wall near the center of the screen.

49. Examine the device on the upper shelf.
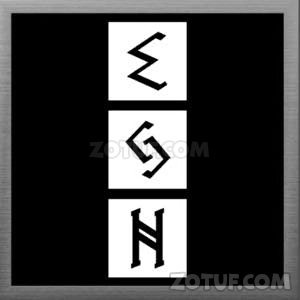
50. Input as follows, referencing the maze path drawn on the floor.
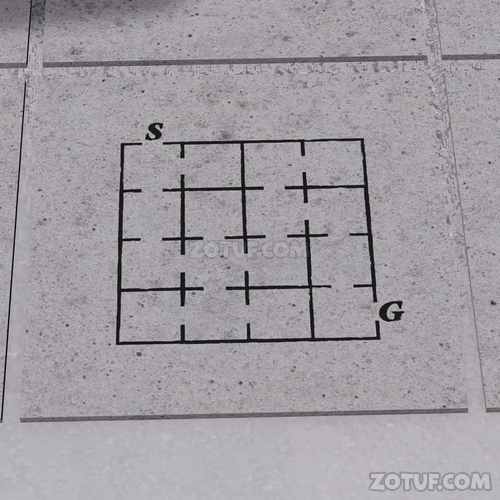
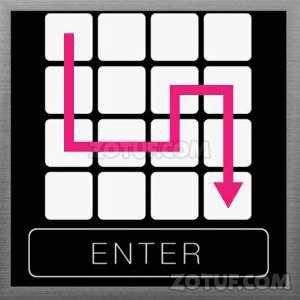
51. Obtain a coin.
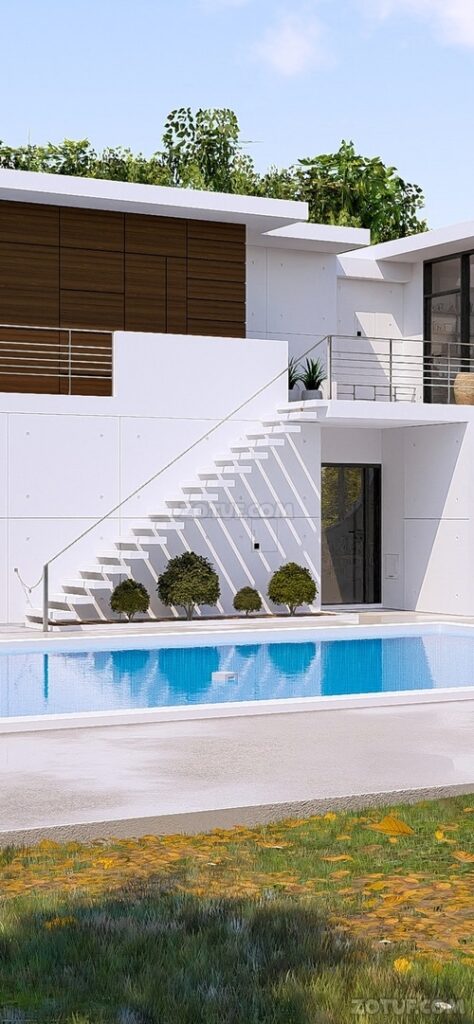
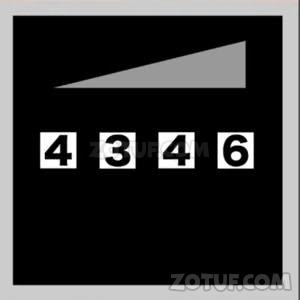
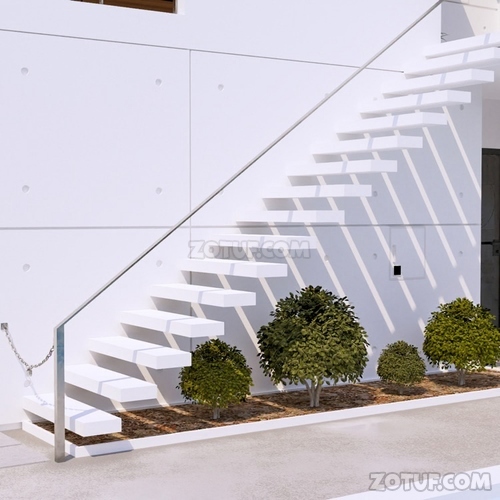
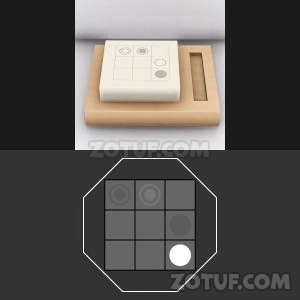
52. Move to this location and check the height of the four trees.

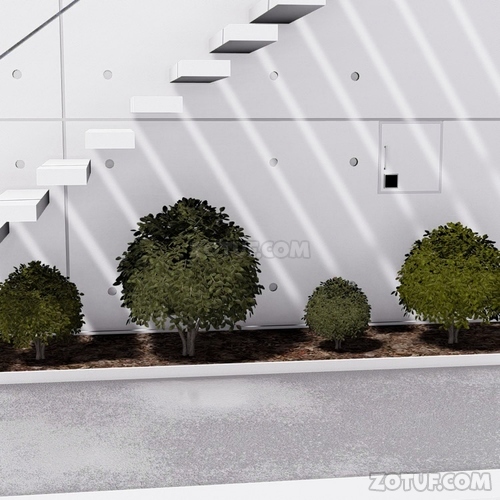
53. Move to this location and examine inside the white door on the right side of the screen.

54. Examine the box on the lower shelf.
55. Input as follows, referencing the height of the four trees.

56. Obtain a coin.

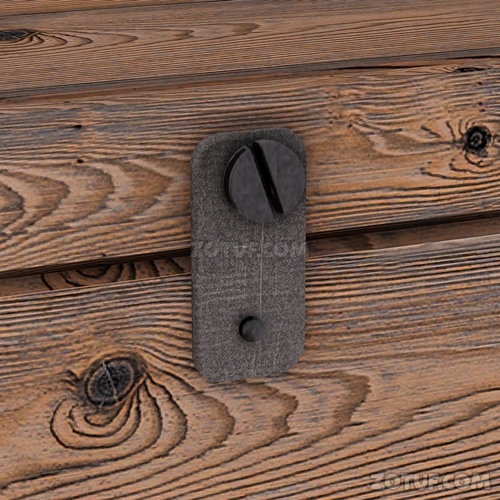
57. Move to this location and examine the barbecue grill.

58. Check the shape of the grill’s knob.
59. Move to this location and examine the door on the left side of the screen.

60. Examine the small door on the wall to the left of the main door.

61. Set the coin as follows, referencing the shape of the grill’s knob.

62. Use the coin.
63. Move to this location and examine the shelf below the TV.

64. Check the shape drawn on the shelf.
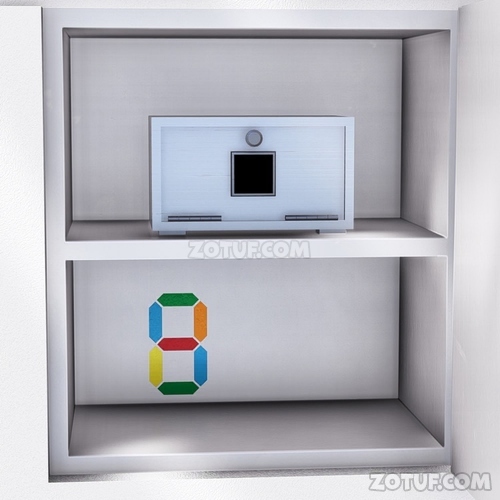
65. Move to this location and examine inside the small door on the wall near the center of the screen.

66. Check the shape drawn on the wall inside the shelf.

67. Move to this location and examine inside the white door on the right side of the screen.
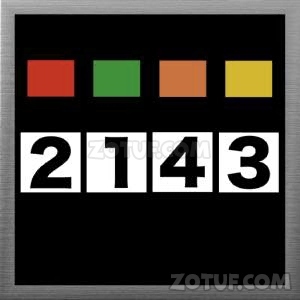
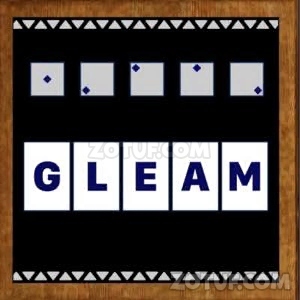
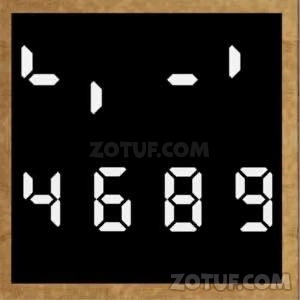
68. Examine the device on the lower shelf.


69. Combine the shapes drawn on the two shelves.


70. Extract the parts of the digital numbers that match the color of the ink shapes as follows.
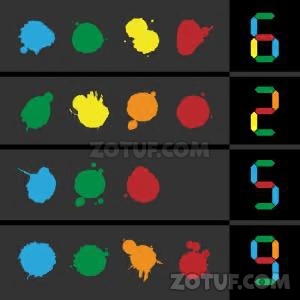
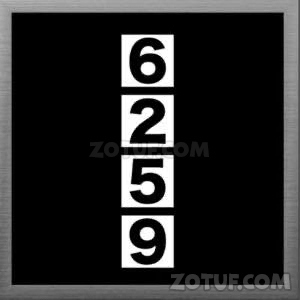
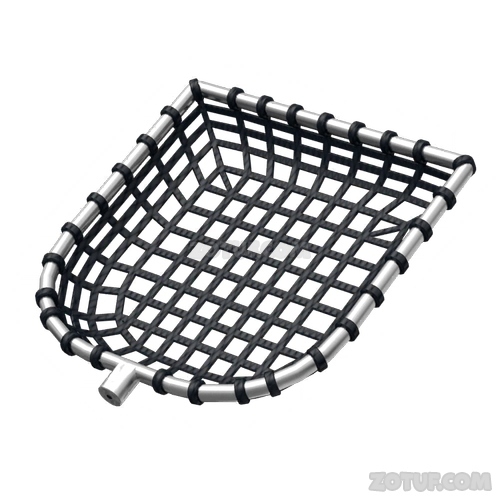
71. Obtain a net.
72. Move to this location and examine inside the white door on the right side of the screen.

73. Examine the painting on the upper shelf.

74. Move to this location and examine the closet on the right side of the screen.

75. Examine the closet’s device.
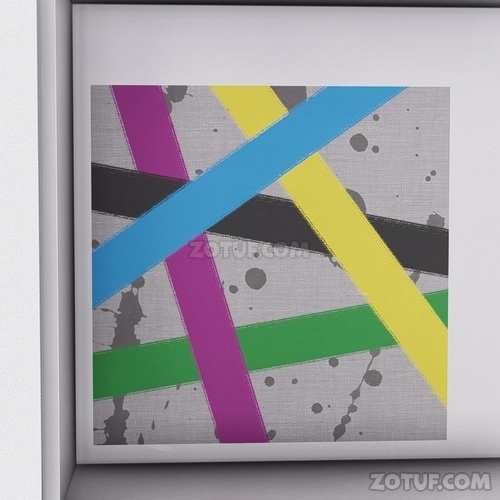
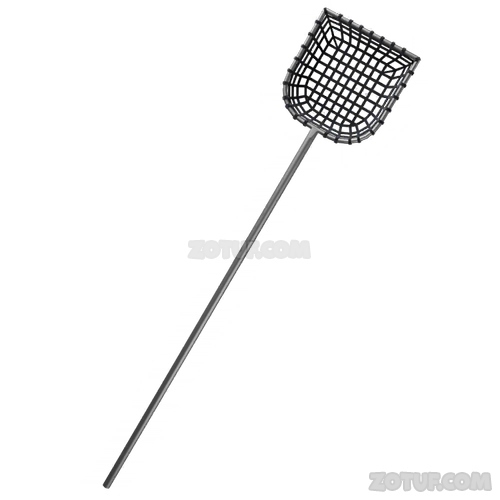
76. Input as follows, referencing the overlapping order of the lines in the painting.

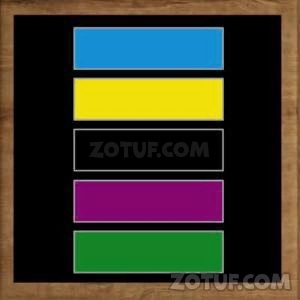
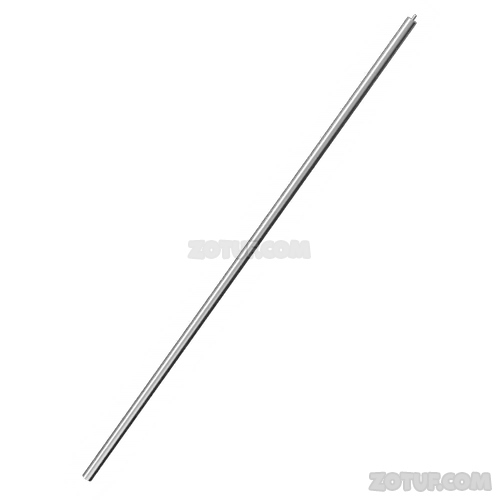
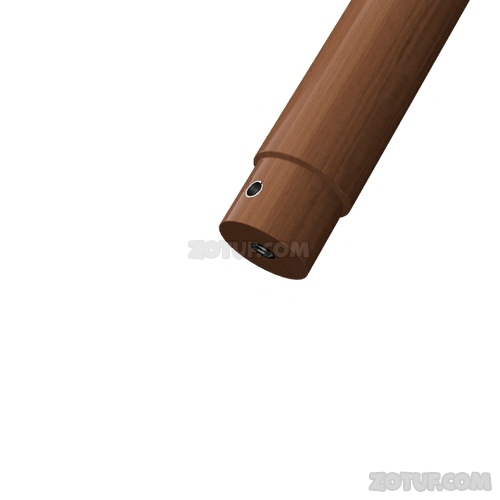
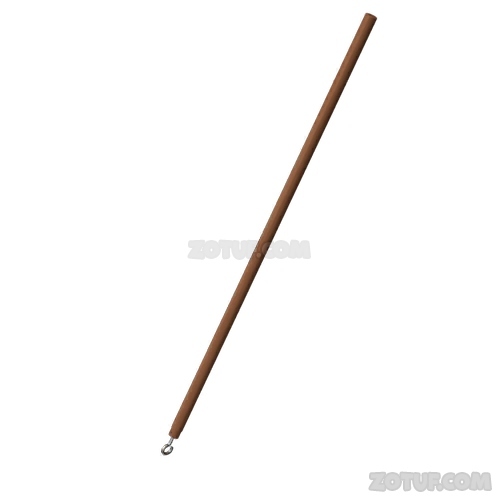
77. Obtain a metal rod.

78. Combine the metal rod with the net.


79. Move to this location and examine the pool.

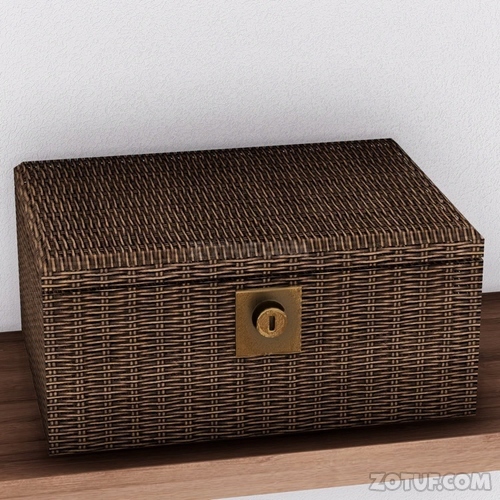
80. Confirm that the box is floating on the water surface.
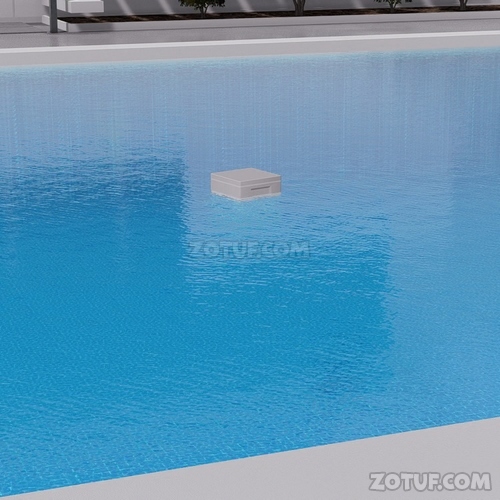
81. Use the net with the rod.

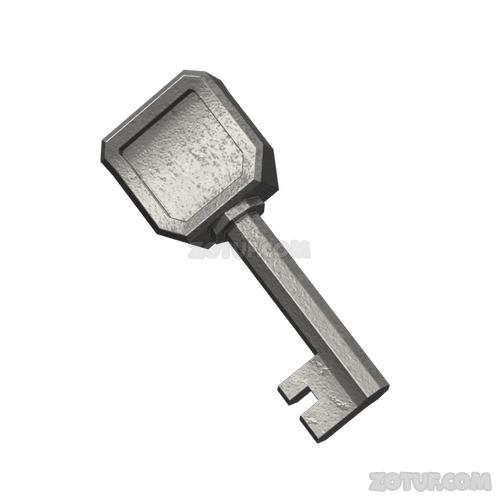
82. Obtain the box.
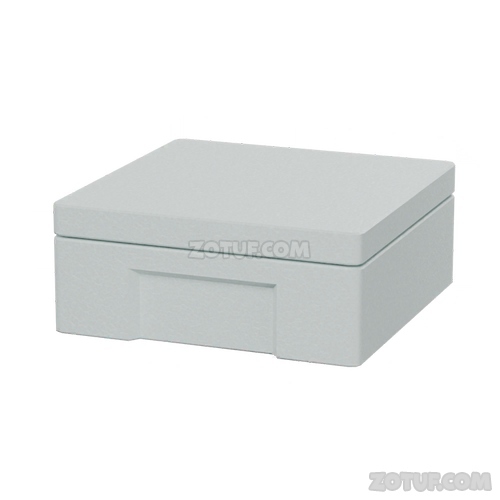
83. Open the box.

84. Obtain a key.
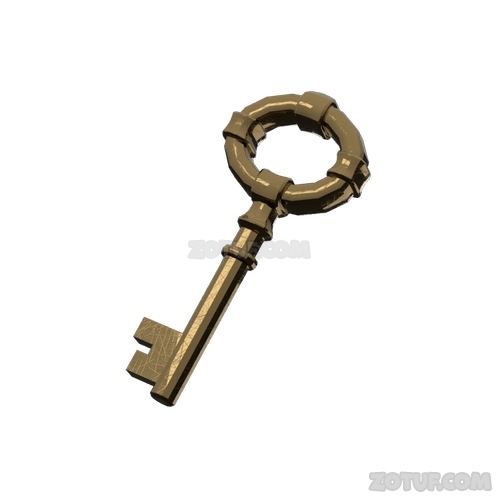
85. Move to this location and examine the shelf on the left side of the screen.

86. Examine the shelf door.

87. Use the key.

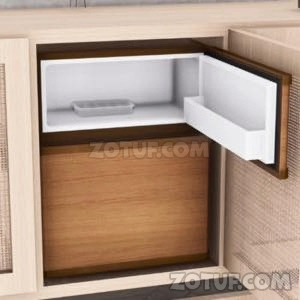
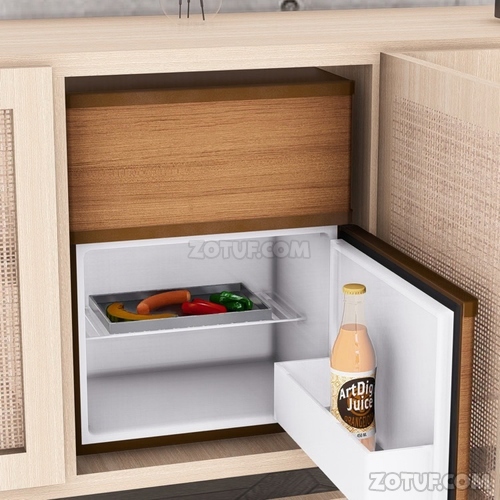
88. Move to this location and examine the shelf on the left side of the screen.

89. Examine the shelf door.

90. Open the upper shelf of the refrigerator.
91. Examine the tray inside.
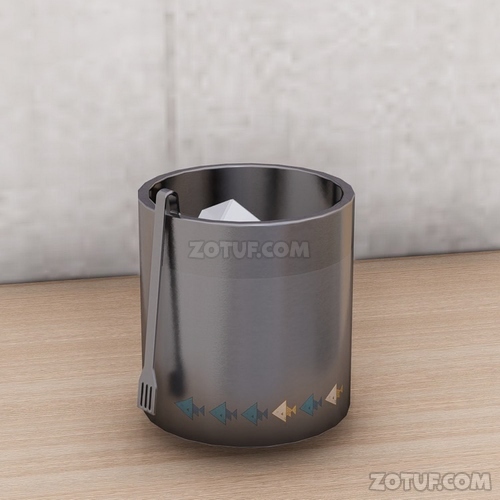
92. Obtain an ice cube tray filled with ice.
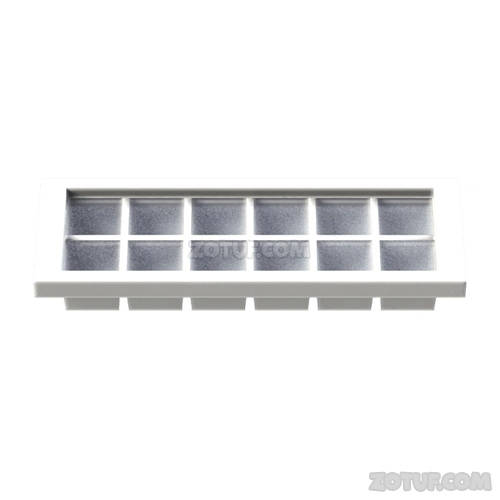
93. Move to this location and examine the top of the left shelf.

94. Examine the metal container on the right side of the top of the shelf.

95. Use the ice cube tray.

96. Check the state of the ice cube tray.

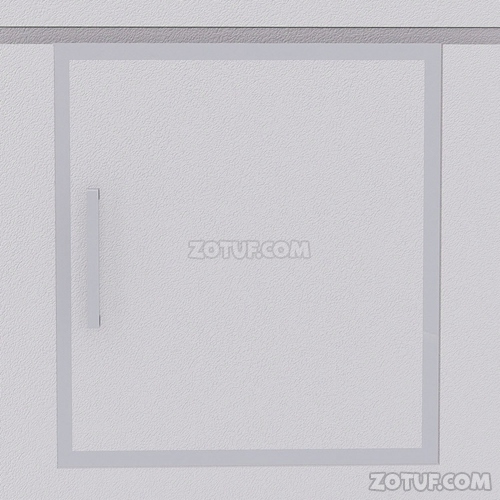
97. Move to this location and examine the door below the central shelf.


98. Input as follows, referencing the missing ice positions on the tray.

99. Move to this location and examine inside the door below the central shelf.

100. Examine the object on the top shelf.
101. Obtain a handle.

102. Move to this location and examine the small door on the right wall.


103. Use the handle.
104. Open the door.

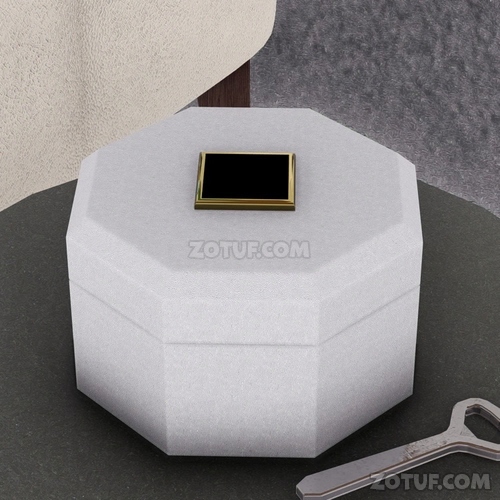
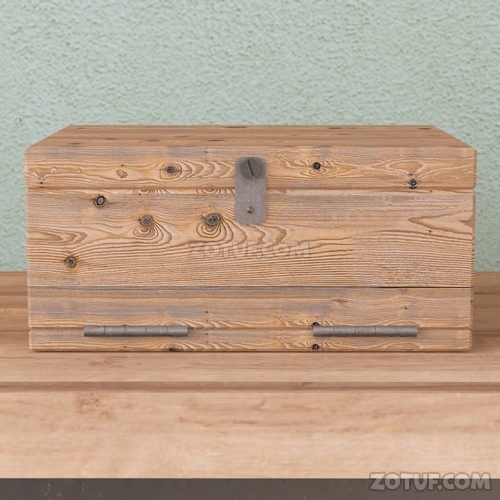
105. Examine the box.
106. Check the shape drawn inside the box.

107. Move to this location and examine the barbecue grill.

108. Examine the device on the grill.

109. Focus on the shape drawn inside the box.
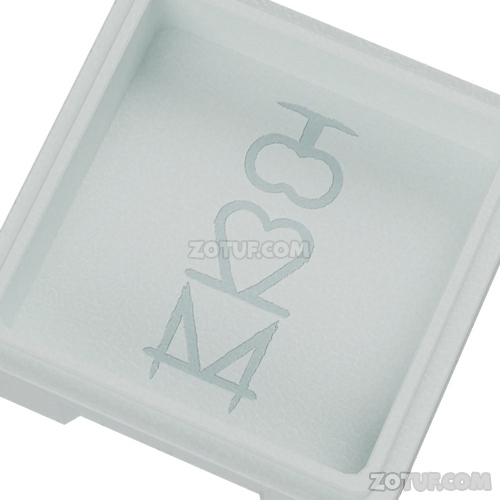
110. When focusing only on the right half of the shape, you can read ‘524’.
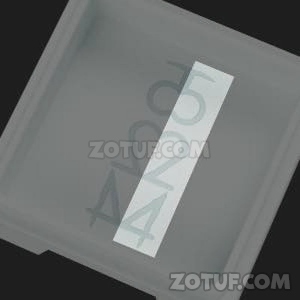
111. Input as follows.
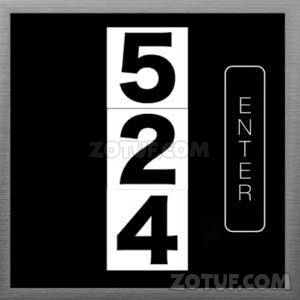
112. The grill ignites.

113. Move to this location and examine the shelf on the left side of the screen.
114. Examine the shelf door.

115. Open the lower shelf of the refrigerator.

116. Examine the tray on the refrigerator shelf.
117. Obtain the tray with vegetables.
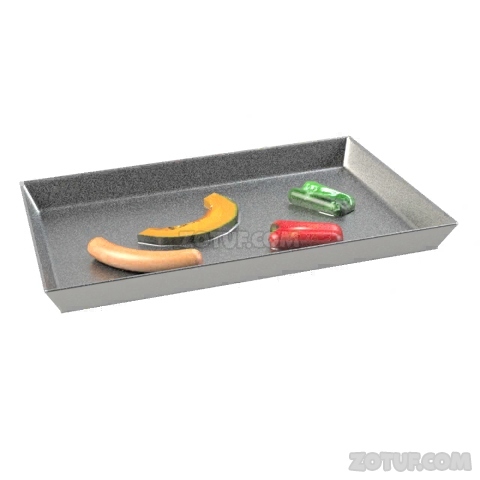
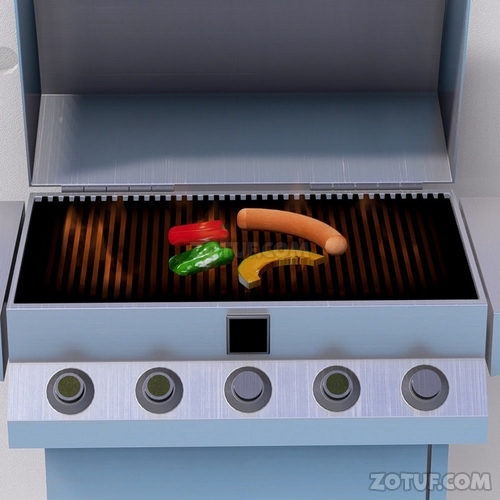
118. Move to this location and examine the barbecue grill.

119. Use the tray with vegetables.

120. Grill the vegetables.

121. Examine the grilled vegetables.

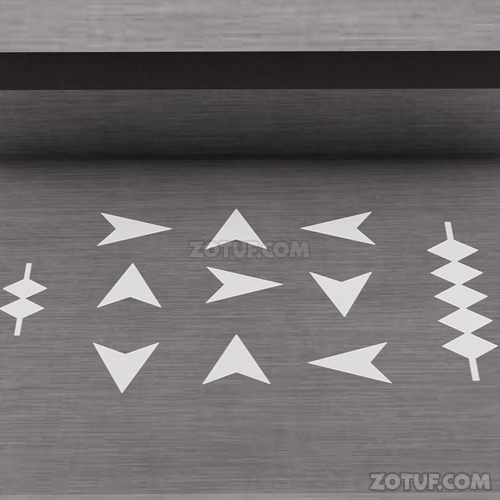
122. Check the grill marks.
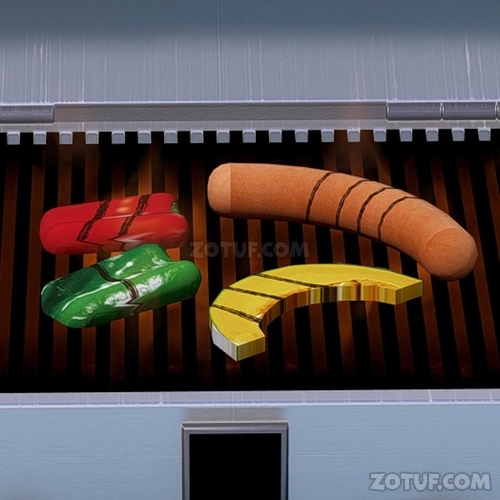
123. Move to this location and examine the small door on the right wall.

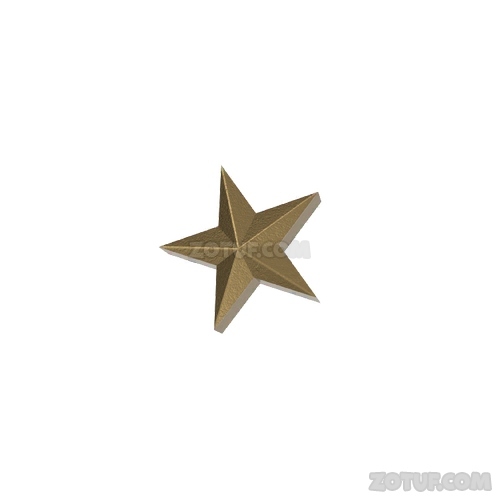
124. Examine the device on the box on the lower shelf.

125. Input as follows, referencing the color of the vegetables and the number of grill lines on each.

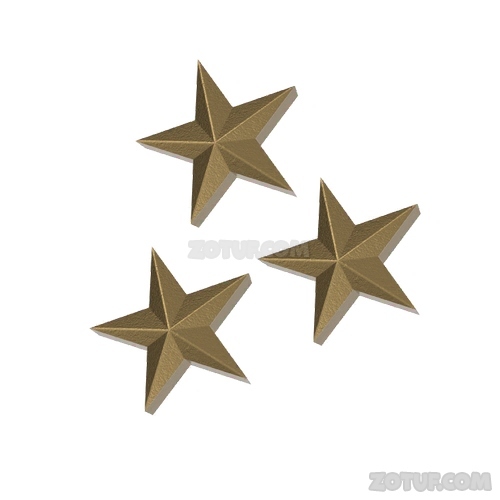
126. Obtain a star-shaped part.
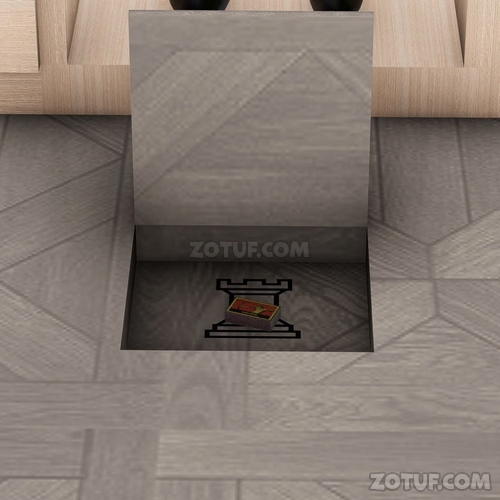
127. Move to this location and examine the stairs.

128. Examine the top of the stairs.

129. Confirm the presence of a star-shaped object.
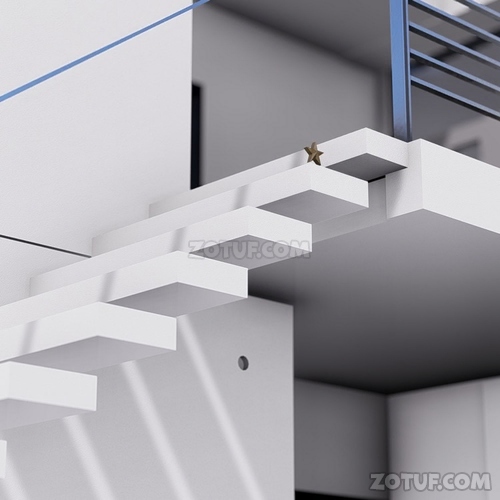
130. Use the net with the rod.
131. Obtain a star-shaped part.
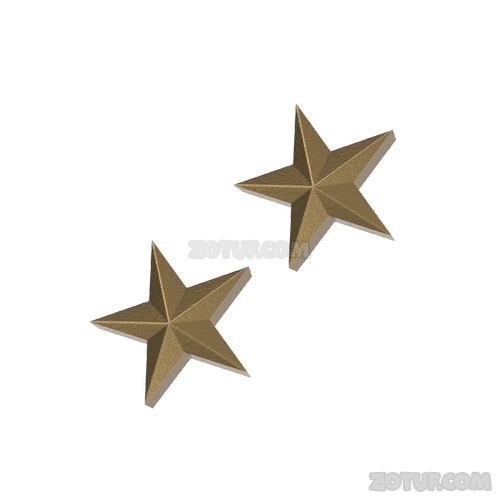
132. Move to this location and examine the door below the central shelf.


133. Examine the object on the bottom shelf.

134. Obtain a star-shaped part.
135. Move to this location and examine the small door on the right wall.

136. Examine the object on the upper shelf.

137. Obtain a star-shaped part.
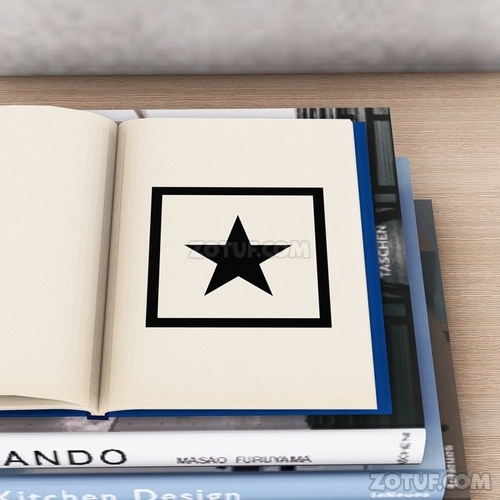
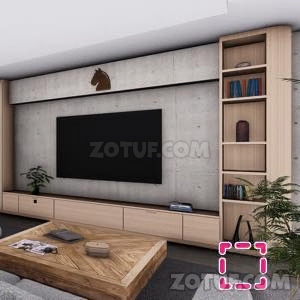
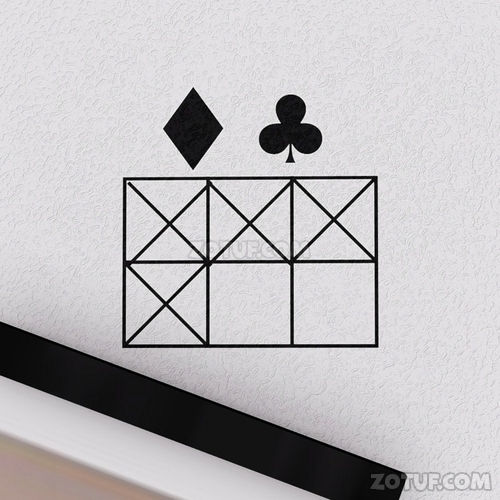
138. Move to this place and examine the book to the right of the TV.

139. Open the book and check the shape.
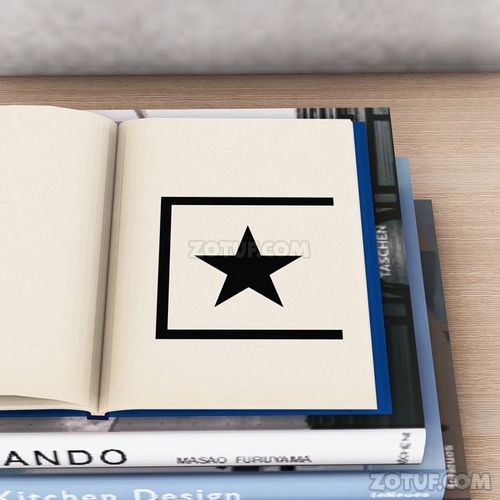
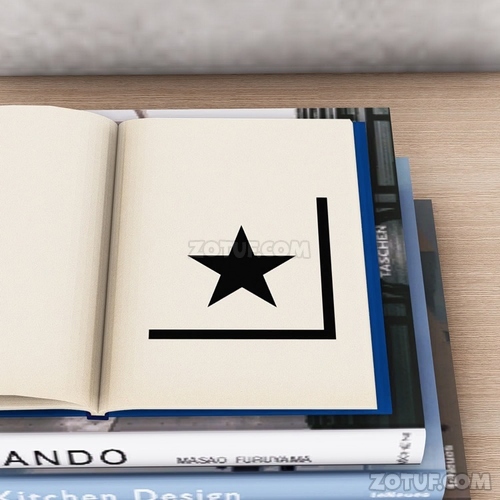
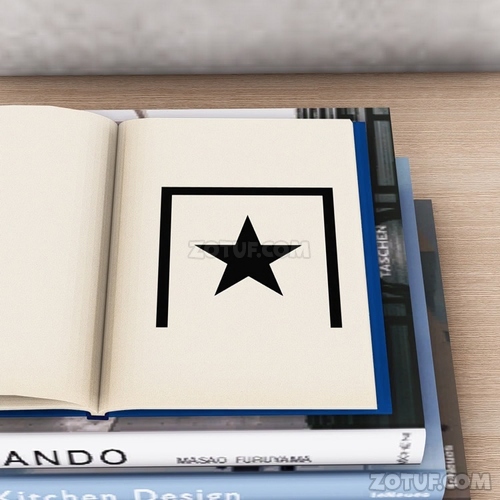
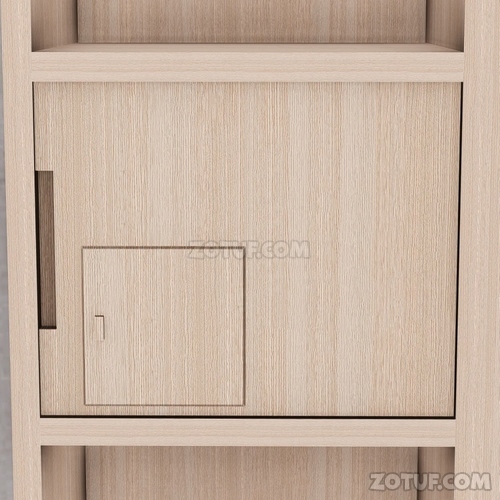
140. Move to this place and examine the third door from the bottom on the shelf on the right side of the screen.

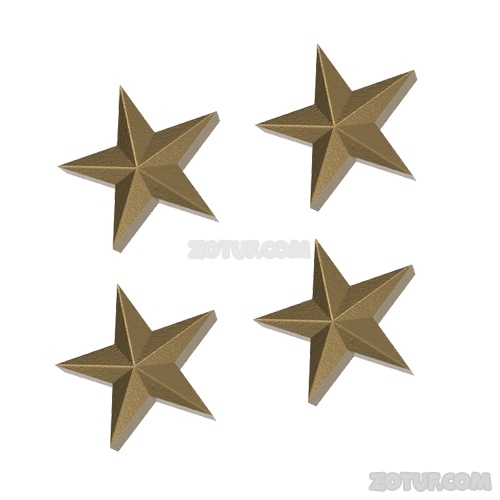
141. Examine the small door.
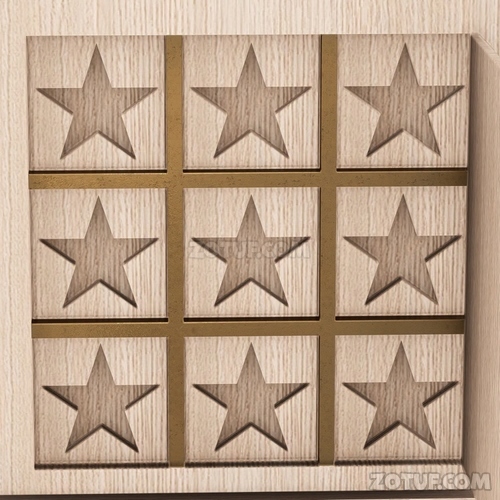
142. When matching the lines on the device frame with the shape in the book, the corresponding positions are as follows.
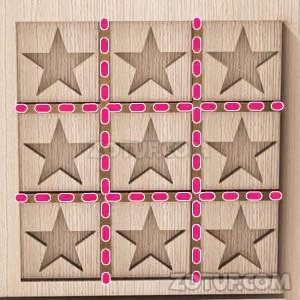
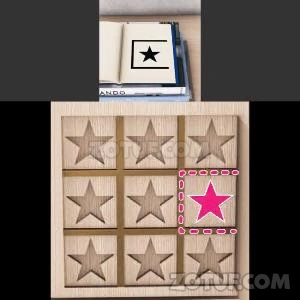
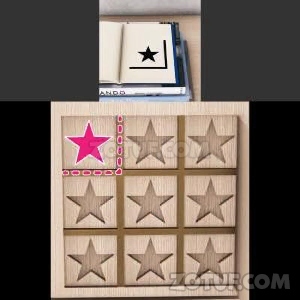
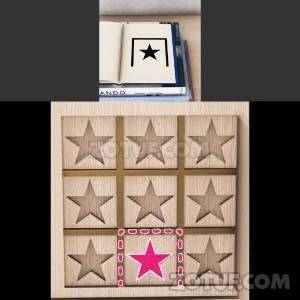
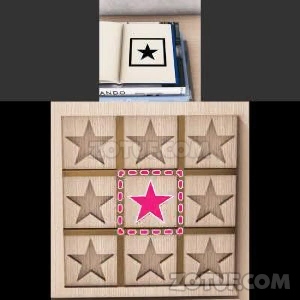
143. Set the star-shaped part in the device as follows.

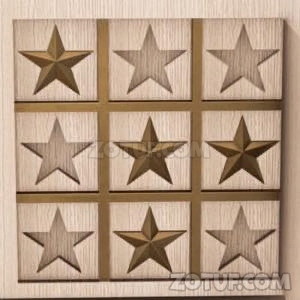
144. Obtain a key.

145. Move to this location and examine the door on the right side of the screen.


146. Use the key.
147. Move to this location and examine the shelf on the left side of the screen.

148. Examine the shelf door.
149. Open the lower shelf of the refrigerator.

150. Examine the bottle in the door pocket.

151. Obtain juice.

152. Move to this location and examine the side table beside the sofa.

153. Examine the object next to the box.
154. Obtain a bottle opener.
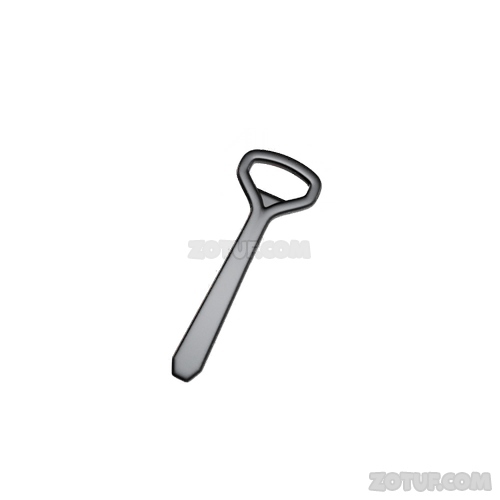
155. Use the bottle opener on the juice bottle.

156. Open the juice bottle cap.

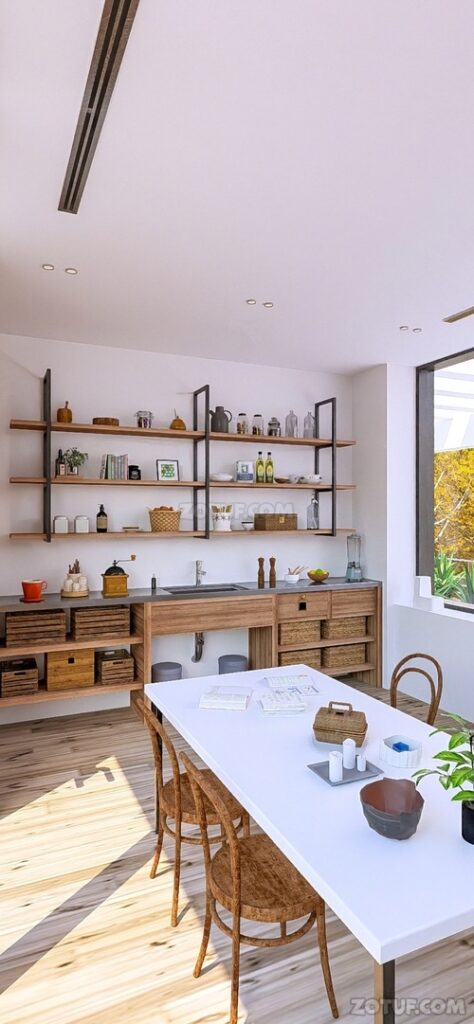
157. Move to this location and examine the table near the potted plant in the center.

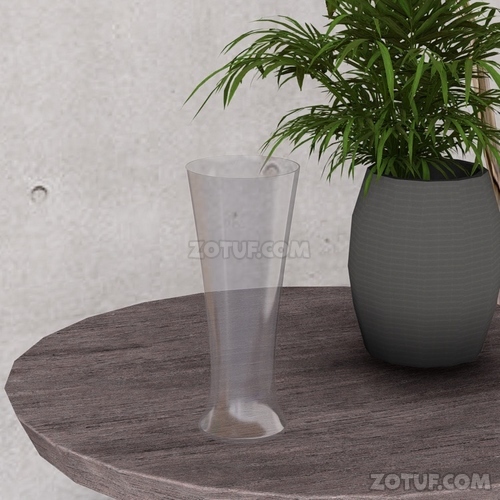
158. Pour the juice into the glass.

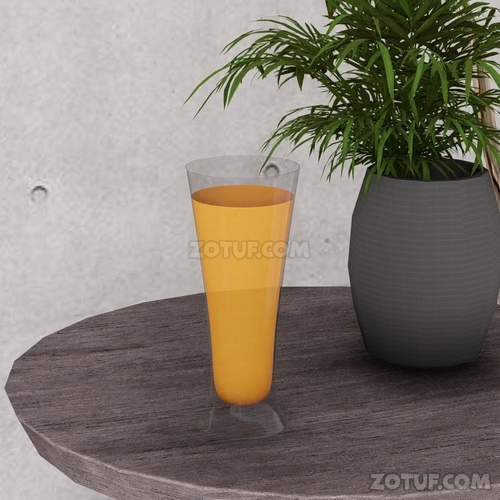
159. Check the color of the juice.
160. Move to this location and examine the shelf on the right wall.

161. Examine the object on the left side of the lower shelf.

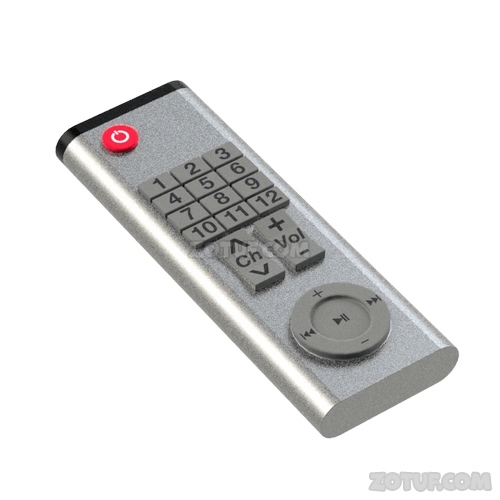
162. Obtain the remote control.

163. Move to this location and examine the TV.

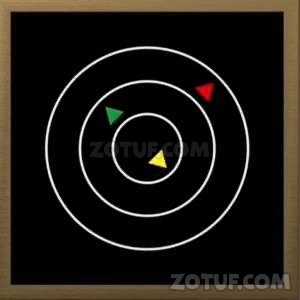
164. Use the remote control to turn on the TV.
165. Check the image displayed on the TV.

166. Move to this location and examine the central shelf.

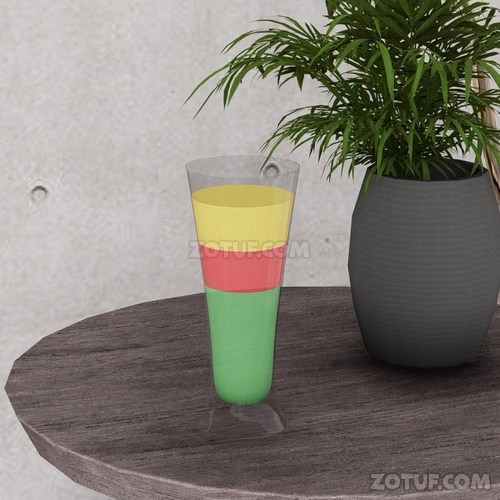
167. Check the yellow, green, and red objects.
168. Move to this location and examine the lower left shelf under the TV.


169. Combine the three corners indicated by the three-colored objects on the shelf with the shape on the TV.

170. Input the shapes into the device in the order of the juice colors.

171. Obtain goggles.
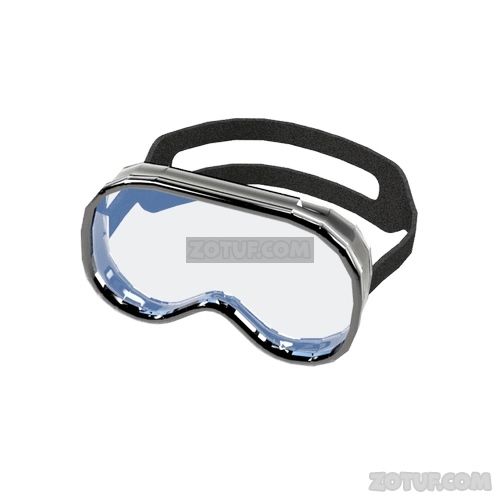
172. Move to this location and examine the pool.

173. Use the goggles.

174. Examine the wall in the center of the pool.
175. Check the shape.

176. Move to this location and examine the shelf.

177. Input as follows, referencing the shape on the pool wall.
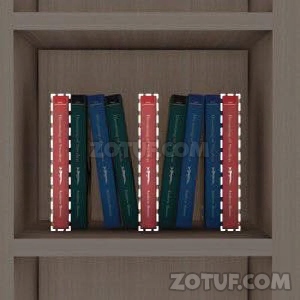
178. Move to this place and examine the second shelf from the top on the right-hand side of the screen.

179. Check the book.
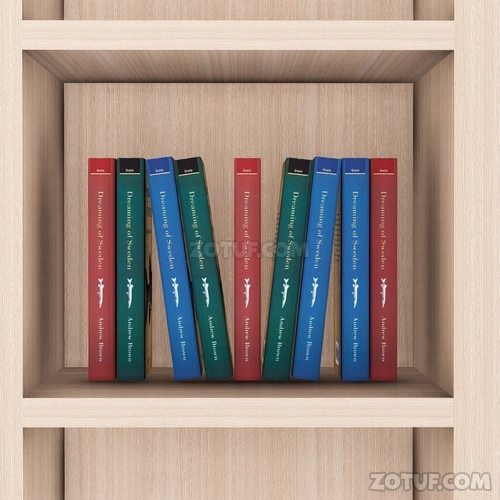
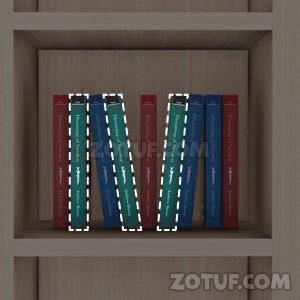
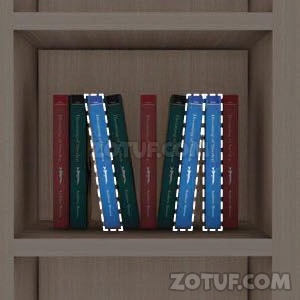
180. Move to this location and examine the shelf.

181. Examine the box on the second shelf from the bottom.

182. Focus on the color of each book on the bookshelf.

183. Input as follows.

184. Obtain a bead.

185. Move to this location and examine the shelf.
186. Examine the envelope on the second shelf from the top.

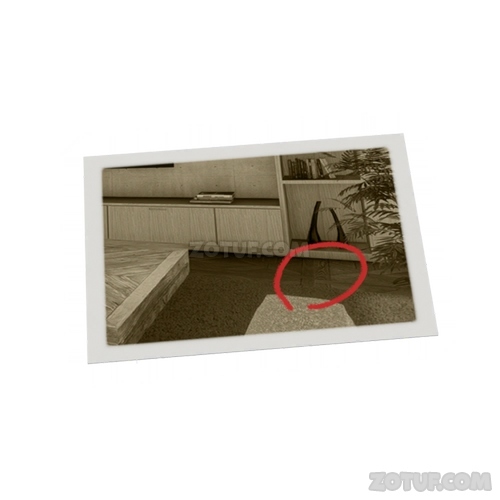
187. Obtain the envelope.

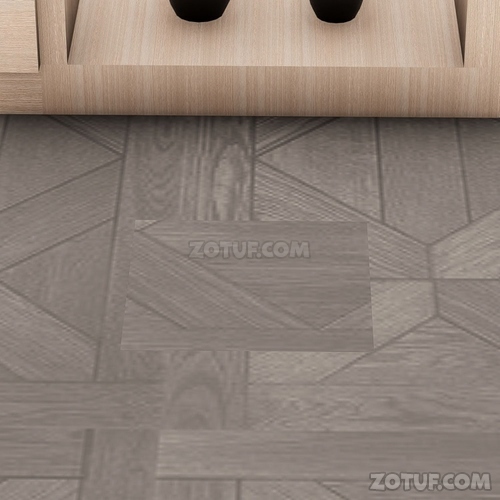
188. Take out the card.
189. Flip the card to check the photo with the circle mark.
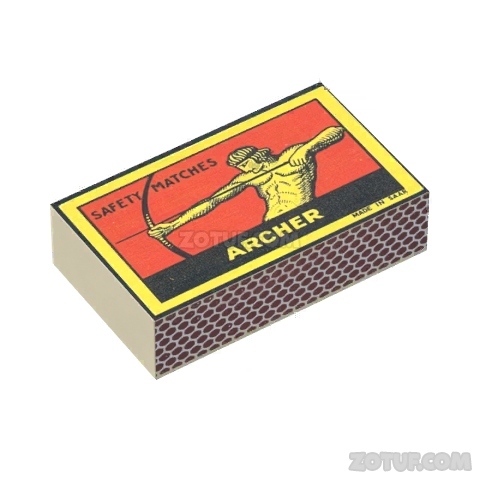
190. Move to this location and examine the floor near the right shelf using the photo as a reference.


191. Obtain matches.

192. Move to this location and examine the candle on the table.

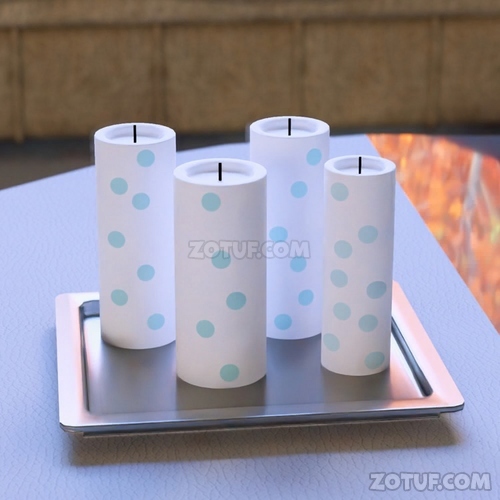
193. Use the matches on the candle.
194. Move to another room once, then return to check the candle again.


195. Check the side of the shortened candle.
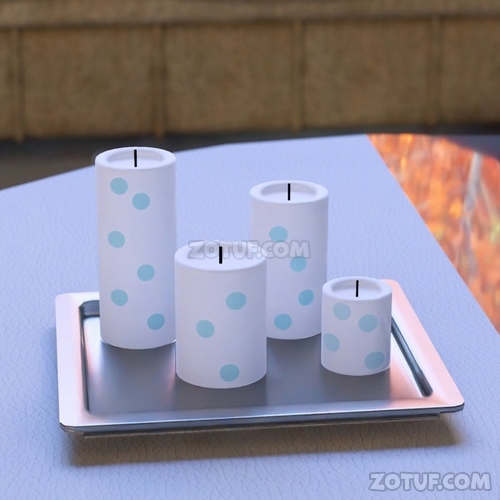
196. Move to this location and examine the shelf.

197. Examine the box on the top shelf.

198. Input in order, referencing the candle heights and the number of dots on each side.

199. Obtain a bead.
200. Move to this location and examine the shelf.

201. Check the shape drawn on the wall of the top shelf.

202. Check the shape drawn on the wall of the bottom shelf.

203. Move to this location and examine the shelf on the left side of the screen.


204. Check the shape drawn on the wall inside the shelf.

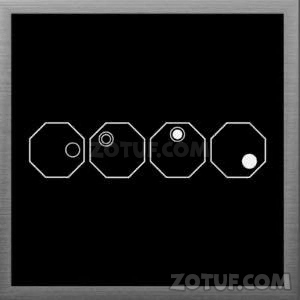
205. Move to this location and examine the top of the left shelf.

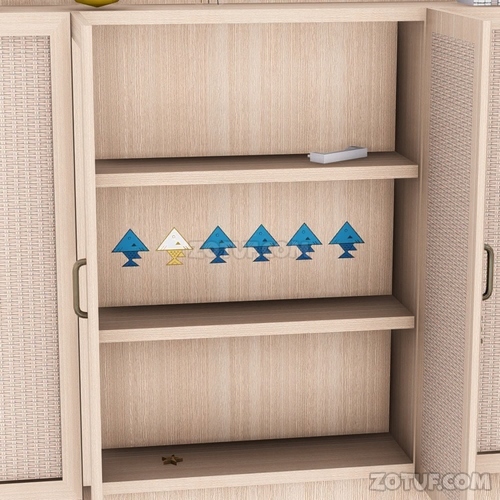
206. Examine the metal container on the right side of the screen.
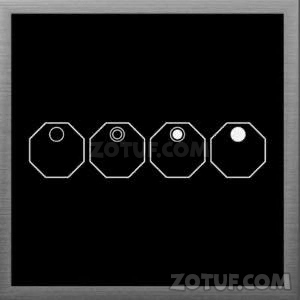
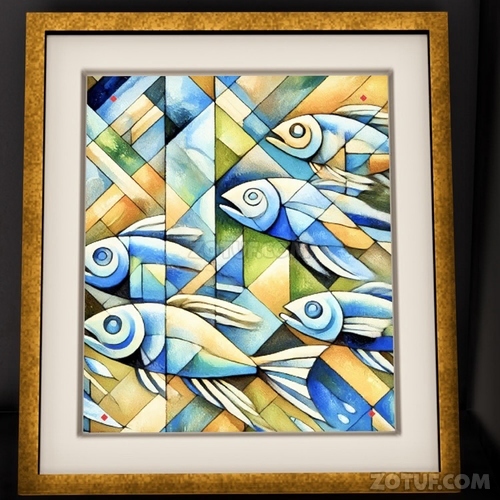
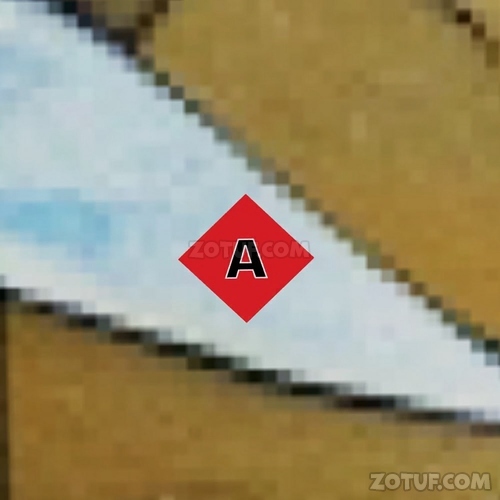
207. Check the fish shape.
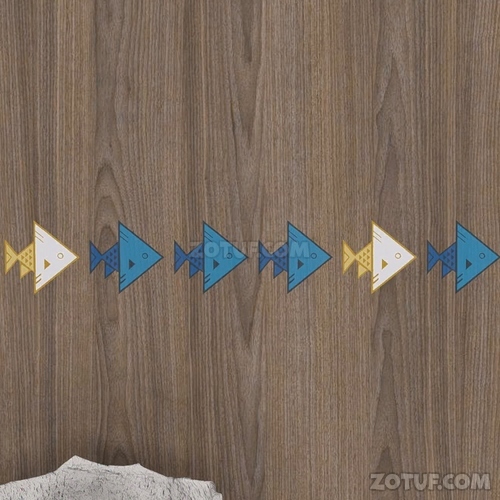
208. Move to this location and examine the side table next to the sofa.

209. Examine the device.


210. Focus on the orientation and color of the four fish shapes. Input the positions of the bright fish from left to right on the device.


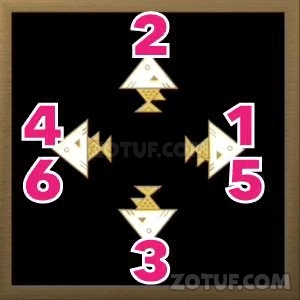
211. Obtain a bead.
212. Move to this location and examine the area around the door.

213. Examine the small door to the right of the main door on the screen.
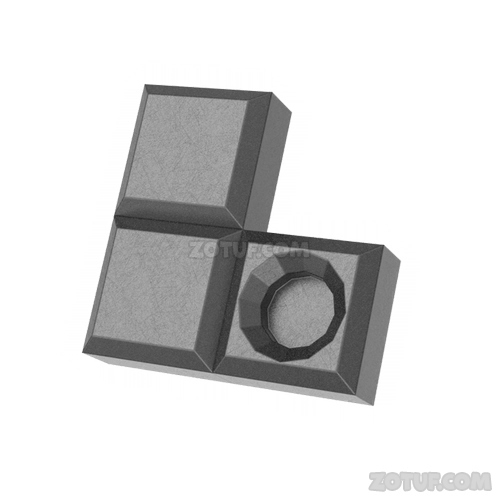
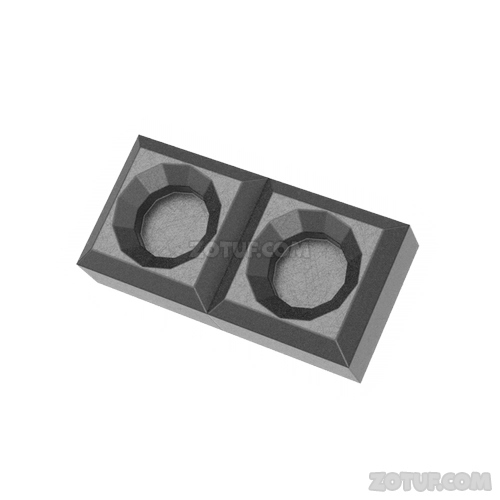
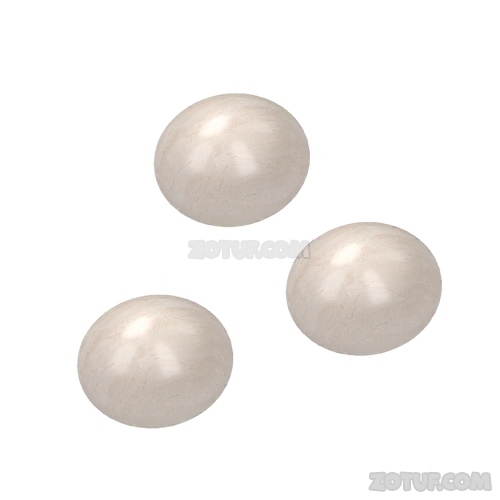
214. Check the circular recess on the device block.

215. Move to this location and examine the box on the table on the left side of the screen.

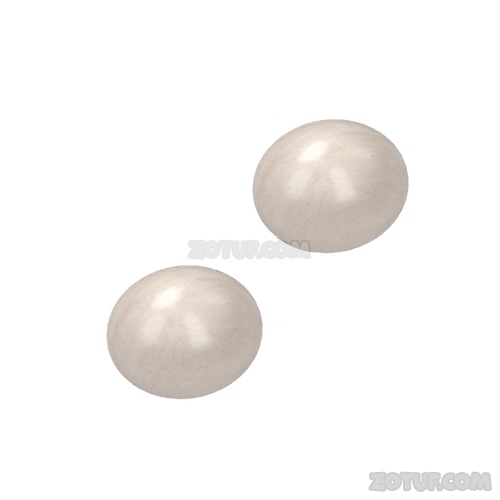
216. Place the three stones into the device based on the positions of the three recesses on the block.

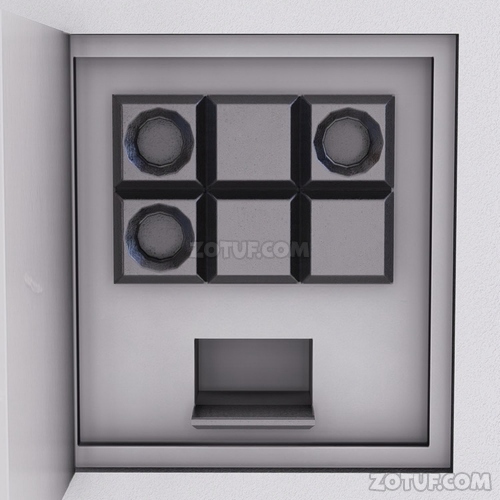
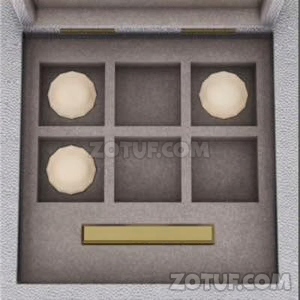
217. Obtain a handle.
218. Move to this location and examine the box on the table.
219. Use the handle.

220. Removing the lid reveals a device inside.

221. Examine the device and check the four patterns on the knobs.

222. Move to this location and examine the side table next to the sofa.
223. Examine the device.
224. Check the shape.
225. Move to this location and examine the shelf.

226. Examine the box on the top shelf.

227. Check the shape inside the box.

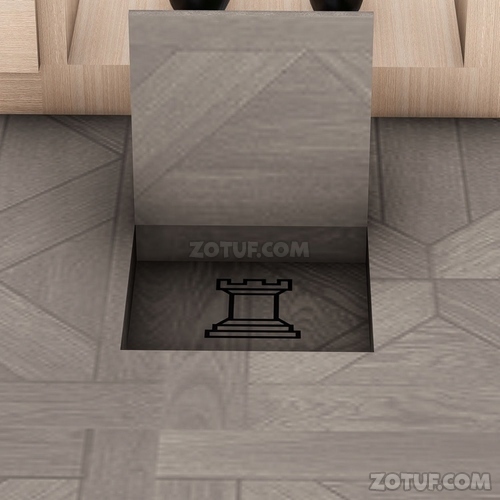
228. Move to this location and examine the floor near the right shelf.

229. Check the shape on the floor.

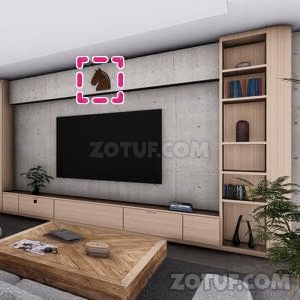
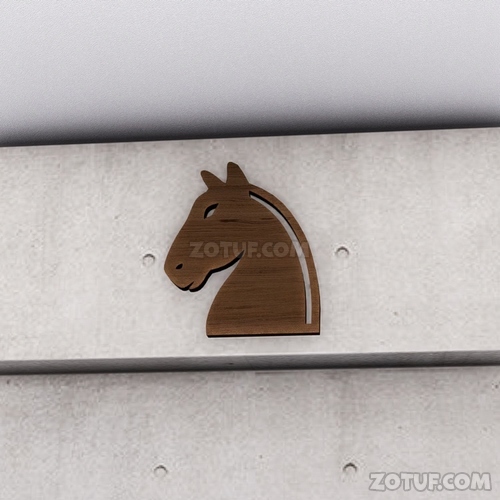
230. Move to this location and examine the object on the wall above the TV.

231. Check the shape on the ceiling wall.

232. Move to this location and examine the device on the box on the table.

233. Note that the four patterns on the device match those positioned on the stage.
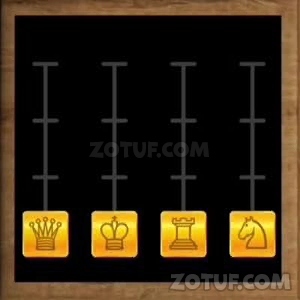
234. Pay attention to the height of each pattern location, ranked in descending order: 1st: Knight
235. Pay attention to the height of each pattern location,ranked in descending order: 2nd: King

236. Pay attention to the height of each pattern location,ranked in descending order: 3rd: Queen

237. Pay attention to the height of each pattern location,ranked in descending order: 4th: Rook
238. Input the order based on the height of the four patterns as follows.
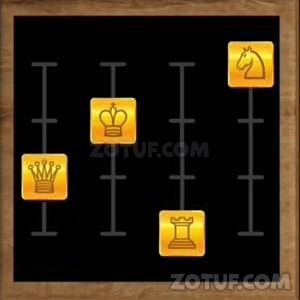
239. Obtain a key.
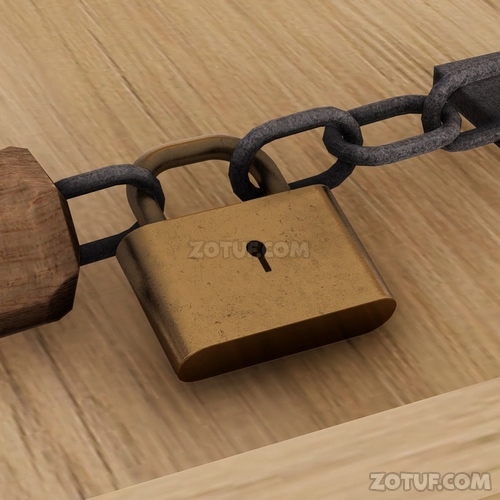
240. Move to this location and examine the entrance to the stairs on the left side of the screen.
241. Examine the padlock at the entrance to the stairs.

242. Use the key.

243. Move to this location and examine the potted plant.

244. Check the shape of the potted plant.

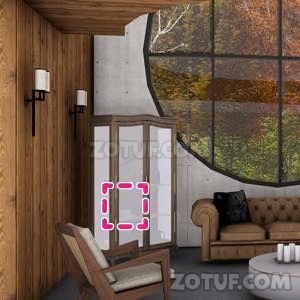
245. Move to this location and examine the device on the small door on the wall next to the door frame at the bottom center of the screen.


246. Based on the shape of the potted plant, input as follows:


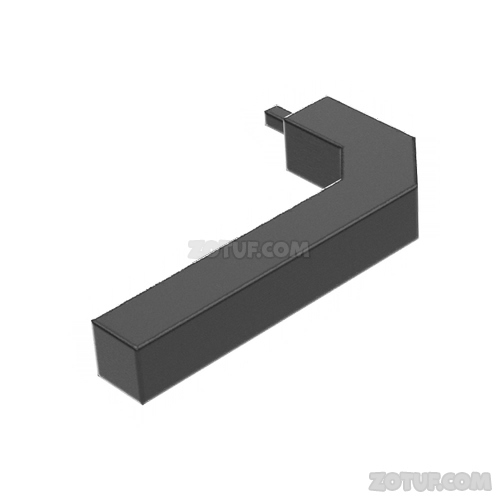
247. Obtain the hook.
248. Move to this location and examine around the potted plant.
249. Examine the stick behind the potted plant.
250. Obtain the stick.

251. Pay attention to the shape of the stick and combine it with the hook.

252. Obtain the stick with a hook.
253. Move to this location and examine around the fence on the wall.

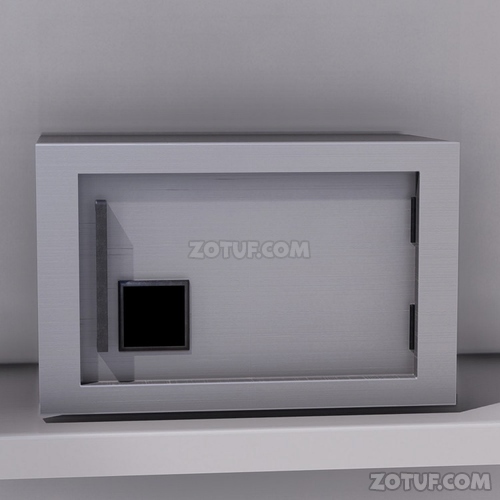
254. Examine the square hole in the wall at the bottom center right of the screen.
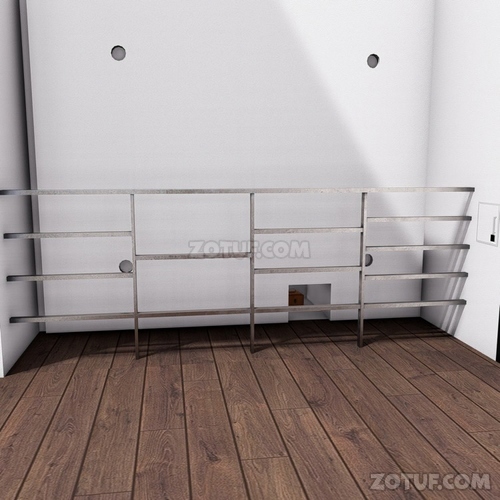
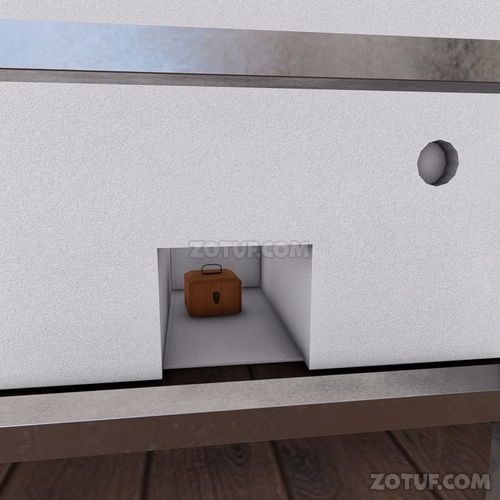
255. Use the stick with a hook.

256. Examine the box attached to the stick.
257. Obtain the box.

258. Examine the box.
259. Obtain the key.

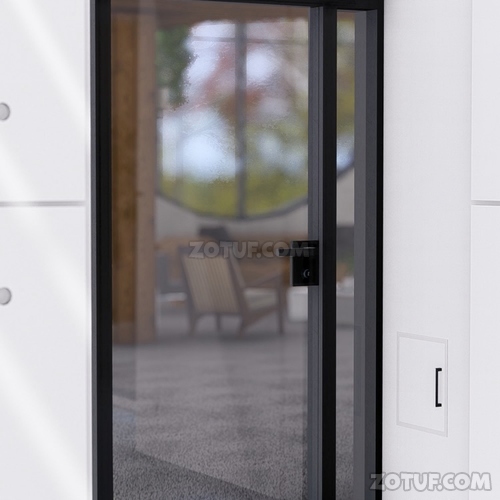
260. Move to this location and examine the door.

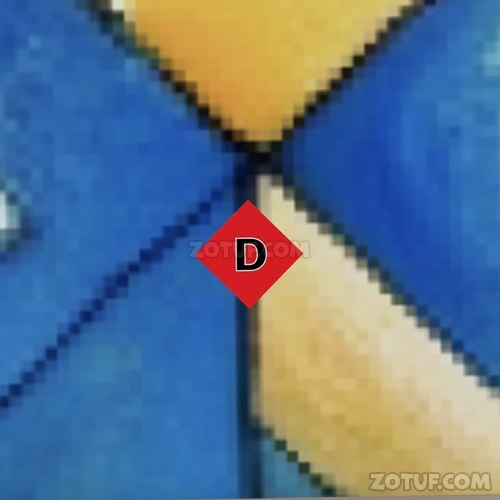
261. Use the key.

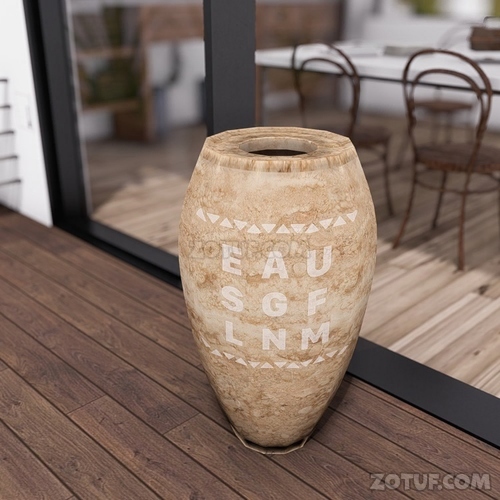
262. Move to this location and examine the pot at the far right of the screen.

263. Check the shapes drawn on the pot.
264. Move to this location and examine the basket on the table.
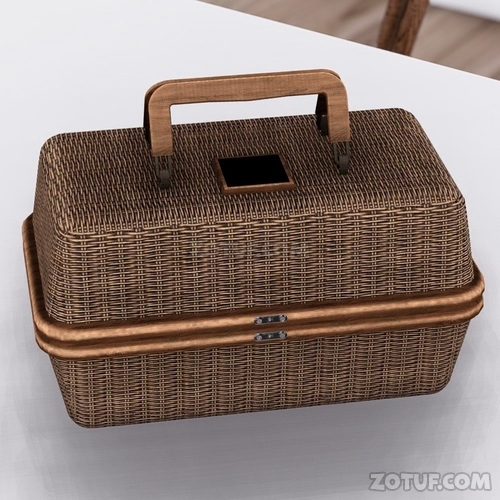
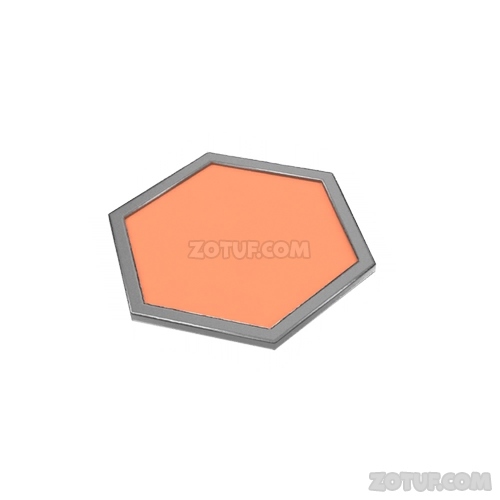
265. Combine the device’s shape—a square with a dot inside—with the shapes drawn on the pot.

266. Input as follows:
267. Obtain the orange part.
268. Move to this location and examine the box on top of the shelf.

269. Examine the metal fitting on the box.
270. Use the orange part.

271. Obtain the bag of coffee beans.

272. Move to this location and examine the box on top of the shelf.

273. Check the shapes written inside the box.
274. Move to this location and examine inside the small door on the wall next to the door frame at the bottom center of the screen.

275. Check the shapes.
276. Move to this location and examine the device on the small door at eye level on the wall.
277. Pay attention to the shapes written inside the box.
278. Referring to the color combinations of the shapes inside the door, combining the shapes in the box results in a four-digit number.
279. Move to this location and examine inside the small door at eye level on the wall.

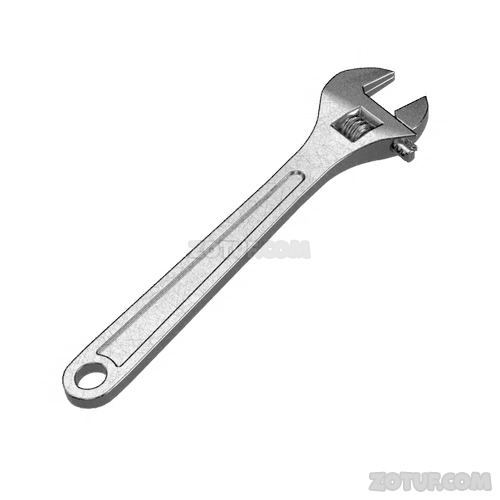
280. Examine the item on the lower right of the shelf.

281. Obtain the wrench.
282. Move to this location and examine the plumbing under the sink near the center of the screen.

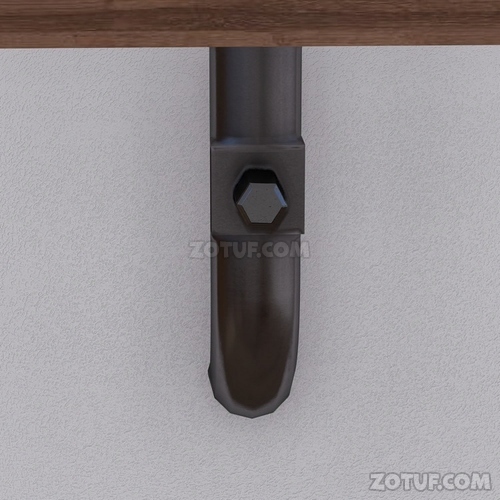
283. Use the wrench.

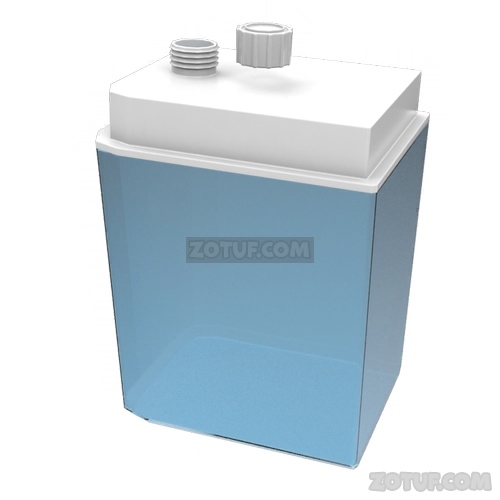
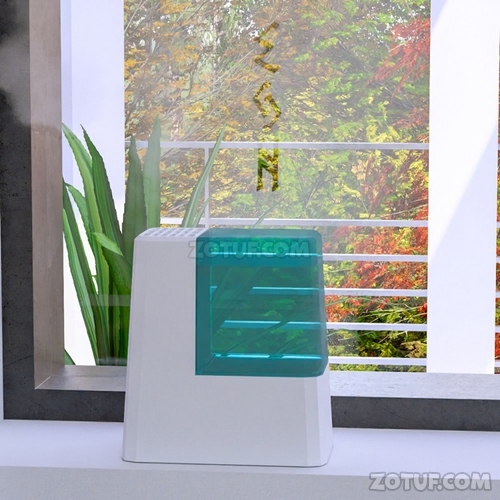
284. Move to this location and examine the humidifier by the window on the right side of the screen.

285. Examine the light blue part of the humidifier.
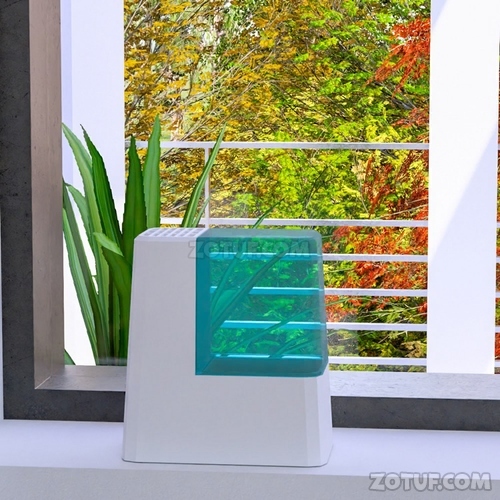
286. Obtain the tank.
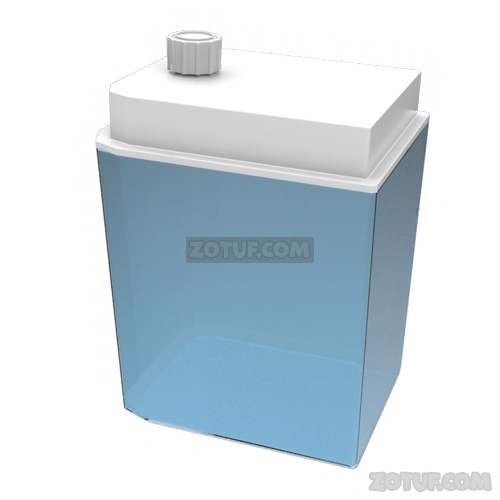
287. Examine the tank and remove the lid.
288. Move to this location and examine the faucet of the sink in the center of the screen.

289. Touch the lever of the faucet.
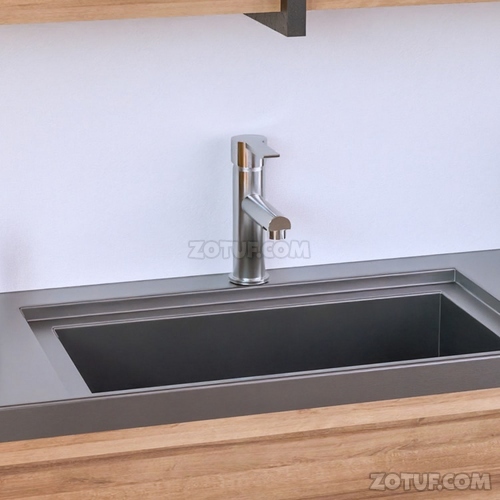
290. Water flows from the faucet.

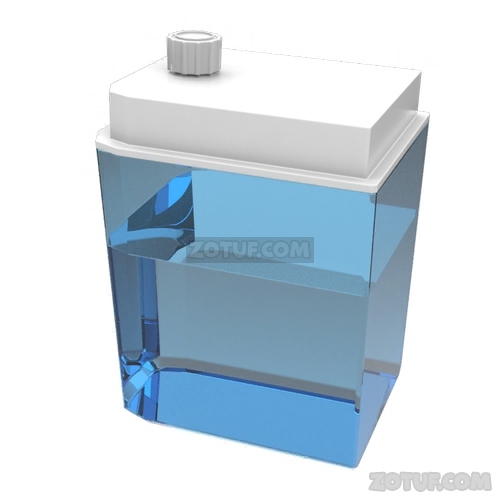
291. Use the tank.

292. Obtain the tank filled with water.
293. Examine the humidifier by the window again.

294. Set the water-filled tank into the humidifier.
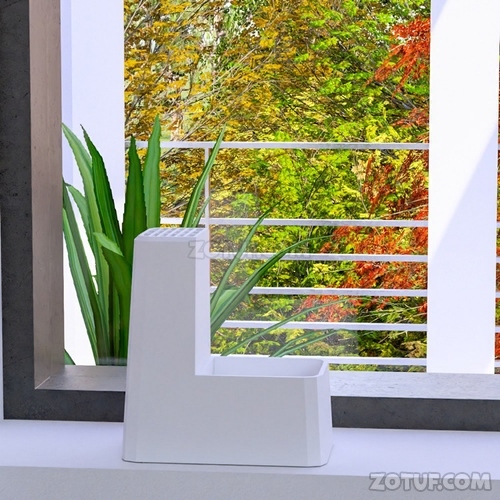

295. Move to this location and examine the humidifier by the window on the right side of the screen.

296. Check the shapes that appear on the window due to the humidifier’s steam.
297. Move to this location and examine the device at eye level on the wall.

298. Examine the device on the upper shelf.

299. Based on the shapes that appeared on the window, input as follows:

300. Obtain the light blue part.
301. Move to this location and examine the fence near the wall.

302. Check the shape of the fence.

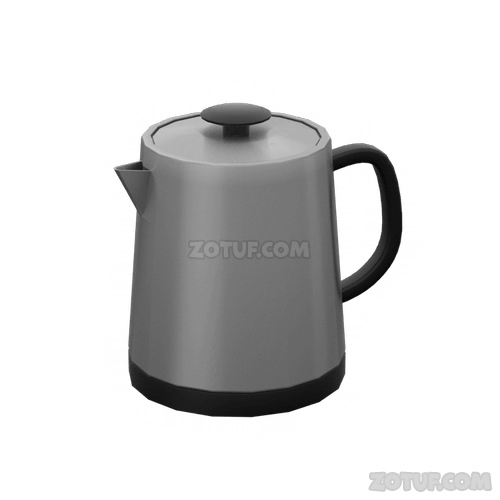
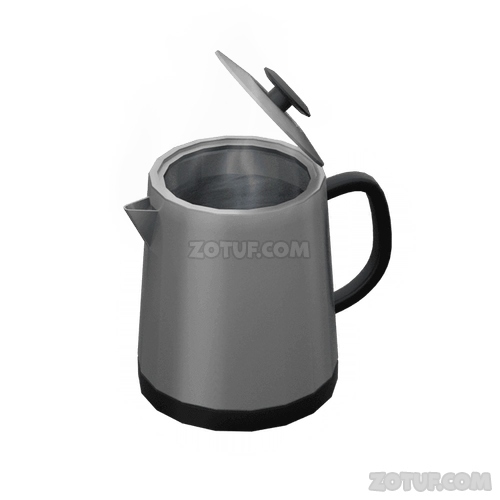
303. Move to this location and examine the box with a device at the lower left of the screen.

304. Based on the shape of the fence, input as follows:

305. Obtain the kettle.
306. Move to this location and examine the faucet of the sink in the center of the screen.

307. Touch the faucet lever to let the water flow.
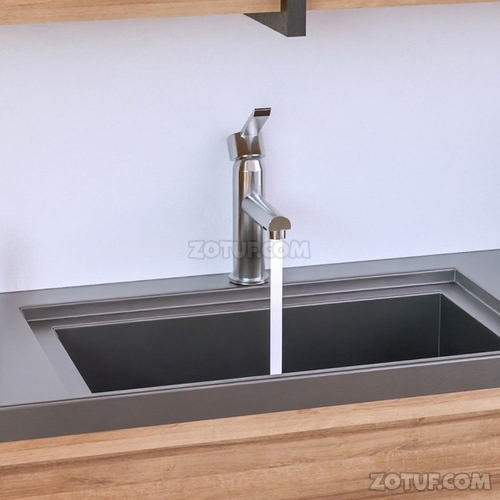
308. Use the kettle.

309. Obtain the kettle filled with water.

310. Move to this location and examine the pot.

311. Examine the inside of the pot.

312. Confirm that there is something inside the pot.
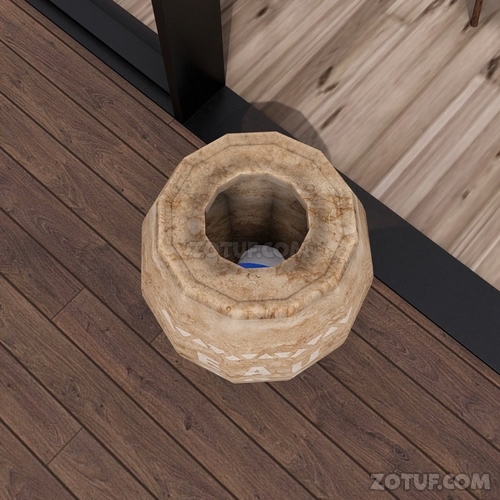
313. Use the kettle filled with water.
314. A capsule floats to the water’s surface.
315. Obtain the capsule.

316. Examine the capsule.

317. Obtain the green part.
318. Move to this location and examine the picture frame on the middle shelf in the center of the screen.

319. Check the shapes.
320. Move to this location and examine the small door next to the left side of the main door.

321. Based on the shapes inside the picture frame, set the three parts as follows:


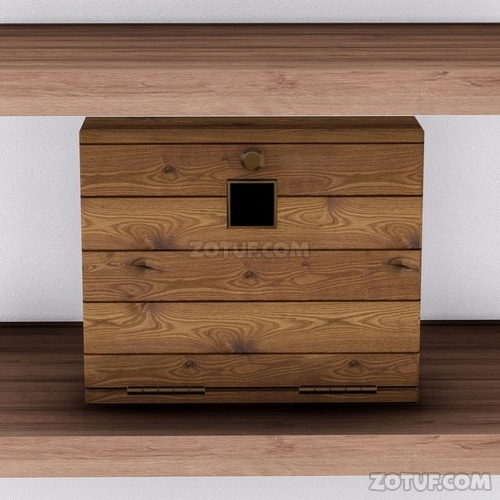
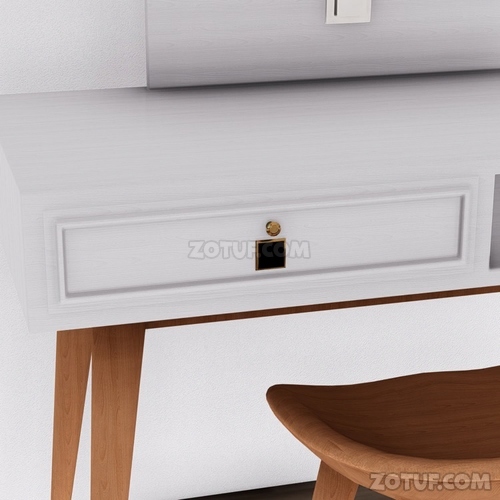
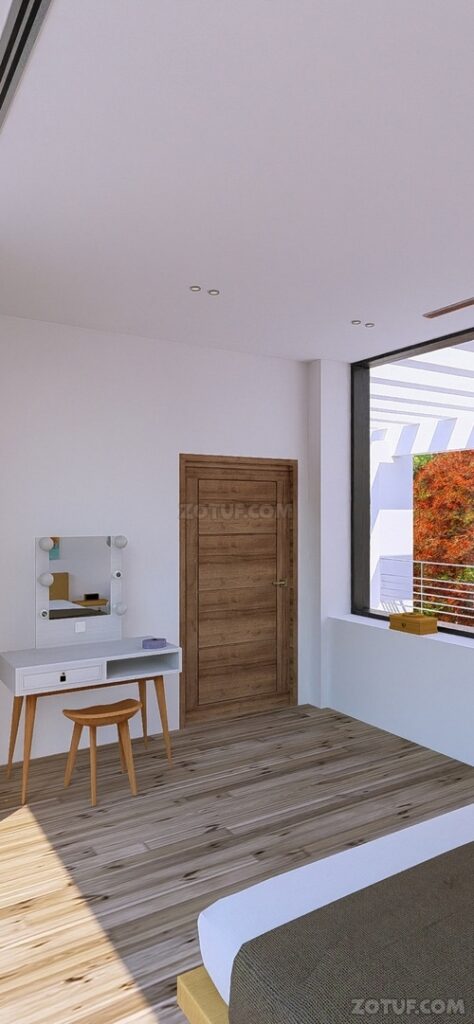
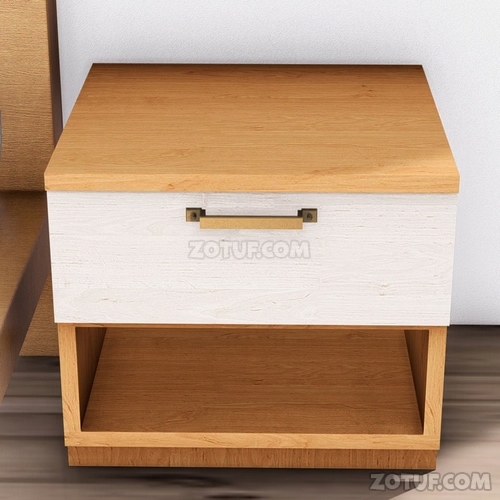
322. Move to this location and examine the box on top of the dresser.

323. Enter numbers that satisfy the calculation formula displayed on the device.
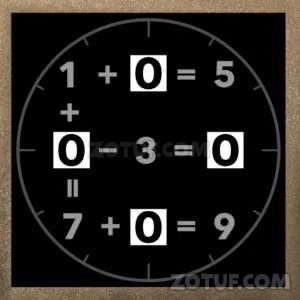
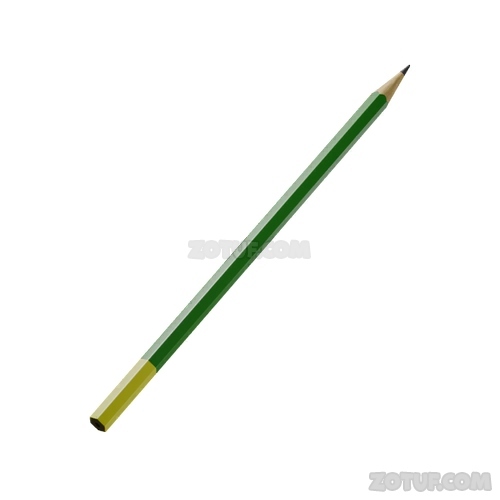
324. Input as follows:
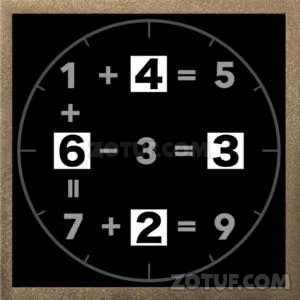
325. Obtain the pencil.

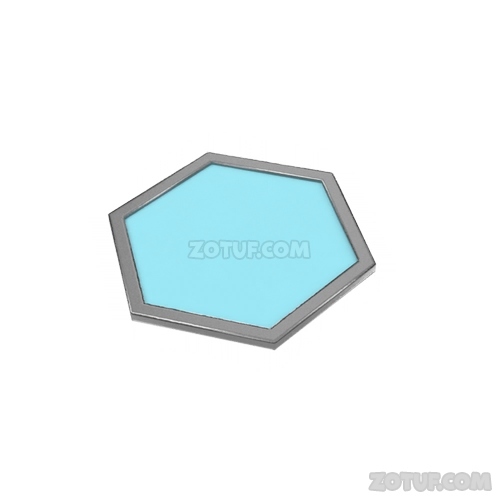
326. Move to this location and examine the right part of the shelf.
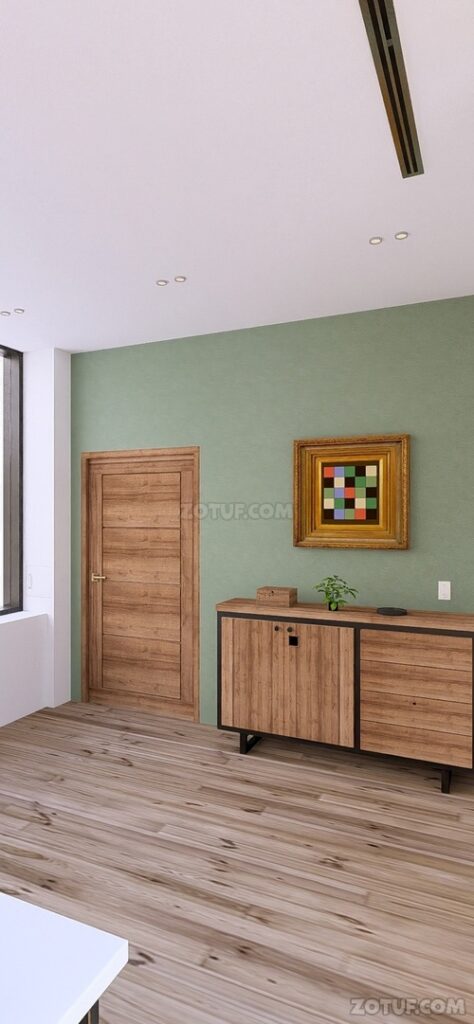
327. Examine the second drawer from the bottom.
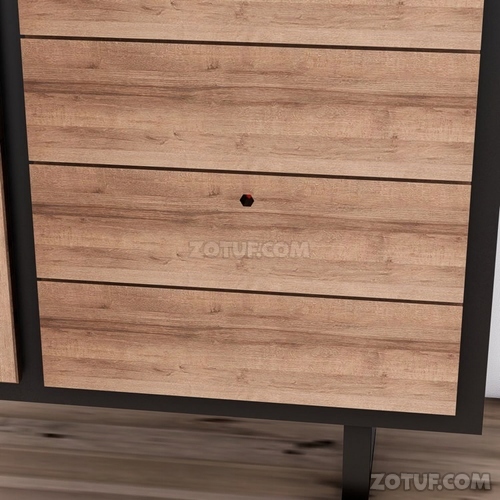
328. Confirm that there is a hexagonal hole.

329. Use the pencil.

330. Obtain the light bulb.
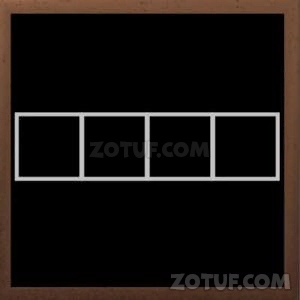
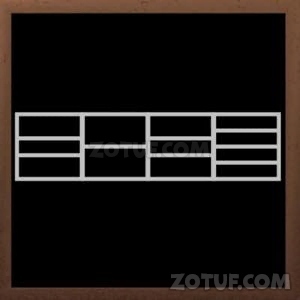
331. Move to this location and examine the device on the drawer on the right side of the sink.


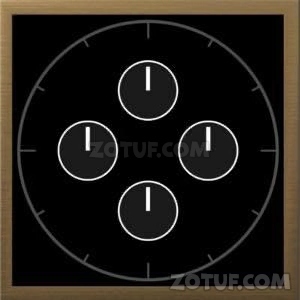
332. Replace the four numbers entered into this device with the directions of the hour hand on a clock.


333. Input as follows:
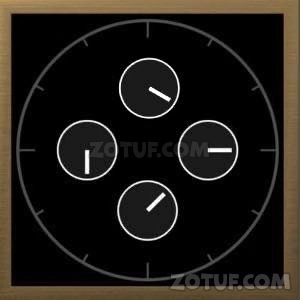
334. Obtain the light bulb.

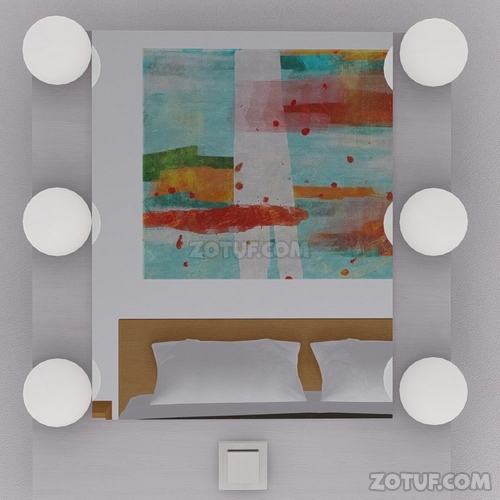
335. Move to this location and examine the dresser.

336. Pay attention to the places without light bulbs on both sides of the mirror.

337. Use the two light bulbs.

338. The lights turn on.
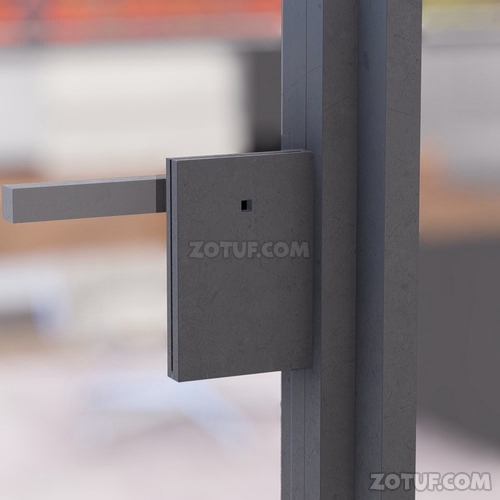
339. Move to this location and examine the device on the door on the wall.


340. Based on the lighting order of the dresser’s bulbs, input as follows:

341. Move to this location and examine the device on the door on the wall.


342. Examine the item on the lower shelf.

343. Obtain the key.

344. Move to this location and examine the box on the bottom shelf on the far right side of the wall shelf.

345. Use the key.
346. Obtain the pencil sharpener.
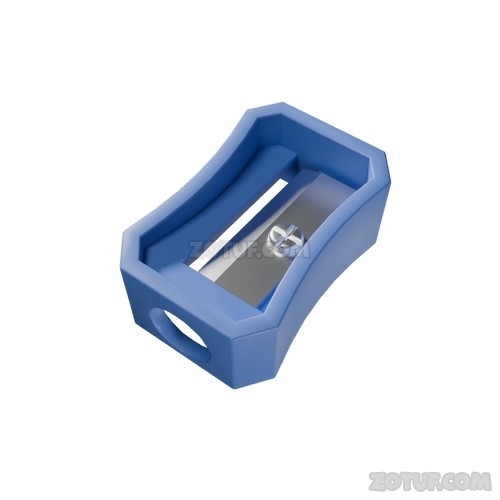
347. Use the pencil on the pencil sharpener.


348. Sharpen the pencil.

349. Move to this location and examine inside the small door at eye level on the wall.

350. Examine the memo pad on the lower left of the shelf.
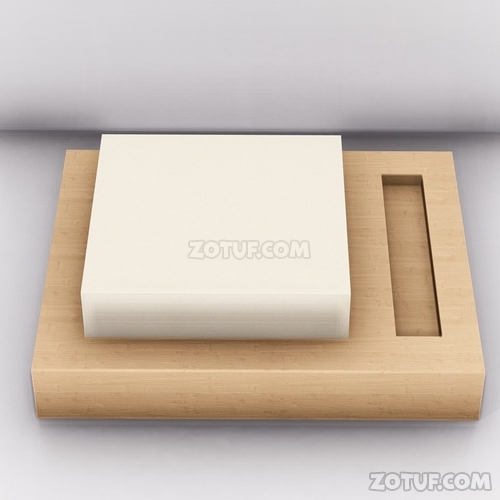
351. Use the sharpened pencil.
352. Check the shapes.
353. Move to this location and examine the left part of the shelf.

354. Examine the device.

355. Considering the four types of dots on the shapes from the perspective of the central square, they become as follows:

356. Input as follows:
357. Move to this location and examine the left part of the shelf.

358. Examine inside the shelf.

359. Examine the pink balloon on the top shelf.
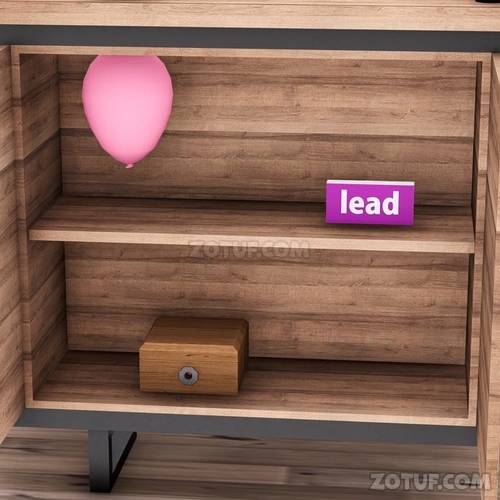
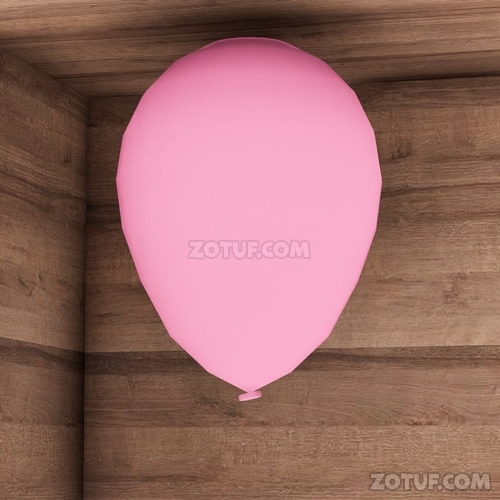
360. Use the sharpened pencil.

361. Something has fallen where the balloon was, so examine it.
362. Obtain the memo.

363. Move to this location and examine the picture frame on the wall.

364. Check the shapes.
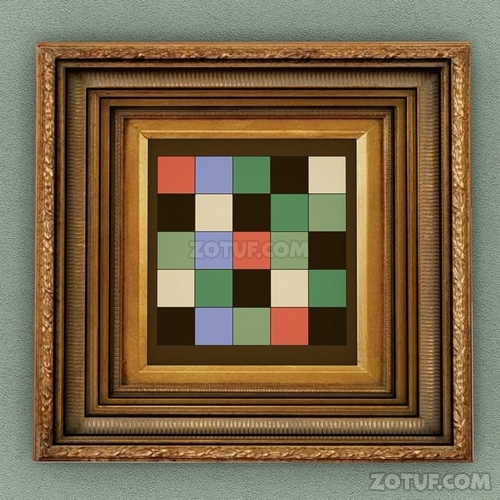
365. Move to this location and examine the side table on the left side of the bed screen.


366. Combine the numbered squares of the shapes on the memo with the colors of the shapes in the picture frame.


367. Input as follows:
368. Obtain the power cable.

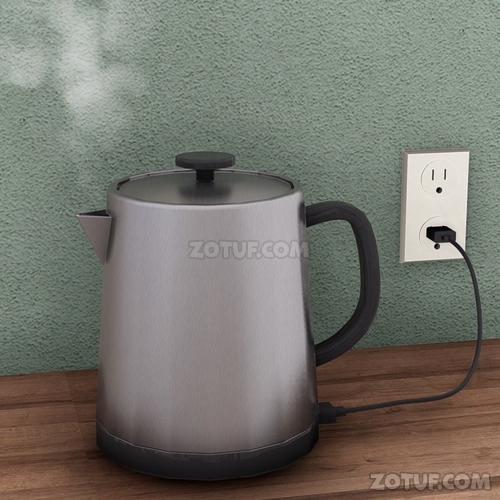
369. Move to this location and examine the area on the upper shelf to the right of the screen.

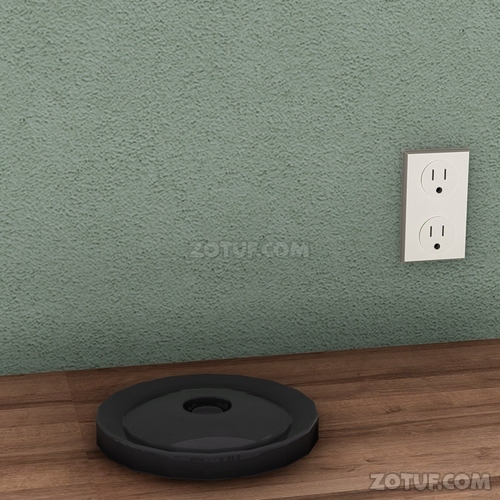
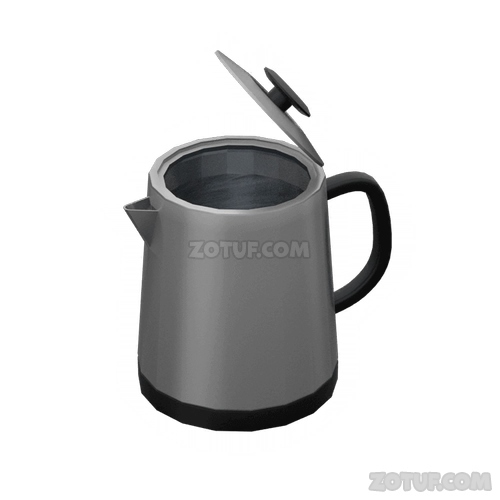
370. Use the kettle filled with water and place it on the base.

371. Use the power cable on the outlet.
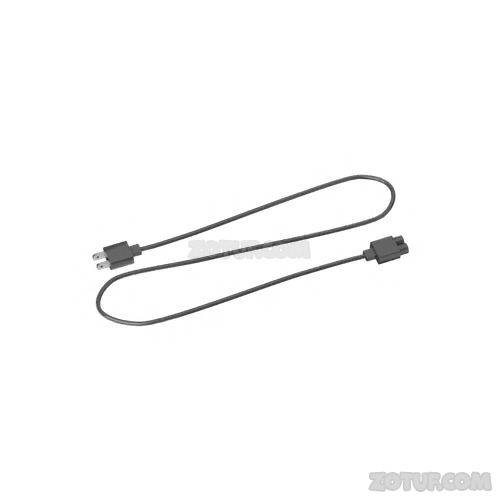
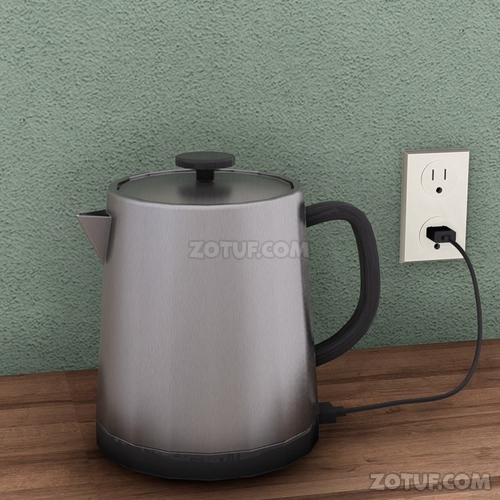
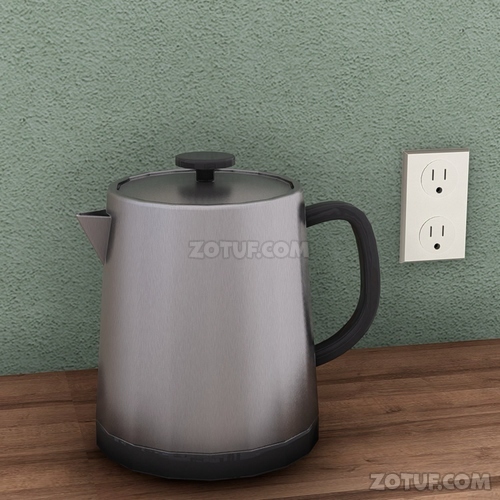
372. The kettle boils water.

373. Pay attention to the mark written on the memo.

374. Move to this place and examine the kettle on the shelf.


375. Use the memo with the steam from the kettle.

376. Use the memo on the steam of the kettle filled with hot water to moisten it.

377. A change appears in the letters “DOUGHNUT”.

378. Move to this location and examine the left drawer of the dresser.

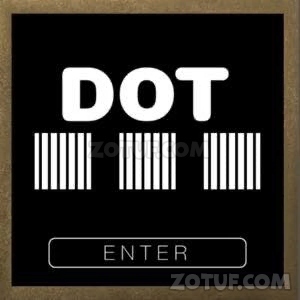
379. Input the slant directions of the letters “D”, “O”, and “T” from “DOUGHNUT” on the memo into the device.


380. Obtain some kind of handle.
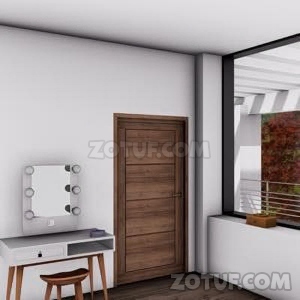
381. Move to this location and examine the door on the left side of the screen.


382. Confirm that there is no doorknob.
383. Use the handle.

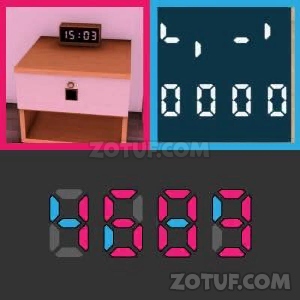
384. Move to this location and examine the side table on the left side of the bed screen.

385. Check the time displayed on the clock.
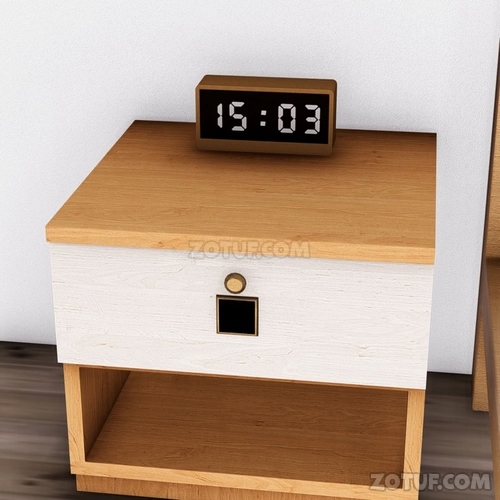
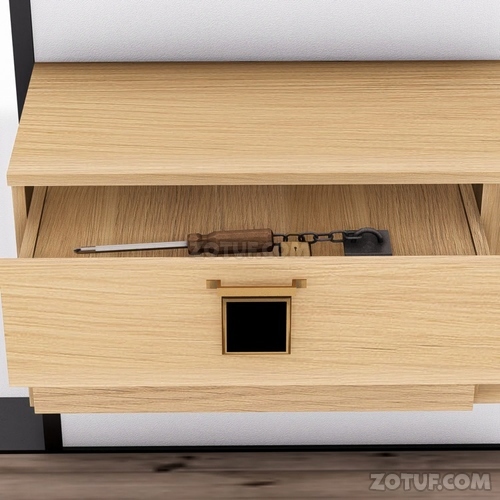
386. Move to this location and examine the left drawer of the shelf closer to the floor.


387. Combine the numbers displayed on the clock with parts of the digital numbers displayed on the device.

388. Move to this location and examine the left drawer of the shelf closer to the floor.

389. Open the drawer.

390. Confirm that a screwdriver is fixed inside the drawer.
391. Notice that the blade of the pencil sharpener is fixed with a screw, so use it on the fixed screwdriver.

392. Obtain the blade of the pencil sharpener.

393. Use the blade of the pencil sharpener on the bag of coffee beans.

394. Open the bag.

395. Move to this location and examine the coffee mill to the left of the sink on the screen.

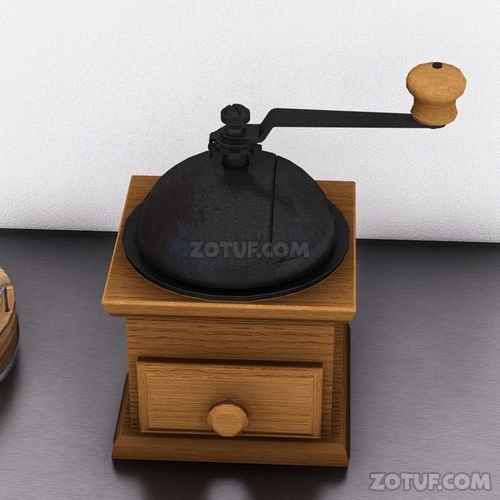
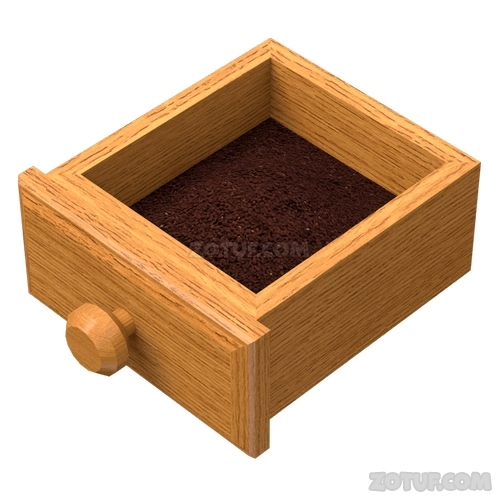
396. Set the coffee beans into the coffee mill.

397. Obtain the coffee powder.


398. Move to this location and examine the coffee dripper on the left side of the screen.

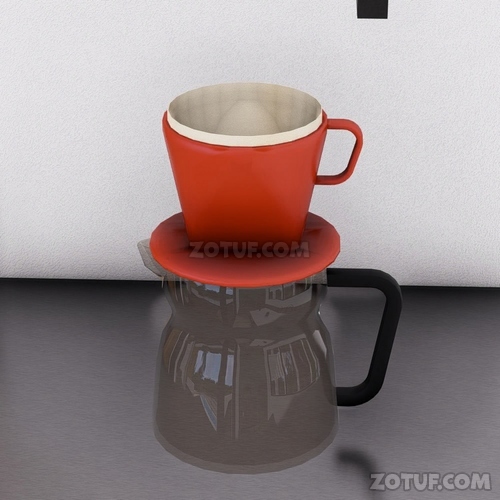
399. Use the coffee powder.

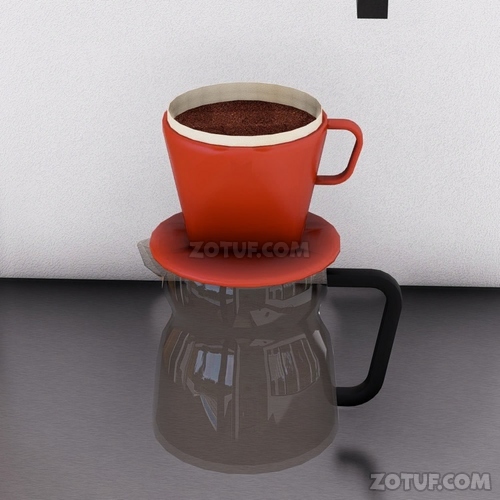
400. Use the kettle and pour hot water.
401. Obtain the coffee.

402. Move to this location and examine the side table on the right side of the bed screen.

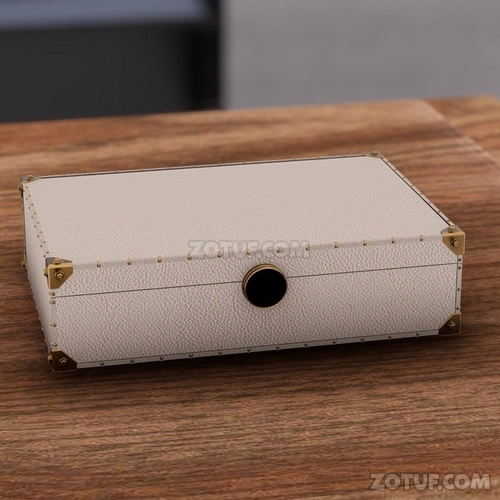
403. Examine the mug.
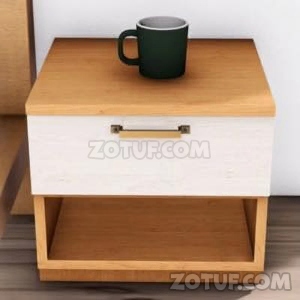
404. Obtain the mug.

405. Move to this location and examine the box in front of the window on the right side of the screen.
406. Pay attention to the shapes drawn on the box.
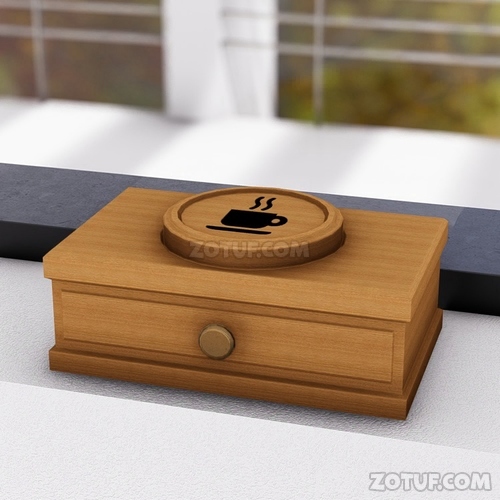
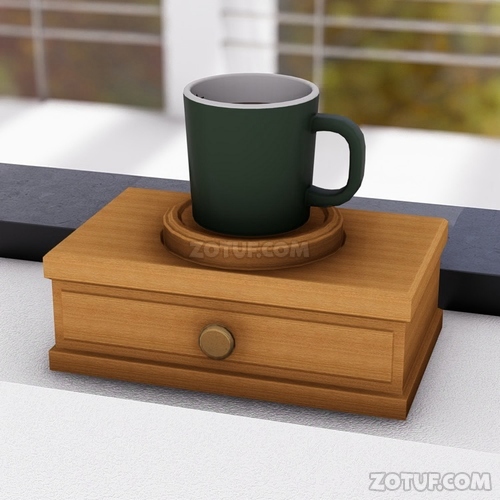
407. Pour coffee into the mug.


408. Obtain the mug filled with coffee.

409. Set the mug filled with coffee on the box.
410. Obtain the spade part.
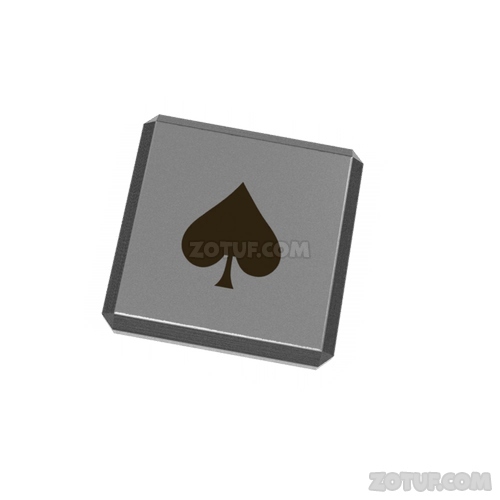
411. Move to this location and examine the box in front of the window on the right side of the screen.
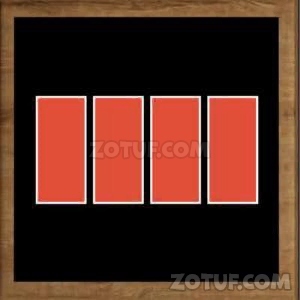
412. Examine the drawer of the box.

413. Check the shapes.
414. Move to this location and examine the picture frame on top of the shelf.
415. Check the picture.
416. Move to this location and examine the drawer on the left side of the screen.


417. Combine the shapes drawn inside the box with those on the picture frame.


418. Connecting the symbols on the picture frame in the order indicated by the arrows results in the following.
419. Input as follows:
420. Obtain the key.
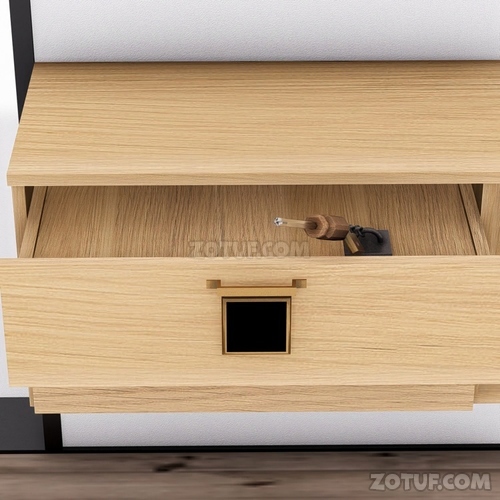
421. Move to this location and examine the left drawer of the shelf closer to the floor.

422. Open the drawer.

423. Examine the chain attached to the screwdriver.

424. Use the key.

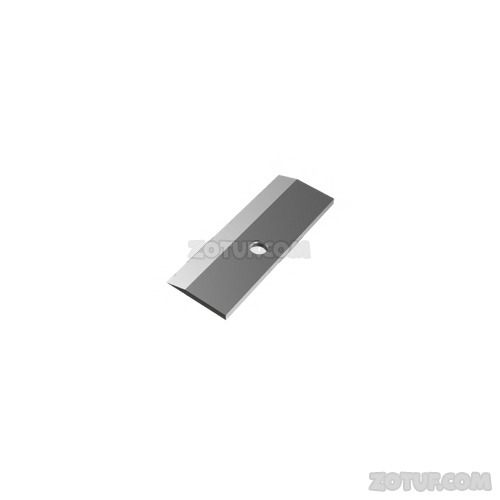
425. Obtain the screwdriver.

426. Move to this location and examine the side table on the right side of the screen.

427. Examine the drawer handle.
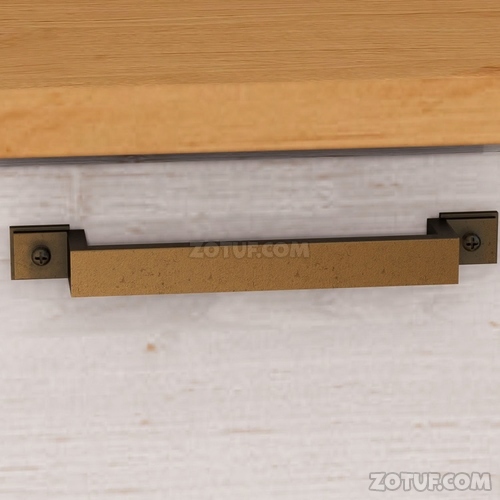
428. Use the screwdriver.

429. Obtain the handle.
430. Move to this location and examine the drawer on the right side of the shelf.

431. Examine the part with the two metal fittings on the drawer.
432. Use the handle.

433. Attach the handle.

434. Obtain the milk portion.

435. Move to this location and examine the device in front of the window on the right side of the screen.

436. Use the milk portion.

437. Examine inside the coffee cup.

438. Check the pattern inside the cup and the arrow drawn with milk.

439. Move to this location and examine the drawer on the left side of the screen.

440. Check the shapes.

441. Move to this location and examine inside the small door on the wall.


442. Examine the device on the upper shelf.

443. Focus on the shapes inside the drawer in the order indicated by the arrows in the coffee cup.

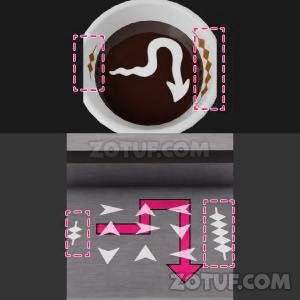
444. Input as follows:
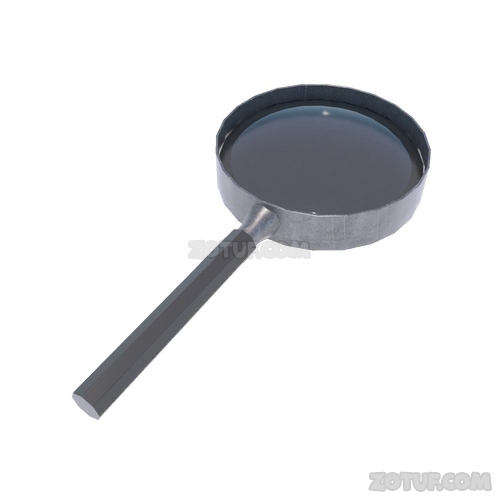
445. Obtain the magnifying glass.
446. Move to this location and examine the left part of the shelf.

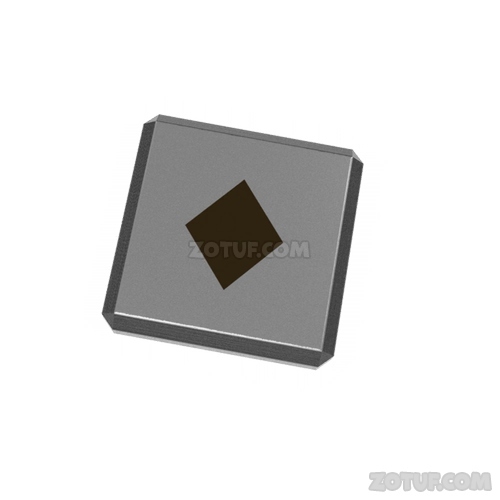
447. Examine the box on the bottom shelf.
448. Check the shape of the hole.
449. Use the magnifying glass.

450. Obtain the diamond part.

451. Move to this location and examine the left part of the shelf.


452. Check the block with letters written on it.

453. Move to this location and examine inside the small door on the wall.

454. Examine the device on the upper shelf.
455. Check the block with letters written on it.
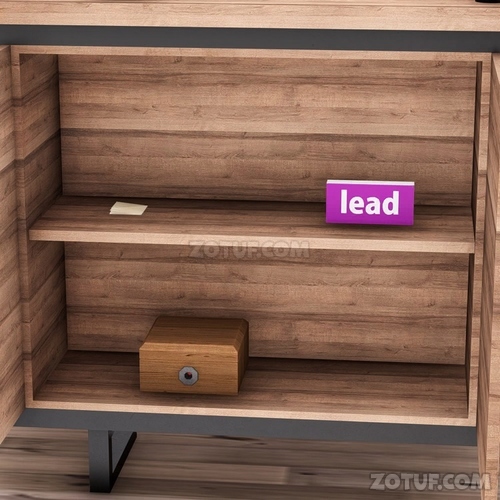
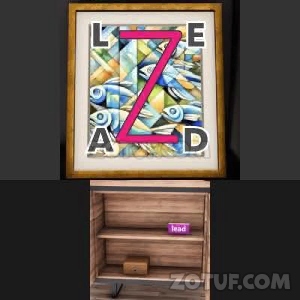
456. Move to this location and examine the top of the desk.

457. Check the block with letters written on it.
458. Move to this location and examine the picture frame on the shelf.

459. Use the magnifying glass to examine the four corners of the painting.

460. Top left: L

461. Top right: E
462. Bottom left: A
463. Bottom right: D
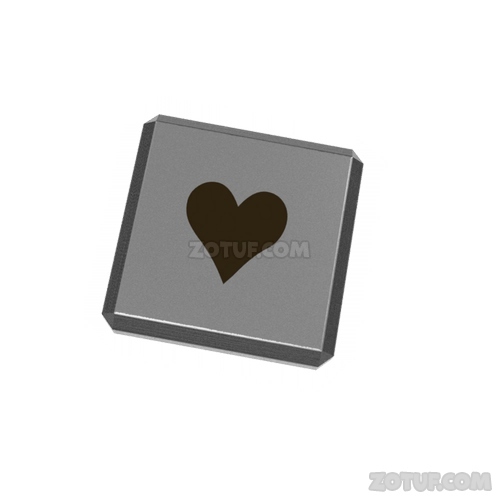
464. Move to this location and examine the box on the desk.


465. Connecting the letters written on the blocks with the letters on the picture frame in order results in the following:
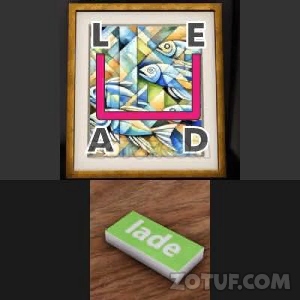
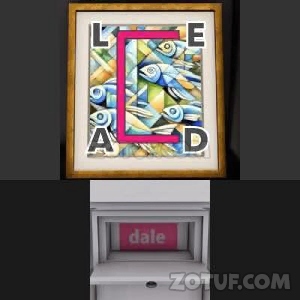
466. Input as follows:

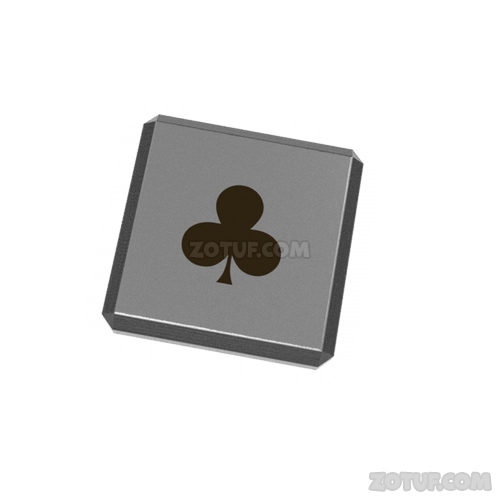
467. Obtain the heart part.

468. Move to this location and examine the bed.
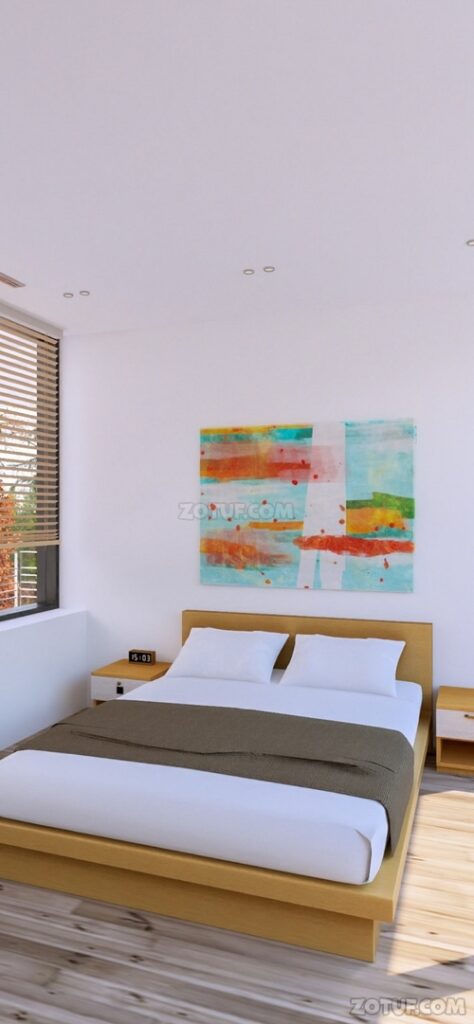
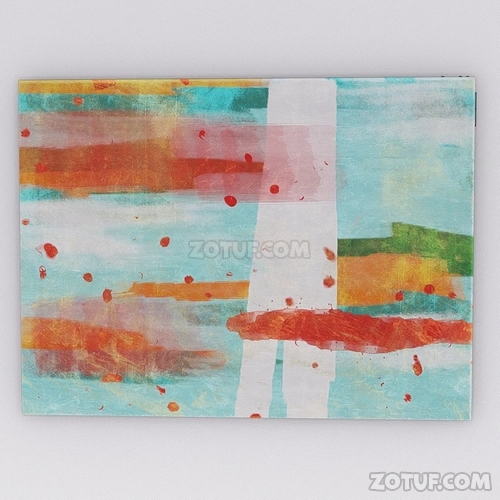
469. Examine the pillow on the right side of the screen.

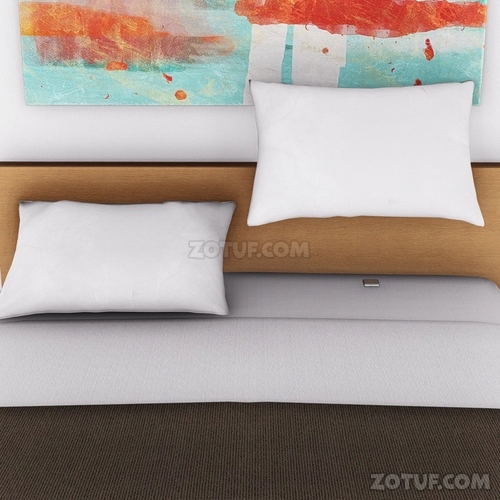
470. Obtain the clover part.
471. Move to this location and examine the painting above the bed.

472. Touch and examine the painting.
473. Check the shapes drawn on the wall.
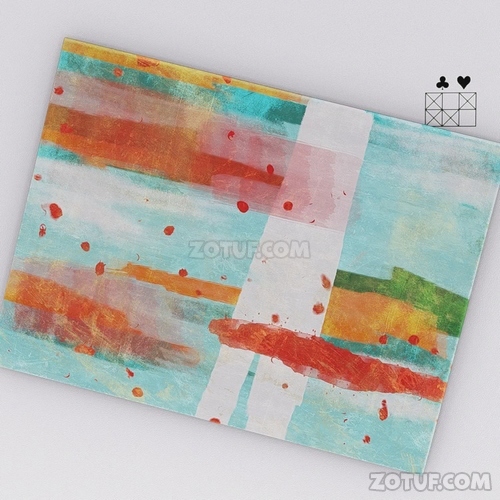
474. Move to this location and examine the picture frame on the right wall.

475. Touch and examine the picture frame.
476. Check the shapes.
477. Move to this location and examine the small door next to the door on the right side of the screen.

478. Combine the two shapes.


479. By noting that the clover is common to both shapes, you can identify the positions of each mark as follows:
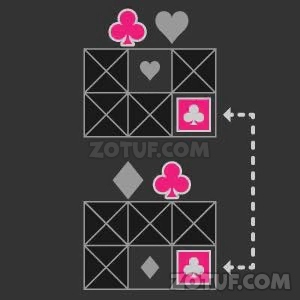
480. Set the four parts as follows:


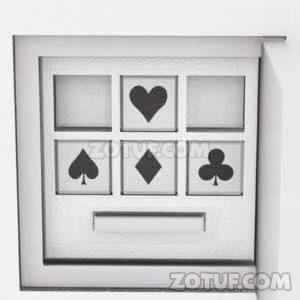
Congratulations! You have completed the game Pool House.


