
Royal Romances Episode 5: Forbidden Magic – The passage of the game begins with the fact that you touch the book of the source of wisdom and spells belonging to the moon elves. And for this, the witch deprives you of magical power. In the world of fairy tales and magic, even villains have a chance for a happy ending. Try on the role of a witch and travel through fairy worlds. And decide to surrender to the darkness or find hope in it. If you can’t complete any of the puzzles or don’t know where the items are, you can watch the Royal Romances 5: Forbidden Magic walkthrough on our website and get your magic powers back.
Royal Romances Episode 5: Forbidden Magic – Walkthrough
Here you can watch the full walkthrough of the game Royal Romances Episode 5: Forbidden Magic, namely the main plot.
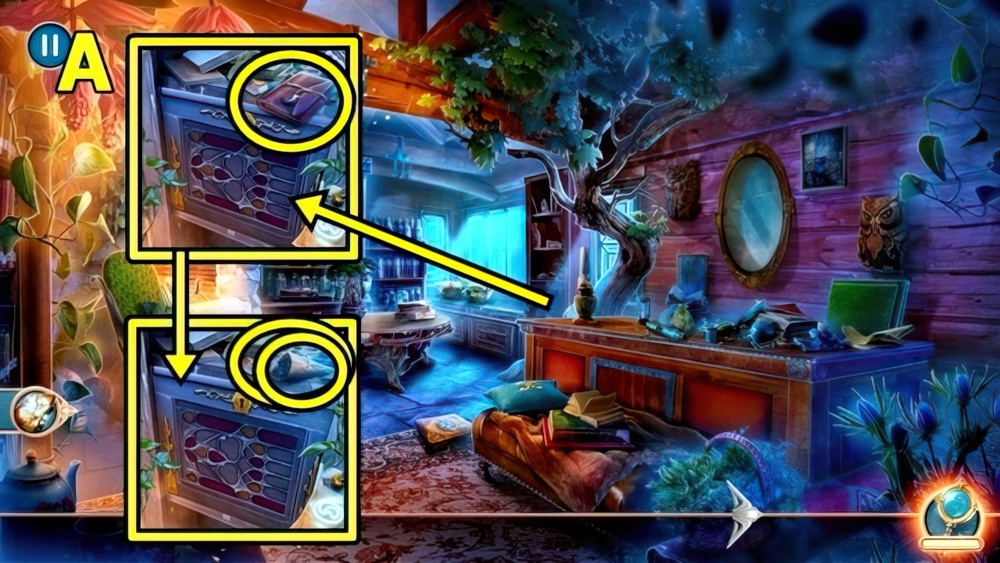
- Take Journal (A), SEEDS and CROWBAR.
- Use CROWBAR (B), take COMB and DIAMOND SCISSORS.
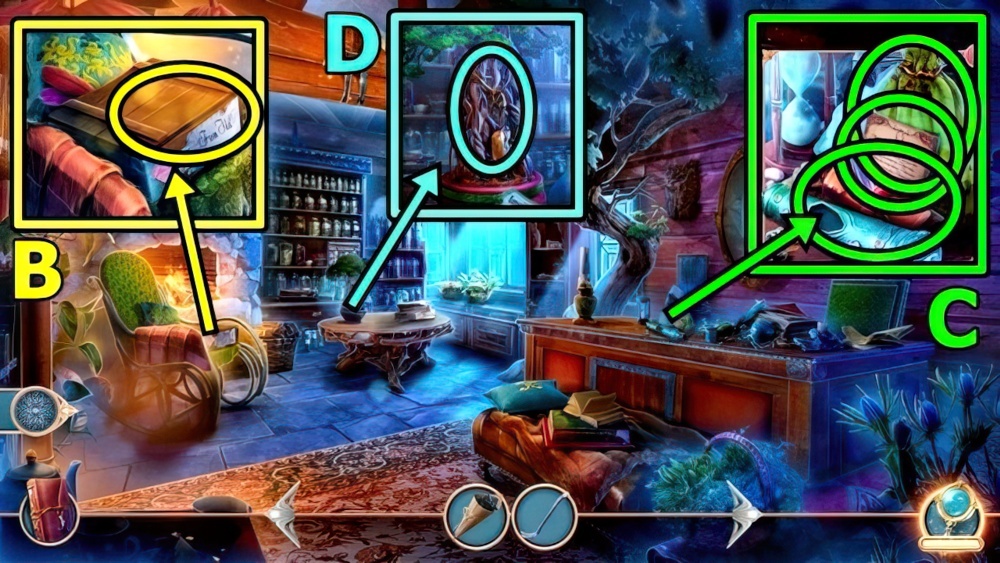
- Take Map (C), read. Use DIAMOND SCISSORS, take DENDRONT STATUETTE and BONSAI FERTILIZER.
- Add BONSAI FERTILIZER (D), receive CABINET KEY.
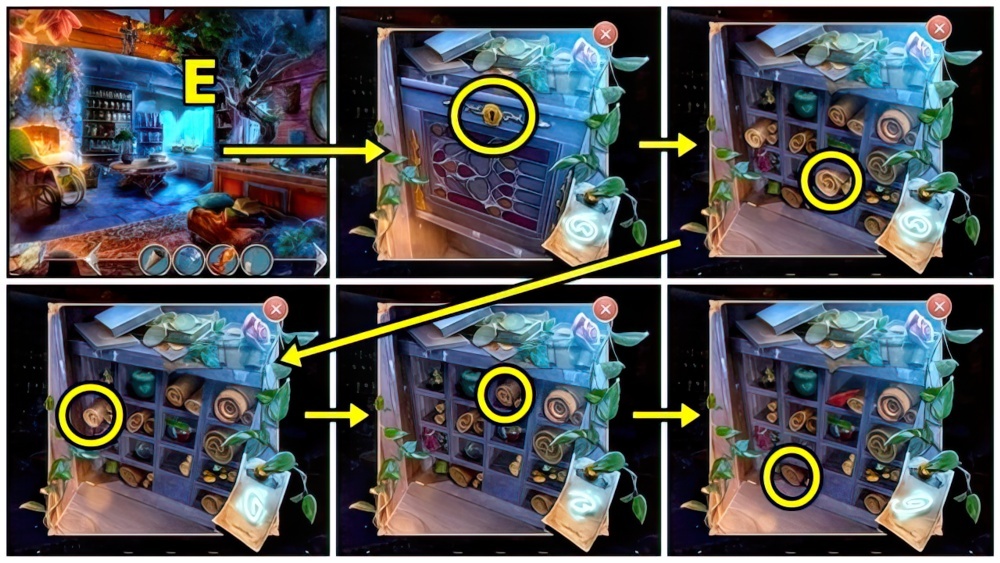
- Use CABINET KEY (E), find runes.

- Find runes (F). Examine, open, take RED GEM.

- Add RED GEM (G). Play puzzle.
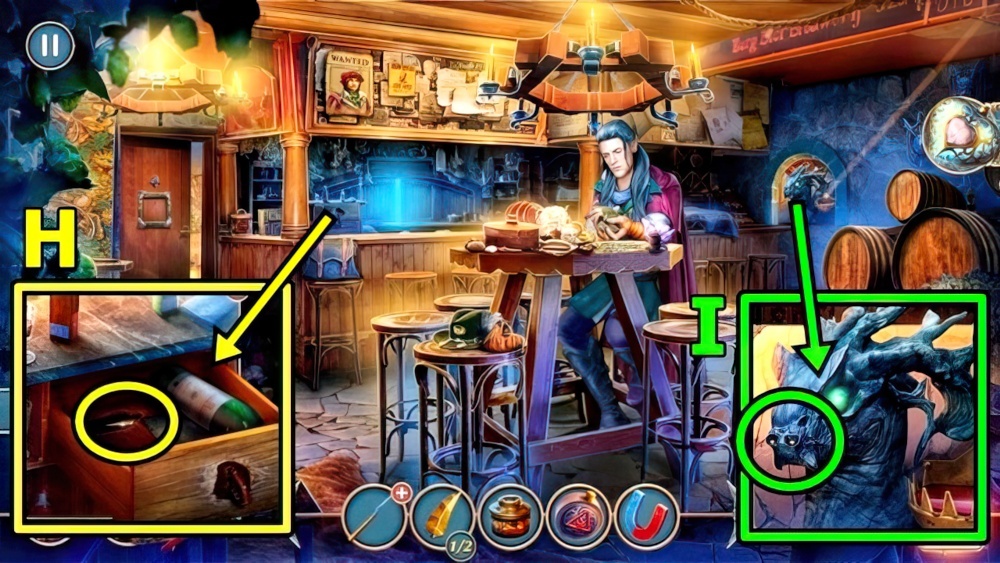
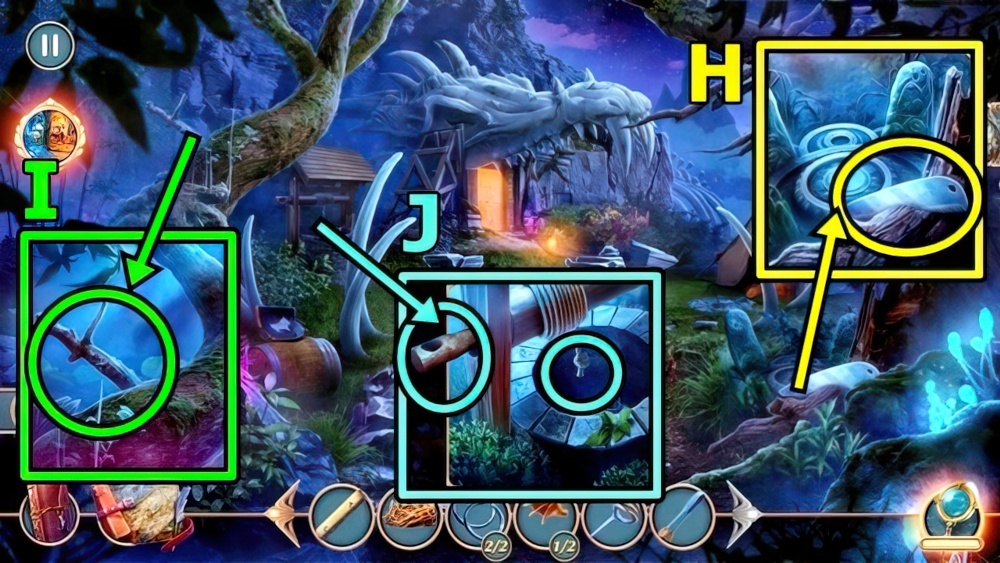
- Select (H).
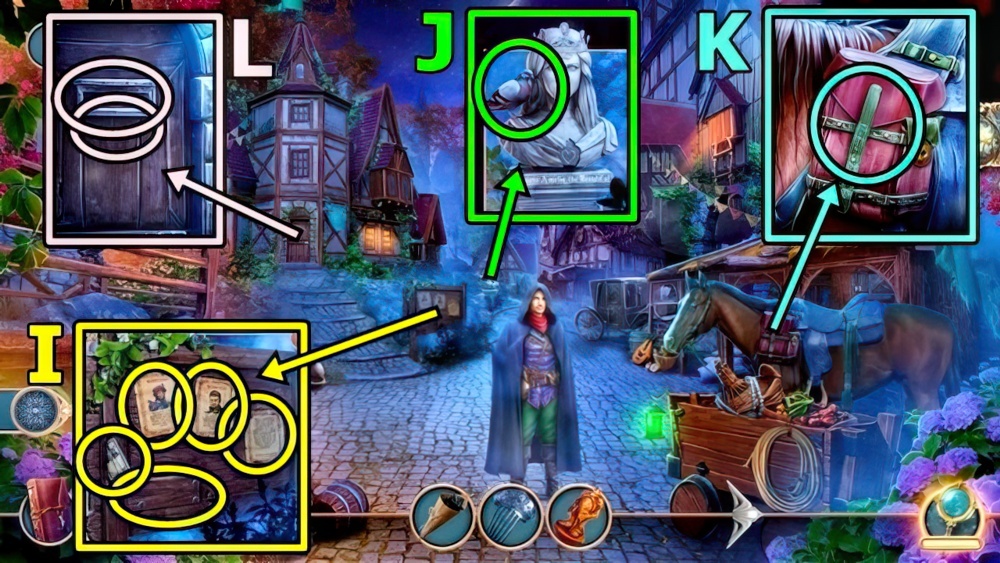
- Take PLAYING CARDS 1/3 (I), read. Use COMB, take LEAFLET.
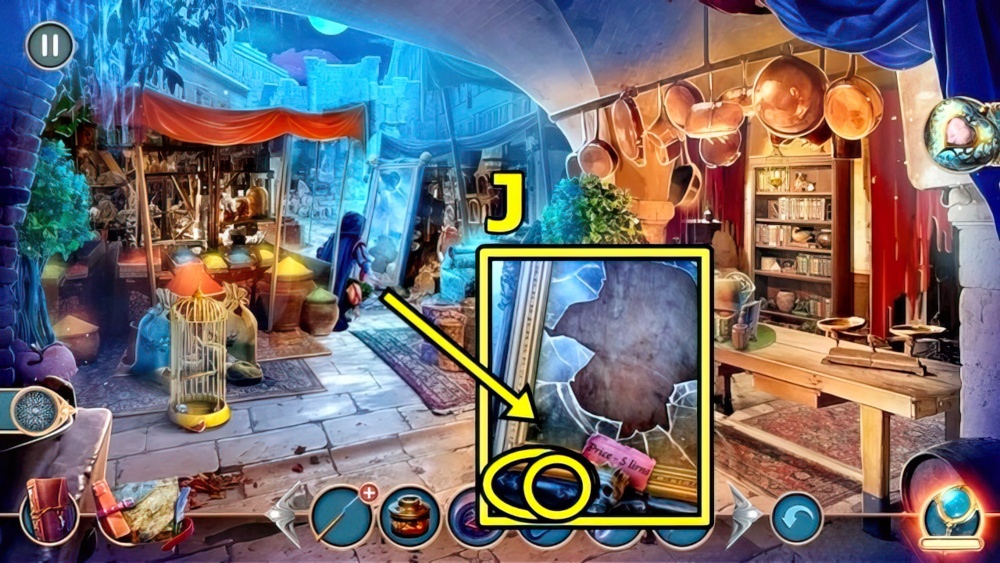
- Offer SEEDS (J), take PIGEON.
- Open (K), take MAGIC WAND, LEATHER BRACELET, PLAYING CARDS 2/3 and TOP HAT.
- Add PIGEON, MAGIC WAND and TOP HAT to LEAFLET, receive MAGIC TRICK.
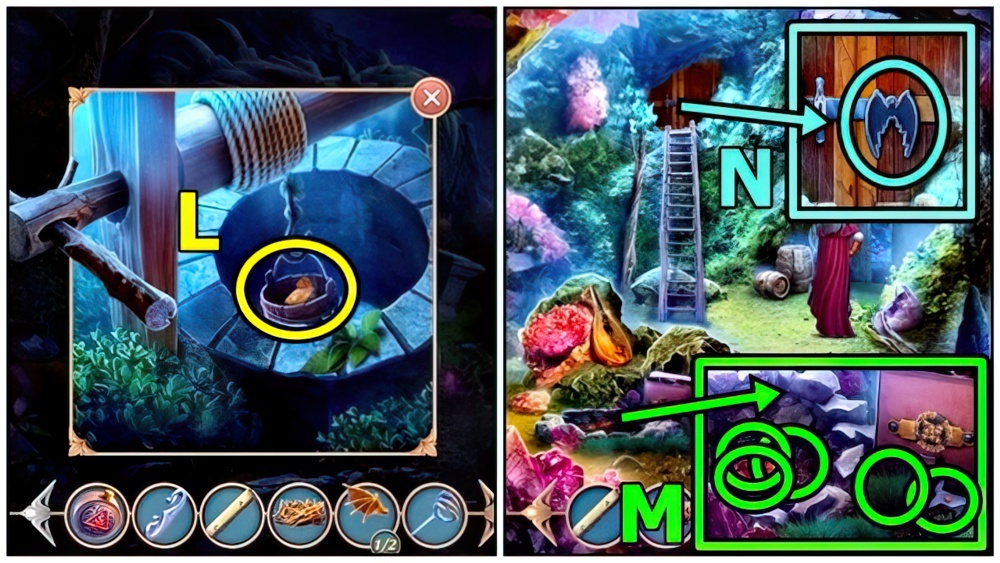
- Knock (L), use MAGIC TRICK.
- Enter The Drunken Dragon.

- Talk (M). Select all.

- Read (N), take RUSHLIGHT. Add LEATHER BRACELET, take SLEEPING POWDER and PLAYING CARDS 3/3.
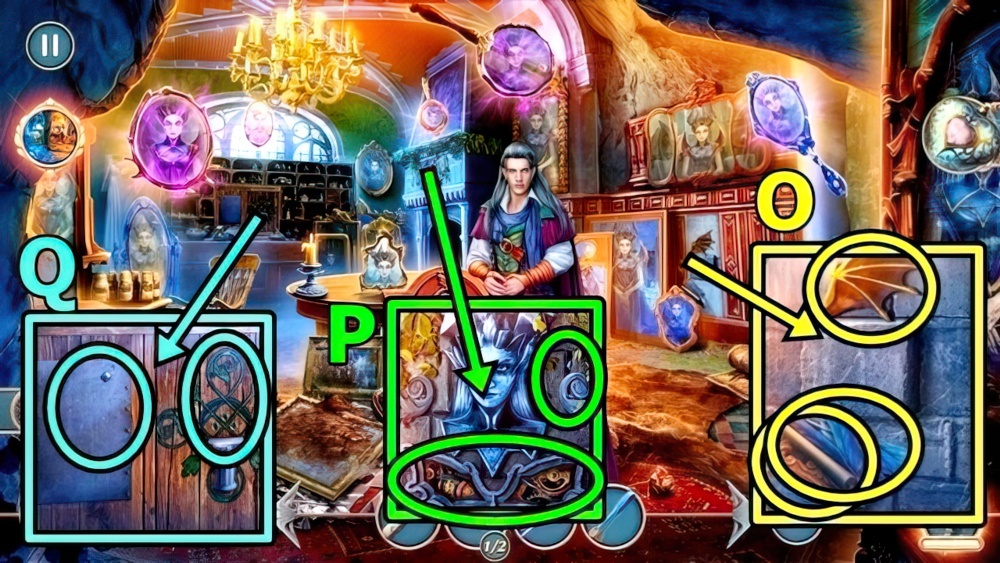
- Add PLAYING CARDS (O).

- Solution: Easy and Hard (P) Solution is random, screenshot shows possible solution.

- Solution: Easy and Hard (Q) Solution is random, screenshot shows possible solution.
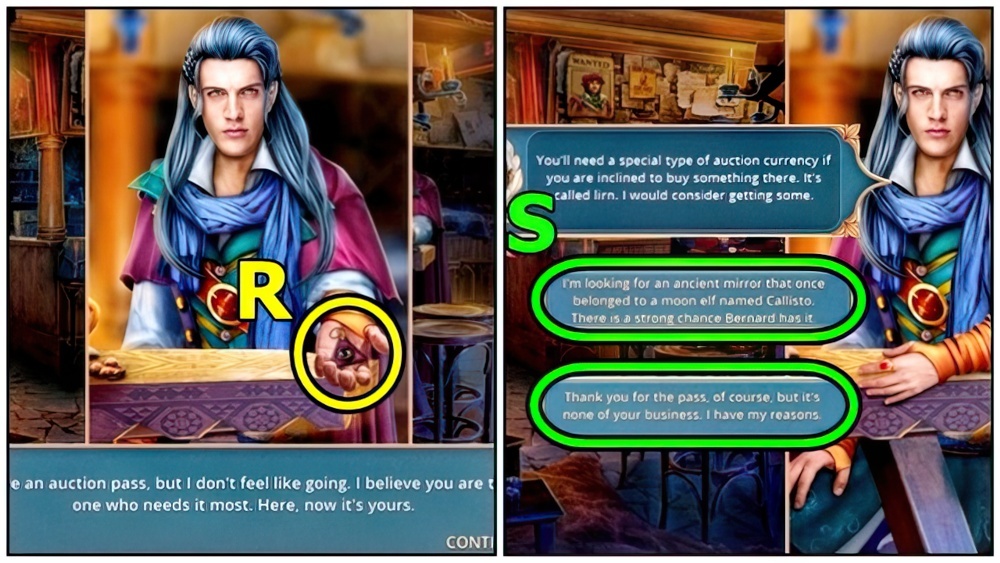
- Take PASS (R).
- Select (S).
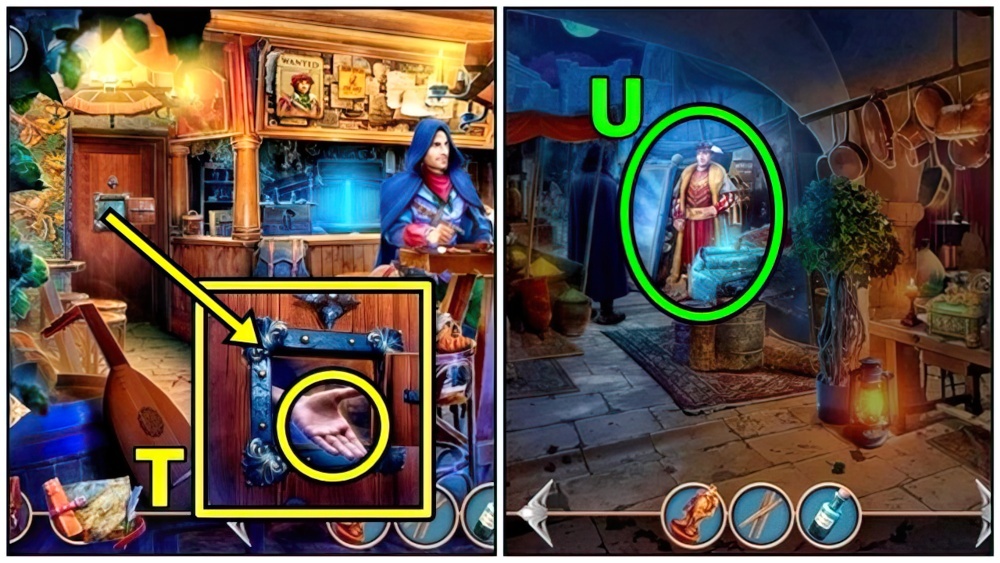
- Offer PASS (T).
- Enter Clandestine Market.
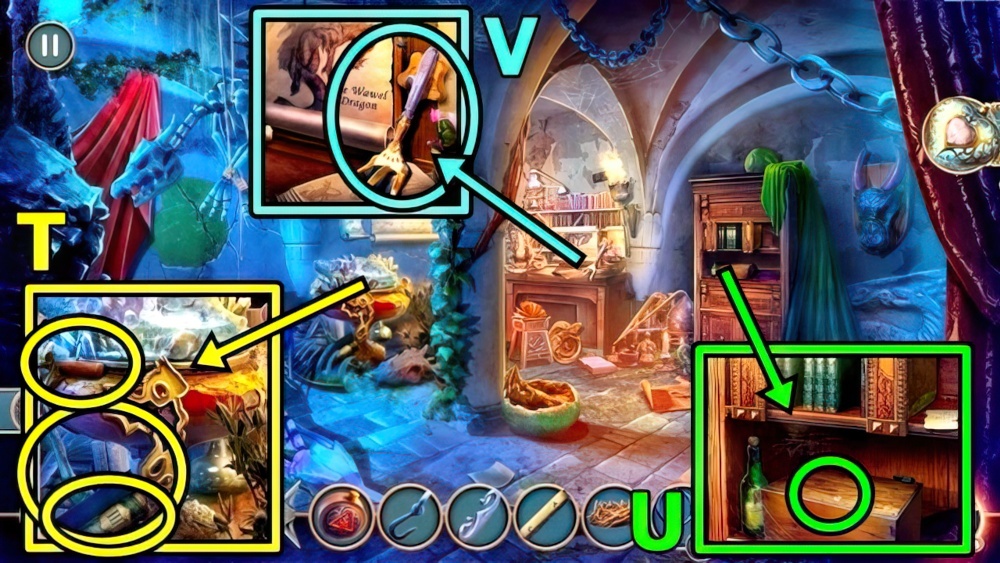
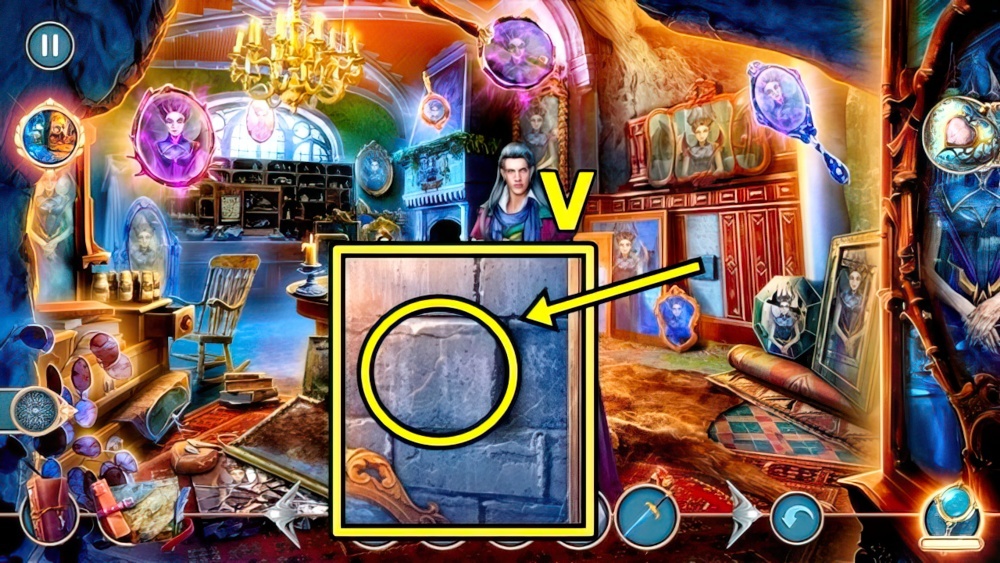
- Talk (U).

- Take GARDENING SHEARS (V). Add SLEEPING POWDER, take SILVER BOOKMARK.
- Use DENDRONT STATUETTE (W), take DRAGON’S FANG 1/2.
- Take GLUE (X). Add SILVER BOOKMARK, take MAGIC STONES, read, take MIRROR.
- Move down.
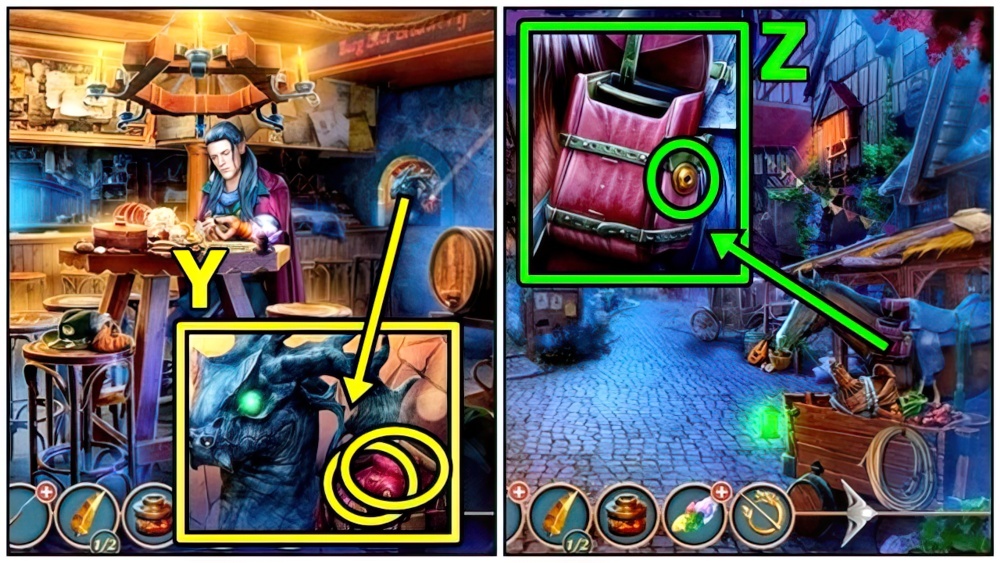
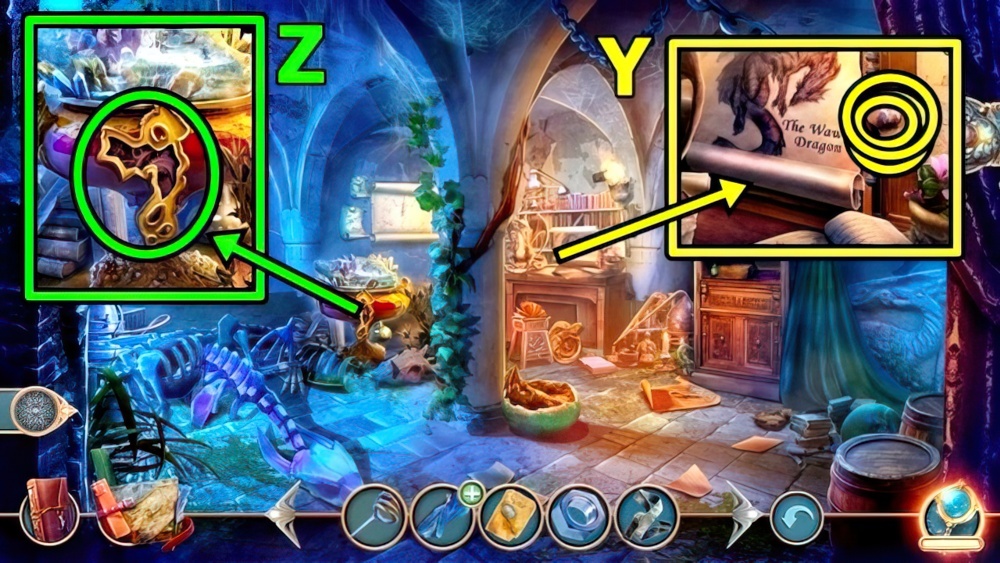
- Add RUSHLIGHT (Y) and MIRROR, take GOLDEN PIN.
- Move down.
- Insert GOLDEN PIN (Z).
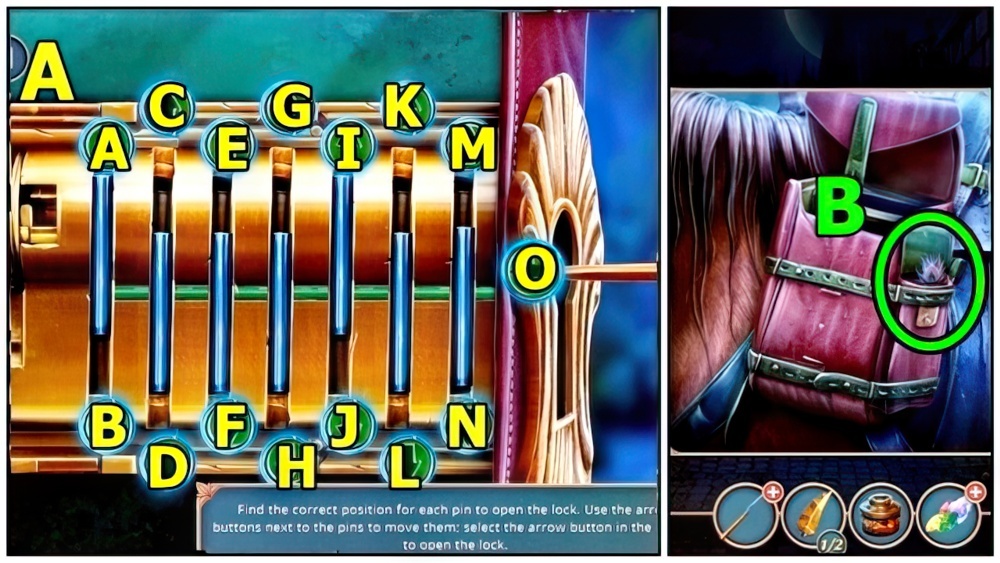
- Solution: (A) Easy (Bx2)-C-(Ex2)-G-(Jx2)-K-(Mx2)-O.
- Solution: (A) Hard (Bx2)-C-(E-2)-H-(Jx2)-H-L-C-E-H-O.
- Take MAGIC FEATHER (B).
- Return to Clandestine Market.

- MAGIC FEATHER on MAGIC STONES (C), receive FIVE LIRNS.
- Offer FIVE LIRNS (D).
- Take MOON AMULET (E).
- Return to Flamedorn Kingdom Streets.

- Insert MOON AMULET (F). Play puzzle, take HEART PENDANT.
- Insert HEART PENDANT (G), take FLASK OF ALCOHOL and MAGNET.
- Enter The Drunken Dragon.
- Use MAGNET (H), receive DRAGON’S FANG 2/2.
- Insert DRAGON’S FANG (I), take HOOK, FIRE STRIKER and BRUSH.
- Enter Clandestine Market.
- Add GLUE (J) and BRUSH.

- Solution: (K) Easy A to X.
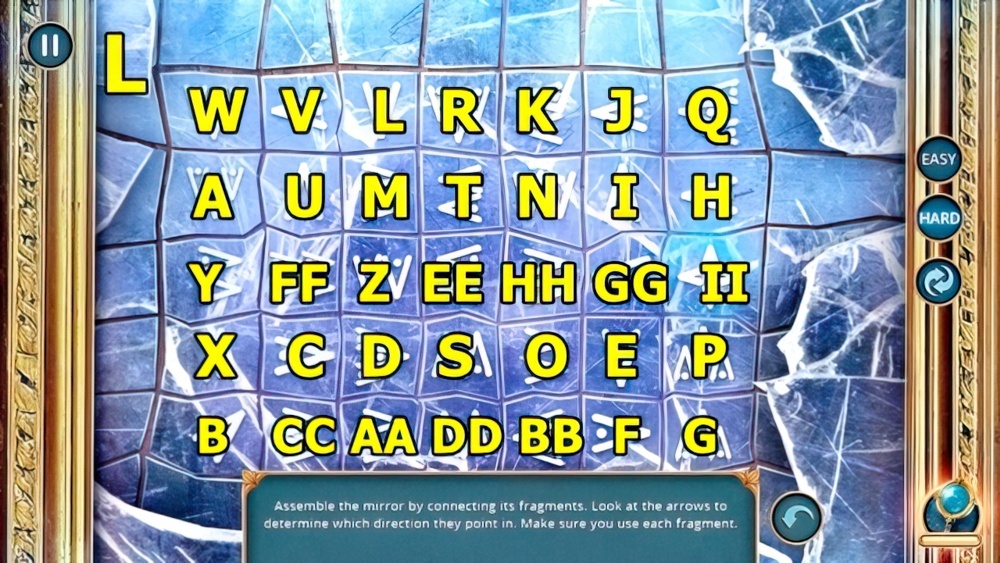
- Solution: (L) Hard A to II.

- Take DRAWING (M) and STRAW.
- Take RINGS 1/2 (N) and METAL WEDGE.
- Take PRUNER PART (O).
- METAL WEDGE and PRUNER PART on GARDENING SHEARS.

- Use GARDENING SHEARS (P). Play puzzle, take CYCLAMEN.
- Give CYCLAMEN (Q).
- Enter Moon Elves Mine.

- Select (R).
- Enter Dragon Study Room (S).
- Take HANDMADE CORKSCREW (T), BOOK 1/3 and BLUNT BOOMERANG.
- Use HANDMADE CORKSCREW (U), read, take PLIERS.
- Take THREE PRONGED FORK (V).
- Move down.

- Take GLOVES (W).
- Use GLOVES (X), receive RINGS 2/2.
- PLIERS on THREE-PRONGED FORK.
- Take WING (Y). Use THREE-PRONGED FORK.

- Solution: (Z) (Cx4)-(Fx3)-E-H-(Ix4)-(Hx3)-E-D-(Gx4)-(Dx3)-E-B-(Ax4)-B.
- Take WHETSTONE (A) and BOOK 2/3.
- Enter Dragon Study Room.
- WHETSTONE on BLUNT BOOMERANG , receive SHARP BOOMERANG.

- Use SHARP BOOMERANG (B).
- Take SILVER BIRD PAW (C) and BOOK 3/3.
- Add BOOK (D).

- Solution: (E) Easy (E-F)-(B-H)-(H-J)-(A-H)-(H-J).
- Solution: (F) Hard (B-G)-(B-C)-(A-H)-(F-G)-(A-B)-(A-B)-(I-J)-(H-J).
- Take TWEEZERS (G).
- Return to By Dragonberg Mountain.
- Add RINGS (H), receive SAW.
- Use SAW (I), receive BRANCH.
- Add HOOK (J) and BRANCH.

- Solution: (K) Easy and Hard: Solution is random.
- Take KEY IN RESIN (L).
- Enter Moon Elves Mine.
- Add FLASK OF ALCOHOL (M), STRAW, FIRE STRIKER, then KEY IN RESIN. Use Pincers, receive CALLISTO’S PENDANT.
- Add CALLISTO’S PENDANT (N).
- Enter Mirror Room.
- Take WING 2/2 (O), FEATHERS and MIRROR OF TRUTH PICTURE.
- Add WING (P), take DOLL. Use TWEEZERS, receive NUT.
- Add DRAWING (Q) and DOLL.

- Solution: (R) Easy.
- Solution: (S) Hard A-Dx3-C-Ex2-Fx4.

- Take TOTEM (T).
- Return to By Dragonberg Mountain.
- Add TOTEM (U), take DAGGER.
- Return to Mirror Room.
- Use DAGGER (V), take DIAMOND PICKAXE.
- Move down.

- Use DIAMOND PICKAXE (W). Play puzzle, take FIGURINE.
- Add FIGURINE (X), take RIBBON.
- Enter to Dragon Study Room.
- Remove (Y), add NUT and SILVER BIRD PAW. Take DRAGON STATUETTE.
- Add DRAGON STATUETTE (Z). Play puzzle.
- Return to Mirror Room.

- RIBBON on FEATHERS, receive BUNCH OF FEATHERS.
- Use BUNCH OF FEATHERS (A), then add MIRROR OF TRUTH PICTURE. Take MIRROR OF TRUTH.
- Use MIRROR OF TRUTH (B).

- Solution: (C) Easy A-C-E-G-A-F-G-D-G-C-G-C.
- Solution: (D) Hard A-B-C-Dx3.
- Select (E).
Congratulations! You have completed the game Royal Romances Episode 5: Forbidden Magic.


