
Strange Investigations 3: Secrets Can be Deadly (Bonus Chapter) – Continue your adventure with Danna Strange. This time the events unfold in the Glasgow Museum, where the opening of a new exhibition is being prepared. However, the preparations are interrupted by an incident: the alarm system is damaged and one of the guards has disappeared. You will have to figure out what is going on and prevent a possible crime. You will be met by Craig Munro, the museum’s head of security, who will tell you about the situation. Together with Danna you will examine the scene, collect evidence and reconstruct the chronology of events.
Bonus Chapter Walkthrough

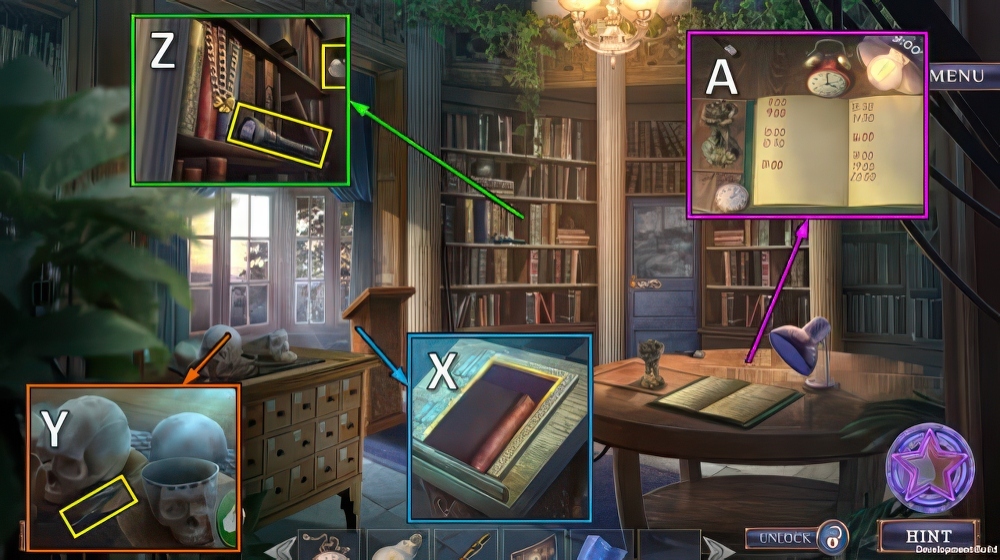
- Read note, take MUSEUM TOKEN (A).
- Take PANEL ELEMENT (B).
- Use MUSEUM TOKEN, take MUSEUM BROCHURE, INCOMPLETE KIT and STENCIL WITH HOLES (C).

- Take TWEEZERS.
- Place PANEL ELEMENT and STENCIL WITH HOLES, select 1-2-3 (D).
- Take KEYBOARD KEYS 1/4 and MAGNET (E).
- Use MAGNET and MUSEUM BROCHURE, take GLASS SHARD and HENDRY’S BAG (F).
- Use GLASS SHARD (G).
- Go (H).
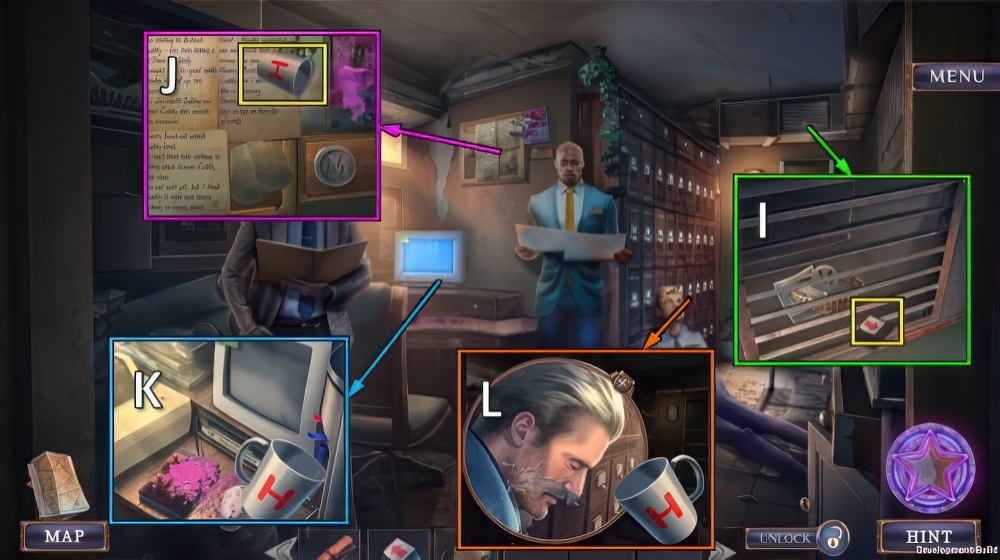
- Take KEYBOARD KEYS 2/4 (I).
- Take HENDRY’S MUG (J).
- Use HENDRY’S MUG (K), receive COLD WATER.
- Use COLD WATER (L).
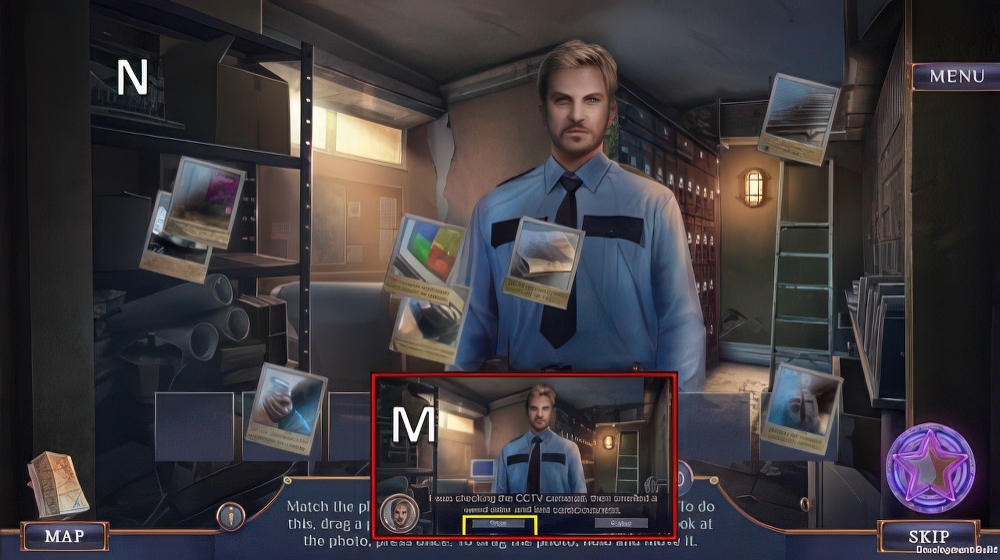
- Answer “true” x4 (M).
- Solution as shown (N).
- Receive EXAMINATION GLOVES and KEYBOARD KEYS 3/4.

- TWEEZERS and EXAMINATION GLOVES on INCOMPLETE KIT, take DETECTIVE’S KIT.
- Use DETECTIVE’S KIT (O), receive CORROSIVE SUBSTANCE.
- Take KEYBOARD KEYS 4/4 (P).
- Use DETECTIVE’S KIT and KEYBOARD KEYS (Q).

- Select R-Sx2-Tx2-U.
- Take STAINED REPORTS and GUARD FIGURINE (V).
- Walk down.
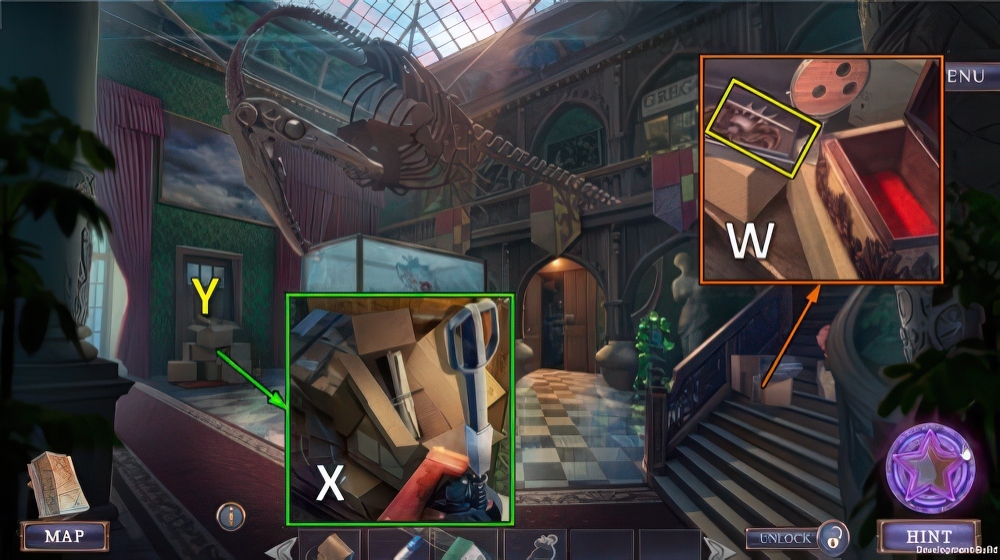
- Use GUARD FIGURINE, take CUTICLE STICK and FRAME PARTS 1/3 (W).
- CUTICLE STICK and CORROSIVE SUBSTANCE on HENDRY’S BAG, take PALLET LEVER and CLIPBOARD.
- Place PALLET LEVER (X).
- Go (Y).

- Take STEEL ROD (Z).
- Take COIN (A).
- Use COIN, take FRAME PARTS 2/3, PAINTBRUSH and RIBBON (B).
- Go to Security Room.

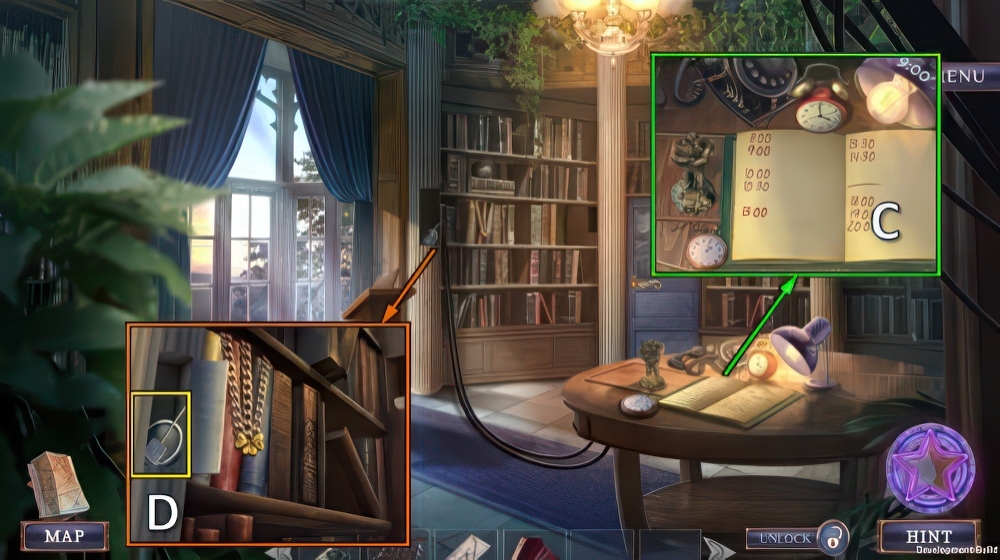
- Use STEEL ROD and RIBBON, take CRAIG’S BRACELET and VAN PHOTO (C).
- Use CRAIG’S BRACELET (D).
- Take CALL BELL and YARDSTICK (E).
- Go to Parking Lot.

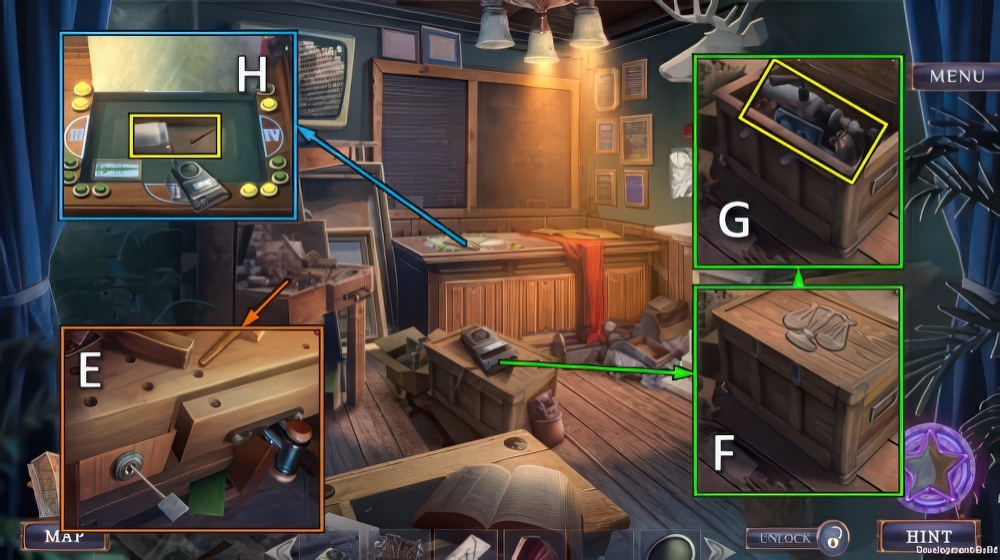
- Use YARDSTICK (F).
- Play puzzle (G), receive GOLDEN LEVER.
- Walk down.
- Use CALL BELL and GOLDEN LEVER, take PIANO TUNER and FRAME PARTS 3/3 (H).
- Place FRAME PARTS, take POCKET WATCH and PENCIL (I).
- Go (J).

- CLIPBOARD, VAN PHOTO and PENCIL on STAINED REPORTS, take GUARD’S REPORTS.
- Offer GUARD’S REPORTS (K).
- Take DEVELOPING SOLUTION (L).
- Go to Security Room.
- Place PAINTBRUSH and DEVELOPING SOLUTION.
- Find pairs, take ADDRESS PLATE (M).
- Go to Parking Lot.
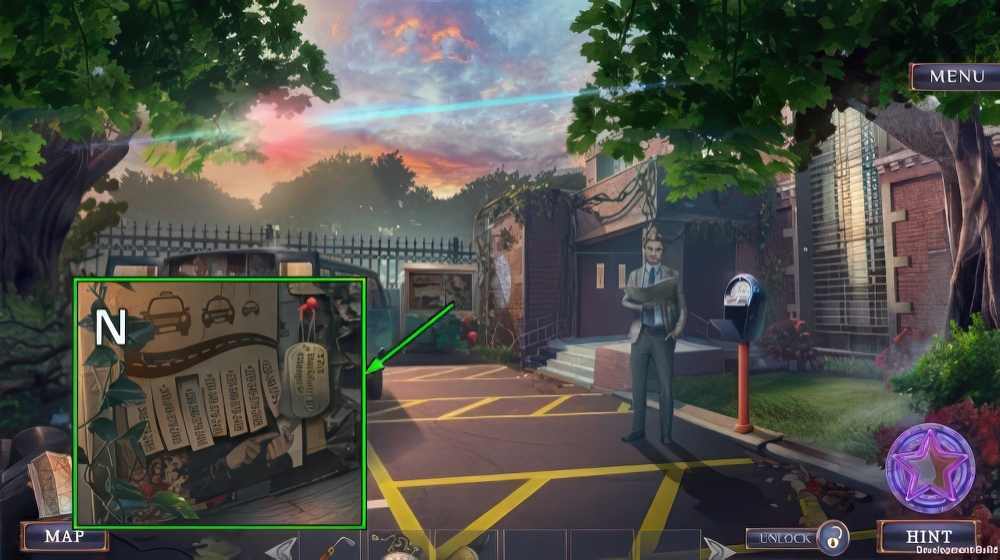
- Use ADDRESS PLATE (N).

- Take PORTRAIT PLAQUE (O).
- Place PORTRAIT PLAQUE (P), take LIGHT BULB and PIANO BRIDGE (Q).

- Use PIANO BRIDGE and PIANO TUNER, take SCHOLAR’S TROPHY and OLD ROOM PHOTO (R).
- Take GOLDEN CHAIN (S).
- Place SCHOLAR’S TROPHY (T).
- Play puzzle (U), receive HOUSE BLUEPRINT.
- Take SILVER CHALICE (V).
- Use SILVER CHALICE, go (W).
- Take BOOK WITH CHAIN (X).
- Take COMPASS (Y).
- Place BOOK WITH CHAIN, take FLASHLIGHT, ALARM CLOCK and GEAR (Z).
- Place ALARM CLOCK, POCKET WATCH and LIGHT BULB (A).
- Play mini-puzzle, take PIANO HAMMER.
- Walk down.

- Place PIANO HAMMER, take PUSHPINS 1/4 and GILDED CRANK (B).
- Place GILDED CRANK, GEAR and GOLDEN CHAIN (C).
- Go (D).

- Take PUSHPINS 2/4 (E).
- Take GLOBE COMPONENT (F).
- Place GLOBE COMPONENT (G), take K MONOGRAM, LEMON JUICE and BLUE FILM (H).
- LEMON JUICE, OLD ROOM PHOTO and COMPASS on HOUSE BLUEPRINT, take SECRET ROOM LOCATION and PUSHPINS 3/4.
- Use SECRET ROOM LOCATION (I).

- Solution (J): (1-9)-(2-11)-(3-17)-(4-14)-(5-9)-(6-22)-(7-13)-(8-16)-(9-11)-(10-19)-(11-23).
- (12-16)-(13-20)-(15-18)-(17-20)-(18-24)-(19-24)-(21-23)-(22-24)-(23-24).
- Go (K).

- Take BROKEN RECORDER (L).
- Take MARBLE INLAY (M).
- Take OILCAN (N).
- Use OILCAN, take LAMP FASTENER, G MONOGRAM and PERMANENT MARKER (O).
- Walk down.

- Place G MONOGRAM, K MONOGRAM and MARBLE INLAY, take BROKEN PHONE and PUSHPINS 4/4 (P).
- Place PUSHPIN (Q), swap (1-3)-(3-4)-(2-4).
- Take TORN NET and STOLEN LANCE (R).
- Go (S).

- Use STOLEN LANCE, take FORGERY PHOTOS 1/2 and RED FILM (T).
- Take JACKET PATTERN (U).
- BLUE FILM and RED FILM on FLASHLIGHT, take UV FLASHLIGHT.
- Place LAMP FASTENER and UV FLASHLIGHT, solution (V).
- Take FORGERY PHOTOS 2/2 and ROLL OF FOIL (W).
- Use ROLL OF FOIL (X).
- Go to Library.

- Place FORGERY PHOTOS (Y), take SCALPEL and DIAL PART (Z).
- Use PERMANENT MARKER and SCALPEL (A).
- Play puzzle (B), take TOOL SET.
- DIAL PART and TOOL SET on BROKEN PHONE, take TELEPHONE.
- Place TELEPHONE (C).
- Take PICKLOCK and SPEAKER (D).
- Go to Secret Room.
- Use PICKLOCK, Play mini-puzzle (E).
- Receive SCALES AMULET.
- Place SCALES AMULET (F).
- Take AUDIOTAPE and WEIGHTS (G).
- AUDIOTAPE and SPEAKER on BROKEN RECORDER, take CUDDY’S RECORDING.
- Place CUDDY’S RECORDING, take JAR OF GLUE and SEAM RIPPER (H).
- Walk down twice.

- Use JACKET PATTERN and SEAM RIPPER, take FISHING LINE and WOOD FRAGMENT (I).
- FISHING LINE, TOOL SET and WEIGHTS on TORN NET, take WEIGHTED NET.
- Use WEIGHTED NET (J).
- Select nets when above the hook shown (K).
- Take HENDRY’S CAP and HANDKERCHIEF (L).
- Go (M).

- Use HANDKERCHIEF and JAR OF GLUE (N).
- Take SLIDER RELAY and FIRE EXTINGUISHER (O).
- Use FIRE EXTINGUISHER, go (P).

- Take HANDLE (Q).
- Take LOCKED SATCHEL (R).
- Use HANDLE, take AUCTIONEER’S GAVEL and MALLET (S).
- Go to Secret Room.

- Use MALLET (T), take COPPER HARE and INCOMPLETE CASE FILE (U).
- SLIDER RELAY and COPPER HARE on LOCKED SATCHEL, take CUDDY’S TOOLS and CASINO CHIP.
- Place WOOD FRAGMENT and CUDDY’S TOOLS, take CHESS PIECE (V).
- Go to Cuddy’s Office.

- Place CHESS PIECE (W).
- Move pieces as indicated (X).
- Receive EMPLOYMENT CONTRACT and MAGNIFIER.

- Place HENDRY’S CAP and EMPLOYMENT CONTRACT (Y).
- Take EXPENSIVE CANE and AUCTION RECORDS (Z).
- Use EXPENSIVE CANE, receive CANDLE (A).
- Use CANDLE and MAGNIFIER (B), select square (C).
- Take AUCTIONEER’S SEAL (D).
- Walk down twice.

- CASINO CHIP, AUCTION RECORDS, AUCTIONEER’S SEAL and AUCTIONEER’S GAVEL on INCOMPLETE CASE FILE, take CASE FILE.
- Show CASE FILE, play puzzle (E).
Congratulations! You have completed the game Strange Investigations 3: Secrets Can be Deadly.


