
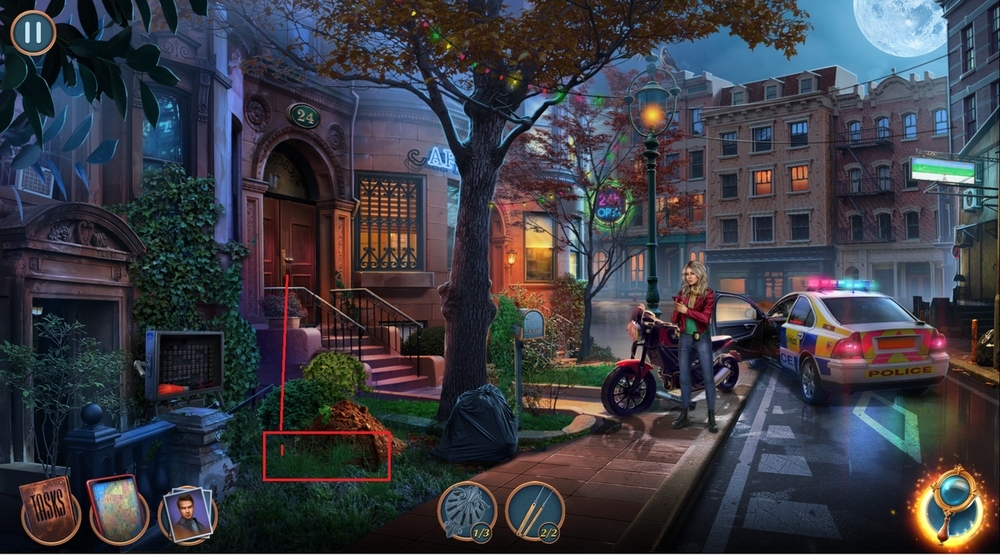
Twin Mind 5: The Deathly Trick (Bonus Chapter, Extra) – The events revolve around Sarah, who has been charged with a crime and is under house arrest. Despite her conviction, the situation escalates when she stops answering her cell phone. It is up to you to help Eleanor by going to Sarah’s house to check on her. While investigating, you discover Tyler’s fresh prints at Sarah’s house, which raises many questions, as Tyler is still behind bars. The situation becomes more and more confusing and you will have to ask some important questions of Mr. Nash to uncover the truth.
Bonus Chapter, Extra Walkthrough

- Take HANDLE (A).
- Take SARAH’S BROOCH (B).
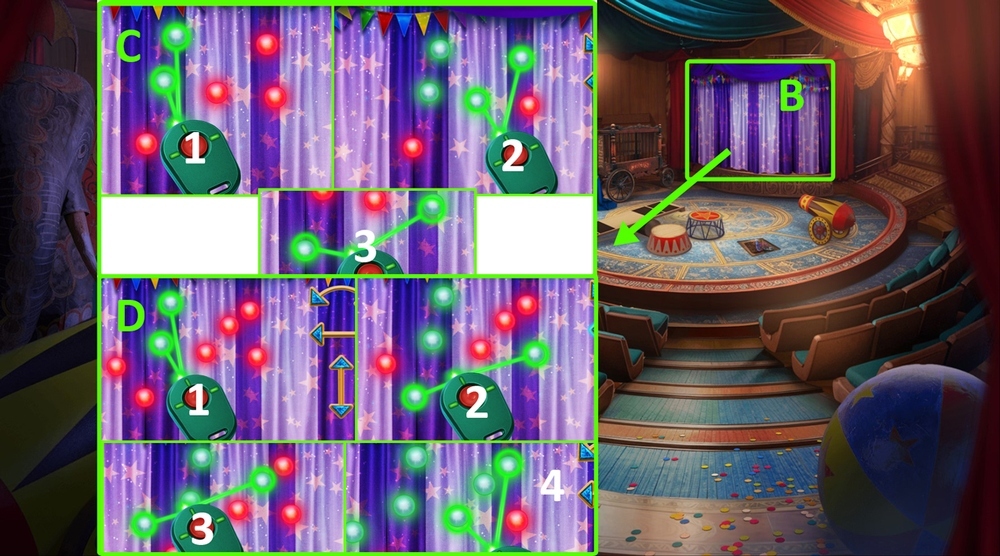
- Use HANDLE on the power panel, take EMBLEMS 1/3 (C).
- Use SARAH’S BROOCH on the bag’s zipper, take RUBBER GLOVE and LOCK PICKING SET 1/2 (D).

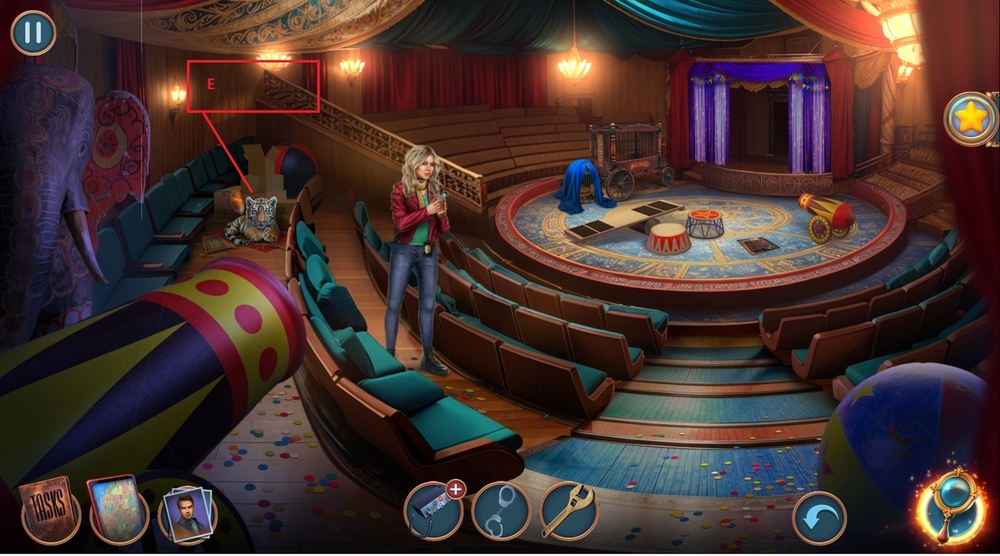
- Use RUBBER GLOVE on the power panel (E).

- Easy solution: U-Lx4-D-R-D-Lx2-U-Lx2-U-D-L-Dx2-L-Dx4-R-Ux3-Lx3-Rx5-Dx3-Lx3-U-Lx2.
- Rx2-D-Rx5-Ux2-L-U-Rx2-Ux2-Rx2-Dx3-R-U-L-Dx3 (F).
- Hard solution: U-Lx4-D-R-D-Lx2-U-Lx2-U-D-L-Dx2-L-Dx4-R-Ux3-Lx3-Rx5-Dx3-Lx3-U-Lx2.
- Rx2-D-Rx5-Ux2-L-U-Rx2-Ux2-Rx2-Dx2-R-D-Lx3-U-Rx2-Dx3 (G).
- Take LOCK PICKING SET 2/2 (H).
- Use LOCK PICKING SET on the door’s key hole, earn LOCK PICKING SET (I).
- Go to Sarah’s house.

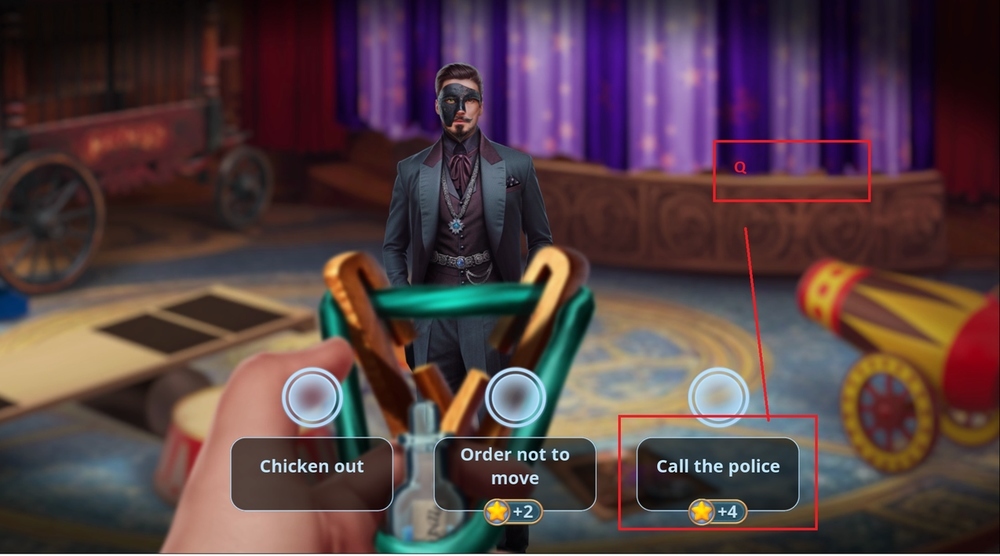
- Select this option (J).
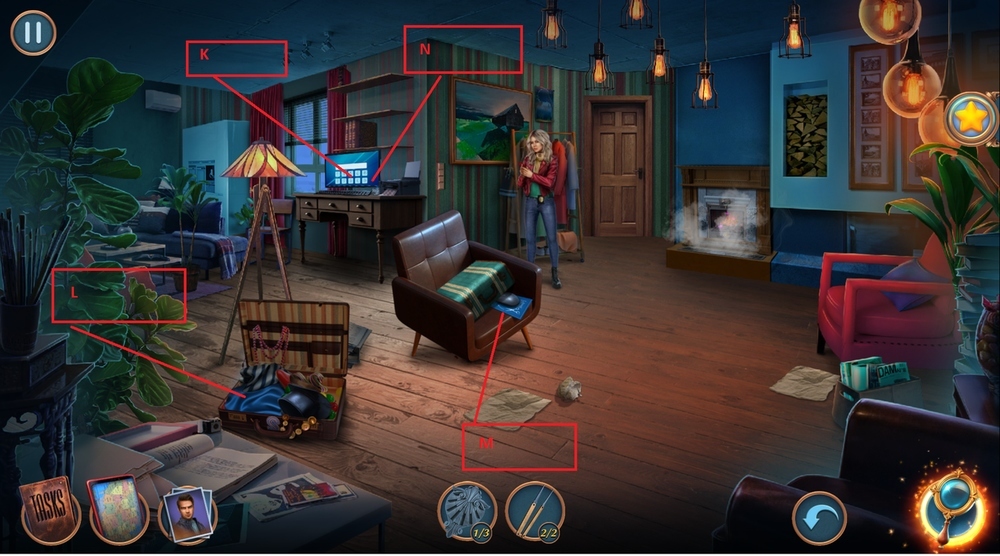
- Take and read the newspaper, take BUTTON (K).
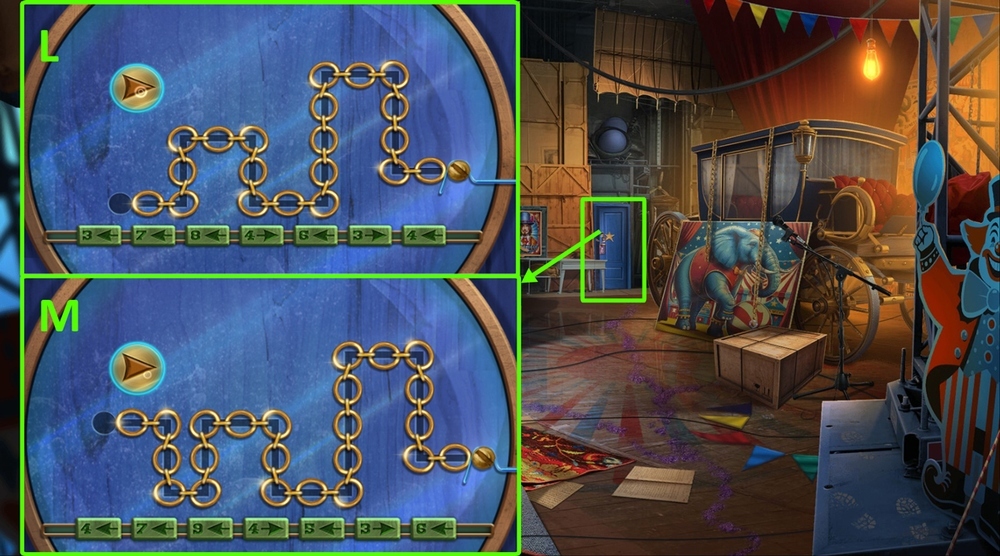
- Move the scarf (L).
- Take COMPUTER MOUSE and take and read DRESS PATTERN (M).
- Use COMPUTER MOUSE on the desktop (N).

- Use DRESS PATTERN on the blue fabric (O).
- Use BUTTON on the wires over the fireplace, take KNIFE (P).
- Use KNIFE on the blue fabric (Q).
- Take Mailbox Key (Q).
- Go back.

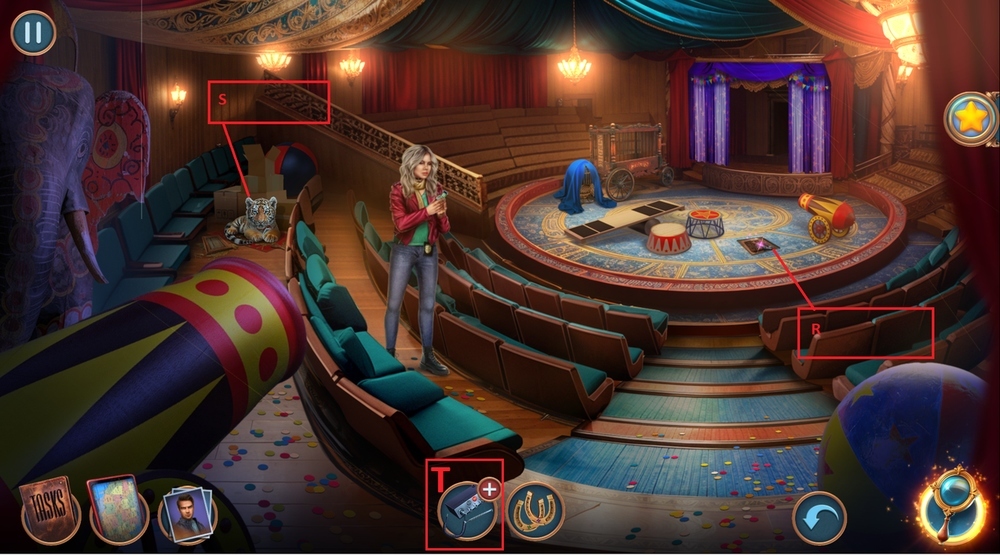
- Easy solution: Arrange as shown in the picture (R).
- Easy solution: Arrange as shown in the picture (S).

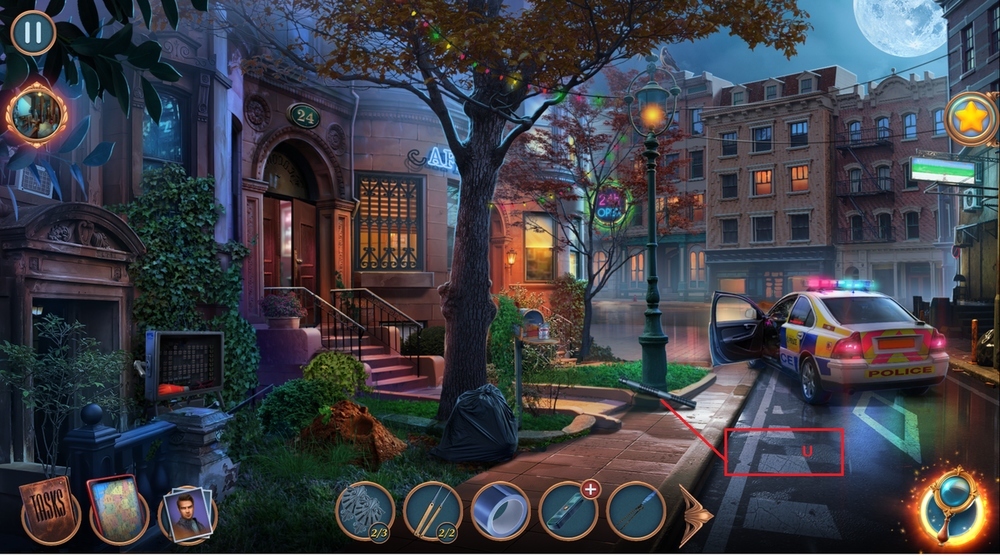
- Use Mailbox Key on the mailbox, take and read the note, take EMBLEMS 2/3, DUCT TAPE, and PHOTO (U).
- Go to Sarah’s House.

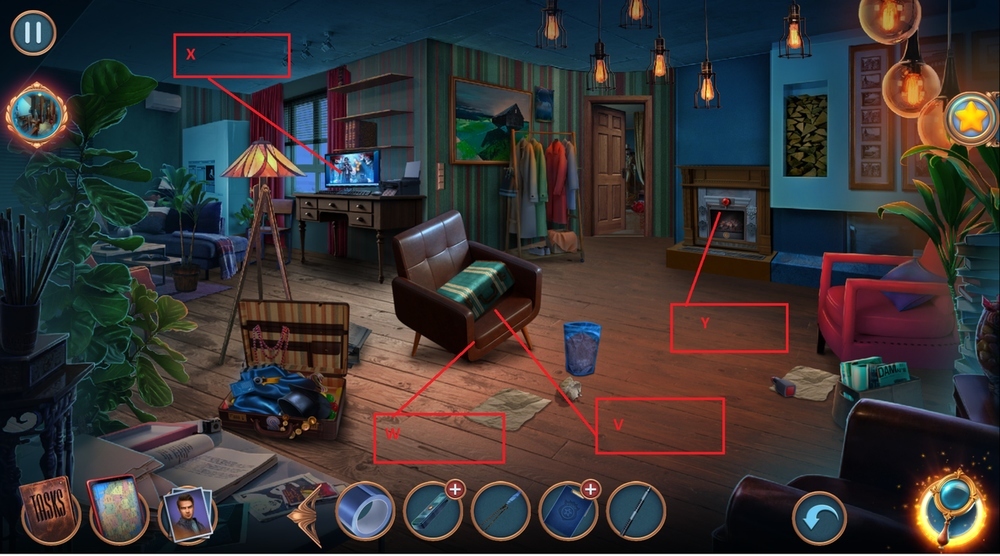
- Use PHOTO on the desktop, enter the code: 1011 (V).
- Play puzzle, earn POSTER (W).
- Use POSTER on Eleanor (X).

- Select this option, earn RANDALL’S KEY FOB (Y).
- Go to Tyler Museum.

- Take and read the note, take VOICE RECORDER (Z).
- Take SOLVENT (A).
- Use SOLVENT on the dirty handkerchief, earn TYLER’S HANDKERCHIEF (B).
- Use TYLER’S HANDKERCHIEF on the tongs, earn FIREPLACE TONGS and take LENS (C).
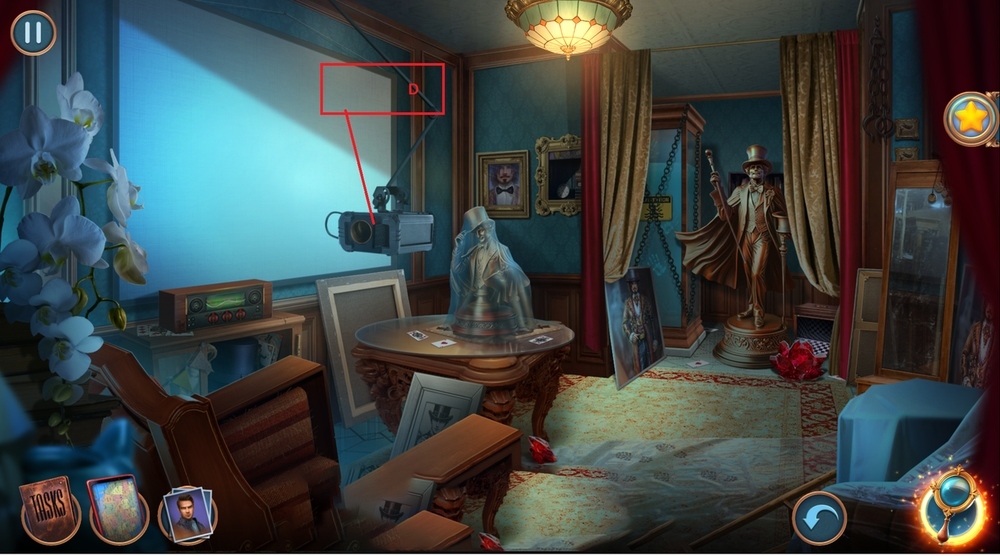
- Use LENS on the projector (D).
- Go to Sarah’s Yard.
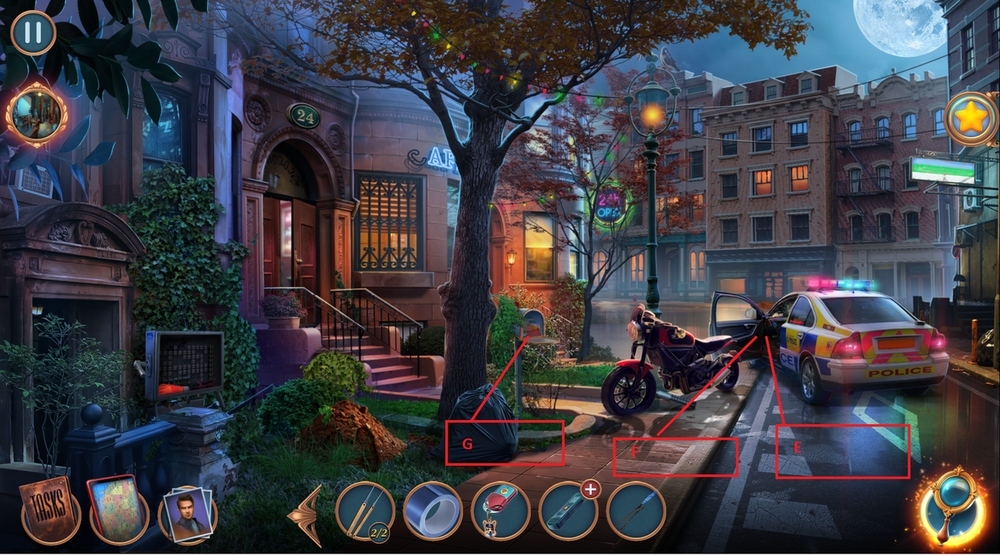
- Use RANDALL’S KEY FOB on glove compartment, take CLIPBOARD (E).
- Take and read COSMETICS BROCHURE, take EVIDENCE BAG (F).
- Use COSMETICS BROCHURE on the mailbox (G).
- Take LIPSTICK SAMPLE (G).
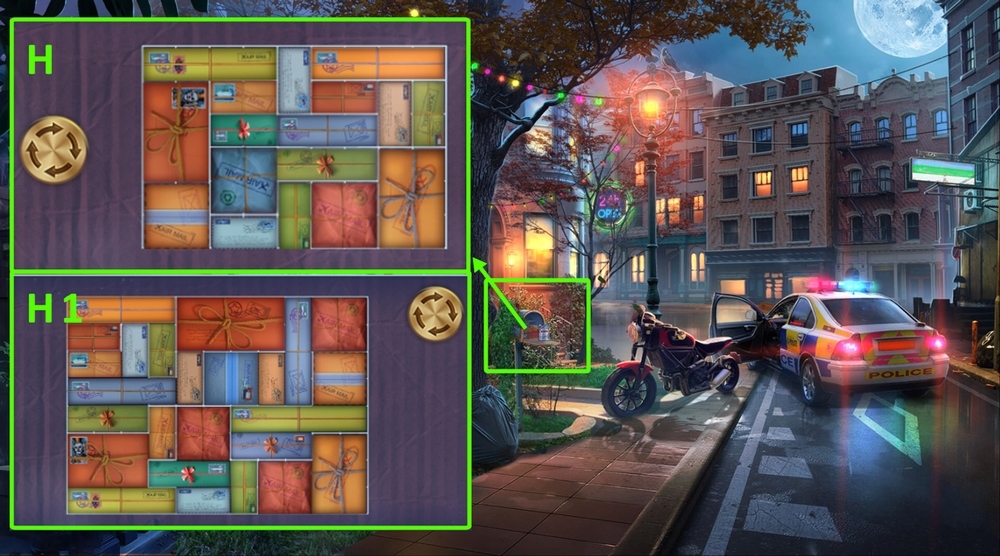
- Easy solution: Follow the instructions (H).
- Hard solution: Follow the instructions (H1).

- Use EVIDENCE BAG on the sand pile, earn SAND (J).
- Go to Sarah’s House.

- Use LIPSTICK SAMPLE and SAND on Eleanor (K).

- Easy solution: Follow the instructions (L).
- Hard solution: Follow the instructions (M).

- Take MAGICIAN’S HAT (N).
- Take SELF-DEFENCE RING, use MAGICIAN’S HAT on the “hat” slot, take ASHTRAY and DARTS (O).
- Use DARTS on the balloons, throw 3 darts at the balloons, take COIN (P).
- Use COIN on the ticket machine, take CIRCUS TICKET (Q).
- Use CIRCUS TICKET on the ticket turnstile (R).

- Easy solution: Follow the instructions (S).
- Hard solution: Follow the instructions (T).
- Take BATON (U).
- Go to Sarah’s House.
- Use BATON on the chair, take EMBLEMS 3/3, use DUCT TAPE on the bloody handprint, earn BLOODY PRINT (V).
- Use FIREPLACE TONGS on the loose board, take FANG and BATTERY (W).
- Play puzzle, earn FINGERPRINTS (X).
- Use EMBLEMS on the fireplace, take PURPLE POWDER and CAR CHARGER, use FANG on the fireplace’s bottom, take METAL BOW TIE (Y).
- Go to Tyler Museum.

- Use METAL BOW TIE on Tyler’s portrait, take AMBER EYE 1/2 (Z).
- Use BATTERY on VOICE RECORDER, earn VOICE RECORDER (A).
- Use PURPLE POWDER on CLIPBOARD (B).
- Use FINGERPRINTS on BLOODY PRINT, click on Tyler Nash’s case file, earn FINGERPRINTS (C).

- Use VOICE RECORDER on the projector, earn VOICE RECORDING (D).
- Use VOICE RECORDING on the stereo system (E).

- Easy solution: 3-3-3-3-3-2-1 (F).
- Hard solution: 1-1-2-2-2-2-2-2-2-2-2-2-2-4-4-4-4-4 (G).
- Take AMBER EYE 2/2.

- Use AMBER EYE on the statue (I).
- Play puzzle and read the journal (J).
- Go to Sarah’s Yard.

- Use CAR CHARGER and FINGERPRINTS on the police radio (K).

- Easy solution: Follow the instructions (L).
- Hard solution: Follow the instructions (M).

- Take ENFORCER (N).
- Use LOCK PICKING SET on the drawer’s lock (O).

- Easy solution: A-4-1-B-4-3-C-4-B-2-BTNx2-C-3 (P).
- Hard solution: A-5-1-B-5-3-D-5-BTNx3-4-B-2-C-5-3 (Q).
- Take COMBINATION.

- Use COMBINATION on the safe, turn the tumbler, take BROKEN TRANSMITTER, DEAD TASER, and NUMBER TAG (S).
- Take and read CONFISCATED DIARY (T).
- Use NUMBER TAG on the tagless blue folder, read and take TYLER’S FILE (U).
- Use CONFISCATED DIARY and TYLER’S FILE on CLIPBOARD, earn INTERROGATION KIT (V).

- Use INTERROGATION KIT on Tyler (W).
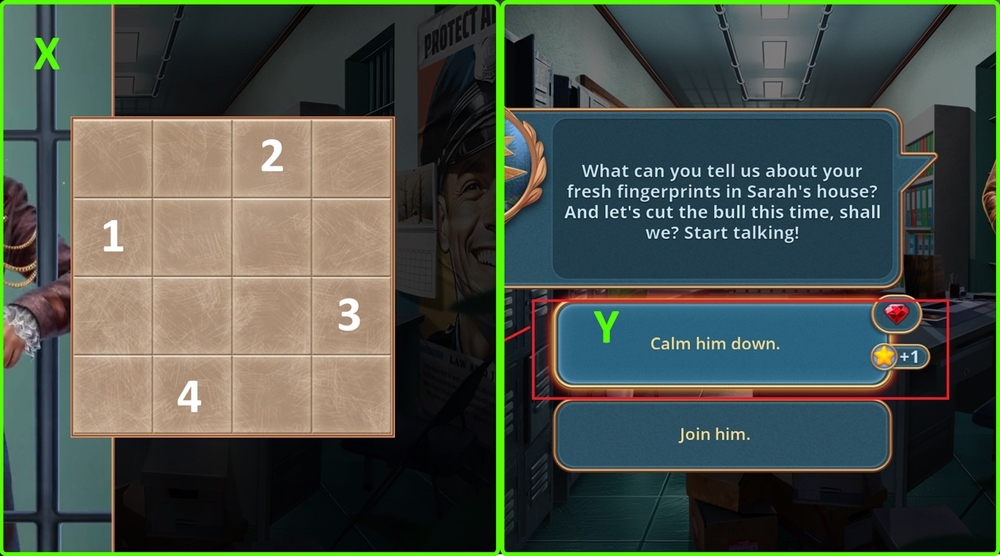
- Solution: 1-2-3-4 (X).
- Select this option, earn HANDCUFFS (Y).
- Use SELF-DEFENCE RING on the ropes.

- Take BROKEN SLINGSHOT (A).
- Take POUCH (B).
- Take and read the note, take HANDLE, use ASHTRAY on the chemical lab (C).
- Use HANDLE on the spike in the drawer, take HAIR TIE and POWDER SAMPLE (D).

- Use HAIR TIE on BROKEN SLINGSHOT (E).
- Use POWDER SAMPLE on the chemical lab (F).

- Easy solution: 5-1-b , 1-2-4-B , 2-3-B , 9-6-5-B , 1-8-B , 7-8-10-B (G).
- Hard solution: 1-5-B , 4-2-1-B , 2-3-B , 9-6-5-B , 1-8-B , 7-8-10-B , 12-3-8-B , 1-10-13-B (H).
- Take CAUSTIC SOLUTION.

- Use CAUSTIC SOLUTION on the lock (J).
- Play puzzle, earn LIGHT BULB (K).
- Use LIGHT BULB on the mirror frame, take and read note, use POUCH on the blue powder, earn SEDATIVE (L).
- Use SEDATIVE on BROKEN SLINGSHOT, earn SLINGSHOT WITH POWDER (M).

- Use SLINGSHOT WITH POWDER on the man in the door (N).
- Easy solution: Follow the instructions (O).
- Hard solution: Follow the instructions (P).
- Select this option (Q).

- Use ENFORCER on the poster, take BATTERY (R).
- Use BATTERY on DEAD TASER, earn TASER (S).
- Use TASER on the ticket turnstile (T).

- Easy solution: Lx5-U-Lx12-Dx2-Lx8-D-Lx2 (U).
- Hard solution: Lx3-D-Lx5-U-Lx4-D-Lx4-Dx2-Lx3-Ux2-Lx6-U-L (V).
- Go to Circus Stage.

- Take KNIFE (W).
- Use KNIFE on the roped bow, take WRENCH and AMMONIUM (X).
- Use AMMONIUM on Eleanor (Y).

- Select this option (Z).
- Earn REMOTE.
- Use REMOTE on the curtain stage (B).
- Easy solution: Arrange as shown in the picture 1 step – 2 step – 3 step (C).
- Hard solution: Arrange as shown in the picture 1 step – 2 step – 3 step – 4 step (D).
- Take SQUIRREL TAIL (E).
- Go Backstage.

- Use HANDCUFFS on the broken chain (F).
- Take SPOTLIGHT PART, use WRENCH on the nuts, earn SPOTLIGHT (G).
- Use SPOTLIGHT on the broken chain, take MIRROR (H).
- Use MIRROR on the chain behind the door (I).
- Use SPOTLIGHT PART on the melted wax, take HOOK (J).
- Use HOOK on the chain behind the door (I).
- Easy solution: Follow the instructions (L).
- Hard solution: Follow the instructions (M).
- Go to Dressing Room.

- Use SQUIRREL TAIL on the spider web, take LEVER (N).
- Use LEVER on the box, take and read the note, take ANTENNA (O).
- Play puzzle, earn HORSESHOES (P).
- Use ANTENNA on BROKEN TRANSMITTER (T).
- Go to Circus Stage.
- Use HORSESHOES on the lock, take TIGER FOOD (R).
- Use TIGER FOOD on the tiger, take GPS (S).
- Use GPS on BROKEN TRANSMITTER, earn RADIO TRANSMITTER (T).
- Go back.

- Use RADIO TRANSMITTER on police car (U).
- Solution: Follow the instructions (V).
- Solution: Follow the instructions (W).
Congratulations! You have completed the game Twin Mind 5: The Deathly Trick.


