Unsolved Case 2: Murderous Script (Bonus Chapter) – You will once again plunge into a world of intrigue and mystery. You will not only solve tricky puzzles and search for items, but also solve mysteries to advance in the investigation. To uncover the true killer, you will have to collect all the clues, search the crime scene and successfully complete the investigation. Only then will you be able to solve this dark and tangled story to the end and find justice.
Bonus Chapter Walkthrough

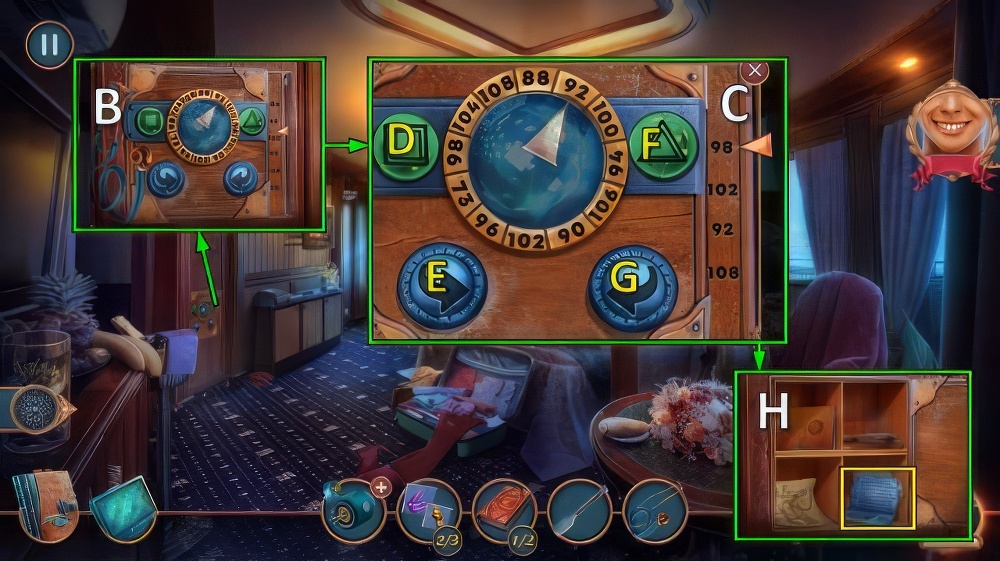
- Take ELECTRIC CUTTER and ESTER’S RING (A).
- Place ESTER’S RING (B).
- Enter M-O-T-H (C).
- Take note and BATTERY (D).
- BATTERY on ELECTRIC CUTTER, receive ELECTRIC LAWNMOWER.
- Use ELECTRIC LAWNMOWER.
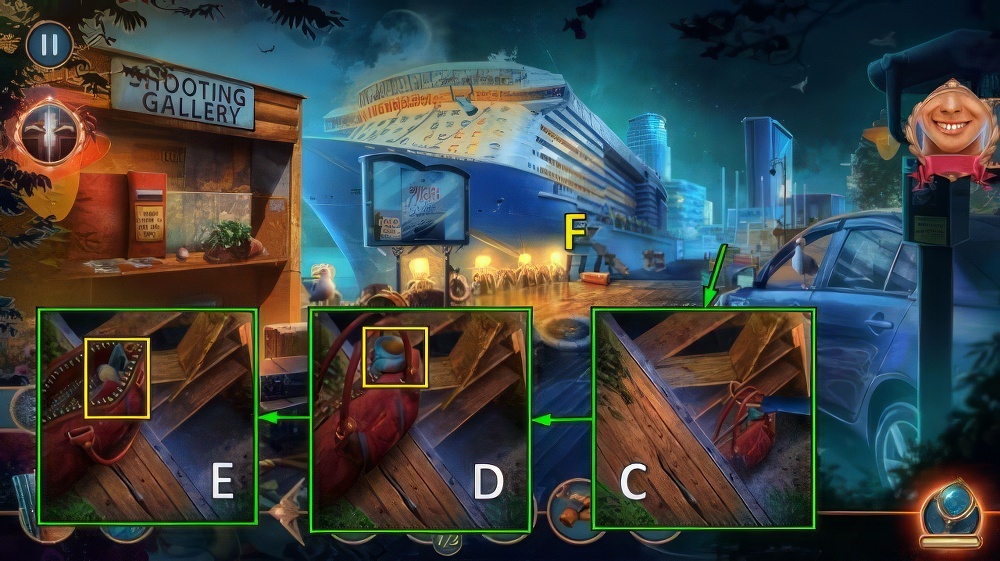
- Take LIGHTER and EMPTY COIL (E).
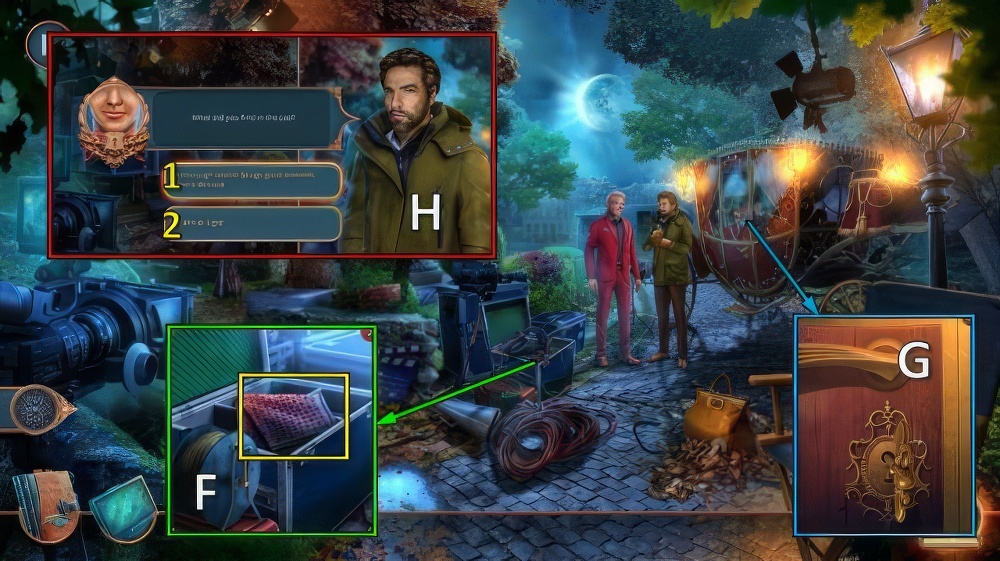
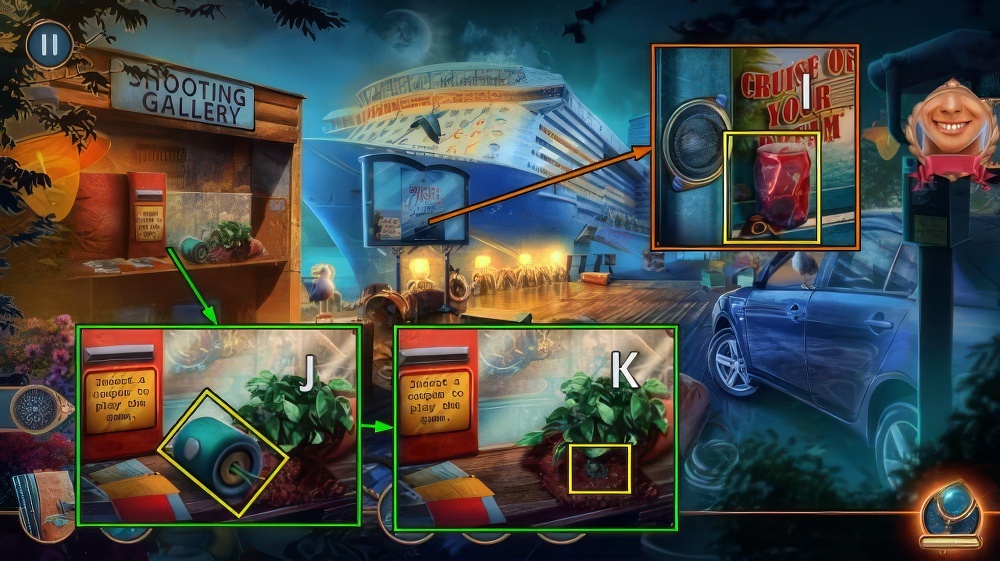
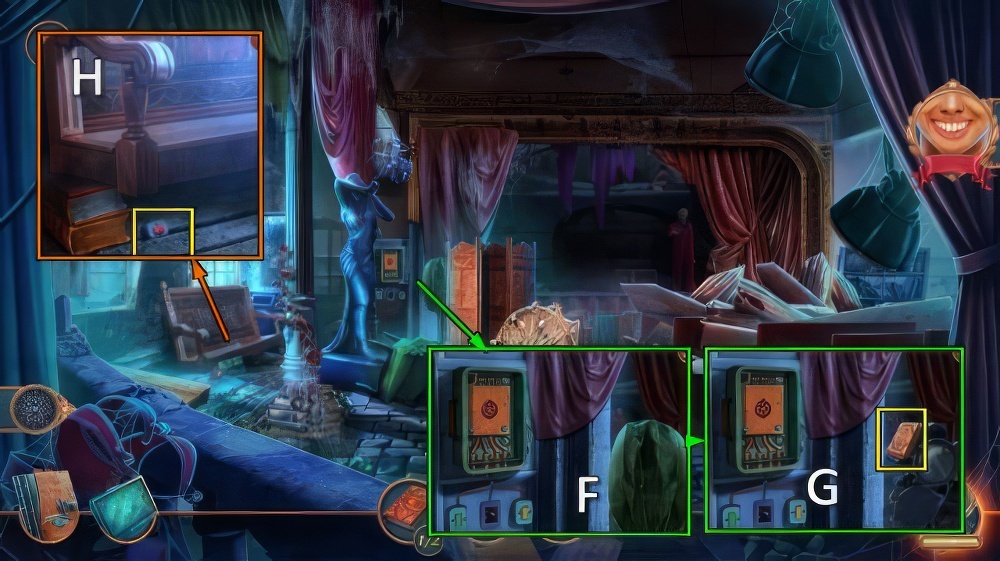
- Use EMPTY COIL, take ESTER’S SCARF and CAB KEY (F).
- Use CAB KEY for puzzle (G).
- Select 1 or 2 (H).
- Receive CARD ADAPTER.
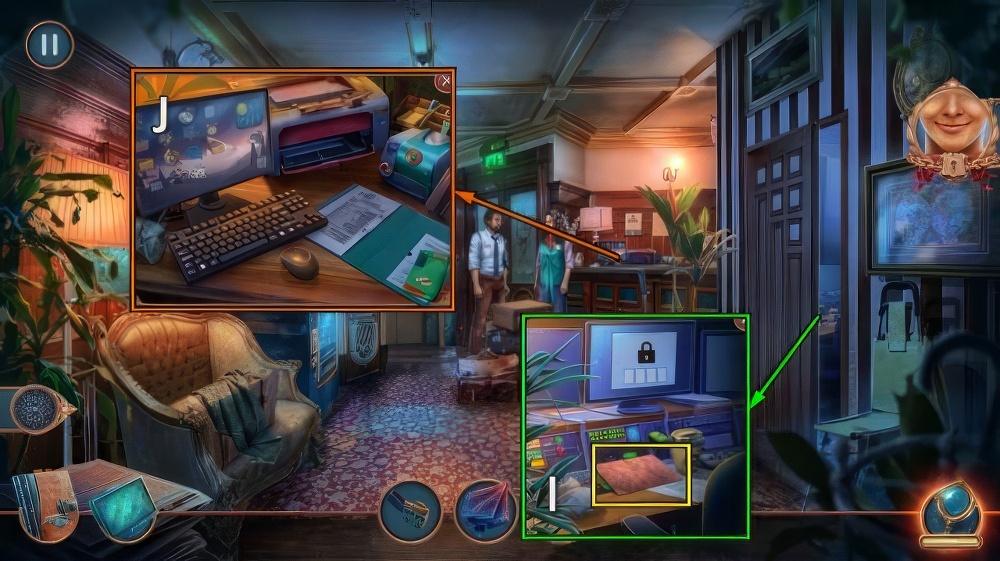
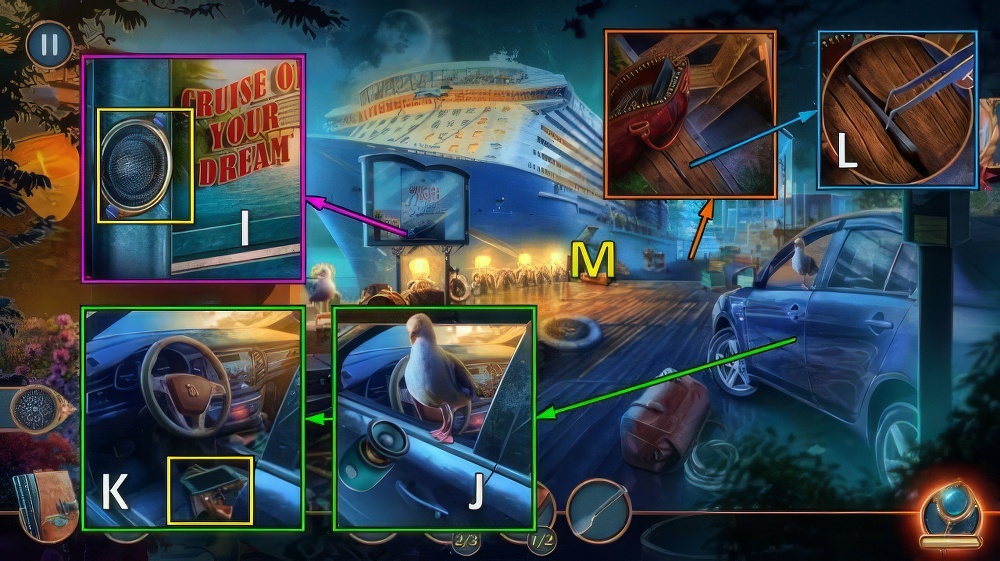
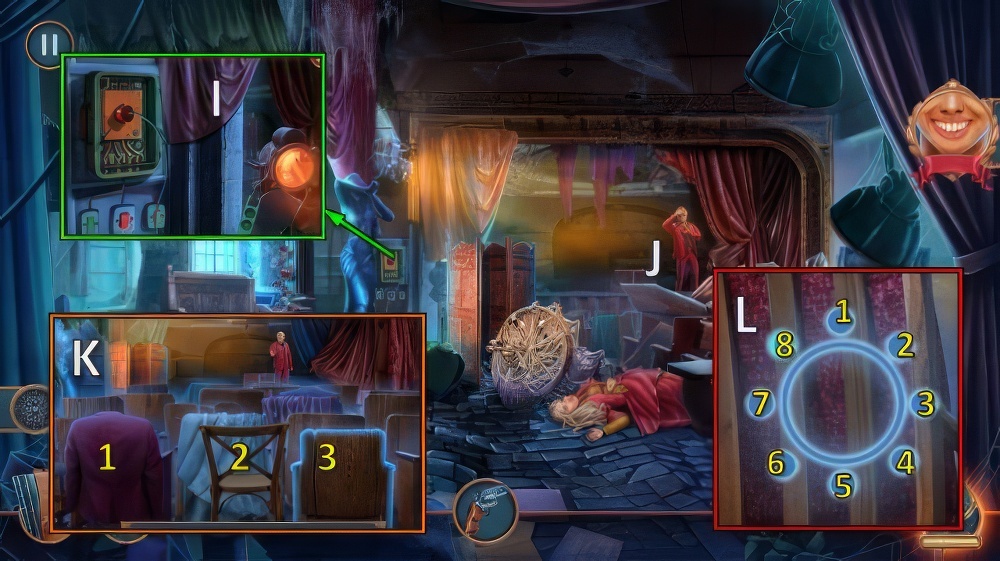
- Take PASSWORD and BLANK CARD (I).
- Place CARD ADAPTER and BLANK CARD (J).
- Move the chains of elements into empty cells until they sit on the appropriate symbols.
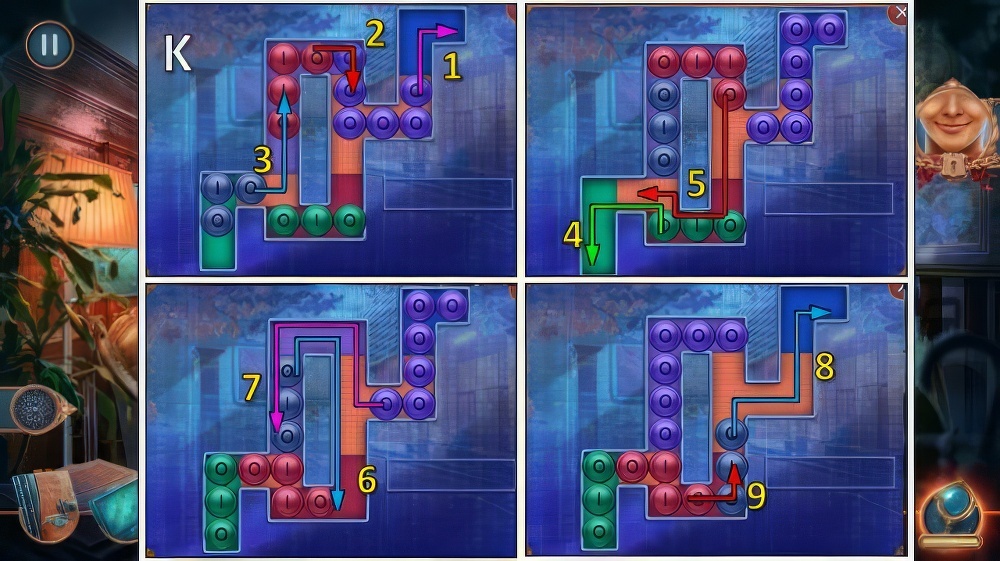
- Easy and hard walkthrough (K).

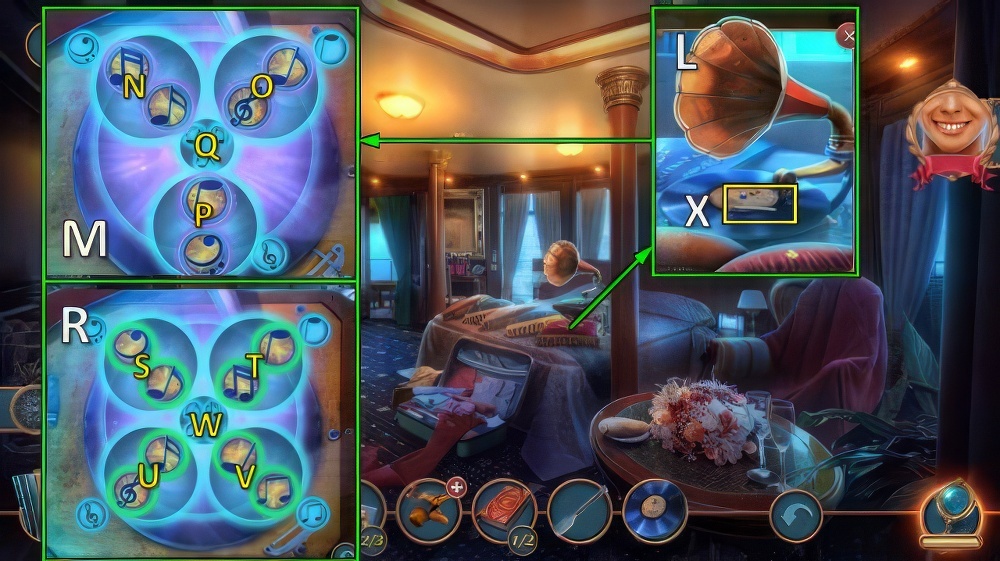
- Take PENTHOUSE CARD (L).
- Use PENTHOUSE CARD (M).
- Go (N).
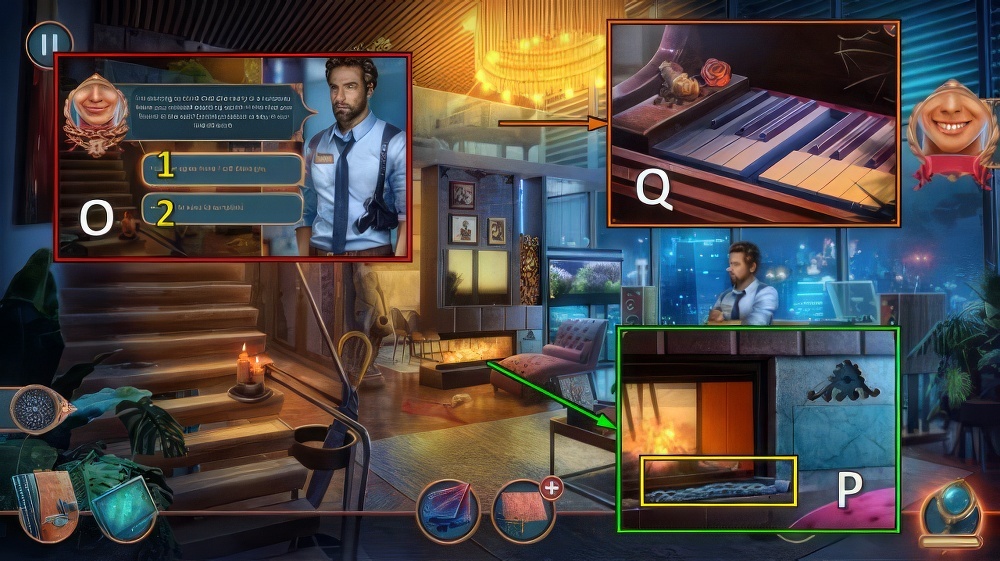
- Select 1 or 2 (O).
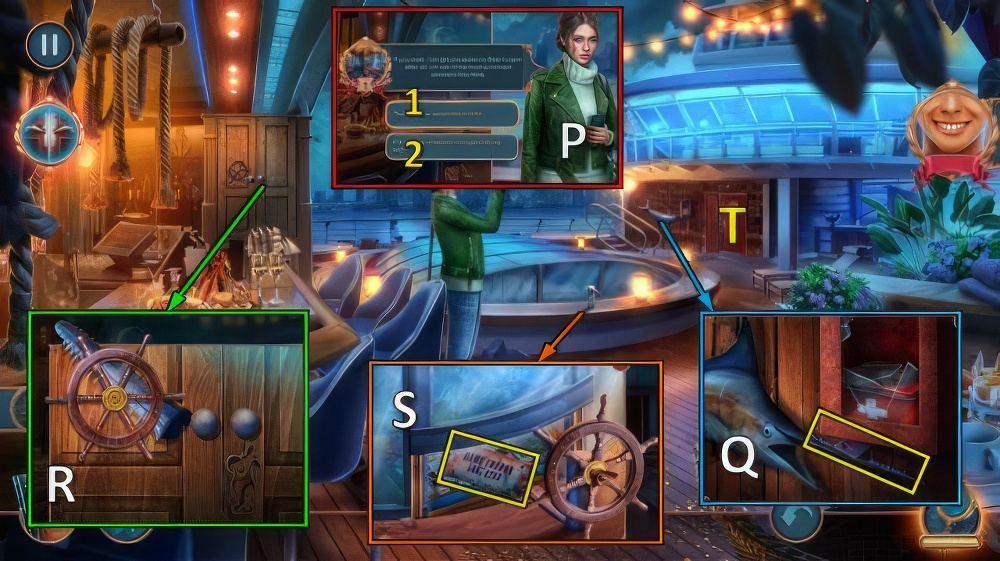
- Take CHAIN and PIANO KEY (P).
- Place PIANO KEY (Q).
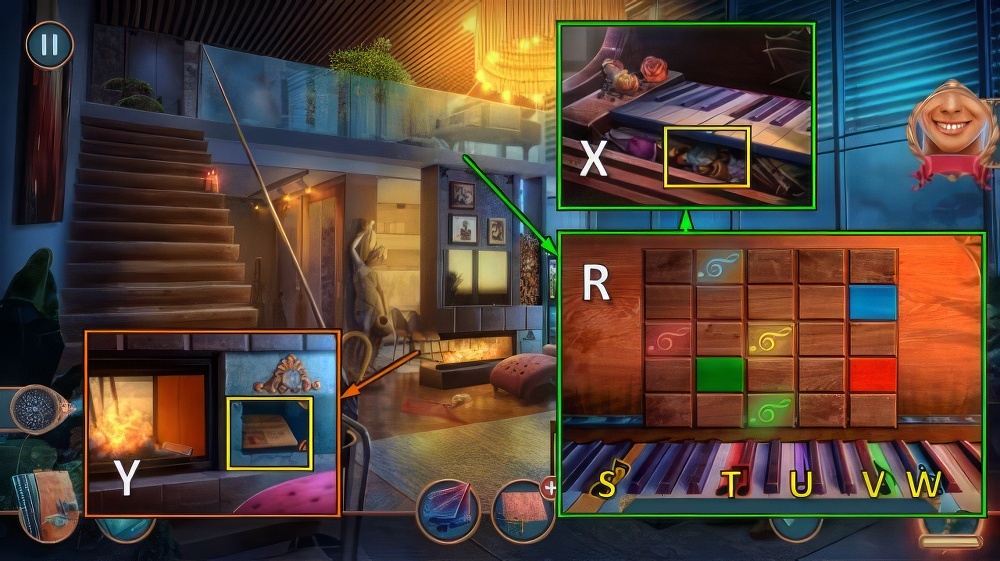
- Place the treble clefs in the slots corresponding to their color.
- Press the keys to move them; thy will move as highlighted.
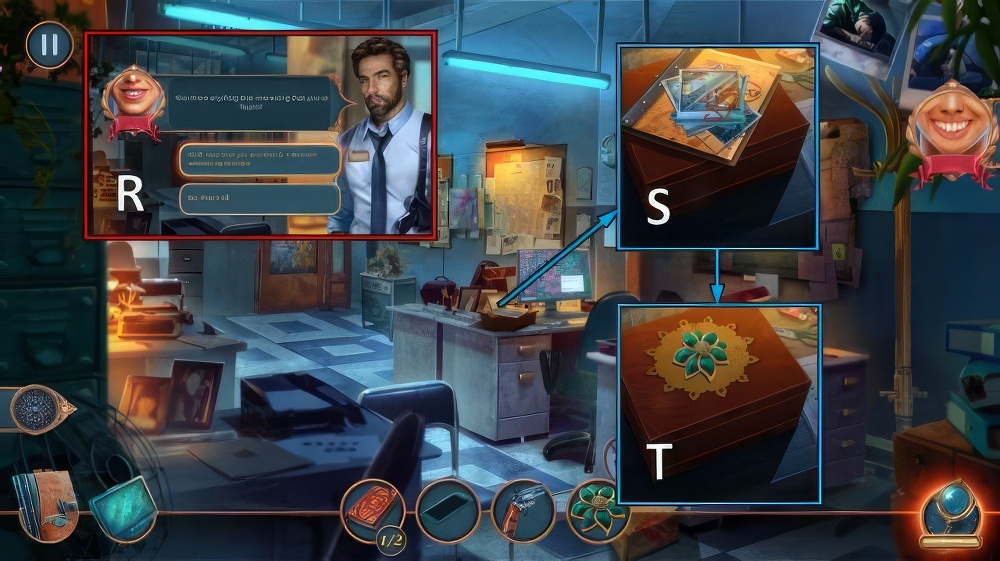
- Easy walkthrough (R): S×3-T-V-U×3-V×3-U×3-V×3-T×3-S-W×2-T.
- Hard walkthrough (R): S×3-T-V-U×3-V×3-U×3-V×3-T×2-W×2-T-S.
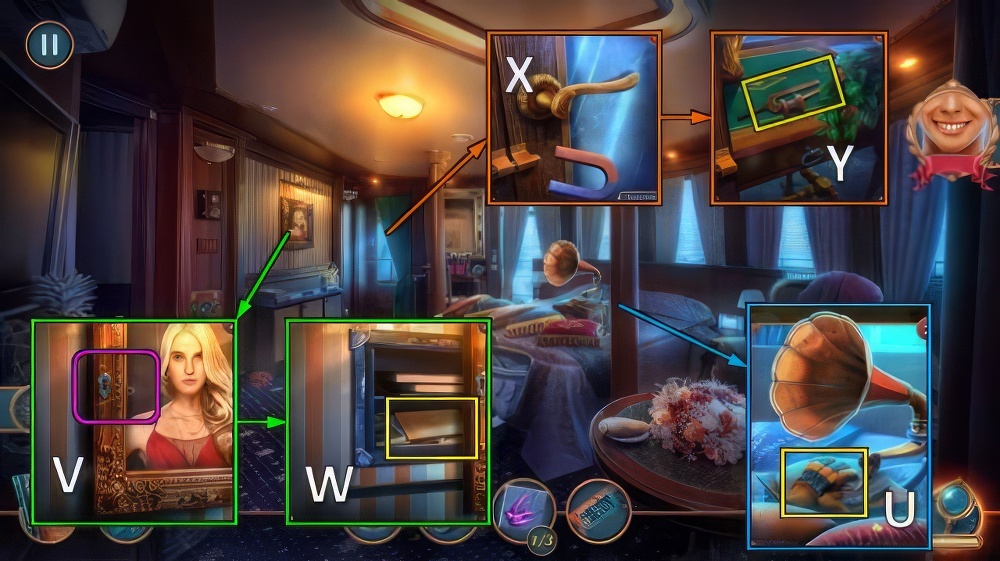
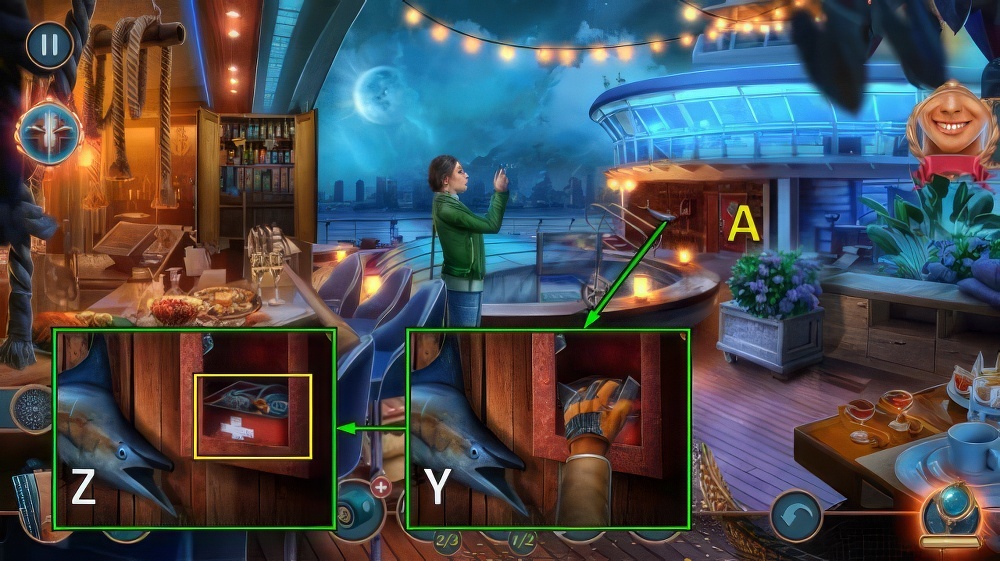
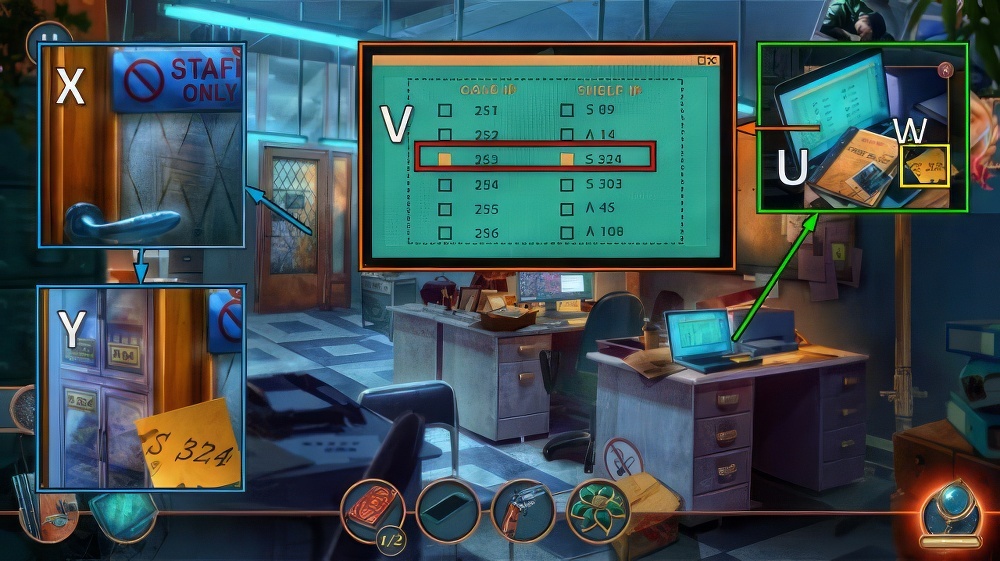
- Take MOON AND SUN AMULET (X).
- Place MOON AND SUN AMULET, take newspaper and 5 CENTS (Y).
- Walk down.
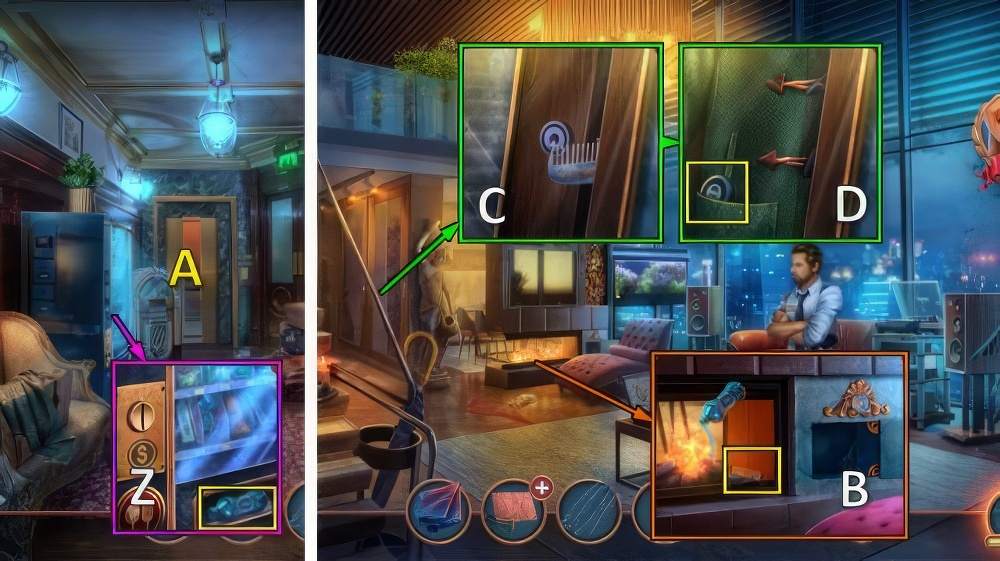
- Use 5 CENTS, take BOTTLE (Z).
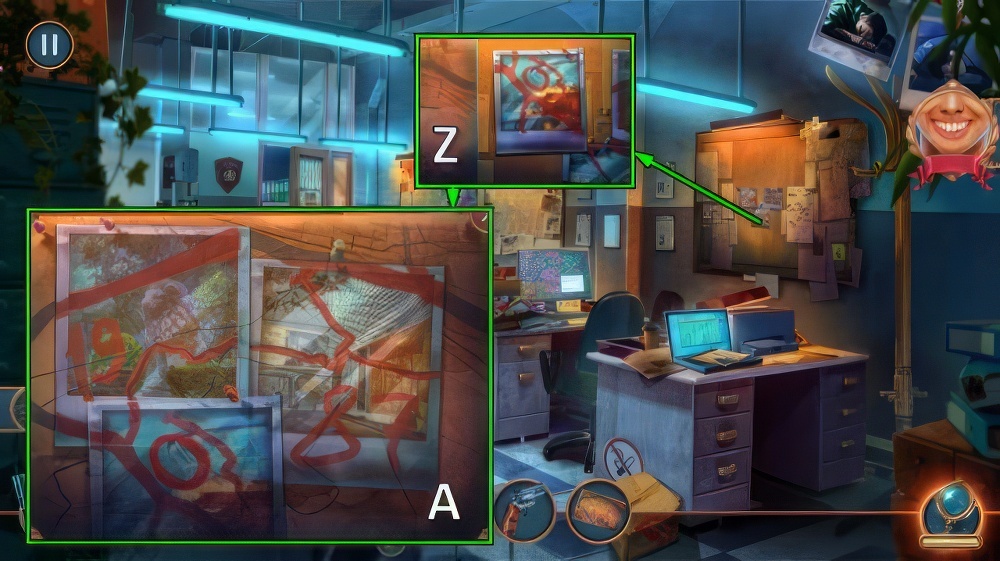
- Go (A).
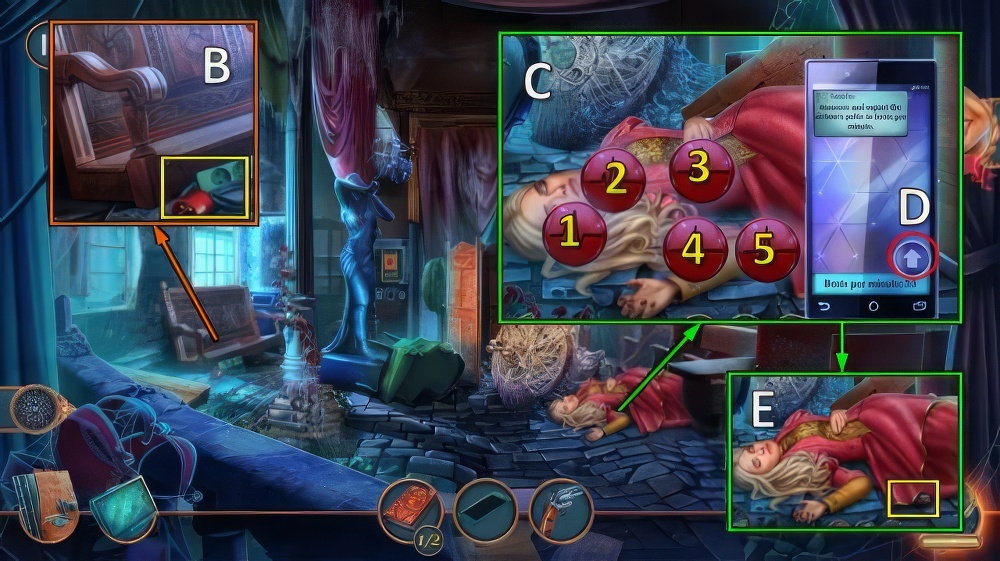
- Use BOTTLE, take COMB with ESTER’S SCARF (B).
- Use COMB (C).
- Take HAIR WAX, BASEBALL and PEN (D).
- Walk down.
- LIGHTER and PEN on PASSWORD.
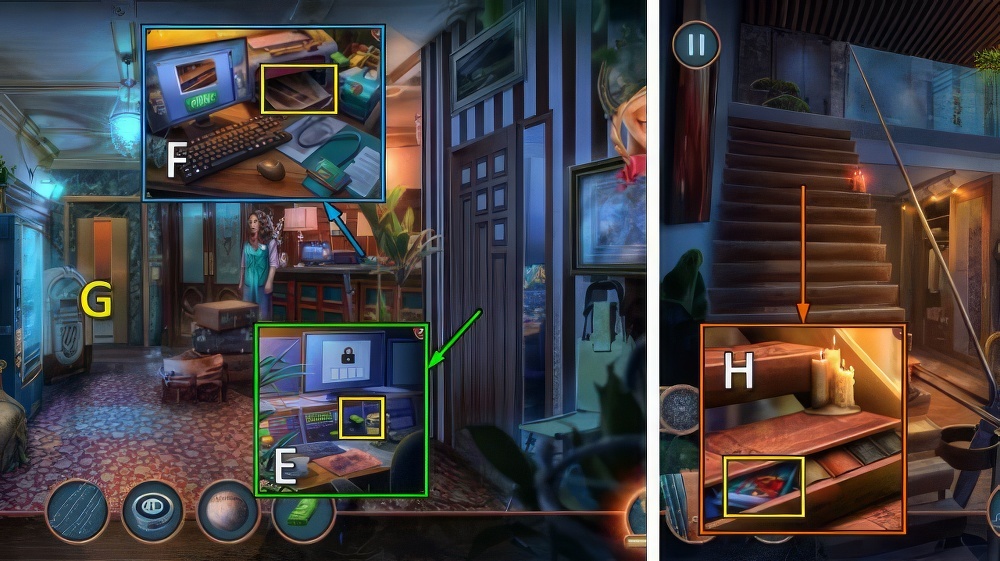
- Place PASSWORD for puzzle, take FLASHDRIVE (E).
- Place FLASHDRIVE, take PRINTED PHOTO (F).
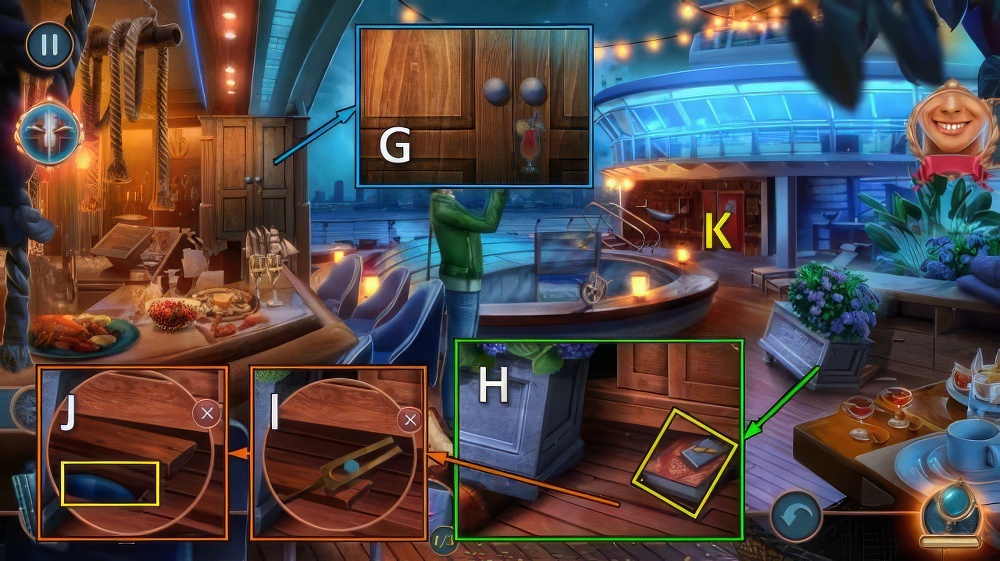
- Go (G).
- Use PRINTED PHOTO.
- Open steps, take photo (H).
- Take SCREW and CUP (I).
- Take PORTABLE SPEAKER (J).
- Use CUP, take GEAR (K).
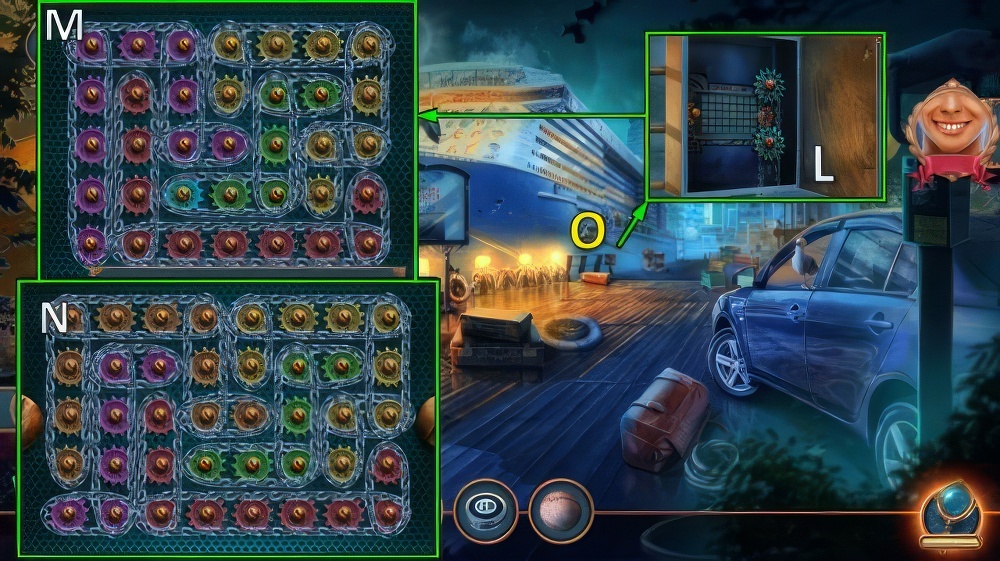
- Place GEAR and CHAIN (L).
- Connect all pairs of gears of the same color by chains.
- To do this, press on one of them and pull over the other gears.
- Easy walkthrough (M).
- Hard walkthrough (N).
- Go (O).
- Select 1 or 2 (P).
- Note: if you’ve selected 2 at this point, skip steps marked #, below.
- Take TILES 1/3 and SAWFISH NOSE (Q).
- Take HELM with SAWFISH NOSE (R).
- Place HELM and SCREW, take GAME COUPON (S).
- # Go (T).
- # Take TORN MITTEN and THIN HAIRPIN (U).
- # Use THIN HAIRPIN (V).
- # Take note and MAGNET (W).
- # Use MAGNET (X).
- # Take THREAD SPOOL and TUNING FORK (Y).
- Go to Promenade.
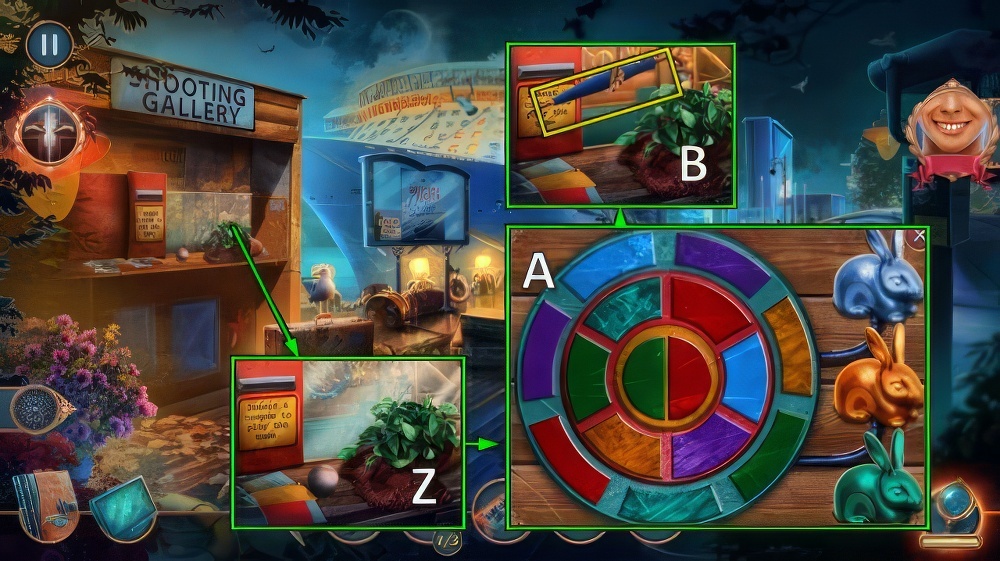
- Place BASEBALL and GAME COUPON (Z).
- Knock out all sectors on the target and the rabbits.
- To do this, you must target three sectors of the same color.
- If they don’t match, the sectors will rotate.
- Easy and hard walkthrough (A).
- Take UMBRELLA (B).
- Use UMBRELLA (C).
- Take DUCT TAPE (D).
- Use HAIR WAX, take DRINKS EMBLEM (E).
- Go (F).
- Place DRINKS EMBLEM for puzzle (G), receive SOUVENIR BOTTLE.
- Place SOUVENIR BOTTLE, take TILES 2/3, THICK BOOK 1/2 and SPATULA (H).
- # Use TUNING FORK (I).
- # Take VINYL RECORD (J).
- # Go (K).
- # Place VINYL RECORD (L).
- # Put the right notes on the outside of the record by clicking on the circles to move them around.
- # Easy walkthrough (M): N-Q-N-Q-N-P-Q×2-O-Q-O.
- # Hard walkthrough (R): W×3-T-W-T-W-T-W×7-T-W×7-S-T.
- # Take GRAMOPHONE NEEDLE (X).
- # Walk down.
- # GRAMOPHONE NEEDLE and THREAD SPOOL on TORN MITTEN, receive GLOVE.
- # Use GLOVE (Y).
- # Take STETHOSCOPE (Z).
- # Go (A).
- # Place STETHOSCOPE.
- # Input the numbers on the safe in the correct order.
- # Select a triangle or a square to set how many spaces the rotating arrow will skip while rotating.
- # Easy walkthrough: D-F-E-D-E-D-E-F-G×2-F×2.
- # Hard walkthrough: D-G×3-E-D-F-E-D-G-D-G-D-F-E-G-E×2-D-F-E.
- # Take notes (H).
- Go to Promenade.
- Use SPATULA, take SPEAKER (I).
- SPEAKER and DUCT TAPE on PORTABLE SPEAKER.
- Use PORTABLE SPEAKER (J).
- Take PHONE, GUN and TWEEZERS (K).
- Take TILES 3/3 with TWEEZERS (L).
- Go (M).
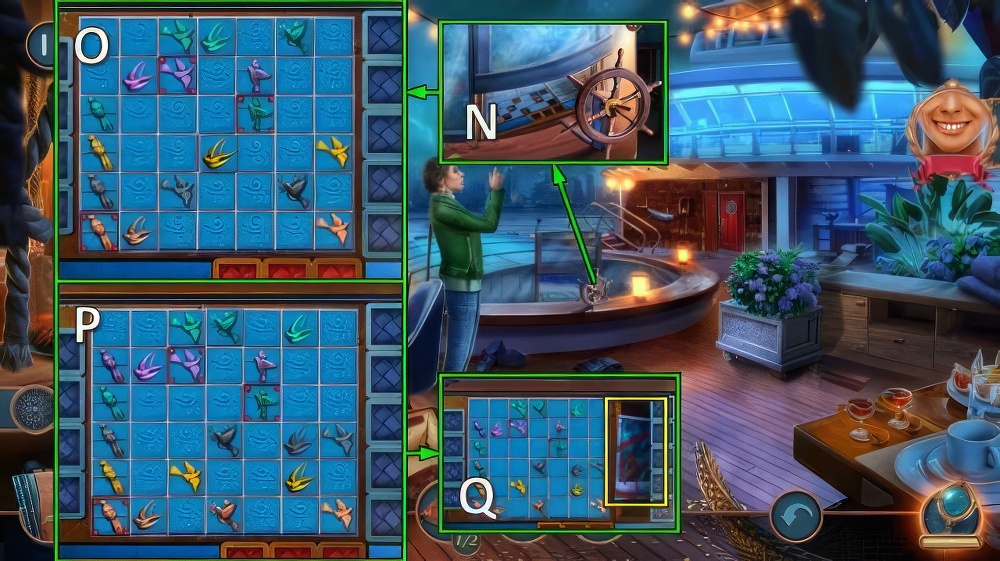
- Place TILES (N).
- Arrange the tiles so that in one row, there are birds of the same color, and in one column, there are birds of the same species.
- Easy walkthrough (O).
- Hard walkthrough (P).
- Take photo (Q).
- Select 1 or 2 (R).
- Note: if you’ve selected 2 at this point, skip steps marked #, below.
- # Receive EMERALD FLOWER.
- Take CLUES and CASE FOLDER (S).
- # Place EMERALD FLOWER for puzzle (T).
- Place CASE FOLDER (U), select V.
- Take RACK NUMBER (W).
- Open (X).
- Place RACK NUMBER for puzzle (Y).
- Receive OLD TOWN MAP.
- Place CLUES and OLD TOWN MAP (Z).
- Arrange photos (A).
- Take EXTENSION CORD (B).
- Place PHONE (C).
- Select 1-4, 4-5, 1-3, 1-2.
- Send twice (D).
- Take phone and SWITCHBLADE (E).
- Use SWITCHBLADE (F).
- Take THICK BOOK 2/2 (G).
- Place THICK BOOK, take SWITCH (H).
- Place EXTENSION CORD and SWITCH, move light (I).
- Use GUN (J).
- Choose the right chair to get close to your opponent; the wrong choice will result in the game starting again.
- Select chair 3, 1, 3, 2 and 3 (K).
- Repeat the pattern to shoot back.
- Walkthrough (L): 2-6-5-3-7-1, 7-3-5-4-1-8, 5-3-2-6-4-8-7.
Congratulations! You have completed the game Unsolved Case 2: Murderous Script.


