Unsolved Case 2: Murderous Script – The game walkthrough begins with you and your partner, experienced detective Scott, facing a new challenge with a mysterious murder. You will have to take on the investigation, in the course of which you will have to interrogate suspects, collect evidence, solve complex puzzles and solve the intricate plot of the crime. On your shoulders is a huge responsibility to make difficult decisions that can affect the outcome of the case. You will have to show not only professionalism, but also courage to solve this tangled story and find the real killer. If you can not pass any of the puzzles or do not know where the items are, on our site you can watch the walkthrough of the game Unsolved Case 2: Murderous Script, and reveal the truth.
Unsolved Case 2: Murderous Script – Walkthrough
Here you can see full walkthrough of Unsolved Case 2: Murderous Script game, namely for all chapters, including bonus chapter, in pictures.

- Take PLIERS, BOTTLE OPENER and CUFFLINK (A).
- Take map and MY BAG (B).
- CUFFLINK on MY BAG, take journal and VICTIM’S DOSSIER.
- Place VICTIM’S DOSSIER for puzzle (C).
- Select 1 or 2 (D).
- Receive RAILWAY BADGE.
- Go (E).

- Take CHAIN, use RAILWAY BADGE (F).
- Take CAMERA (G).
- Use CAMERA (H).

- Focus the camera in the right spot using the camera’s own sliders.
- Easy walkthrough (I).
- Hard walkthrough (J).
- Go (K).

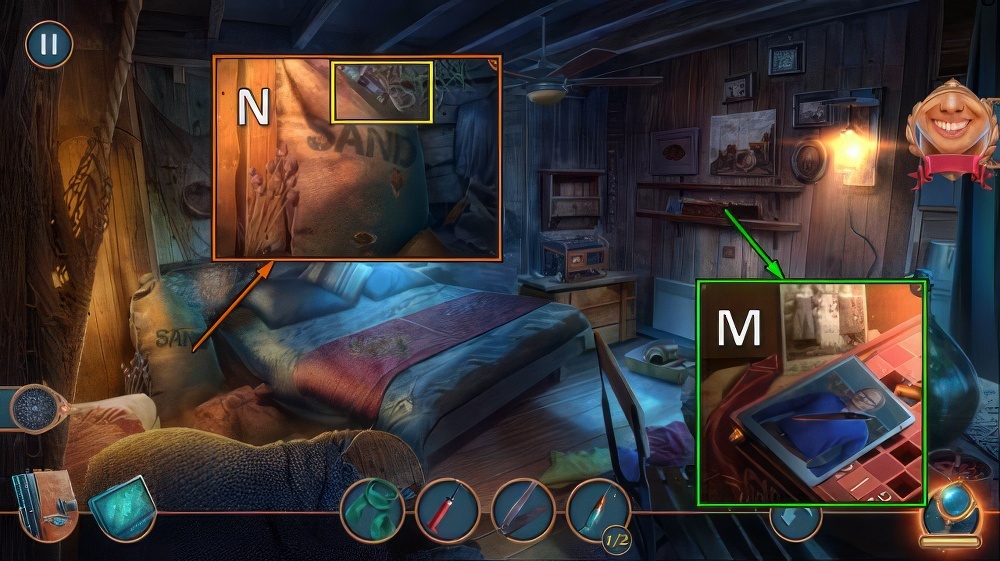
- Use PLIERS (L), take STENCIL WITH HOLES and evidence 1/4 (M).
- Take HAND CREAM and LIGHT BULBS 1/2 (N).
- Open, take evidence 2/4.
- Place STENCIL WITH HOLES (O).
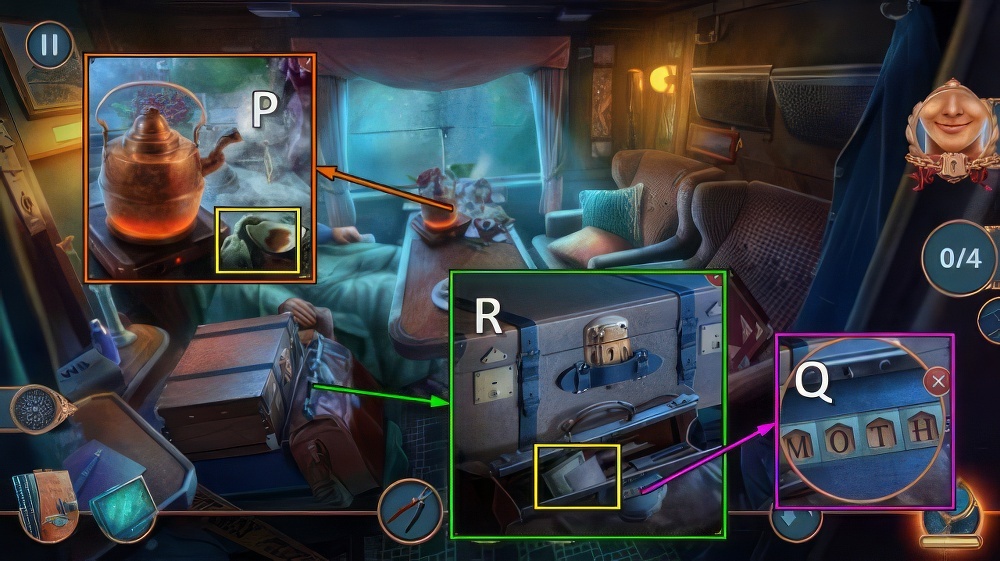
- Take evidence 3/4 (P).
- Enter M-O-T-H (Q).
- Take evidence 4/4 (R).
- Walk down.

- Select 1 or 2 (S).
- Receive NAIL FILE.
- Use NAIL FILE (T).
- Take ACCESS CARD (U).

- Use ACCESS CARD (V).
- Turn the dials in right directions using the guide.
- Easy walkthrough (W): X×3-Y×4-Z×4-A×2-B×4.
- Hard walkthrough (W): Z×4-Y-A-X×3.
- Go (C).

- Go through all dialog (D).
- Take WINE GLASS AMULET PART and DUCT TAPE (E).
- Use BOTTLE OPENER, take BRANDED KEY (F).

- Use BRANDED KEY (G).
- Take TAPE MEASURE (H).
- Walk down twice.
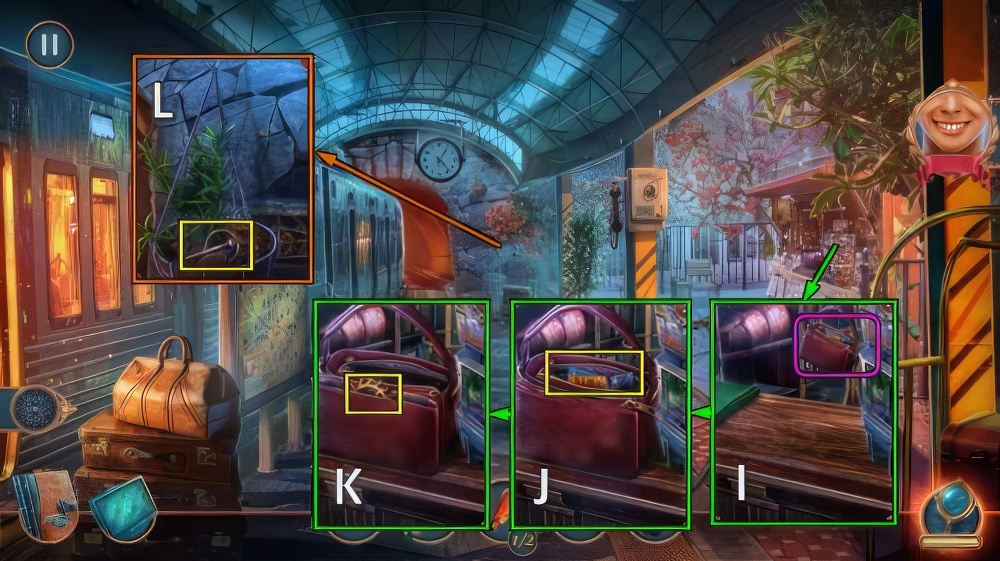
- Use TAPE MEASURE (I).
- Take GLUE and VACUUM BAG (J).
- Use HAND CREAM, take GEAR (K).
- Place GEAR and CHAIN, take FIBULA (L).
- Go to Train Compartment.

- Use FIBULA for puzzle (M), receive HAT.
- Use HAT, take CORKSCREW (N).
- Walk down twice.
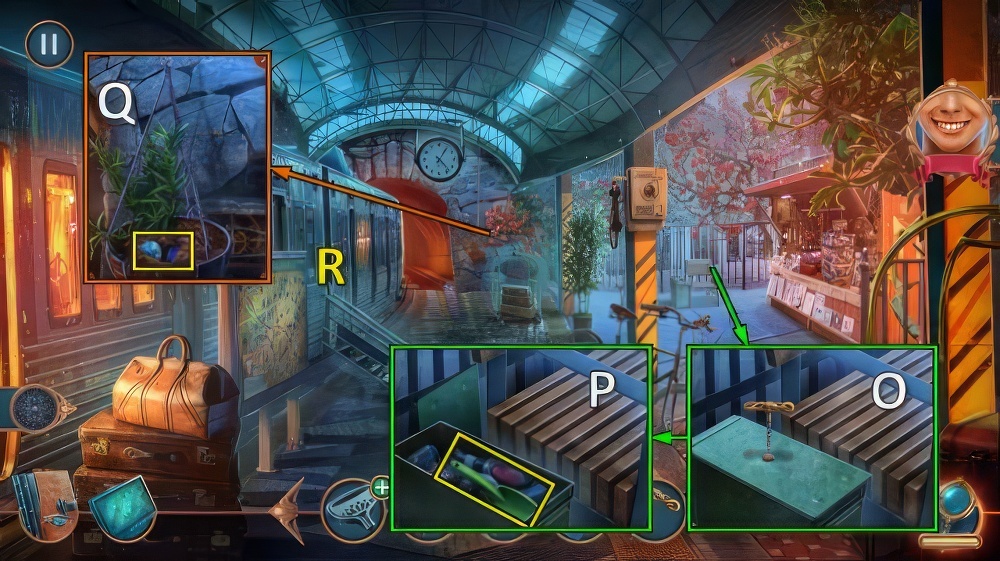
- Use CORKSCREW (O).
- Take GARDENING SHOVEL (P).
- Use GARDENING SHOVEL.
- Take SUCTION CUP KEYCHAIN (Q).
- Go (R).

- Use SUCTION CUP KEYCHAIN (S).
- Put the tokens in the appropriate slots using the buttons on both sides of the game.
- Easy walkthrough (T): U×2-X-V, W×2-U-Y, U×3-A-V-W.
- Hard walkthrough (T): U×2-X-V, W×2-U-Y, U×3-A-V-W, W-V-X.
- Take LATEX GLOVES and HANDKERCHIEF (C).

- Use HANDKERCHIEF (D).
- Take LIGHT BULBS 2/2 (E).
- Go (F).

- Place LIGHT BULBS (G).
- Arrange pieces to restore the original picture.
- Easy walkthrough (H): (2-7)-(4-12)-(5-7)-(10-7)-(7-12)-I-(1-8)-(3-11)-(6-8)-(9-11)-(9-8).
- Hard walkthrough (J): (2-10)-(4-16)-(6-16)-(8-10)-(10-20)-(12-18)-(12-14)-(12-20).
- (10-14)-K-(1-5)-(3-11)-(5-17)-(7-9)-(9-17)-(11-15)-(11-19)-(13-17).
- Take KNITTED SCARF and WINE GLASS AMULET LOWER PART (L).

- GLUE and WINE GLASS AMULET LOWER PART on WINE GLASS AMULET PART, receive WINE GLASS AMULET.
- Use WINE GLASS AMULET (M).
- Take PUMP and TWEEZERS (N).
- Go to Train Compartment.

- Take PUZZLE FRAGMENT with TWEEZERS (O).
- Place PUZZLE FRAGMENT (P).
- Arrange the fragments correctly using arrows.
- Click the fragment to put it in place.
- Easy walkthrough (Q): R×3-9-R-12-R-7-R-1-6-R-4-8-R×3-2.
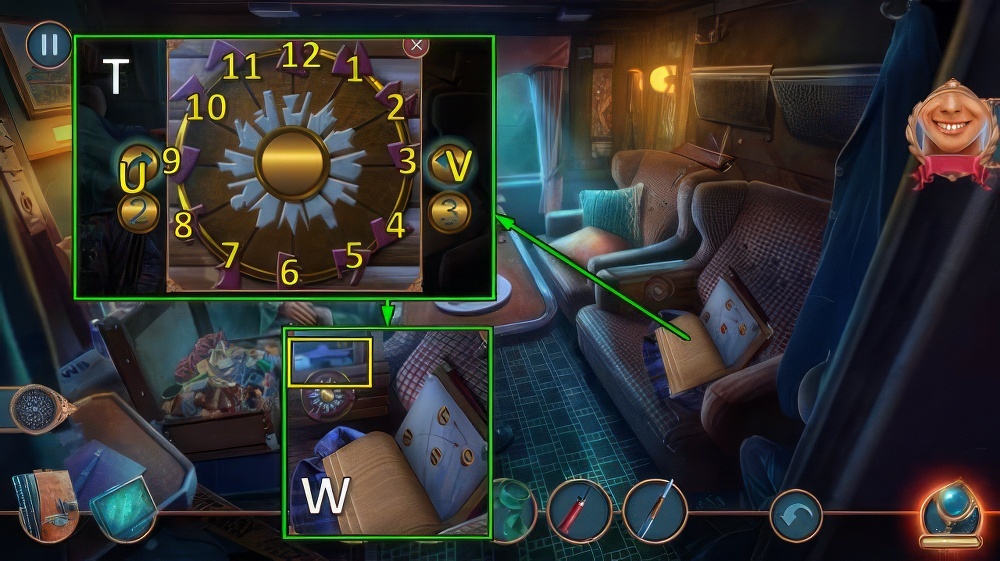
- Hard walkthrough (T): U-1-U-2-U×2-3-U-10-V-4-12-V×2-5-U-9-11-U-6-7-8.
- Take STAPLE REMOVER and PLUG (W).
- Go to Dining Car.

- Place DUCT TAPE and PLUG, take CLOCK WEIGHT (X).
- Place CLOCK WEIGHT, use LATEX GLOVES and VACUUM BAG (Y).
- Receive EVIDENCE.

- Select 1 or 2 (Z).
- Print, take STAFF AND PASSENGER LIST and CLIPPERS (A).
- Use STAPLE REMOVER, take note and NEW FINGERPRINTING KIT (B).
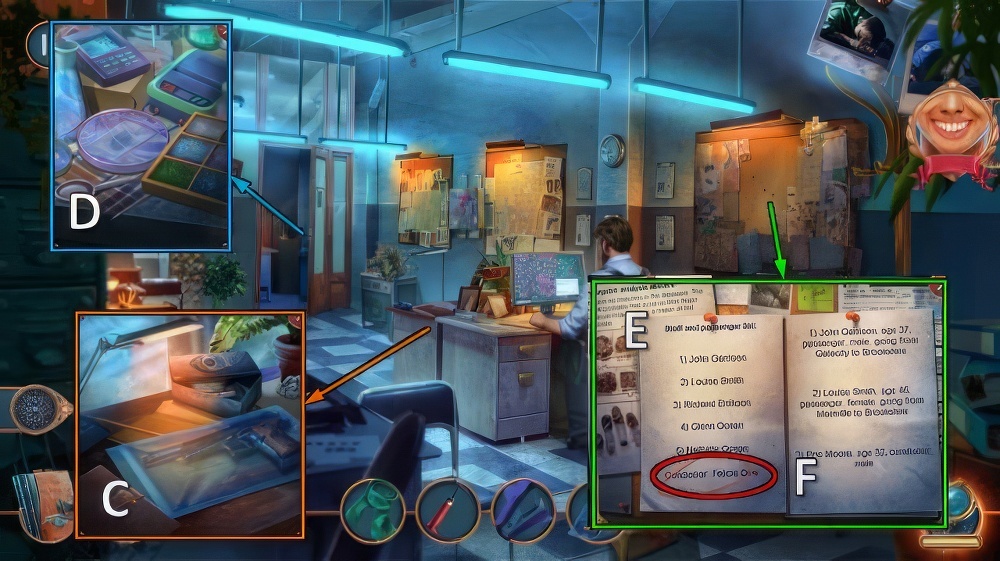
- Place EVIDENCE and NEW FINGERPRINTING KIT (C), receive FINGERPRINTS.
- Place FINGERPRINTS for puzzle (D), receive FINGERPRINT ANALYSIS RESULTS.
- Place STAFF AND PASSENGER LIST and FINGERPRINT ANALYSIS RESULTS (E), select F.

- Select 1 or 2 (G).
- Note: if you’ve selected 2 at this point, skip all steps marked #, below.
- # Go (H).

- # Take GAS CANISTER (I).
- # Take LURES 1/2 (J).
- Use GAS CANISTER (K).
- Start the generator by moving the hand to the green zone.
- # Easy walkthrough (L): 1-3-4.
- # Hard walkthrough (L): 1-4-5.
- # Take note and AWL (M).
- # Use AWL, take REMOTE CONTROL WITHOUT BATTERIES and HEX KEY (N).
- # Walk down.

- Open, take HOOK and BROKEN PETROL LIGHTER.
- Use CLIPPERS, take LIFE JACKET (O).
- Place PUMP and LIFE JACKET (P).
- Go (Q).

- Take SCREW and LIGHTER RING (R).
- Use KNITTED SCARF, take BROKEN WEATHERVANE (S).
- Place HOOK and BROKEN WEATHERVANE, take BIRD-SHAPED AMULET 1/2 and BUCKET (T).

- Use BUCKET, take BUCKET OF SAND (U).
- Use BUCKET OF SAND, take SEASHELL FIGURE (V).
- # Use HEX KEY (W).
- # Take FLASH DRIVE (X).
- Walk down.

- Place SEASHELL FIGURE (Y).
- Arrange the seashells so that every tile is lit.
- Seashells only emit shine in certain directions.
- Easy walkthrough (Z).
- Hard walkthrough (A).
- Take note and RATTLE (B).
- # Go (C).
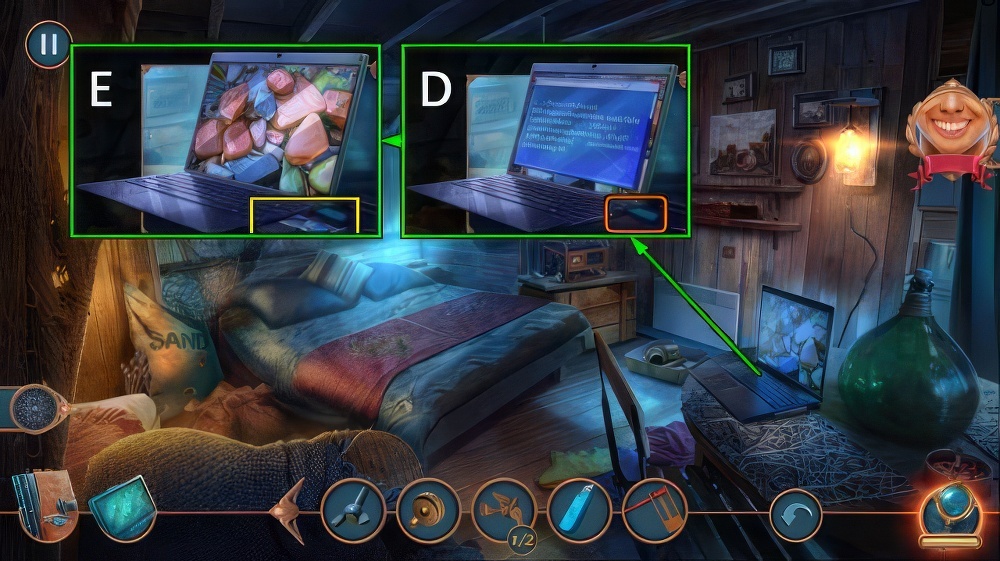
- # Place FLASH DRIVE for puzzle (D).
- # Take BROKEN DISC (E).
- Go to Cliff.

- Use RATTLE, take TWO RINGS AMULET (F).
- Place TWO RINGS AMULET (G).
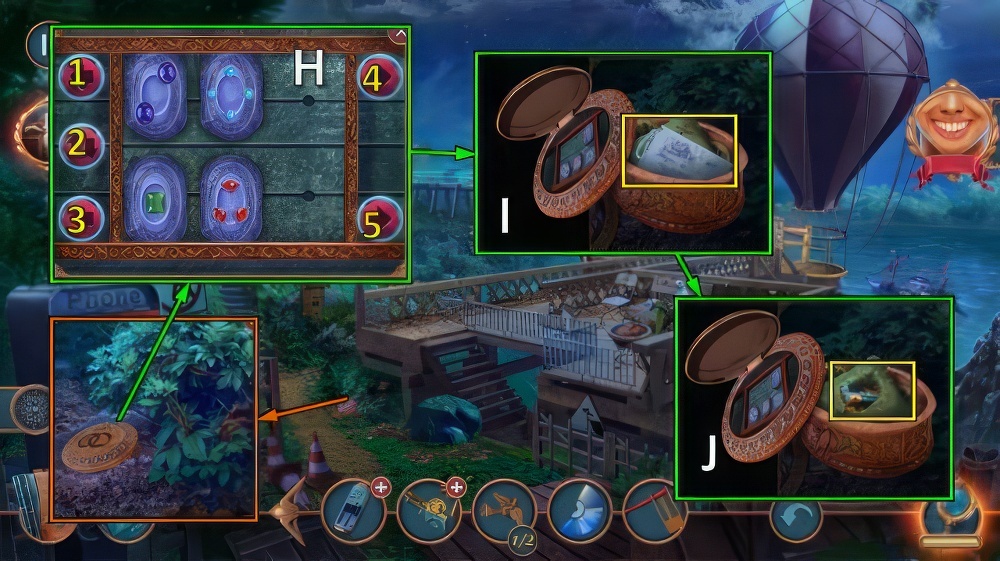
- Arrange the stones in increasing order from left to right.
- Walkthrough (H): 4-2-1-5-2.
- Take note and LIGHTER FLUID (I).
- # Use BROKEN DISC, take BATTERIES (J).
- Walk down.

- LIGHTER RING and LIGHTER FLUID on BROKEN PETROL LIGHTER, receive PETROL LIGHTER.
- Use PETROL LIGHTER (K), move wire for puzzle (L).
- Receive THERESA’S PENDANT.
- Use THERESA’S PENDANT, take WINDMILL BLADES (M).
- # Go (N).

- # BATTERIES on REMOTE CONTROL WITHOUT BATTERIES, receive REMOTE CONTROL WITH BATTERIES.
- # Use REMOTE CONTROL WITH BATTERIES (O), receive LURES 2/2.
- # Place LURES (P).
- # Arrange the lures so that there are as many of them as numbers on the sides indicate.
- # Easy walkthrough (Q).
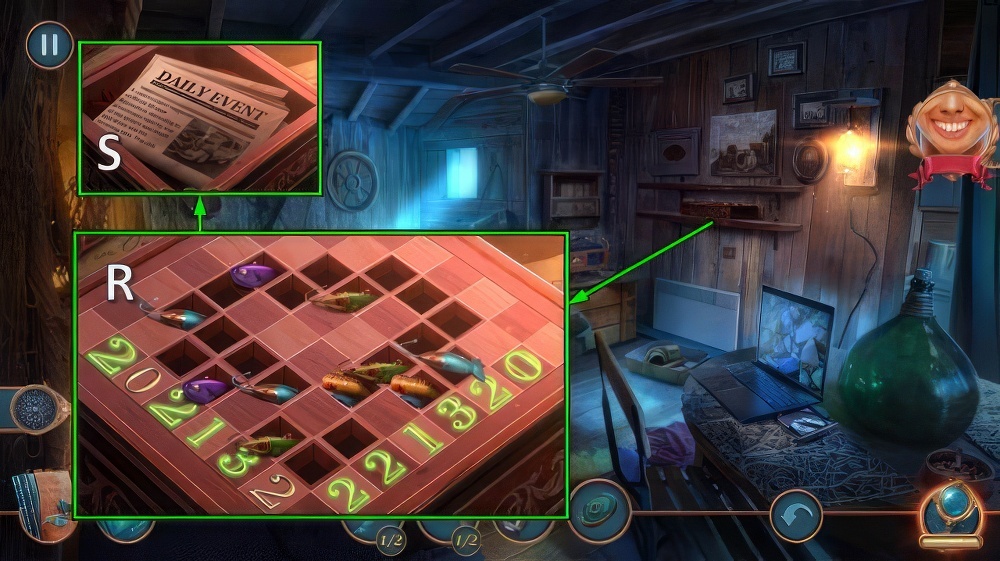
- # Hard walkthrough (R).
- # Take papers (S).
- Go to Cliff.

- Place SCREW and WINDMILL BLADES, take BIRD-SHAPED AMULET 2/2 (T).
- Place BIRD-SHAPED AMULET, take MOTORBOAT KEY (U).
- Walk down.
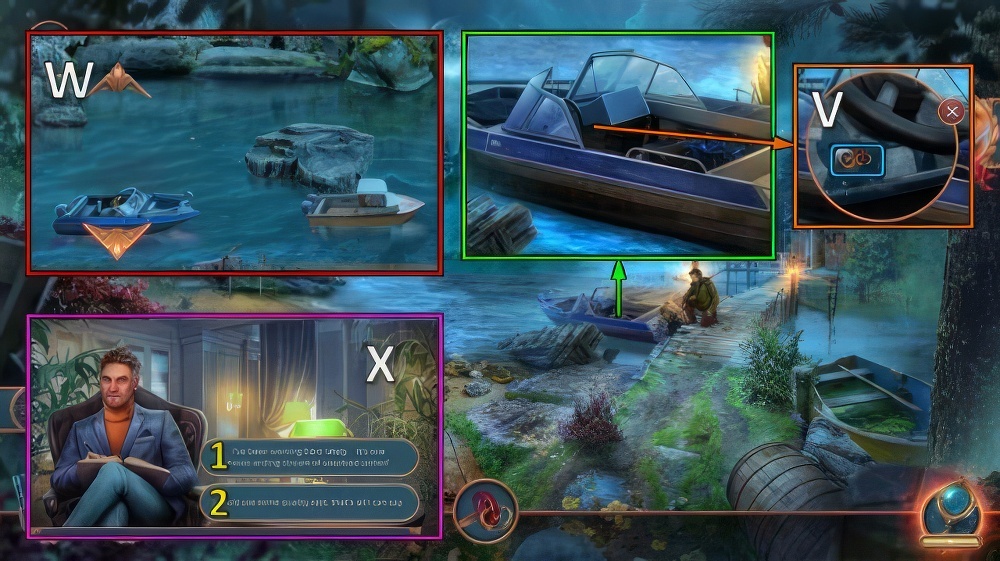
- Use MOTORBOAT KEY (V).
- Catch up to the criminal.
- Use arrows to avoid obstacles.
- Avoid obstacles (W).
- Select 1 or 2 (X).

- Receive PHOTO.
- Take CODE LOCK CYLINDERS 1/2 (Y).
- Take GEAR, place PHOTO (Z).
- Place piggy banks according to the photo.
- Walkthrough: (1-5)-(2-4)-(3-5).
- Take FORTUNE TELLER CHIP (A).

- Use FORTUNE TELLER CHIP for puzzle (B), receive HOUSE OF HORRORS KEY.
- Use HOUSE OF HORRORS KEY (C).
- Go (D).

- Place GEAR, push button.
- Take BATTERY (E).
- Take ROULETTE and MAGNIFIER, place BATTERY (F).
- Take FREEZER SPRAY and HURL (G).
- Walk down.

- Arrange the pinatas according to their weight, starting with the heaviest.
- Use the scales to determine the weight.
- Use HURL, easy walkthrough (H).
- Hard walkthrough (I).
- Receive BASEBALL.
- Use BASEBALL and ROULETTE (J).
- Take UV LAMP (K).
- Go (L).

- Use UV LAMP, press “here” (M).
- Take CODE LOCK CYLINDERS 2/2 (N).
- Place CODE LOCK CYLINDERS (O).
- Set the path on the spinners so that the threads on the adjacent pieces match.
- To test the solution, click on the button.
- Easy walkthrough (P): Q×3-S×2-T×3-V×4-W×3-X, Y×4-Z-B×2-C×2-E×4-F×4.
- Select G.
- Hard walkthrough (P): Q×3-R×4-S×2-T×3-U-V×4-W×3-X×2.
- Y×4-Z-A-B×2-C×2-D×3-E×4-F×4.
- Select G.

- Take note, HAMMER and SCISSORS (H).
- Use SCISSORS (I).
- Select 1 or 2 (J).
- Receive CLOVER AMULET.
- Walk down.

- Place CLOVER AMULET (K).
- Score points by selecting the stone with the clover and then the square you want it to go to.
- Placing your stone next to your opponent’s stone will make adjacent stones yours.
- Defeat your opponent (random) (L).
- Take BEADS (M).
- Use BEADS, take DETECTIVE PERMIT and SAMPLE COLLECTION KIT (N).
- Go (O).
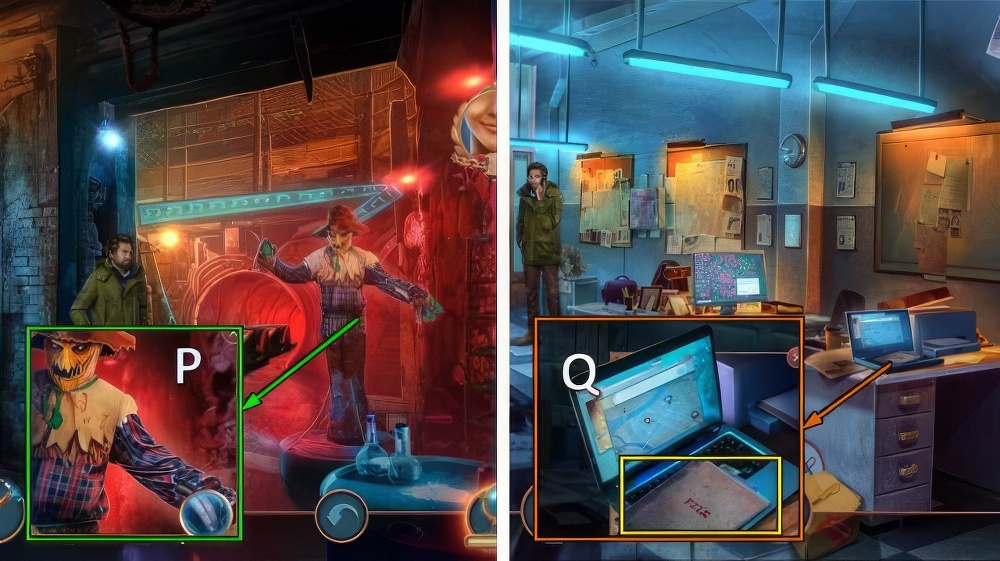
- Use MAGNIFIER and SAMPLE COLLECTION KIT, receive DIRT SAMPLE (P).
- Take file, SLIDE and ARCHIVE KEY (Q).

- Use ARCHIVE KEY, take ARCHIVE FOLDER (R).
- Place DIRT SAMPLE and SLIDE for puzzle, move and take CHEMICAL ANALYSIS (S).
- Place ARCHIVE FOLDER and CHEMICAL ANALYSIS (T).
- Select U, take ANALYSIS RESULT (V).
- Place ANALYSIS RESULT (W).
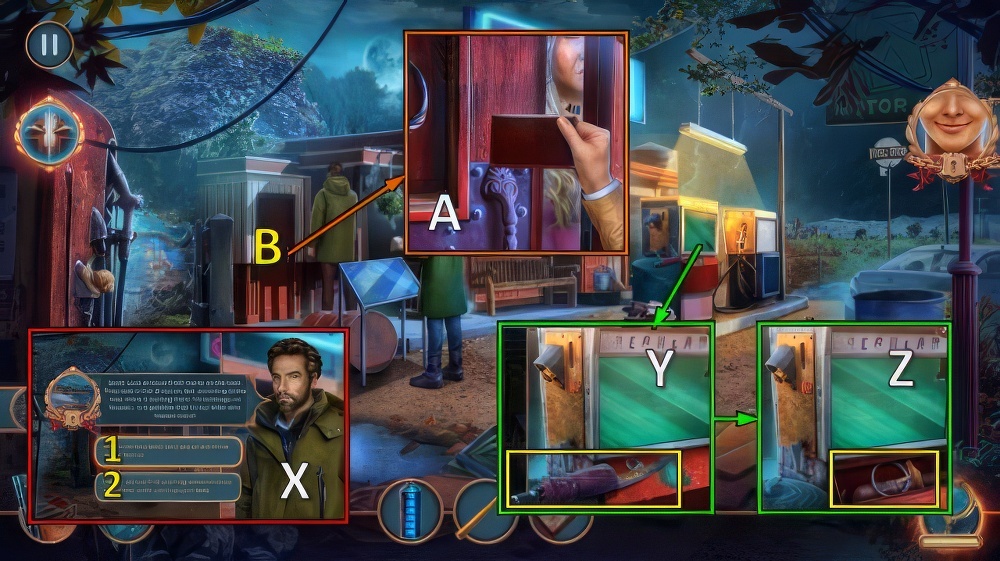
- Select 1 or 2 (X).
- Note: if you’ve selected 2 at this point, skip steps marked #, below.
- Take UMBRELLA and RUSTY SCYTHE BLADE (Y).
- Use FREEZER SPRAY and HAMMER, take CORKSCREW and DOOR KNOCKER (Z).
- Use DOOR KNOCKER, show DETECTIVE PERMIT (A).
- Go (B).

- Select 1 or 2 (C).
- Take REFUELING PISTOL and TUNING FORK (D).
- Place UMBRELLA, take MEDAL (E).

- Place MEDAL (F).
- Move the tiles so that when they are connected, there are no empty cells on the shield.
- Easy walkthrough (G): (2-3)-(5-6)-H.
- Hard walkthrough (I): (1-4)-(1-3)-(1-2)-(5-8)-(5-7)-J.
- Take MULTI-TOOL (K).
- # Go to Abandoned Park.

- # Take NUTCRACKER and EMPTY CONTAINER (L).
- # Open revolver chamber, use NUTCRACKER (M).
- Receive GUNPOWDER.
- Go to Old Gas Station.
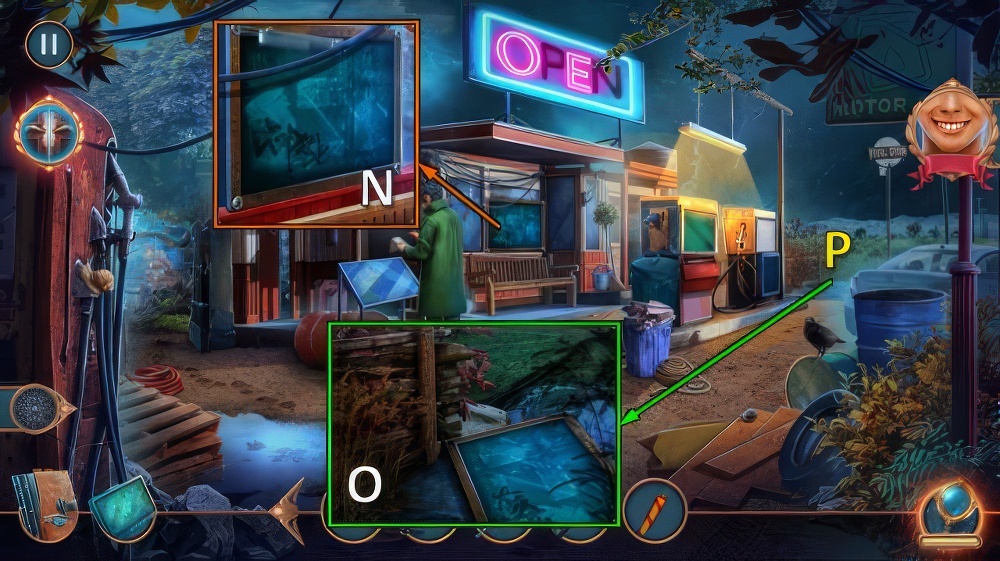
- Use MULTI-TOOL (N), receive BILLBOARD and SCREWS.
- Place BILLBOARD (O).
- Go (P).

- Take THERMAL MUG and STAIRS (Q).
- Use TUNING FORK, take DOOR FLYWHEEL (R).
- # Open EMPTY CONTAINER, use GUNPOWDER.
- Receive FIRECRACKER.
- # Use FIRECRACKER, take MAGNET (S).

- Place DOOR FLYWHEEL (T).
- When you press the button with the corresponding notch, the bar corresponding to that notch will disappear.
- Easy walkthrough (U): 3-5-6-1-4-2.
- Hard walkthrough (V): 1-2-8-5-3-4-7-6-9.
- Go (W).

- Select 1 or 2 (X).
- Take CANISTERS and METAL CROSSBARS (Y).
- METAL CROSSBARS, SCREWS and MULTI-TOOL on STAIRS.
- Place STAIRS for puzzle (Z), receive DIVIDERS.

- Use DIVIDERS (A), take BUSINESS CARD (B).
- Use CORKSCREW, take COINS (C).
- # Use MAGNET, take COMPASS (D).
- # Go to Abandoned Park.

- # Place COMPASS for puzzle (E), receive LINE AND HOOK.
- # Place LINE AND HOOK (F), receive GLOVE.
- Go to Gas Station.

- Place THERMAL MUG and COINS (G).
- Set the sliders to the specified level by clicking on the arrows to do so.
- Some sliders’ movement is connected.
- Easy walkthrough (H): as shown.
- Hard walkthrough (H): O×3-R×3-J×2-Q×2-S-N×4.
- Take HOT TEA (U).
- Use HOT TEA (V).
- take PROJECTOR and CUTTERS (W).
- Go to Backwater Barn.

- Use CUTTERS (X).
- Take note and PITCHFORK (Y).
- # Use GLOVE, take AMULET and HOUR HAND (Z).
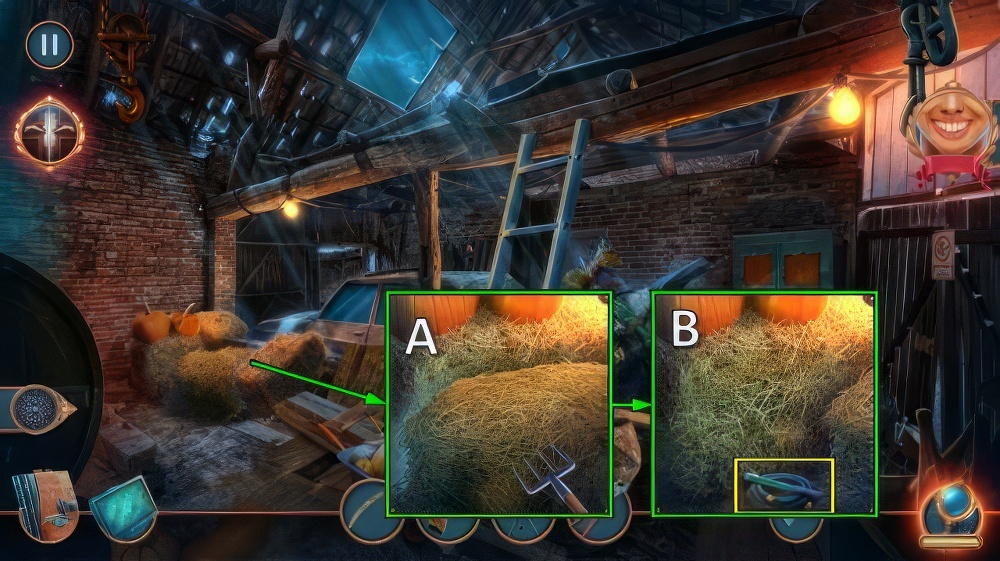
- Use PITCHFORK (A).
- Take METAL HANDLE and NEW HOSE (B).
- # Go to Abandoned Park.
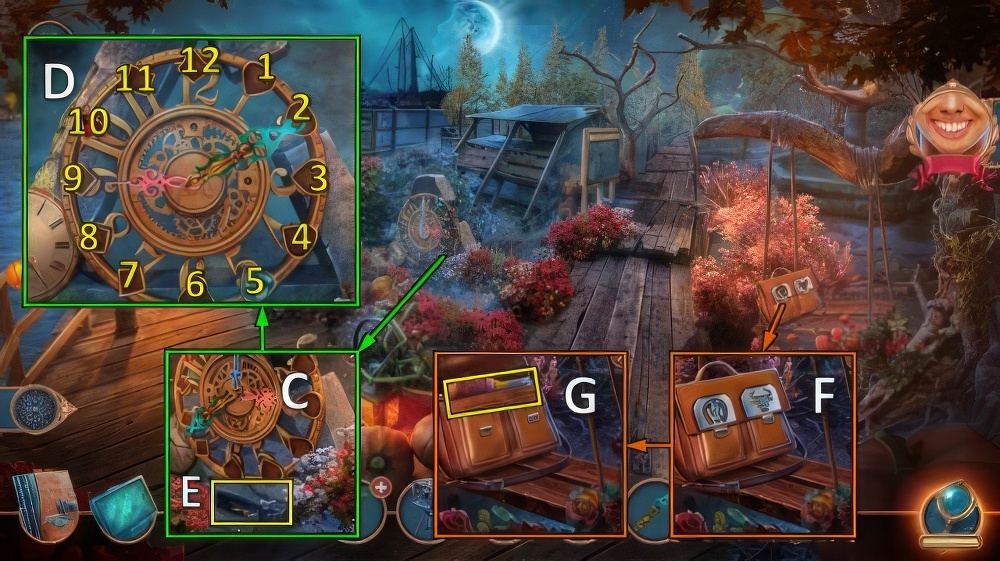
- # Place HOUR HAND (C).
- # Set the time according to the clue.
- # To do this, rearrange the gemstones.
- # Easy and hard walkthrough (D): (5-4)-(4-5)-(5-4)-(4-5).
- # Take BULL AMULET (E).
- # Place AMULET and BULL AMULET (F), take notes (G).
- Go to Old Gas Station.

- Place REFUELLING PISTOL, CANISTERS and NEW HOSE.
- Use the buttons to fill all the tanks in the machine correctly.
- Easy walkthrough: J-L-N, T-S-P, X-Z-W, F-E-B.
- Hard walkthrough: J-L-N, T-S-P, X-Z-W, D-F-C, LL-KK-II.
- Take GAS (N).
- Go (O).
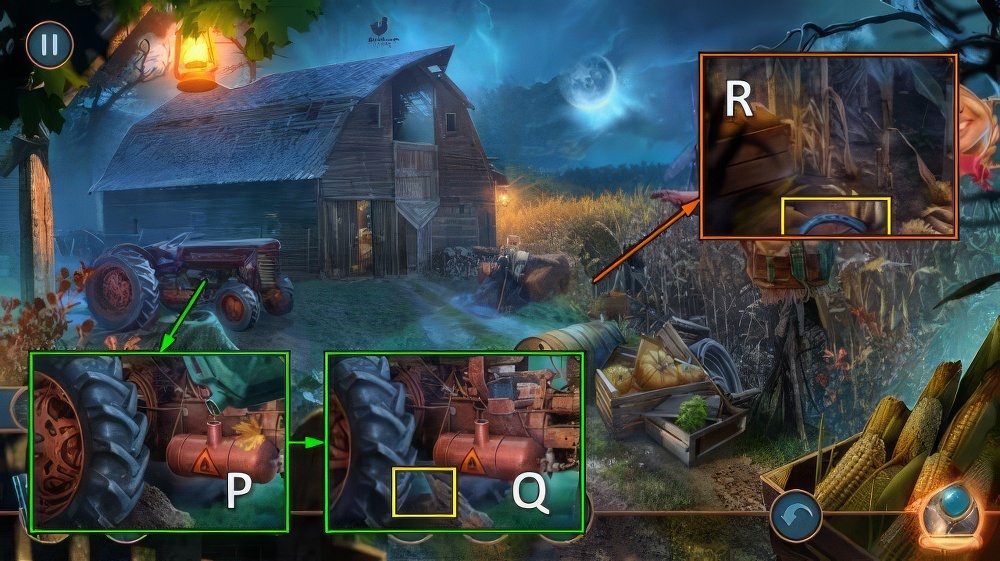
- Use GAS (P).
- Take GRINDSTONE (Q).
- METAL HANDLE and GRINDSTONE on RUSTY SCYTHE BLADE, receive GARDEN SCYTHE.
- Use GARDEN SCYTHE, take HORSESHOE (R).
- Go to Gas Station.
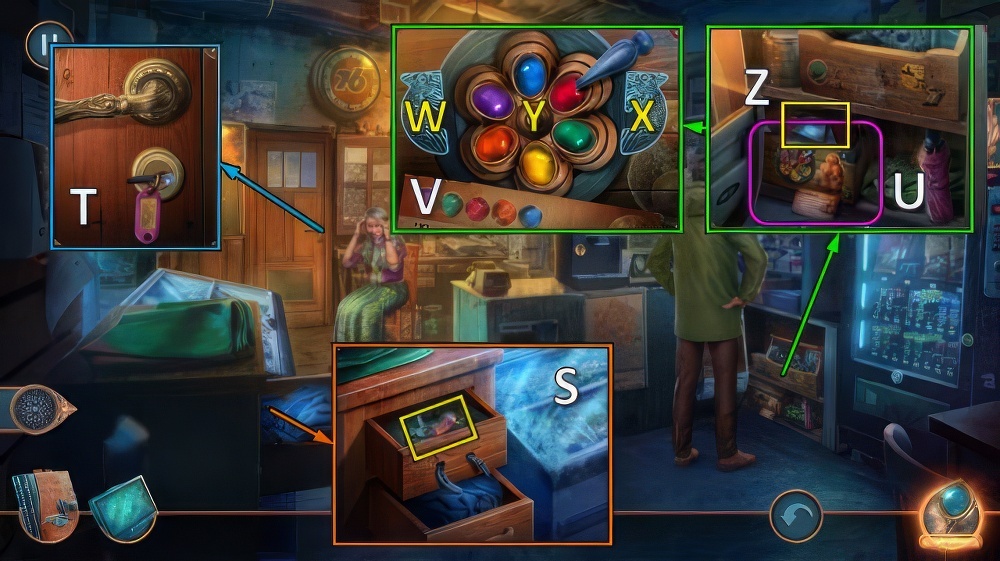
- Use HORSESHOE, take UTILITY ROOM KEY (S).
- Use UTILITY ROOM KEY for puzzle (T), receive FLOWER AMULET.
- Place BUSINESS CARD and FLOWER AMULET (U).
- Click on the arrows to turn the flower clockwise or counterclockwise.
- When the desired color is under the arrow, click on the button in the center of the flower.
- Walkthrough (V): W×2-Y-W×3-Y-W-Y-W×3-Y-X×2-Y.
- Take MIRRORS and notes (Z).
- Go to Corn Field.

- Receive COMB.
- Go (A).
- Use COMB (B).
- Take LIGHTBULB (C).
- Walk down.

- LIGHTBULB and MIRRORS on PROJECTOR, receive SPOTLIGHT.
- Use SPOTLIGHT (D).
- Get out of the corn labyrinth.
- Go right (E).
- Take pump (F).
- Walk down (G).

- Use pump (H).
- Go left (I).
- Right (J).
- Take mask (K).
- Down (L).
- Left (M).
- Use mask (N).
- Go (O).

- Take machete (P).
- Left (Q).
- Use machete (R).
- Go (S).

- Take DETECTIVE’S NOTEBOOK and ORDER RECEIPT (T).
- Take CUTTERS and CARD.
- Place ORDER RECEIPT for puzzle (U), receive KITCHEN KEY.
- Use KITCHEN KEY (V).
- Go (W).
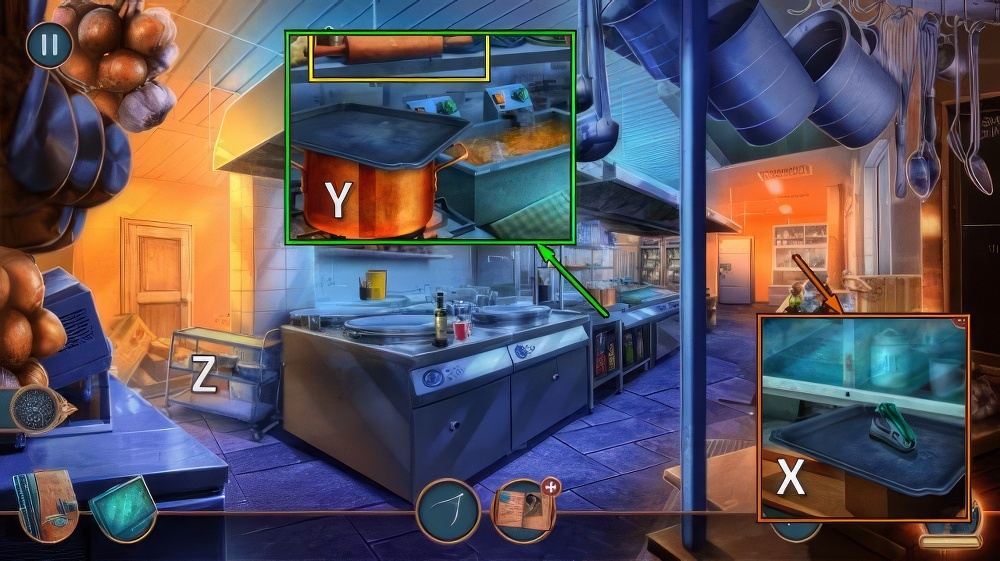
- Take CUTTERS and TRAY (X).
- Use TRAY, take ROLLING PIN (Y).
- Place ROLLING PIN (Z).

- Place the boxes in the cart so that they all fit.
- Easy walkthrough (A).
- Hard walkthrough (B).
- Go (C).
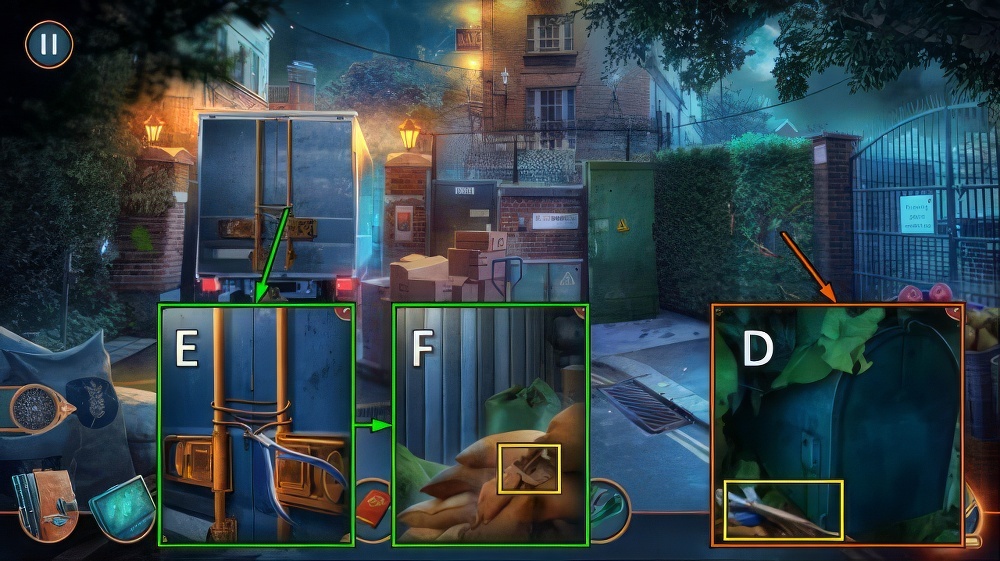
- Take TONGS and FUSE TERMINALS 1/2 (D).
- Use CUTTERS (E).
- Take MAGAZINE PIECE and FUSE TERMINALS 2/2 (F).

- Open (G).
- Place FUSE TERMINALS (H).
- Place the terminals so that all cells are exposed to the rays they emit.
- Easy walkthrough (I): as shown.
- Hard walkthrough (I): place as shown, select J.
- Take MAGNET (K).
- Walk down.
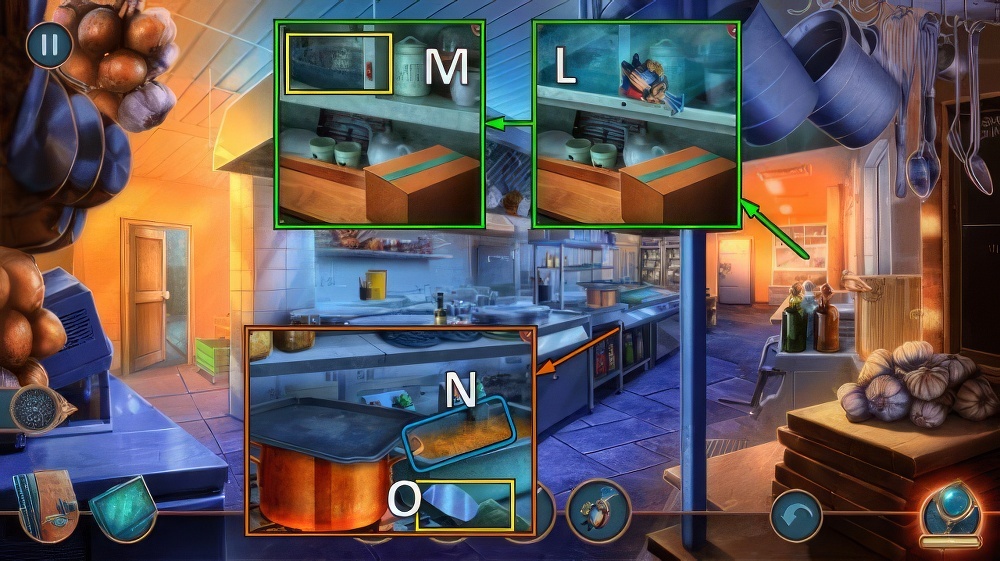
- Use MAGNET (L).
- Take FRYER BASKET (M).
- Use FRYER BASKET (N).
- Take SPATULA (O).
- Walk down.
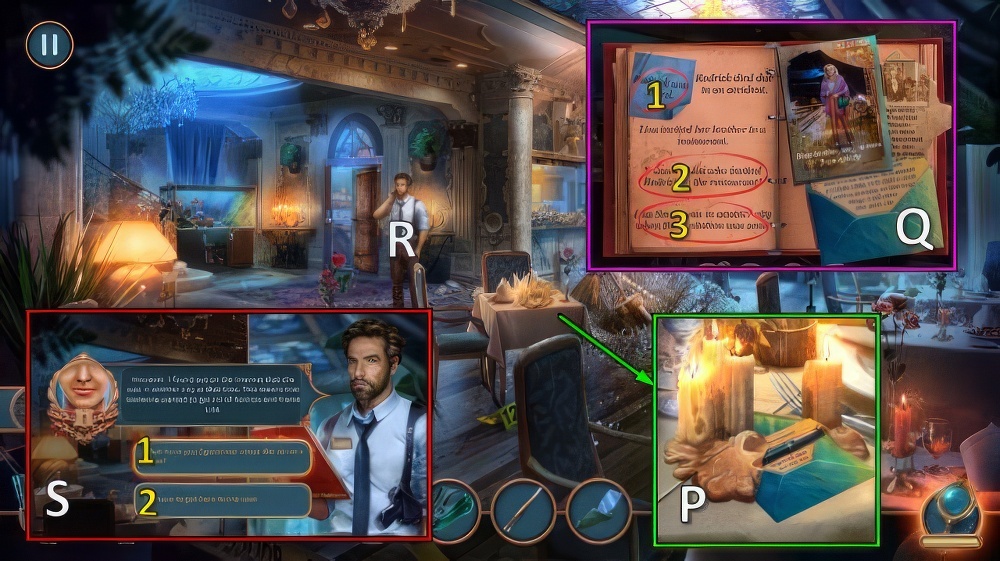
- Use SPATULA, take WRITING ACCESSORIES 1/2 and INVITATION (P).
- Open DETECTIVE’S NOTEBOOK, place CARD, MAGAZINE PIECE and INVITATION.
- Choose the correct conclusions in the notebook.
- Select 1-2-3 (Q).
- Receive DEDUCTION RESULTS.
- Offer DEDUCTION RESULTS (R).
- Select 1 or 2 (S).
- Receive SAGITTARIUS AMULET.
- Go to Courtyard.
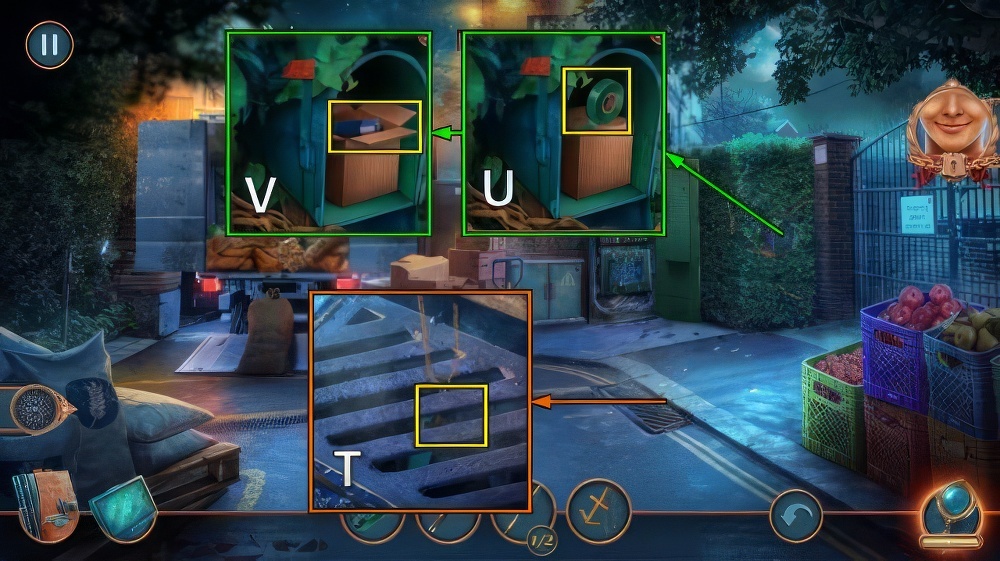
- Use SAGITTARIUS AMULET, take MAIL FLAG (T).
- Place MAIL FLAG, take TAPE (U).
- Use CUTTERS, take BATTERY (V).
- Walk down twice.
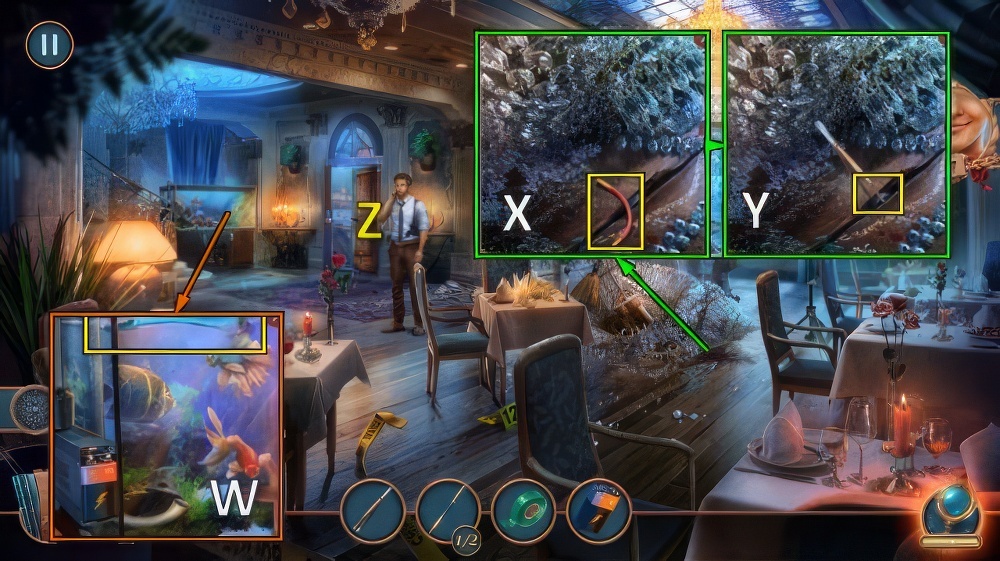
- Place BATTERY, take BRUSH (W).
- Use BRUSH, take WIRE (X).
- Take TEMPERATURE REGULATOR with TONGS (Y).
- Go (Z).
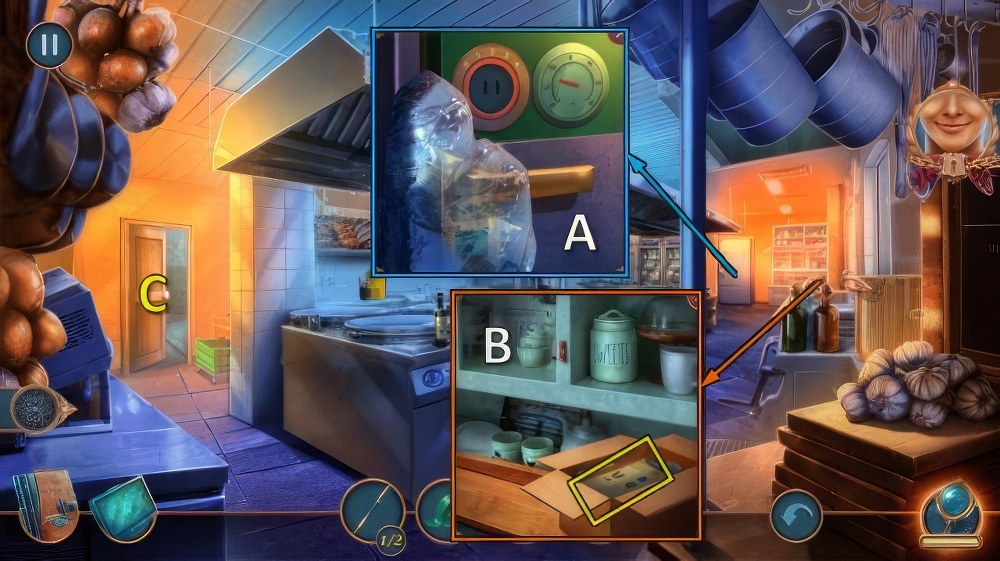
- Place TEMPERATURE REGULATOR for puzzle (A), receive PIZZA KNIFE.
- Use PIZZA KNIFE, take PROCUREMENT LIST (B).
- Go (C).

- Place PROCUREMENT LIST (D).
- Find all pairs of items with the symbols shown in the guide.
- Find pairs (E).
- Take bottle (F).

- Take SURVEILLANCE PHOTOS and FILING CABINET KEY (G).
- Use FILING CABINET KEY, take WRITING ACCESSORIES 2/2 (H).
- Place WRITING ACCESSORIES, go through dialog (I).
- Receive WITNESS TESTIMONY.
- Place WITNESS TESTIMONY (J).

- Put the sketch together.
- Select attributes (K).
- Print, take SUSPECT SKETCH (L).

- Place SUSPECT SKETCH and SURVEILLANCE PHOTOS (M).
- Find last photo (N).

- Select 1 or 2 (O).
- Take HORSESHOE, TORN INSTRUCTIONS and GARDEN POINTER (P).
- Take FLASHLIGHT, use GARDEN POINTER (Q).
- Take HACKING CHIP (R).

- Place WIRE, TAPE and HACKING CHIP (S).
- Assemble the whole picture by turning the pieces.
- Easy walkthrough (T): U-V×3-W×2-X×2-Z-A.
- Hard walkthrough (T): U-V×2-W-X×2-Y×3-Z×3-A.
- Go (B).
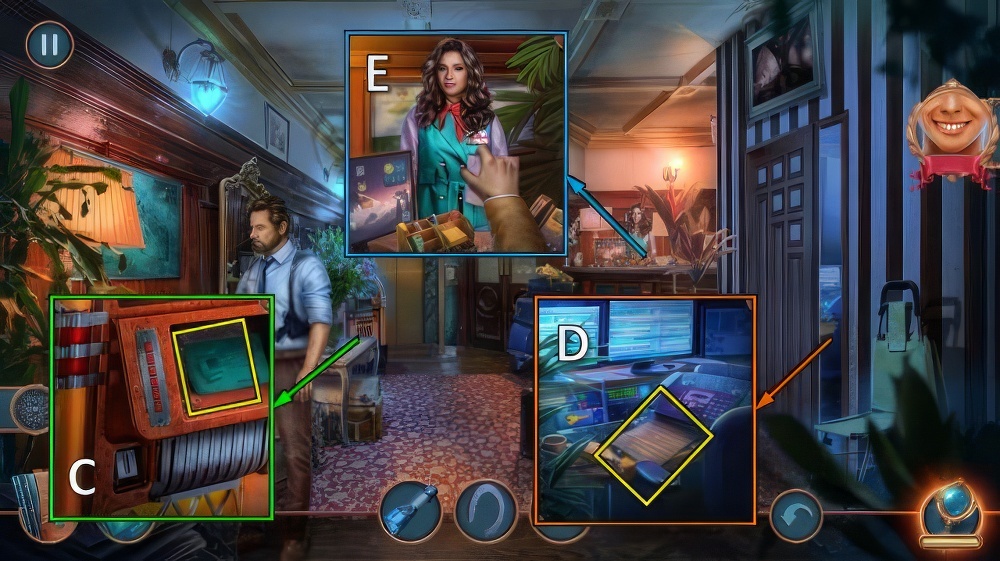
- Take note and PAPER SHEET (C).
- Place PAPER SHEET, take SEARCH WARRANT (D).
- Offer SEARCH WARRANT for puzzle (E), receive HOTEL ROOM KEYCARD.

- Use HOTEL ROOM KEYCARD (F).
- Choose 1 or 2 (G).
- Note: if you’ve selected 2 at this point, skip steps marked #, below.
- # Select H.
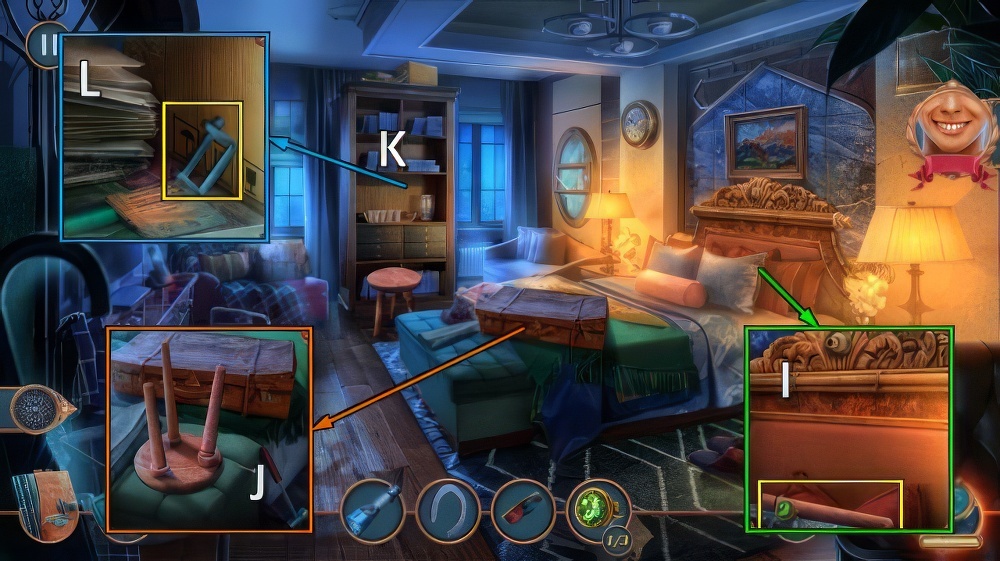
- # Take COLORFUL DIAMONDS 1/3 and TORN OFF LEG (I).
- # Place TORN OFF LEG, take CHAIR (J).
- # Place CHAIR (K).
- # Take note and SELFIE STICK (L).
- # Walk down.

- # Take COLORFUL DIAMONDS 2/3 and RING WITH LETTER P with SELFIE STICK (M).
- # Go to Peter Fellow’s Hotel Room.
- # Use RING WITH LETTER P, take LION’S HEAD (N).
- # Place LION’S HEAD, take note and TEA STRAINER (O).
- # Walk down twice.

- # Use TEA STRAINER, take COLORFUL DIAMONDS 3/3 (P).
- # Go to Peter Fellow’s Hotel Room.
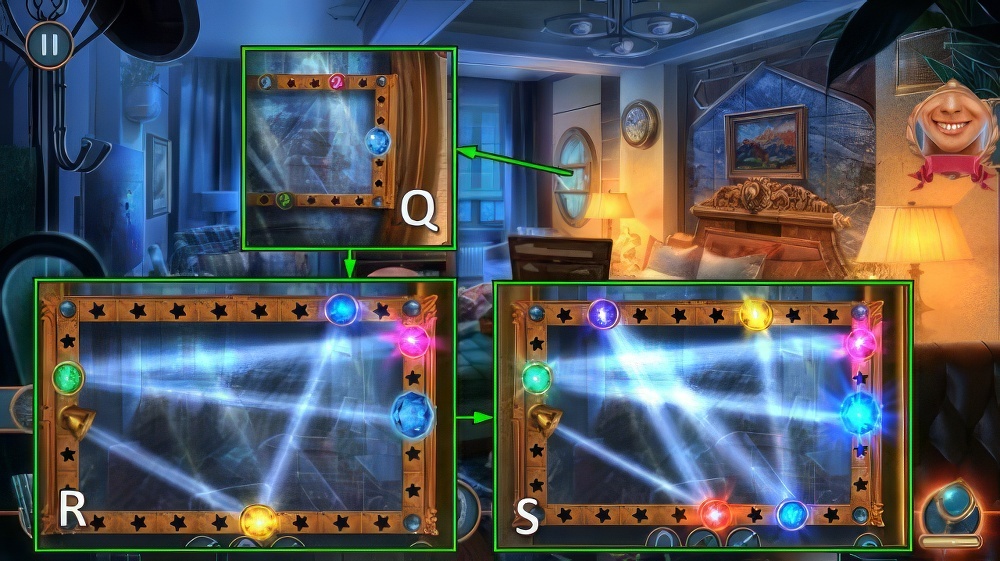
- # Place COLORFUL DIAMONDS (Q).
- # Direct rays into the big crystal by moving the small crystals around.
- # Easy walkthrough (R).
- # Hard walkthrough (S).
- # Walk down.

- Select T.
- Select 1 or 2 (U).
- Note: if you’ve selected 2 at this point, skip steps marked #, below.
- # Receive DVD DISC.

- # Place DVD DISC for puzzle (V).
- Take THEATRE MASKS AMULET 1/2 and SAFE VALCODER (W).
- Use HORSESHOE, take BEADS (X).
- Place BEADS, take FLOWER HANDKERCHIEF (Y).
- Walk down twice.
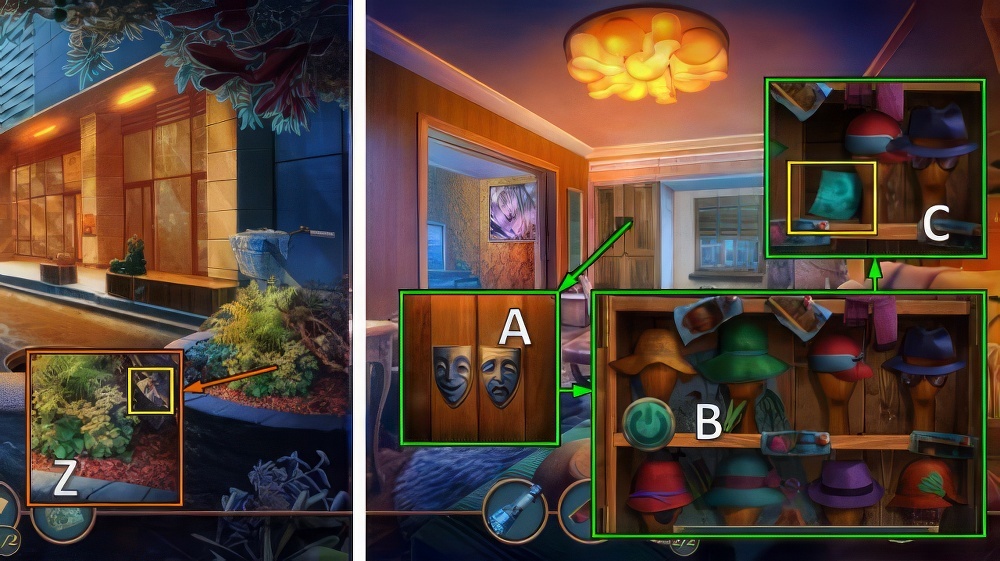
- Use FLOWER HANDKERCHIEF, take THEATRE MASKS AMULET 2/2 (Z).
- Go to Lisa Smith’s Hotel Room.
- Place THEATRE MASKS AMULET, use TORN INSTRUCTIONS (A).
- Arrange the hats using the guide’s fragments.
- If you make an error, the hats will return to their initial places.
- Easy and hard walkthrough (B).
- Take SAFE INSTRUCTIONS (C).

- Place SAFE VALCODER and SAFE INSTRUCTIONS (D).
- Select and rotate the handle to recreate the combination.
- Walkthrough (E): ↺ to F, ↻ to G, ↺ to H.
- Take EXPENSIVE SMOKING PIPE (I).
- Walk down twice.

- Use EXPENSIVE SMOKING PIPE for puzzle (J), receive PARKING TICKET.
- Enter PARKING TICKET, take COIN (K).
- Go (L).

- Use COIN, take SECURITY KEY (M).
- Use SECURITY KEY (N).
- Scroll through screens (O).
- Take CADUCEUS (P).
- Go (Q).

- Use FLASHLIGHT (R).
- Place CADUCEUS (S).
- Take FIRST AID KIT (T).
- Use FIRST AID KIT (U).
- Receive TELEPHONE.
- Walk down.
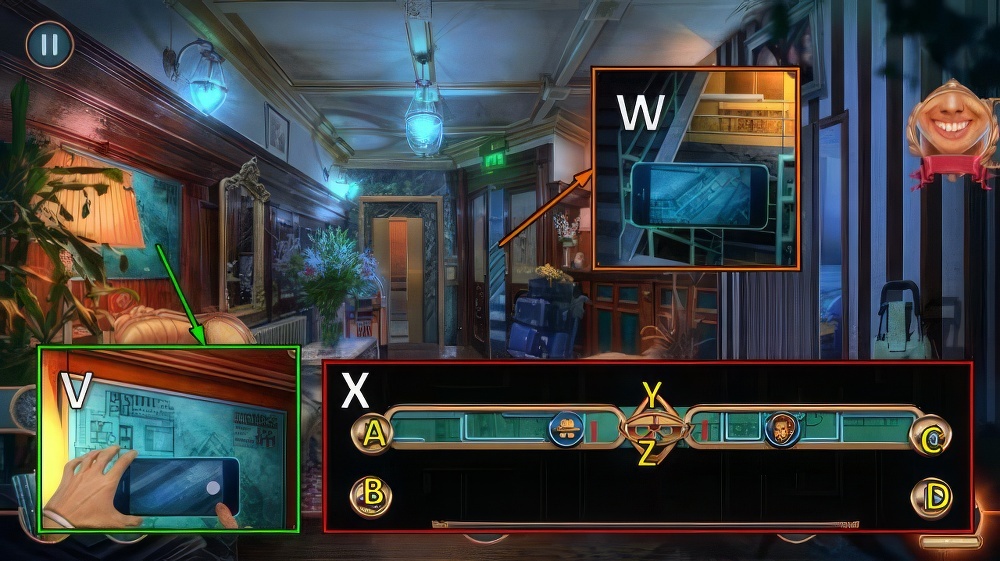
- Use TELEPHONE (V), receive HOTEL PLAN.
- Use HOTEL PLAN (W).
- Reach the end of the maze.
- Move the tokens using arrows.
- Upward and downward movement is only available when both tokens can move backwards and forwards, respectively.
- Easy walkthrough (X): C×2-A-Y×2-A-Y-B×2-D-Y-A-Y-D-Z-D-Y×2-C×2-B-Y-B.
- Z-B-Y-D-Y-C×2-Z×2-C-Y×2-A×4-Y-D×2-B×2-Y-C-Y-A-Y.
- Hard walkthrough (X): as easy walkthrough, then D-Y-B-Y-A×2-C×2-Y-D×4-Y×2-B.
- Z×2-B×2-Y-A-Y-B×2-C-Z-C-Y-C-Y×2-A-Z-A-Y-D-Y-A-C×2-Y-D-Y×2-B×2-D-Y.
- Walkthrough Bonus Chapter, at the link below.

