
Unsolved Case Episode 1: Murderous Talent – The walkthrough begins with Scott asking you for help. A new business has come up. Just found a body in Central Park, you should take a look. Inspection of the body makes it difficult to pile leaves. Head to the crime scene before people trample all the evidence. This man was charming, conscientious and undeniably talented, no one could have thought that he would become a victim of murder. You begin to suspect that someone from the guy’s environment envied his rapid career growth. However, as you investigate, you realize that the victim had several skeletons in his closet, which led to his untimely death. You have to find the culprit and bring him to justice. If you are stuck and do not know how to get through one of the locations, on our website you can watch the walkthrough of the game Unsolved Case Episode 1: Murderous Talent, and find out what will happen in the next series.
Unsolved Case Episode 1: Murderous Talent – Walkthrough
Here you can watch the full walkthrough of Unsolved Case Episode 1: Murderous Talent, namely the main story.
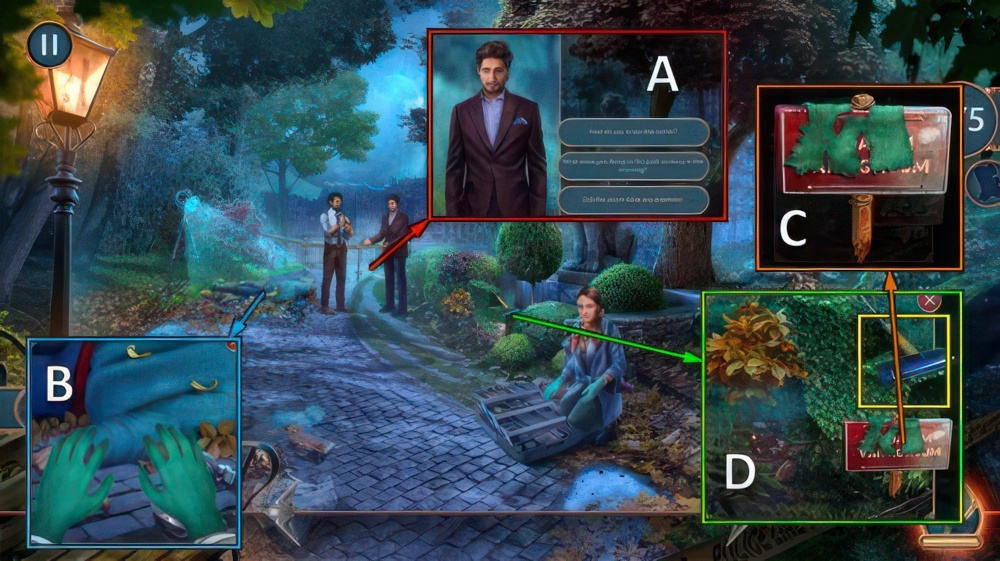
- Talk, go through all dialog options (A).
- Receive LATEX GLOVES.
- Use LATEX GLOVES for puzzle (B), receive evidence 1/5.
- Receive DETECTIVE’S TOOLKIT.
- POLAROID, journal, FINGERPRINTING KIT and PLASTIC BAGS from DETECTIVE’S TOOLKIT.
- Take evidence 2/5 with PLASTIC BAGS.
- Use FINGERPRINTING KIT, receive evidence 3/5 (C).
- Take BROKEN UV LAMP and GARDEN RAKE (D).
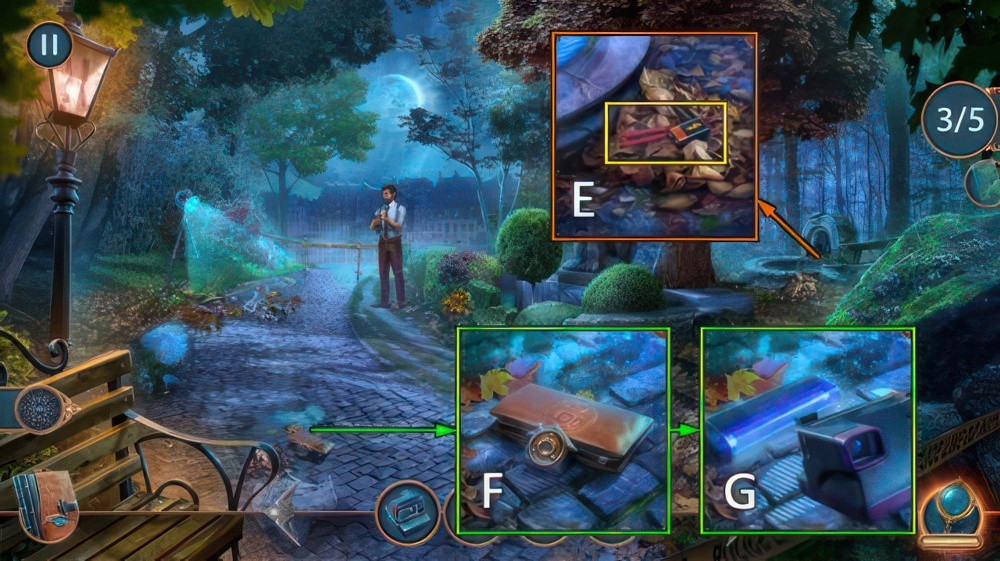
- Use GARDEN RAKE.
- take BATTERY.
- Take evidence 4/5 with PLASTIC BAGS (E).
- BATTERY on BROKEN UV LAMP, receive UV LAMP.
- Take HOUSE-SHAPED KEYRING and WALLET (F).
- Use UV LAMP, use POLAROID.
- Take evidence 5/5 (G).

- Select 1-2-3 (H).
- Select 1 or 2 (I).
- Note: answer 1 unlocks a chain.

- Receive BOTTLED WATER.
- Take map, DUCT TAPE and SPONGE (J).
- Take FOLDABLE UMBRELLA (K).
- Use SPONGE and BOTTLED WATER.
- Take HOOK EARRING (L).
- HOOK EARRING on WALLET, take notes, COIN 1/3 and OTTO’S PERMIT.
- Use OTTO’S PERMIT (M).
- Go (N).

- Go through all dialog options (O).
- Take COIN 2/3 and CABLE PLUG (P).
- Use CABLE PLUG and DUCT TAPE (Q), receive HDMI CABLE.
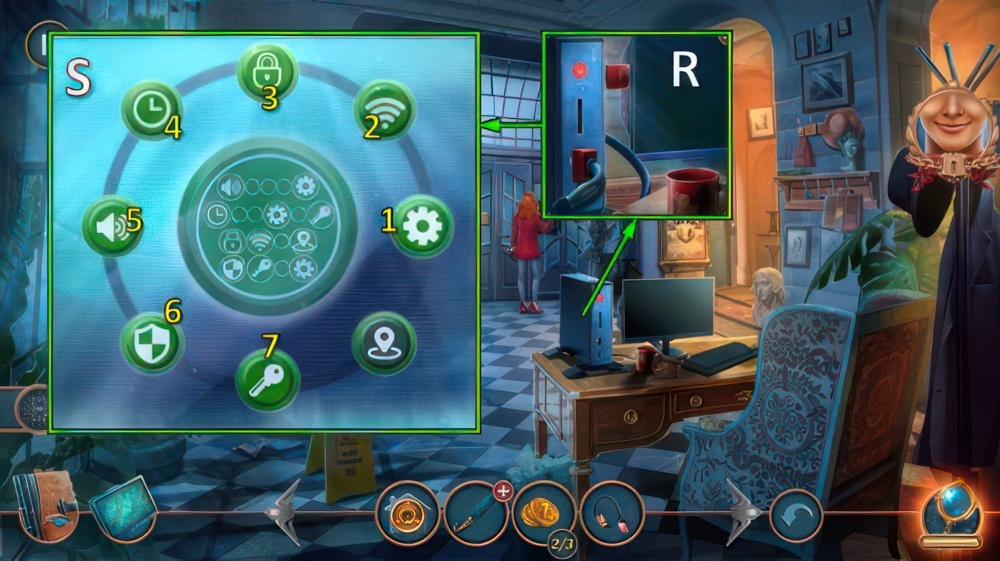
- Place HDMI CABLE (R).
- Easy solution (S).
- Hard solution (S): (2-3)-(3-4)-(4-5)-(5-6)-(6-7)-(3-4)-(4-5).
- (5-6)-(3-4)-(4-5)-(2-3)-(3-4)-(1-2)-(2-3)-(1-2).
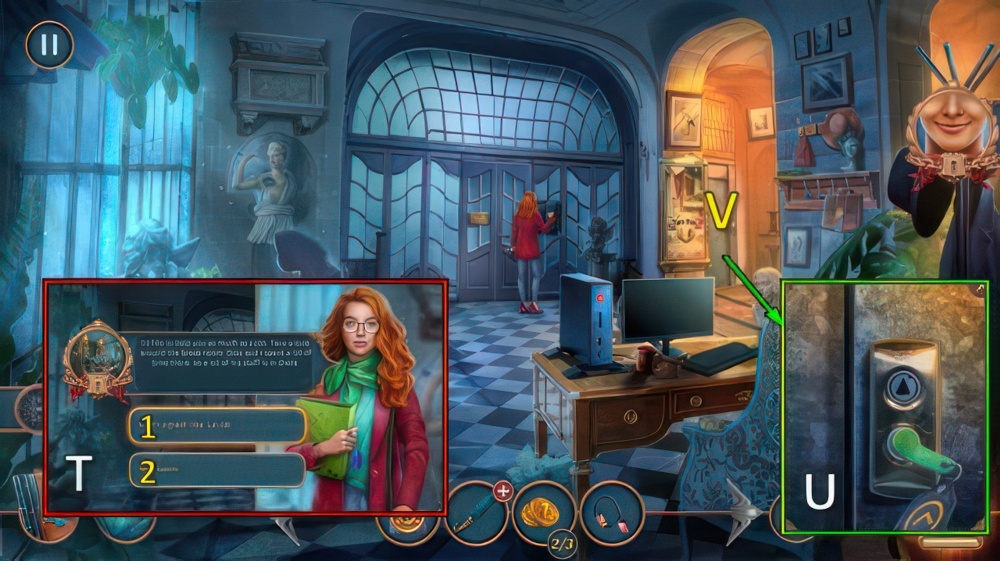
- Select 1 or 2 (T).
- If you’ve selected 2, skip the steps marked with # below.
- # Receive MAGNETIC KEY.
- # Use MAGNETIC KEY (U).
- # Go (V).
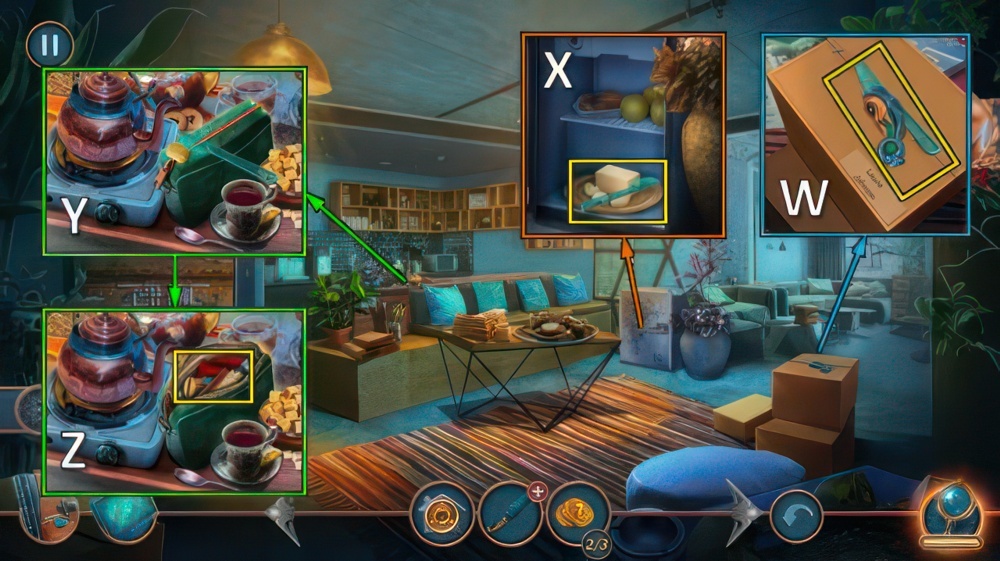
- # Take BROKEN AMULET and KNIFE (W).
- # Open.
- Use KNIFE, receive BUTTER KNIFE (X).
- # Use BUTTER KNIFE (Y).
- # Take note, GLUE and SILVER CHAIN (Z).
- Go to Otto’s Office.

- Place HOUSE-SHAPED KEYRING (A).
- Easy solution (B).

- Hard solution (C).
- Take picture, ARCHITECTURAL COMPASS, DISASSEMBLED JACK and TOWER MOCK-UP (D).

- # Place and pull SILVER CHAIN, touch lamp.
- Take AMULET HALF (E).
- Take COIN 3/3 with ARCHITECTURAL COMPASS (F).
- # Go to Break Room.

- # GLUE and AMULET HALF on BROKEN AMULET, receive FIRE AMULET.
- # Place FIRE AMULET (G).
- # Easy solution (H).
- # Hard solution (I).

- # Take note and DIADEM (J).
- # Use DIADEM, take NAIL FILE (K).
- # Walk down.
- # Use NAIL FILE.
- # Take ANCHOR KEYCHAIN (L).
- Go to Near Architectural Studio.
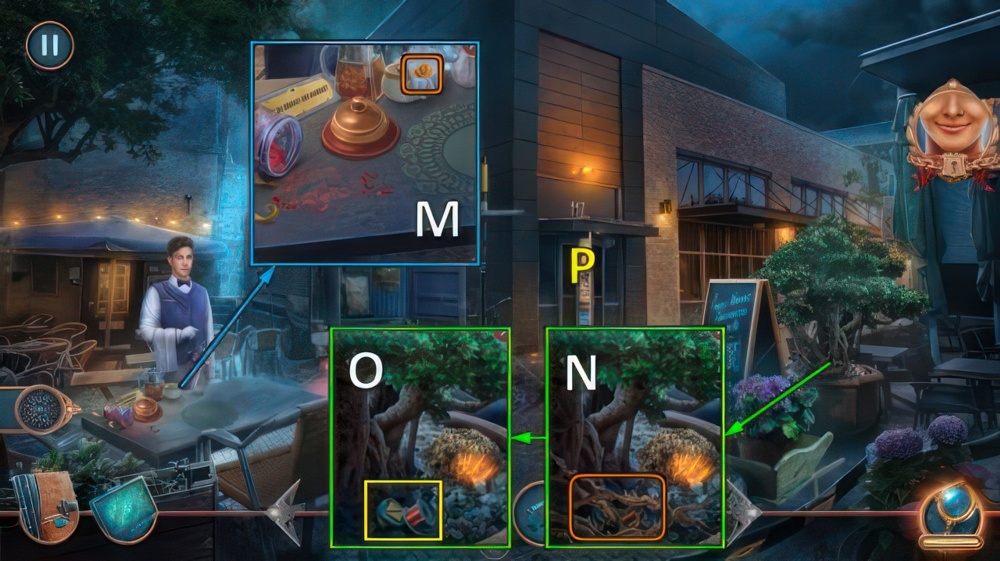
- Ring bell, offer COIN for puzzle (M).
- Receive TABLE NAPKIN.
- Use TABLE NAPKIN (N).
- Take WIRE and UMBRELLA BUTTON (O).
- Go (P).

- UMBRELLA BUTTON on FOLDABLE UMBRELLA, receive FOLDED UMBRELLA.
- Use FOLDED UMBRELLA, take CUP and AWL (Q).
- Walk down.
- Use AWL, take note, NOTEPAD WITH PEN 1/2 and BROKEN DUMMY (R).
- Use BROKEN DUMMY.
- Take LANTERN MOCK-UP (S).
- Go to Otto’s Office.

- Place TOWER MOCK-UP and LANTERN MOCK-UP (T).
- Easy and hard solution (U).
- Take note and OUTSTANDING ARCHITECT AWARD (V).
- Place OUTSTANDING ARCHITECT AWARD, take SCARF and JACK LEVER (W).
- Walk down twice.

- WIRE and JACK LEVER on DISASSEMBLED JACK, receive JACK.
- Place JACK, take SCULPTURE FRAGMENT (X).
- # Use ANCHOR KEYCHAIN, take STAPLE REMOVER (Y).
- # Go to Break Room.
- # Use STAPLE REMOVER for puzzle (Z), receive PHOTO.
- Go to Lobby.

- Place SCULPTURE FRAGMENT, take RULER (A).
- Go (B).
- Place RULER for puzzle (C), receive STATUE OF LIBERTY DRAWING.
- Place STATUE OF LIBERTY DRAWING.
- Take PISTOL and blueprints (D).
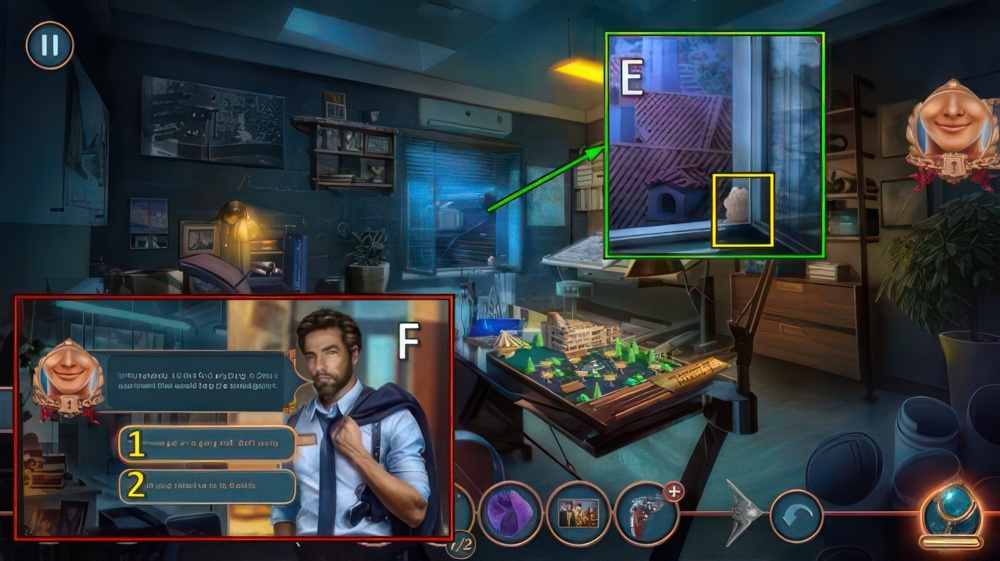
- Take paper (E).
- Select 1 or 2 (F).
- Note: answer 1 unlocks a chain.

- Take PHONE and NOTEPAD WITH PEN 2/2 (G).
- Place NOTEPAD WITH PEN, go through all dialog (H).
- Receive WITNESS TESTIMONY.
- # Offer PHOTO (H).
- Use CUP (I), receive GLASS OF WATER.

- Use GLASS OF WATER (J).
- Take BOLT and KEY (K).
- Use KEY, take NUT and PAPER (L).
- Turn on laptop, place PAPER.
- Take DAMAGE REPORT (M).

- Place WITNESS TESTIMONY and DAMAGE REPORT (N).
- Place 1-9 (O).
- Place 1-7 (P).
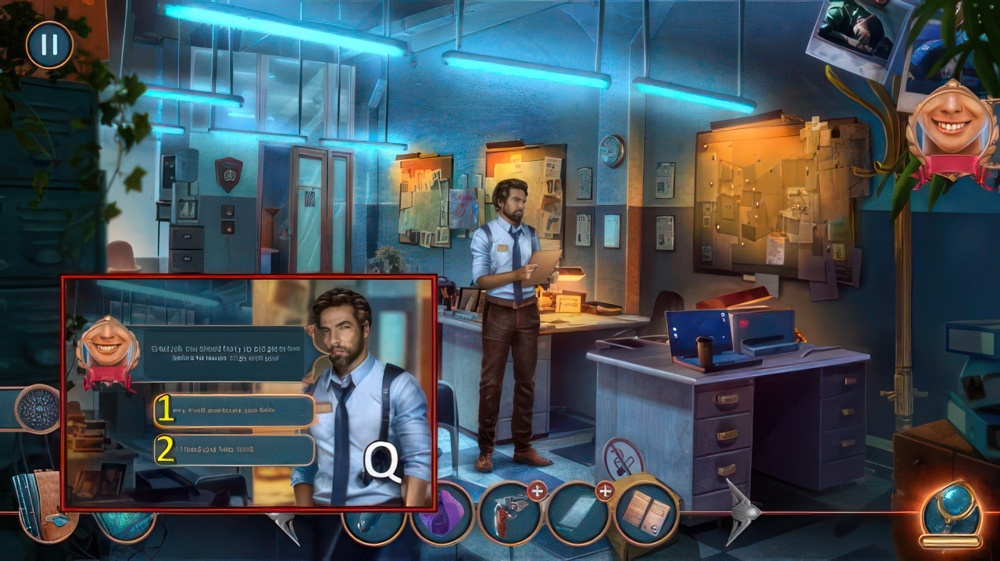
- Select 1 or 2 (Q).
- Note: answer 1 unlocks a chain.
- Receive DANIEL SMITH’S ADDRESS.

- DANIEL SMITH’S ADDRESS on PHONE.
- Receive LOCKPICKS.
- Note: you only receive these if you chose enough correct answers to unlock two chains.
- Take STAR PART 1/2 and LOCK PART.
- Open, use SCARF.
- Take BULLET (R).
- BULLET on PISTOL, receive REVOLVER.
- Use REVOLVER (S).
- Take CROWBAR (T).
- Use CROWBAR (U).
- Select Scott (V).
- Go (W).
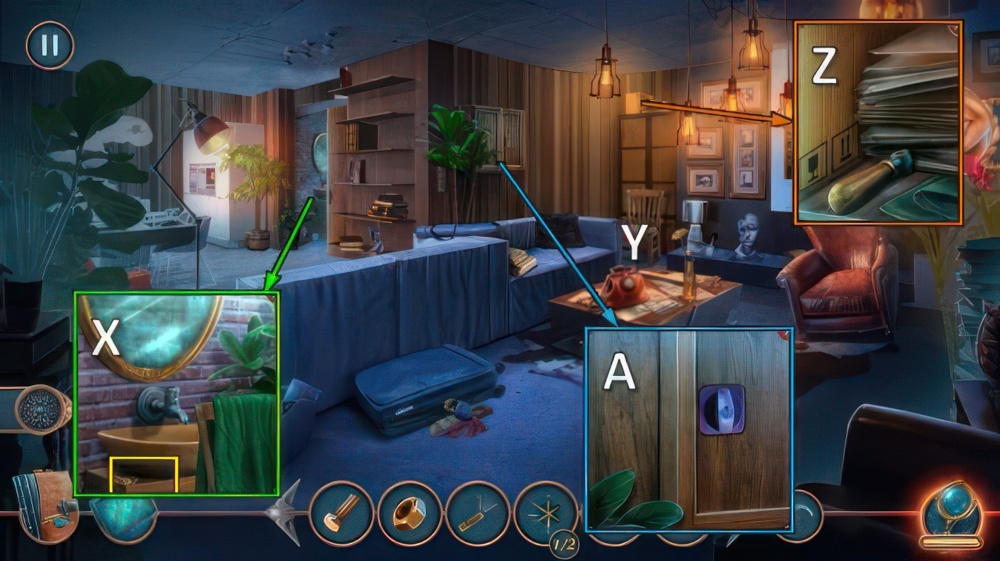
- Take MONOGRAM.
- Move sweater, take STURDY CHAIR (X).
- Place STURDY CHAIR (Y).
- Take VALVE (Z).
- Use LOCKPICKS (if you’ve received them) for puzzle (A).

- Place VALVE, BOLT and NUT (B).
- Place LOCK PART, enter 4-2-9-4 for puzzle (C).
- Receive MAIL HORN.
- Walk down.

- Place MAIL HORN, take note and BASEBALL MITT (D).
- Use BASEBALL MITT, take TOWER FIGURINE (E).
- Go (F).

- Place TOWER FIGURINE, take STAR PART 2/2 (G).
- Place STAR PART (H).
- Solution (I): 1-1-3-2-4-3-5-4-6-6.
- Take DANIEL’S DIARY (J).

- MONOGRAM on DANIEL’S DIARY, read and receive BIKE KEY.
- Use BIKE KEY (K).
- Cross the road safely (L).
Congratulations! You have completed the game Unsolved Case Episode 1: Murderous Talent.


