
Unsolved Case Episode 2: Deadly Exhibition – The walkthrough of the game begins with the fact that shortly after your last investigation, you are faced with a new difficult case. A respected head of a local museum is found dead in his office. But not everything is so simple, it turns out that the victim has his own skeletons in the closet. Find out the killer’s motives and solve this mysterious case. If you are stuck and do not know how to get through one of the locations, on our website you can watch the walkthrough of the game Unsolved Case Episode 2: Deadly Exhibition, and find out who killed the head of the museum.
Unsolved Case Episode 2: Deadly Exhibition – Walkthrough
Here you can watch the full walkthrough of the game Unsolved Case Episode 2: Deadly Exhibition, namely the main plot.
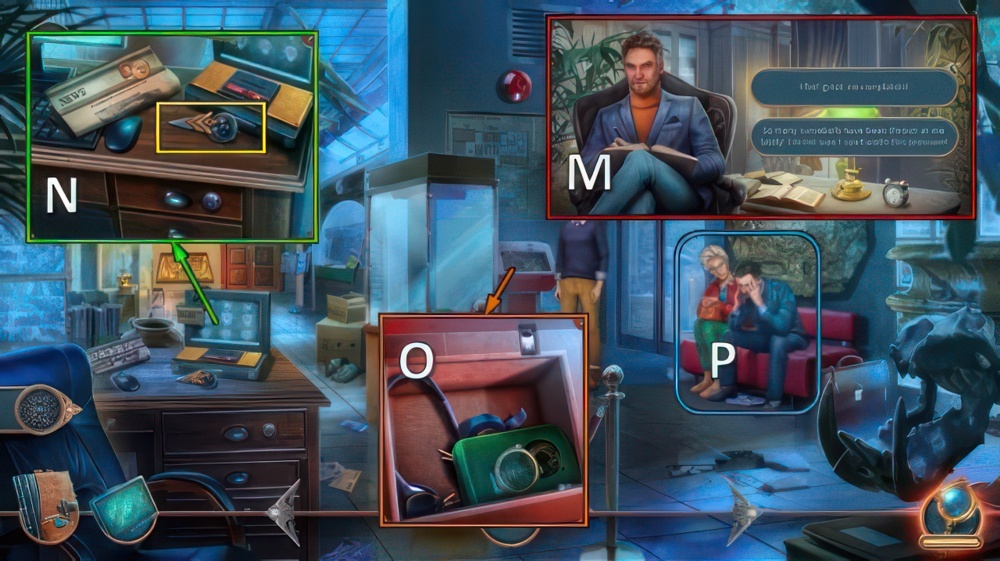
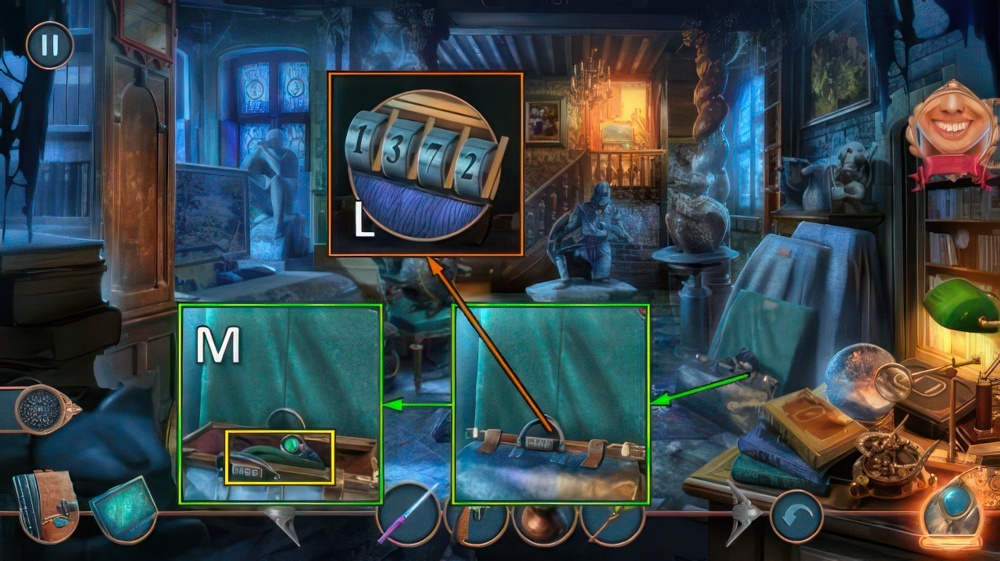
- Select any dialog options (M).
- Receive OUR BAG.
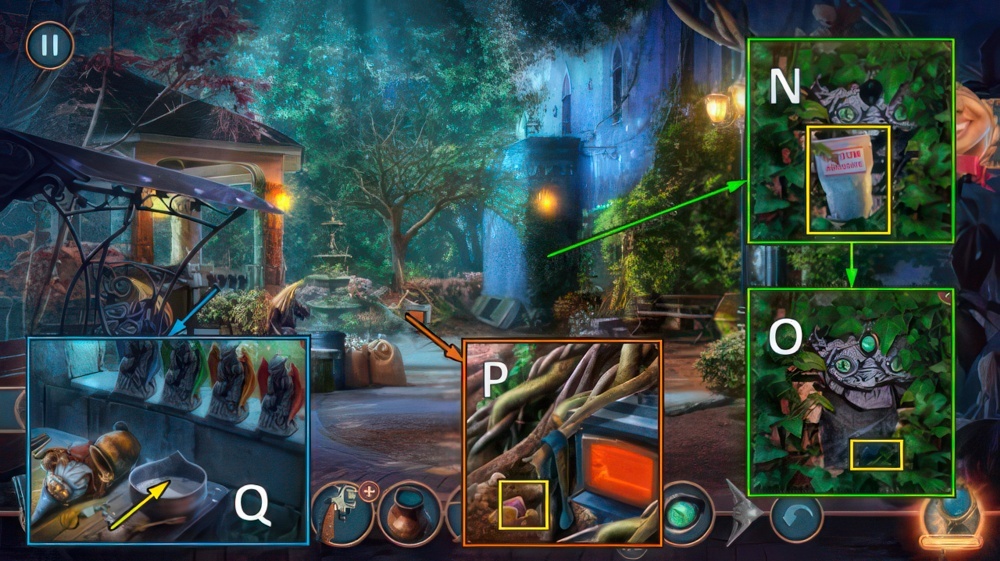
- Take ARROWHEADS 1/2, SPARE PARTS and paper (N).
- PICKLOCK 1/2, FAN and SCREWDRIVER from OUR BAG.
- Place SPARE PARTS and SCREWDRIVER.
- Take IMPROVISED TAPE RECORDER (O).
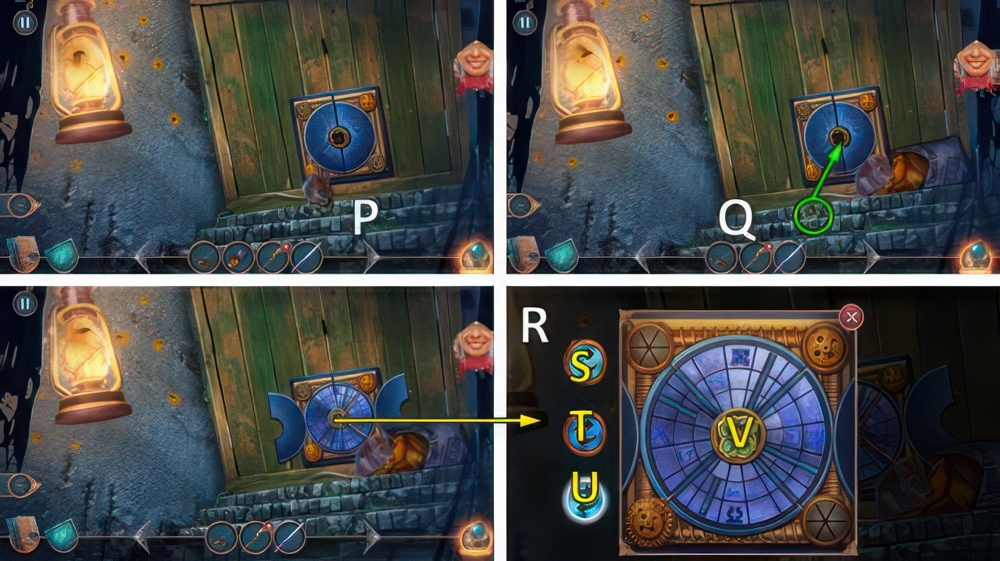
- Use IMPROVISED TAPE RECORDER for puzzle (P).
- Receive SECURITY DESK KEY.
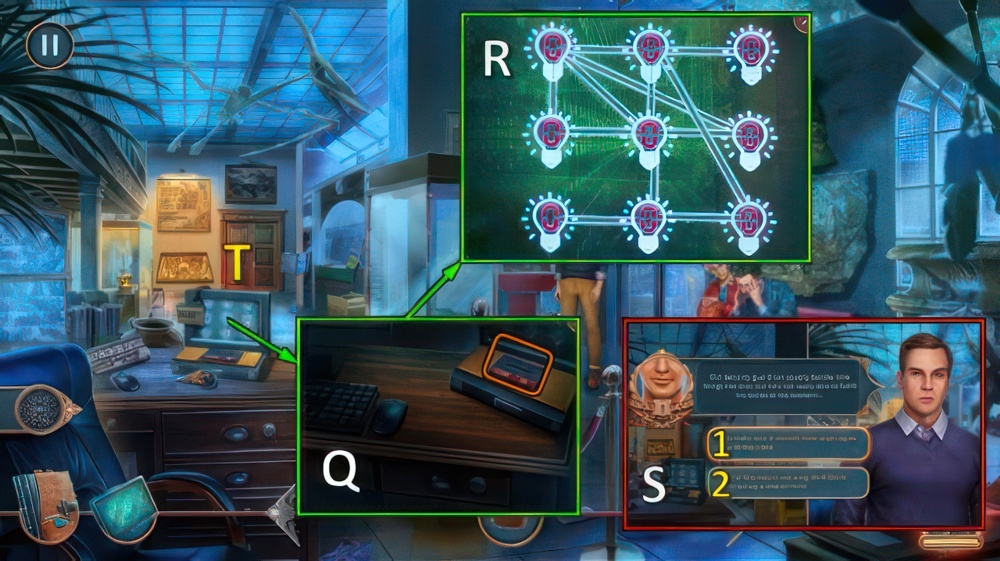
- Place SECURITY DESK KEY (Q).
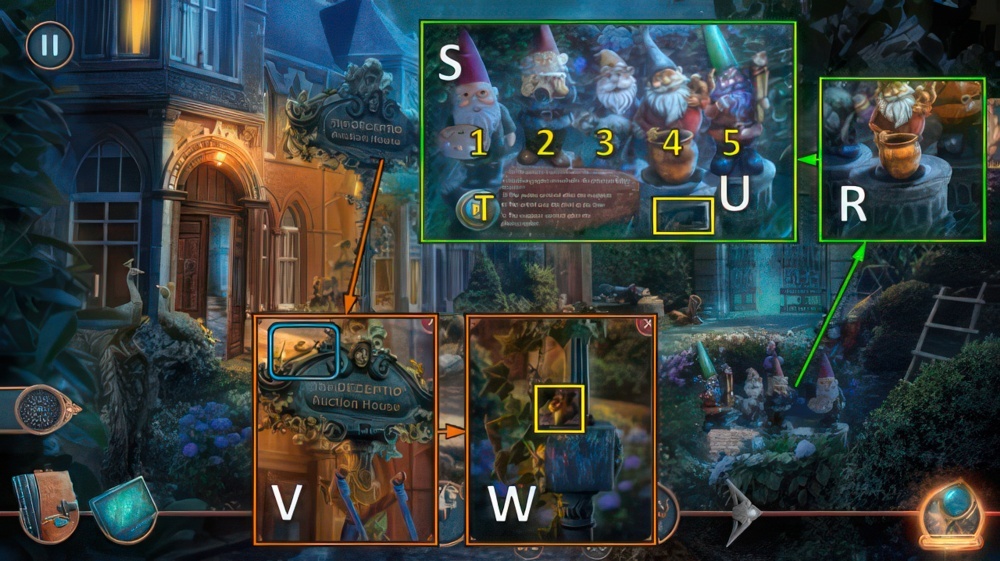
- Possible solution (R).
- Select 1 or 2 (S).
- Note: option 1 unlocks a chain.
- Go (T).
- Take FIVE-DOLLAR BILL and PEN (U).
- Use FAN, take SCRAPER (V).
- Go to Street Outside Museum.

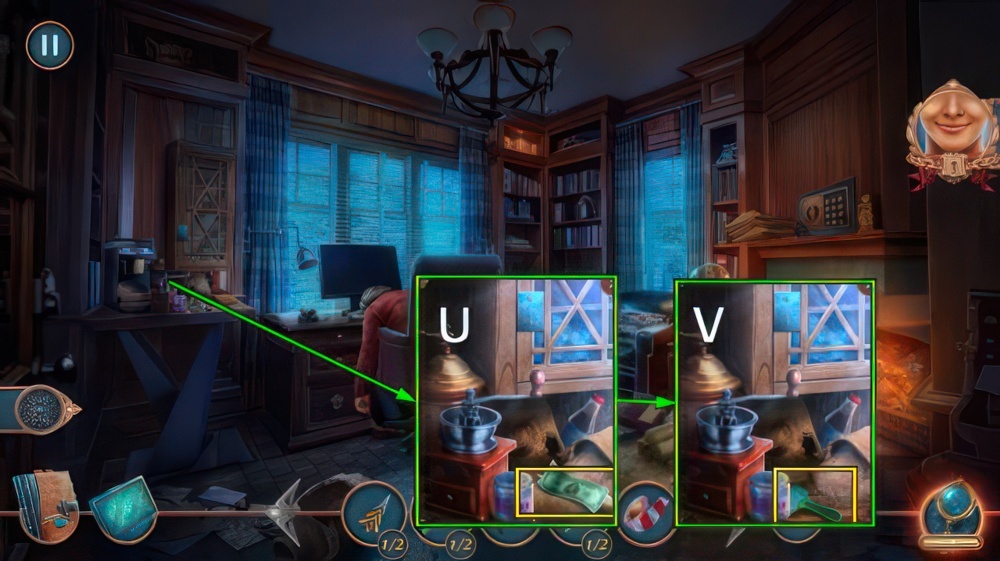
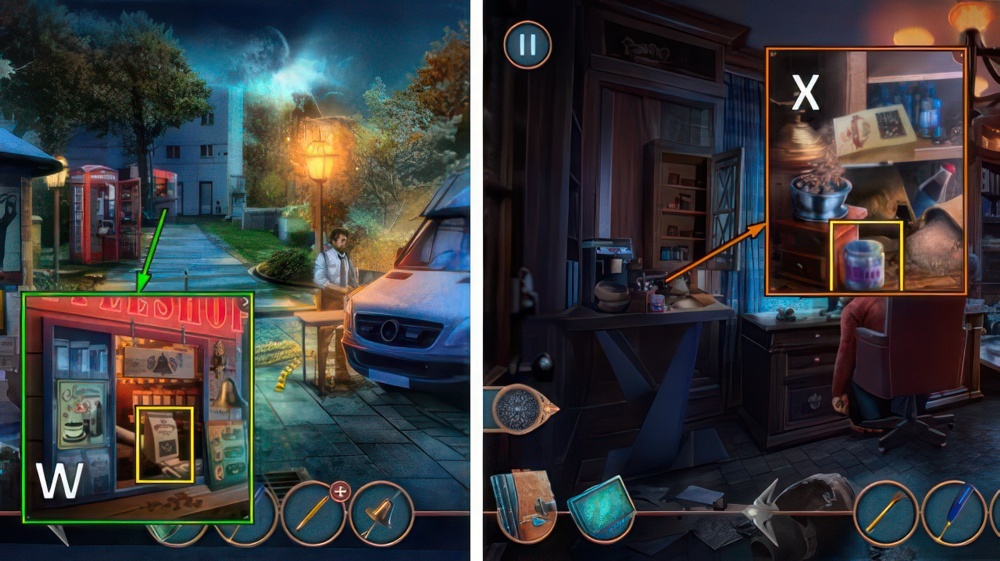
- Open, take LIQUID COLLECTING KIT 1/2 and POLICE TAPE (W).
- Use SCRAPER, take HOOK (X).
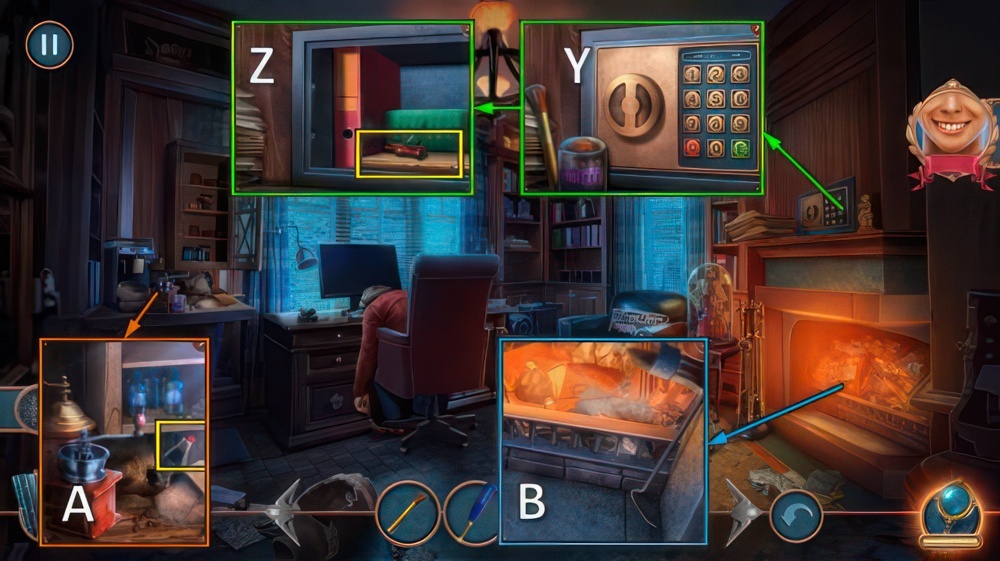
- Use HOOK (Y).
- Take POWDER BRUSH.
- Use POLICE TAPE.
- Take CANE WITH POLICE TAPE (Z).
- Walk down.
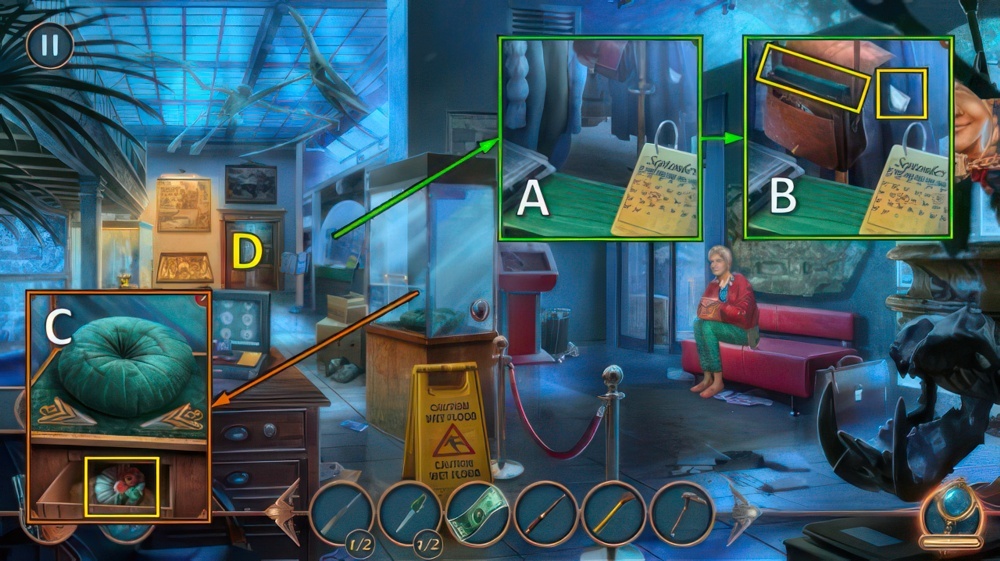
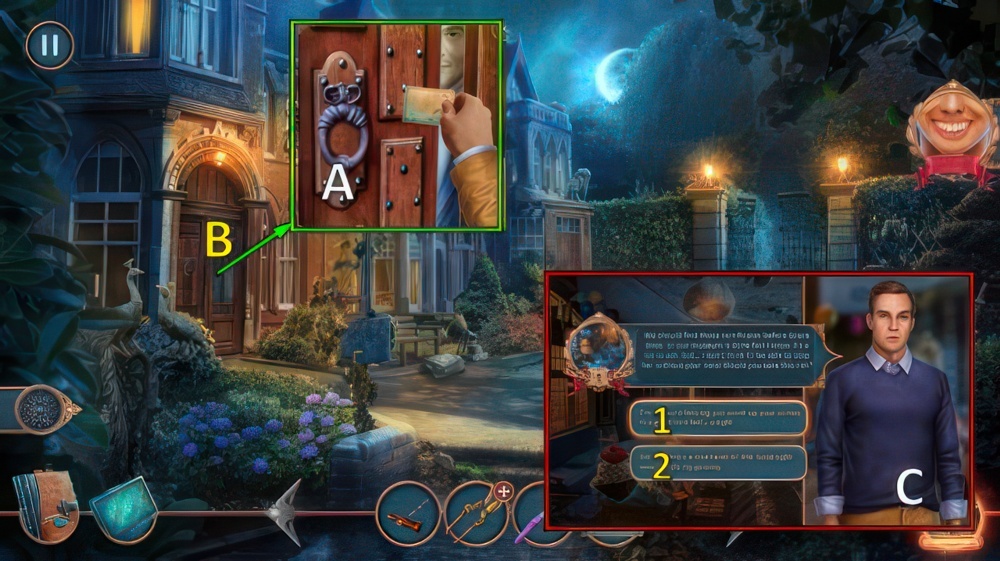
- Use CANE WITH POLICE TAPE (A).
- Open, take book, note and ARROWHEADS 2/2 (B).
- Open, place ARROWHEADS.
- Take SOUVENIR MAGNET (C).
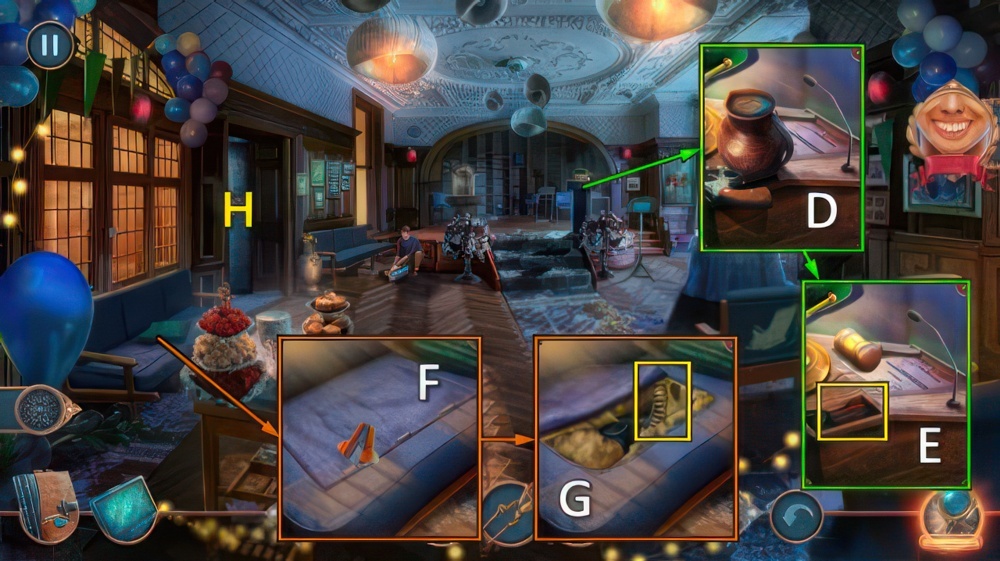
- Go (D).
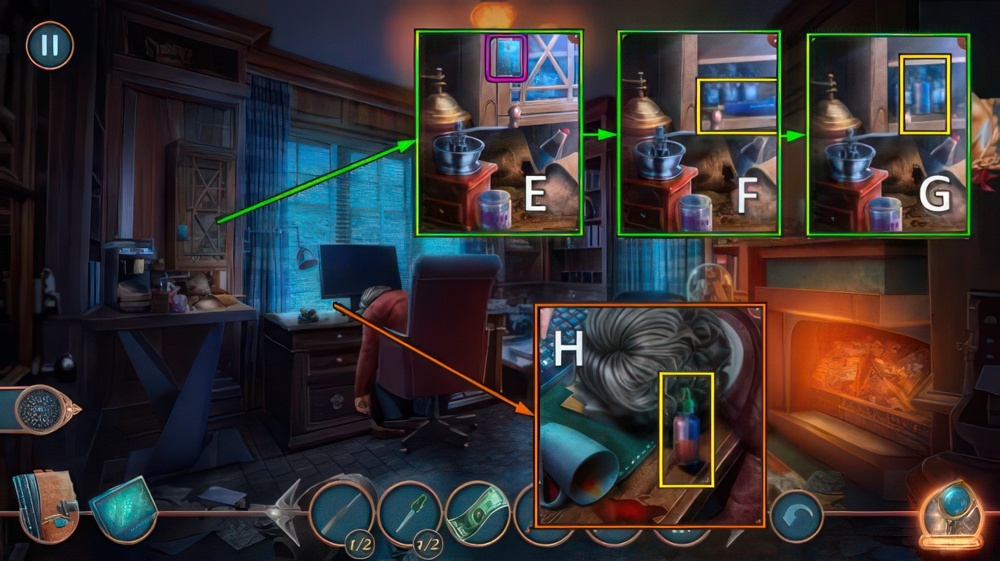
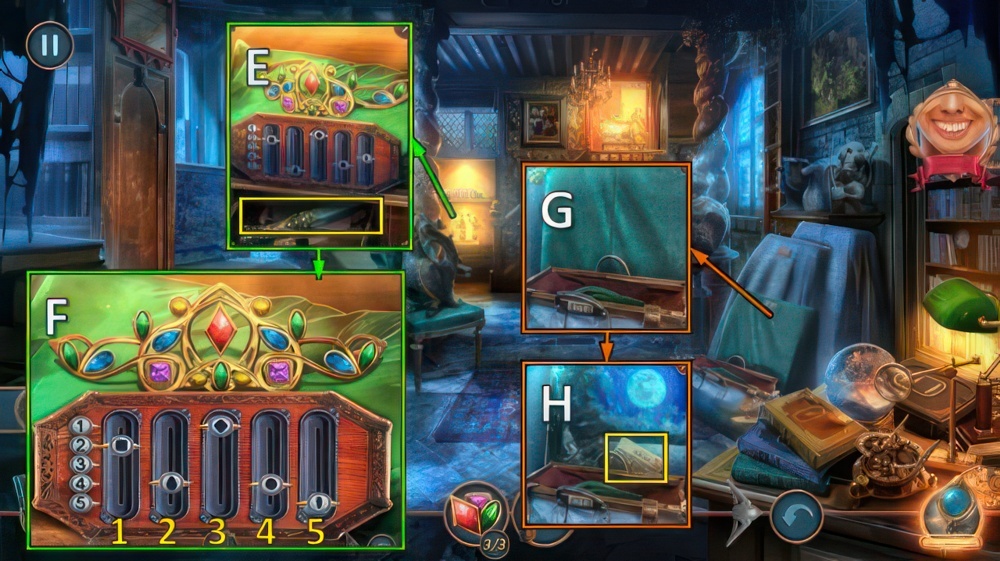
- Use SOUVENIR MAGNET (E).
- Take SOLDERING IRON (F).
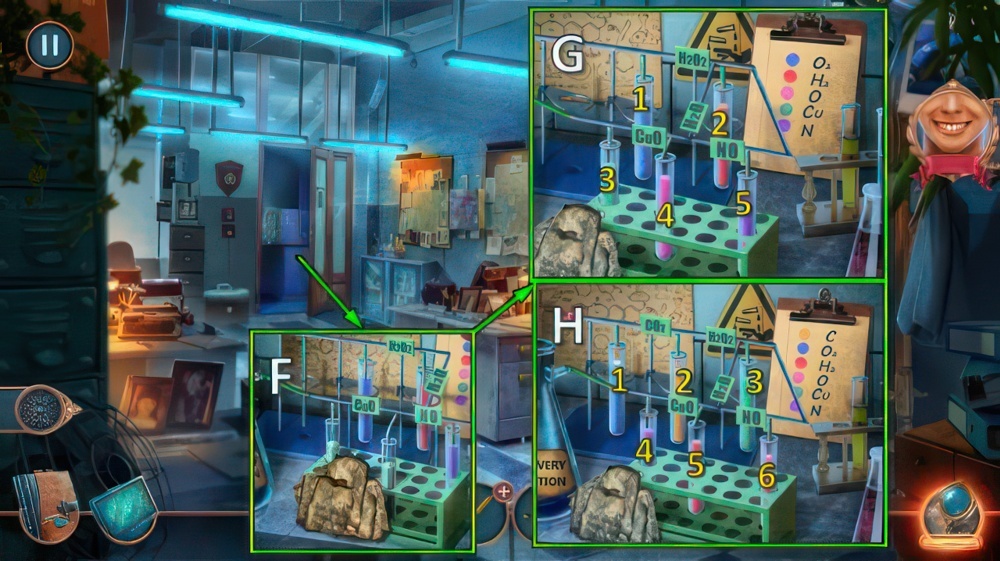
- Use PEN, take LIQUID COLLECTING KIT 2/2 (G).
- Use LIQUID COLLECTING KIT, take COFFEE IN TEST TUBE (H).
- Go to Street Outside Museum.
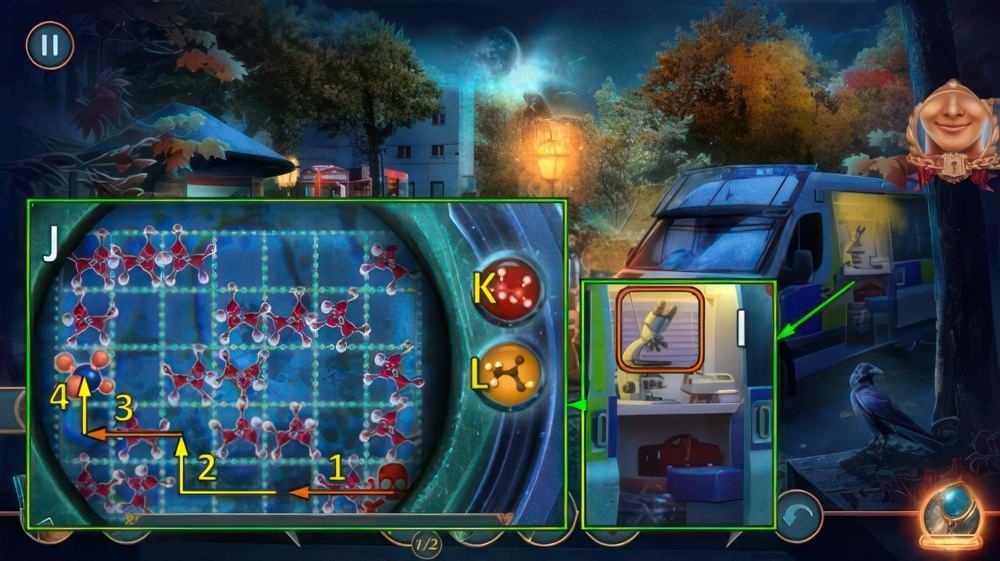
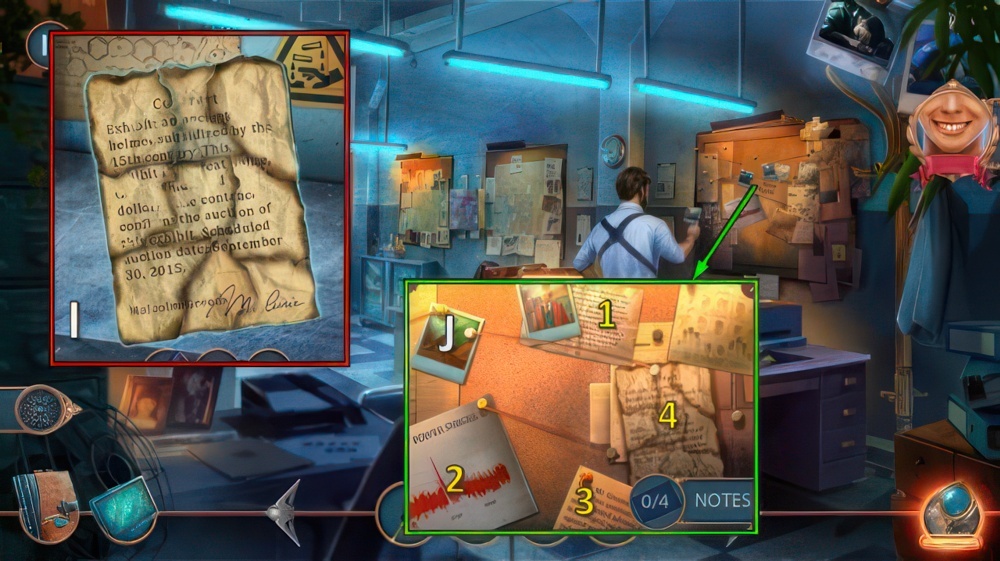
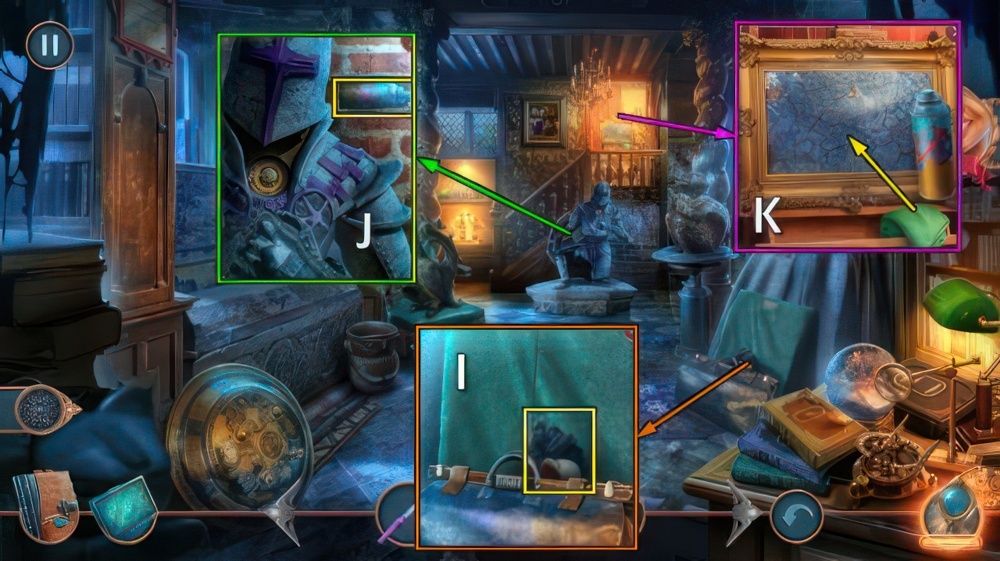
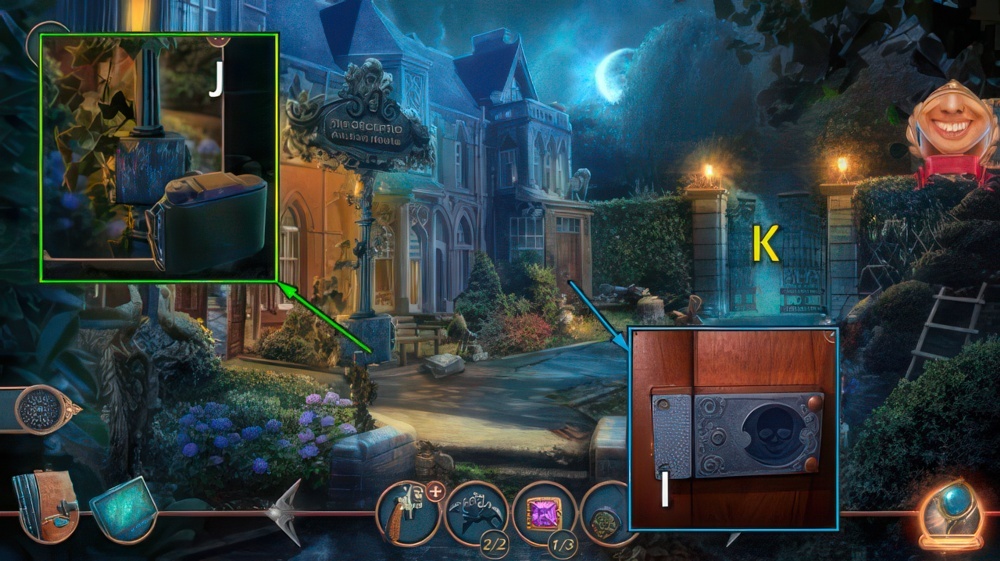
- Use COFFEE IN TEST TUBE (I).
- Easy solution (J): L-1-K-2-L-3-K-4.

- Hard solution (M): 1-P-2-N-3-O-4-P-5.
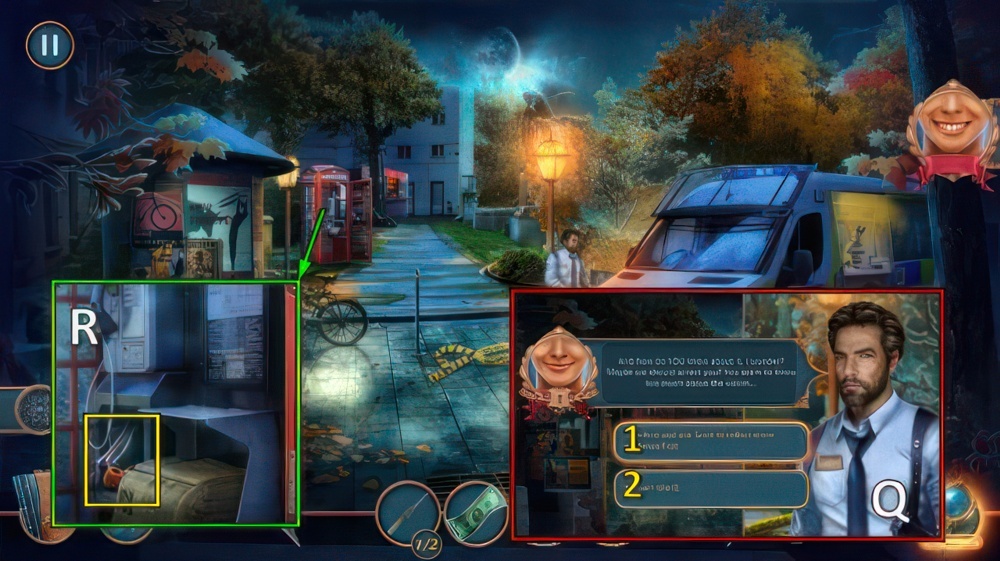
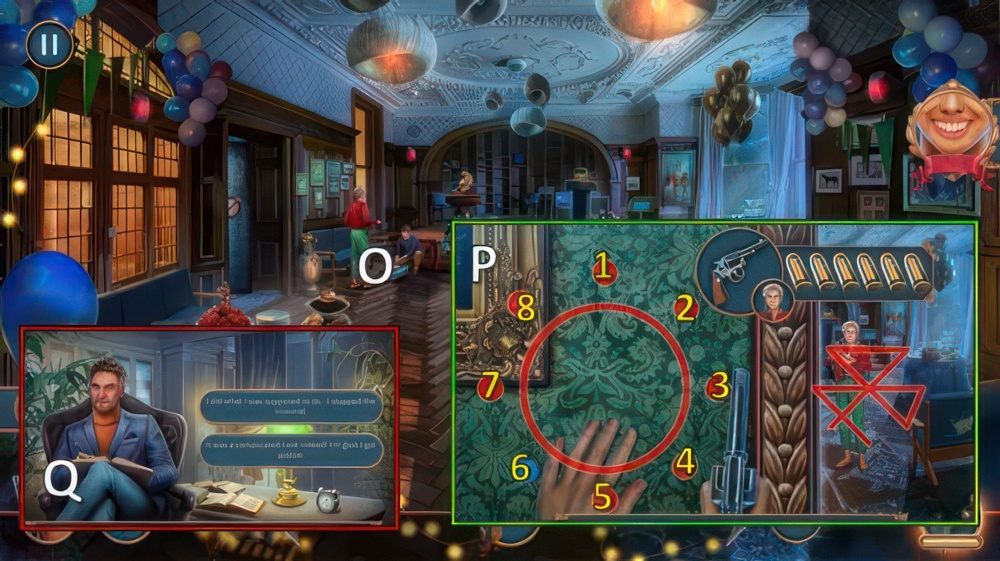
- Select 1 or 2 (Q).
- Note: option 1 unlocks a chain.
- Receive WIRE CUTTERS.
- Use WIRE CUTTERS, take SMOKING PIPE (R).
- Walk down.
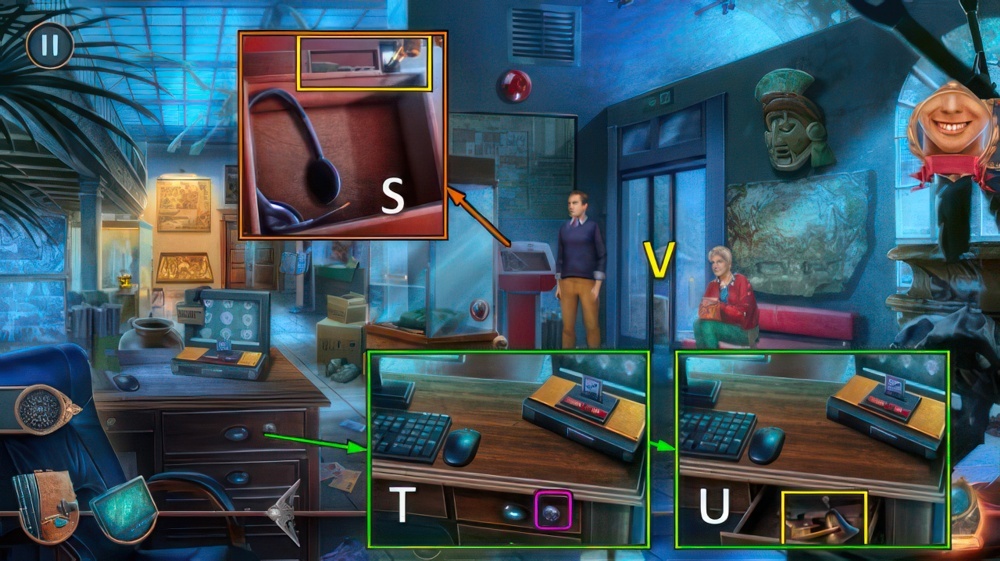
- Place SMOKING PIPE, take PICKLOCK 2/2 (S).
- Use PICKLOCK (T), take BROKEN PENCIL and ENTRANCE ALERT CHIME (U).
- Go (V).
- Use ENTRANCE ALERT CHIME and FIVE-DOLLAR BILL, take GRAIN COFFEE (W).
- Go to Director’s Office.
- Use GRAIN COFFEE, take GROUND COFFEE (X).
- Place POWDER BRUSH and GROUND COFFEE, enter 2-6-8-1-E (Y).
- Take CORKSCREW and FLAT BOTTLE OPENER (Z).
- Use FLAT BOTTLE OPENER, take SPARKLING WATER (A).
- Use SPARKLING WATER for puzzle (B).
- Receive CHARRED DOCUMENT.

- Take PENCIL SHARPENER (C).
- PENCIL SHARPENER on BROKEN PENCIL, receive PENCIL.
- Take CHEESE-FLAVORED CRISPS.
- Place PENCIL, receive REAGENT FORMULA (D).
- Open, place REAGENT FORMULA.
- Add 1-2-3 to 4.
- Take REAGENTS (E).
- Place REAGENTS and CHARRED DOCUMENT (F).
- Easy solution (G): select 4-2-3-5-4.
- Hard solution (H): select 1-2-1-5-3-4-6-5.
- Solution (I).
- Receive RESTORED DOCUMENT.
- Place RESTORED DOCUMENT, select 1-2-3-4 (J).

- Knock (K).
- Take BROKEN PRUNING SHEARS and NAIL FILE (L).
- Use SOLDERING IRON (M), receive IRON KEY.
- Use IRON KEY (N).
- Go (O).
- Place CHEESE-FLAVORED CRISPS (P), move clover (Q).
- Easy solution (R): Tx12-Ux4-V.
- Hard solution (R): Sx2-Tx6-Ux4-V.

- Take PRUNING SHEARS PART and SLEDGEHAMMER (W).
- Use SLEDGEHAMMER for puzzle (X), receive FIRST AID KIT.
- Use FIRST AID KIT (Y).
- Select 1 or 2 (Z).
- Note: option 1 unlocks a chain.
- Receive INVITATION TO AUCTION.
- Walk down.
- Offer INVITATION TO AUCTION (A).
- Go (B).
- Select 1 or 2 (C).
- If you’ve selected 2, skip the steps marked with # below.
- Take UNLOADED REVOLVER and JUG OF WATER (D).
- Use CORKSCREW, take STAPLE REMOVER (E).
- Use STAPLE REMOVER (F).
- Take PRUNER (G).
- # Go (H).
- # Take SEASHELL and DUSTER BRUSH (I).
- # Use DUSTER BRUSH, take CLEANSER (J).
- # Use CLEANSER and rag (K).
- # Enter 1-3-7-2 (L), take notes, AMULET SHARDS 1/2 and THIRD EYE (M).
- Go to Backyard.
- PRUNING SHEARS PART and PRUNER on BROKEN PRUNING SHEARS, receive PRUNING SHEARS.
- Use PRUNING SHEARS, take GYPSUM ADHESIVE (N).
- # Place THIRD EYE.
- # Take AMULET SHARDS 2/2 (O).
- # Use SEASHELL, take GEMSTONES 1/3 (P).
- Use GYPSUM ADHESIVE and JUG OF WATER, use spoon.
- Take GARDEN GNOME (Q).
- Walk down.
- Place GARDEN GNOME (R).
- Solution (S): (1-4)-(2-3)-(4-5)-T.
- Take LOADED SLINGSHOT (U).
- Use LOADED SLINGSHOT (V).
- Take FLEUR-DE-LIS, take METAL FIGURINE with NAIL FILE (W).
- # Go to Storage Room.

- # Place AMULET SHARDS for puzzle (X), receive JADE AMULET.
- # Place JADE AMULET.
- # Take GEMSTONES 2/3 and TWEEZERS (Y).
- Go to Auction Hall.
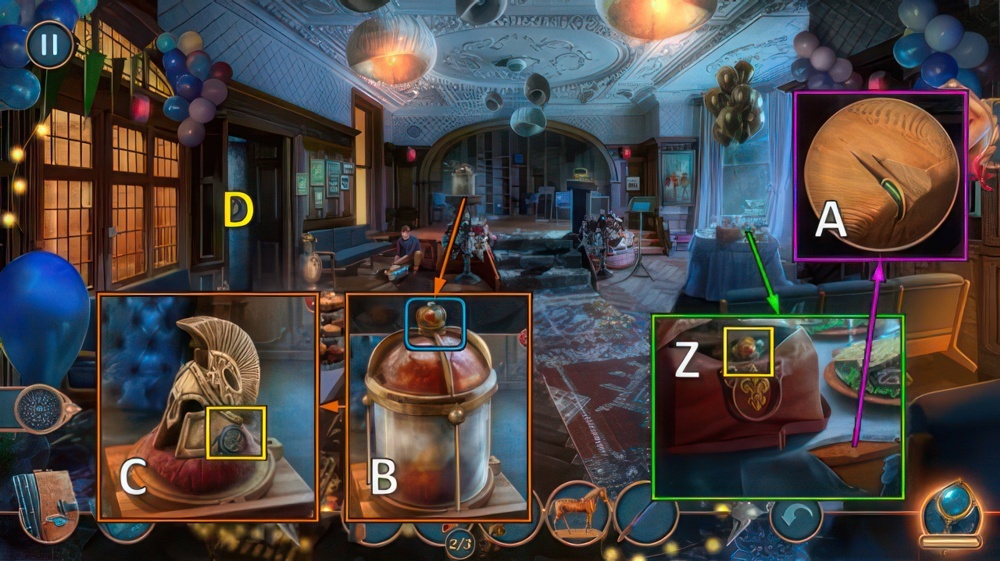
- Place FLEUR-DE-LIS, take IRON CROWN (Z).
- # Take GEMSTONES 3/3 with TWEEZERS (A).
- Place IRON CROWN, remove (B).
- Take MARKED KEY (C).
- # Go (D).
- # Place GEMSTONES (E).
- Easy solution (F).
- Hard solution (F): move 5, 4, 1, and 3 into positions shown.
- # Take PRECIOUS DAGGER (E).
- # Use PRECIOUS DAGGER (G), take note (H).
- Go to Near Auction House.
- Use MARKED KEY for puzzle (I), receive VINTAGE POLAROID.
- Use VINTAGE POLAROID, receive PICTURE OF GARGOYLES (J).
- Go (K).

- Place PICTURE OF GARGOYLES (L).
- Solution (L): (4-3)-(3-2)-(2-1)-(4-3)-(3-2).
- Take BULLET MOLD (M).
- Place METAL FIGURINE and BULLET MOLD.
- Use tongs, take CARTRIDGE (N).
- Go to Auction Hall.
- CARTRIDGE on UNLOADED REVOLVER, receive REVOLVER.
- Use REVOLVER (O).
- Easy solution (P): 2-8-4-3-7-5, 5-4-6-3-7-2-8, 5-8-7-3-4-1-6.
- Hard solution (P): 2-3-5-8-4-1-7, 6-2-4-8-7-5-3, 1-7-5-3-8-4-6.
- Select any dialog (Q).
Congratulations! You have completed the game Unsolved Case Episode 2: Deadly Exhibition.


