
Wilde Investigations 1: The Zoo Kerfuffle – You will find yourself in the center of an unusual incident in the zoo. It’s Monkey Day, but the animals have strangely left their enclosures and the zoo is in chaos. The police are powerless before this mystery, and the only hope, Detective Artemis Wild, who has a unique gift of communication with animals. Solving puzzles and collecting clues, you will uncover the chain of events that led to this incredible situation. You are waiting for a fascinating investigation, where you will need not only intuition, but also the help of your furry friends. Find out who is behind this commotion and return order to the zoo. If you can not pass any of the puzzles or do not know where the items are, on our site you can watch the walkthrough of Wilde Investigations 1: The Zoo Kerfuffle, and return order to the zoo.
Wilde Investigations 1: The Zoo Kerfuffle – Walkthrough
Here you can see the full walkthrough of Wilde Investigations 1: The Zoo Kerfuffle, namely for all chapters, including the bonus chapter, in pictures.
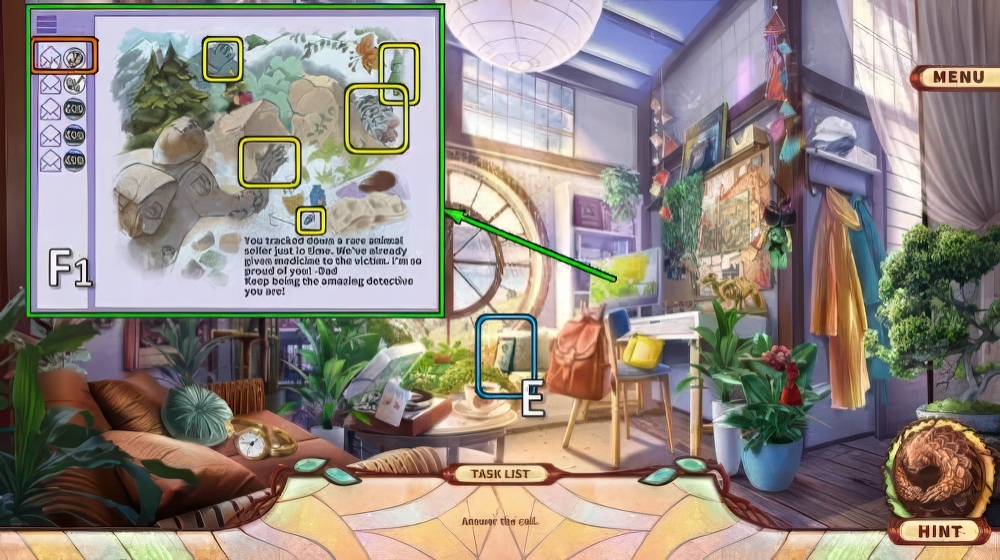
- Answer phone (E).
- Play puzzle (F1).

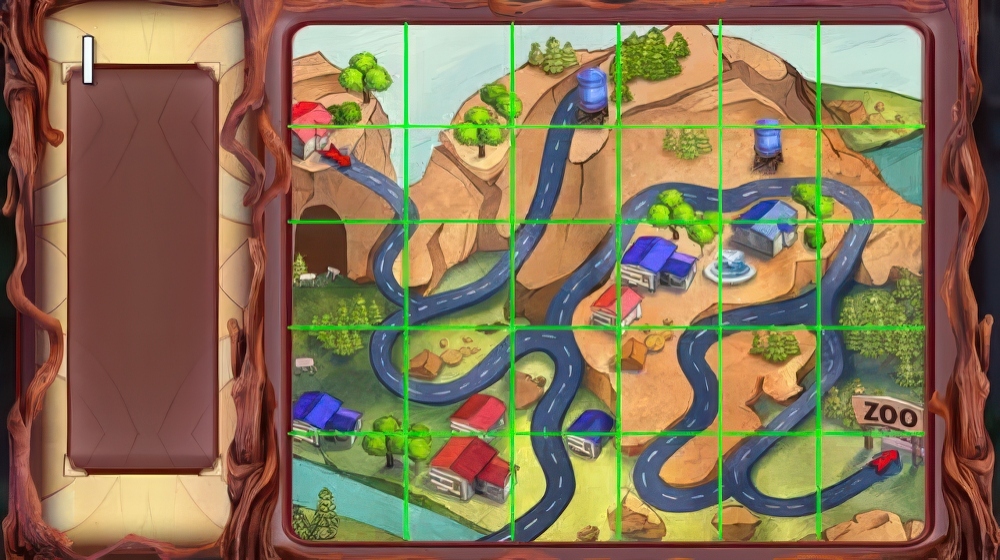
- Play puzzle (F2-F3).

- Play puzzle (F4-F5).

- Select backpack (G) for puzzle (H).
- Solution (I).
- Go to Zoo Entrance.
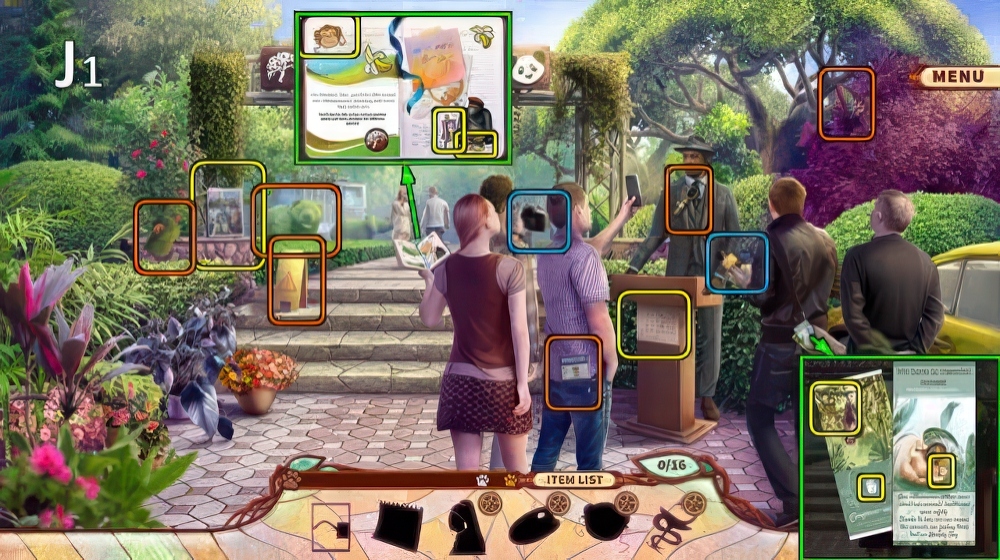
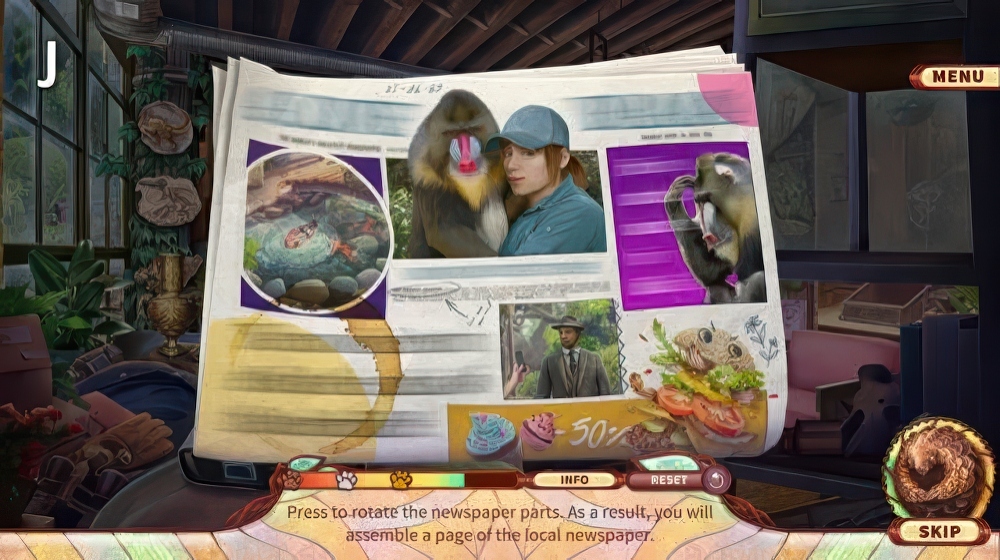
- Play puzzle (J1).

- Play puzzle (J2).
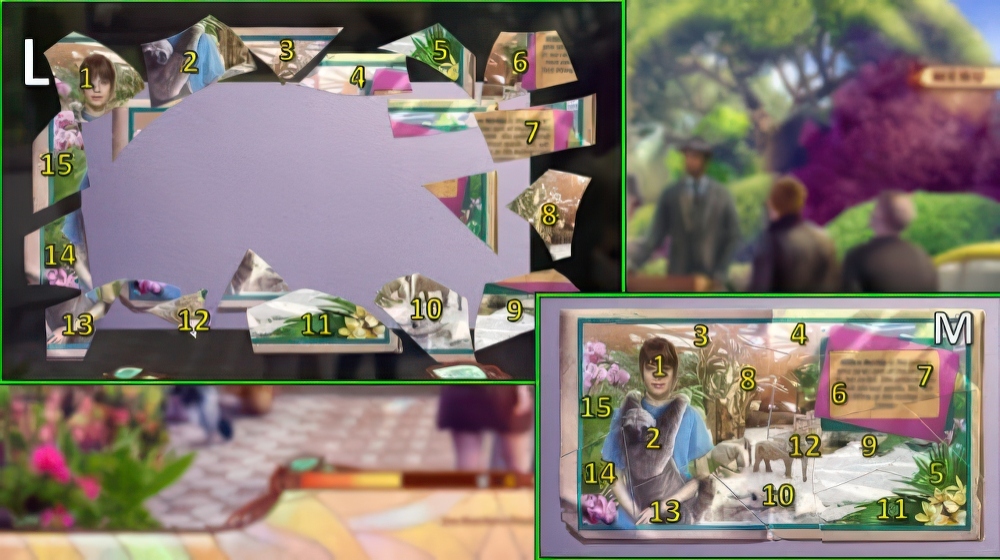
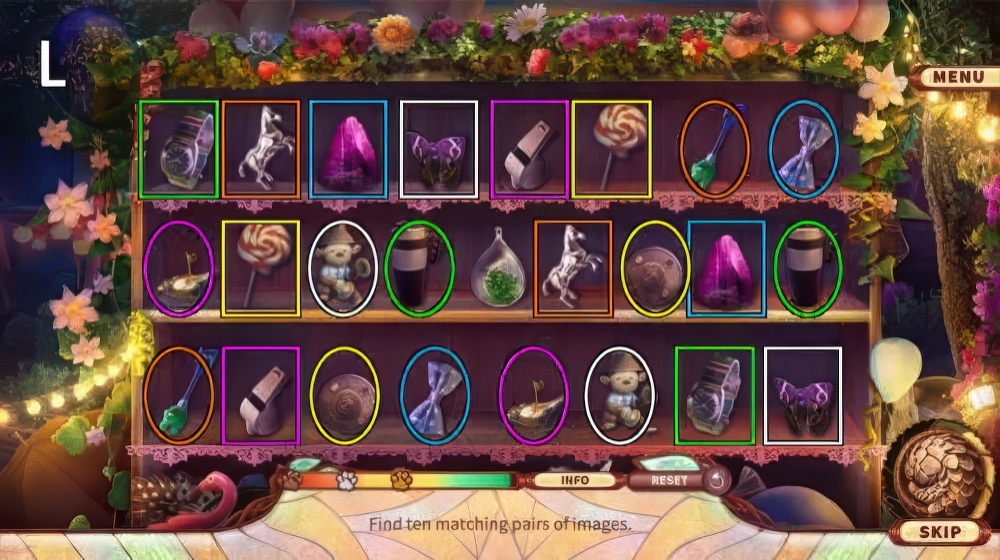
- Solution (L).
- Read note (M).
- Go to Care Center.

- Play puzzle (N).
- Select bubbles in order (1-4).
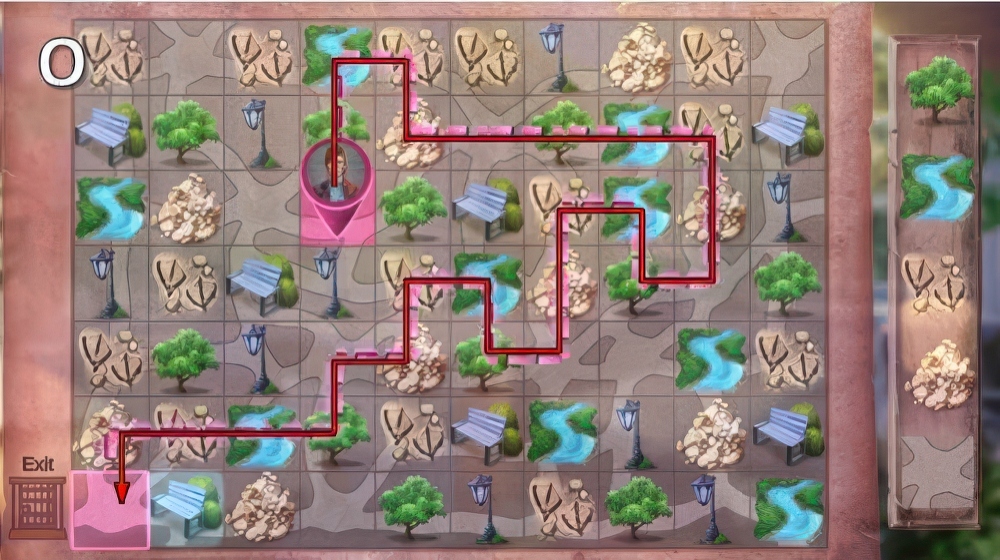
- Solution (O).
- Go to Otter Enclosure.

- Select 3-2-1 (P).
- Play puzzle (Q).
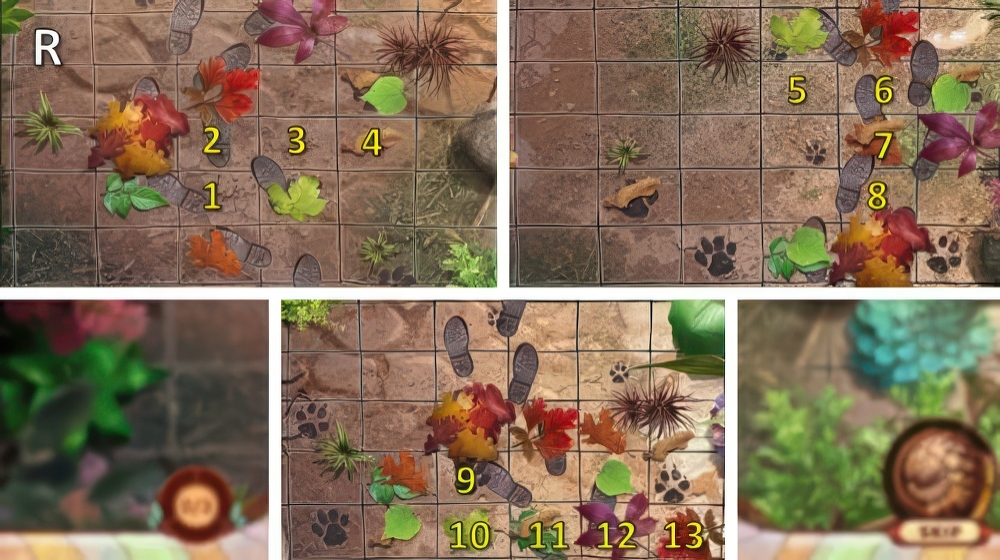
- Solution (R).
- Go to Security Room.

- Play puzzle (S1).

- Play puzzle (S2).

- Solution (U): (1-9)-(2-11)-(3-17)-(4-14)-(5-9)-(6-22)-(7-13)-(8-16)-(9-11)-(10-19)-(11-23)-(12-16)-(13-20)-(15-18)-(17-20)-(18-24)-(19-24)-(21-23)-(22-24)-(23-24).
- Go to Aviary.
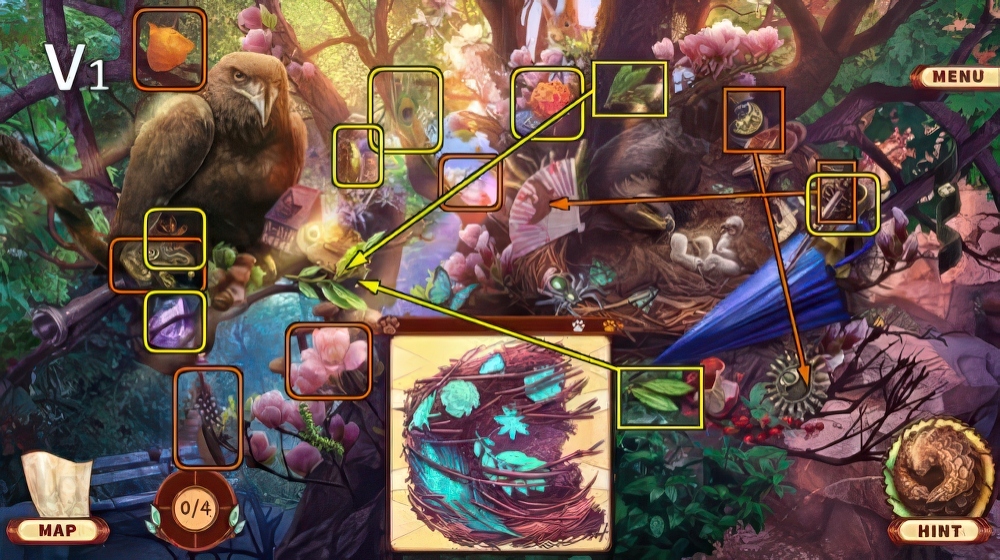
- Play puzzle (V1).

- Play puzzle (V2).
- Select 1-3-2 (W).

- Solution (X).
- Go to Central Square.

- Play puzzle (Y).

- Solution (Z).
- Go to Souvenir Stand.

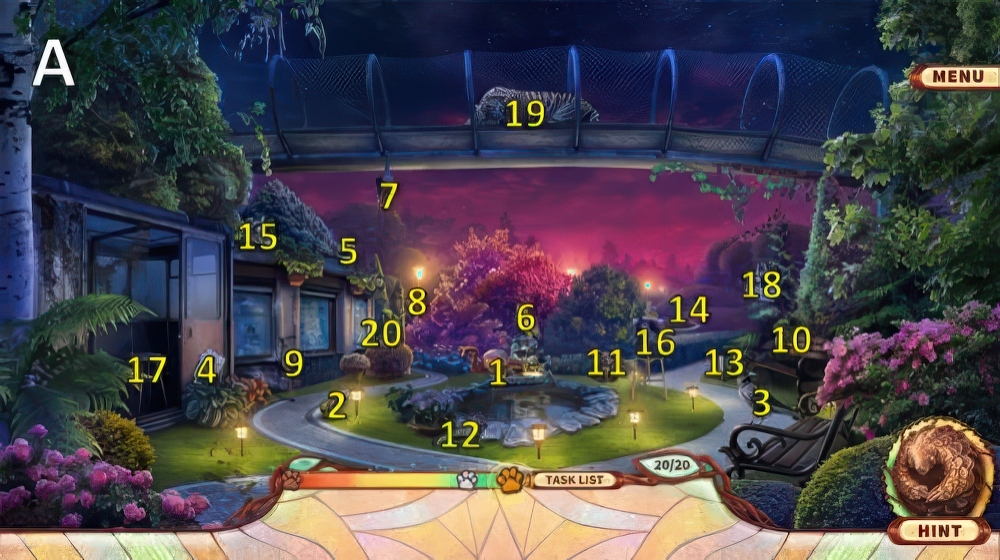
- Play puzzle (A1).
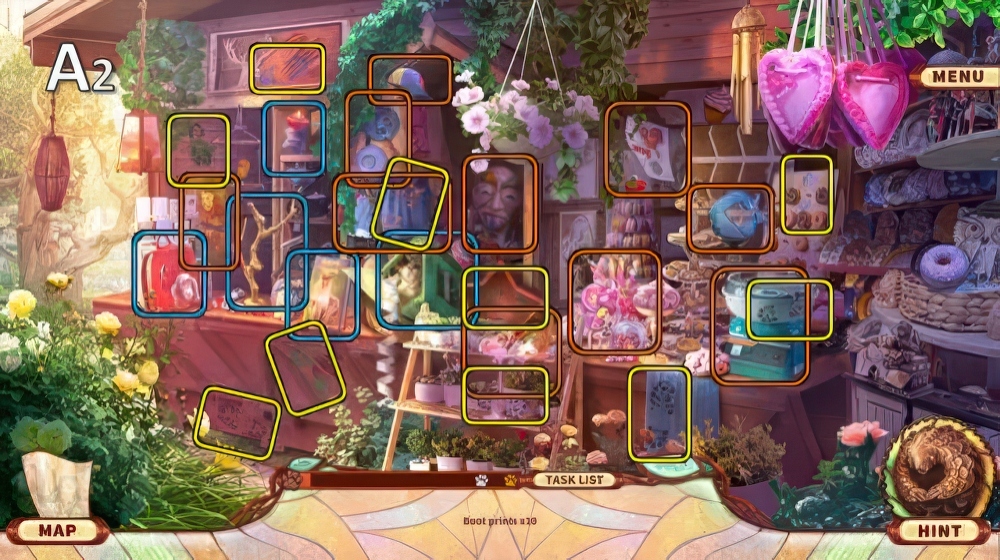
- Play puzzle (A2).
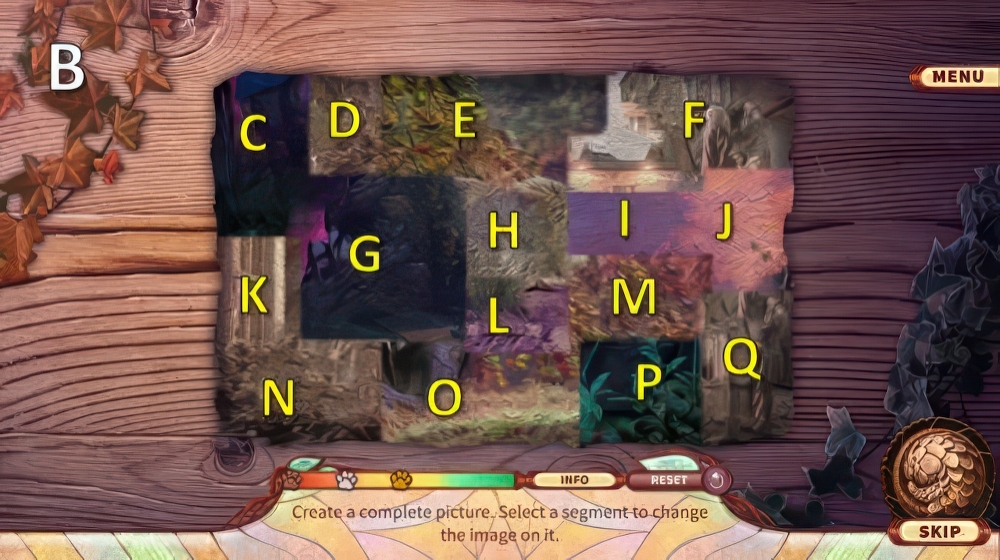
- Solution (B): Cx3-D-Ex2-F-Gx4-Hx2-Ix3-Jx3-K-Lx3-Mx2-N-Ox2-Q.
- Go to Artemis’ Car.
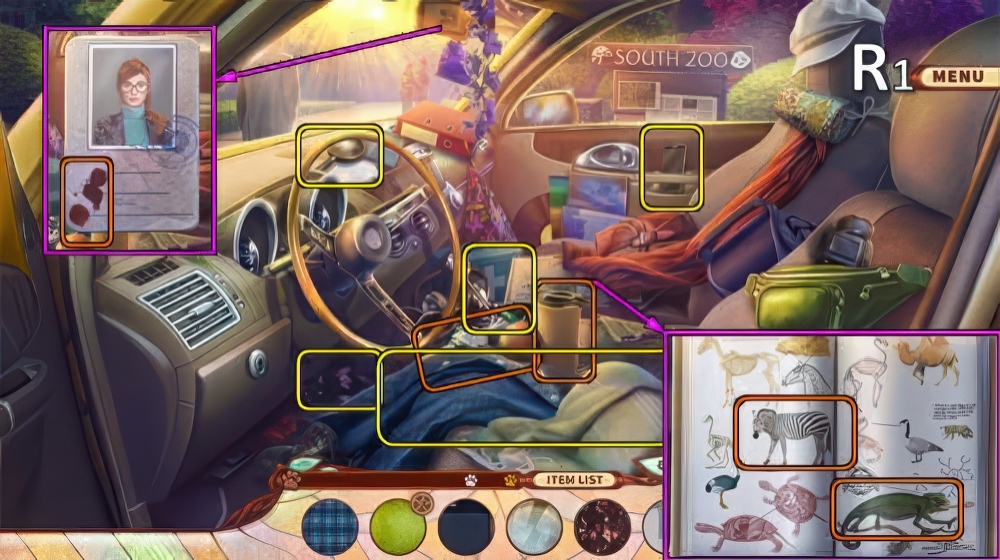
- Play puzzle (R1).

- Play puzzle (R2).
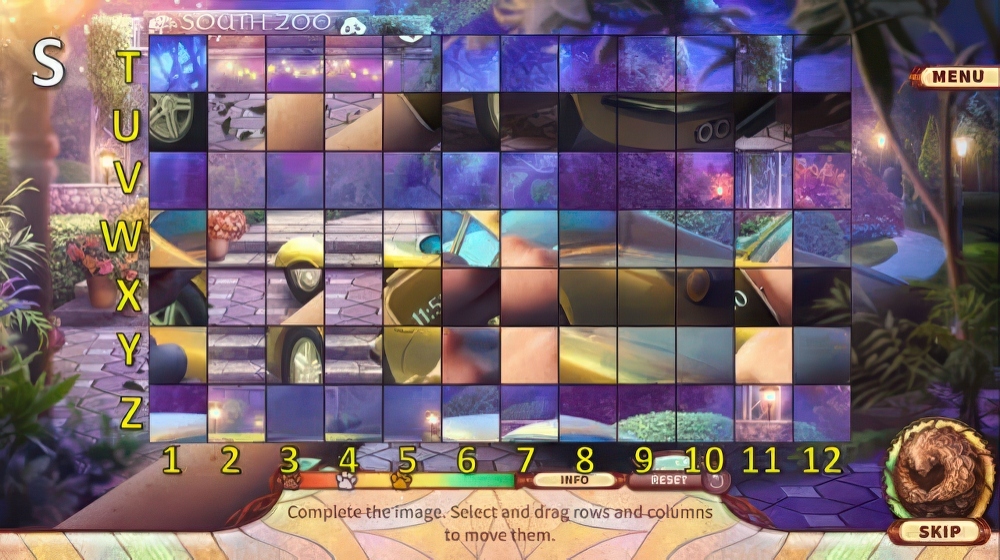
- Solution (S): (U-Z)-(W-Y)-(W-X)-(V-W)-(2-1)-(4-2)-(4-3)-(5-4)-(11-5)-(8-6)-(8-7).
- Go to Zookeeper’s Cabin.
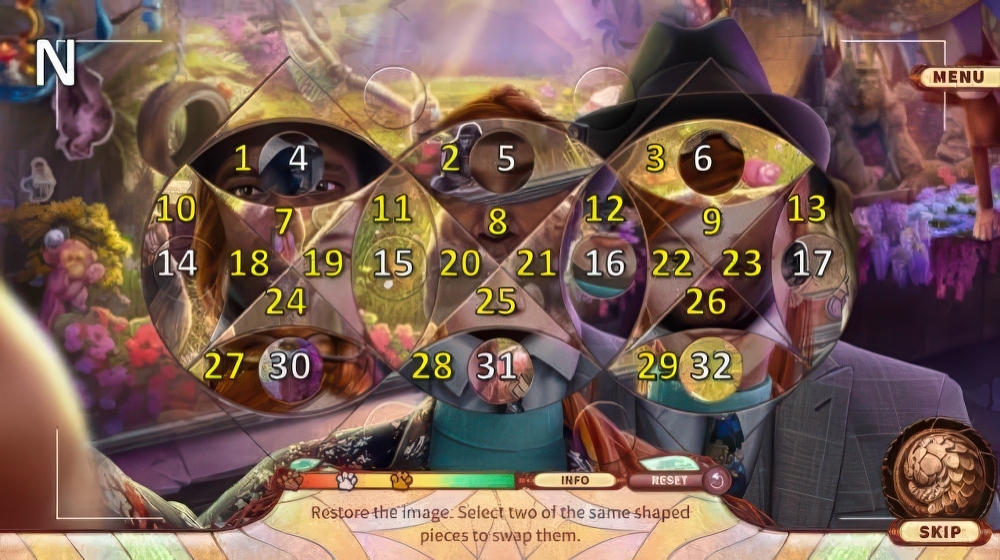
- Play puzzle (A).

- Solution (B): (1-3)-(2-27)-(4-32)-(5-6)-(8-9)-(10-11)-(12-13)-(14-15)-(16-31)-(17-30)-(18-20)-(19-21)-(20-22)-(28-29).
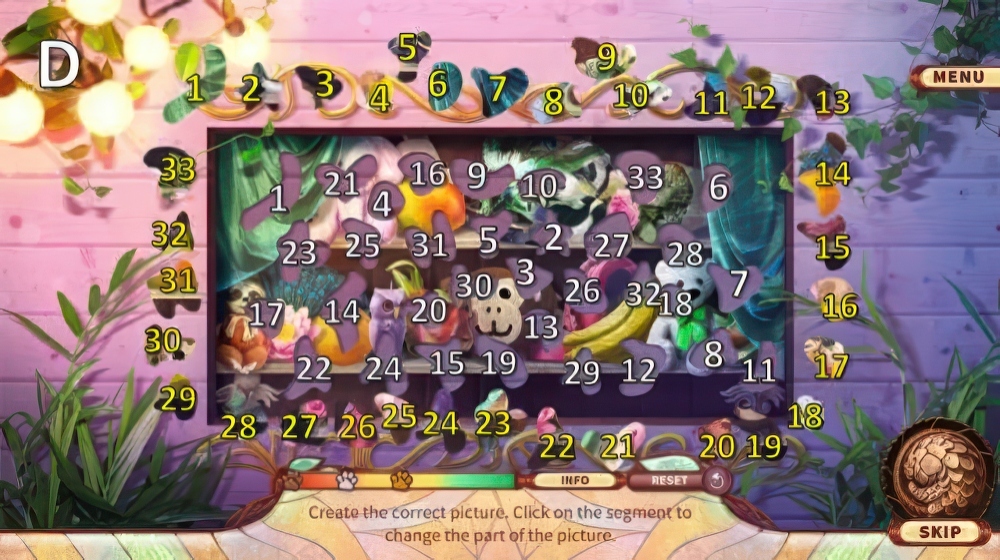
- Go to Playground.

- Play puzzle (C1).
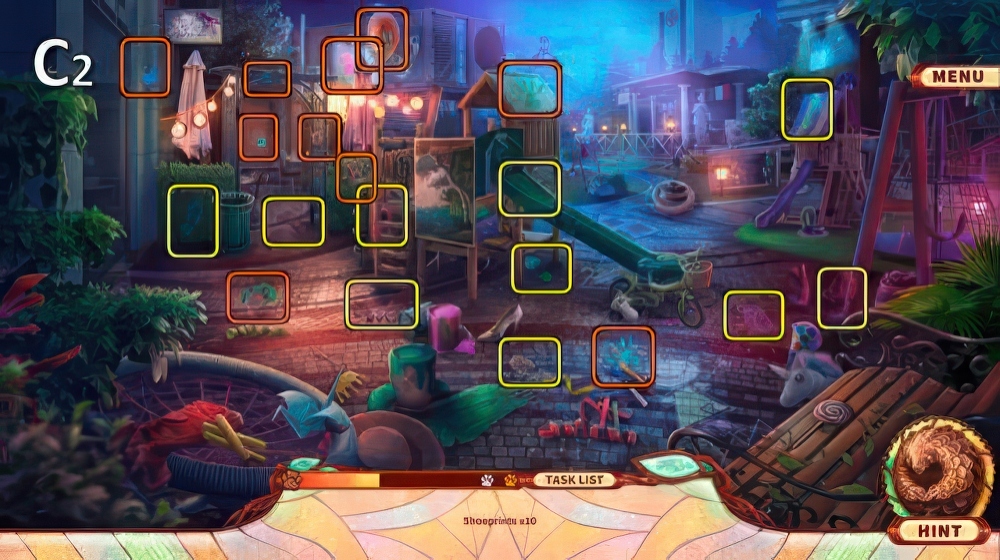
- Play puzzle (C2).
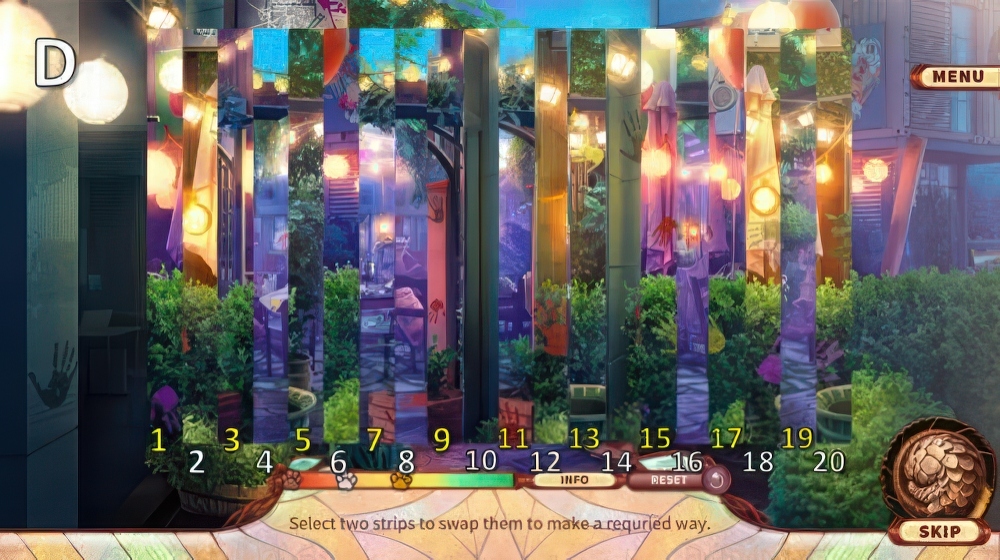
- Solution (D): (1-10)-(2-14)-(3-12)-(4-14)-(5-18)-(6-20)-(7-13)-(8-18)-(9-19)-(10-16)-(11-18)-(12-14)-(14-18)-(15-19)-(16-18)-(17-18)-(18-19).
- Go to Cafe Entrance.

- Play puzzle (E1).

- Play puzzle (E2).

- Solution (F).
- Go to Inside Cafe.

- Play puzzle (G1).
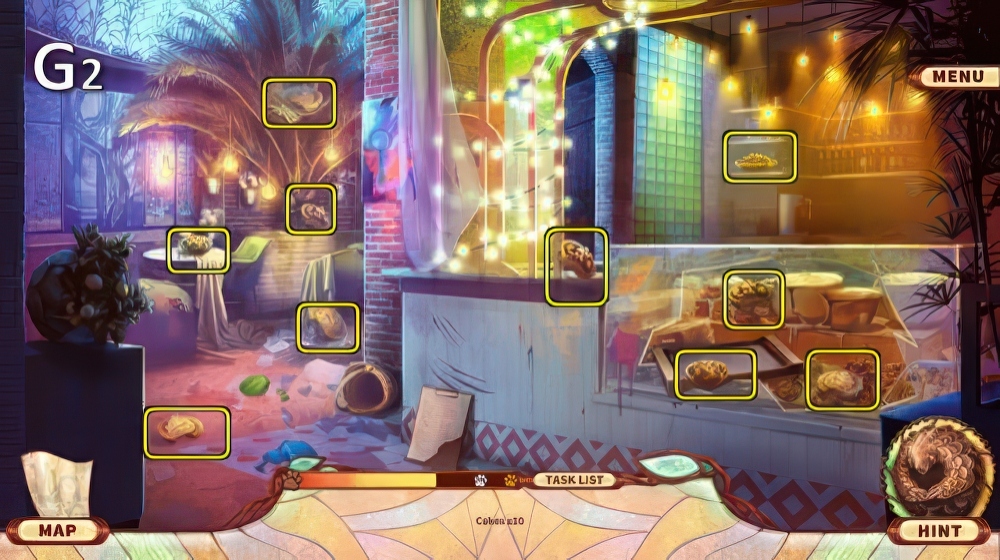
- Play puzzle (G2).

- Solution (H): 4-3-2-1-10-9-4-3-2-7-5-22-19-17-13-11-7-6-23-22-20-21-16-15-10-9-4.
- 23-22-20-21-16-15-10-9-17-13-11-15-10-15-14-13-12-16-14-13-22-20-21-16-15.
- 23-22-20-21-16-20-21-20-19-17-20-19-18-19-20-22.
- Go to Raccoon Den.
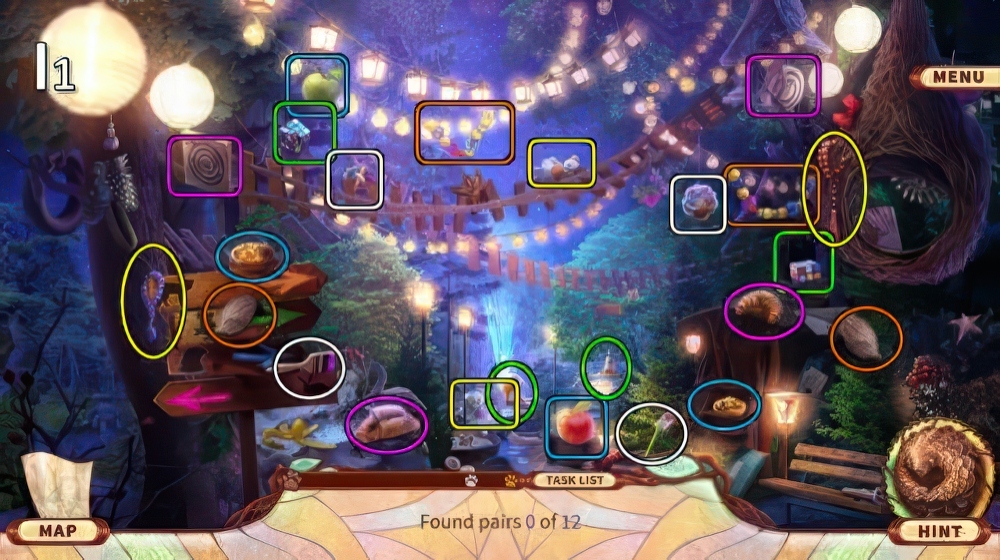
- Play puzzle (I1).

- Play puzzle (I2).

- Solution (J1).

- Solution (J2).
- Go to Old Koala House.

- Play puzzle (K1).

- Play puzzle (K2).
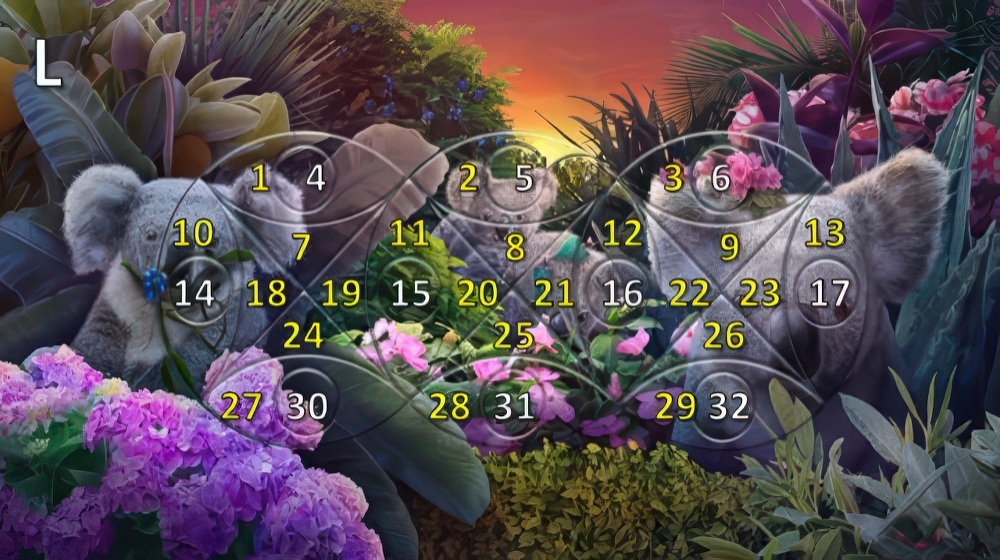
- Solution (L): (1-3)-(2-27)-(4-32)-(5-6)-(8-9)-(10-11)-(12-13)-(14-15)-(16-31)-(17-30)-(18-20)-(19-21)-(20-22)-(28-29).
- Go to New Koala House.

- Play puzzle (M).

- Solution (N).
- Go to Monkey House.

- Play puzzle (O).

- Solution (P).
- Go to Panda Enclosure.
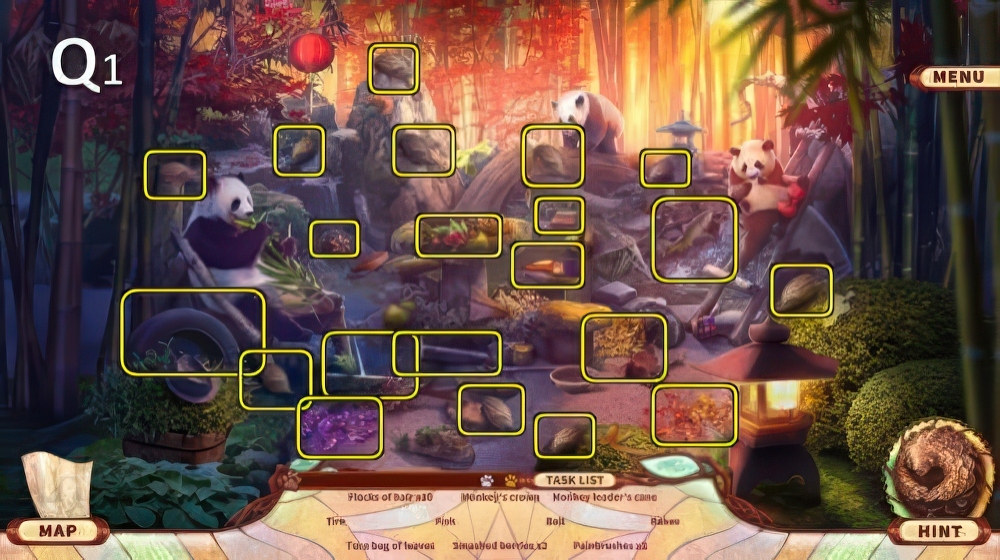
- Play puzzle (Q1).

- Play puzzle (Q2).

- Solution (R): Sx5-Tx3-Ux3-Vx4-Wx5-Xx2-Y-Zx4-Ax5-Bx5-Cx3-Dx3-Ex2-Fx4-Gx5.
- Go to Giraffes.

- Play puzzle (H1).

- Play puzzle (H2).

- Solution (I).
- Go to Elephants.

- Play puzzle (J).

- Solution (K): (1-4)-(2-3)-(5-6)-(7-10)-(9-10)-(11-12).
- Select 1-2-3-4 (L).

- Solution (M): (1-4)-(2-3)-(5-6)-(7-10)-(9-10)-(11-12).
- Select 1-2-3-4 (N).
- Go to Turtle Pond.

- Play puzzle (O1).

- Play puzzle (O2).

- Select 1-2-3-4-5 (P).
- Solution (Q): (1-10)-(2-14)-(3-12)-(4-14)-(5-18)-(6-20)-(7-13)-(8-18)-(9-19)-(10-16)-(11-18)-(12-14)-(14-18)-(15-19)-(16-18)-(17-18)-(18-19).
- Go to Souvenir Shop.

- Play puzzle (R1).
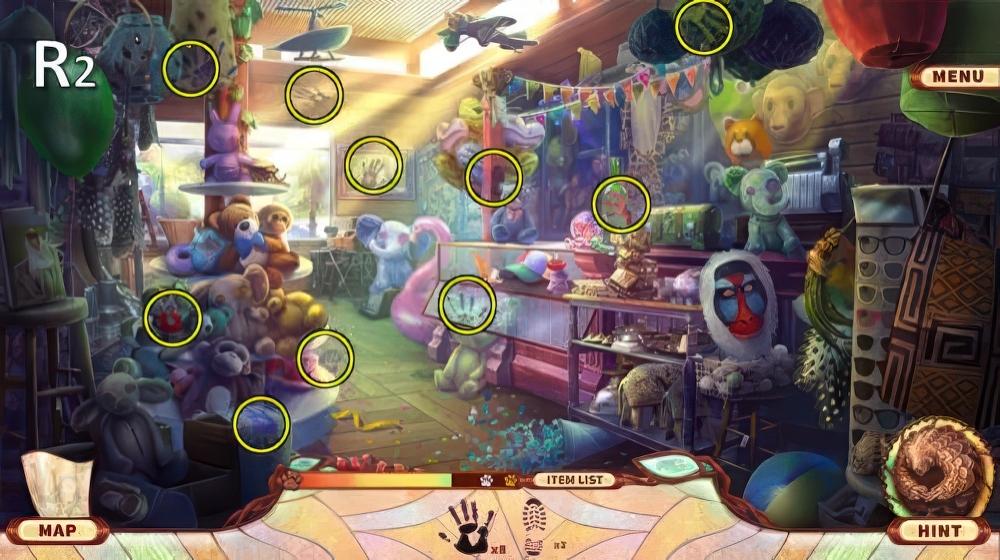
- Play puzzle (R2).

- Solution (S).
- Go to Flower Shop.
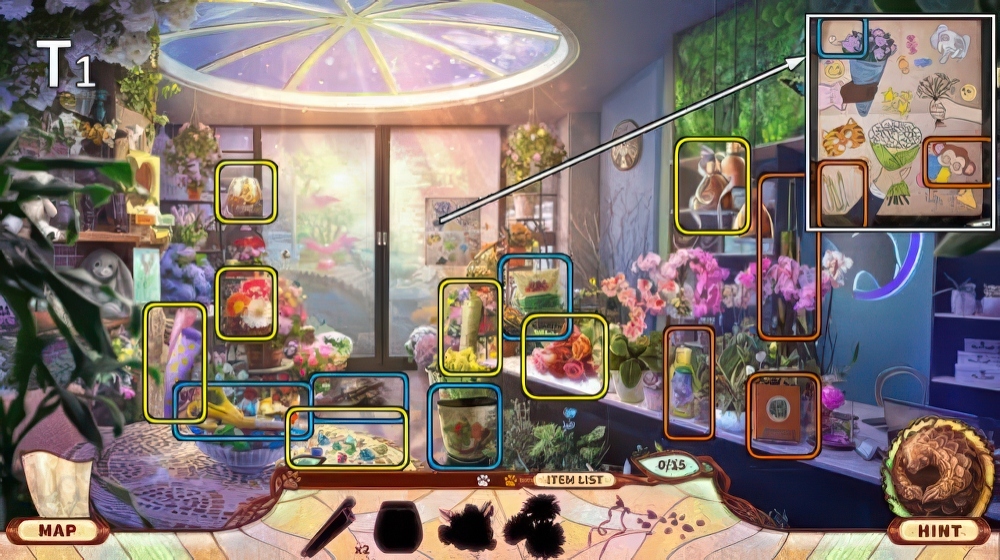
- Play puzzle (T1).
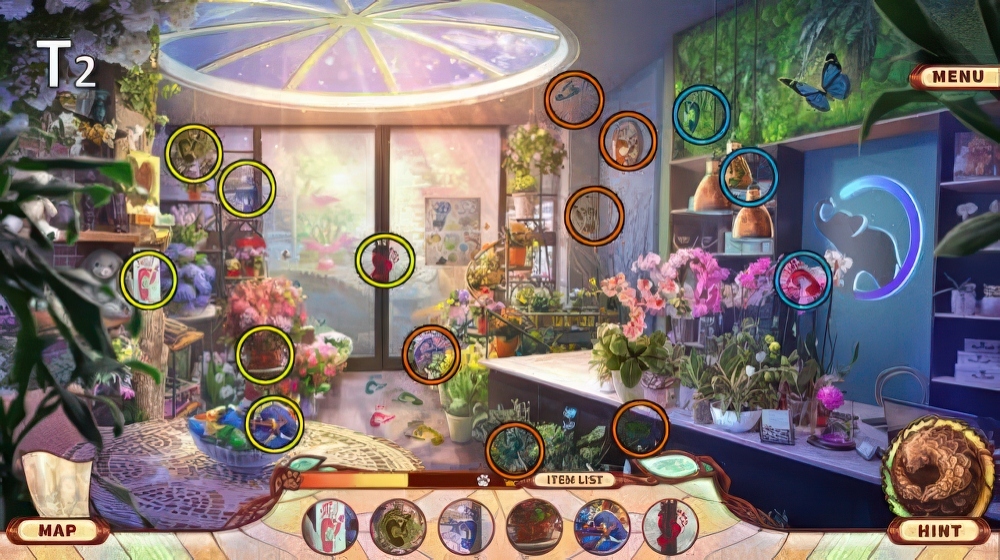
- Play puzzle (T2).

- Solution (U): X-Y-Xx2-Y-Xx5-Y-Xx4-Y-Xx4-Y-Wx5-Y-Wx3-Y-Xx3-Y-Wx3-Y-Xx4-Y-Wx2-Y-Xx2.
- Go to Koi Garden.

- Play puzzle (Z1).
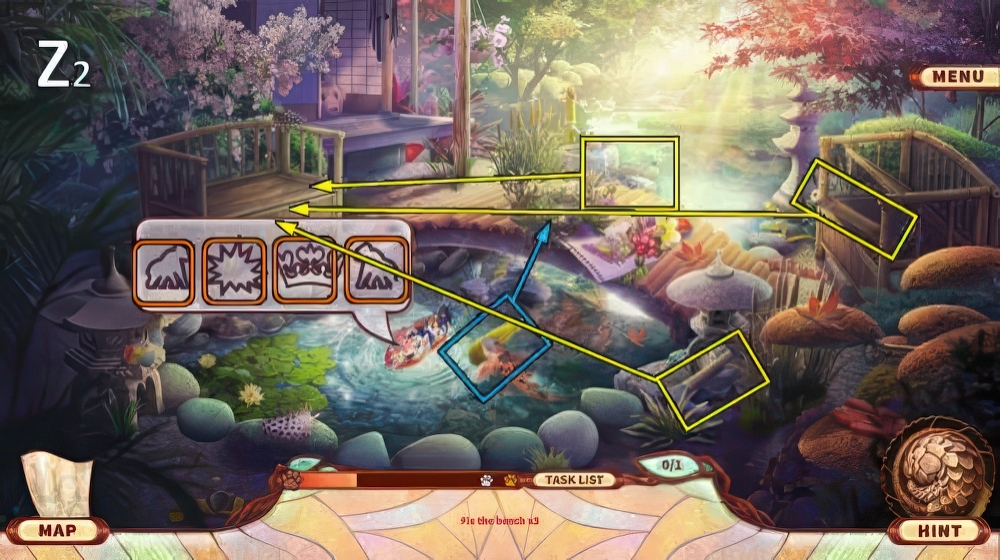
- Play puzzle (Z2).
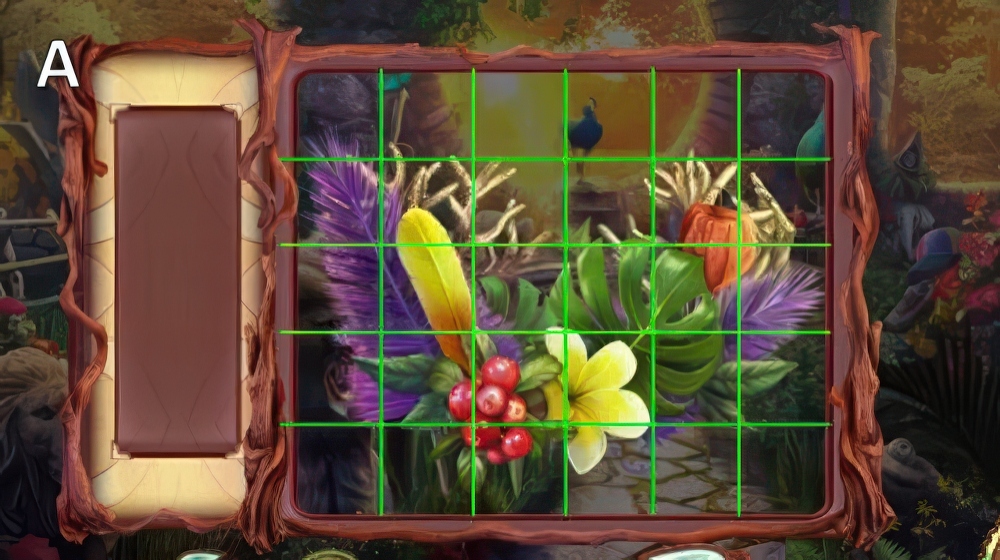
- Solution (A).
- Go to Peacocks.
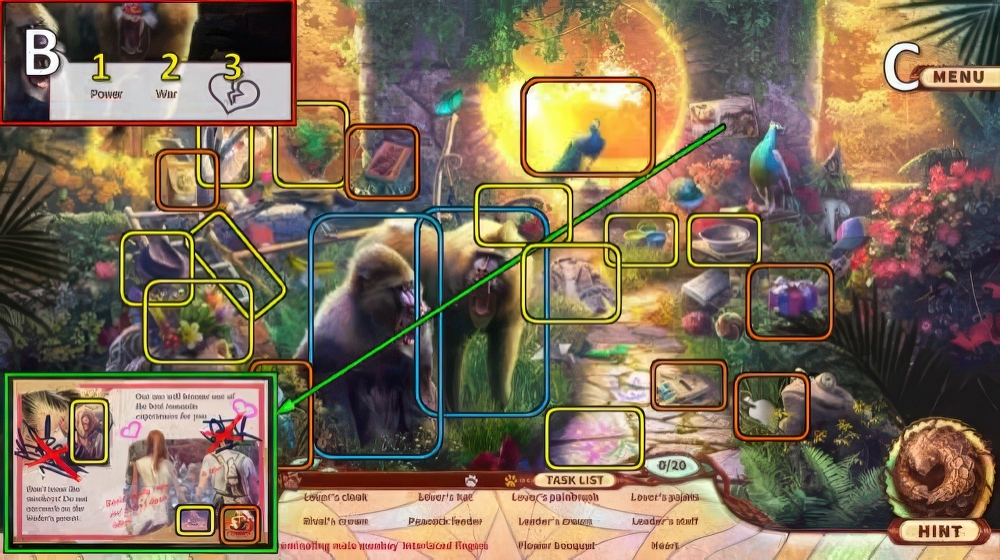
- Select 1-2-3 (B).
- Play puzzle (C).
- Solution (D).
- Go to Tropical Paradise.

- Play puzzle (E).

- Solution (F): (1-9)-(2-11)-(3-17)-(4-14)-(5-9)-(6-22)-(7-13)-(8-16)-(9-11)-(10-19)-(11-23)-(12-16)-(13-20)-(15-18)-(17-20)-(18-24)-(19-24)-(21-23)-(22-24)-(23-24).
- Go to Photo Area.

- Play puzzle (G1).

- Play puzzle (G2).

- Solution (H): (1-9)-(2-19)-(3-4)-(4-25)-(5-26)-(6-11)-(7-13)-(8-19)-(9-27)-(10-13)-(11-19)-(12-21)-(13-27)-(14-15)-(15-16)-(16-28)-(17-26)-(18-27)-(19-24)-(20-25)-(21-26)-(22-23)-(23-26)-(24-25)-(25-26)-(26-28).
- Go to Director’s Study.

- Play puzzle (I1).

- Play puzzle (I2).
- Solution (J): random.
- Go to Terrace.

- Play puzzle (K).
- Solution (L).
- Go to Happy Couple.
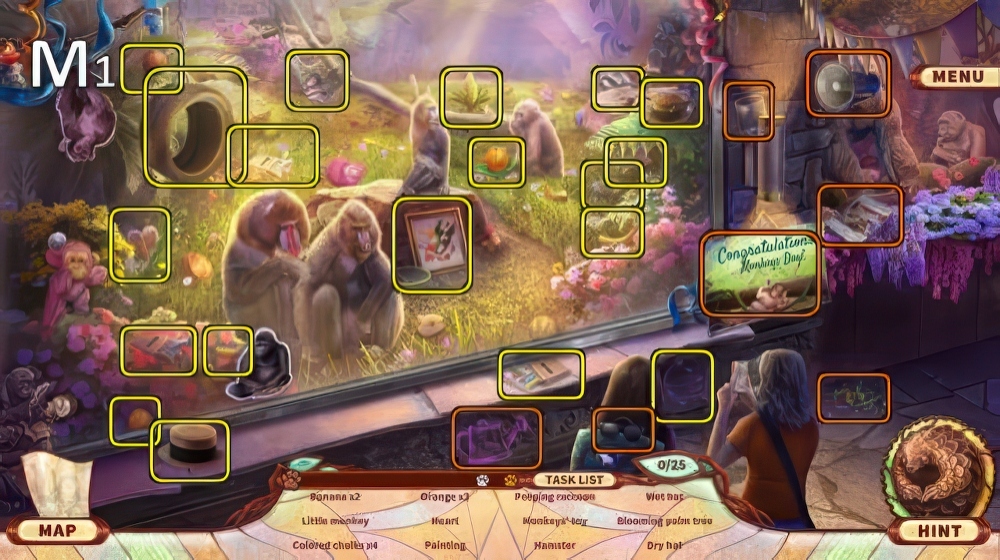
- Play puzzle (M1).

- Play puzzle (M2).
- Solution (N): (1-3)-(2-27)-(4-32)-(5-6)-(8-9)-(10-11)-(12-13)-(14-15)-(16-31)-(17-30)-(18-20)-(19-21)-(20-22)-(28-29).
- Go to Artemis’ Office.
- Walkthrough Bonus Chapter, at the link below.


