Lost Lands 3: The Golden Curse – An adventure game in which you travel to the Soaring Islands and descend into the depths of the Dungeon to explore diverse and mysterious places. Meet new characters, help them and they will not remain indebted to you. Dive into an unforgettable passage of an interesting story, solve a lot of puzzles and plunge into the study of the history of the Lost Lands, and help Maaron to get rid of the curse and defeat all the awakened demons. In times of oppression, the Druid Guild is the only settlement that has long defied the conqueror’s siege. But eventually, the Druids agreed to pay tribute to the Dwarf. They collected all the gold in the village, put it in a chest and gave it to the enemy. Satisfied with another victory, Horasar returned to his lair in Bashar and began a feast. In the process, He, Harpy, Naga, Minotaur and Solidus each took one golden object from the chest and were petrified after a moment. The rest of the host realized that the druids had cursed the gold and all scattered in fear. The enemy took over the lands, collected tribute from the peoples, and whoever disobeyed, he destroyed. It all ended when Horasar was tricked by the forest dwellers into accepting a chest of gold from them. In the aftermath, it turned out to be cursed gold. If you are stuck and do not know how to pass any of the locations, on our site you can watch the walkthrough of Lost Lands 3: The Golden Curse, and find out why the demons began to free themselves from the stone captivity.
Lost Lands 3: The Golden Curse – Walkthrough
Here you can see the full walkthrough of Lost Lands 3: The Golden Curse, namely the main story and the bonus chapter.
Forest Settlement
There’s a village in the forest. I can hear voices coming from there. I’ll have to get beyond the gates to learn what’s going on there.
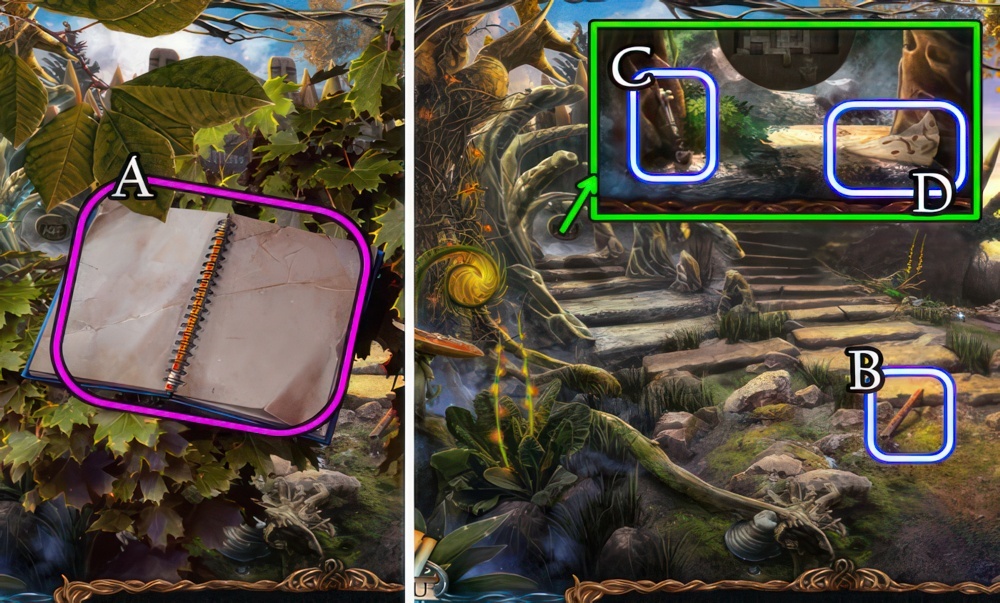
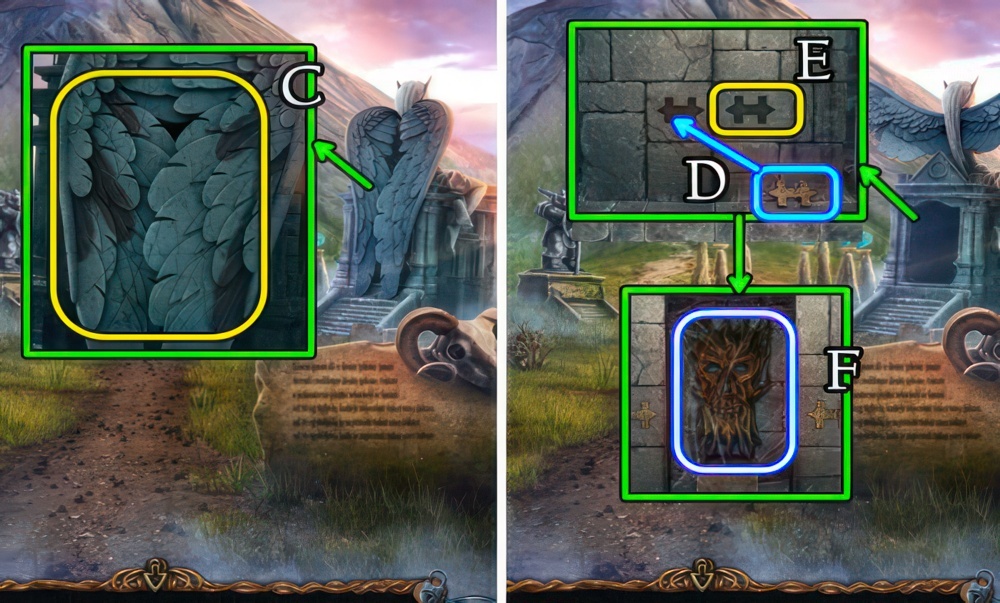
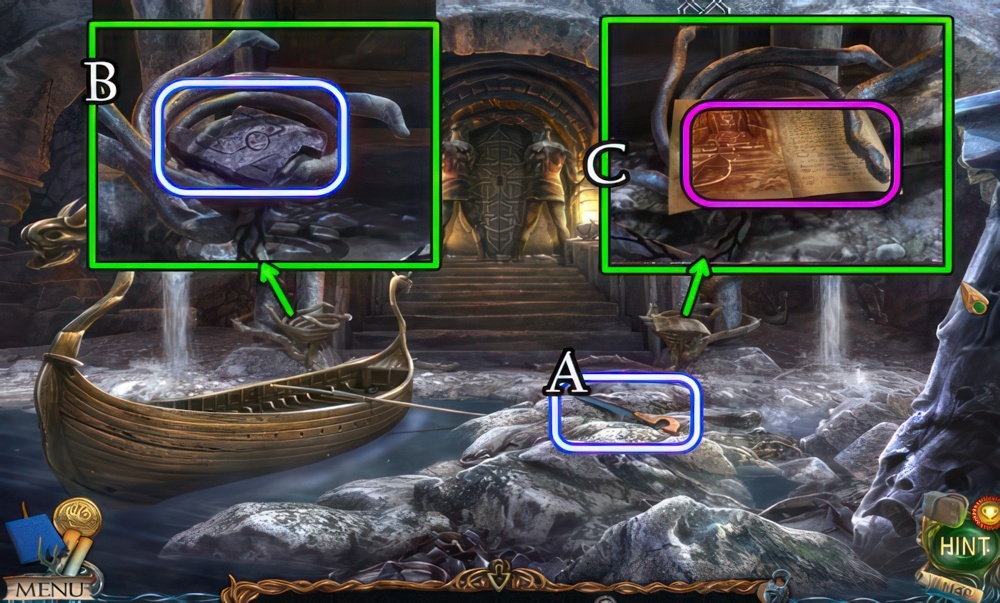
- Uncover and take the Notebook (A).
- Select the branch.
- Take the HAMMER HANDLE (B).
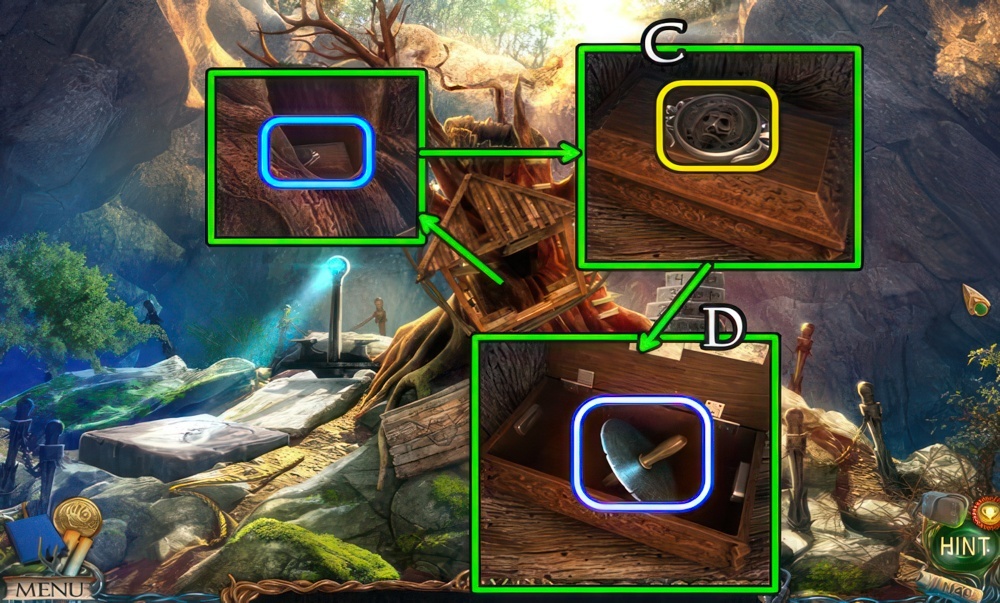
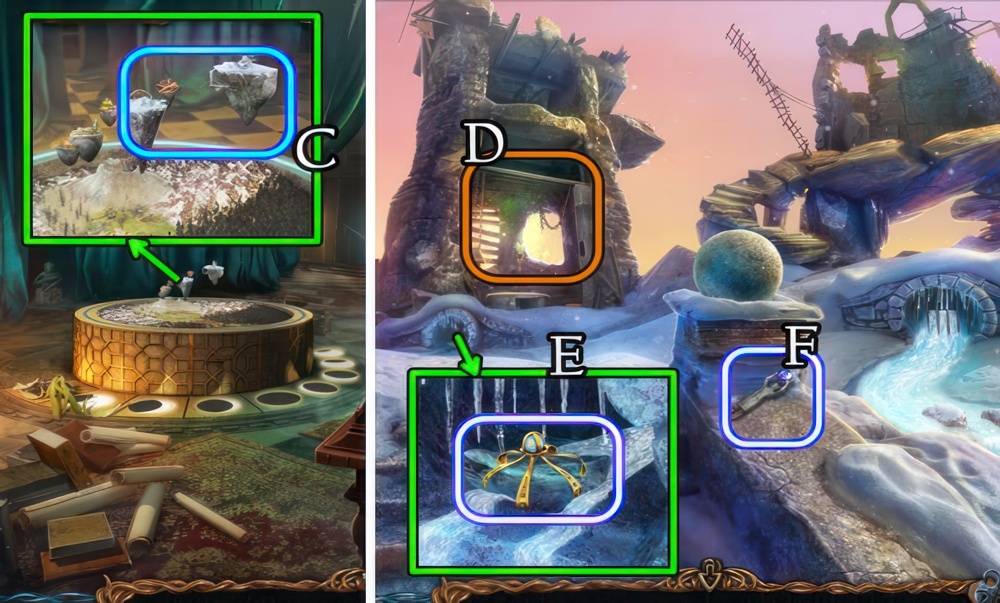
- Take XYLOPHONE HAMMER 1/3 (C) and MAP FRAGMENT (D).
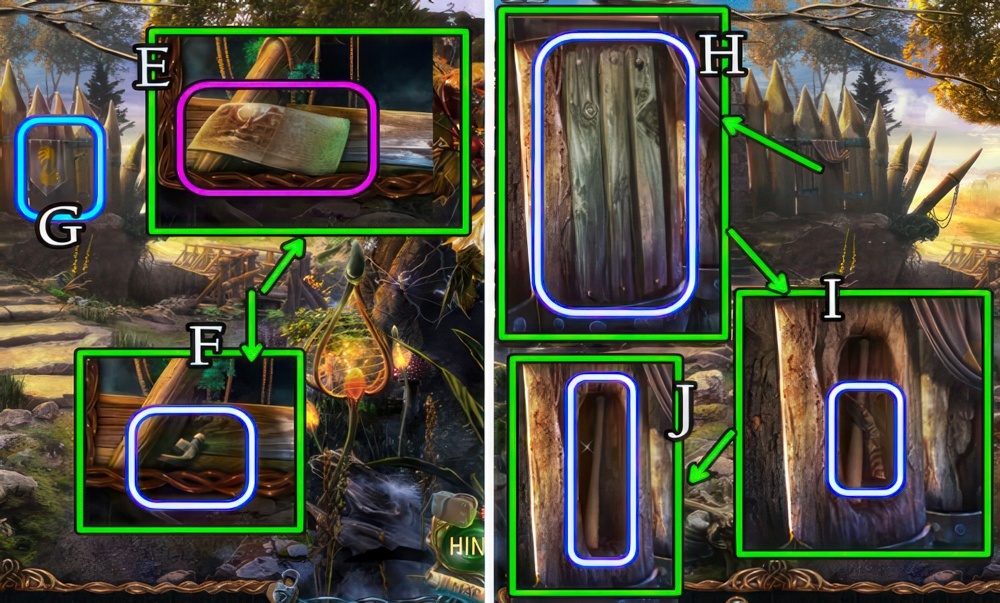
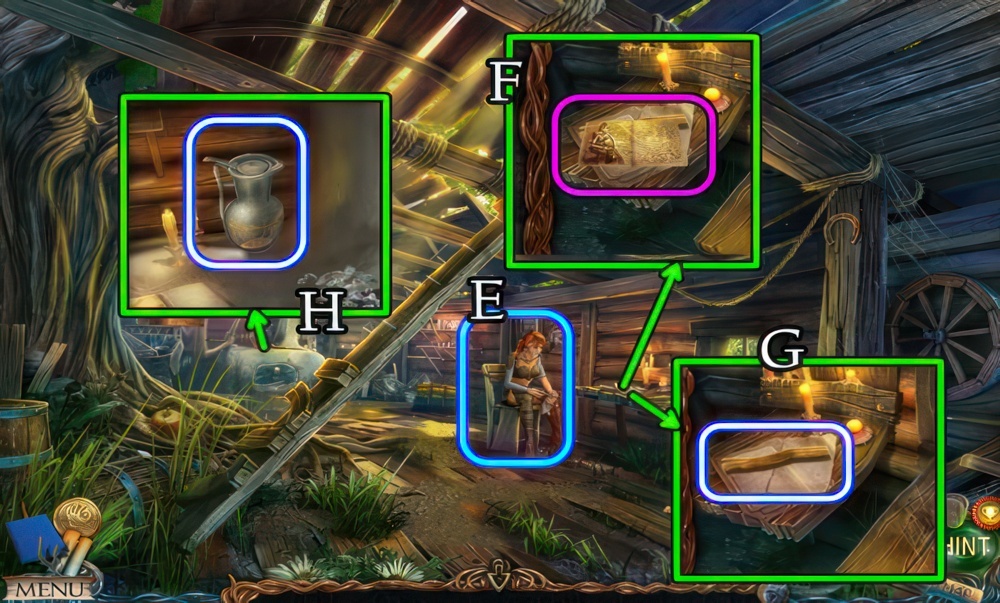
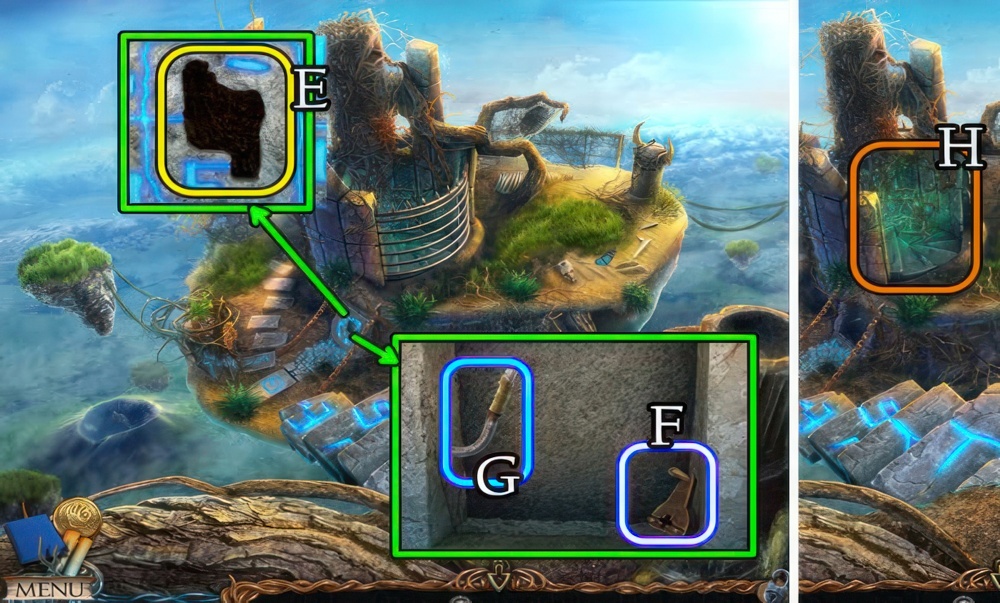
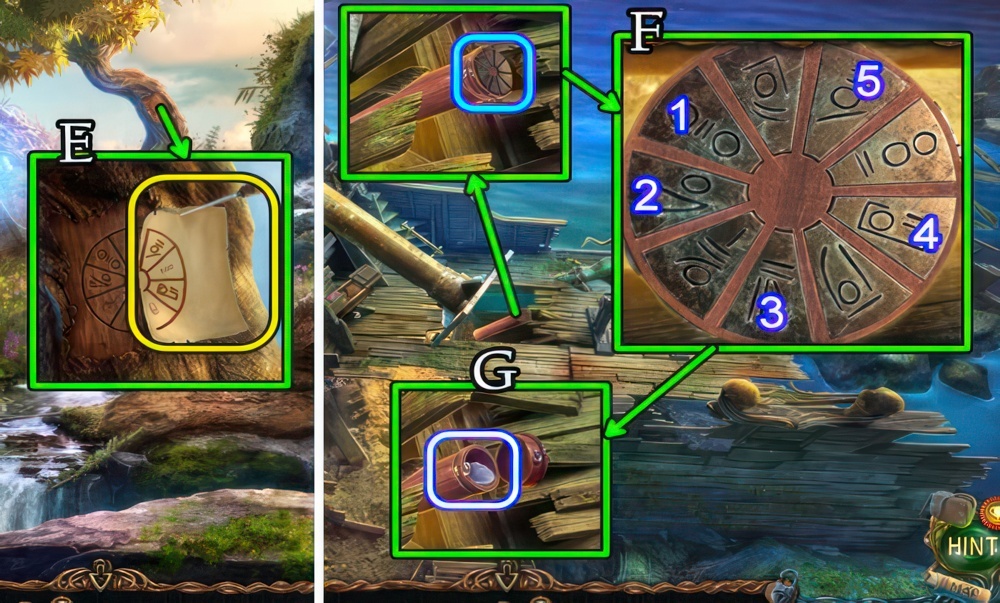
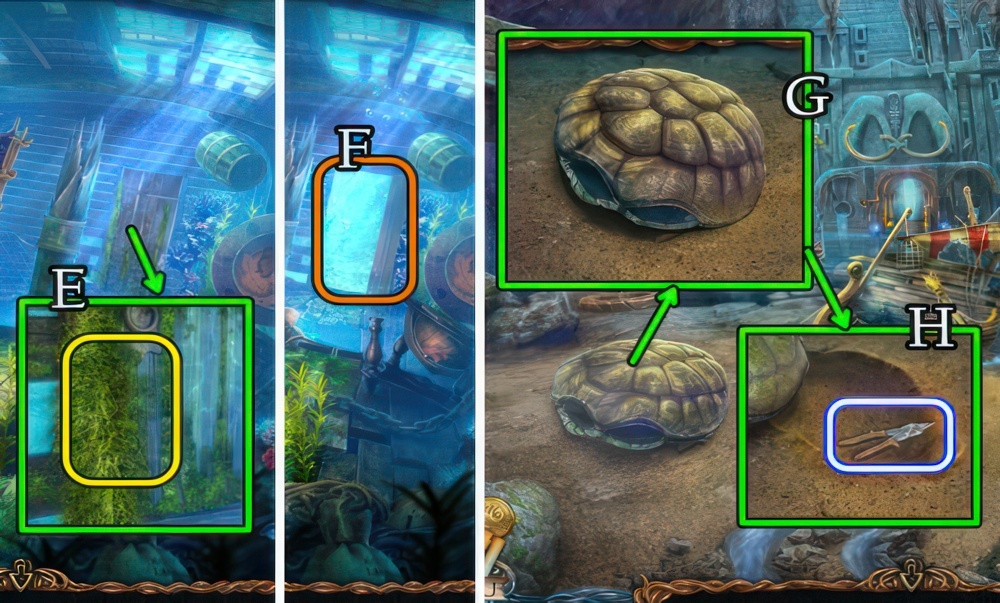
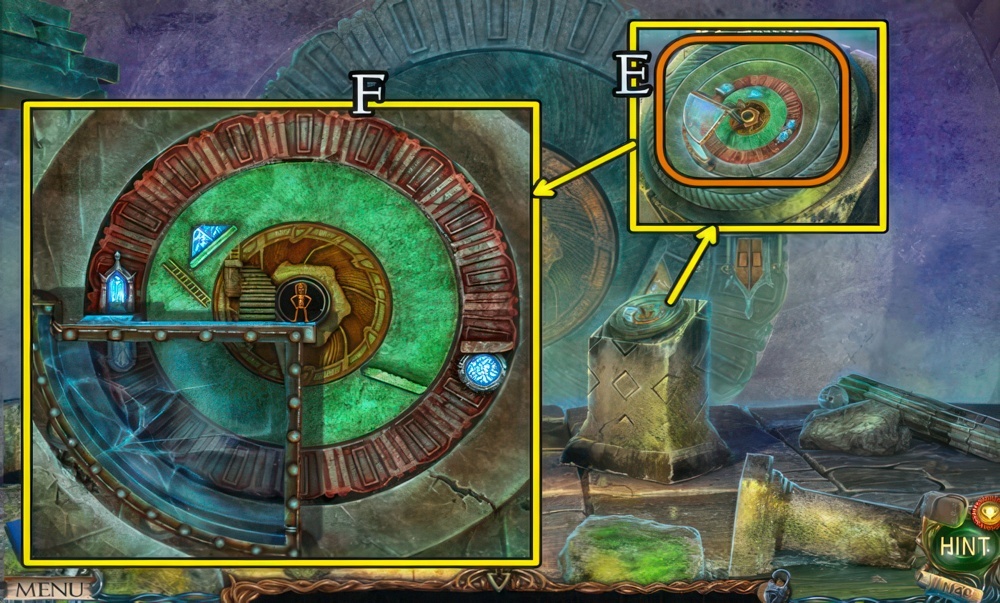
- Take Manuscripts 1/28 (E).
- Take the HAMMER HEAD (F).
- Combine the HAMMER HEAD and HAMMER HANDLE for a HAMMER.
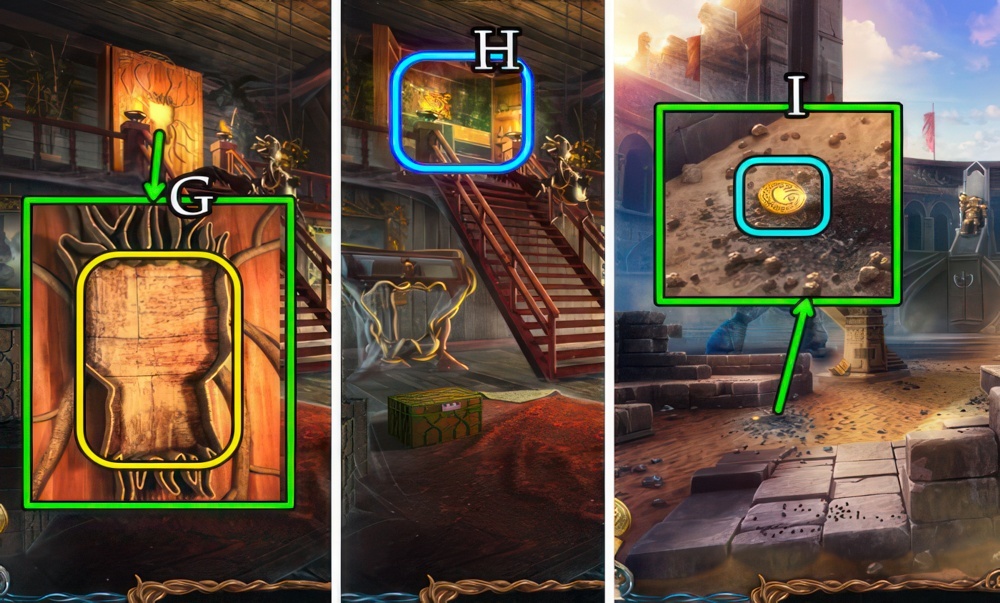
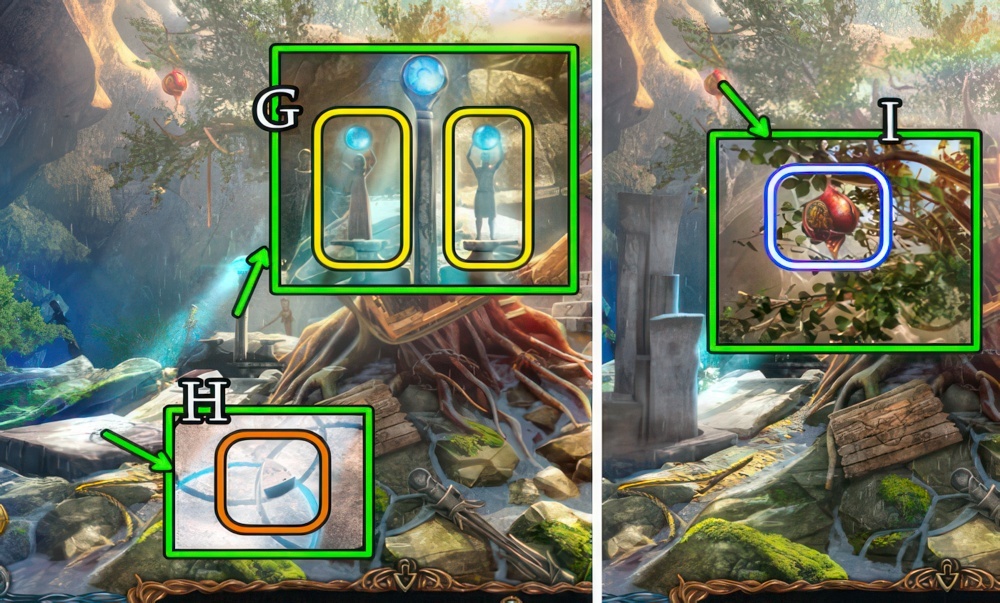
- Select (G).
- Use the HAMMER for NAILS.
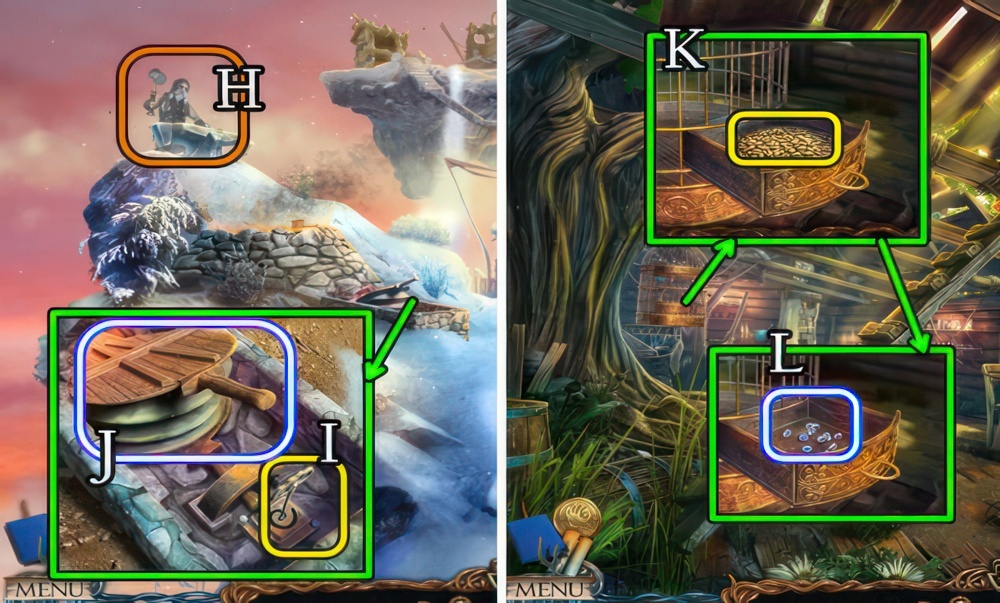
- Take the PLANKS (H).
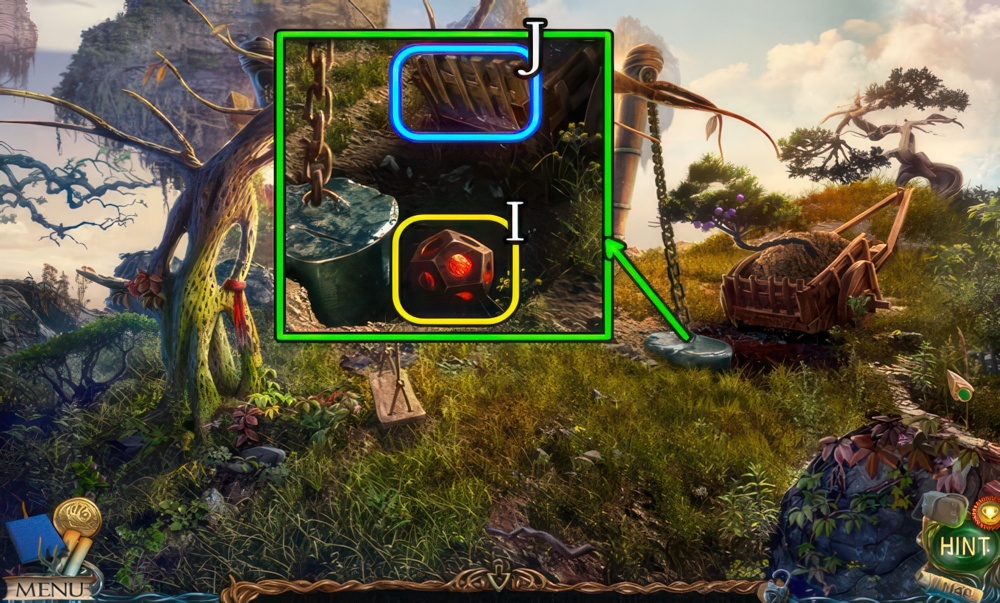
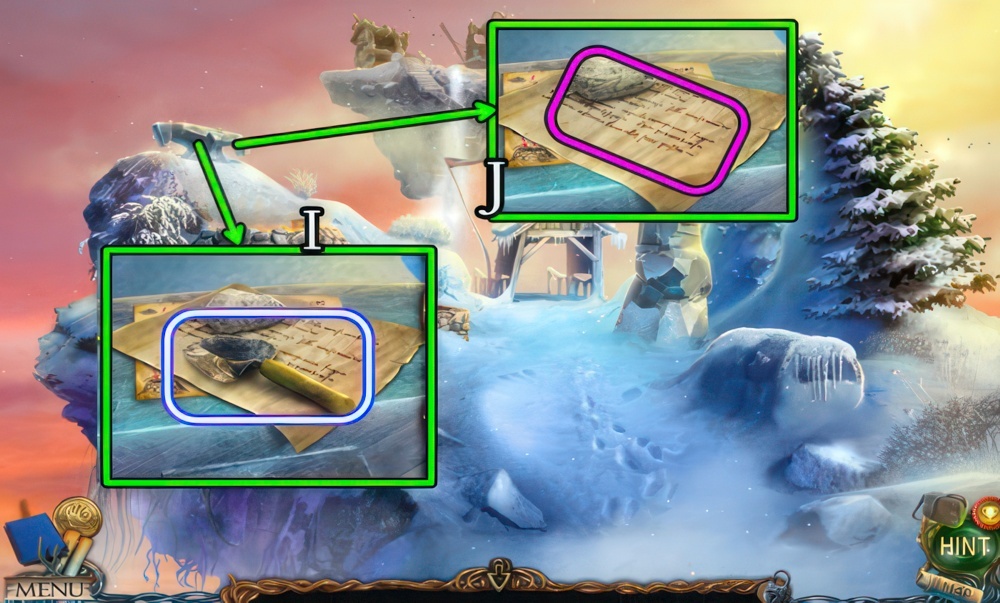
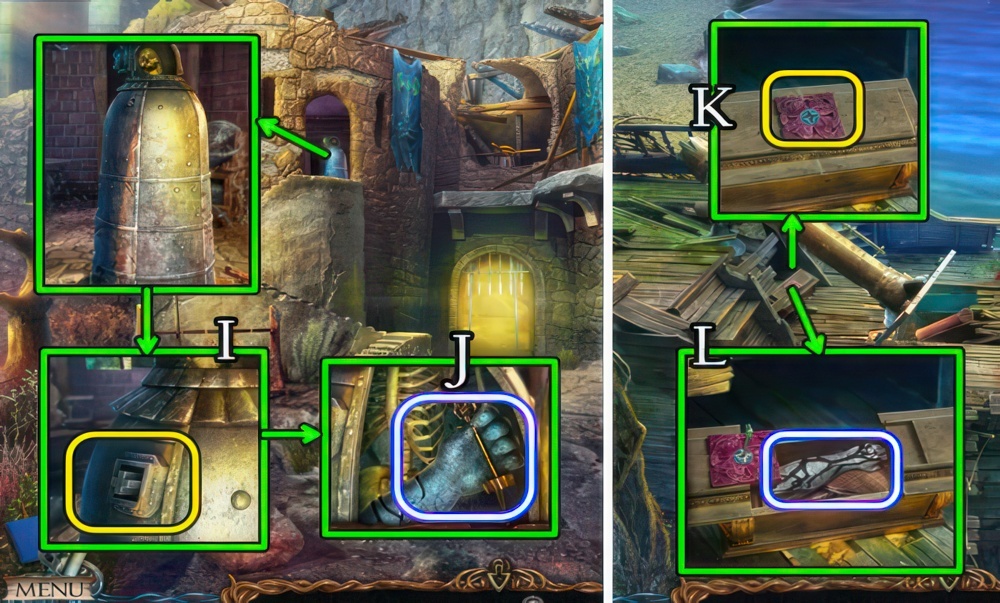
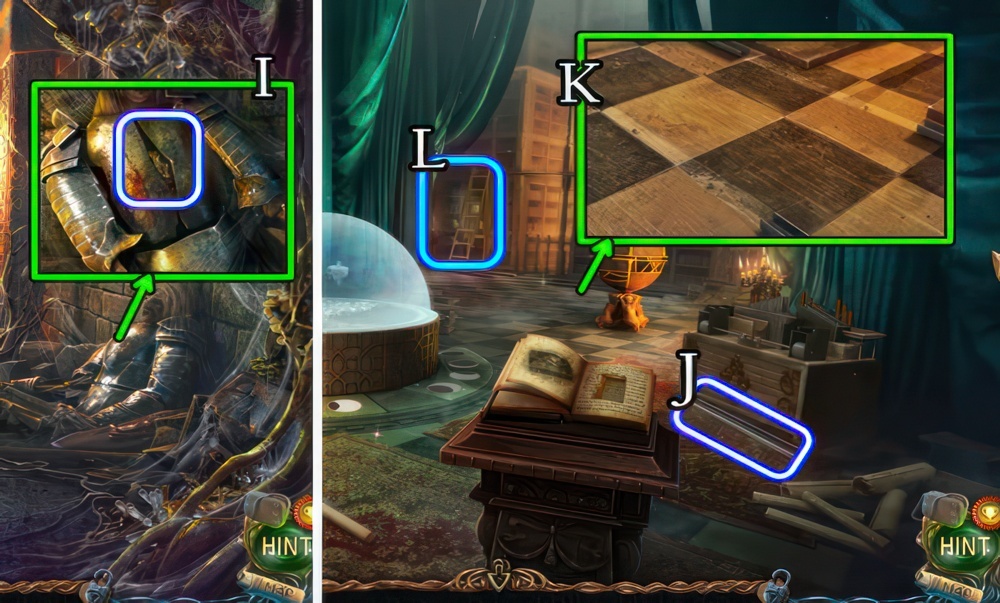
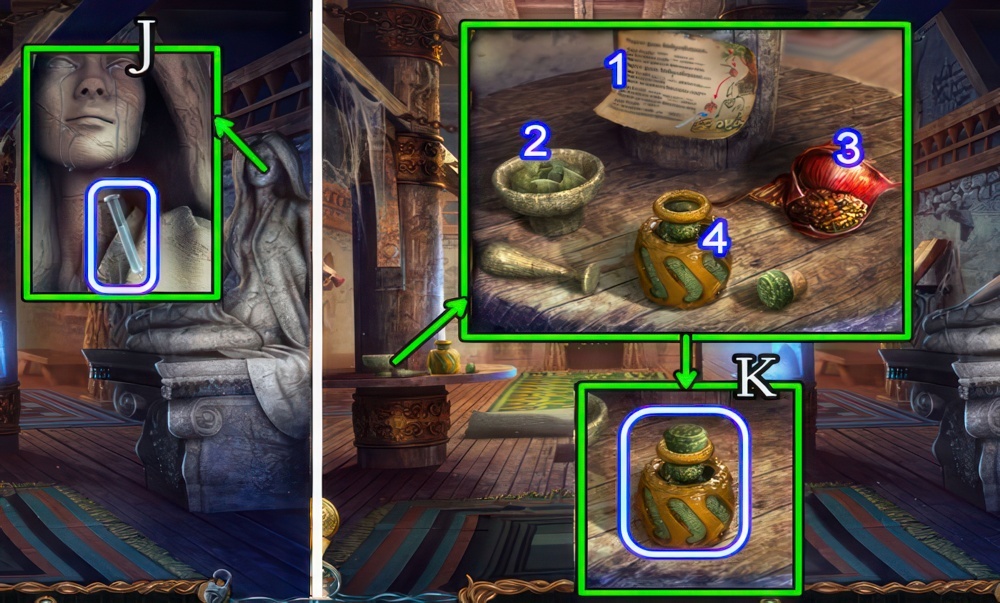
- Take the KNIFE (I) and PICK-AXE HANDLE (J).
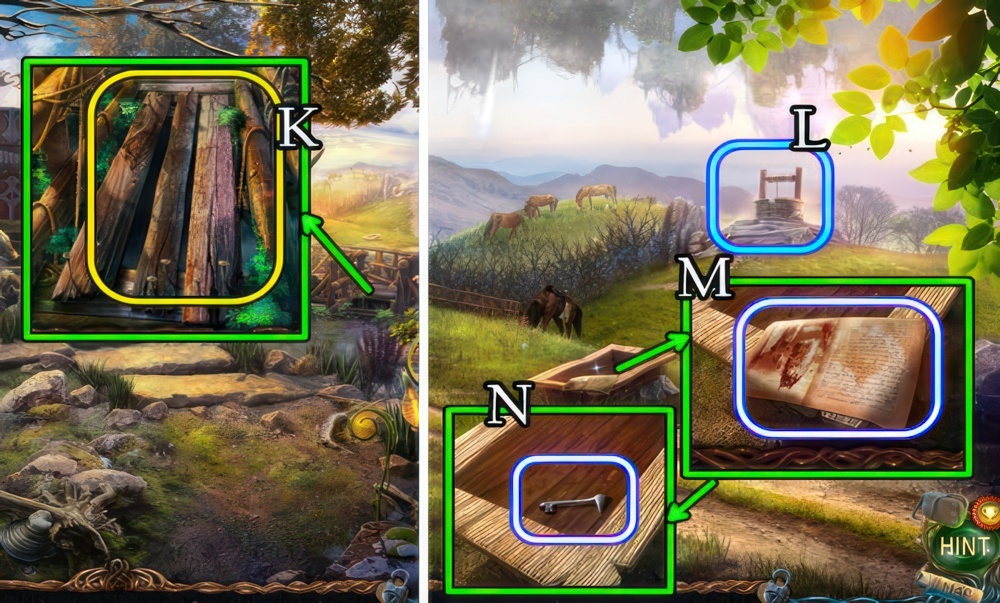
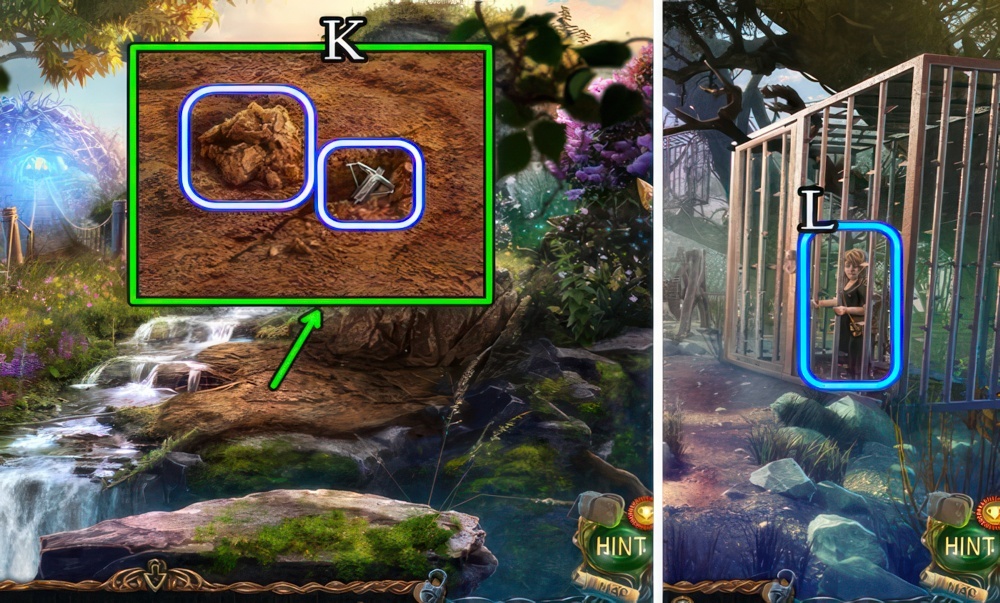
- Place the PLANKS and NAILS (K), use the HAMMER.
- Go forward.
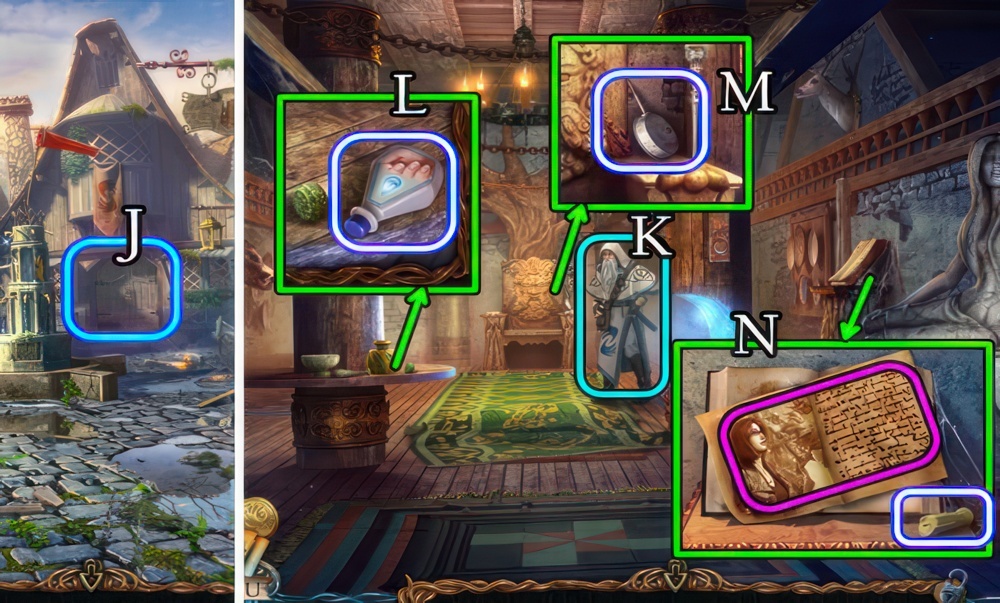
- Select (L), speak to the girl.
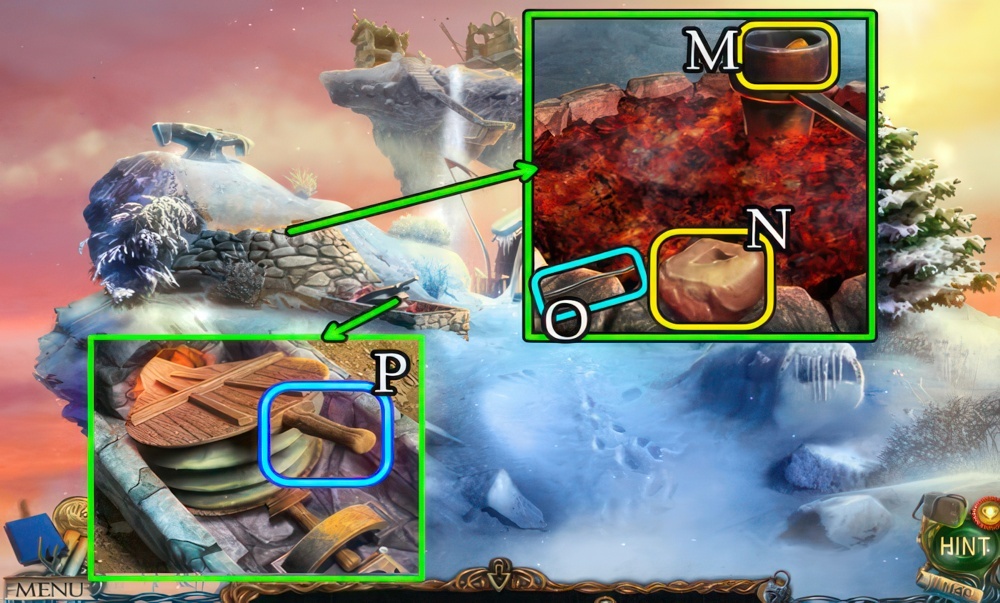
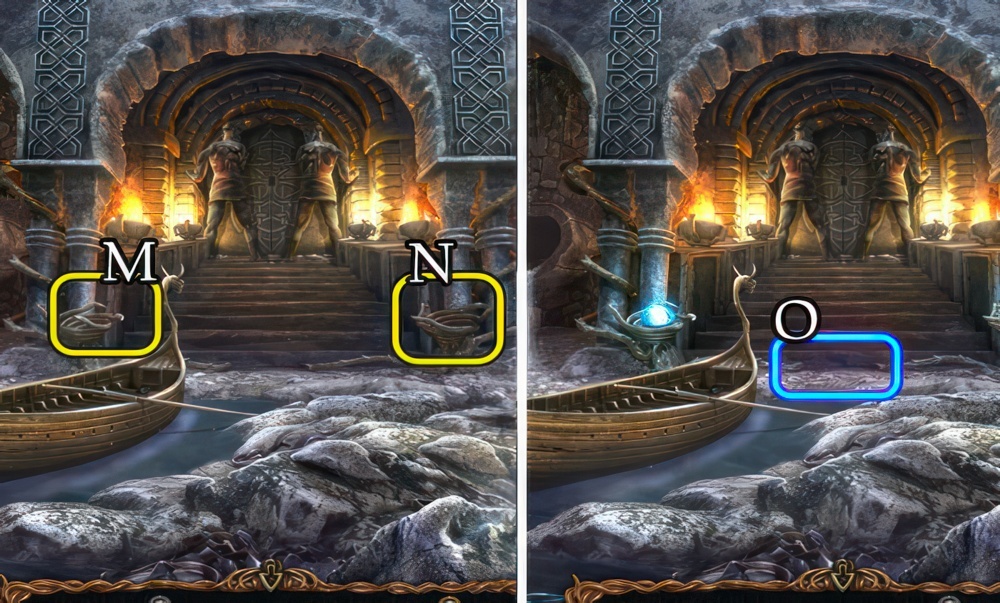
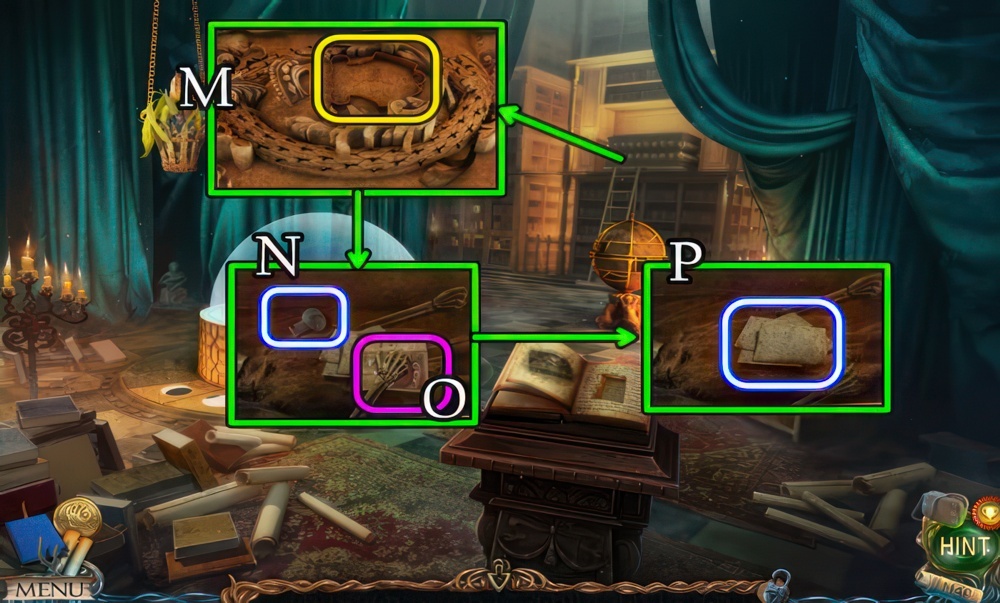
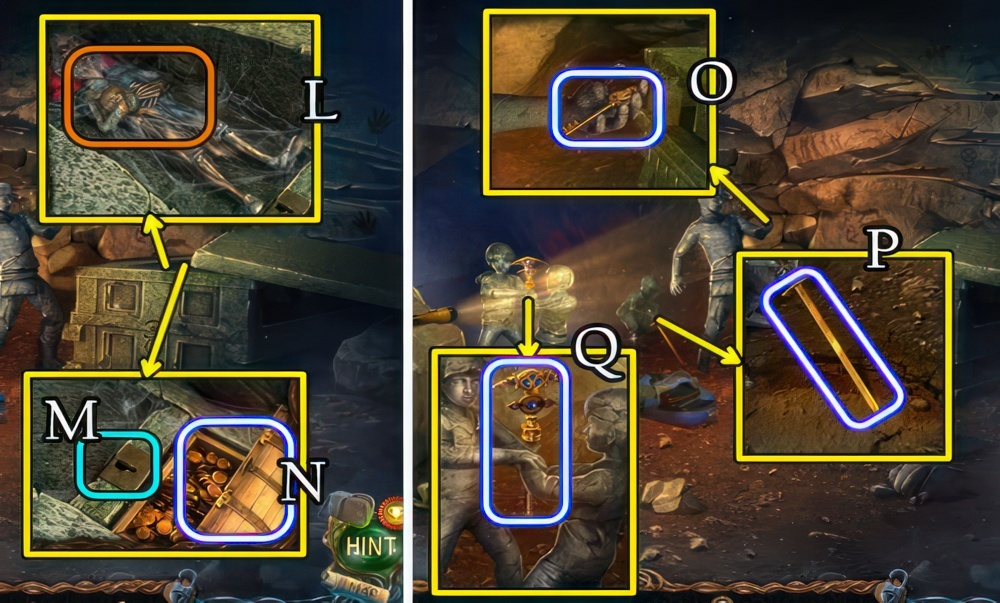
- Take Manuscripts 2/28 (M).
- Take XYLOPHONE HAMMER 2/3 (N).
Girl in the Well
A frightened girl is hiding inside the well. She might help me. I must save her.

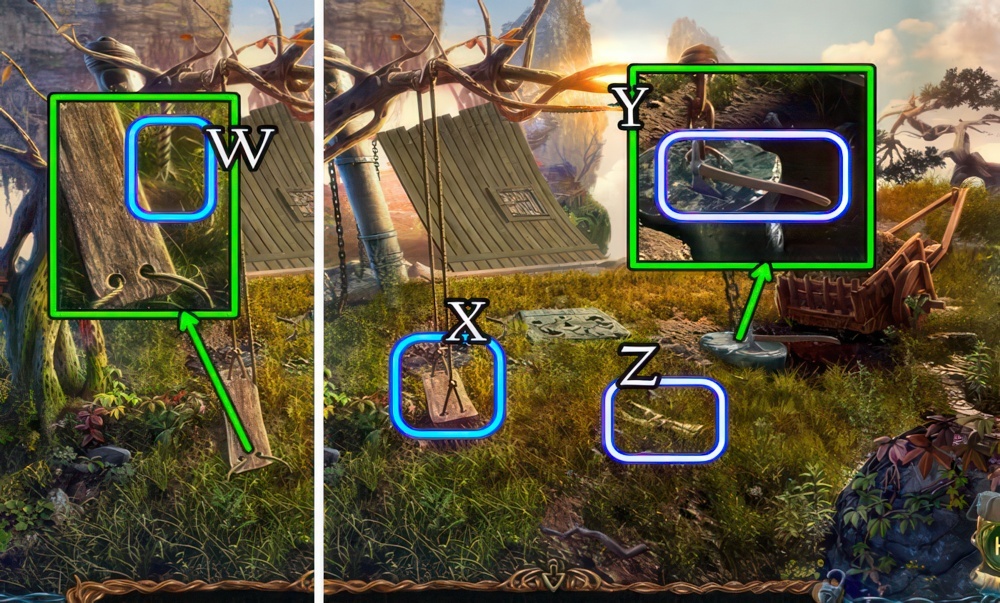
- Use the KNIFE (O) for a ROPE WITH HOOK (P).
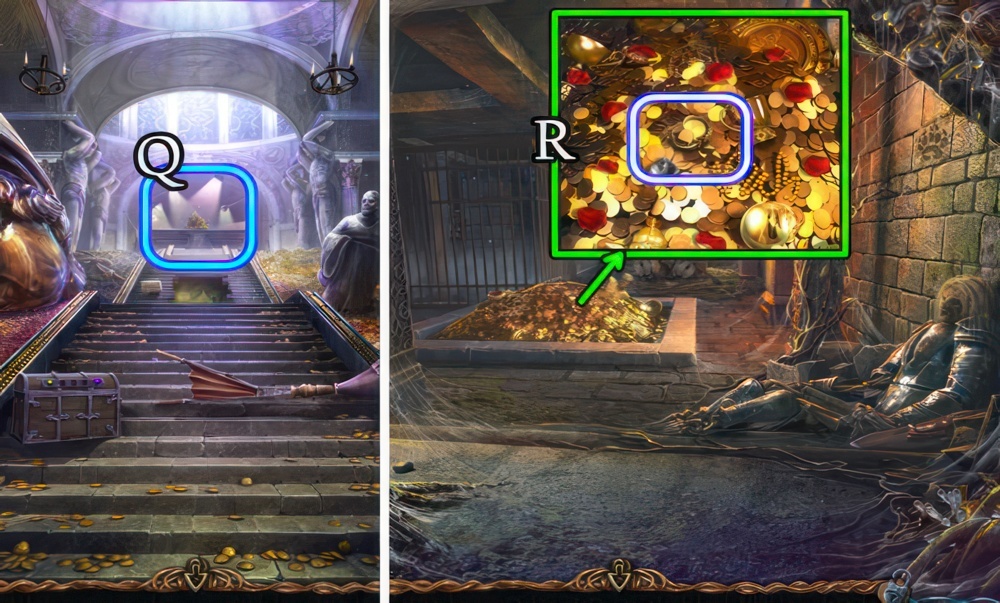
- Place the ROPE WITH HOOK (Q).
- Select the hook (R).
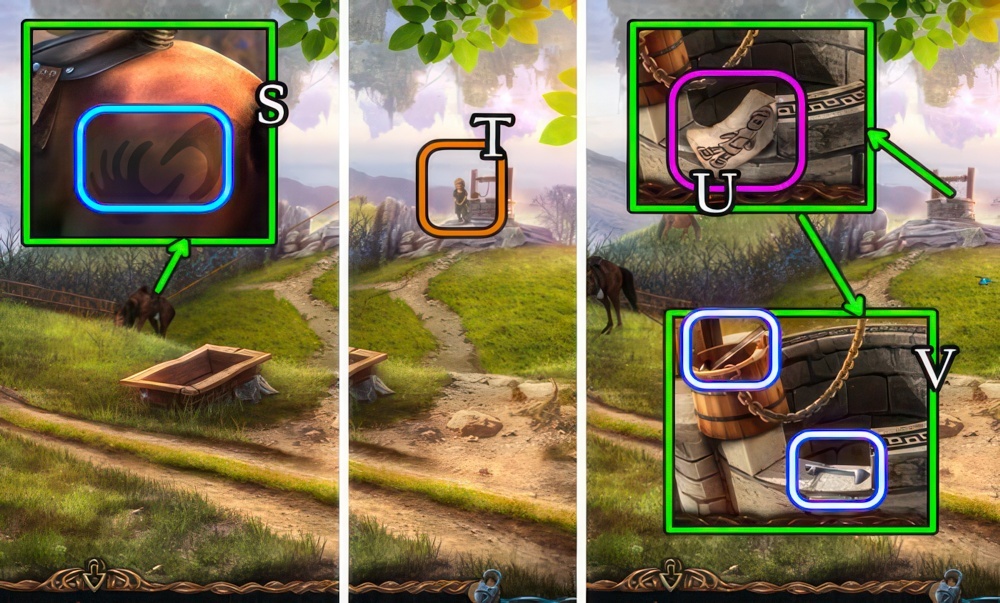
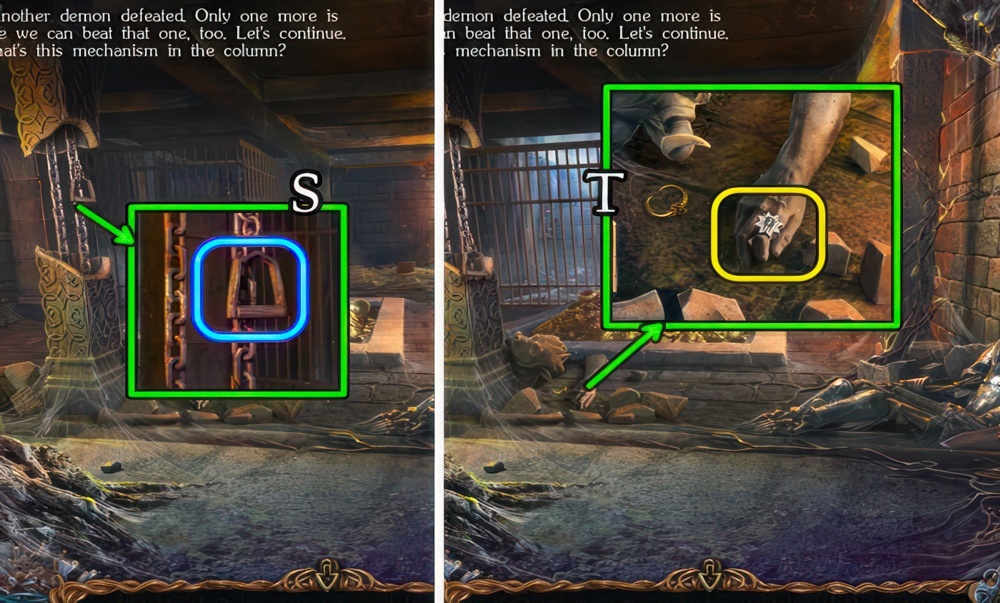
- Touch (S).
- Speak to the girl (T), receive SHEET MUSIC.
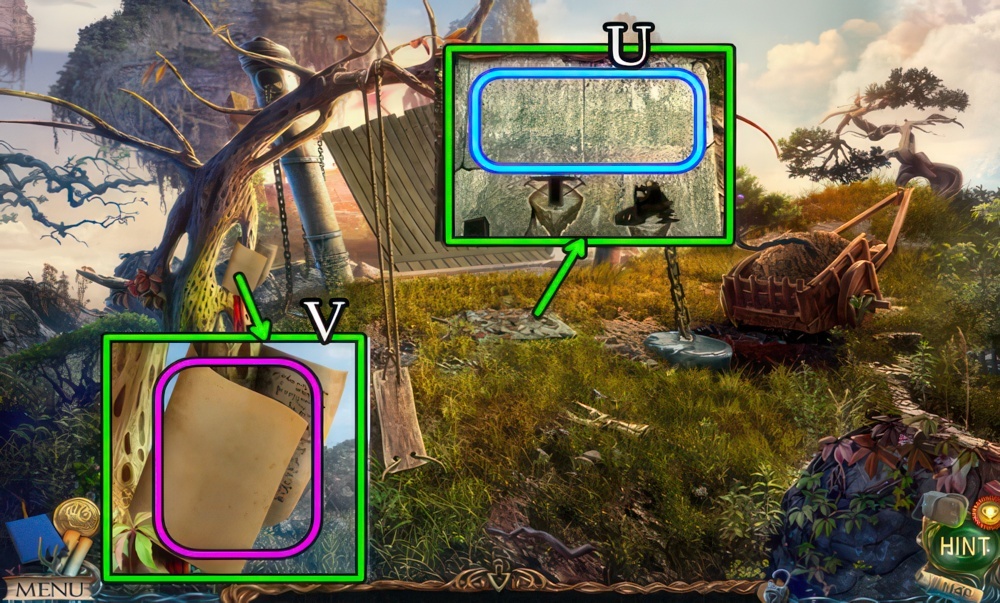
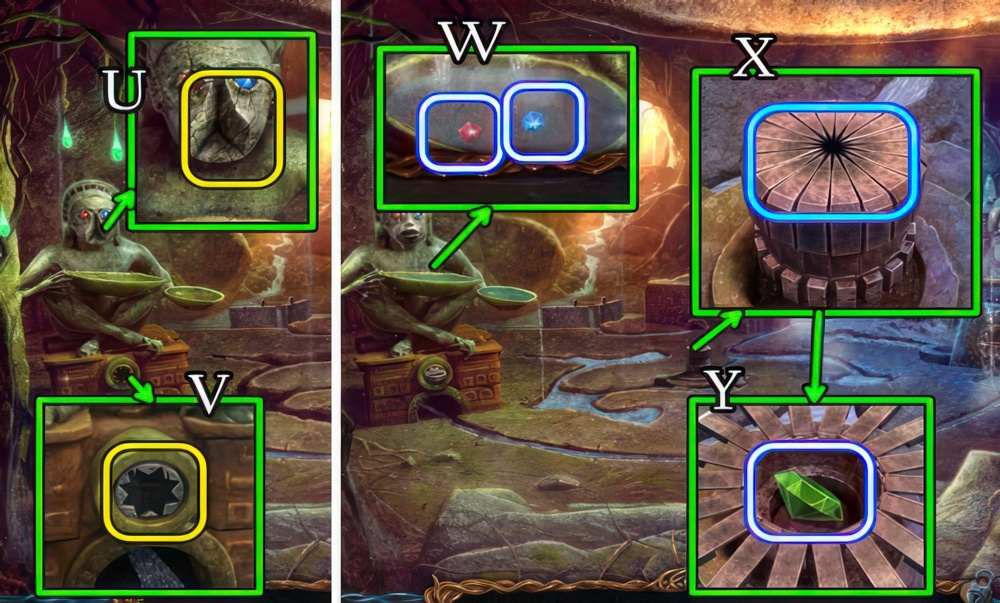
- Take the drawing (U).
- Take XYLOPHONE HAMMER 3/3 and HALF A PAIR OF CLIPPERS (V).
- Go down.
Blossom
Fiora dropped her doll Blossom into the well. I know how important toys are for children. I must find the doll and return it to the girl.
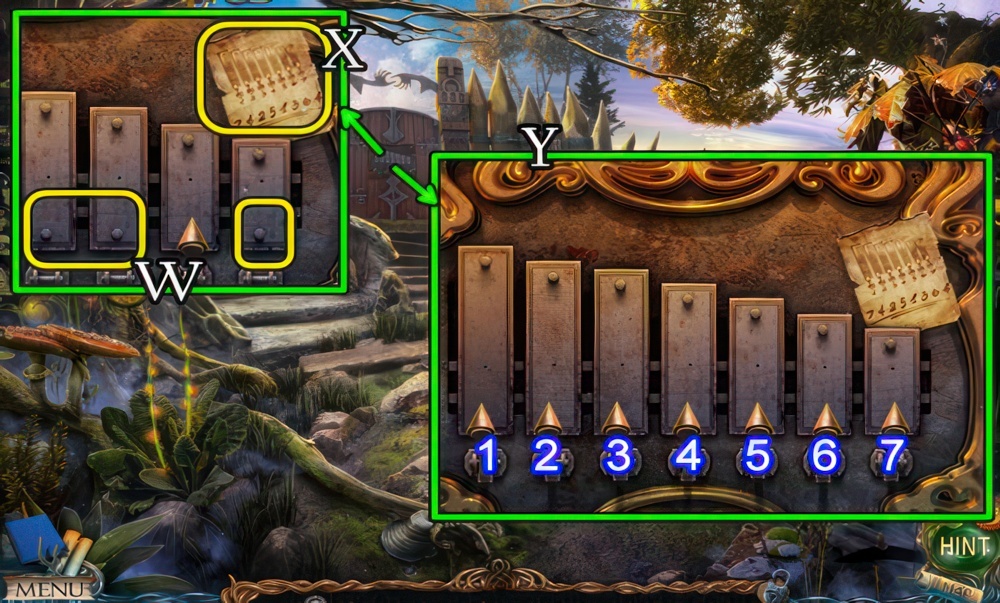
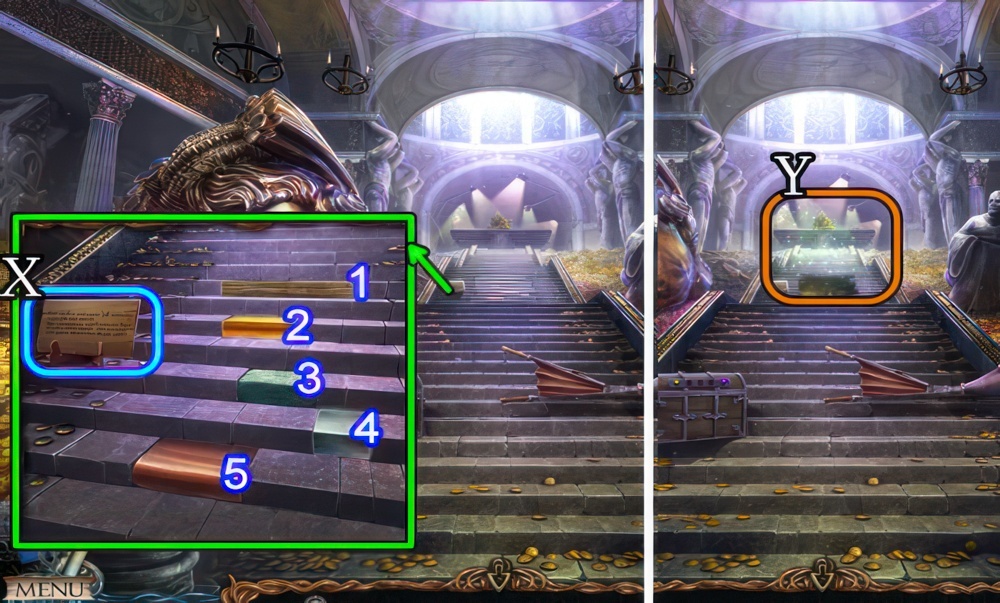
- Place XYLOPHONE HAMMERS 3/3 (W) and the SHEET MUSIC (X).
- Play the melody by tapping the hammers in the correct order.
- Walkthrough (Y): 7-4-2-5-1-3-6-4.
- Go forward.
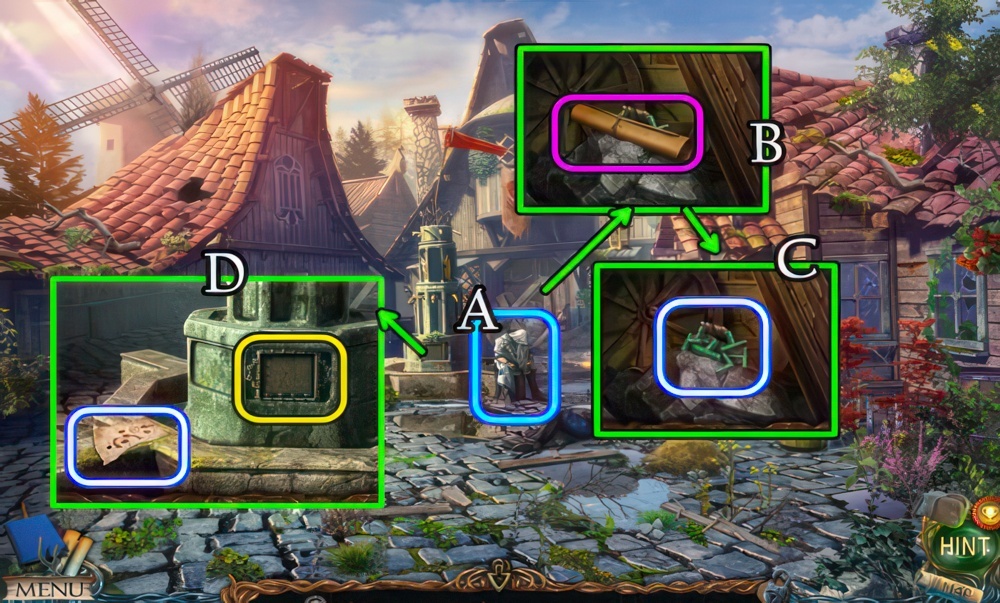
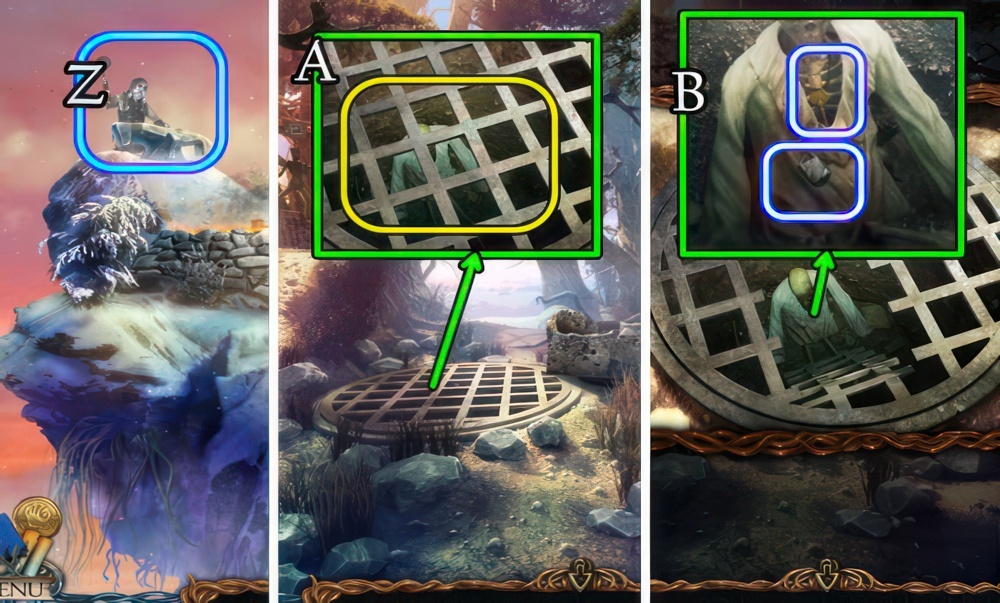
- Speak to the grandfather (A).
- Uncover and take Manuscripts 3/28 (B).
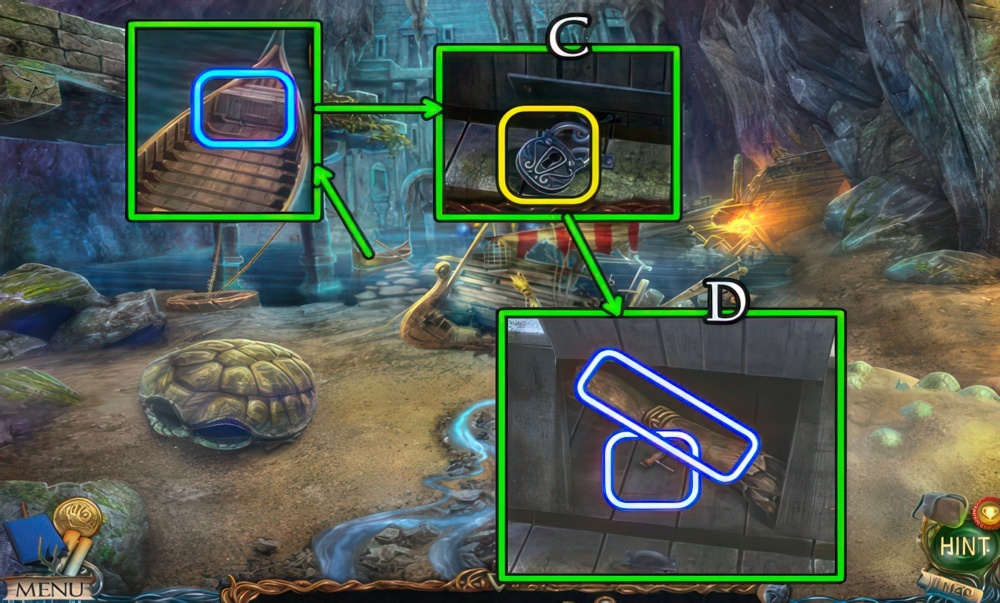
- Take the BRACKETS (C).
- Take the MAP FRAGMENT.
- Place the BRACKETS (D).
Event at Mount Bashar
Maaron asked me to go with Fiora to Mount Bashar and learn how the Harpy managed to escape from her “prison of stone”.

- Move the brackets and drop the balls so that they land in each pipe at least once.
- Walkthrough (E1-E2-E3-E4).
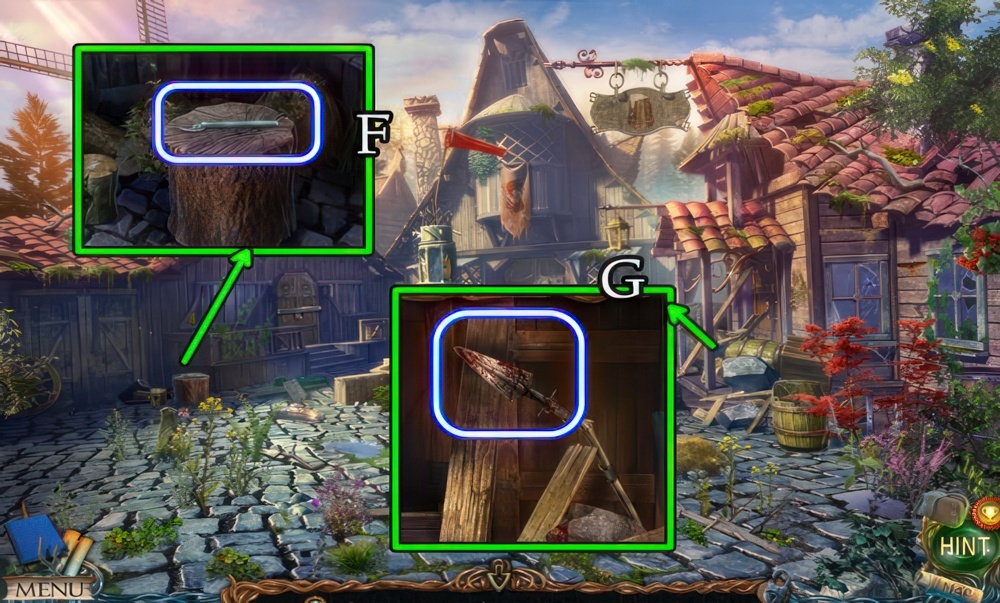
- Grab the HALF A PAIR OF CLIPPERS (F) and BLOODY SPEAR (G).
- Go down, cross the bridge.
- Combine the two HALF A PAIR OF CLIPPERS for CLIPPERS.

- Use the CLIPPERS (H).
- Take the BUCKET (I).
- Go down and through the gates.
- Place the BUCKET (J) for a BUCKET OF WATER.
- Return to the Hills.
- Pour the BUCKET OF WATER (K).
- Go forward.
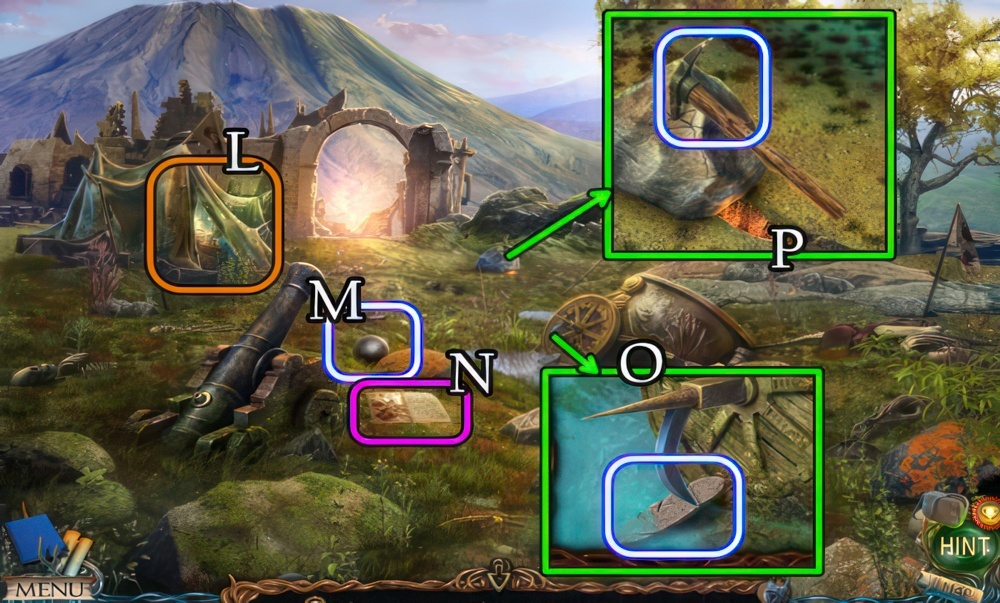
- Play the puzzle (L) to receive OINTMENT.
- Take the CANNONBALL (M) and Manuscripts 4/28 (N).
- Take STONE FEATHERS 1/6 (O).
- Select then take the BROKEN PICK-AXE (P).
- Go forward.
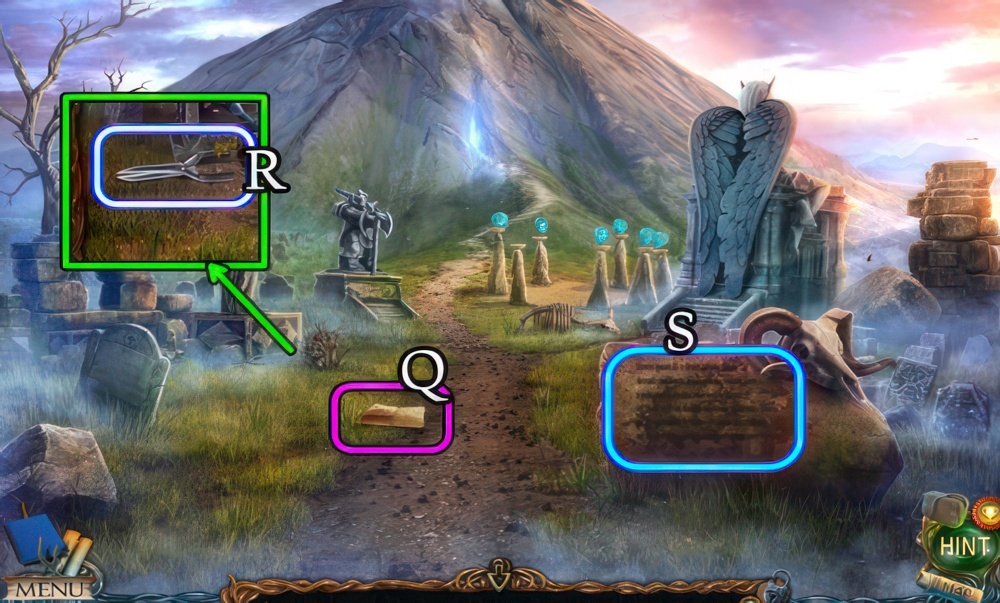
- Take Manuscripts 5/28 (Q).
- Grab the GARDEN SHEARS (R).
- Select (S) thrice.
- Note the inscription.
- Go forward.
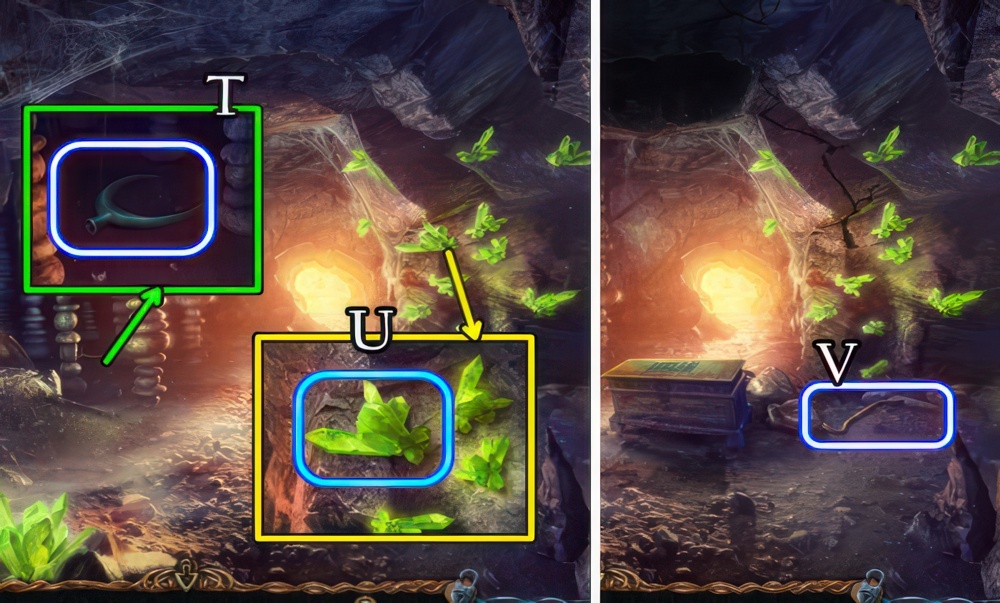
- Grab the SPEAR HEAD (T).
- Combine the BROKEN PICK-AXE, HAMMER and PICK-AXE HANDLE for a PICK-AXE.
- Use the PICK-AXE for VOLCANIC CRYSTAL (U).
- Take the CROWBAR (V).
- Go forward.
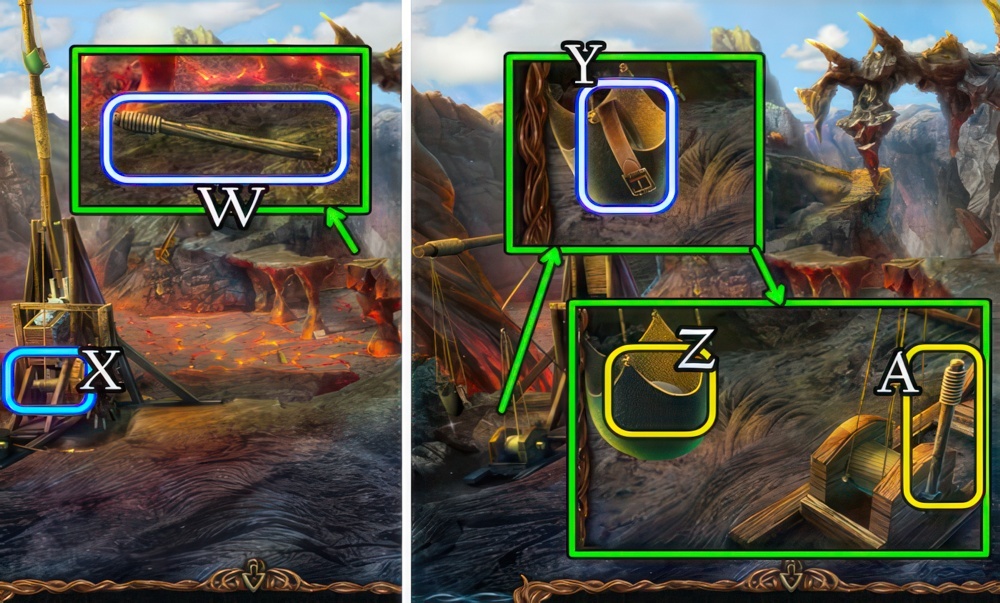
- Take the LEVER (W).
- Select (X).
- Take the BELT (Y), place the CANNONBALL (Z) and LEVER (A).
- Pull the lever.
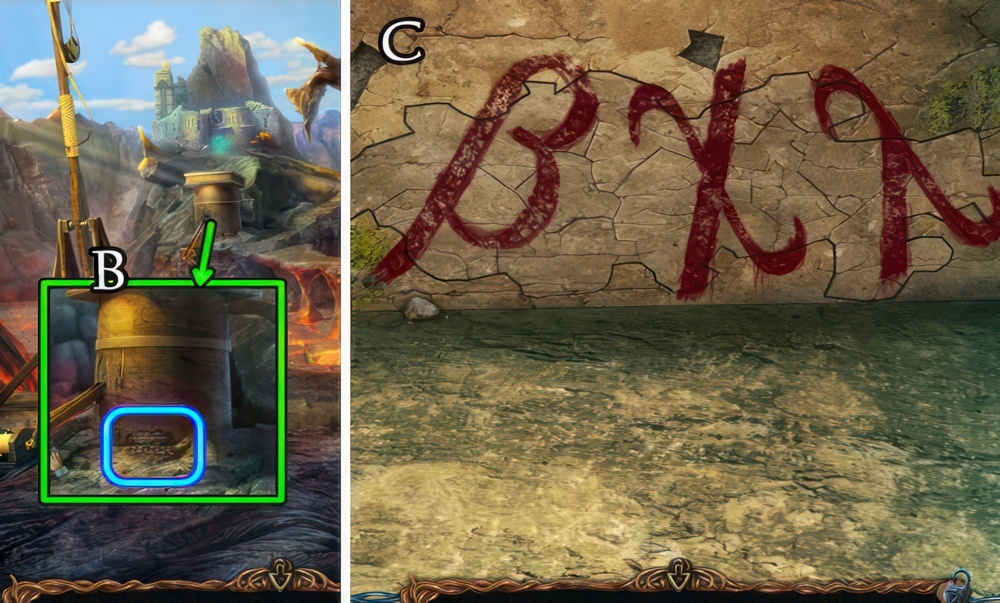
- Select (B).
- Restore the damaged pattern.
- Walkthrough (C).
- Go forward.

- Grab the CAGE TRAP (D).
- Take the CLAMP and BANDAGE (E).
- Go down 5 times.
- Use the GARDEN SHEARS.
- Take the BLACKTHORN BERRIES and BLACKTHORN TWIG (F).
- Go down and through the gates.

- Use the CROWBAR, place the VOLCANIC CRYSTAL (G).
- Go left.
- Take Manuscripts 6/28 and the MOUSE (H).
- Note the directions, take the FLASK (I).
- Return to the Volcanic Cavern.
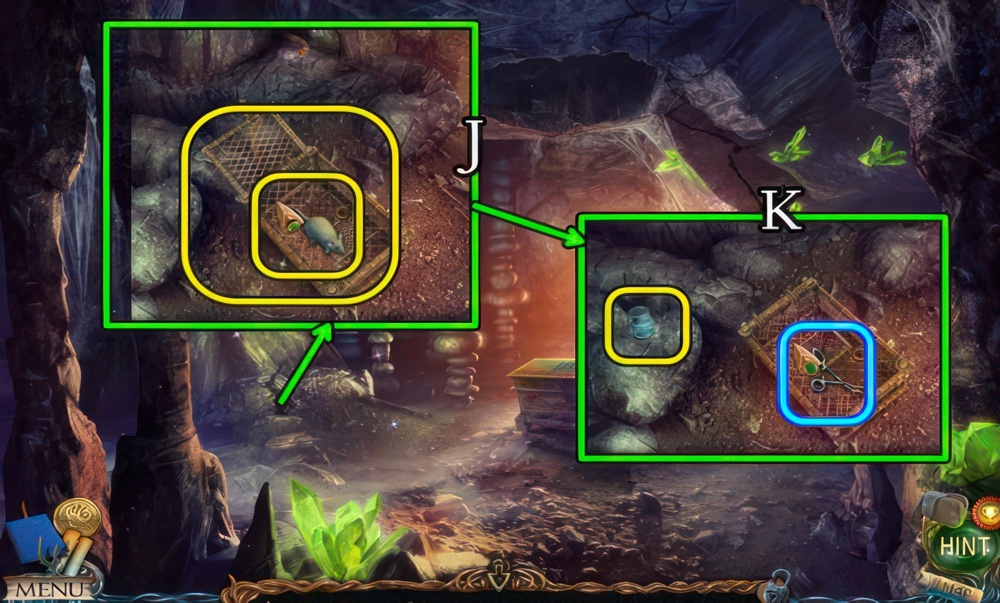
- Place the CAGE TRAP, place the MOUSE (J).
- Place the FLASK.
- Use the CLAMP (K).
- Take the VIPER VENOM.
- Return to the Relic Repository.
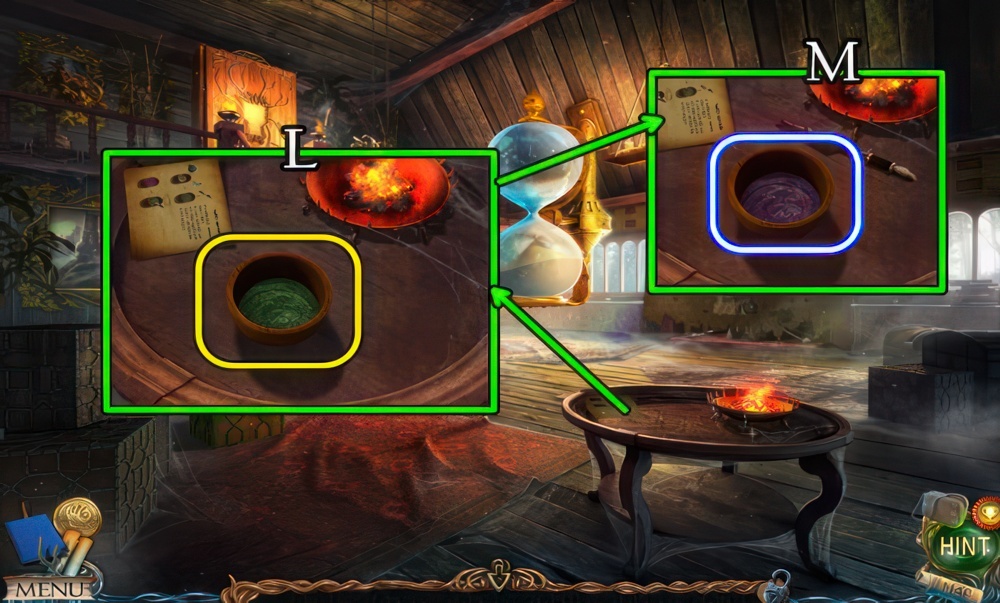
- Place the OINTMENT (L).
- Add the BLACKTHORN BERRIES, VIPER VENOM and BLOODY SPEAR.
- Take the POTION (M).
- Go down.

- Place and select the POTION (N).
- Apply the BANDAGE, take the BELT (O).
- Take the KEY (P).
- Go left.
- Use the KEY (Q), take STONE FEATHERS 2/6 (R).
- Return to the Arena Entrance.
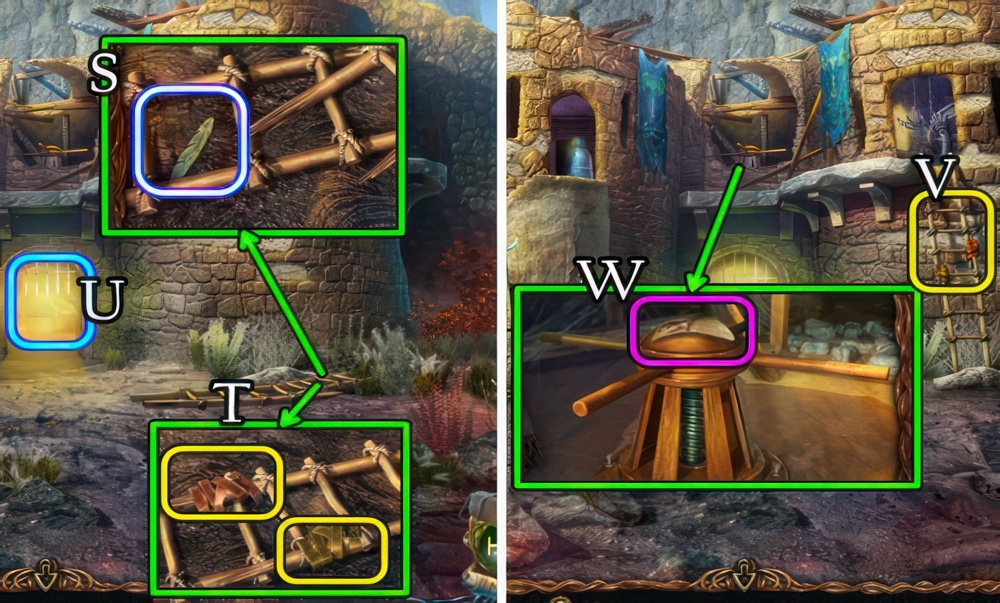
- Take STONE FEATHERS 3/6 (S).
- Use both BELTS (T), take the LADDER.
- Attempt to go forward (U).
- Place the LADDER (V).
- Take Manuscripts 7/28 (W).
- Select the wheel.
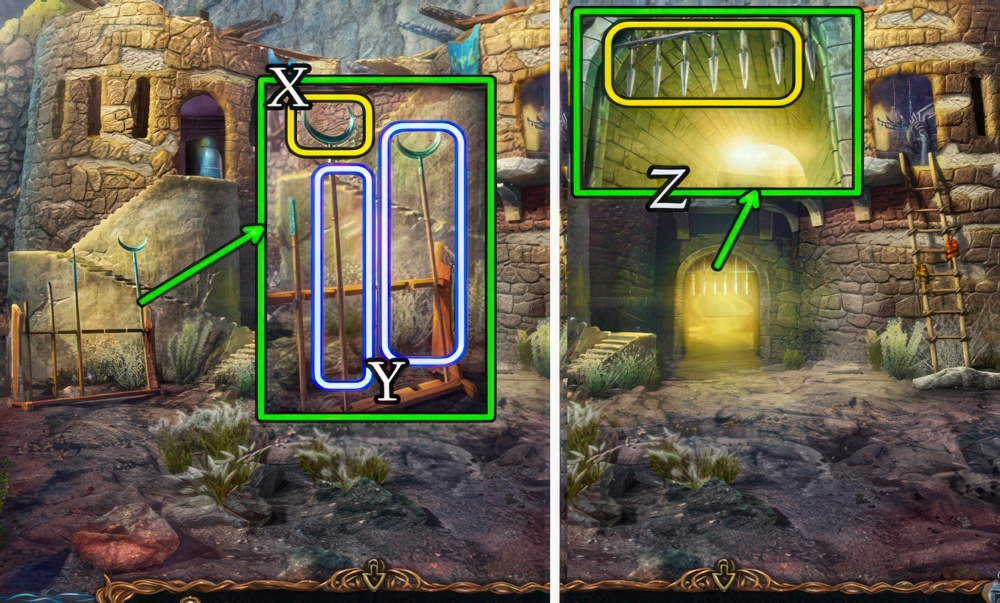
- Place the SPEAR HEAD (X).
- Take TWO-PRONGED SPEAR 1/2-2/2 (Y).
- Place TWO-PRONGED SPEARS 2/2 (Z).
- Go forward.

- Grab the CHEWING GUM (A).
- Take Manuscripts 8/28 (B).
- Take the BATTERY (C).
- Touch (D).
- Take the MAP FRAGMENT (E).
- Select and read the diary.
- Go down thrice.
- Unwrap and select the CHEWING GUM for used CHEWING GUM.
- Combine the MAP FRAGMENTS and the CHEWING GUM for a MAP.
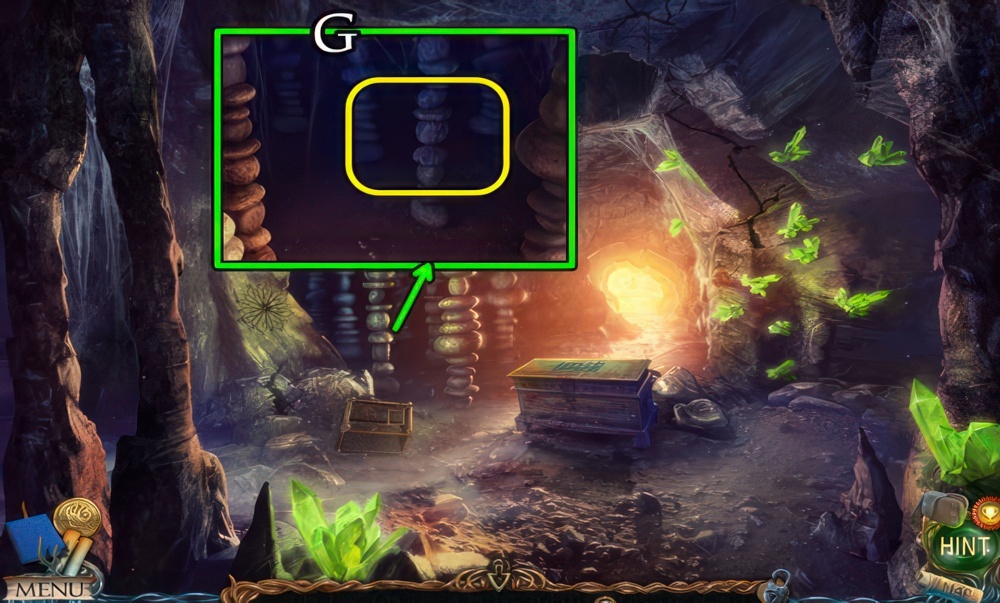
- Place the MAP (G).
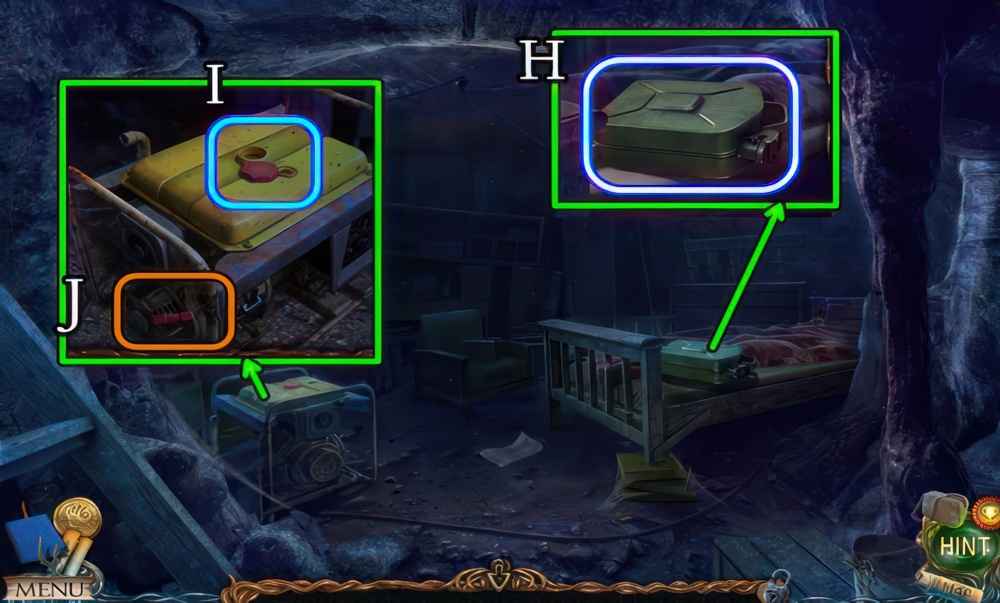
- Grab the FULL JERRY CAN (H).
- Remove the cap, place the FULL JERRY CAN and replace the cap (I).
- Pull the handle thrice (J).

- Play the puzzle (K), receive STONE FEATHERS 4/6.
- Use the KNIFE (L), lift the newspaper and take the KEY (M).
- Lift the mattress, take the STONE FIGURINE (N).

- Use the KEY (P).
- Uncover and take the PUZZLE PIECES (Q).
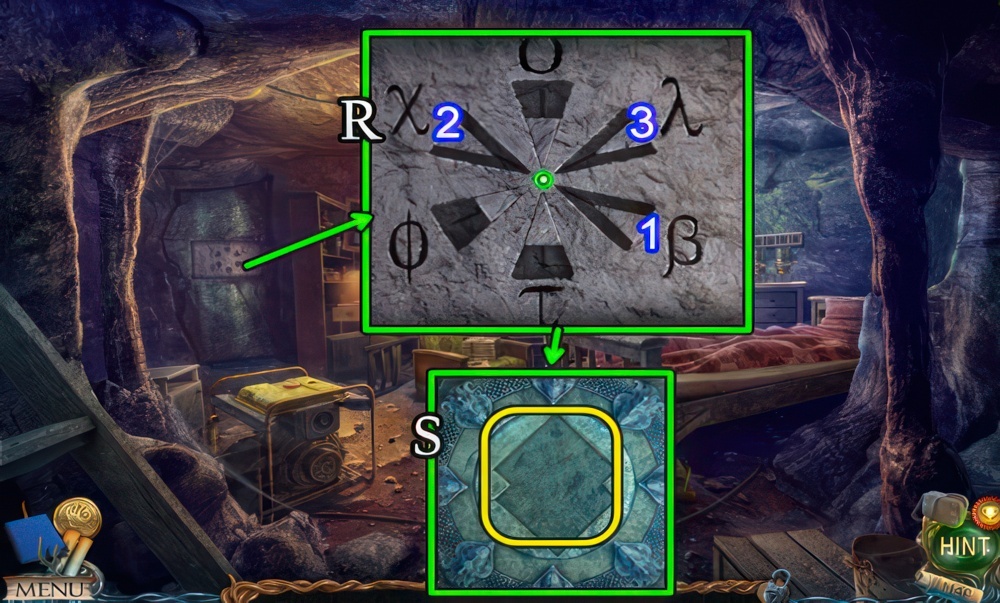
- Mark the right symbols with the sliding triangles. You’ve seen them before.
- Walkthrough (R): 1-2-3.
- Place the PUZZLE PIECES (S).
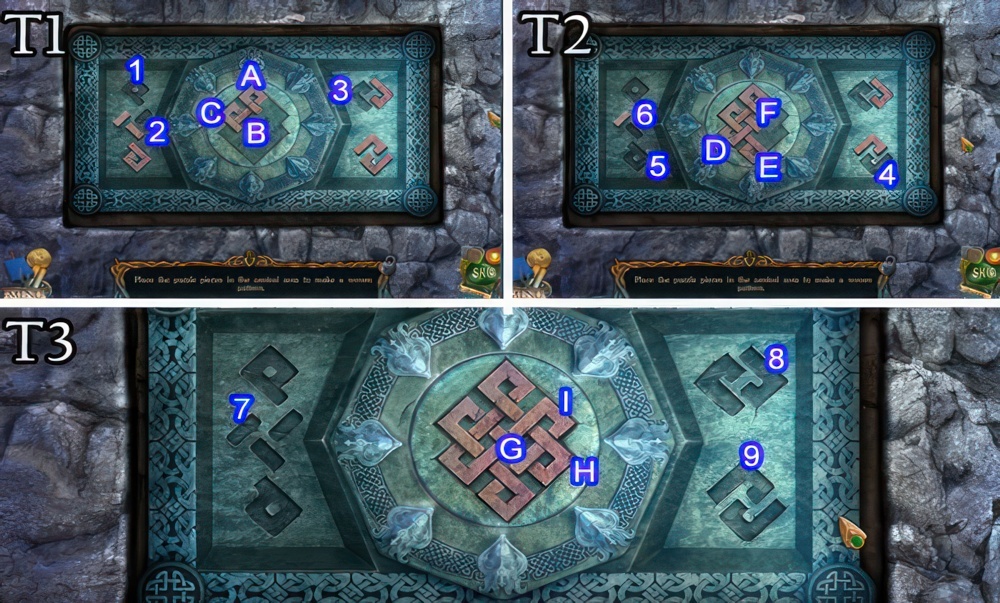
- Place the puzzle pieces in the central area to make a woven pattern.
- Walkthrough (T1-T2-T3): (1-A)-(2-B)-(3-C)-(4-D)-(5-E)-(6-F)-(7-G)-(8-H)-(9-I).
- Go forward.
Search Results
I’ve learned all I can for Maaron. Now, I need to hurry back to tell him everything.
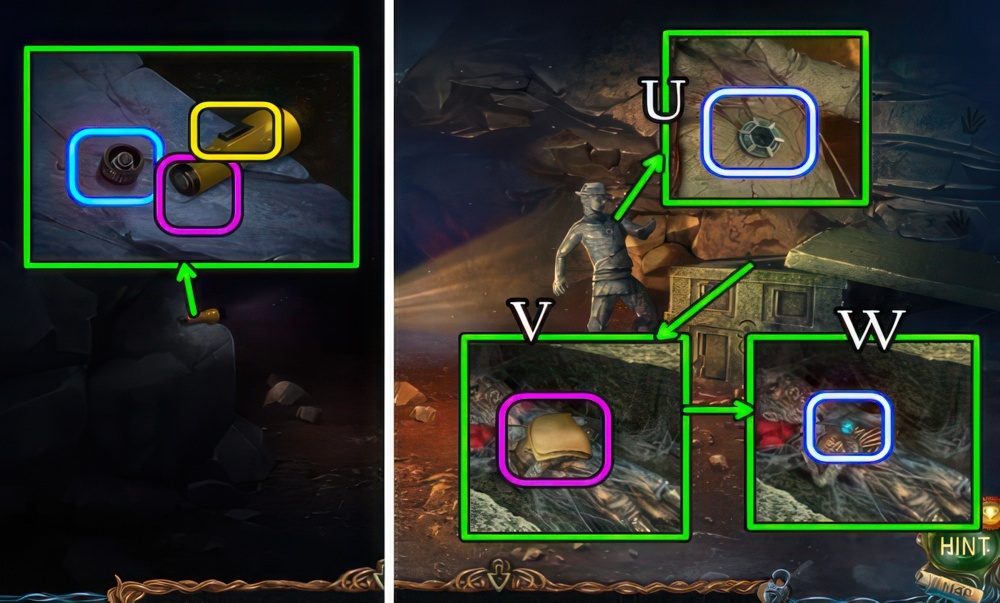
- Remove the cap (blue), exchange the BATTERY (pink) and replace the cap.
- Touch the switch (yellow).
- Take the MEDALLION PART (U).
- Take Manuscripts 9/28 (V).
- Take the MEDALLION PART (W).
- Return to the Druid Village.
Cursed Harpy Coin
Using the Antimagic Gloves from the Relic Repository, I need to collect the cursed coin from the Arena.
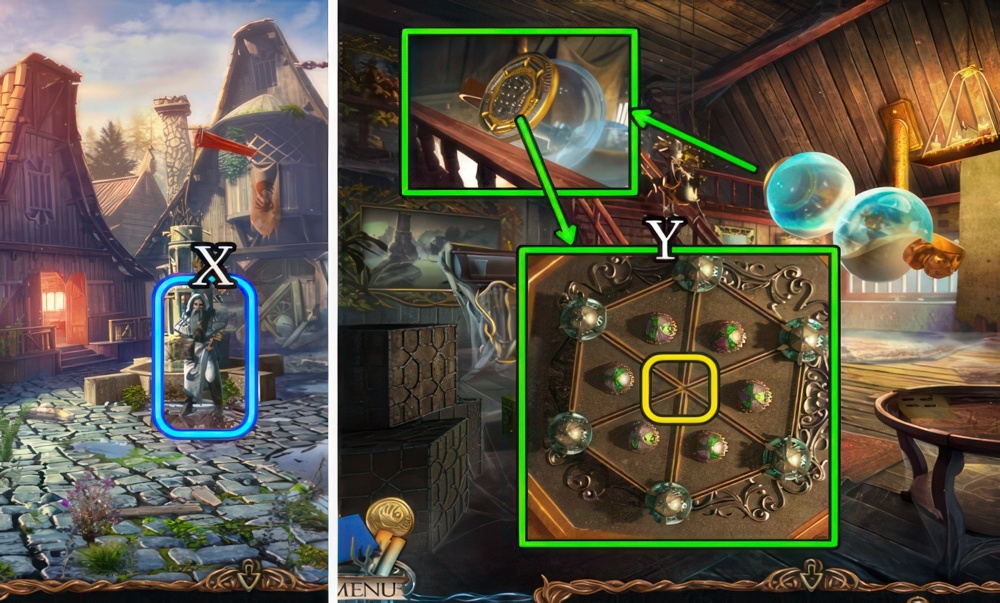
- Speak to the grandfather (X).
- Receive STONE FEATHERS 5/6.
- Go left.
- Select the hourglass twice.
- Combine the MEDALLION PARTS for a MEDALLION.
- Place the MEDALLION (Y) and select.
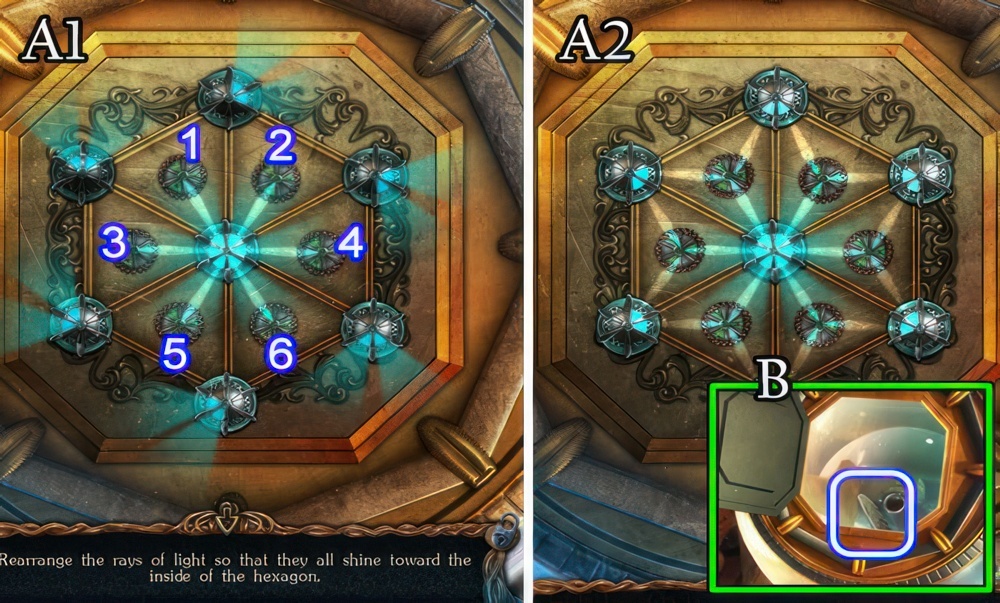
- Rearrange the rays of light so that they all shine toward the inside of the hexagon.
- Walkthrough (A1-A2).
- 6-1-5-4-3-6.
- Take STONE FEATHERS 6/6 (B).
- Return to the Ancient Graveyard.
Sudden Escape
Three demons have escaped the arena. I have to go to the druid village right away and tell Maaron everything.
- Place STONE FEATHERS 6/6 (C).
- Drag the stone piece.
- (D) Place the STONE FIGURINE (E).
- Take the MASK (F).
- Return to the Relic Repository.
On the Trail of the Harpy
The Harpy has captured Fiora and brought her to her lair. I have to go to the floating islands and find the girl.
- Place the MASK (G).
- Play the puzzle (H) to put on gloves.
- Return to the Arena.
- Pick up the coin (I), receive a CURSED HARPY COIN.
- Return to the Druid Village.
Braeloff’s Signal
Braeloff the Blacksmith agreed to help me search for Fiora. But to get to him I have to signal him first. With fireworks.
- Open (J) and go forward.
- Speak to the grandfather (K).
- Take the NAIL POLISH REMOVER (L) and OILCAN (M).
- Take Manuscripts 10/28 and the CANDLE (N).
- Read the book.
- Go down and left.

- Place the CANDLE (O), receive a BURNING CANDLE.
- Select (P).
- Place the BURNING CANDLE, take the POWDER FLASK (Q).
- Touch the candle, take the HUMAN FIGURINE (R).
- Go down twice.
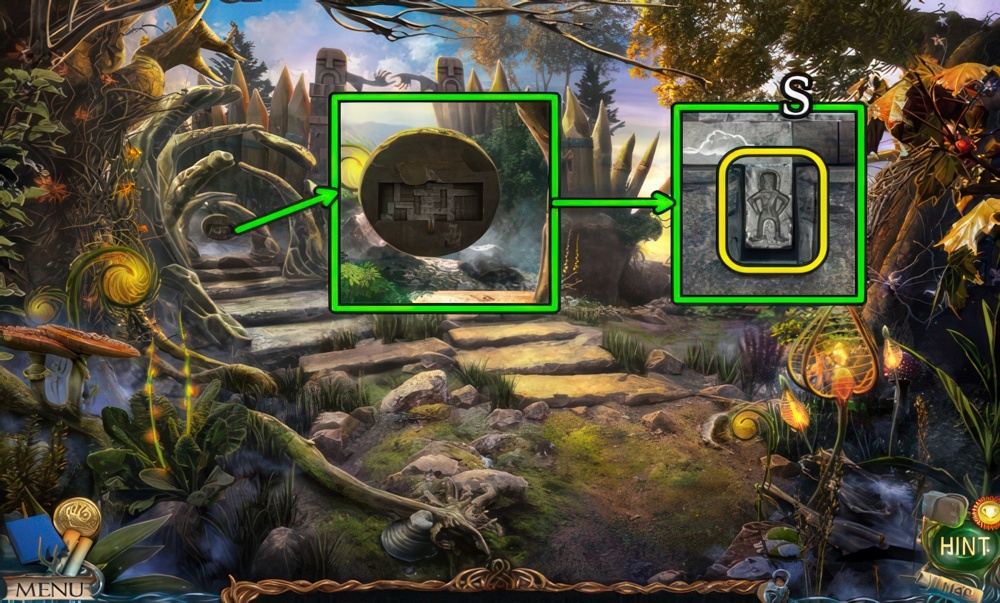
- Place the HUMAN FIGURINE (S).

- Move the blocks so the one showing the little man lands on top.
- Walkthrough (T1-T2-T3).
- 1-2-3-4-5-6-7-8-9
- Uncover and select (U).
- Take Manuscripts 11/28 (V).
- Select (W).
- Touch (X).
- Take the AXE (Y).
- Grab the FIGURINE (Z).
- Return to the Druid Village.
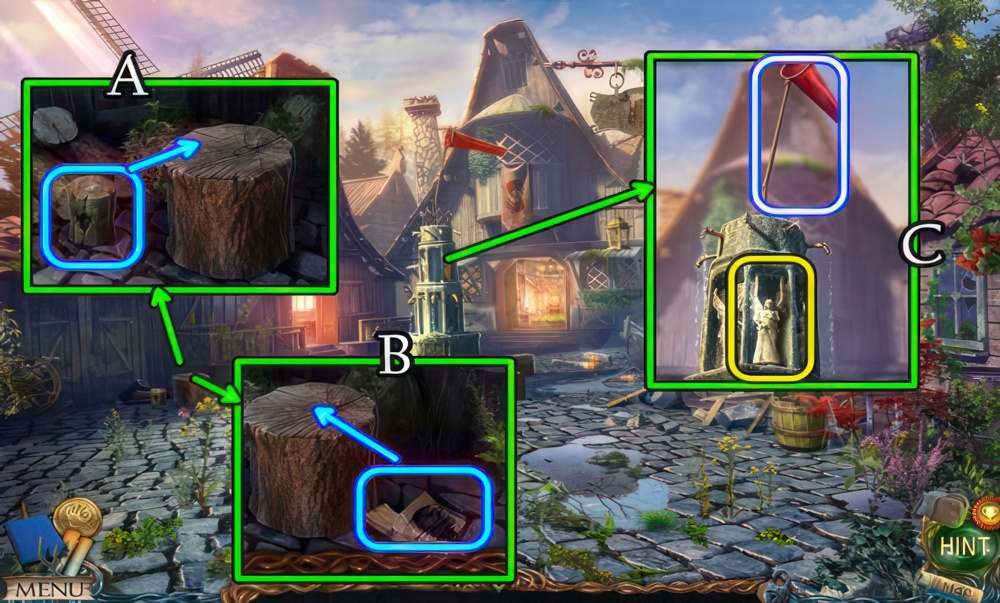
- Place the log (A).
- Use the AXE twice.
- Place the piece of wood (B).
- Use the AXE.
- Take the FIREWOOD.
- Place the FIGURINE.
- Take the WINDSOCK (C).
- Return to the Lower Island.
- Touch the WINDSOCK, for a NET.

- Use the OILCAN (D).
- Slide the latch, open the door.
- Use the NET, receive a STAMP (E).
- Return to the Volcanic Crater.
- Place the STAMP (F).
- Open and take the CORE OF FLAMES (G).
- Take Manuscripts 12/28 (H).
- Read the book.
- Return to the Lower Island.
- Place the CORE OF FLAMES (I).
- Select (J).
- Go left.
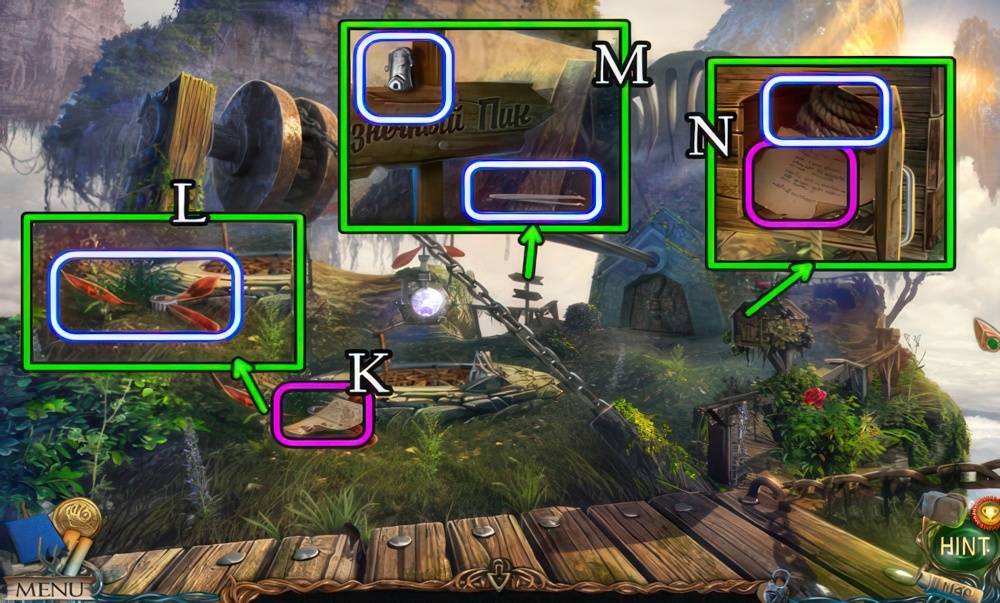
- Take Manuscripts 13/28 (K).
- Take the BROKEN BLADES (L).
- Take the METRONOME TILE and TWEEZERS (M).
- Open, take the note and ROPE (N).
- Return to the Relic Repository.
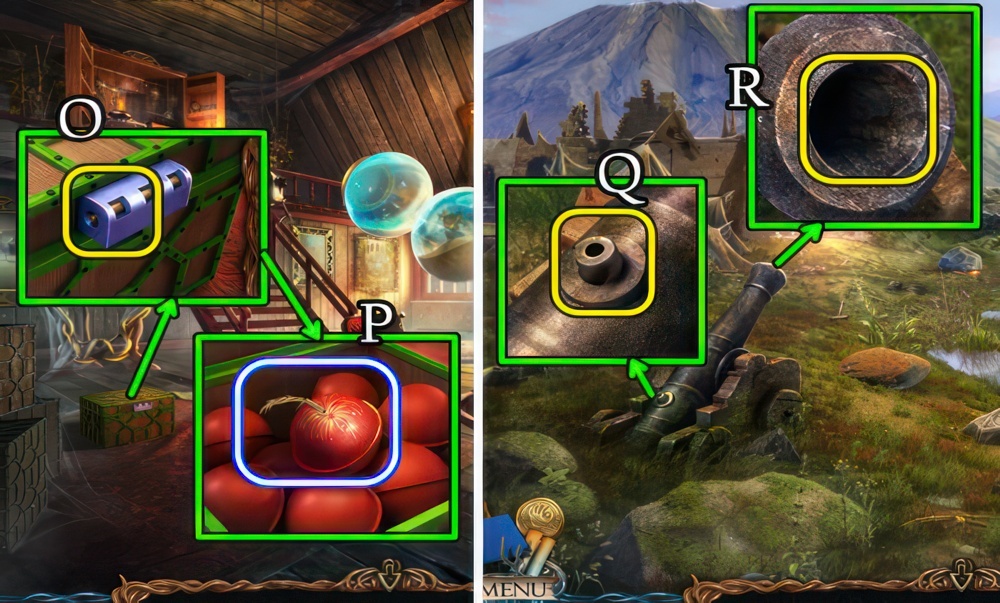
- Use the TWEEZERS (O).
- Take the FIRECRACKER (P).
- Return to the Plains of the Dead.
- Combine the ROPE and NAIL POLISH REMOVER for an ALCOHOL-SOAKED ROPE.
- Use the POWDER FLASK, place the ALCOHOL-SOAKED ROPE (Q).
- Place the FIRECRACKER (R).
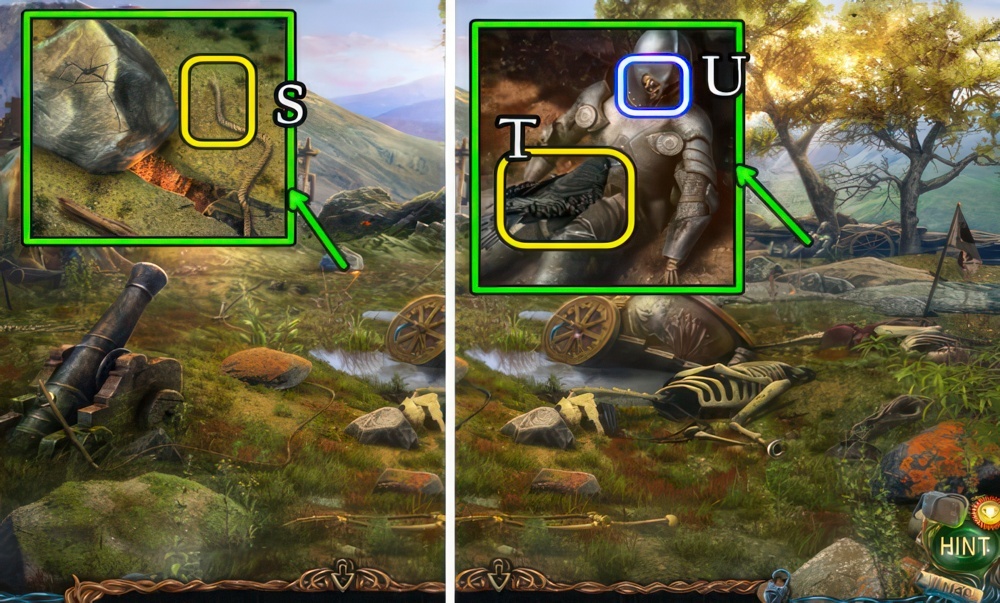
- Select (S).
- Use the BLACKTHORN TWIG (T).
- Take the MECHANICAL EYE (U).
- Return to the Crossroads.
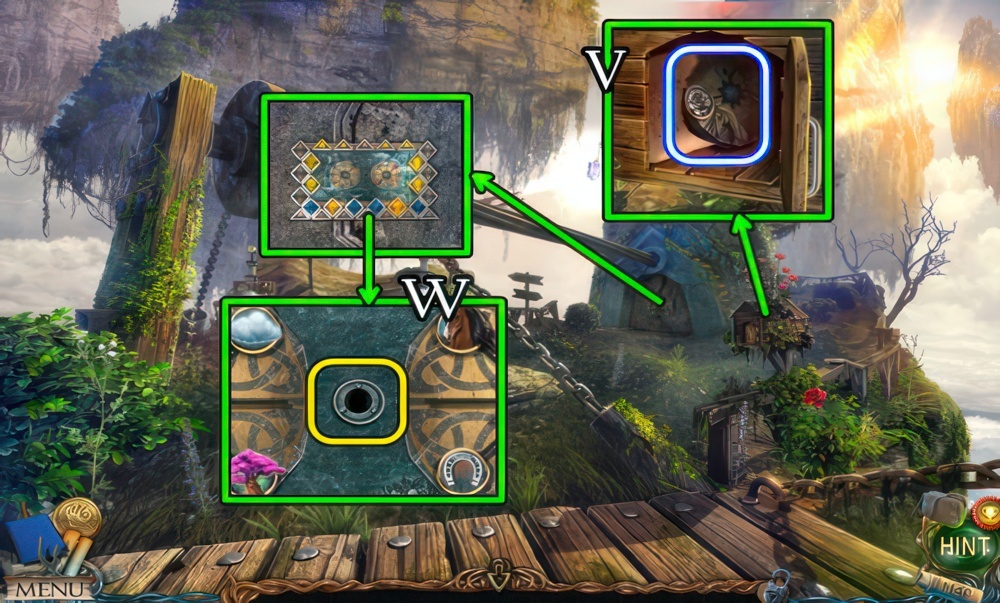
- Take the DEVICE PART (V).
- Place the DEVICE PART (W).
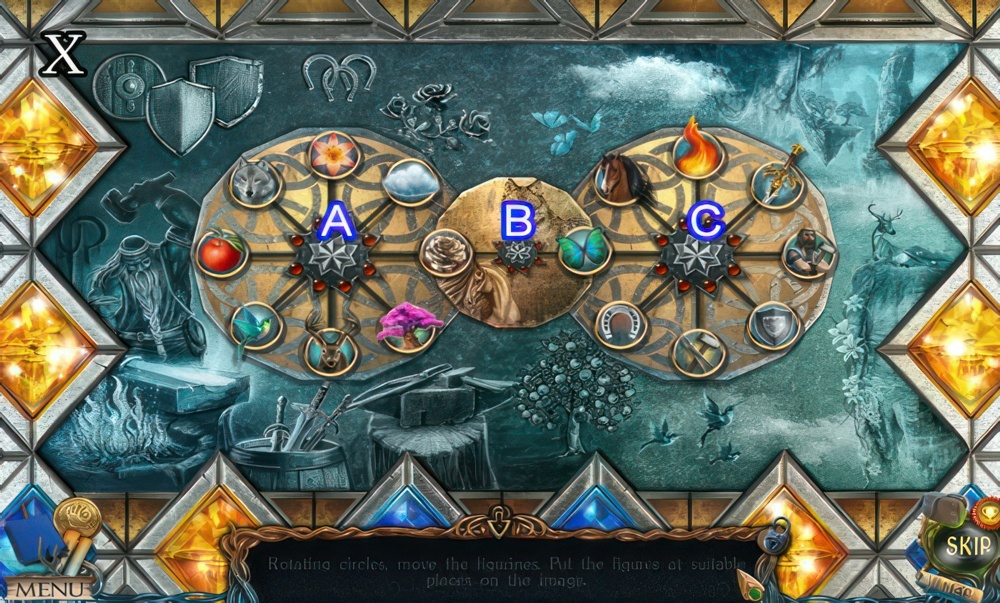
- Turn the circles to move the figurines.
- Place them at their correct spots as in the image.
- Walkthrough (X): C-A×3-B-C-A-B-C-A-B-C-A-B-A×4-B-C-B.
- C-A×5-B-C-A×2-B-C×2-A-B-A×6-B-A.
- B-A-B-A-B-A-B-A×5-B-A×2-B-A×7.
- Go right.
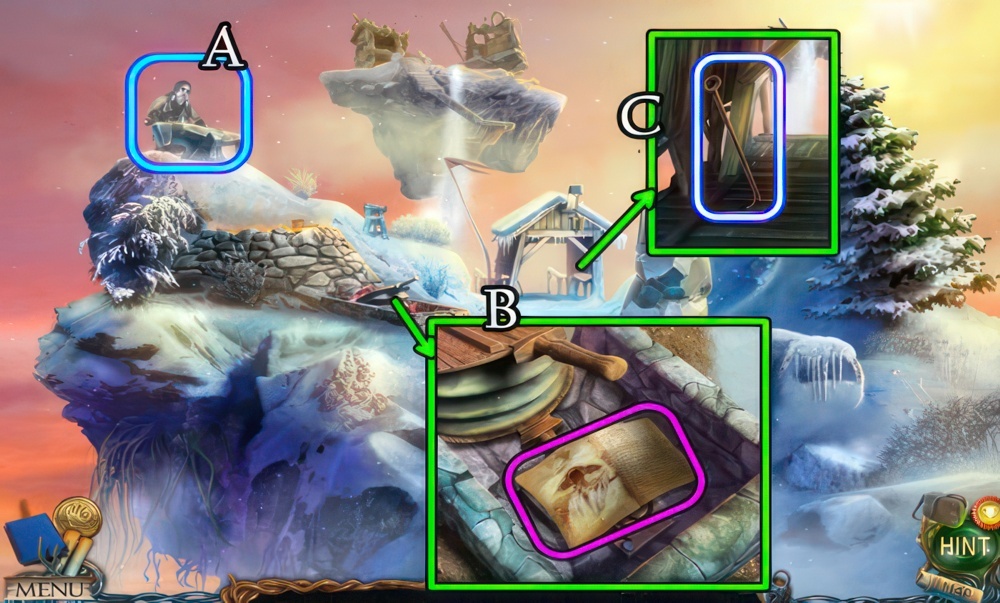
- Speak to the blacksmith (A), give him the BROKEN BLADES.
- Take Manuscripts 14/28 (B).
- Take the POLE HOOK (C).
- Return to Leprochs Tomb.

- Use the POLE HOOK (D) to receive COAL.
- Return to Anvil Peak.
- Give the COAL (E), receive BLADES.
- Go down.
- Place the BLADES (F).
- Go forward.
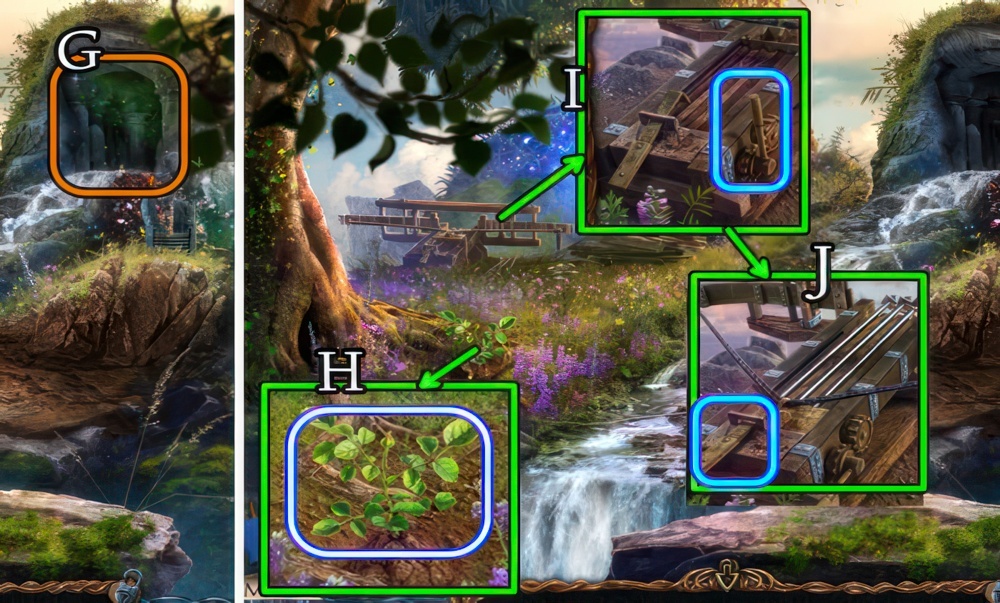
- Play the puzzle (G) to receive a MOTHER FIGURINE.
- Take the YOUNG ROSE BUSH (H).
- Pull the lever (I), place the arrows and release (J).
- Go forward.
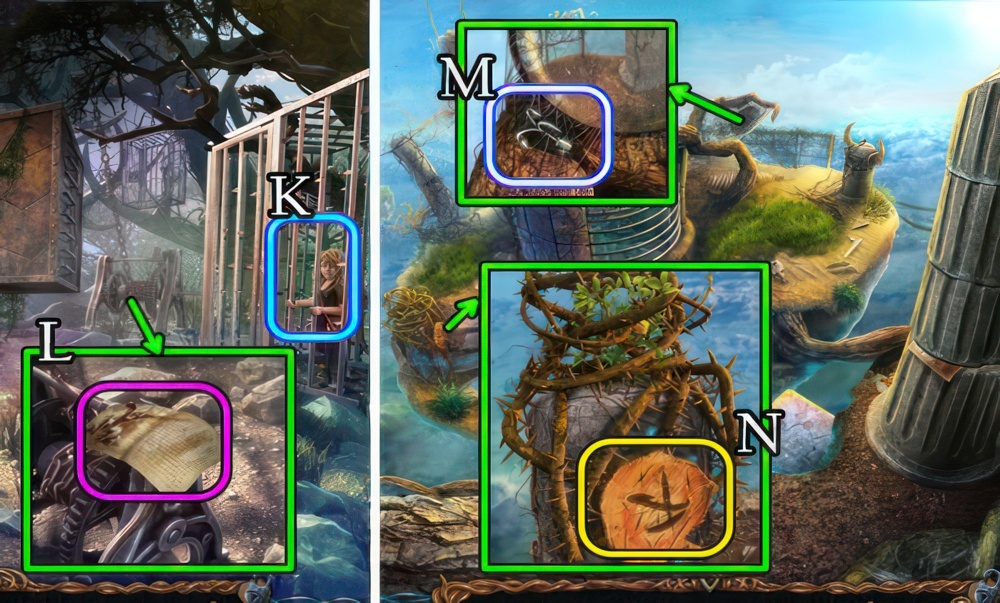
- Speak to the girl (K), receive a HARPY CLAW.
- Take Manuscripts 15/28 (L).
- Go forward.
- Take the FISH HOOK (M).
- Touch the HARPY CLAW, receive a SHOELACE and HARPY CLAW.
- Place the HARPY CLAW (N).
- Take the LEMON.
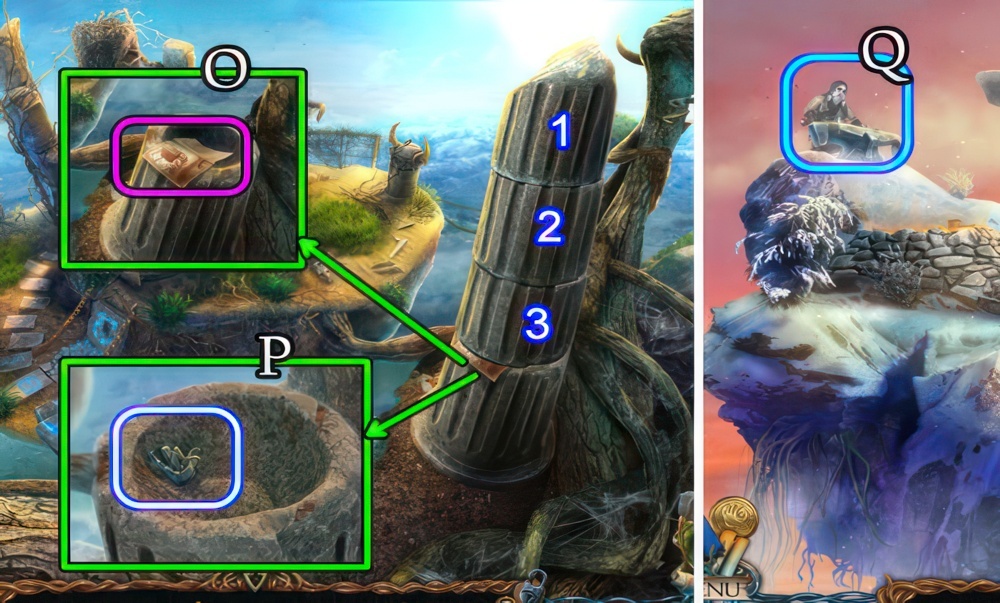
- Touch stones (1-2-3).
- Take MANUSCRIPTS 16/28 (O).
- Take the TOWER TILE (P).
- Return to Anvil Peak.
- Speak to the Blacksmith (Q).
- Return to the Druid Village.

- Open the door (R), go right.
- Take Manuscripts 17/28 (S).
- Uncover and take the SCRAPER (T).
- Take the FISHING ROD (U).
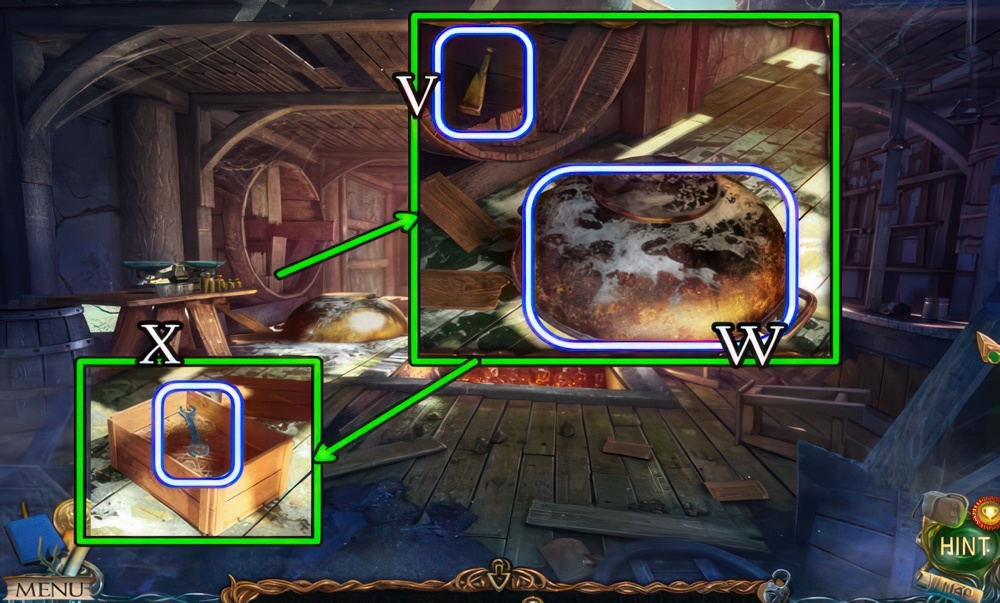
- Remove the boards, take the FAN (V).
- Take the WET BOWL (W).
- Open, uncover and take the WRENCH (X).
- Go down twice.
- Combine the FISHING ROD and FISH HOOK for a FISHING ROD.
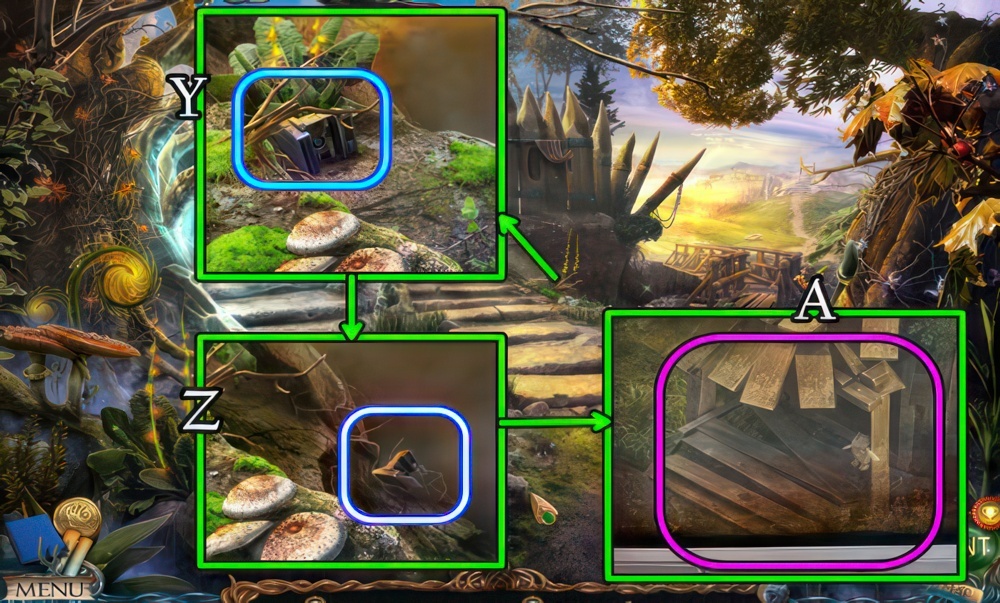
- Attempt to take the camera (Y).
- Use the FISHING ROD (Z).
- Select the snapshot (A).
- Receive a CAMERA.
- Return to the Ancient Graveyard.
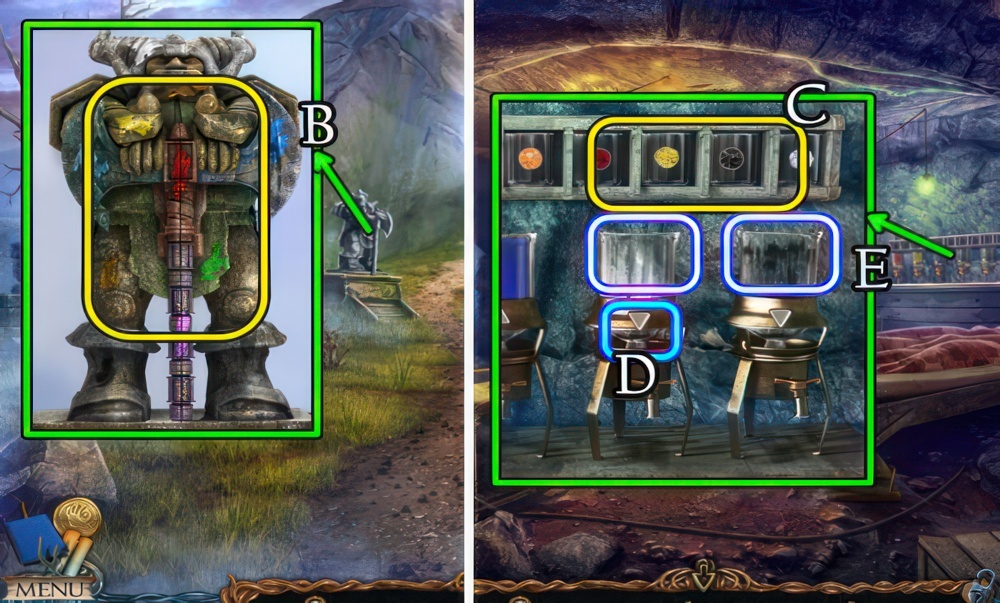
- Use the SCRAPER (B) for a DYE SET.
- Return to Leprochs House.
- Place the DYE SET (C).
- Use the WRENCH (D).
- Take the FLASK FOR WHITE PAINT and the FLASK FOR BLACK PAINT (E).
- Return to the Lower Island.

- Place the FLASK FOR WHITE PAINT (F), receive FLASK OF CHALK DUST.
- Take the LEVER (G).
- Return to the Elders House.
- Move the carpet.
- Place, then select the LEVER (H).
- Take the METAL BRUSH (I).
- Go down, then right.

- Place the FIREWOOD and WET BOWL (J).
- Use the FAN.
- Select the bowl.
- Place the FLASK FOR BLACK PAINT (K).
- Use the METAL BRUSH (L), receive a FLASK OF SOOT.
- Use the CAMERA for a PHOTO OF LITTLE MAN (M).
- Return to Island of Exile.
To Beat the Harpy
Fiora has a good idea how to beat the Harpy. She suggested making a copy of the Harpy’s claw and tossing it to her.
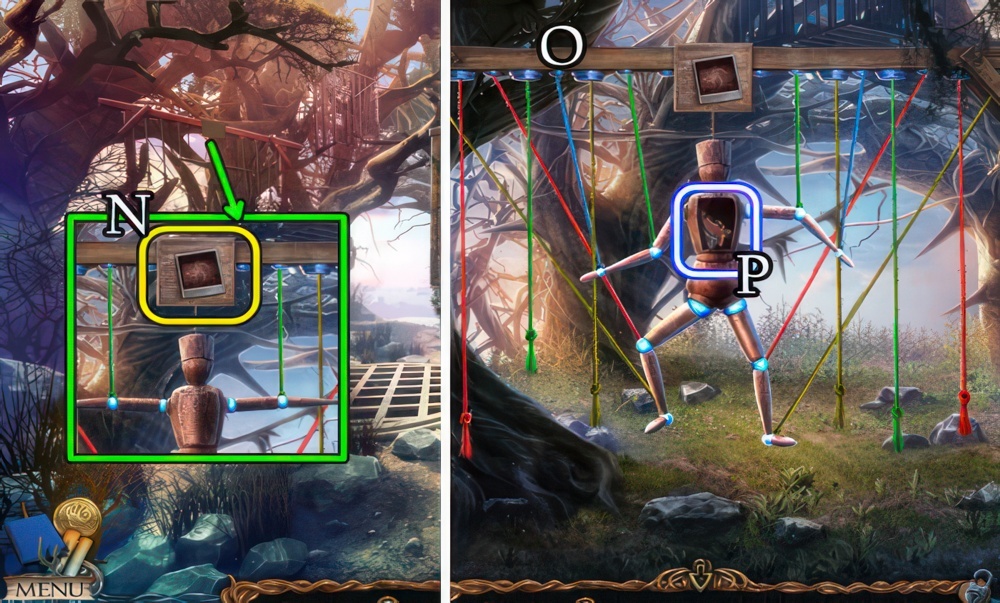
- Place the PHOTO OF LITTLE MAN (N).
- Place the marionette as shown on the photo.
- Walkthrough (O).
- Take the METAL WING (P).
- Return to the Relic Repository.
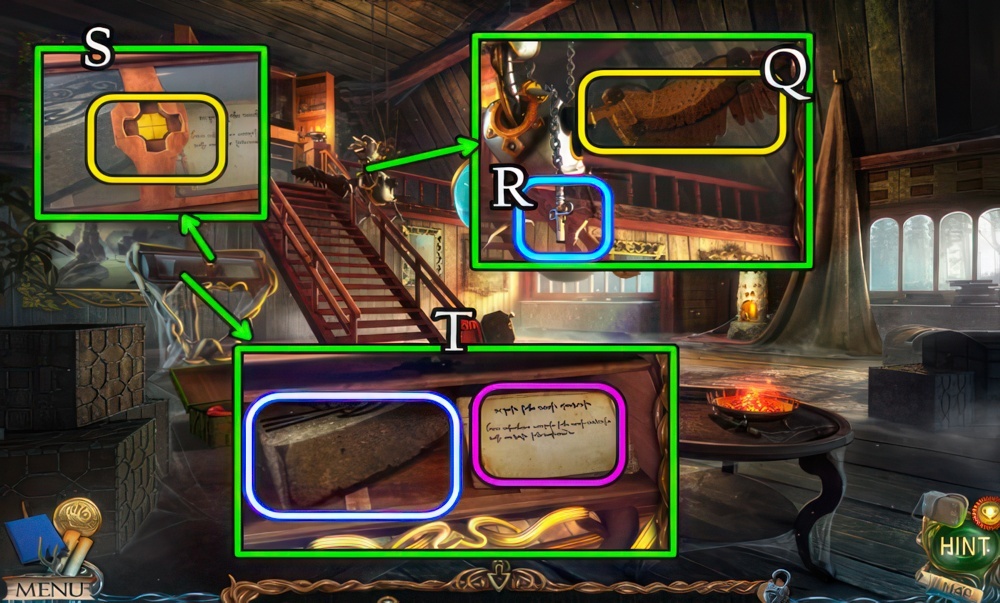
- Place the METAL WING (Q).
- Select (R) to receive a KEY.
- Use the KEY (S).
- View the note and STONE SLAB (T).
- Return to the Hills.
Braeloff’s Hammer
To work with the cursed gold, Braeloff needs a special Hammer, which he lost when It fell off the island. I have to find it.
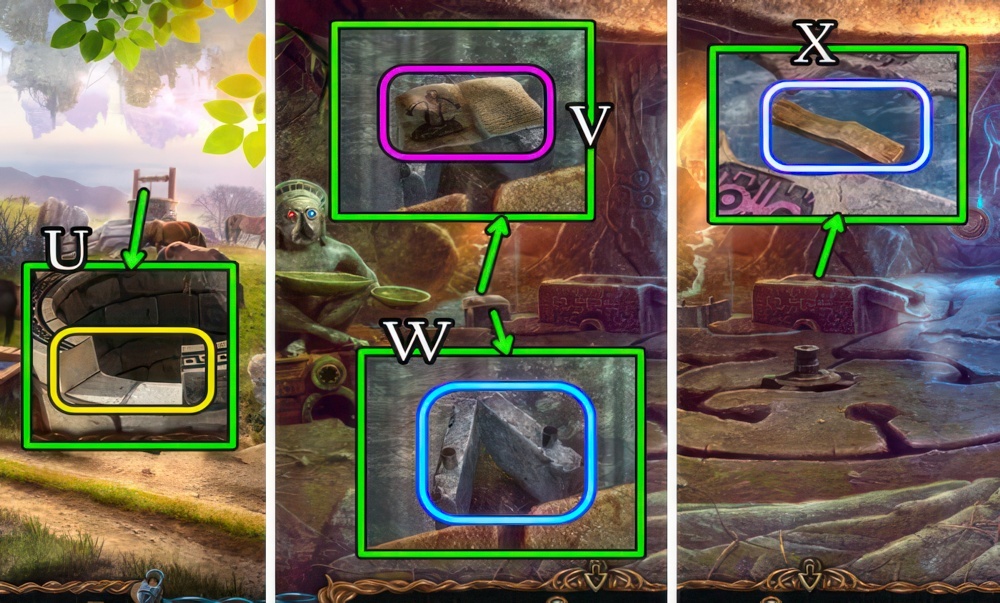
- Place the STONE SLAB (U).
- Climb down the well.
- Take Manuscripts 18/28 (V).
- Touch the stones (W).
- Take STEP 1/4 (X).
- Go forward.
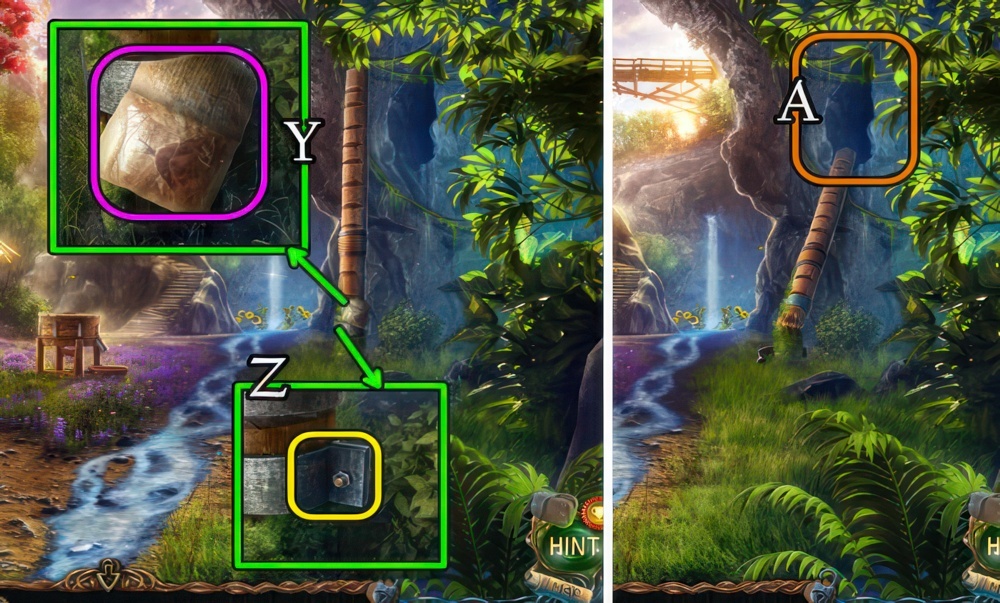
- Take Manuscripts 19/28 (Y).
- Use the WRENCH (Z).
- Remove the nut.
- Play the puzzle (A), receive BLESSED WATER.
Fiora’s Doll
I found Fiora’s doll. I think I’d better return it to its owner. She’ll be so happy.

- Use the KNIFE thrice (B), for SUNFLOWERS.
- Take the DOLL (C).
- Touch the DOLL for a PEDAL-KEY and FIORAS DOLL.
- Place and select the PEDAL-KEY (D).
- Go left.
- Speak to the woman (E), receive a MAGIC HAMMER.
- Take Manuscripts 20/28 (F).
- Take STEP 2/4 (G).
- Take the FLASK FOR SUNFLOWER OIL (H).
- Return to Anvil Peak.
- Take the SHOVEL (I) and note and diagram (J).
- Return to the Hanging Gardens.
- Use the SHOVEL.
- Take the CLAY and BALLISTA TILE (K).
- Go forward.
- Give (L) FIORAS DOLL, receive BLACKSMITHS PINCERS.
- Return to Anvil Peak.
- Touch the CLAY, combine it with the HARPY CLAW for a CLAY FORM.
- Place the CURSED HARPY COIN (M).
- Place the CLAY FORM (N), insert the wire (O) and select the form.
- Touch the bellows thrice (P).

- Select the crucible (Q).
- Use the BLACKSMITHS PINCERS (R) for a NIPPER WITH A CAST.
- Remove the snow.
- Place the NIPPER WITH A CAST (S).
- Take the PLIERS (T).
- Use the HAMMER (U).
- Take the GOLDEN CLAW CASTING.
- Combine the GOLDEN CLAW CASTING and PLIERS for a GOLDEN CLAW CASTING.
- Place the GOLDEN CLAW CASTING (V).
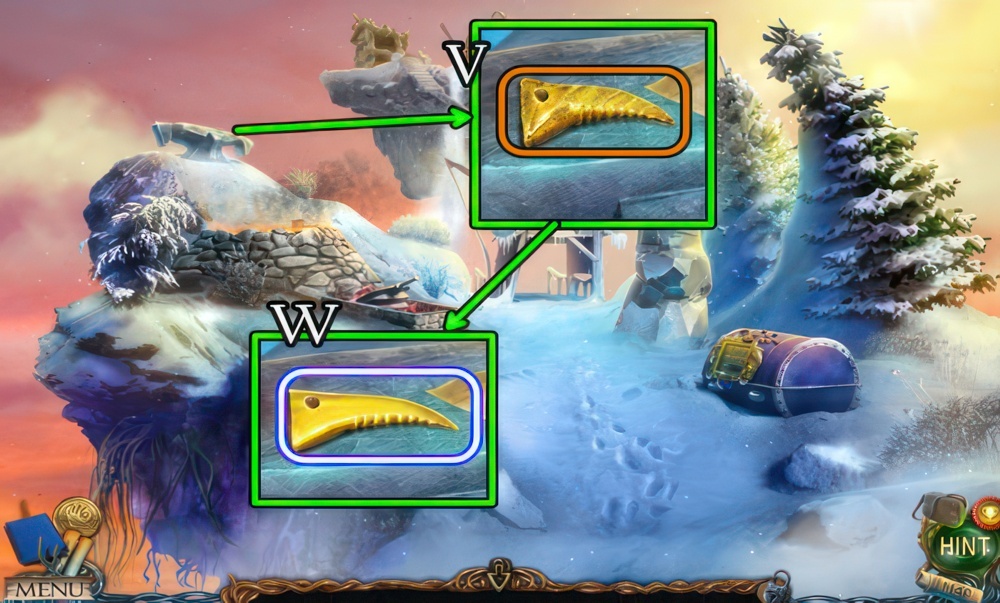
- Use the MAGIC HAMMER.
- Take a GOLDEN CLAW (W).
- Combine the GOLDEN CLAW with the SHOELACE for a GOLDEN HARPY CLAW.
- Return to the Tavern.
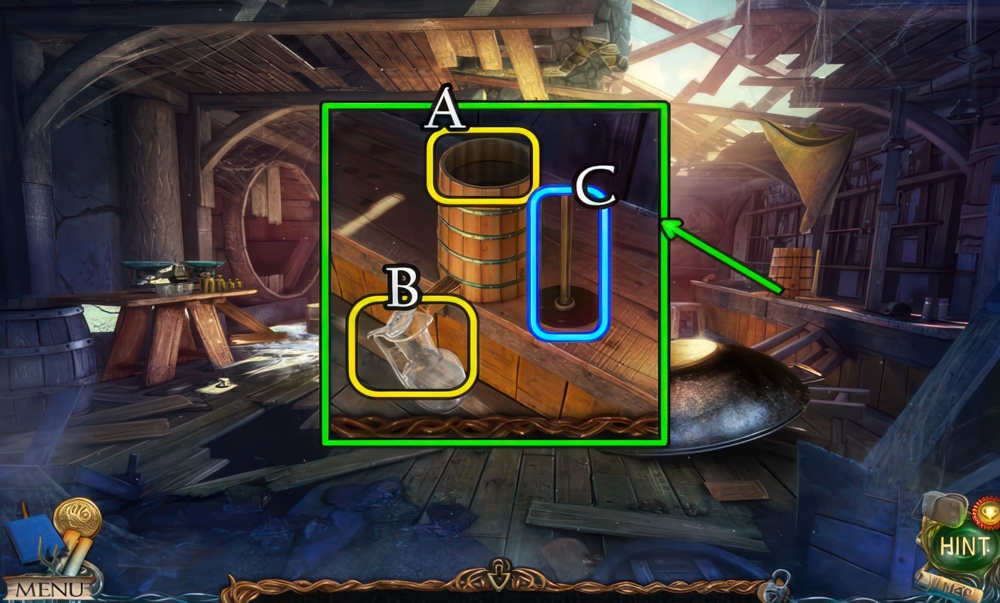
- Place the SUNFLOWERS (A) and FLASK FOR SUNFLOWER OIL (B).
- Select (C) for SUNFLOWER OIL.
- Return to Leprochs House.
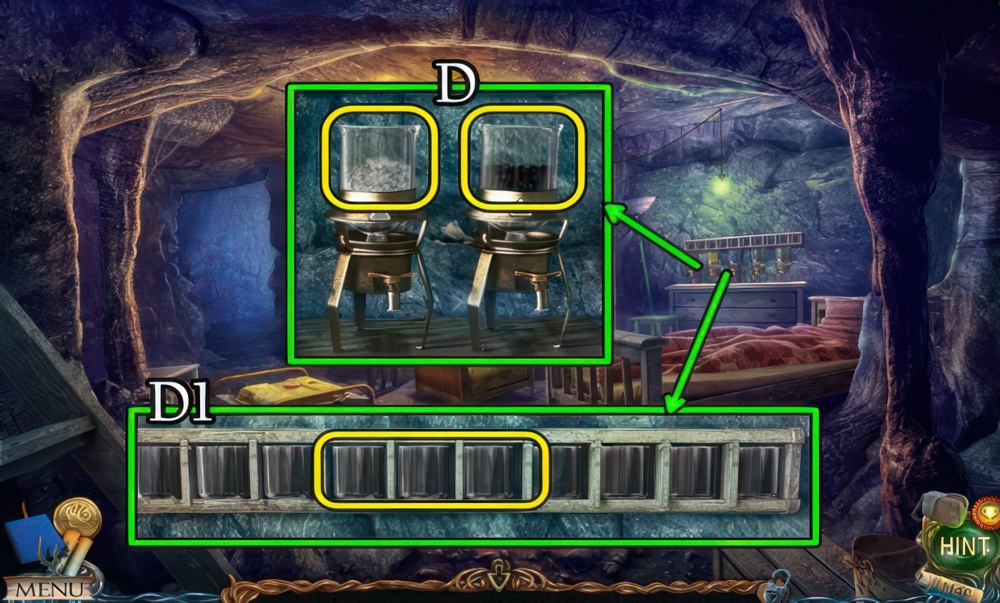
- Place the FLASK OF CHALK DUST and the FLASK OF SOOT (D).
- Add the SUNFLOWER OIL.
- Place the DYE SET (D1).
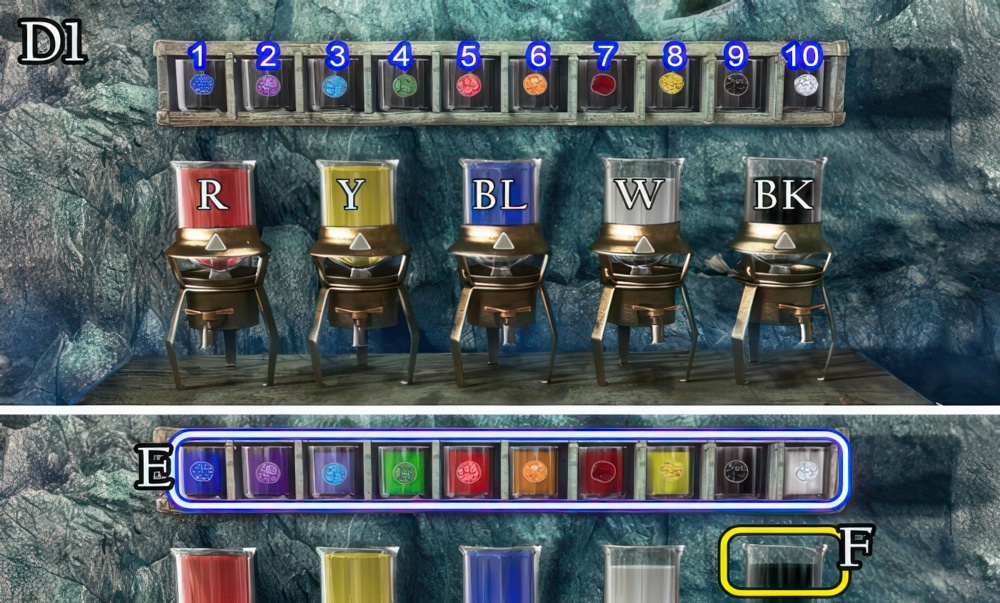
- Make the paints you need by mixing the ones you have.
- Walkthrough (D1): (1-BL×2)-(2-BL,R)-(3-BL,W)-(4-BL,Y)-(5-R×2).
- (6-R,Y)-(7-R,BK)-(8-Y×2)-(9-BK×2)-(10-W×2).
- Take the PAINT SET (E).
- Place the GOLDEN HARPY CLAW (F), receive a FAKE HARPY CLAW.
- Return to the Island of Exile.

- Place the FAKE HARPY CLAW (G).
- Speak to Fiora (H).
- Take the PAPER CLIP (I).
- Return to Leprochs House.
- Touch the PAPER CLIP 4 times for an UNBENT PAPER CLIP.
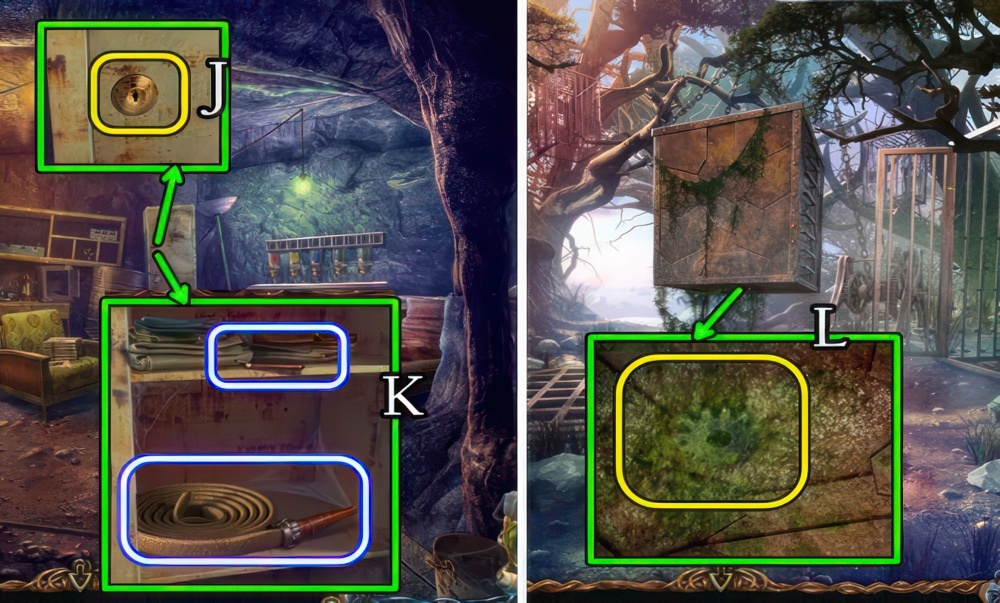
- Use the UNBENT PAPER CLIP (J).
- Take the FIRE HOSE and FLINT STONE (K).
- Return to the Island of Exile.
- Combine the LEMON and KNIFE for a HALF A LEMON.
- Use HALF A LEMON (L), receive a GEAR.
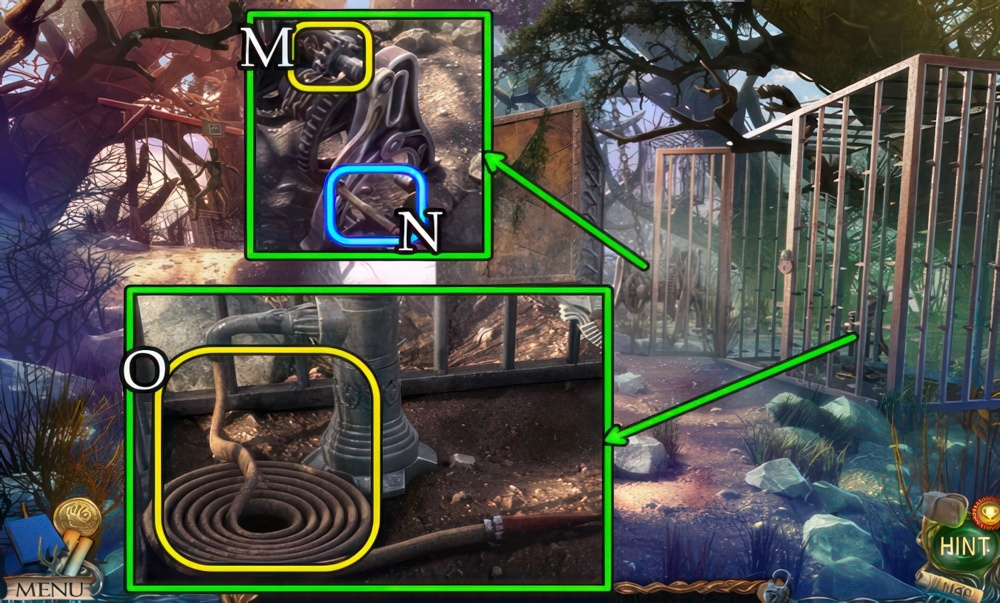
- Place the GEAR (M) and pull (N).
- Place and select the FIRE HOSE (O).
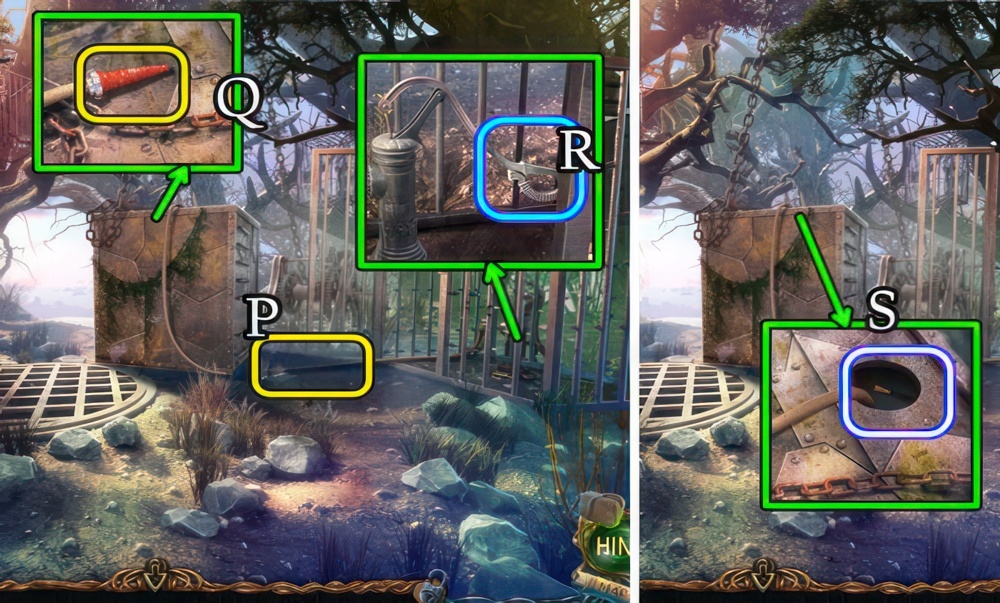
- Select (P-Q).
- Touch (R).
- Take the BRUSH (S).
- Return to the Ancient Graveyard.
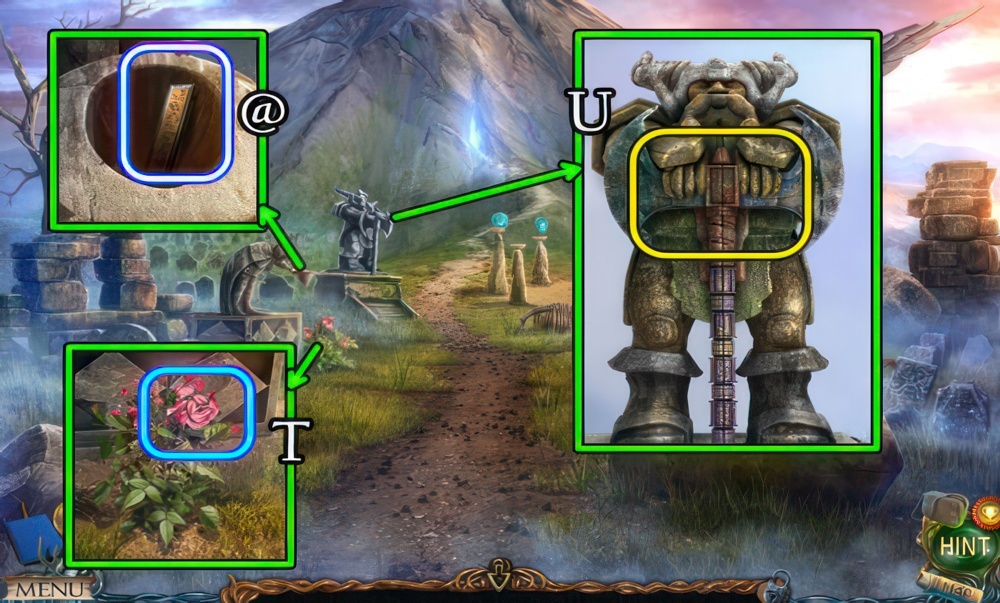
- Replace the bush with the YOUNG ROSE BUSH, use the BLESSED WATER.
- Take the BUTTON (@).
- Select the rose (T), take ROSE PETALS.
- Place the PAINT SET and BRUSH (U).

- Paint all parts of the statue the right color.
- Walkthrough (U1).
- Take the TNT (V).
- Return to the Island of Exile.
The Forgery
Braeloff left me complete instructions on how to forge an amulet for the Harpy. Unfortunately I have to do it myself.
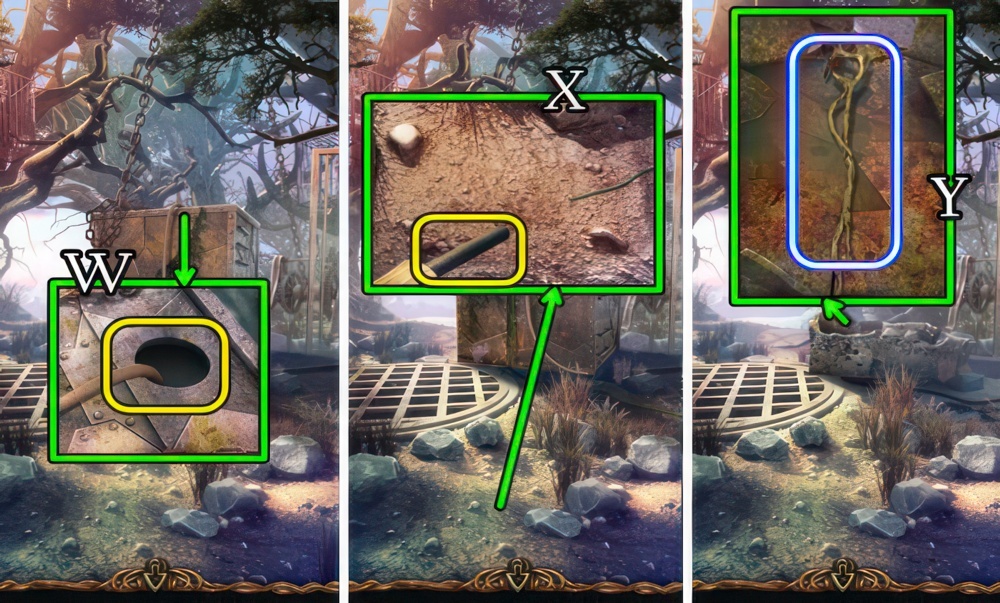
- Place the TNT (W).
- Use the FLINT STONE (X) and KNIFE.
- Go forward.
- Take MAARONS STAFF (Y).
- Return to the Elders House.
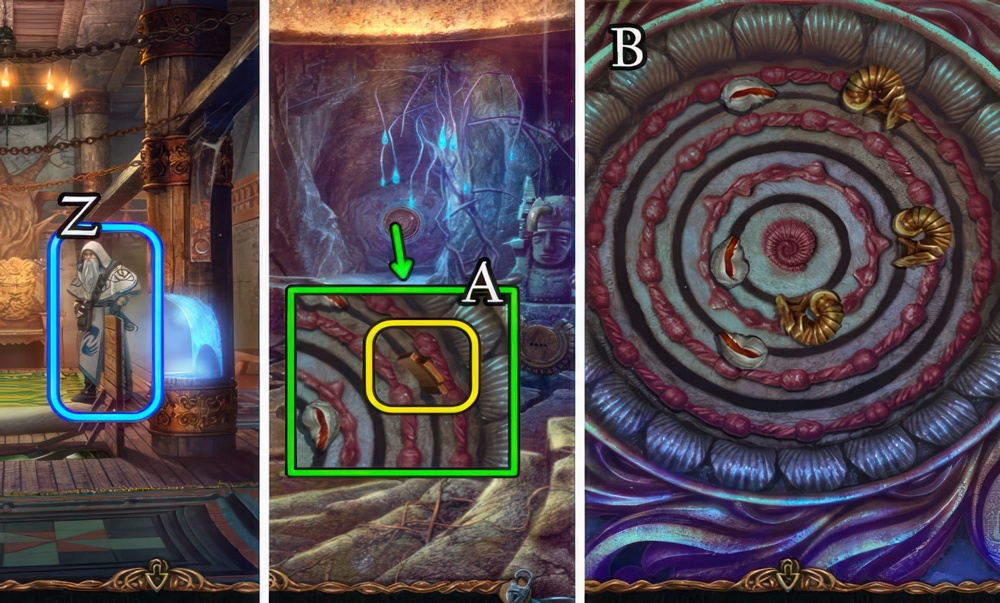
- Give MAARONS STAFF (Z), receive a DRAGON FIGURINE.
- Return to the Cave.
- Place the DRAGON FIGURINE (A).
- Rotate the disks so that all the beams are lit.
- Walkthrough (B).
- Go forward.

- Play the puzzle (C) for a CAULDRON.
- Go left.
- Use the KNIFE (D).
- Touch (E).
- Touch (F).
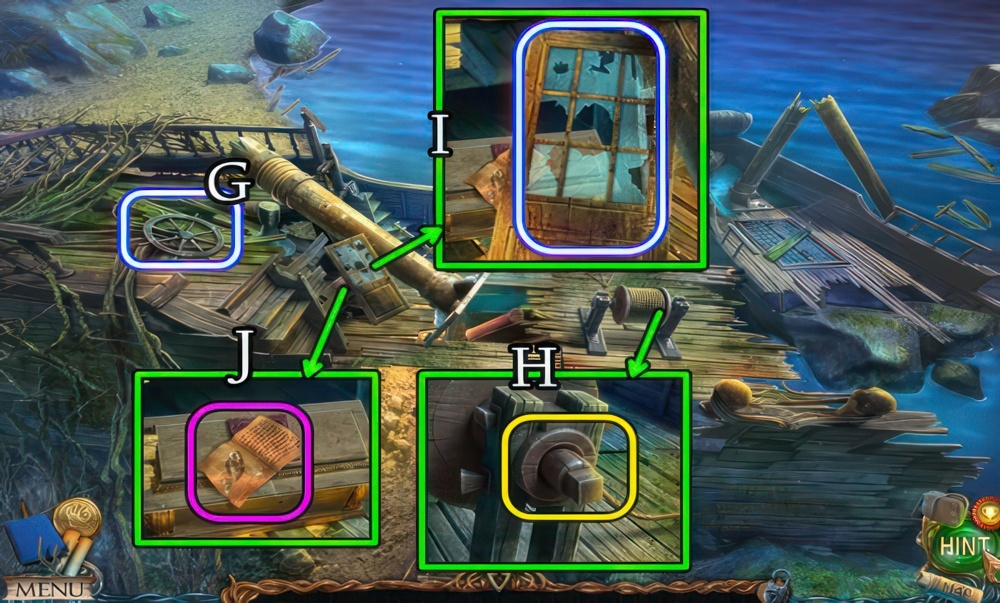
- Take (G), then place the STEERING WHEEL (H).
- Take the DOOR (I) and Manuscripts 21/28 (J).
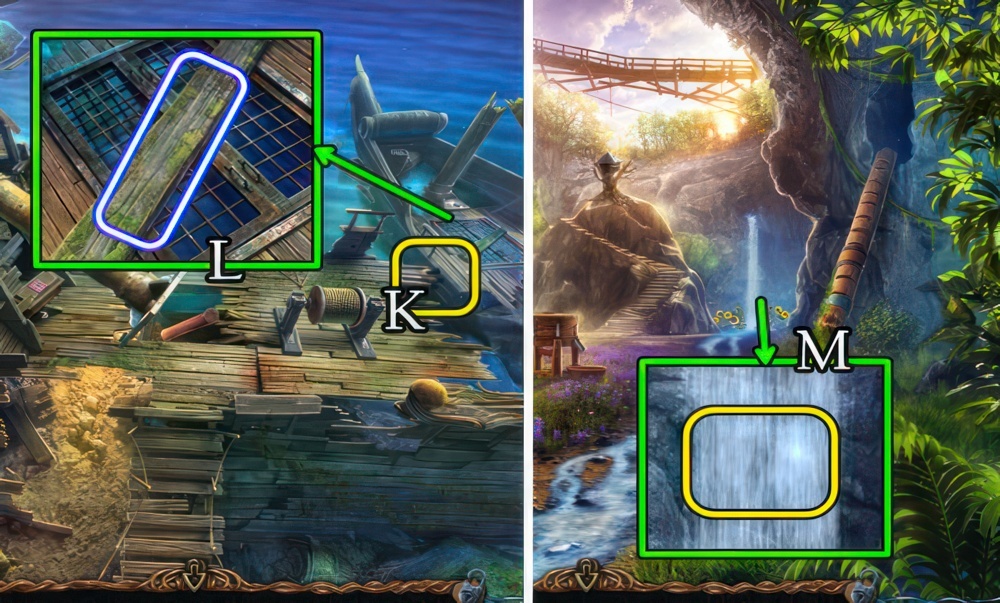
- Place the DOOR (K).
- Take the LONG LOG (L).
- Go down twice and forward.
- Place the CAULDRON for a CAULDRON OF WATER (M).
- Climb the steps.
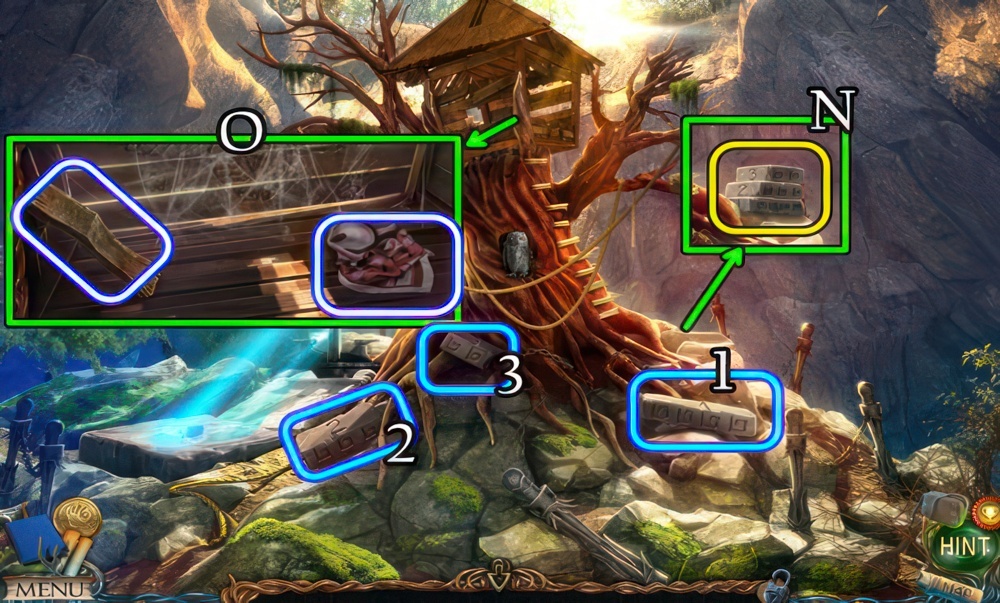
- Place the rocks 1-2-3 (N).
- Take the SILK HEADSCARF and STEP 3/4 (O).
- Return to Anvil Peak.
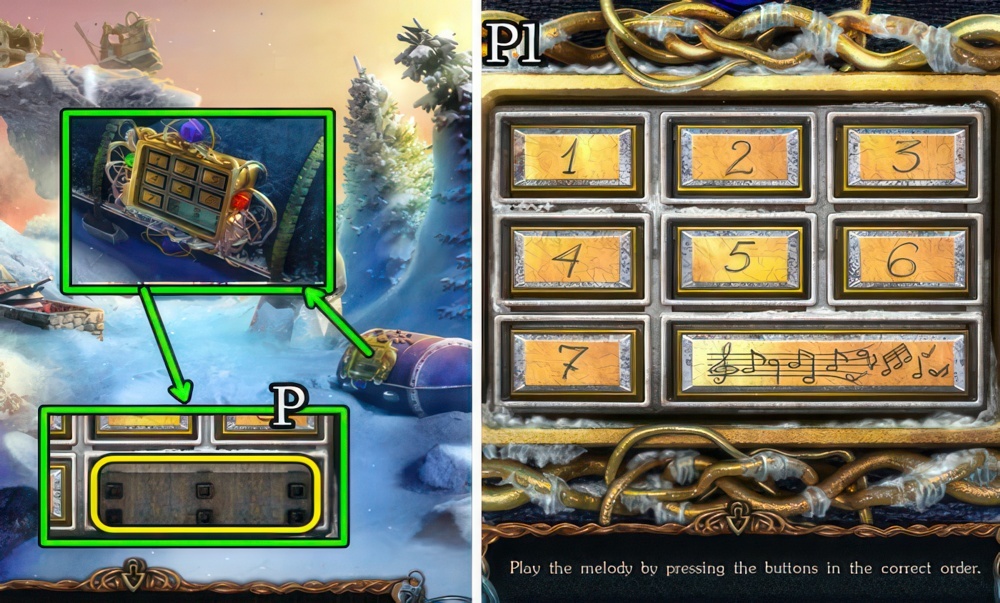
- Place the BUTTON (P).
- Play the melody by tapping the hammers in the correct order.
- Walkthrough (P1): 5-3-7-2-4-6-1.
Maaron’s Staff
Fiora mentioned she that she has seen how the Harpy used Maarons’ Stuff with the Cube. I have to find the staff.
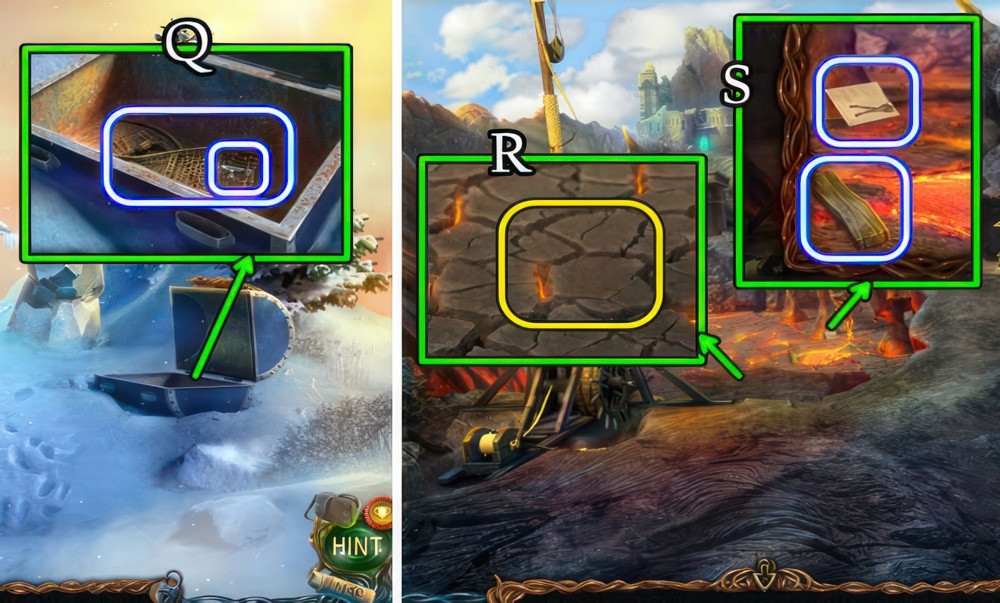
- Take the ANVIL TILE and SNOW SHOES (Q).
- Return to the Volcanic Crater.
- Place the SNOW SHOES (R).
- Take the PACKAGE OF NYLONS and STEP 4/4 (S).
- Return to the Fishermans Hut.

- Place the STEPS 4/4 (T).
- Play the puzzle (U) for a MECHANICAL EYE.
- Return to the Arena.
- Take SOLIDUSS CURSED KNUCKLES (V), the CURSED MINOTAUR AMULET (W) and GOLD MASK (X).
- Go down.
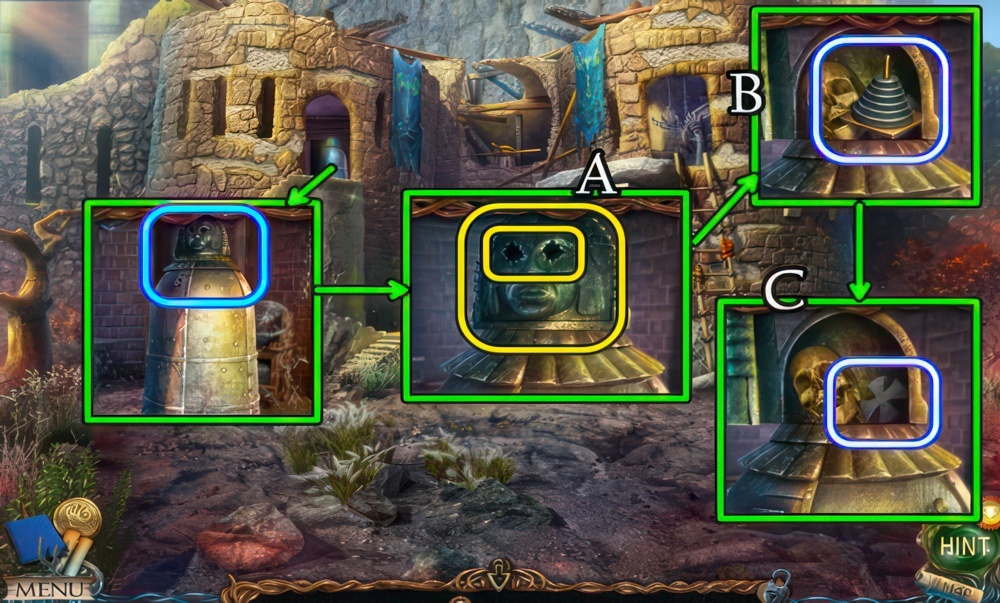
- Place each MECHANICAL EYE and the GOLD MASK (A).
- Take the STACKING TOY (B) and TILE-KEY (C).
- Return to the CAVE.
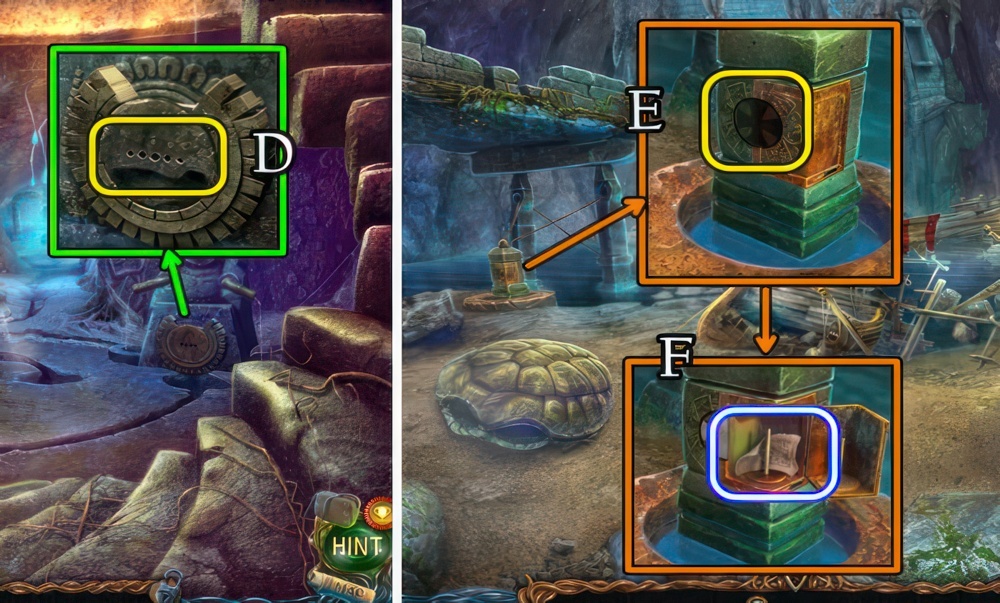
- Place, then select SOLIDUSS CURSED KNUCKLES (D).
- Go forward.
- Place the TILE-KEY (E).
- Take the GLUE FORMULA (F).
- Return to the Fishermans Hut.
Good News
I’ve beaten the Harpy, freed Fiora and found the staff! I have to tell Maaron.

- Speak to the woman (G), receive SCISSORS.
- Return to the Hills.
- Use the SCISSORS for HORSES MANE 1/3, 2/3, 3/3 (H-I-J).
- Return to the Hanging Gardens.
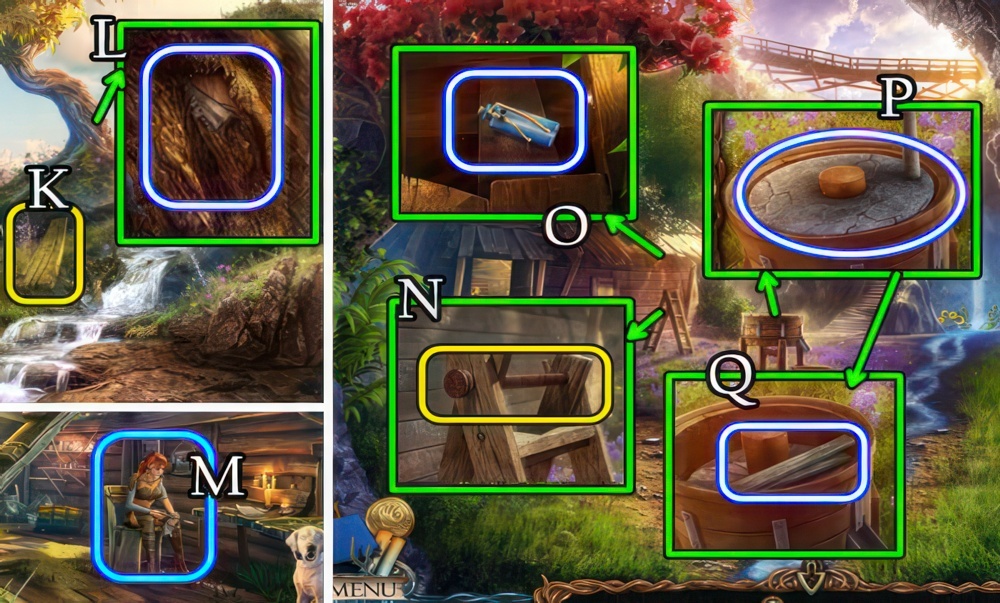
- Place the LONG LOG (K).
- Use the KNIFE to get CORKWOOD BARK (L).
- Return to the Fishermans Hut.
- Give HORSES MANE 3/3 and CORKWOOD BARK (M).
- Receive an AXIS PIN.
- Go down.
- Place the AXIS PIN (N).
- Move the branches, take the FLASK (O).
- Take the BROKEN MILLSTONE DISK (P) and WOODEN BOARDS (Q).
- Return to Anvil Peak.
The Book of Spells
In order to find a way to get rid of the curse, Maaron needs a certain Book of Spells. I have to find it and bring it to him.
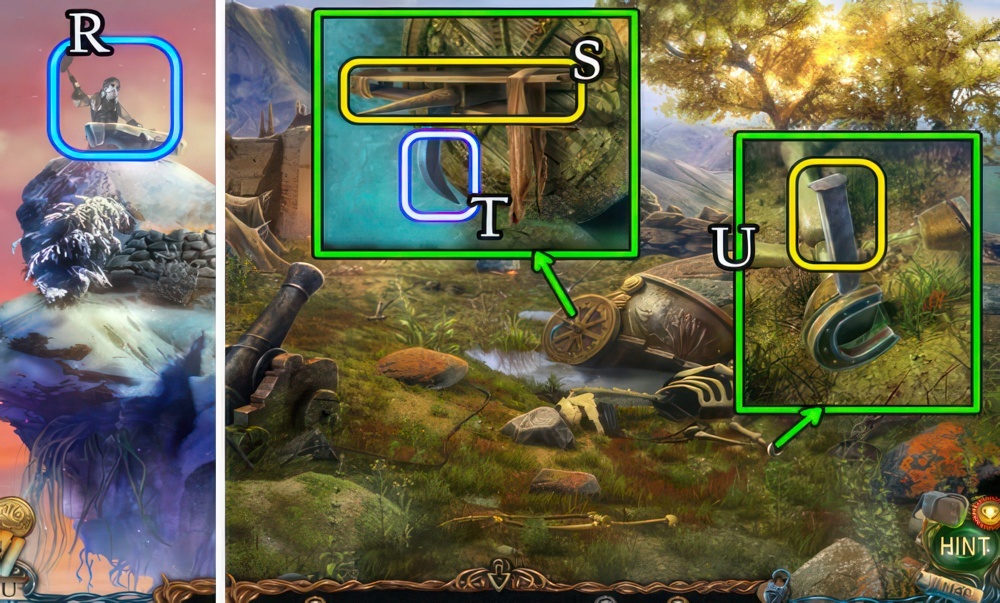
- Give the BROKEN MILLSTONE DISK (R), receive a CHISEL.
- Return to the Plains of the Dead.
- Open and select the PACKAGE OF NYLONS for NYLON STOCKINGS.
- Combine the WOODEN BOARDS, NYLON STOCKINGS and KNIFE for a HOMEMADE LEVER.
- Place the HOMEMADE LEVER (S).
- Select twice.
- Take the HOOKS BLADE (T).
- Use the CHISEL and HAMMER, take a HORSESHOE (U).
- Return to Anvil Peak.
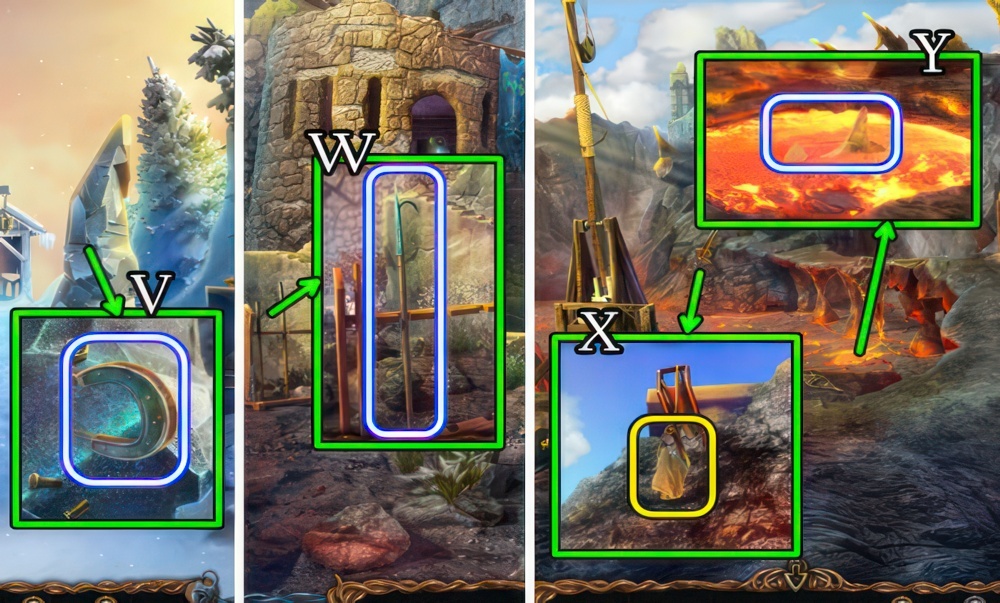
- Place the HORSESHOE (V).
- Take a MAGNETIZED HORSESHOE.
- Return to the Arena Entrance.
- Combine the HOOKS BLADE and HAMMER for a HOOK.
- Place the HOOK, take a POLE HOOK (W).
- Go down.
- Use the POLE HOOK for a GLOVE and PIECE OF A GLOBE (X).
- Combine the MAGNETIZED HORSESHOE and GLOVE for an ENCHANTED HORSESHOE WITH GLOVE.
- Use the ENCHANTED HORSESHOE GLOVE for a CHAIN-MAIL FISH (Y).
- Return to Anvil Peak.
The Castle of Madness
People say the Castle is located deep in the Underground Caverns. I have to find someone who knows the area well.
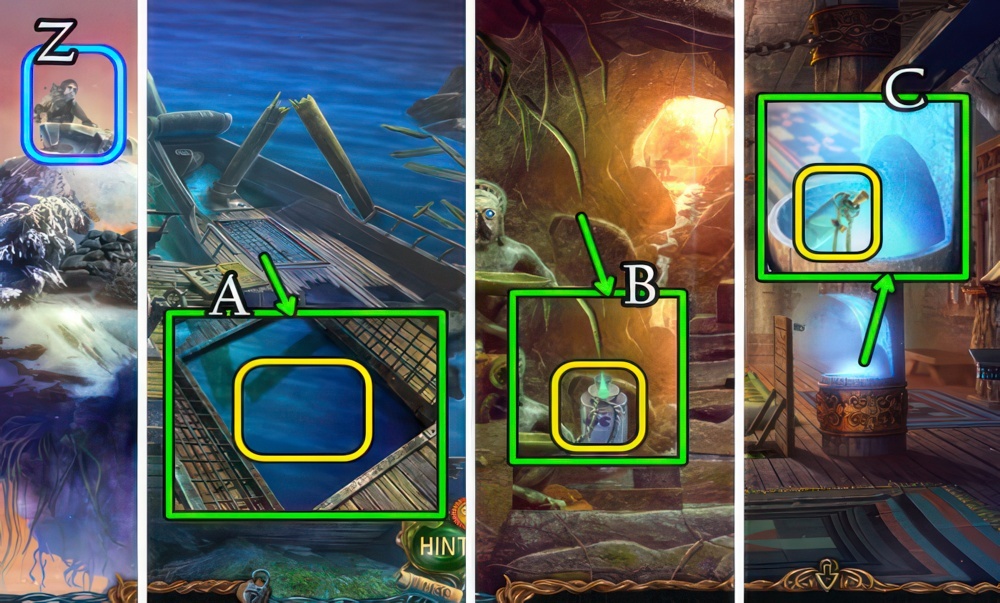
- Give the CHAIN-MAIL FISH (Z).
- Receive a FIXED MILLSTONE DISK.
- Return to the Schooner Wreckage.
- Untie the FLASK for a note and FLASK FOR ELIXIR.
- Open the hatch.
- Place the FLASK FOR ELIXIR (A), receive a FLASK OF LAKE WATER.
- Go down twice.
- Place the FLASK OF LAKE WATER (B), receive a POTION FLASK.
- Return to the Elders House.
- Place the POTION FLASK (C) for an ELIXIR OF WATERBREATHING.
- Return to the Schooner Wreckage.
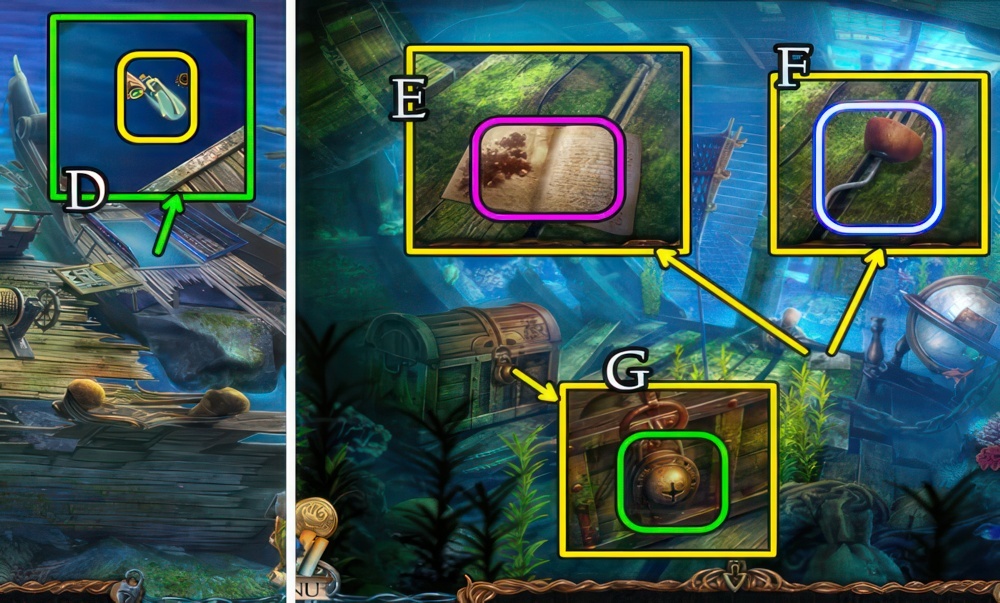
- Place the ELIXIR FOR WATERBREATHING (D).
- Take Manuscripts 22/28 (E).
- Take the PIRATE HOOK (F).
- Use the PIRATE HOOK (G).
Cursed Net
Using an ordinary net, which Sandra can make for me, I have to make a golden one, using the cursed golden mask.
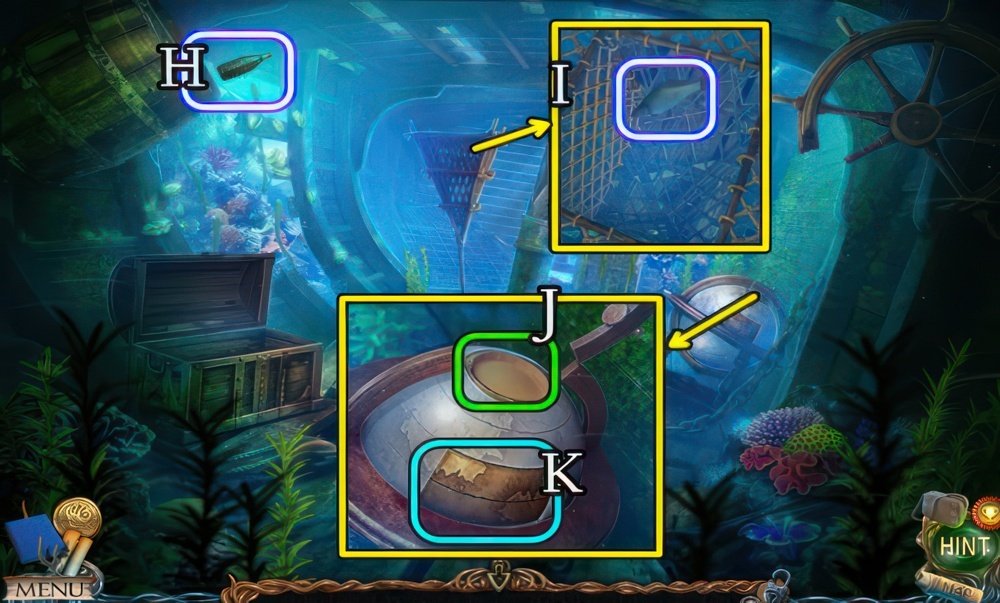
- Take the BOTTLE WITH A LETTER (H).
- Open and take the FISH (I).
- Unlatch and place the PIECE OF A GLOBE (J).
- Select (K).
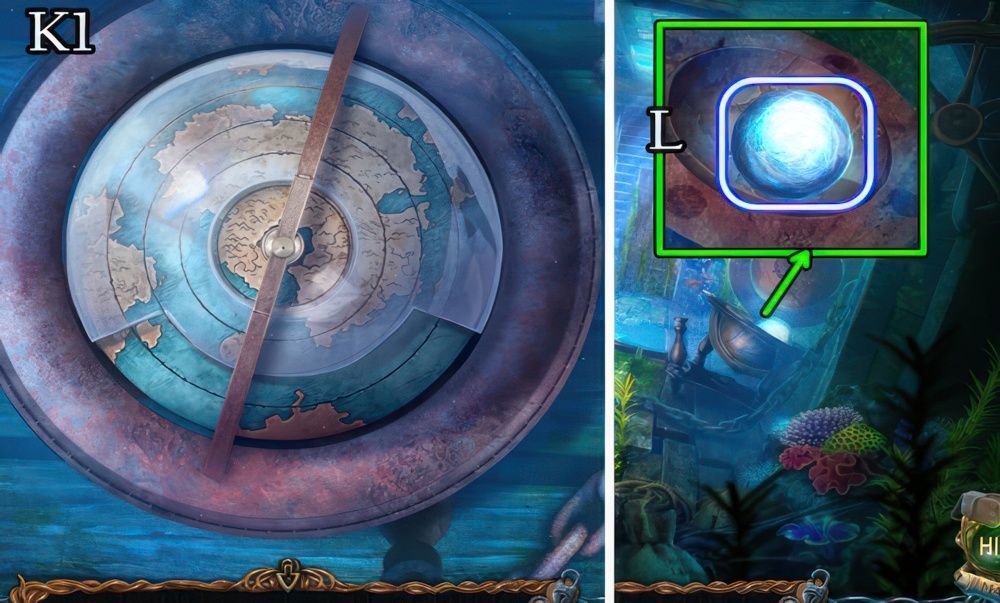
- Rotate the disks to restore the map.
- Walkthrough (K1).
- Take the ENERGY BALL (L).
- Return to the Fishermans Hut.
- Receive a FISHING NET.
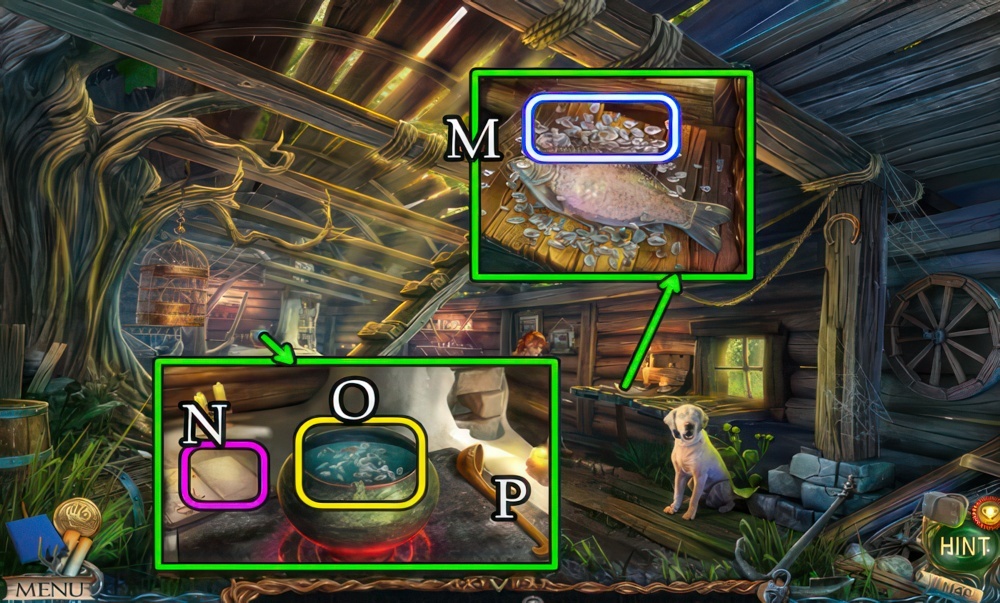
- Place the FISH, use the KNIFE, take FISH SCALES (M).
- Place and select the GLUE FORMULA (N).
- Place the CAULDRON OF WATER.
- Add the FISH SCALES (O).
- Stir (P).
- Add the FISHING NET for a GLUE-COVERED NET.
- Go down.
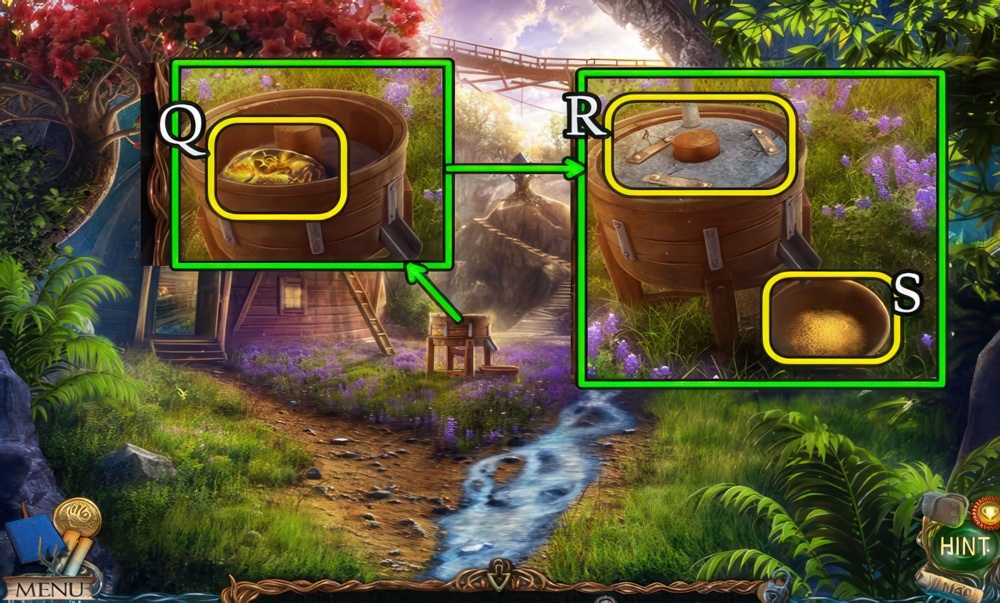
- Place the GOLD MASK (Q).
- Place and select the FIXED MILLSTONE DISK (R).
- Place the GLUE-COVERED NET (S).
- Take a CURSED NET.
- Return to the Underground Lake.
The Glue
I have to prepare fish-scale glue while Sandra is working on her net.

- Place the CURSED NET (T).
- Go left.
- Select (U-V).
- Select (W) and use the KNIFE.
- Use the HAMMER (W1), take the STACKING TOY.
- Go down.
Chain-mail Fish
Braeloff asked for a chain-mail fish in order to fix the millstone part.
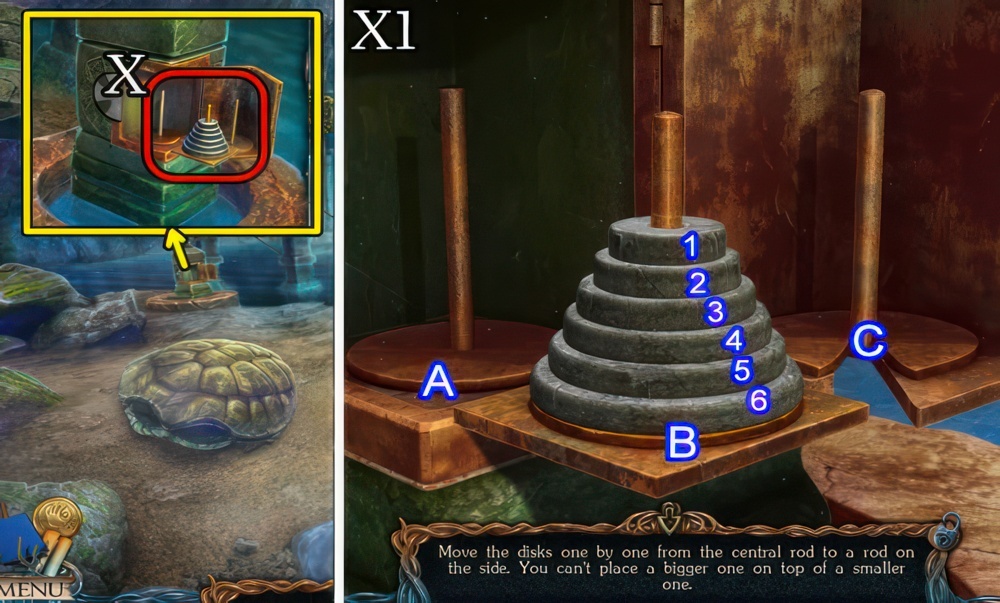
- Place the STACKING TOY (X).
- Move the disks one by one from the central rod to a rod on the side.
- You can’t place a bigger one on top of a smaller one.
- Walkthrough (X1): (1-A)-(2-C)-(1-C)-(3-A)-(1-B)-(2-A)-(1-A)-(4-C)-(1-C)-(2-B).
- (1-B)-(3-C)-(1-A)-(2-C)-(1-C)-(5-A)-(1-B)-(2-A)-(1-A)-(3-B)-(1-C)-(2-B)-(1-B)-(4-A).

- Walkthrough (X2-X3): (1-A)-(2-C)-(1-C)-(3-A)-(1-B)-(2-A)-(1-A)-(6-C)-(1-C)-(2-B).
- (1-B)-(3-C)-(1-A)-(2-C)-(1-C)-(4-B)-(1-B)-(2-A)-(1-A)-(4-B).
- (1-C)-(2-B)-(1-B)-(5-C)-(1-A)-(2-C)-(1-C)-(3-A)-(1-B)-(2-A).
- (1-A)-(4-C)-(1-C)-(2-B)-(1-B)-(3-C)-(1-A)-(2-C)-(1-C).
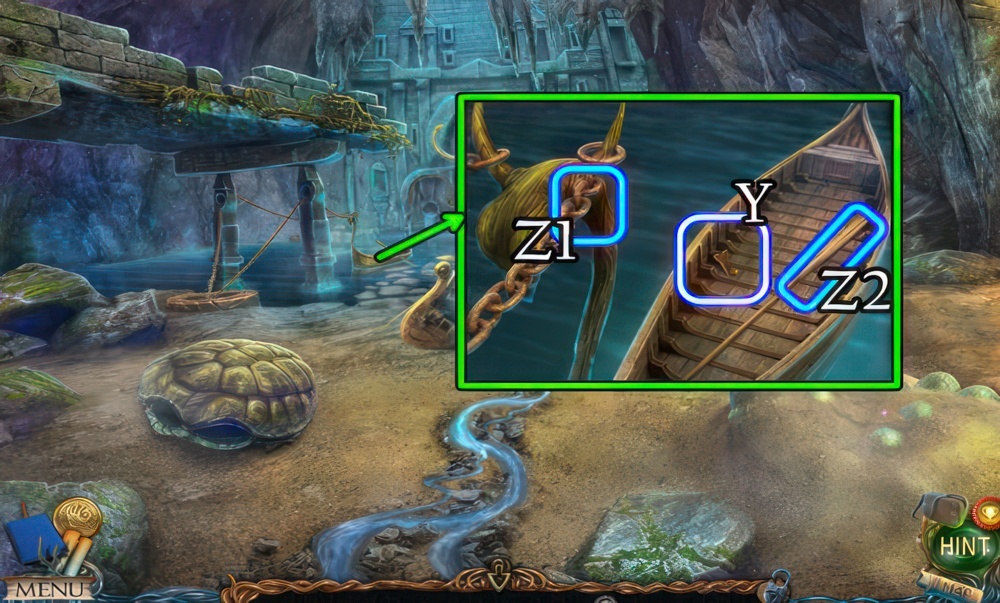
- Take the KEY PART (Y).
- Touch (Z1-Z2).
- Go forward.
- Grab the WOOD SAW (A).
- Take the STONE TILE (B).
- Take Manuscripts 23/28 (C).
- Return to the Harpys Nest.
- Place the STONE TILE (E).
- Take the KEY PART (F).
- Pull the lever (G).
- Play the puzzle (H), receive an ENERGY BALL.
- Return to the Arena Entrance.
- Combine both KEY PARTS for a KEY.
Horn
I have to blow the horn to get the Minotaur out of his lair. But before I do, I have to swap out the old bellows with new ones.
- Place and select the KEY (I).
- Take ATLASS ARM (J).
- Return to the Schooner Wreckage.
- Take the KEY from ATLASS ARM.
- Use the KEY (K).
- Take ATLASS ARM (L).
- Return to the Castle of Madness.
- Place each ENERGY BALL (M-N).
- Select (O).
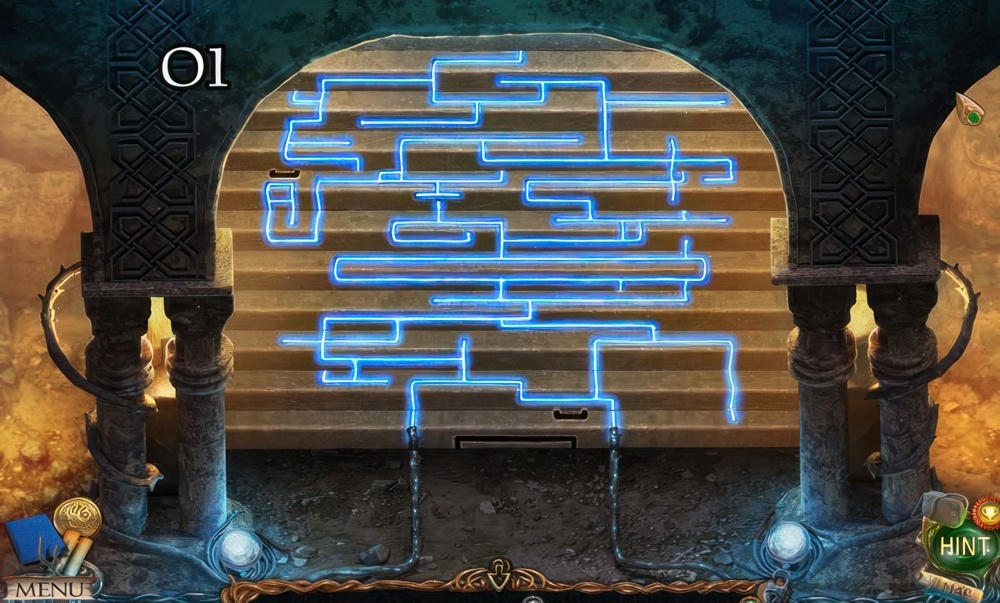
- Move the steps to connect the first to the last.
- Walkthrough (O1).
- Take a DIAMOND KEY from ATLASS ARM.

- Place each of ATLASS ARMS (P).
- Go forward.
- Take (Q), then place the PIECE OF PATTERN (R).
- Take Manuscripts 24/28 (S).
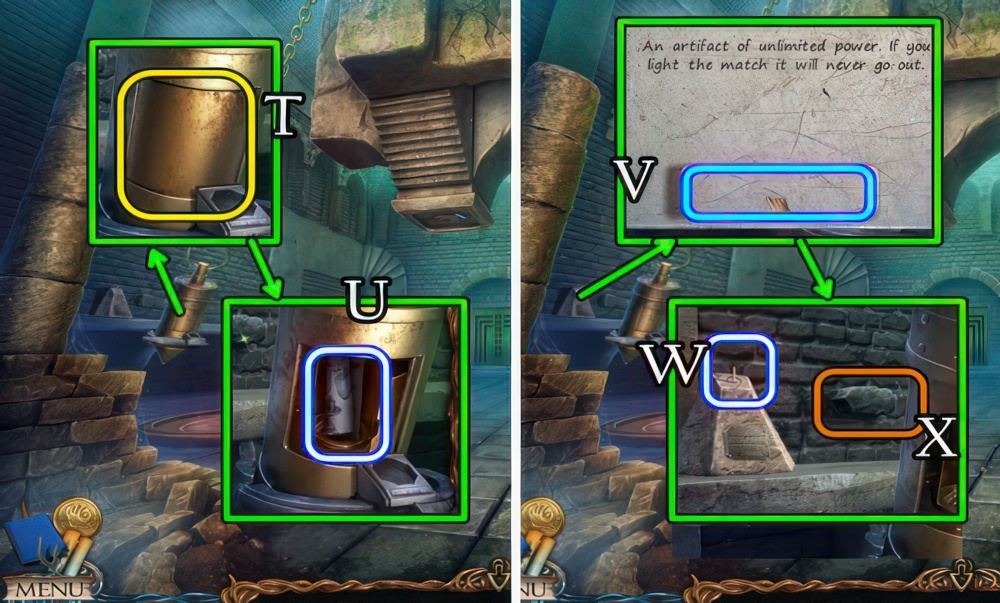
- Touch twice (T).
- Take the INK FORMULA (U).
- Touch (V).
- Take the EVERLASTING MATCH (W).
- Touch (X).

- Take the LIPSTICK (Y).
- Place the DIAMOND KEY (Z).
- Go right.

- Grab the SUNGLASSES (A).
- Take the LENS (B).
- Place the LIPSTICK (C).
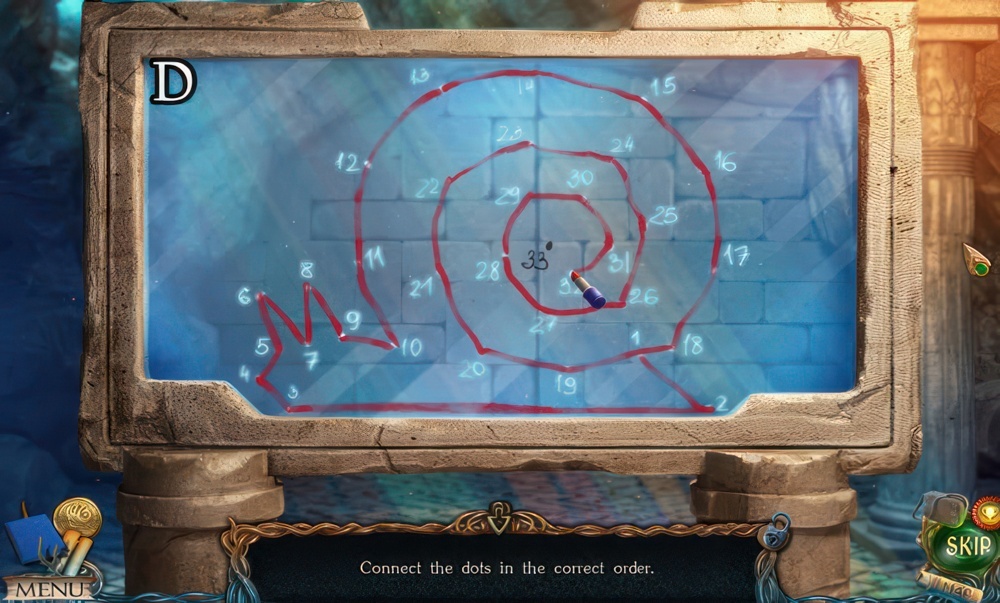
- Connect the dots in the correct order.
- Walkthrough (D).
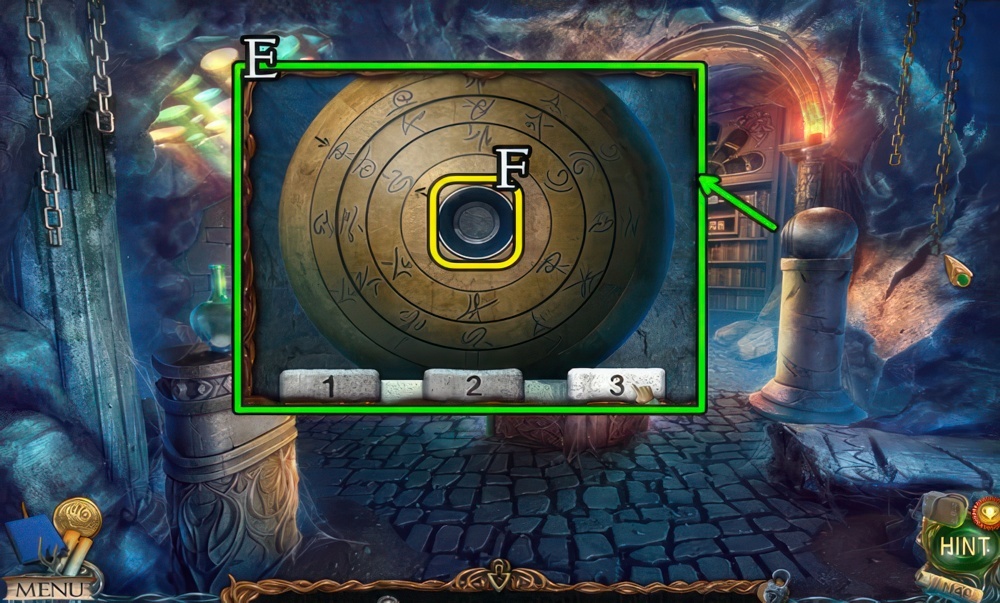
- Enter the correct code. You saw a hint earlier.
- Walkthrough (E): 1×2-2×10-3×6.
- Place the LENS (F).
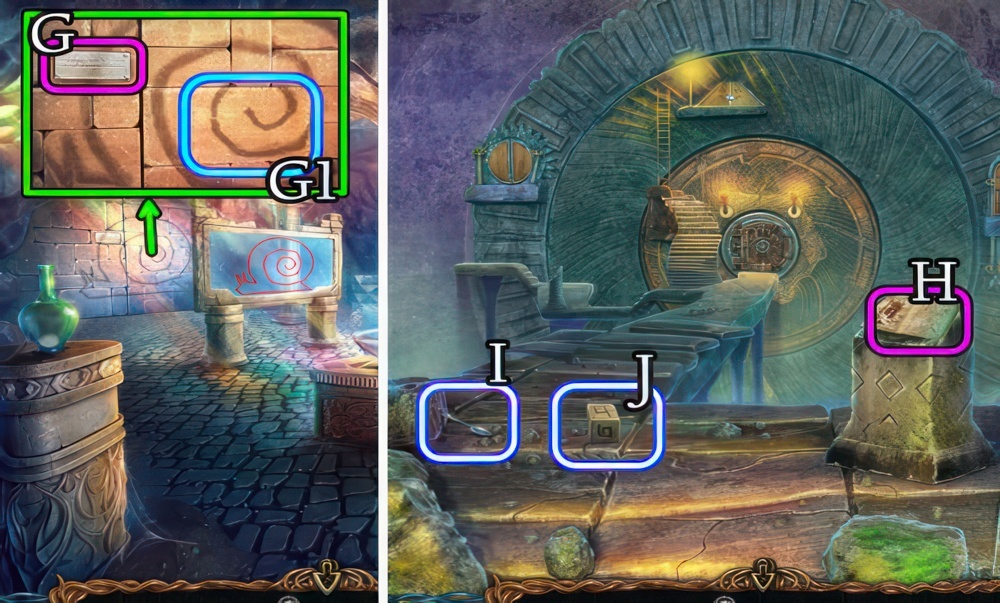
- Touch (G-G1).
- Go left.
- Take Manuscripts 25/28 (H).
- Grab the SPOON (I) and STONE BLOCK (J).
- Return to the Tree of Life.
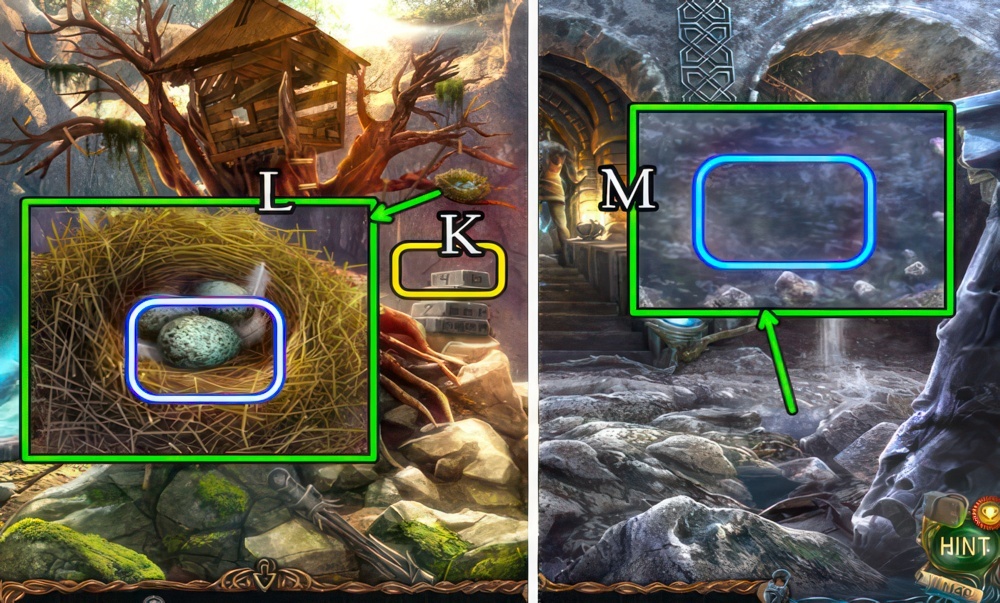
- Place the STONE BLOCK (K).
- Take the EGG (L).
- Return to the Castle of Madness.
- Place the EGG (M).
- Use the SPOON for a BOILED EGG.
- Select the BOILED EGG for a peeled BOILED EGG.
- Go forward and right.
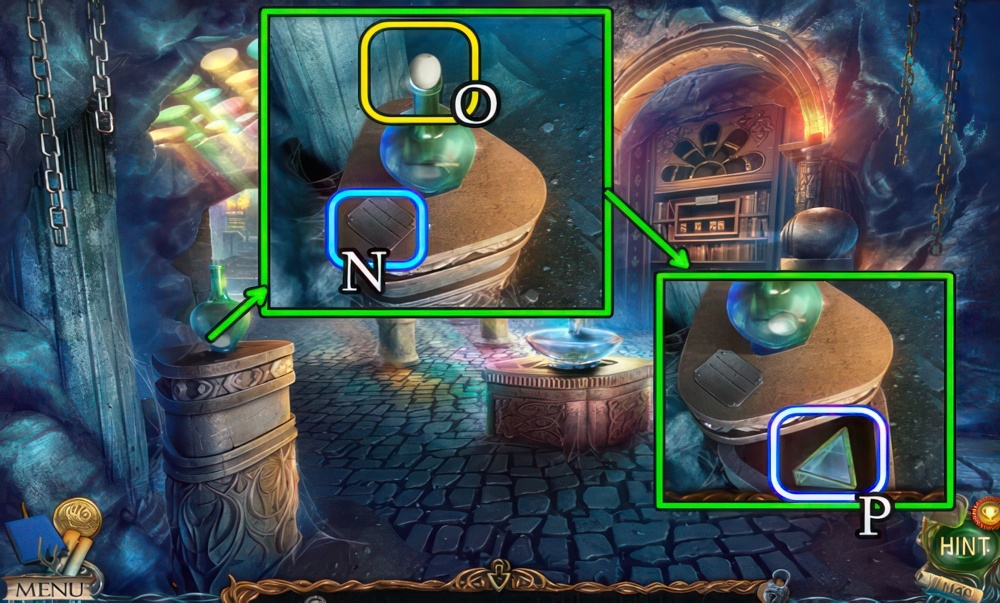
- Select (N).
- Place the EVERLASTING MATCH and BOILED EGG (O).
- Take the CRYSTAL PYRAMID (P).
- Go left.

- Place the CRYSTAL PYRAMID and CURSED MINOTAUR AMULET (Q).
- Take the HAND WHEEL KEY (R).
- Place the HAND WHEEL KEY (S).
- Go forward.
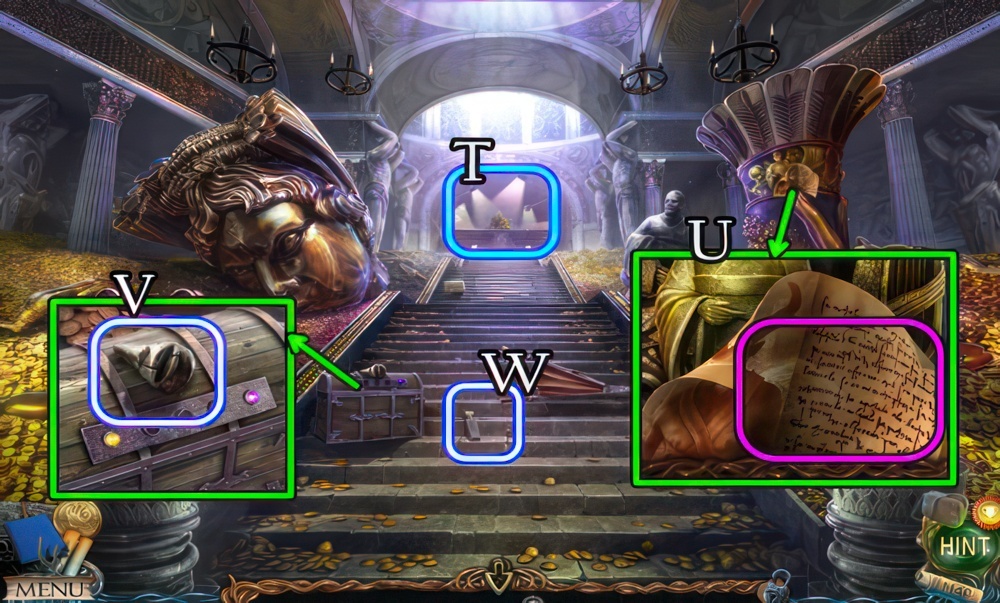
- Speak to the man (T), receive DIAMONDS AND GRAINS.
- Take Manuscripts 26/28 (U).
- Take the PIECE OF THE STATUE (V) and BOTTLE OF COLOGNE (W).
- Select (X).
- Walkthrough: 1-3-5-4-2.
- Play the puzzle (Y), receive an EMPTY CARTRIDGE.
- Return to Anvil Peak.
- Speak to the blacksmith (Z), receive a METAL SAW.
- Return to the Island of Exile.
- Use the METAL SAW (A).
- Take the CUBE TILE and KEY (B).
- Return to the Underground Lake.
- Use the KEY (C).
- Take the CORKSCREW and LEATHER ROLL (D).
- Combine the BOTTLE WITH A LETTER and CORKSCREW.
- Receive an EMPTY BOTTLE and NOTE.
- Return to the Hanging Garden.
- Place the NOTE (E).
- Return to the Schooner Wreckage.
- Walkthrough (F).
- 1-2-3-4-5.
- Take the TRACING PAPER (G).
- Return to Anvil Peak.
- Give the LEATHER ROLL and SUNGLASSES (H), receive a SLIDING BOLT KEY.
- Place and select the SLIDING BOLT KEY (I).
- Take the BELLOWS (J).
- Return to the Fishermans Hut.
- Place the DIAMONDS AND GRAINS (K).
- Slide the drawer in, then out.
- Take the DIAMONDS (L).
- Return to Leprochs House.

- Take the FLASK OF BLACK PAINT (M).
- Return to the Tavern.
- Place the EMPTY BOTTLE (N), select (O) for a BOTTLE OF WINE.
- Place the INK FORMULA (P), FLASK OF BLACK PAINT (Q), BOTTLE OF WINE (R) and BOTTLE OF COLOGNE (S).
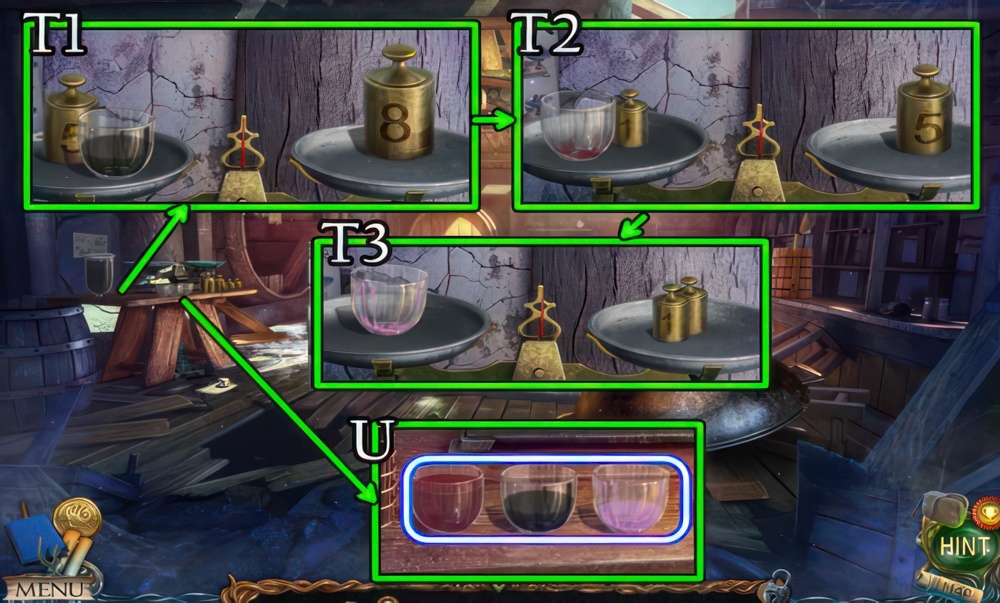
- Follow the recipe and measure out the required quantity of ingredients.
- Walkthrough (T1-T2-T3).
- Take the INK INGREDIENTS (U).
- Return to the Labyrinth.
- Combine the EMPTY CARTRIDGE and INK INGREDIENTS for a CARTRIDGE.

- Place the CARTRIDGE (V) and select, take the KEY.
- Place the KEY (W).
- Place, then take the TRACING PAPER (X).
- Return to the Volcanic Cavern.
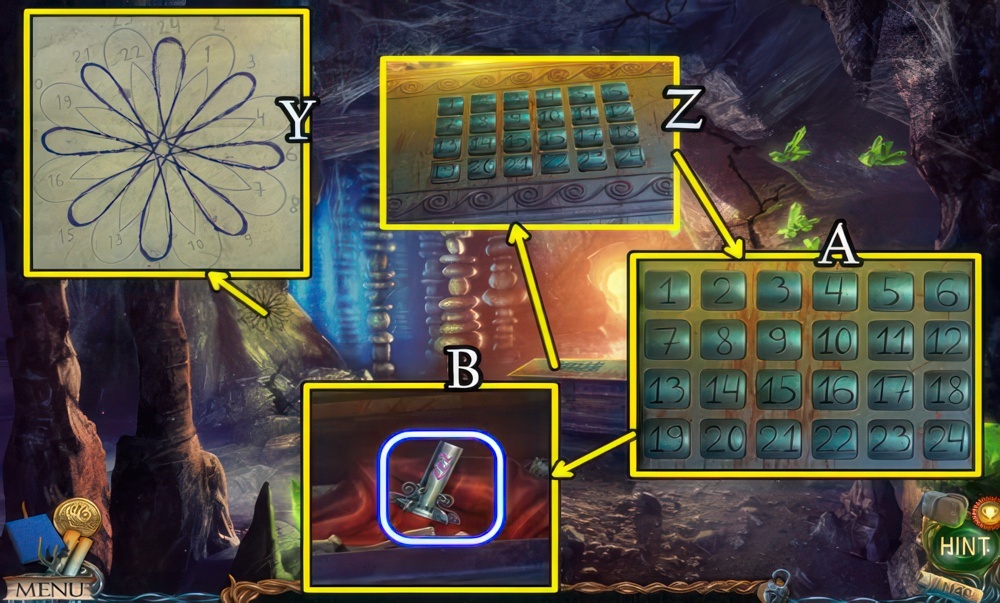
- Place the TRACING PAPER (Y).
- Select (Z).
- Press the buttons in the correct order. You saw the code earlier.
- Walkthrough (A).
- 3-6-9-12-15-18-21-24.
- Take the AIR ELEMENT (B).
- Return to the Room of Insanity.
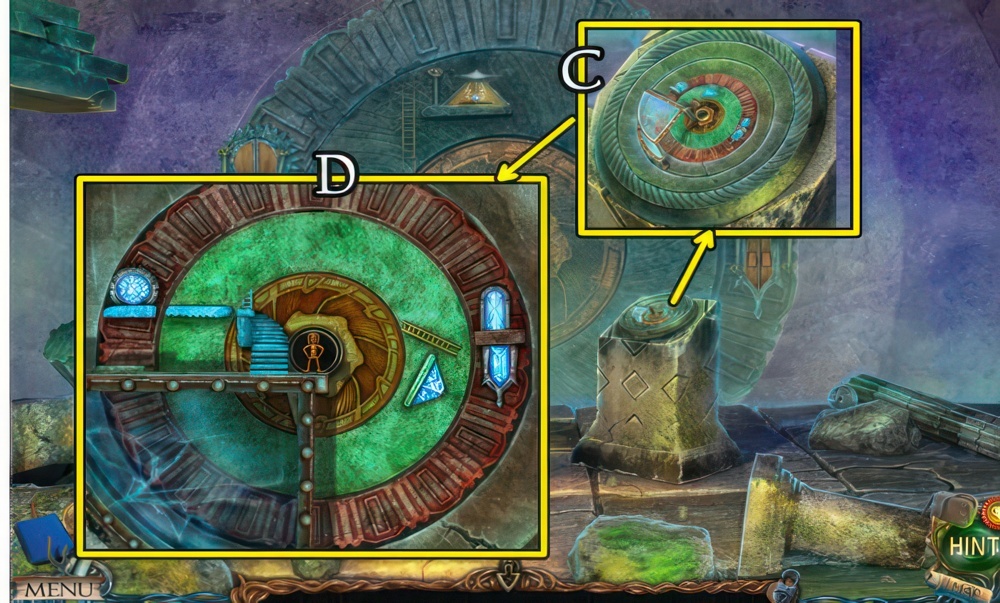
- Select (C).
- Walkthrough (D).
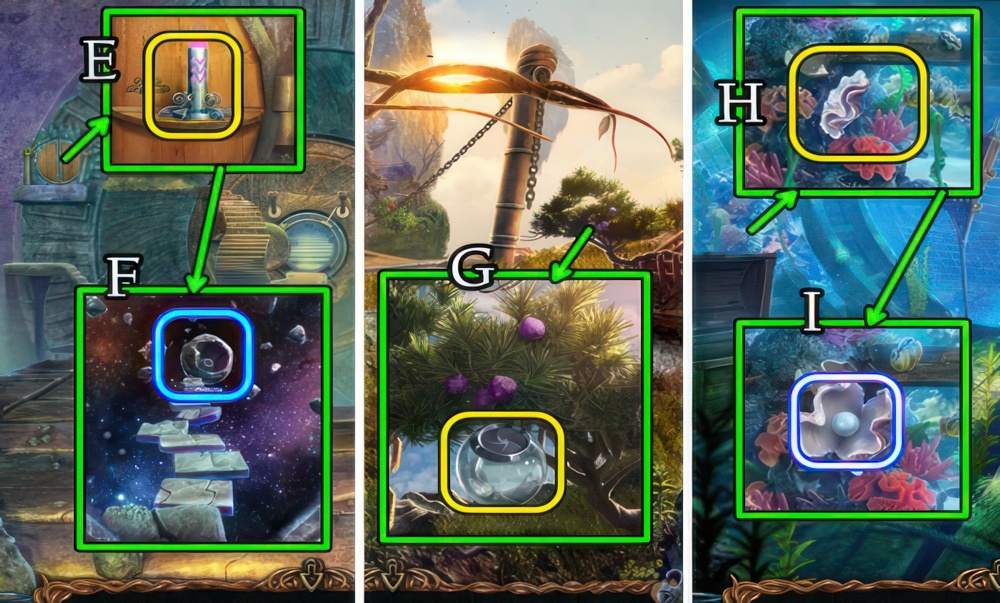
- Place the AIR ELEMENT (E).
- Select twice (F).
- Take the VACUUM CONTAINER.
- Return to the Lower Island.
- Place the VACUUM CONTAINER (G), receive CONES OF PARALYSIS.
- Return to the Sunken Hull.
- Place the CONES OF PARALYSIS (H).
- Use the KNIFE.
- Take the PEARL (I).
- Return to The Safe.

- Give the DIAMONDS and PEARL (J), receive a WHISTLE.
- Remove (K).
- Place the WHISTLE (L) and BELLOWS (M).
- Select the bellows, receive a LEVER.
- Select the bellows.
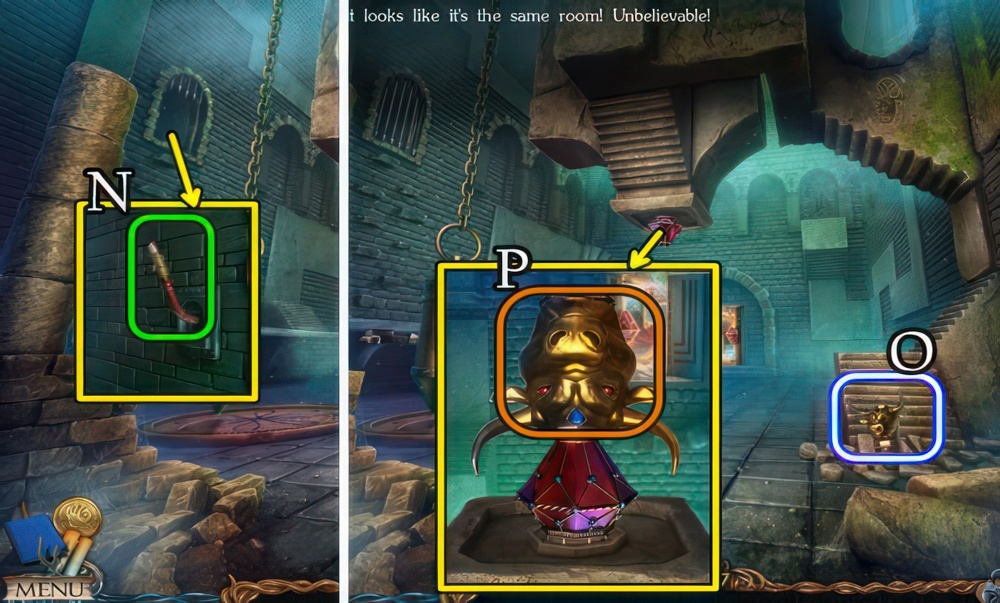
- Place, then select the LEVER (N).
- Take the BULL-HEAD KEY (O).
- Place, then select the BULL-HEAD KEY (P).
- Go right.

- Take Manuscripts 27/28 (Q).
- Grab the RAIL 1/2 (R).
- Uncover and take the TRIDENT (S).
- Take the JUG OF WATER (T), use the TRIDENT.
- Open and take the TILES (U).
- Return to the Room of Riddles.
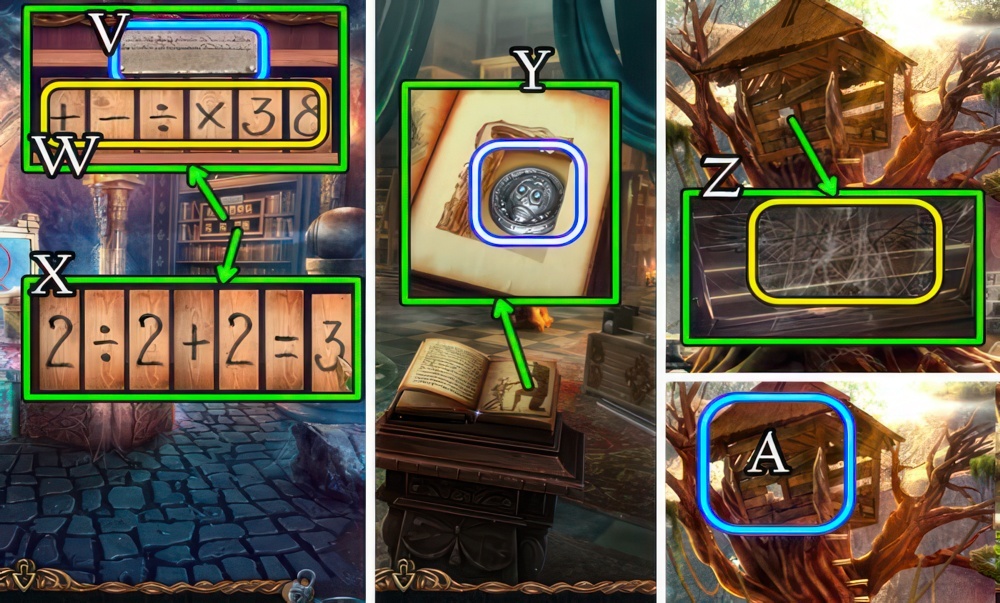
- Select (V).
- Place the TILES (W).
- Move the tiles to get the correct equation.
- Walkthrough (X).
- Go right.
- Turn the page.
- Take the CASKET BUTTON (Y).
- Return to the Tree of Life.
- Use the SILK HEADSCARF (Z).
- Touch (A).
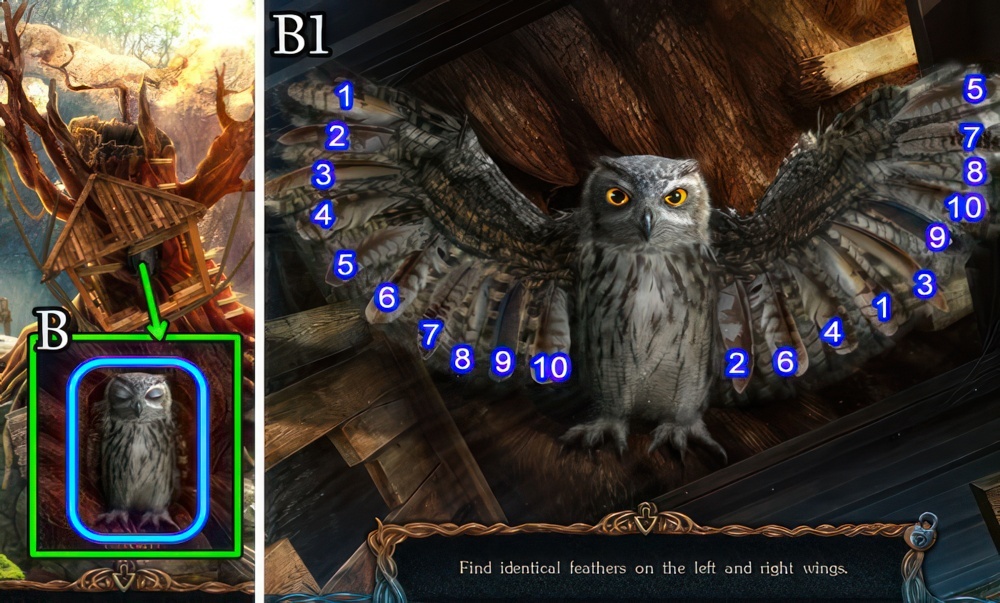
- Select (B) twice.
- Find identical feathers on the left and right wings.
- Walkthrough (B1).
- Place the CASKET BUTTON (C).
- Take the DISK KNIFE (D).
- Return to the Sunken Hull.
- Use the DISK KNIFE (E).
- Play the puzzle (F) for a BENCH PIECE.
- Go down twice.
- Use the BENCH PIECE (G).
- Take METALWORKING SCISSORS (H).
- Return to the Minotaurs Lair.
A Gift for the Minotaur
Yudzhit asked me to get him a pearl for the piece, and also sort out some diamonds that have gotten mixed in with some grains.
- Use the METALWORKING SCISSORS.
- Select for a PIECE OF THE PATTERN (I).
- Return to the Great Library.
- Take RAIL 2/2 (J).
- Place RAILS 2/2 (K).
- Select (L).
A Fair Trade
Braeloff agreed to give me his bellows in exchange for new sunglasses and a piece of leather. I have to find what he’s asking for.
- Place the PIECE OF THE PATTERN (M) and open.
- Take the EMPTY BEAKER (N).
- Uncover and take Manuscripts 28/28 (O).
- Take the KEEPERS MANUSCRIPT (P).
- Return to The Safe.
The Madman’s Manuscripts
Yudzhit told me that his father’s manuscripts are located in the Great Library. He asked me to bring them to him.
- Give the KEEPERS MANUSCRIPT (Q).
- Return to the Minotaurs Lair.
- Place the ROSE PETALS.
- Uncover and take the CURSED BULL RING (R).
Missing Books
The book riddle is missing some of its books. According to Yudzhit, the Minotaur took them. I need to see if that’s the case.
- Pull the lever (S).
- Use the HAMMER (T).
- Take the SIGNET RING.
- Return to the Cave.
- Place the PIECE OF THE STATUE (U).
- Place and select the SIGNET RING (V).
- Take the SAPPHIRE and RUBY (W).
- Select (X).
- Take the EMERALD (Y).
- Return to The Safe.

- Place the SAPPHIRE, RUBY and EMERALD (Z).
- Take the JADE SKULL (A).
- Return to the Ancient Graveyard.
- Place the JADE SKULL (B).
- Select (C).

- Arrange the skulls so that they are all looking toward the center.
- Walkthrough (C1-C2): (F-A)-(C-F)-(B-G)-(B-E)-(B-G)-(C-D)-(B-E)-(E-D)-(D-C)-(E-D)-(E-B).
- Take the WATER ELEMENT (D).
- Return to the Room of Insanity.
Returning the Gold
According to the Book of Spells, we have to return all the gold back to the pedestal on the Arena to break the curse.
- Select (E).
- Walkthrough (F).
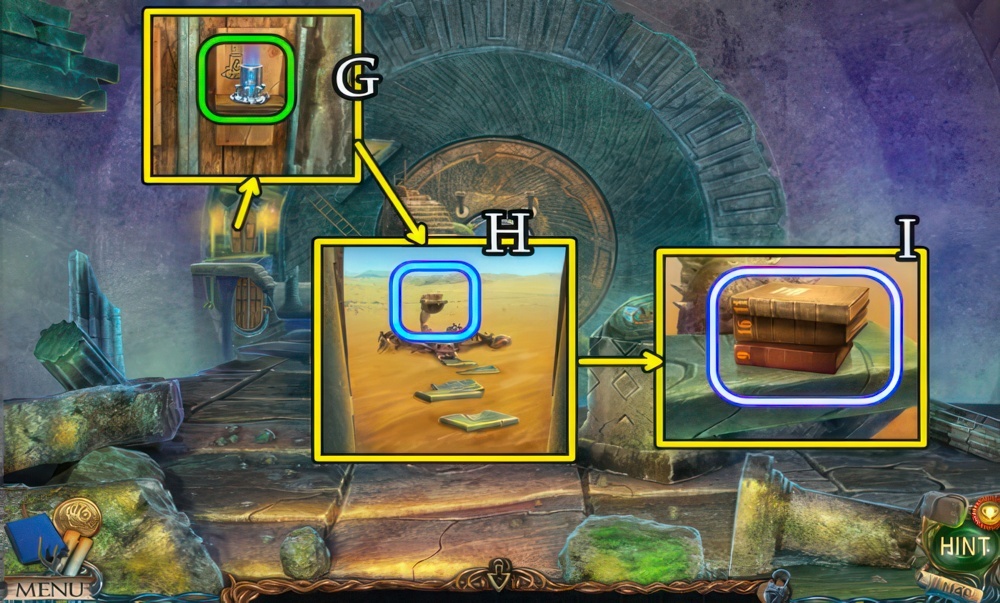
- Place the WATER ELEMENT (G).
- Select (H), then take the BOOKS (I).
- Return to the Great Library.

- Place the BOOKS (J).
- Press the buttons with the numbers that are skipped on the shelf.
- Walkthrough (K): 4-12-17.
- Play the puzzle (L) for a SPELL BOOK.
- Select (M).
- Take the HANGING BUCKET (N).
- Go down.
Resurrection
To get all of the gold back into the chest, I have to be sure that Leproch Conn didn’t hide any of the gold somewhere when he moved the chest out of the Arena. Guess what? Only Leproch Conn knows for sure.
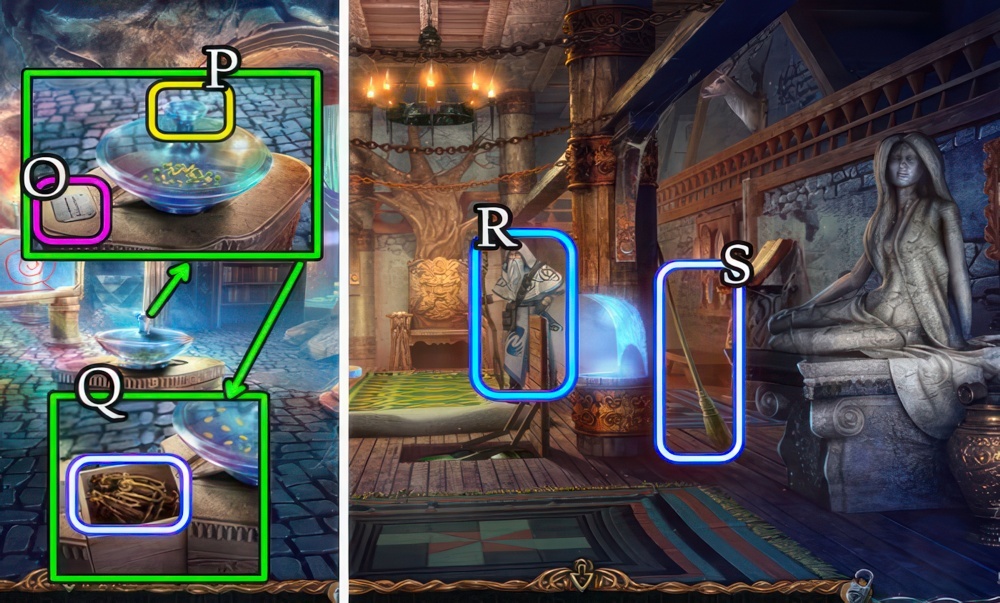
- Select (O).
- Place the JUG OF WATER (P).
- Take the ROPE LADDER (Q).
- Return to the Elders House.
- Give the SPELL BOOK (R), receive a LEVER and ELIXIR OF ANIMATION FORMULA.
- Grab the BROOM (S).
- Return to the Underground Lake.
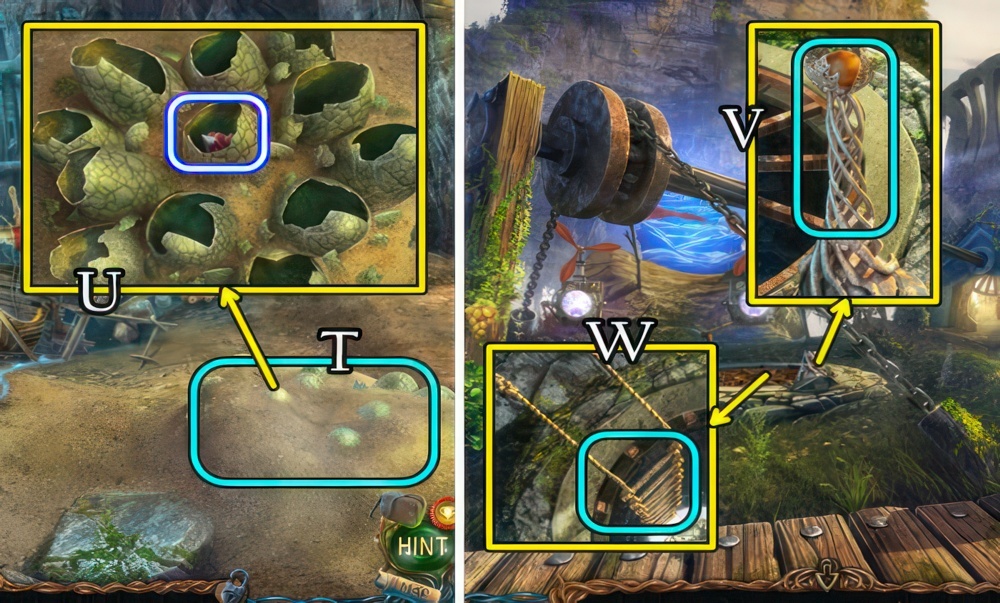
- Use the BROOM (T).
- Break the eggs.
- Take the SWITCH and DRAGON-EGG SHELLS (U).
- Return to the Crossroads.
- Place and select the LEVER (V).
- Place the ROPE LADDER (W).
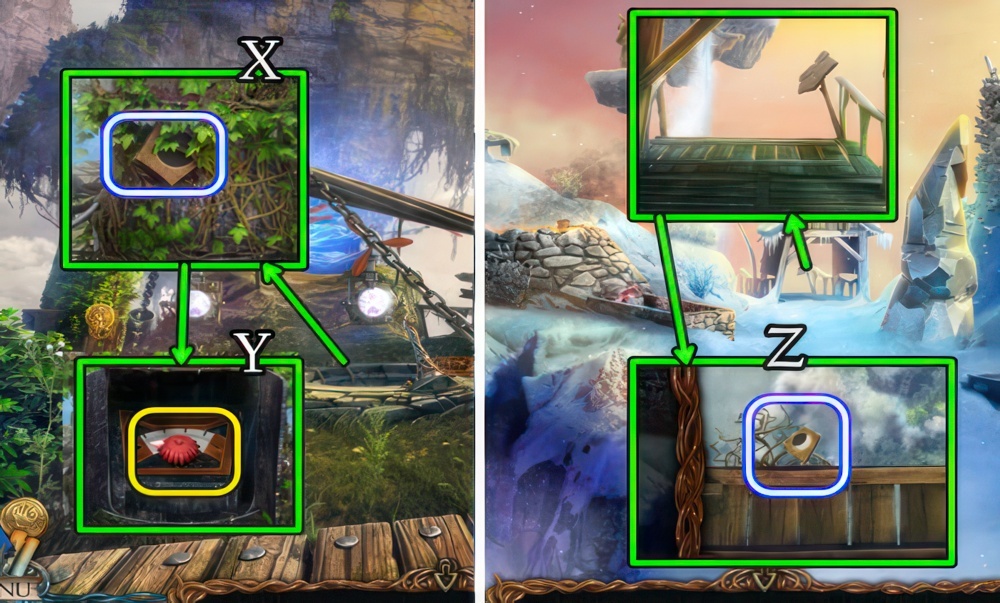
- Take the FULL-ECLIPSE TILE (X).
- Use the KNIFE.
- Uncover to place and select the SWITCH (Y).
- Return to Anvil Peak.
- Use the HANGING BUCKET for a HALF-ECLIPSE TILE (Z).
- Return to the Great Library.

- Place the HALF-ECLIPSE TILE and FULL-ECLIPSE TILE (A).
- Move the tiles into the correct order.
- Walkthrough (B1-B2).
- Select (C).
- Return to Anvil Peak.
- Go left.
- Play the puzzle (D), receive a CROWN PIECE.
- Take the CROWN PART (E).
- Take the FATHER FIGURINE (F).
- Return to the Tree of Life.
- Place the MOTHER FIGURINE and FATHER FIGURINE (G).
- Touch (H).
- Take the TREE OF LIFE FRUIT (I).
- Return to the Elders House.
- Place the EMPTY BEAKER for NYMPHS TEARS (J).
- Place the ELIXIR OF ANIMATION FORMULA (1), DRAGON-EGG SHELLS (2) and TREE OF LIFE FRUIT (3).
- Crush, then place (4) the DRAGON-EGG SHELLS.
- Place the NYMPHS TEARS (4).
- Use the KNIFE (3).
- Place the TREE OF LIFE FRUIT (4).
- Cap then take the ELIXIR OF ANIMATION (K).
- Return to Leprochs Tomb.
- Use the ELIXIR OF ANIMATION (L), receive a KEY.
- Use the KEY (M).
- Take CHEST OF GOLD 1/9 (N).
- Take the CURSED KEY (O).
- Use the KNIFE, take the CURSED SWORD (P).
- Use the HAMMER, take the CURSED SCEPTER (Q).
- Return to the Crossroads.

- Place and select the CURSED KEY (R).
- Receive CHEST OF GOLD 2/9.
- Open and take the KEY (S).
- Return to the Ruined Temple.
- Select (T) and place the KEY (U).

- Uncover and take the HANDLE (V).
- Touch (W), take the DICE (X).
- Return to the Elders House.
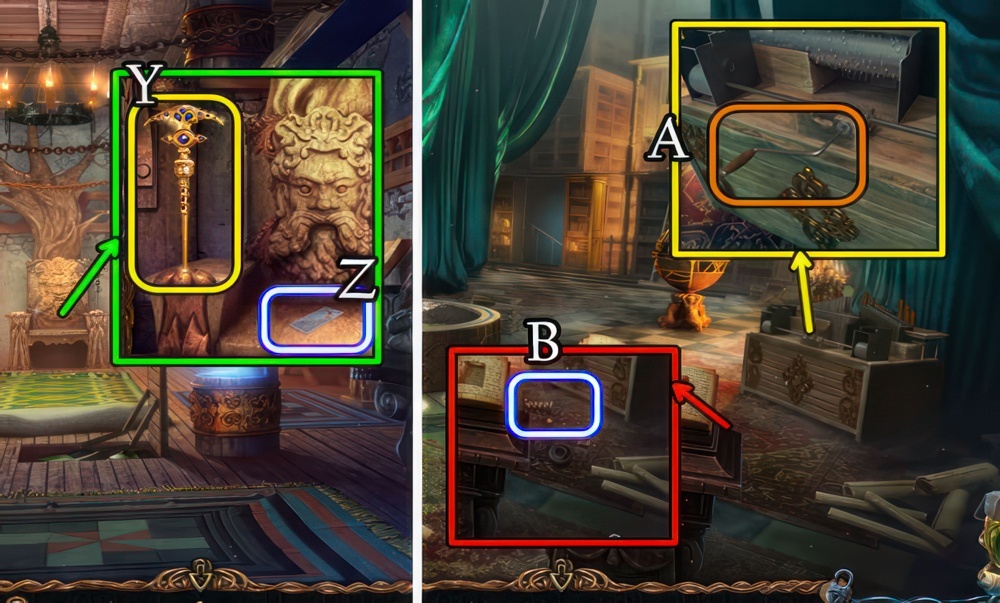
- Place the CURSED SCEPTER (Y).
- Take the GLASS PUNCHCARD (Z).
- Take (Y) for CHEST OF GOLD 3/9.
- Return to the Great Library.
- Place and select the HANDLE (A).
- Take the SPRING (B).
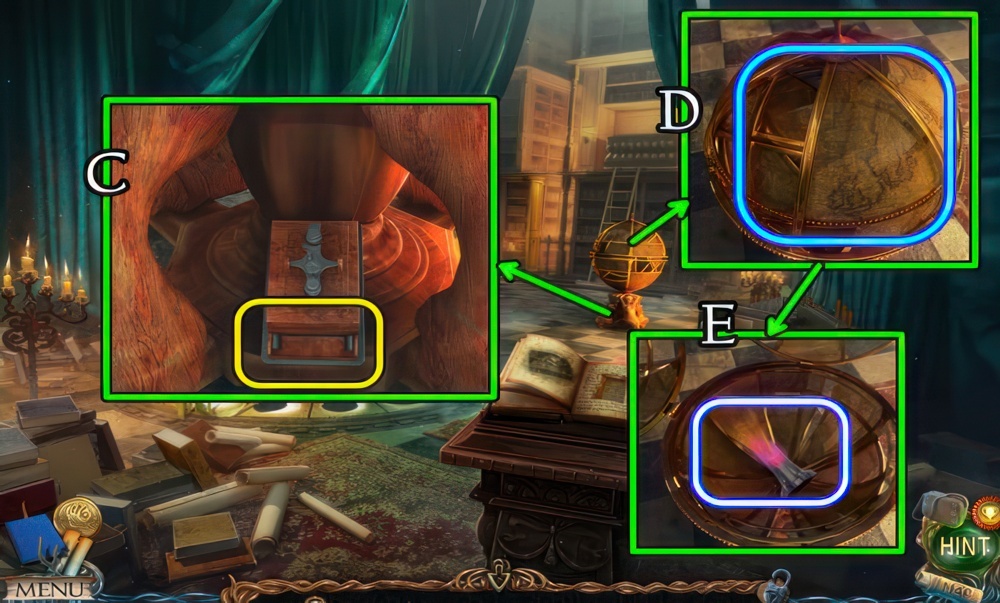
- Place the SPRING (C).
- Select (D).
- Take the FIRE ELEMENT (E).
- Return to the Room of Insanity.

- Select (F).
- Walkthrough (G).
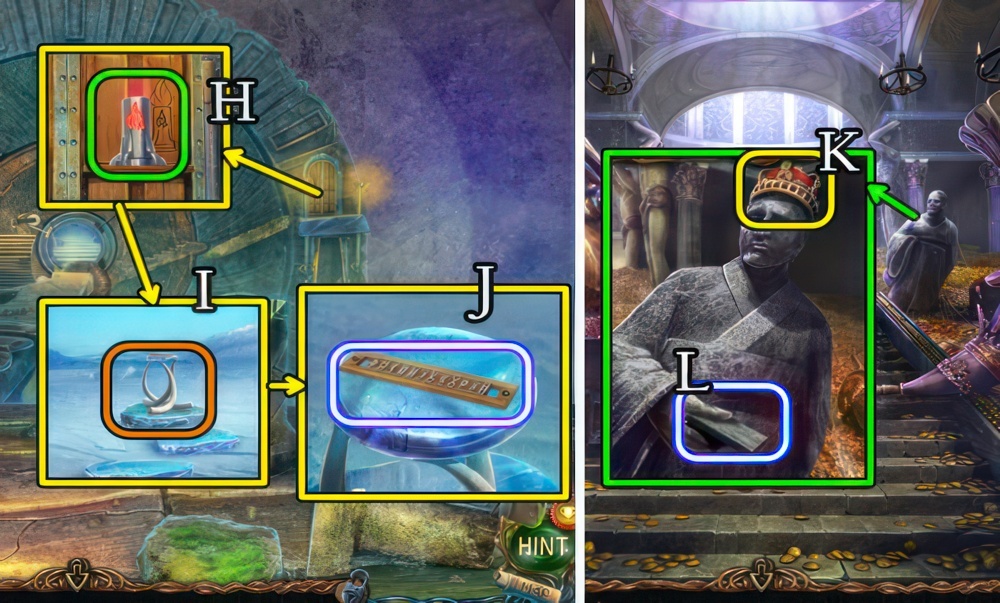
- Place the FIRE ELEMENT (H).
- Select (I) and take the PLANK (J).
- Go forward.
- Combine the CROWN PIECE and the CROWN PART for a CROWN.
- Place the CROWN (K).
- Take the STONE TABLET (L).
- Combine the STONE TABLET and HAMMER for a WOODEN PUNCHCARD.
- Return to the Minotaurs Lair.

- Place the GLASS PUNCHCARD and WOODEN PUNCHCARD (M).
- Play the puzzle (N), receive a SPREADING TOOL.
- Take CHEST OF GOLD 4/9 (O).
- Return to The Safe.
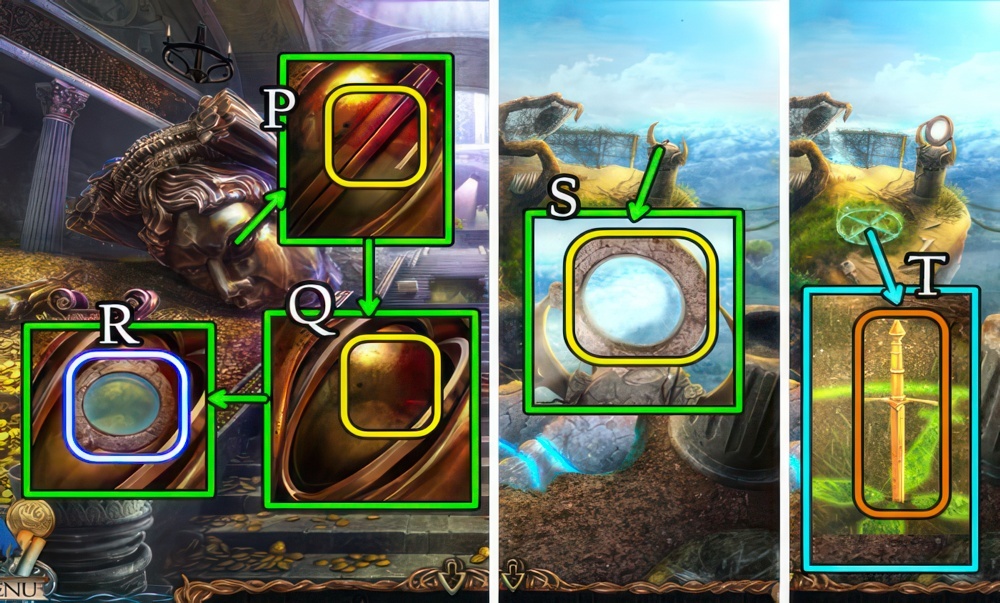
- Use the SPREADING TOOL (P).
- Select thrice (Q).
- Take the LENS (R).
- Return to the Harpys Nest.
- Place and select the LENS (S).
- Place the CURSED SWORD (T).
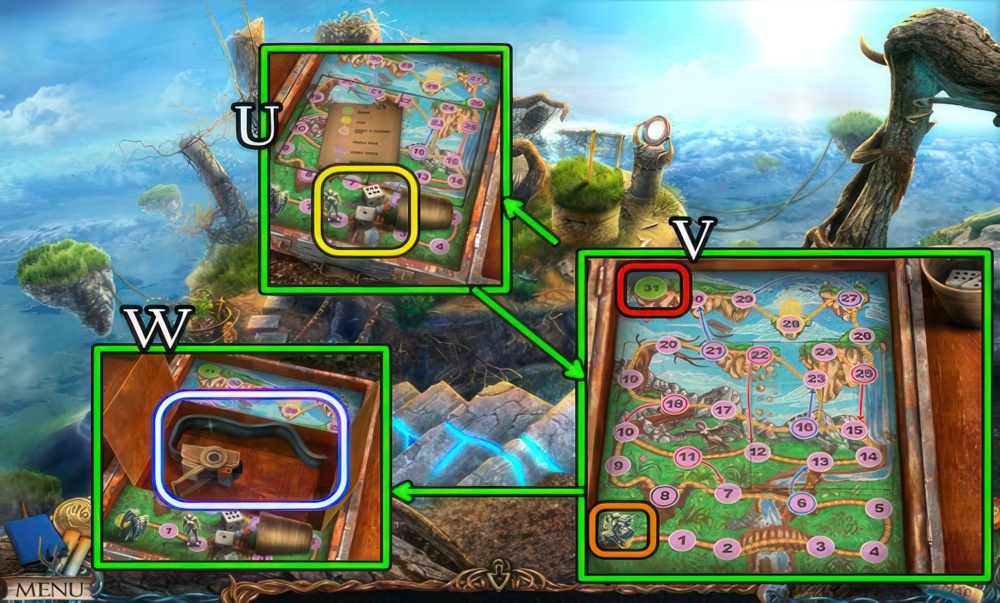
- Uncover and open the box.
- Place the DICE (U).
- Roll the dice to win the game.
- Walkthrough are random (V).
- Take the RATCHET STRAP (W).
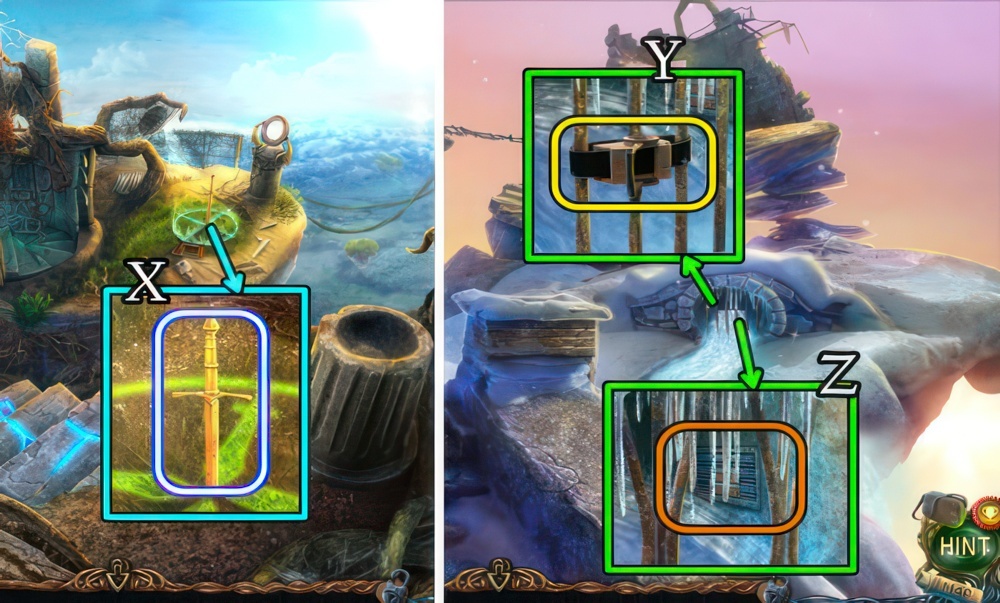
- Take CHEST OF GOLD 5/9 (X).
- Return to the Ruined Temple.
- Place and select the RATCHET STRAP (Y).
- Select (Z).
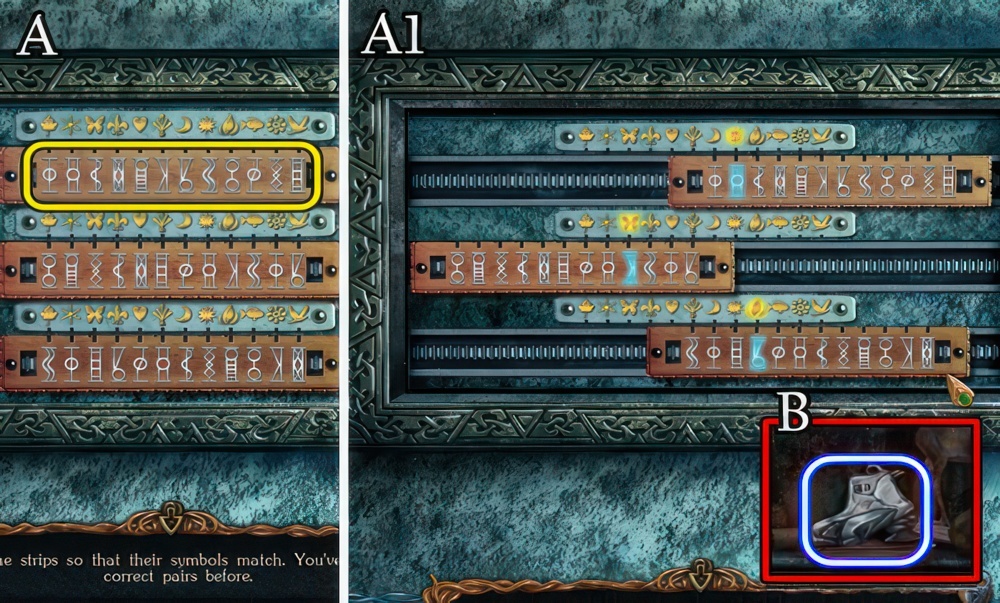
- Place the PLANK (A).
- Move the strips so that their symbols match. You’ve seen the correct pairs before.
- Walkthrough (A1).
- Take the SANCTUARY TILE (B).
- Return to the Lower Island.
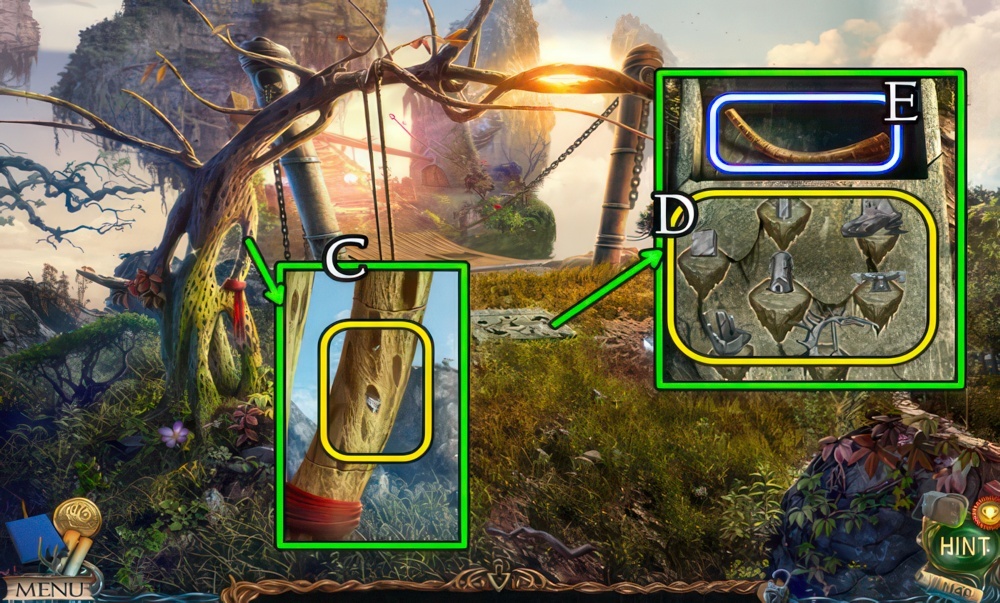
- Use the WOOD SAW (C), select for a WOOD-NETWORK TILE.
- Place the ANVIL, BALLISTA,METRONOME, CUBE, TOWER, SANCTUARY and WOOD-NETWORK TILES (D).
- Take CHEST OF GOLD 6/9 (E).
- Return to the Hills.
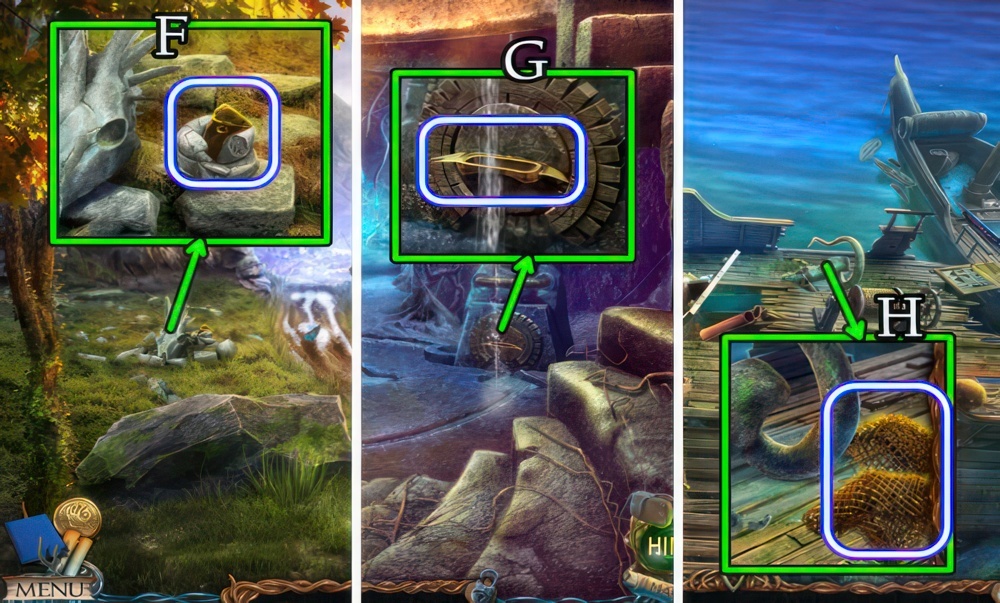
- Use the HAMMER.
- Take CHEST OF GOLD 7/9 (F).
- Go down the well.
- Take the CHEST OF GOLD 8/9 (G).
- Return to the Schooner Wreckage.
- Take CHEST OF GOLD 9/9 (H).
- Return to the Arena.
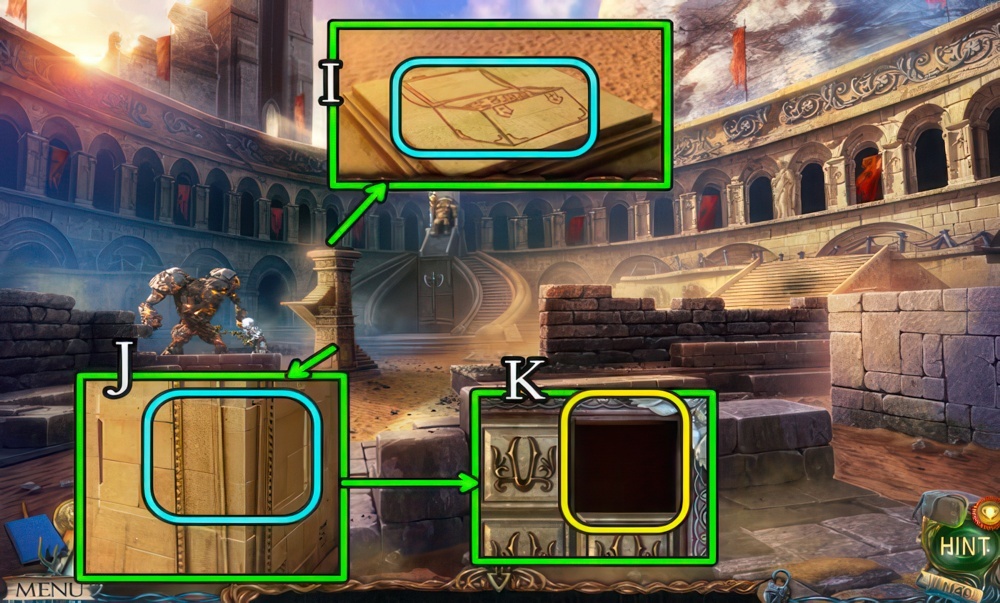
- Place the CHEST OF GOLD 9/9 (I).
- Receive a TILE.
- Open (J) and place the TILE (K).
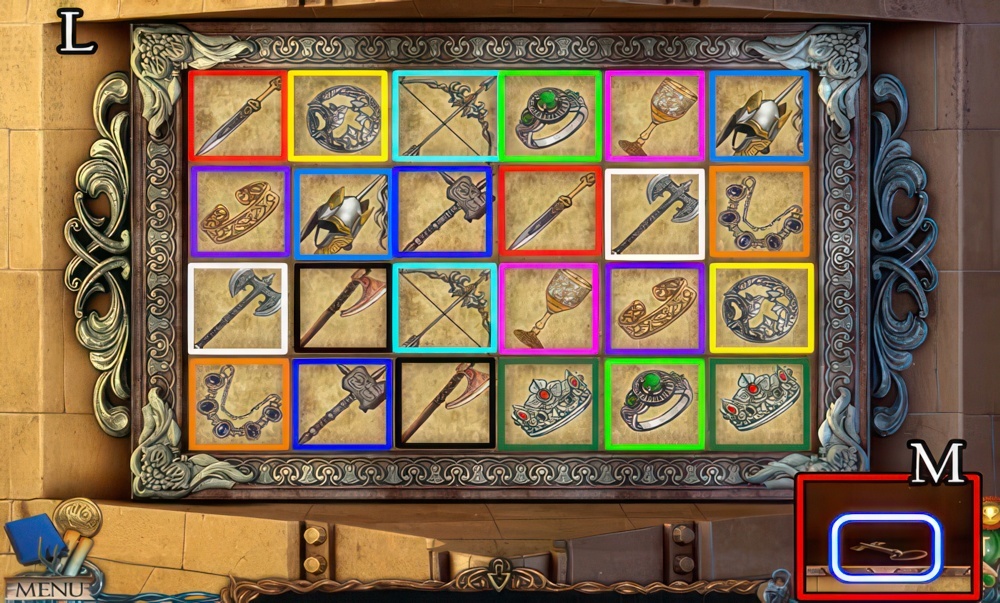
- Find the pairs.
- Walkthrough (L).
- Take the KEY (M).

- Place and select the KEY (N).
- Take the POLE AXE (O).
- Use the POLE AXE (P), receive a GOLDEN CUP.
- Place the GOLDEN CUP (Q).
- Walkthrough Bonus Chapter, at the link below.


