
Royal Romances Episode 7: Destined by fate – The walkthrough of the game begins with the fact that a girl appears in your dreams and asks you to help her. You turn to the local sorceress Nerida and ask her to read your thoughts and find out who this girl is. It turns out to be a long-disappeared princess. A friend of the princess is called in to help find her. If you are stuck and do not know how to get through one of the locations, on our website you can watch the walkthrough of the game Royal Romances 7: Destined by fate, and save the princess.
Royal Romances Episode 7: Destined by fate – Walkthrough
Here you can watch the full walkthrough of the game Royal Romances Episode 7: Destined by fate, namely the main plot.

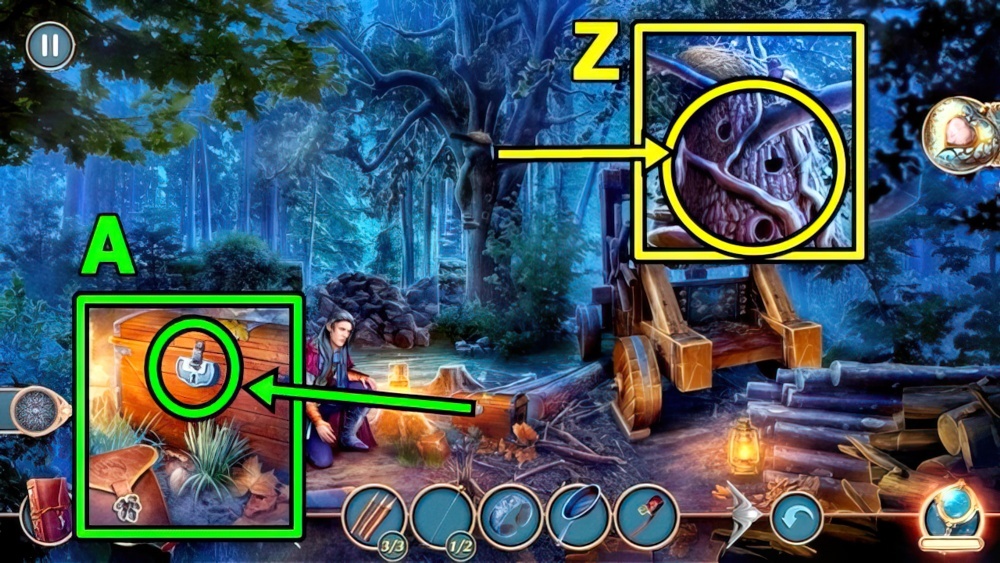
- Take CHAIN (Y), NIPPERS PART and APRON.
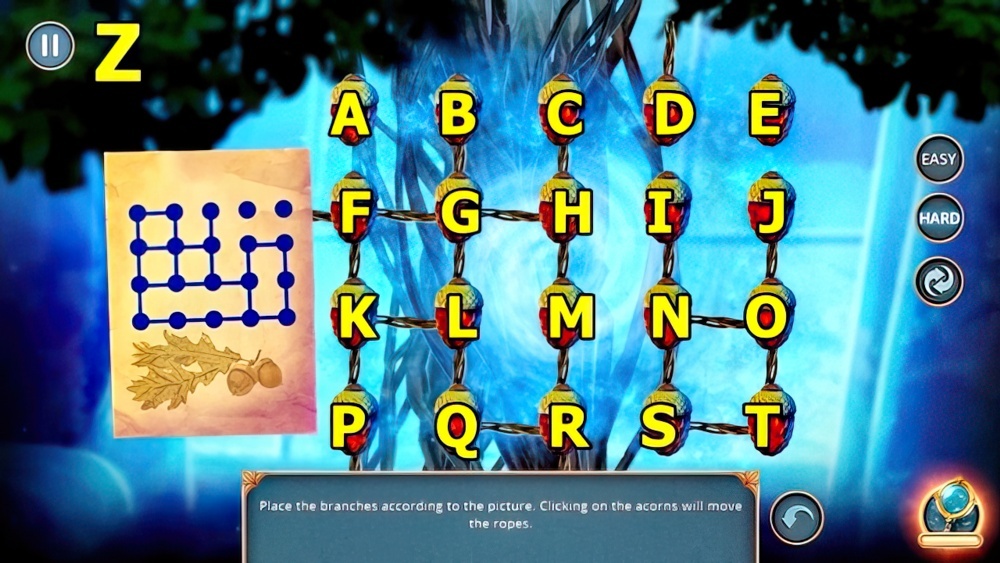
- Take CAUSTIC SOLUTION (Z). Use APRON, receive WEIGHT.
- Add CHAIN (A) and WEIGHT.

- Solution: (B) Easy (Ax4)-(Bx3)-(Cx5).
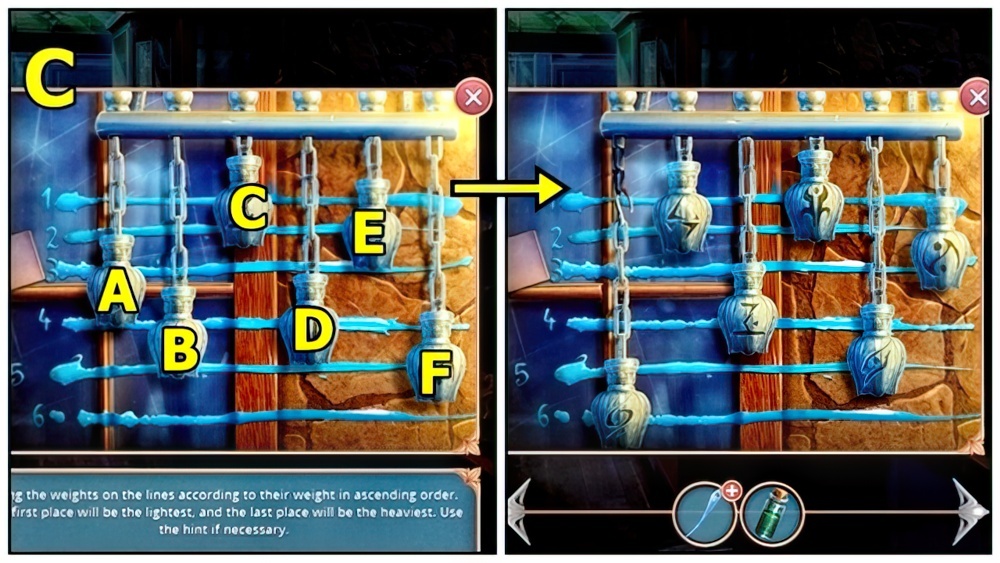
- Solution: (C) Hard (Ax6)-(Cx4)-(Ex5).
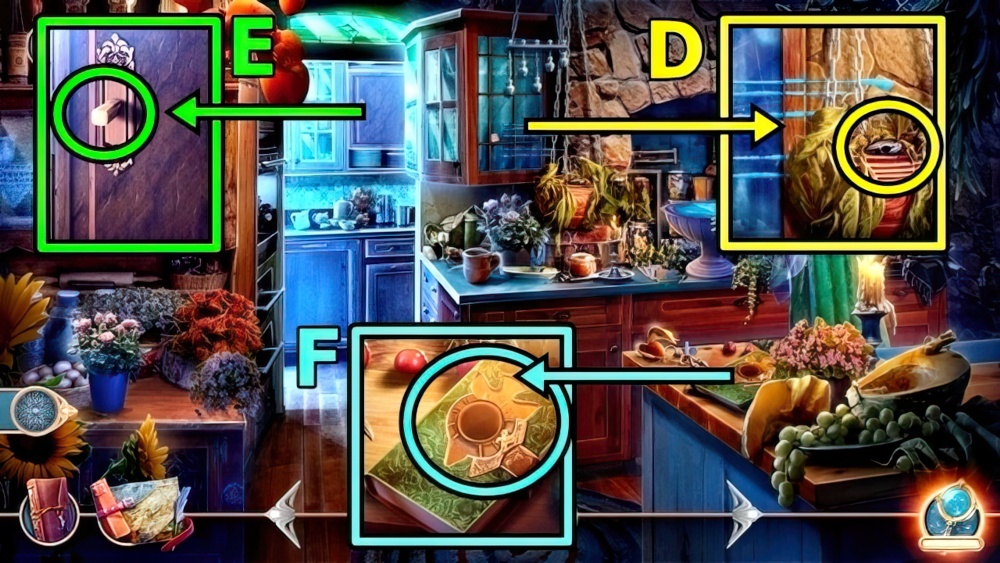
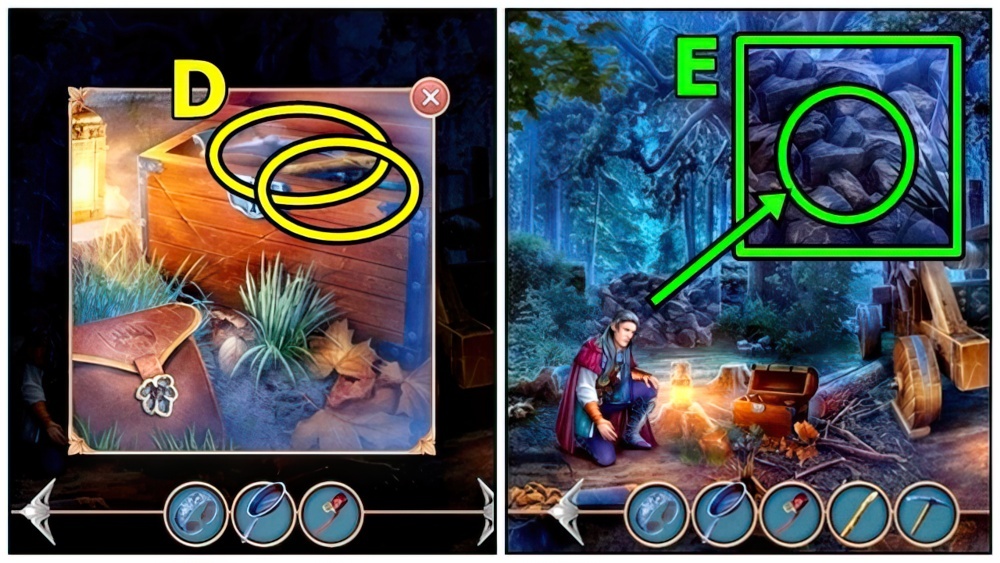
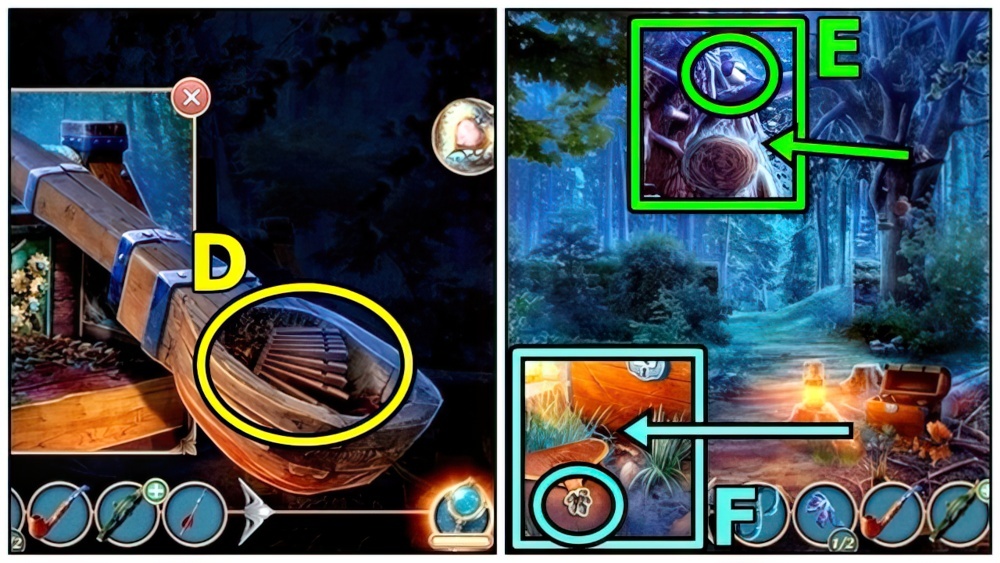
- Take NUTCRACKER (D).
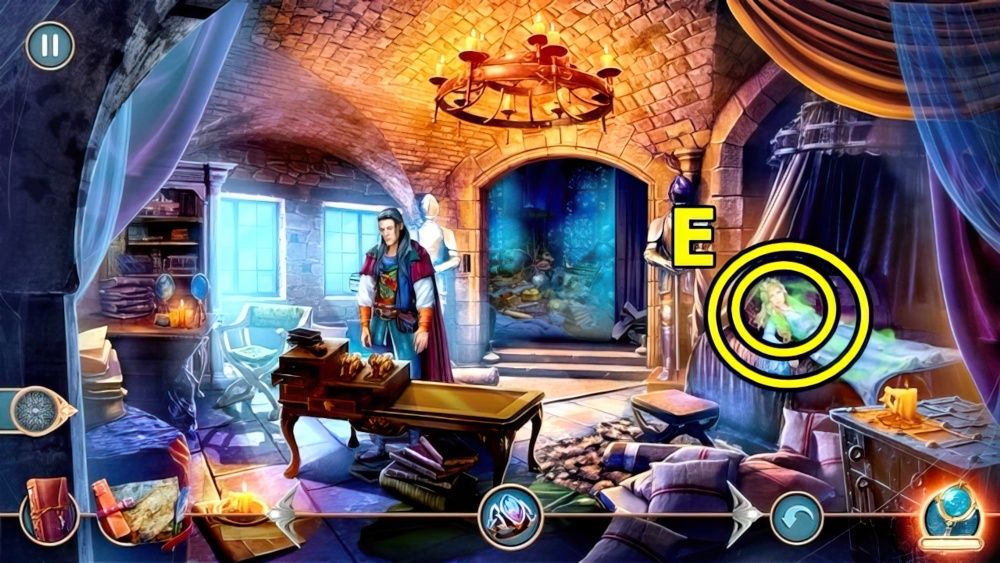
- Use NUTCRACKER (E), take SPATULA and MOON AMULET.
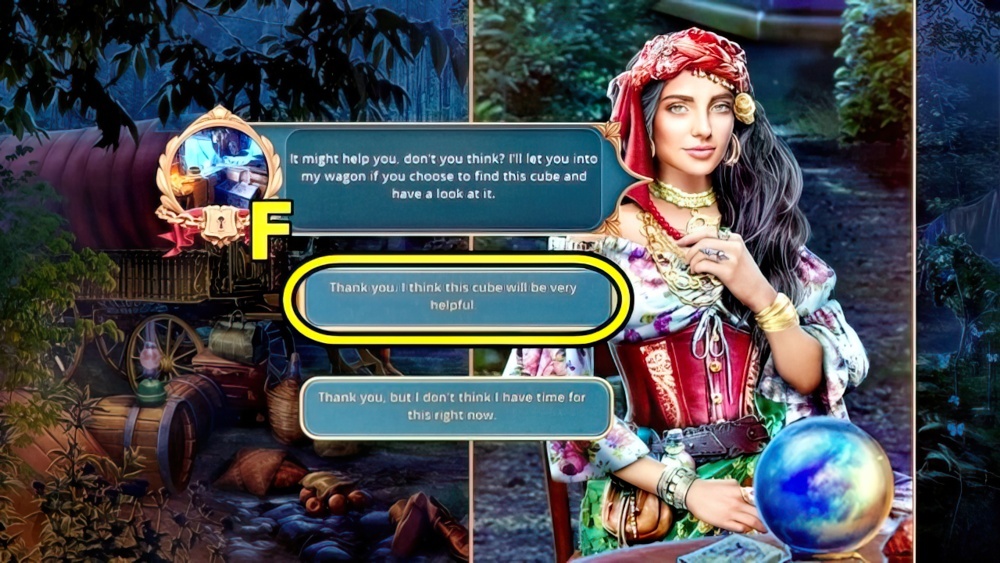
- Add MOON AMULET (F), turn pages, receive SPELL BOOK.
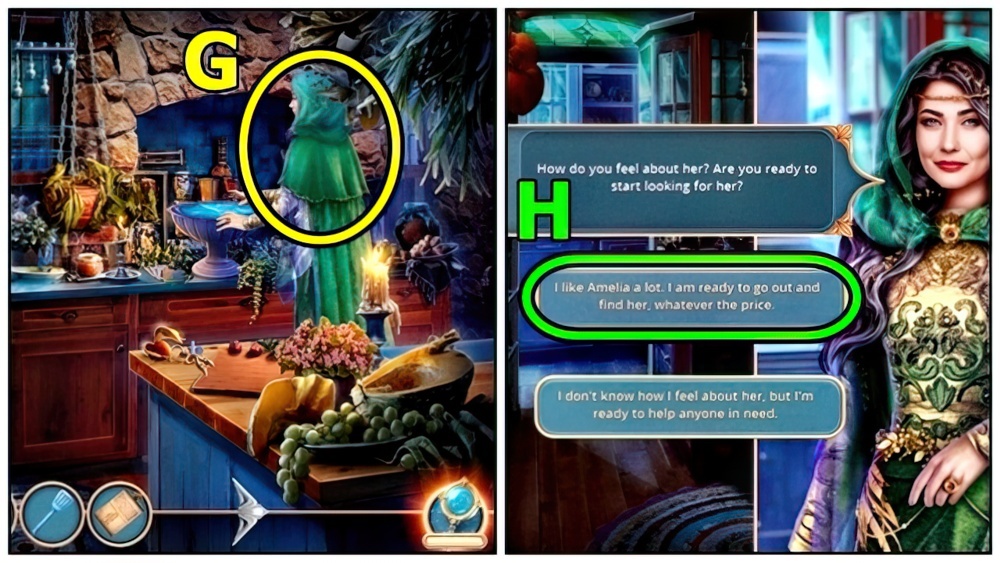
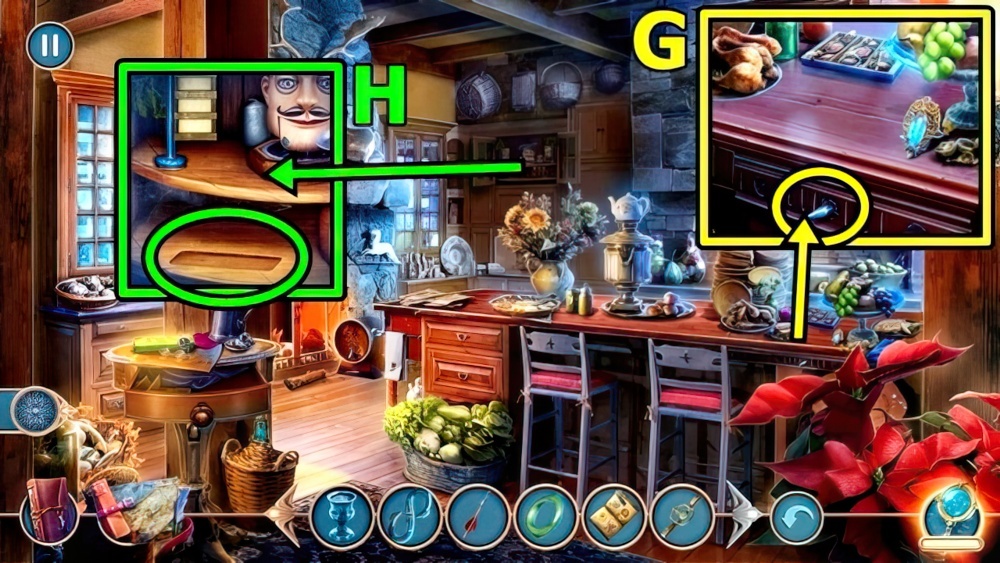
- Offer SPELL BOOK (G). Play puzzle.
- Select (H).

- Take NIPPERS PART (I), PEGS 1/3 and SPOKE 1/2.
- Use SPATULA (J), receive BOLT.
- NIPPERS PART and BOLT on NIPPERS PART, receive NIPPERS.
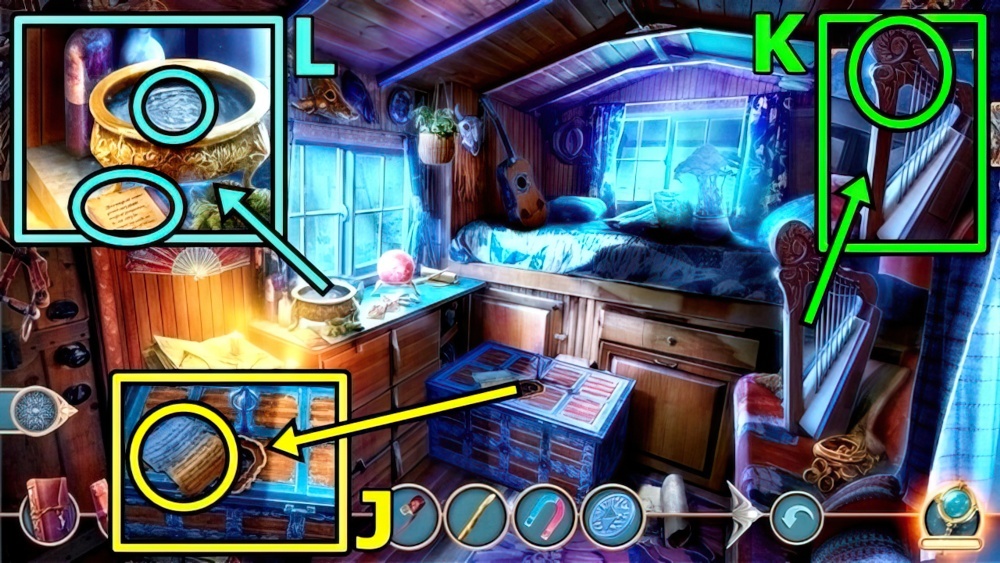
- Use NIPPERS (K), open. Take SILVER ORNAMENTS and LION HEAD HANDLE.
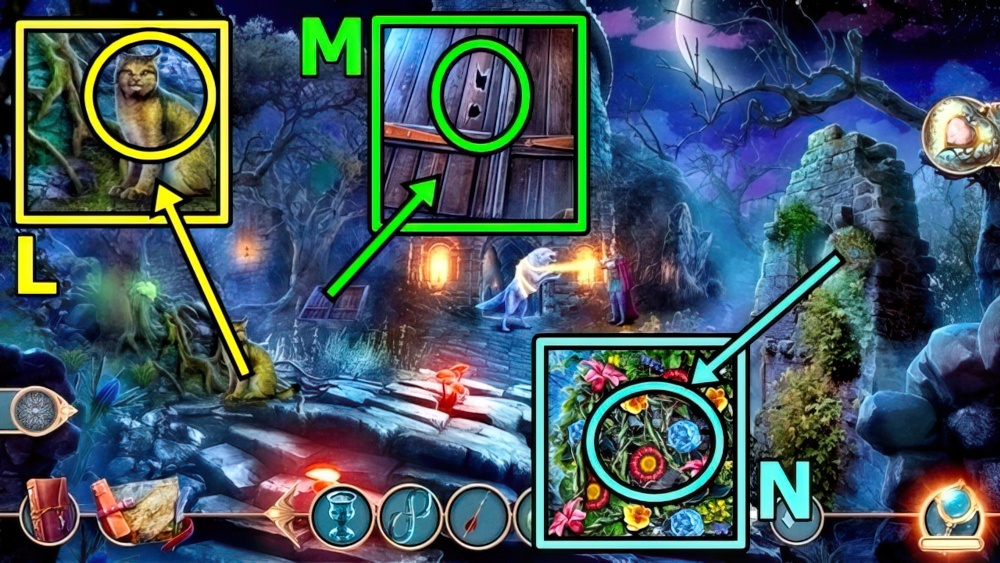
- Add LION HEAD HANDLE (L).
- Enter Tervenir’s House.
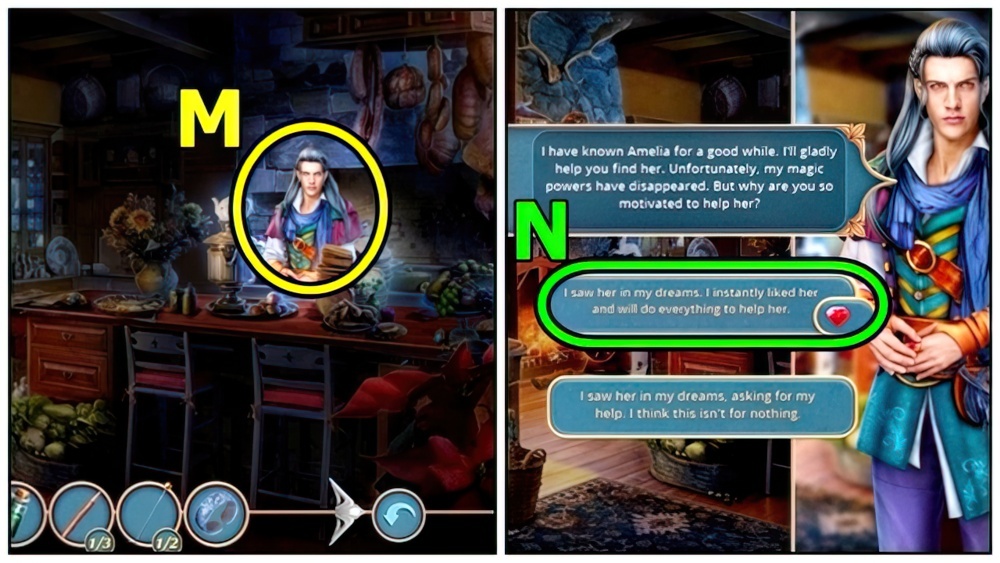
- Talk (M).
- Select (N).
- Enter Tervenir’s House.
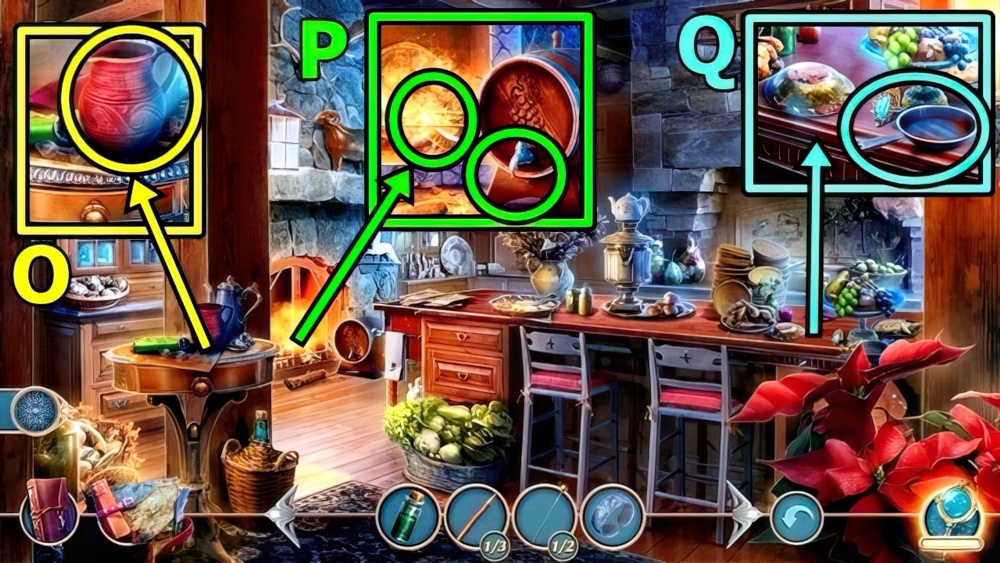
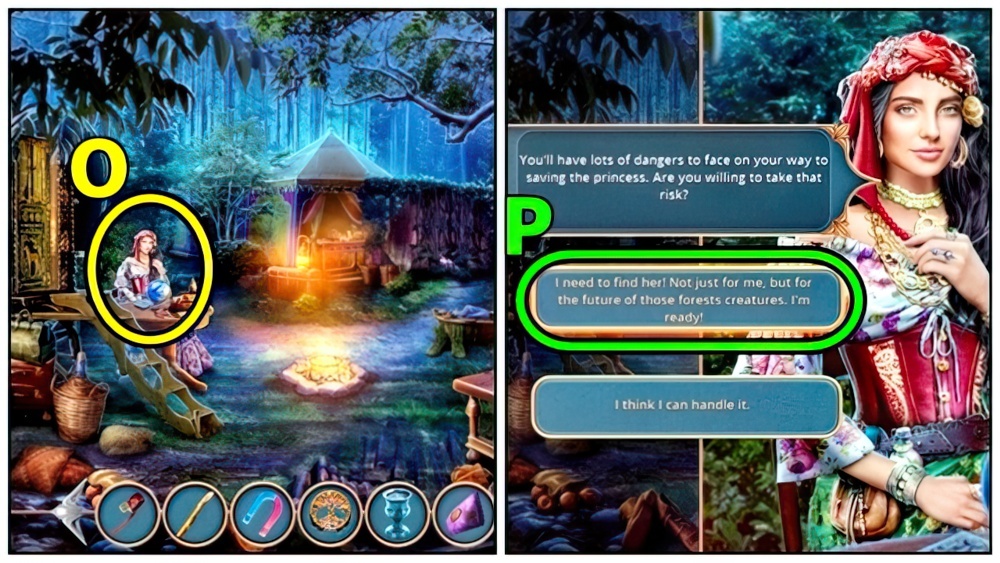
- Take JUG (O).
- Add JUG (P), take METAL BRUSH.
- Take FRYING PAN (Q).
- Move down.

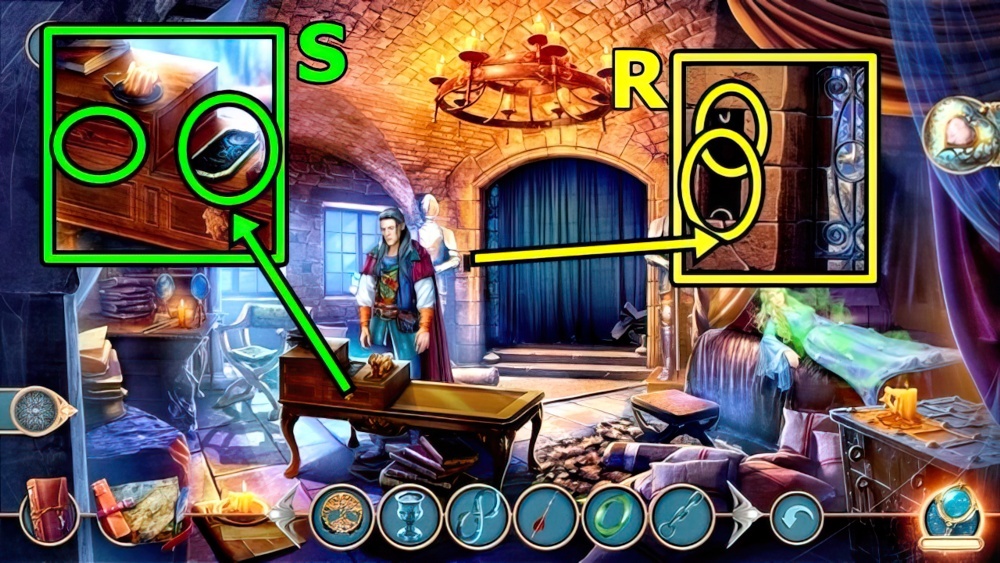
- Add CAUSTIC SOLUTION (R) and METAL BRUSH, read, take SLEEP POWDER.
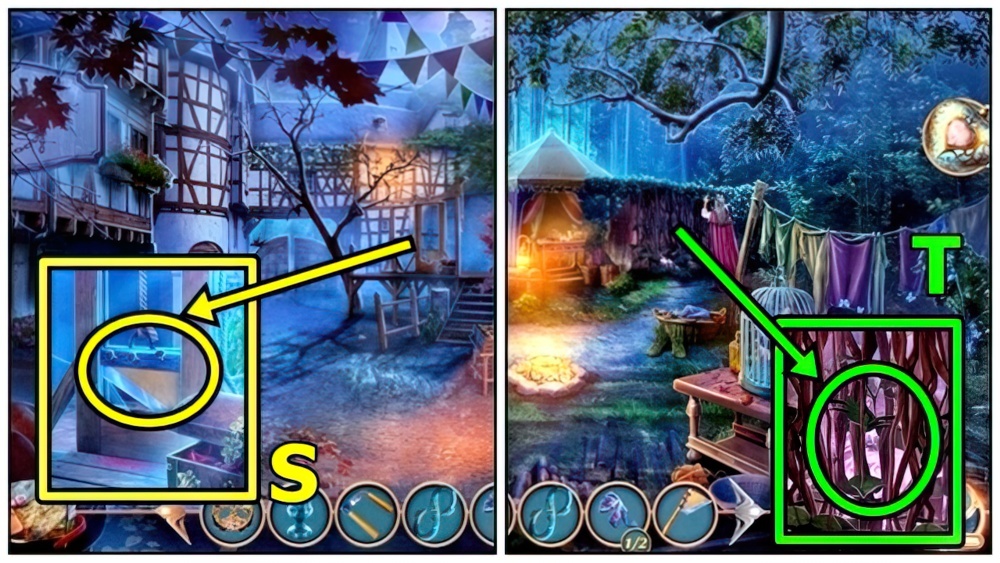
- Use SLEEP POWDER (S).
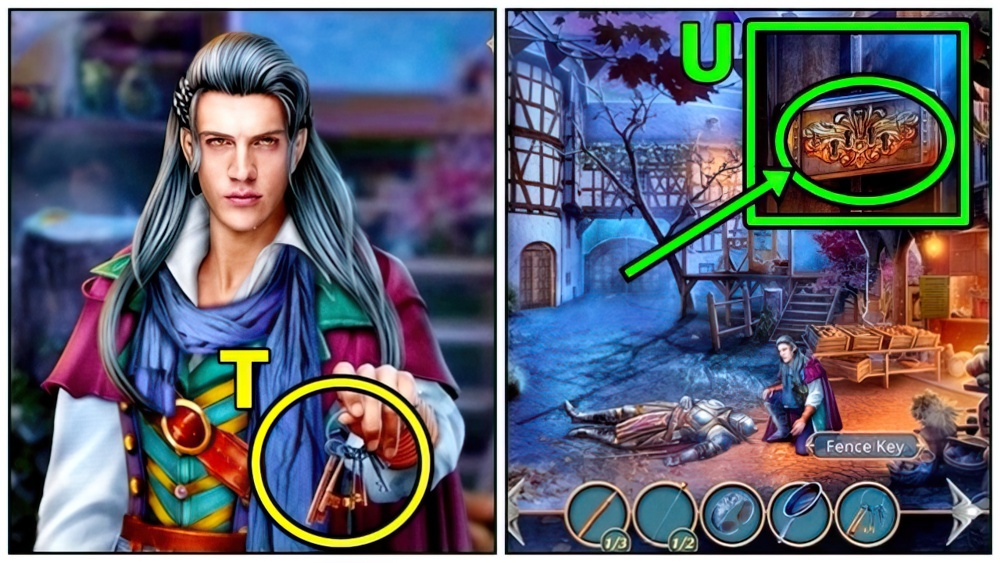
- Take FENCE KEY (T).
- Insert FENCE KEY (U).
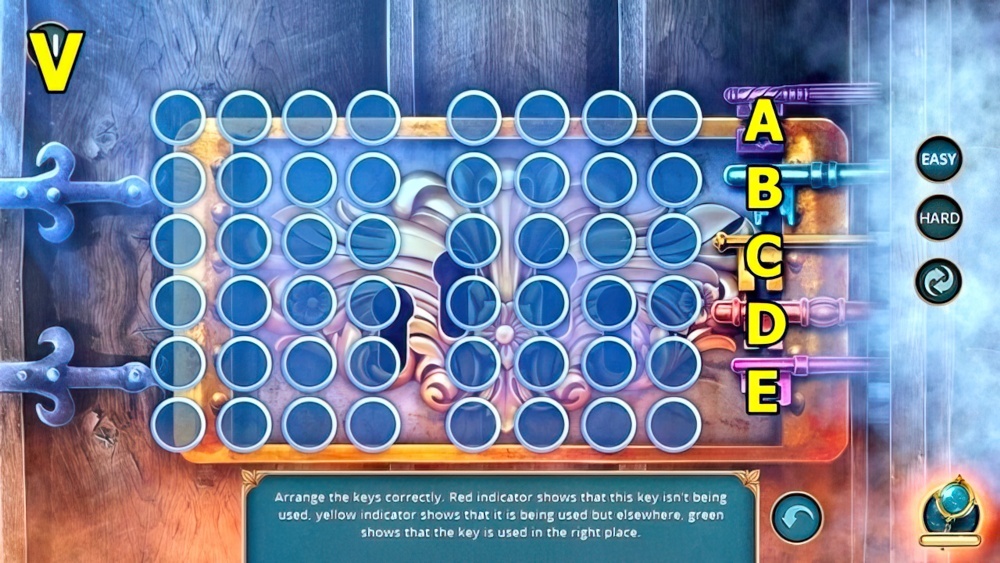
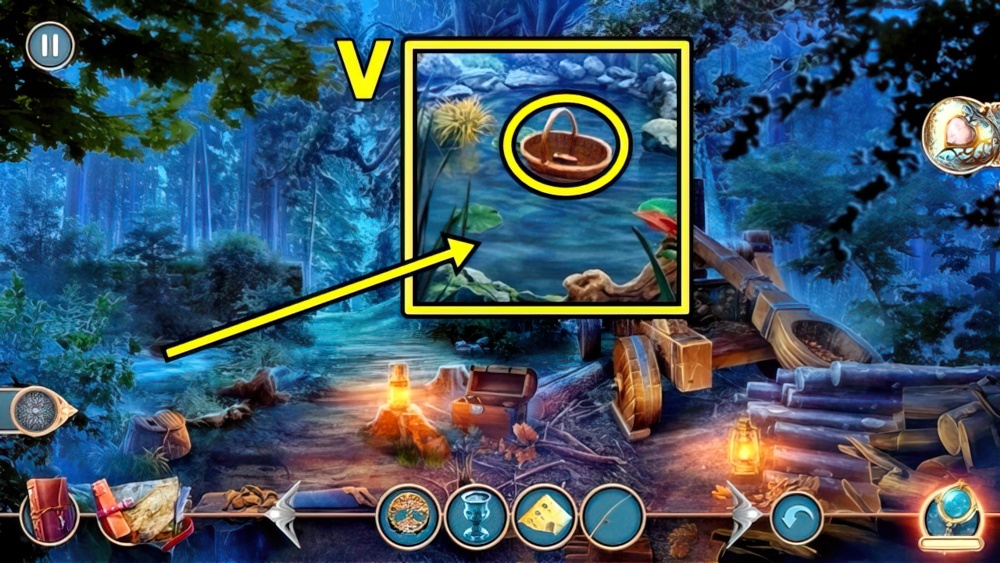
- Solution: (V) Easy B-C-A-D.

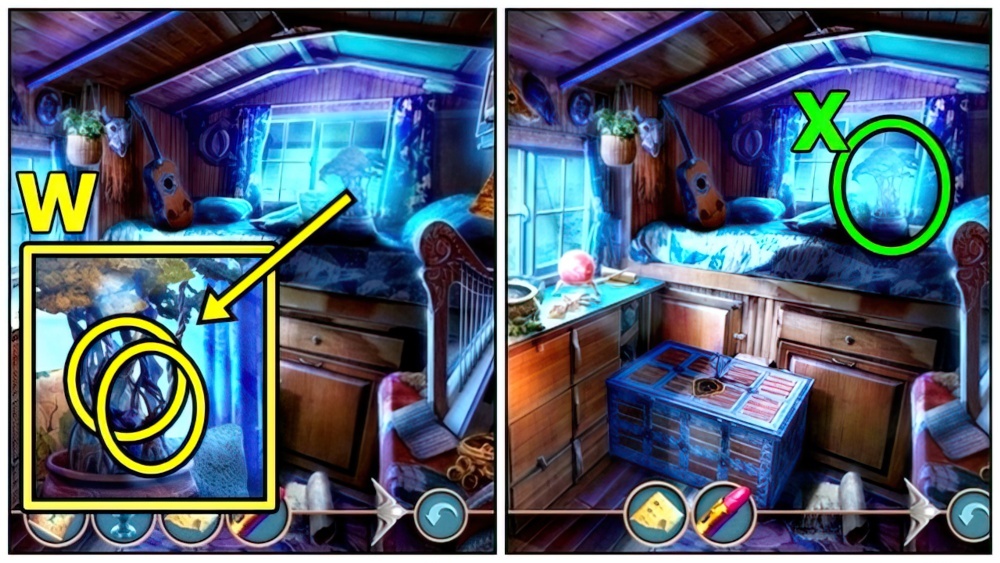
- Solution: (W) Hard F-C-A-D.
- Move forward.
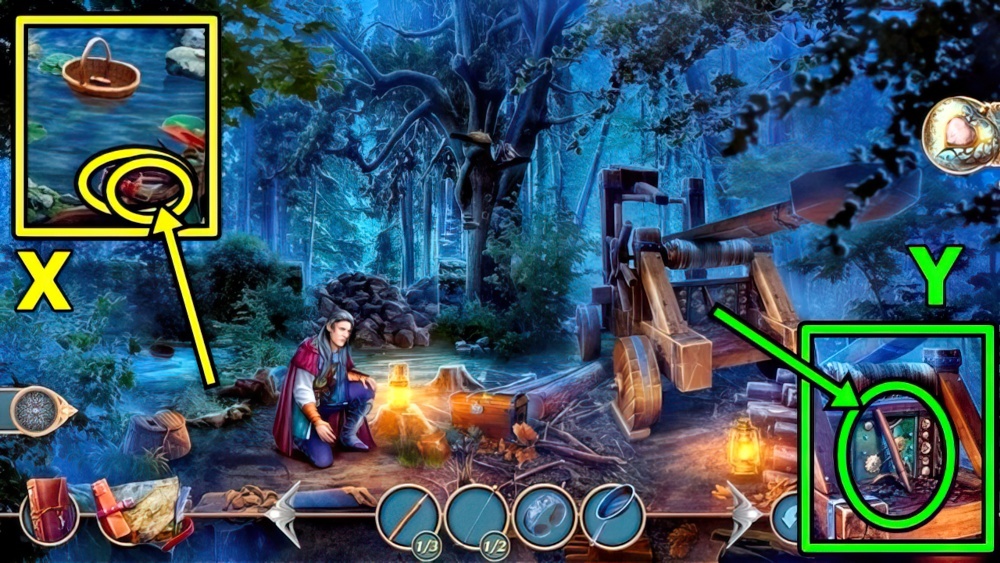
- Take BELT (X) and PEGS 2/3.
- Take PEGS 3/3 (Y).
- Add PEGS (Z), take SPOKE 2/2.
- Add SPOKE (A).

- Solution: (B) Easy – press quickly: E-C-A-D-B.
- Solution: (C) Hard – press quickly: H-E-G-D-C-A-F-B.
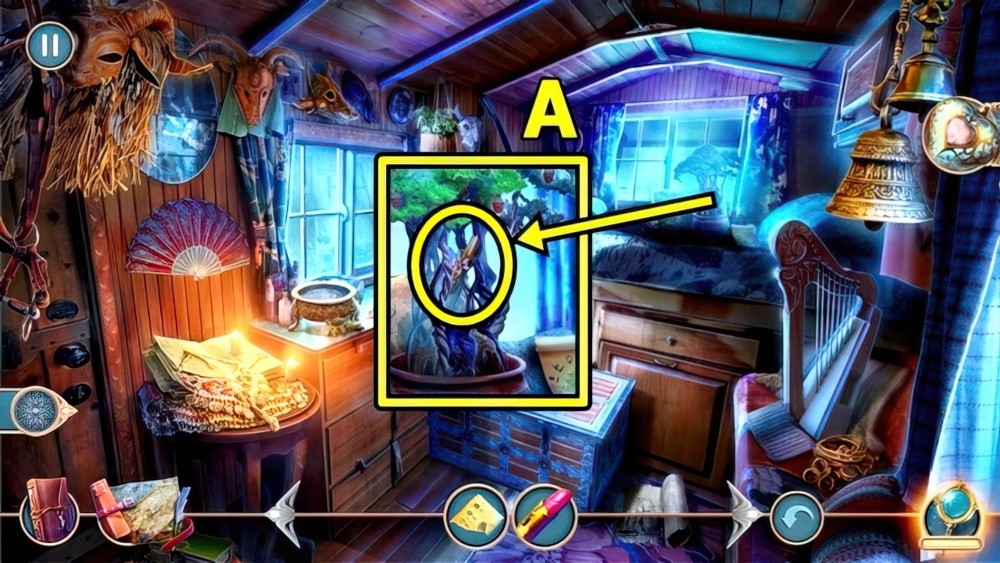
- Take HOE HANDLE (D) and PICK.
- Use PICK (E).
- Move forward.
- Select (F).

- Take MAGNET (G).
- Add FRYING PAN (H) and SILVER ORNAMENTS, take BOWL OF MOLTEN SILVER.
- Add BOWL OF MOLTEN SILVER (I), take COIN.
- Enter Fringilda’s Wagon.
- Take NOTATION (J) and TREE EMBLEM.
- Add NOTATION (K), take SILVER CUP.
- Read (L), use SILVER CUP, receive MAGICAL WATER.
- Return to Flamdorn Street.

- Add COIN (M). Play puzzle, take SHUTTERS HANDLE.
- Add SHUTTERS HANDLE (N), take AMELIA’S HANDKERCHIEF.
- Return to Forest Tabor.
- Give AMELIA’S HANDKERCHIEF (O).
- Select (P). Receive PROPHESY TOME.
- Return to Tervenir’s House.

- Read PROPHESY TOME, take BOOKMARK.
- Insert TREE EMBLEM (Q), receive SPELL.
- Use BOOKMARK, take LADLE and BOX OF CANDY.
- Open BOX OF CANDY, receive OPEN CANDY BOX.
- Use MAGNET (R), take CARABINE. Add OPEN CANDY BOX, take AMULET 1/2 and CREST.
- Move down.
- Use CREST (S). Examine, add BELT and HOE HANDLE, receive BLADE MACHETE.
- Return to Forest Tabor.
- Use BLADE MACHETE (T).

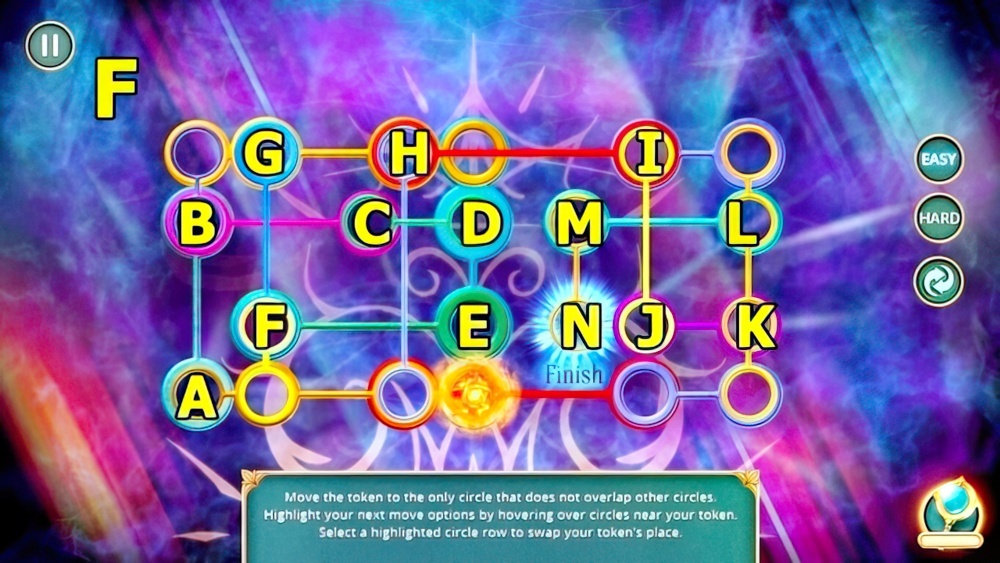
- Solution: (U) Easy (F-E)-(A-C)-(A-E)-(B-D)-(A-D).
- Solution: (V) Hard (A-E)-(H-B)-(G-C)-(A-F)-(A-D)-(B-D).

- Use LADLE (W), take SMOKING PIPE.
- Take LILY (X).
- Take SMALL TRAP (Y) and DART.
- Move down.
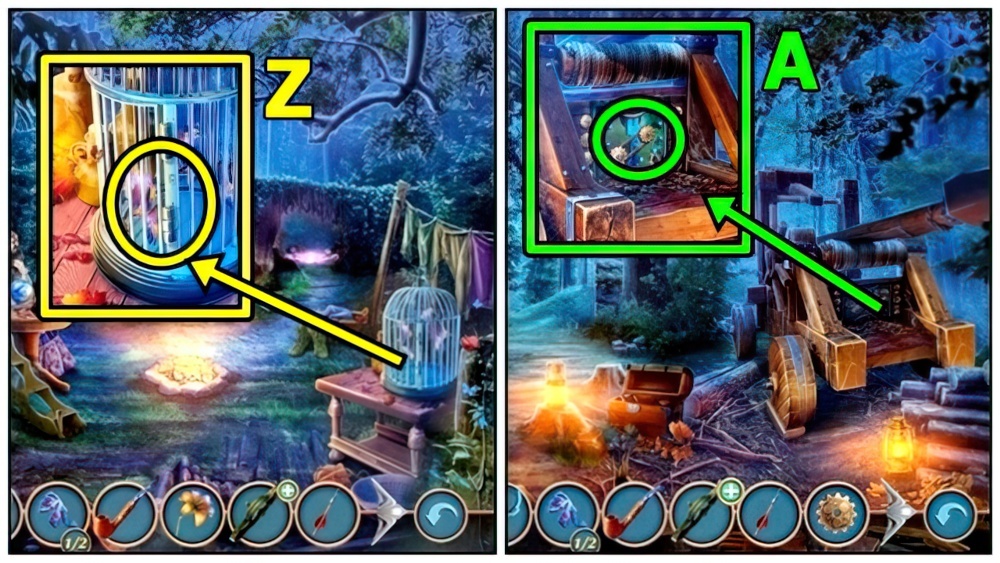
- Open (Z), give LILY, receive CATAPULT MECHANISM PART.
- Move down.
- Add CATAPULT MECHANISM PART (A).
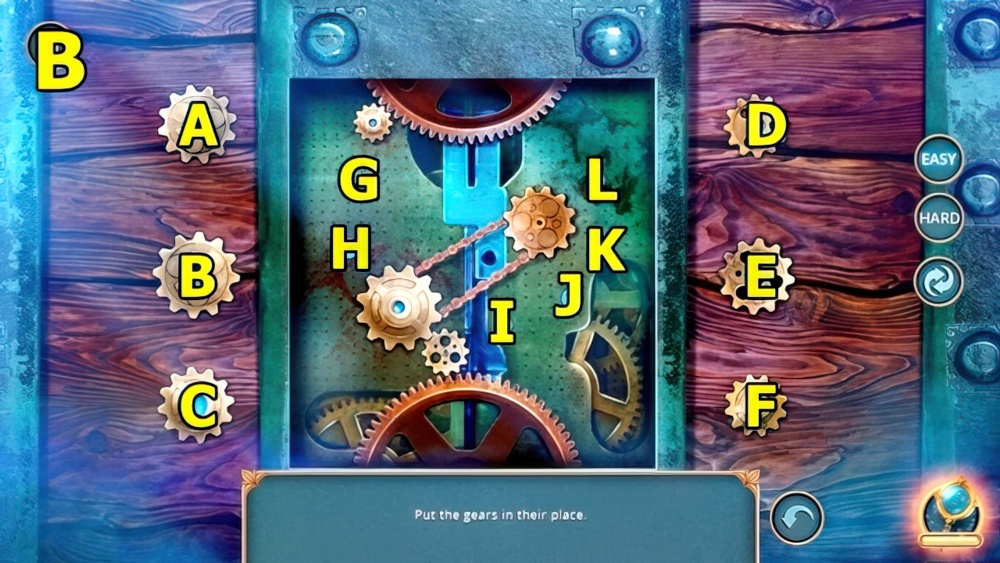
- Solution: (B) Easy (A-G)-(B-I)-(C-L)-(D-J)-(E-H)-(F-K).

- Solution: (C) Hard (A-G)-(B-I)-(C-L)-(D-J)-(E-H)-(F-K).
- Take RATCHET (D).
- Use RATCHET (E), take AMULET 2/2.
- Insert AMULET (F), take LINE and BOOK OF MAGIC FLOWERS.
- Return to Tervenir’s House.
- SMOKING PIPE on SMALL TRAP, receive TINY TRAP.
- Use TINY TRAP (G), take SPICE MIX.
- Add SPICE MIX (H).
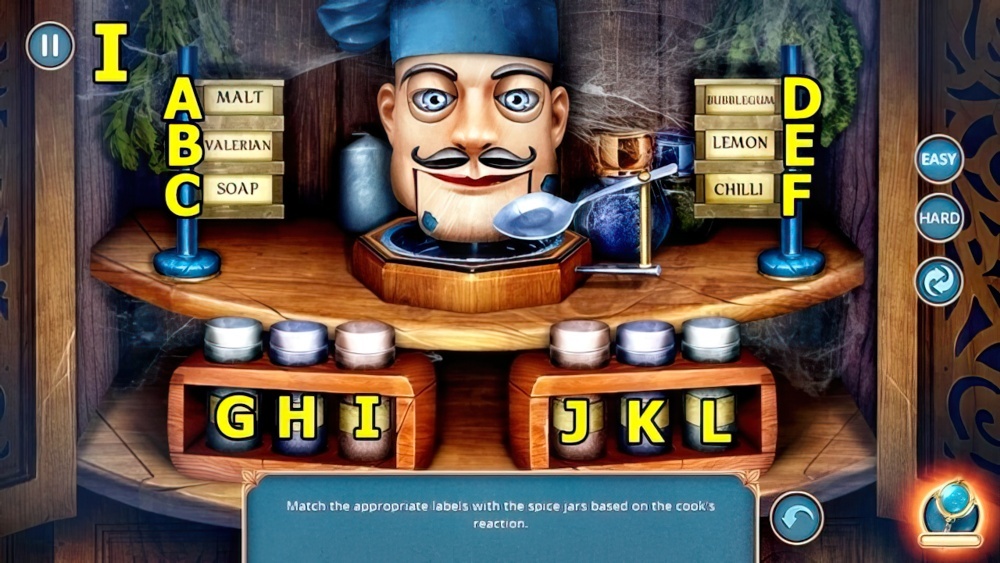
- Solution: (I) Easy G-(F-G)-H-(A-H)-I-(B-I)-J-(C-J)-K-(D-K)-L-(E-L).
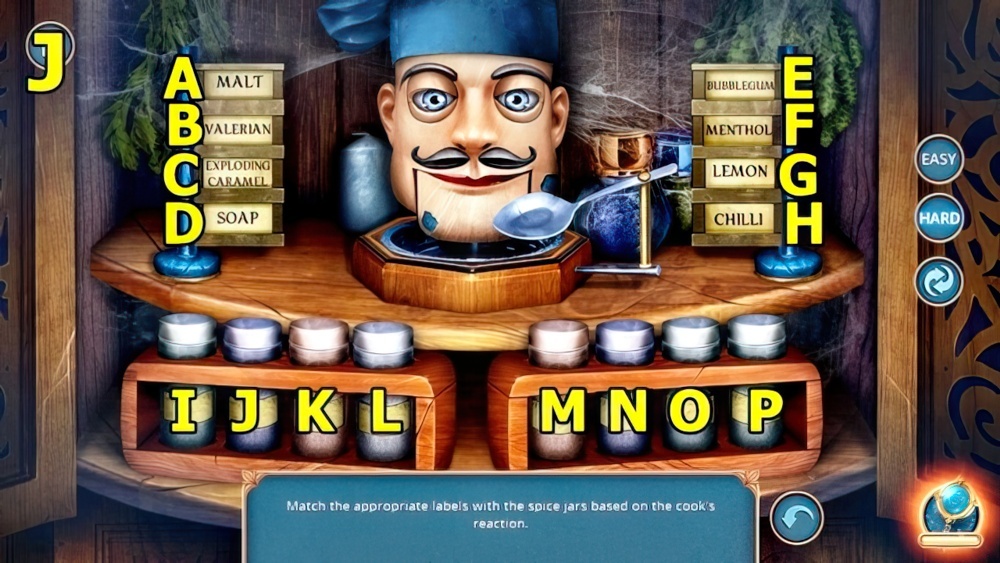
- Solution: (J) Hard I-(H-I)-J-(A-J)-K-(B-K)-L-(C-L)-M-(D-M)-N-(E-N)-O-(G-O)-P-(F-P).

- Take VALERIAN (K).
- Return to Before the Tower.
- Use VALERIAN (L). Take HORSESHOE.
- Use HORSESHOE (M). Play puzzle, take NET GUN.
- Use BOOK OF MAGIC FLOWERS (N).

- Remove flowers (O), take FORCEPS.

- Use FORCEPS (P), receive CHAIN.
- Use NET GUN (Q).
- Add CARABINE (R) and CHAIN. Play puzzle, take LION STATUETTE.
- Add CLAY LUMP (S), take ROPE PIECE. Add LION STATUETTE, read, take INSTRUCTIONS PIECE and TUNING FORK.

- Add TUNING FORK (T), take HOOK.
- Take FISHING ROD (U).
- Return to Before the Forest.
- LINE, HOOK and ROPE PIECE on FISHING ROD.
- Use FISHING ROD (V), take LIPSTICK.
- Return to Fringilda’s Wagon.
- Add MAGICAL WATER (W) and SPELL.
- Examine (X).

- Solution: (Y) Easy D-(Cx3)-(Bx3)-E-K-(Ox2)-(Kx2)-(Nx3)-M-N-(Mx3)-N.
- Solution: (Z) Hard F-D-(Cx3)-(Bx3)-(Jx3)-O-N-(Ox3)-N-(Rx3)-M-P-R-(Mx2)-R-P-(Qx3)-P-Q-(Px3)-Q.
- Take LONG SILVER HAIRPIN (A).
- Return to Trevenir’s House.

- Use LONG SILVER HAIRPIN (B), receive GEMSTONE.
- Return to Fringilda’s Wagon.
- Insert GEMSTONE (C), move items, read, examine, open. Play puzzle.
- Return to Inside the Tower.

- Read (D), add INSTRUCTIONS PIECE, examine. Use LIPSTICK. Take BOX.
- Open BOX, read, take MAGICAL RING.
- Give MAGICAL RING (E). Examine.
- Solution: (F) Easy and Hard: A through N.
Congratulations! You have completed the game Royal Romances Episode 7: Destined by fate.


