
Royal Romances Episode 8: Wolf hunting – The walkthrough of the game begins six months before the main events earlier in the episodes. You begin to transform into a werewolf and a girl named Domna shoots you with an arrow soaked in a potion that stops the process. As it turns out, you were bitten by a werewolf, and only the one who cast it can remove the curse. You have to find the witch and remove the spell from yourself. If you are stuck and do not know how to get through one of the locations, on our website you can watch the walkthrough of the game Royal Romances 8: Wolf hunting, and confront the evil witch.
Royal Romances Episode 8: Wolf hunting – Walkthrough
Here you can watch the full walkthrough of the game Royal Romances Episode 8: Wolf hunting, namely the main plot.
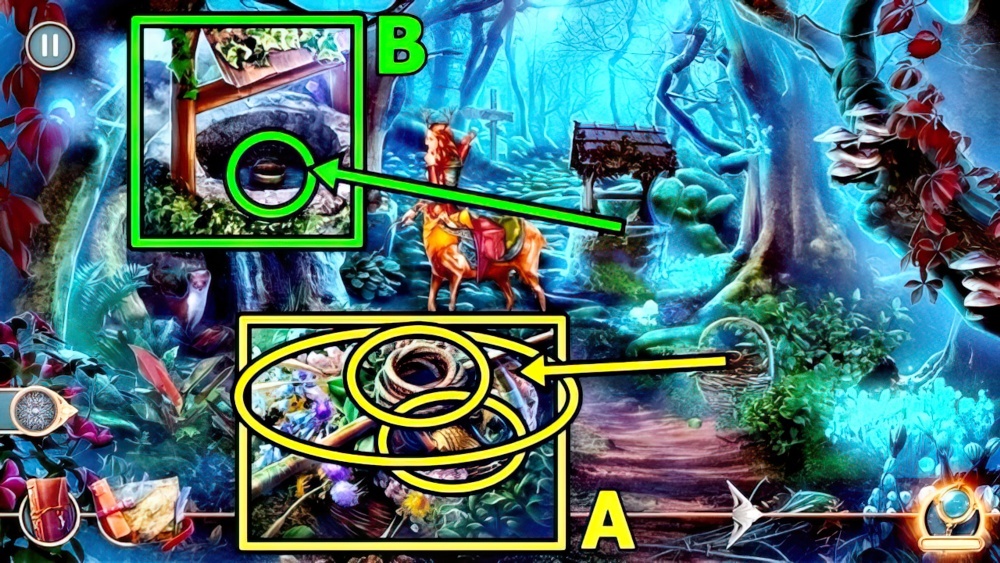
- Take ROPE WITH A HOOK (A), UNFINISHED FISHING ROD and GOLDFISH 1/2.
- Add ROPE WITH A HOOK (B), take SMALL BUCKET.
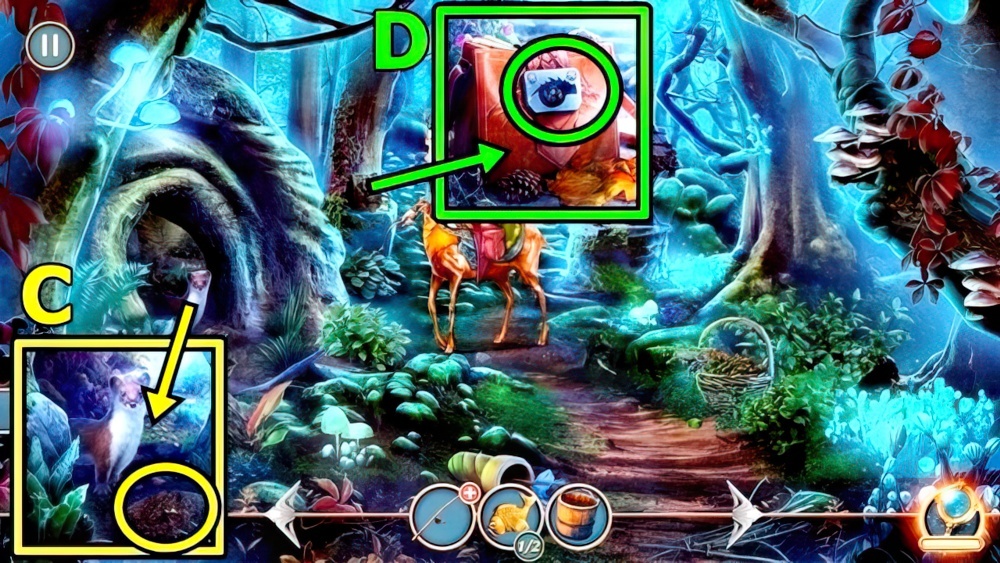
- Use SMALL BUCKET (C), take DRAGON HEAD EMBLEM-KEY.
- Add DRAGON HEAD EMBLEM-KEY (D), read, take FIRE KIT 1/2 and HERBALIST’S NOTES.

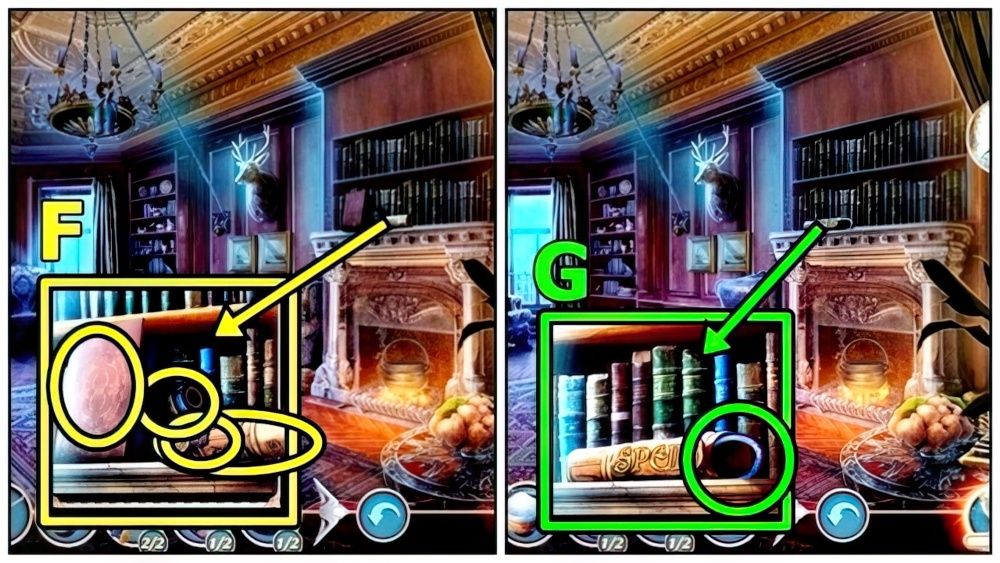
- Move items (E), add HERBALIST’S NOTES. Find items, BERRIES.

- Offer BERRIES (F). Play puzzle, take ROAD SIGN.
- Add ROAD SIGN (G).
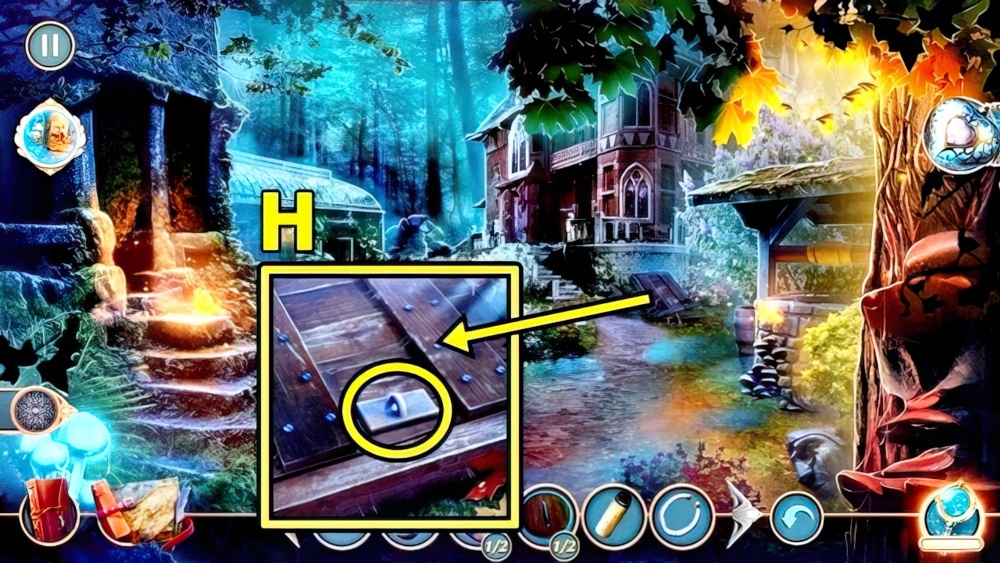
- Move forward.

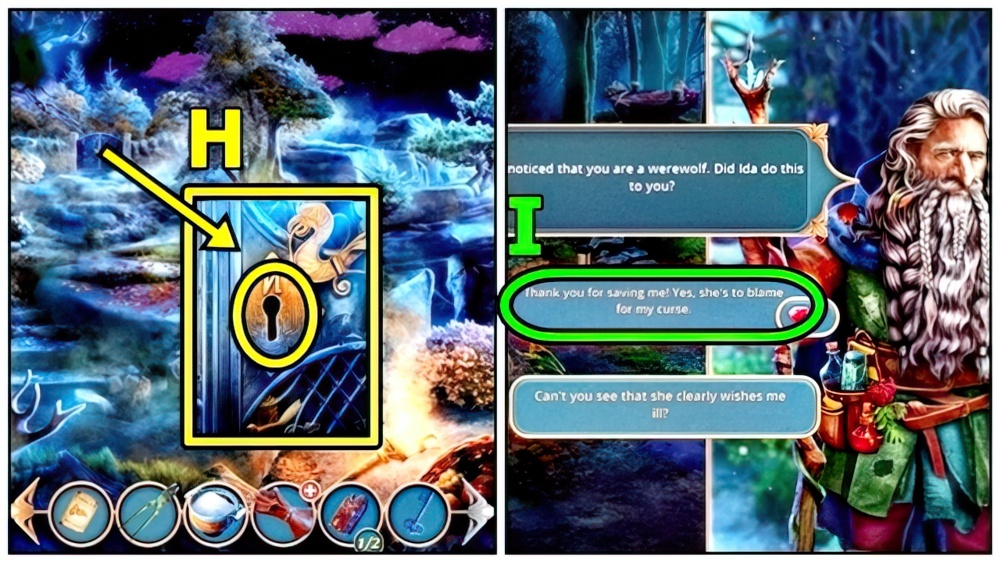
- Select (H).
- Enter Hunter’s Gatehouse.

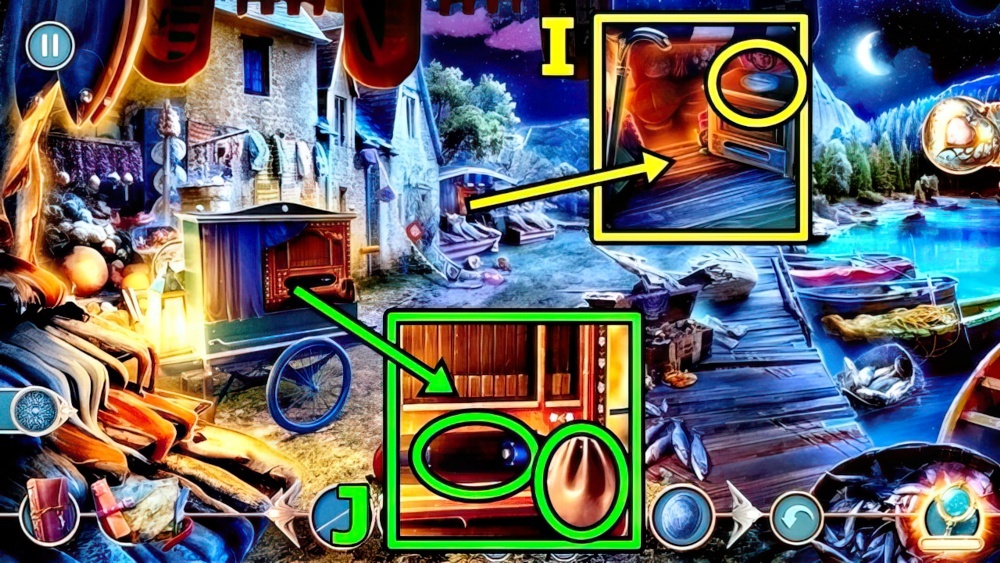
- Take GLUE (I).
- Take GOLDEN HAIRPIN (J), BOWL, KITCHEN KNIFE and TAMBOURINE.
- Use GOLDEN HAIRPIN (K), receive SPOKE.
- Move down.

- Take GOLDFISH 2/2 (L) and SHOE COVERS 1/2.
- Take PICKAXE (M).
- Add GOLDFISH (N), take SAWFISH NOSE.
- Use SAWFISH NOSE (O).
- Go to Market.

- Take GEAR 1/4 (P), FAN and FIRE KIT 2/2.
- Use FIRE KIT (Q), take HOOK.
- HOOK on UNFINISHED FISHING ROD, receive FISHING ROD.
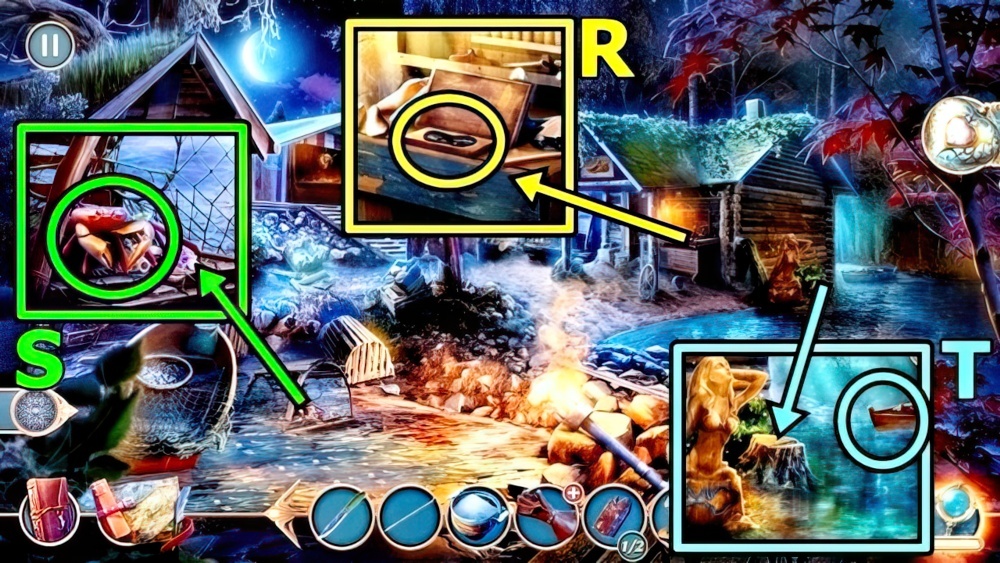
- Use FISHING ROD (R), receive ARROW WITH A POTION.
- Use ARROW WITH A POTION (S).
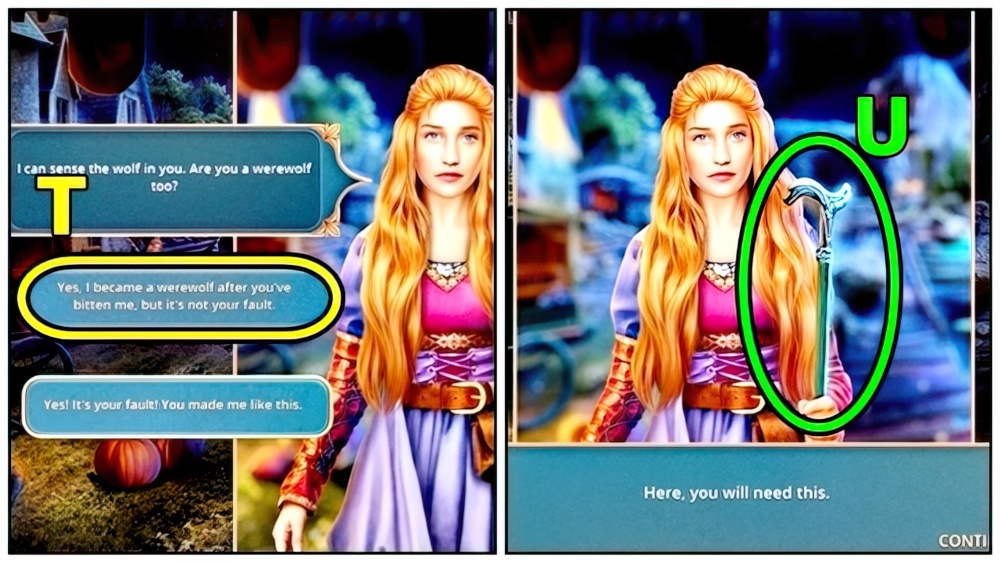
- Select (T).
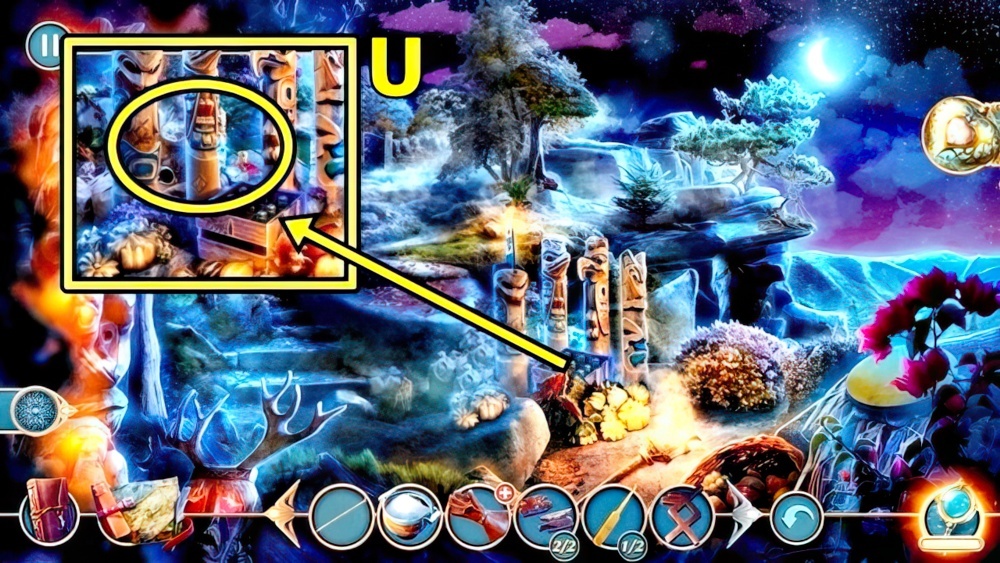
- Take CANE (U).

- Use CANE (V), take OIL LAMP, FORK and SHOE COVERS 2/2.
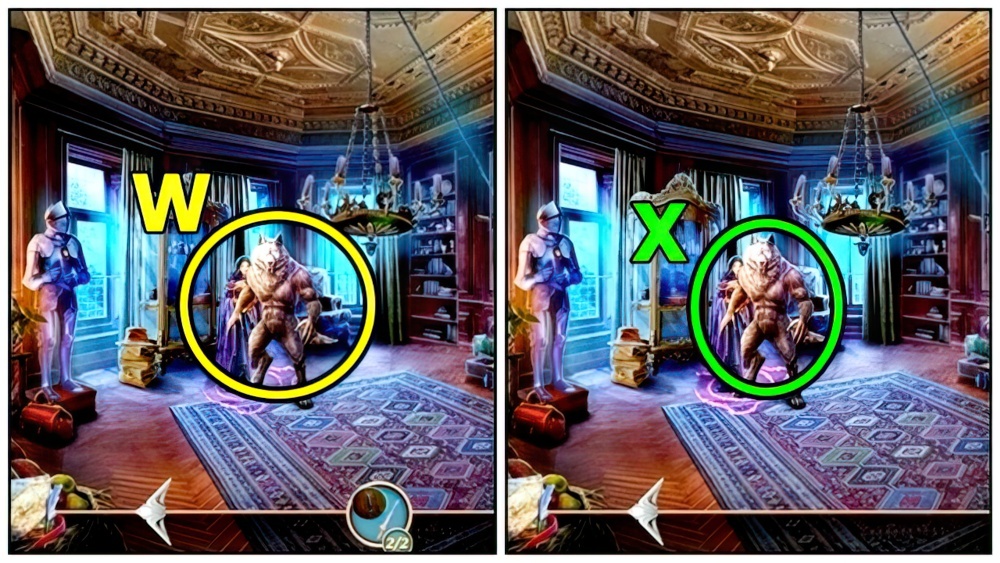
- Use PICKAXE (W) and SHOE COVERS.
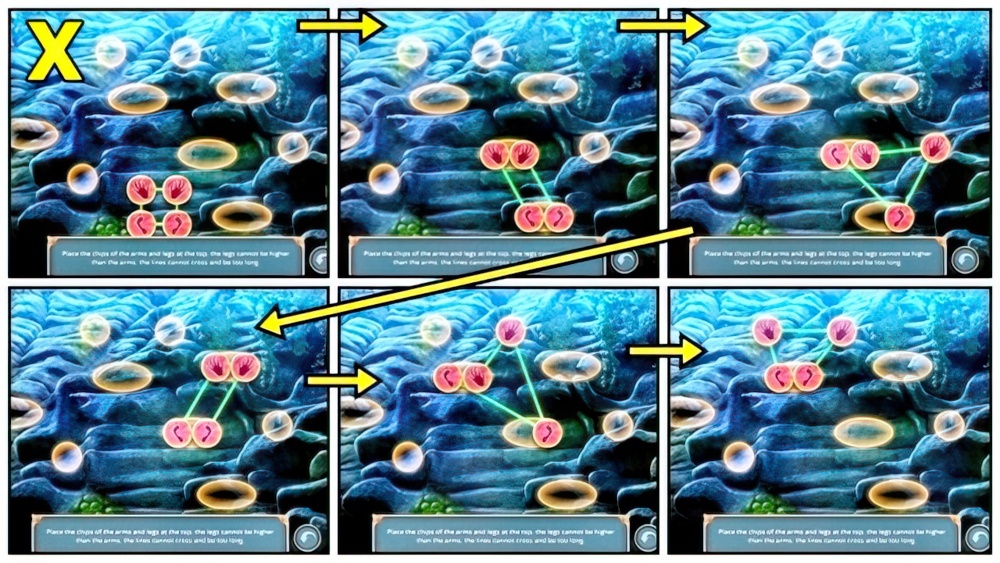
- Solution: (X) Easy and Hard.
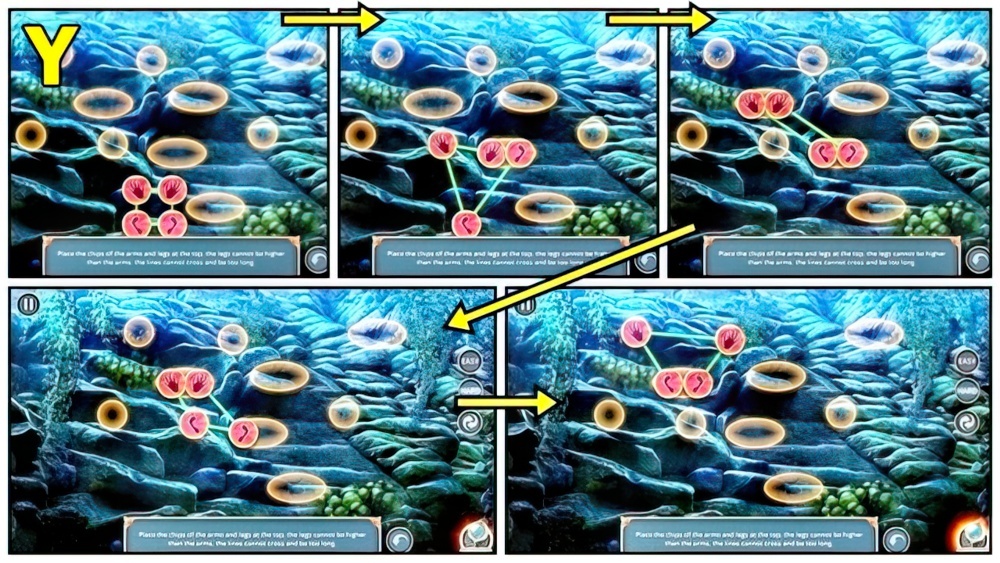
- Solution: (Y) Easy and Hard.

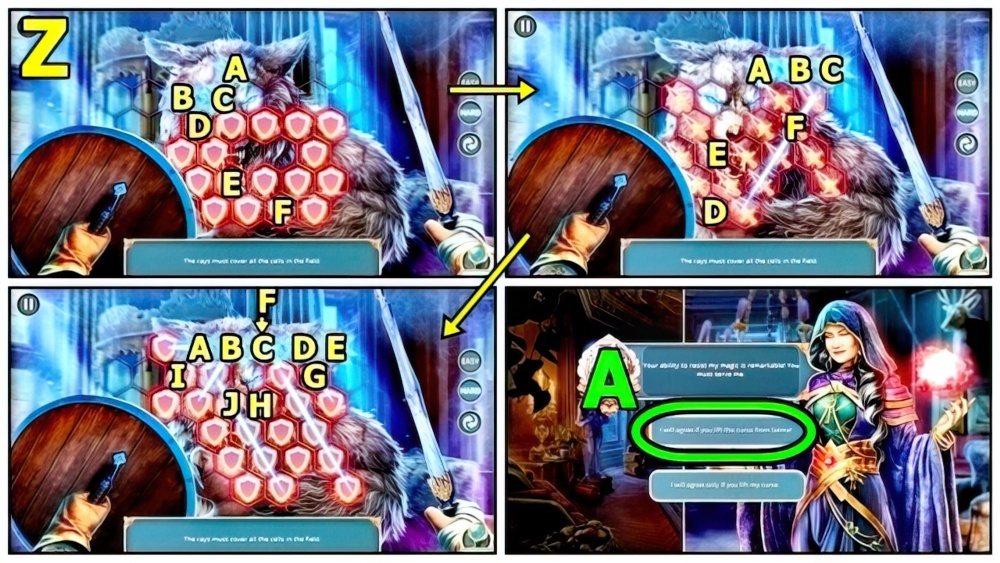
- Solution: (Z) Easy and Hard.
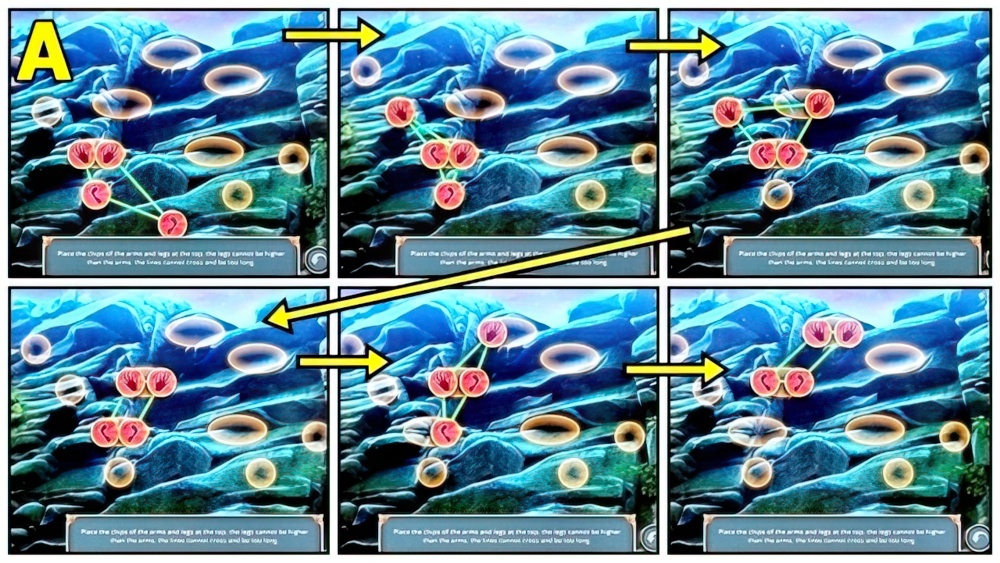
- Solution: (A) Hard.
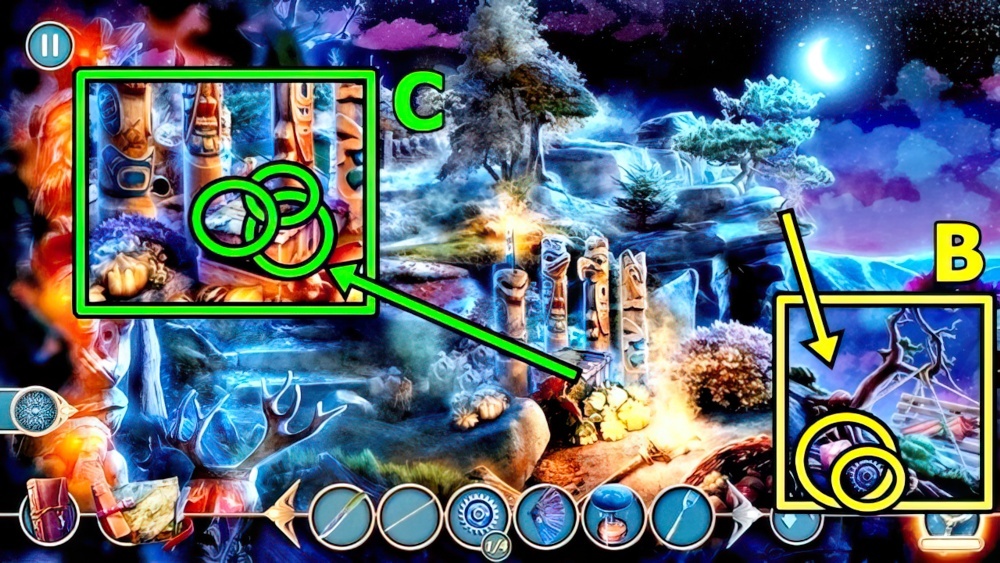
- Take GEAR 2/4 (B) and WET CLAY.
- Read (C), take WOOD CUTTER.
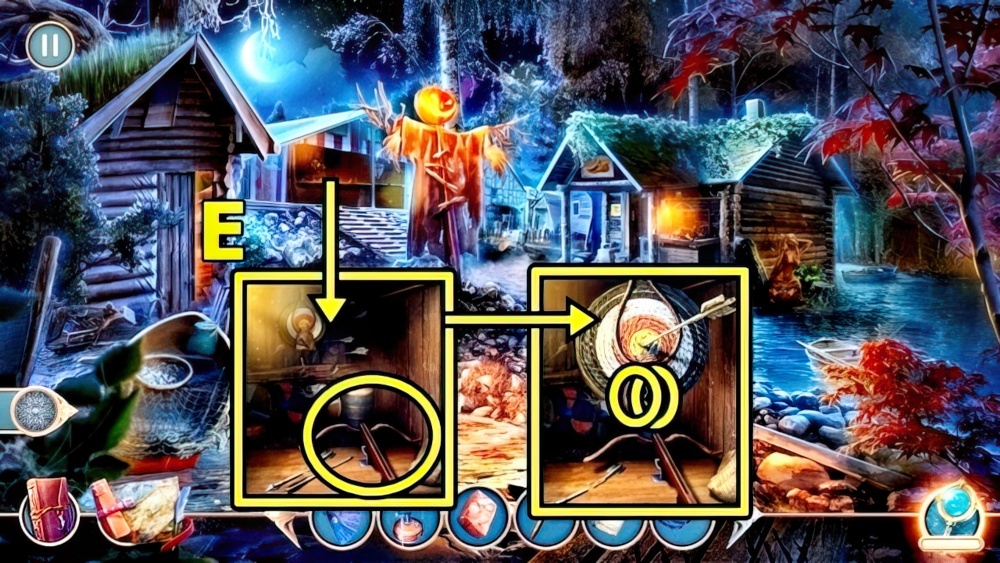
- Use FORK, take CHAMPAGNE BOTTLE.

- Use CHAMPAGNE BOTTLE (D). Take GEAR 3/4, PROMOTIONAL TICKET and BOW’S STRING.
- Return to Fisherman’s Village.
- Add BOW’S STRING (E), take PLIERS and GEAR 4/4.
- Go to Market.

- Add GEAR (F). Play puzzle, take OIL.
- Use BOWL (G), receive FLOUR. Use OIL, take TORN GLOVE, BOARD 1/2 and KEY FRAGMENTS.
- Go to Howling Mountain.
- FAN, OIL LAMP and WET CLAY on KEY FRAGMENTS, receive KEY.
- Use KEY (H).
- Move forward.
- Select (I).

- Take FIGURINE MOLD (J) and CANDLE 1/2.
- Take SANDPAPER (K) and CANDLE 2/2.

- Add CANDLE (L), take GOLD SICKLE.
- Use GOLD SICKLE (M).

- Solution: (N) Easy (A-G)-(B-H)-(C-I)-(D-J)-(E-K)-(F-L).
- Solution: (O) Hard (A-H)-(B-I)-(C-J)-(D-K)-(E-L)-(G-M).
- Go to In Front of Ida’s Manor.

- Use PLIERS (P), receive PIECE OF GLASS.
- Use PIECE OF GLASS (Q), take LITTLE CHISEL.
- Return to Fisherman’s Village.
- WOOD CUTTER, PROMOTIONAL TICKET, SANDPAPER and LITTLE CHISEL on FIGURINE MOLD, receive WOODEN FIGURINE.
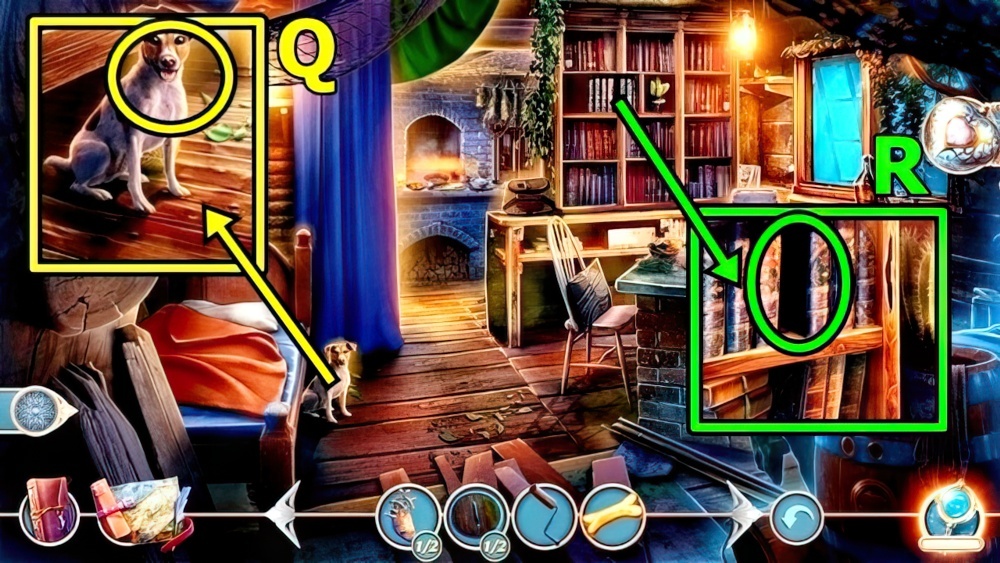
- Add WOOD FIGURINE (R), take LOCKPICK 1/2 and FISH FOOD.
- Give FISH FOOD (S). Play puzzle, take HARPOON.
- Use HARPOON (T), take RUNE and BOARD 2/2.
- Return to Howling Mountain.
- Add RUNE (U).

- Solution: (V) Easy.
- Solution: (W) Hard.
- Take BIG IDOL (X).

- Use BIG IDOL (Y), take UMBRELLA.
- Go to Clearing in the Forbidden Forest.

- Use UMBRELLA (Z), take LOCKPICK 2/2 and HEART CLASP 1/2.
- Add BOARD (A).
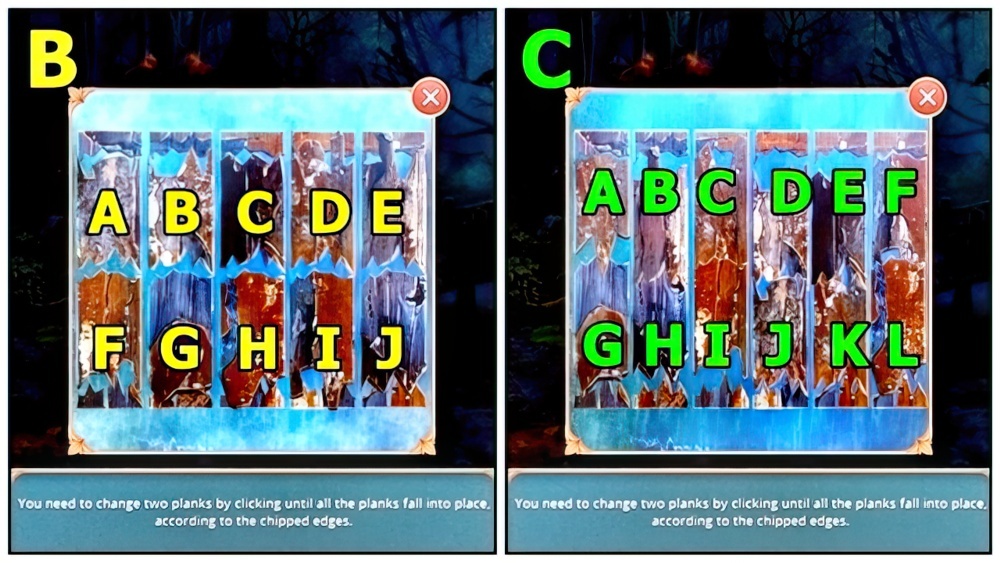
- Solution: (B) Easy (F-G)-(G-H)-(I-J)-(H-I)-(A-F)-(B-G)-(C-H)-(D-I)-(E-J).
- Solution: (C) Hard (G-C)-(B-L)-(D-H)-(I-E)-(I-J).
- Take SHIELD AND SWORD 1/2 and SEWING KIT.
- Move forward.

- SEWING KIT on TORN GLOVE, receive PROTECTIVE GLOVE.
- Use PROTECTIVE GLOVE (D), receive LION HEAD HANDLE.
- Insert LION HEAD HANDLE (E).
- Enter Inside Ida’s Manor.
- Read (F), take HURDY-GURDY ROLL. Insert LOCKPICK, examine, read.
- Take SEPTUM RING (G).
- Move down.
- Insert SEPTUM RING (H). Play puzzle, take COIN.
- Return to Market.
- Insert COIN (I), take PUNCH CARD.
- Use KITCHEN KNIFE (J), take PIECE OF LEATHER. Add HURDY-GURDY ROLL, then PUNCH CARD.

- Solution: (K) Easy and Hard: F-Cx2-Bx2-F-Cx2-I-Fx2-Dx2-I. Receive HURDY-GURDY HANDLE.
- Return to Hunter’s Gatehouse.

- GLUE, PIECE OF LEATHER and SPOKE on TAMBOURINE, receive SIEVE.
- Use SIEVE (L), receive PEPPER PEA.
- Add FLOUR (M) and PEPPER PEA.
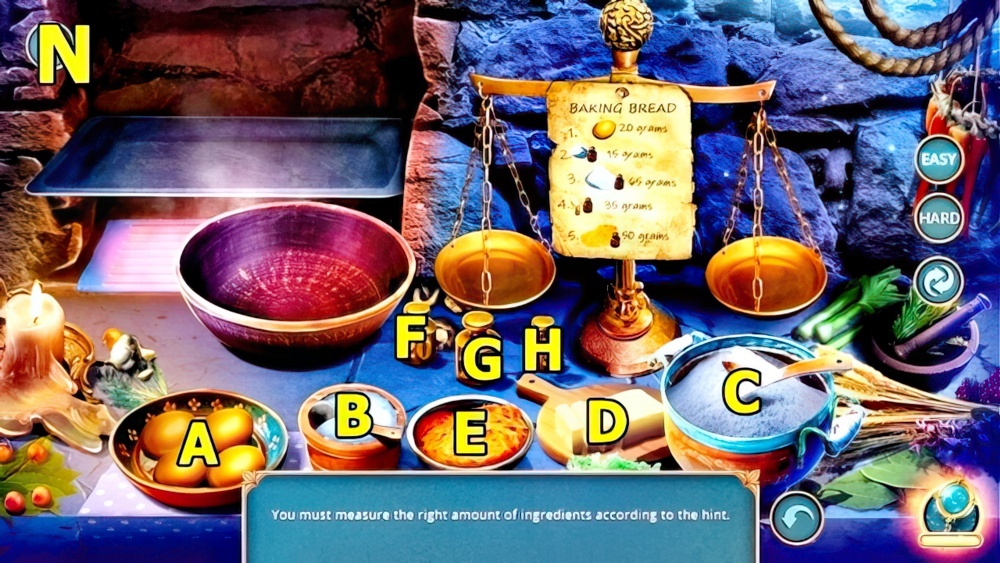
- Solution: (N) Easy A-F-B-H-(Cx5)-F-G-H-(Dx3)-F-H-(Ex5)-F-G.

- Solution: (O) Hard A-H-B-J-(Cx5)-H-I-J-(Dx3)-H-J-(Ex5)-H-I-G-J-(Fx3)-I.
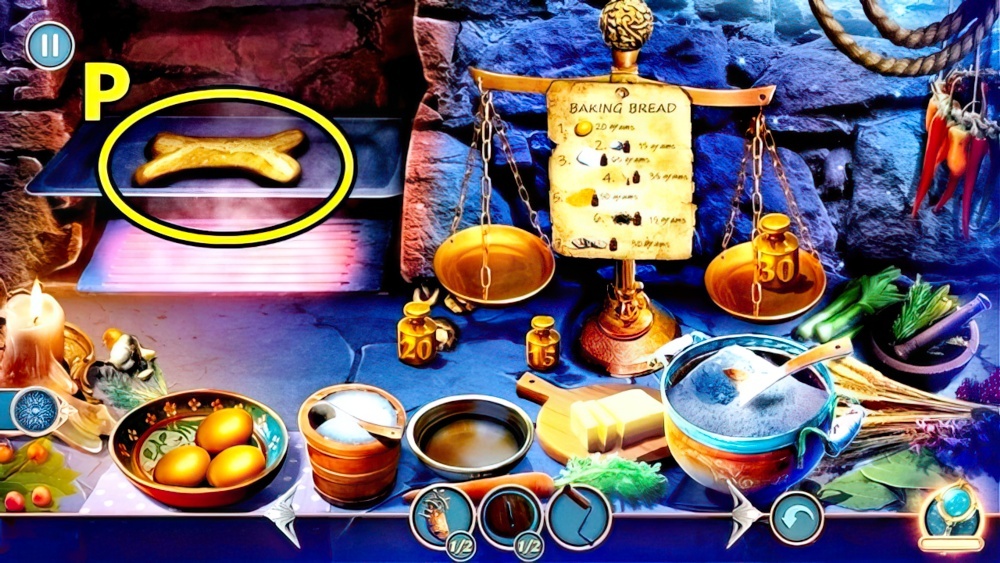
- Take BREAD (P).
- Offer BREAD (Q), take BOOK.
- Add BOOK (R). Examine. Play puzzle.
- Return to Inside Ida’s Manor.
- Insert HURDY-GURDY HANDLE (S).
- Take TAPE (T).
- Use TAPE (U), take HEART CLASP 2/2.
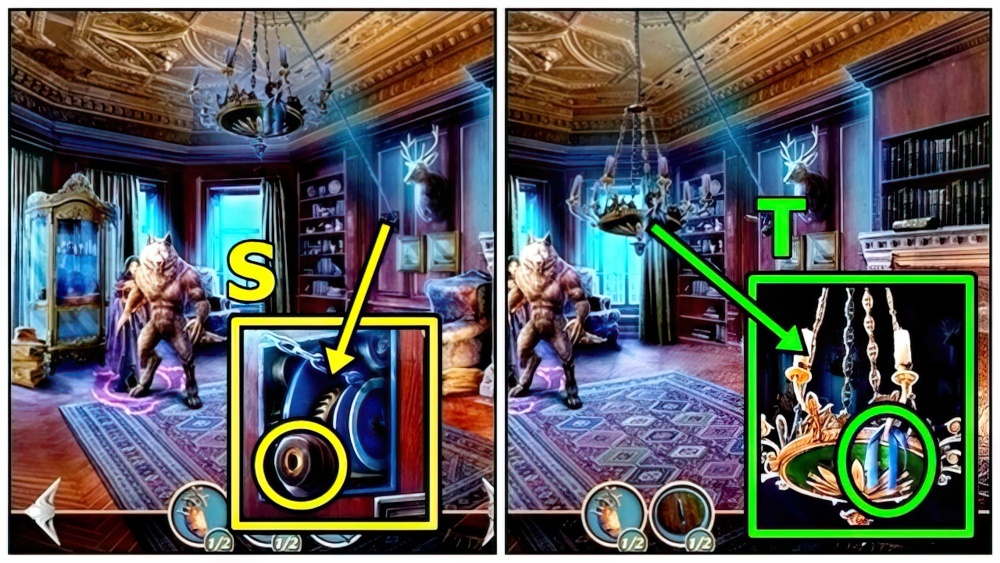
- Add HEART CLASP (V), receive SHIELD AND SWORD 2/2.
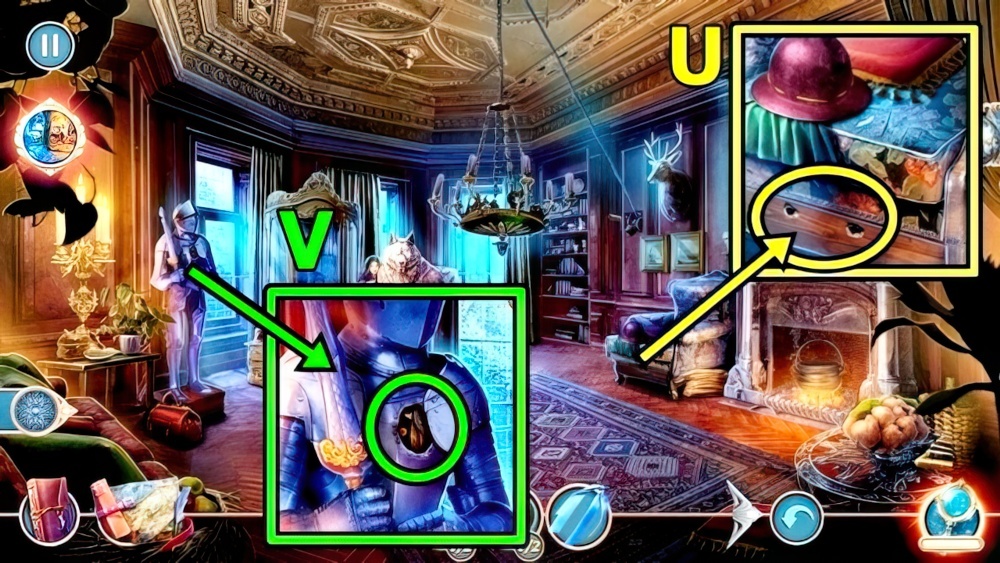
- Use SHIELD AND SWORD (W).
- Examine (X).

- Solution: (Y) Easy (A-C)-(B-D). (A-D)-(B-E)-(C-F). (A-D)-(B-E)-(C-F).
- Solution: (Z) Hard (A-D)-(B-E)-(C-F). (A-D)-(B-E)-(C-F). (B-G)-(C-H)-(A-F)-(D-I)-(E-J).
- Select (A).
Congratulations! You have completed the game Royal Romances Episode 8: Wolf hunting.


