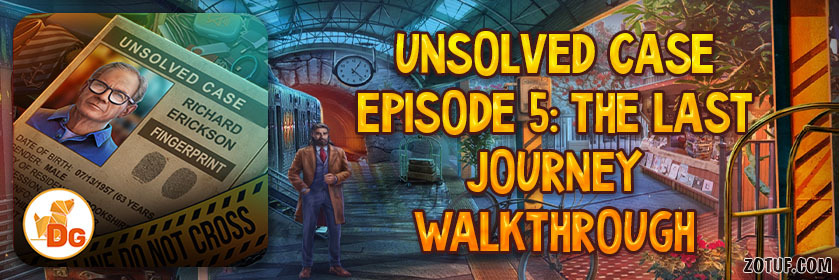
Unsolved Case Episode 5: The Last Journey – The walkthrough of the game begins with the fact that you arrive at the crime scene where the famous city attorney Richard Errikson was killed. The crime happened on the train, he was shot right in his compartment. You have to collect evidence, interrogate witnesses and find out who the killer is. If you can’t complete any of the puzzles or don’t know where the items are, you can watch the walkthrough of the game Unsolved Case 5: The Last Journey on our website and get to the bottom of the mystery of the incident.
Unsolved Case Episode 5: The Last Journey – Walkthrough
Here you can watch the full walkthrough of the game Unsolved Case Episode 5: The Last Journey, namely the main plot.

- Take PLIERS, BOTTLE OPENER and CUFFLINK (A).
- Take map and MY BAG (B).
- CUFFLINK on MY BAG, take journal and VICTIM’S DOSSIER.
- Place VICTIM’S DOSSIER for puzzle (C).
- Select 1 or 2 (D).
- Receive RAILWAY BADGE.
- Go (E).

- Take CHAIN, use RAILWAY BADGE (F).
- Take CAMERA (G).
- Use CAMERA (H).

- Easy solution (I).
- Hard solution (J).
- Go (K).

- Use PLIERS (L), take STENCIL WITH HOLES and evidence 1/4 (M).
- Take HAND CREAM and LIGHT BULBS 1/2 (N).
- Open, take evidence 2/4. Place STENCIL WITH HOLES (O).

- Take evidence 3/4 (P).
- Enter M-O-T-H (Q).
- Take evidence 4/4 (R).
- Walk down.

- Select 1 or 2 (S).
- Receive NAIL FILE.
- Use NAIL FILE (T), take ACCESS CARD (U).

- Use ACCESS CARD (V).
- Easy solution (W): Xx3-Yx4-Zx4-Ax2-Bx4.
- Hard solution (W): Zx4-Y-A-Xx3.
- Go (C).

- Go through all dialog (D).
- Take WINE GLASS AMULET PART and DUCT TAPE (E). Use BOTTLE OPENER, take BRANDED KEY (F).

- Use BRANDED KEY (G), take TAPE MEASURE (H).
- Walk down twice.

- Use TAPE MEASURE (I), take GLUE and VACUUM BAG (J). Use HAND CREAM, take GEAR (K).
- Place GEAR and CHAIN, take FIBULA (L).
- Go to Train Compartment.

- Use FIBULA for puzzle (M), receive HAT.
- Use HAT, take CORKSCREW (N).
- Walk down twice.

- Use CORKSCREW (O), take GARDENING SHOVEL (P).
- Use GARDENING SHOVEL, take SUCTION CUP KEYCHAIN (Q).
- Go (R).

- Use SUCTION CUP KEYCHAIN (S).
- Easy solution (T): Ux2-X-V, Wx2-U-Y, Ux3-A-V-W.
- Hard solution (T): Ux2-X-V, Wx2-U-Y, Ux3-A-V-W, W-V-X.
- Take LATEX GLOVES and HANDKERCHIEF (C).

- Use HANDKERCHIEF (D), take LIGHT BULBS 2/2 (E).
- Go (F).

- Place LIGHT BULBS (G).
- Easy solution (H): (2-7)-(4-12)-(5-7)-(10-7)-(7-12)-I-(1-8)-(3-11)-(6-8)-(9-11) -(9-8).
- Hard solution (J): (2-10)-(4-16)-(6-16)-(8-10)-(10-20)-(12-18)-(12-14)-(12-20) -(10-14)-K-(1-5)-(3-11)-(5-17)-(7-9)-(9-17)-(11-15) -(11-19)-(13-17).
- Take KNITTED SCARF and WINE GLASS AMULET LOWER PART (L).

- GLUE and WINE GLASS AMULET LOWER PART on WINE GLASS AMULET PART, receive WINE GLASS AMULET.
- Use WINE GLASS AMULET (M), take PUMP and TWEEZERS (N).
- Go to Train Compartment.

- Take PUZZLE FRAGMENT with TWEEZERS (O).
- Place PUZZLE FRAGMENT (P).
- Easy solution (Q): Rx3-9-R-12-R-7-R-1-6-R-4-8-Rx3-2.

- Hard solution (T): U-1-U-2-Ux2-3-U-10-V-4-12-Vx2-5-U-9-11-U-6-7-8.
- Take STAPLE REMOVER and PLUG (W).
- Go to Dining Car.

- Place DUCT TAPE and PLUG, take CLOCK WEIGHT (X).
- Place CLOCK WEIGHT, use LATEX GLOVES and VACUUM BAG (Y). Receive EVIDENCE.

- Select 1 or 2 (Z).
- Print, take STAFF AND PASSENGER LIST and CLIPPERS (A). Use STAPLE REMOVER, take note and NEW FINGERPRINTING KIT (B).

- Place EVIDENCE and NEW FINGERPRINTING KIT (C), receive FINGERPRINTS.
- Place FINGERPRINTS for puzzle (D), receive FINGERPRINT ANALYSIS RESULTS.
- Place STAFF AND PASSENGER LIST and FINGERPRINT ANALYSIS RESULTS (E), select F.

- Select 1 or 2 (G). Note: if you’ve selected 2 at this point, skip all steps marked, below.
- Go (H).

- Take GAS CANISTER (I).
- Take LURES 1/2 (J). Use GAS CANISTER (K).
- Easy solution (L): 1-3-4.
- Hard solution (L): 1-4-5.

- Take note and AWL (M).
- Use AWL, take REMOTE CONTROL WITHOUT BATTERIES and HEX KEY (N).
- Walk down.

- Open, take HOOK and BROKEN PETROL LIGHTER. Use CLIPPERS, take LIFE JACKET (O).
- Place PUMP and LIFE JACKET (P).
- Go (Q).

- Take SCREW and LIGHTER RING (R). Use KNITTED SCARF, take BROKEN WEATHERVANE (S).
- Place HOOK and BROKEN WEATHERVANE, take BIRD-SHAPED AMULET 1/2 and BUCKET (T).

- Use BUCKET, take BUCKET OF SAND (U).
- Use BUCKET OF SAND, take SEASHELL FIGURE (V).
- Use HEX KEY (W), take FLASH DRIVE (X).
- Walk down.

- Place SEASHELL FIGURE (Y).
- Easy solution (Z).
- Hard solution (A).
- Take note and RATTLE (B).
- Go (C).

- Place FLASH DRIVE for puzzle (D).
- Take BROKEN DISC (E).
- Go to Cliff.

- Use RATTLE, take TWO RINGS AMULET (F).
- Place TWO RINGS AMULET (G).

- Solution (H): 4-2-1-5-2.
- Take note and LIGHTER FLUID (I).
- Use BROKEN DISC, take BATTERIES (J).
- Walk down.

- LIGHTER RING and LIGHTER FLUID on BROKEN PETROL LIGHTER, receive PETROL LIGHTER.
- Use PETROL LIGHTER (K), move wire for puzzle (L).
- Receive THERESA’S PENDANT.
- Use THERESA’S PENDANT, take WINDMILL BLADES (M).
- Go (N).

- BATTERIES on REMOTE CONTROL WITHOUT BATTERIES, receive REMOTE CONTROL WITH BATTERIES.
- Use REMOTE CONTROL WITH BATTERIES (O), receive LURES 2/2.
- Place LURES (P).
- Easy solution (Q).

- Hard solution (R).
- Take papers (S).
- Go to Cliff.

- Place SCREW and WINDMILL BLADES, take BIRD-SHAPED AMULET 2/2 (T).
- Place BIRD-SHAPED AMULET, take MOTORBOAT KEY (U).
- Walk down.

- Use MOTORBOAT KEY (V).
- Avoid obstacles (W).
Congratulations! You have completed the game Unsolved Case Episode 5: The Last Journey.


