
Grim Tales 26: Prisoners of the Past (Bonus Chapter) – Invites you to look at history through Richard Gray’s eyes and discover what led him to make the fateful decisions that changed the fate of his entire family. You will have to take the side of the man who has long been considered the perpetrator of the tragedy. Richard returns to the orphanage, realizing that he has put off this step for too long. Thomas has spent years here alone, and now the situation is becoming more and more alarming, the director is missing, there are strange power failures in the building, communication is unstable, and the staff can not explain what is happening. A threat hangs in the air, and Richard senses it’s not just technical faults, but something much darker. You’ll learn exactly what drove him to imprison Thomas and what forces he was trying to contain, creating a protective barrier that became a trap for his stepson. Deprived of his former power, Richard must use not only magic, but also wit to overcome the obstacles and make sense of his own mistakes. His journey is accompanied by flashbacks, bitter, rebuking, but necessary to understand protection and punishment are not the same thing. Uncover Richard’s emotional and personal side, his doubts, his attempts to right what he has done, and his desperate hope for redemption. Help him escape the trap of the past and rebuild broken bonds so history doesn’t repeat itself again.

- Take MAGNET (A).
- Read note, use MAGNET, take MARKER, ENGINE OIL, and RUBBER BATON (B).
- Use RUBBER BATON, take THOMAS’S PHOTO, FIRECRACKER, FLOOR PLAN, and SMOKING PIPE (C).

- Use SMOKING PIPE and ENGINE OIL (D).
- Play puzzle, earn MAGICAL RUNES (E).
- MAGICAL RUNES and MARKER on THOMAS’S PHOTO, take BARRIER REMOVER.
- Use BARRIER REMOVER (F).
- Go right.

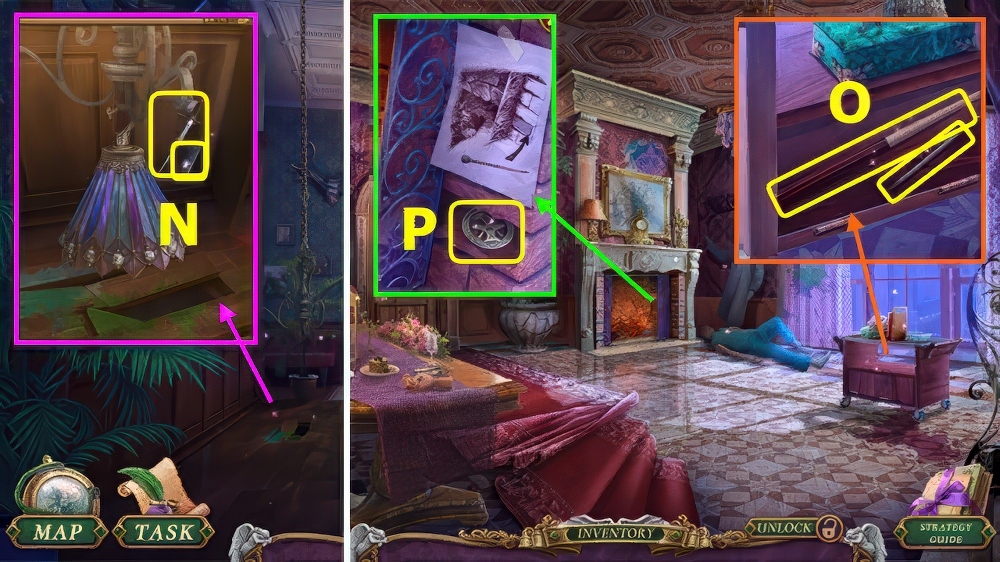
- Use (G-H)-(I-J)-(K-L).
- Use (M-N)-(O-P)-(Q-R).

- Take PUZZLE BOX (A).
- Take COIN (B).
- Take HANDKERCHIEF (C).

- Use COIN, take SPRAYER and BOX FRAGMENT (D).
- BOX FRAGMENT, HANDKERCHIEF, and MAGICAL RUNES on PUZZLE BOX, read note, take PROTECTIVE SHOES.
- Use FLOOR PLAN and PROTECTIVE SHOES (E).

- Solution (F).
- Solution (G).

- Take KEYCARD (H).
- Use KEYCARD, take 1/2 PATIENT CHARTS and STONE HAND (I).
- Walk down.
- Place STONE HAND, take MATCHES and RUBBER HOSE (J).
- Go right.

- Use FIRECRACKER and MATCHES, take SPRAYER NOZZLE and 2/2 PATIENT CHARTS (K).
- Place PATIENT CHARTS (L), play puzzle, earn DOOR DRAWING.
- Walk down.
- Use DOOR DRAWING (M).
- Go forward.

- Take CLAY KNIFE (N).
- Use CLAY KNIFE, take 1/4 WOODEN BEES, REMOTE KEY, and CANDLE (O).
- Use CANDLE and MATCHES, solution (P), take 2/4 WOODEN BEES and BLEACH.

- RUBBER HOSE, SPRAYER NOZZLE, and BLEACH on SPRAYER, take BLEACH SPRAYER.
- Use BLEACH SPRAYER (A).
- Take MONSTER KETTLEBELL and CLAY (B).
- Walk down, right.
- Use MONSTER KETTLEBELL, select 5x (C).
- Go forward.

- Read note, take 3/4 WOODEN BEES (D).
- Take PIN NUT (E).
- Use PIN NUT, take ELECTRIC INDICATOR and MOLD (F).
- Walk down 2x.

- Use ELECTRIC INDICATOR and REMOTE KEY, take HAND VACUUM and BATTERY (G).
- Go right.
- Use HAND VACUUM (H), play puzzle, earn DOCTOR’S BADGE.
- Use DOCTOR’S BADGE, take 4/4 WOODEN BEES, BATTERY CHARGER, and BROKEN HEADLAMP (I).
- Walk down, forward.

- Place WOODEN BEES, take TRANQUILIZER GUN and MODELING PLATE (J).
- Place MODELING PLATE, MOLD, and CLAY, select 4x, take MORTAR (K).
- Go to Medicine Storage.
- Use MORTAR, earn HERBS (L).
- Use HERBS (M).

- Solution (N).

- Take LEATHER STRAP and MEDICINE (O).
- LEATHER STRAP and BATTERY on BROKEN HEADLAMP, take HEADLAMP.
- Use HEADLAMP and FLOORPLAN (P).
- Go forward.

- Take RESET LEVER (A).
- Take DART, use RESET LEVER, take LOUISA’S PHOTO and JUMPER CABLE (B).
- Take CLIMBER’S EQUIPMENT, use JUMPER CABLE and BATTERY CHARGER (C), play puzzle, earn CYLINDER.
- DART, MEDICINE, and CYLINDER on TRANQUILIZER GUN.
- Use TRANQUILIZER GUN (D).

- Take RICHARD’S PENDANT (E).
- Take MANNEQUIN HAND (F).
- Place MANNEQUIN HAND, take DIRECTOR’S CRYPTEX, SAFETY BELT, and ANNA’S PHOTO (G).

- Use HAND VACUUM and DIRECTOR’S CRYPTEX (H).
- Play puzzle, earn RICHARD’S PHOTO (I).
- Place ANNA’S PHOTO, RICHARD’S PHOTO, and LOUISA’S PHOTO (J).
- Go right.

- Take THOMAS’S TOY CAR (K).
- Take FRAME PART (L).
- Place FRAME PART, take ANASTASIA’S PENDANT and CHANDELIER LEVER (M).

- Place ANASTASIA’S PENDANT (R) and RICHARD’S PENDANT (N), solution Q-P-O-T-R-Q-P-T-N-S-R-T-P-O-N-T-P-O-T.
- Take PROP KNIFE and CREEPY DOLL (U).
- Walk down.

- Use PROP KNIFE, take BOW TIE and ROPE (A).
- SAFETY BELT and ROPE on CLIMBER’S EQUIPMENT, take SAFETY GEAR.
- Go right.
- Use SAFETY GEAR (B).
- Solution (C).

- Take NEEDLES (D).
- Take WHEEL (E).
- Place WHEEL, take POKER and BROKEN LAMPSHADE (F).

- Use POKER, take RICHARD’S TOY CAR and STAPLER (G).
- Walk down 2x.
- Place RICHARD’S TOY CAR and THOMAS’S TOY CAR, take GLASS FRAGMENT and CHAIN (H).
- Place CHANDELIER LEVER and CHAIN, take THREAD and CHANDELIER FASTENER (I).
- BOW TIE, NEEDLES, and THREAD on CREEPY DOLL, take KEY MOLD and FAMILY DOLL.
- Go right, forward.

- Place FAMILY DOLL (J).
- Play puzzle, earn PAINTING FRAGMENT and MAGICAL BRACELET (K).
- Walk down.
- Use PAINTING FRAGMENT and STAPLER, take WOLF STATUETTE and FRAME CLUE (L).
- Use FRAME CLUE, select 1-4 (M), take CRYSTAL and FIREPLACE DRAWING.
- GLASS FRAGMENT, CRYSTAL, and CHANDELIER FASTENER on BROKEN LAMPSHADE, take CHANDELIER LAMPSHADE.
- Walk down.
- Place CHANDELIER LAMPSHADE, select panel, take PARRYING DAGGER and SILVER INGOT (N).
- Go right, forward.
- Use PARRYING DAGGER and WOLF STATUETTE, take CUE and KNITTING NEEDLE (O).
- Use FIREPLACE DRAWING and KNITTING NEEDLE, take RITUAL SIGIL (P).

- SILVER INGOT, RITUAL SIGIL, and MAGICAL BRACELET, on KEY MOLD.
- Use MAGICAL BRACELET (Q), play puzzle.
- Use CUE, earn MAGIC KEY (R).
- Use MAGIC KEY (S).

- Solution (E-A)-(K-J)-(J-I)-(G-K)-(K-J)-(F-G)-(G-K)-(D-E)-(E-F)-(F-G)-(G-H).
Congratulations! You have completed the game Grim Tales 26: Prisoners of the Past.


