
Halloween Stories 5: The Neglected Dead (Bonus Chapter) – A new investigation into the legendary Mothman. The action unfolds a year before the events of the main story. This time you will travel to the United States, where an incident at the Museum of Debunking has jeopardized the reputation of mythbusters. Eyewitnesses claim that a creature with huge wings and bright red eyes burst through the window of the museum. The locals are already calling this creature the Moth Man, but can the legend be true? It’s up to you to help William, an experienced member of the debunker team, solve this mystery. Explore the museum, find hidden clues and disprove myths to find out who or what is behind this frightening incident.
Bonus Chapter Walkthrough

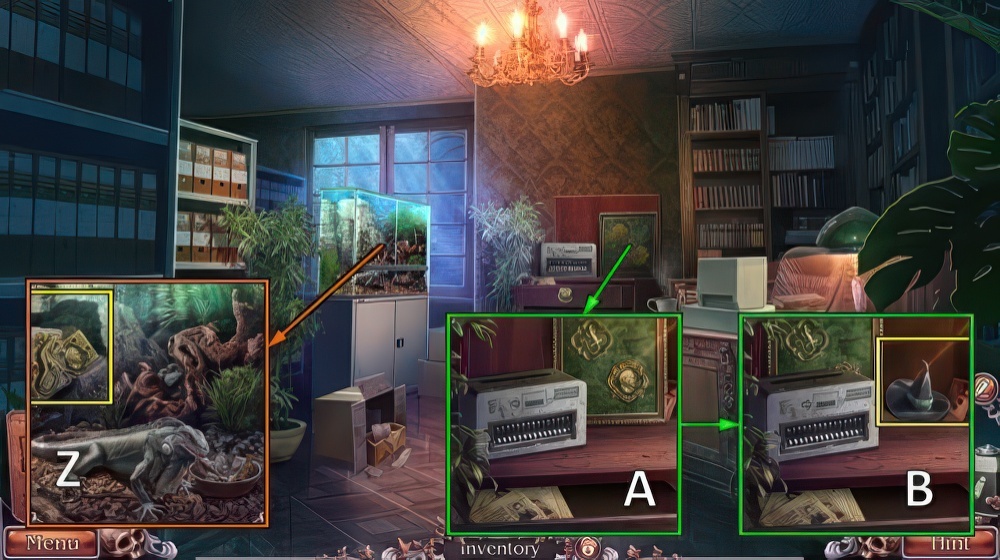
- Take BELLOWS (A).
- Take WOODEN HANDLE (B).
- Take MUSEUM LOGO, use BELLOWS (C).
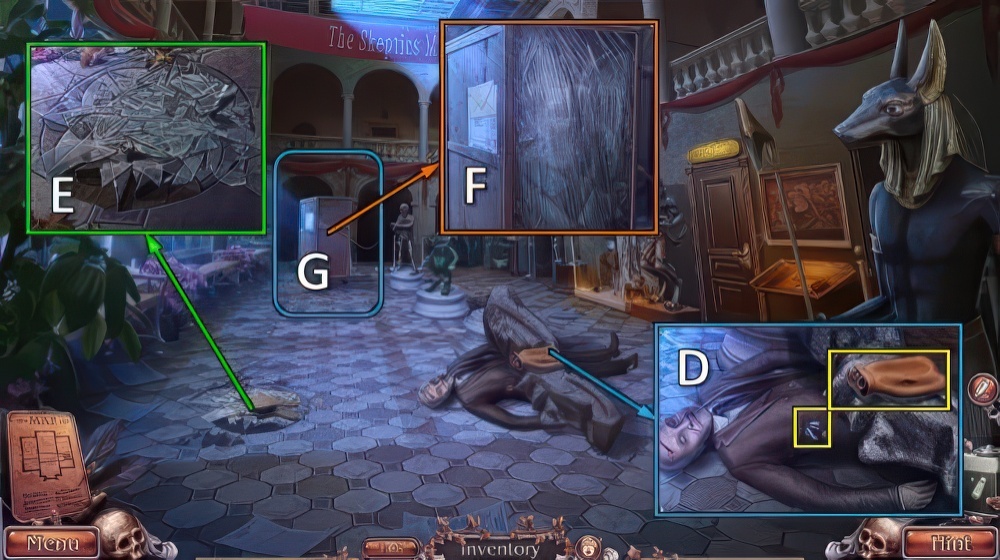
- Place MUSEUM LOGO, take BROKEN INFLATABLE, HEX KEY and HANDKERCHIEF (D).
- Take SHARD with HANDKERCHIEF, take HOSE (E).
- Use HEX KEY and SHARD (F).
- Play puzzle (G), receive MODELING WAX.
- HOSE, WOODEN HANDLE and MODELING WAX on BROKEN INFLATABLE, take PUMP.
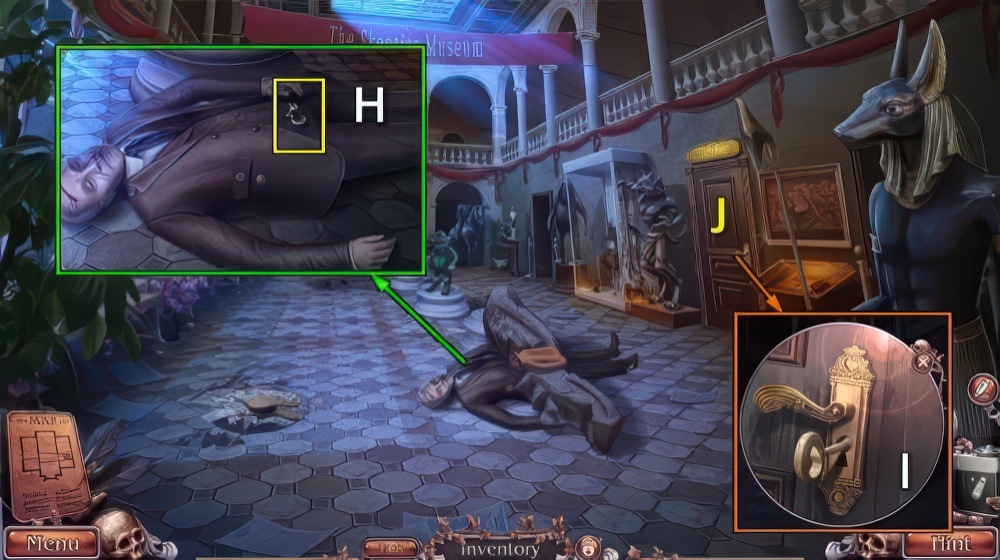
- Place PUMP, take SIGNET RING and RALPH’S KEY (H).
- Use RALPH’S KEY (I).
- Go (J).
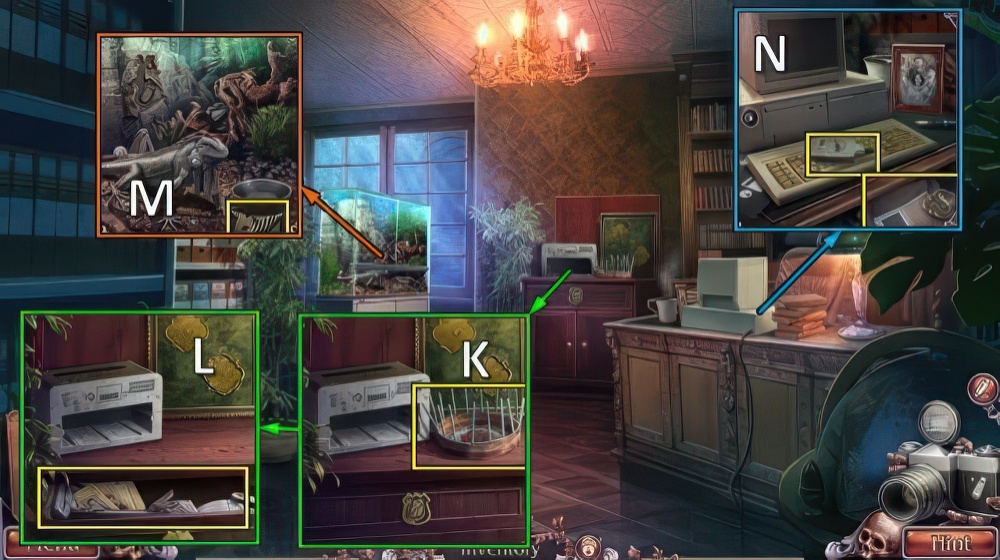
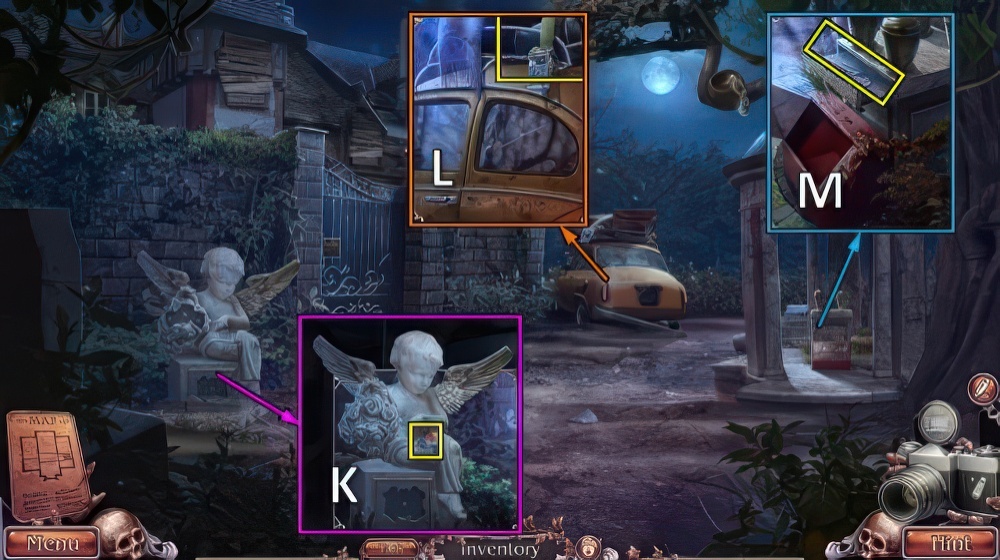
- Take BASKET BOTTOM, use SIGNET RING (K).
- Take HANDHELD VACUUM and INLAY (L).
- Take SPIRAL HANDLE and COLOR PANELS 1/4 (M).
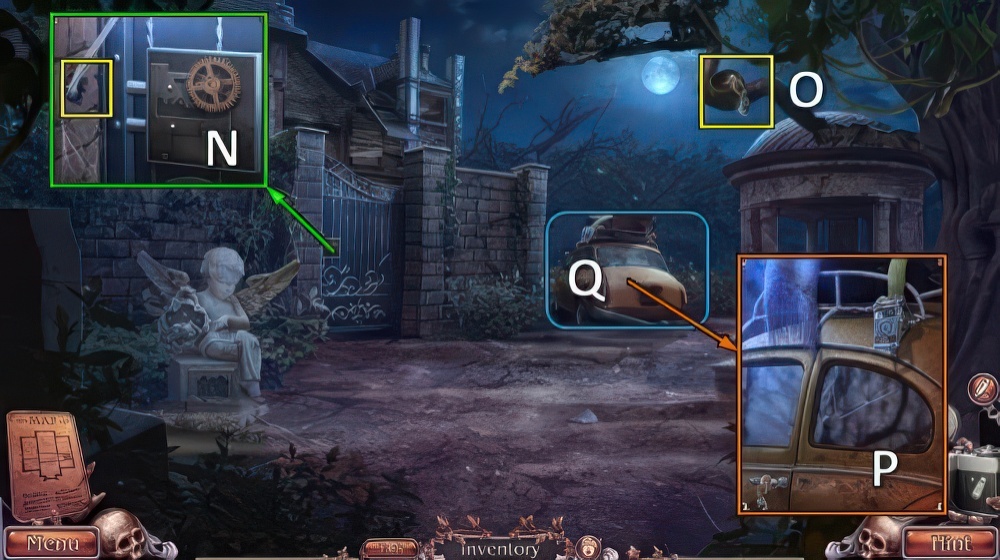
- Place SPIRAL HANDLE, take GLUE, IGUANA CAMEO and PAPER (N).

- Use HANDHELD VACUUM (O).
- Take SHREDDER BLADES (P).
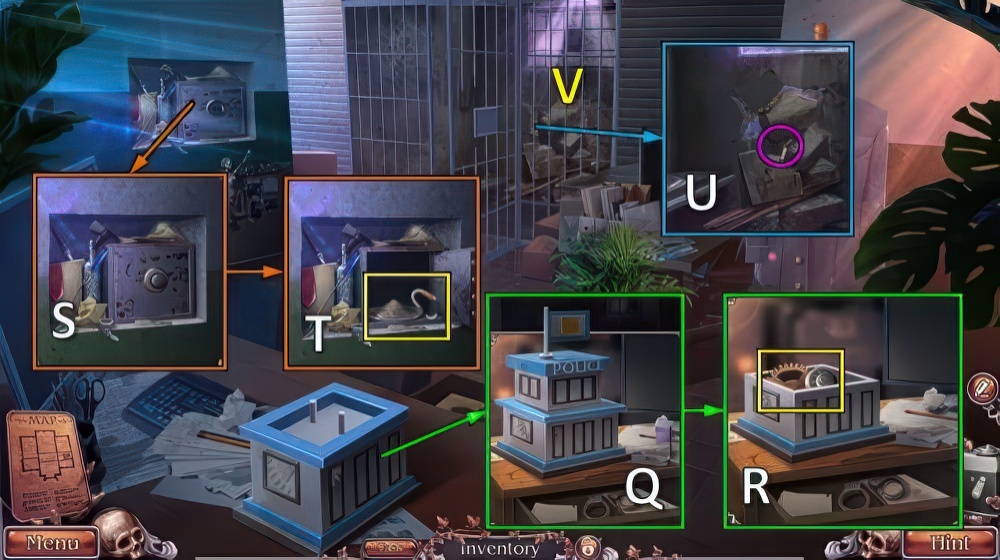
- Place SHREDDER BLADES and PAPER, take PAPER STRIPS (Q).

- PAPER STRIPS and GLUE on BASKET BOTTOM, take BASKET.
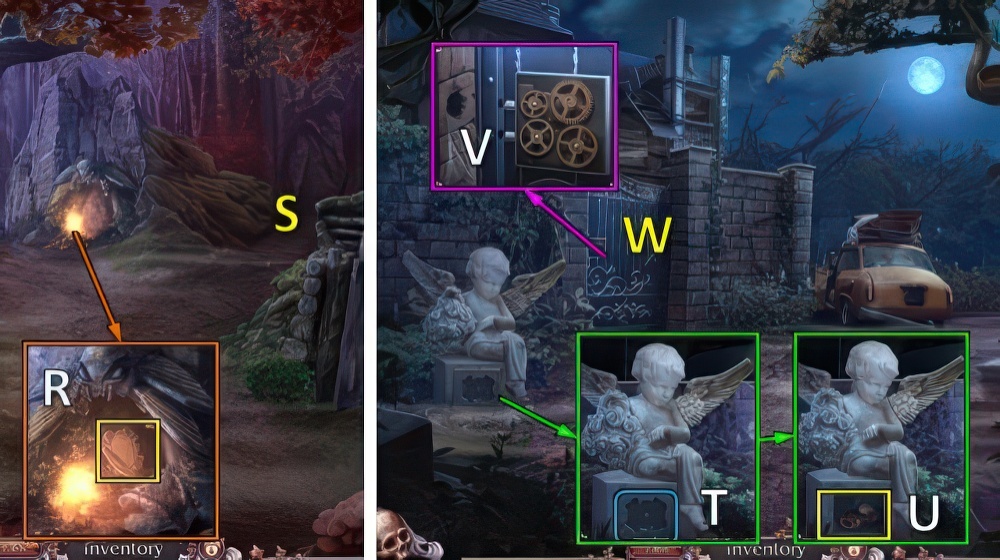
- Place BASKET, find pairs (R).

- Take COLOR PANELS 2/4 and MOTHS (S).
- Offer MOTHS, take POWER BUTTON and INLAY (T).
- Walk down.
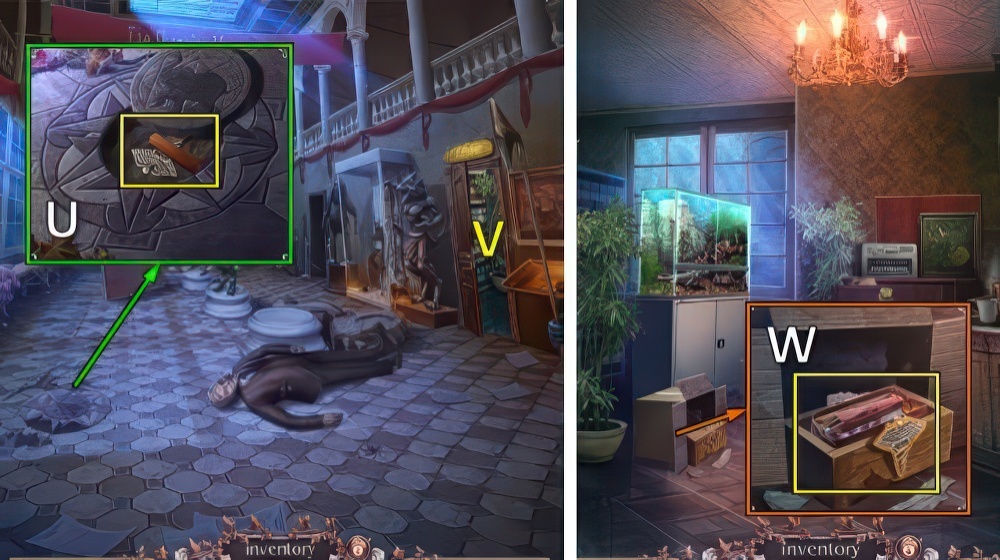
- Place INLAY x2, take CHALK and CADUCEUS (U).
- Go (V).
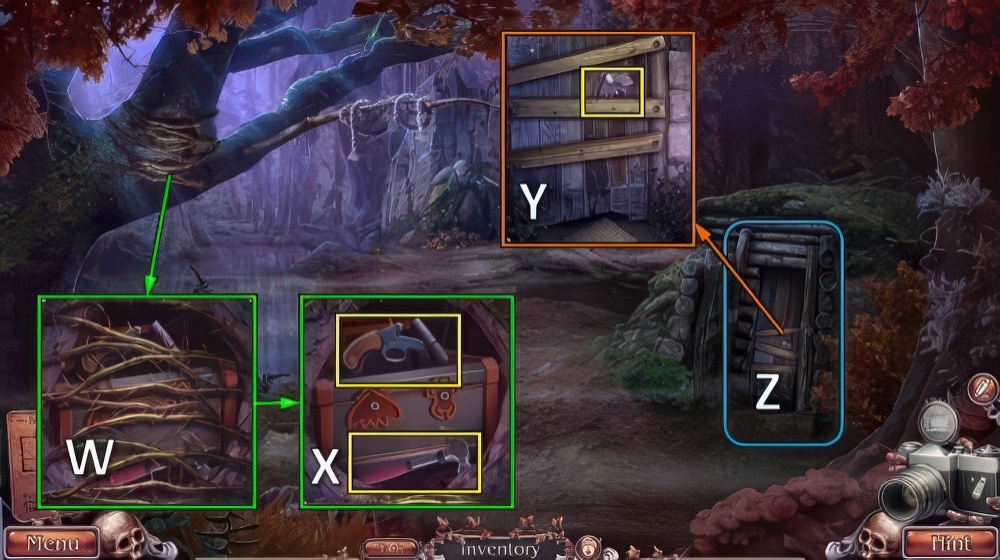
- Place CADUCEUS, take TONGS and FIRST AID KIT (W).
- Walk down.

- Place FIRST AID KIT (X), use 3-4-1-2.
- Receive NUMBER BOARD and LIZARD.
- Go (Y).
- Place LIZARD, take RALPH CAMEO and COLOR PANELS 3/4 (Z).
- Place IGUANA CAMEO and RALPH CAMEO (A), take HAT and COLOR PANELS 4/4 (B).
- COLOR PANELS and CHALK on NUMBER BOARD, receive PASSWORD.
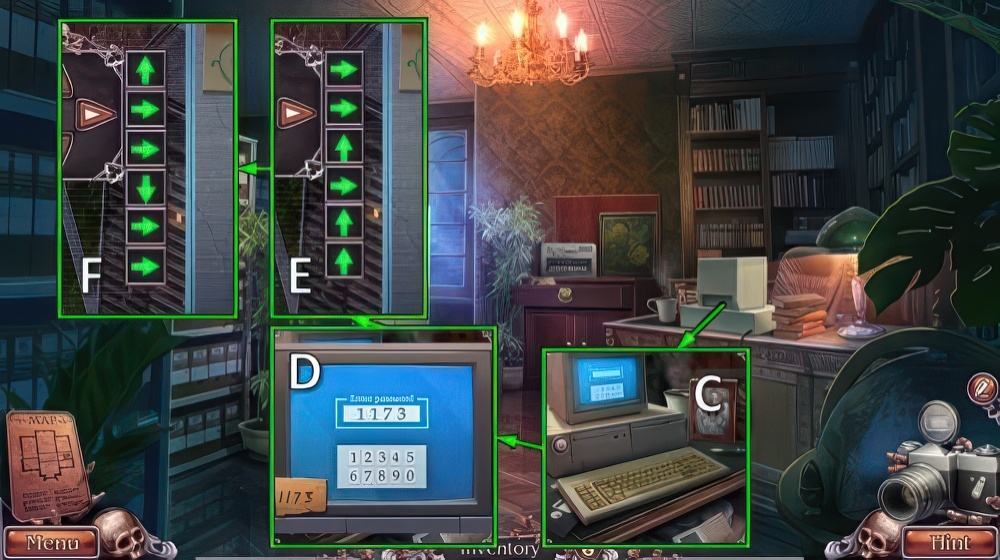
- Place POWER BUTTON and PASSWORD (C), enter 1-1-7-3 (D).
- Solution 1 (E).
- Solution 2 (F).

- Talk (G), receive DRESS CODE.
- Take LIGHTS and SPOON.
- Use TONGS, take CLOWN and DARTS 1/3 (H).
- Take ZOMBIE (I).

- Take LEVER and MASK (J).
- Place ZOMBIE and CLOWN, take CROSSBONES (K).
- Take DARTS 2/3, place CROSSBONES for mini-puzzle (L).
- Receive SLOT REELS.
- Place LEVER and SLOT REELS, pull lever x3.
- Take NUTCRACKER and SCALPEL (M).

- Use SCALPEL, SPOON and LIGHTS, take JACK-O’-LANTERN (N).
- Use NUTCRACKER and JACK-O’-LANTERN, take CLOAK and LOLLIPOP (O).
- HAT, MASK and CLOAK on DRESS CODE, take COSTUME.
- Use COSTUME, go (P).
- Receive VIP BRACELET.
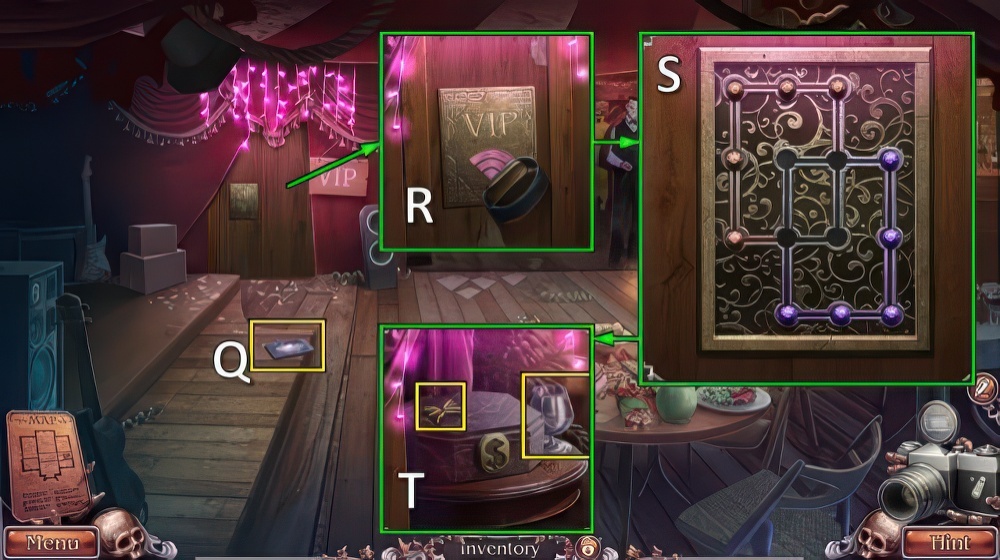
- Take BROKEN CELLPHONE (Q).
- Use VIP BRACELET (R).
- Solution (S), many strategies are possible.
- Take CANDY and WINEGLASS (T).

- Place CANDY and LOLLIPOP (U), take CUP (V).
- Place CUP and WINEGLASS (W), take LIDS and CASH (X).
- Walk down.

- Use CASH, take DARTS 3/3 and SCREEN (Y).
- Place and throw DARTS, take POLICE STATION and DOLLAR SIGN (Z).
- Go (A).
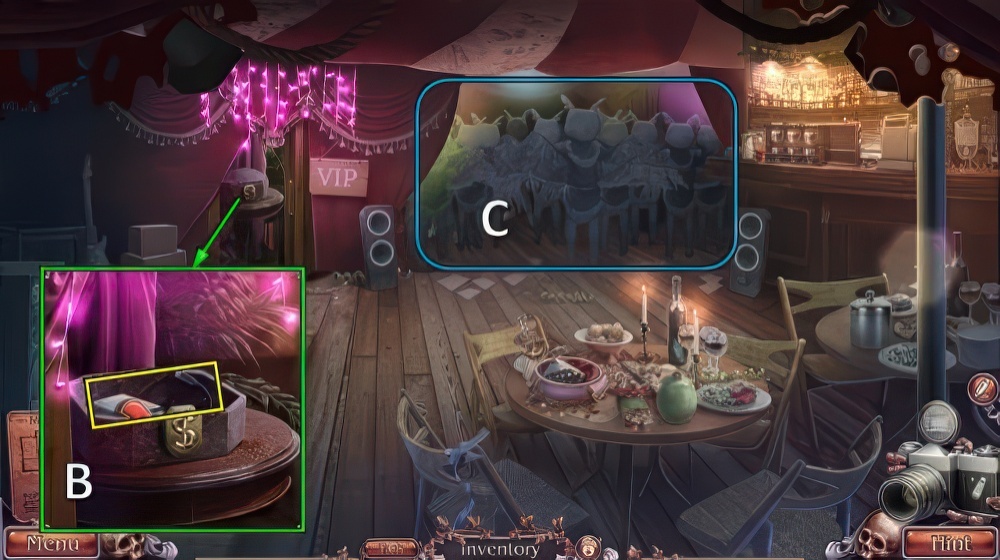
- Place DOLLAR SIGN, take RED MEDAL and PORTABLE BATTERY (B).
- SCREEN and PORTABLE BATTERY on BROKEN CELLPHONE, take CULPRIT VIDEO.
- Place CULPRIT VIDEO for puzzle (C).
- Receive CLIPBOARD.

- Take BLUE MEDAL (D).
- Place RED MEDAL and BLUE MEDAL (E), take PEN and LETTER P (F).
- Take FORM and DRAWER PULL with LETTER P (G).
- FORM and PEN on CLIPBOARD, take QUESTIONNAIRE.
- Offer QUESTIONNAIRE (H).

- Answer K-J-J-I-J.
- Place DRAWER PULL, take LIGHTER, GLOVES and KNIFE (L).
- Use KNIFE, take FUSE and SCALE (M).

- Place SCALE for mini-puzzle (N), receive FILE.
- Use FILE (O), receive PIPE.
- Take FLAG (P).
- Place POLICE STATION and FLAG (Q).
- Take DIAL and GEARS 1/3 (R).
- Place DIAL (S), take GUNPOWDER and CARABINER (T).
- LIDS, GUNPOWDER and FUSE on PIPE, take BOMB.
- Use BOMB and LIGHTER (U).
- Go (V).
- Use GLOVES (W).
- Take HAMMER and EMPTY GUN (X).
- Take MOTH AMULET, use HAMMER (Y).
- Play puzzle (Z), receive SAW.
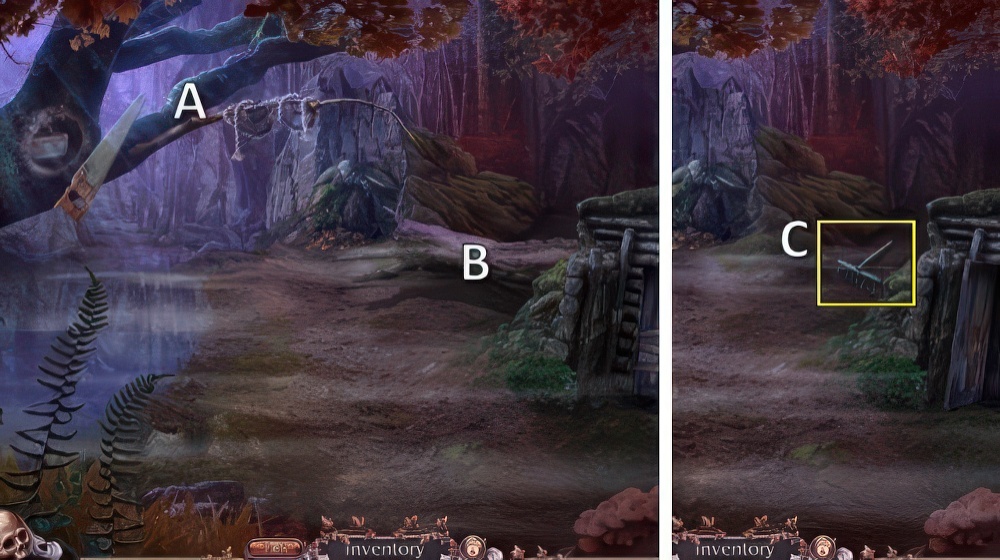
- Use SAW (A), receive BRANCH and ROPE.
- Use ROPE and CARABINER (B).
- Take RAKE (C).
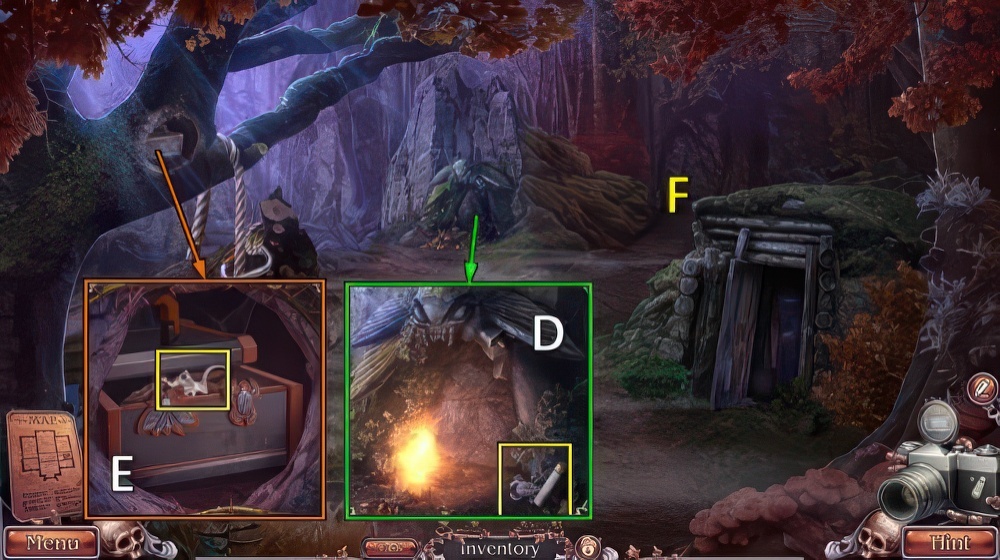
- Use RAKE and LIGHTER, take FLARE and BEETLE AMULET (D).
- Place MOTH AMULET and BEETLE AMULET, take TRIGGER (E).
- FLARE and TRIGGER on EMPTY GUN, take FLARE GUN.
- Use FLARE GUN, go (F).

- Take LATCH (G).
- Use LATCH (H).
- Solution (I): (5-7)-(7-2)-(7-8).
- Take GEARS 2/3 and ROSES (J).
- Place ROSES, take TETRAHEDRON and WHEEL AMULET (K).
- Place WHEEL AMULET, take URN (L).
- Place URN, take HOOK and TWEEZERS (M).
- Take FISHING LINE with TWEEZERS (N).
- FISHING LINE and HOOK on BRANCH, take FISHING ROD.
- Take CAR KEY with FISHING ROD (O).
- Use CAR KEY (P).
- Play puzzle (Q), receive WING.
- Walk down.
- Place WING, take NAMEPLATE and FEATHERS 1/3 (R).
- Go (S).
- Place NAMEPLATE (T), take GEARS 3/3 and CRACKED SKULL (U).
- Place GEARS (V).
- Go (W).

- Place CRACKED SKULL, take OCTAHEDRON and FEATHERS 2/3 (X).
- Place TETRAHEDRON and OCTAHEDRON, take FEATHERS 3/3 (Y).
- Place FEATHERS (Z), receive CANVAS FRAGMENT.

- Place CANVAS FRAGMENT (A).
- Take KEYBOARD (B).
- Place KEYBOARD (C).

- Find pairs (D).
- Defeat the Mothman (E).
Congratulations! You have completed the game Halloween Stories 5: The Neglected Dead.


