
Immortal Love 9: True Treasure – Immerse yourself in an atmosphere of magic on the eve of the summer solstice, the only night of the year when mythical creatures cross the borders of worlds. But your life is far from fairy tales: to save your family, you’re preparing for an unwanted wedding to Count Patrick O’Dwyer. Everything changes when you find evidence of the leprechaun’s gold, a mythical treasure that could change your fate. However, the path to it is strewn with dangers. The forest is full of secrets, and the fae, deceitful and cruel, are ready to protect their secrets at any cost. You will have to solve riddles, overcome magical traps and resist ancient forces to get the treasure, about which legends have been written. If you can not pass any of the puzzles or do not know where the items are, on our site you can watch the walkthrough of Immortal Love 9: True Treasure, and discover the secrets of the forest.
Immortal Love 9: True Treasure – Walkthrough
Here you can see full walkthrough of Immortal Love 9: True Treasure game, namely for all chapters, including bonus chapter, in pictures.
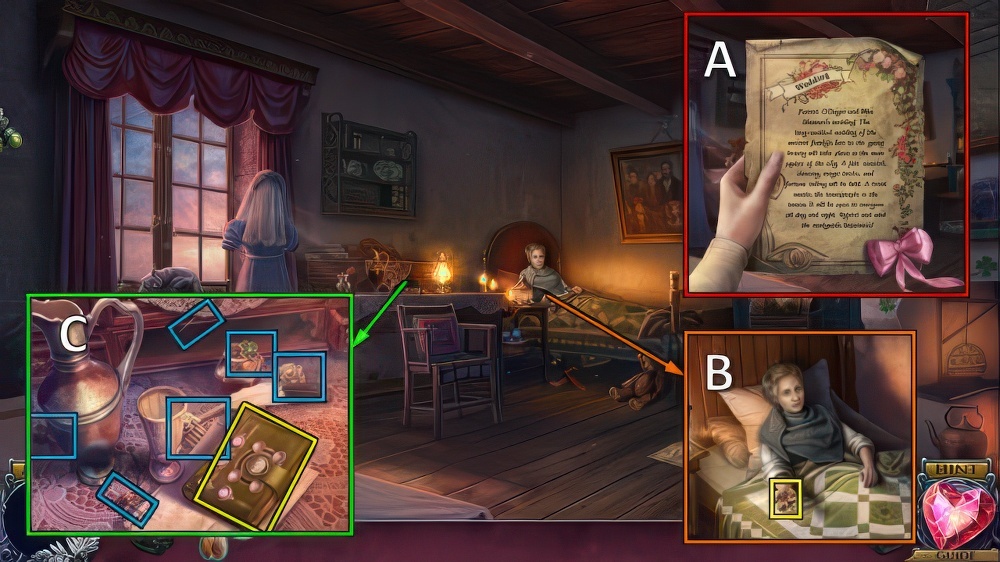
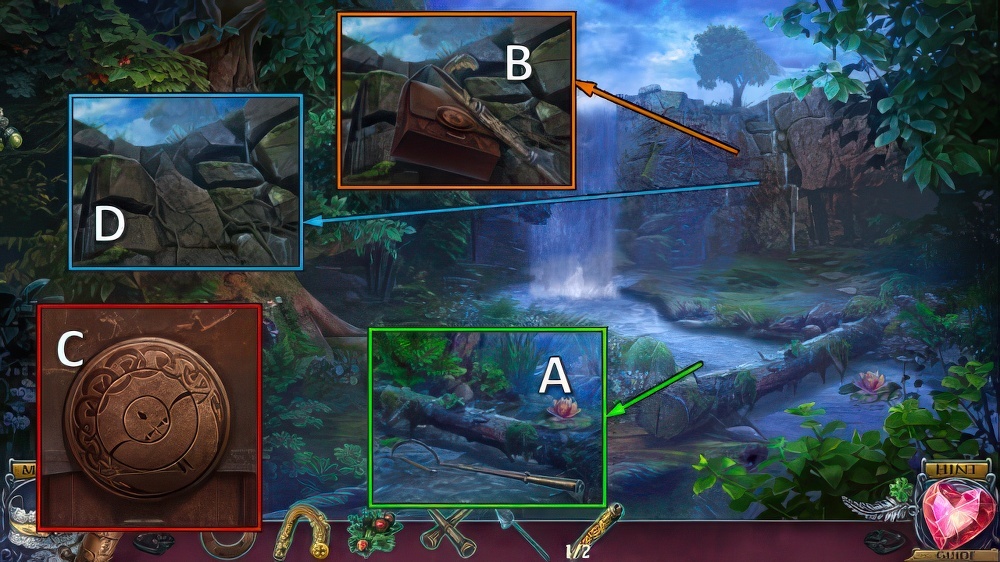
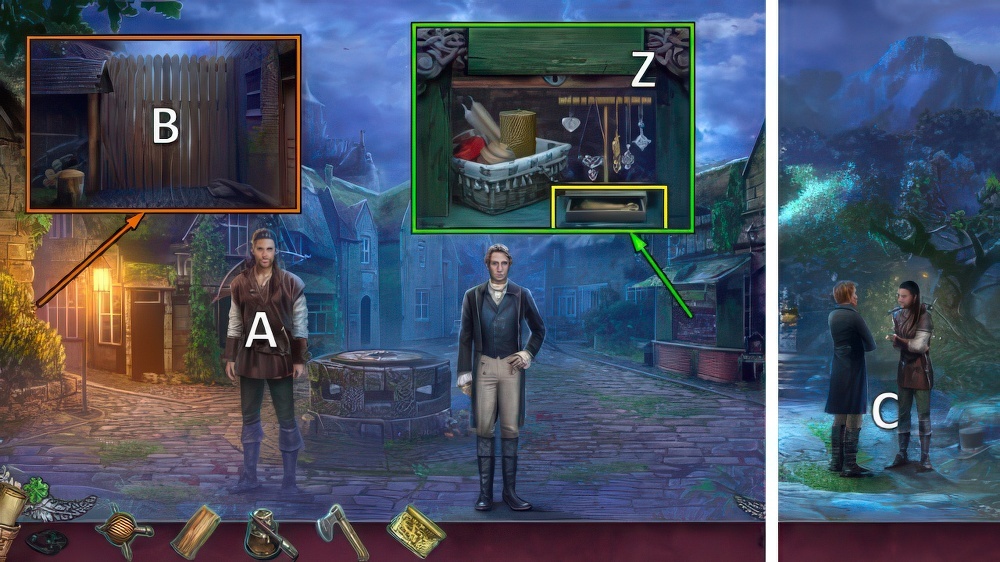
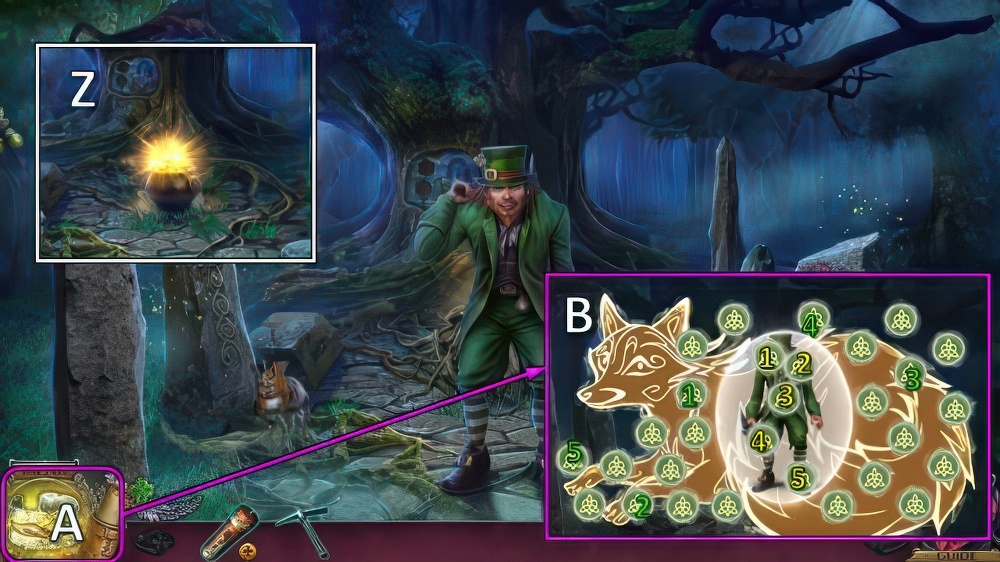
- Drop letter (A).
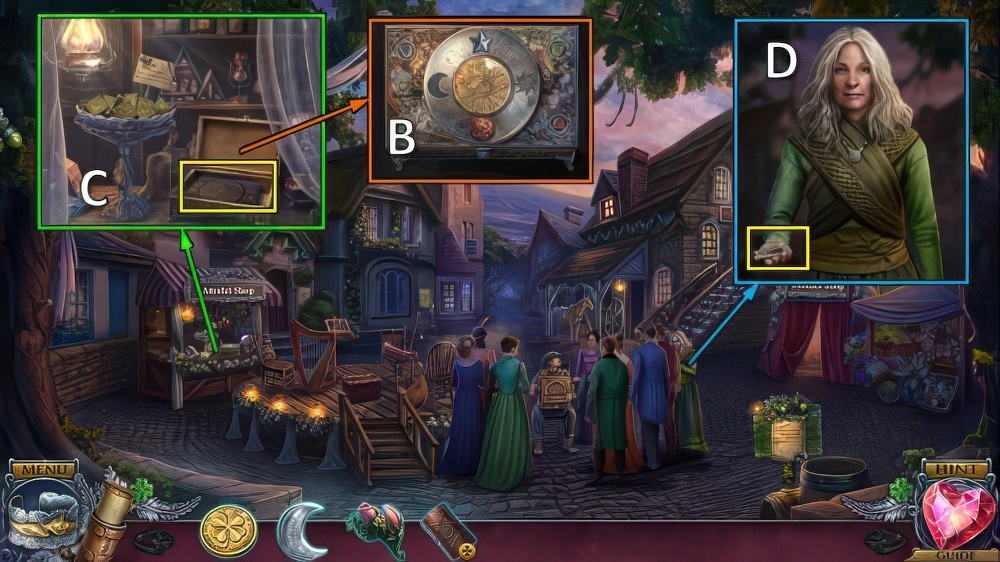
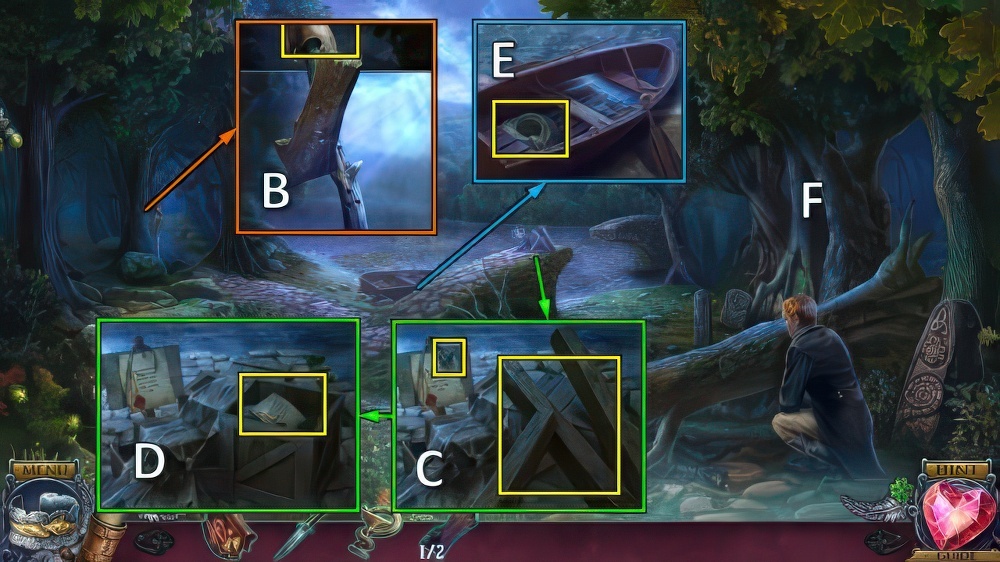
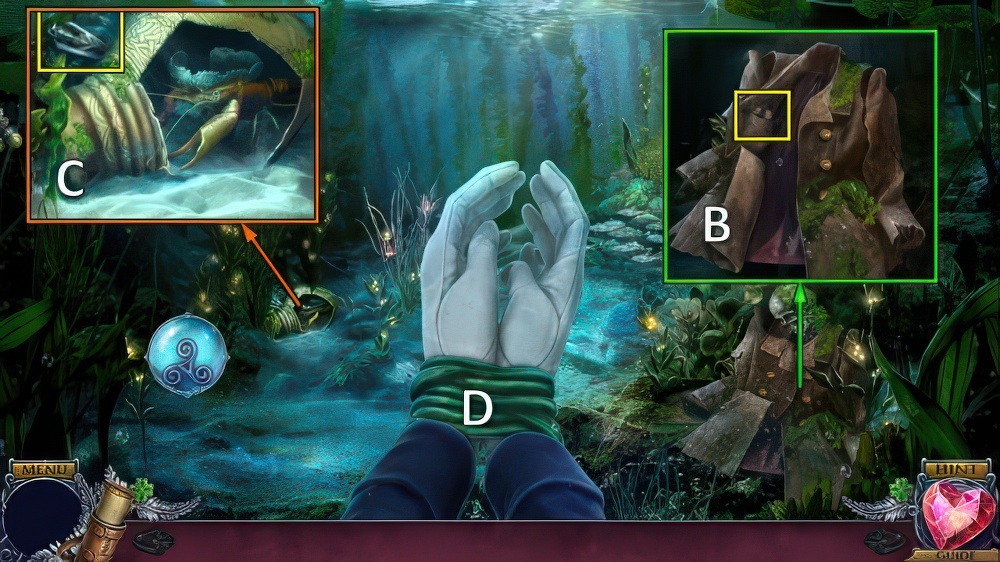
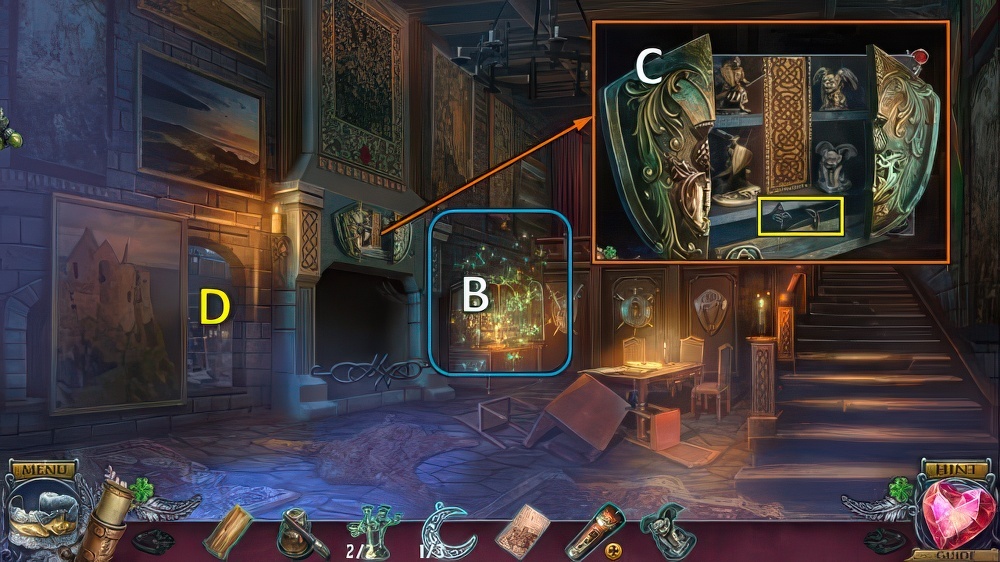
- Talk, take CLOVER PART (B).
- Take SHANNON’S DIARY, find and take FLOWER PINS x6 (C).

- Access SHANNON’S DIARY, move symbols (D).
- Read diary and take FOX PART and CLOVER PART.
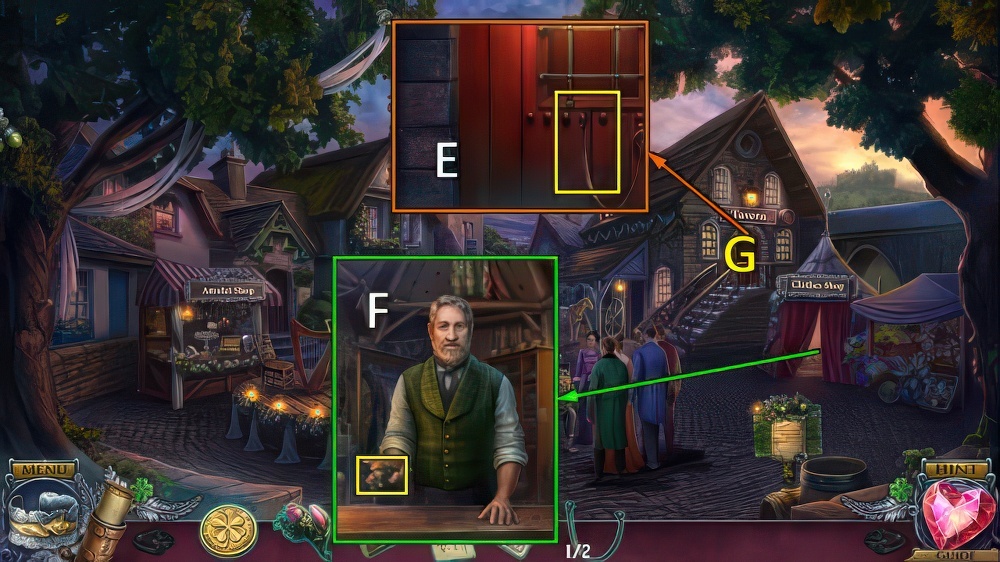
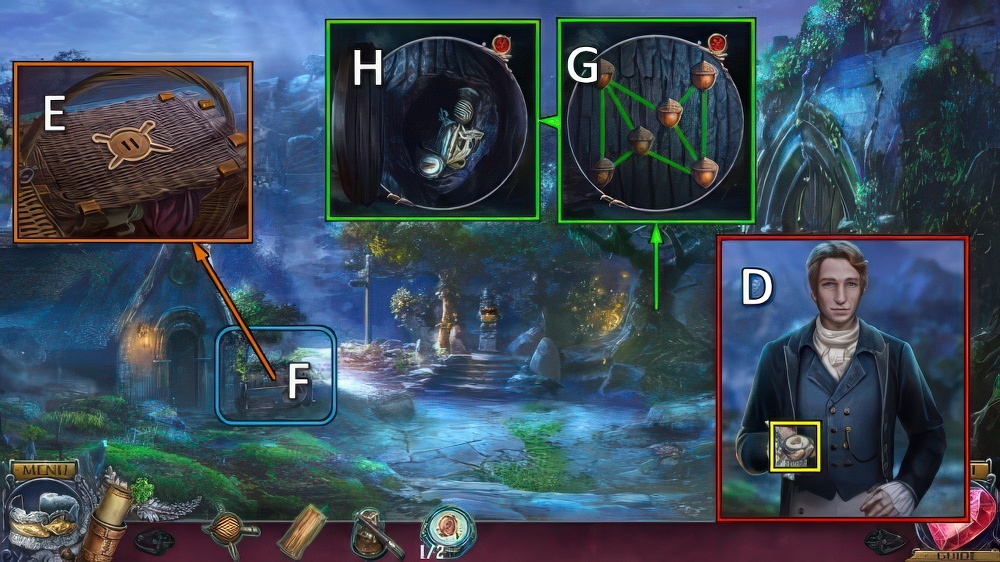
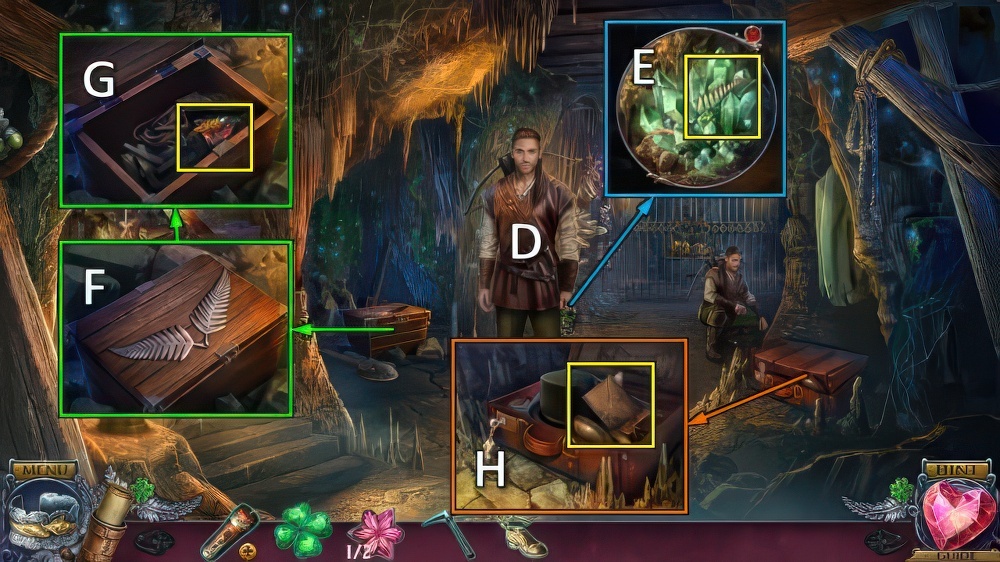
- Move quilt, place CLOVER PART x2 (E).
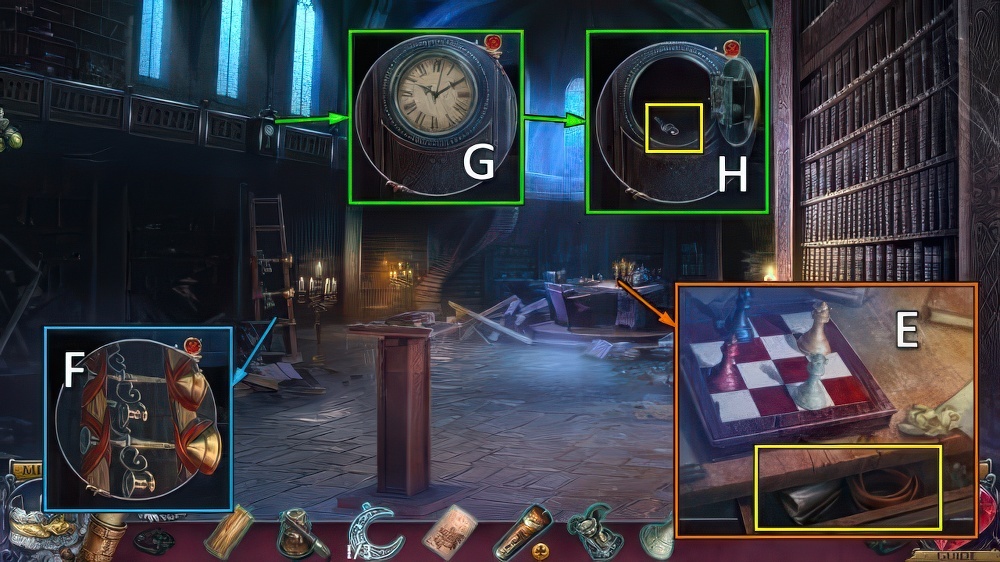
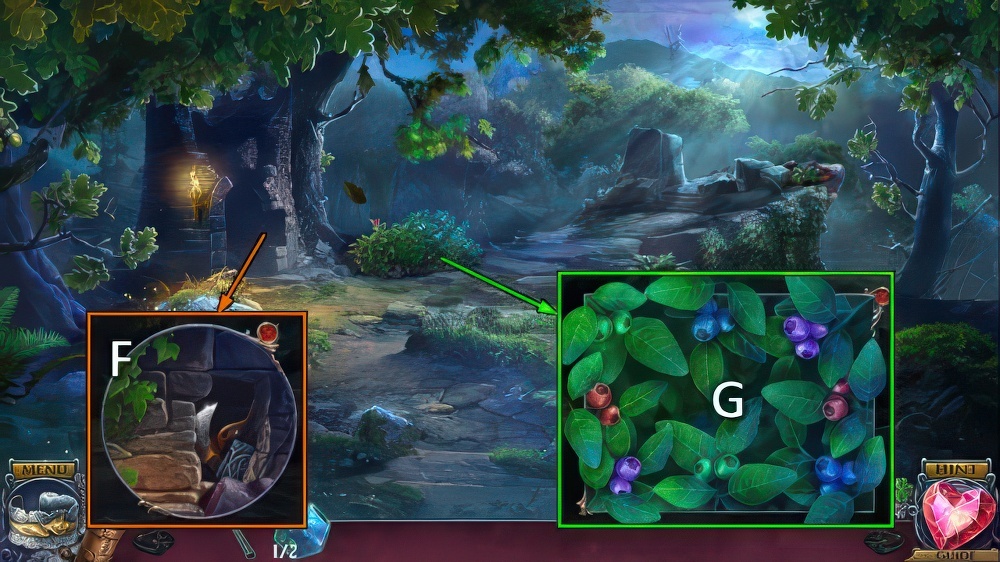
- Move items, take PRESCRIPTION MEDICINE (F).
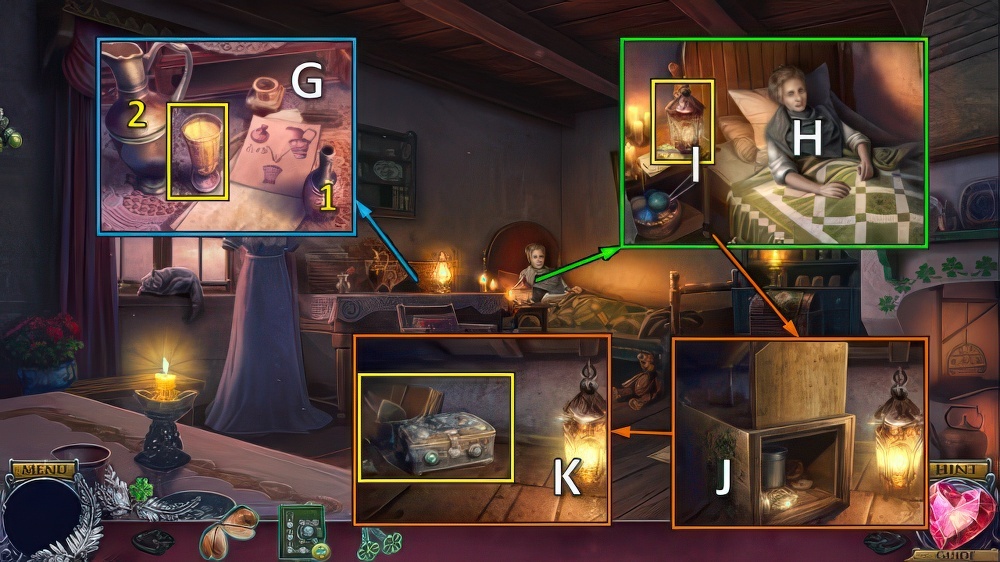
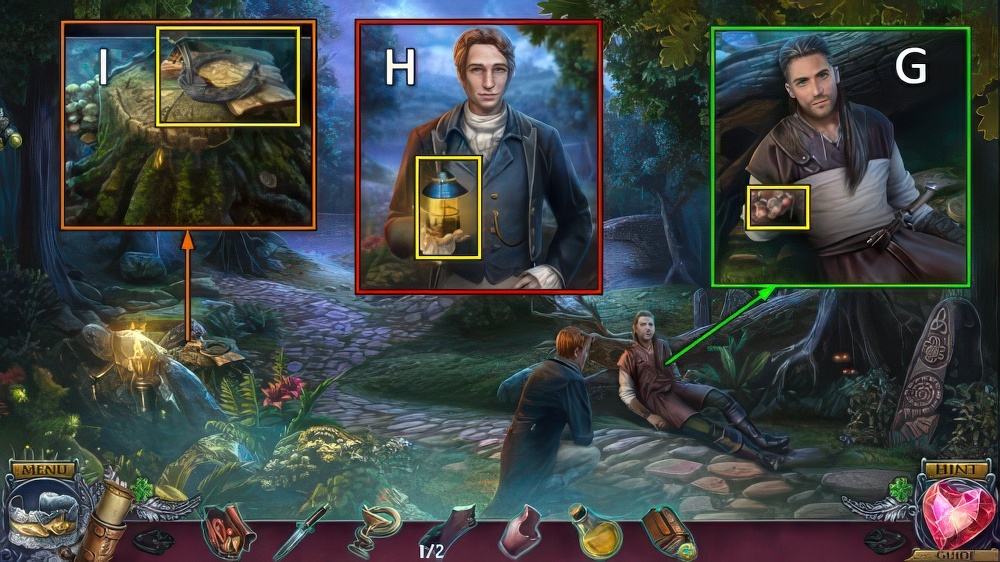
- Place PRESCRIPTION MEDICINE, select 1-2.
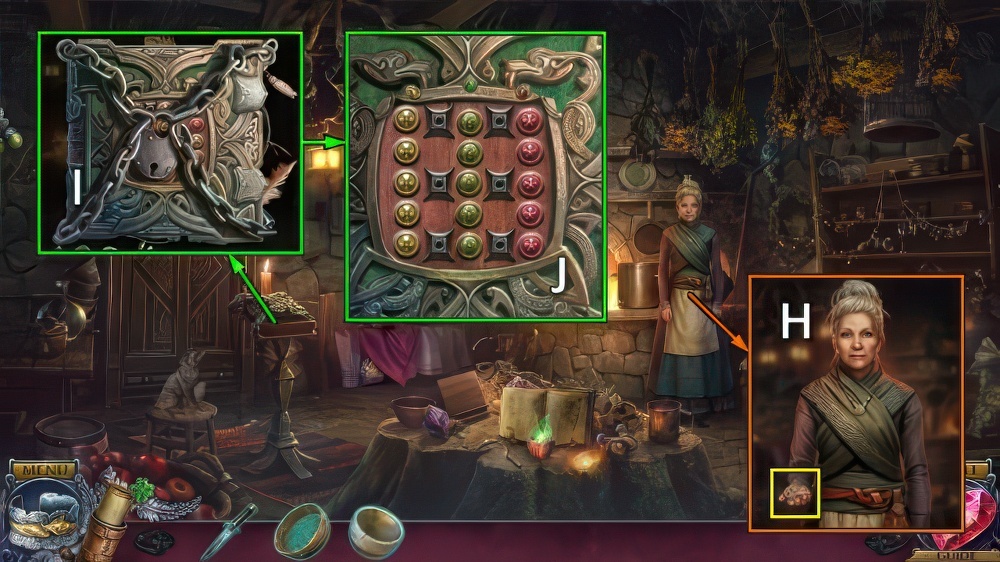
- Take MEDICINE (G).
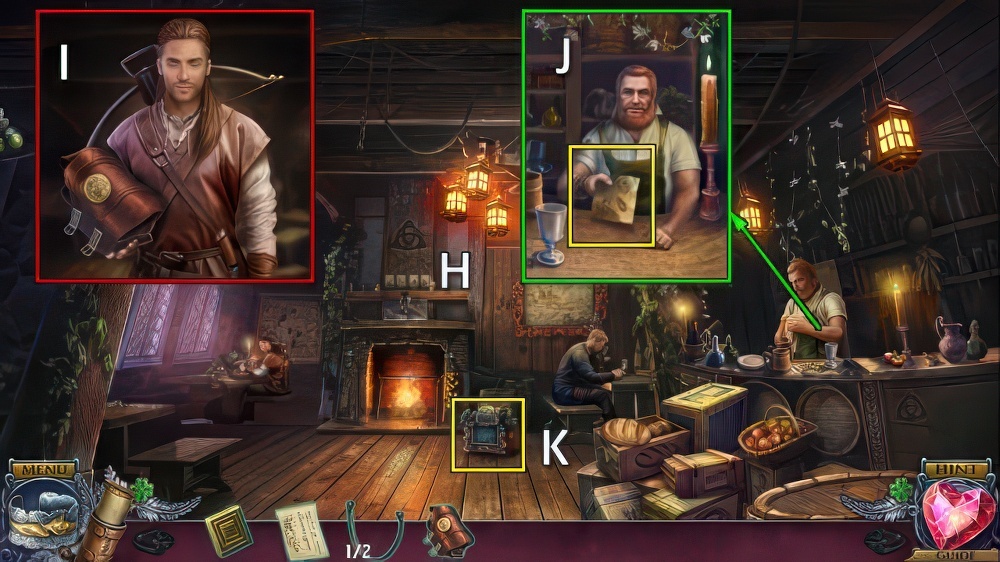
- Offer MEDICINE (H), take LAMP (I).
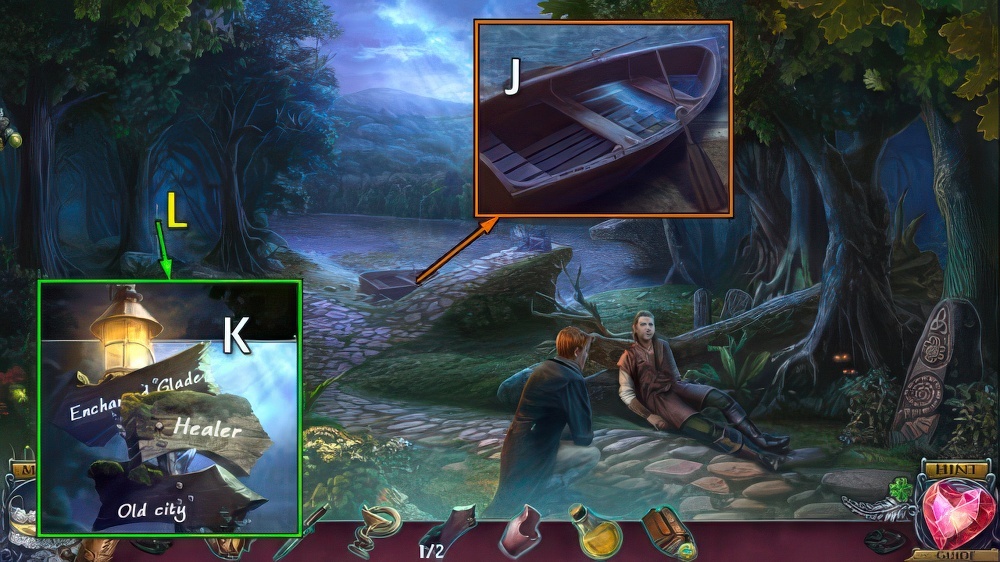
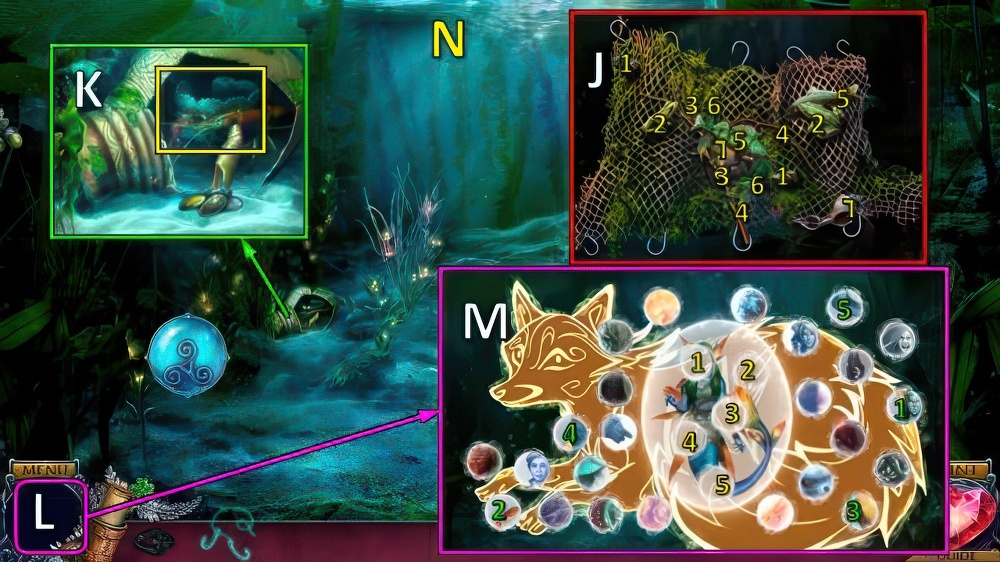
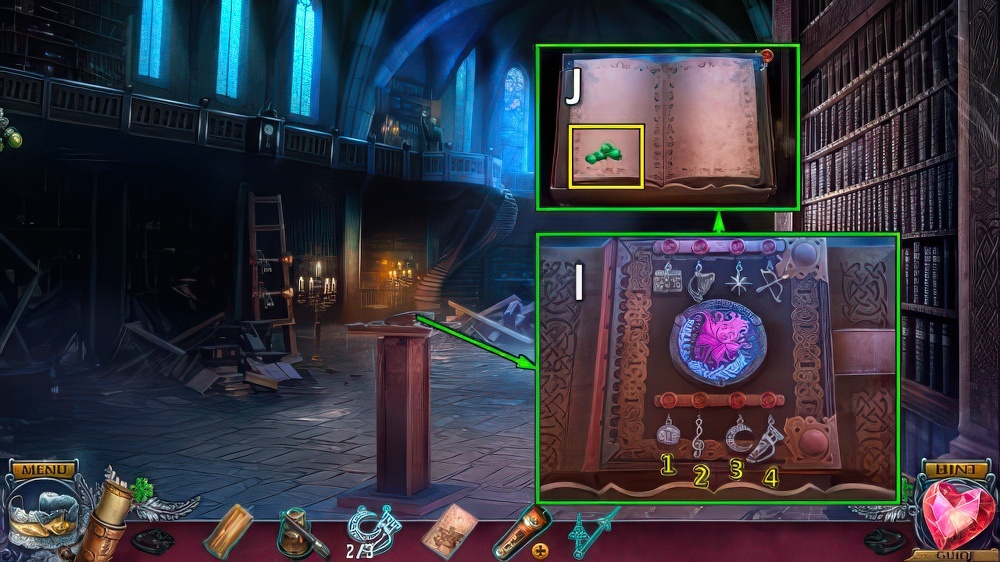
- Place LAMP, close and move trap (J).
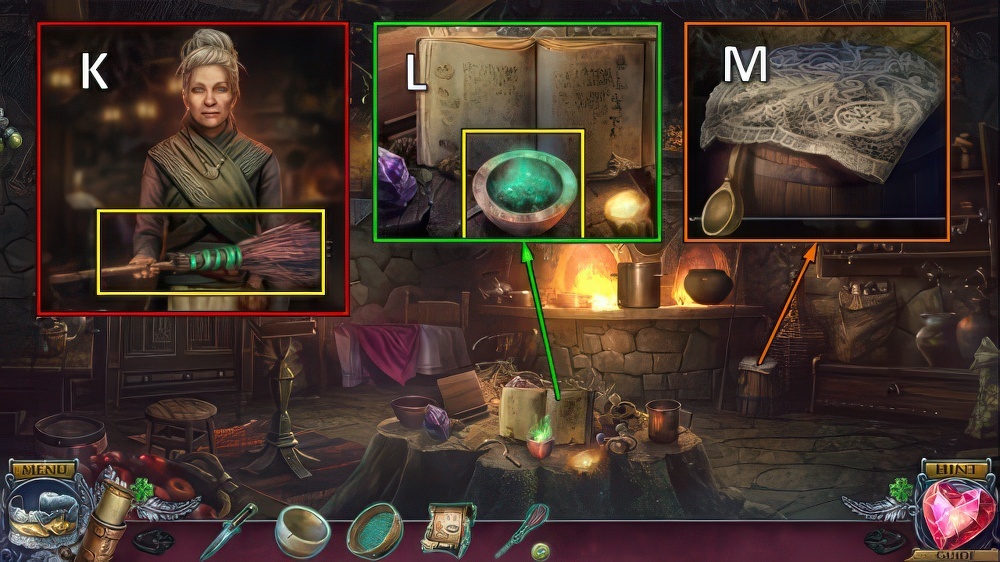
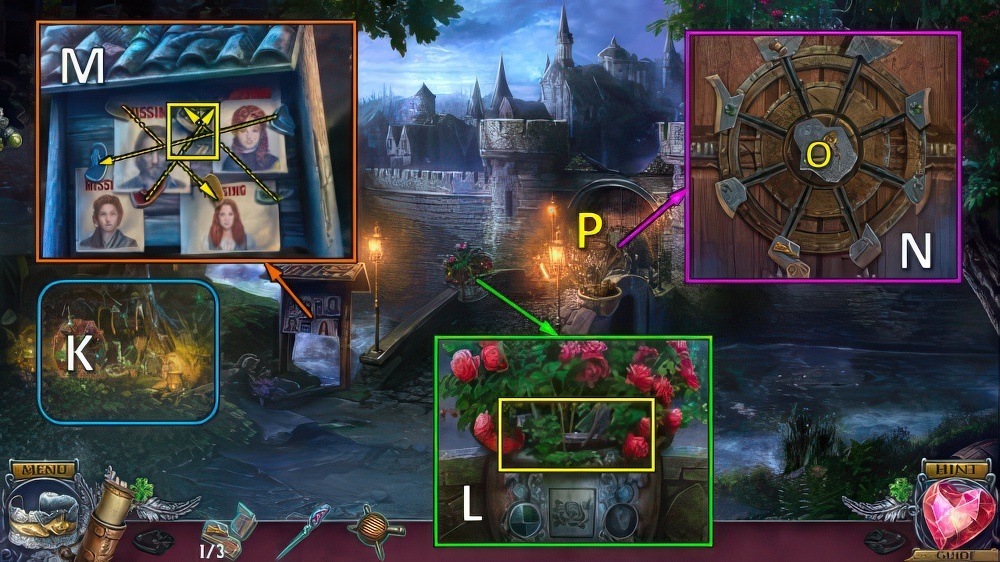
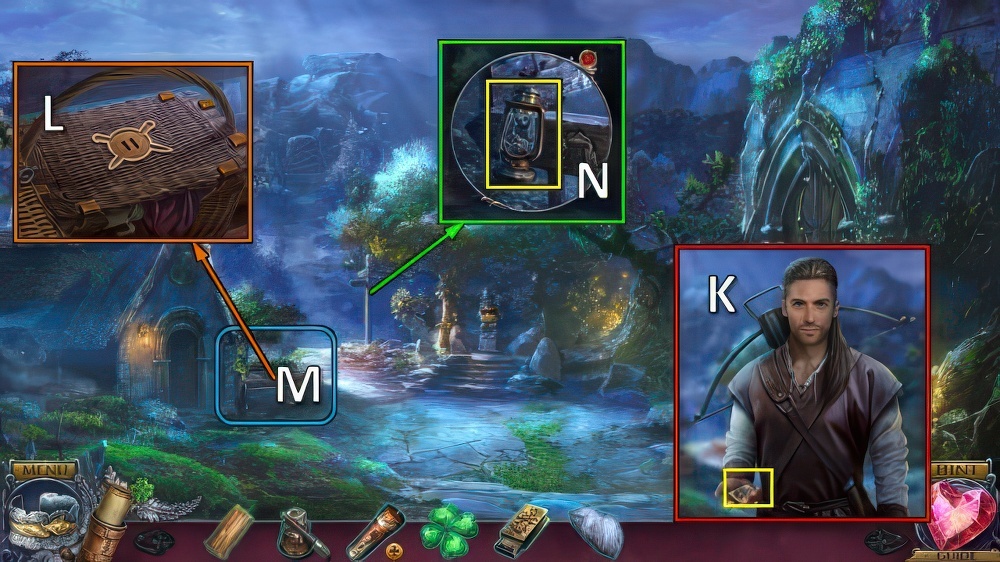
- Take CHEST and BOOK (K).

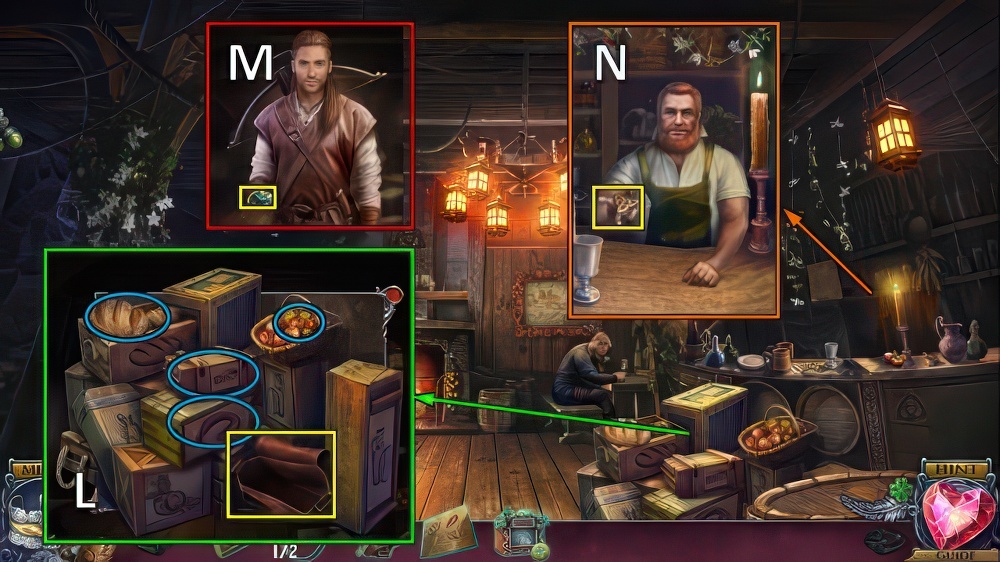
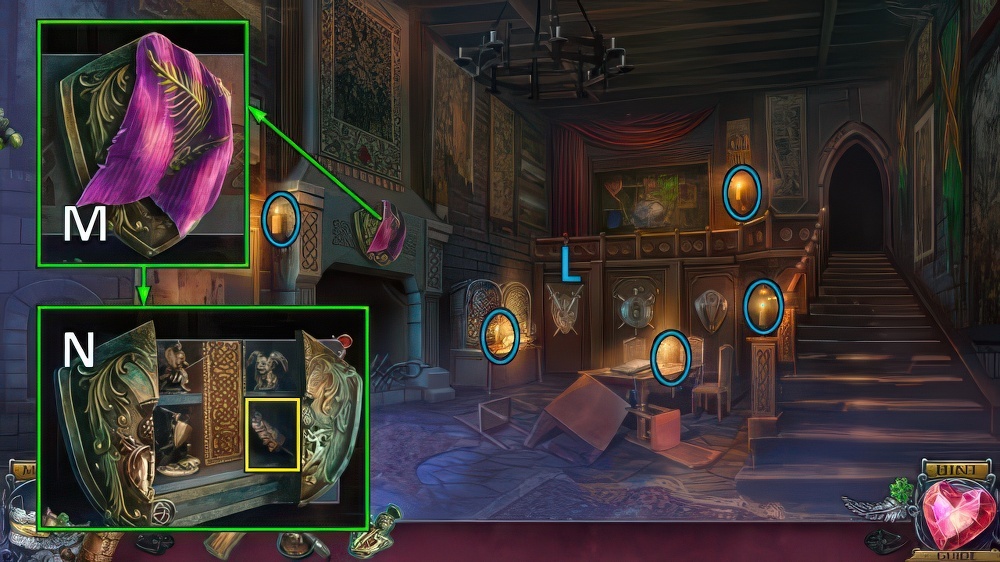
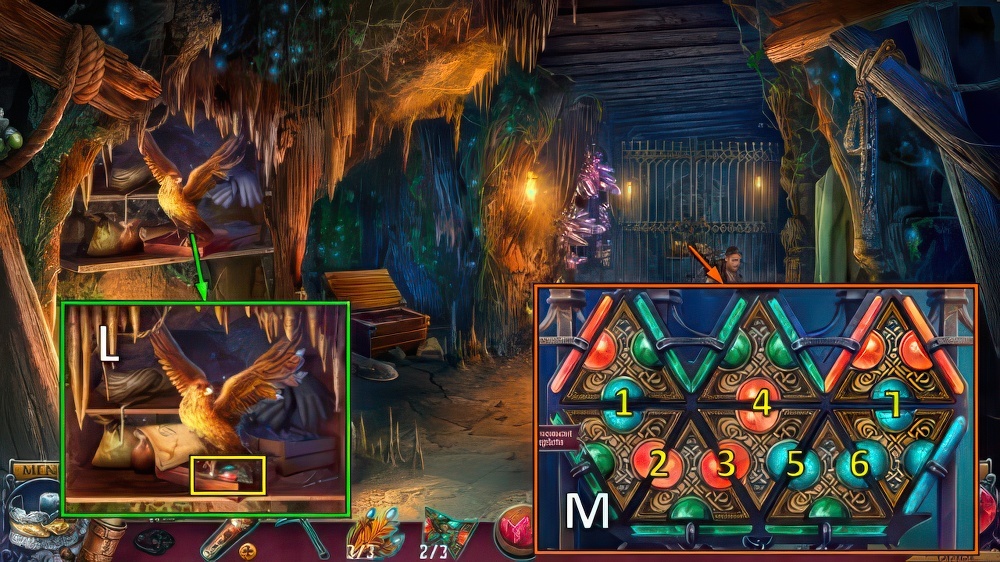
- Place FLOWER PINS, take GOLDEN HARP and COAT OF ARMS (L).
- COAT OF ARMS on BOOK, read book and take map and BOOK.
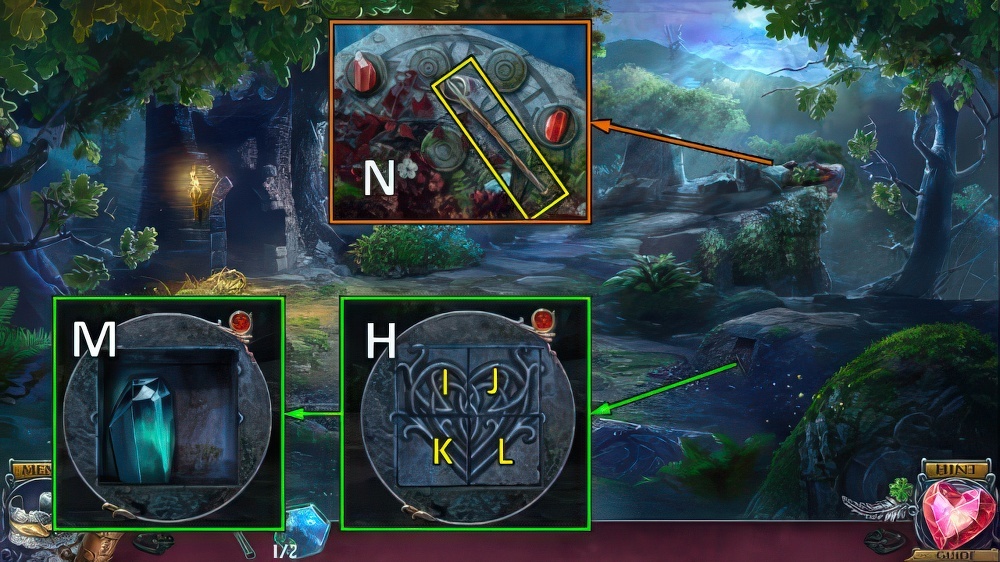
- Offer BOOK, take KEY (M).
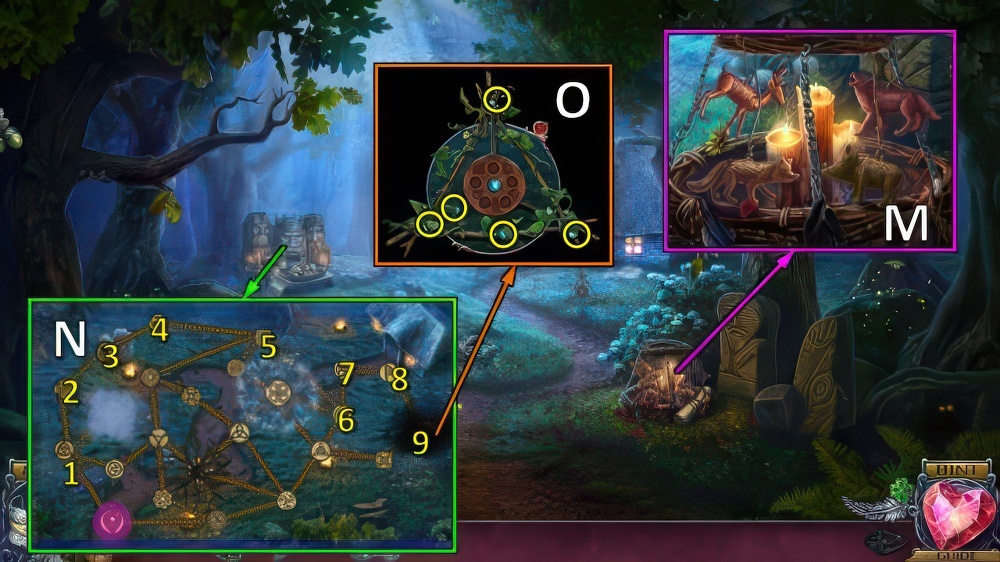
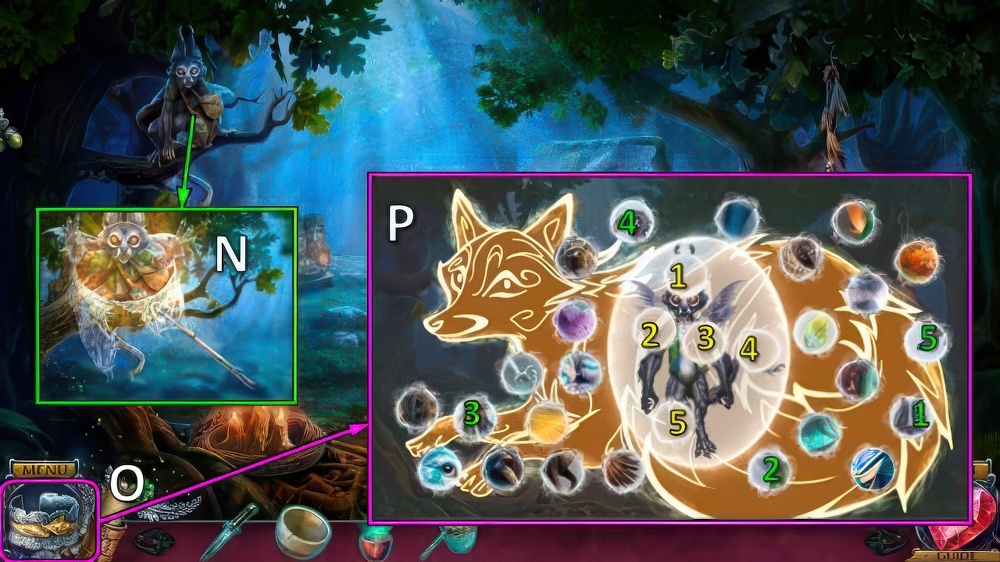
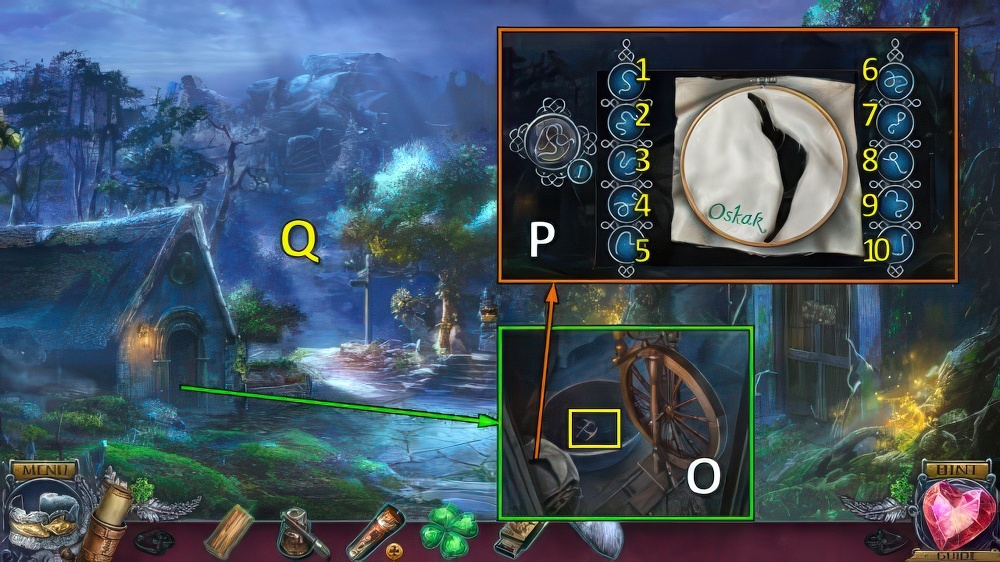
- Access CHEST.
- Casual solution (N): 5-1-4-4.
- Hard solution (N): 5-1-3-3-5-1.
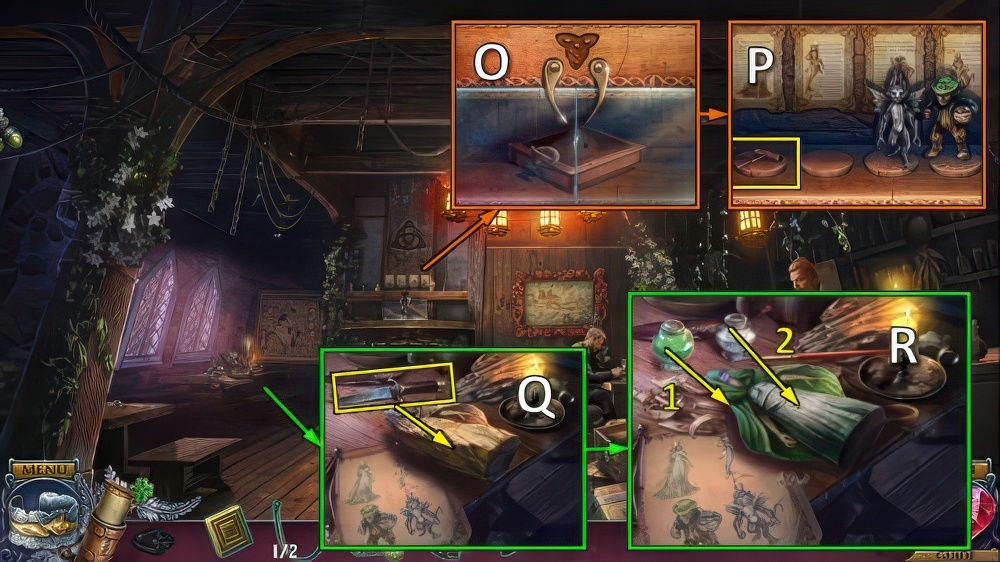
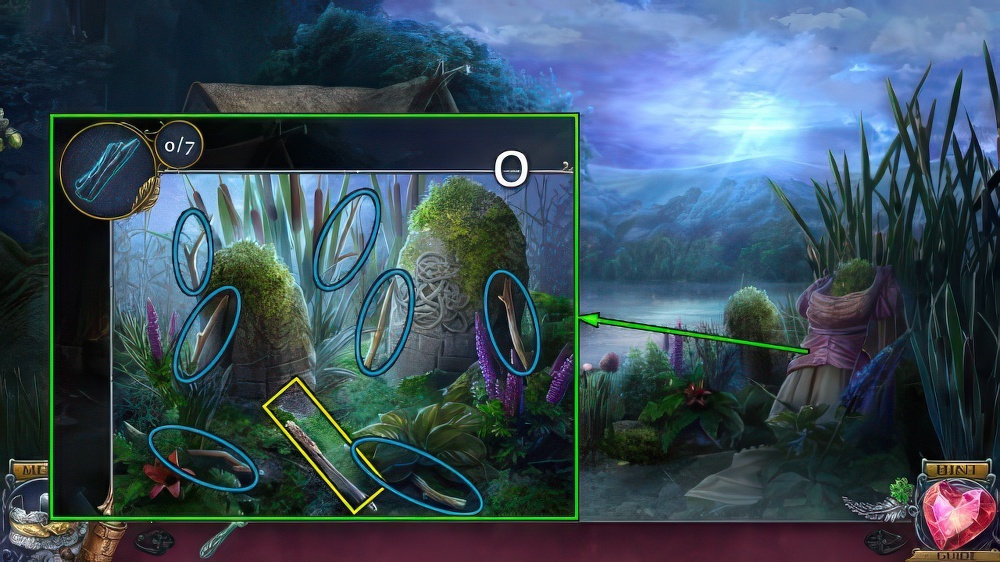
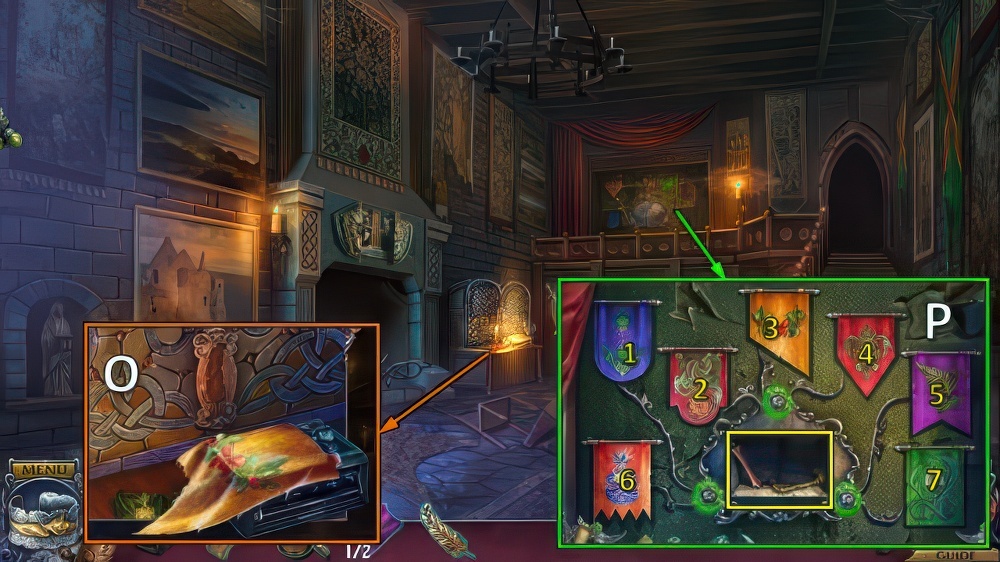
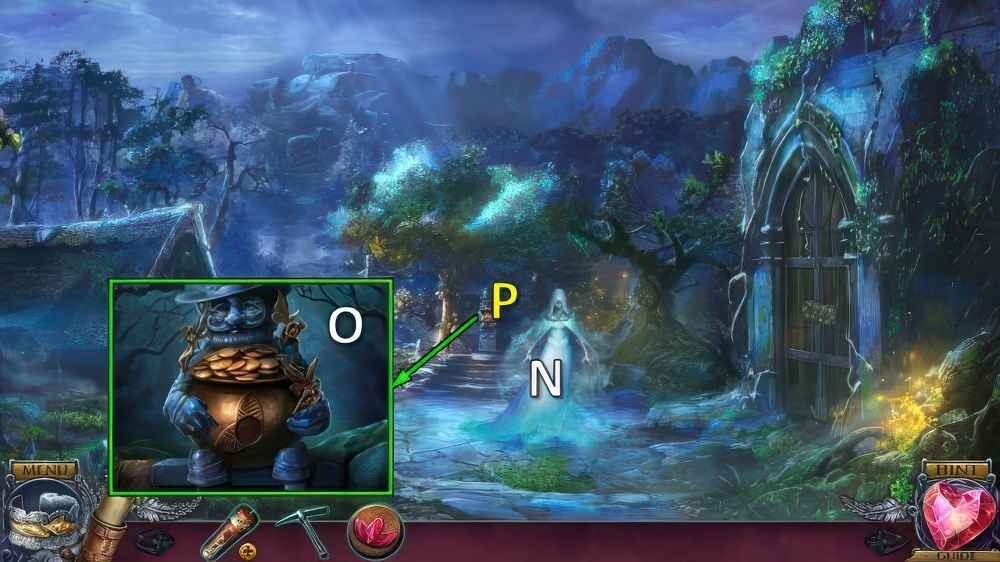
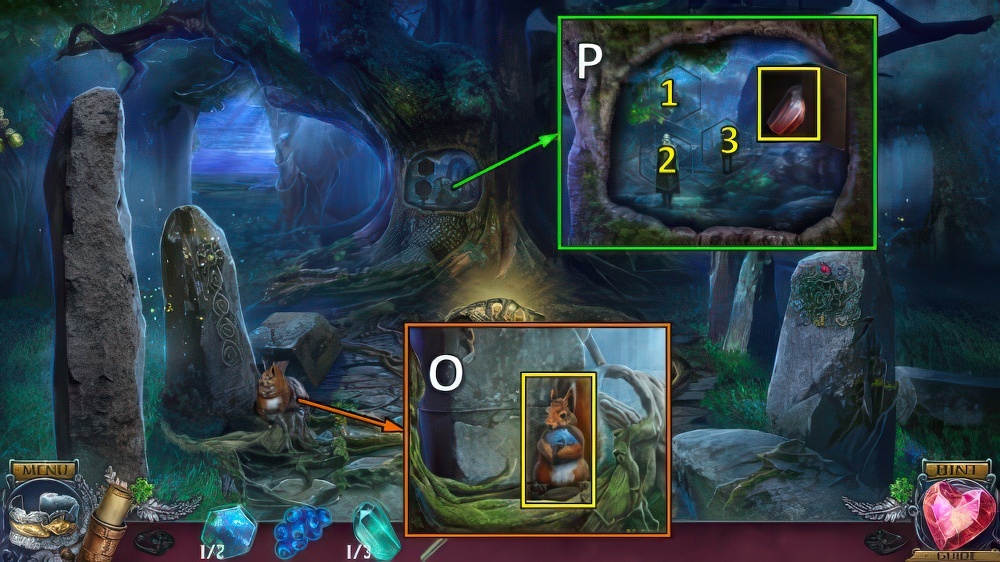
- Use KEY (O), take notes, BRACELET and GOLD COIN.
- FOX PART on BRACELET, take bracelet.
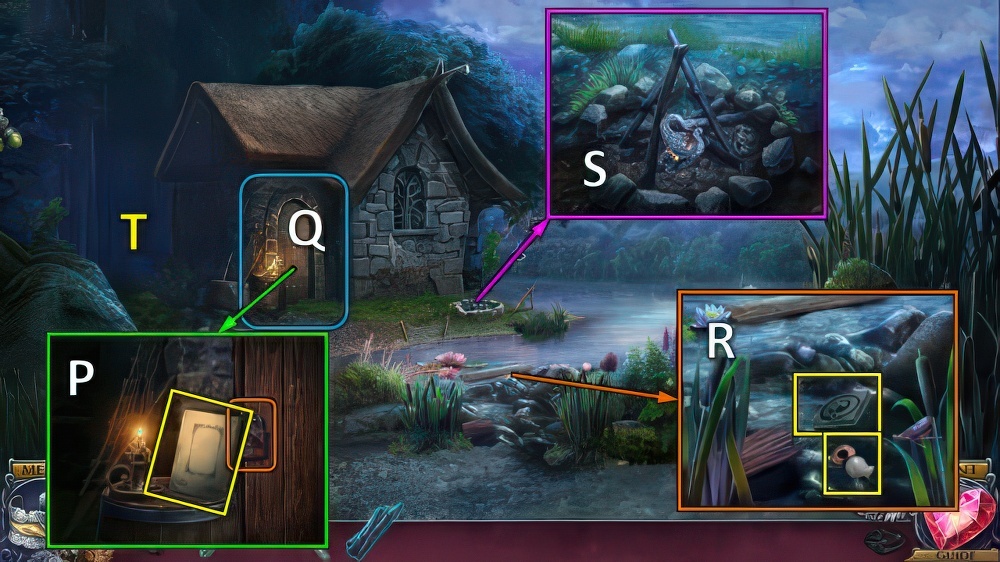
- Go (P).
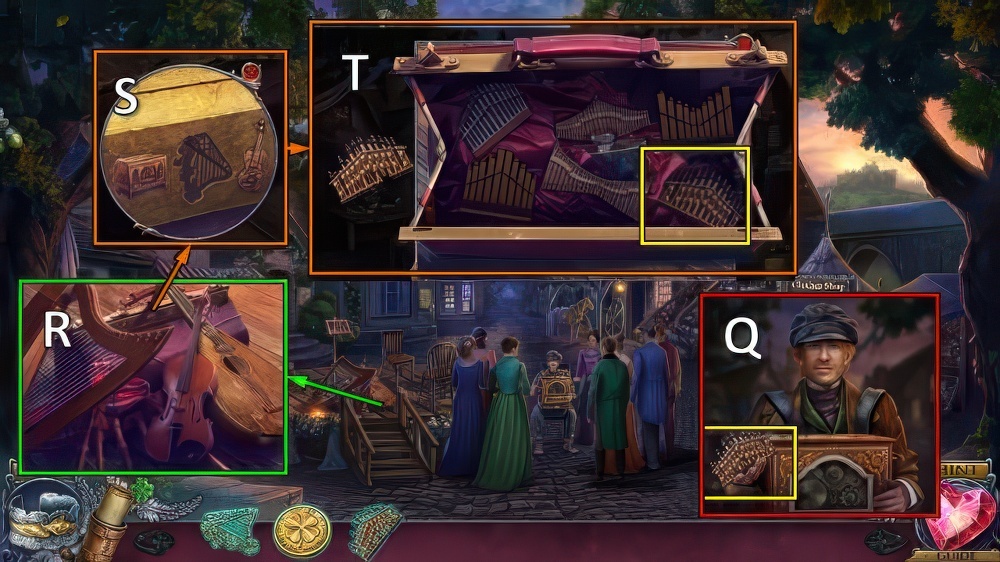
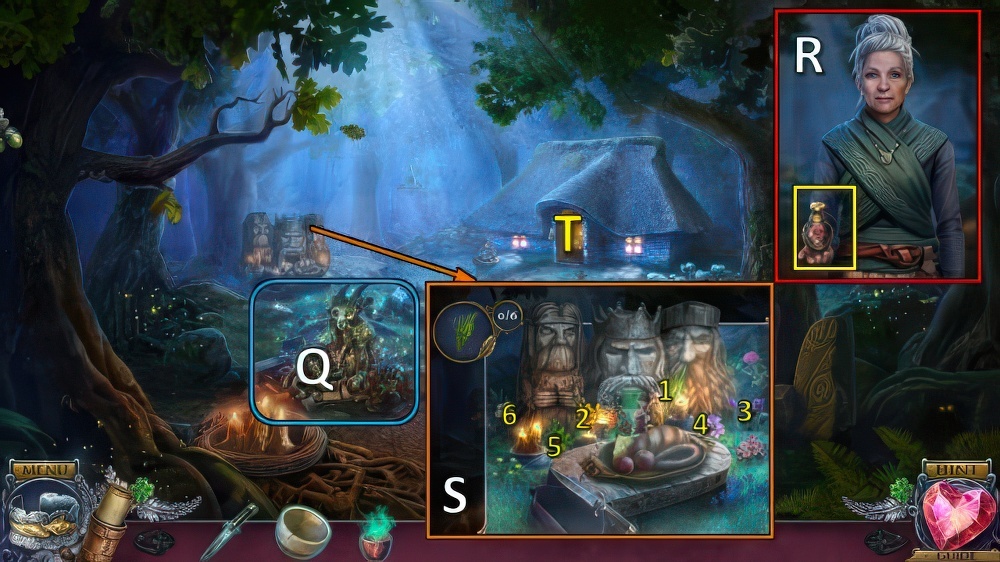
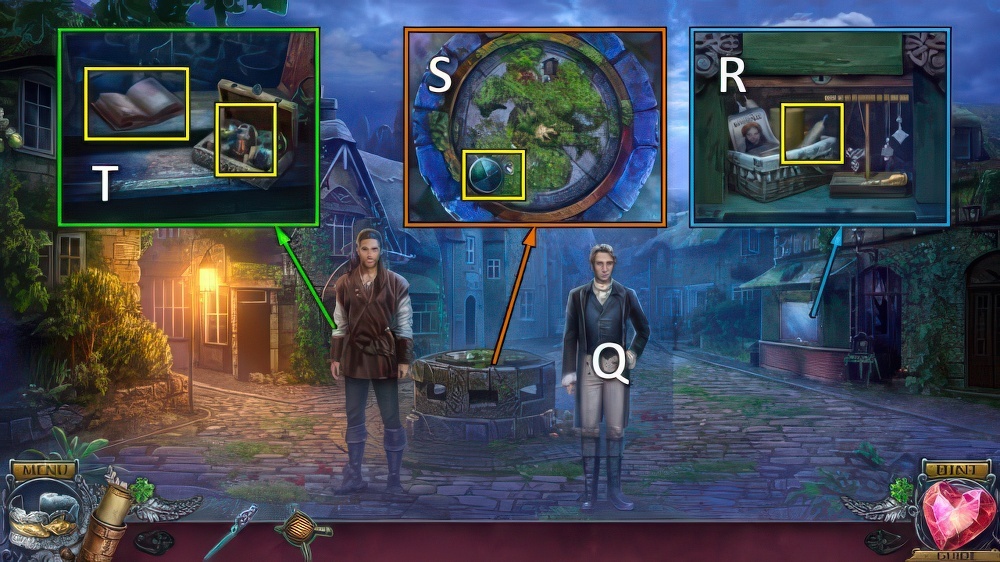
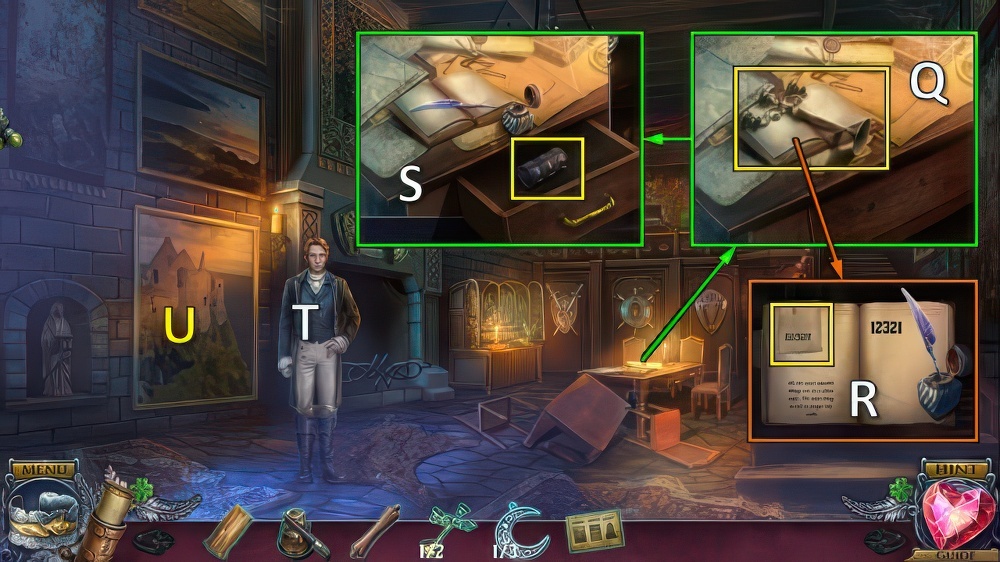
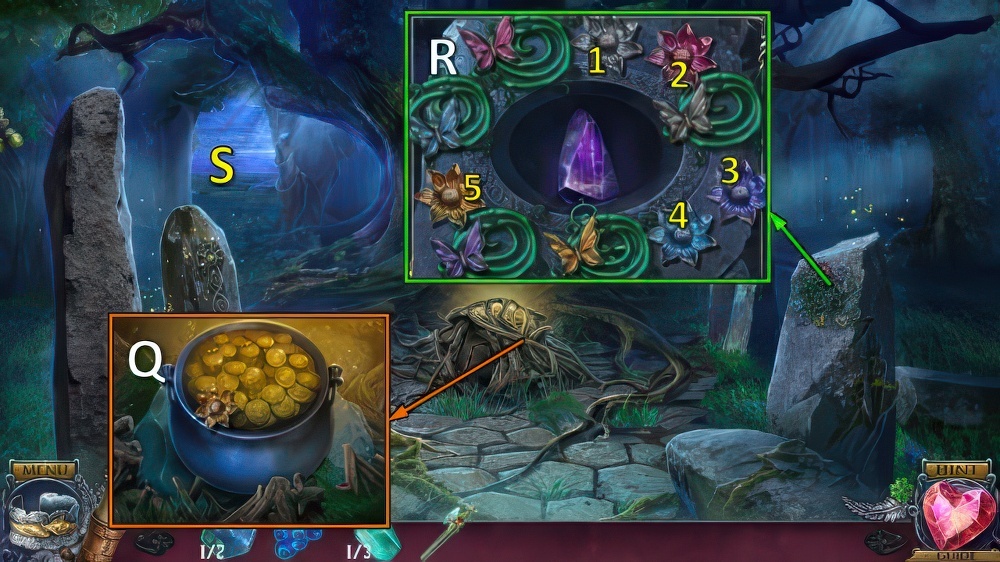
- Talk, take BROKEN ORGAN PART (Q).
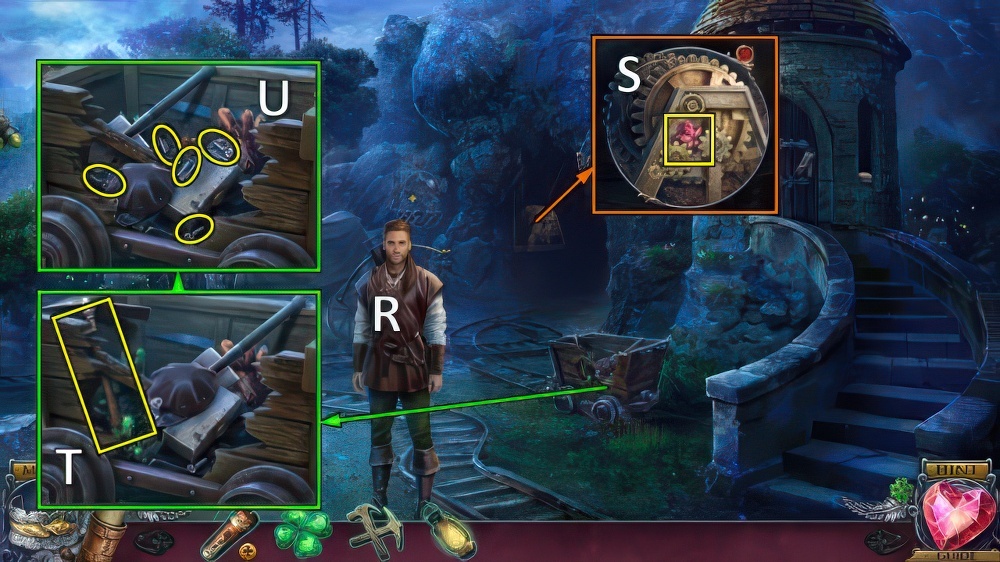
- Move items (R).
- Place GOLDEN HARP (S).
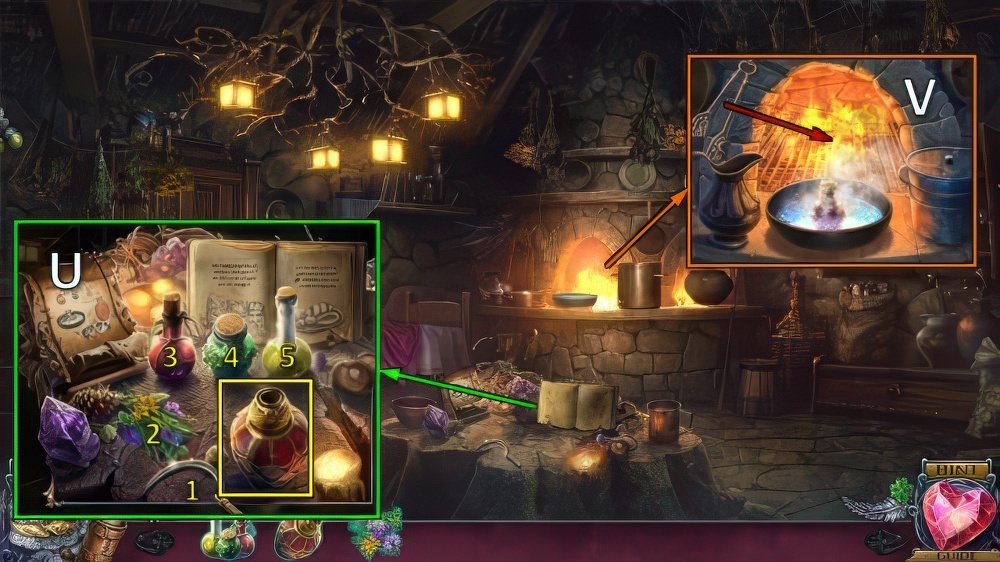
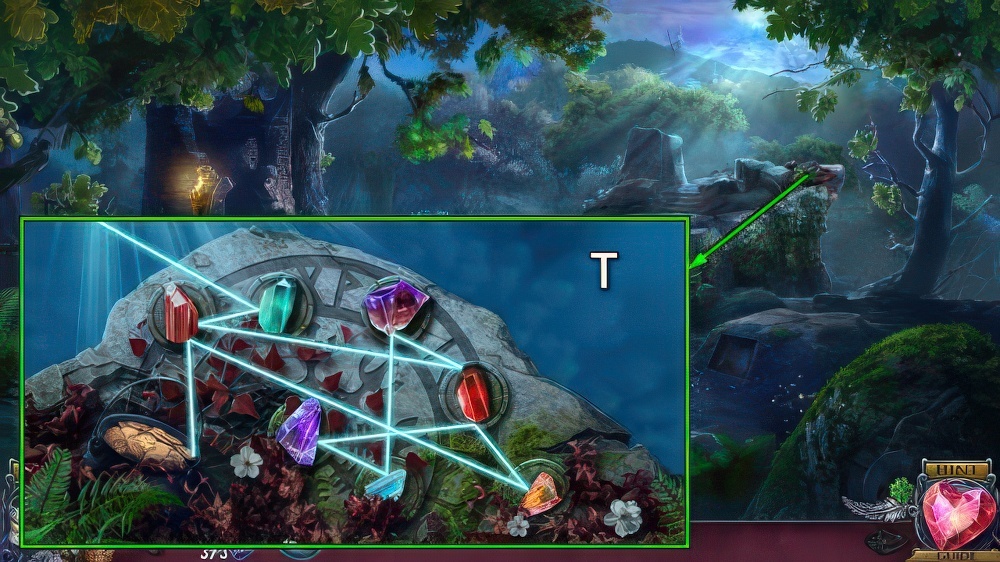
- Place BROKEN ORGAN PART, move items and take ORGAN PART (T).
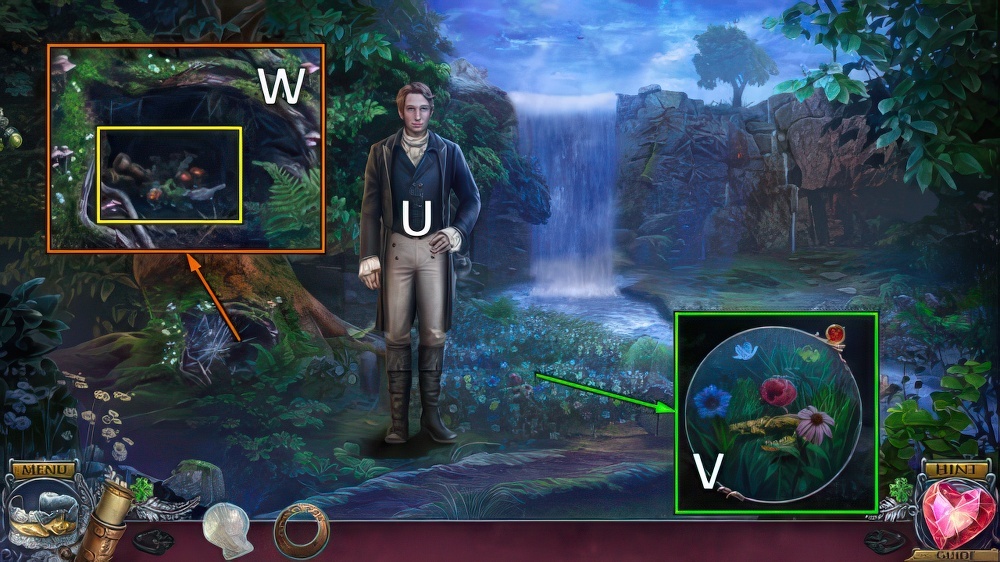
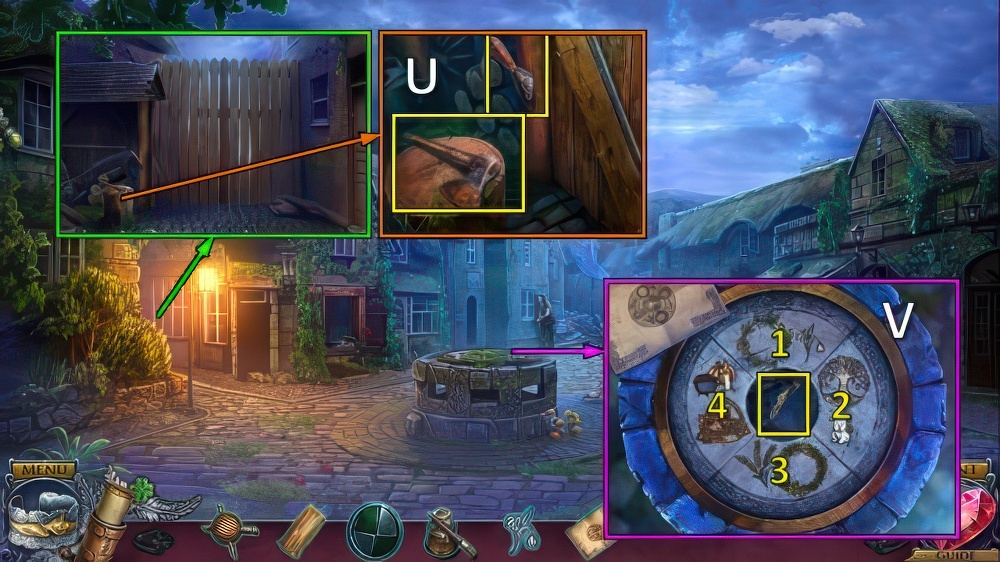
- Offer ORGAN PART (U).
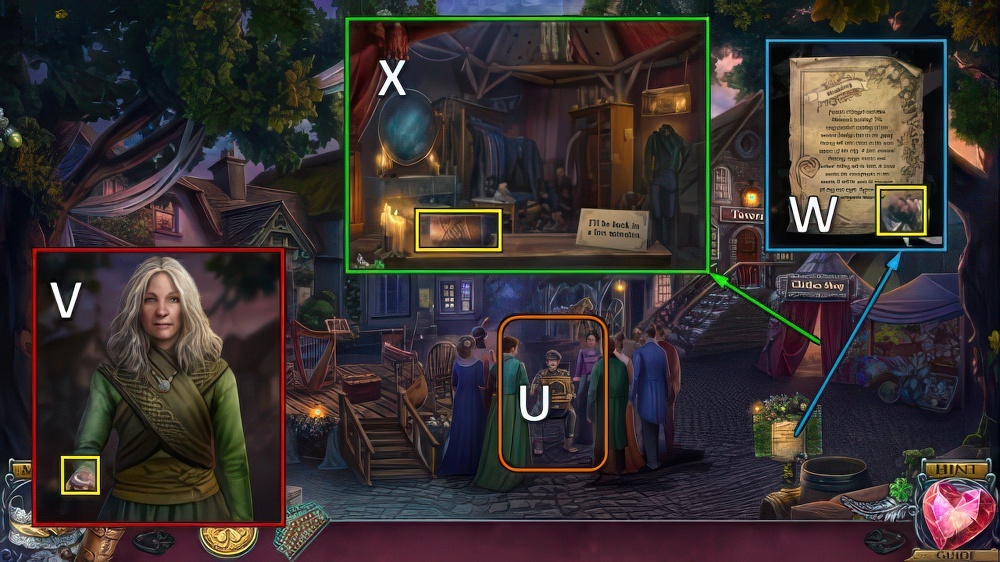
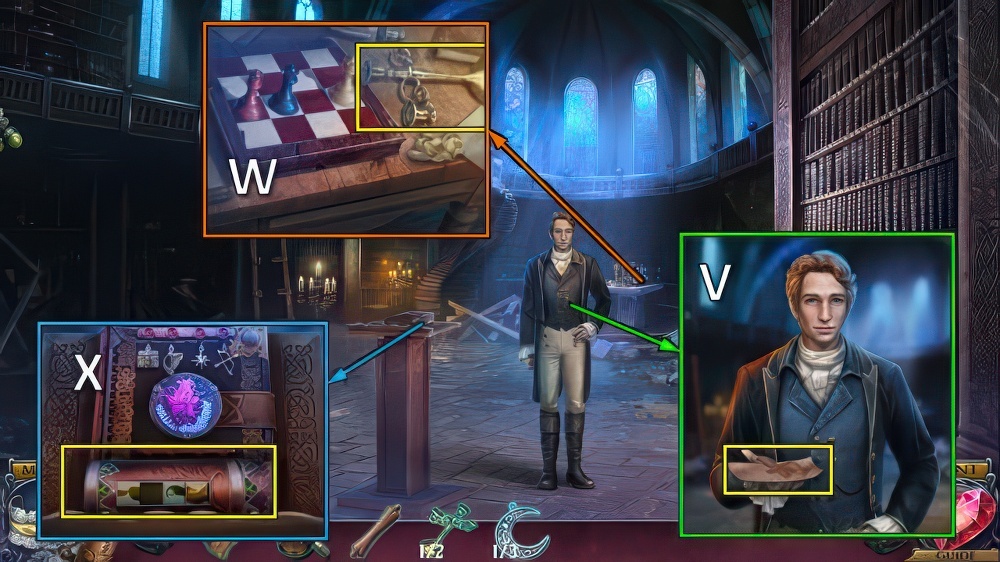
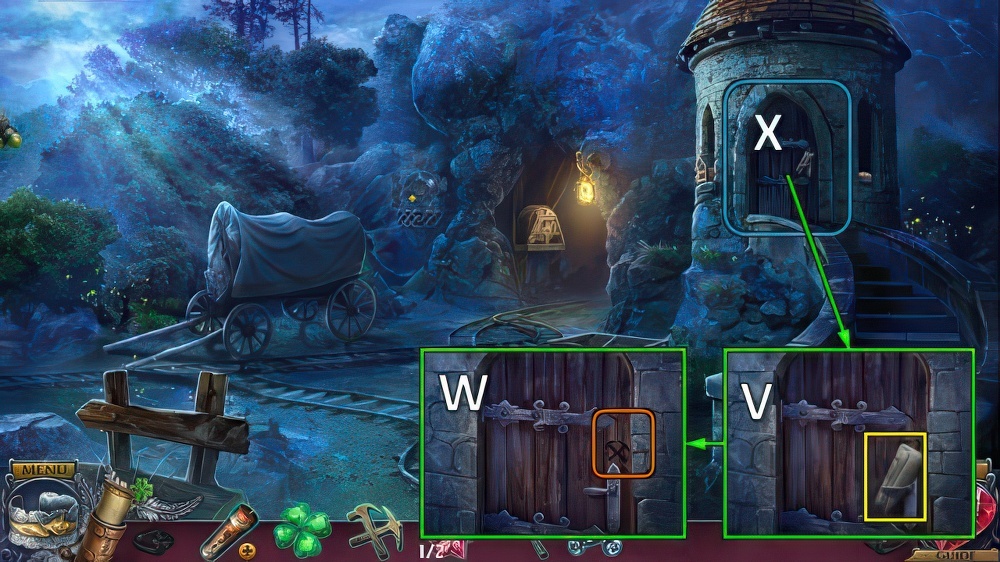
- Take CRESCENT MOON (V).
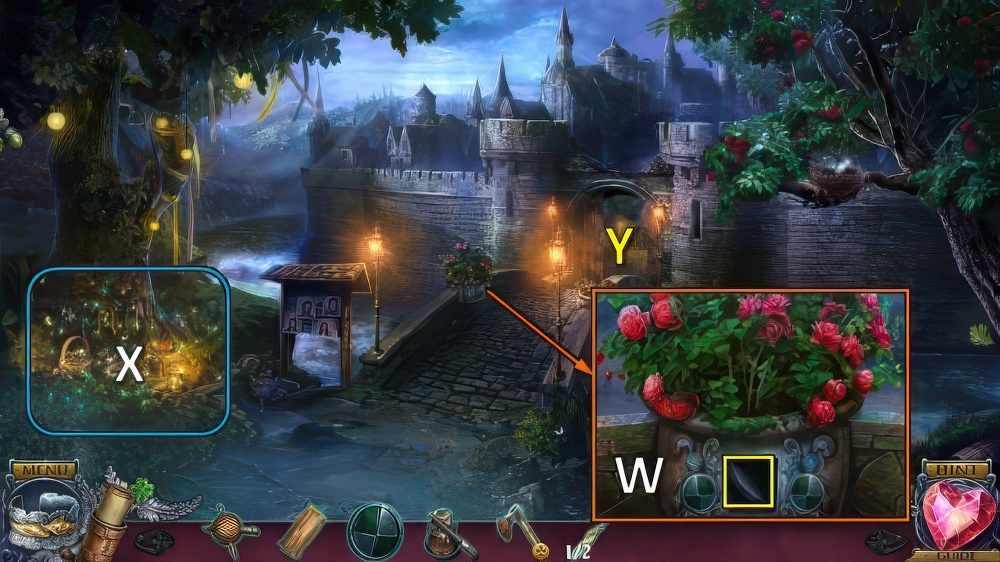
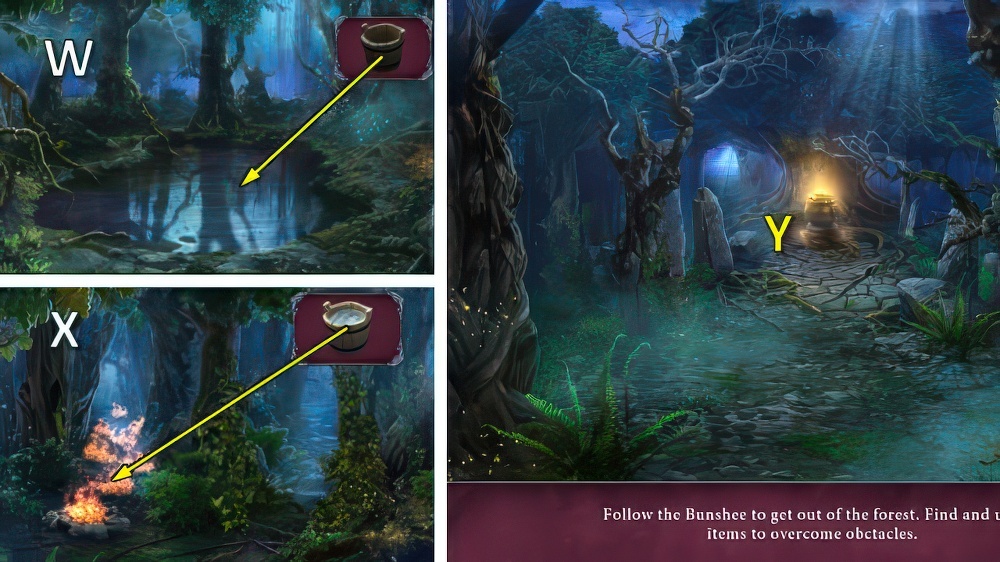
- Take BOUTONNIERE (W).
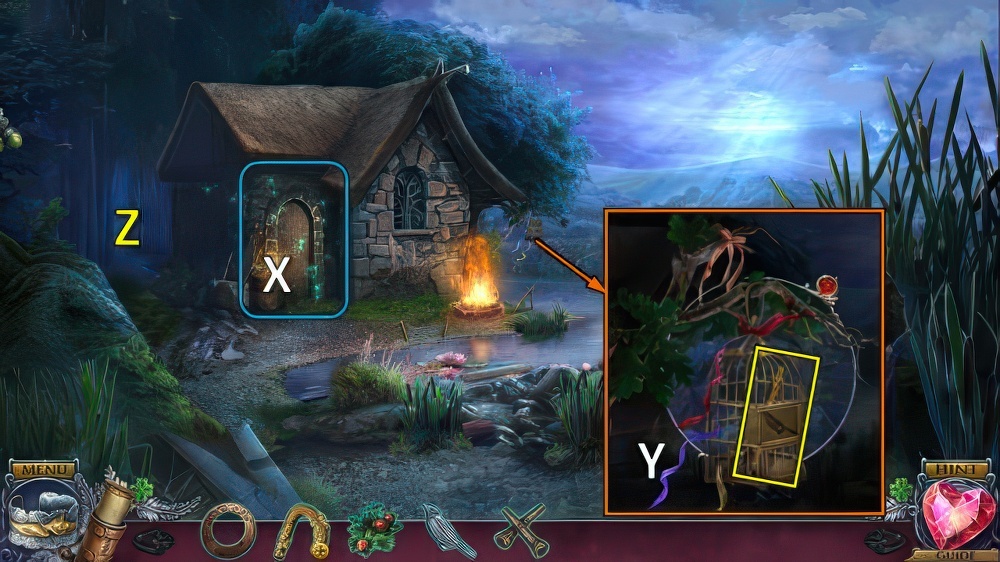
- Take JEWELRY CASE (X).

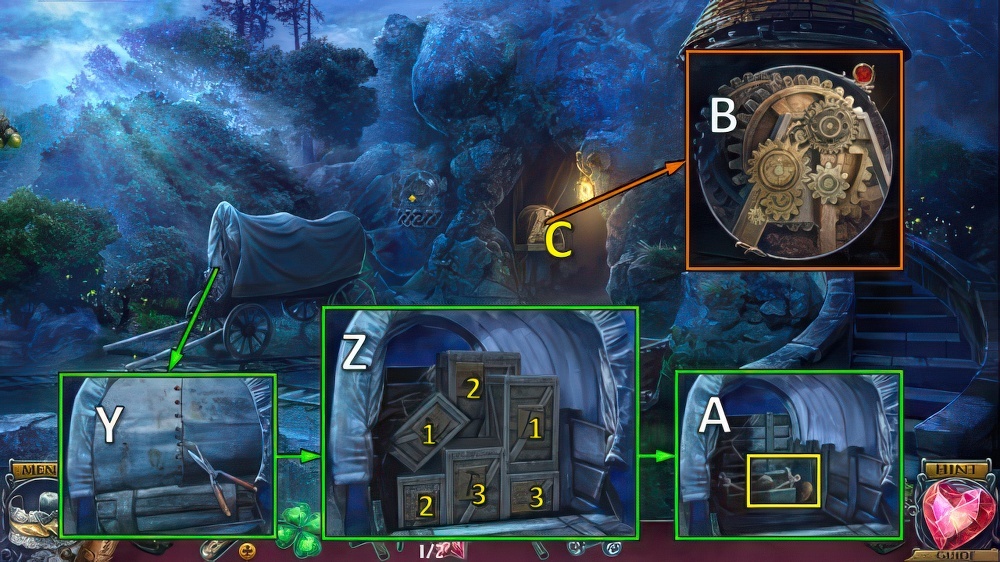
- Take NEWSPAPER and GIFT TOKEN (Y).
- CASE INLAY from NEWSPAPER.
- Find items, take MEAL TICKET (Z).
- CASE INLAY on JEWELRY CASE.
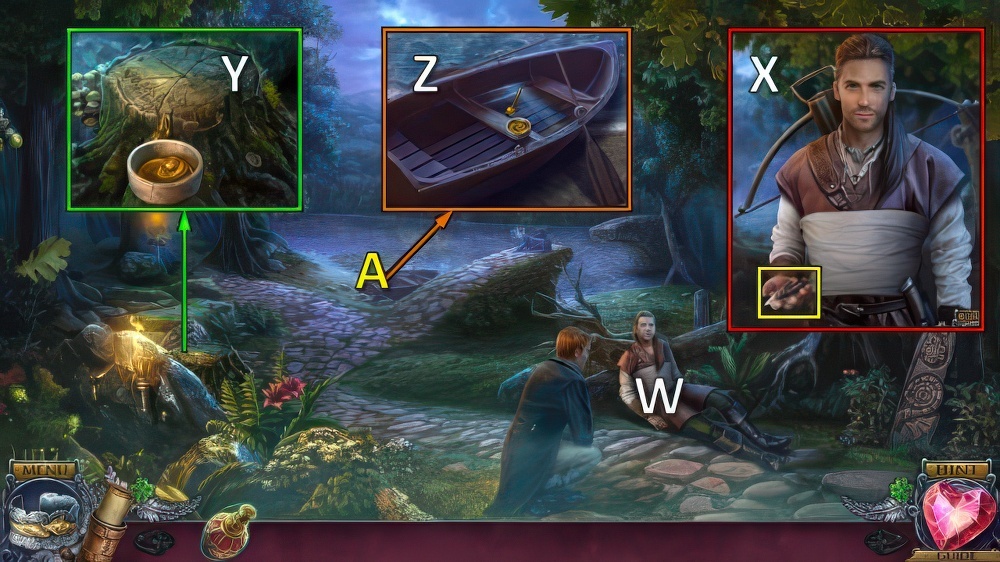
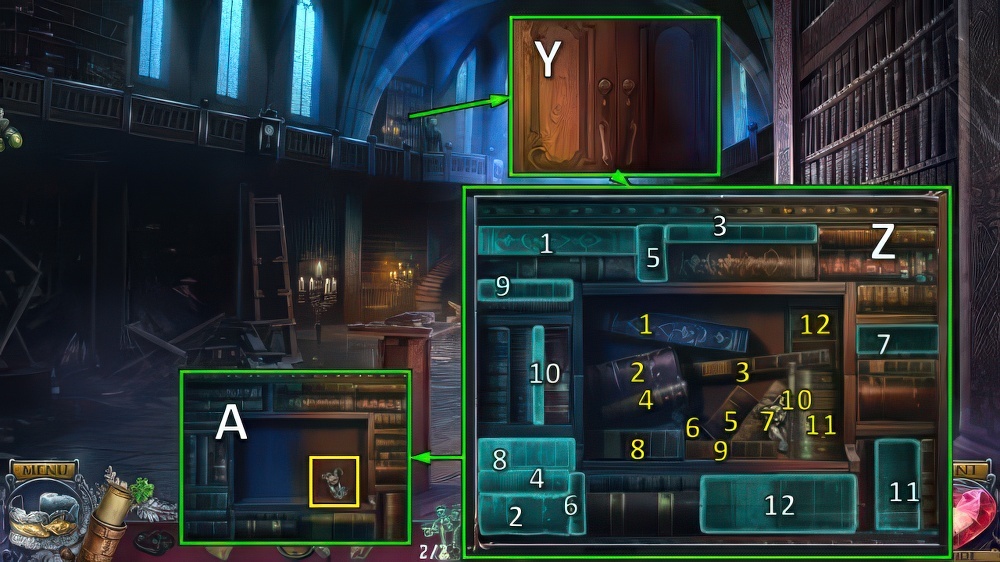
- Move pieces, take SUN (A).
- Place SUN and CRESCENT MOON (B).
- Take TAROT DECK (C).
- Offer TAROT DECK, take PORTRAIT CARD (D).
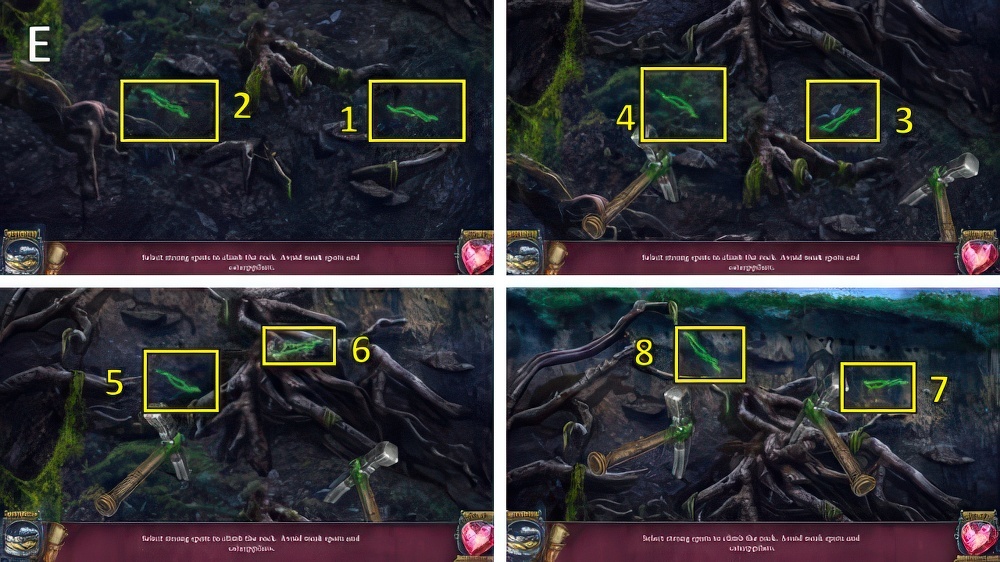
- Take BRIDLE 1/2, knock (E).
- Talk, offer BOUTONNIERE (F).
- Play puzzle.
- Knock again (E).
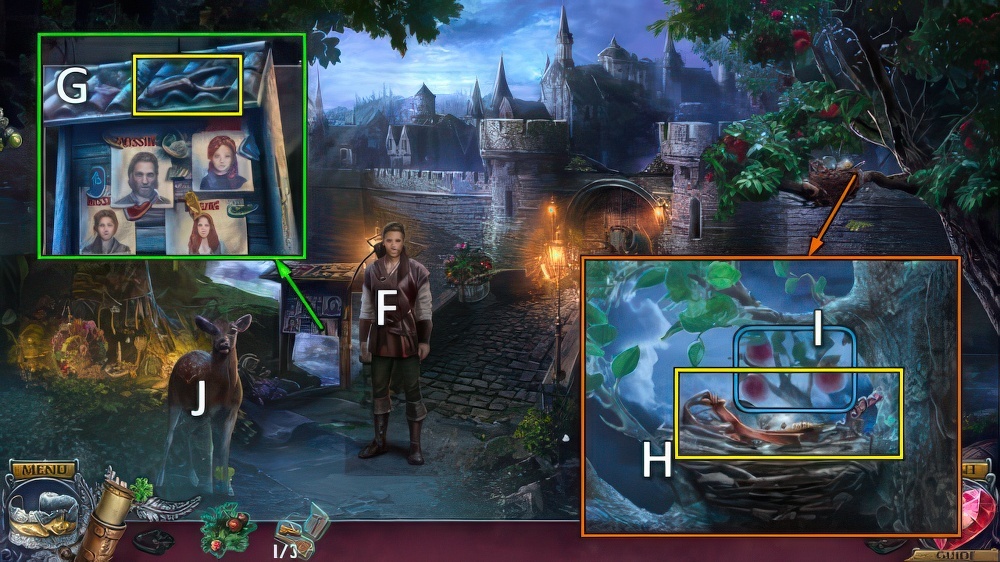
- Go (G).
- Use PORTRAIT CARD, talk (H).
- Offer GOLD COIN, take BAG (I).
- Offer MEAL TICKET, take LIST (J).
- Take BOX (K).
- Place LIST and BAG, select bread, apples, cheese and sausages.
- Take SUPPLY BAG (L).
- Take JEWELS (M).
- Offer JEWELS, take FIREPLACE INLAY (N).
- Place FIREPLACE INLAY (O).
- Take CORKSCREW (P).
- GIFT TOKEN on BOX, take PAINT SET.
- Use and take KNIFE (Q).
- Place PAINT SET and CORKSCREW.
- Use brush to paint 1 and 2.
- Take FIGURINE 1/2 (R).

- Use KNIFE (S), receive FIGURINE 2/2.
- Place FIGURINE, swap (1-2)-(3-4) (T).
- Open, take SNAKE INLAY and GAME SET (U).
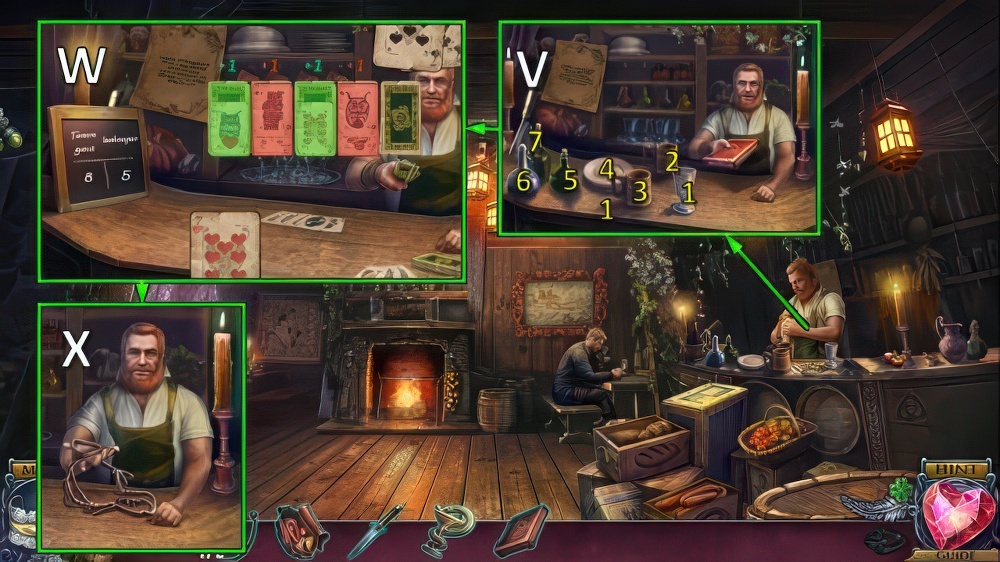
- Offer GAME SET, clear items (V).
- Place cards on the five stacks in the middle, you get a point for each stack where you have the highest card at the end of each round (W).
- Take BRIDLE 2/2 (X).
- Walk down.

- Talk (Y).
- Place BRIDLE (Z).
- Play puzzle (A), receive ROAD SIGN 1/2.
- Take BROKEN POT (B).
- Take WINCH PARTS 1/3 and 2/3 (C).
- Use KNIFE, take note, OIL and MEDICINE KIT (D).
- Take WINCH PART 3/3 (E).
- Place WINCH PART (F).
- SNAKE INLAY on MEDICINE KIT, take FIRST AID 1/2 and 2/2.
- Offer FIRST AID, take TALISMAN (G).
- Take LANTERN (H).
- Use OIL, take nail, HORSESHOE and ROAD SIGN 2/2 (I).
- Use BROKEN POT (J), receive WATER POT.
- WATER POT on HORSESHOE, take NAILS.
- Place LANTERN, ROAD SIGN and NAILS (K).
- Go (L).
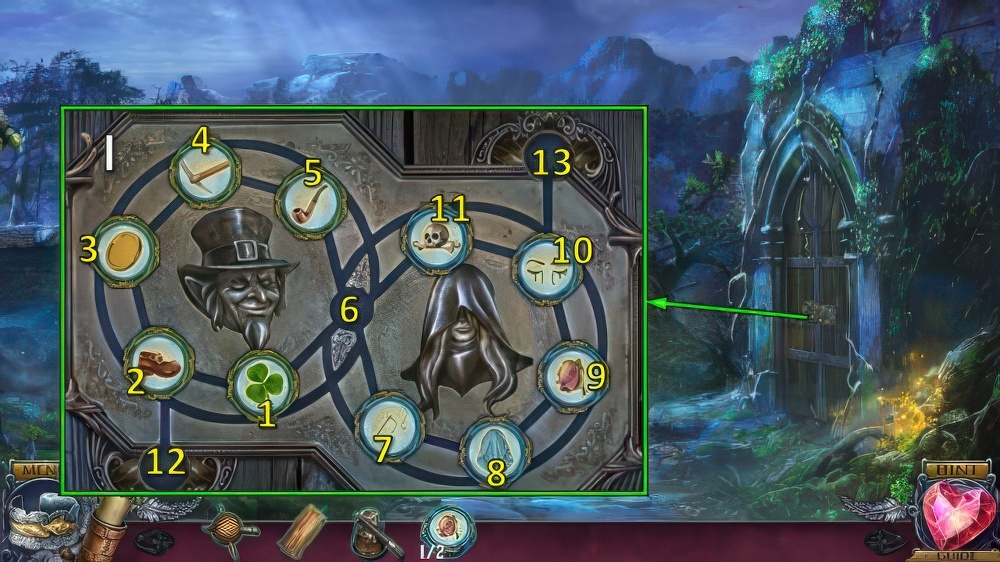
- Take note, restore and take AMULETS (M).
- Solution (N): 1-2-3-4-5-6-7-8-9-(O).
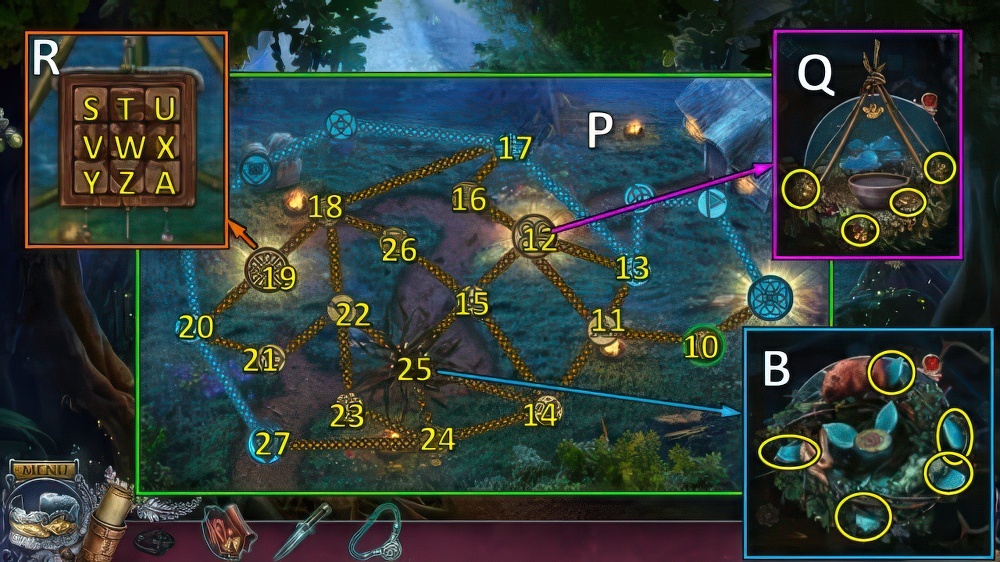
- Solution continued (P): 9-10-11-12-(Q)-12-13-11-14-15-12-16-17-18-19.
- R: Sx3-T-Ux2-W-Xx2-Yx3-Ax2.
- 19-20-21-22-23-24-25-(B)-25-22-18-26-15-25-14-24-27.
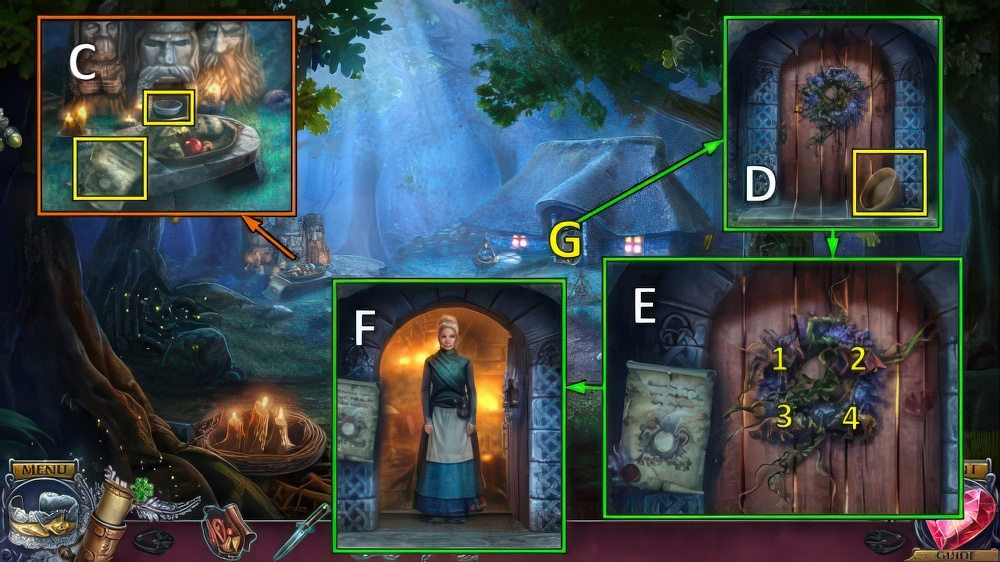
- Take PICTURE and BOWL.
- Remove food, place and empty SUPPLY BAG (C).
- Take SIEVE (D), place PICTURE and AMULETS.
- Swap (1-3)-(2-4) (E).
- Offer TALISMAN (F).
- Go (G).
- Talk, take KEY (H).
- Use KEY (I).
- Solution (J).
- Take INSTRUCTIONS.
- Take BROOM (K).
- Take INCENSE, read book and place INSTRUCTIONS (L).
- Take CLOTH.
- Use ladle, receive LADLE OF WATER (M).
- Walk down.
- SIEVE and CLOTH on BROOM, take ribbon and stick.
- Place all items, take NET.
- Use NET (N).
- Use bracelet (O).
- Solution (P).
- Play puzzle (Q), receive POTION INGREDIENTS.
- Take BOTTLE (R).
- Place INCENSE.
- Use KNIFE, find and take RARE HERBS x6 (S).
- Go (T).
- Place POTION INGREDIENTS, BOTTLE and RARE HERBS (U).
- Select 1-2-3-4-5, take POTION BOTTLE (U).
- Use tongs on bowl, use LADLE OF WATER and POTION BOTTLE.
- Move bowl and use tongs, receive HEALING POTION (V).
- Walk down twice.
- Offer HEALING POTION (W).
- Take ARROWHEAD (X).
- Place BOWL and ARROWHEAD, take BOWL WITH RESIN (Y).
- Place and use BOWL WITH RESIN (Z).
- Go (A).
- Take FISHLINE AND HOOKS and MAGNET (B).
- Take ARROWHEAD with MAGNET (C).
- Use ARROWHEAD (D).

- Solution (E): 1-1-3-4-4-6.
- Guide bubble to 1-2-3-4-5-6-7-8-9 (F).
- Take FORK (G).
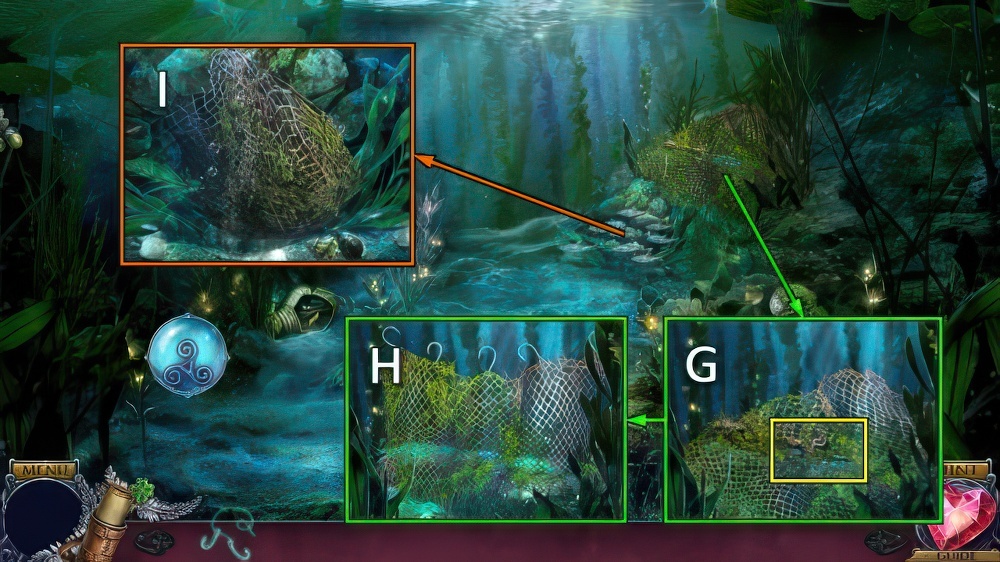
- Move net, place FISHLINE AND HOOKS.
- Take NET (H).
- Use NET (I), receive RIVER CREATURES.
- Find pairs of RIVER CREATURES, take MOLLUSKS (J).
- Offer MOLLUSKS, take bracelet (K).
- Select bracelet (L).
- Solution (M).
- Go (N).
- Take dress, find and take BRANCHES x7 and BRUSH (O).
- Take BOX KEY, use FORK (P).
- Play puzzle (Q), receive RUST REMOVER.
- Take SHELL and CLASP, use BOX KEY.
- Take FLINT (R).
- RUST REMOVER and BRUSH on FLINT.
- Place and stack BRANCHES, use FLINT (S).
- Go (T).
- Talk (U).
- Take CANE, use SHELL.
- Receive BOUQUET (V).
- Use BOUQUET, take NUTS, BIRD and HANDLES (W).
- Walk down.
- Play puzzle (X), receive SCOOP NET.
- Place BIRD, take CANE PART 1/2 (Y).
- Go (Z).
- Take CANE PARTS 2/2 and COAT OF ARMS PIECE 1/3 with SCOOP NET (A).
- CANE PARTS on CANE.
- Take LIAM’S BAG with CANE (B).
- CLASP on LIAM’S BAG, restore image (C).
- Take STRIPS, place HANDLES and STRIPS.
- Take PICKS.
- Use PICKS (D).
- Solution (E).
- Talk (F).
- Take SLINGSHOT (G).
- Take PIN, RUBBER BAND and KNITTING (H).
- RUBBER BAND and NUTS on SLINGSHOT.
- Use SLINGSHOT (I), receive APPLE.
- Offer APPLE (J).
- Play puzzle (K), receive GLOVE.
- Take COAT OF ARMS PIECES 2/3 and TWEEZERS with GLOVE (L).
- Join pieces, take COAT OF ARMS PIECE 3/3 with TWEEZERS (M).
- Place COAT OF ARMS PIECE (N).
- Turn Ox5, move all pieces.
- Go (P).
- Talk (Q).
- Use PIN, take note and CANDLE (R).
- Take LITTLE SHIELD (S).
- Take GLUE, take SNOWDROP and INSTRUCTIONS from book (T).
- Take SCRAPER and AXE (U).
- Use SCRAPER, place SNOWDROP and INSTRUCTIONS (V).
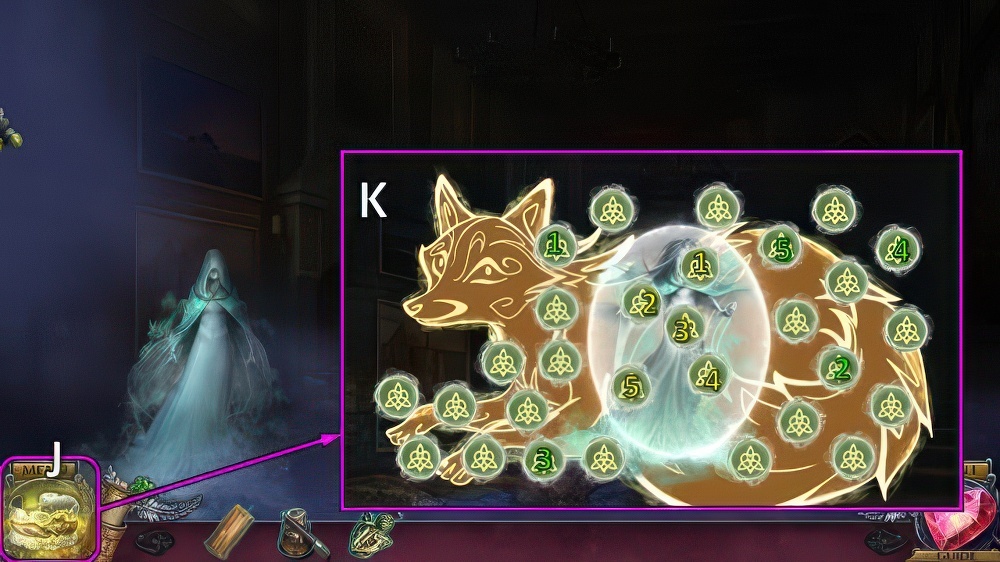
- Swap (1-4)-(2-3), take AMULET 1/2 (V).
- Walk down.
- Place LITTLE SHIELD, take WHETSTONE (W).
- Play puzzle (X), receive AMULET 2/2.
- Go (Y).
- Place AMULET, take MAP (Z).
- Offer MAP (A).
- WHETSTONE on AXE.
- Use AXE (B).
- Talk (C), select Patrick or Liam.
- Take CASTLE DOOR TOKEN 1/2 (D).
- If you’re playing Patrick first, place KNITTING (E).
- Play puzzle (F), receive ACORN.
- Place ACORN, solution (G).
- Take CASTLE DOOR TOKEN 2/2 and EMBLEM (H).
- Place CASTLE DOOR TOKEN (I).
- Solution: 2-(1-2)-11-(6-1)-(10-11)-9-8-(7-8)-5-(6-7)-4-3-2-5-4-(3-4)-12-(2-3)-1-(2-12)-6-(1-2).
- Continued: 11-(6-1)-(10-11)-9-8-(7-8)-5-(6-7)-4-3-2-(1-2), repeat this section three times.
- Continued: 11-(6-1)-5-(6-11)-4-3-2-12.
- Use bracelet (J).
- Solution (K).
- Light all candles (L).
- Take TAPESTRY 1/2, place EMBLEM (M).
- Take TOKEN (N).
- Take TAPESTRY 2/2 and SAFE, place TOKEN (O).
- Play puzzle, receive QUILL.
- Place TAPESTRY.
- Swap (1-6)-(2-3)-(4-7)-(5-6)-(4-5).
- Take HANDLE and SCROLL TOKEN (P).
- Move items, take CANDELABRA 1/2 (Q).
- Place QUILL, take CODE (R).
- Place HANDLE, take TUMBLERS (S).
- TUMBLERS and CODE on SAFE, enter 1-2-3-2-1.
- Take TRINKET 1/3 and CASTLE PLAN.
- Talk, offer CASTLE PLAN (T).
- Go (U).
- Talk, take PAGE (V).
- Take CANDELABRA 2/2 (W).
- Take CANISTER (X).
- Place SCROLL TOKEN (Y).
- Return all books (Z).
- Take GARGOYLE (A).
- Walk down.
- Play puzzle (B), receive CHESS PIECE.
- Place GARGOYLE, take CLOCK HANDS (C).
- Go (D).
- Place CHESS PIECE, take BELT and TRINKET 2/3 (E).
- Place CANDELABRA and BELT (F).
- Place CLOCK HANDS (G), take TRINKET 3/3 (H).
- Place TRINKET, swap (2-4)-(1-3)-(1-2) (I).
- Place PAGE, play puzzle.
- Take EMERALDS (J).
- Take MATCHES (K).
- If you’re playing Liam first, place KNITTING (L).
- Play puzzle (M), receive WOOL.
- Take LANTERN (N).
- Take HAMMER TILE, place WOOL (O).
- Select 1-3-5, 1-2-7, 4-8-9.
- Take HANDKERCHIEF (P).
- HANDKERCHIEF, CANDLE, MATCHES and GLUE on LANTERN.
- Go (Q).
- Offer LANTERN (R).
- Take CRYSTAL 1/2 (S).
- Take ROCK HAMMER (T) and BOLTS x5 (U).
- Take KEY (V), place HAMMER TILE (W).
- Play puzzle (X), receive SHEARS.
- Use SHEARS (Y).
- Remove pairs (Z).
- Take WRENCH and GEARS (A).
- Place GEARS, BOLTS and WRENCH (B).
- Go (C).
- Talk (D).
- Use ROCK HAMMER, take CRYSTAL 2/2 and FERN FROND (E).
- Place FERN FROND (F).
- Take GEM FEATHER 1/3 and TRIANGLE 1/3 (G).
- Use KEY, take LOCKET and GEM FEATHER 2/3 (H).
- Walk down.

- Play puzzle (I), receive GEM FEATHER 3/3.
- Place CRYSTAL, swap (1-4)-(2-3)-(3-4)-(3-5).
- Take TRIANGLE 2/3 (J).
- Go (K).
- Place GEM FEATHERS, take TRIANGLE 3/3 (L).
- Place TRIANGLE (M).
- Solution: 2-1-2-5-4-3-5-6-7-6.
- If you’ve played Liam first, continue with Patrick.
- Talk (N).
- EMERALDS on LOCKET, take JEWEL FLOWER.
- Place JEWEL FLOWER (O).
- Go (P).

- Go forward-left-take axe (Q)-down-down-use axe (R)-left-right-take plank 1/2 (S)-down.
- Forward-right-take plank 2/2 (T)-down-place plank (U)-left-right-right-assemble and take bucket (V).
- Down-left-take water with bucket (W)-down-down-use water (X)-forward.
- Go (Y).
- Touch treasure (Z).
- Use bracelet (A).
- Solution (B).

- Take RUNE (C).
- RUNE on CANISTER, swap (1-3)-(2-3)-(3-4).
- Take IMAGE FRAGMENT 1/2 (D).
- Go (E).
- Use ROCK HAMMER, take TOKEN and BROKEN HALBERD (F).
- Find pairs, take BERRIES (G).
- Place TOKEN (H), turn Ix3-Jx1-Kx2-Lx3.
- Take CRYSTAL 1/3 (M).
- Take HANDLE (N).
- Walk down.
- Offer BERRIES (O), receive IMAGE FRAGMENTS 2/2.
- Place IMAGE FRAGMENTS.
- Swap (1-2)-(2-3), take CRYSTAL 2/3 (P).
- HANDLE on BROKEN HALBERD, take HALBERD.
- Use HALBERD, take FLOWER and TREASURE (Q).
- Place FLOWER.
- Swap (1-4)-(2-4)-(3-4)-(4-5).
- Take CRYTAL 3/3 (R).
- Go (S).
- Place CRYSTAL and TREASURE, solution (T).
- Choose Patrick or Liam.
- Walkthrough Bonus Chapter, at the link below.


