
Lucky Season 2: End of the Rainbow (Bonus Chapter) – You’ll embark on a new magical adventure to solve the mystery of the disappearance of the forest fairies and help restore the delicate balance between ancient peoples. This time you play as a leprechaun named Will, who finds himself at the heart of a long-standing conflict between fairies and pixies, creatures who once lived in peace and harmony but were divided by treachery. Old legends come to life when Will’s niece, Lily, finds an injured fairy. She shows signs of poisoning, and the only way to help her is with a rare antidote. Lily hands you the tools and asks you to hurry, she barely manages to keep the fairy stable. Among the ingredients, a gloomy briar, a dangerous plant that someone may have used for evil purposes. You’ll explore greenhouses, collect materials, solve riddles, and restore forgotten connections between fairies and pixies. Will believes that someday the pixie exile will end and the ancient cultures can unite again. But first he must rescue a fairy and find out who is behind the poisoning and why an old feud has flared up with renewed vigor. Find out what really happened to the forest fairies and become the one who can change the course of magical history.
Bonus Chapter Walkthrough

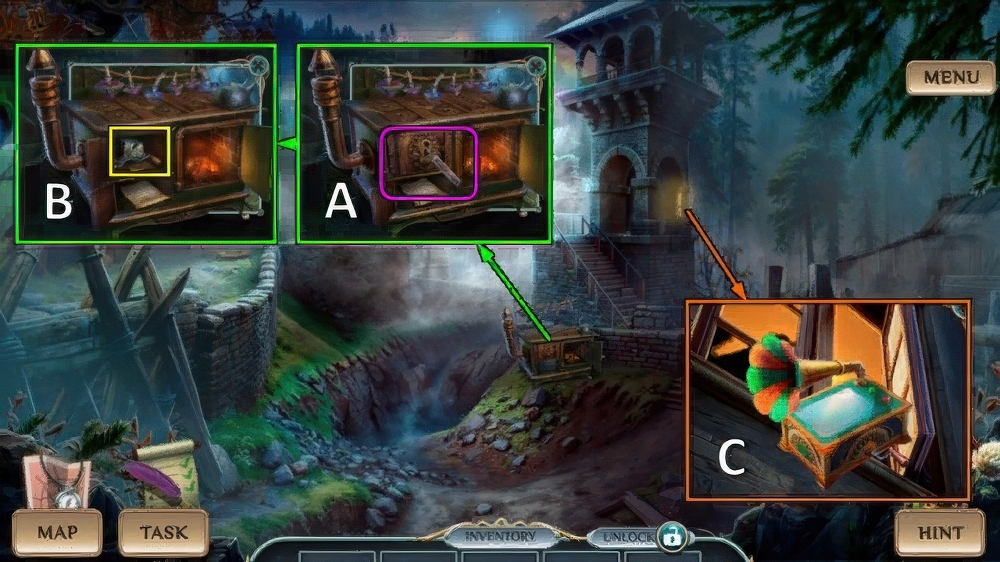
- Talk, take MICROSCOPE SLIDE (A).
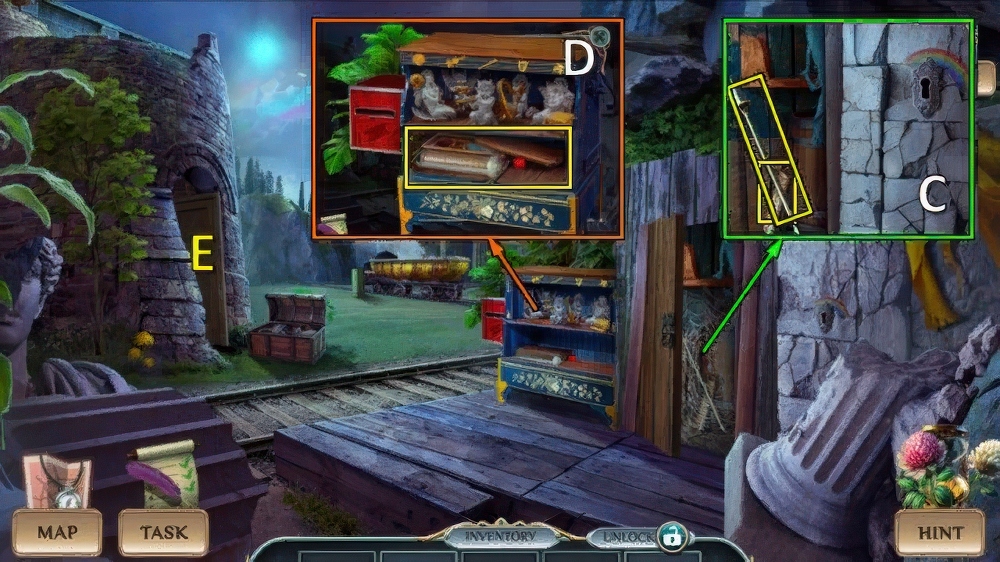
- Take BROKEN WHEEL (B).
- Take PUNCH CARD (C).
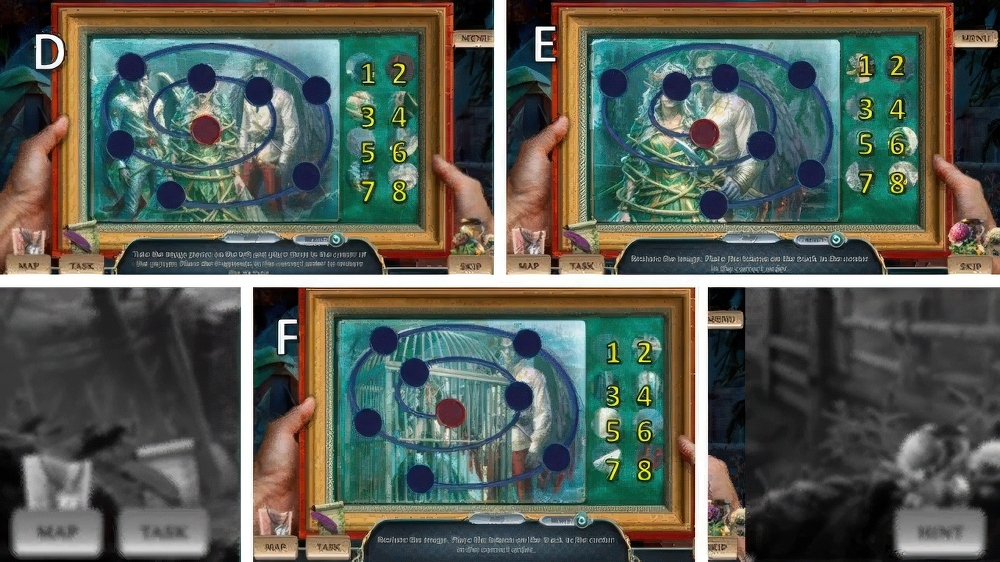
- Use PUNCH CARD (D).
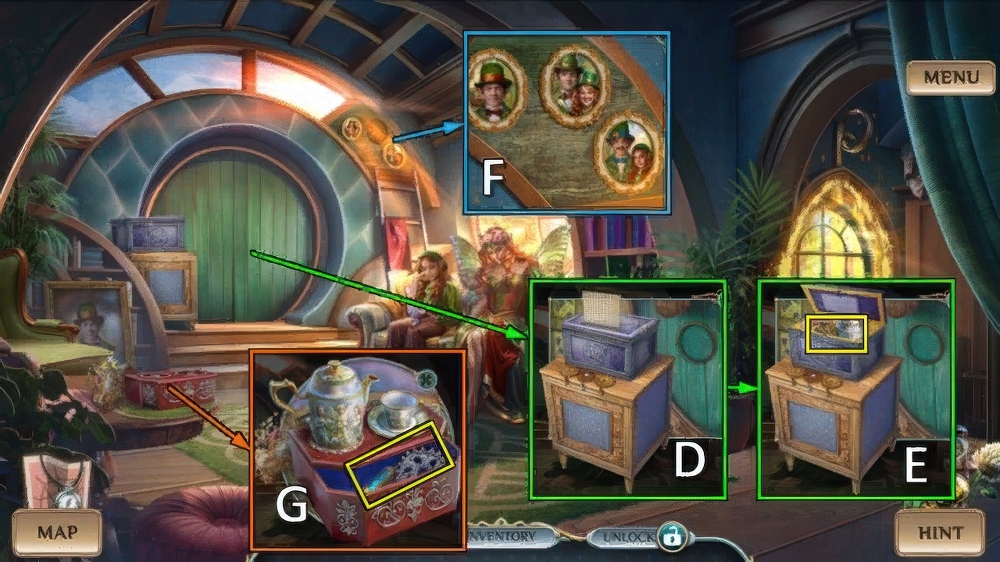
- Take TEAPOT and PARENTS’ PORTRAIT (E).
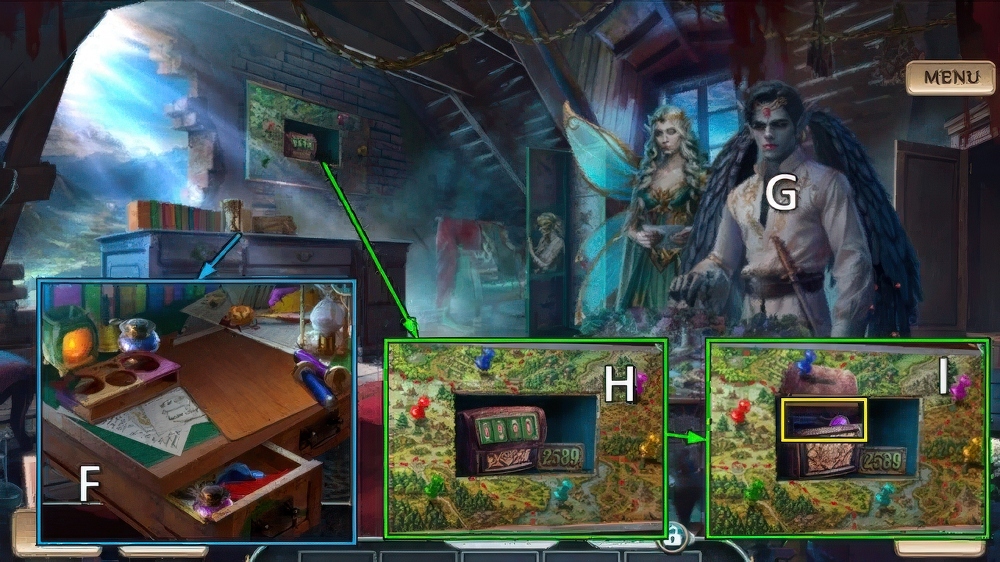
- Place PARENTS’ PORTRAIT for puzzle (F), receive TEACUP.
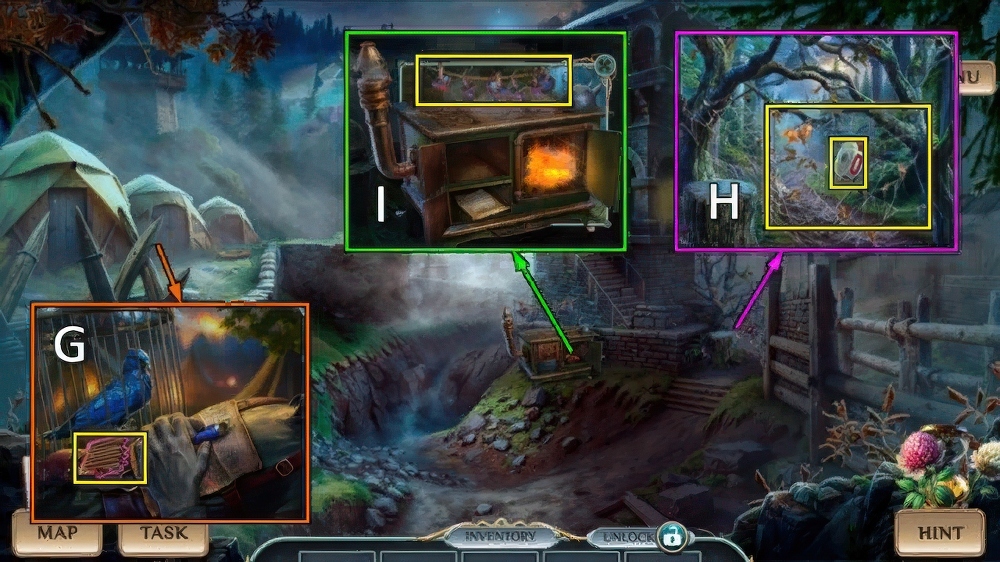
- Place TEAPOT and TEACUP, take SILVER GEAR and SYRINGE BARREL (G).
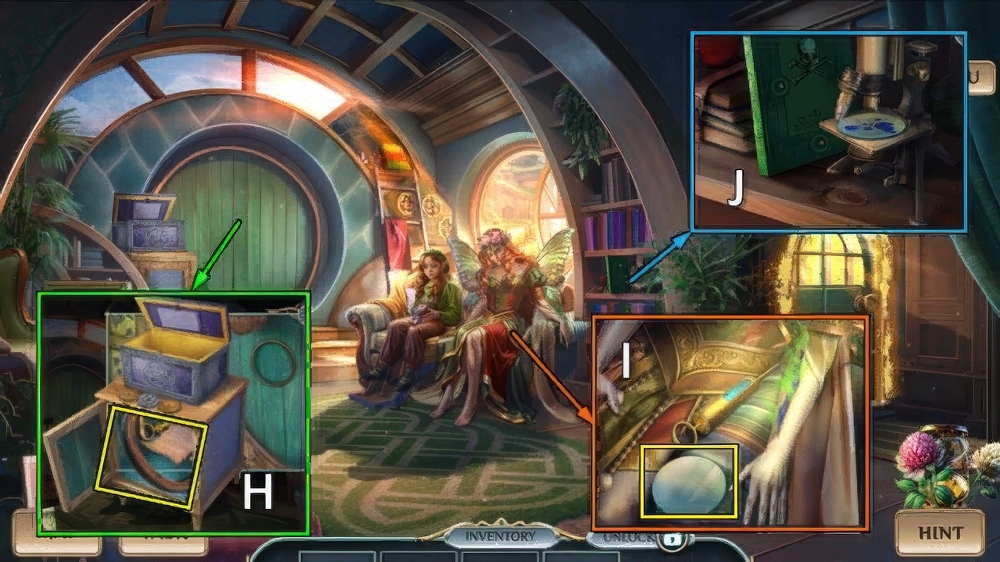
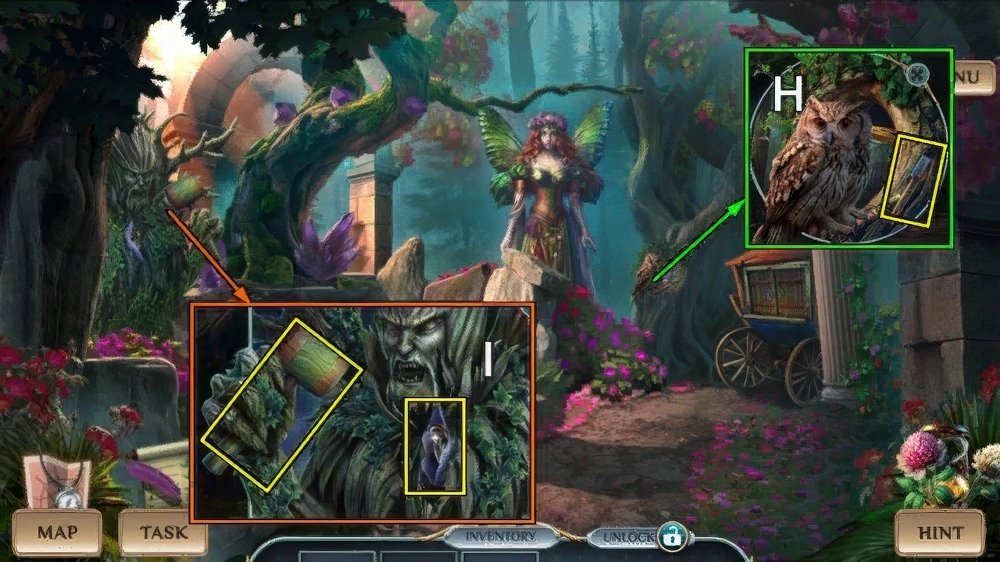
- Place SILVER GEAR, take PLUNGER and RIM (H).
- PLUNGER on SYRINGE BARREL, take SYRINGE.
- Place MICROSCOPE SLIDE and SYRINGE, take BLOOD SAMPLE (I).
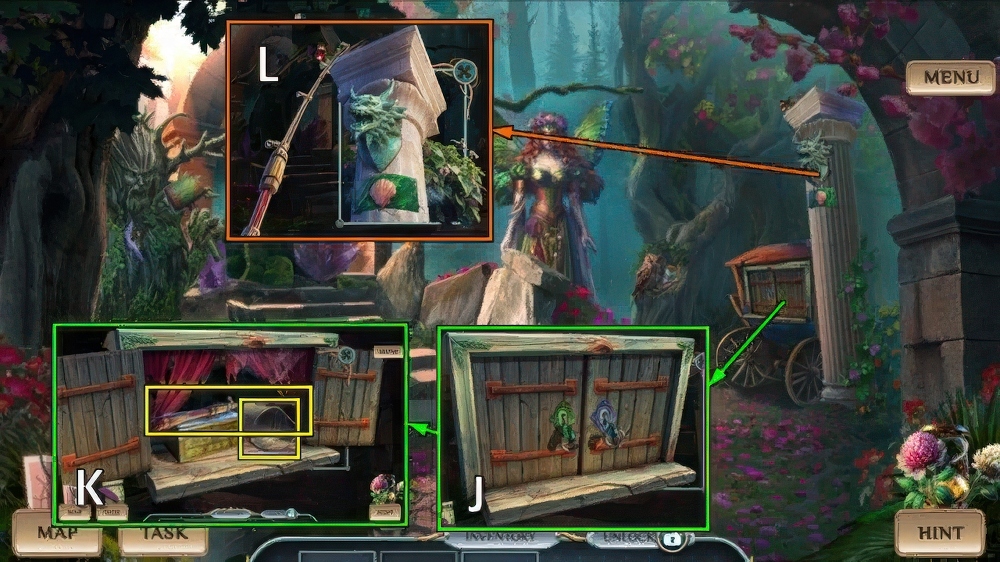
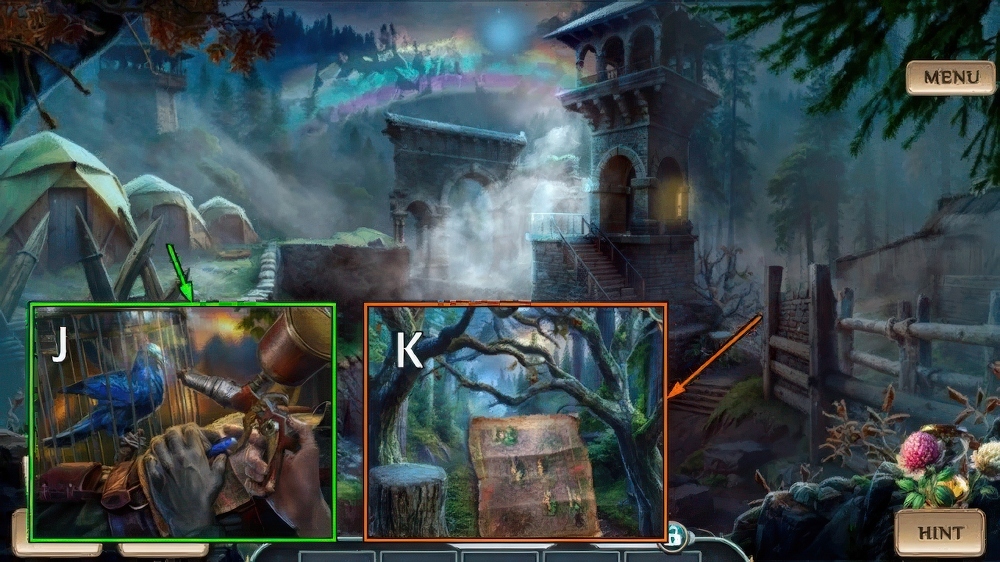
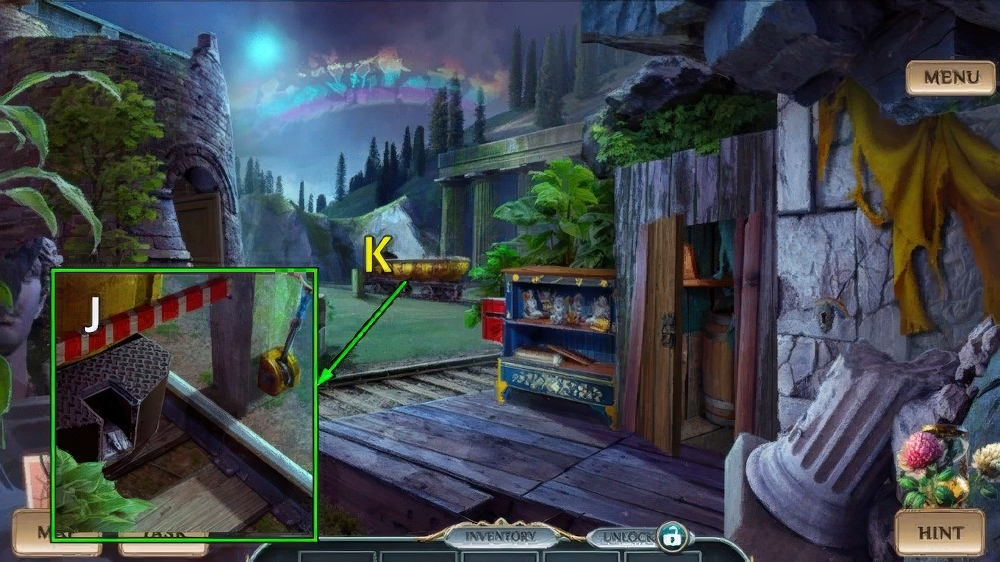
- Place BLOOD SAMPLE (J).
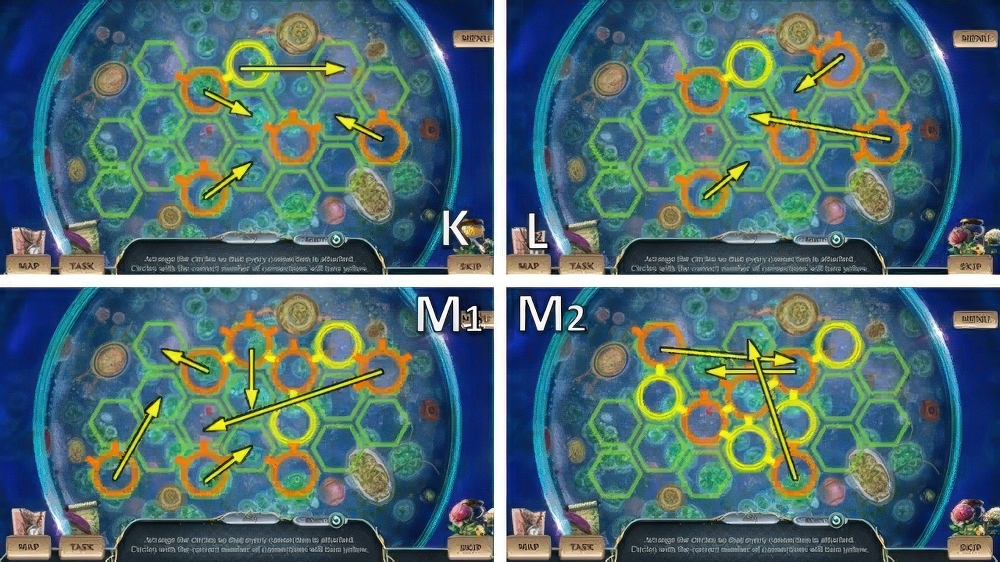
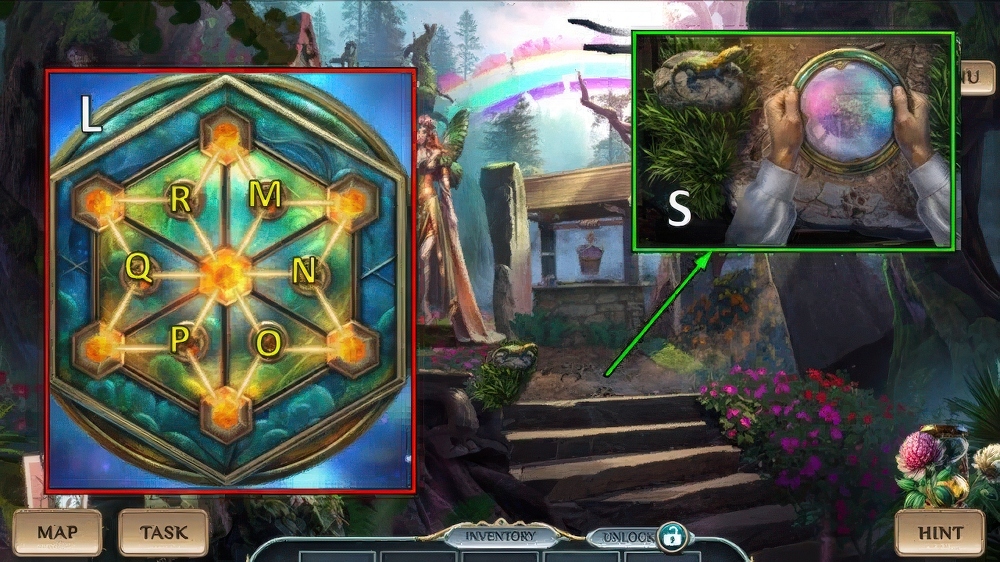
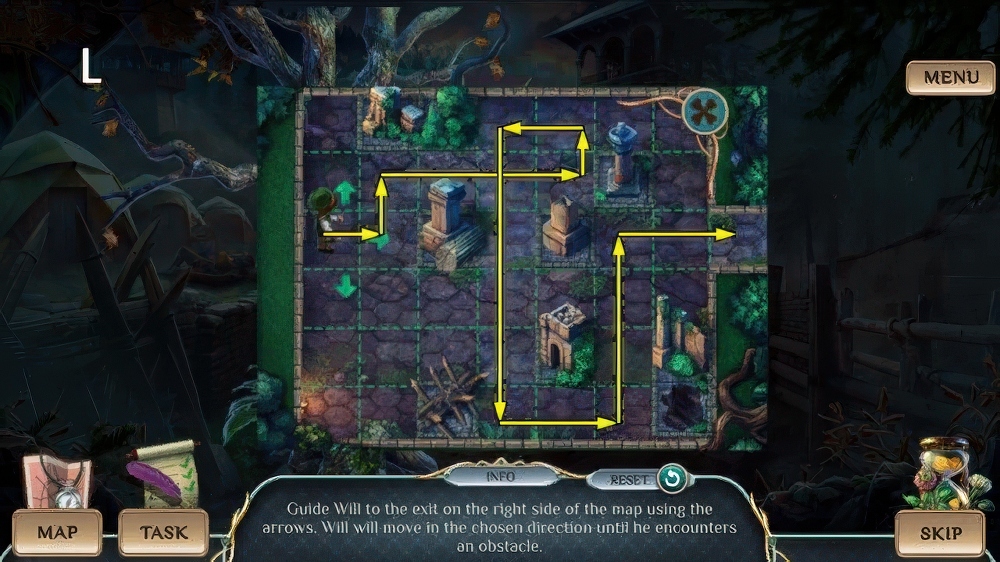
- Solution (K-L-M).
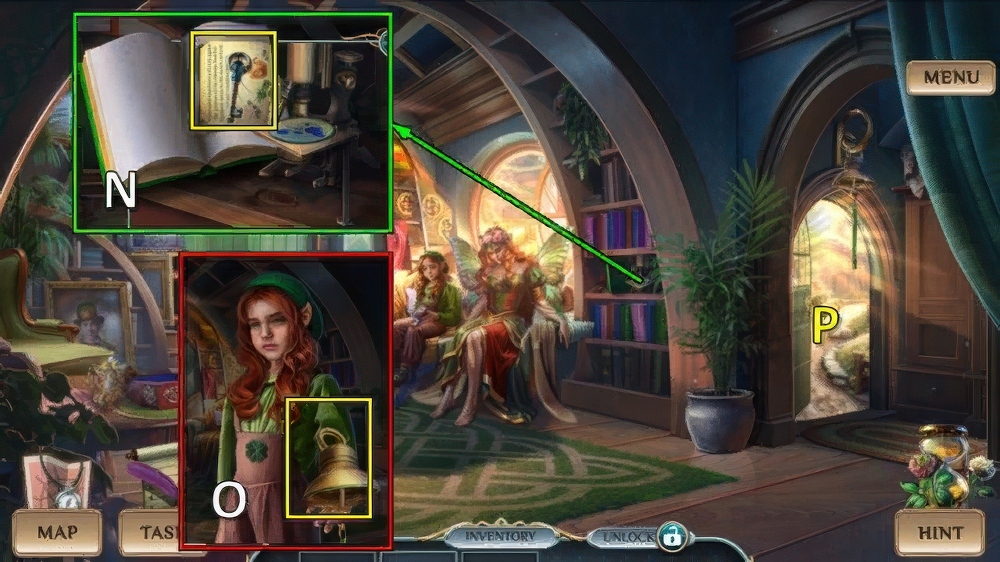
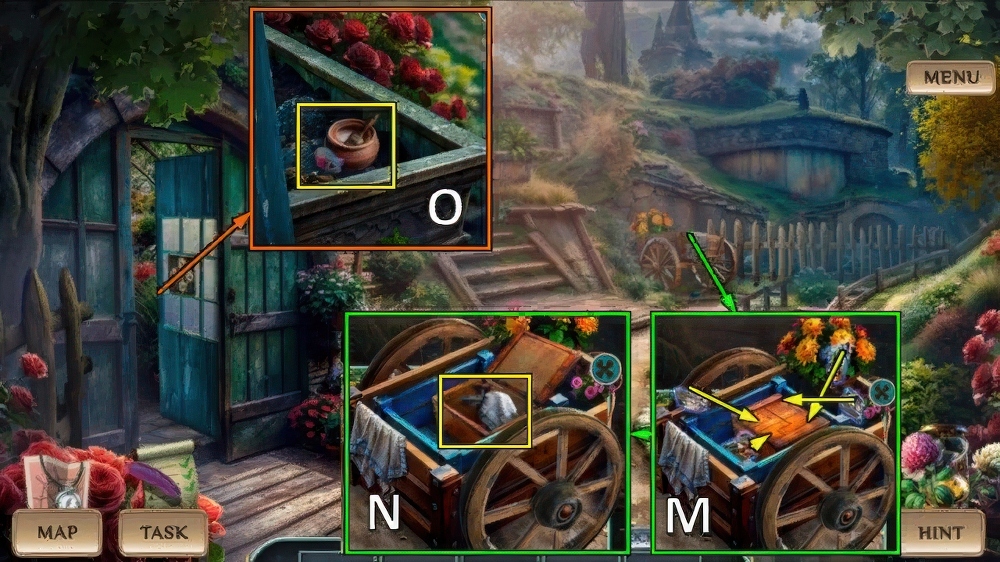
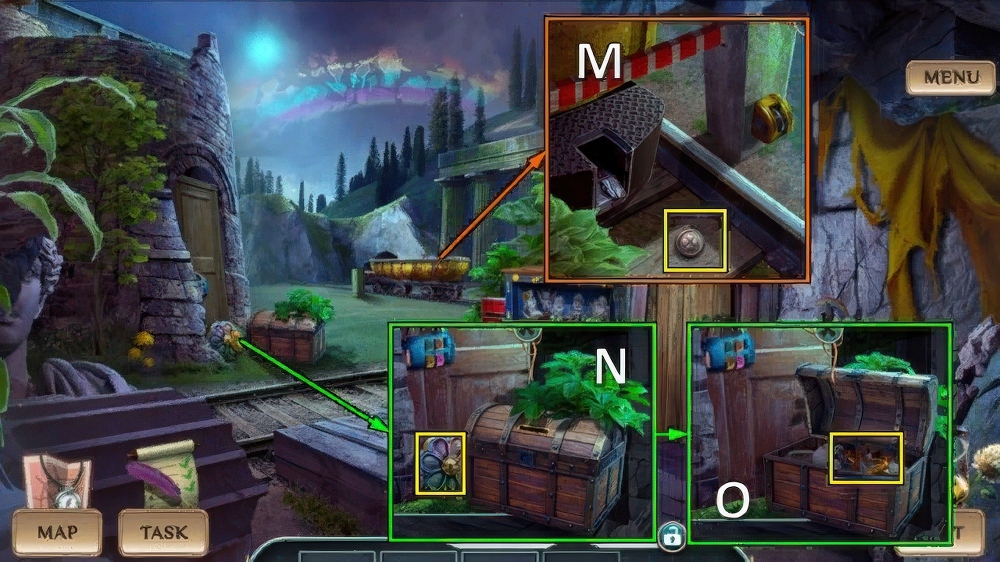
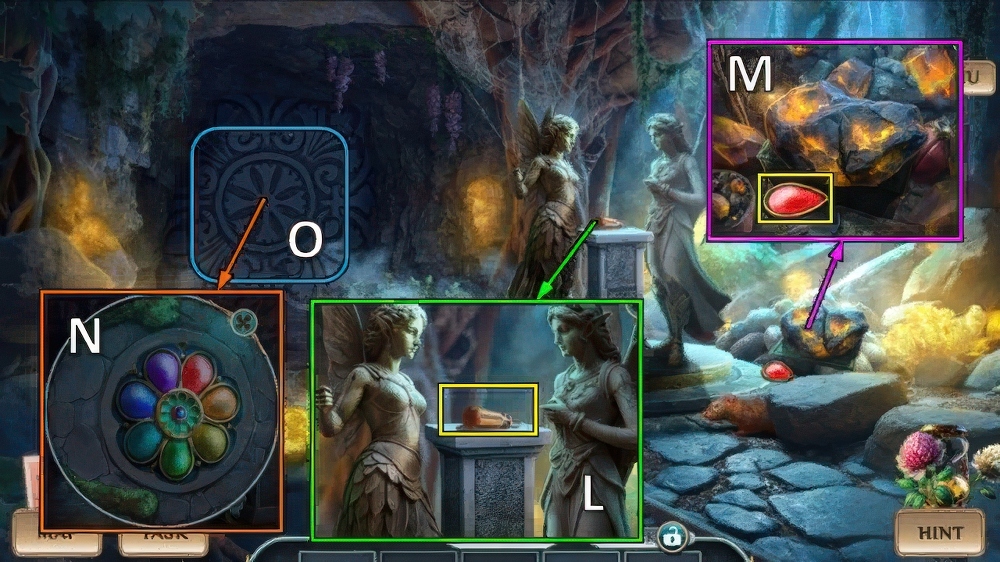
- Take BLUE KEY and HEALING RECIPE (N).
- Take BELL (O).
- Place BELL, go (P).
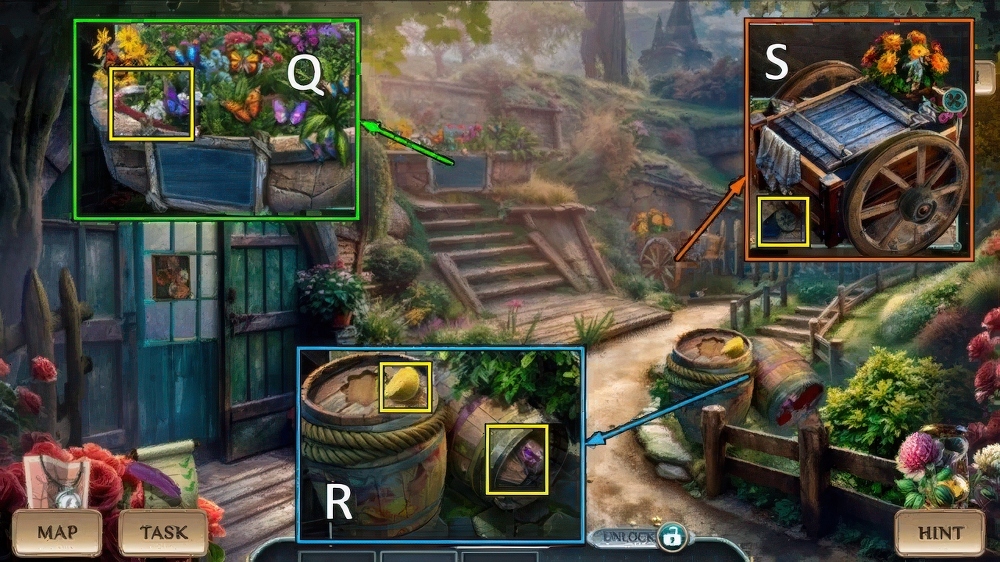
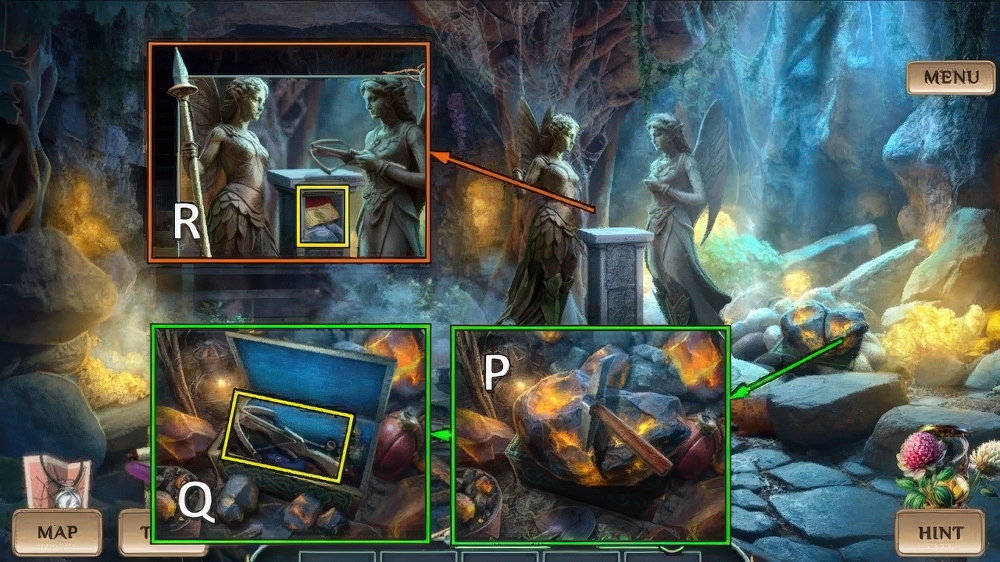
- Take CROWBAR (Q).
- Use CROWBAR, take LEMON, SPOKES and ORE (R).
- RIM and SPOKES on BROKEN WHEEL, take WHEEL.
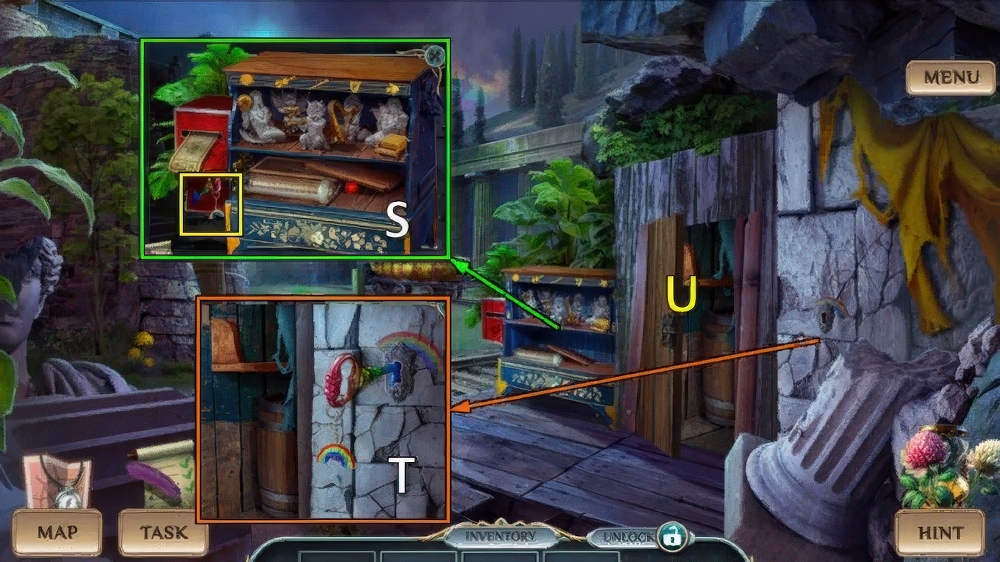
- Place WHEEL, take TOKEN and SCOOP (S).
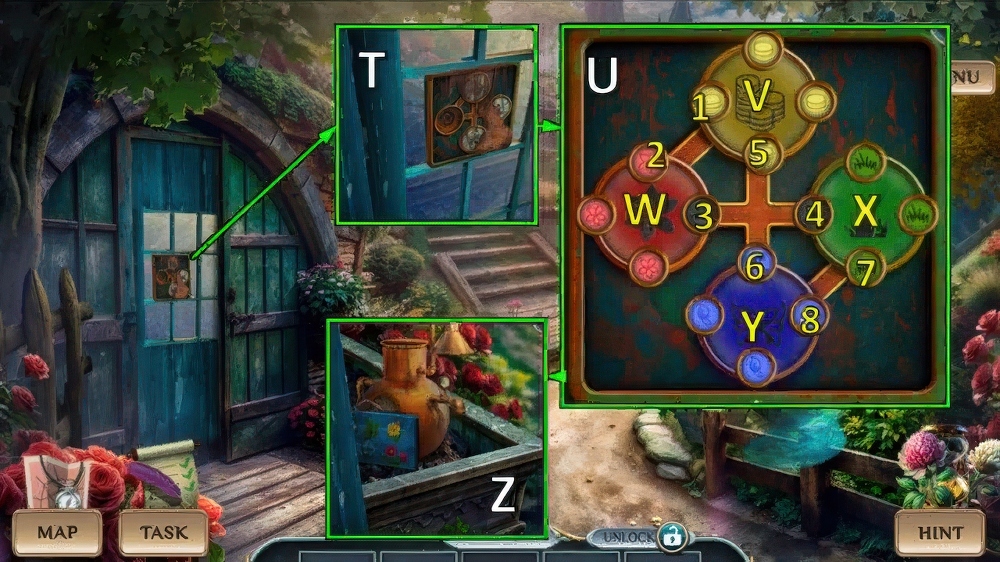
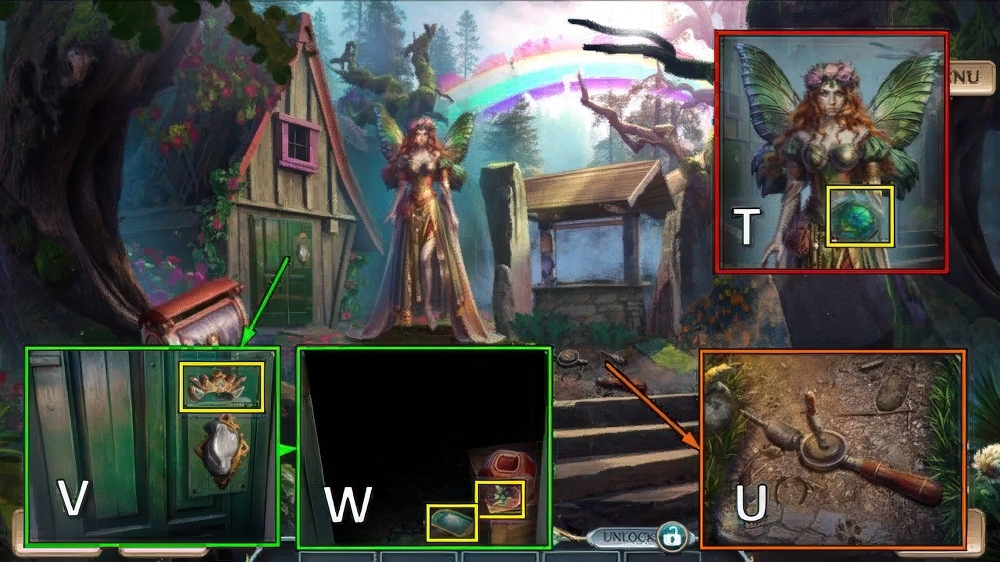
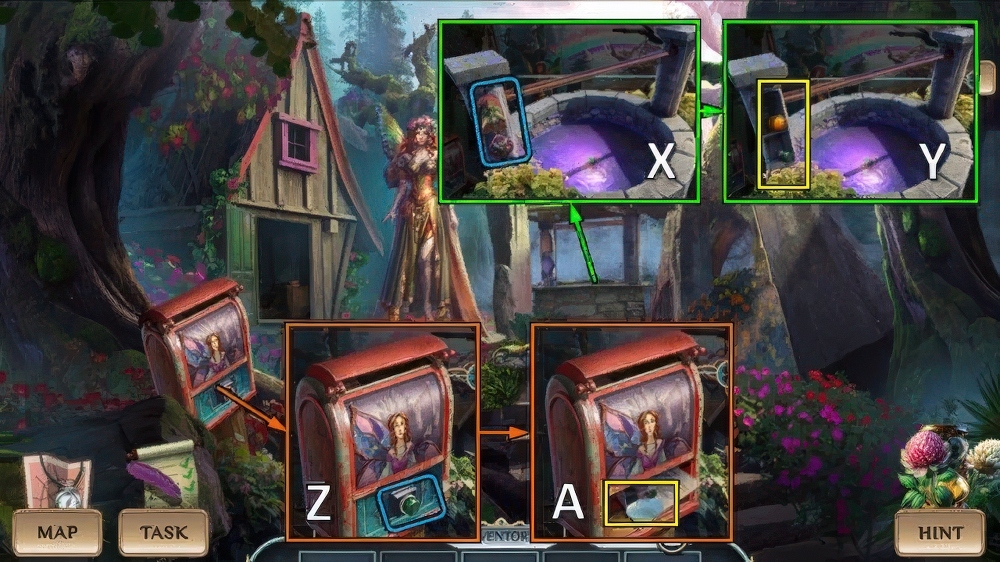
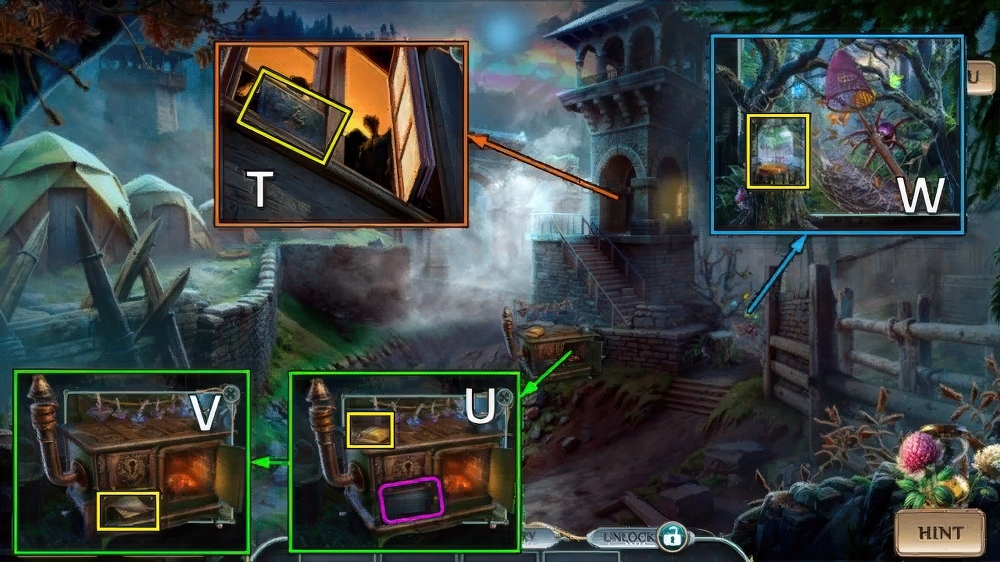
- Use LEMON and TOKEN (T).
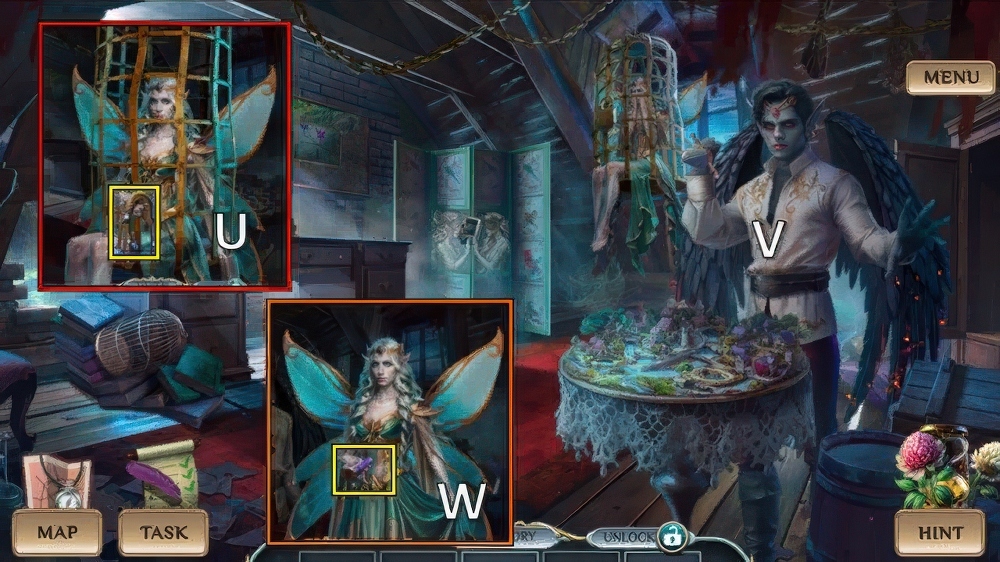
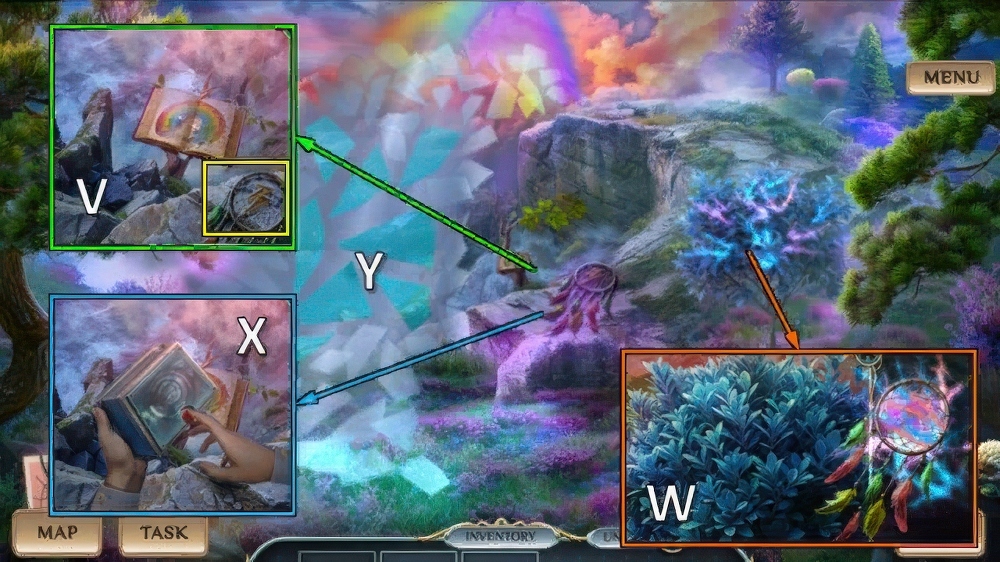
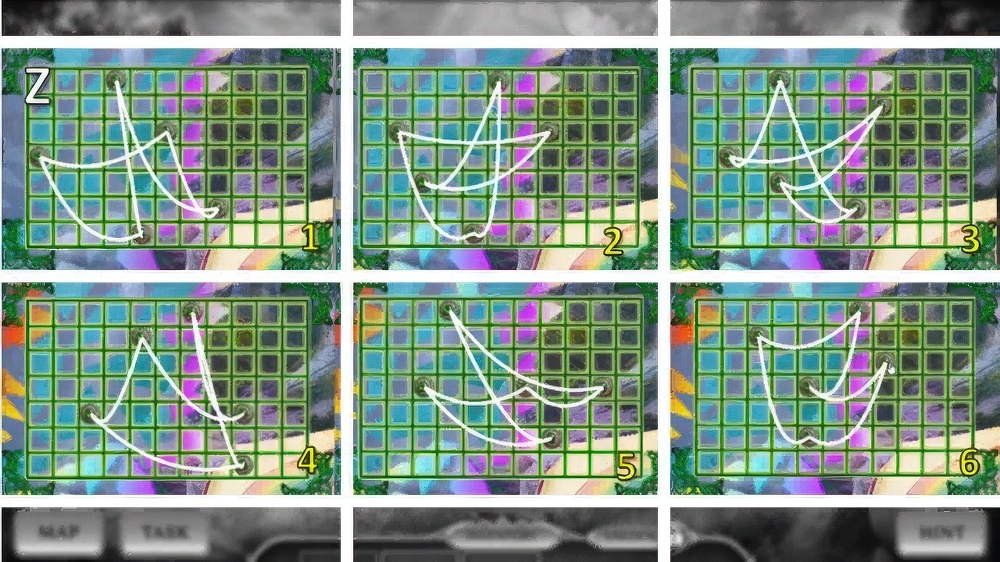
- Solution (U): (7-8)-Xx2-Y-(7-8)-Y-V-(5-6)-(3-4)-W-(1-2)-V-W-(1-2)-V-W-(1-2)-W-Xx2-(3-4)-W-X-(3-4).
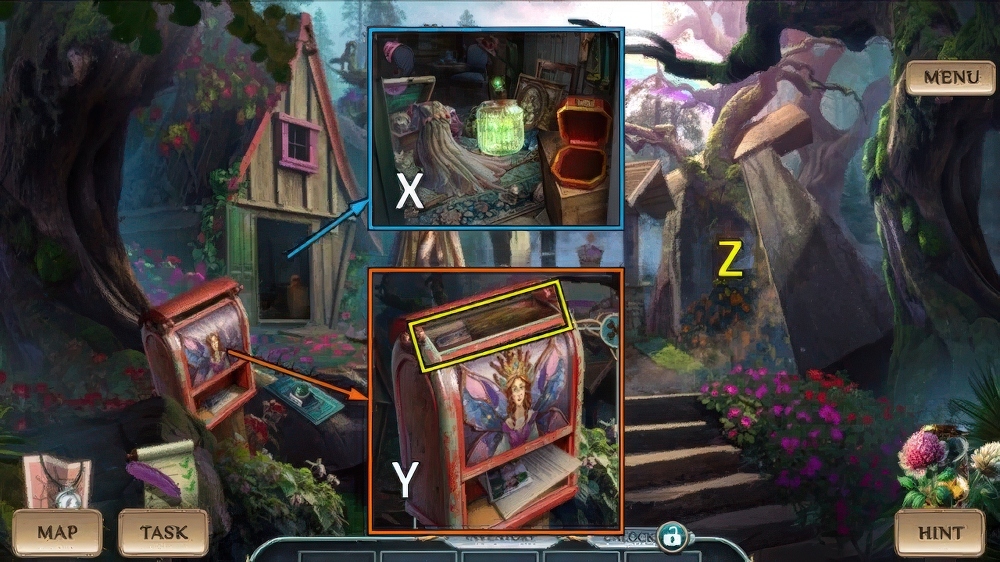
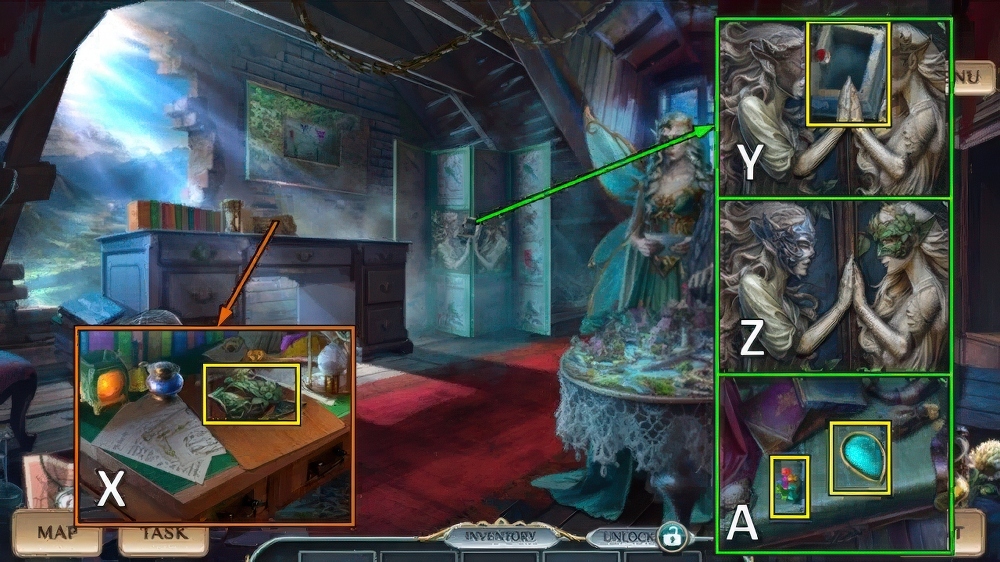
- Take HERB LIST and DISTILLER (Z).
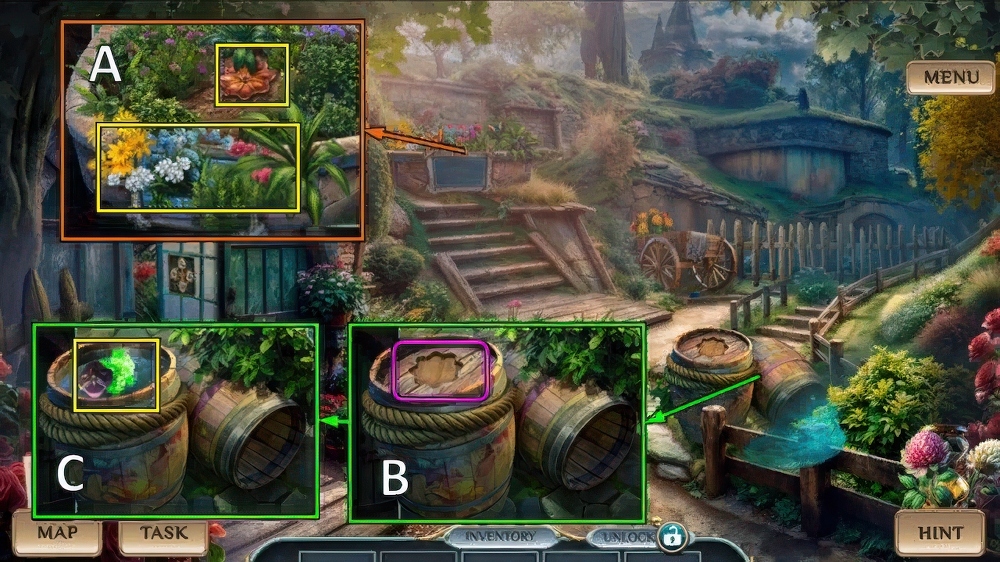
- Place HERB LIST.
- Move plants, take FLOWER INLAY and HERBS (A).
- Place FLOWER INLAY (B).
- Take PIXIE SYMBOL and HAWTHORN (C).
- Walk down.
- DISTILLER, HERBS and HAWTHORN on HEALING RECIPE, take HEALING TINCTURE.
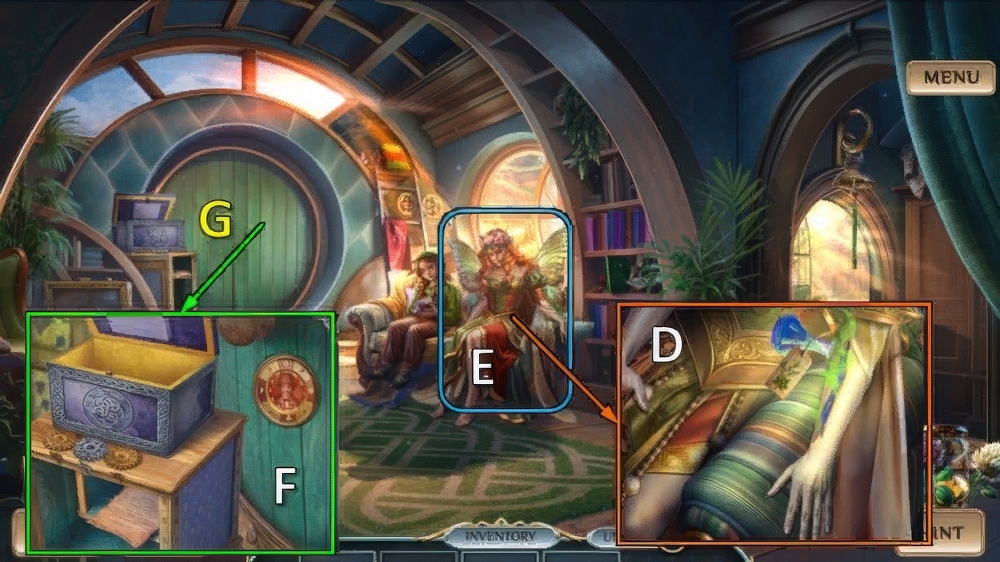
- Use HEALING TINCTURE (D).
- Play puzzle (E), receive CHIP.
- Place CHIP (F).
- Go (G).
- Take MAGNET (H).
- Use MAGNET, take MALLET, GREEN KEY and DRAWING (I).
- Use GREEN KEY and BLUE KEY (J), take FISHING ROD and BUCKET (K).
- Use FISHING ROD, receive COMB (L).
- Go to Backyard.
- Use COMB, move pieces (M).
- Take EMBROIDERED HANDKERCHIEF and PRESS (N).
- Use SCOOP and EMBROIDERED HANDKERCHIEF, take GLUE and MOUSE (O).
- Go Magic Forest.

- Offer MOUSE, take SMALL CHISEL and JAR (P).
- SMALL CHISEL and MALLET on ORE, take UNCHARGED CRYSTAL.
- Offer UNCHARGED CRYSTAL (Q).
- Take PORTAL STONE (R).
- Use PORTAL STONE, play puzzle (S).
- Take AMULET BASE (T).
- Assemble and take DRILL (U).
- Take CROWN, use DRILL (V).
- Take FAIRY SYMBOL and INCOMPLETE DEVICE (W).
- Place FAIRY SYMBOL and PIXIE SYMBOL (X), take ROUND BUTTON and JEWELS (Y).
- Place ROUND BUTTON (Z), take GLASS PANEL (A).
- Walk down.
- PRESS and GLASS PANEL on DRAWING, take MOSAIC TILE.
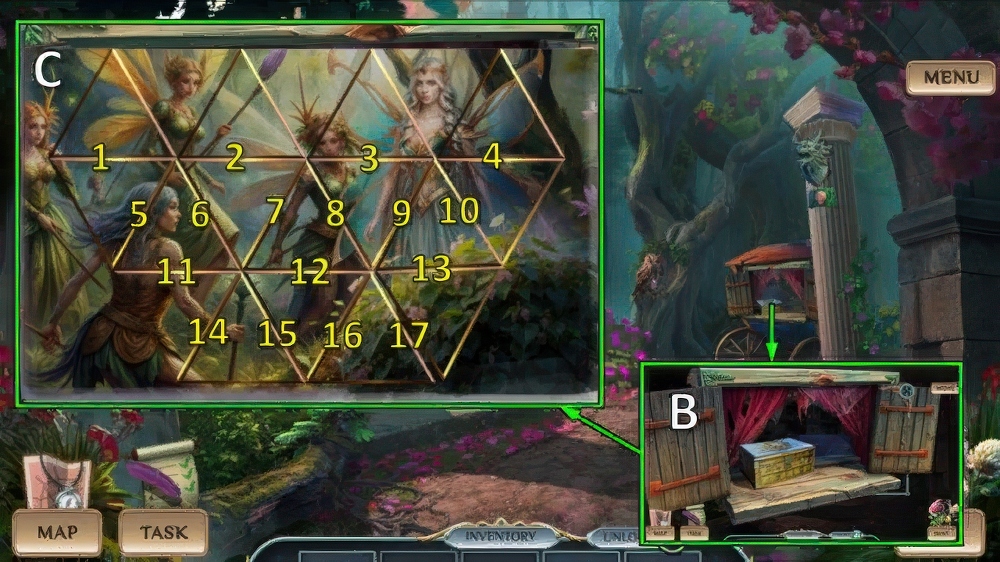
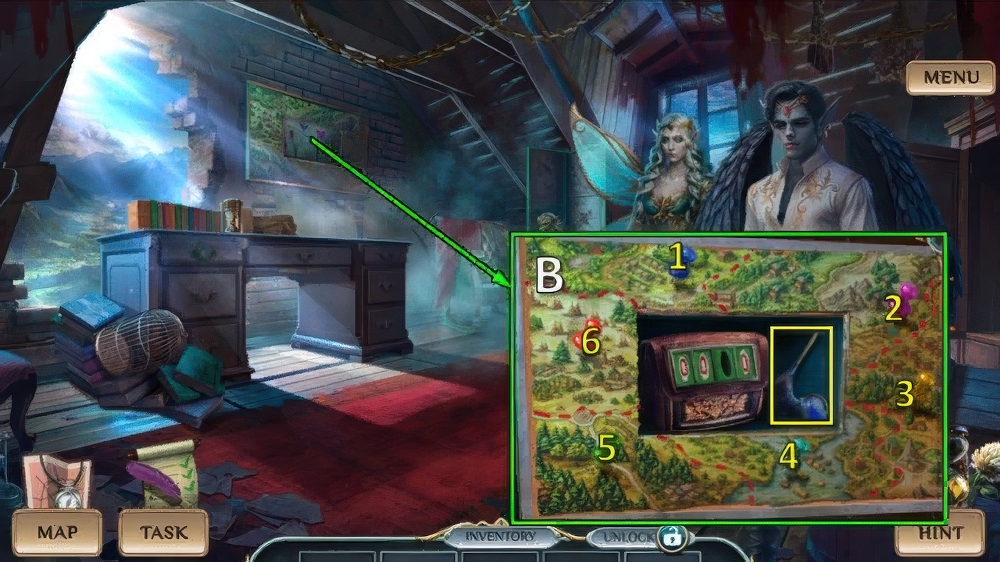
- Place MOSAIC TILE (B).
- Solution (C, D and E): 11-5-1-16-15-14-11-5-14-11-9-8-7-2-3-8-12-15-14-12-8-3-13.
- 9-8-7-16-12-15-16-17-13-10-4-15-16-17-13-10-13-17-16-15-17-13-9.

- Take SEASHELL and DEVELOPER (F).
- Place SEASHELL, take MORTAR AND PESTLE and ROPE (G).
- Go (H).
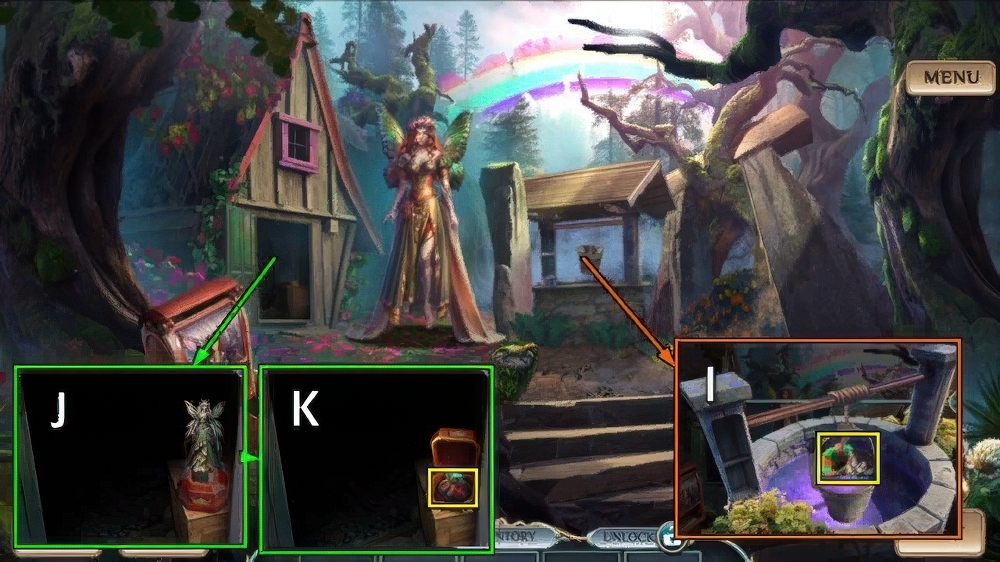
- Place BUCKET and ROPE, take EAR TRUMPET and QUEEN FIGURINE (I).
- Place QUEEN FIGURINE (J), take PIXIE DUST (K).
- JEWELS, PIXIE DUST and DEVELOPER on AMULET BASE.
- Solution (L): O-N-M-Q-P-O-N-P-O-Q-P.
- Take AMULET OF INSIGHT.
- Place AMULET OF INSIGHT (S).
- Take STONE TABLET (T).
- Take PIANO, place STONE TABLET (U).
- Take SCOOP-NET (V).
- Use JAR and SCOOP-NET, receive SLEEP STONE.
- Take FIREFLIES (W).
- Walk down.
- Use FIREFLIES for mini-puzzle (X), receive DELICATE WING.
- Place GLUE, CROWN and DELICATE WING, take BOARD and ANCIENT LOCKPICK (Y).
- Go (Z).
- Use ANCIENT LOCKPICK (A), take PIXIE MASK and CRANK HANDLE (B).
- CRANK HANDLE and EAR TRUMPET on INCOMPLETE DEVICE, take LISTENING DEVICE.
- Use LISTENING DEVICE (C).
- Solution (D): 4-2-5-1-7-6-8-3.
- Solution (E): 1-2-5-4-7-3-8-6.
- Solution (F): 3-8-6-7-1-5-2-4.
- Take NOISEMAKER (G).
- Use NOISEMAKER, take CODE WHEEL and DRY SPIDERWEB (H).
- Use DRY SPIDERWEB, take DRIED MUSHROOMS (I).
- SLEEP STONE and DRIED MUSHROOMS on MORTAR AND PESTLE, take TRANQUILIZER.
- Use TRANQUILIZER and BOARD (J), receive SECRET MAP and LEADERS’ SEALS 1/2.
- Use SECRET MAP (K).
- Solution (L).
- Take SILVER COIN (M).
- Take BROKEN FLOWER, use SILVER COIN (N).
- Take HARP (O).

- Place HARP and PIANO.
- Swap (1-2)-(3-4)-(4-5).
- Take AWL and SCREW (P).
- Use AWL (Q).
- Take KEYCHAIN and RAINBOW PETALS 1/5 (R).
- Use KEYCHAIN (S).
- Go (T).
- Take TRUTH TRAP (U).
- Use TRUTH TRAP for puzzle (V).
- Take LEADERS’ SEALS 2/2 (W).
- Take FAIRY MASK (X).
- Take WEATHER DEVICE (Y), place FAIRY MASK and PIXIE MASK (Z).
- Take RAINBOW PETALS 2/5 and PUSHPINS (A).
- Place PUSHPINS, swap (2-6)-(1-5)-(3-4).
- Take FEATHER DUSTER and RAINBOW PETALS 3/5 (B).
- Walk down.
- Use FEATHER DUSTER, take SPEAR and ORGAN BARREL (C).
- Place ORGAN BARREL, take GLASS PLATE and INKWELL (D).
- Go (E).
- Place LEADERS’ SEALS and INKWELL for mini-puzzle (F), take TREATY.
- Offer TREATY (G), receive LOCK CODE.
- Place CODE WHEEL and LOCK CODE (H).
- Take CART LEVER and RAINBOW PETALS 4/5 (I).
- Walk down.
- Place CART LEVER (J).
- Go (K).
- Take UNUSUAL SCREWDRIVER (L).
- Take RAINBOW PETALS 5/5 (M).
- RAINBOW PETALS and SCREW on BROKEN FLOWER, take RAINBOW AMULET.
- Place RAINBOW AMULET (N).
- Play puzzle (O), receive RAINBOW PIECES and MINER’S PICKAXE.
- Use MINER’S PICKAXE (P), take CROSSBOW (Q).
- Place SPEAR and CROSSBOW, take TICKET and CLOUDS (R).
- Walk down.
- Use TICKET, take RAINBOW KEY (S).
- Use RAINBOW KEY (T).
- Go (U).
- Take LIGHTCATCHER (V).
- Use LIGHTCATCHER, remove all lightning.
- Take LIGHTNING (W).
- GLASS PLATE, LIGHTNING, CLOUDS and UNUSUAL SCREWDRIVER on WEATHER DEVICE, take STORM.
- Use STORM (X), receive FOLIO.
- Use RAINBOW PIECES and FOLIO (Y).
- Solution (Z).
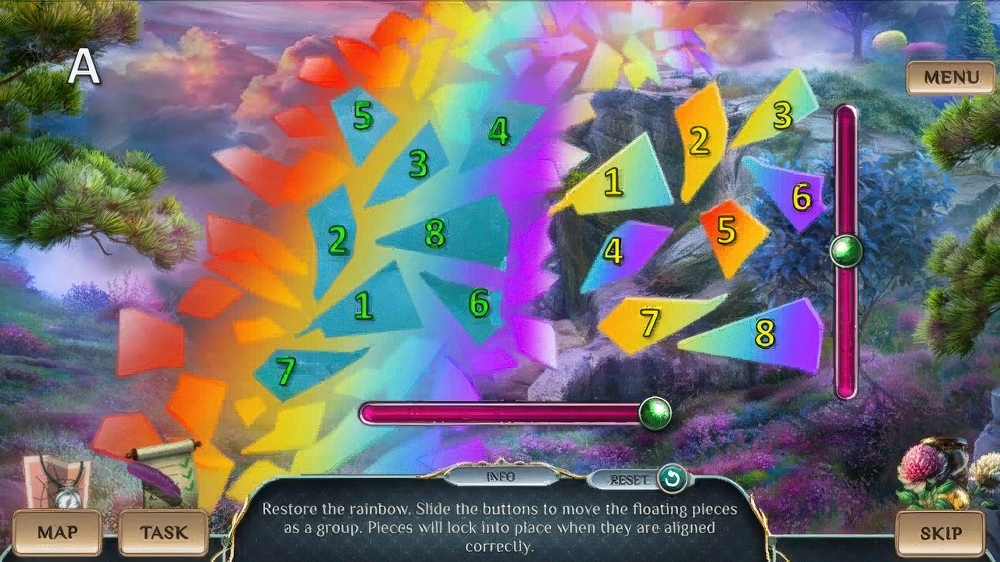
- Move all pieces into place (A).
Congratulations! You have completed the game Lucky Season 2: End of the Rainbow.


