
Maze 4: Stolen Minds (Bonus Chapter) – Offers an ending to a disturbing story and a new perspective. You are in the role of a doctor who suddenly finds himself drawn into a dangerous situation. One of the patients, gripped by panic, claims that a certain person has trapped everyone among the monsters. Scraps of information, strange names, frightening messages, all point to the involvement of Victor Hawkins, Dr. Aldine’s former assistant. But who is he now, a madman, a thief, or a messiah with a twisted sense of truth. In an attempt to figure it out, you are sent to the asylum where mysterious events are taking place. There, amidst the shadows and distorted minds, Victor claims to have given the patients, the truth, an eye-opening medicine, albeit at the cost of their lives. He believes that now everyone must see. It’s up to you to get to the truth and stop Victor before his vision of reality becomes everyone’s last.
Bonus Chapter Walkthrough
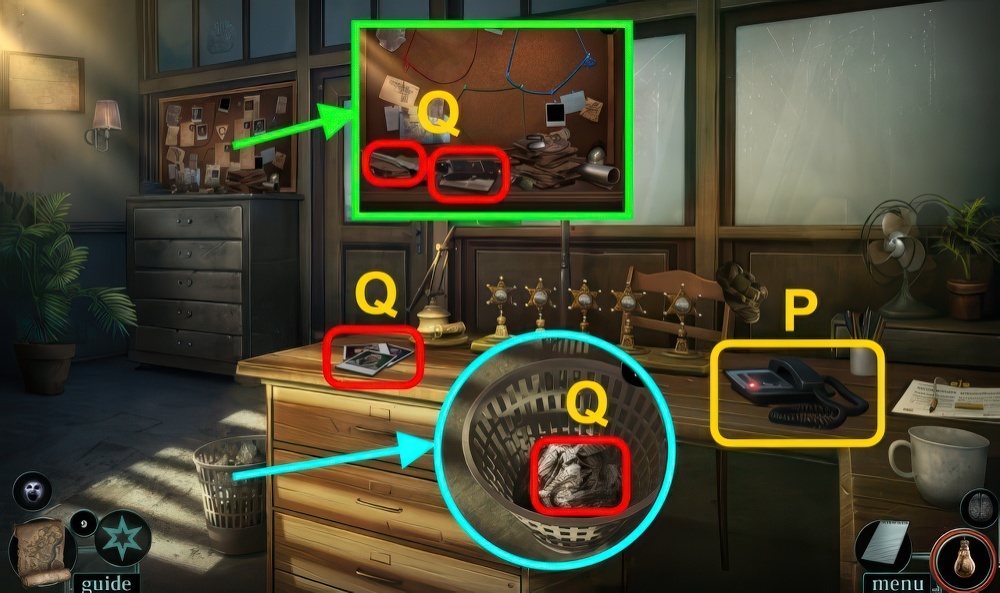
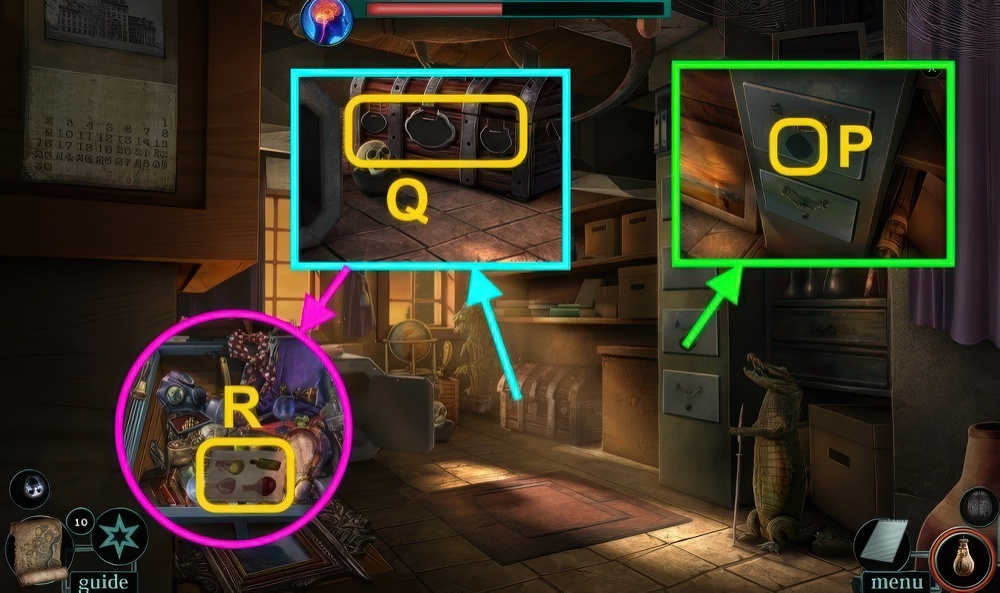
- Answer phone (P).
- Take PHOTOS, ELECTROSHOCK DEVICE, TORN NEWSPAPER ARTICLE, LETTER OPENER, and CRUMPLED NEWSPAPER ARTICLE (Q).
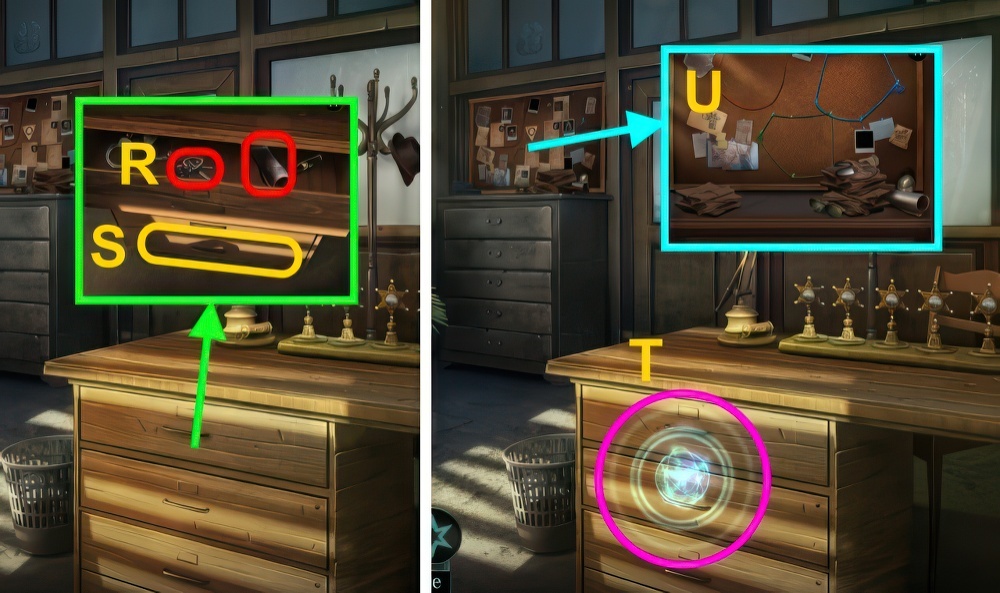
- Open, take GLITTERY RING, NEWSPAPER PIECE, and CAR KEYS (R).
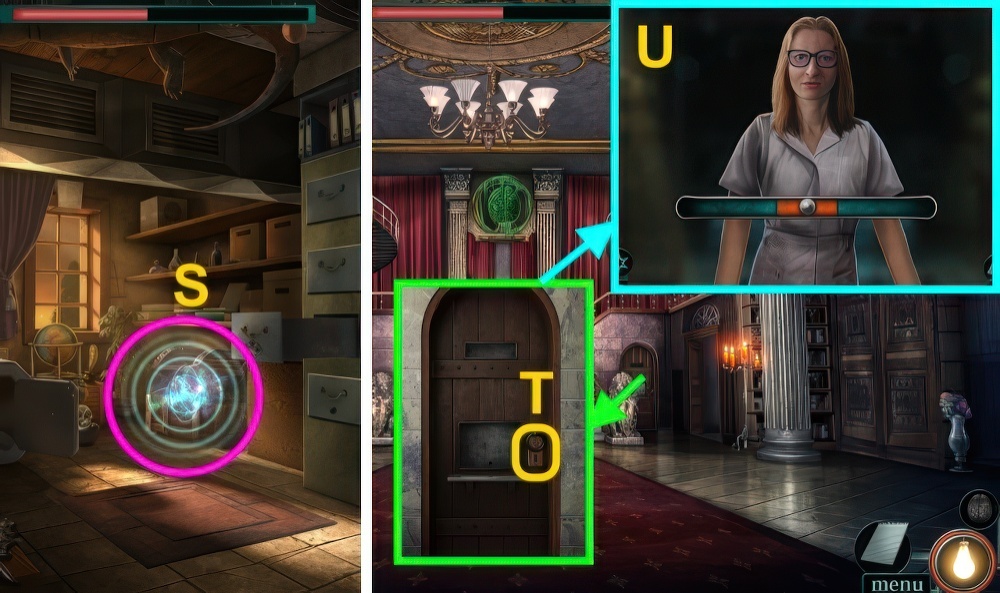
- Use LETTER OPENER (S).
- Play puzzle, receive CASE FILES (T).
- NEWSPAPER PIECE and CRUMPLED NEWSPAPER ARTICLE on TORN NEWSPAPER ARTICLE, take NEWSPAPER ARTICLES.
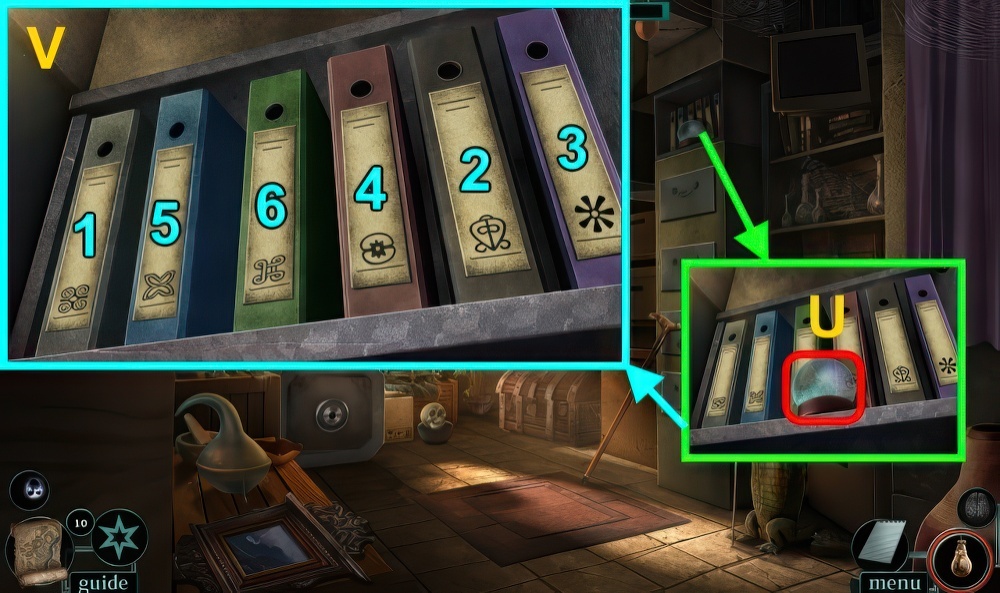
- Place PHOTOS, CASE FILES, and NEWSPAPER ARTICLES (U).
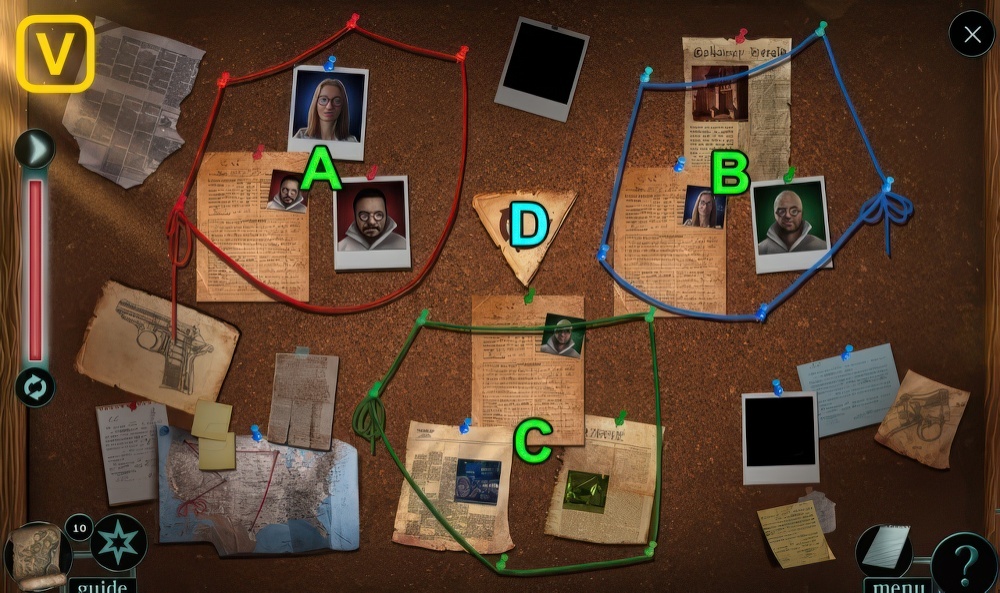
- Solution (V): B-Ax2-D-B-Cx2-D-C-D.
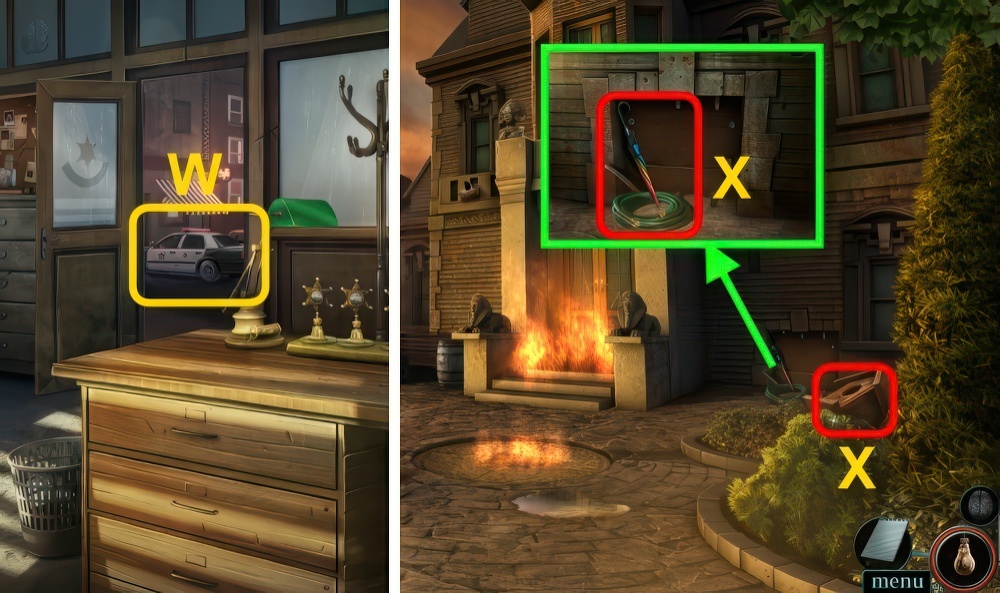
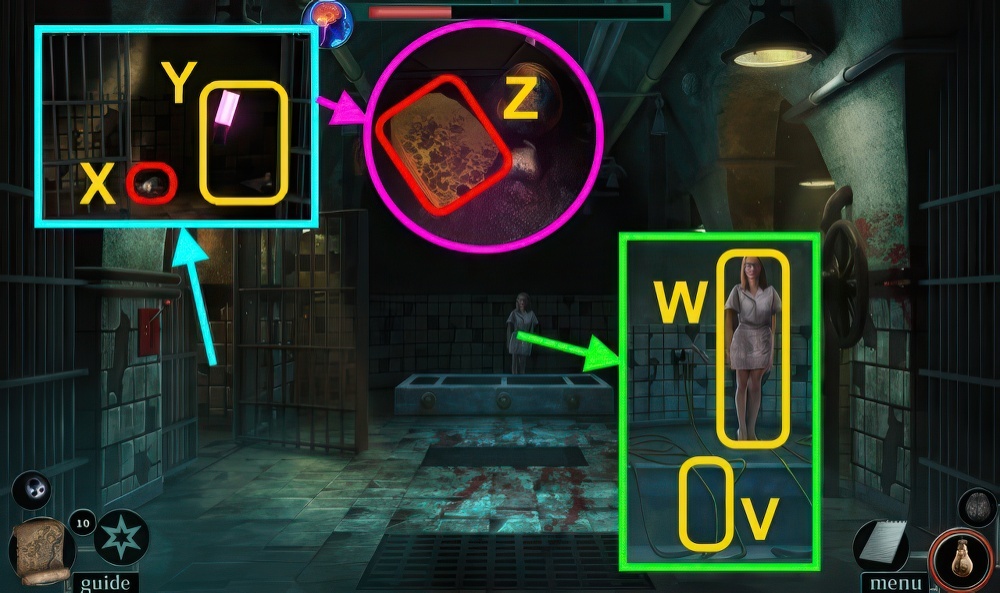
- Open door, use CAR KEYS (W).
- Walk forward.
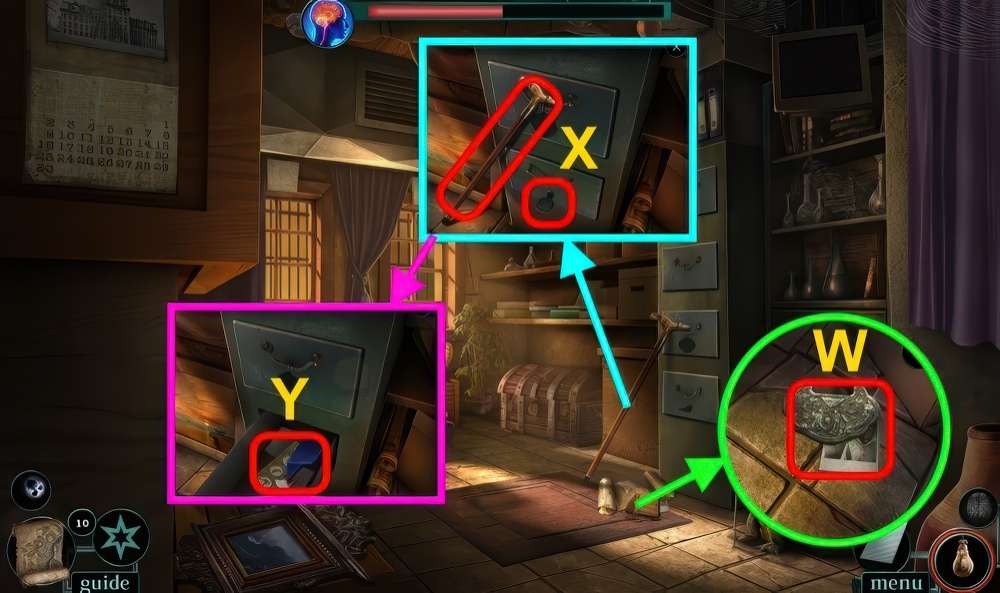
- Take BROKEN BIRDHOUSE, UMBRELLA, and HOSE (X).
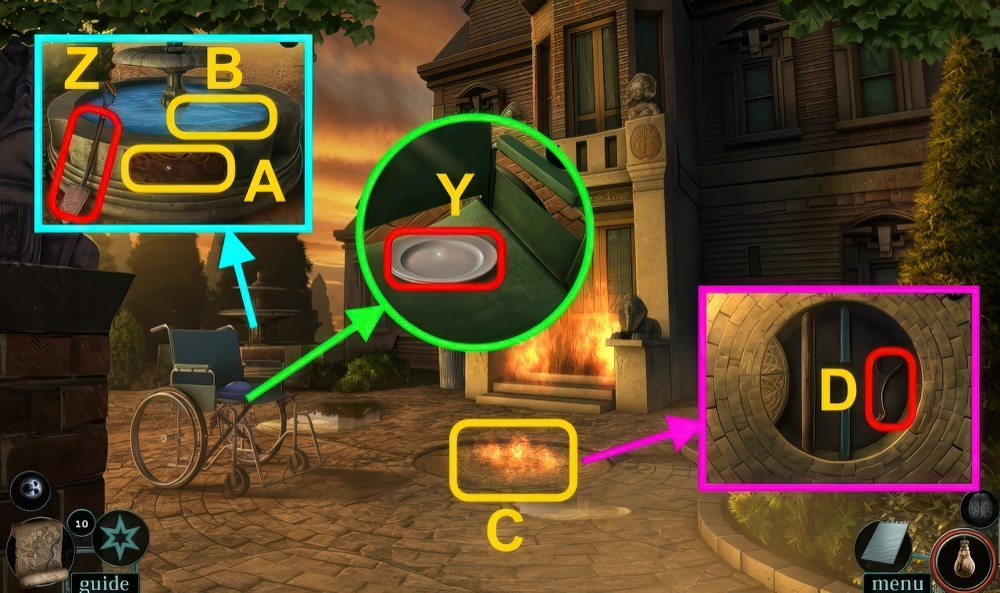
- Remove cloth, take SOUP PLATE (Y).
- Take SHOVEL (Z).
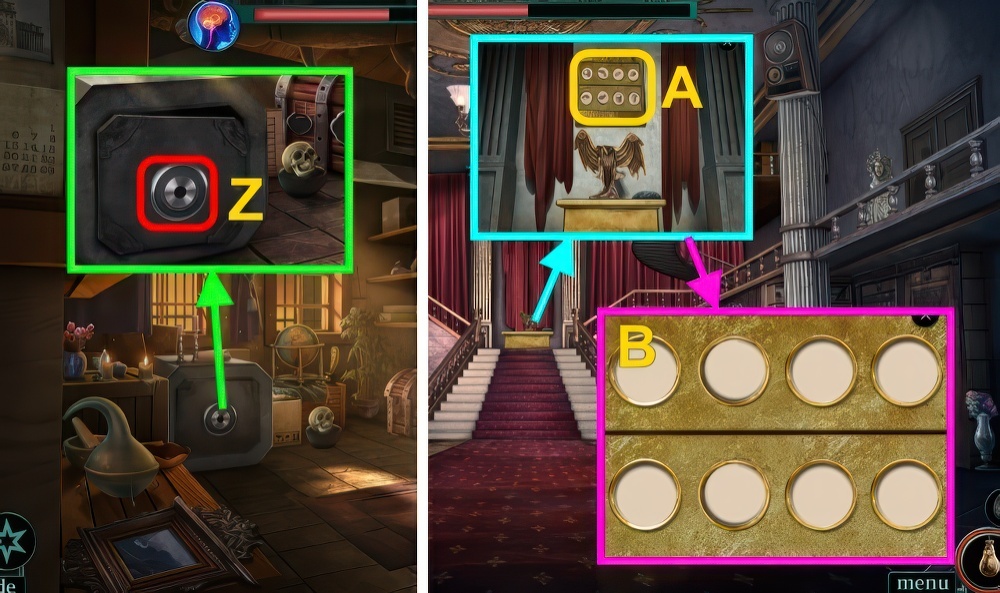
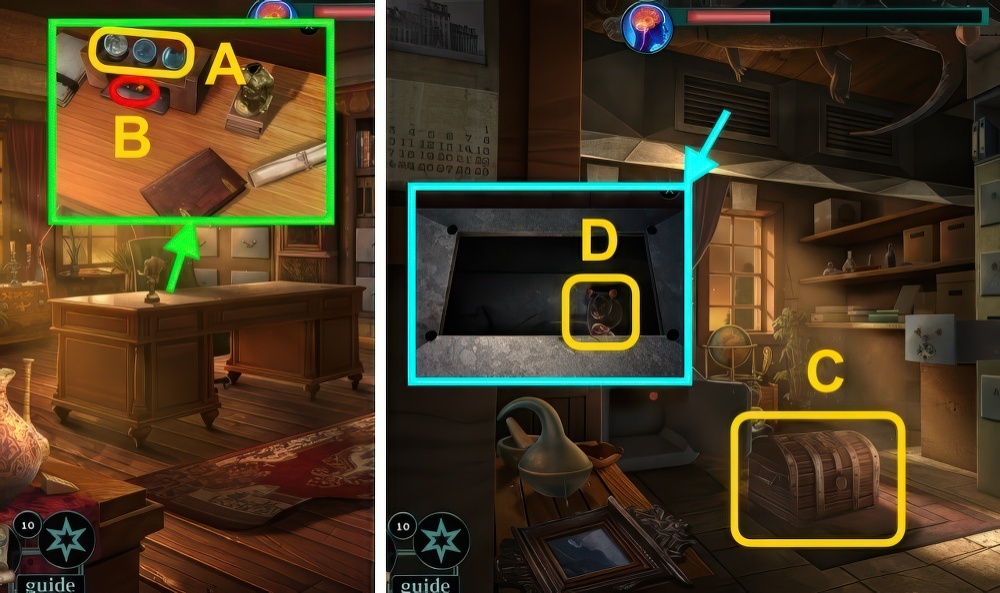
- Use LETTER OPENER (A), take FOUNTAIN INSET.
- Use SOUP PLATE (B), receive PLATE WITH WATER.
- Use PLATE WITH WATER (C).
- Place FOUNTAIN INSET, take DRY TWIG (D).
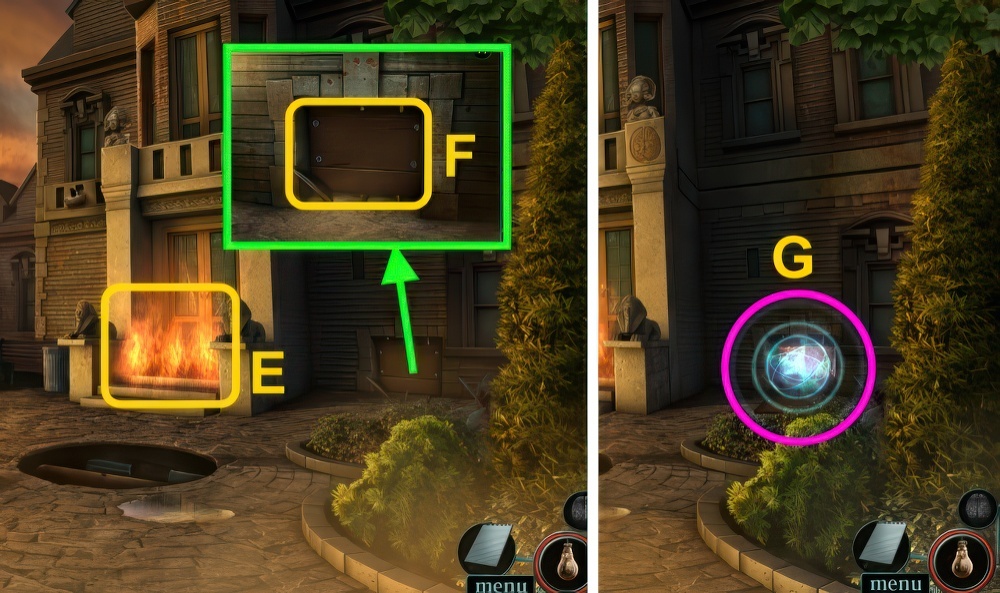
- Use DRY TWIG (E), receive BURNING TWIG.
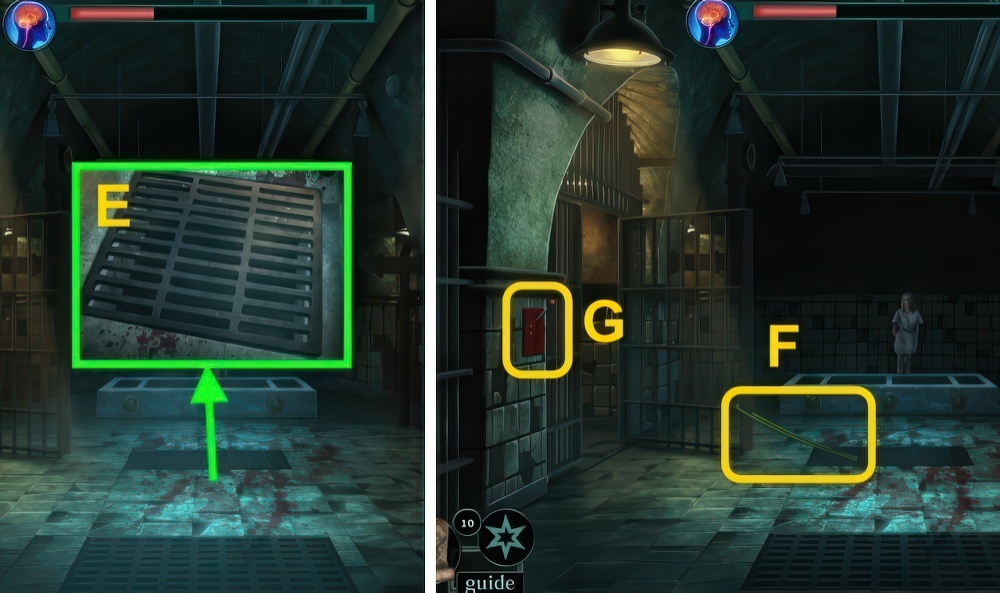
- Use SHOVEL (F).
- Play puzzle, receive JANITOR LOCKPICK (G).
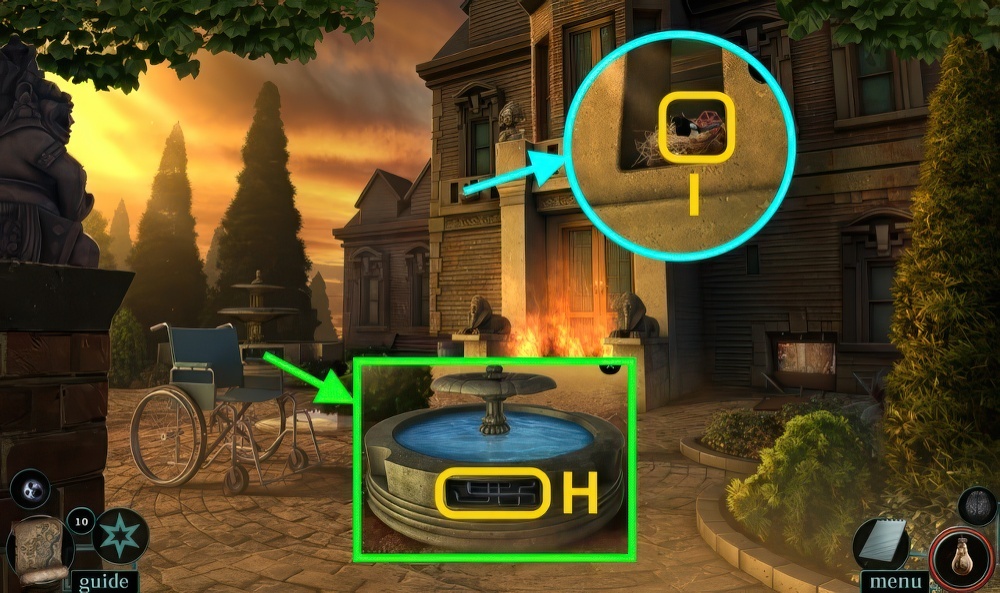
- Use BURNING TWIG (H), take PIPE.
- Use HOSE.
- BROKEN BIRDHOUSE and GLITTERY RING on BROKEN SHOVEL, take MAGPIE LURE.
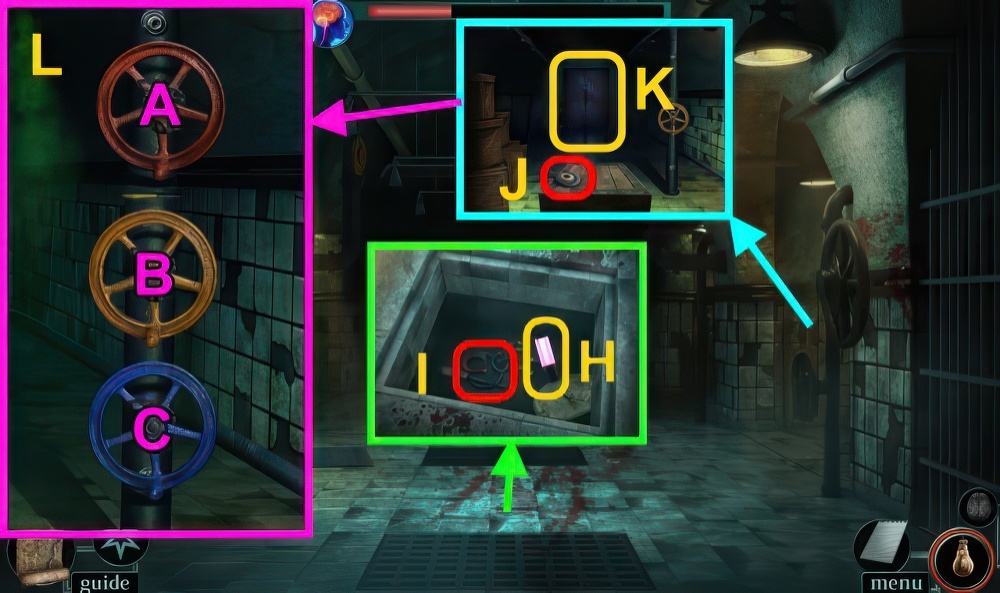
- Use MAGPIE LURE and UMBRELLA (I), receive VALVE.
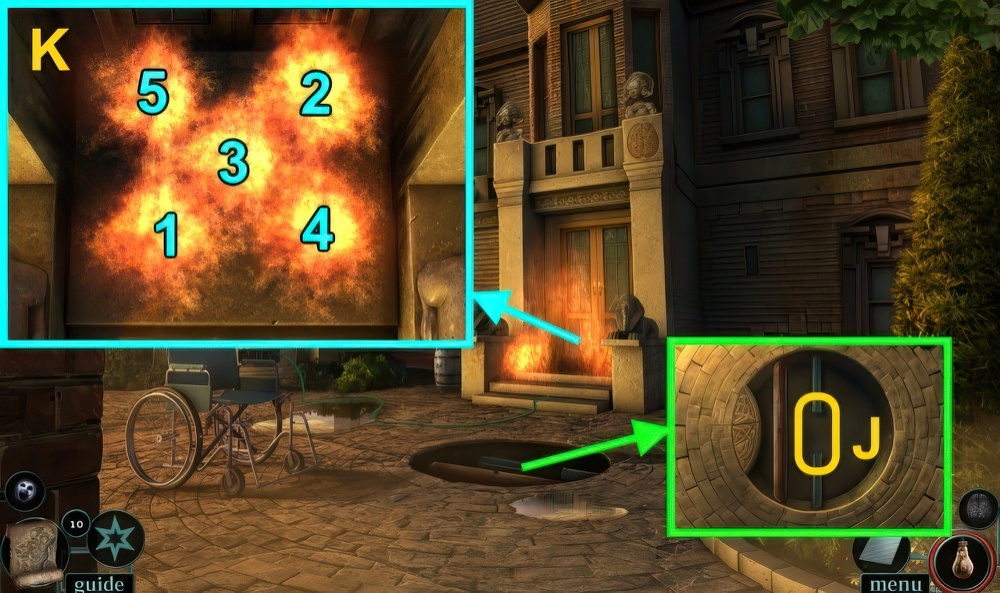
- Place PIPE and VALVE (J).
- Examine (K).
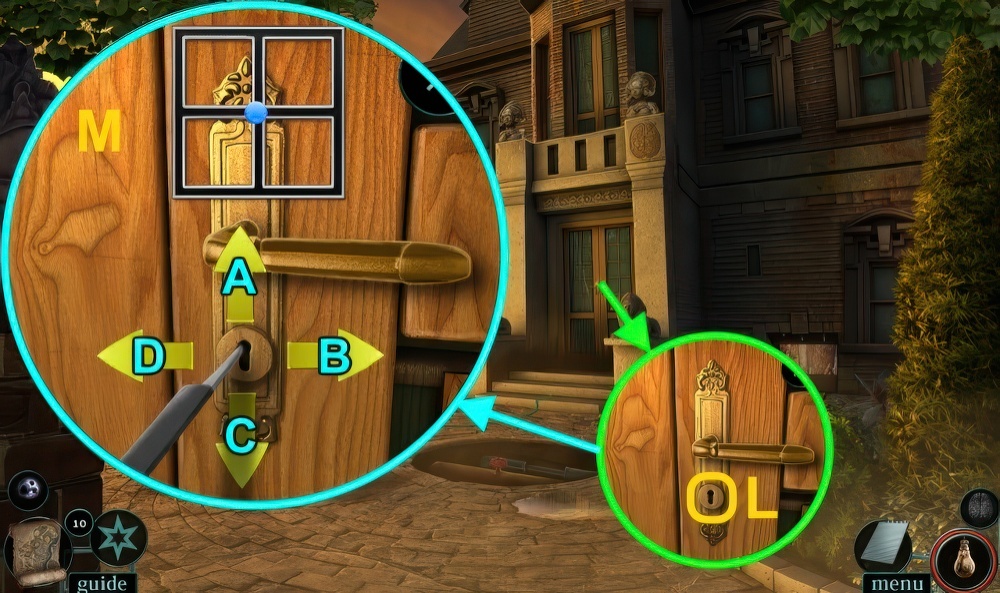
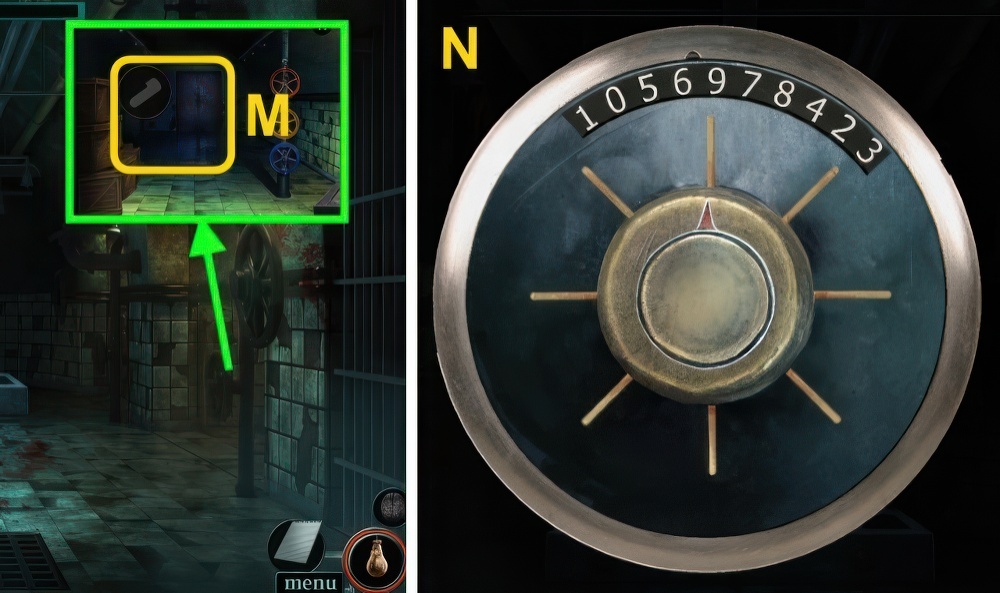
- Use JANITOR LOCKPICK (L).
- Solution (M): (A-B-Cx2)-(D-A-D)-(A-B-Cx2)-(A-B-A).
- Walk forward.
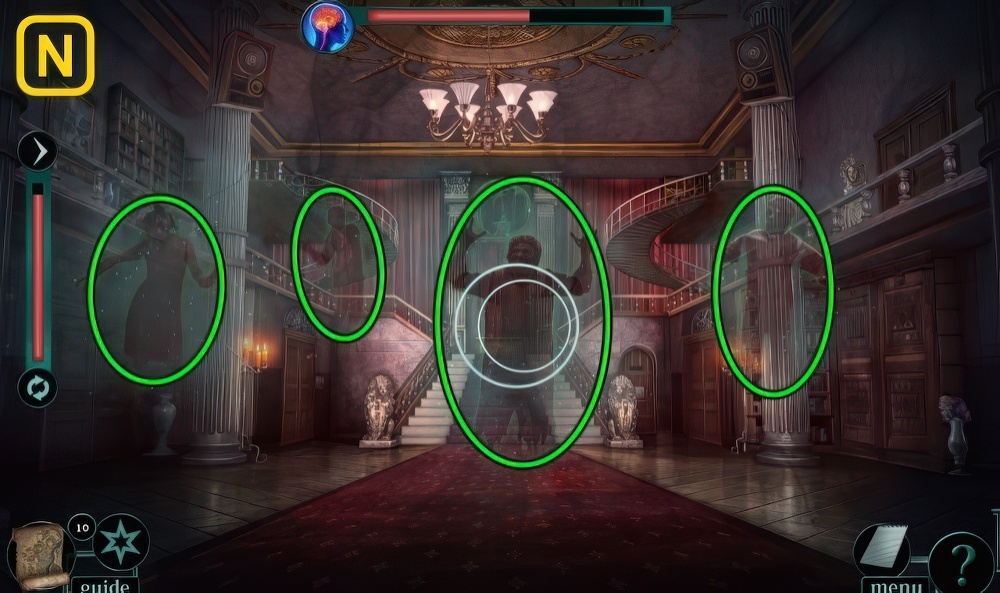
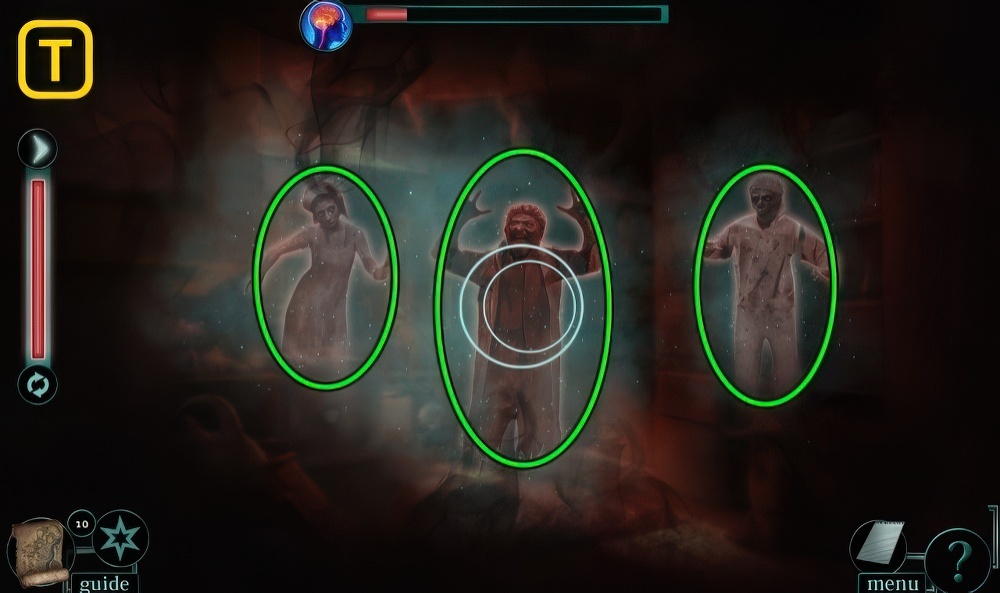
- Solution (N): stop circles over each ghost.
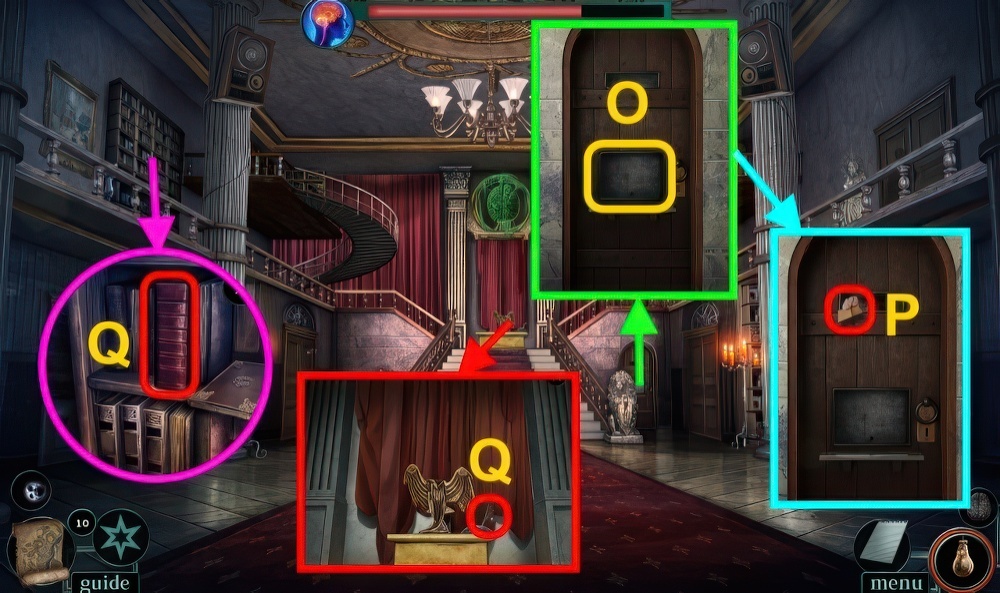
- Examine (O), take BOOK (1/2).
- Take note (P).
- Take BOOK (2/2) and NEEDLES (Q).
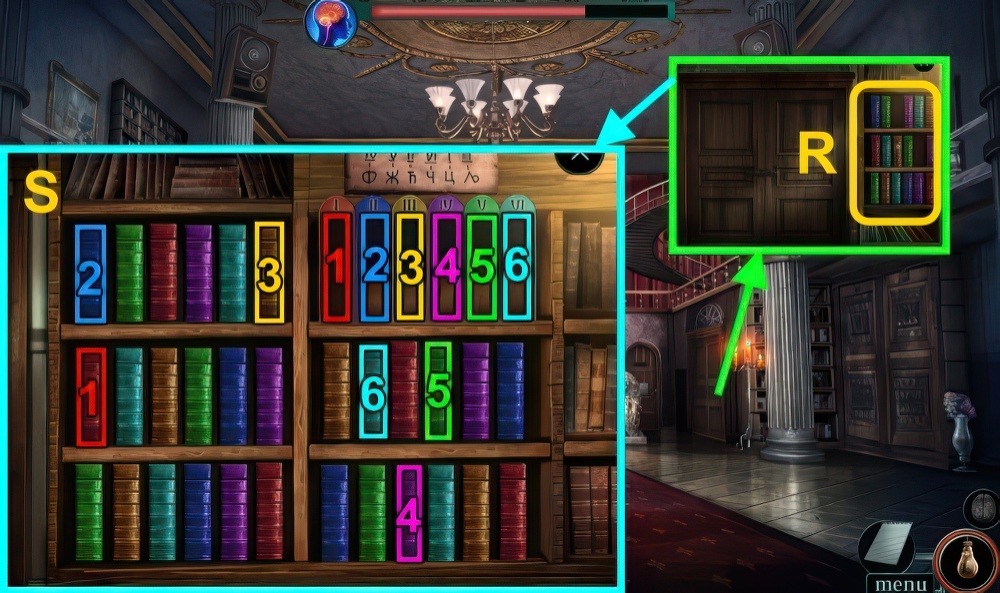
- Place BOOK (2/2) (R), examine.
- Solution (S).
- Walk right.
- Solution (T): stop circles over each ghost.
- Take SNOW GLOBE (U).
- Solution (V).
- Move papers, take CHEST LOCK (1/3) (W).
- Examine photo, take GAS COLOR CODE.
- Take CANE and BROKEN KEY PIECE (X).
- Use NEEDLES.
- Open, take CLEANING SPRAY and LETTER PLATE (Y).
- Take BROKEN SAFE LOCK (Z), use CANE.
- Take TYPEWRITER, GAS VALVE (1/2), and CHEST LOCK (2/3), press button.
- Walk down.
- Open curtain.
- Place LETTER PLATE (A), examine.
- Solution is random (B).
- Take DIRECTOR’S CARD and DIRECTOR’S OFFICE CODE.
- Use CANE (C), receive KITCHEN KNIFE.
- KITCHEN KNIFE on TYPEWRITER, take TYPEWRITER KEYS.
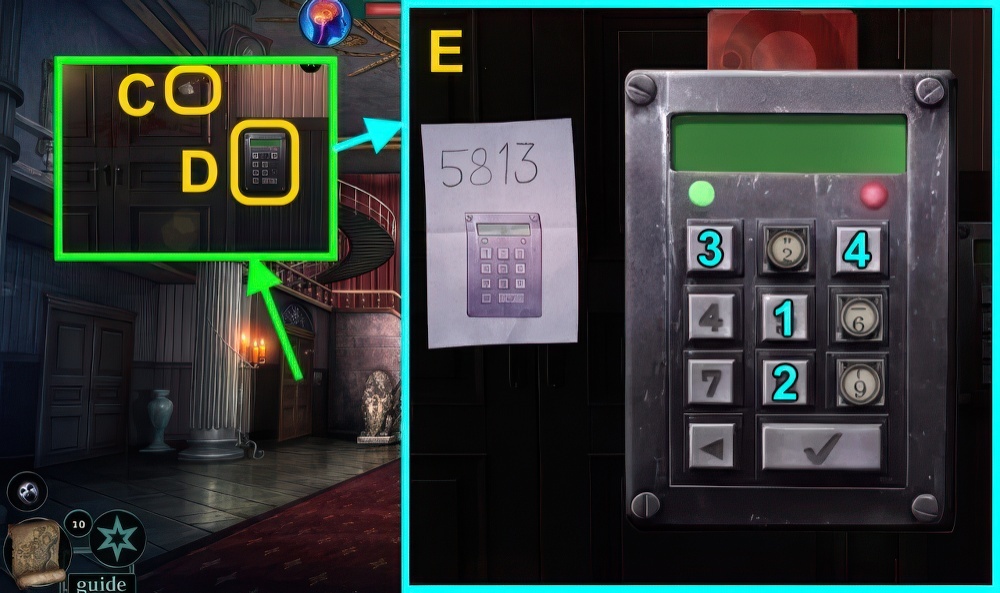
- Use DIRECTOR’S CARD and TYPEWRITER KEYS (D), examine.
- Use DIRECTOR’S OFFICE CODE, enter code (E).
- Walk left.
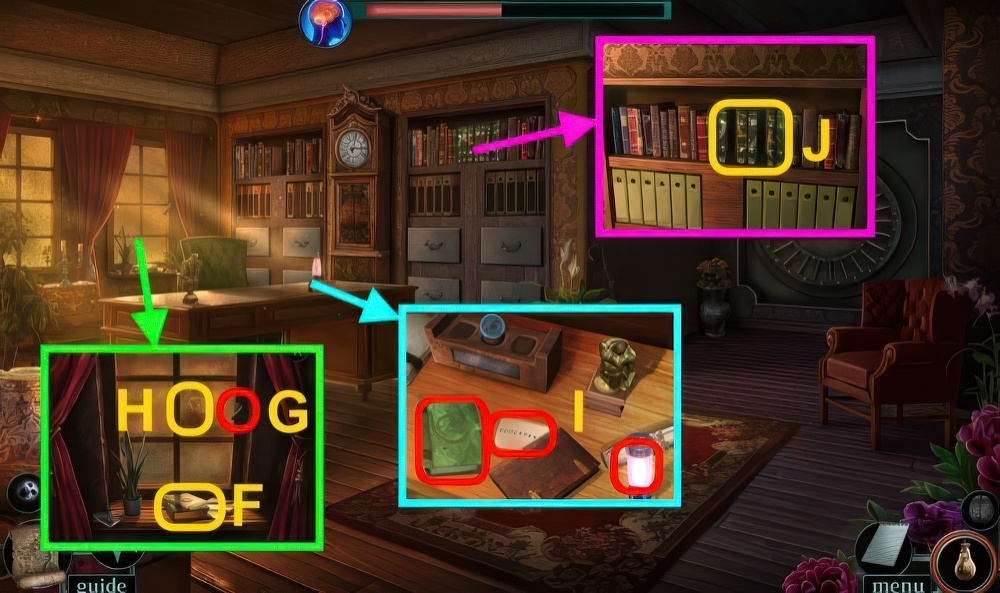
- Move paper (F), take SYMBOL BOOK.
- Take HANDLE (G).
- Use CLEANING SPRAY (H), examine.
- Take SYMBOL NOVEL.
- NUMBERS, and TABLE LAMP (I).
- Place SYMBOL BOOK and SYMBOL NOVEL (J).
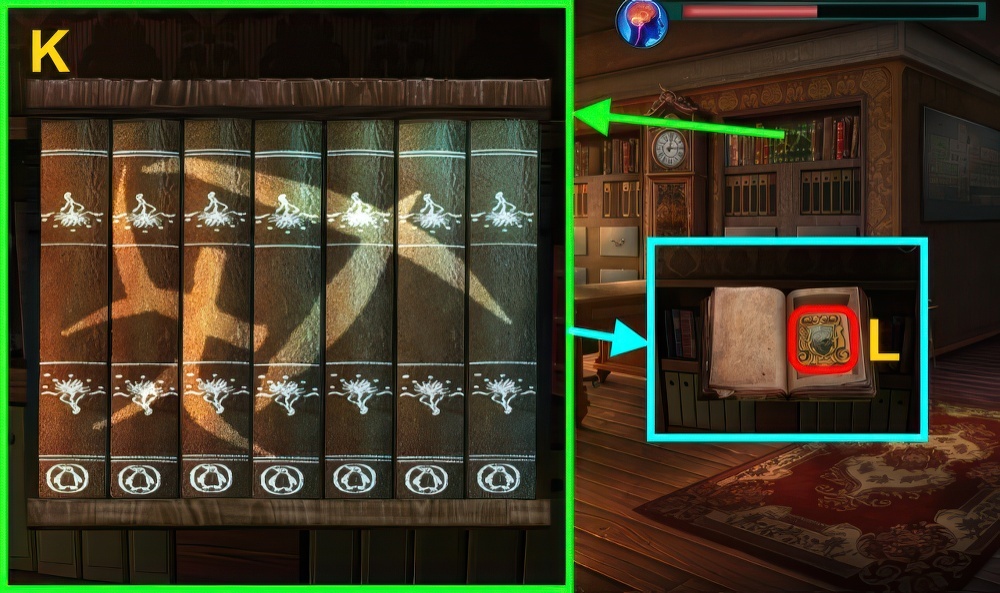
- Solution (K).
- Read book, take ASYLUM CREST (L).
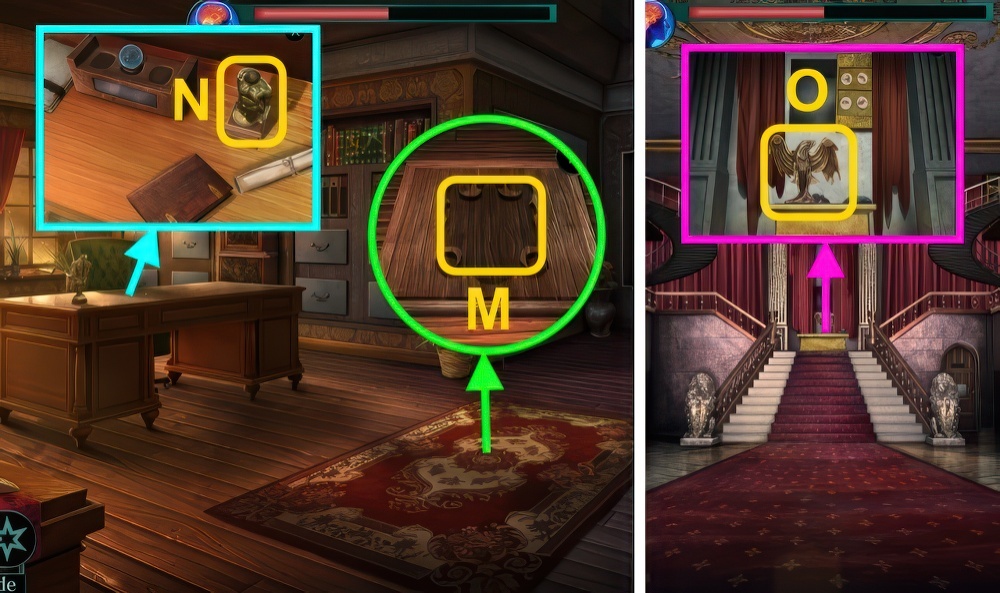
- Move rug, place ASYLUM CREST (M).
- Take REFLEX HAMMER, CABINET INSET, and SAFE REPAIR PART (1/4).
- Use REFLEX HAMMER (N), take EAGLE HEAD.
- Walk down.
- Place EAGLE HEAD (O), take CHEST LOCK (3/3).
- Walk right.
- Place CABINET INSET (P), take SAFE REPAIR PART (2/4).
- Place CHEST LOCK (3/3) (Q).
- Read note (R).
- Play puzzle, receive RUSTY KEY (S).
- Walk down.
- Use RUSTY KEY (T), open.
- Enter Detention Hall.
- Solution (U): stop ball inside red section of the meter 3x.
- Use KITCHEN KNIFE (V), receive HOSE ROPE.
- Use HOSE ROPE (W).
- Take BROKEN SNOW GLOBE (X).
- Use TABLE LAMP, examine (Y).
- Take PRISON FOOD (Z), receive DEAD TABLE LAMP.
- Walk down, then left.
- Place SNOW GLOBE and BROKEN SNOW GLOBE (A), take BATTERIES (B).
- Go to Storage Room.
- Move chest (C).
- Use BROKEN KEY PIECE, give PRISON FOOD (D).
- Receive GAS VALVE (2/2).
- Go to Detention Hall.
- Examine grate (E), use HOSE ROPE.
- Examine hose (F).
- Pull lever (G).
- BATTERIES on DEAD TABLE LAMP, take RESTORED TABLE LAMP.
- Use RESTORED TABLE LAMP (H).
- Move items, take SAFE REPAIR PART (3/4) (I).
- Take SAFE REPAIR PART (4/4) (J), move crate.
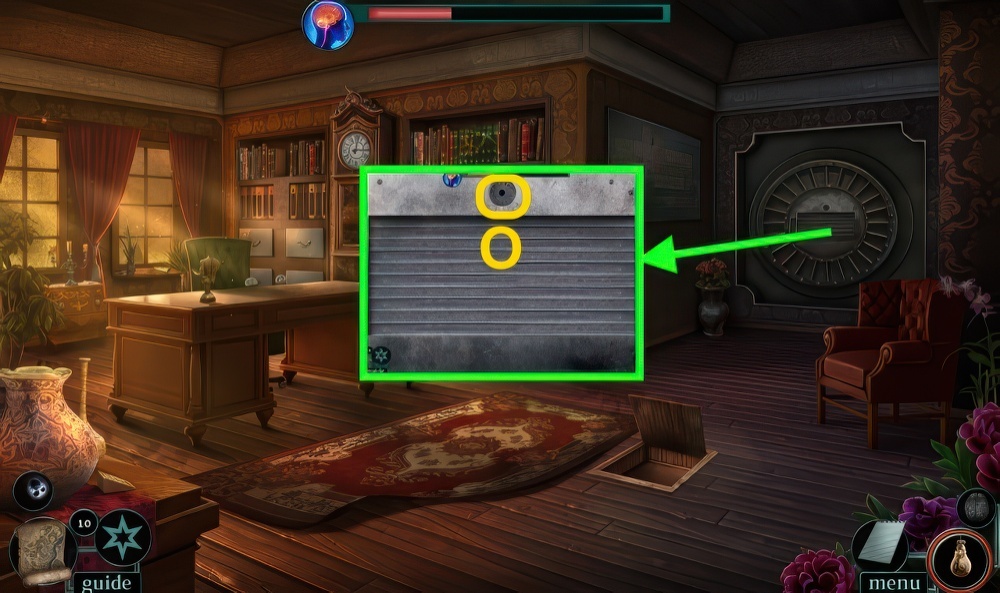
- Examine door (K).
- Use GAS VALVE (2/2) and GAS COLOR CODE, solution (L): (A-O-(B-C)-(A-B).
- Examine door, use HANDLE (M).
- Examine door.
- Use ELECTROSHOCK DEVICE on scene.
- SAFE REPAIR PART (4/4) and NUMBERS on BROKEN SAFE LOCK, solution (N).
- Take SAFE LOCK.
- Walk down, then left.
- Place SAFE LOCK (O).
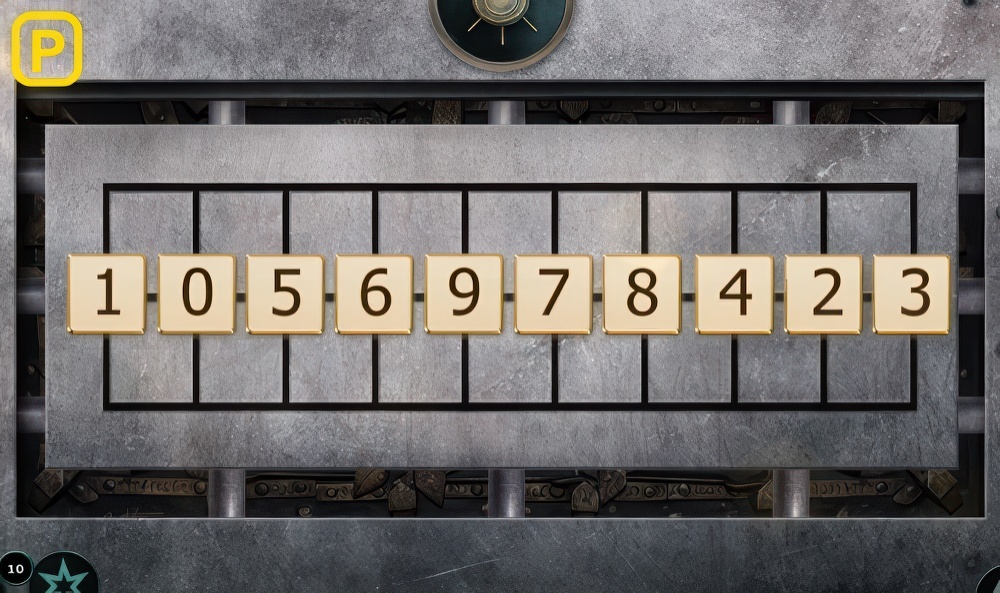
- Completed puzzle shown (P).
- Solution: (19 down, leftx3)-(25 up)-(19 up)-(2 5 rightx3, down)-(02 down)-(5 4 leftx2)-(95 up).
- (02 left, up)-(2 4 rightx2)-(95 right, down)-(24 down)-(63 leftx2)-(56 up)-(24 left, up)-(92 down).
- (56 left, down)-(43 rightx2)-(92 rightx2, up)-(87 down, leftx2)-(43 rightx2)-(87 up)-(74 down, leftx2).
- (28 rightx2)-(74 up)-(83 down, leftx2)-(42 rightx2)-(83 up)-(78 down)-(34 leftx2)-(78 rightx2, up).
- (47 down)-(82 leftx2)-(38 up, rightx3, down)-(47 left, up)-(23 down)-(47 rightx2)-(78 up, leftx3, down)-(23 right, up).

- Play puzzle, receive ANTIDOTE (Q).
- Go to Detention Hall.
- Examine (R), give ANTIDOTE.
Congratulations! You have completed the game Maze 4: Stolen Minds.


