
Mindframe 1: The Secret Design (Bonus Chapter) – Continues the story of William Rogers as he uncovers new threats related to the TP1 experiments. Two weeks have passed since Stone’s capture, and the danger seems to have passed. But a sudden message changes everything, the scientist Mortimer, thought dead, has reappeared. Not only is Mortimer alive, but he is continuing his work. His recent statement to the business network speaks for itself, he intends to revive the TP1 substance experiment, promising to create something that will change the world. However, the evidence found tells a different story: he’s using people as test subjects, and the two missing people could be his next victims. Now it’s up to you to figure out what’s going on, investigate the evidence and get into the minds of those who can shed light on the mad scientist’s plans.
Bonus Chapter Walkthrough

- Walk right.
- Take phone (L), examine phone 5x.
- Take CORTES’ ID (M).
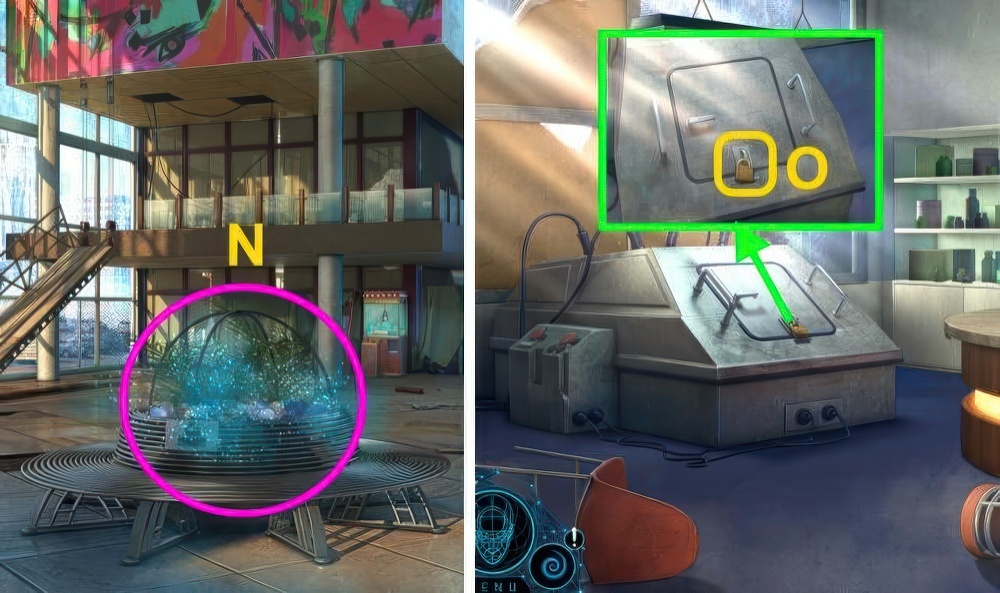
- Take MULTI-PURPOSE TOOL PART (N).
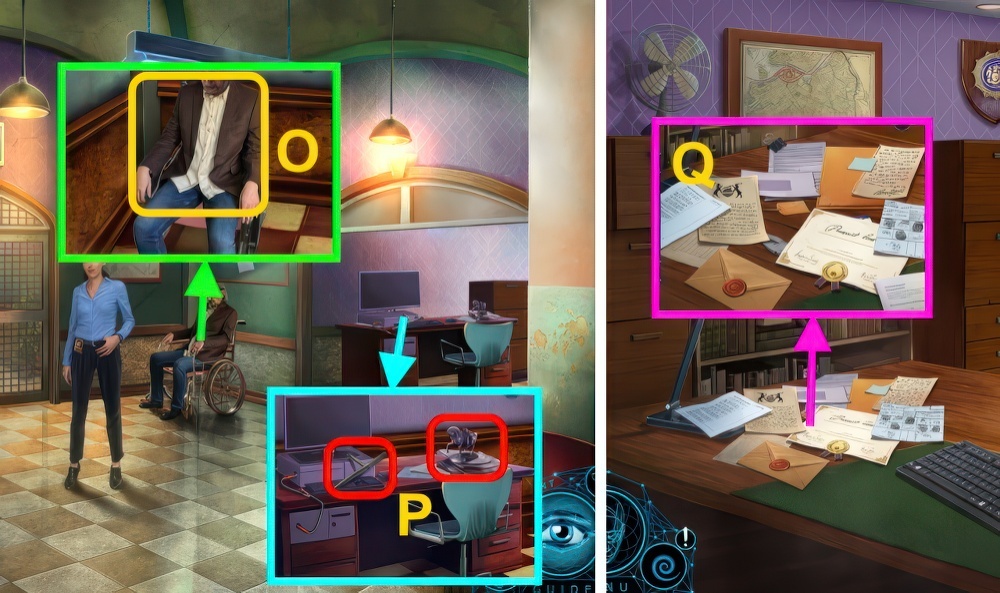
- Open coat (O), take BAG EMBLEM.
- Take PAPERWEIGHT and BATON (P).
- Walk down.
- Play puzzle (Q), take WILLAIM’S ID and MULT-PURPOSE TOOL.
- MULT-PURPOSE TOOL PART on MULTI-PURPOSE TOOL.
- Take CABINET KEY and SEDATIVE (R).
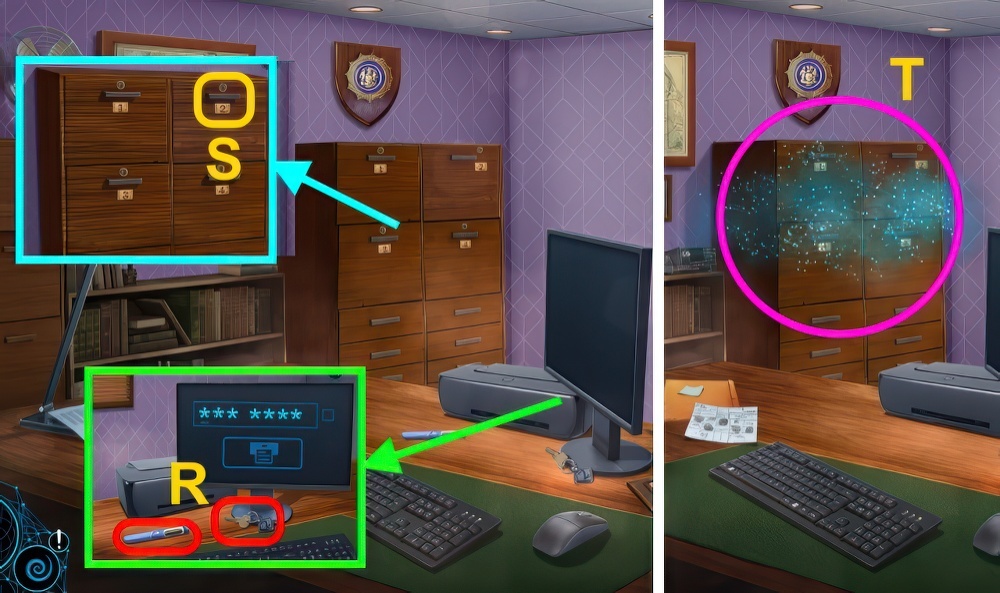
- Use CABINET KEY (S).
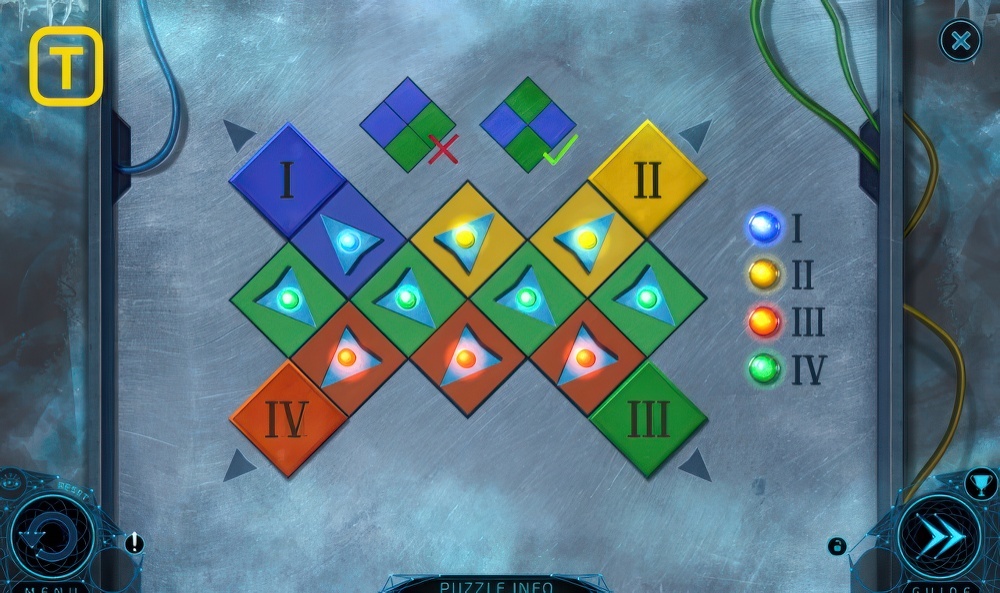
- Play puzzle, receive CABLE (T).
- Walk right.

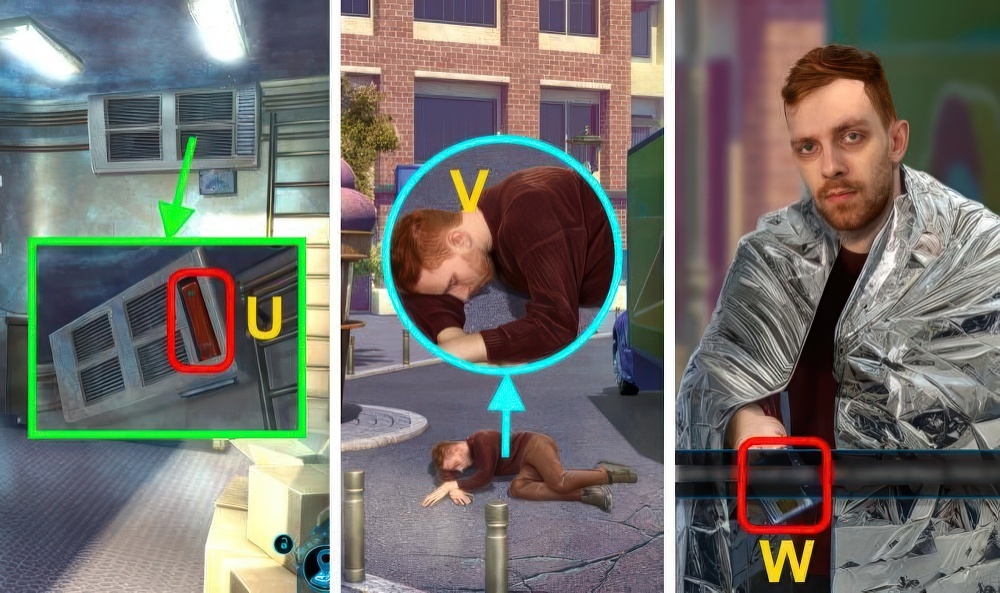
- Use CORTES’ ID (U).
- Use MULTI-PURPOSE TOOL (V), receive WIRE.
- Place CABLE, use CORTES ID (U).
- Take ULTRAVIOLET LIGHT.
- Use WILLIAM’S ID (W).
- Walk forward.
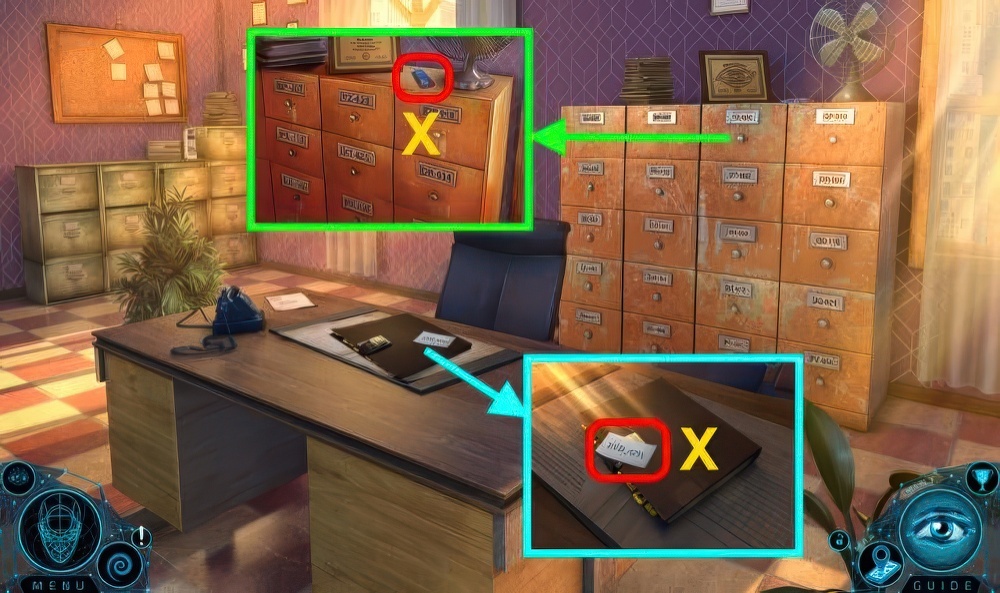
- Take LIGHTER and DRAWER CODE (X).
- Walk down twice.
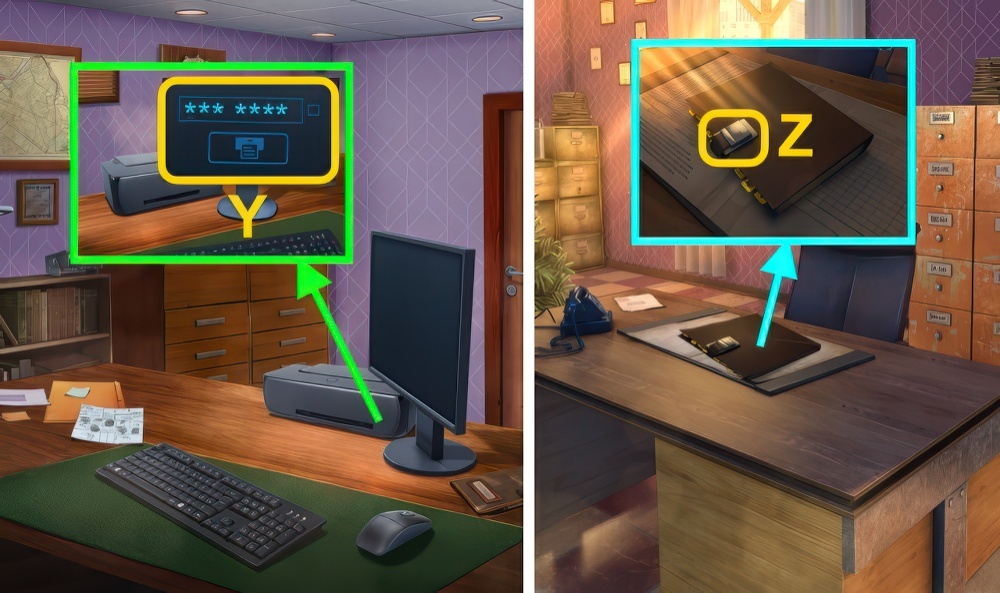
- Use DRAWER CODE, examine screen (Y).
- Take EVIDENCE PRINTOUT.
- Walk right, then forward.
- Use PAPERWEIGHT (Z), place EVIDENCE PRINTOUT.
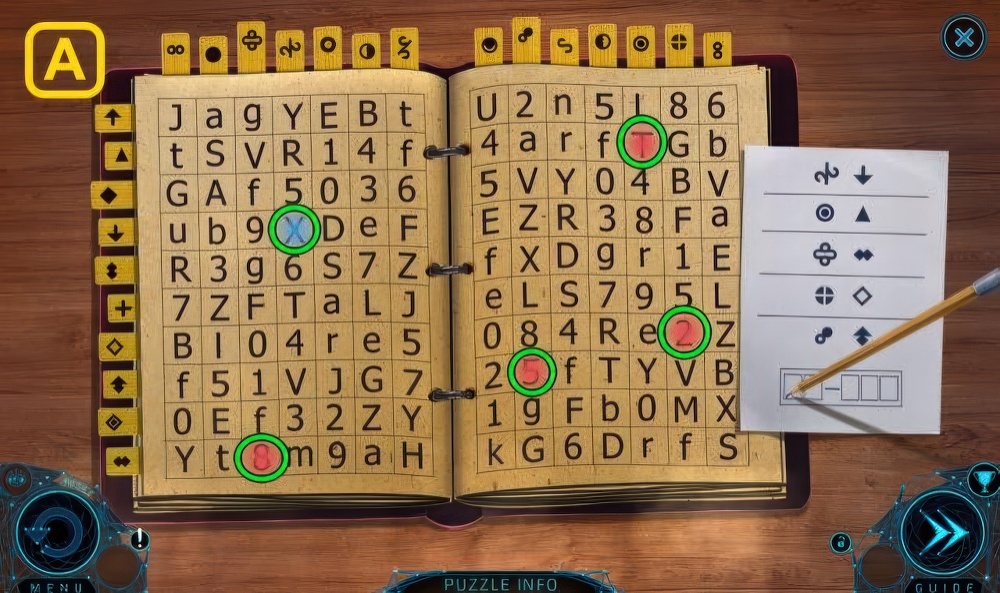
- Solution (A).
- Receive FILE CODE.
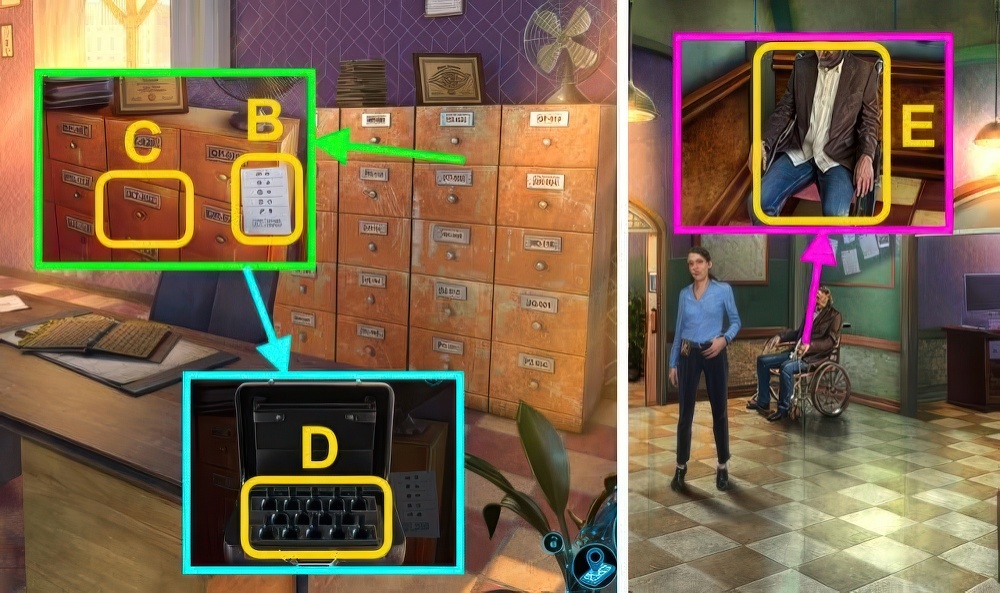
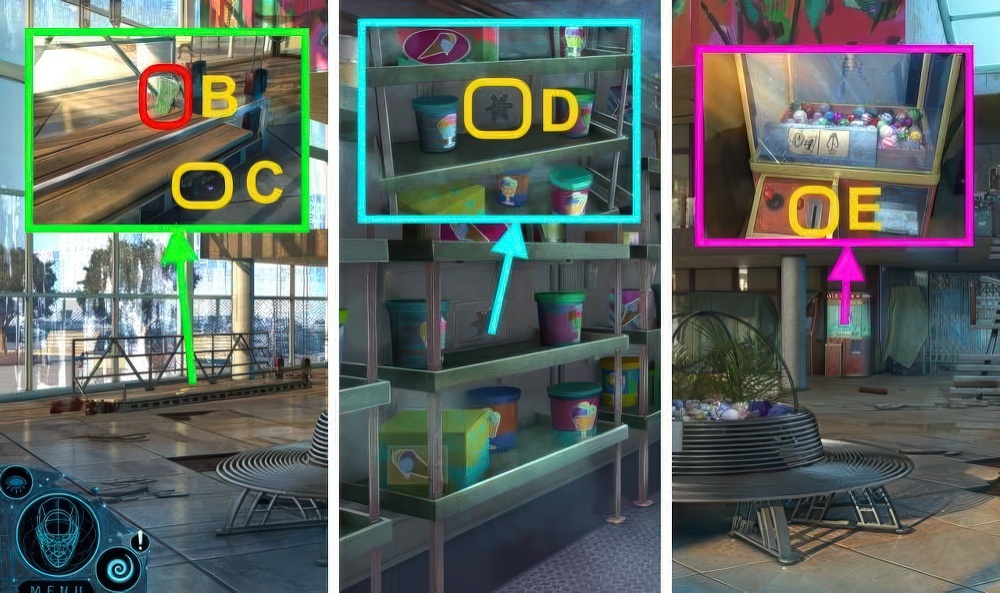
- Place FILE CODE (B), use BATON (C).
- Examine, place BAG EMBLEM.
- Use ULTRAVIOLET LIGHT (D), take RED VIAL and GREEN VIAL.
- Walk down.
- Examine (E).
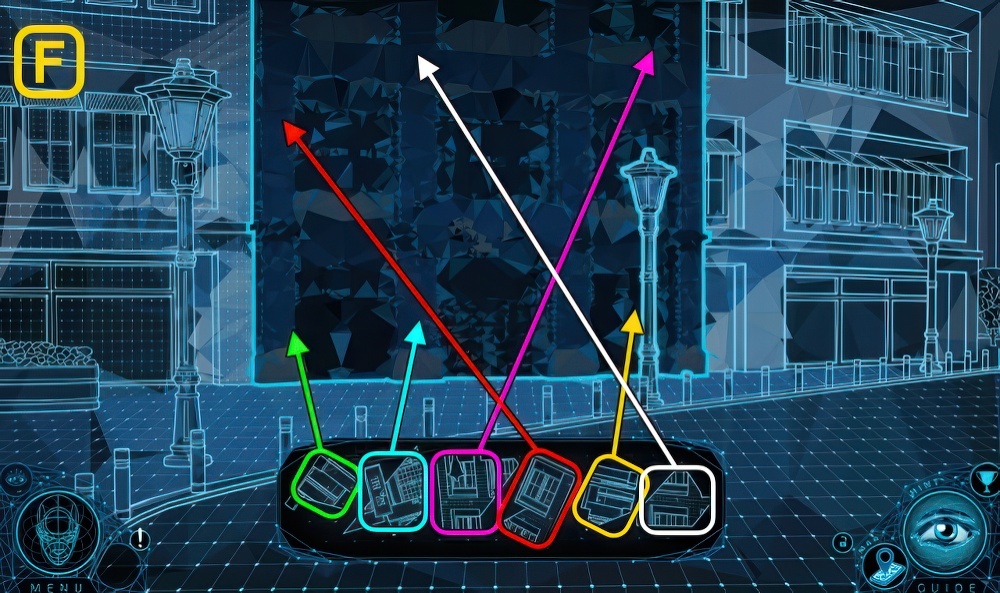
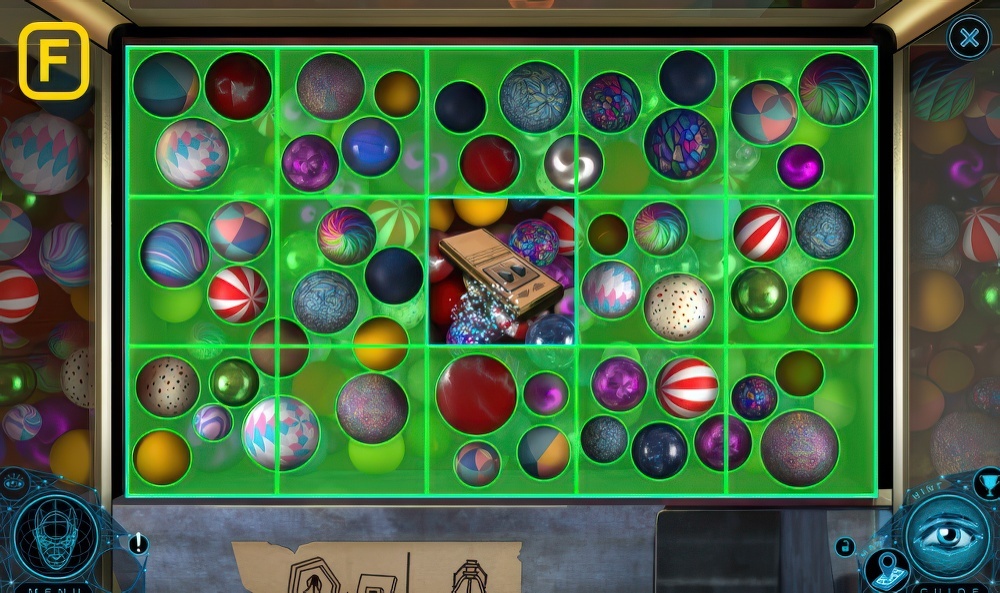
- Solution (F).

- Examine scene.
- Examine phone 2x (G).
- Use GREEN VIAL on scene.
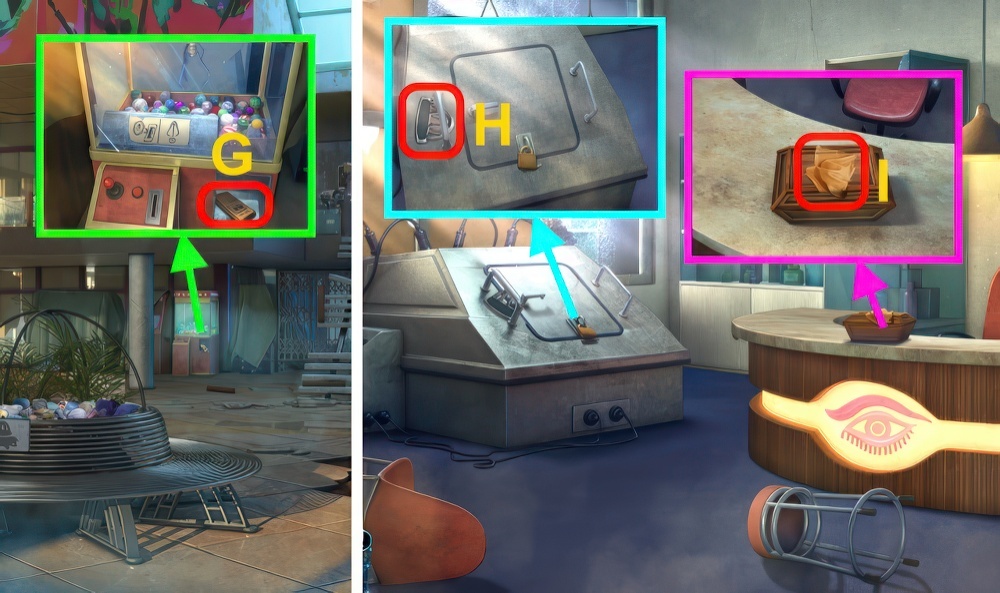
- Play puzzle, take ICE CREAM KEY PART (1/2) and RADIATOR VENT (1/4) (H).
- Examine (I), take FRIDGE MAGNET.
- Take ICE CREAM KEY PARTS (2/2) (J).

- Take BATTERY (1/2) and ICE CREAM KEY (K).
- ICE CREAM KEY PARTS on ICE CREAM KEY.
- Take RADIATOR VENT (2/4) (L), use ICE CREAM KEY.
- Play puzzle, receive FREEZER LATCH (M).
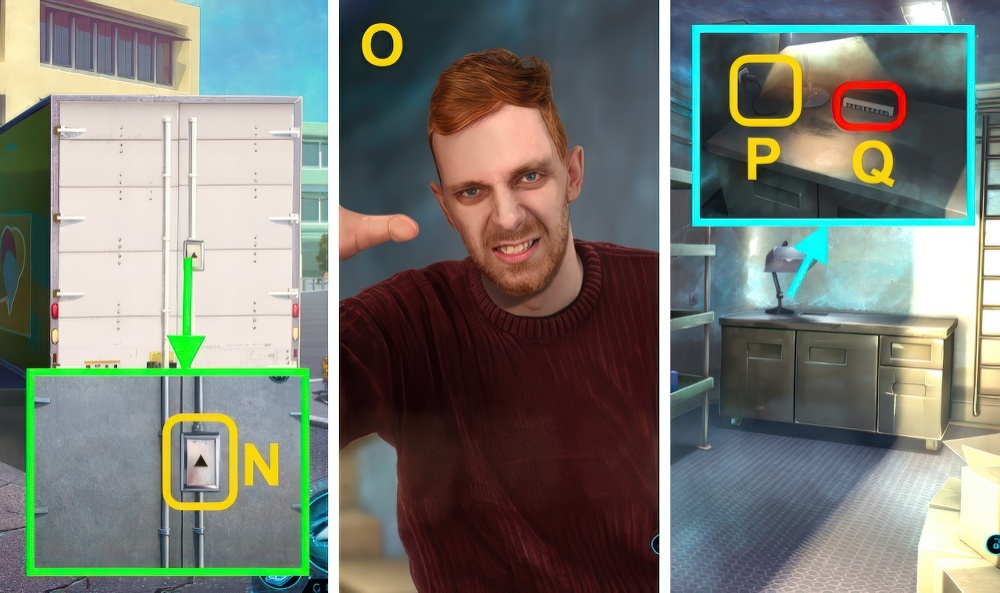
- Use FREEZER LATCH (N), examine truck.
- Use SEDATIVE (O).
- Enter Truck Freezer.
- Place WIRE (P).
- Take RADIATOR VENT (3/4) (Q).

- Take notebook and RADIATOR VENT (4/4) (R).
- Use LIGHTER, take ANTENNA (S).
- Place RADIATOR VENT (4/4).
- Solution (T).
- Take FIRST AID KIT (U).
- Open FIRST AID KIT, move items.
- Take THERMAL BLANKET.
- Walk down.
- Use THERMAL BLANKET (V).
- Talk, take SECURITY CARD (W).

- Use SECURITY CARD (X).
- Walk forward.
- Use RED VIAL on scene.
- Take PRISMATIC GLASS (1/3) (Y).
- Use ANTENNA (Z), take BATTERY (2/2).
- Take CRYSTAL ORNAMENT (A).
- Take PRISMATIC GLASS (2/3) (B).
- Use FRIDGE MAGNET (C), take GLASS SNOWFLAKE.
- Walk down, then right.
- Place GLASS SNOWFLAKE (D), take TOKEN.
- Walk down, then forward.
- Use TOKEN (E).
- Solution (F).
- Take ELEVATOR REMOTE (G).
- BATTERY (2/2) on ELEVATOR REMOTE.
- Go forward.
- Take METAL PLANT PLATE (1/2) (H).
- Take DEERSKIN (I), place CRYSTAL ORNAMENT.
- Take CASE HANDLE.

- Use DEERSKIN (J), place CASE HANDLE.
- Play puzzle, take PRISMATIC GLASS (3/3).
- Walk down twice.
- Place PRISMATIC GLASS (3/3) (K).
- Take METAL PLANT PLATE (2/2) (L).
- Walk forward.
- Place METAL PLANT PLATE (2/2) (M).
- Play puzzle, receive EMERGENCY AXE (N).
- Go forward.
- Use EMERGENCY AXE (O), open.
- Examine.
Congratulations! You have completed the game Mindframe 1: The Secret Design.


